Make sure you check out my new YouTube Channel,
The Cutting Bored for future project updates!
I had no idea where to start with this build. Brooke had done her Pinterest homework and found three different designs that we both liked, so I decided to combine all three of them in my build.
Started off by cutting the plywood in half using a piece of whitewood as a straight guide and some clamps. Measure twice. Cut once.

MATERIALS
10 x 1" x 4" x 8' whitewood slabs
3 x 2" x 4" x 10' framing lumber
1 x 4' x 4' x .375" plywood
Wood Screws (1.25”)
Wood Screws (2.50”)
1.5” Brad Nails
TiteBond II Wood Glue
4 x 4" Carriage bolts (plus washers and nuts)
Paint (I had 3 colors) and Stain (I used 2 finishes)
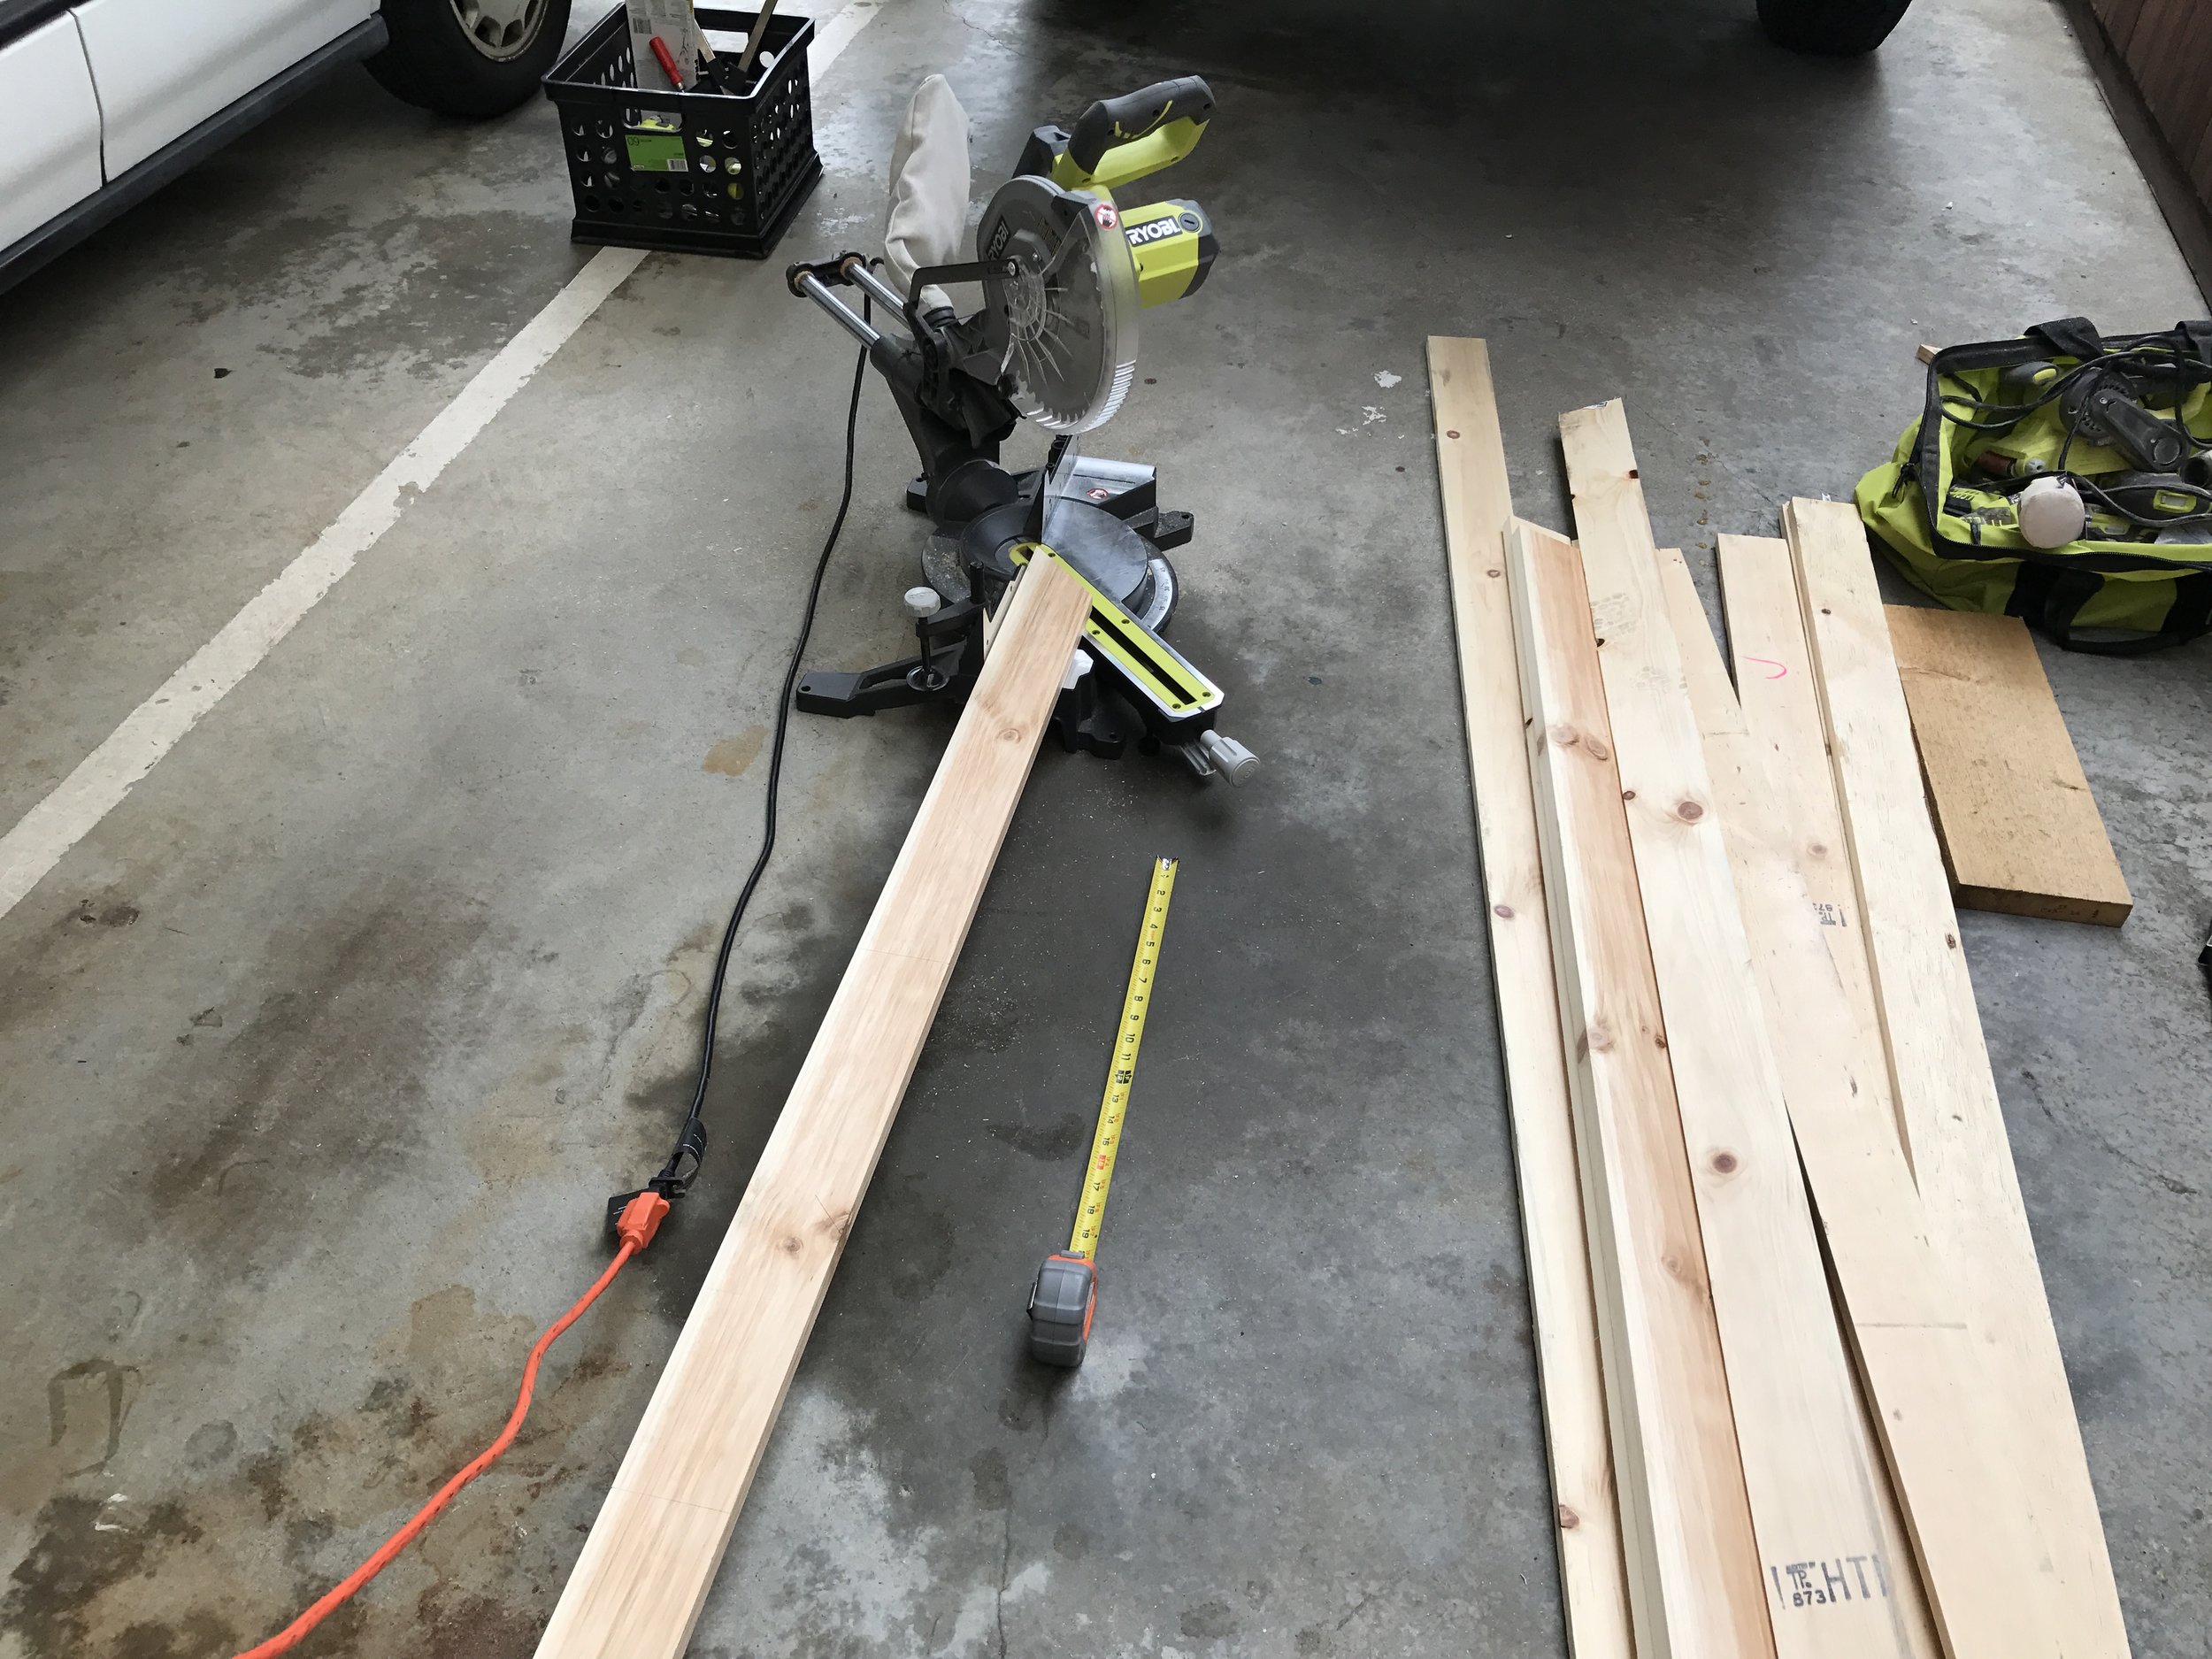
Next, used my Miter Saw to cut 40 chevron pieces all at 45°.

Testing first cut for precision and length. Using the right angle square was perfect for checking the angle as well as drawing a straight line down the middle.
I cut each piece about an inch longer than needed to allow for extra length on the outsides to square up later. If you're building this, you should be able to get 5 pieces per 8ft whitewood board.

Making sure 40 would enough. I could use excess pieces cut away to fill the small gaps at the top and bottom.
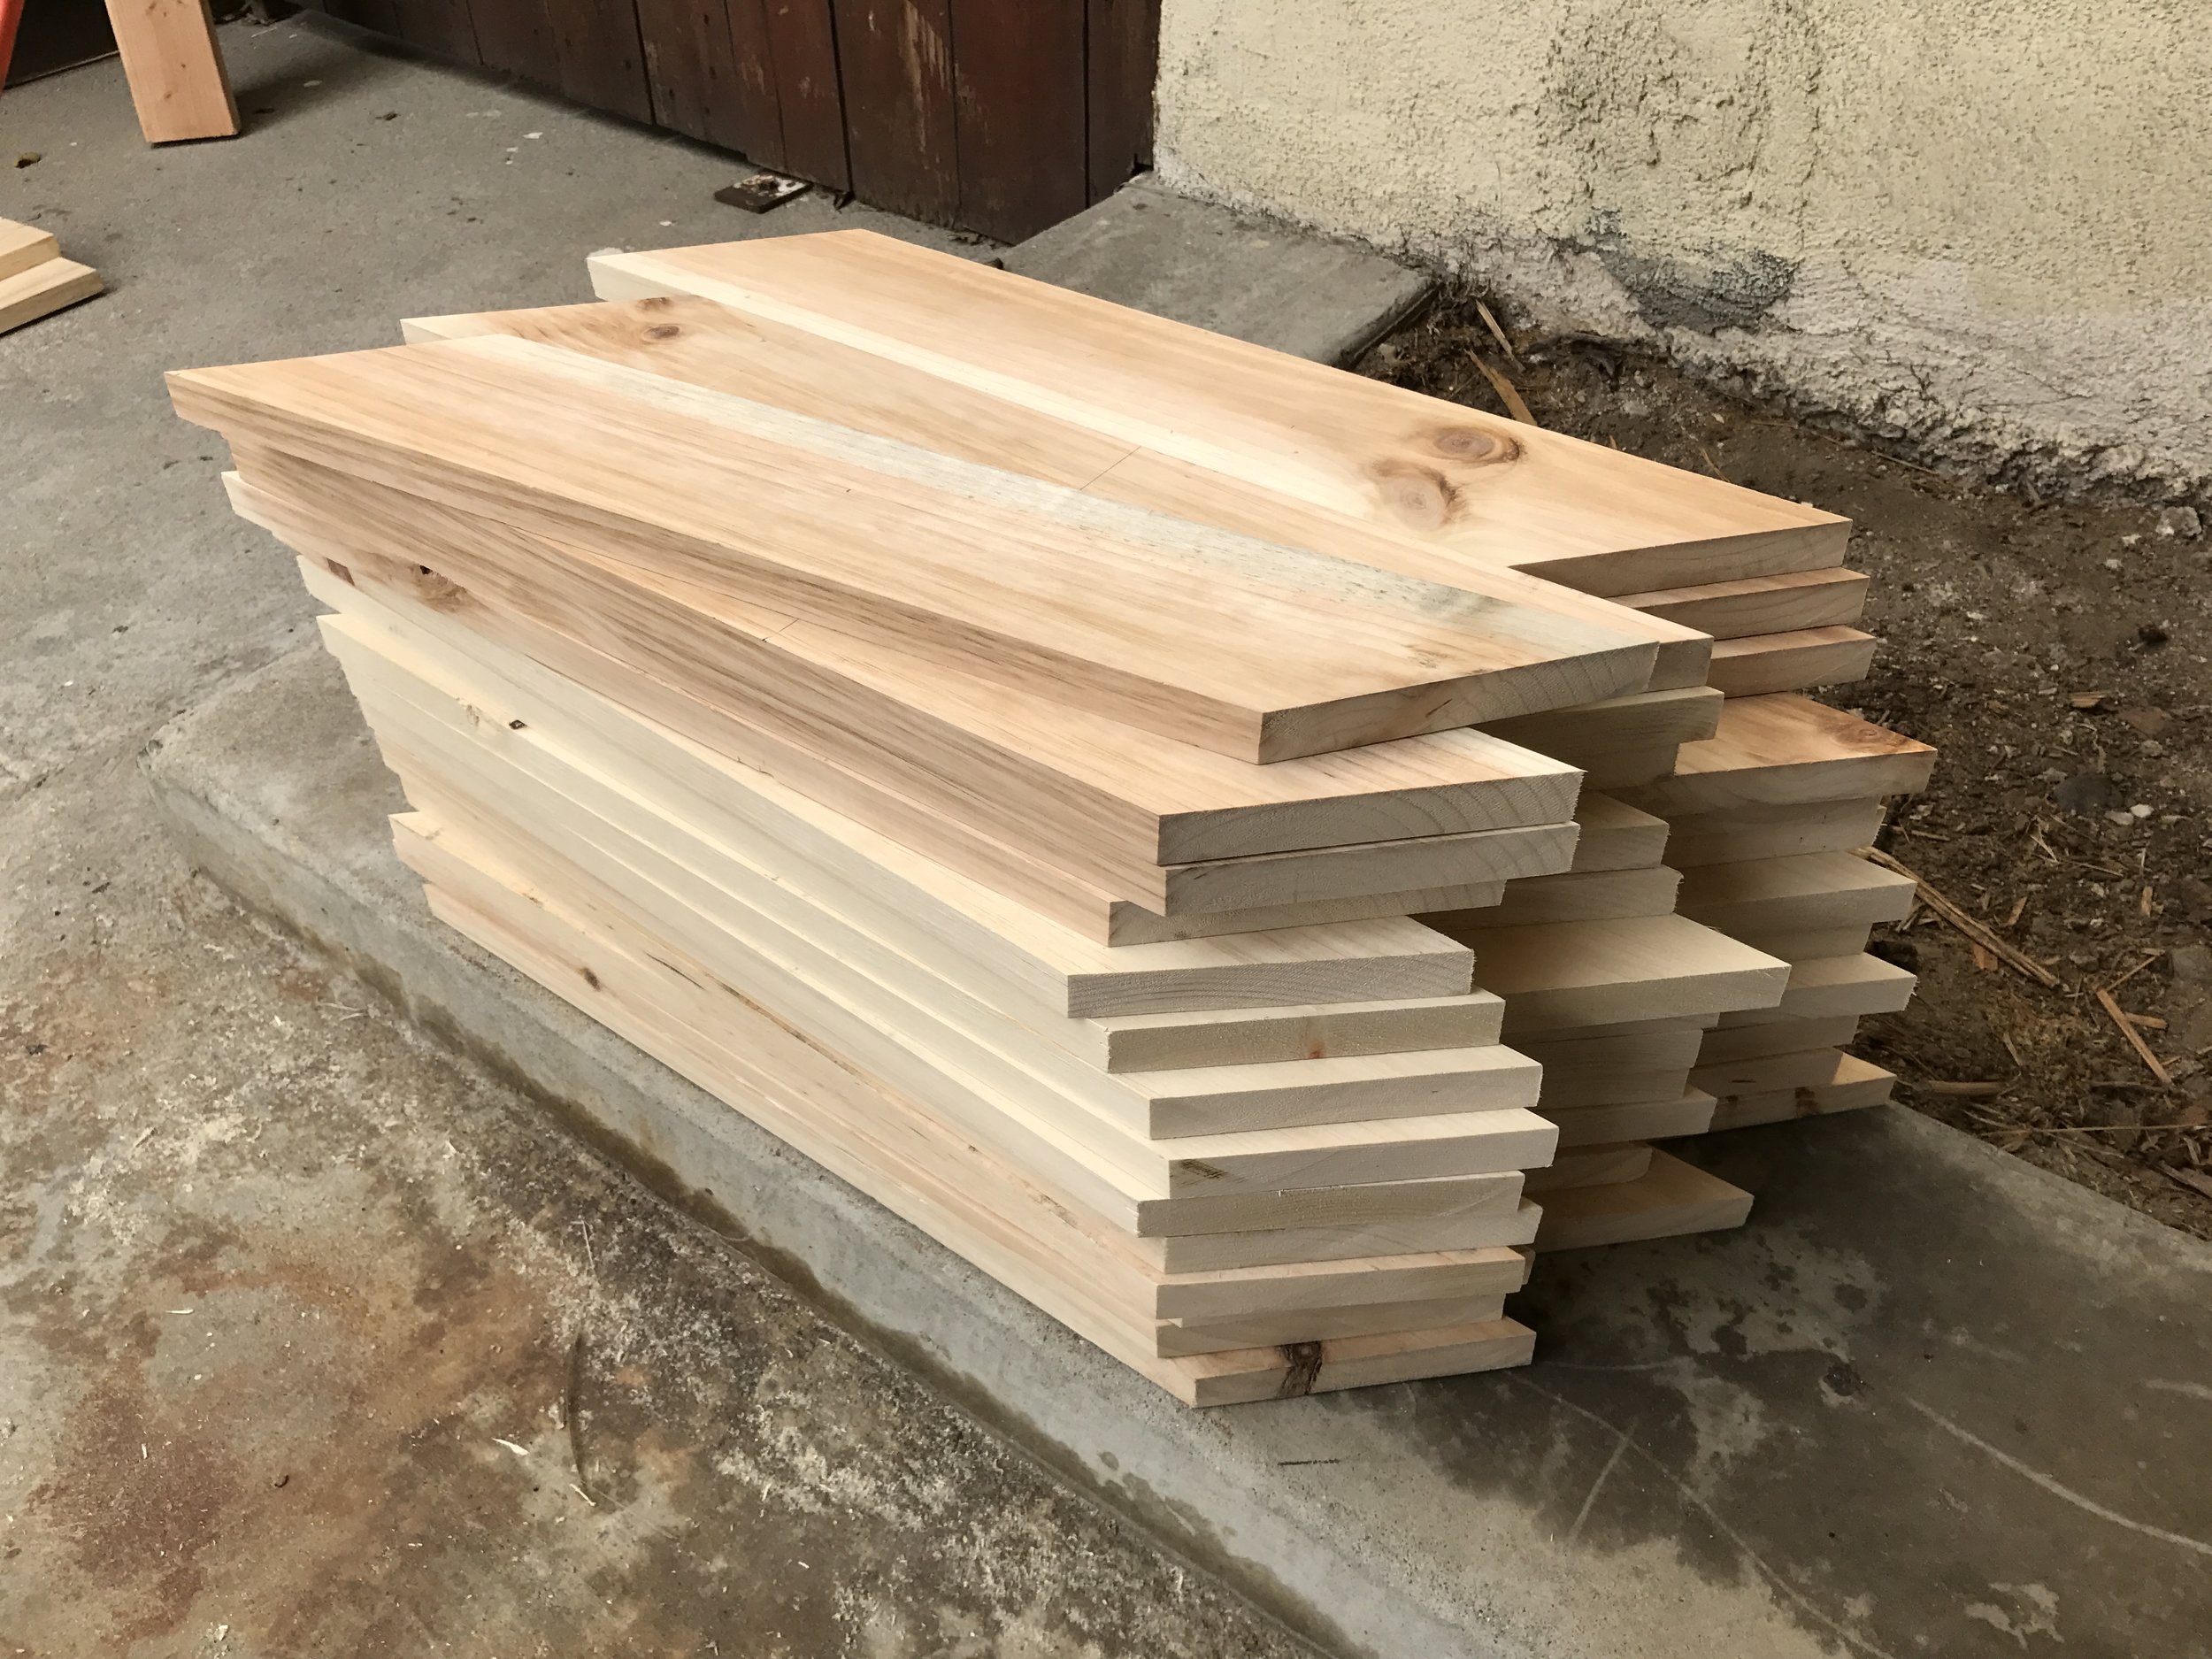
40 pieces cut and sanded down to get rid of any tear out.

Laying them out for a base coat of Minwax Early American stain.

Stain applied. Almost looks like hardwood flooring.

While the stain dried, I cut 2 x 4's to length for the base. Luckily, I had extra whitewood as I didn't buy enough 2 x 4's...connected them using 2.5" wood screws.

Glued the plywood down, held in place with finish nails, and then ultimately screwed down with 1" wood screws. Solid.
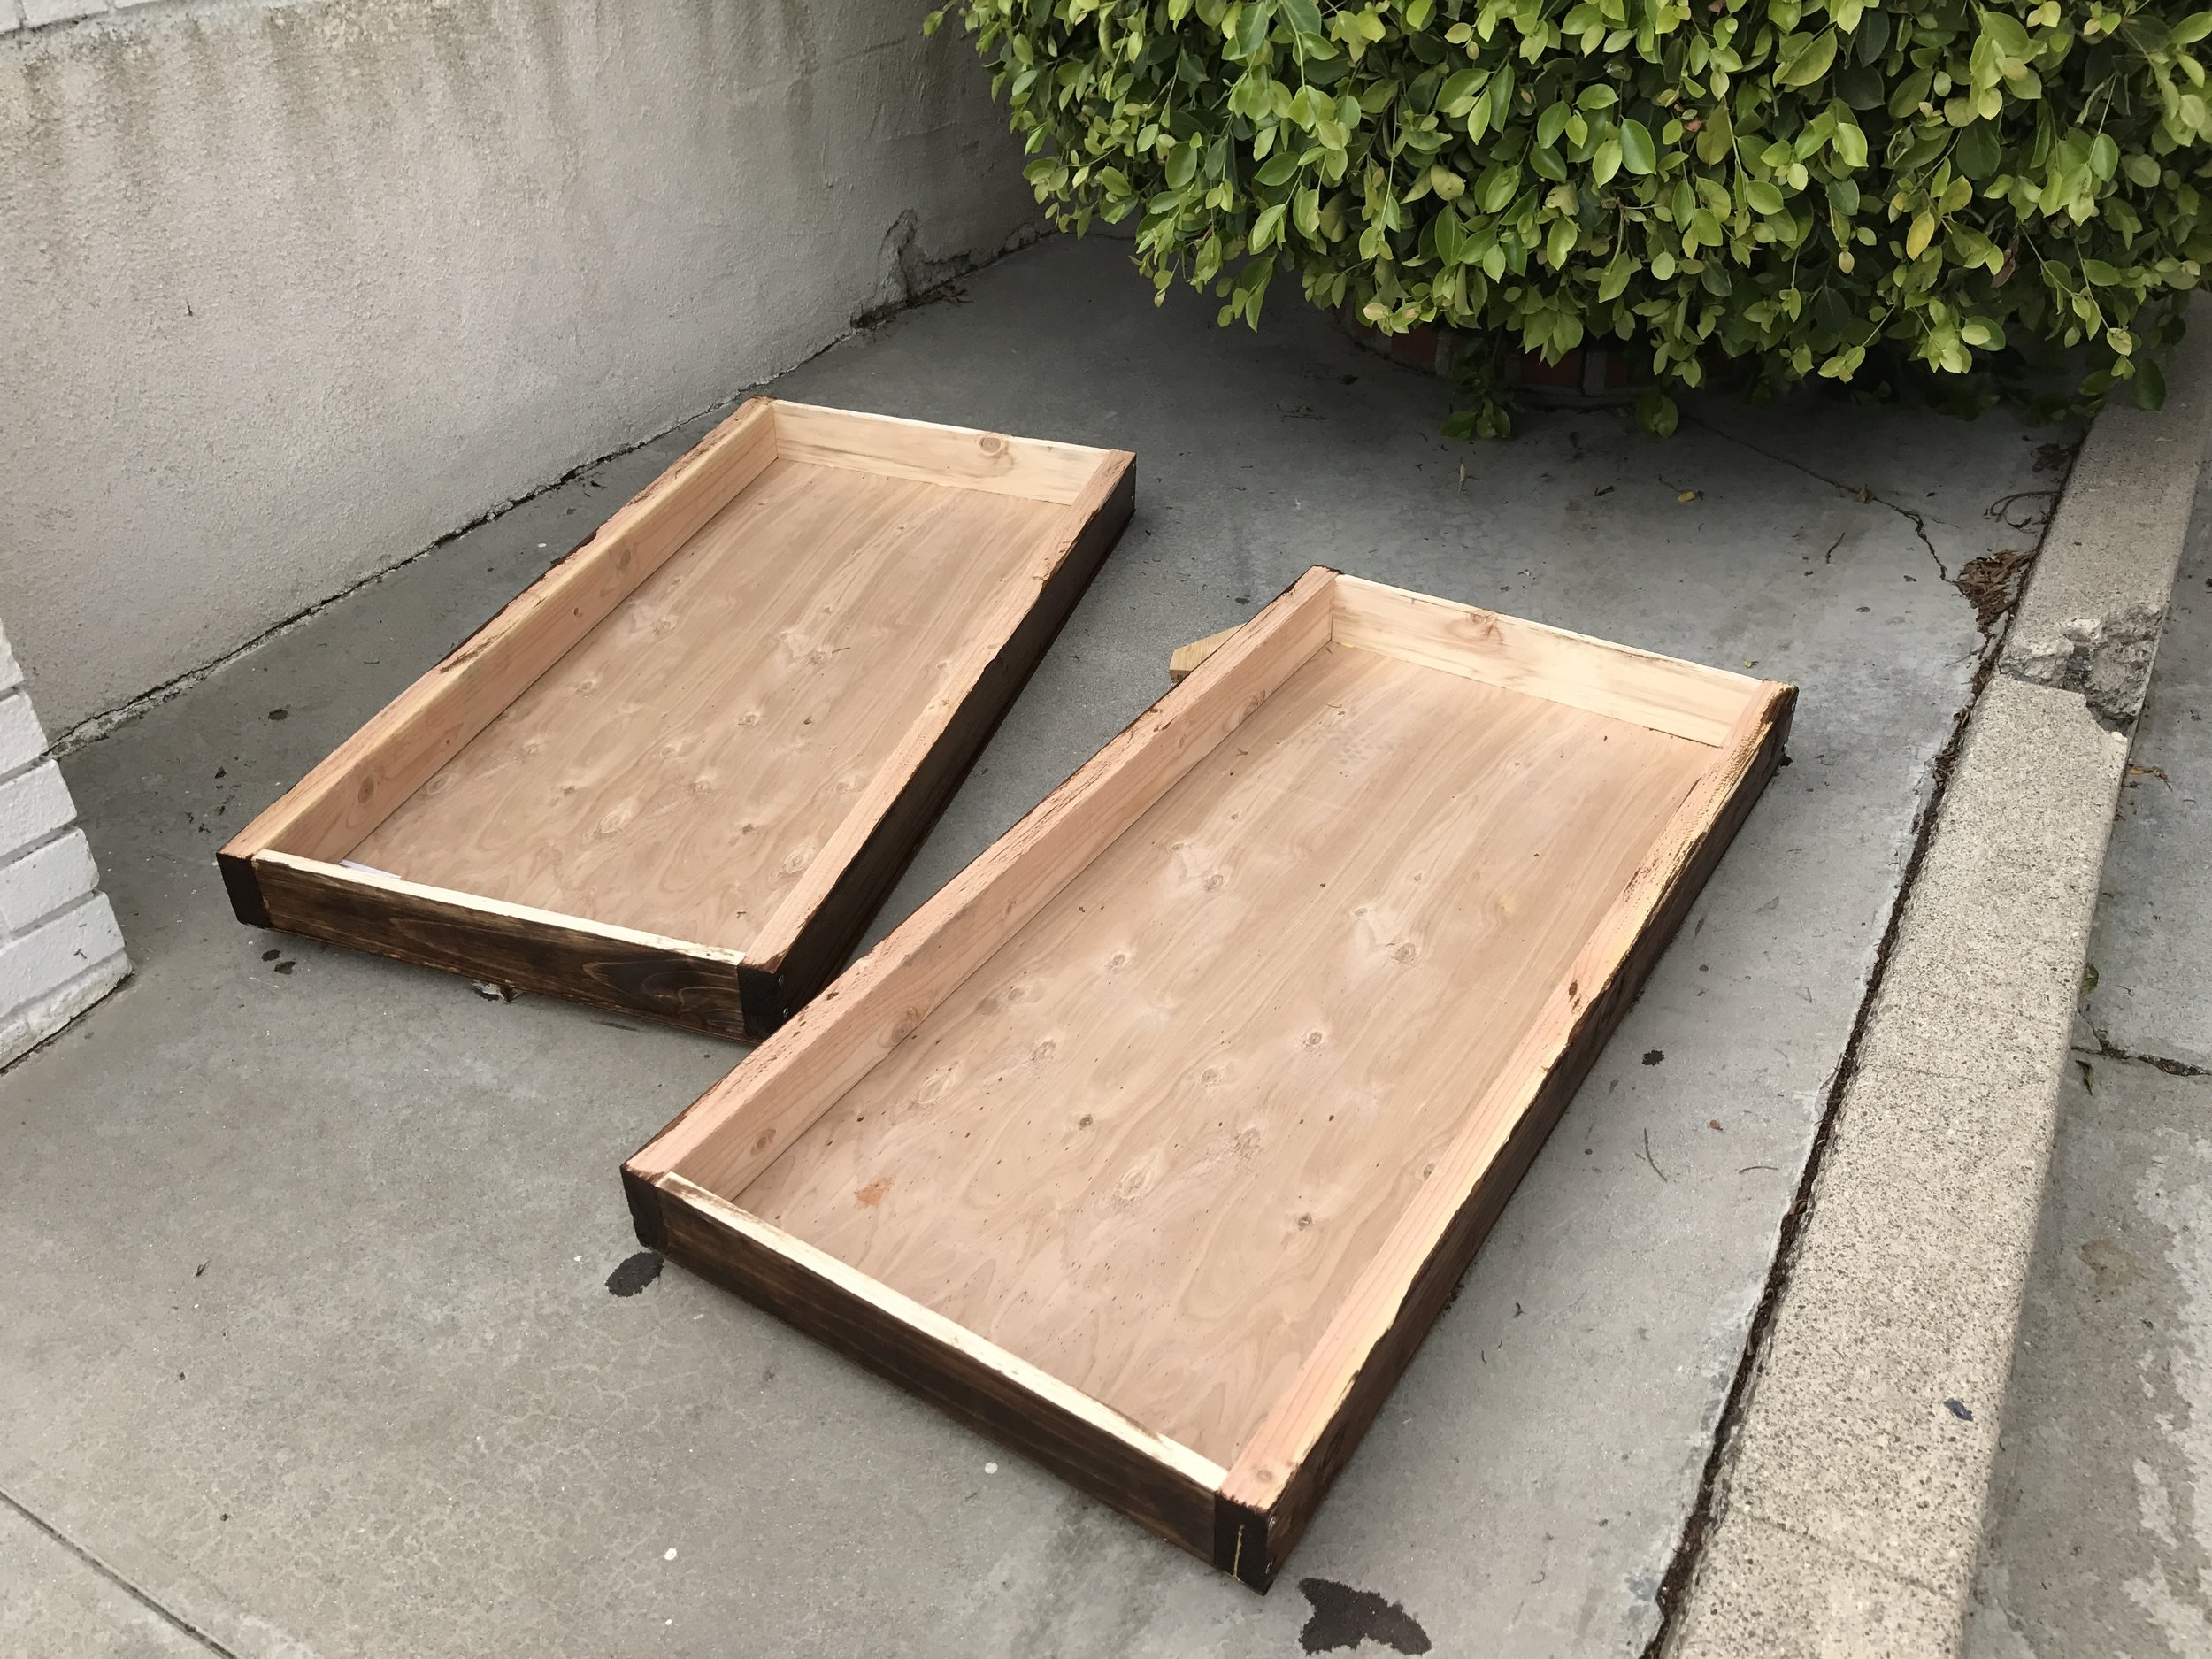
Flipped them over and stained the sides to match the top.

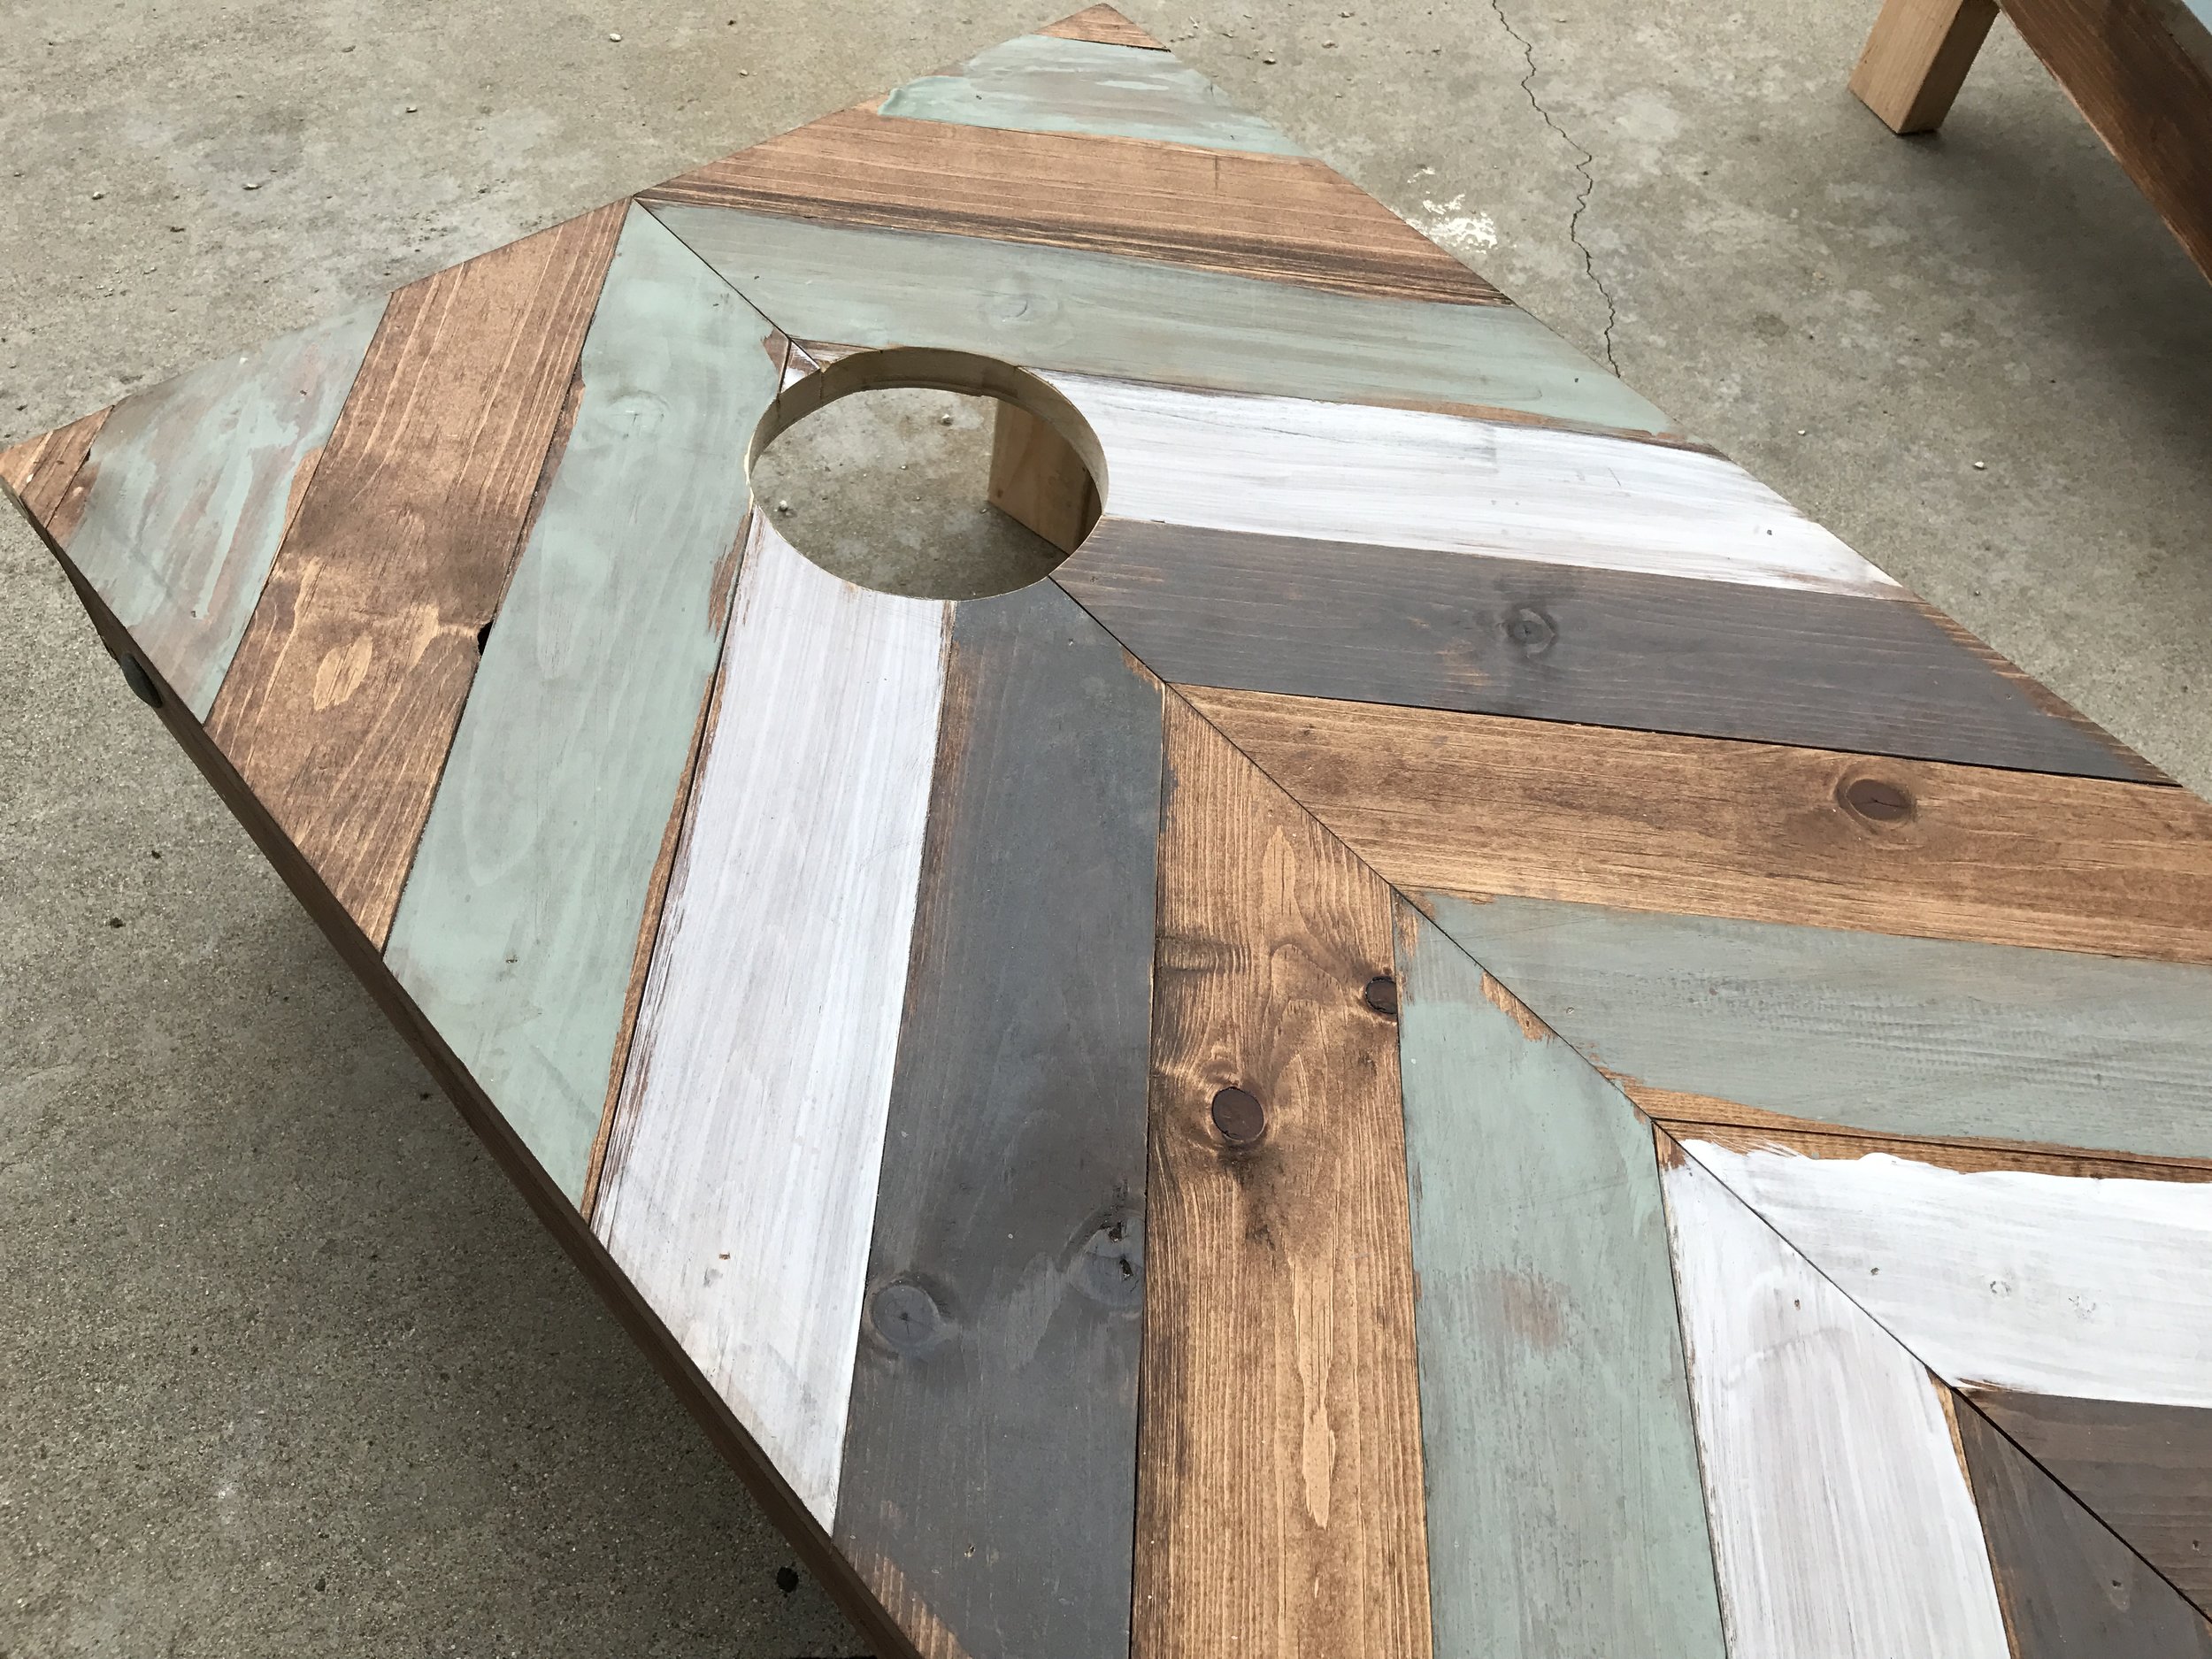
For the look of the tops, I wanted a rustic/weathered vibe.
I was glad I had kept left over paints and stains from painting my apartment and other DIY projects as they were the perfect combination to achieve the look I wanted. To get a thinner coat that allowed the paint to go on easier and have the base wood stain show through better (as if it had been weathered down), I did 2 parts paint, one part water. Painting them individually before attaching to the boards was definitely the way to go. I was stoked at how it came out.

Onto the legs. The tops of these need to be round so they can rotate 90° when setting up. Didn't have a compass to mark the rounding off of the tops, so I improvised using this adjustable wrench. I'd also call this a success.

I couldn't find my jigsaw blade to cut these individually, so I resorted to using my belt sander, which took more time but worked out pretty well.

I used these 4" carriage bolts to attach the legs to the main frame.

Was oddly difficult to measure and get things lined up, but they came out great.

Lining up for the final design and glue down. I had done a bit of mental math to make sure that the excess pieces I'd cut off could fill in the smaller spaces that didn't require full slats.

I used wood glue and finish nails to hold everything in place while it dried. It was, at this point, that I realized it was nearly 3pm and I had not eaten anything the entire day...
So I took a break while it all dried.
No pictures of my food unfortunately.

Using the spare piece of whitewood and clamps, I marked a very precise straight edge and squared up all the sides with my circular saw.

All squared up and nearly finished.
At this point, I put a cork in it for the day as I needed more tools to complete the job and I was exhausted...

Day 2.
Compass has been purchased and I found my jigsaw blade. Time to finish this baby. Used the compass to measure a 6" diameter hole that had a center 9" down from the top. Then, I used a half inch drill bit to make a pilot hole.
Another special shout out to my passive aggressive neighbor who actually came out this time and into my driveway to ask if I'd be building things every weekend in a condescending tone. She has no appreciation for my craftsmanship.

Once she dipped, I used the jigsaw to cut out the circles. It is oddly difficult to run a jigsaw in continual circle...

Because corn hole sets sit at an angle, I needed to cut off a small piece on each of the legs so they would sit flush with the ground.
Quick rant - saw dust is annoying. I'm so over sweeping. I need a shop with a vacuum system.
Moving on...
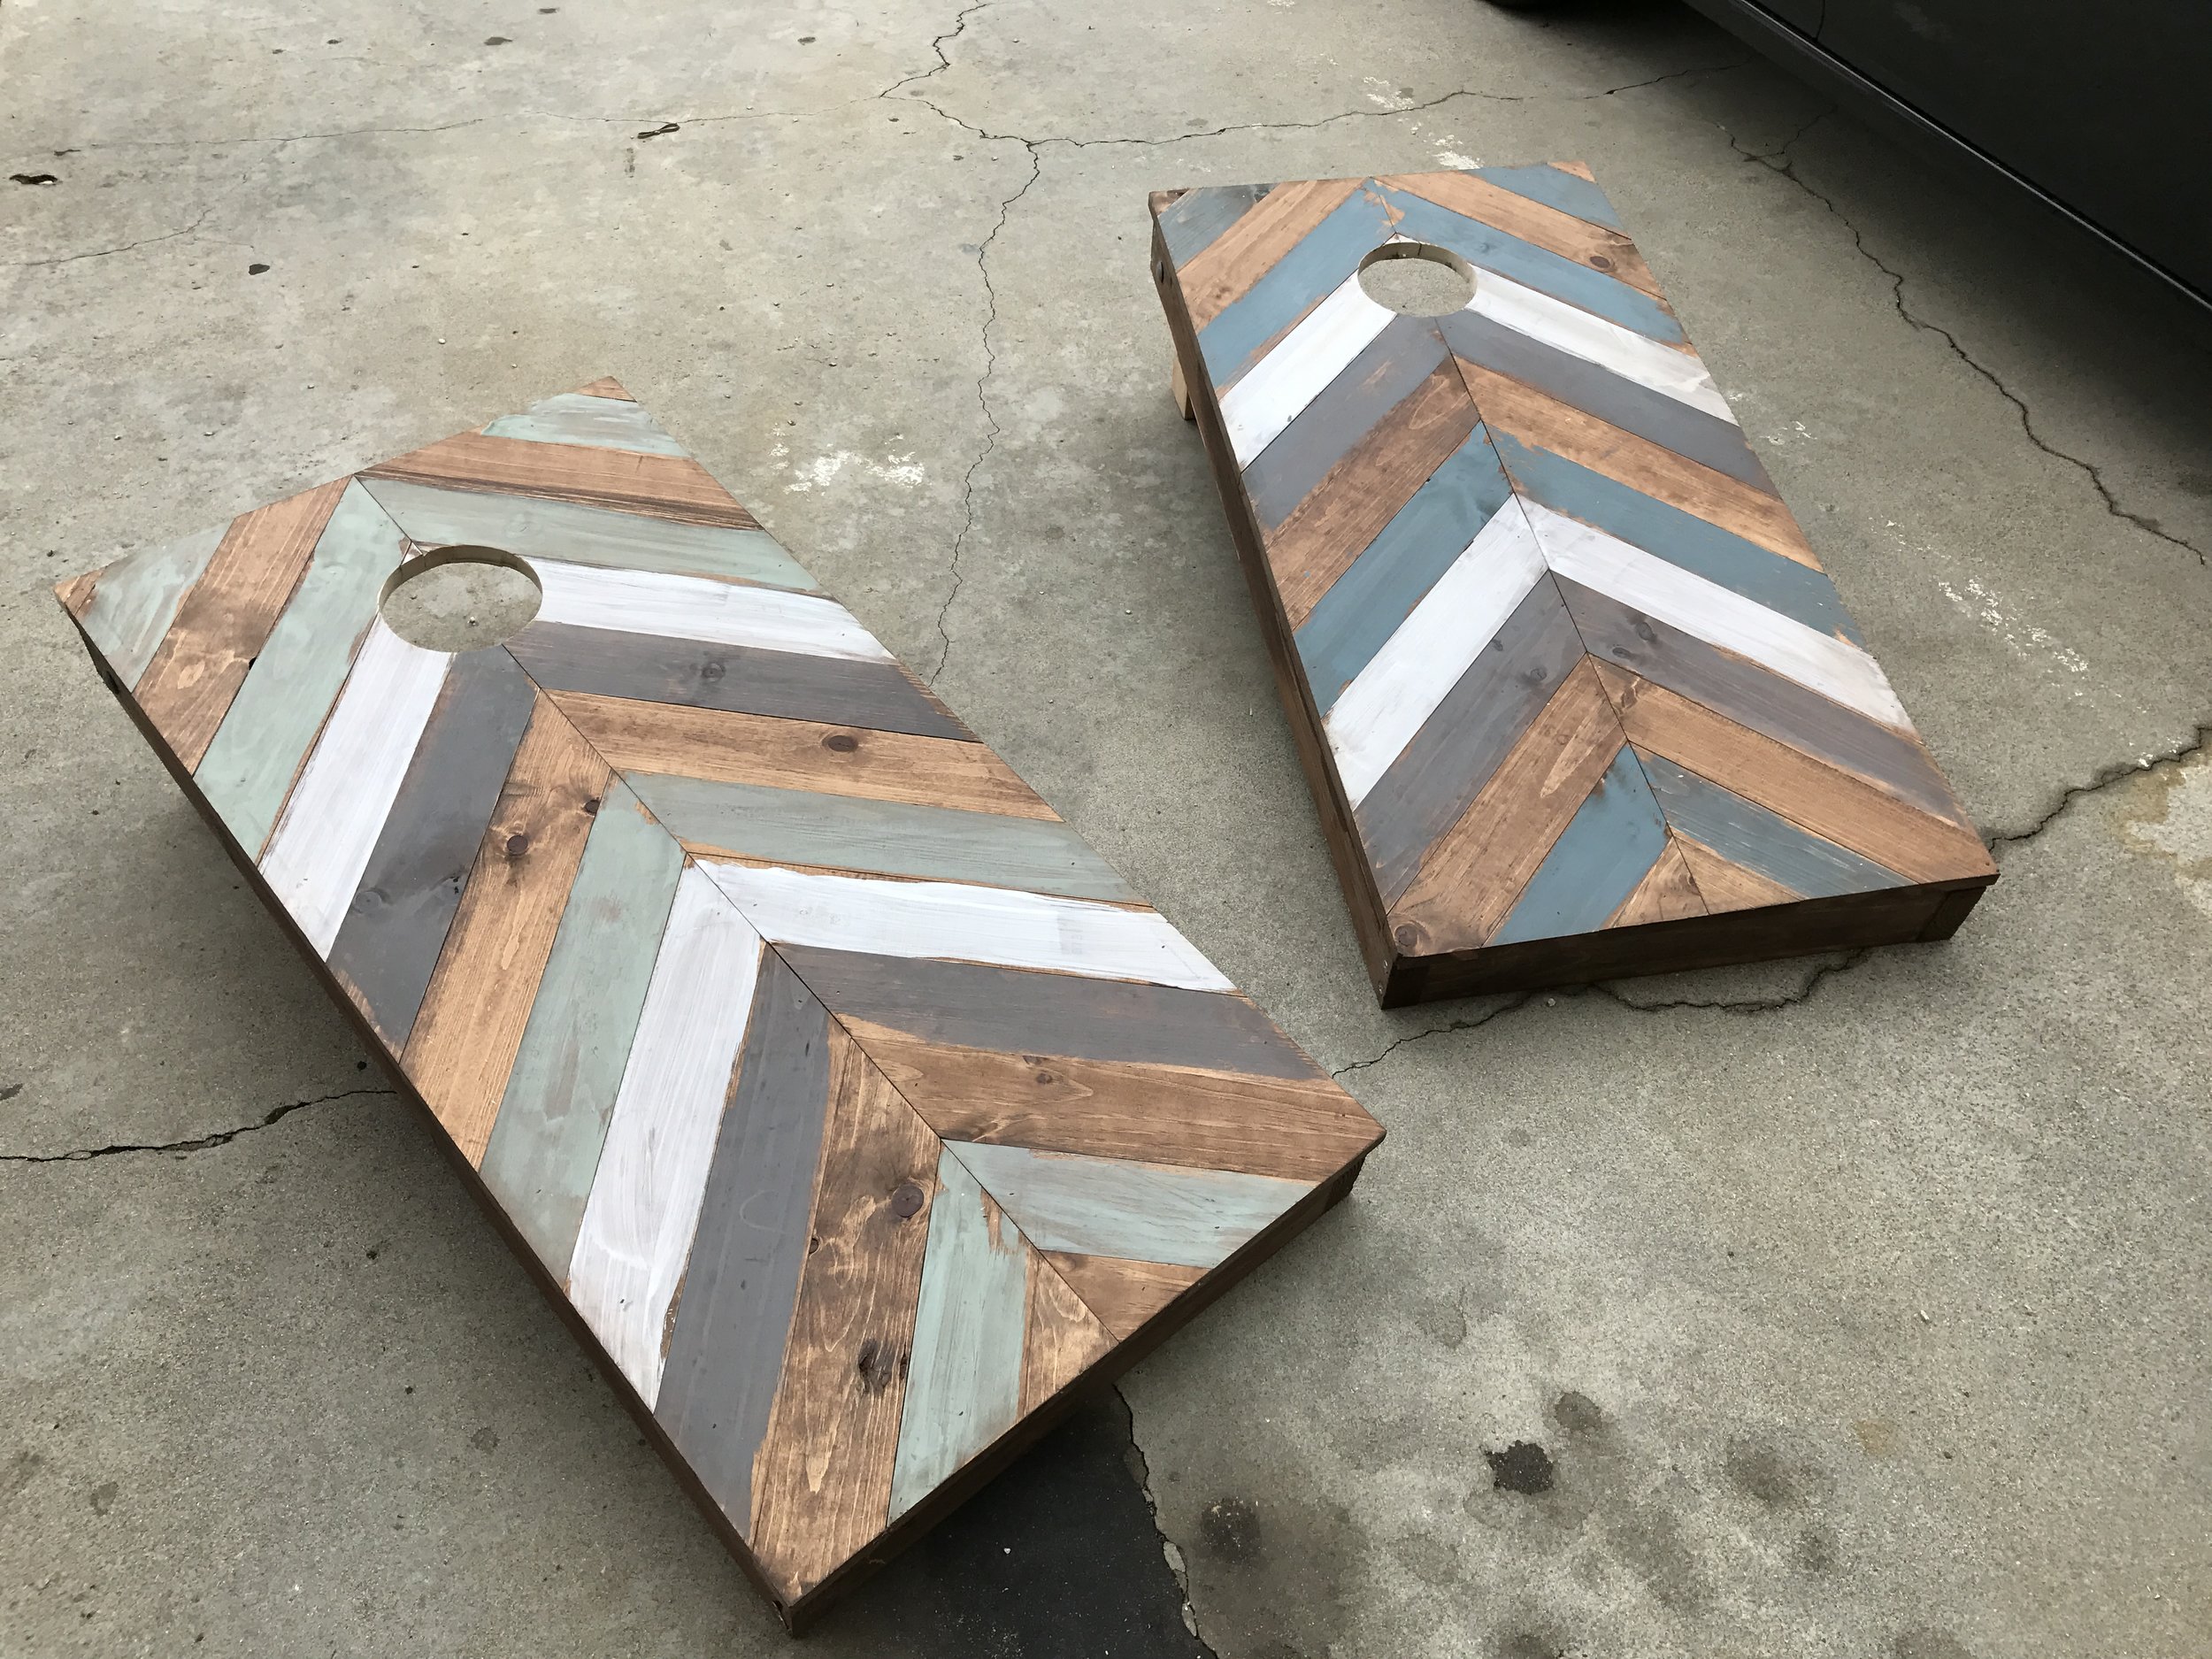
I hate it when I make something for someone else and it turns out so good that I regret not being able to keep it for myself...but it will go to great use for the newly married couple!
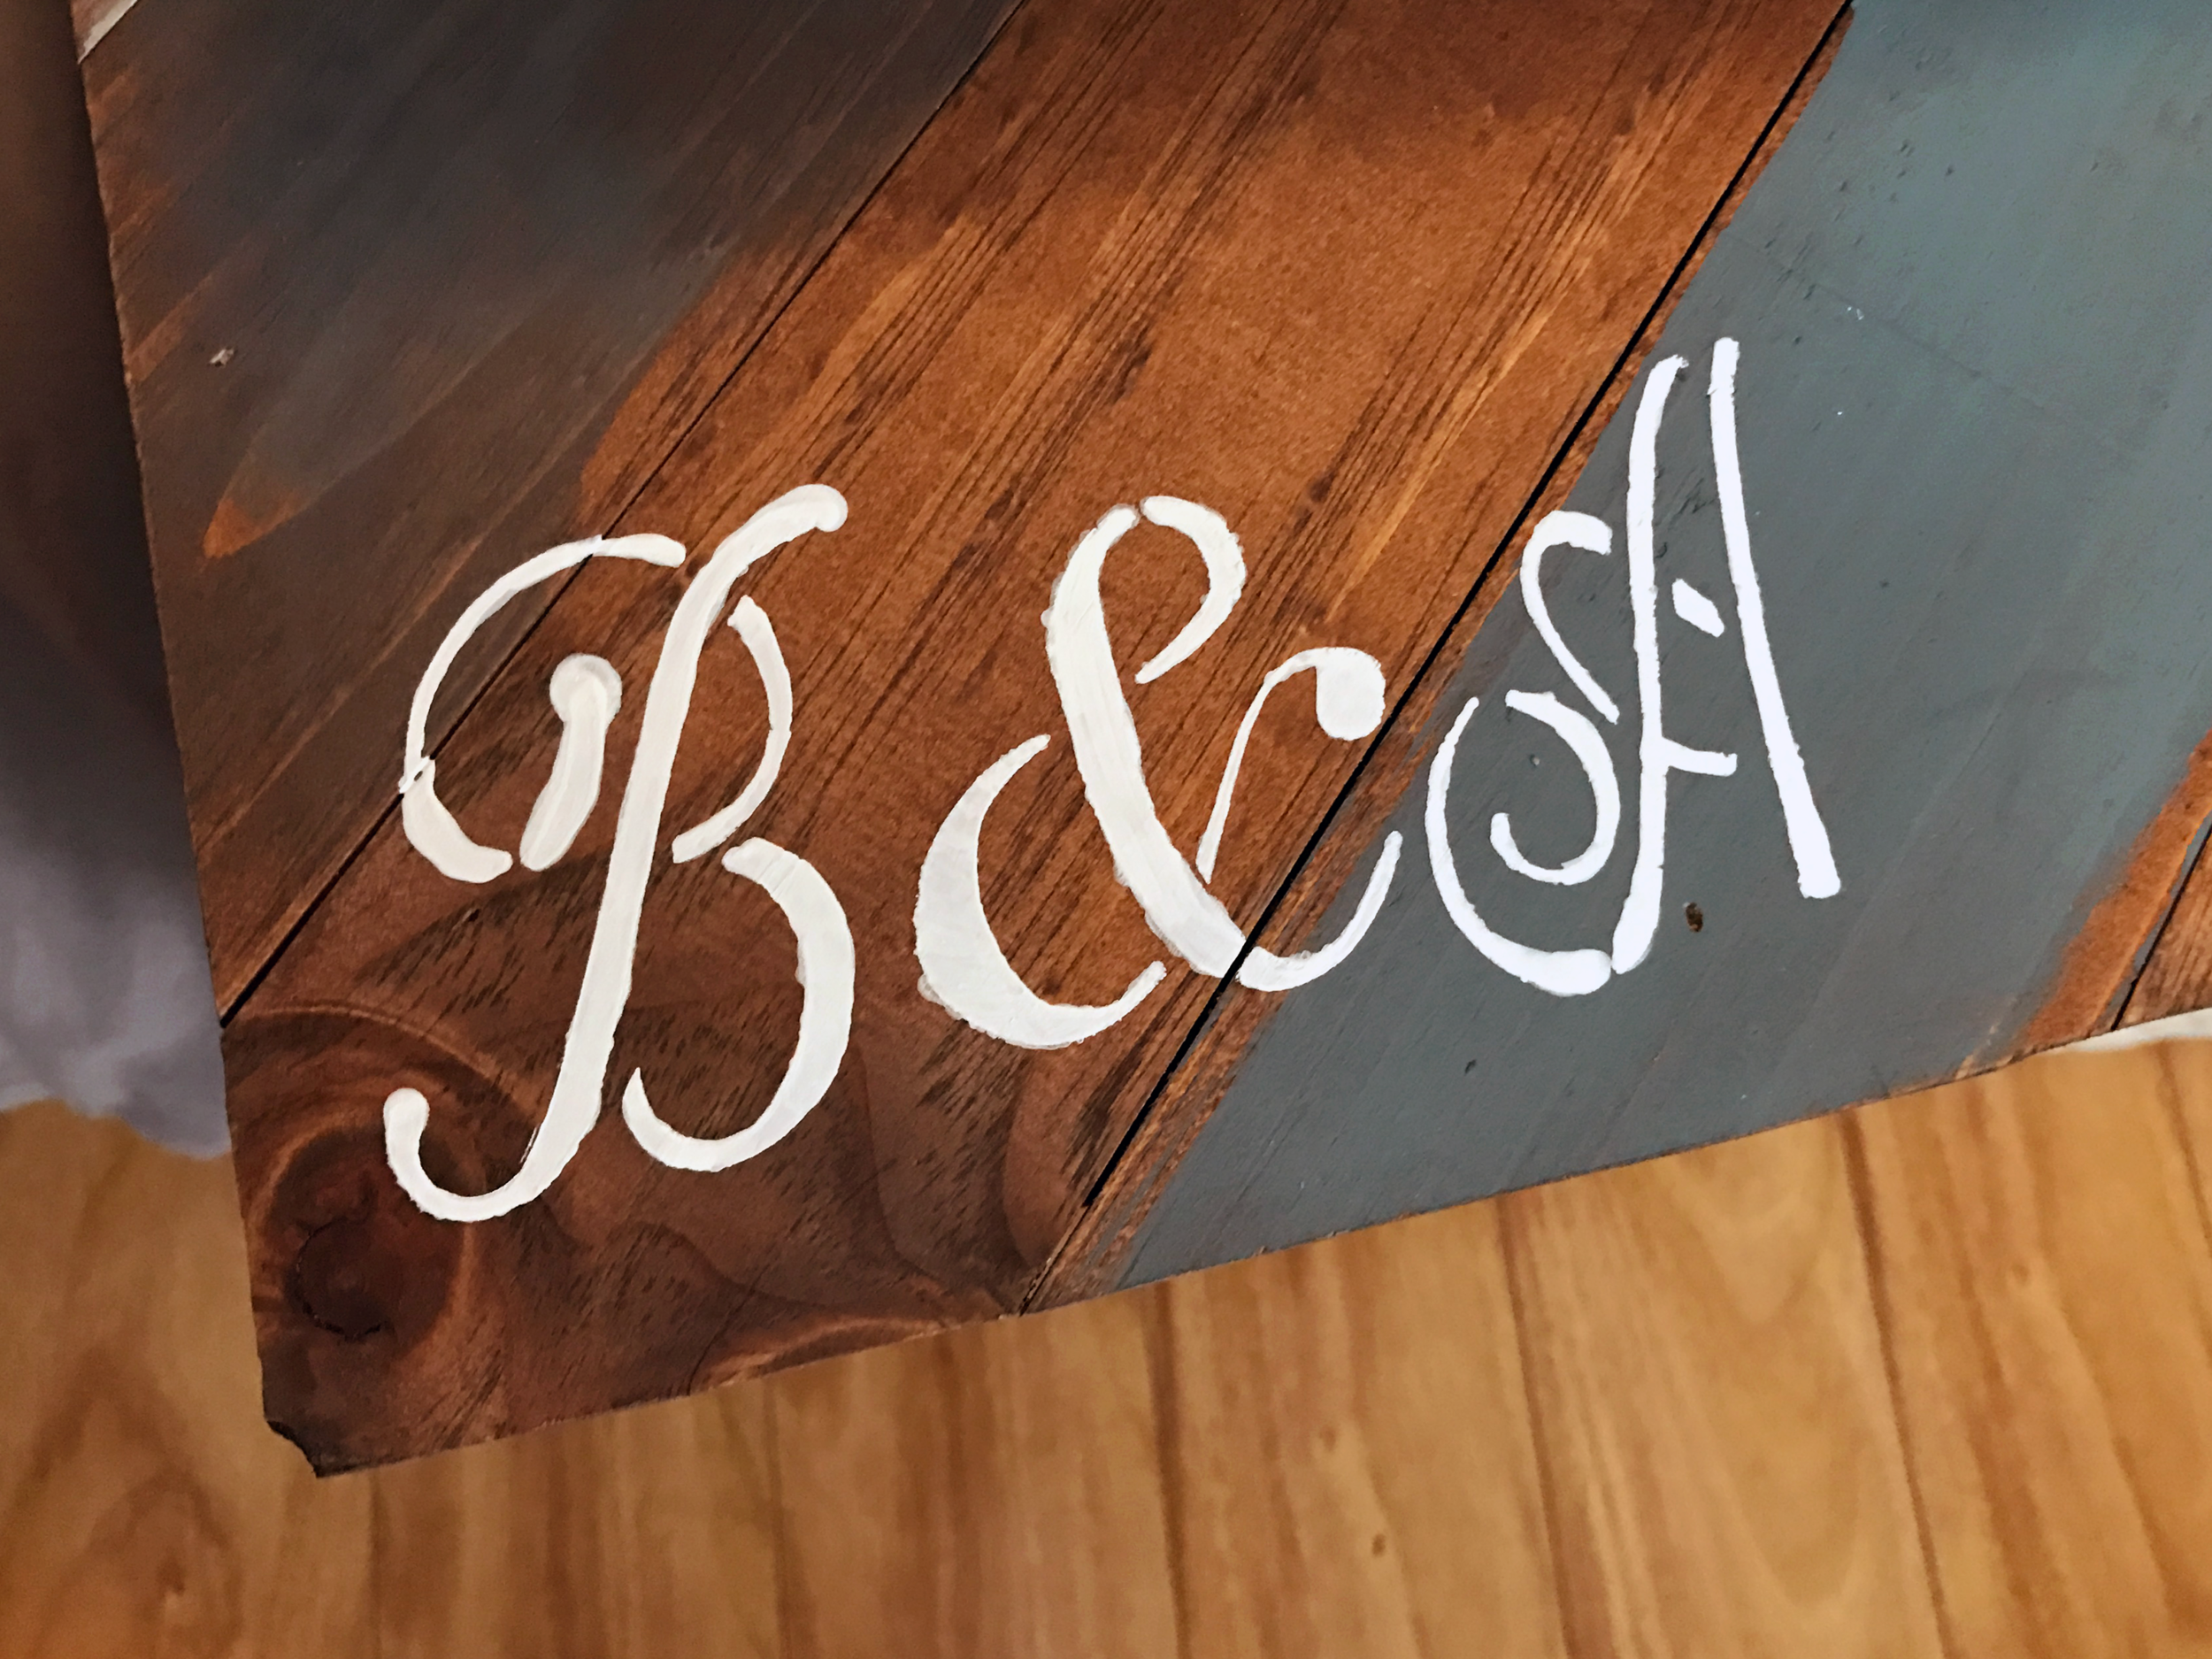

Brooke went in and added a final personal touch to the bottom corners.
TOOLS
RYOBI 10 in. Sliding Compound Miter Saw
RYOBI Miter Saw Stand
RYOBI Cordless Orbital Sander
RYOBI Circular Saw
RYOBI Power Drill
RYOBI Impact Driver
RYOBI Cordless Jigsaw
RYOBI Cordless Brad Nailer
RYOBI Belt Sander
Hand Sanding Sponges (120 grit)
BESSEY Economy 2.5” x 12” Clutch Clamps
12” Rafter Square
Compass
Hammer
Thanks for reading!
Check out my new DIY Youtube Channel here!