Full video of this amazingly fun and versatile project is below which can be found on my Youtube Channel.
The initial steps for this project can be done based on your access to tools.
There is the true maker method of making your own hex nut to mold which requires a few tools that you might not have, or the more simple (and frankly, cheaper and more accessible) way of just purchasing an oversized hex nut to mold and create castings from. I'll show you how to do both as I did in the above video, and will list out the materials I used as well below:
MATERIALS
Oversized Hex Nut (More information on that below)
Scrap Piece 2 x 6 for making your own hex nut
Smooth-On Liquid Rubber for Mold Making + Mixing Bowel
Quikrete 5000 (60lb bag) + WATER
Aquaphor (for greasing molding tray)
Tupperware Container (any size that fits your needs)

Incase you've never drawn a hex nut, the above gif will show you how to make your own using only a compass and straight edge. A fun trick to know!
After you have designed your hex nut from the previous step, do the following:
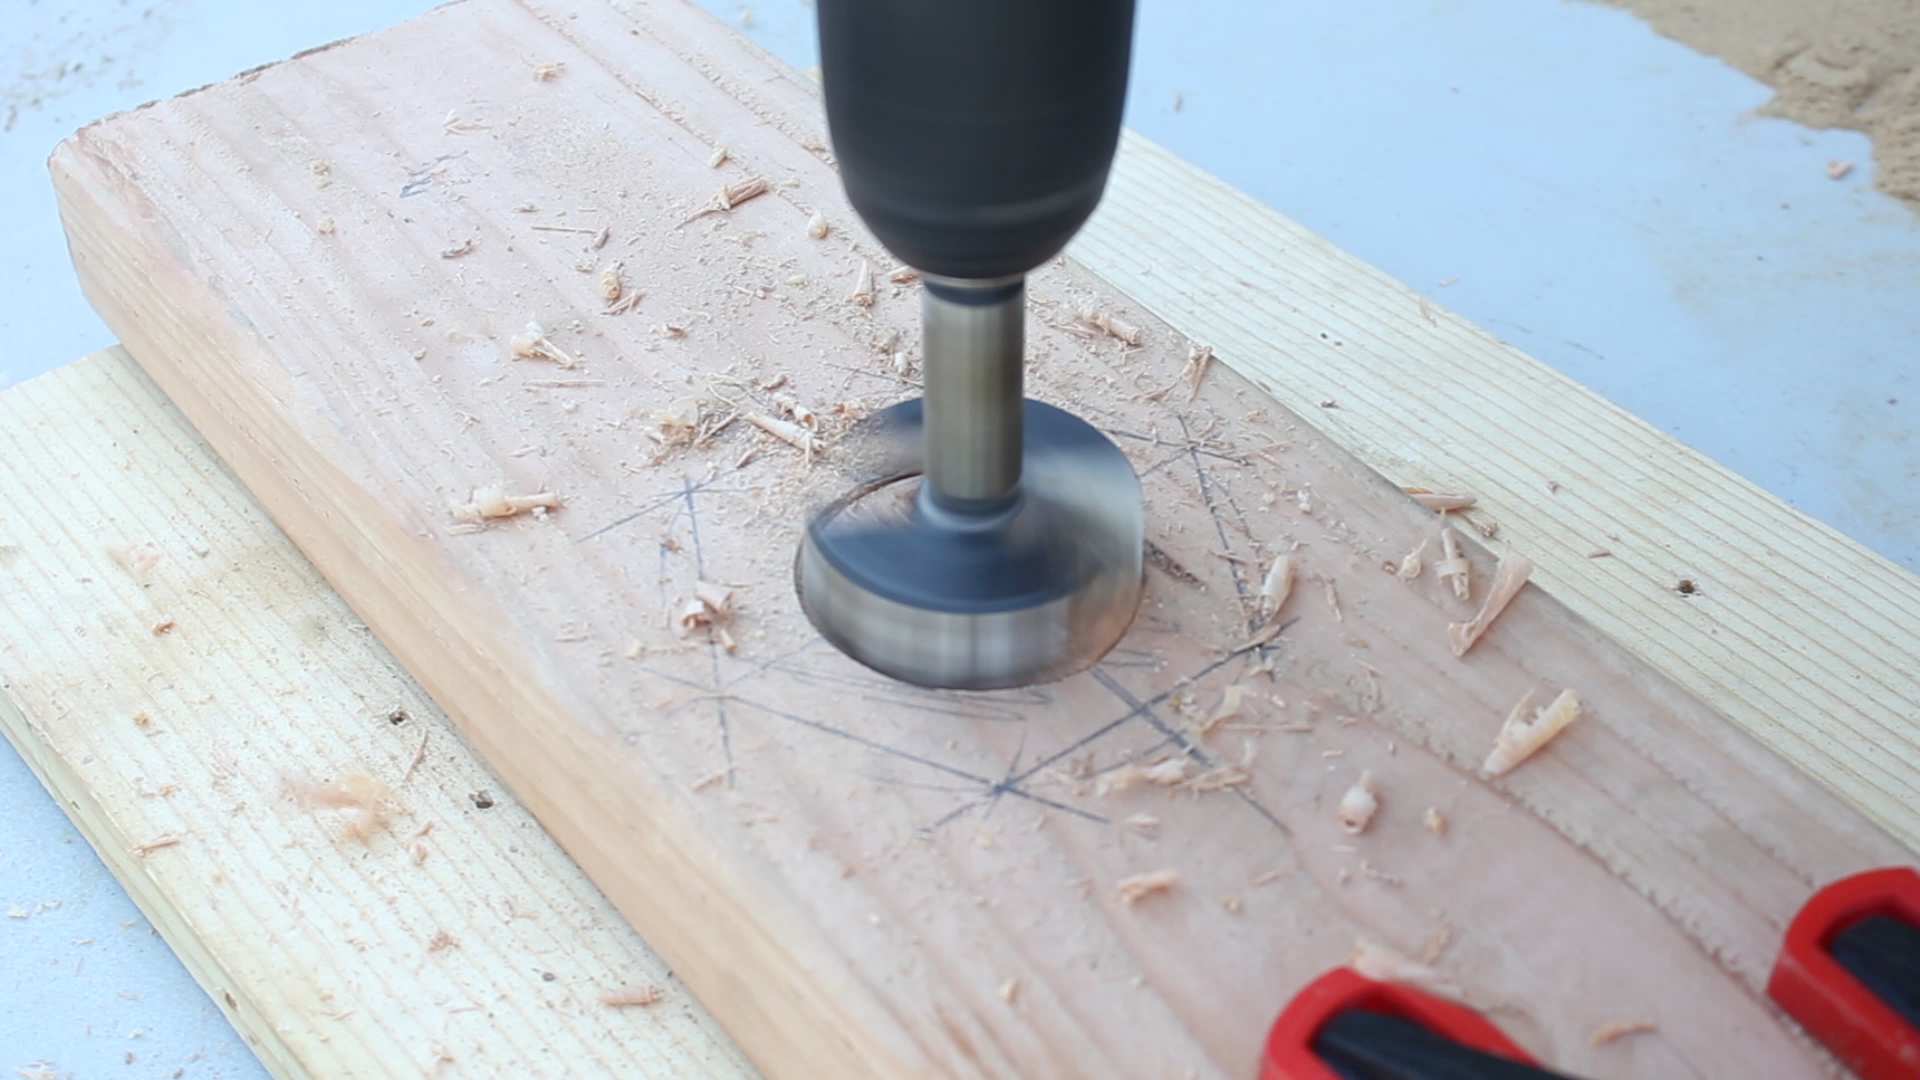
Clamp your piece to a secured surface and drill a large hole using a forstner bit (Picture 1). I used the biggest Forstner bit I had, which was 2.125", but if you have something smaller, no big deal.
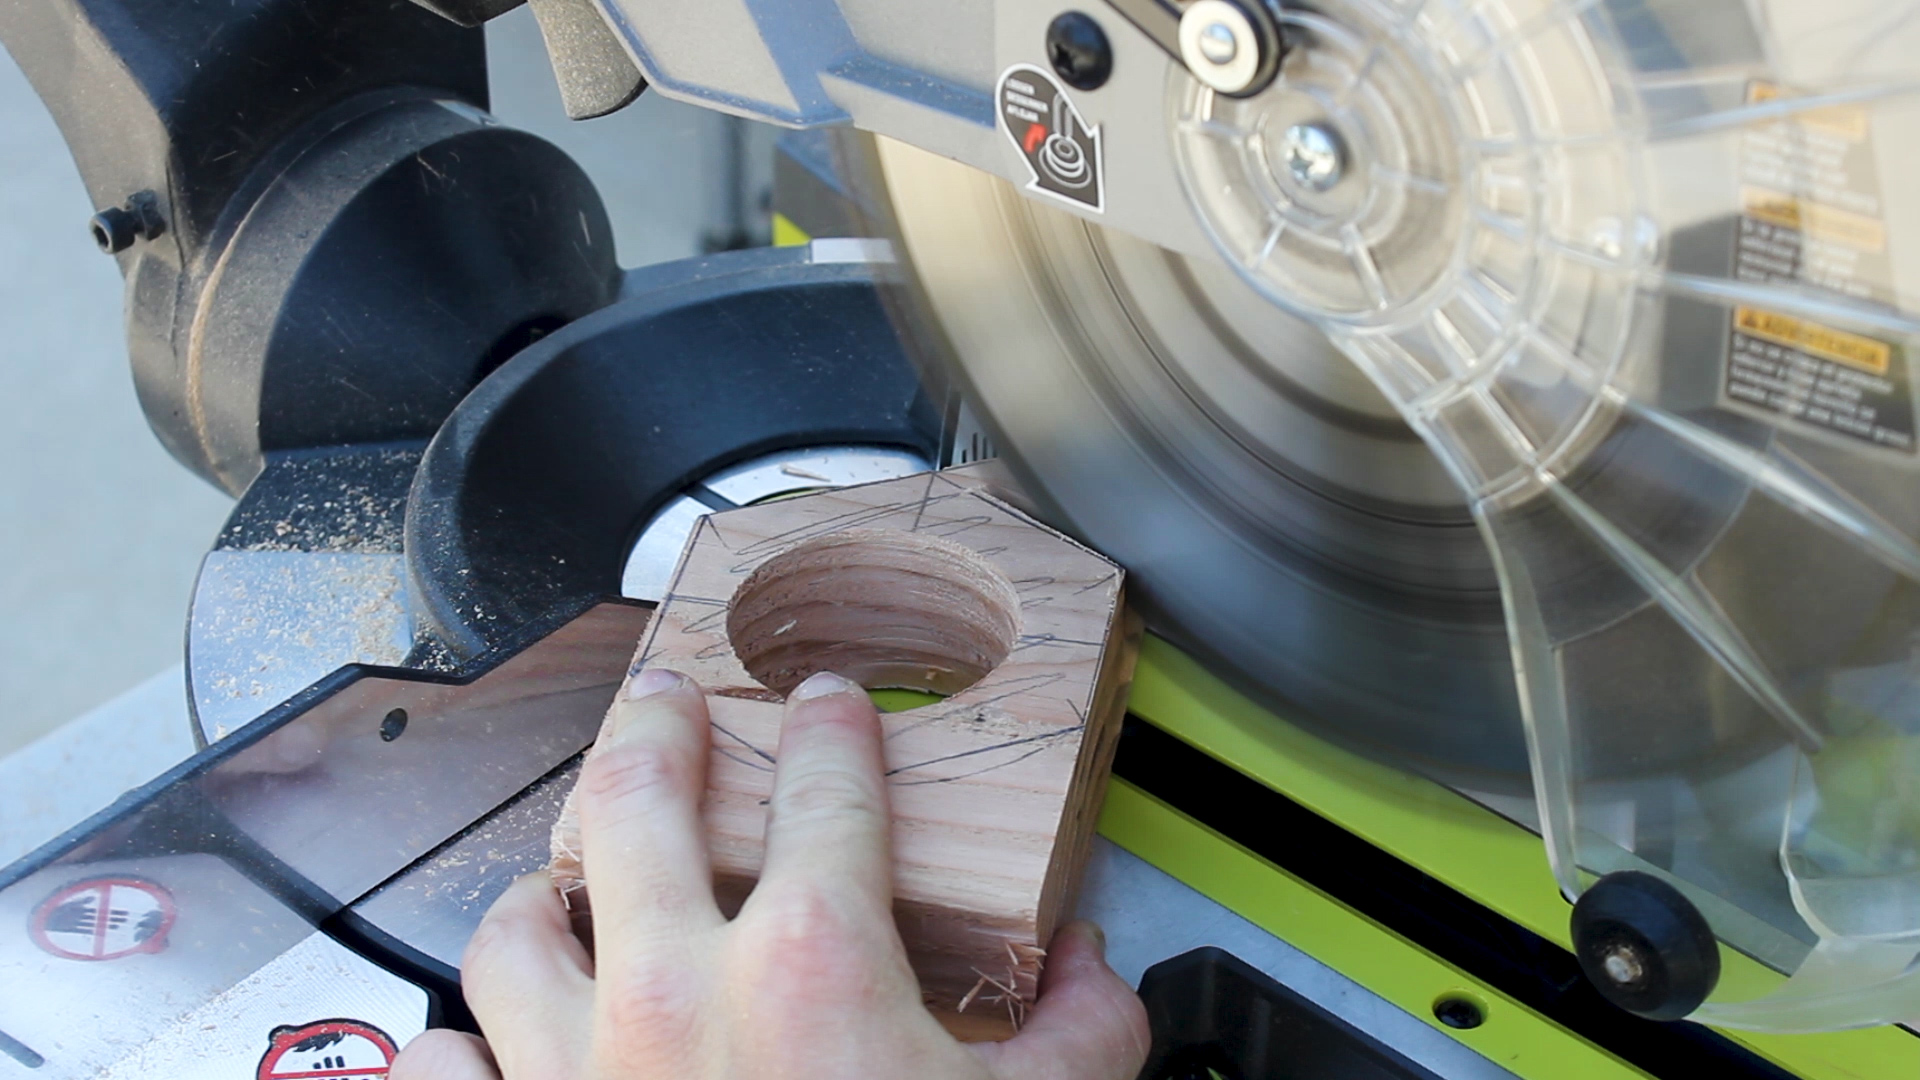
Next, carefully cut away all sides to your piece using your miter saw (Picture 2). Safety is priority here. Secure your piece to make your cuts as best you can and take it slow.
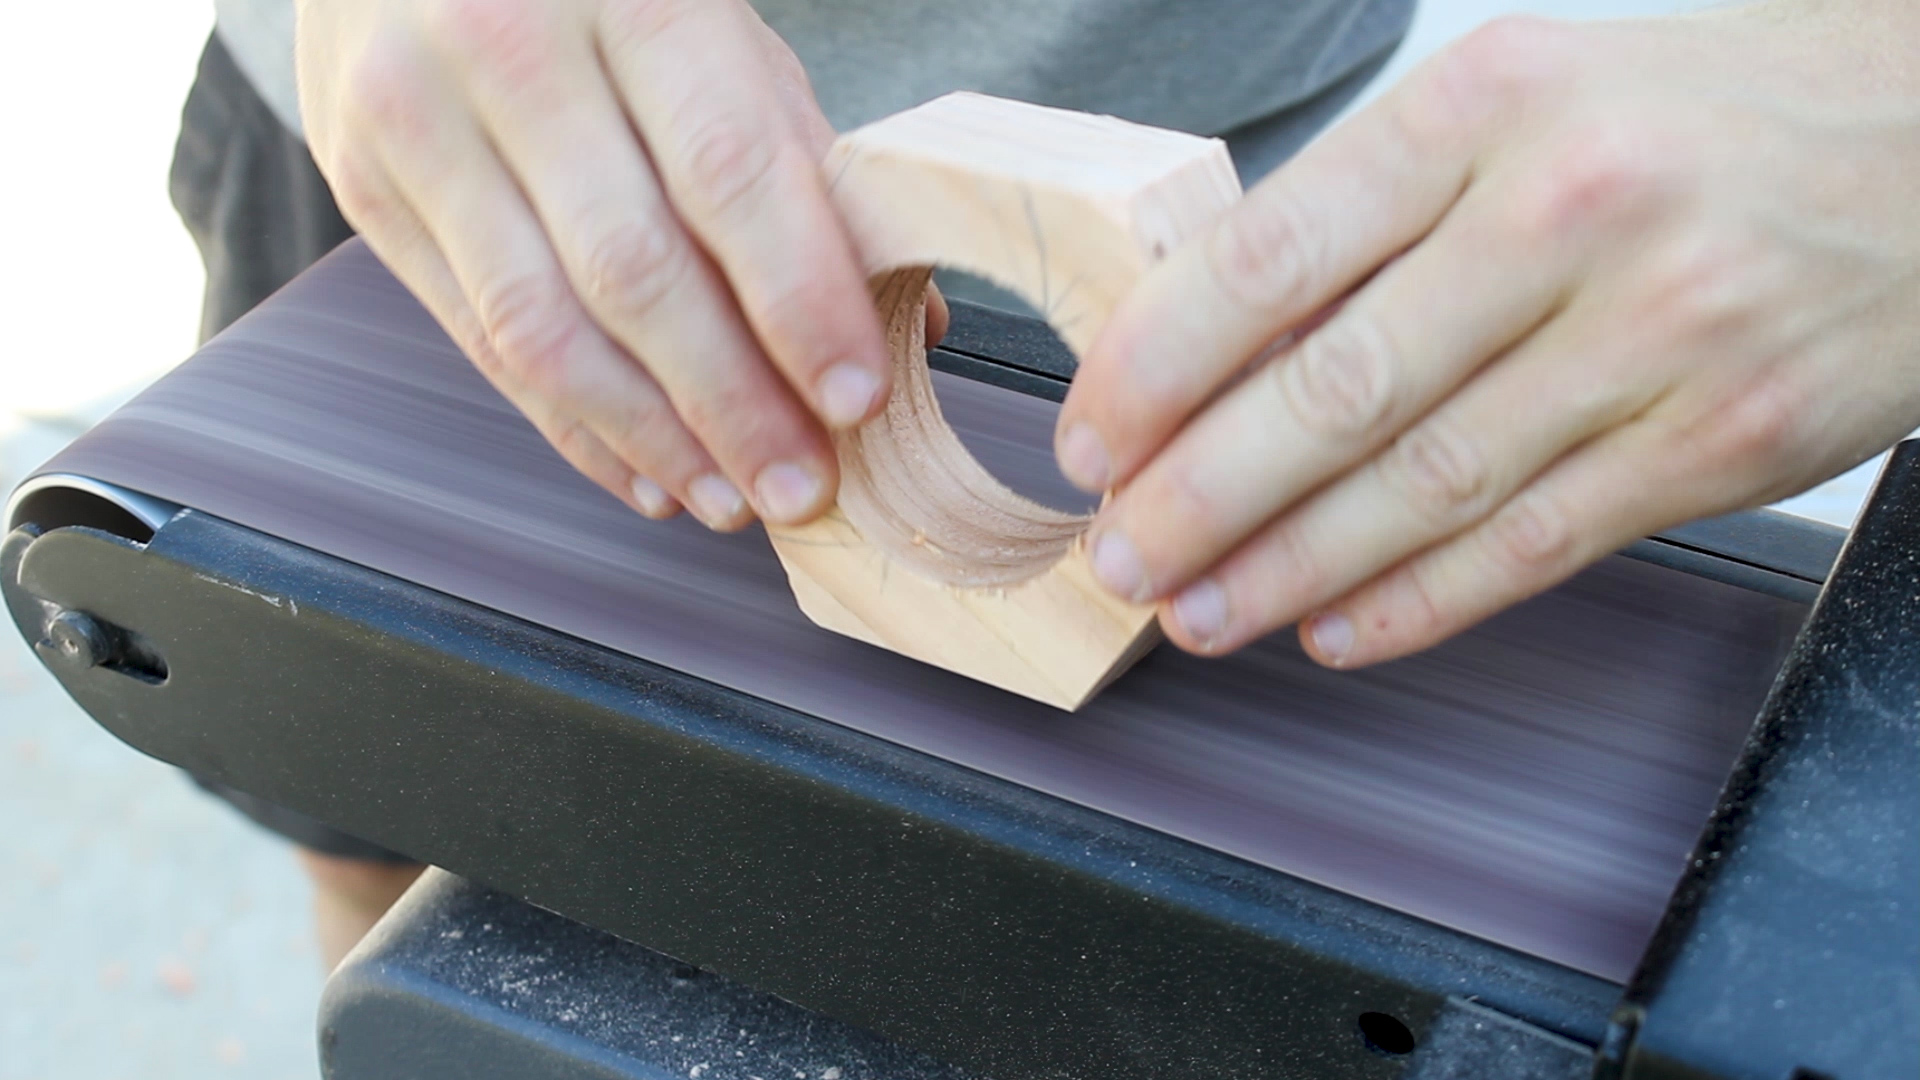
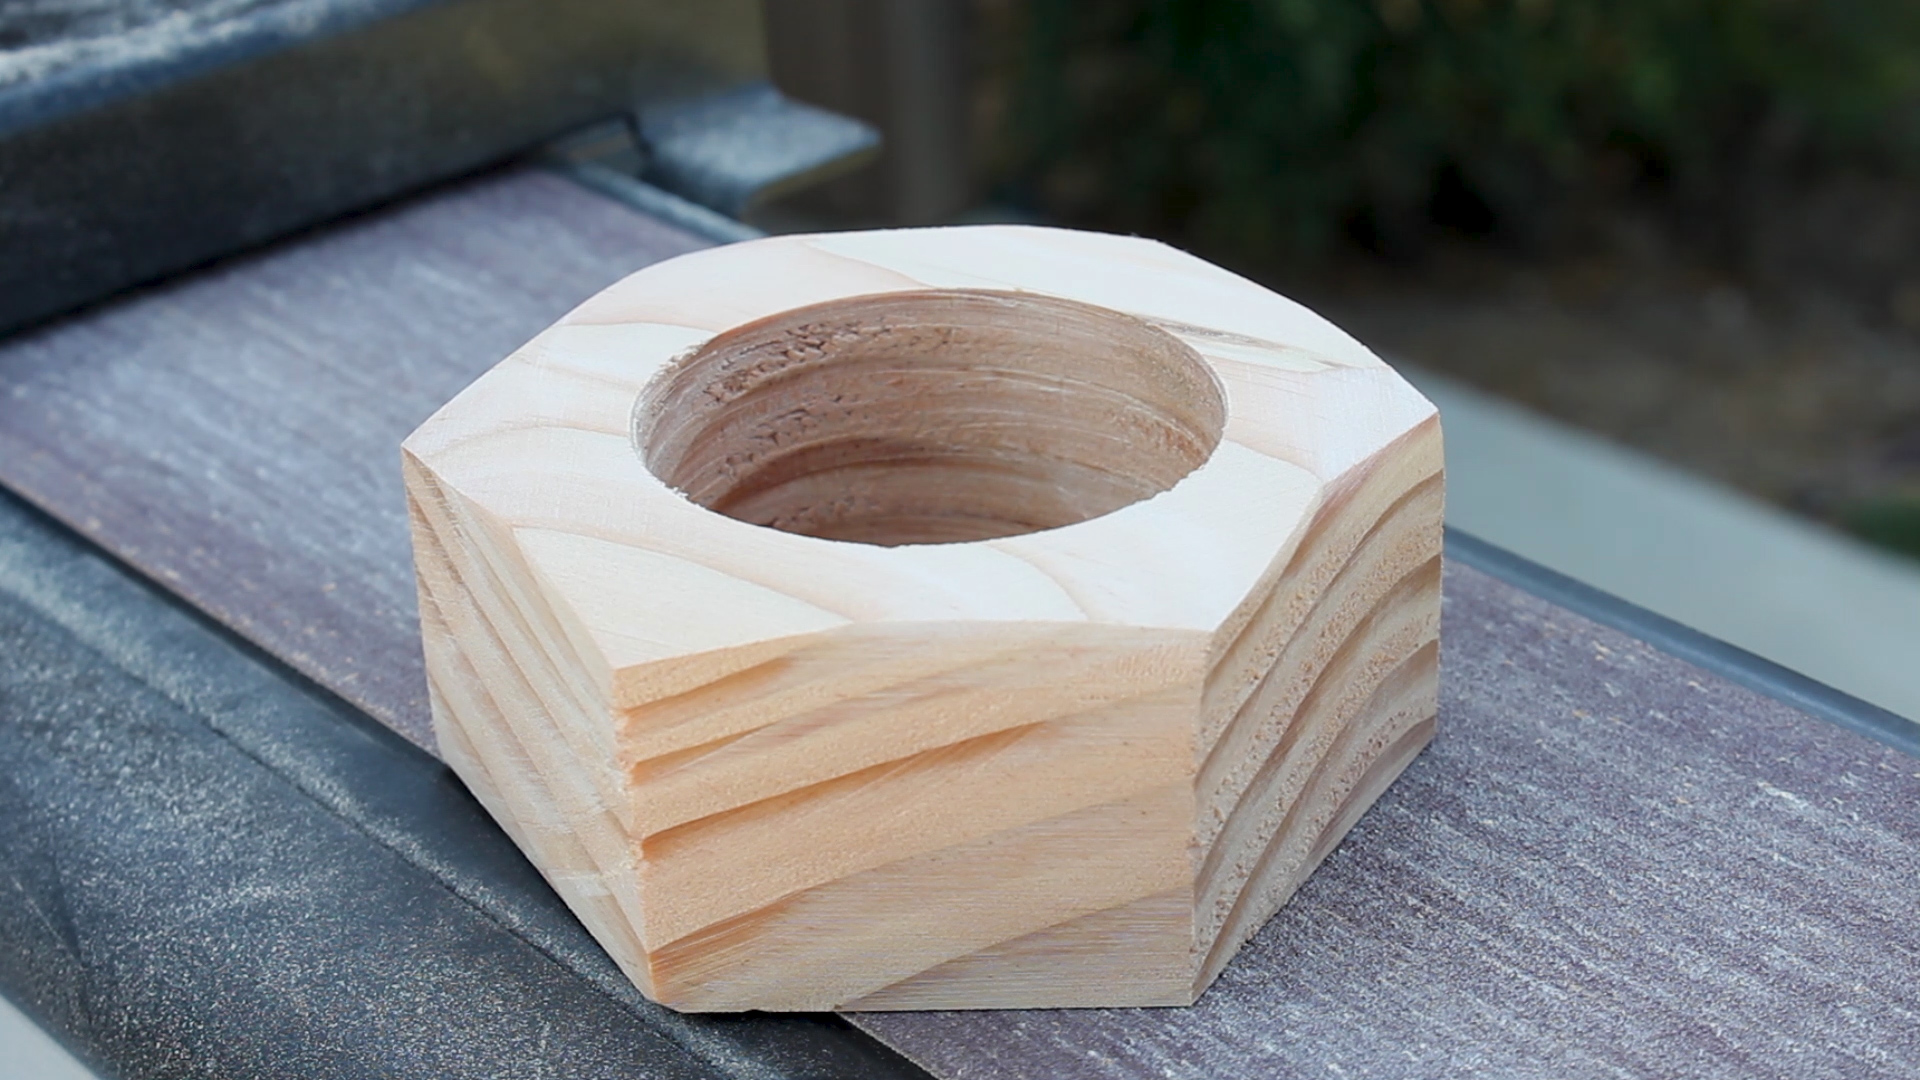
Last up, you can sand down your edges however you like. I used my stationary belt sander to get it more of a smoothed profile (Picture 3), leaving me with a final Hex Nut to cast (Picture 4). Now, I did not actually cast this one, but I am guessing it would be good to coat it in a non stick surface - maybe a Minwax Polycrylic or even just melted candle wax - so that it doesn't stick to the molding material due to the porous nature of wood.

I purchased this Hex Nut from a company called Grainger Industrial Supply. The dimensions are as such:
Height: 1 15/16"
Width: 3.375" (outside boarder)
Center Hole: 2.125"
and it cost me $18 total. Beyond using it for this project, I have used it mostly as a heavy paper weight to hold things down where a clamp doesn't work - it doesn't replace a clamp, but it does work well to a certain extent as it weighs about 3 pounds
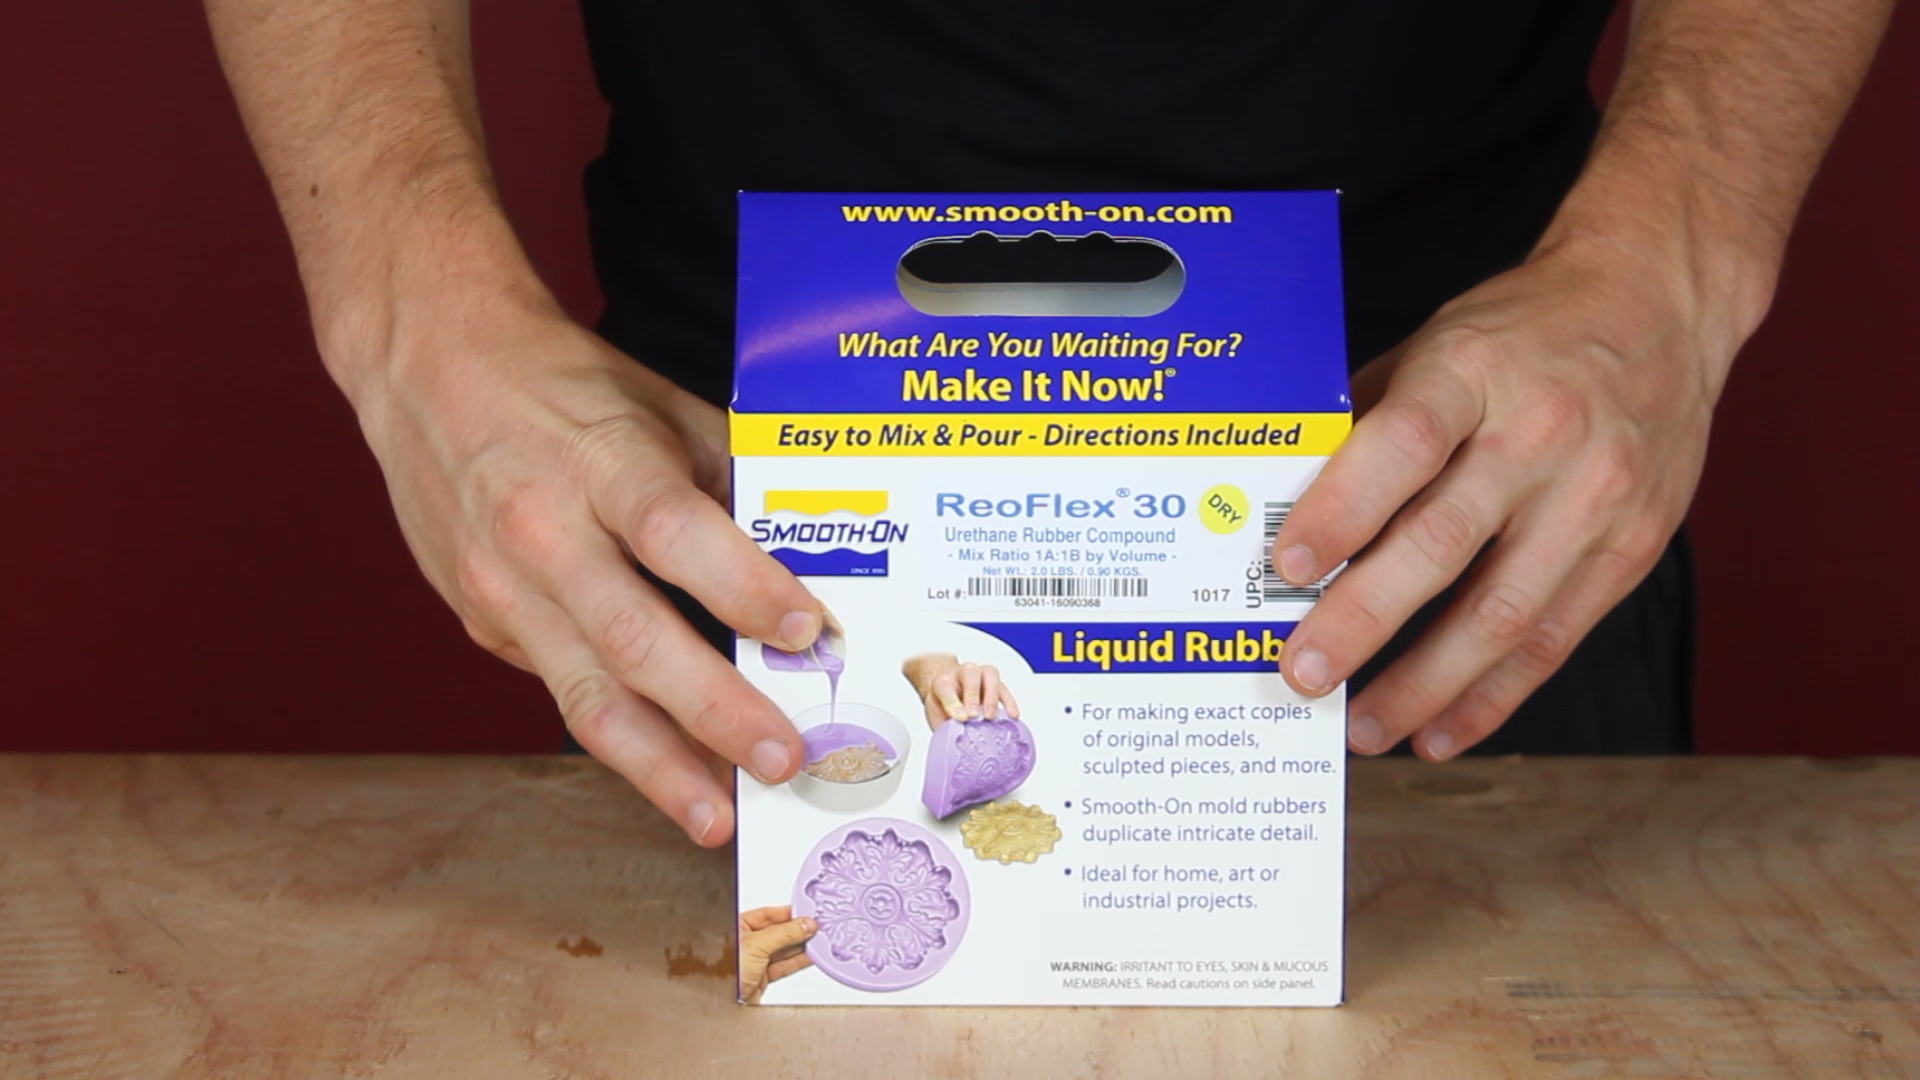

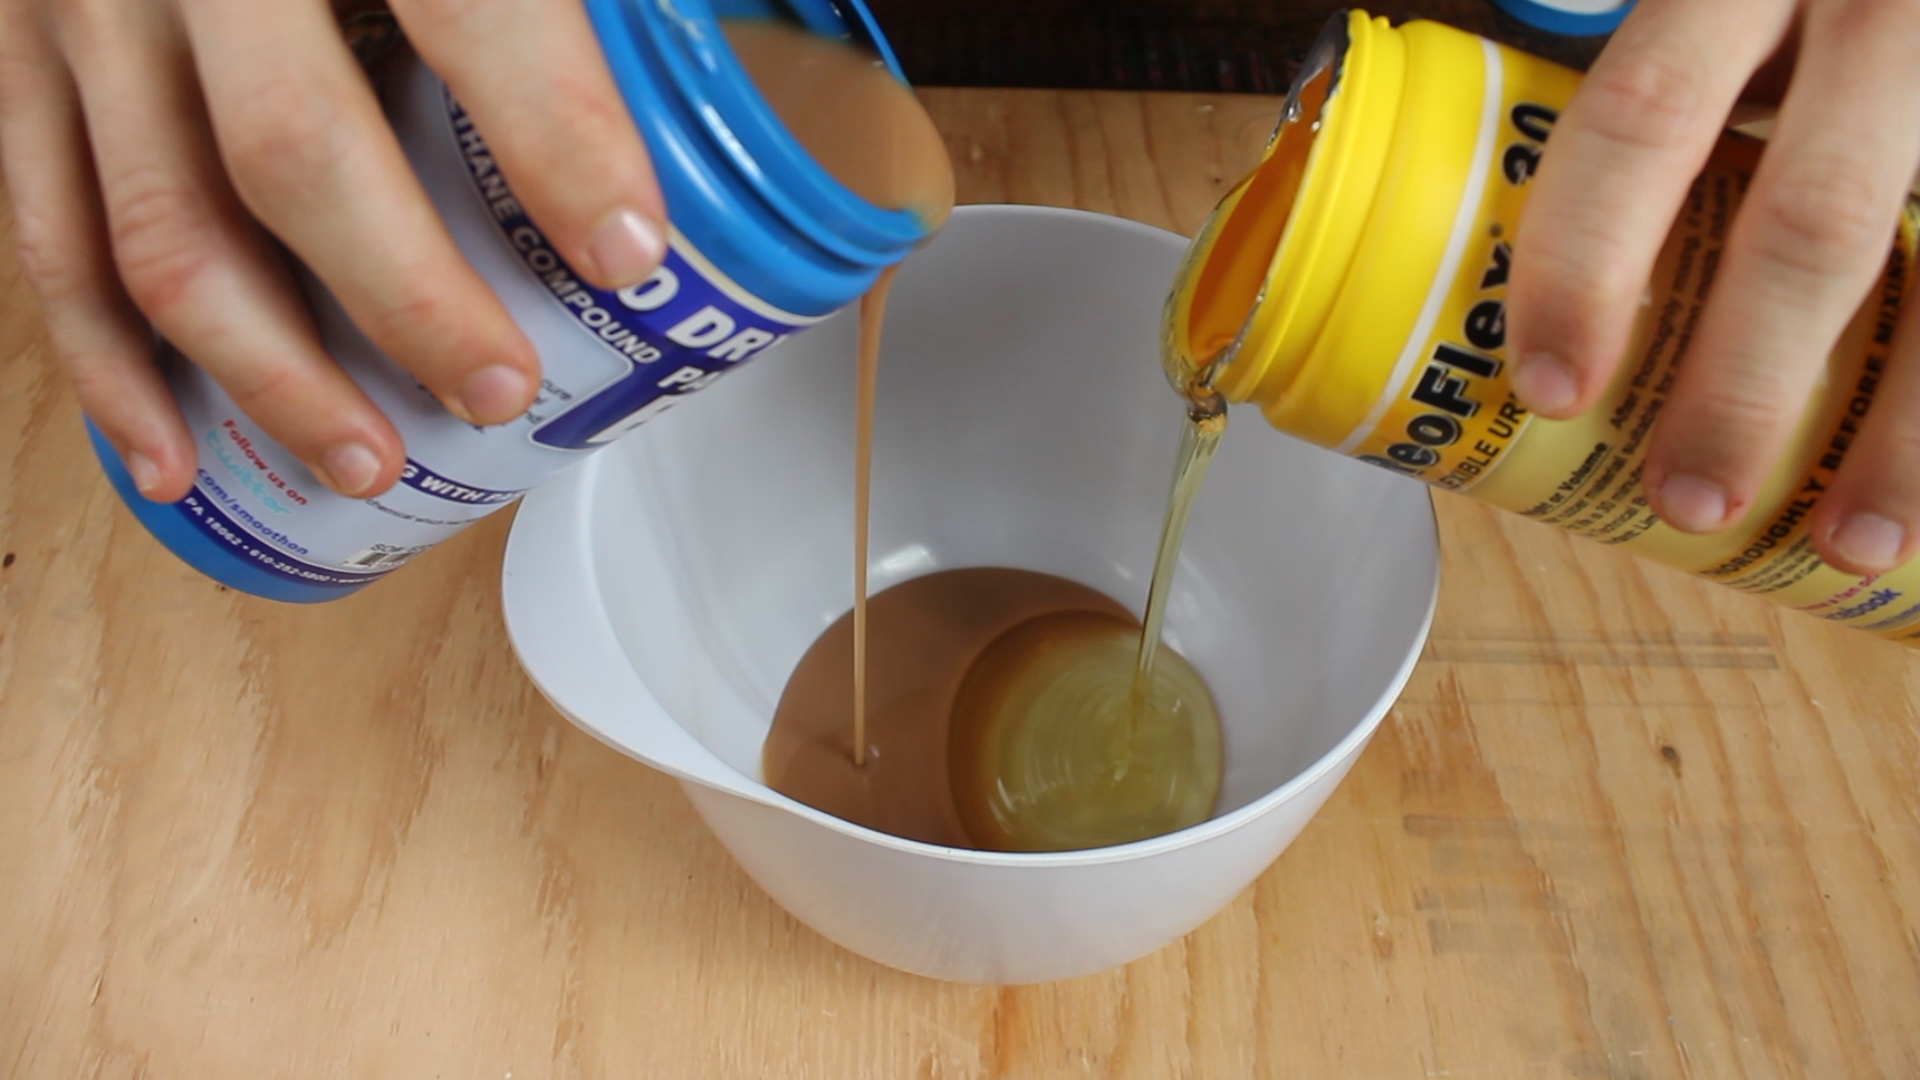

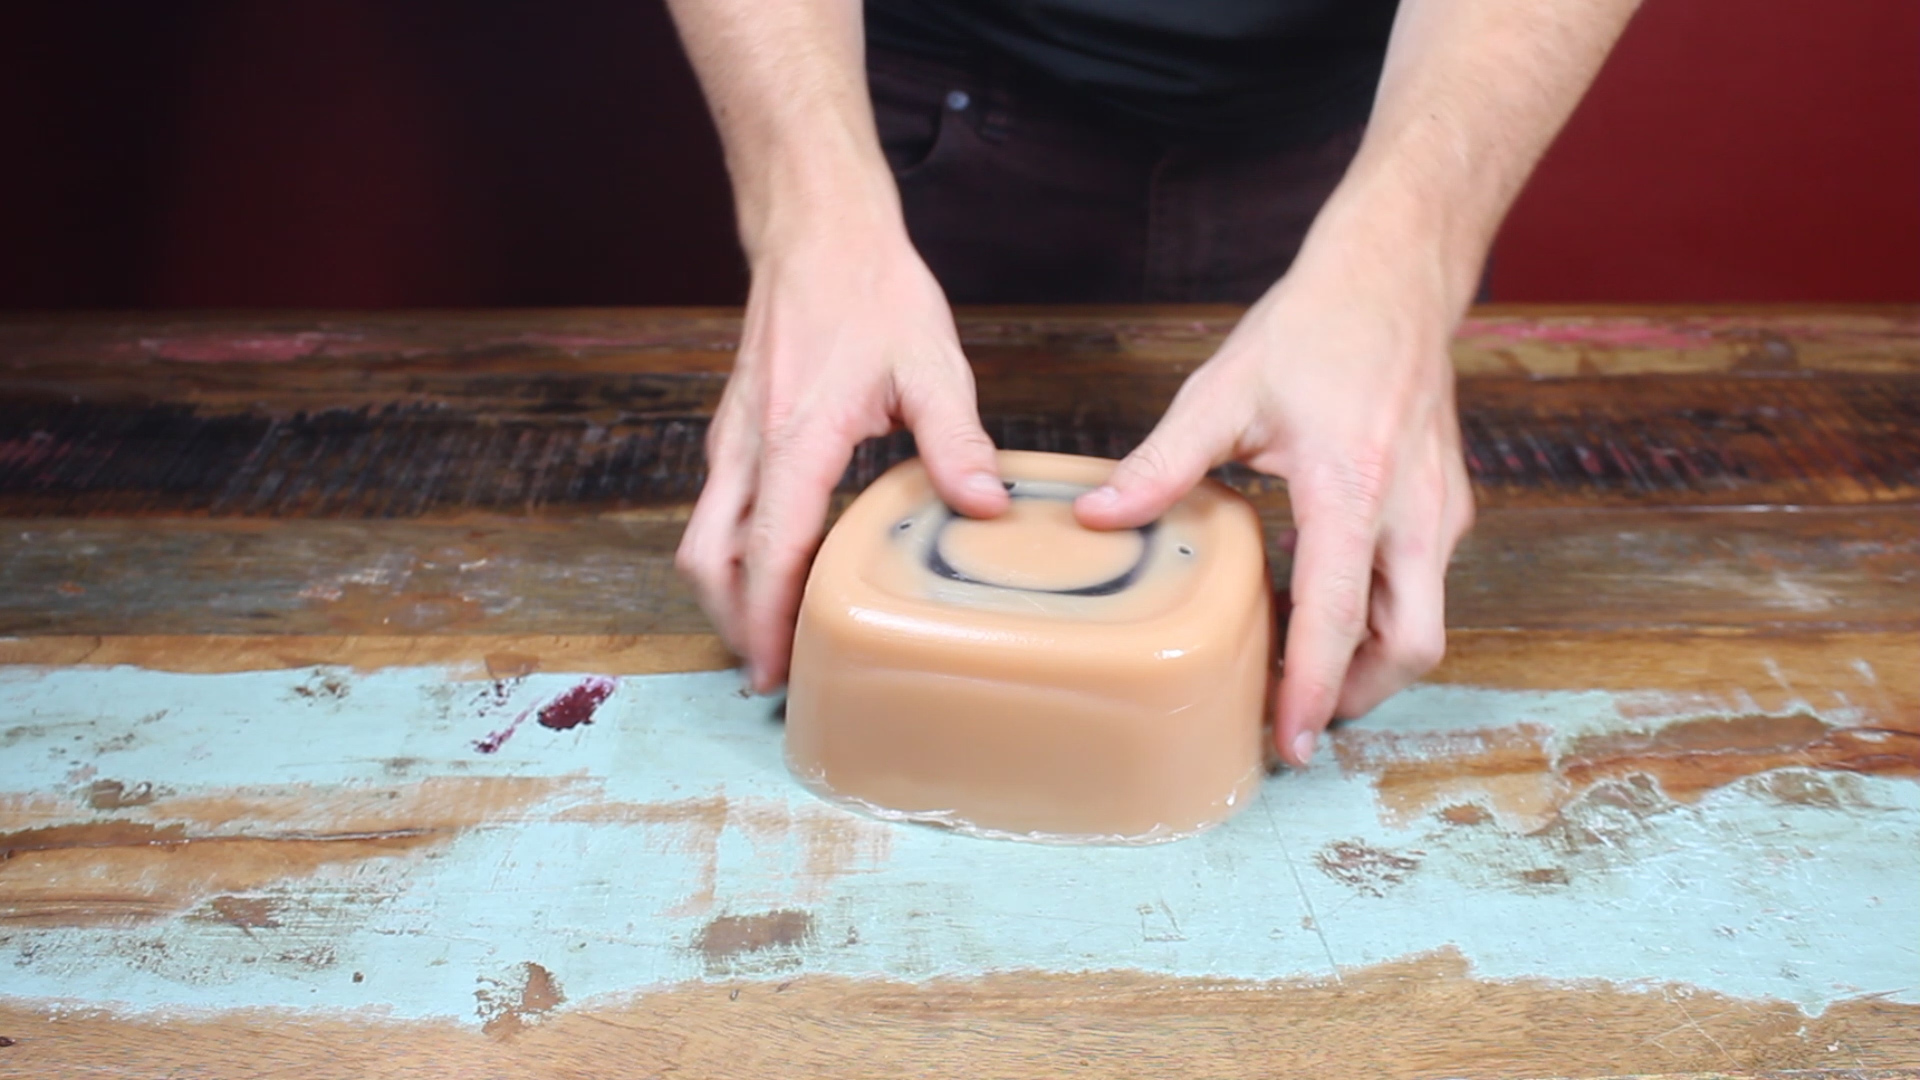
For molding, I'm using a product called Smooth-On (Picture 1). It is a two part mixture that you mix at a 1:1 ratio and sets and hardens over about 6-8 hours.
Before molding, I rubbed my surfaces (Picture 2) with Aquaphor, hoping that it would make it easier to remove the molding after it hardened (spoiler - it did, but not as much as I thought).
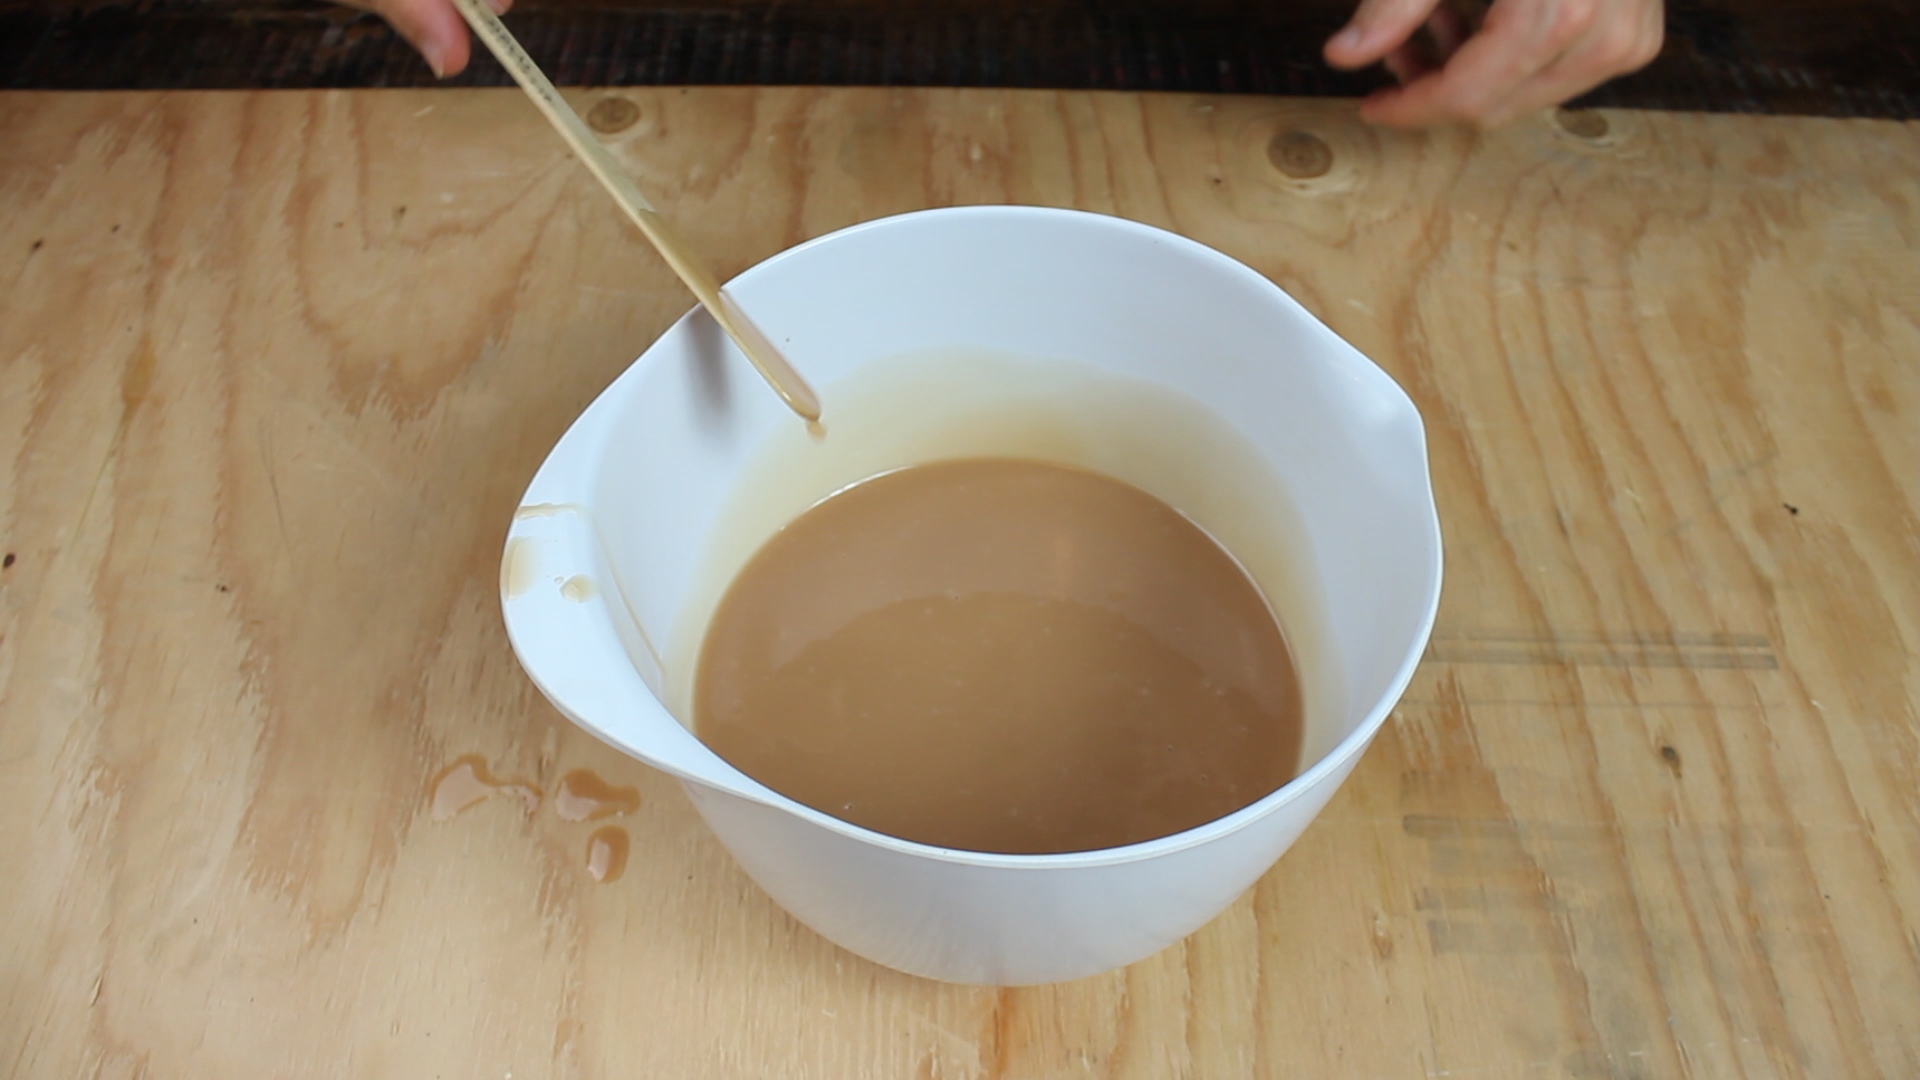
I wasn't sure how much molding I'd need, so I started off by using half of the mixture in each container (Picture 3) and combining / mixing in a large bowl for 2 minutes (Picture 4).
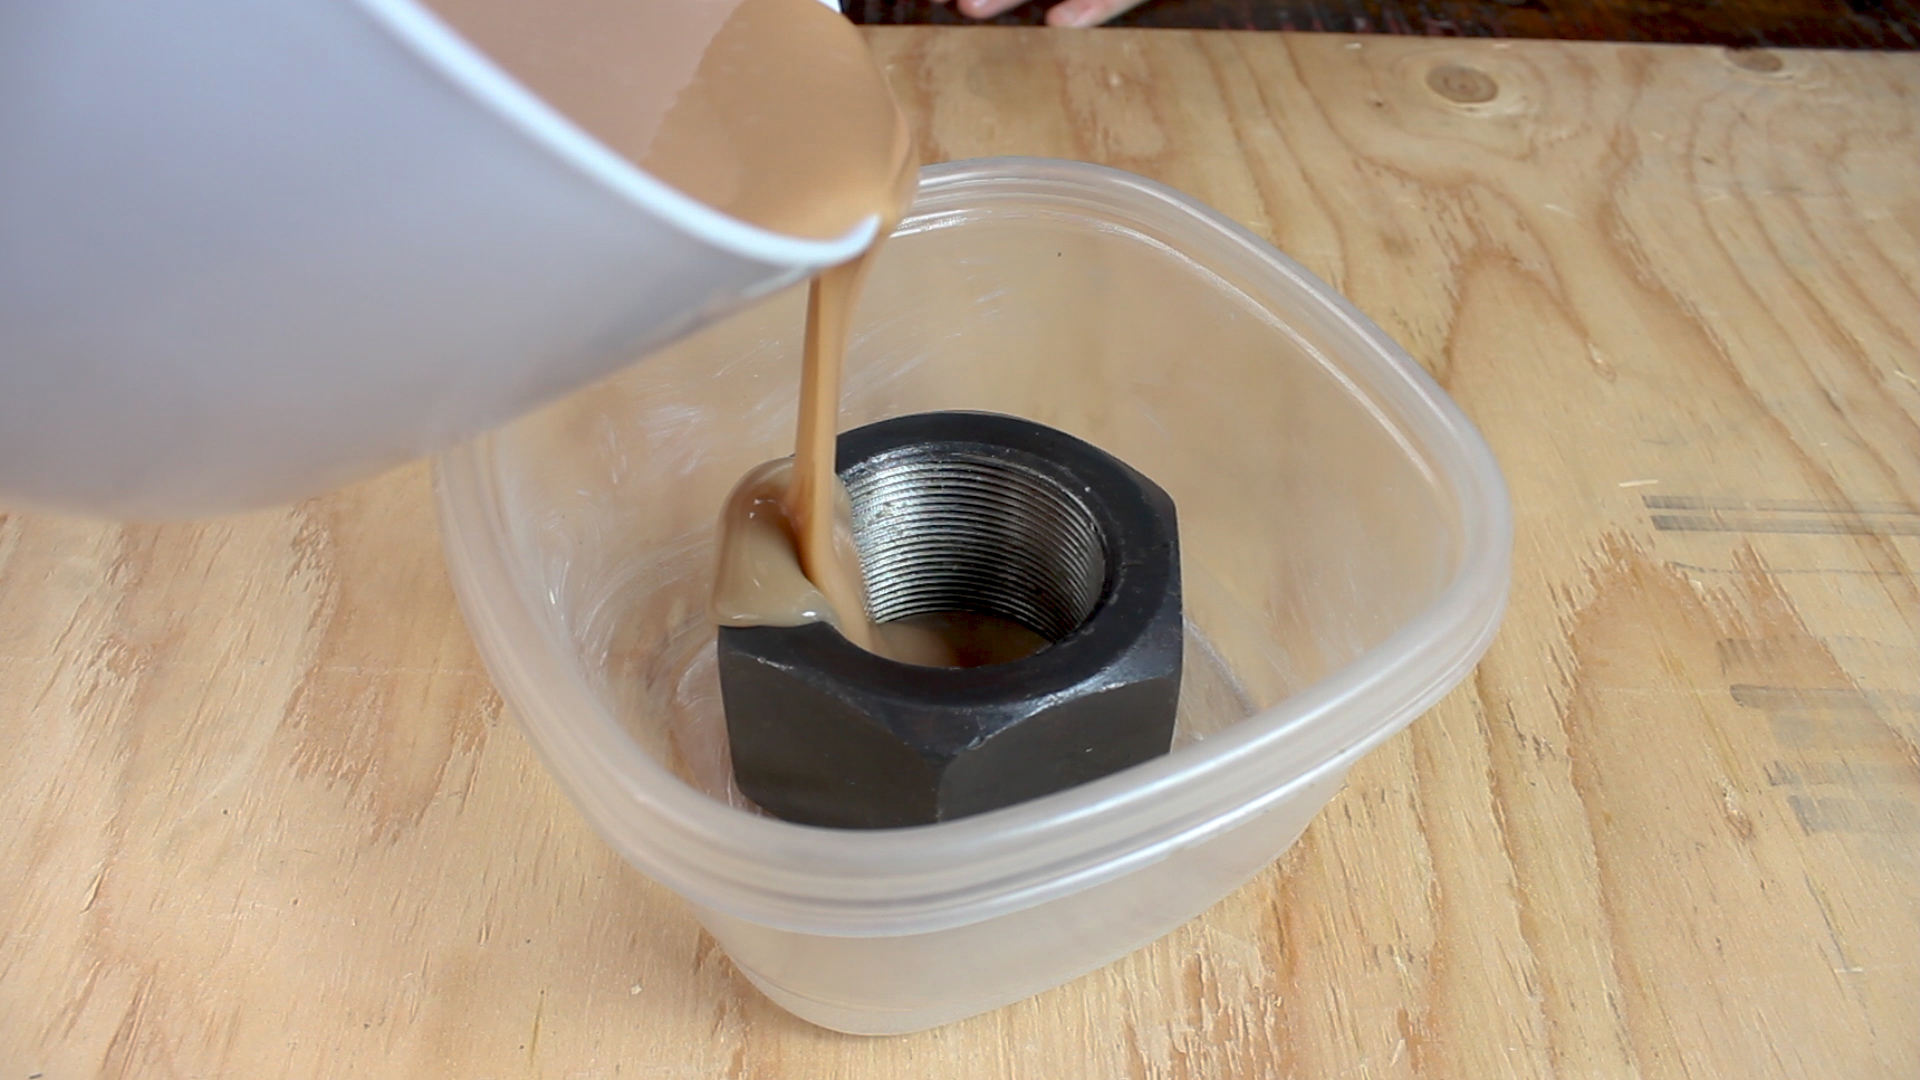
I placed the hex nut down in the container, then poured my mixture (Picture 5).
NOTE - I placed the metal hex nut facing UP in the container before pouring the molding; that way, once the mixture covered the nut and I removed it later on, there would be an opening at the bottom of the mold that I could then use to cast the concrete molding upside down, allowing it to have a bottom. More on that later.
I also vibrated the mold once I cast it to remove air bubbles (Picture 6).
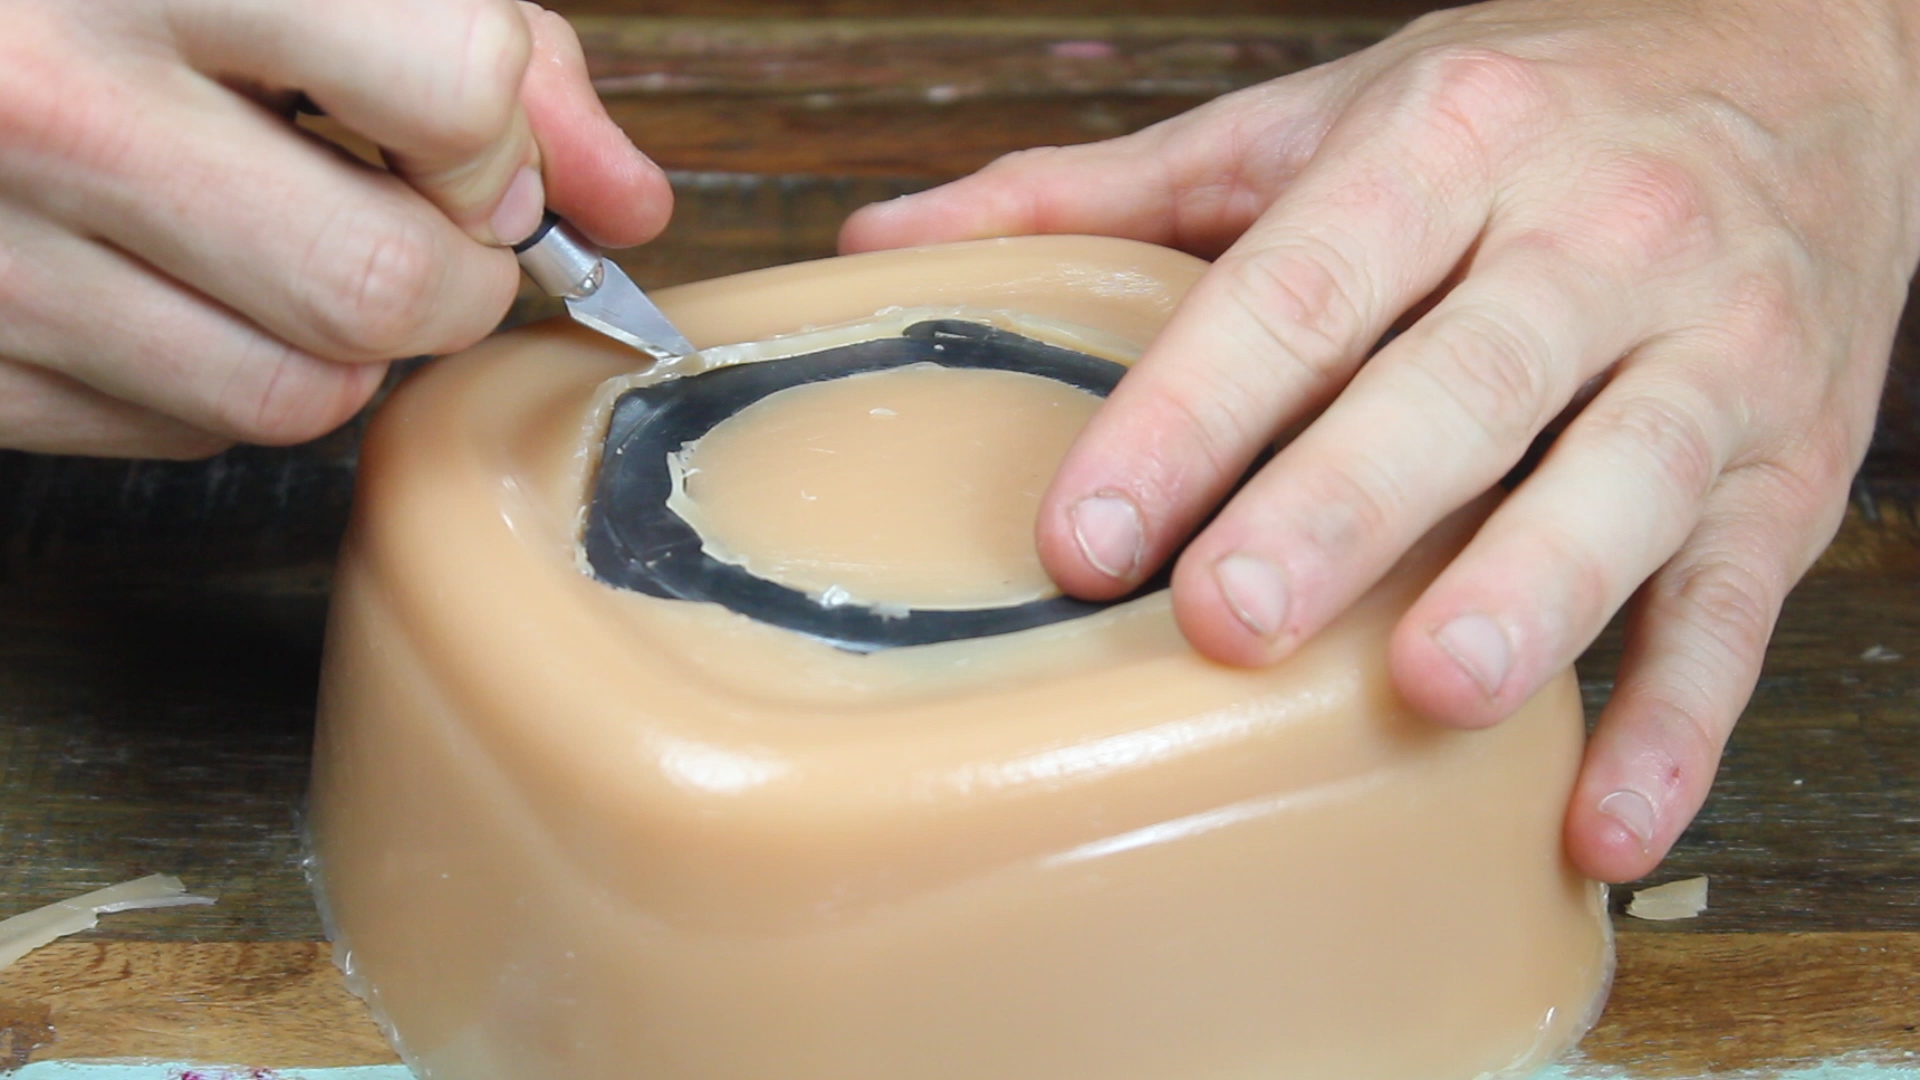
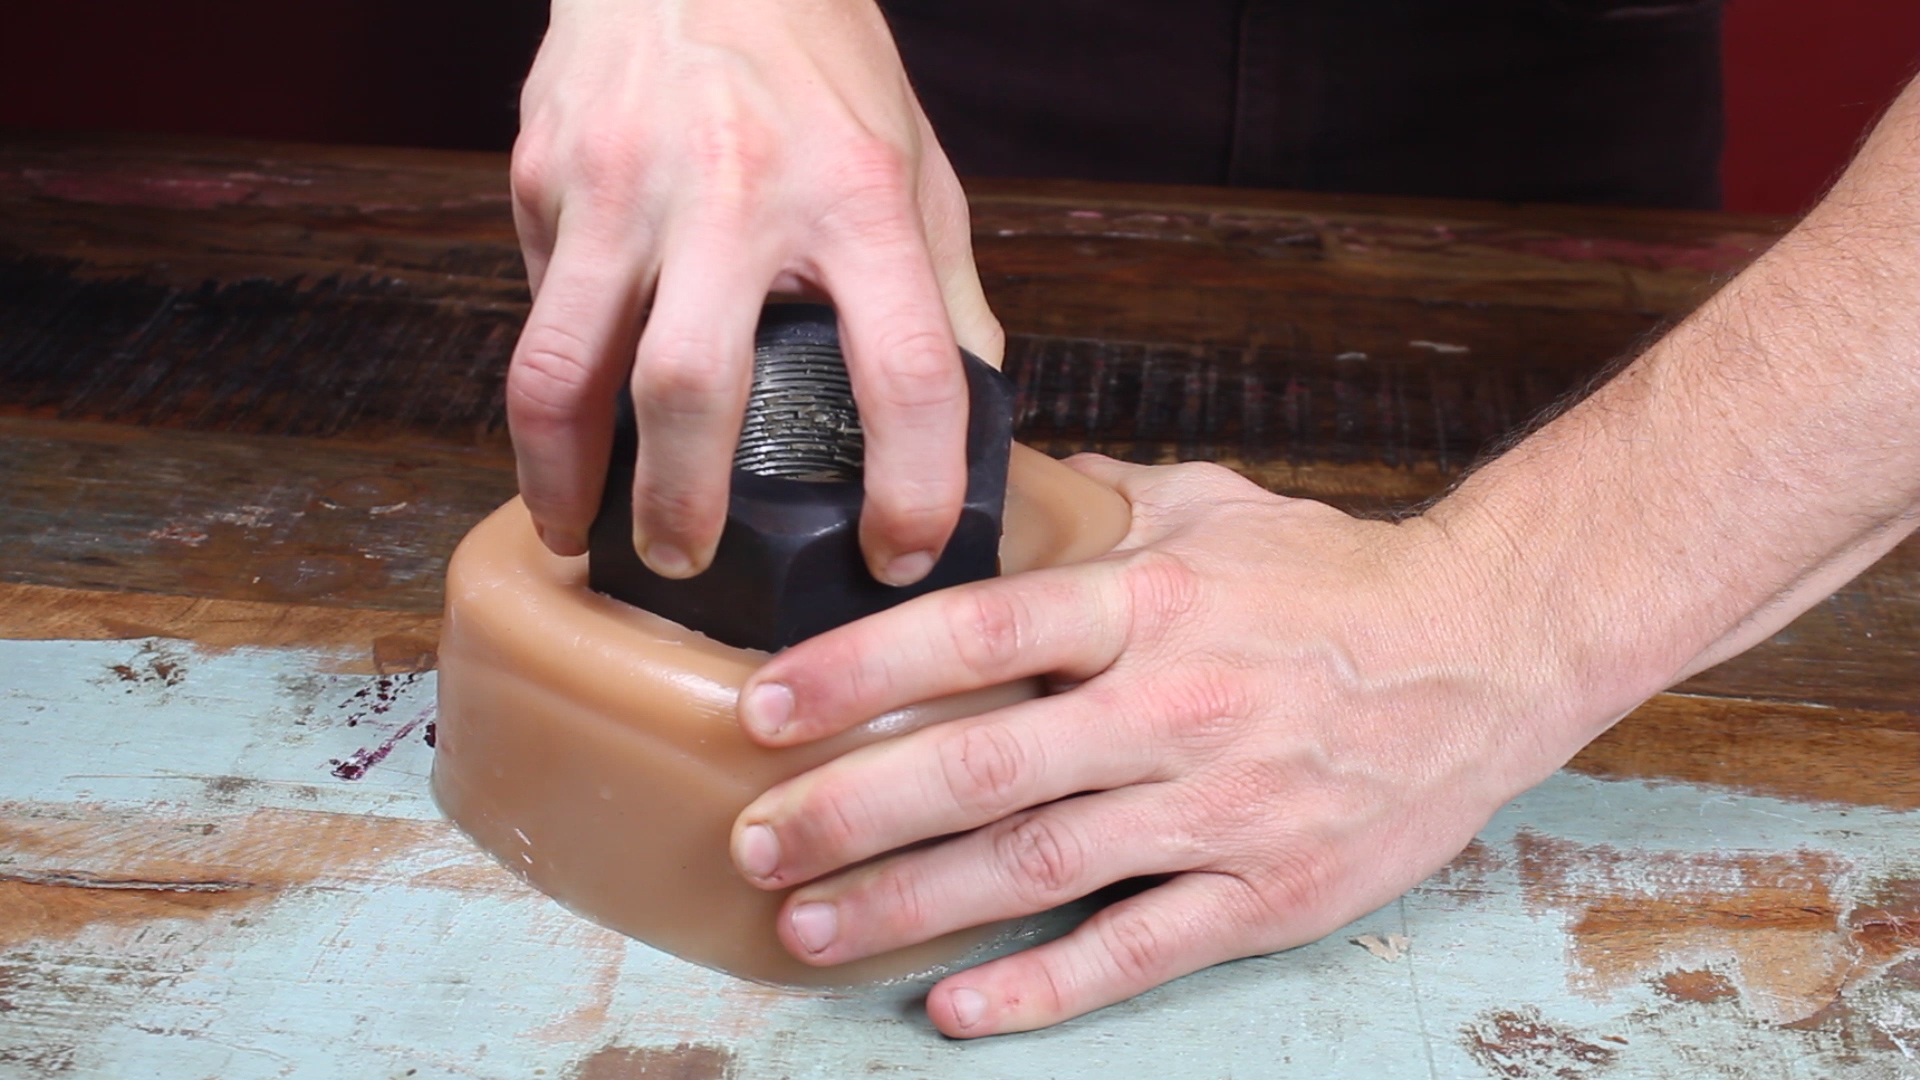


Using pressure, finesse, and an X-Acto blade, careful remove the hex nut from the molding (Pictures 1-4).
Picture 5 shows how wonderful the molding came out!
Now, here is where it is important to cast your blank a certain way. Since we casted it facing up, we ended up with a molding that has a bottom to it. In Picture 6, I am using my X-Acto blade to remove about 1/8" of the center piece of the mold. That way, when you pour concrete in, there will be a ~1/8" space where concrete can fill the entirety of the mold in a single layer, creating a bottom to your planter. Without this, it will just be like your original metal blank.
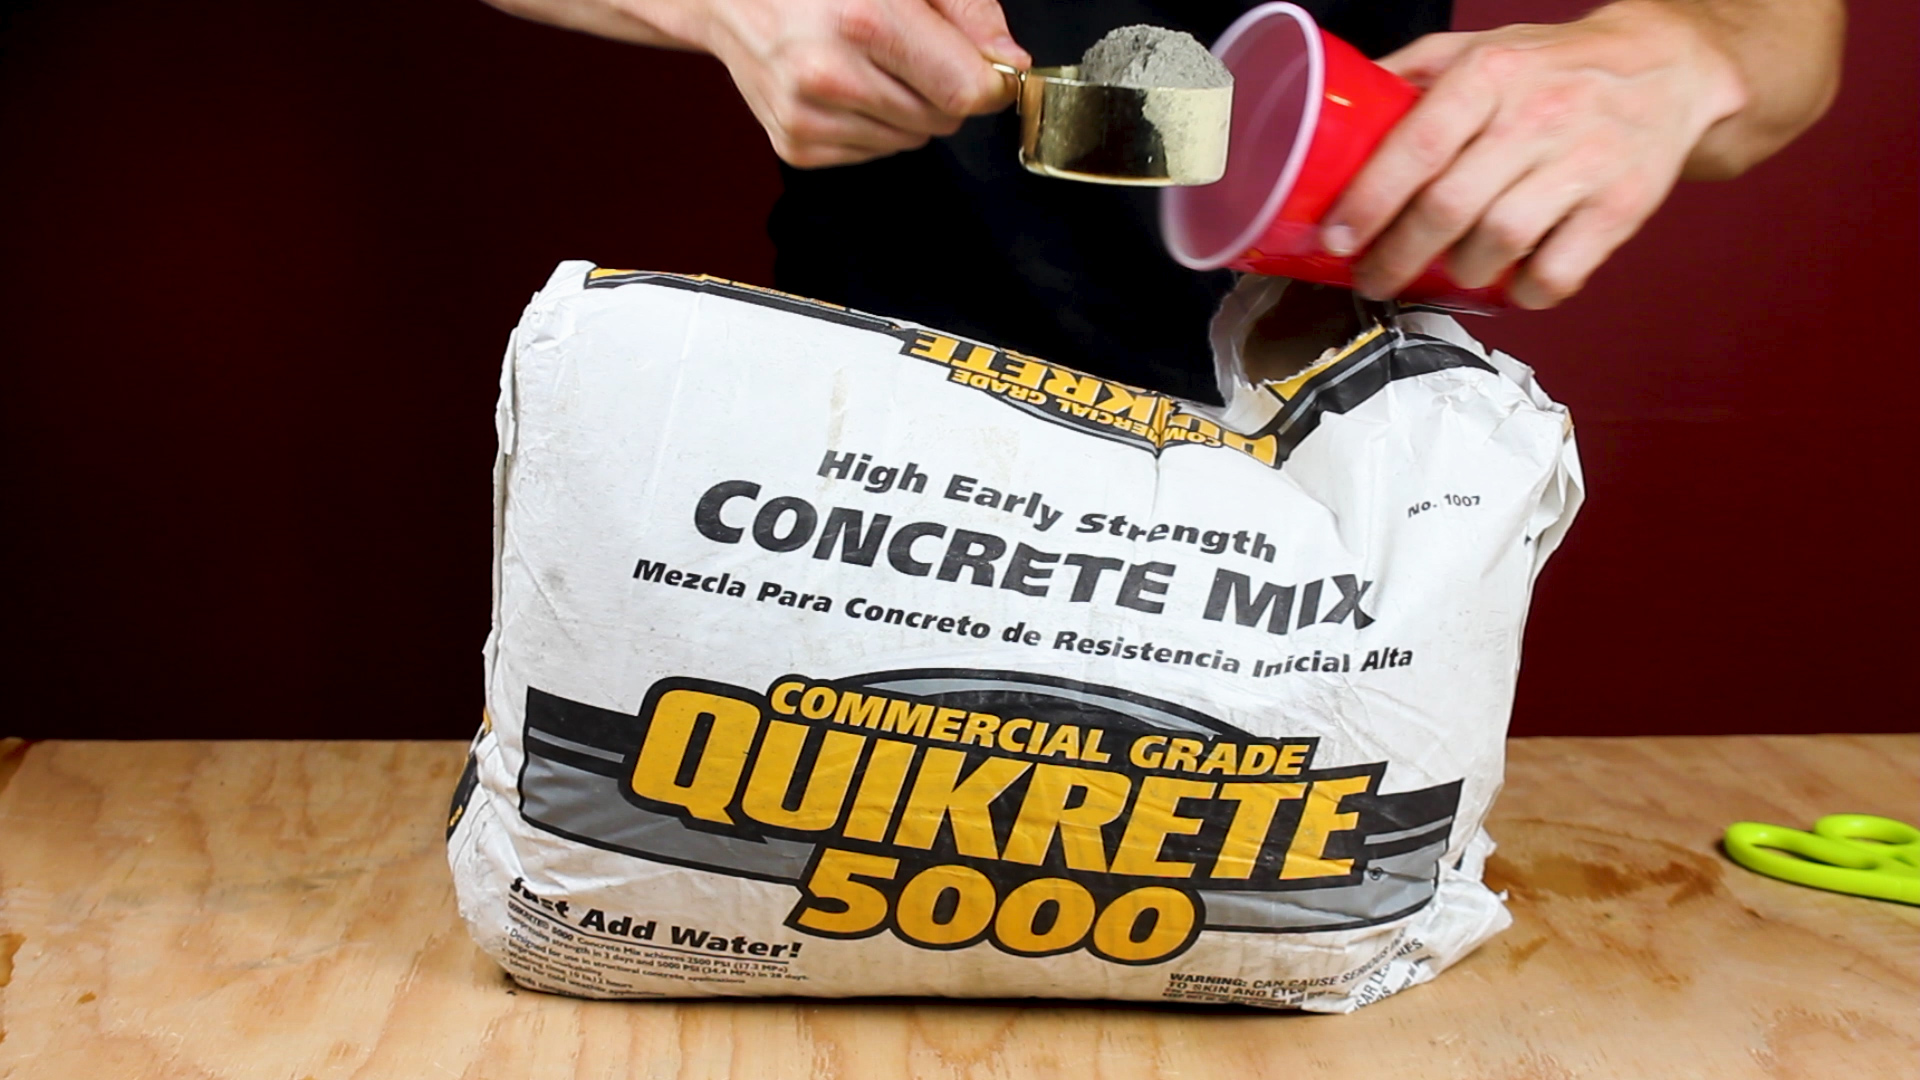

I have never done this before, so this was trial and error. I'm using Quikrete 5000 for this project as it is about $5 for a 60lb back and was recommended from other videos I watched on the process.
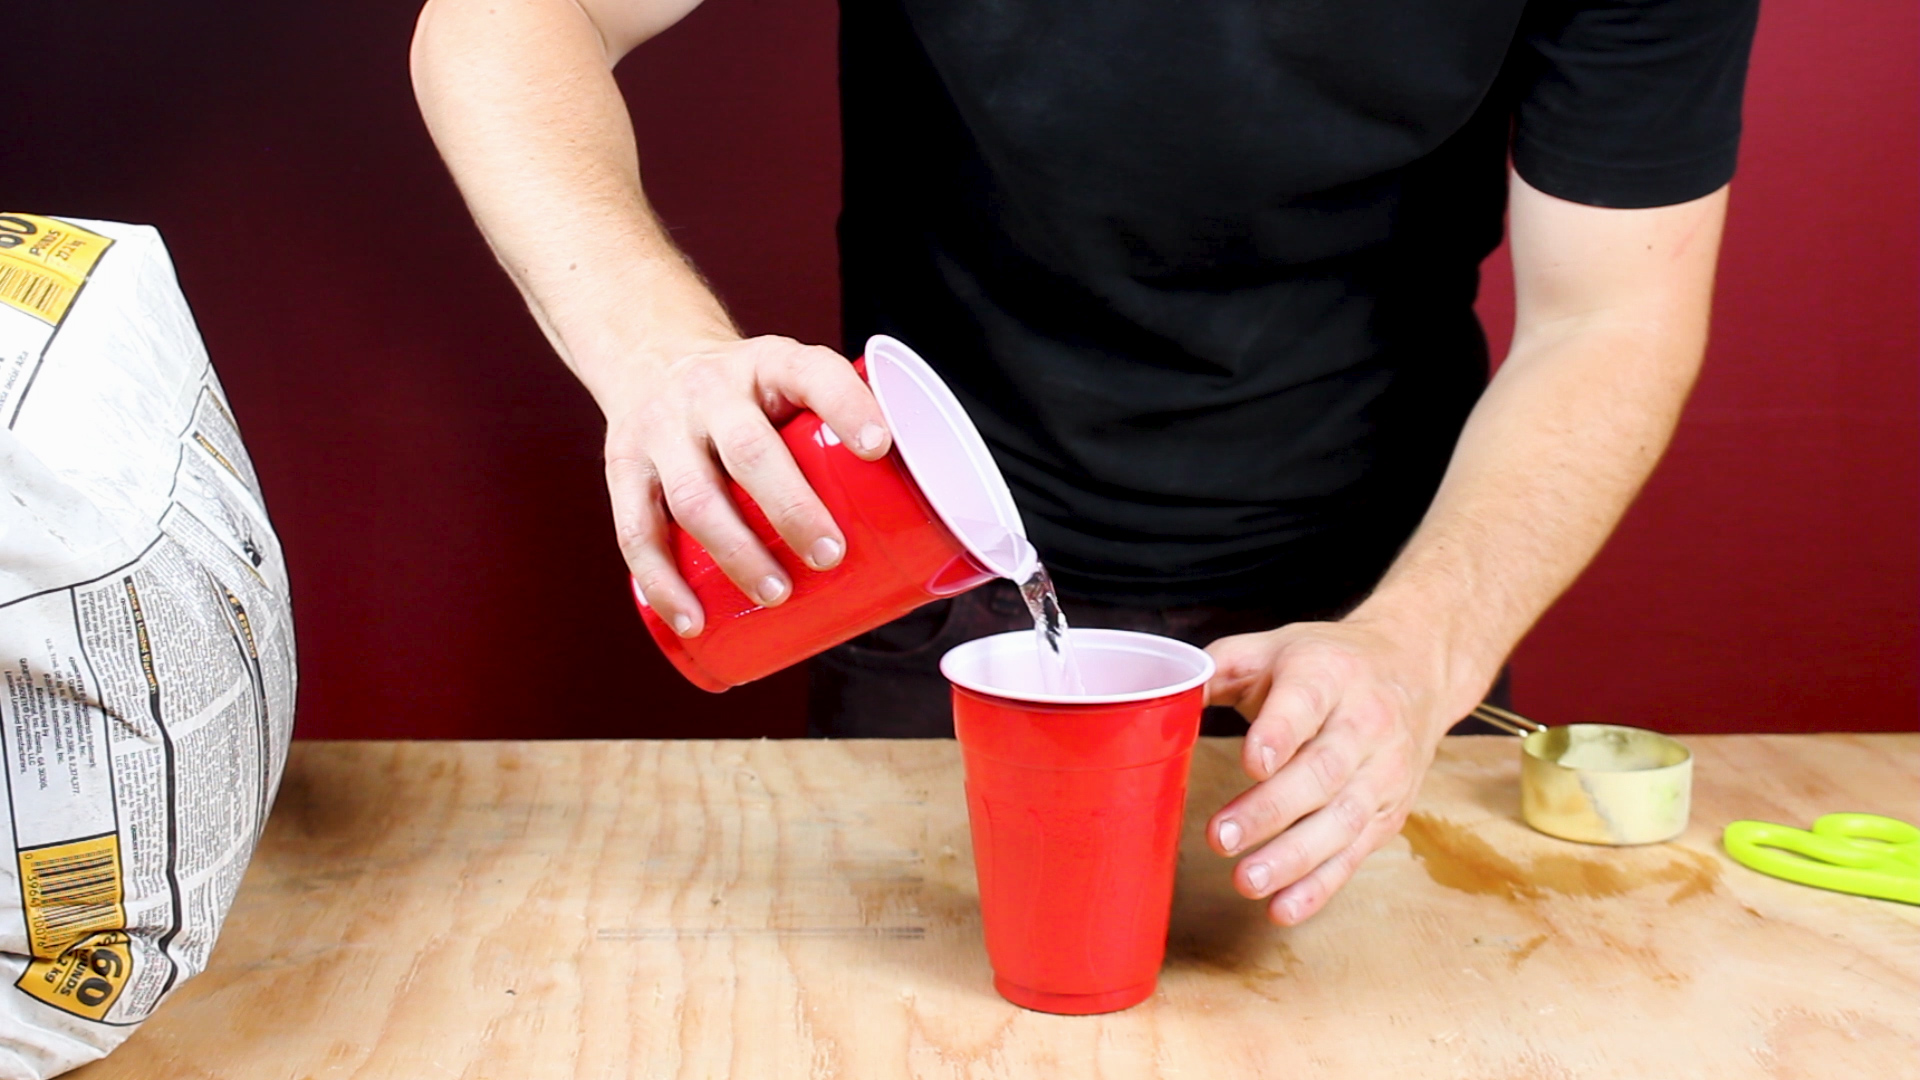
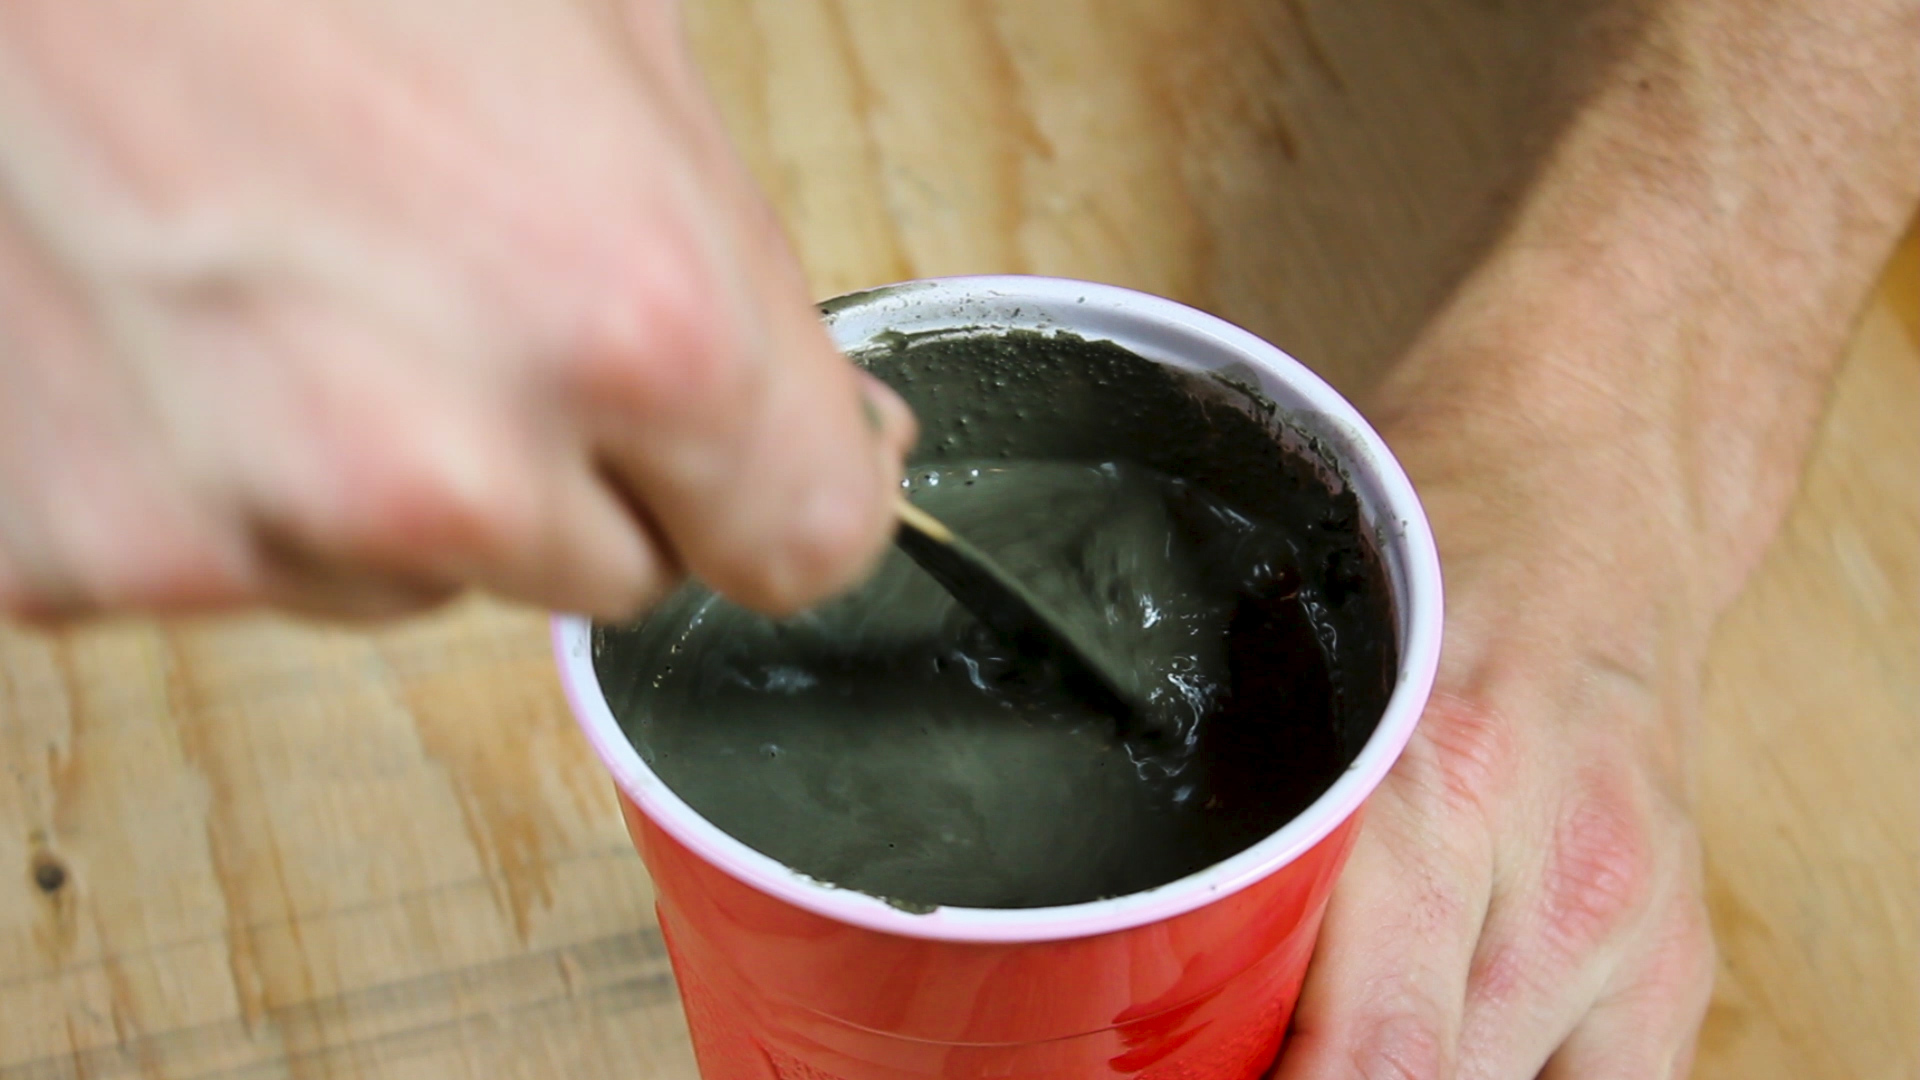
In Pictures 1 - 3 I scoop out, add water, and mix the concrete till it has the consistency of pancake batter. Now, this might be trial and error for you. My advice, error on the side of less water. You really don't need as much as you think, and making it too soupy will result in weakened final moldings that break rather easily.
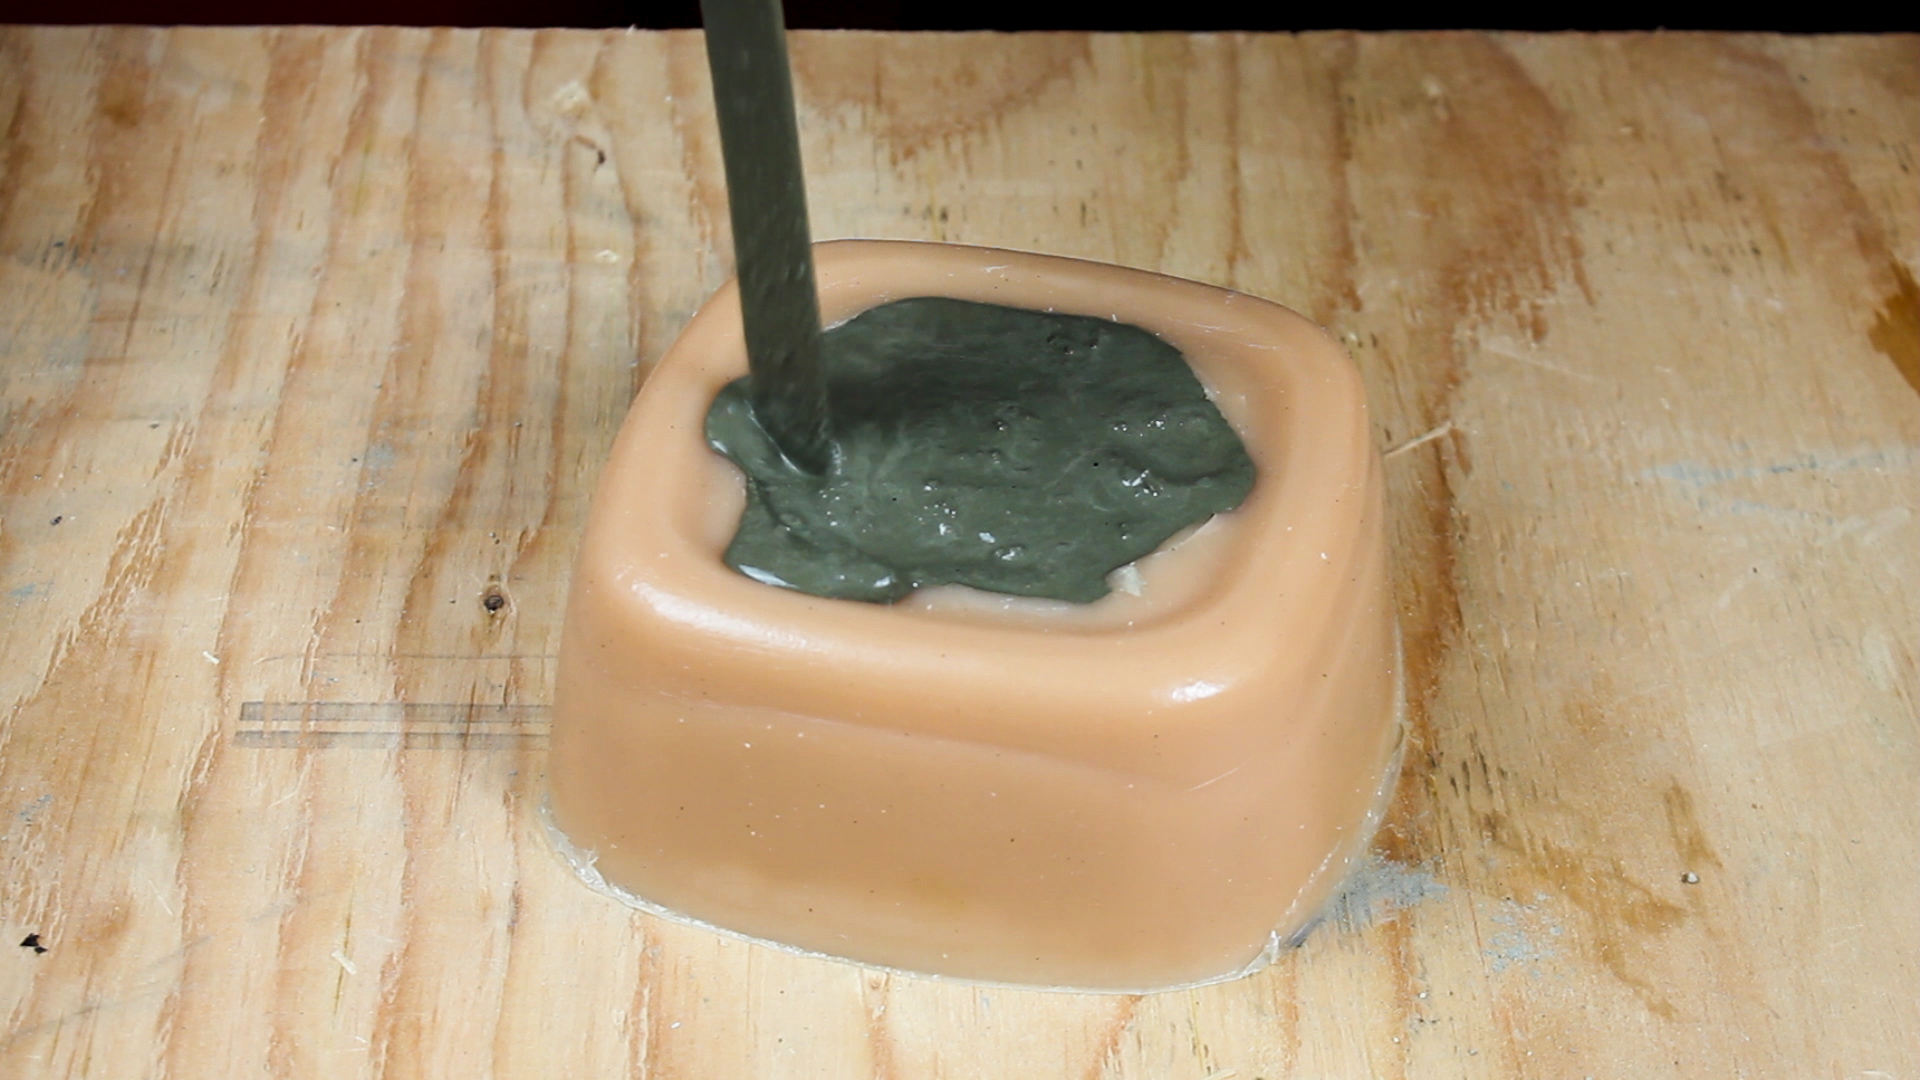
In Pictures 5 - 6, I pour in, push down, and vibrate out as many air bubbles as I can. As you can see in Picture 5, by cutting away that 1/8" layer in the previous step, the concrete will span the entirety of the hex mold shape and create a base layer to serve as the bottom of the molding.


Two things I want to discuss here.
First, in Picture 1, you can see a broken hex nut. This is for two reasons. One, I pulled my molding out way too early (about 12 hours). I recommend waiting (based on experience), at least 24 hours for the concrete to set and cure.
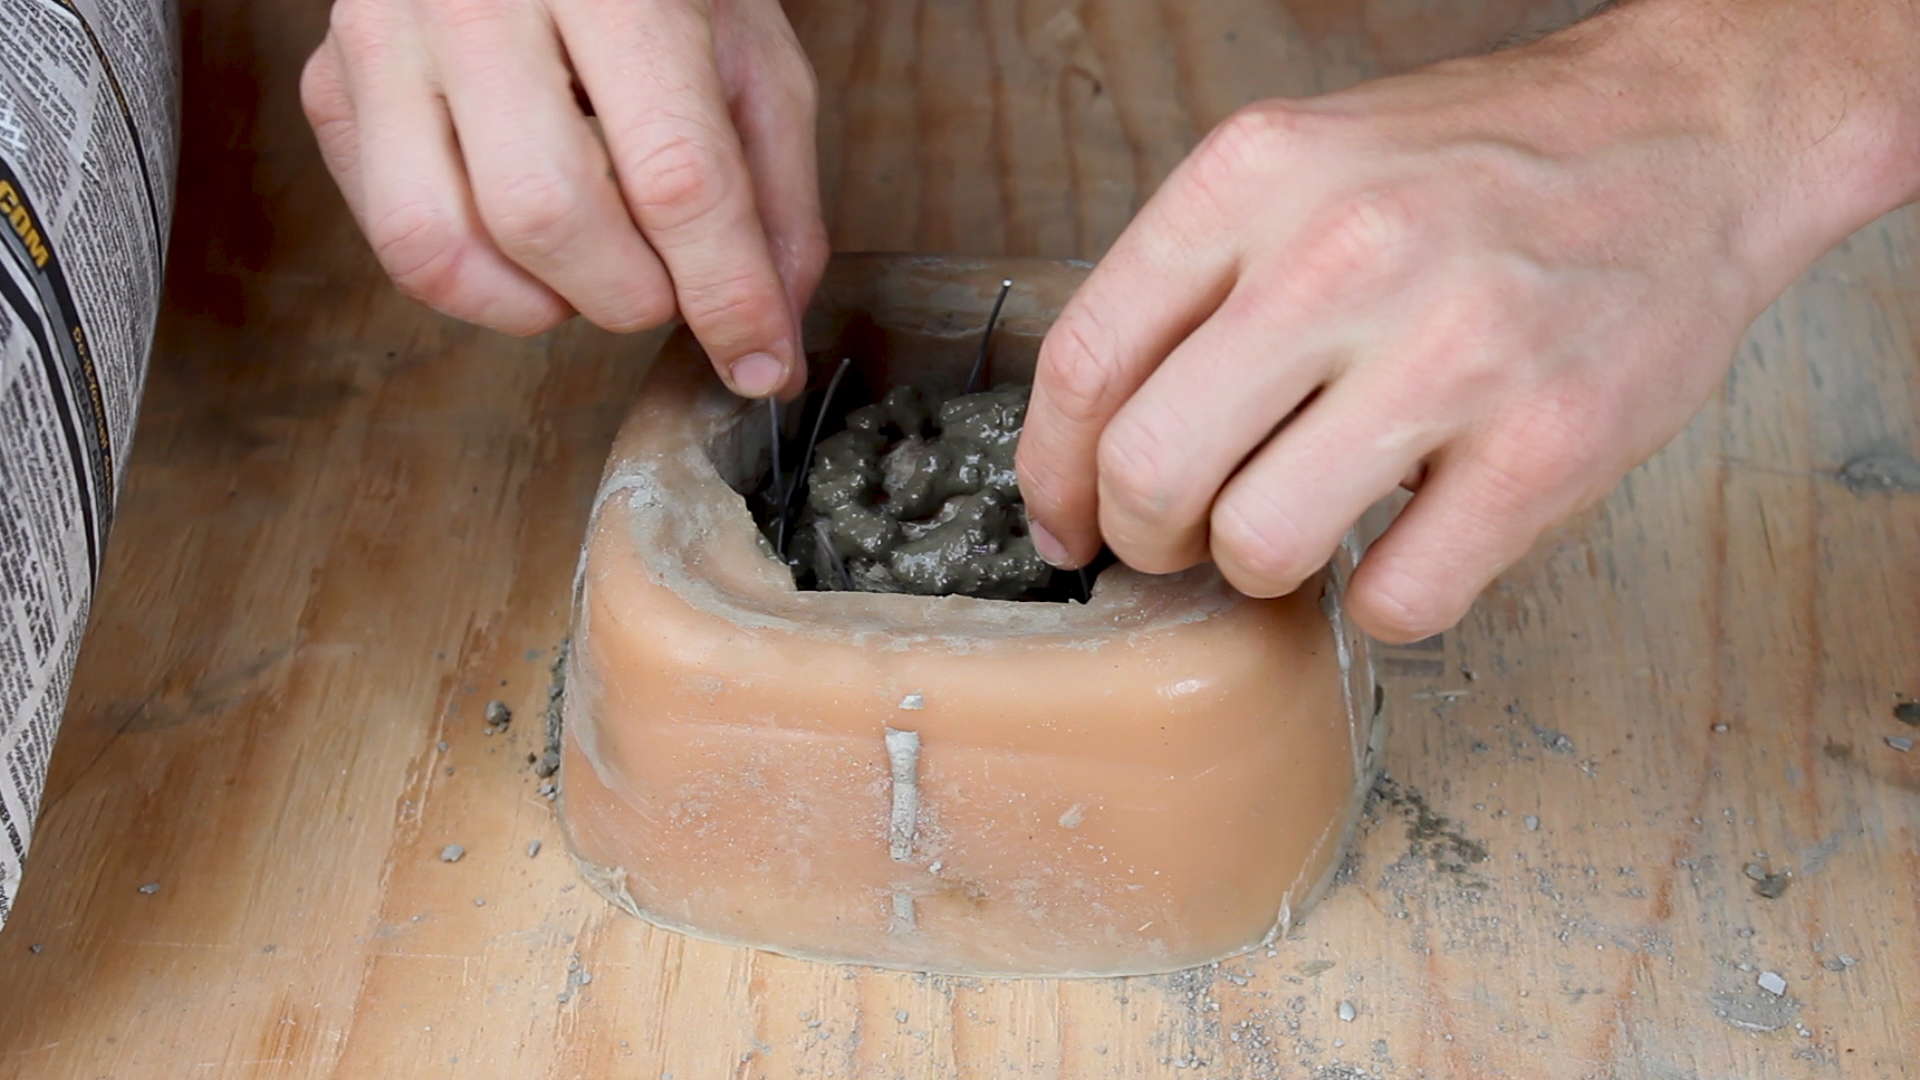
Second, as discussed in the previous step, my mix had too much water, and resulted in a weaker overall final product. I don't believe these would have ever held up regardless of how long I let them cure. To rectify this, I used a piece of chicken wire (you can really use any flexible metal like a paper clip) to create my own mini-rebar (Picture 2).
I then mixed up another batch of concrete, this time using much less water, and cast another mold, pouring about 1/3 of the mixture into the molding, adding the chicken wire (Picture 3), then pouring the rest and doing the whole "vibrate out the air bubbles" method again.

Like I said before, I let this one sit for much longer before trying to remove. About 36 hours to be exact.
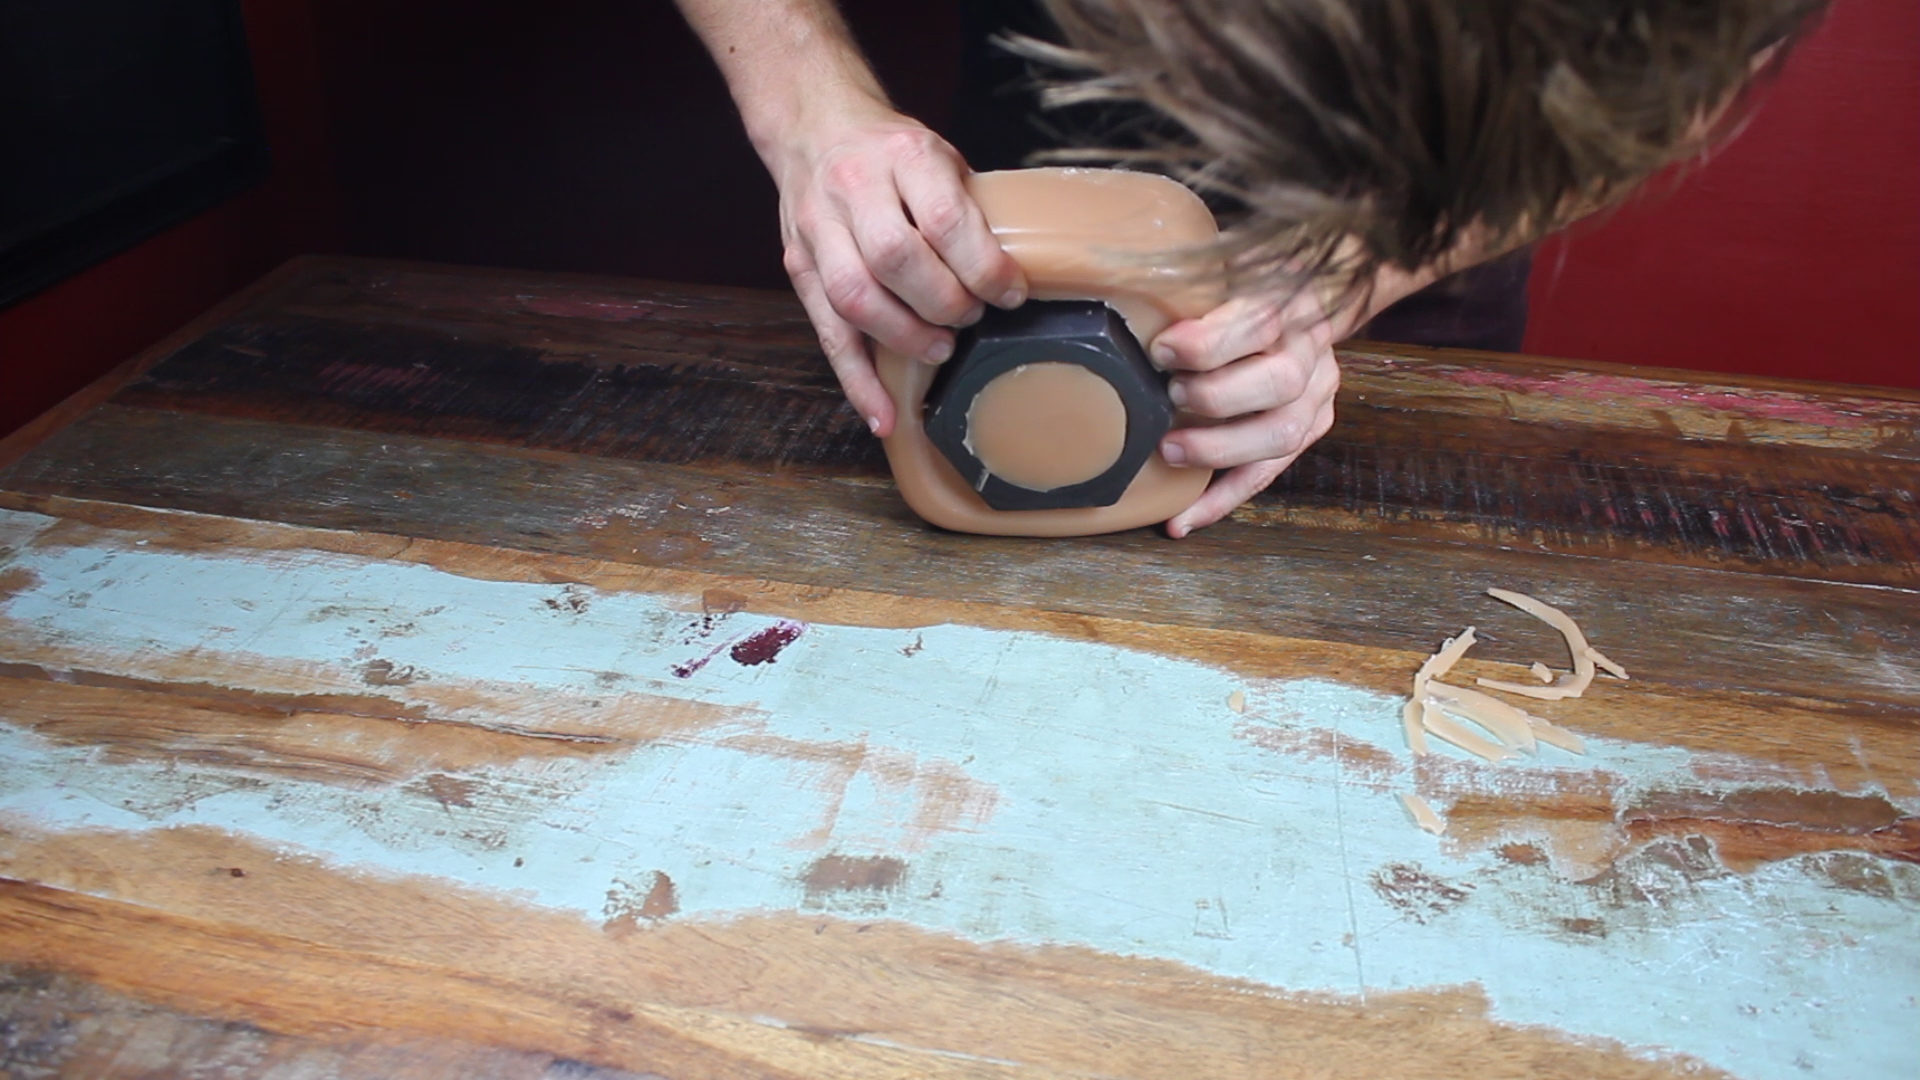
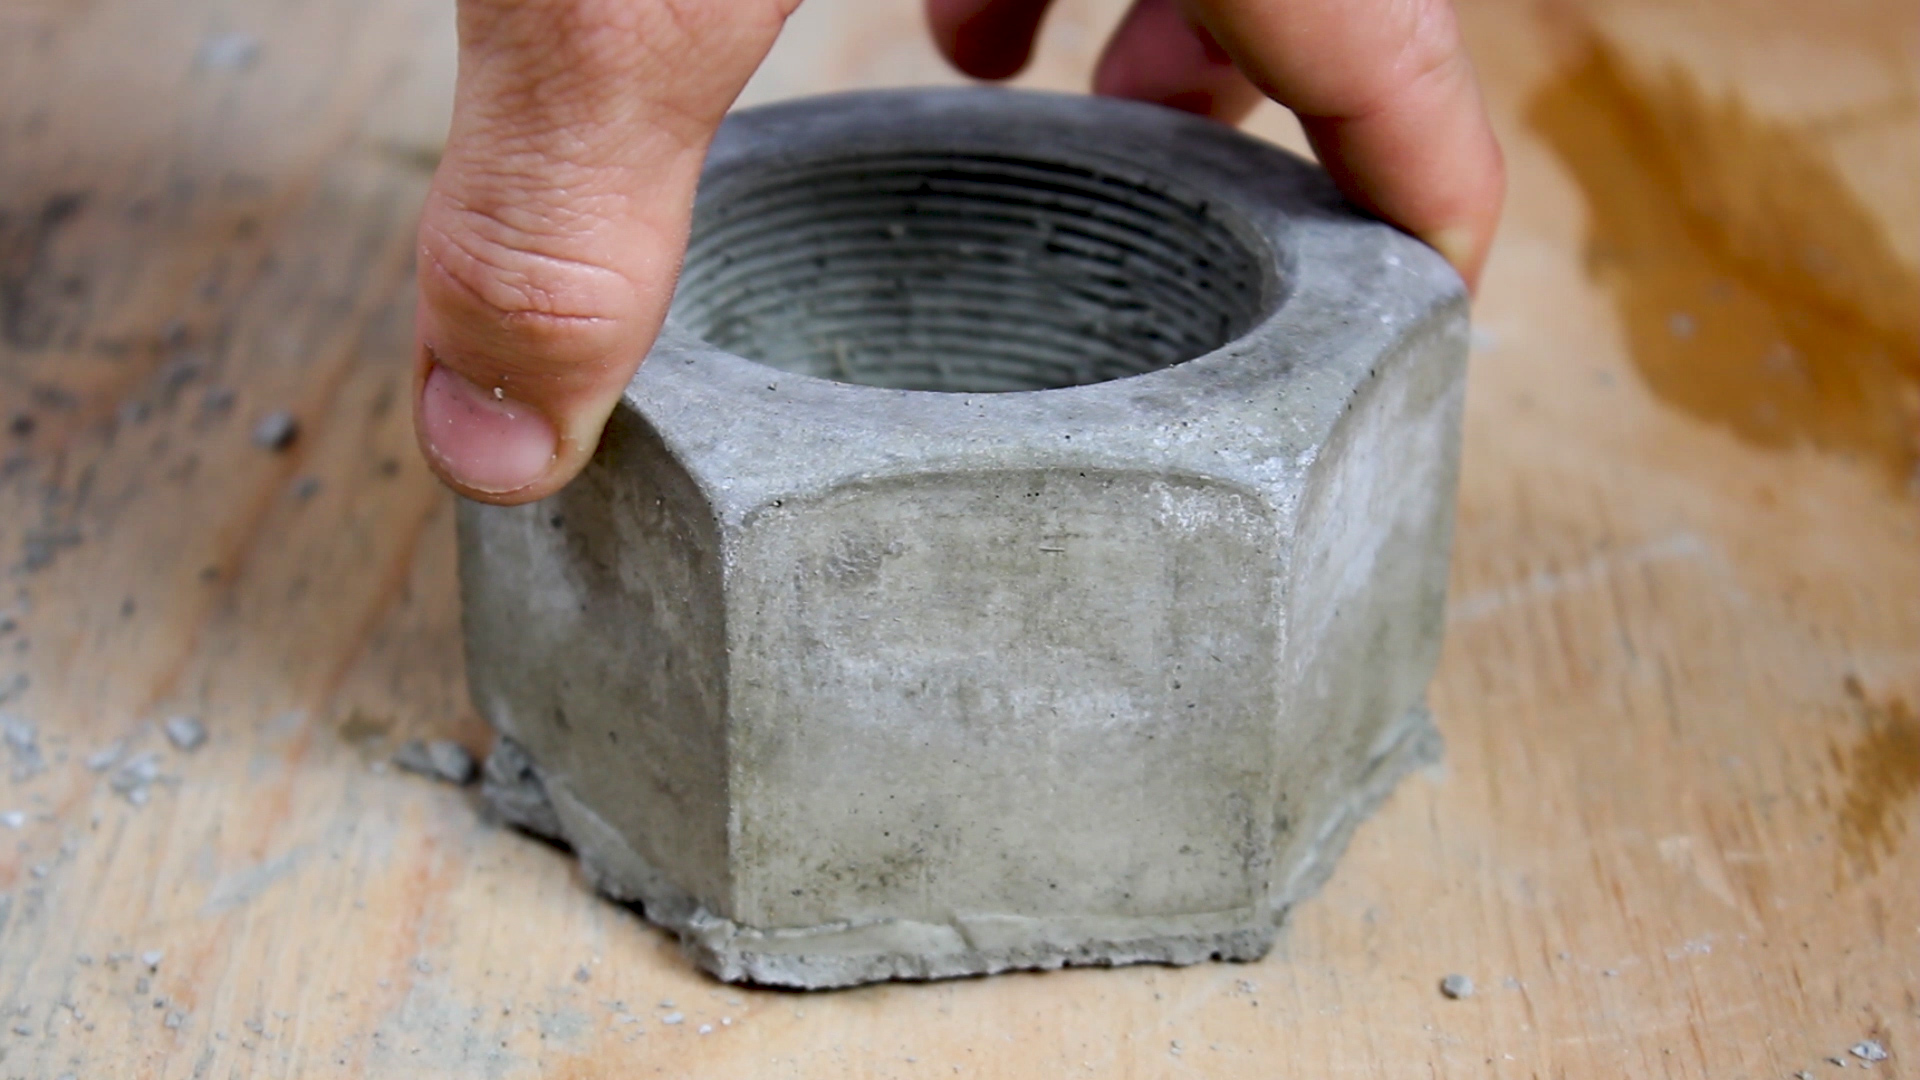
Removing these from the molding was a little tricky. My advice, take it slow and hold it up to your ear when doing so. As you squeeze, pull, and flex the mold, you will hear the mold separate itself from the concrete, and slowly it will slip out. Takes about 2 minutes-ish once you get decent at it. Hex nut fresh from the molding is in Picture 1.
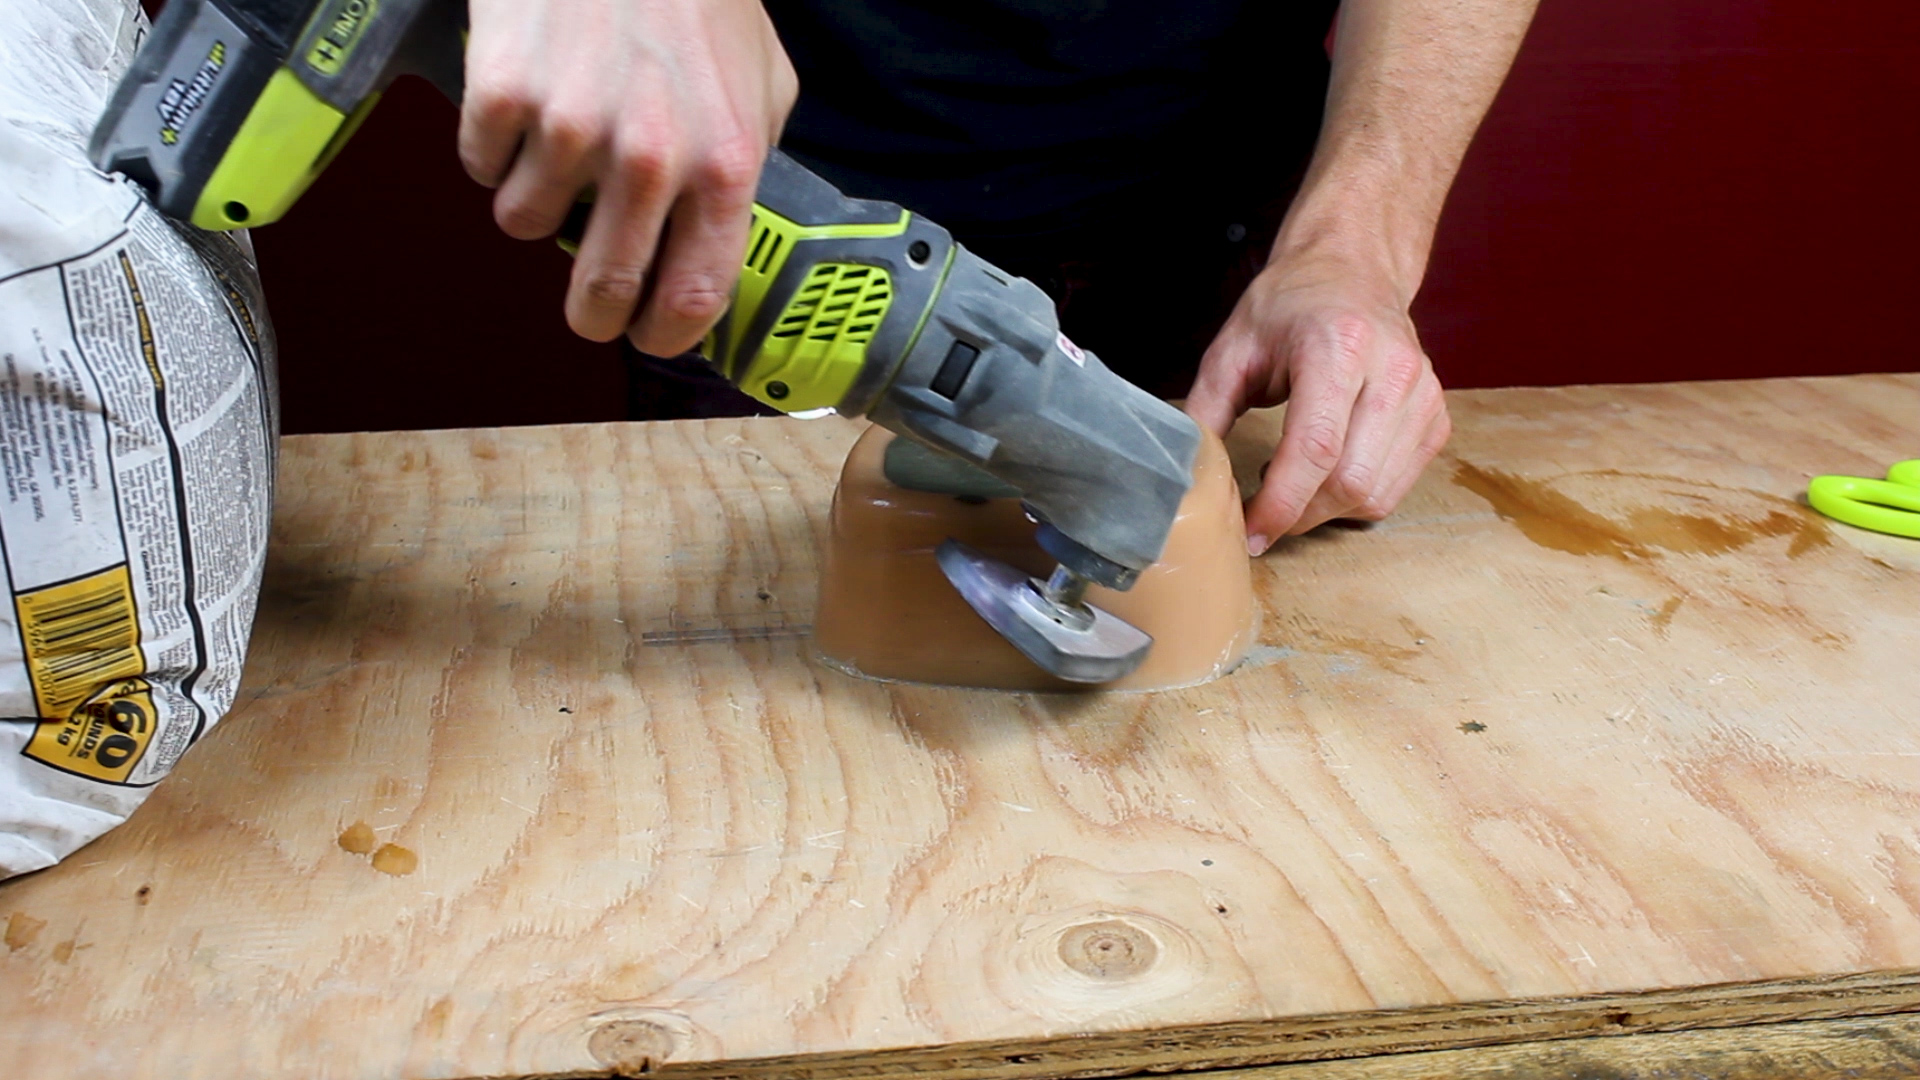
The bottoms / bottom corners were a bit rough, so I used some sand paper to hand sand down these edges (Picture 2) to give everything as clean of surfaces as I can. Concrete actually sands away pretty well. You can also use a stationary belt sander to do this if you fancy speeding it up - but I found it can be a little aggressive if you're not careful!

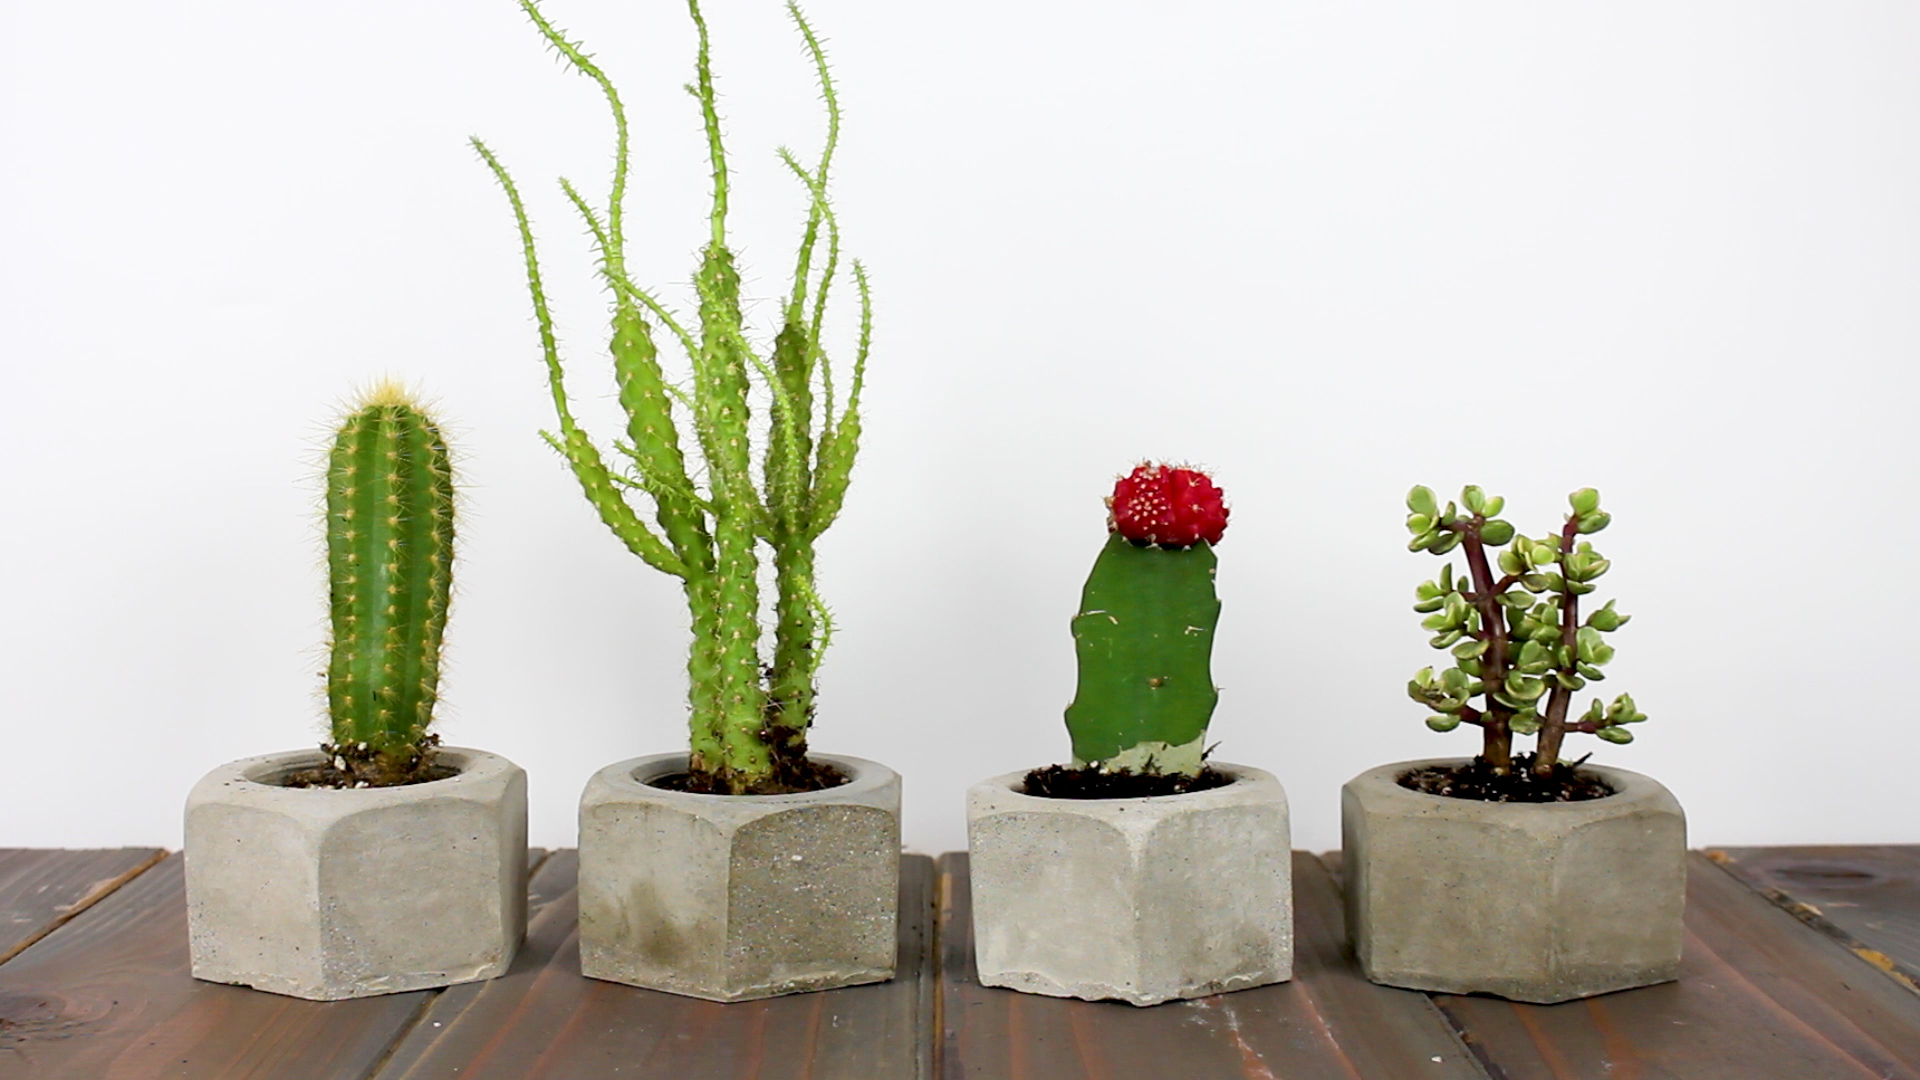
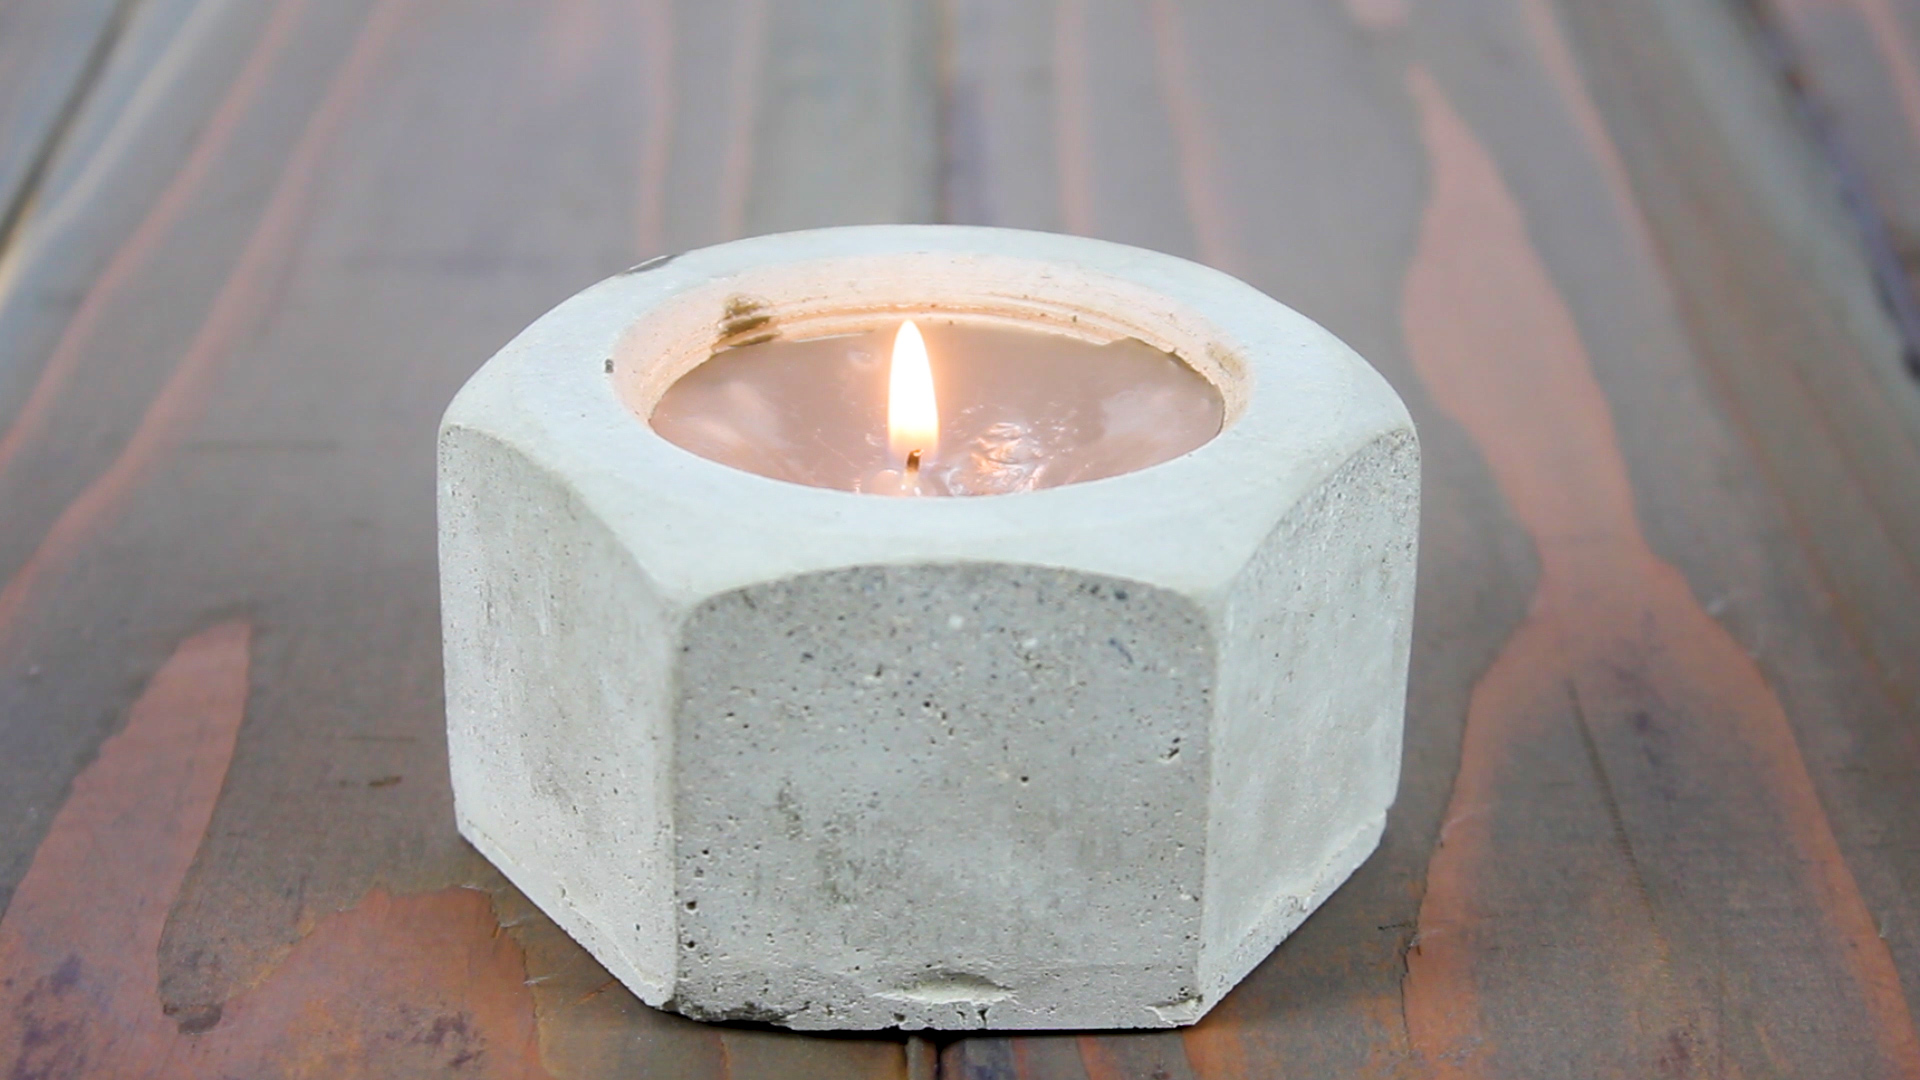
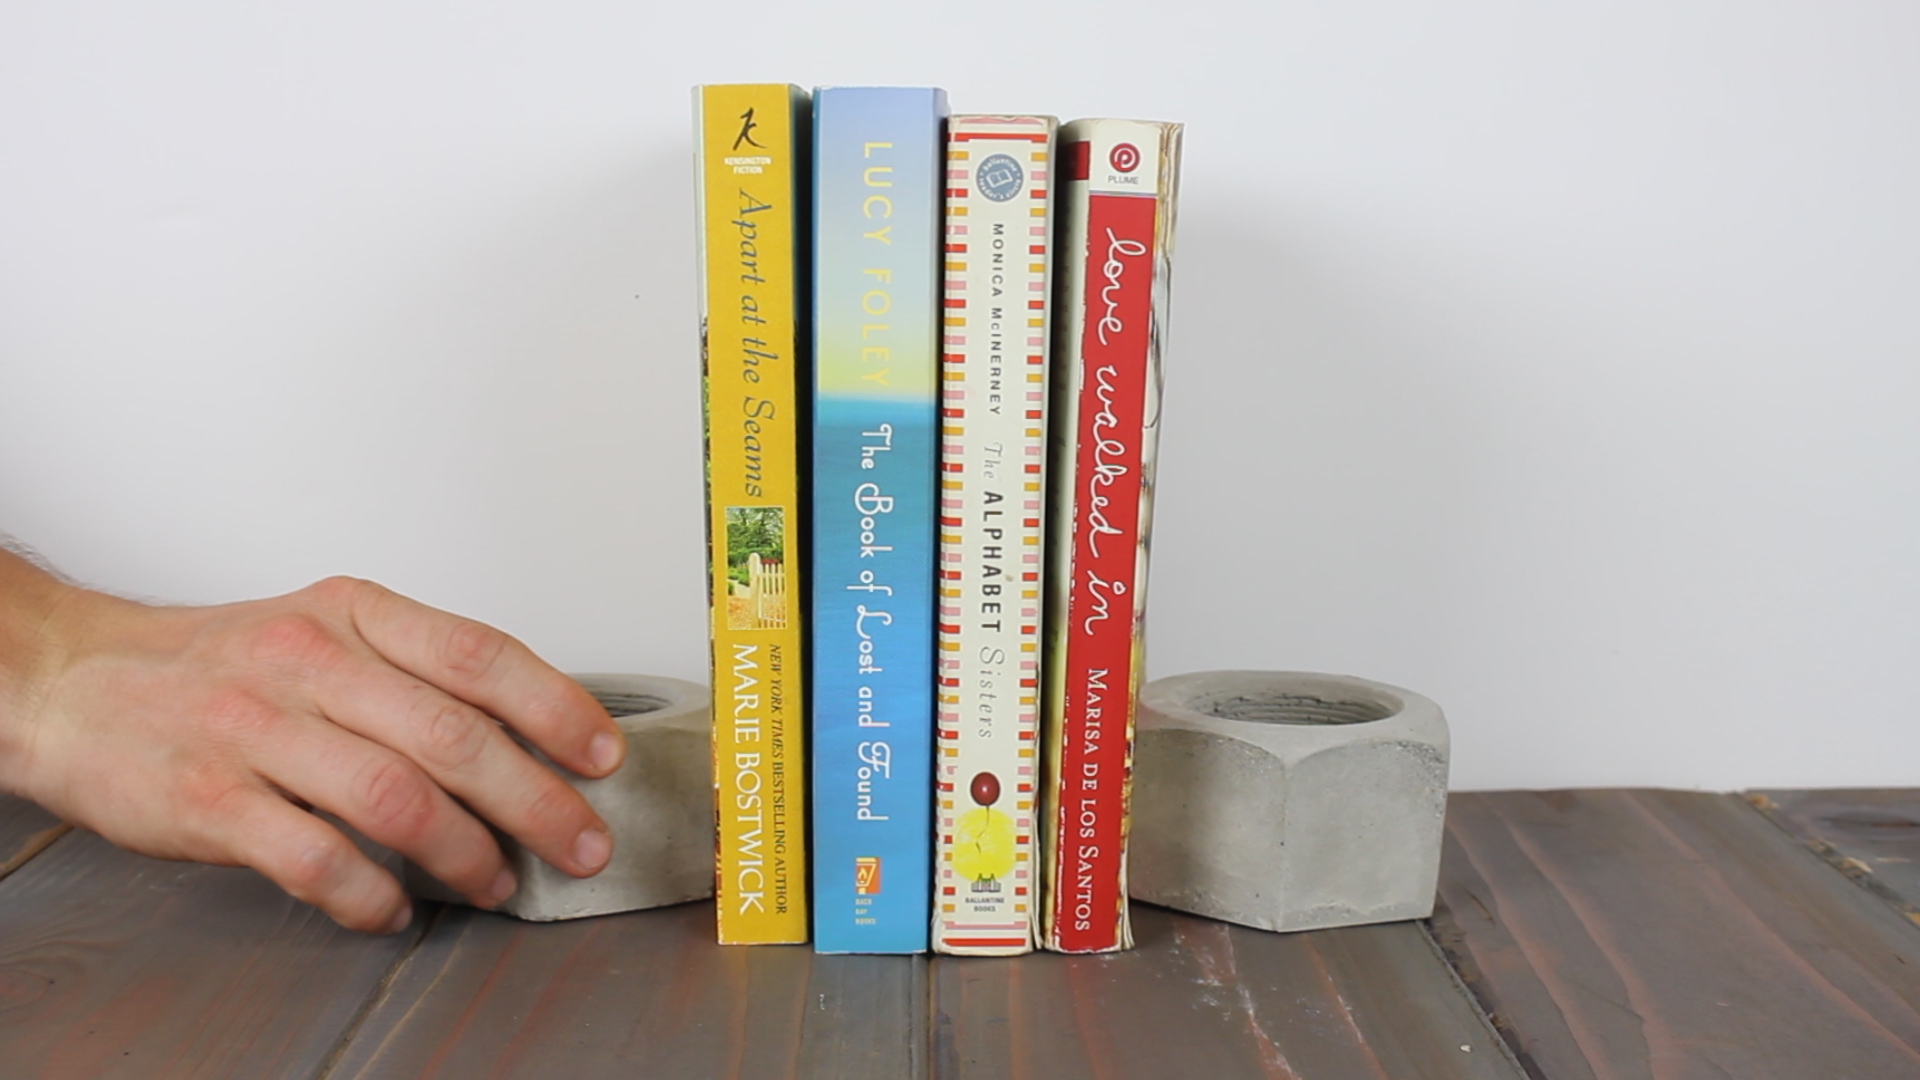
These work awesome as succulent holders, candle moldings (I did my first wax melting / custom candle making session), cool little book-ends, and probably 100 other neat things I haven't considered yet!
TOOLS For Making Your Own Hex Nut (If you have the tools...)
Compass
RYOBI Power Drill
RYOBI 10 in. Sliding Compound Miter Saw
RYOBI Miter Saw Stand
BESSEY Economy 2.5” x 12” Clutch Clamps
RYOBI Stationary Bench Sander
Forstner Bit (2.125”)
TOOLS for Molding / Finishing (Needed regardless)
Any tool that can vibrate (I used my RYOBI Multi-Tool)
X-Acto Blade (for trimming mold)
Cup / Mixing Apparatus for Concrete
Hand Sanding Sponges
MY FILM / AUDIO EQUIPMENT
Canon Rebel EOS T2i
Canon EF-S 18-55mm f/3.5-5.6 IS II Lens
Studio Lighting Equipment
H4N Zoom (VO Recording)
As always, thank you for reading! I would be so grateful if you could please subscribe to my Youtube Channel for future projects.
I put out videos every few weeks.
Cheers!
Zach