Thanks for checking out the full article!
Please Subscribe to our Youtube Channel by clicking here.
My full video of the build is below, followed by detailed instructions with tools, materials, and measurements!
My friend had two old shelves (wood species unknown at this point) that he didn't want. I thought it would be fun to convert one of them into a wooden beer mug. So I did!
MATERIALS
Hardwood of your choice (about 2-3 board feet, 4/4 stock)
TiteBond II Wood Glue
Mineral Oil
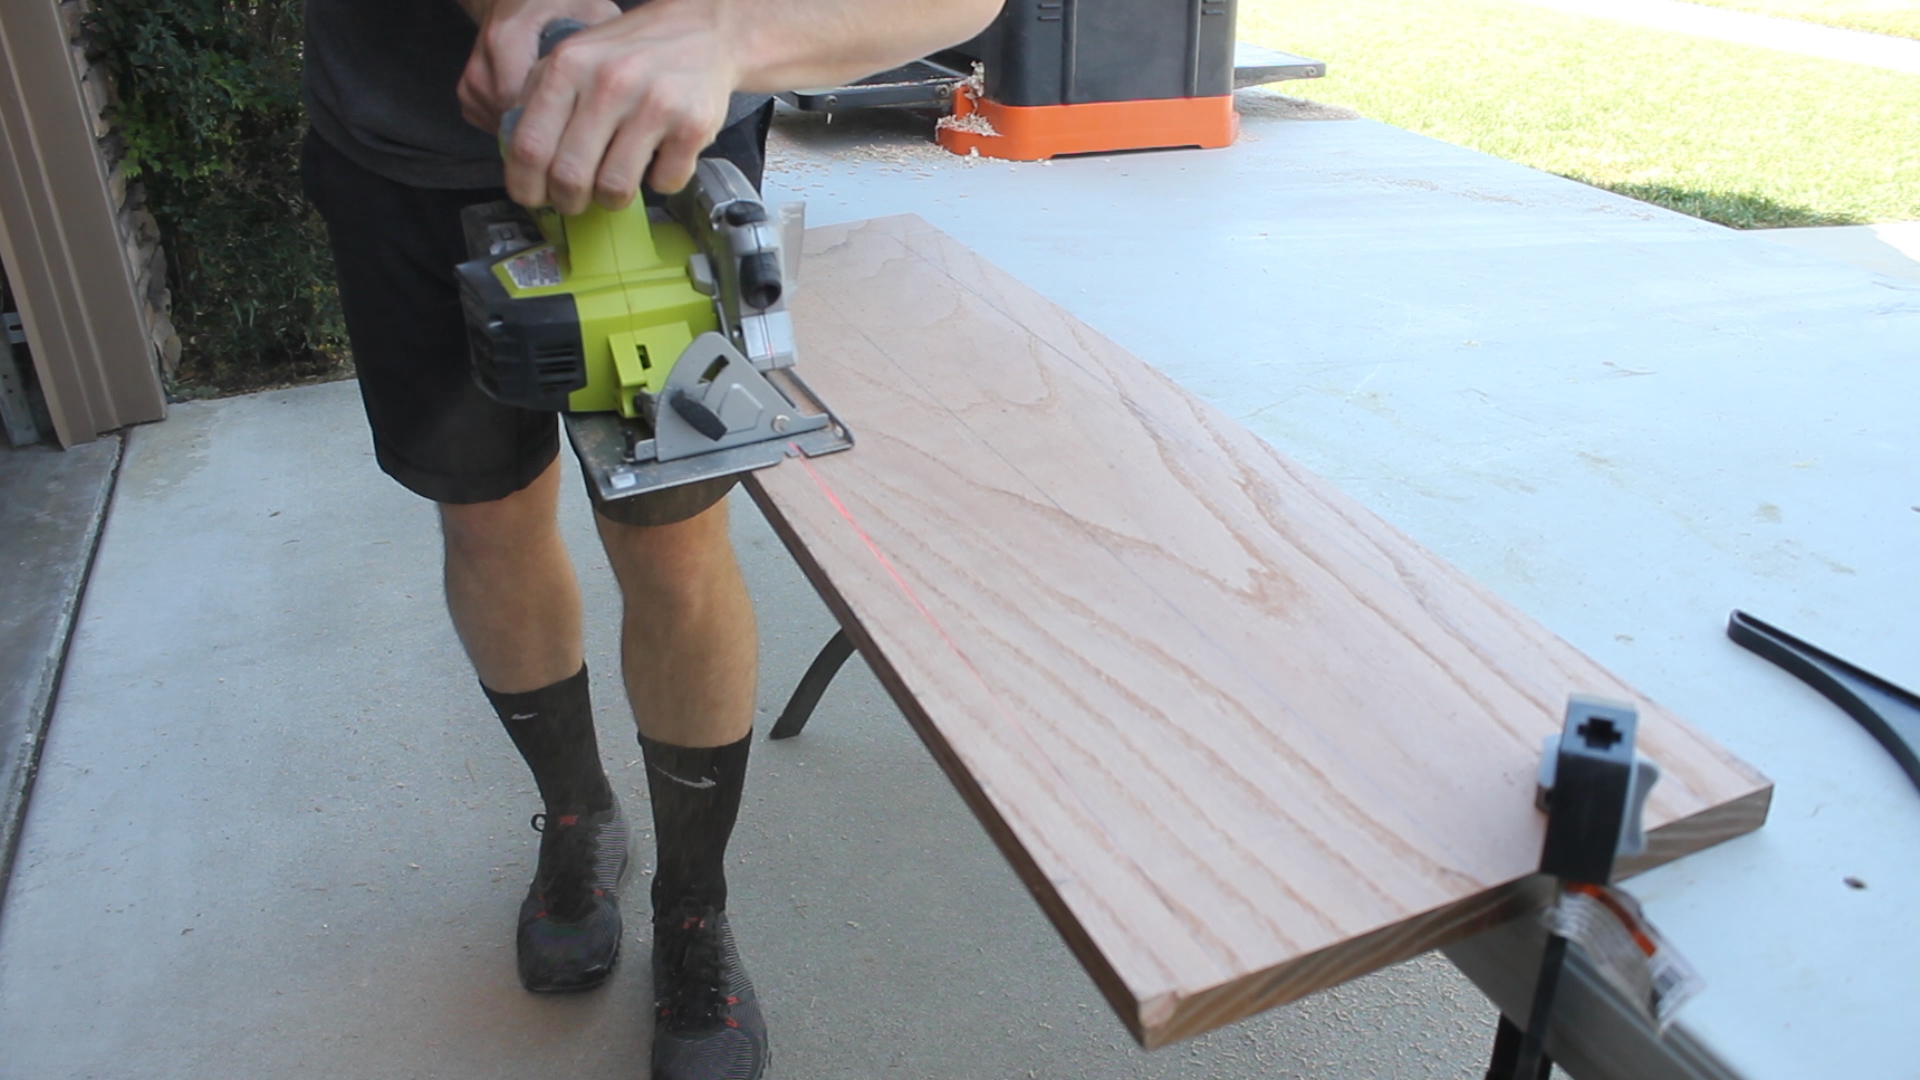
The wood I had acquired was previously finished with some type of oil, so the first steps were to remove that finish so that the wood would be returned to useable lumber and glue-able! I only removed what I needed to keep as much thickness as possible. The result was wood about .70" thick.

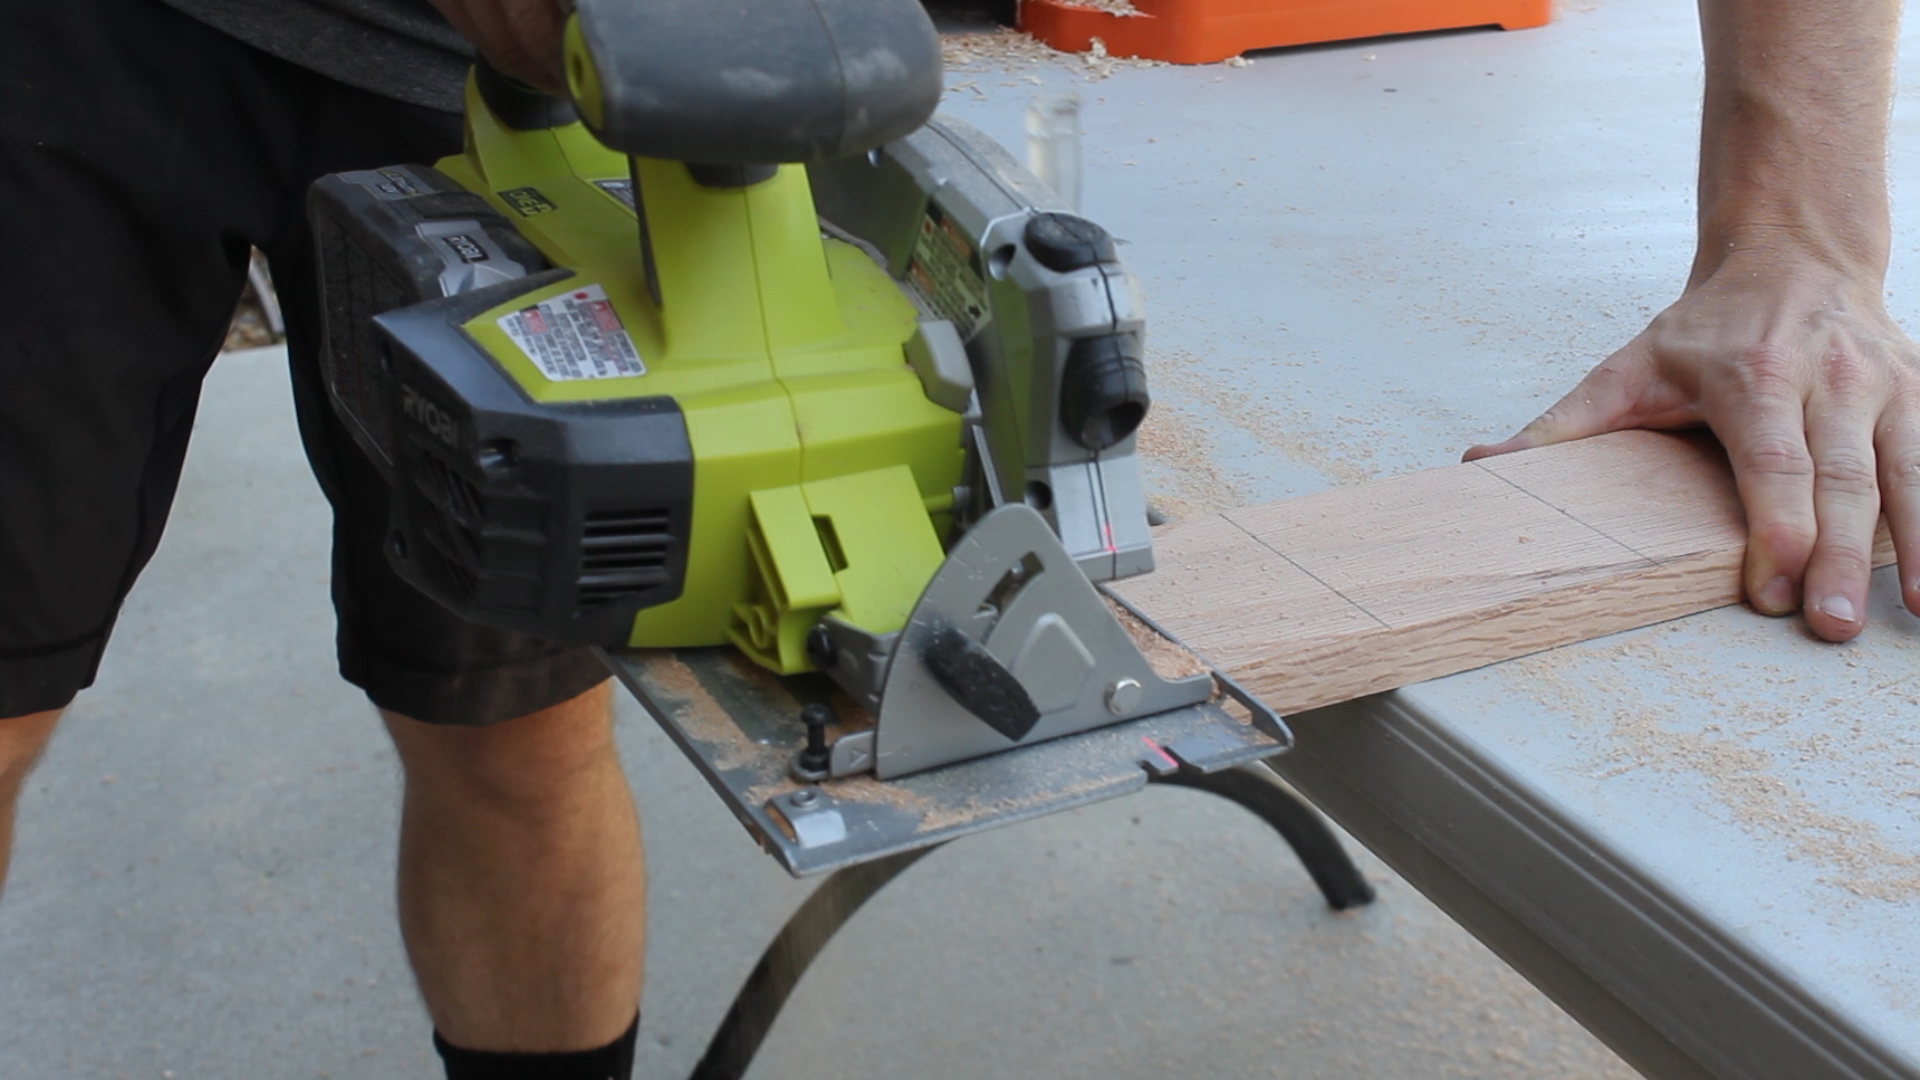
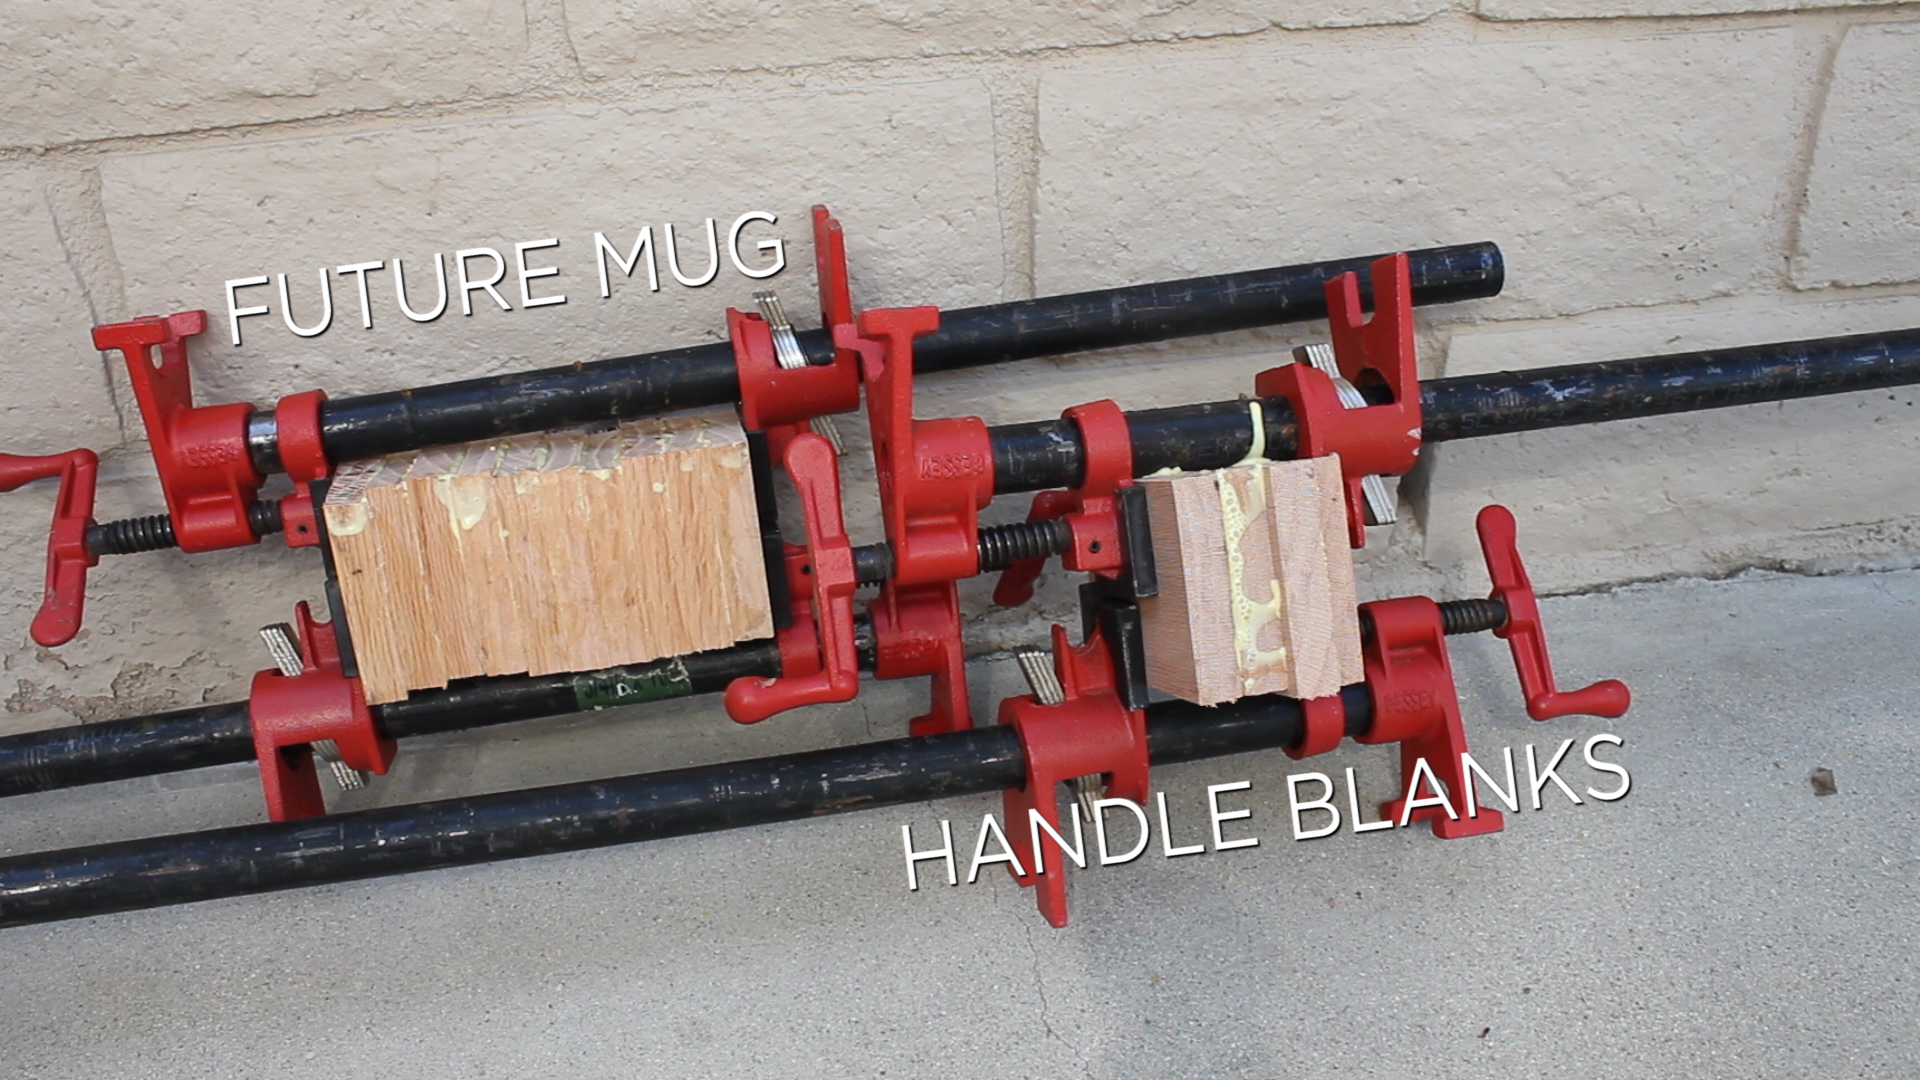
Next I could rip my pieces into strips at 3.5", then cut those 3.5" strips into squares. I think I ended up cutting 9 total squares. I also cut four pieces at 4.5" long that would later become the handles. I then glued things up.
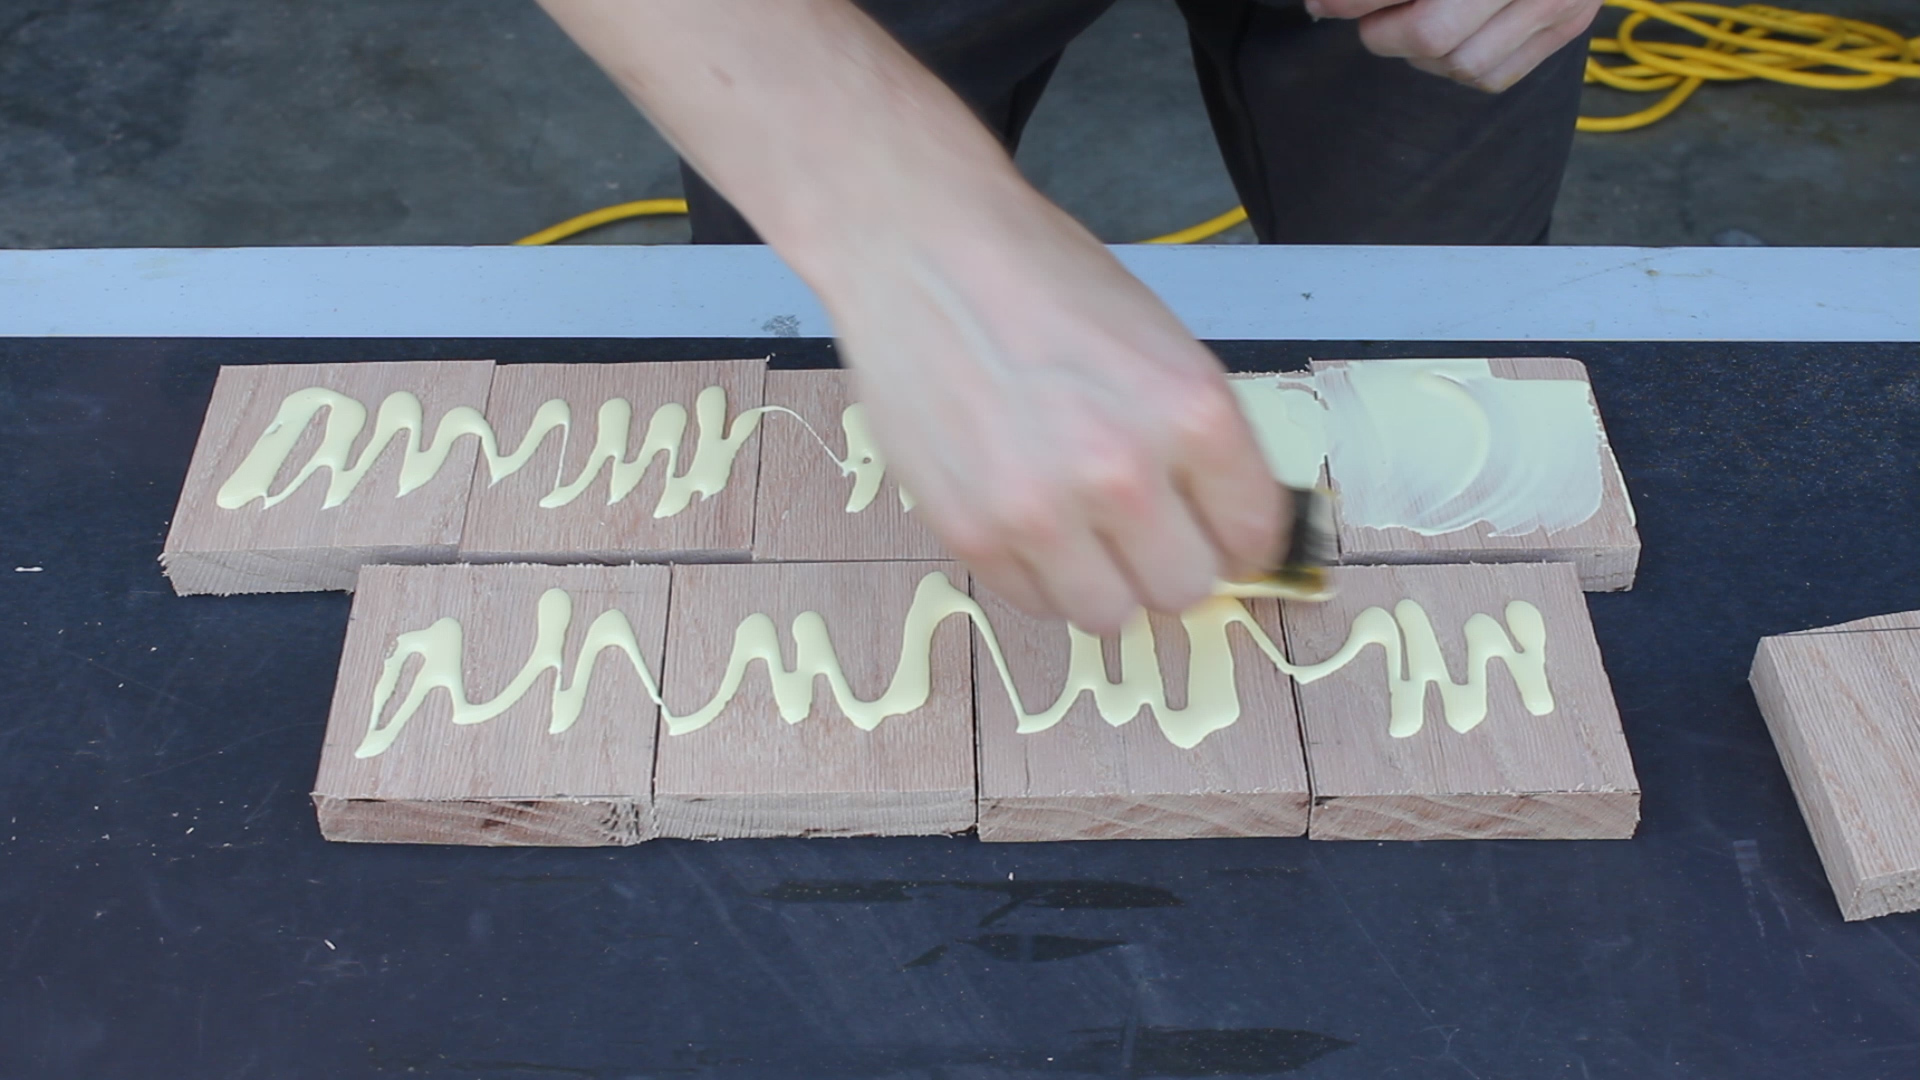
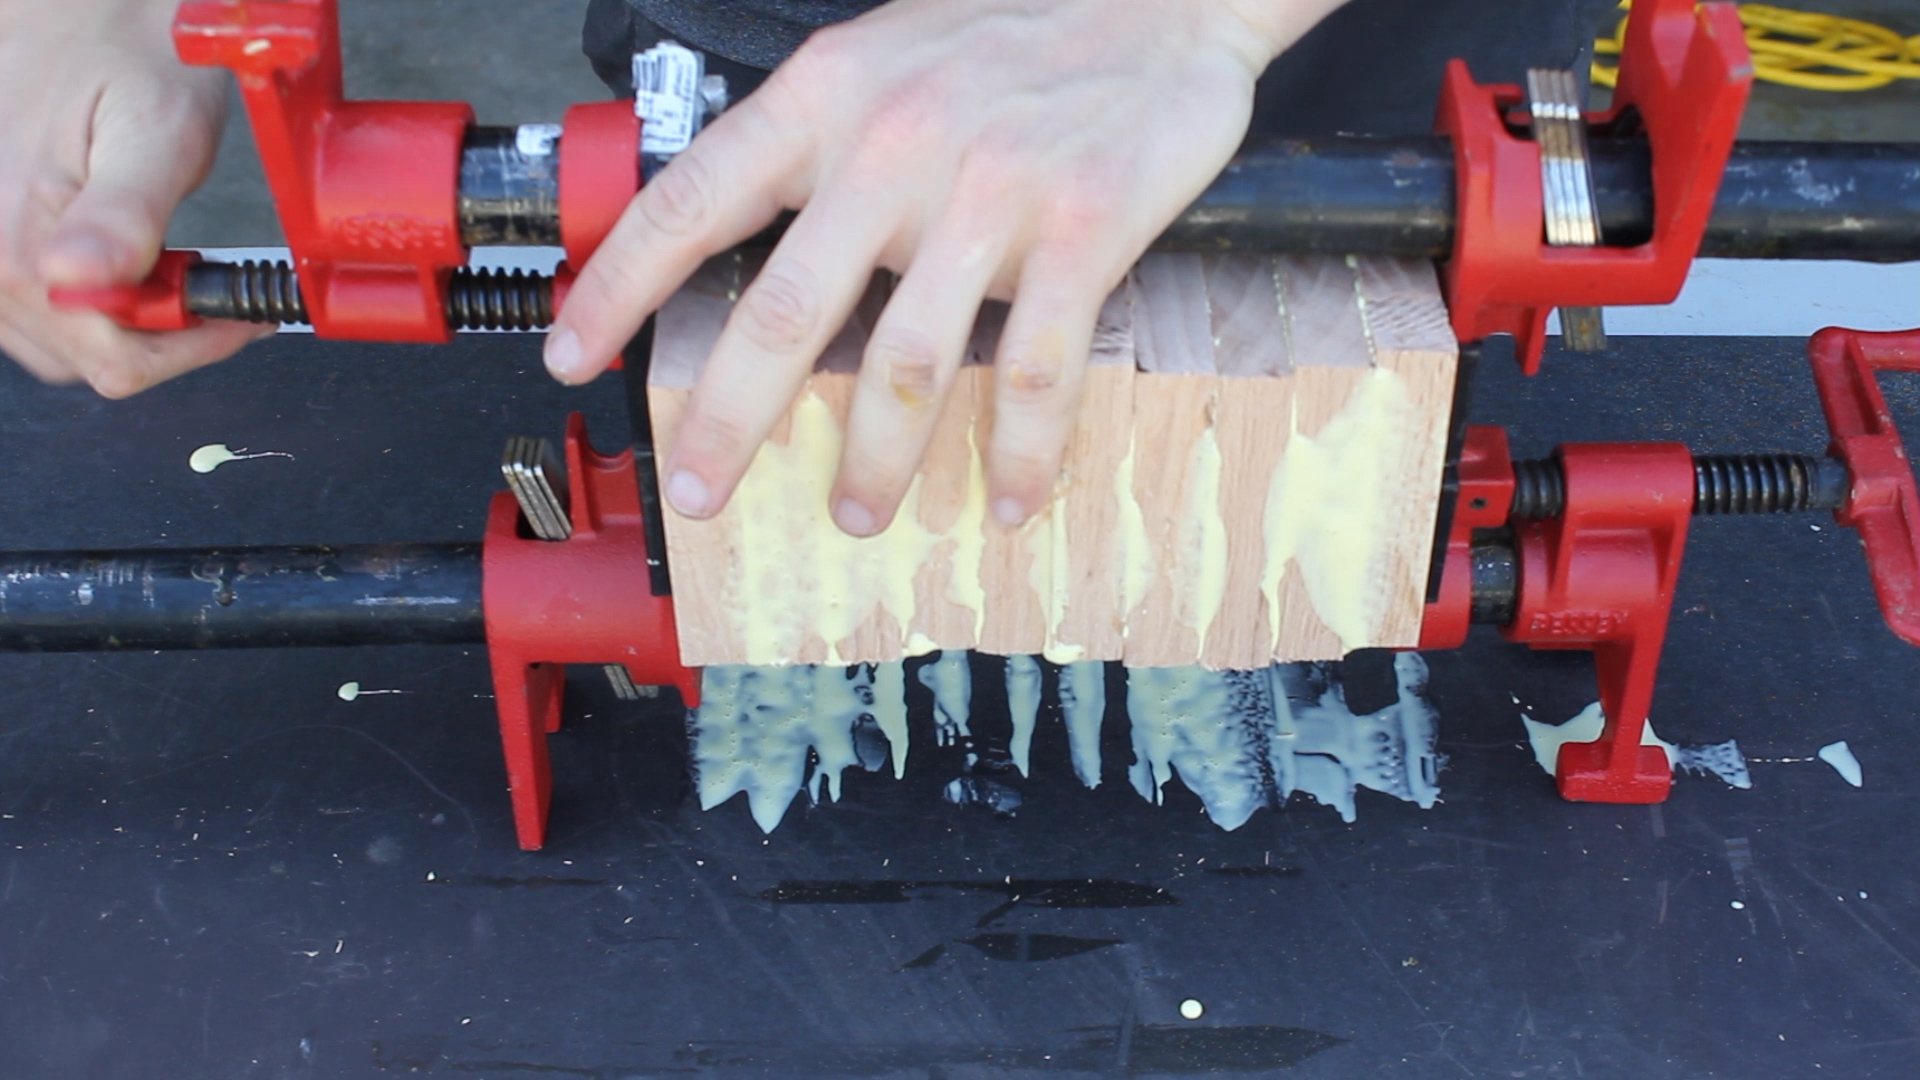
You can see how I glued up all the squares to form the "mug" blank, and the longer pieces to form handle blanks. NOTE - I glued up two sets of handle blanks (two pieces each), incase I messed up later on. These are not four piece glued together, they are two pieces glued together, just clamped up together. I was careful to make sure the grain of my wood all ran the same direction as well for the "future mug" blank.
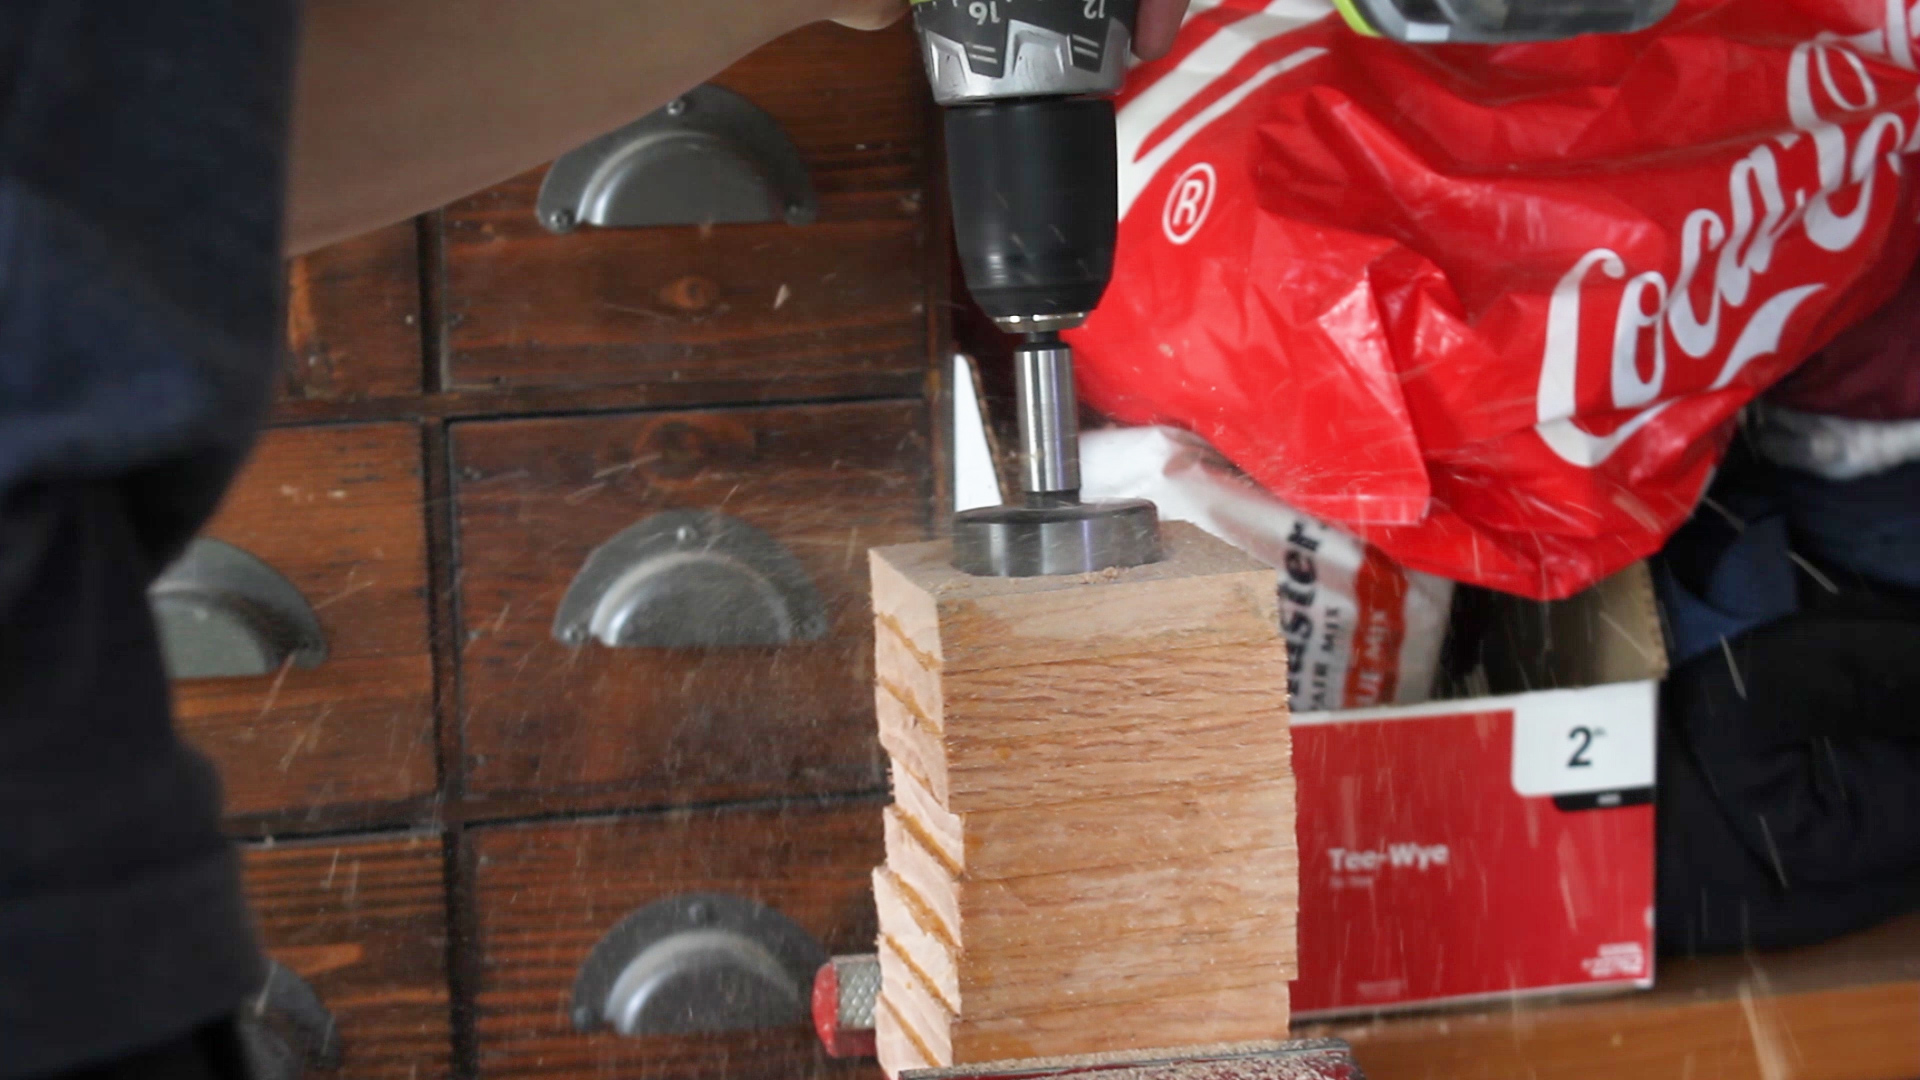
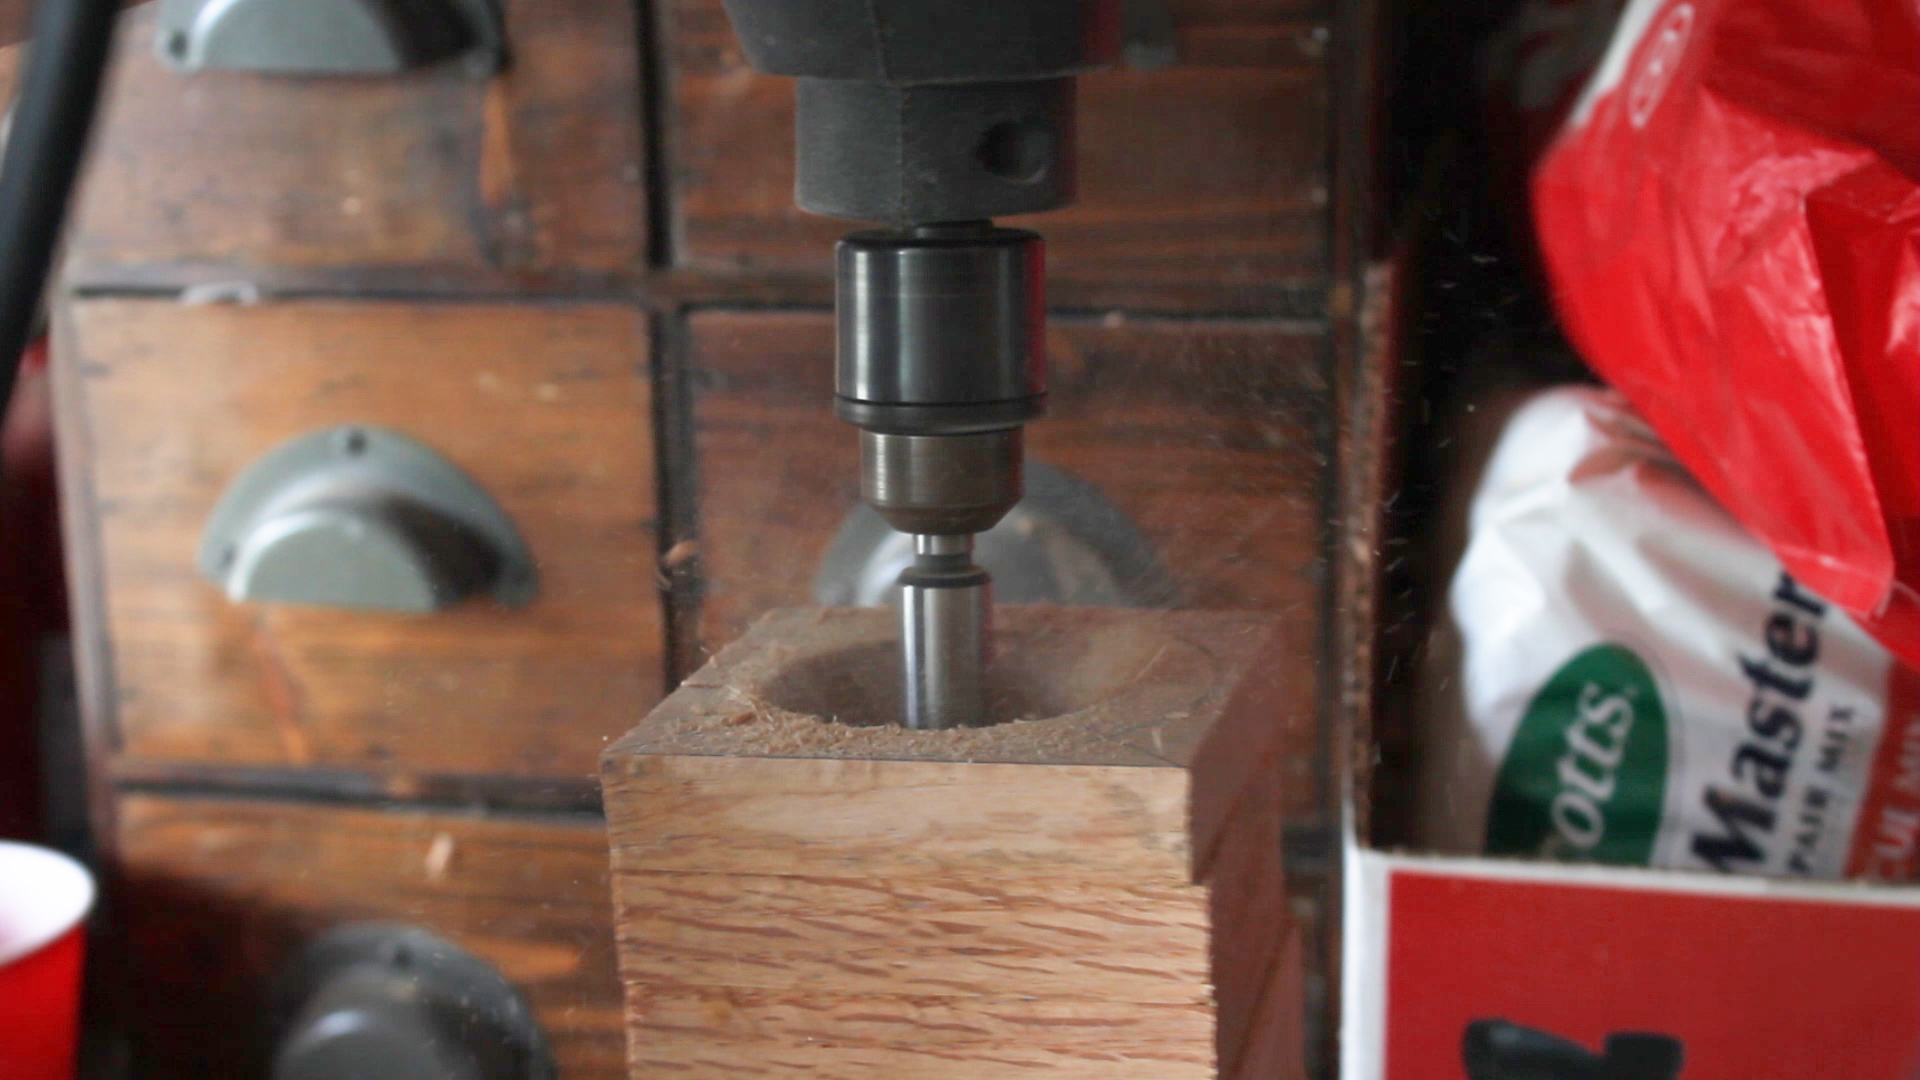
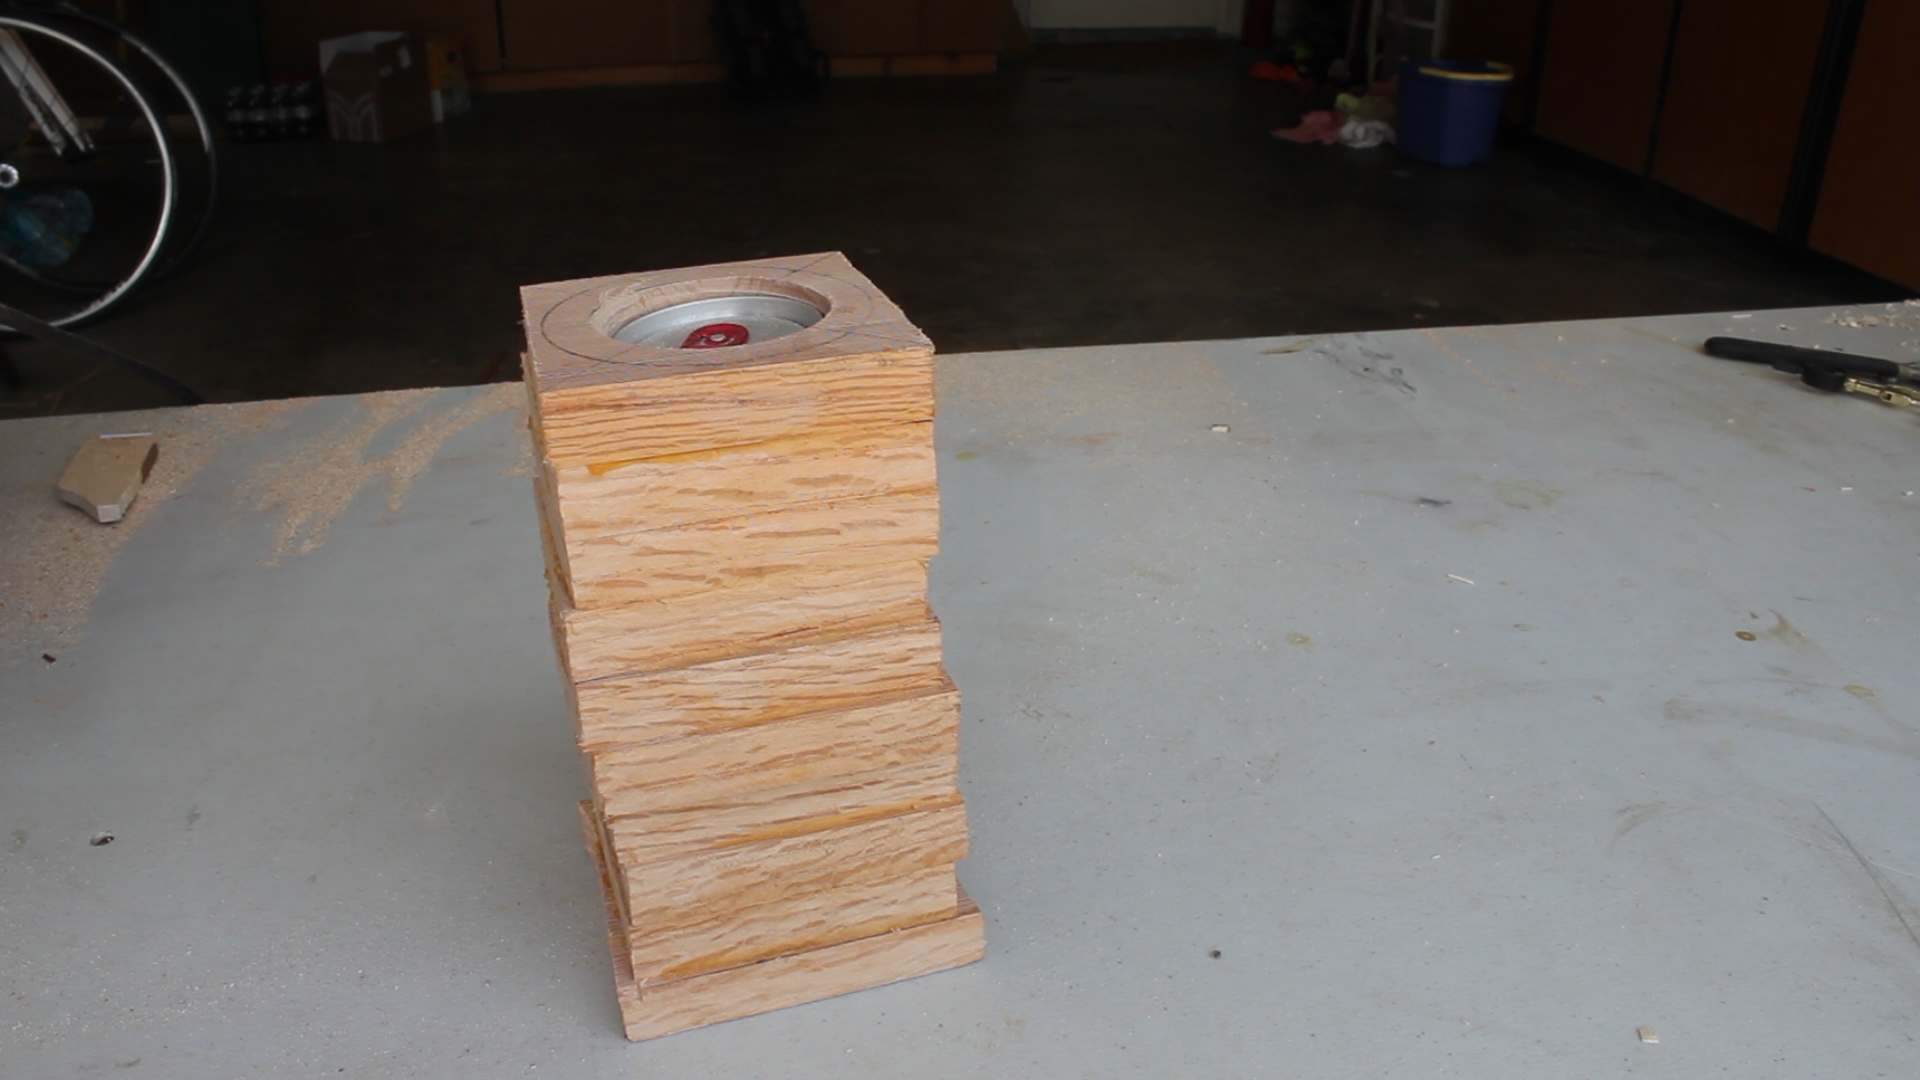
The next step was to find the center using two diagonal lines, followed by using a compass to mark out two circles. Since I don't have a lathe, I can't turn this piece on the inside and outside.
Instead, I'll be hollowing it out with a forstner bit, and rounding off the outside using various methods detailed later. My forstner bit is 2.125", so that is the size of my center circle. Then I just measured about .50" outside of that to create a parameter for the outside of the cup.

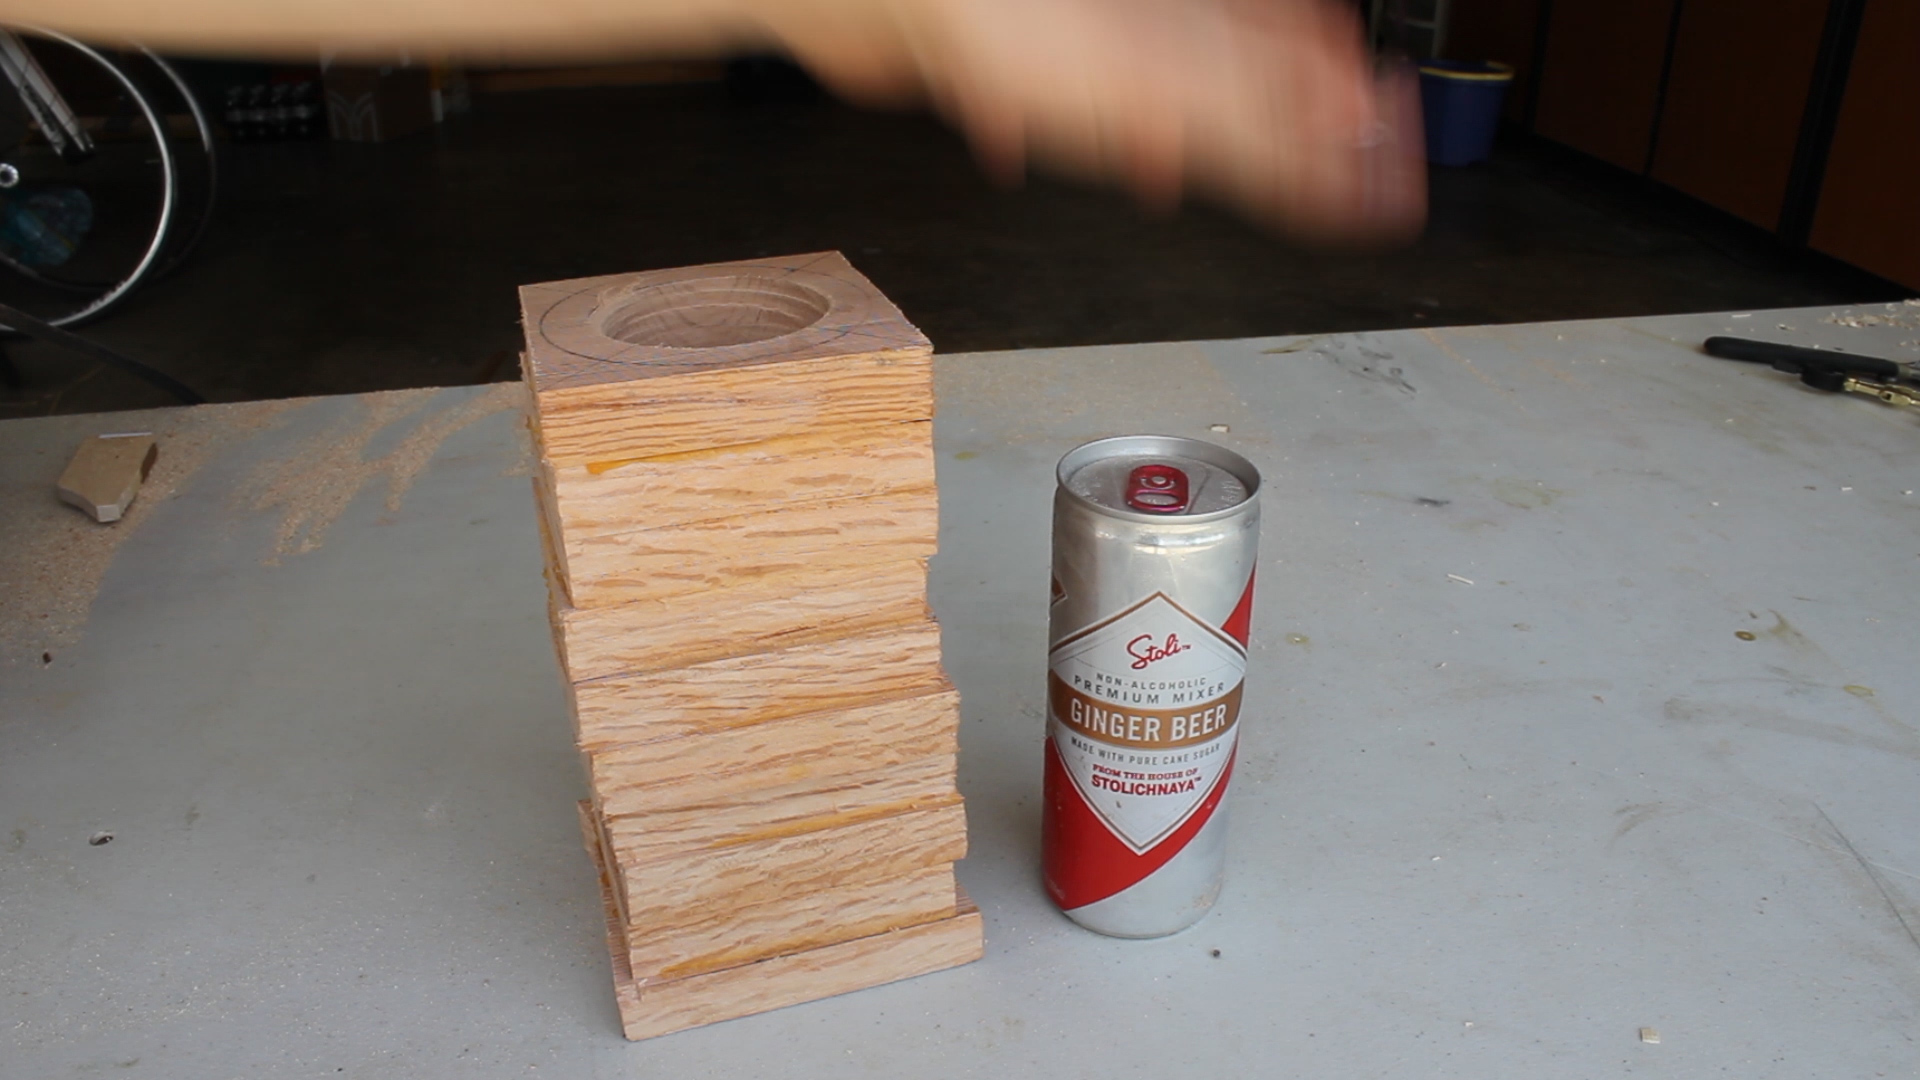
Then I spent a good amount of time boring a hole using my power drill. Without a drill press this was a lot of work and probably took me three total Ryobi Batteries to complete. I ended up drilling about 5.5" deep. You can see in the last two photos the depth at which I dug. That is an 8.4 oz. can of soda (for reference), so the cup probably holds 10 oz total.
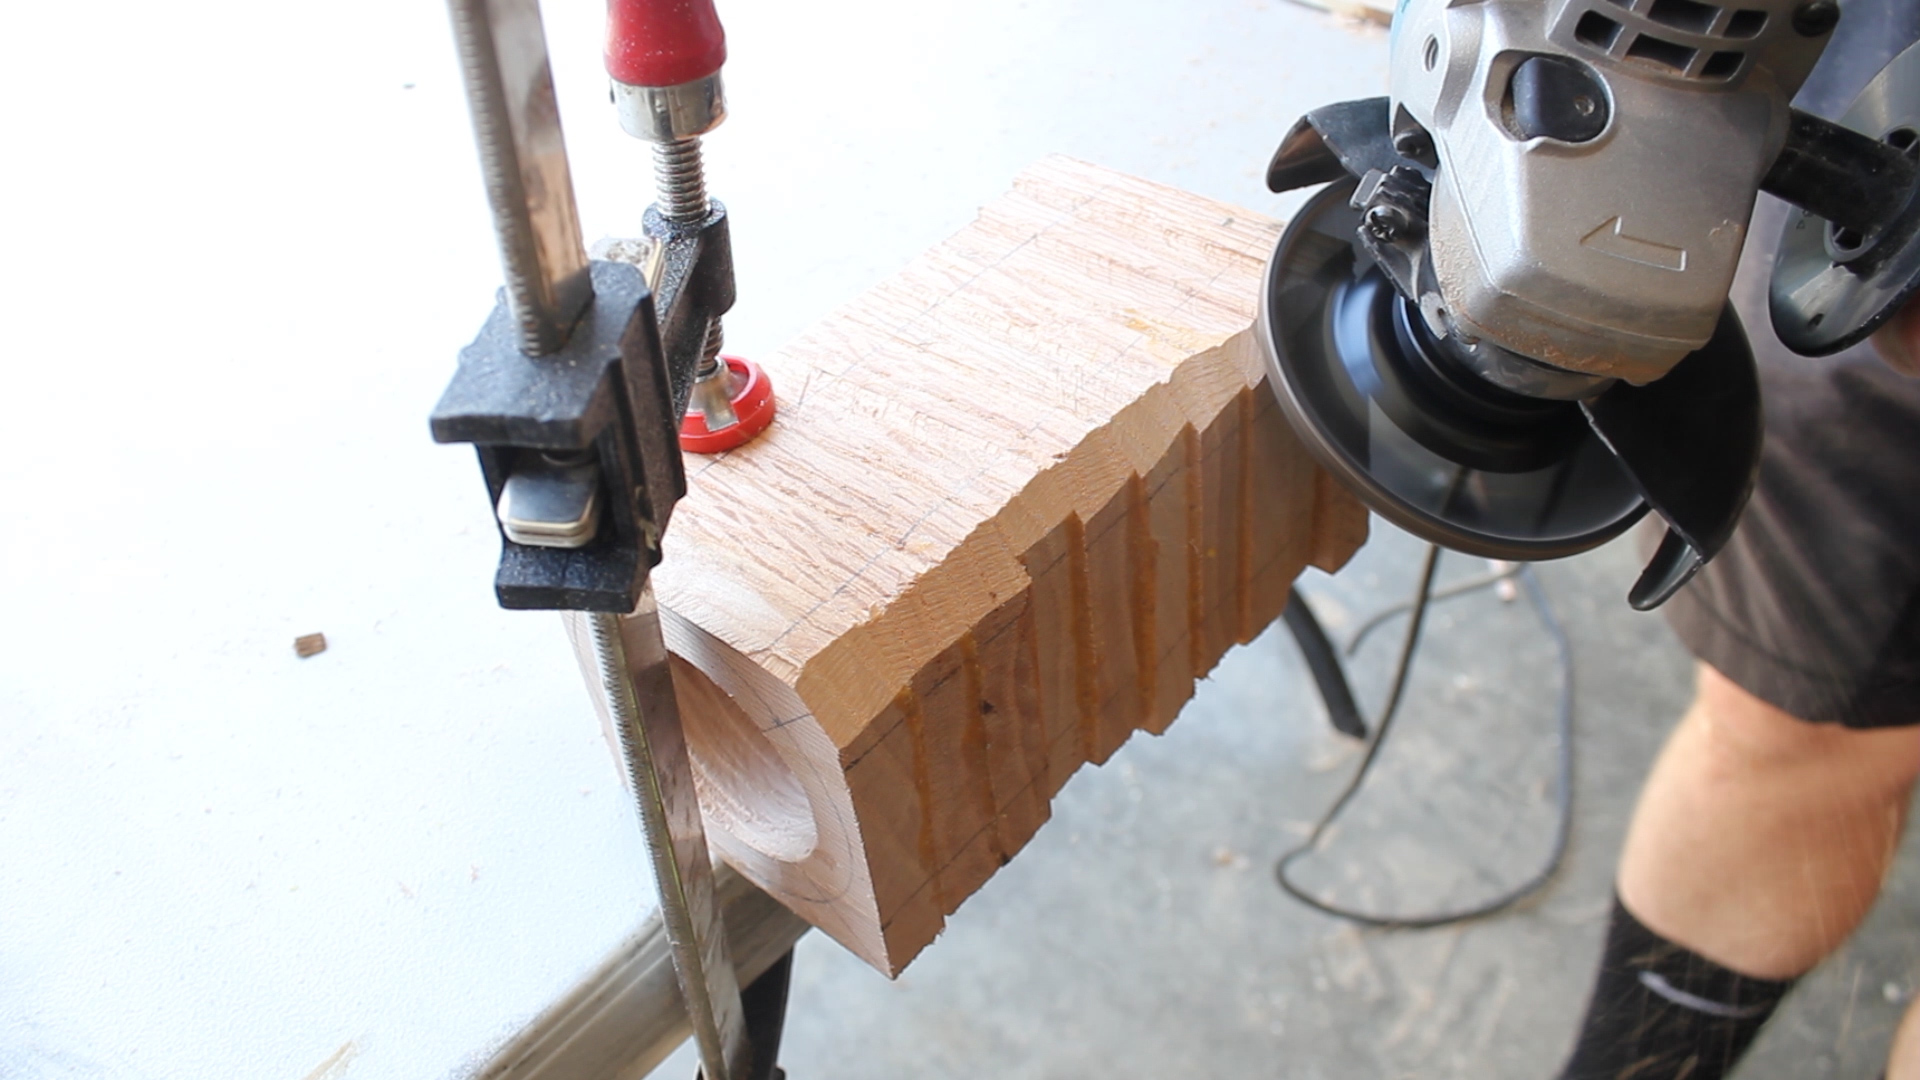
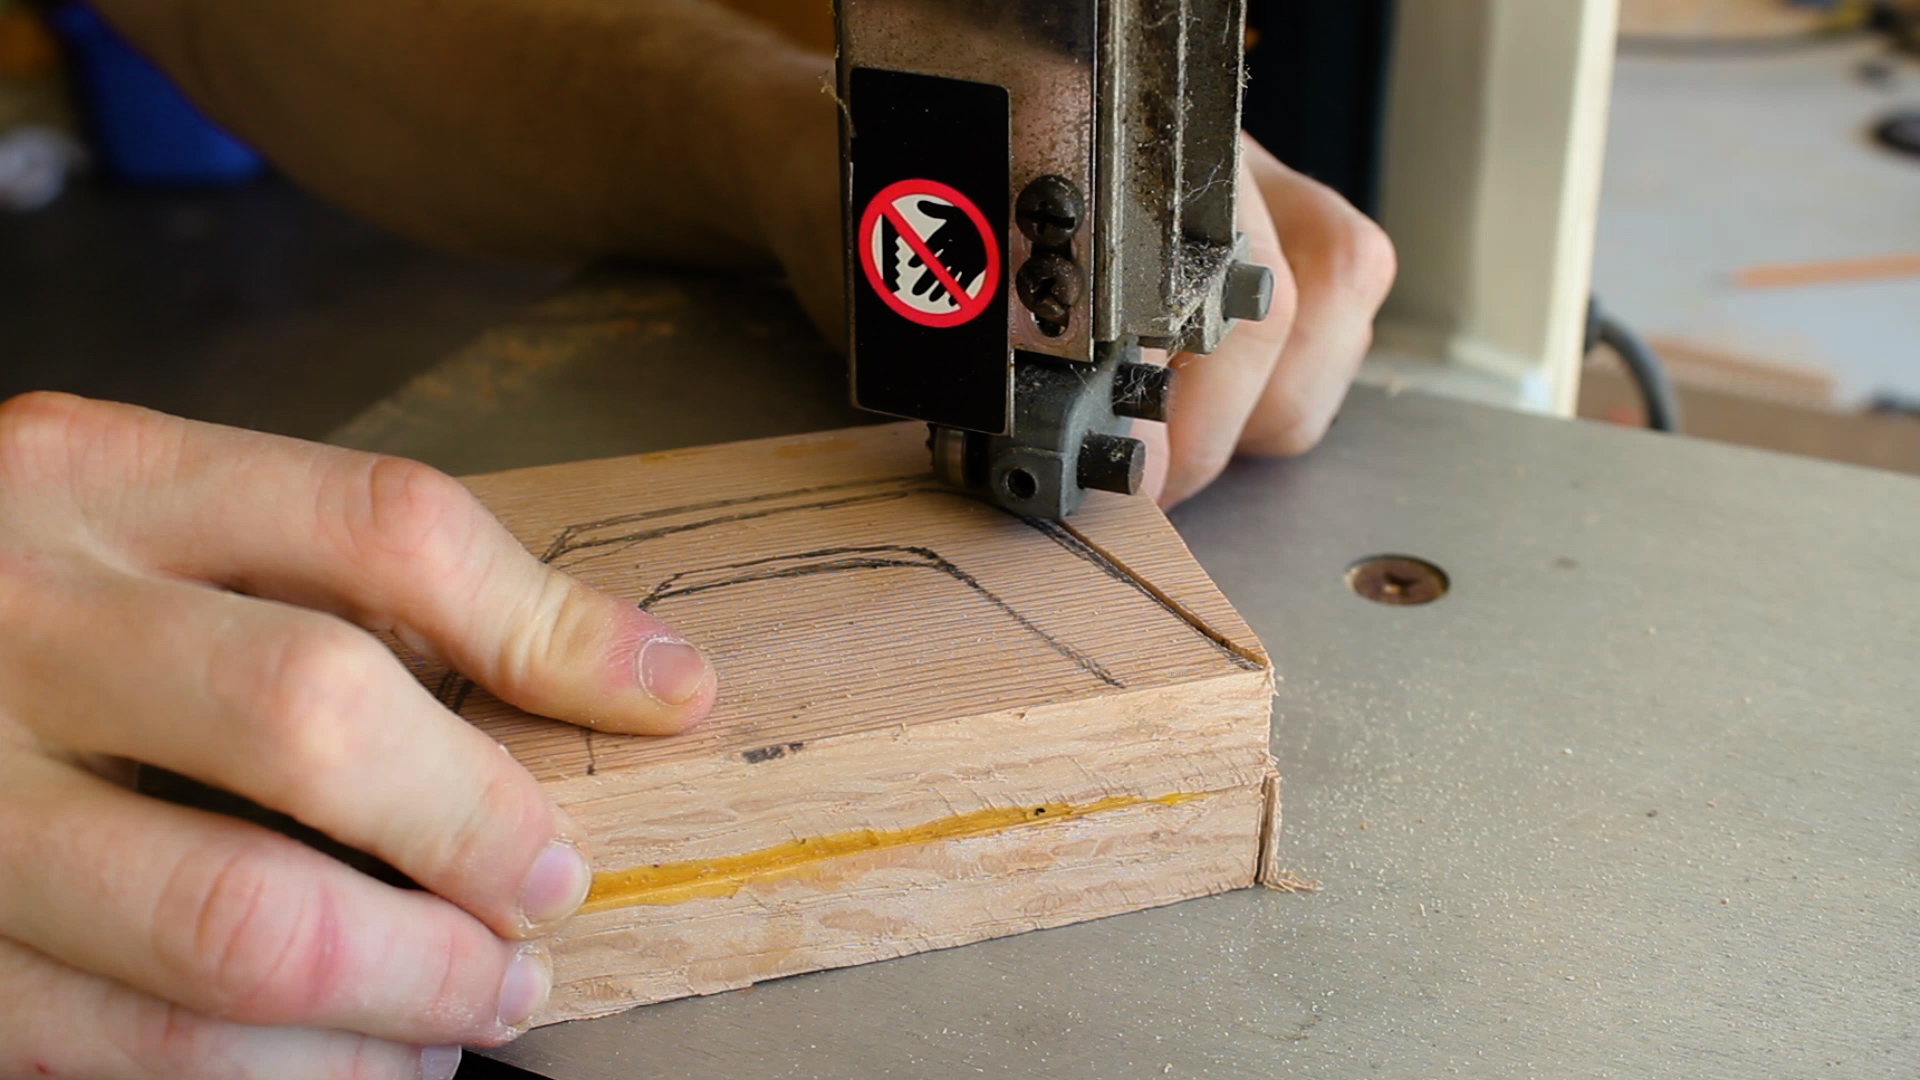
This next step can be done many ways. The whole point is just to remove excess material so that it is easier to round out the outside of the mug later on with a belt sander. I chose to use an angle grinder with my ARBORTECH TURBOPlane Blade, but it can also be done as such:
- Miter'd band saw cuts
- Miter'd table saw cuts
- Miter Saw cuts
- Hand carving tools
- All belt sanding (takes the longest)

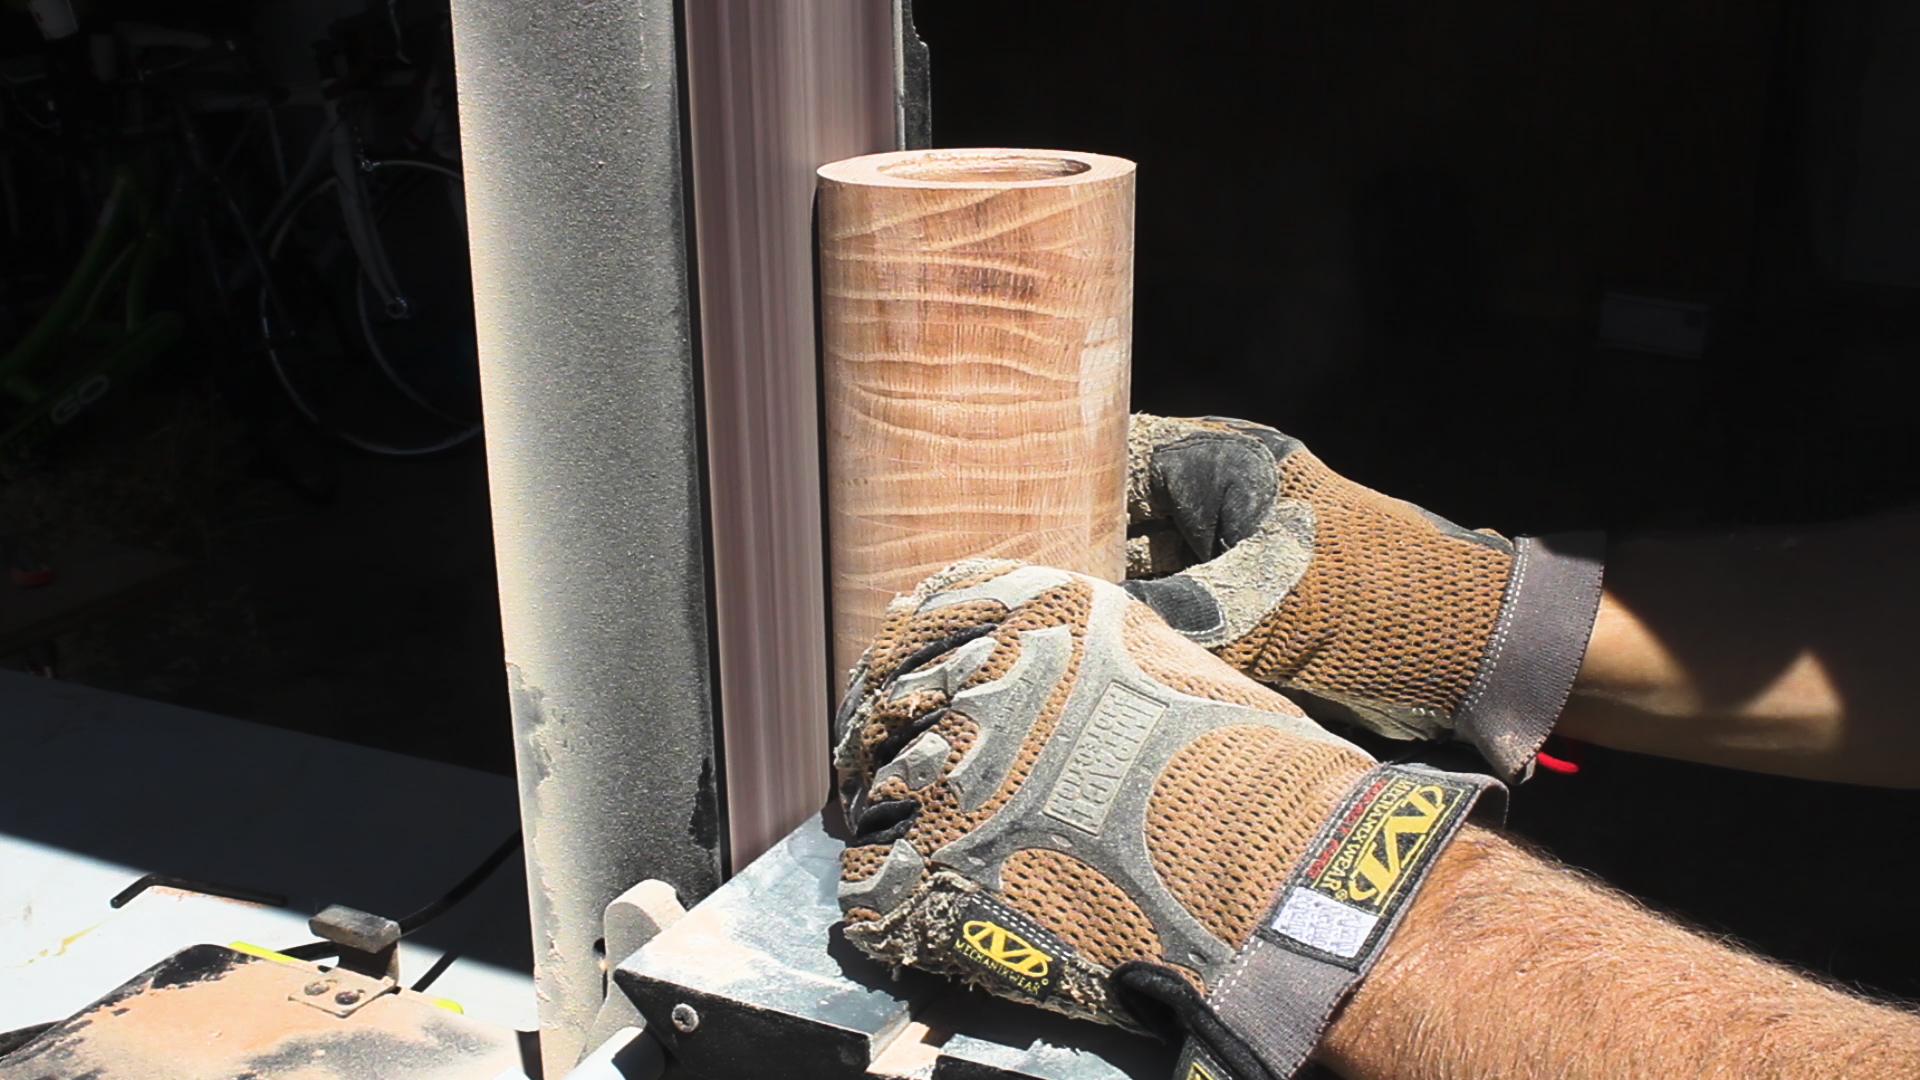
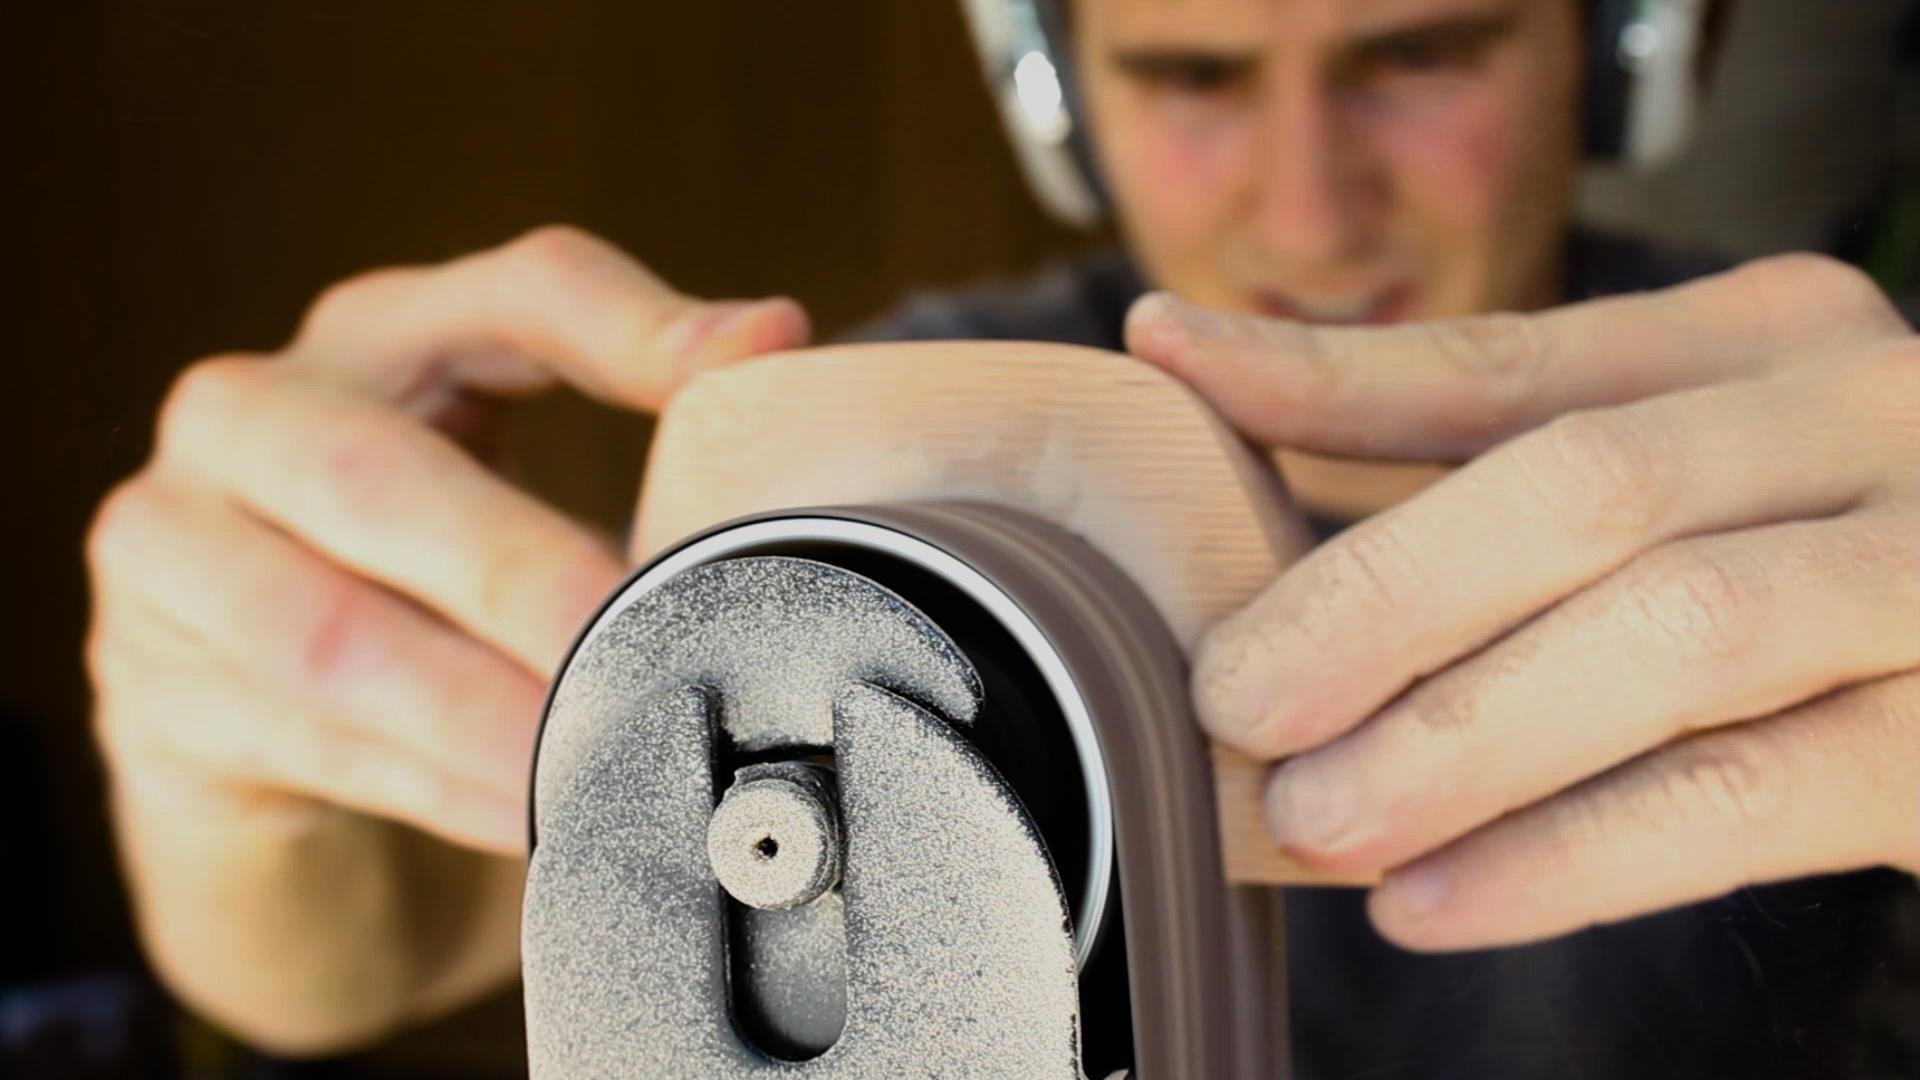
Then, I could move to my stationary belt sander and begin rounding out the edges. I was using 120 grit sand paper at this point which wasn't course enough, so this took longer than expected. 40 or 60 grit would speed things up for you. I was pretty excited at this point with how the grain was starting to look! I also flattened one side to where the handle would eventually be glued to just to have flat clean glueable surfaces.

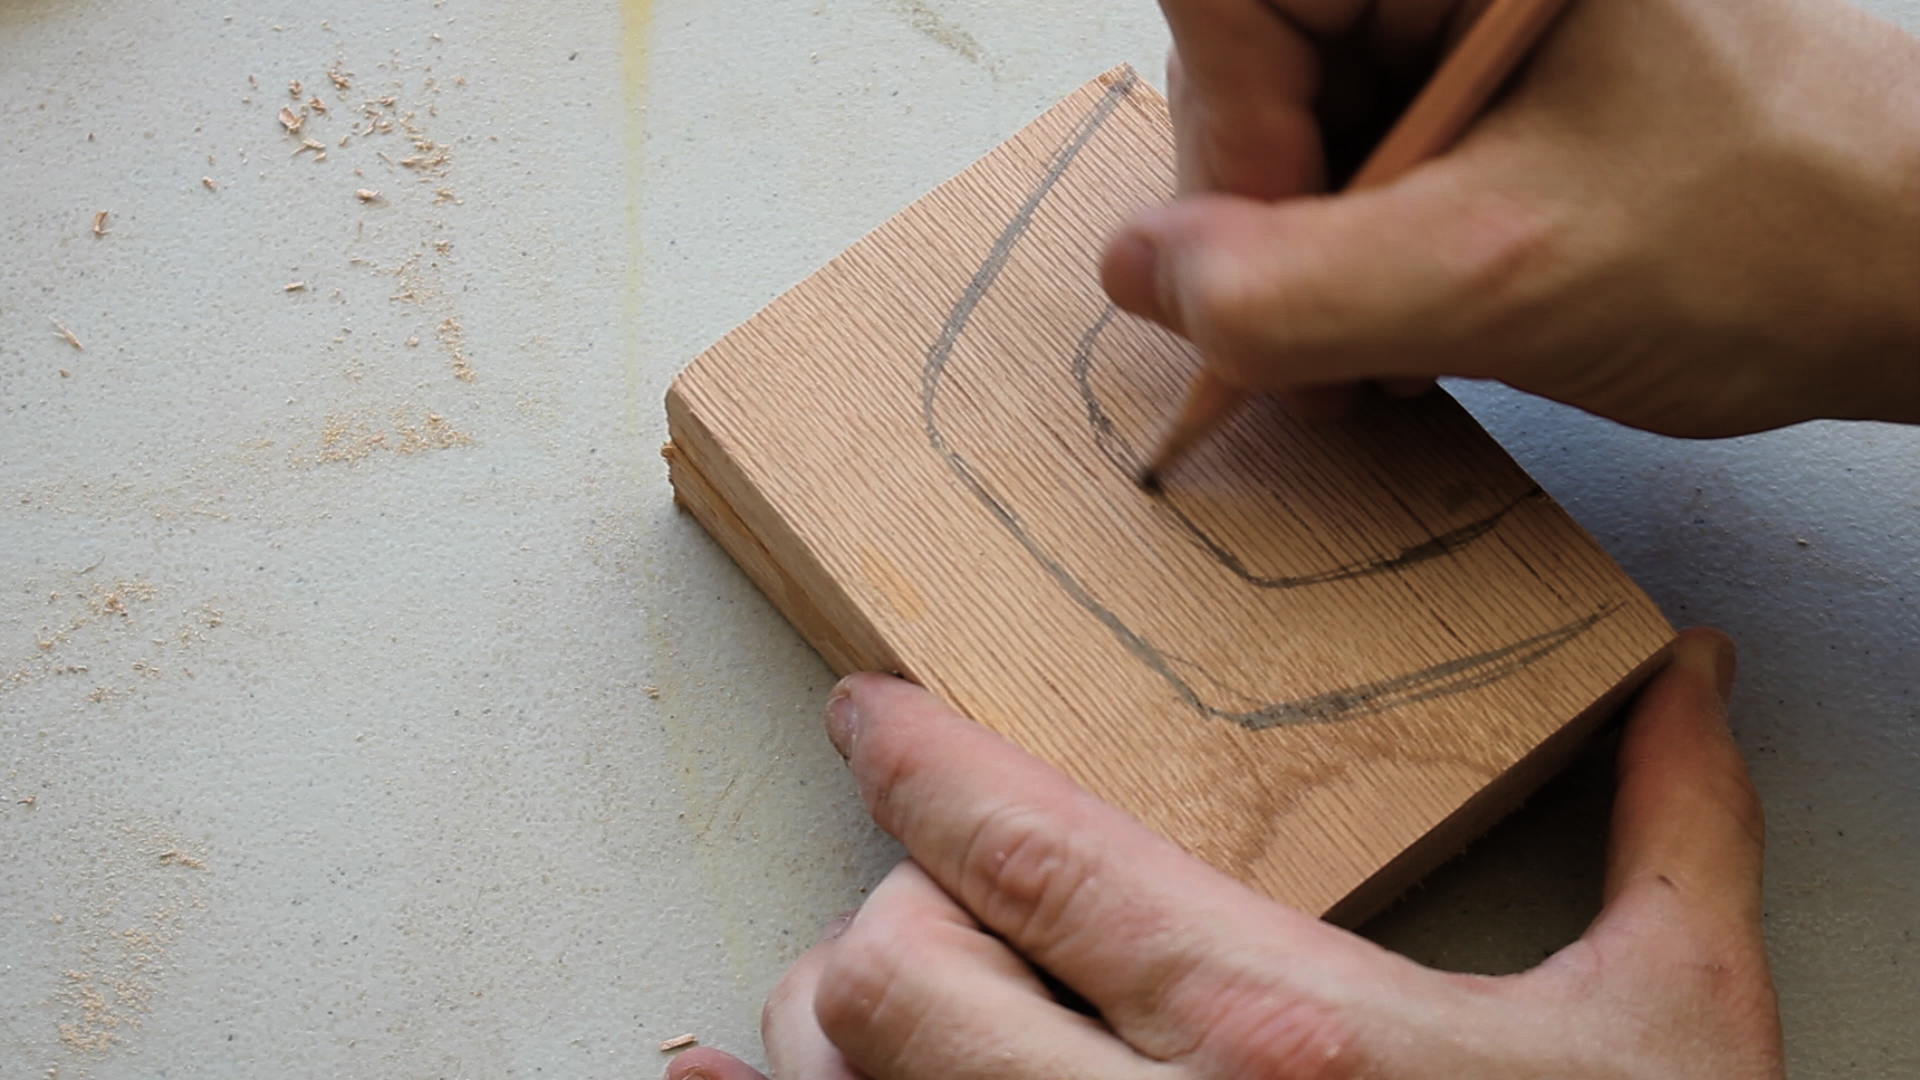
Next up was shaping the handle, the design and drawing of which was completely freehanded and not based on anything but the idea that it should look and function like a handle. I then moved to sanding all faces of it, including rounding the interior and exterior edges as well as flattening the ends that would later be attached to the mug.

I then wetted everything down and gave it one final sanding at 220 and 320 grit. I did this to both smooth it out as well raise the grain on the wood so that when it did get wet eventually, it would remain smooth.

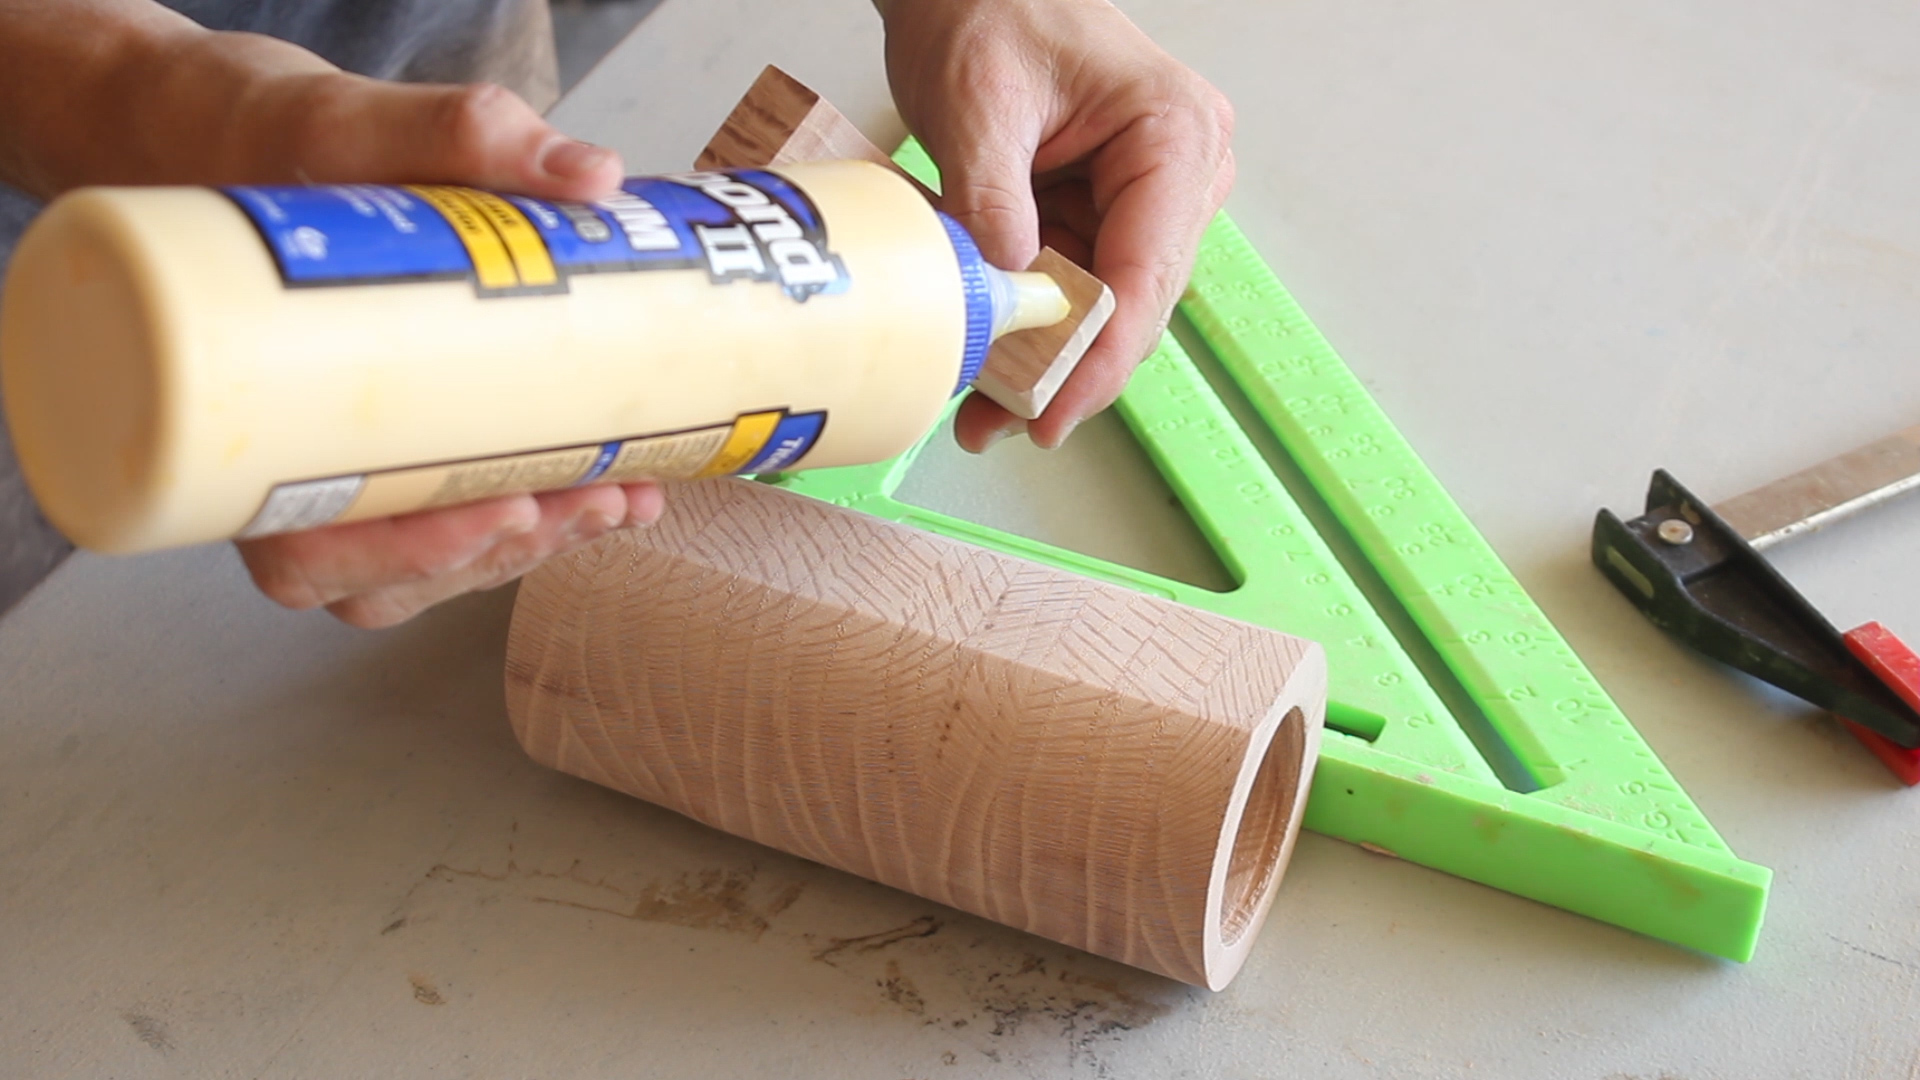
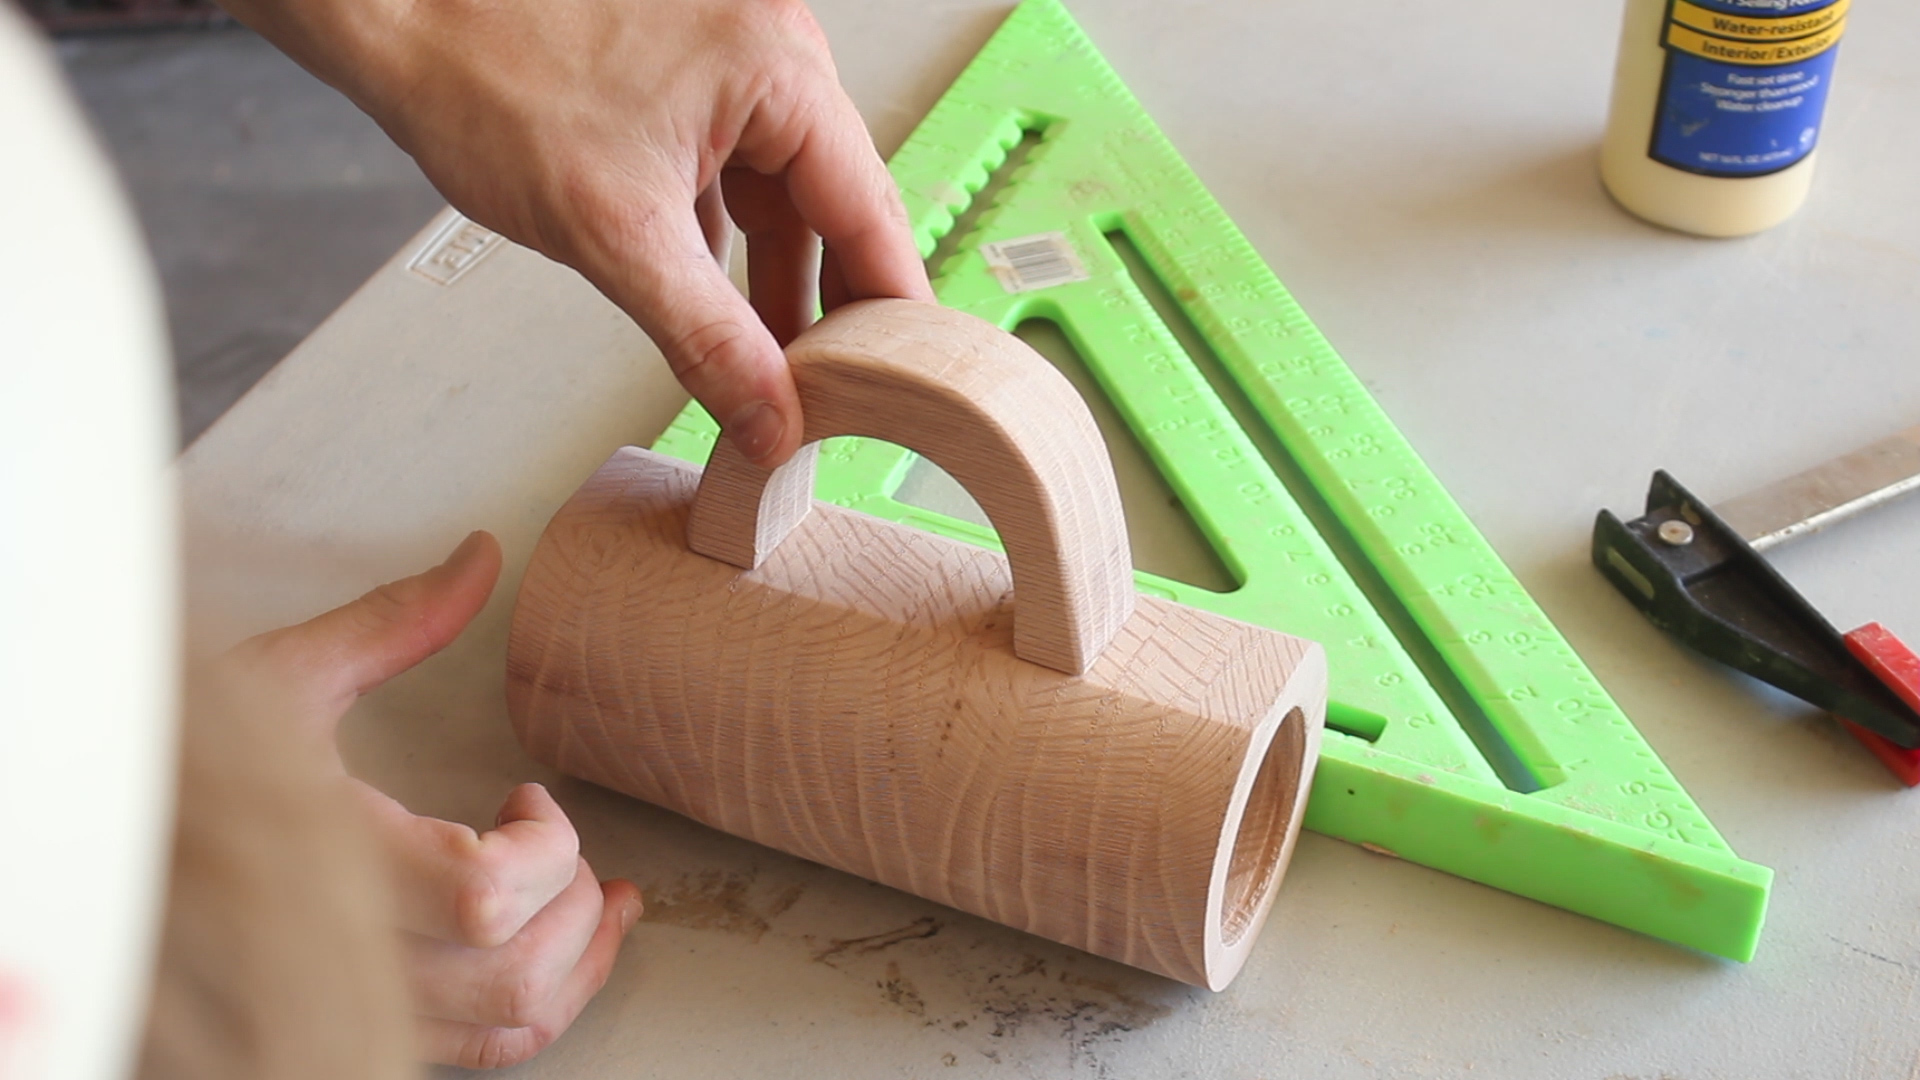
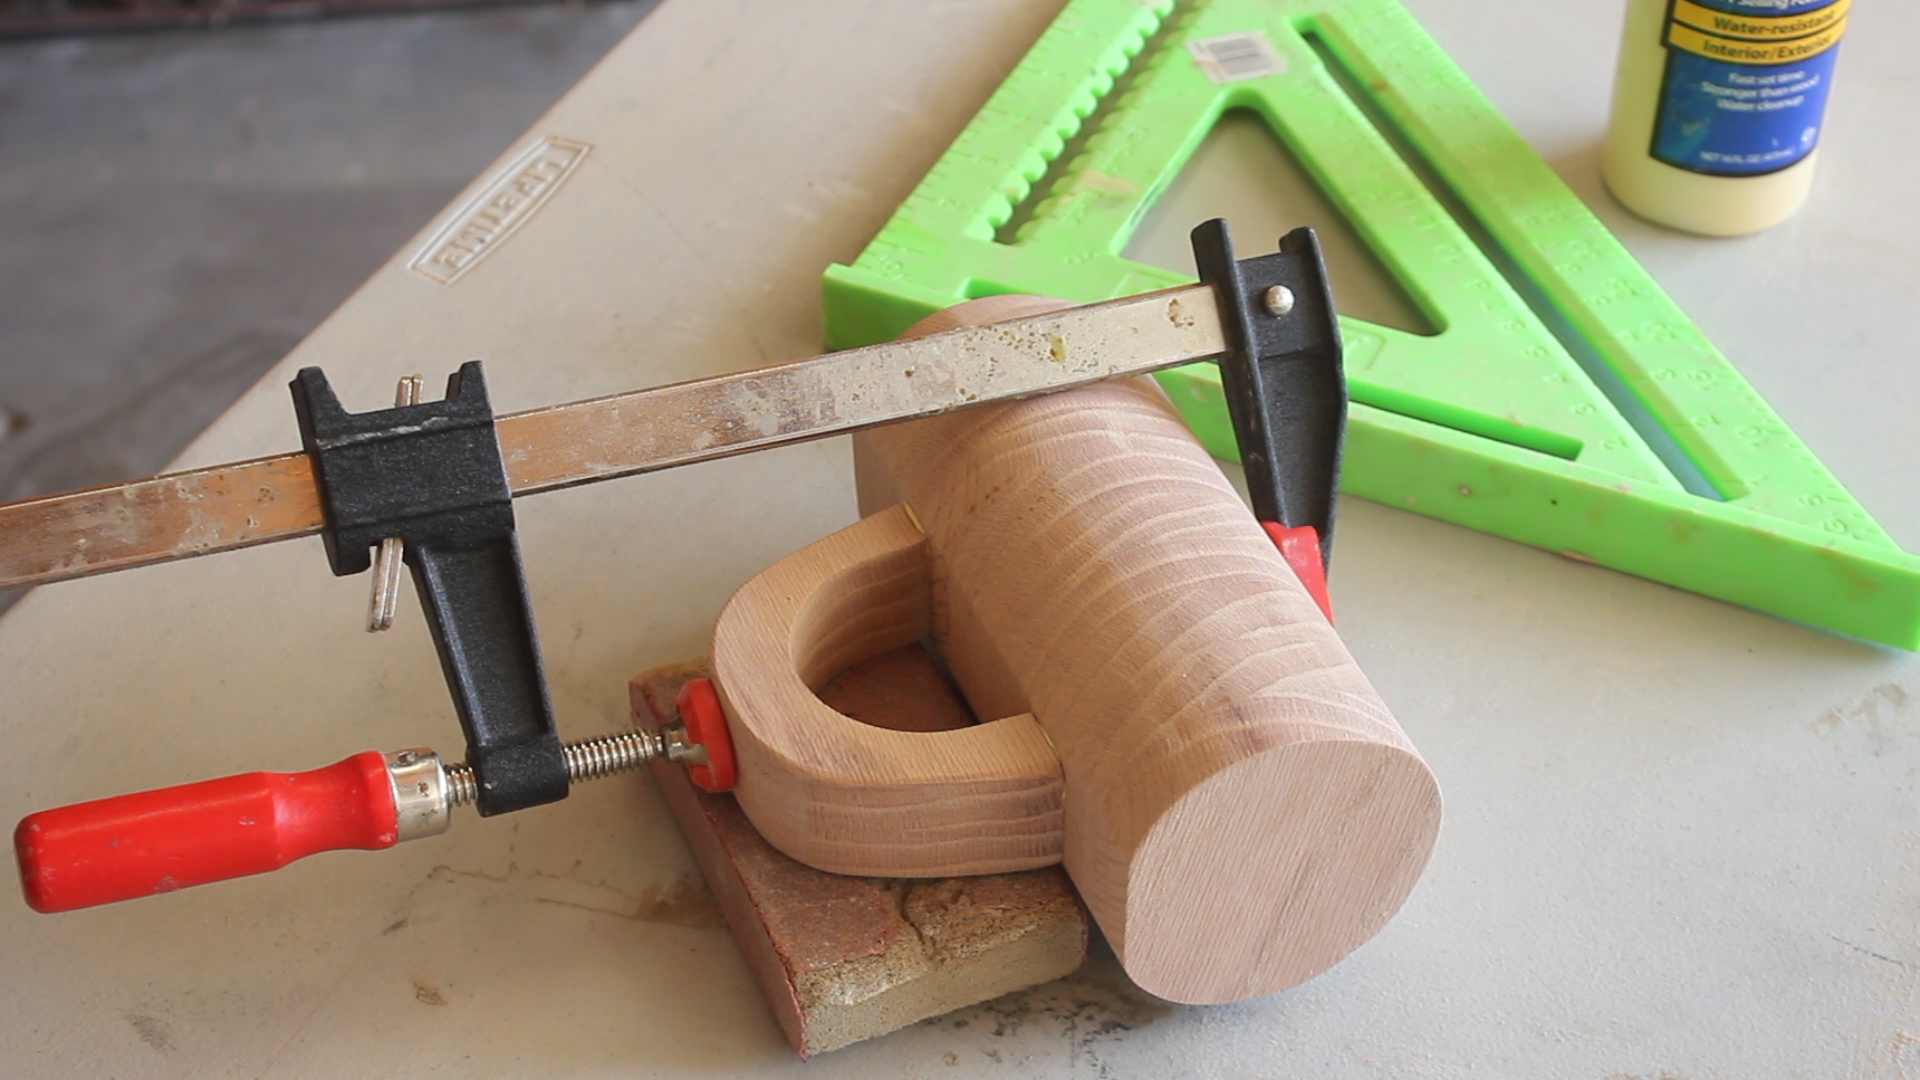
hen I glued my handle to my mug using Titebond II Again. Only glue here - no screws (obviously!), no joinery. Just apply a solid amount of glue, spread it out, and push and hold it firmly to the mug surface for a few seconds for it to set. Then clamp it up.
The glue joint, if clamped and tightened properly, would be strong as hell.
he last step was two fold.
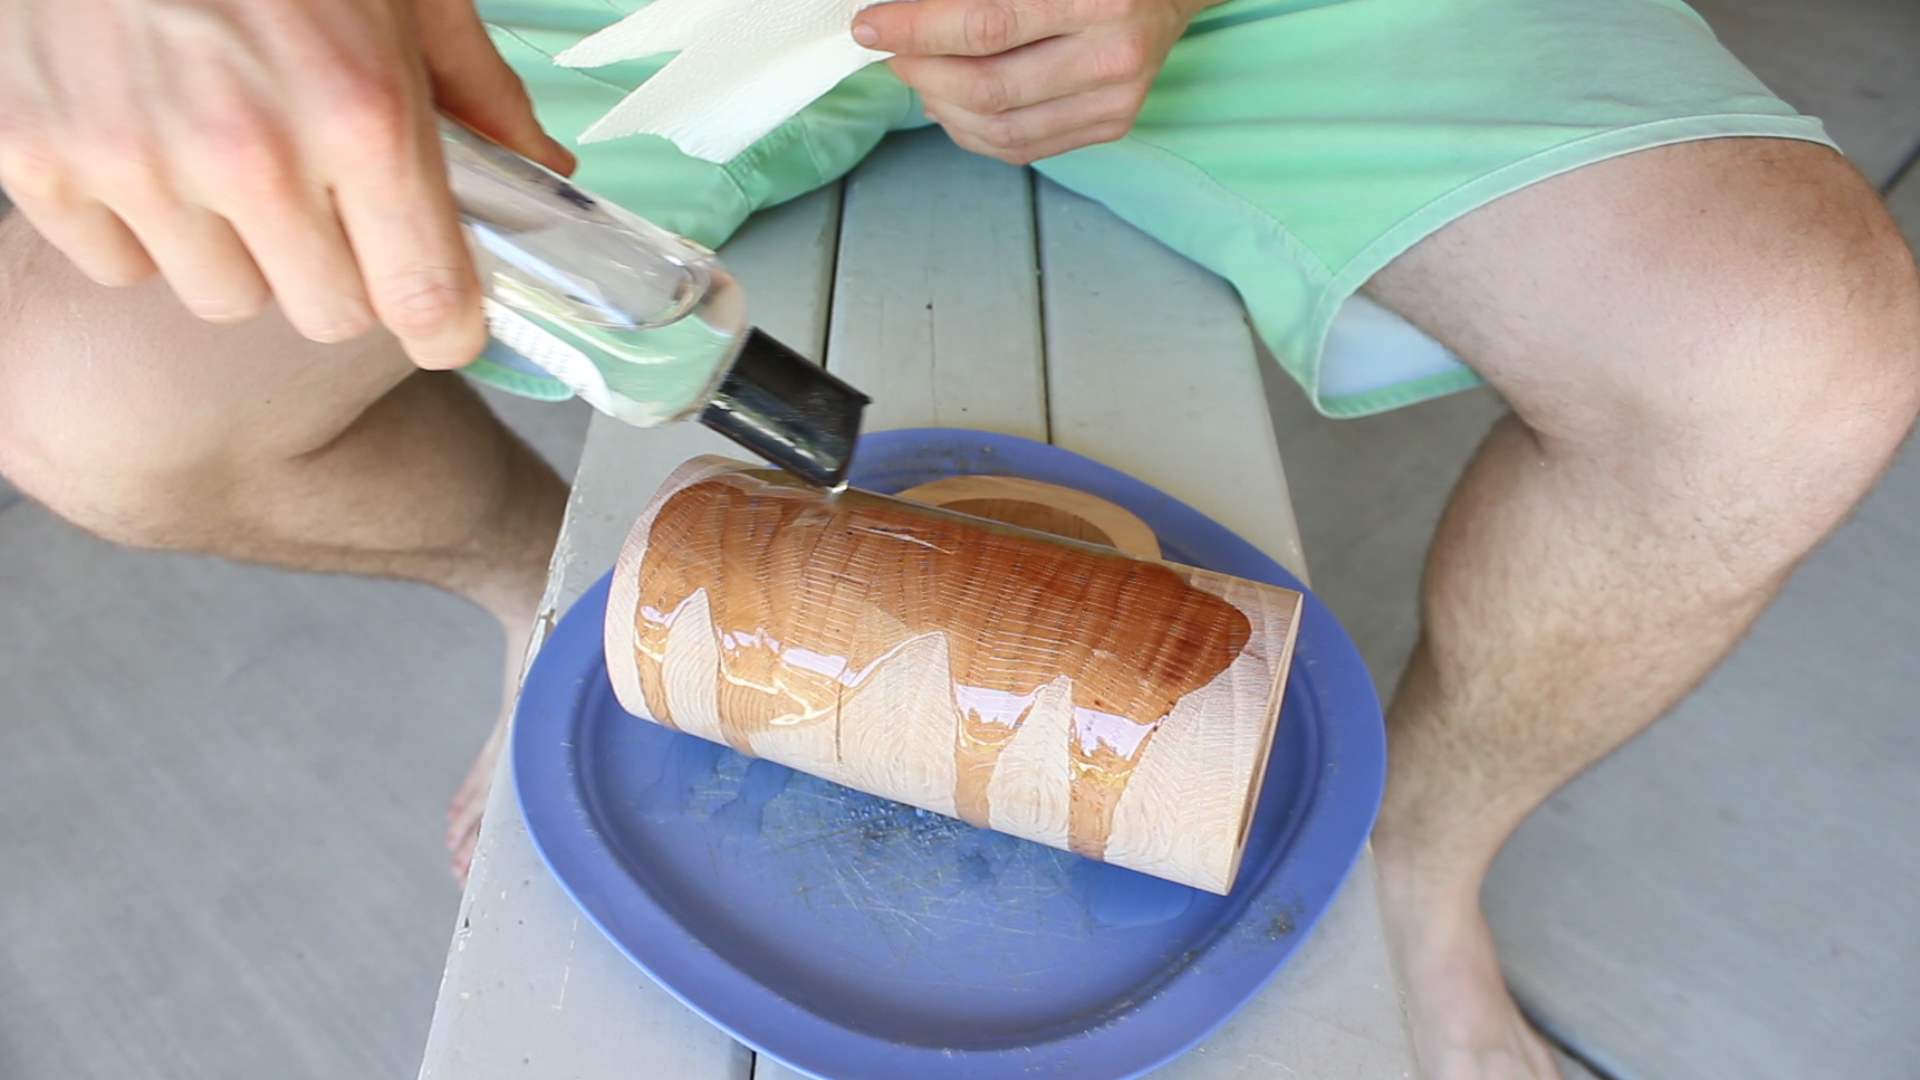
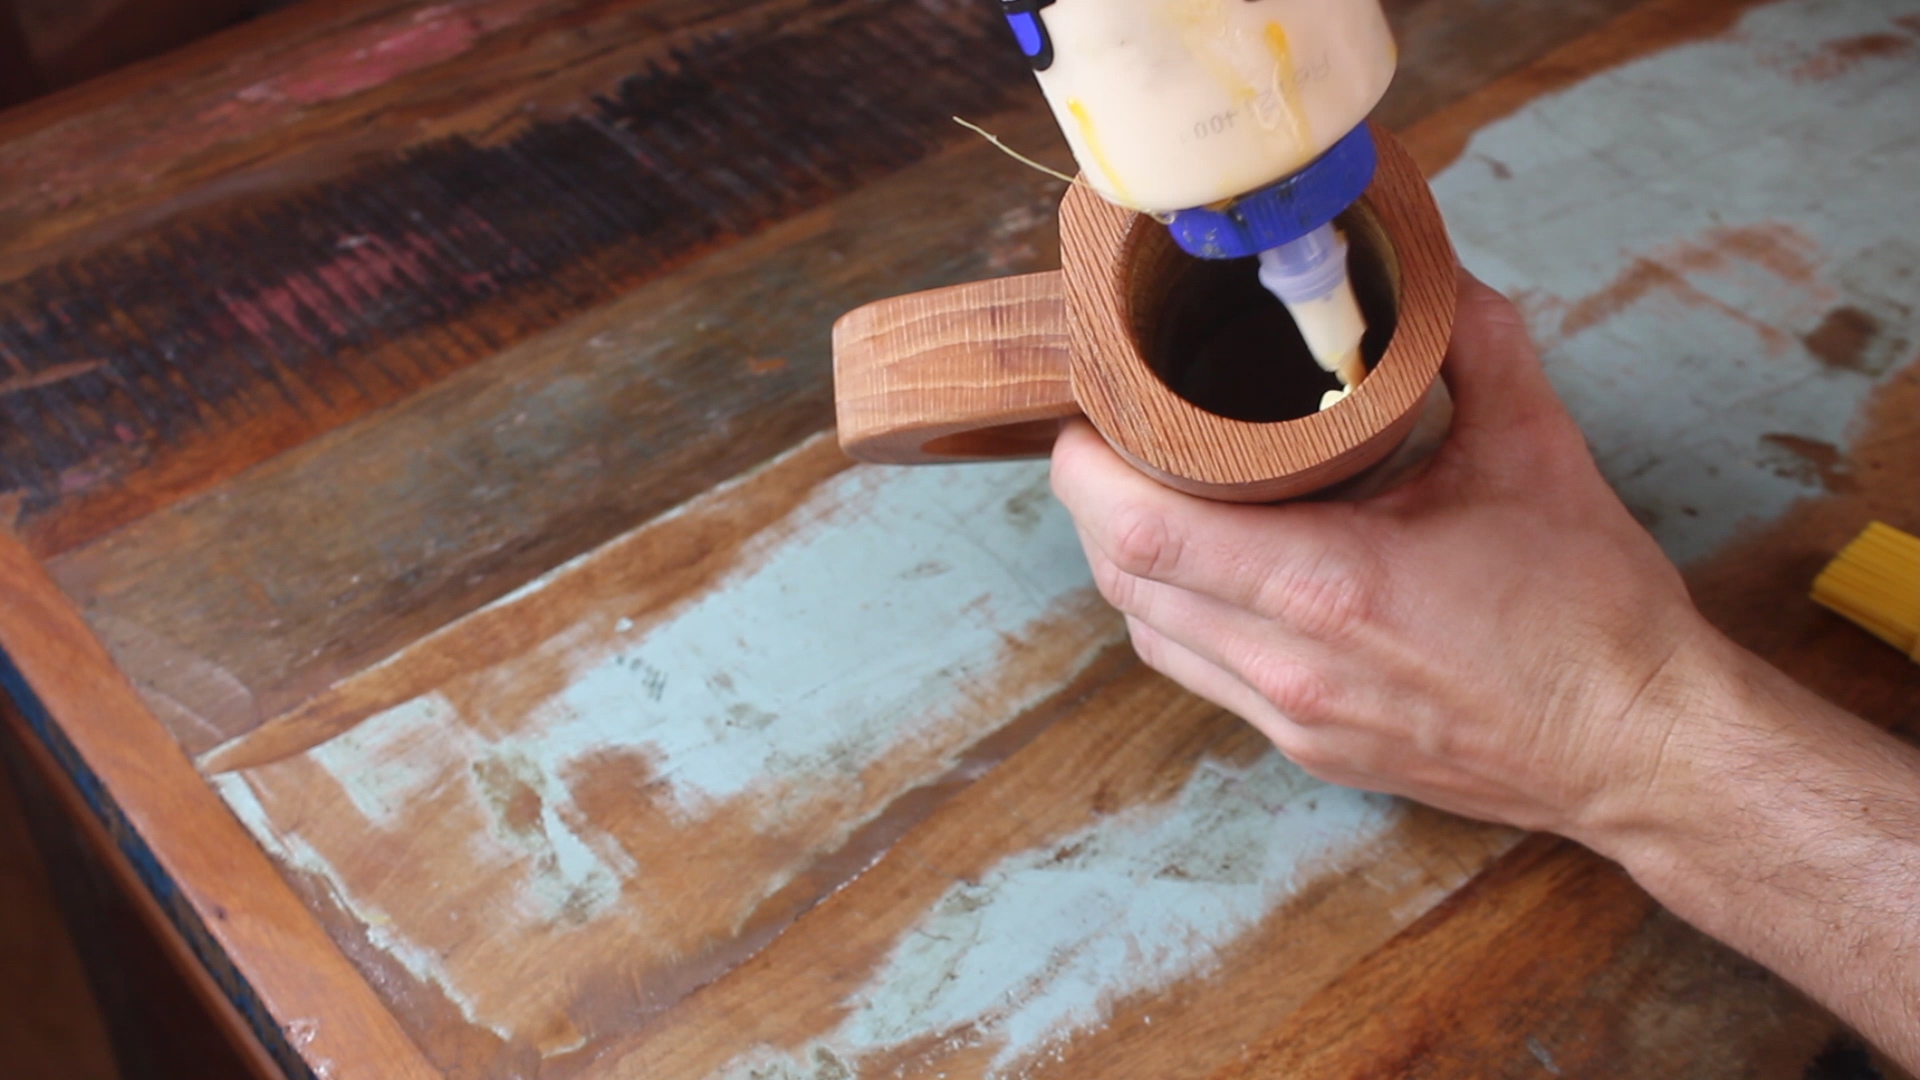
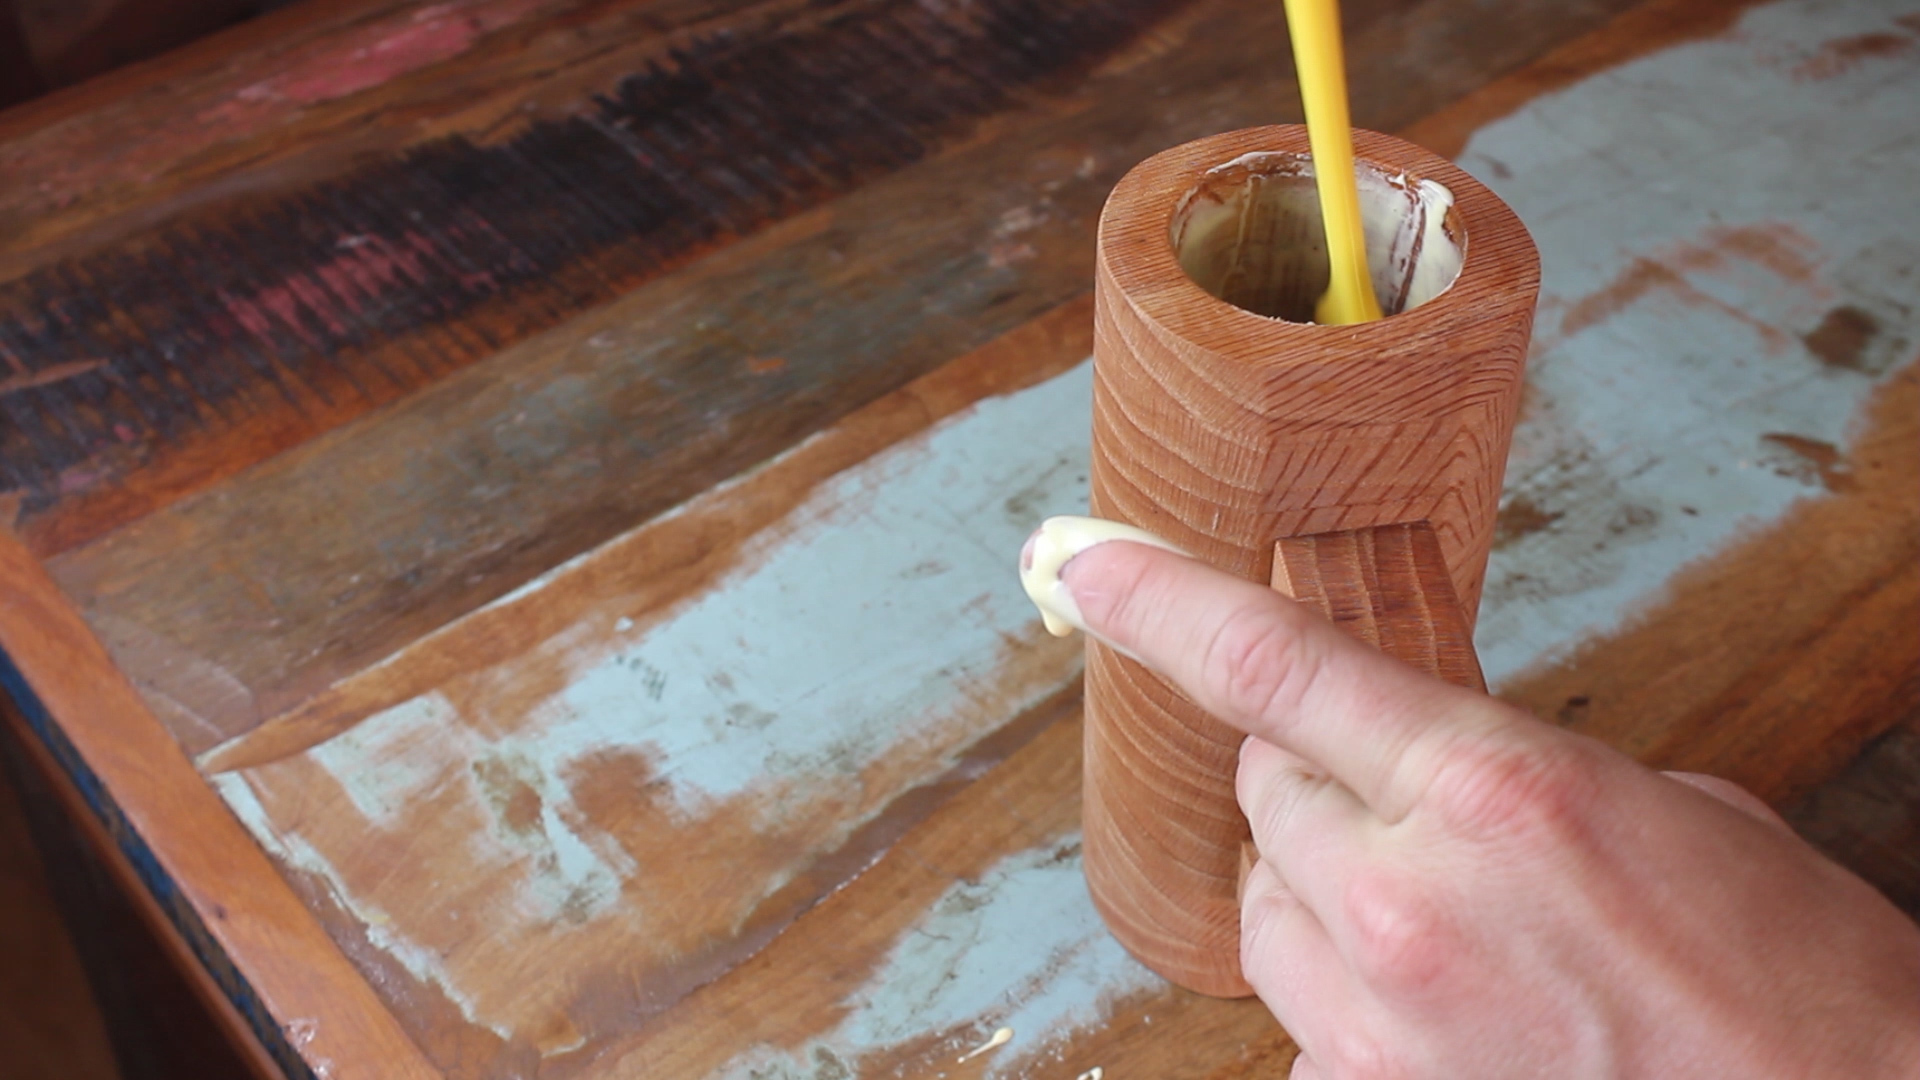
First, I applied mineral oil to finish the cup and bring out the color and grain (looked awesome!). Second step was to take wood glue (food safe and water proof) and rub a few layers of it on the inside of the mug to help protect the interior.
NOTE - This by no means is the only way to do this, it just made the most sense to me based on what materials I had at my apartment. I'll let you know how the glue sealant holds up...
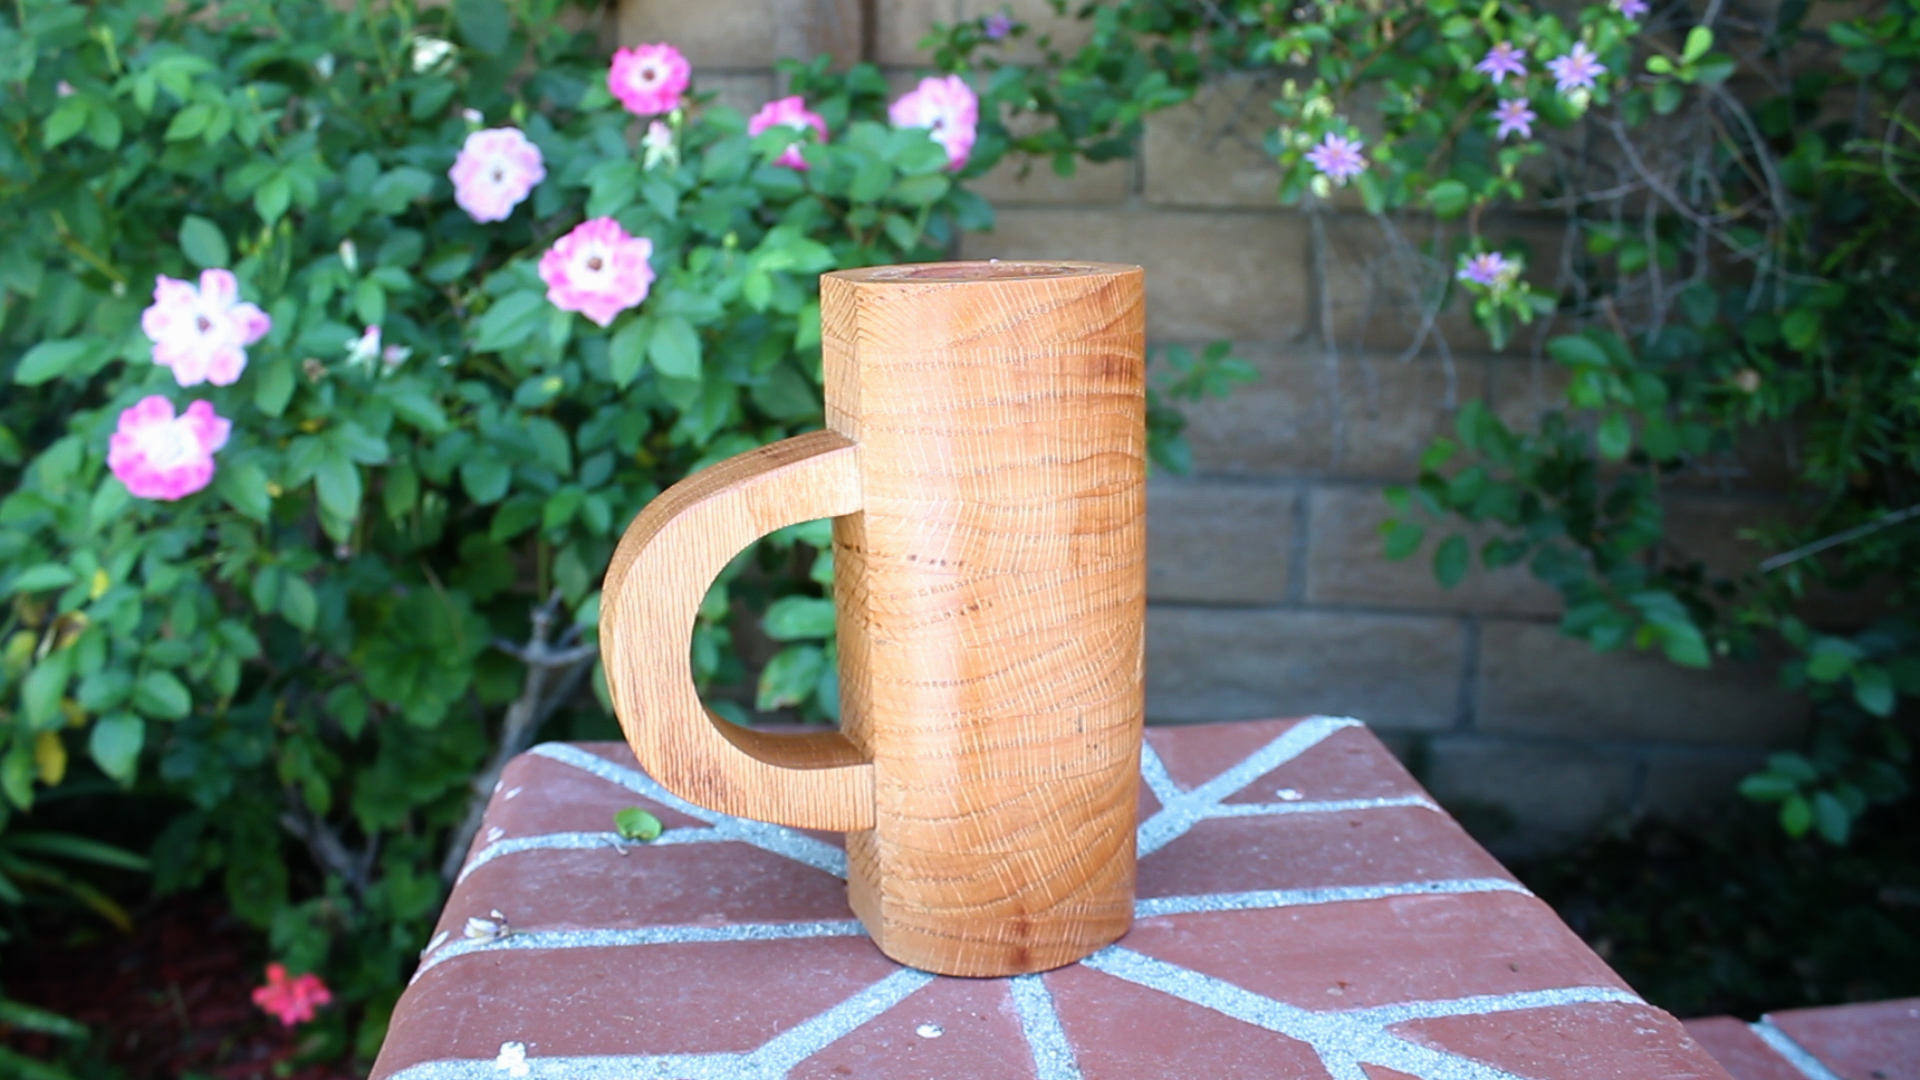
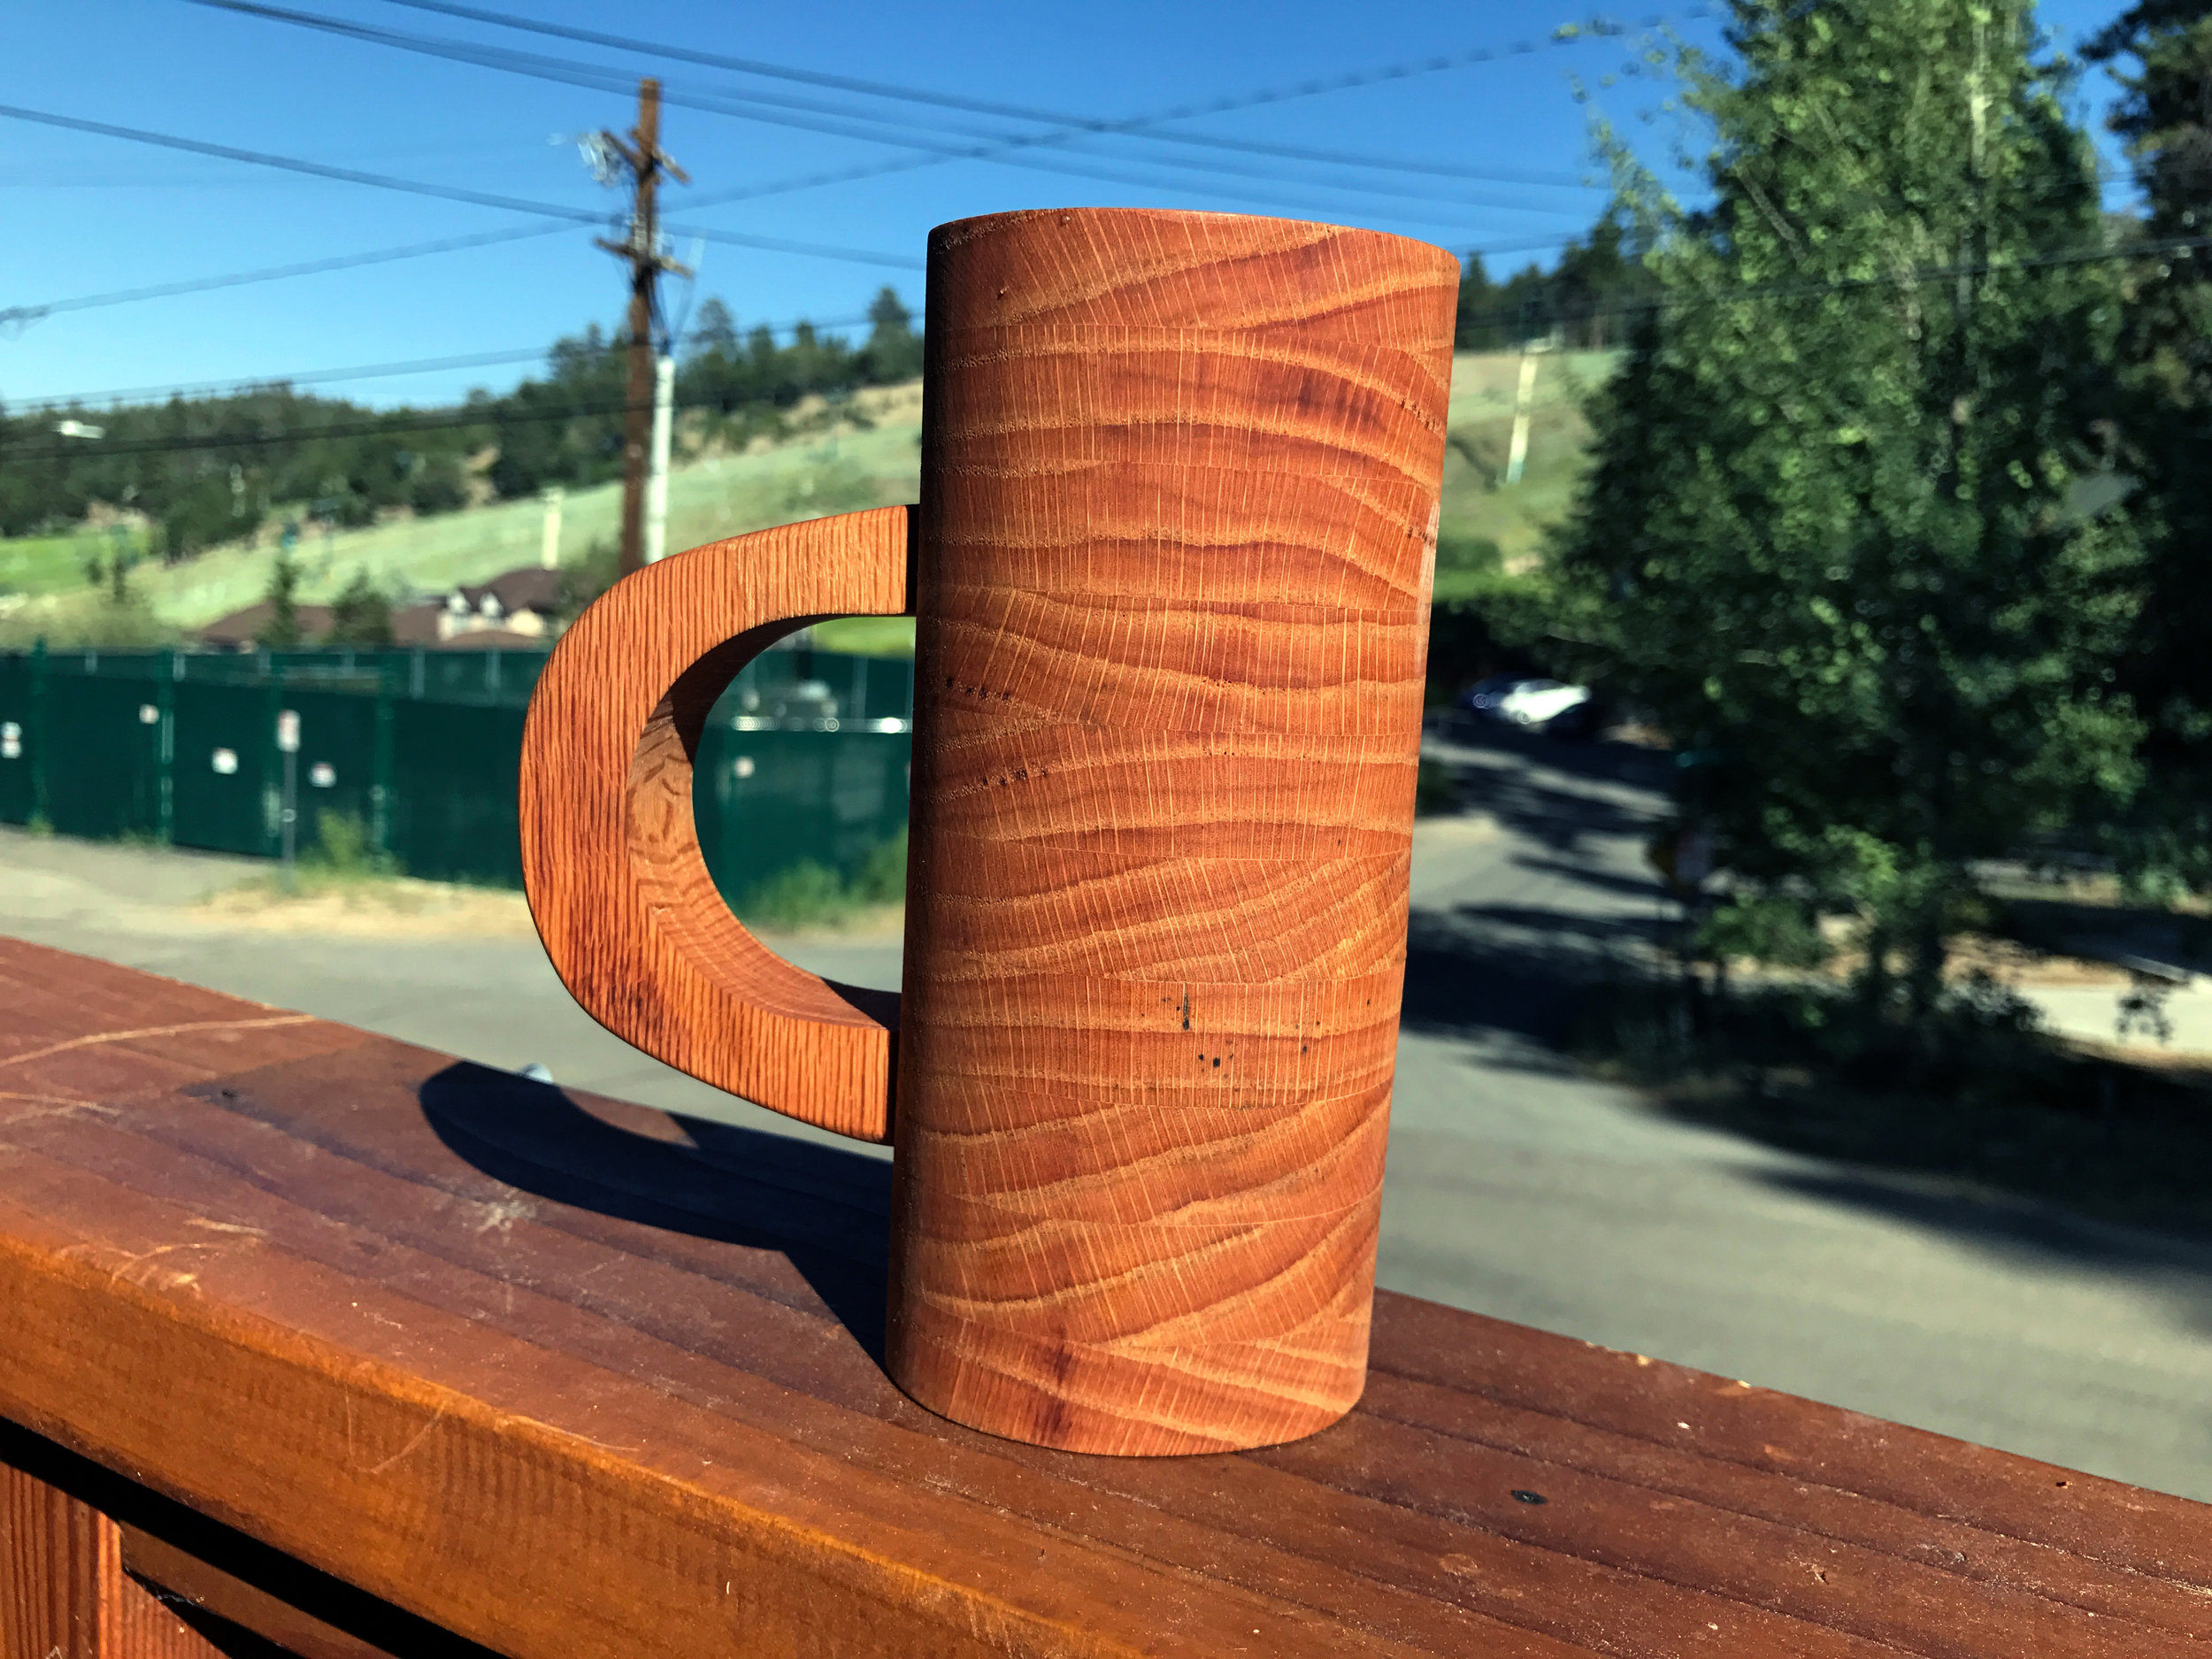
Then I was finished! Below are final pictures of the mug! I think it is pretty awesome! Grain looks great and the directions of which it runs looks fantastic, the shape is basic but fun looking, and it functions great!

TOOLS
RYOBI Circular Saw
RYOBI Power Drill
RYOBI Stationary Bench Sander
RYOBI Band Saw
Wen 12.5” Thickness Planer
MAKITA Paddle Switch 4.5” Angle Grinder
ARBORTECH TURBOPlane Blade
Forstner Bit (2.125”)
Vice Clamp
BESSEY Economy 2.5” x 12” Clutch Clamps
Compass
Tape Measure
Hand Sanding Sponges (220 and 320 Grit)
3M Face Shield
FILM / EDIT EQUIPMENT:
Canon Rebel EOS T2i
Canon EF-S 18-55mm f/3.5-5.6 IS II Lens
Studio Lighting Equipment
Rode Microphone
Voice Recording
Adobe Premiere (Editorial)
As always, thank you for reading! I would be so grateful if you could please subscribe to my Youtube Channel for future projects. I put out videos every few weeks.
Cheers!
Zach