Thanks for checking out the full article!
Full video build is below, followed by detailed instructions with tools and measurements! You can subscribe to our YouTube channel by clicking here!
Now this is the second time around that I have built these shelves. The first time was for myself; this time, I was building them as a Christmas gift for my family. I've already blogged about them (see first post ever for me), but I'll go ahead and do it again as I went about building them differently.
MATERIALS
1 x 1" x 6" x 8' Whitewood
6 x Galvanized Pipe Nipple (8”L) (3/4" thick)
6 x 8" Galvanized Pipe Caps (3/4" thick)
6 x 8" Galvanized Pipe Flanges (3/4" thick)
Minwax Special Walnut
Textured Spray Paint
Matte Black Spray Paint
12 x Toggle Bolts (50lb/screw strength)
Green Interior Paint (4 parts water, 1 part paint)
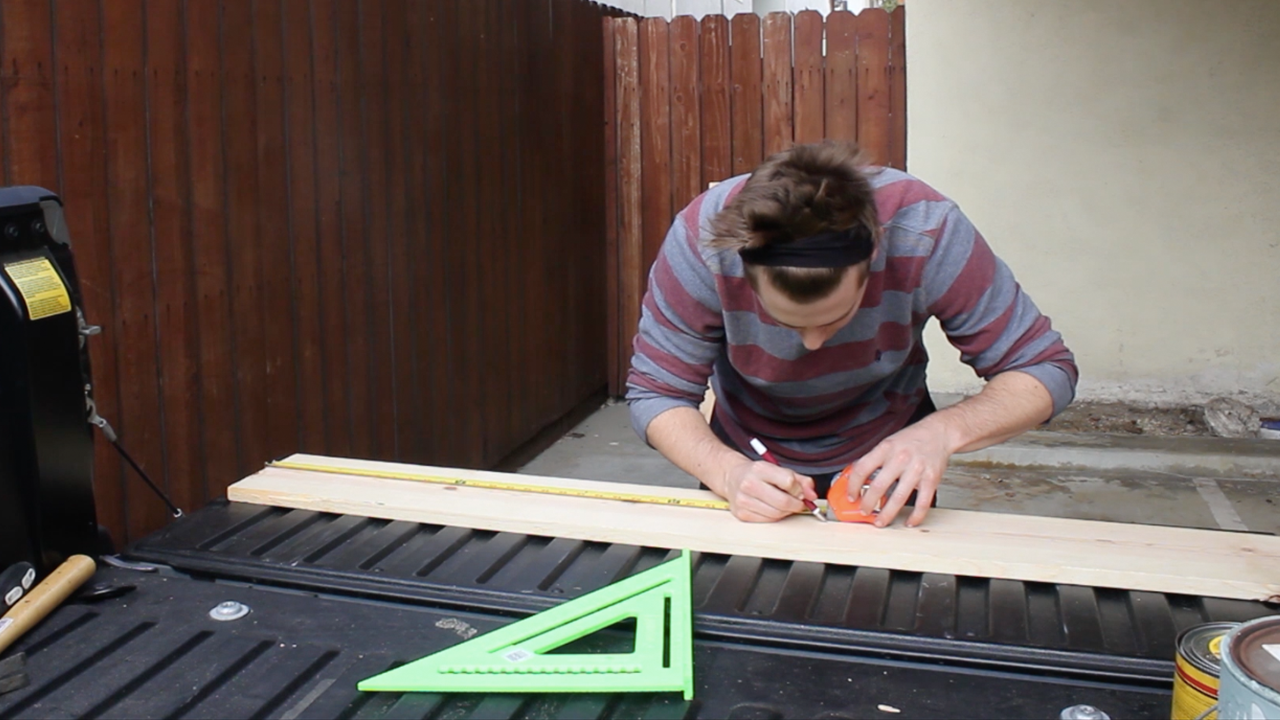
I started off by measuring out the length of my pieces. I had an 8 foot piece of wood, so I planned to make 3 x 32" shelves.
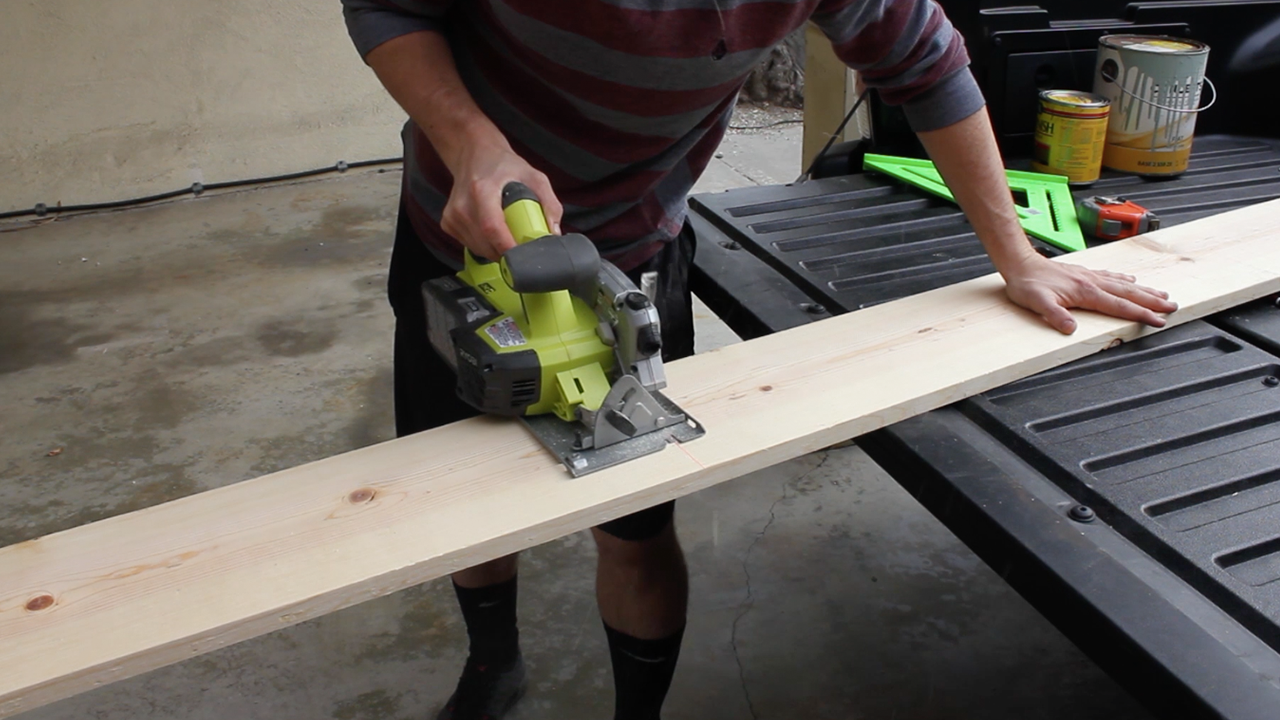
Using my rafter square to measure a straight line, I free cut my pieces to length using my circular saw. This can also be done using more advanced tools (a Miter Saw, for example) or more simple hand tools (like a standard hand saw).
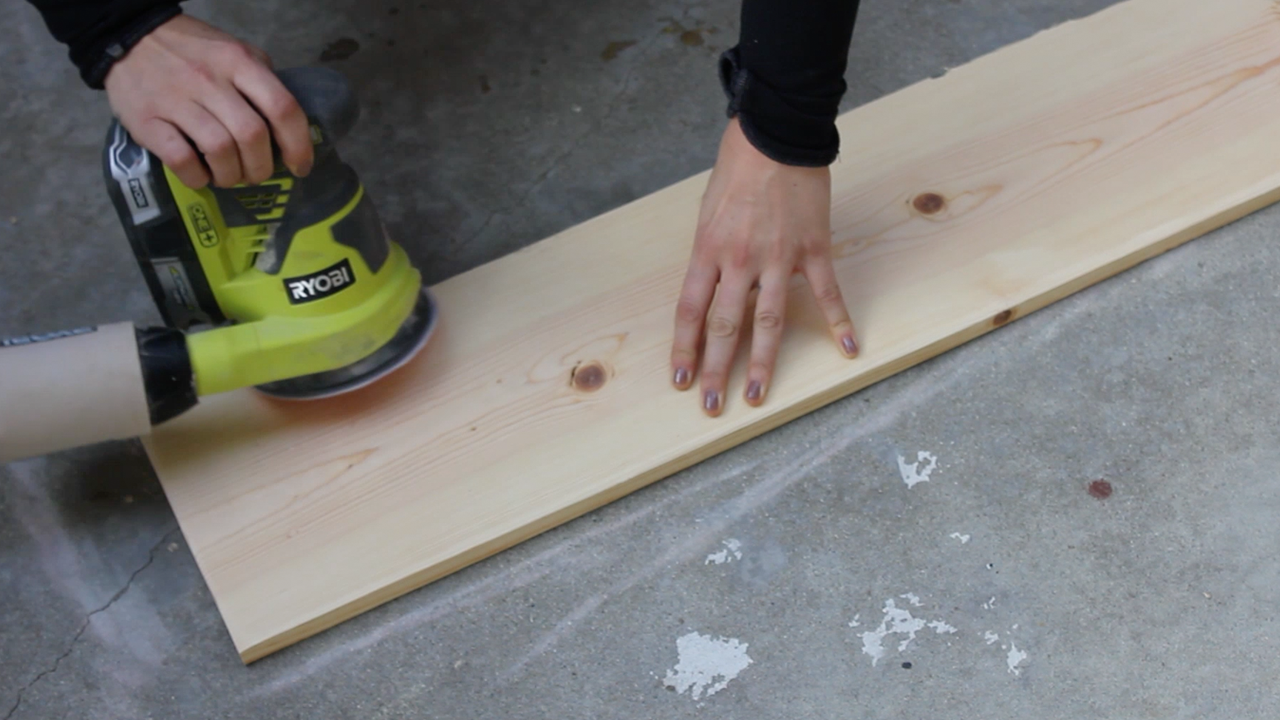
Next up, we sanded down the edges of the boards using an orbital sander and 60 grit paper to take down the edges significantly. You can also use a hammer to round off the edges, as well as a hand sanding block with finer grit (90-120) to smooth things out after the 60 grit.
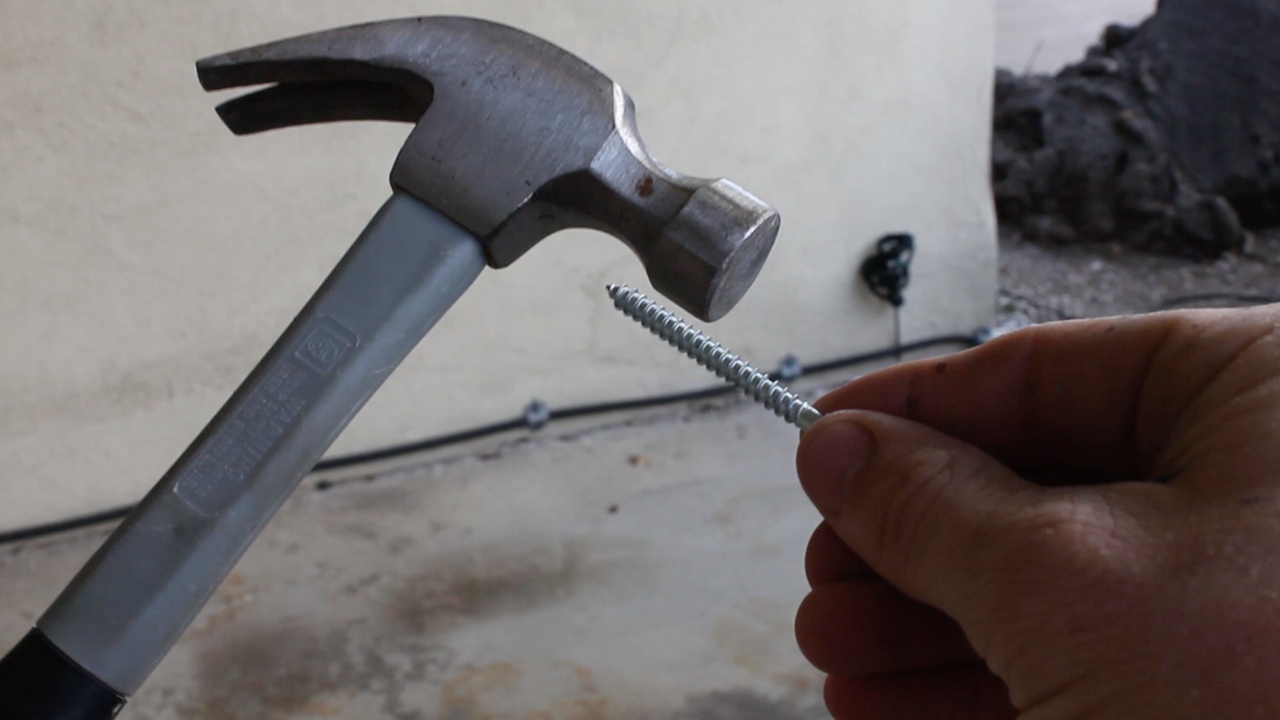
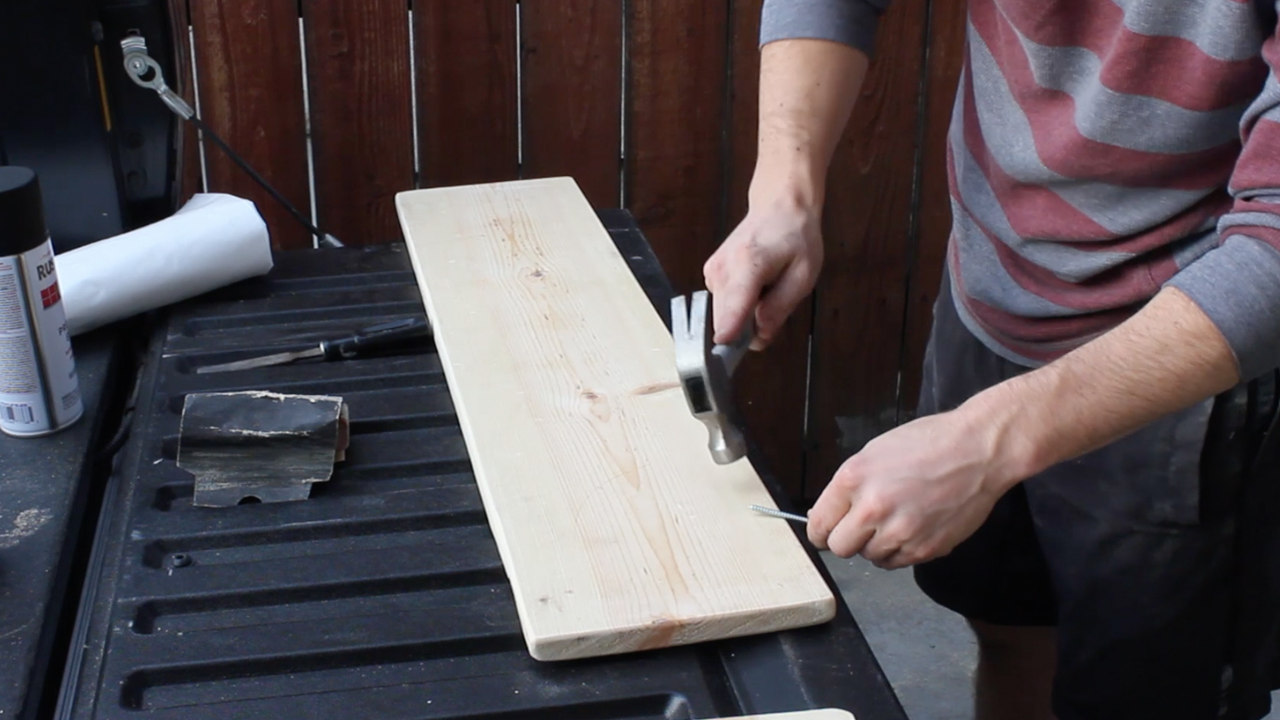
Next, I used my hammer and a screw to bang up the edges and faces - this gives them a wear and tear look. You can do this as much or as little as you want - totally up to the look you want to achieve!
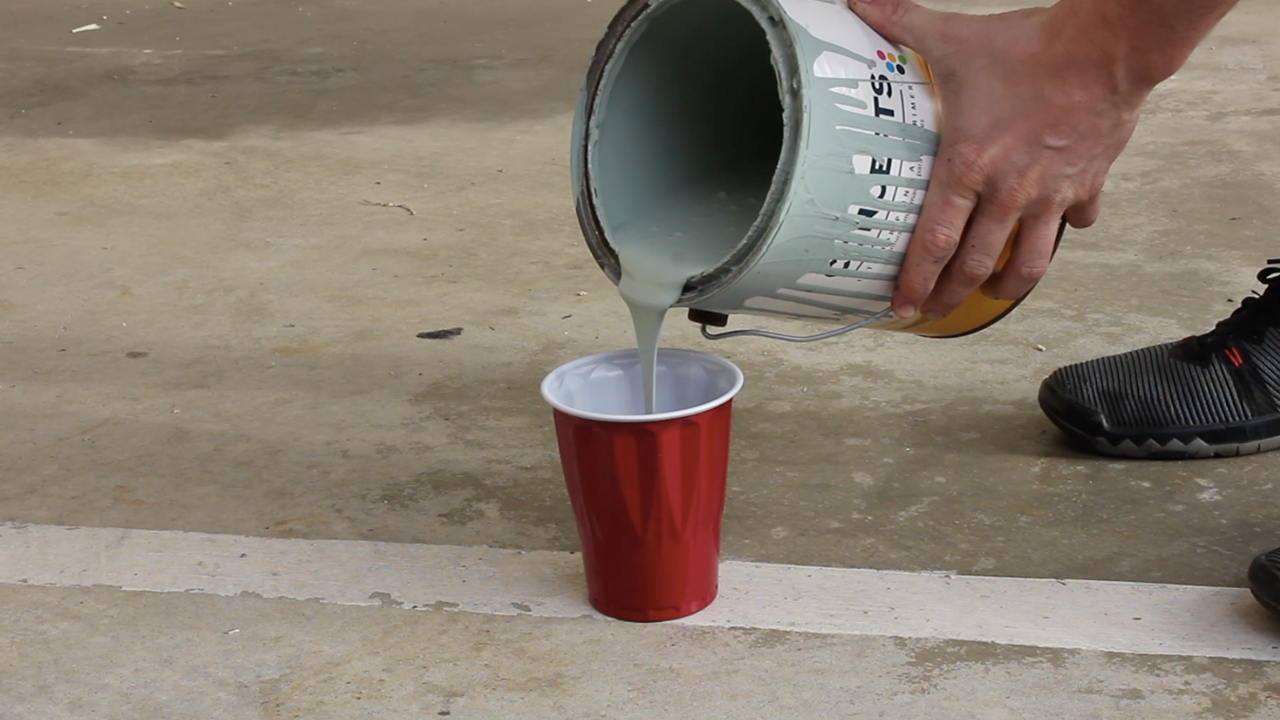
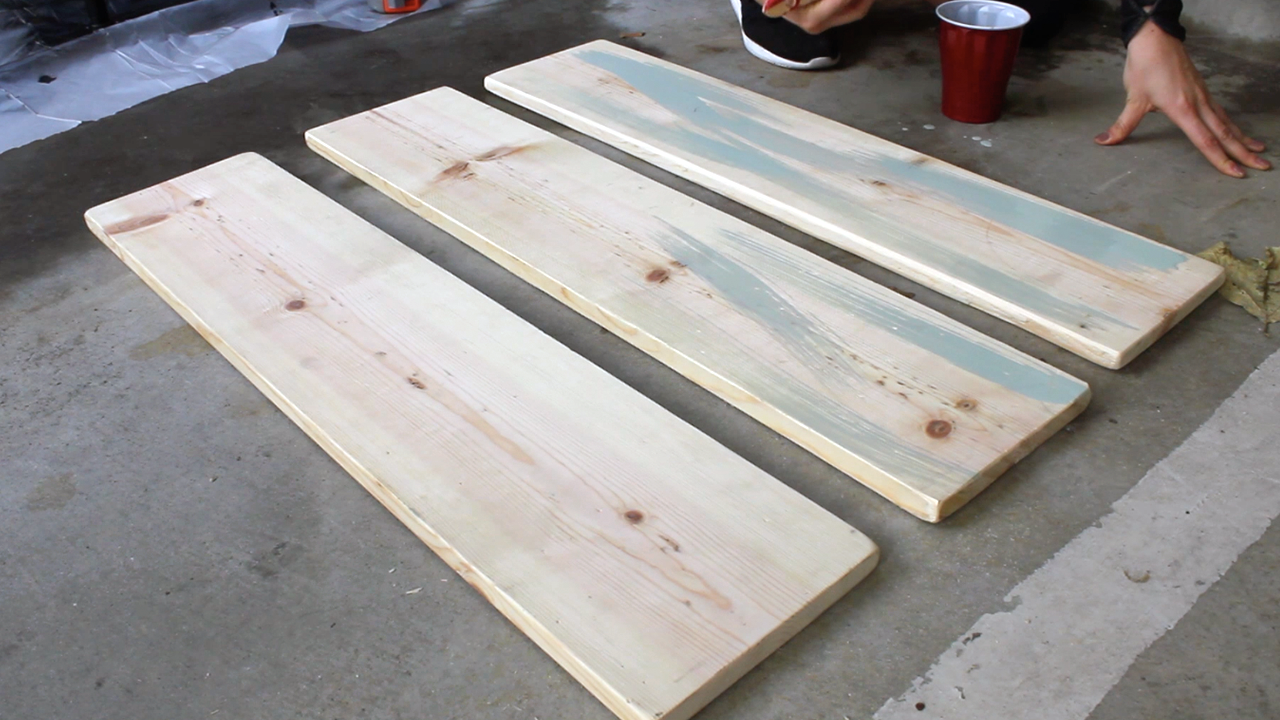
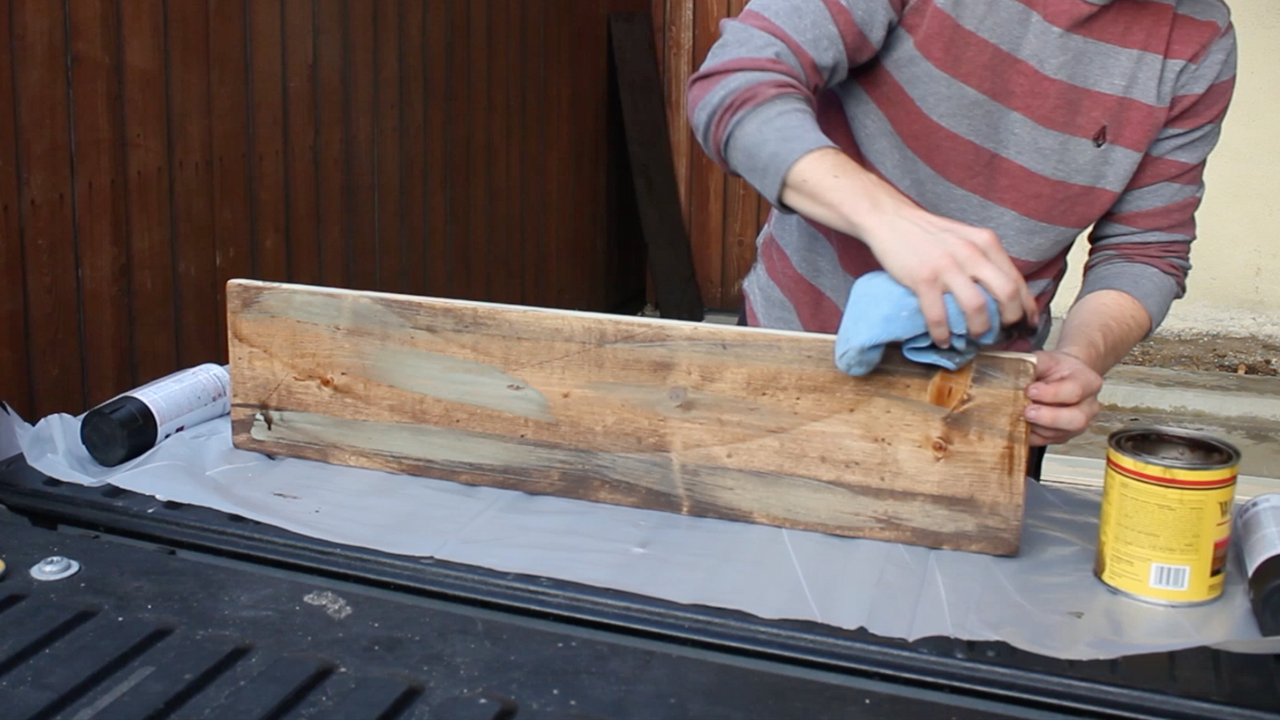
Next, we mixed up some left over interior paint with water to make a thing solution to paint on the boards. The reason we painted first before staining is that the paint will show through really well after it dries - give it a try! I then stained all sides of the board with one coat of Minwax's Special Walnut. This overall is a fantastic color to use on any DIY rustic project.
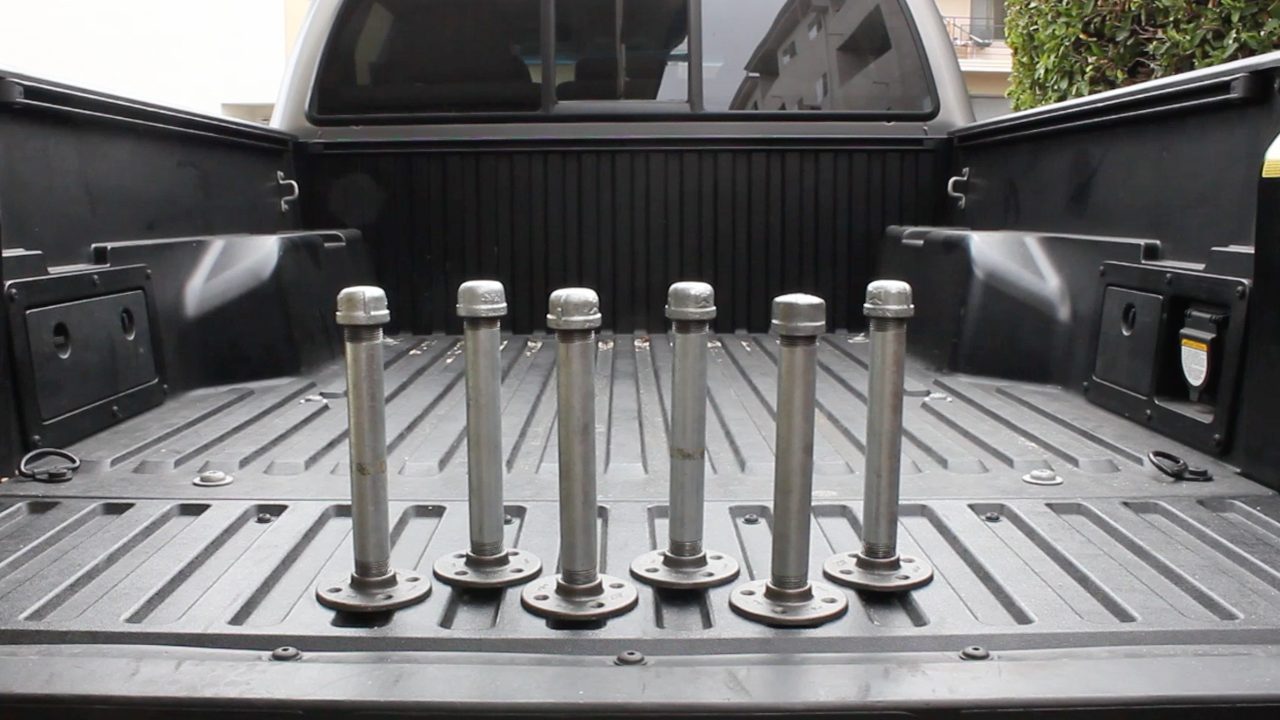
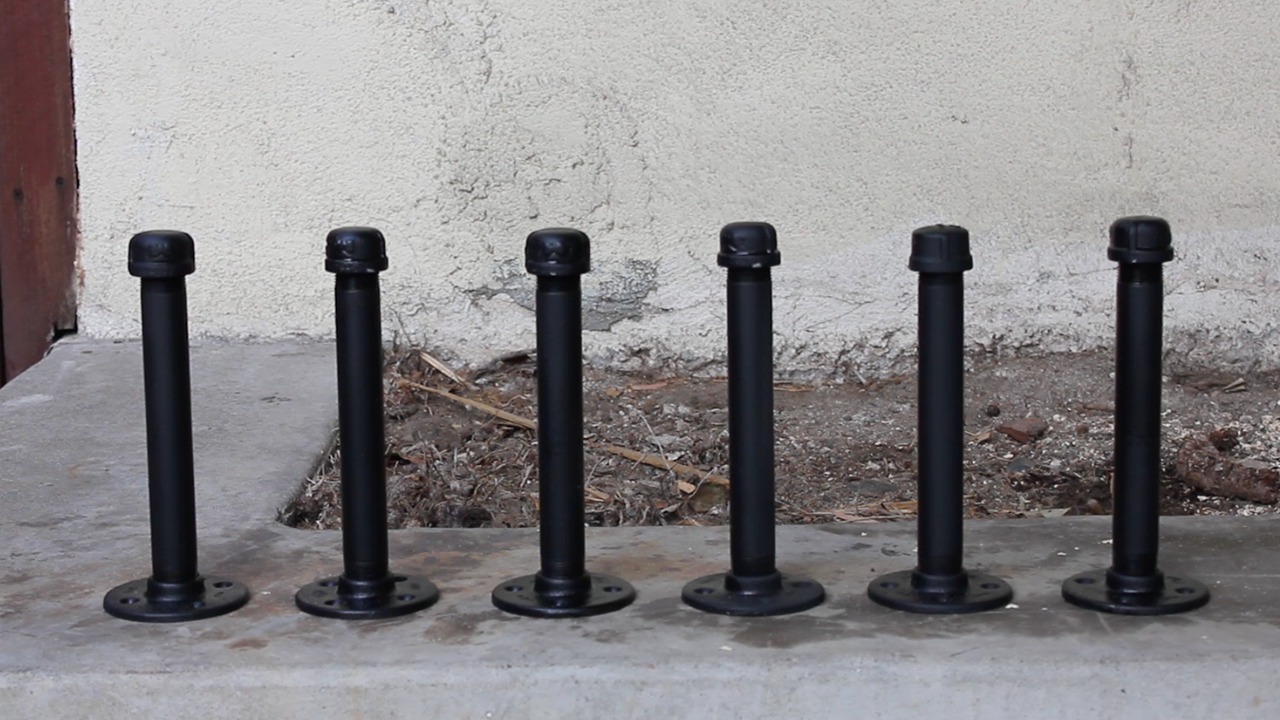
While the boards dried, I assembled and spray painted my three piece galvanized pipe wall mounts. Make sure you get all surfaces, even underneath the cap!

Once everything was dry, it was time to hang. Now, since these were a gift, I don't have images of me hanging them, but the key to hanging them is to make sure they are mounted properly. Since the width of the pipes (based on the length you cut your boards) won't fit in standard studs, I recommend using these toggle strap screws to anchor to your dry wall. There are hundreds of videos out there on how to use these.

Here are what my final hung shelves look like. The version I built this time around will look nearly identical when hung up.

This project is super easy to do and can be done with very few tools. If you want to hand these shelves, you'll need a power drill as well.
TOOLS
RYOBI Circular Saw
RYOBI Power Drill
RYOBI Cordless Orbital Sander (60 Grit)
12” Rafter Square
Level (24’)
Hammer
Hand Sanding Sponges (120 Grit)
FILM / EDIT EQUIPMENT:
Canon Rebel EOS T2i:
Canon EF-S 18-55mm f/3.5-5.6 IS II Lens
Rode Microphone
Voice Recording
Adobe Premiere (Editorial)
Below is a picture of the final shelves that I build this time around - I think they honestly look even better than the first set I build last year. Kind of jealous I have to give them away...

Thanks for reading! I would be so grateful if you could please subscribe to my new Youtube Channel for future projects. I put out videos every two weeks.
Cheers!
Zach