THANKS FOR CHECKING OUT THE FULL ARTICLE!
I'D AlSO RECOMMEND YOU CHECK OUT MY YOUTUBE CHANNEL BY CLICKING HERE.
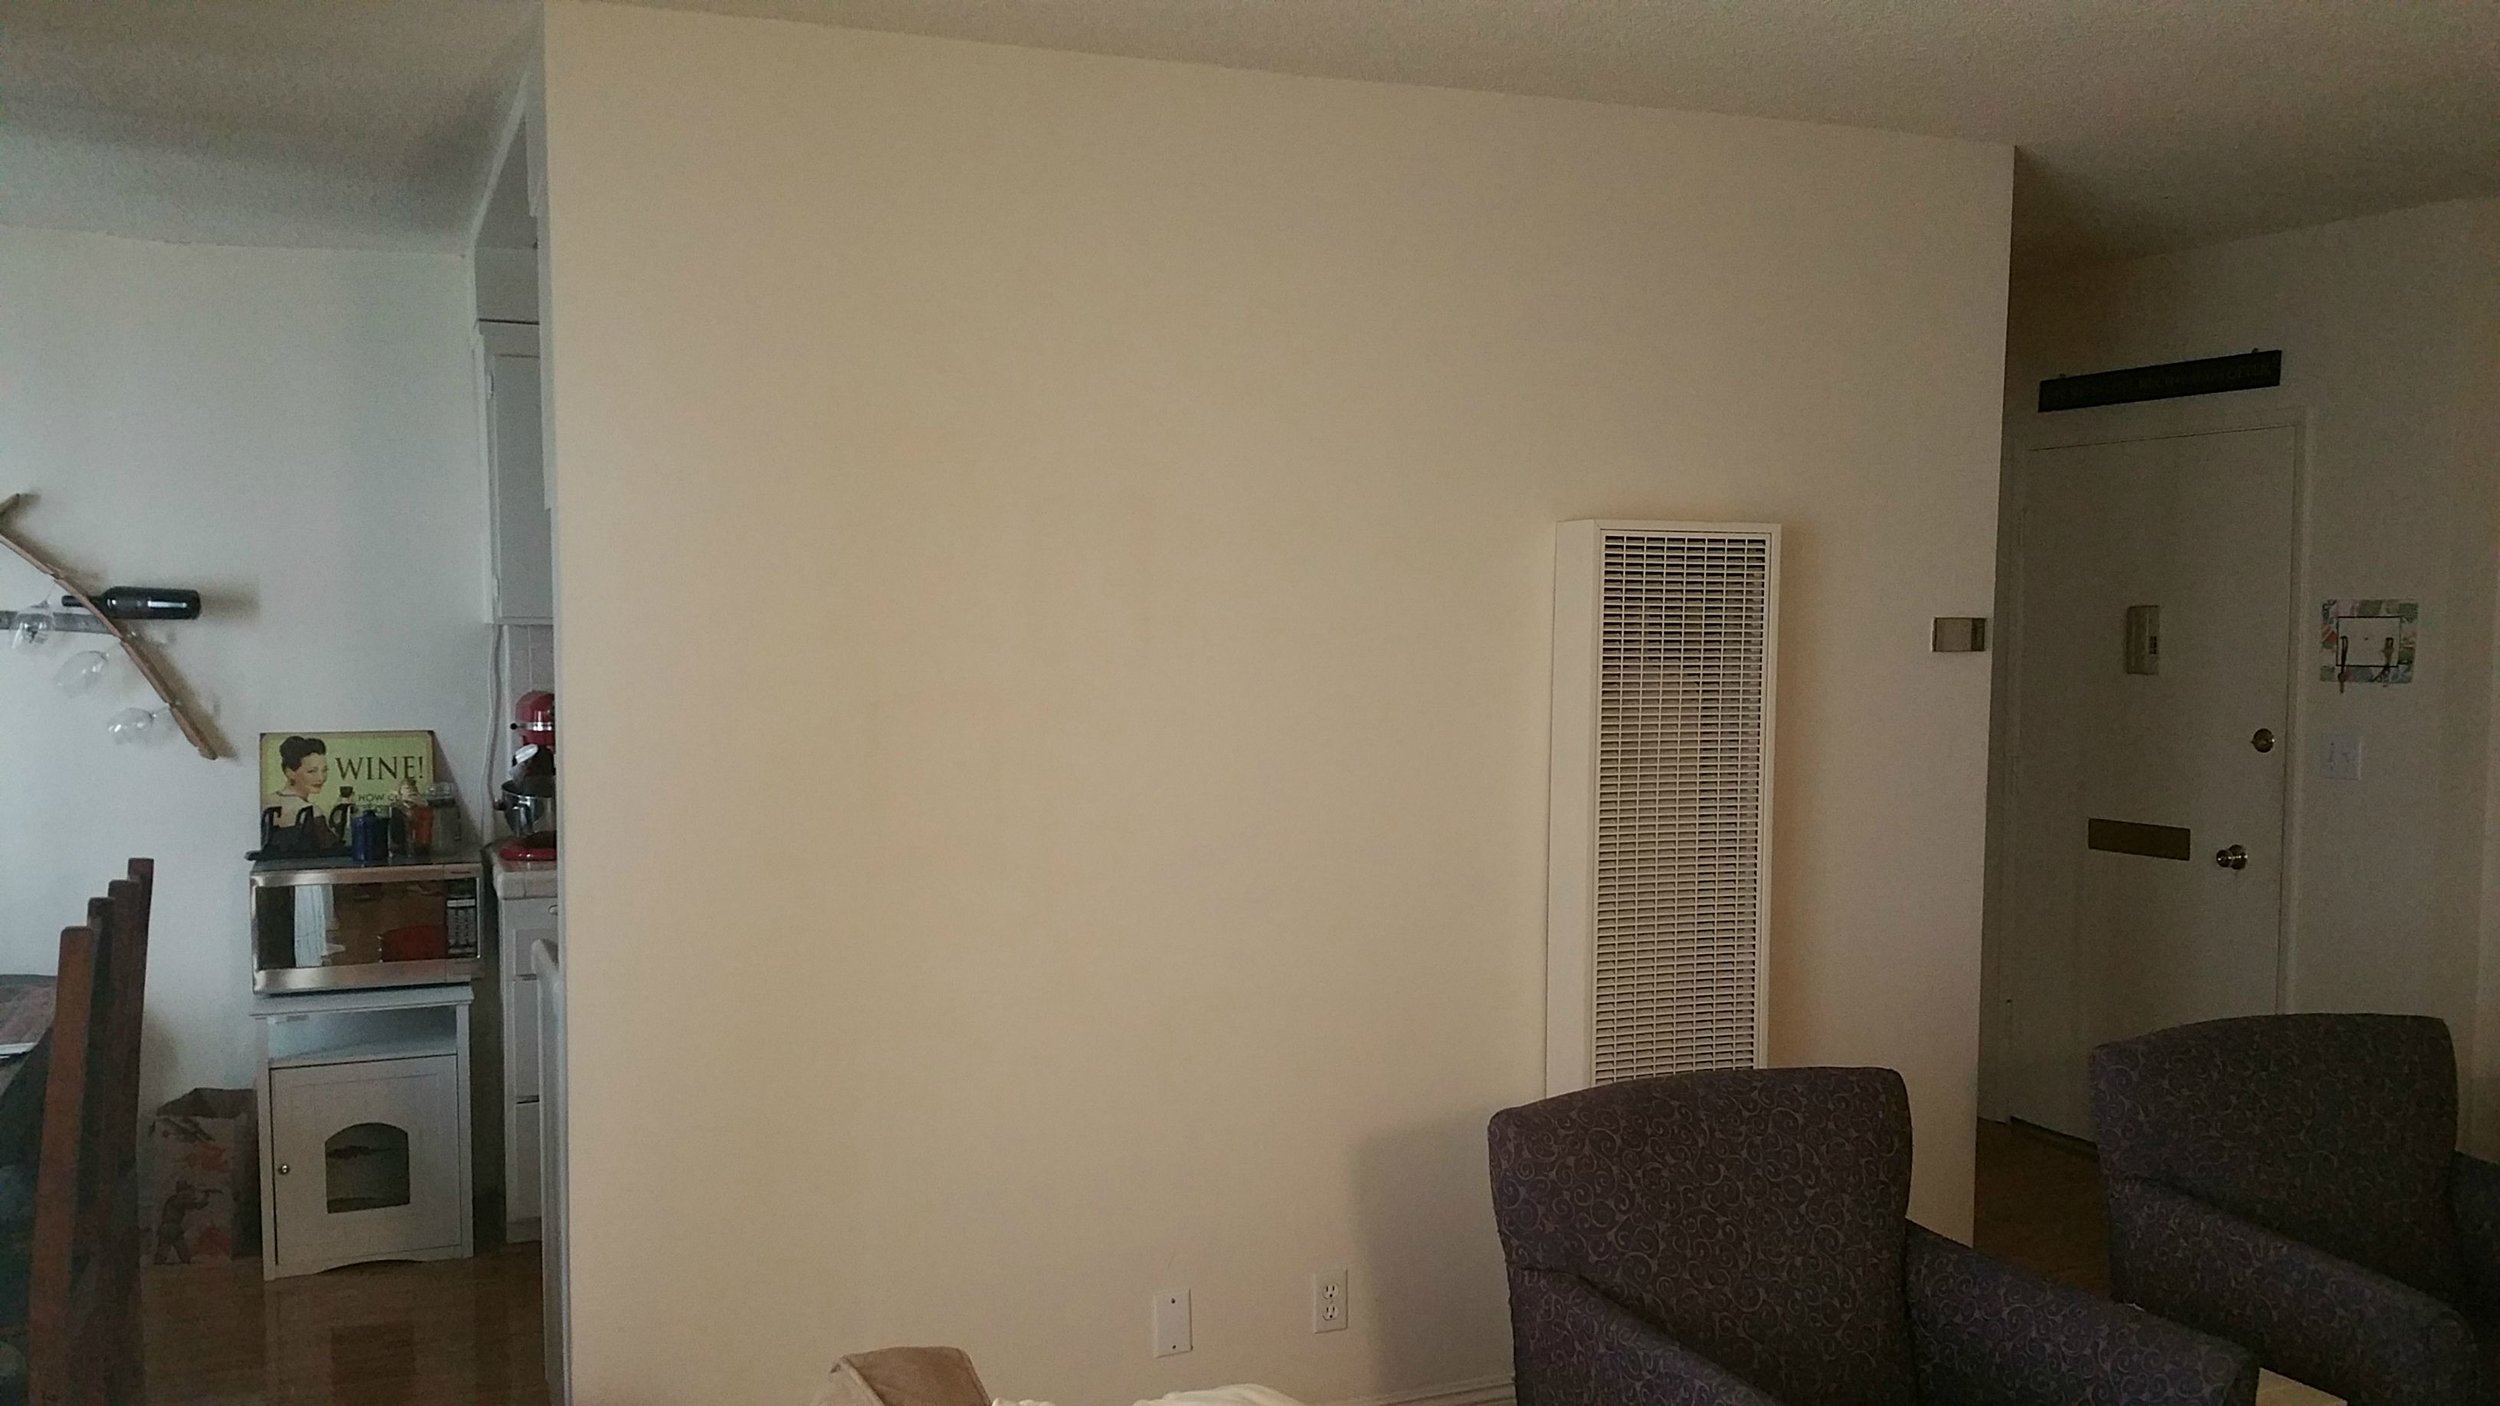
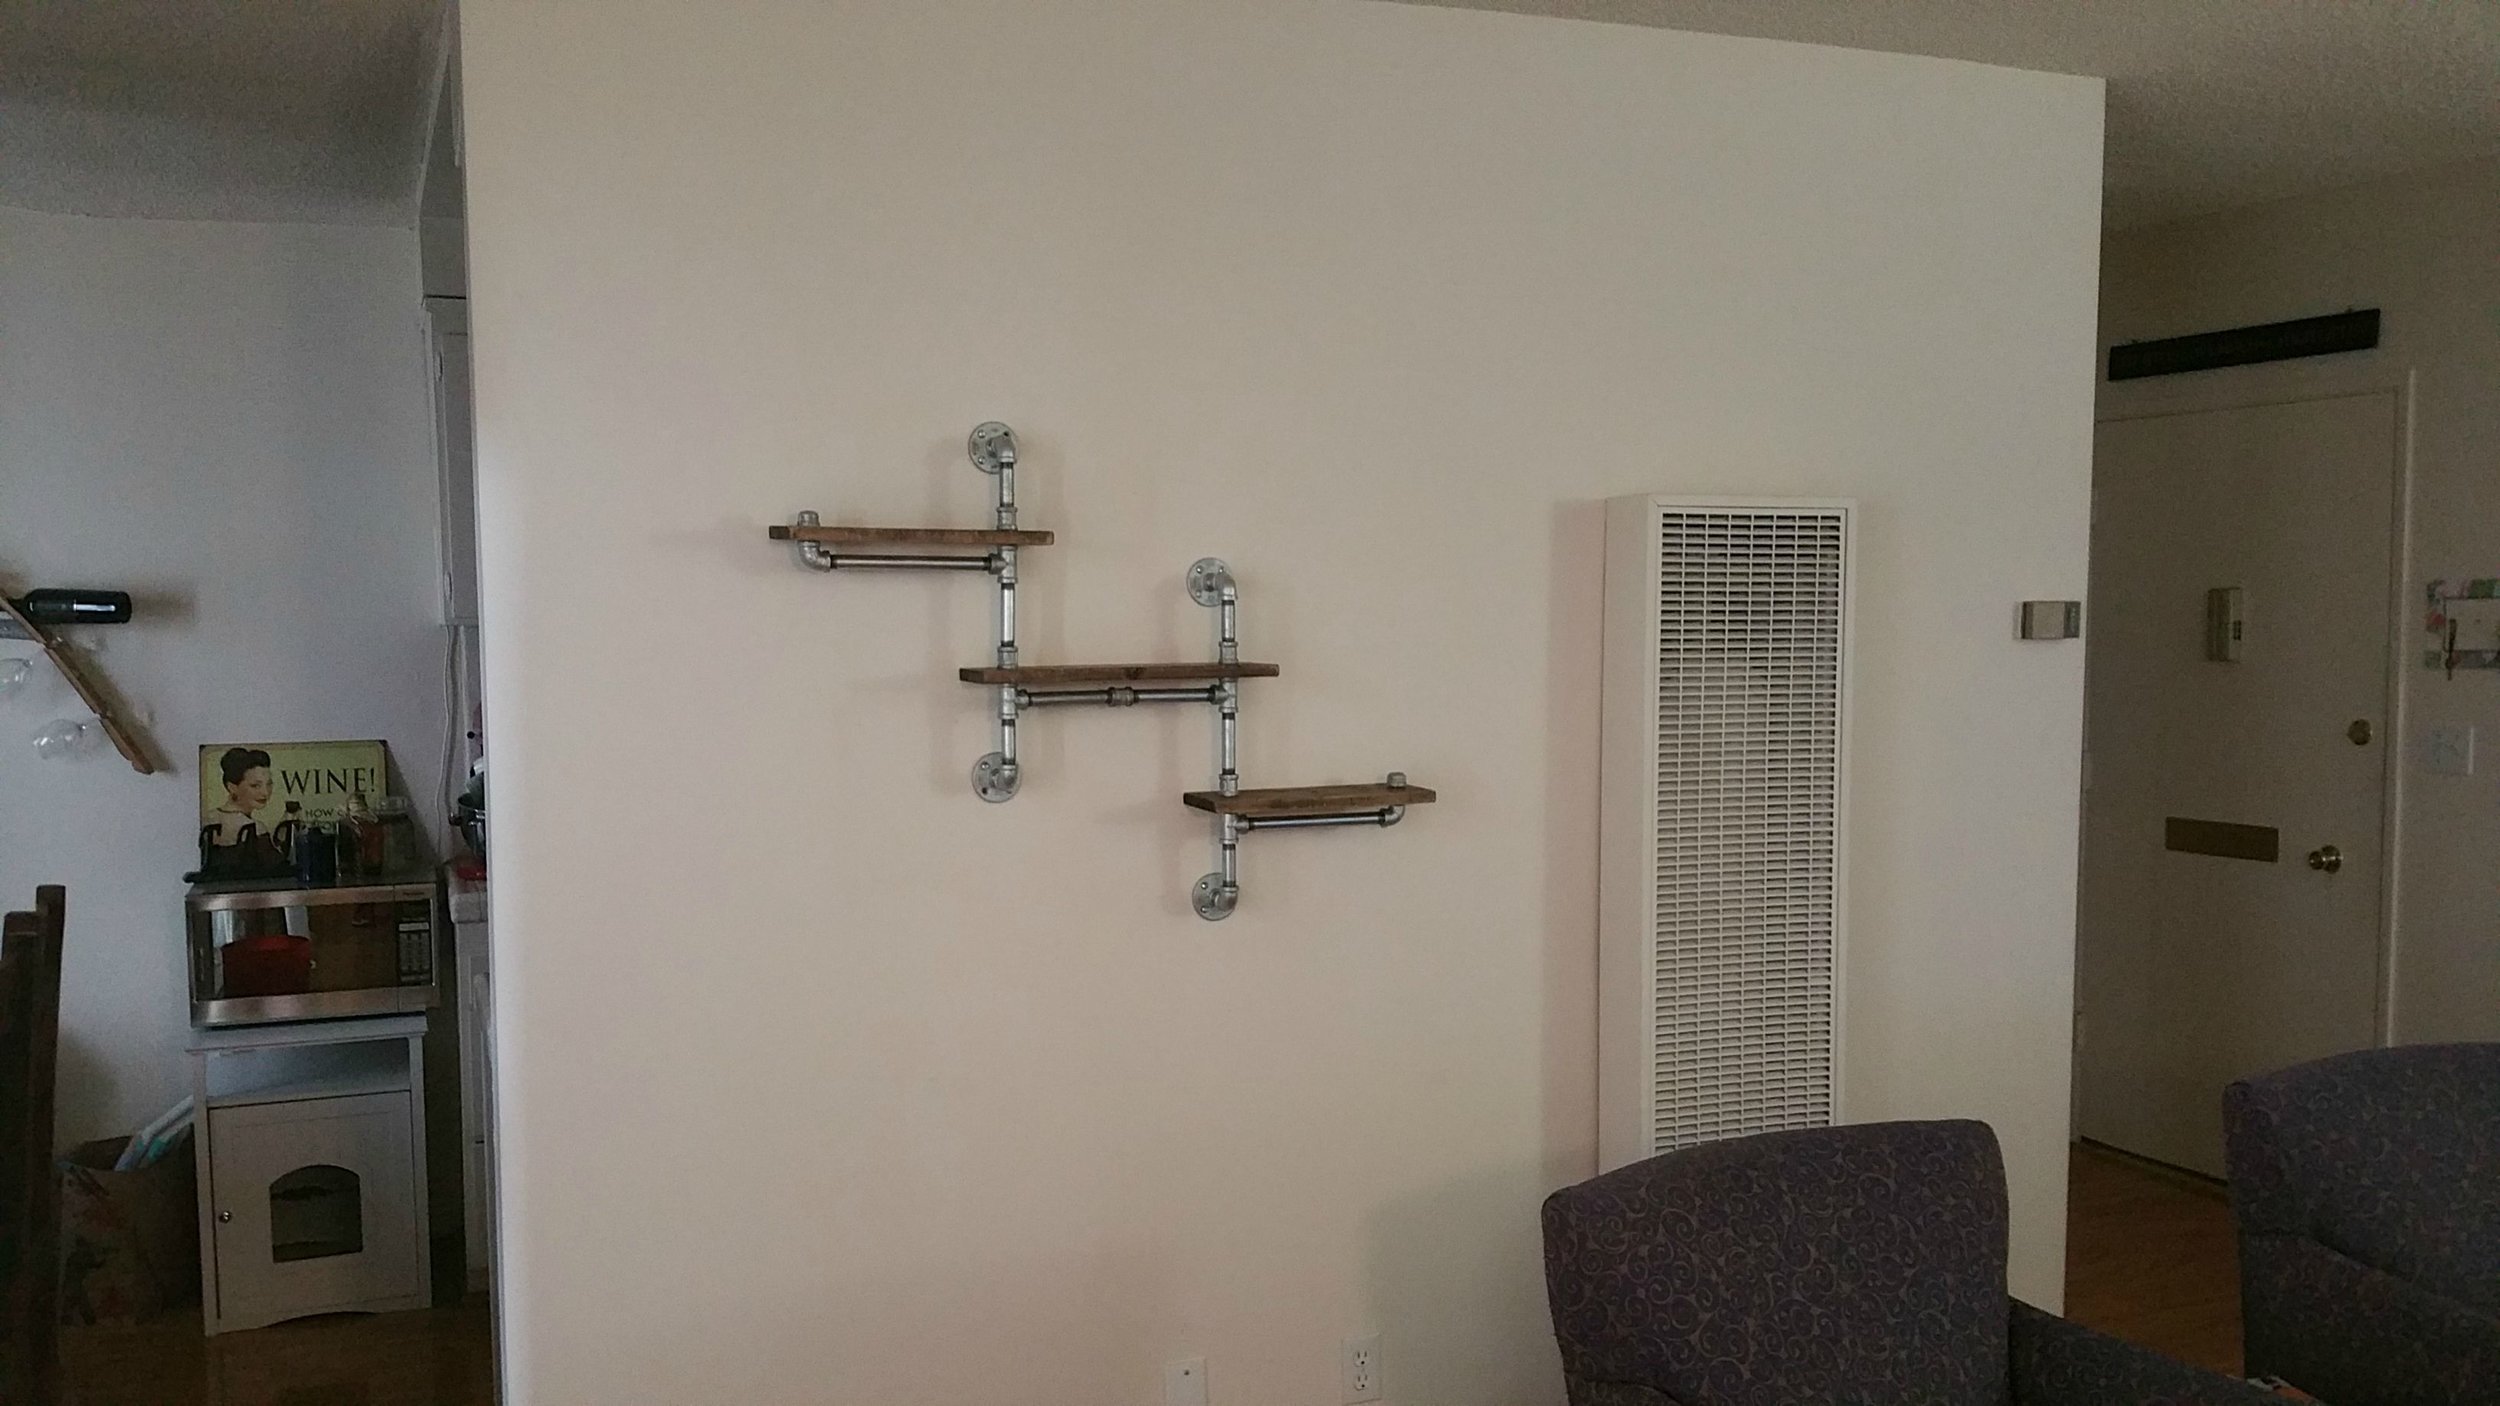
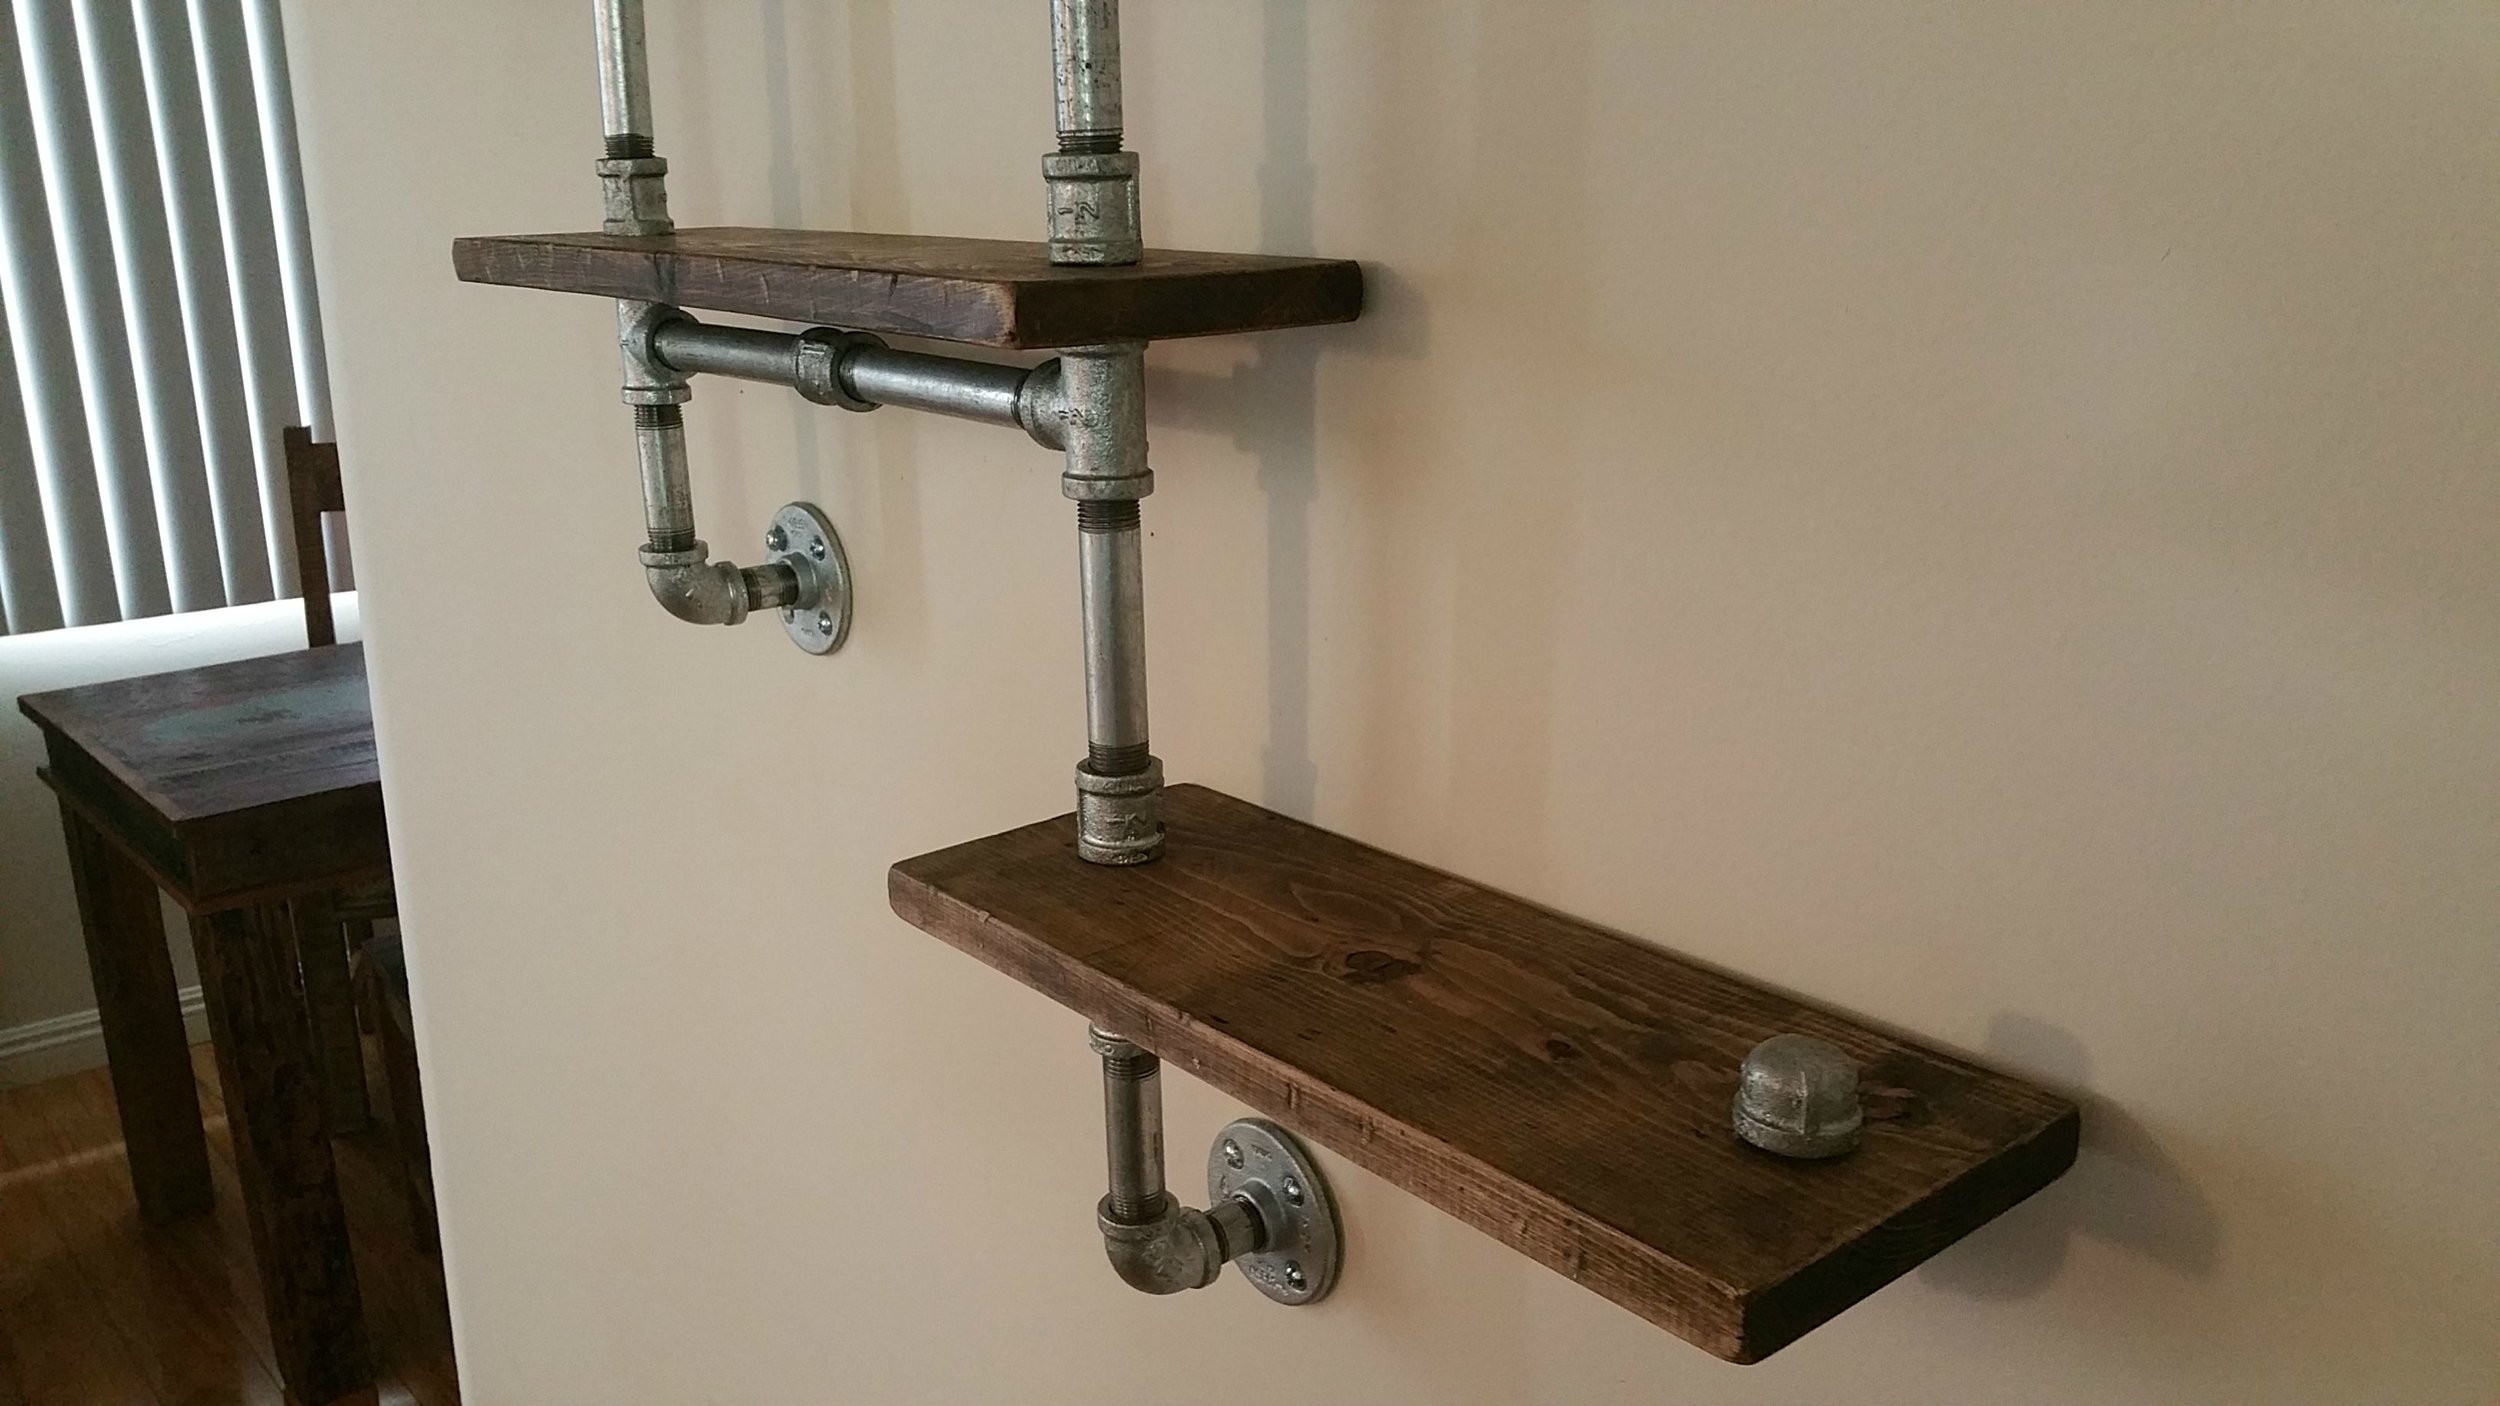
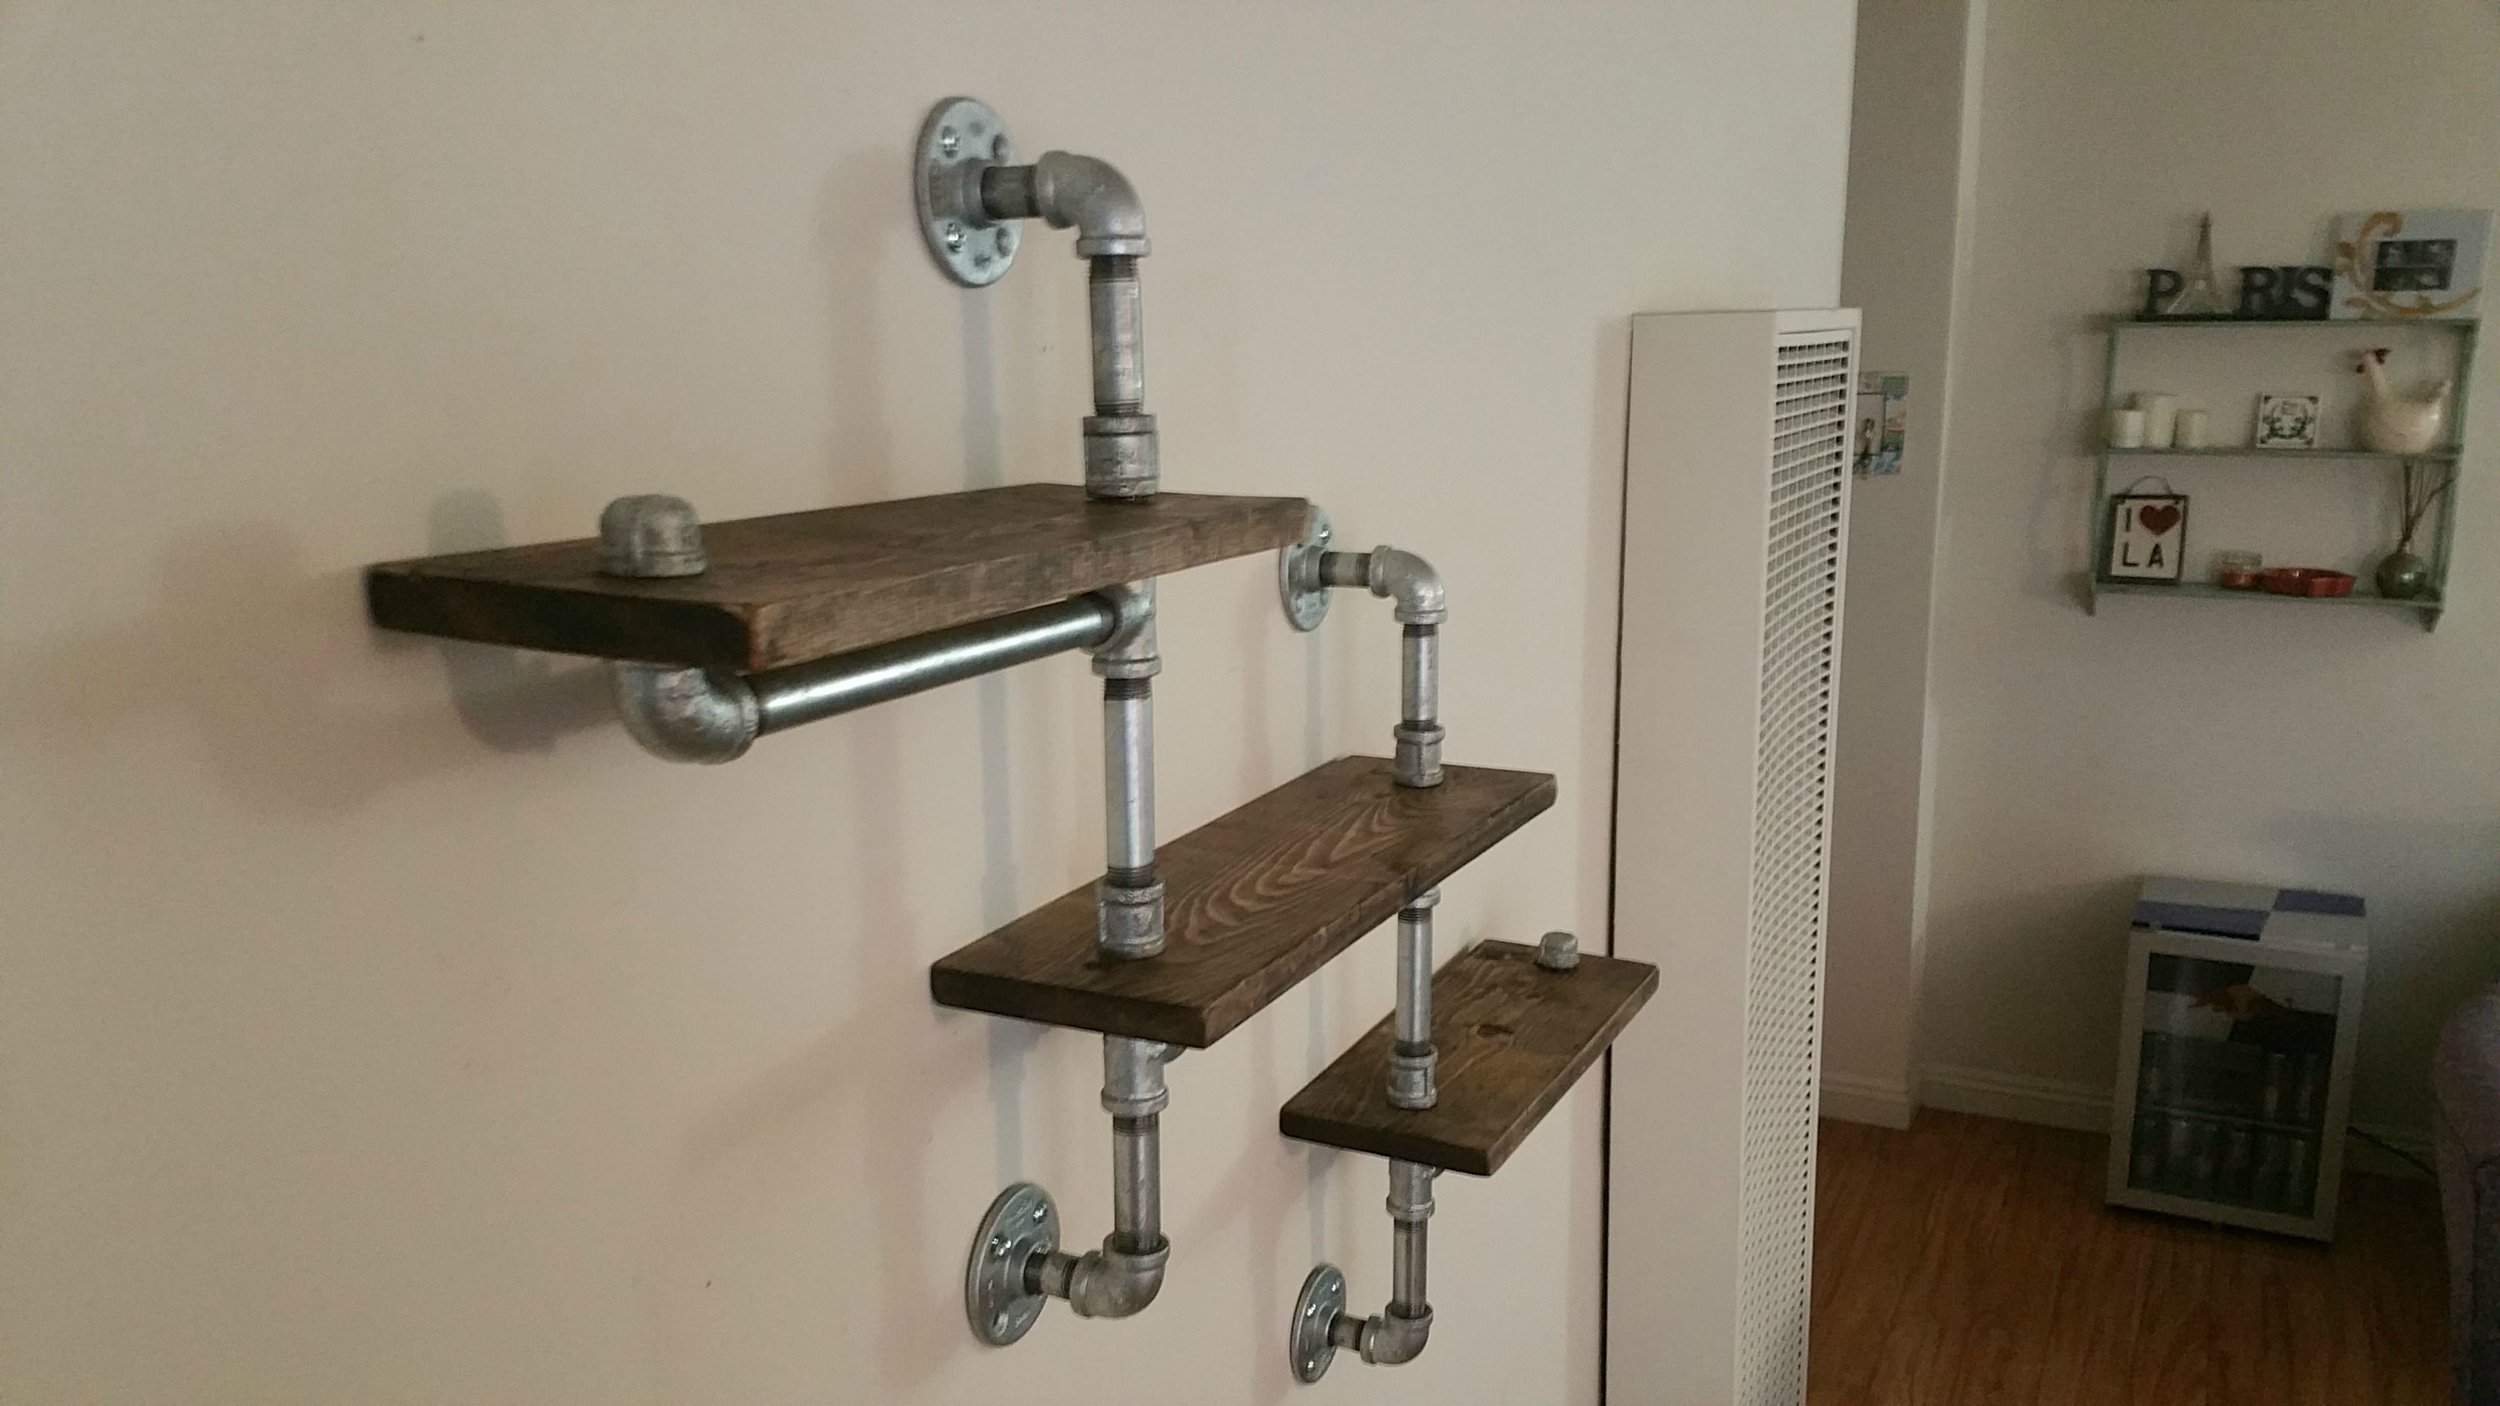
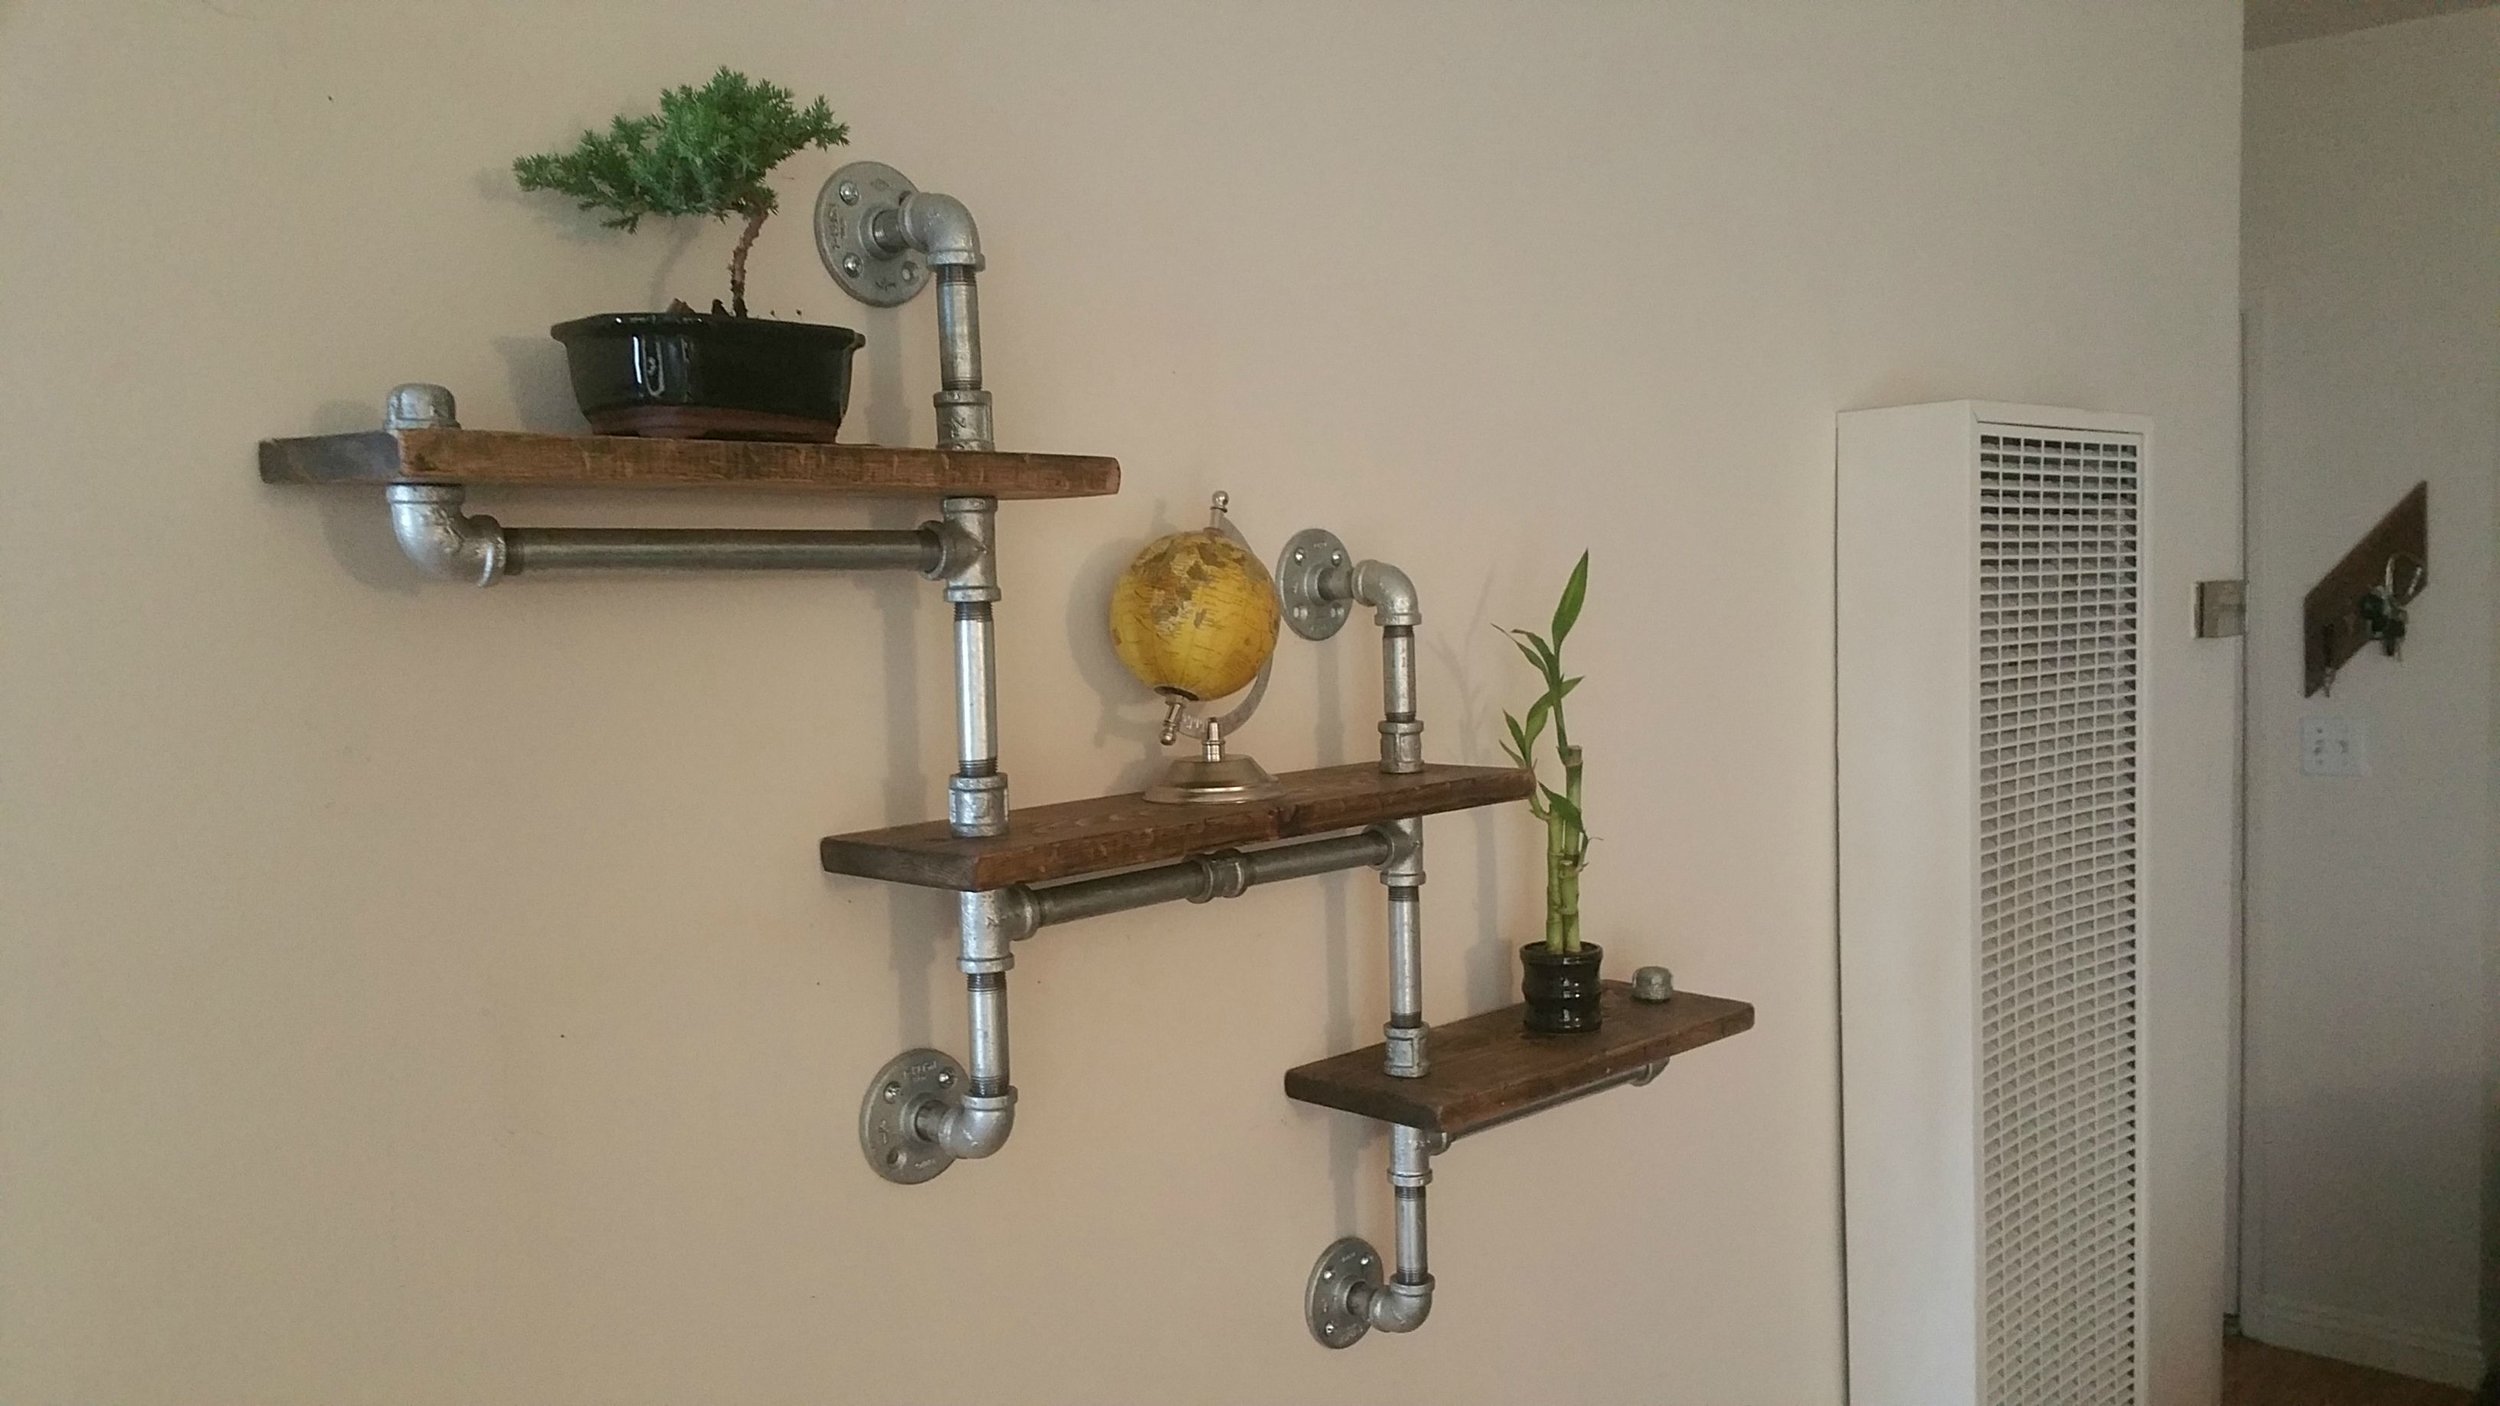
This was the second DIY Project I ever took on - nearly two years ago - it was low on the woodworking skill but high on the design / pre-planning skills. I wanted to share it here as I probably get the most compliments on these shelves in my apartment of anything I have built...which maybe means I built other things that were a lot less cool!

I saw a picture online (can't find that anymore) of shelves that I liked from Restoration Hardware - they were $300+. That's a big "hell no" for me. Time to build my own.
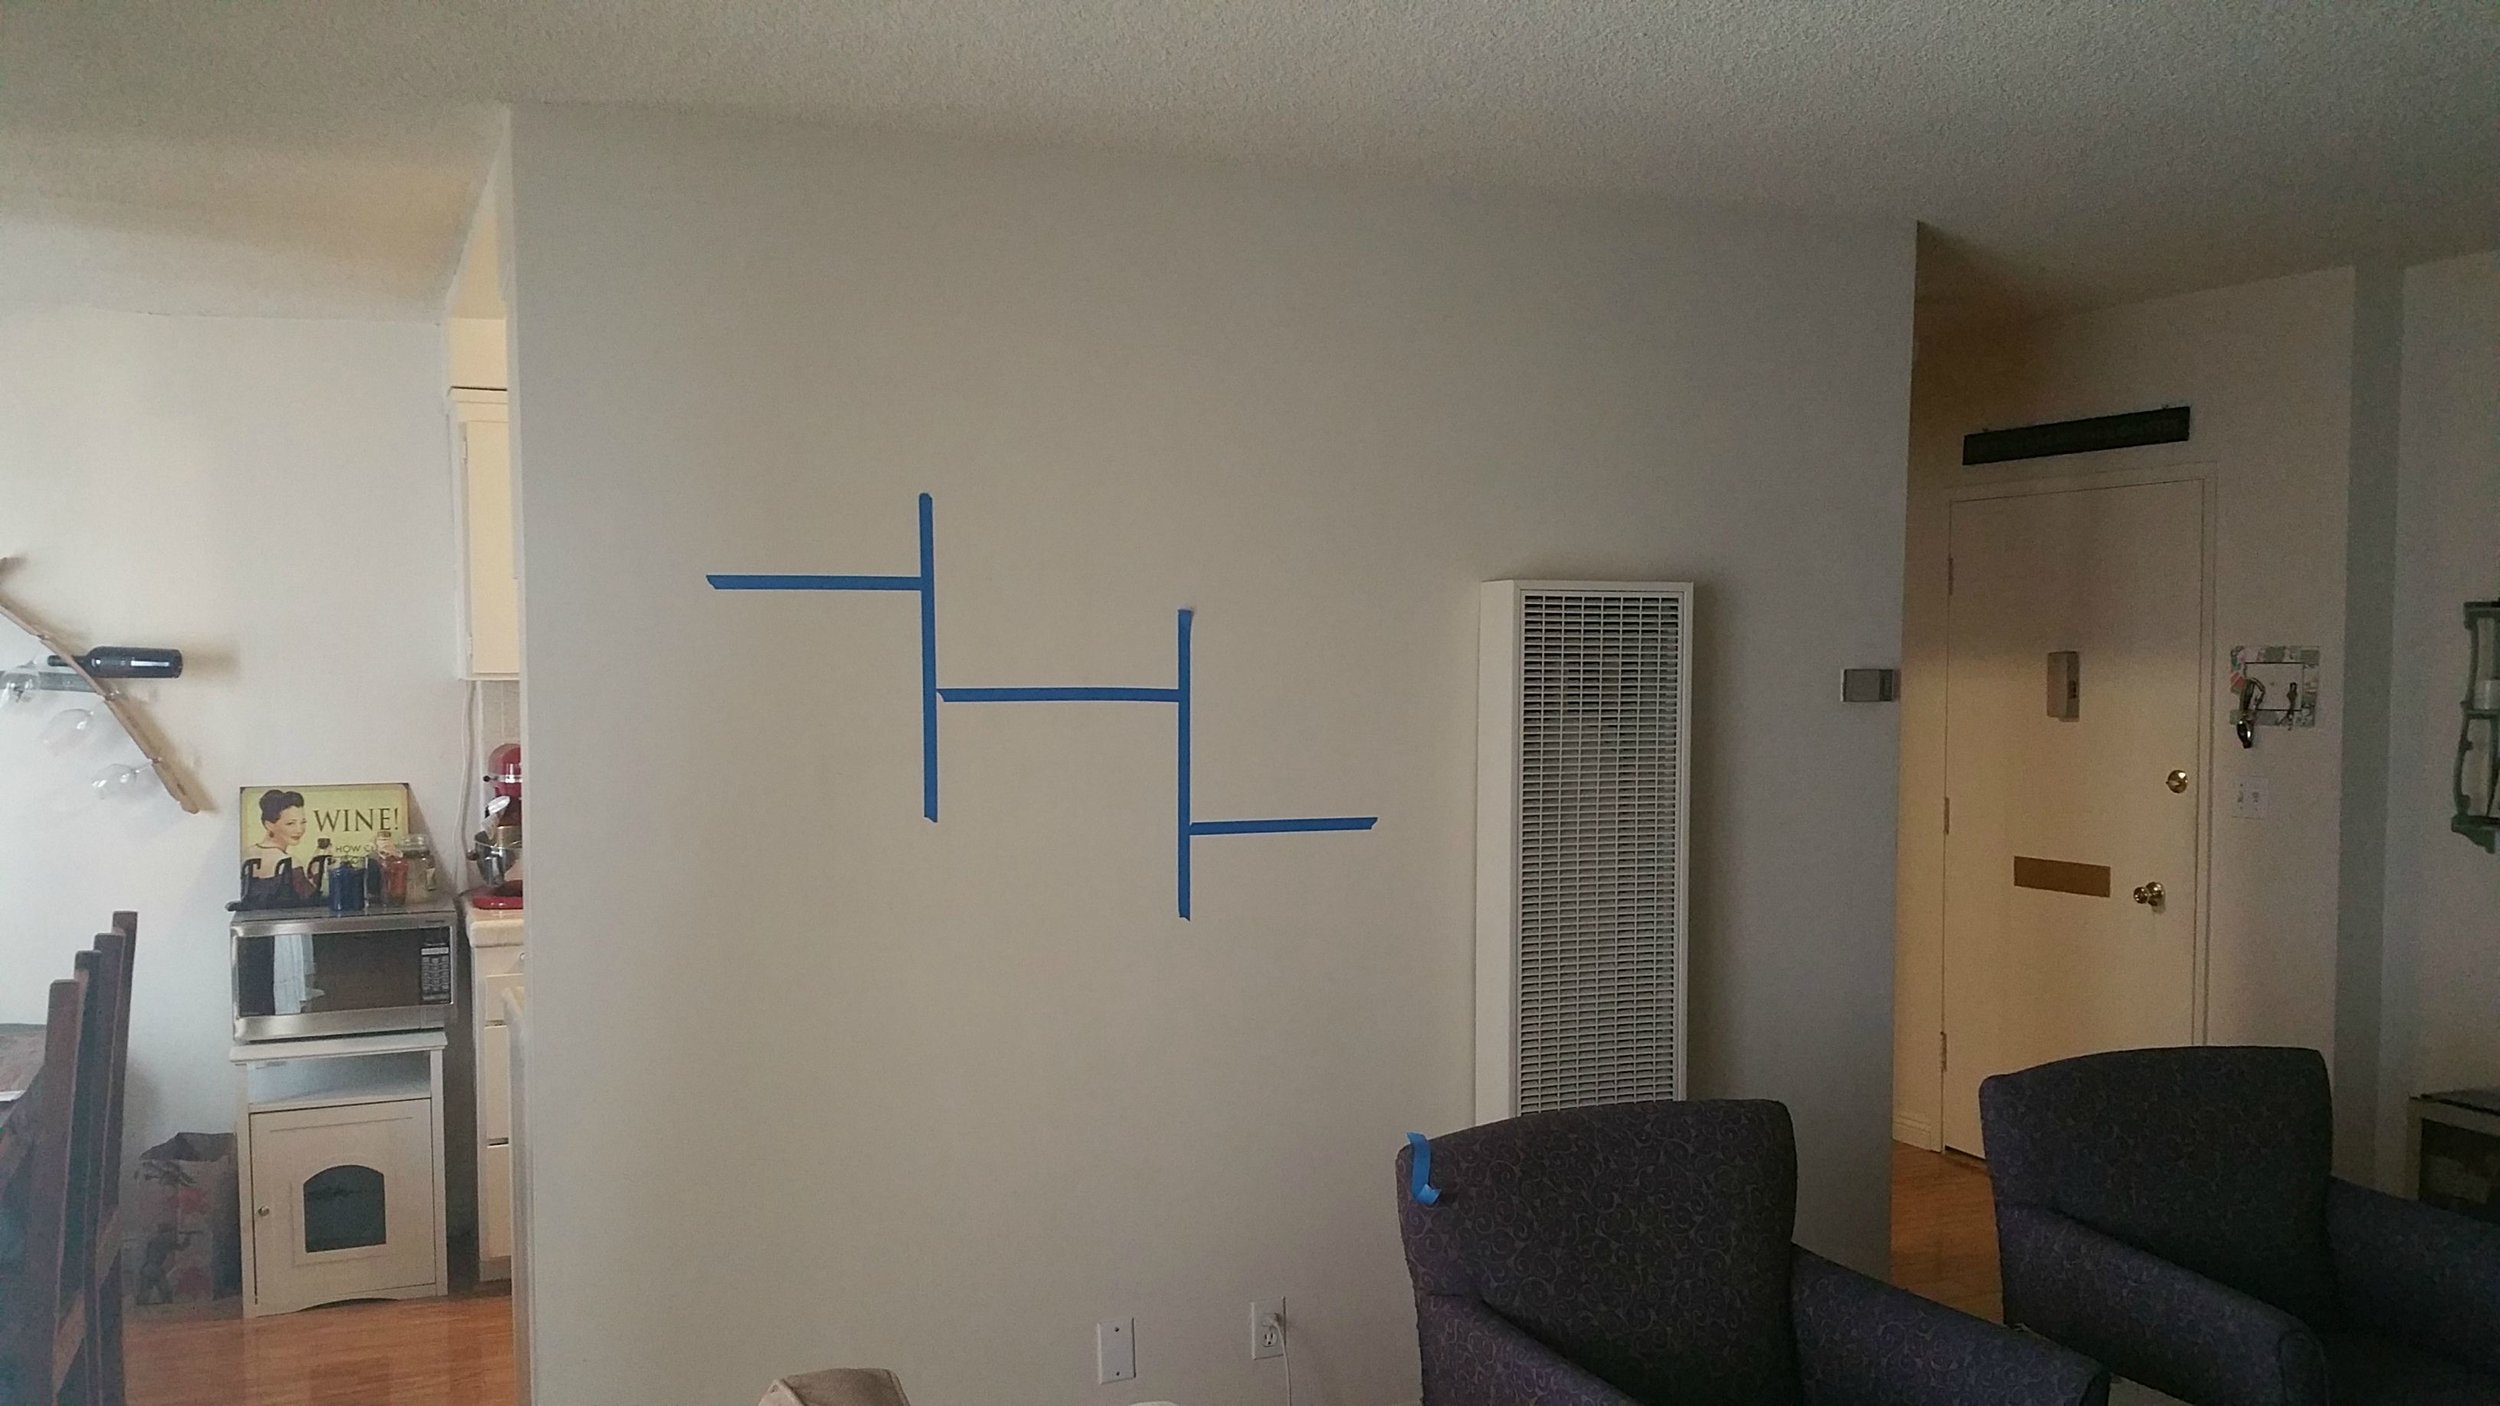
Quick tape layout for measurement. Shelves will be slightly smaller, but you get the idea.

Started off by taking a trip to Home Depot. I was working off of only one reference image I had found and with zero direction and very little building experience...I bought what I believed was exactly what I needed. I also spent a good 45 minutes in the galvanized pipe aisle testing out combinations, double checking which parts I bought...
Side Note - I can't believe I got everything in one trip from Home Depot.
Wood / Stain Materials
1 x 1" x 6" x 4' Whitewood (Cut into 2 x 15", 1 x 18")
Ash Woodstain
Toggle Bolt Screws (to mount to drywall)
Pipe Pieces (All 3/4" Galvanized)
6 x 0" (just to serve as connectors)
4 x 1"
4 x 3"
2 x 4"
2 x 7"
2 x 12"
Pipe Connectors
4 x Pipe Flanges
2 x Tips / Nipples
6 x Elbows
4 x T Pieces
5 x Pipe Connectors
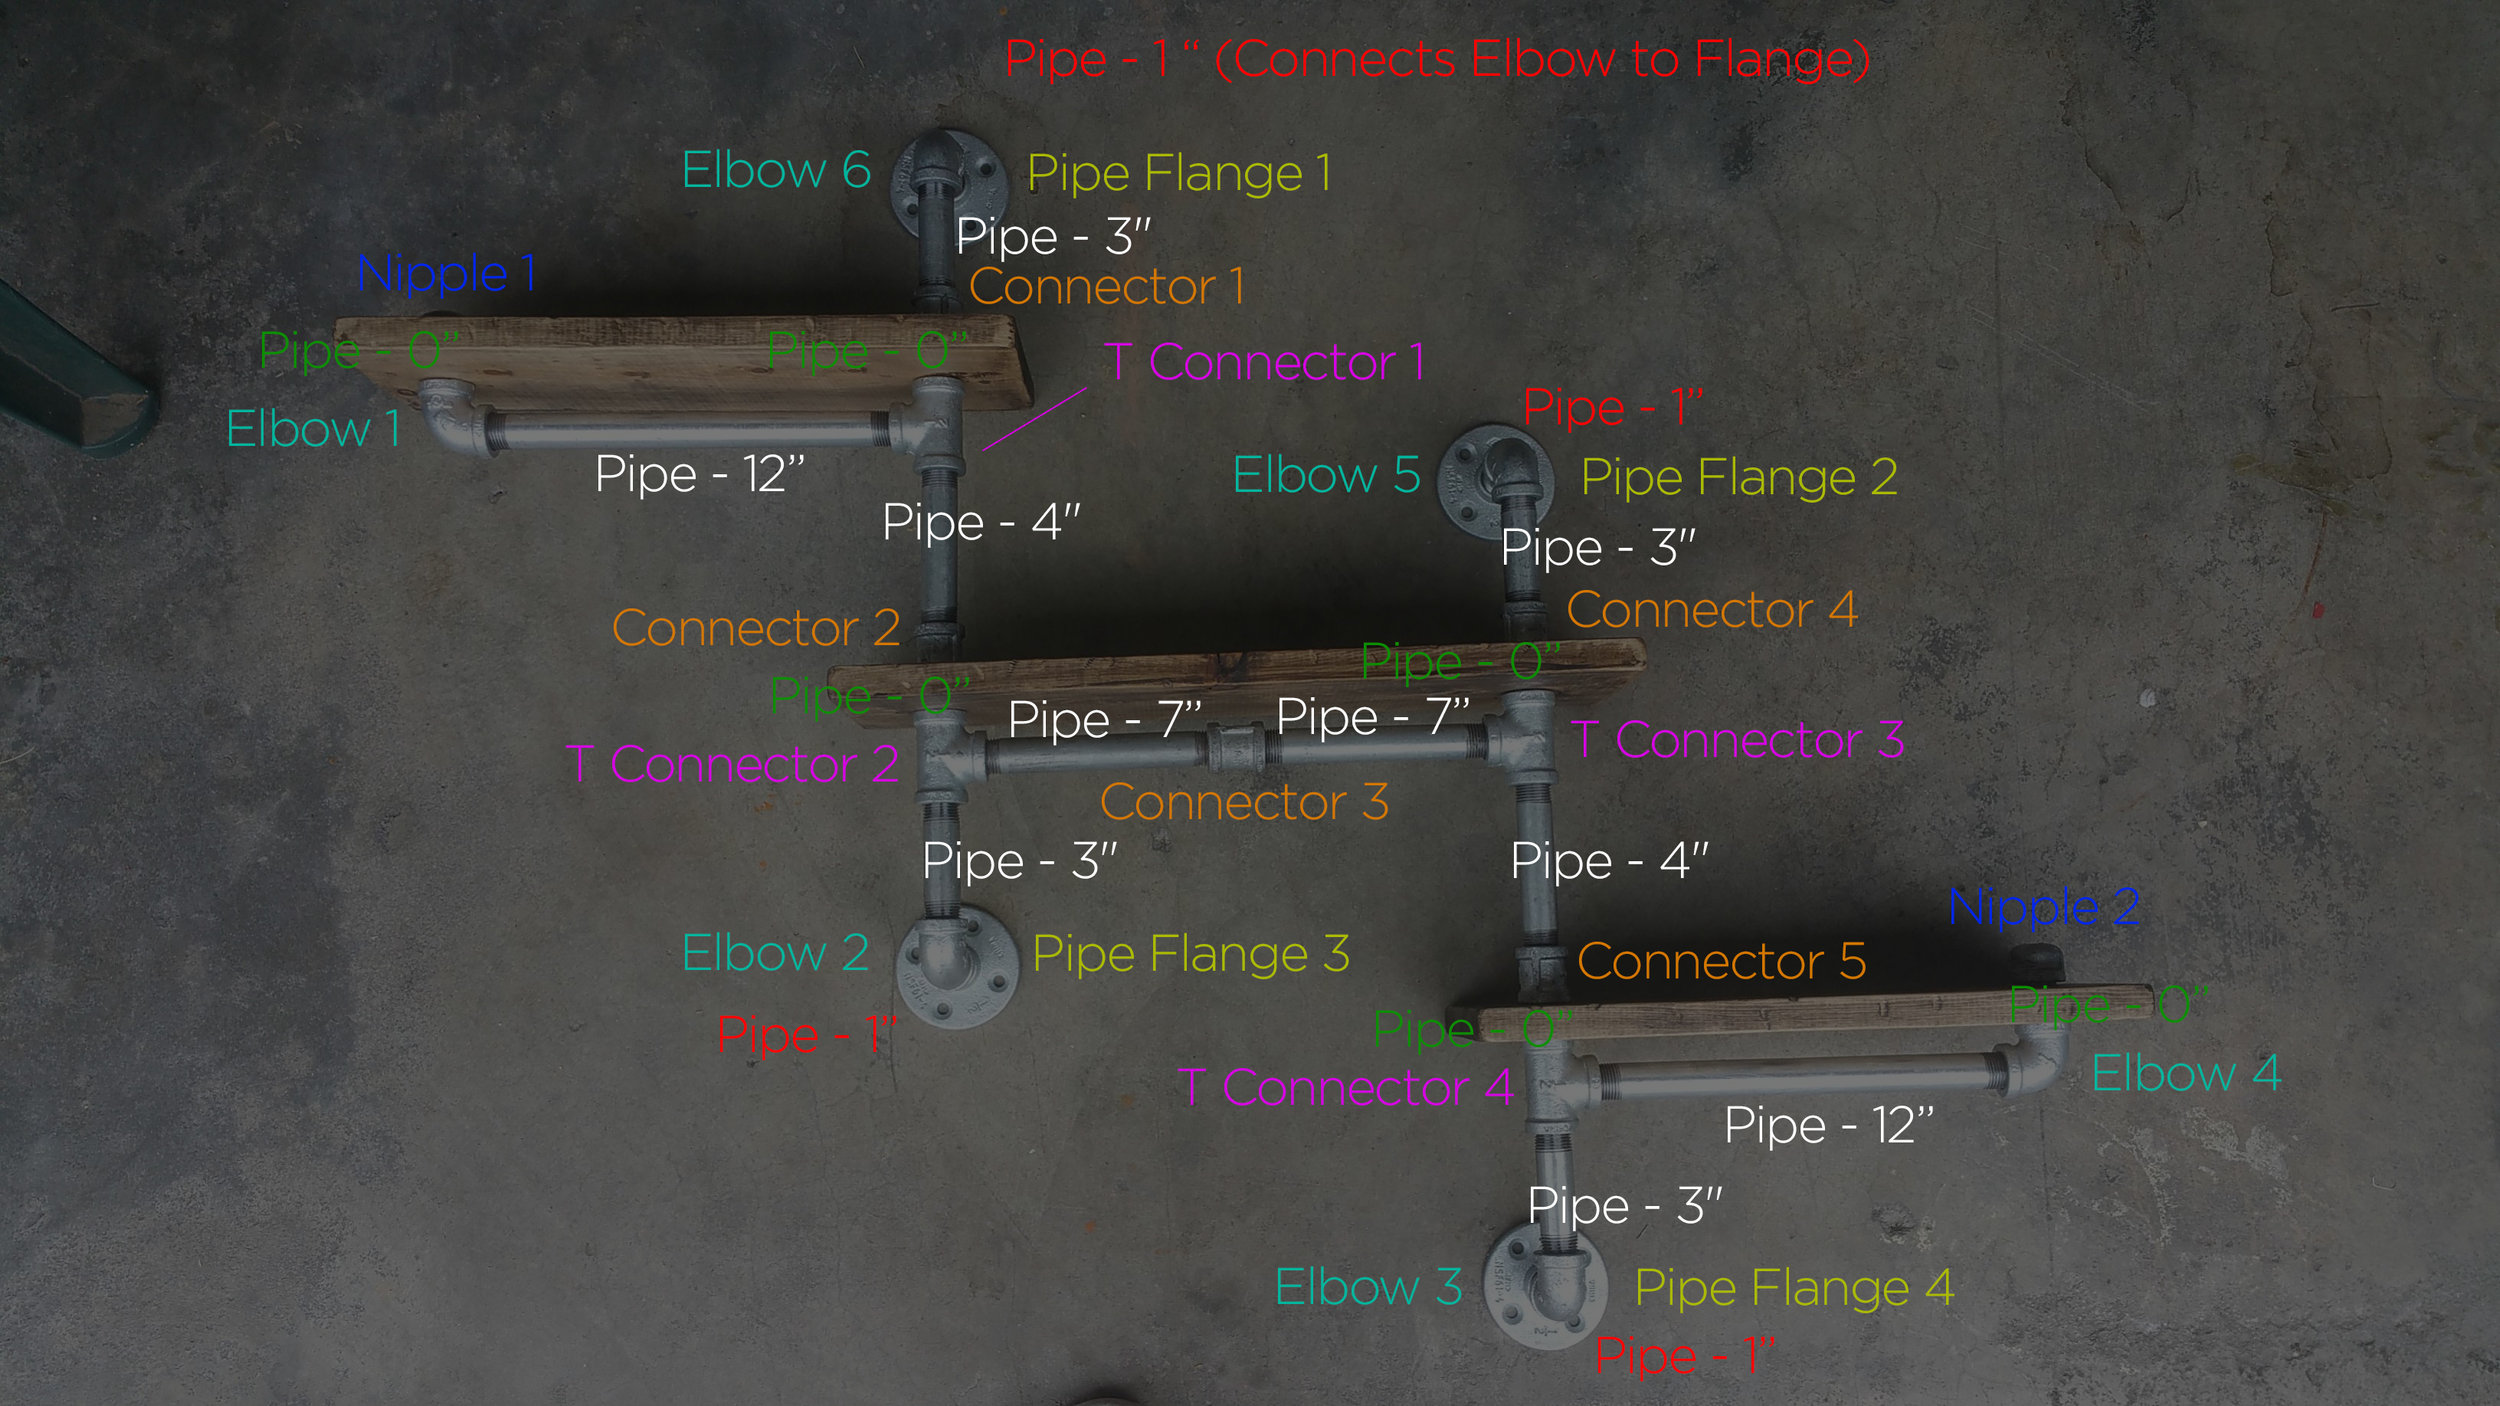
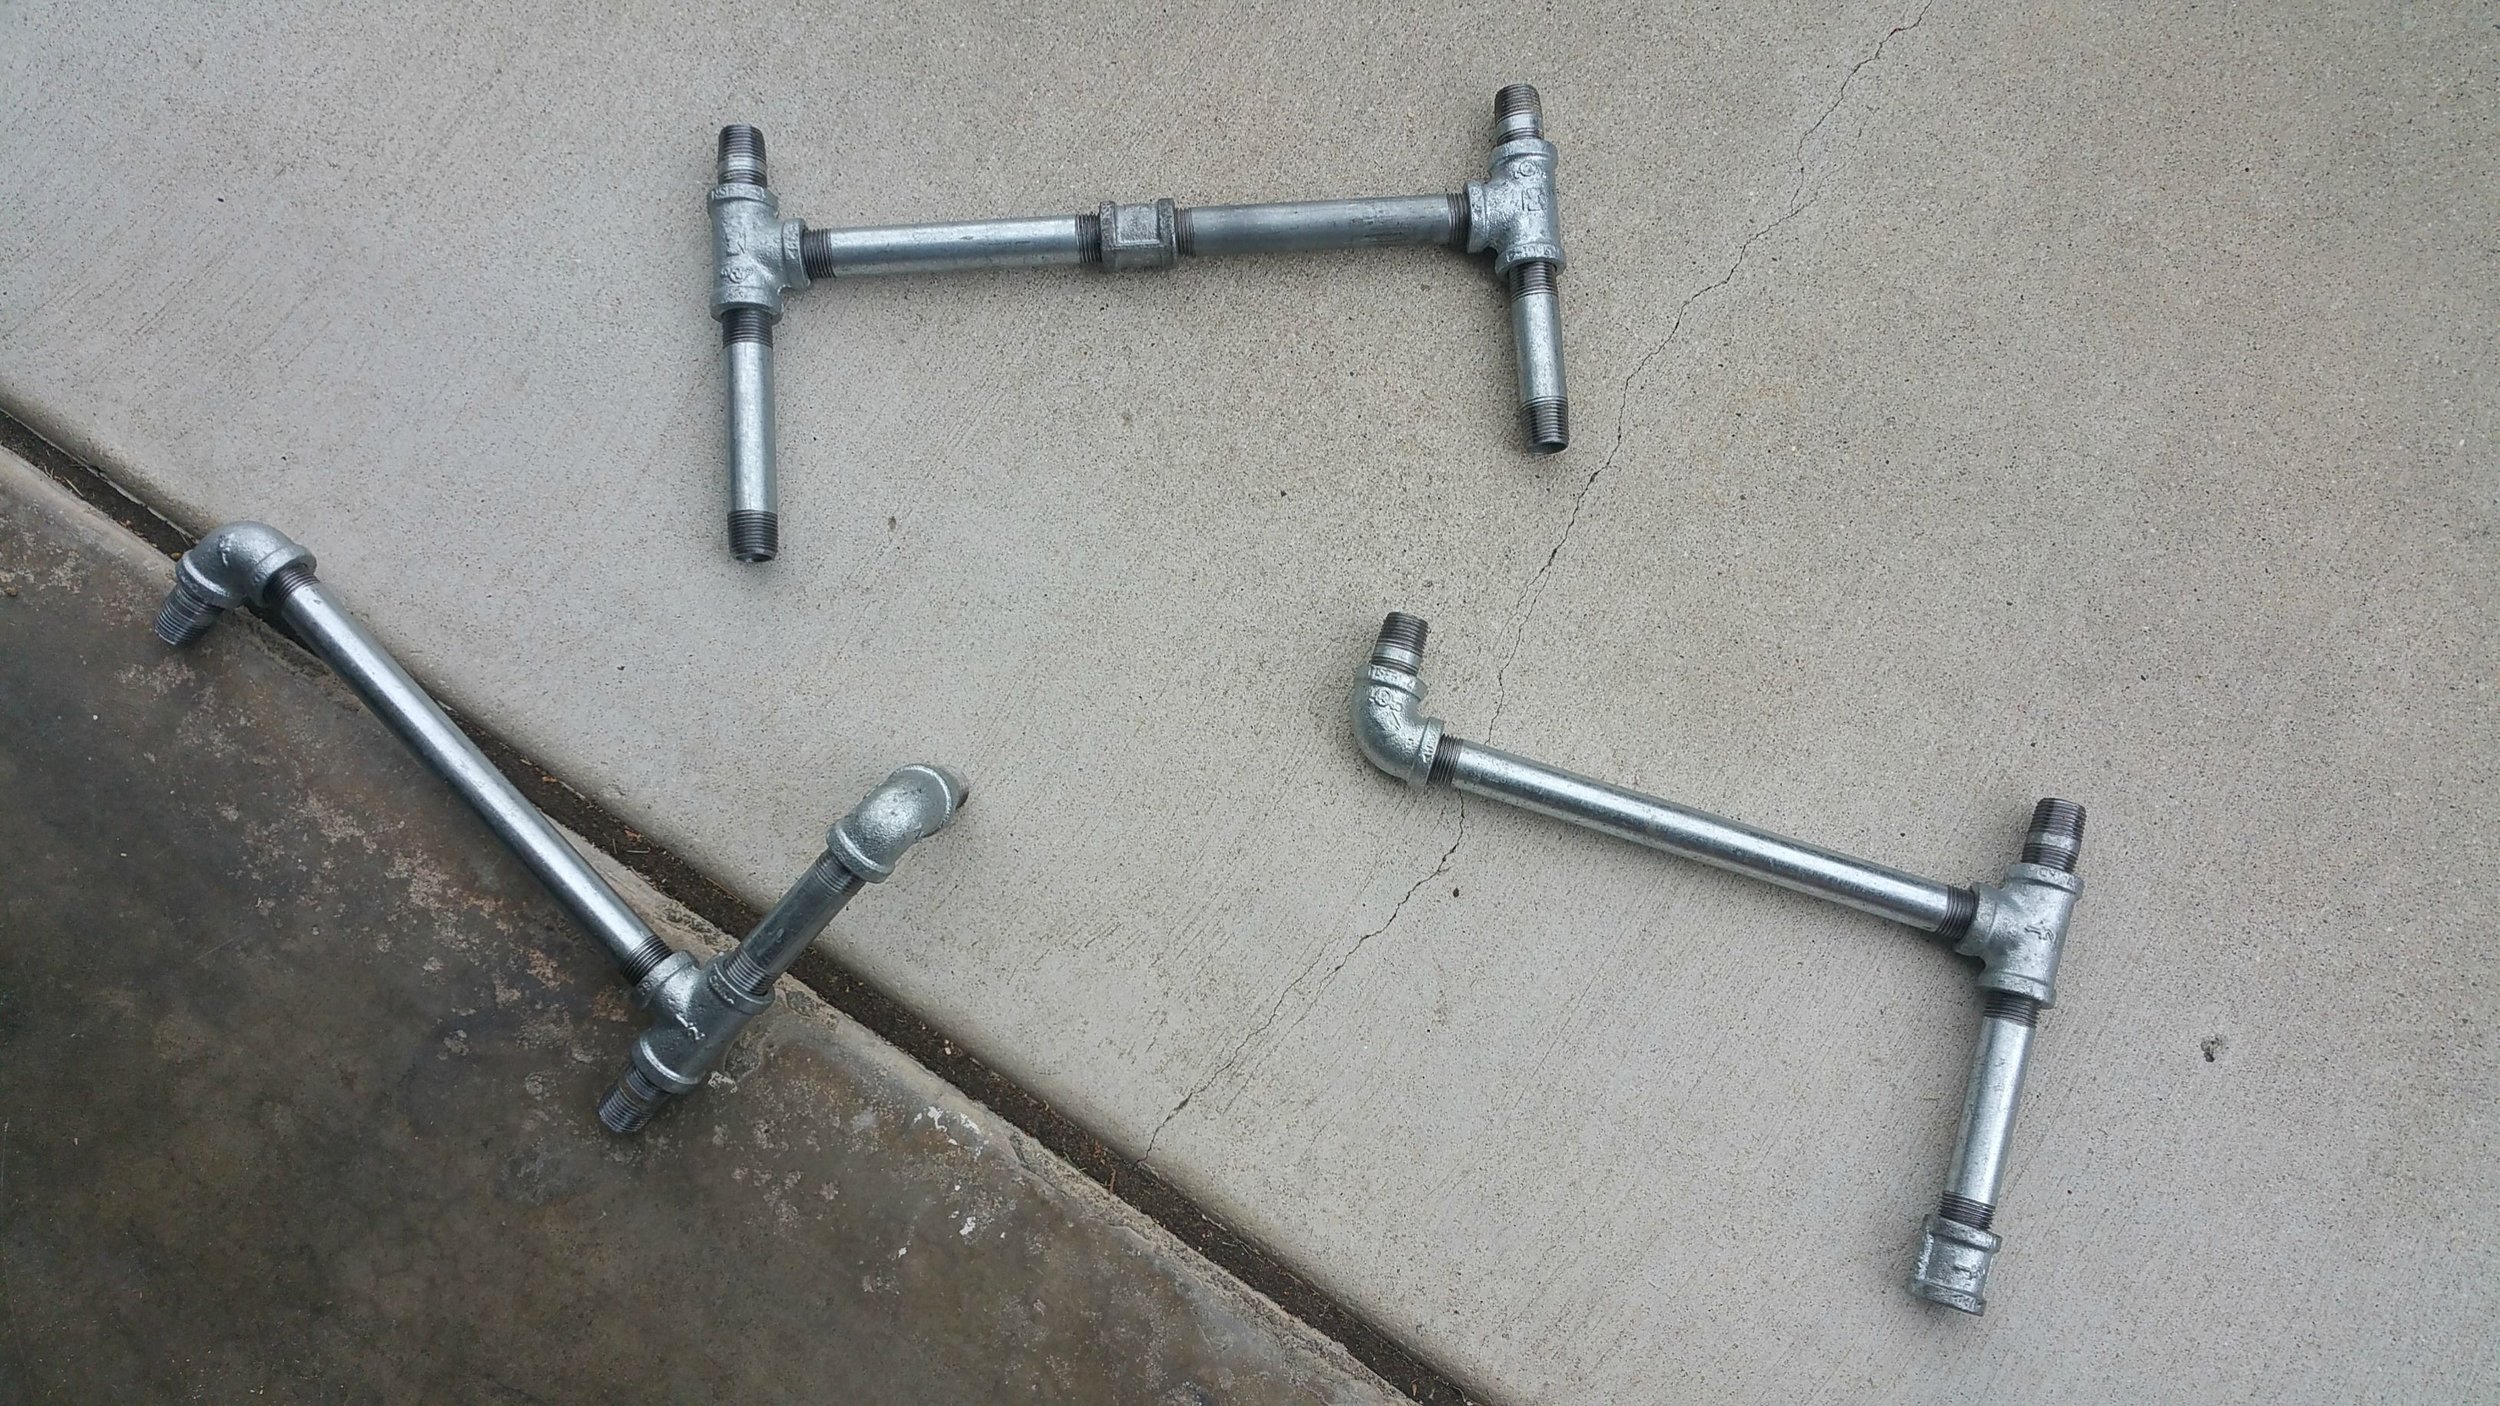
Here is a grid of how everything comes together - I color coded pieces in the picture and below to help you map our and references things - all pipe pieces 3" and above are White.
Pipe Pieces (All 3/4" Galvanized)
6 x 0" (lime green)
4 x 1" (red)
4 x 3" (white)
2 x 4" (white)
2 x 7" (white)
2 x 12" (white)
Pipe Connectors
4 x Pipe Flanges (Green / Yellow)
2 x Tips / Nipples (Blue)
6 x Elbows (Teal)
4 x T Pieces (Magenta / Pink)
5 x Pipe Connectors (Orange0

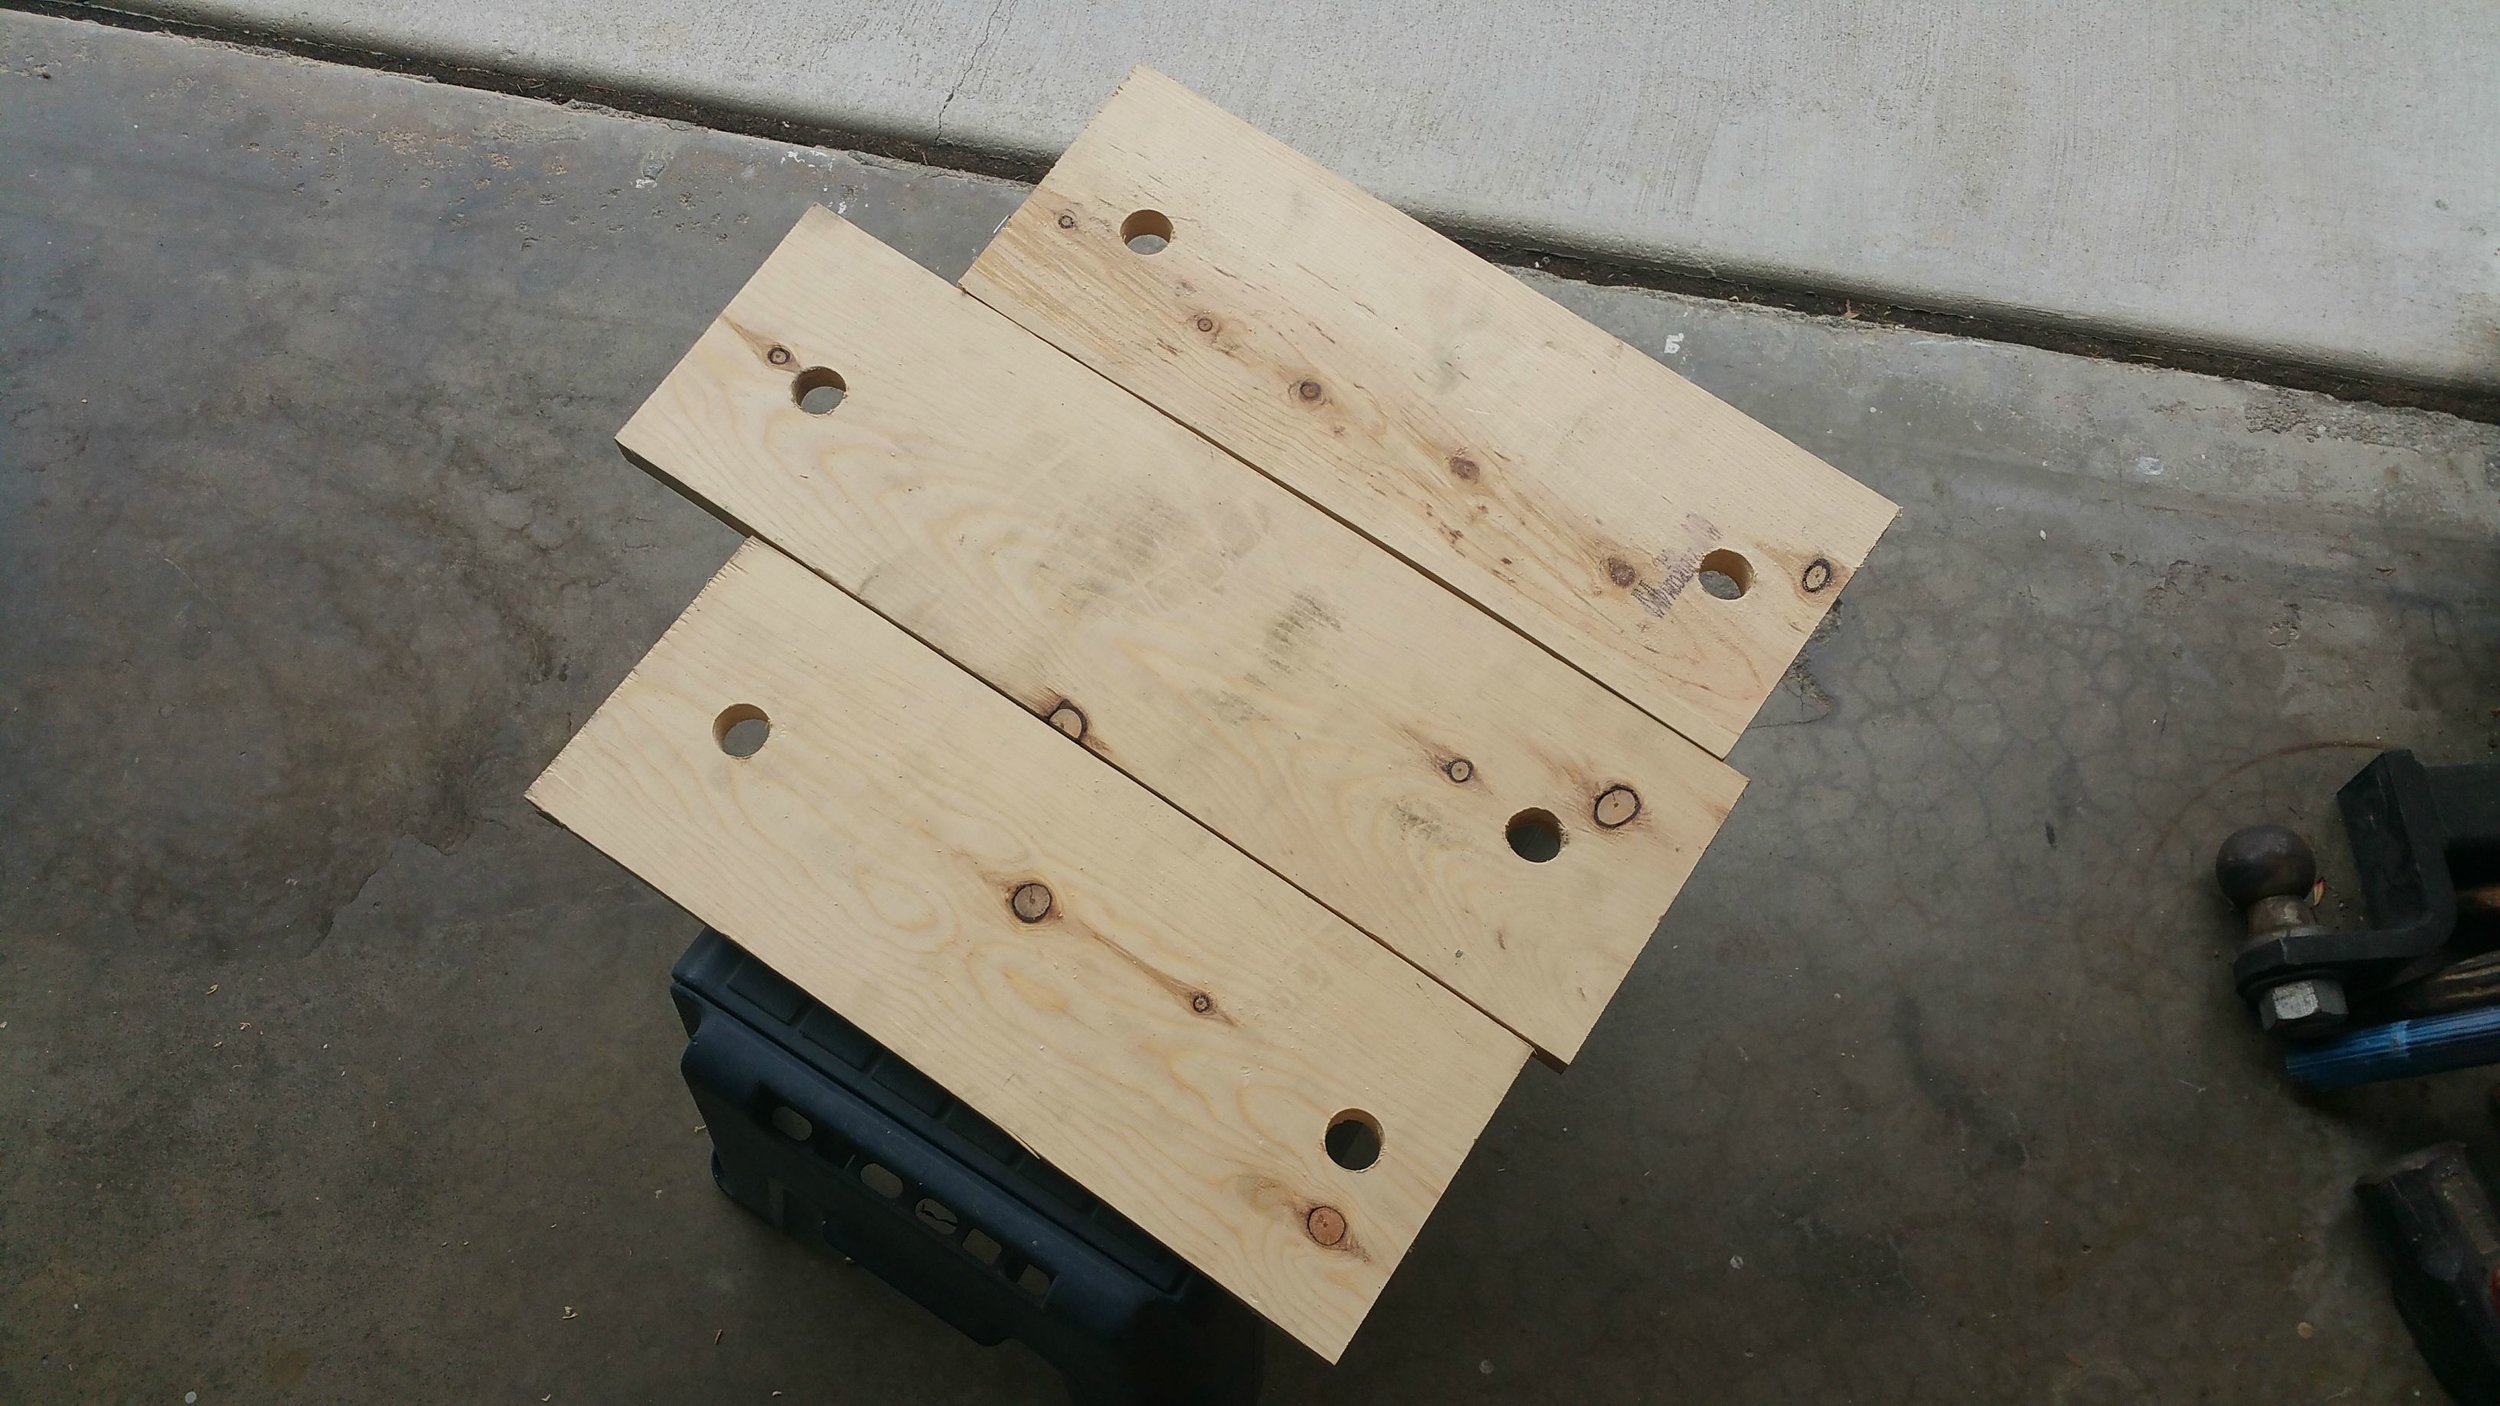
You need to drill six total holes at 1" wide in order to connect everything. The best part about these pipes is you can always tighten them one extra turn incase the holes you drilled are slightly off - they tighten very well and are very sturdy.
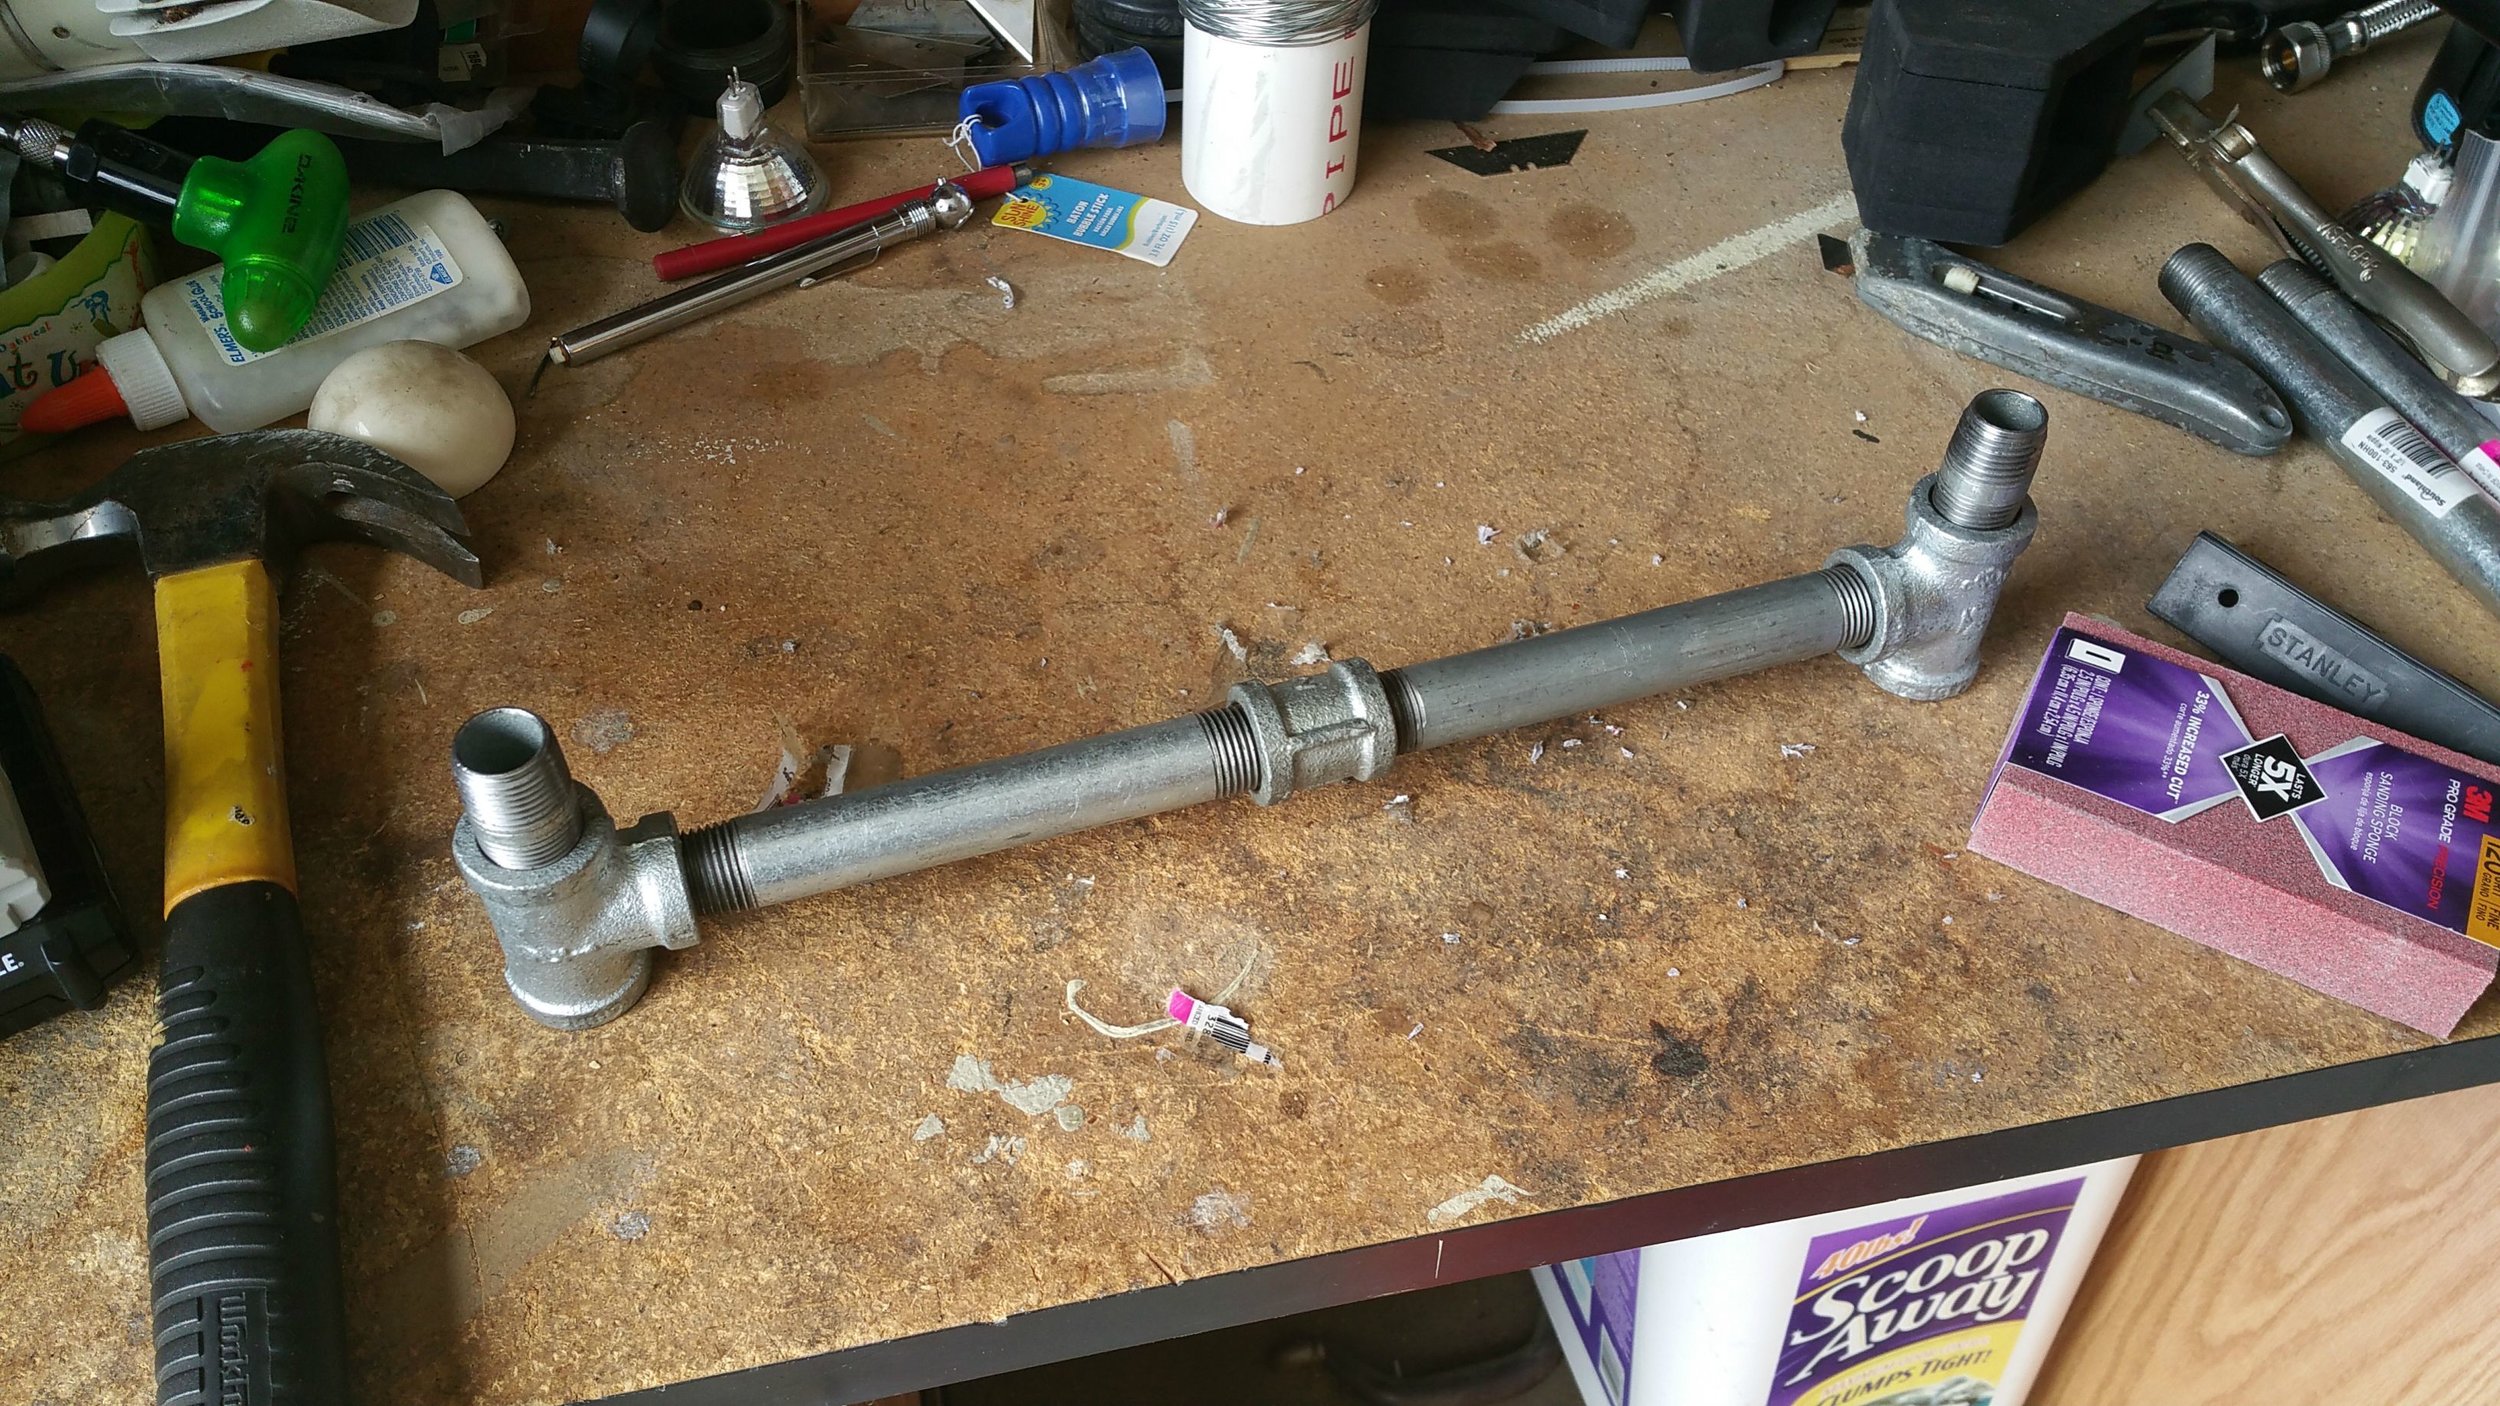
Picture 1 is the pipe assembly of the middle section - I assembled my pieces beforehand as it was helpful in measuring out exactly where the holes needed drilling.
Picture 2 is me measuring out the two outside sections with the pipe pieces
Picture 3 shows the final drilled holes of each section.
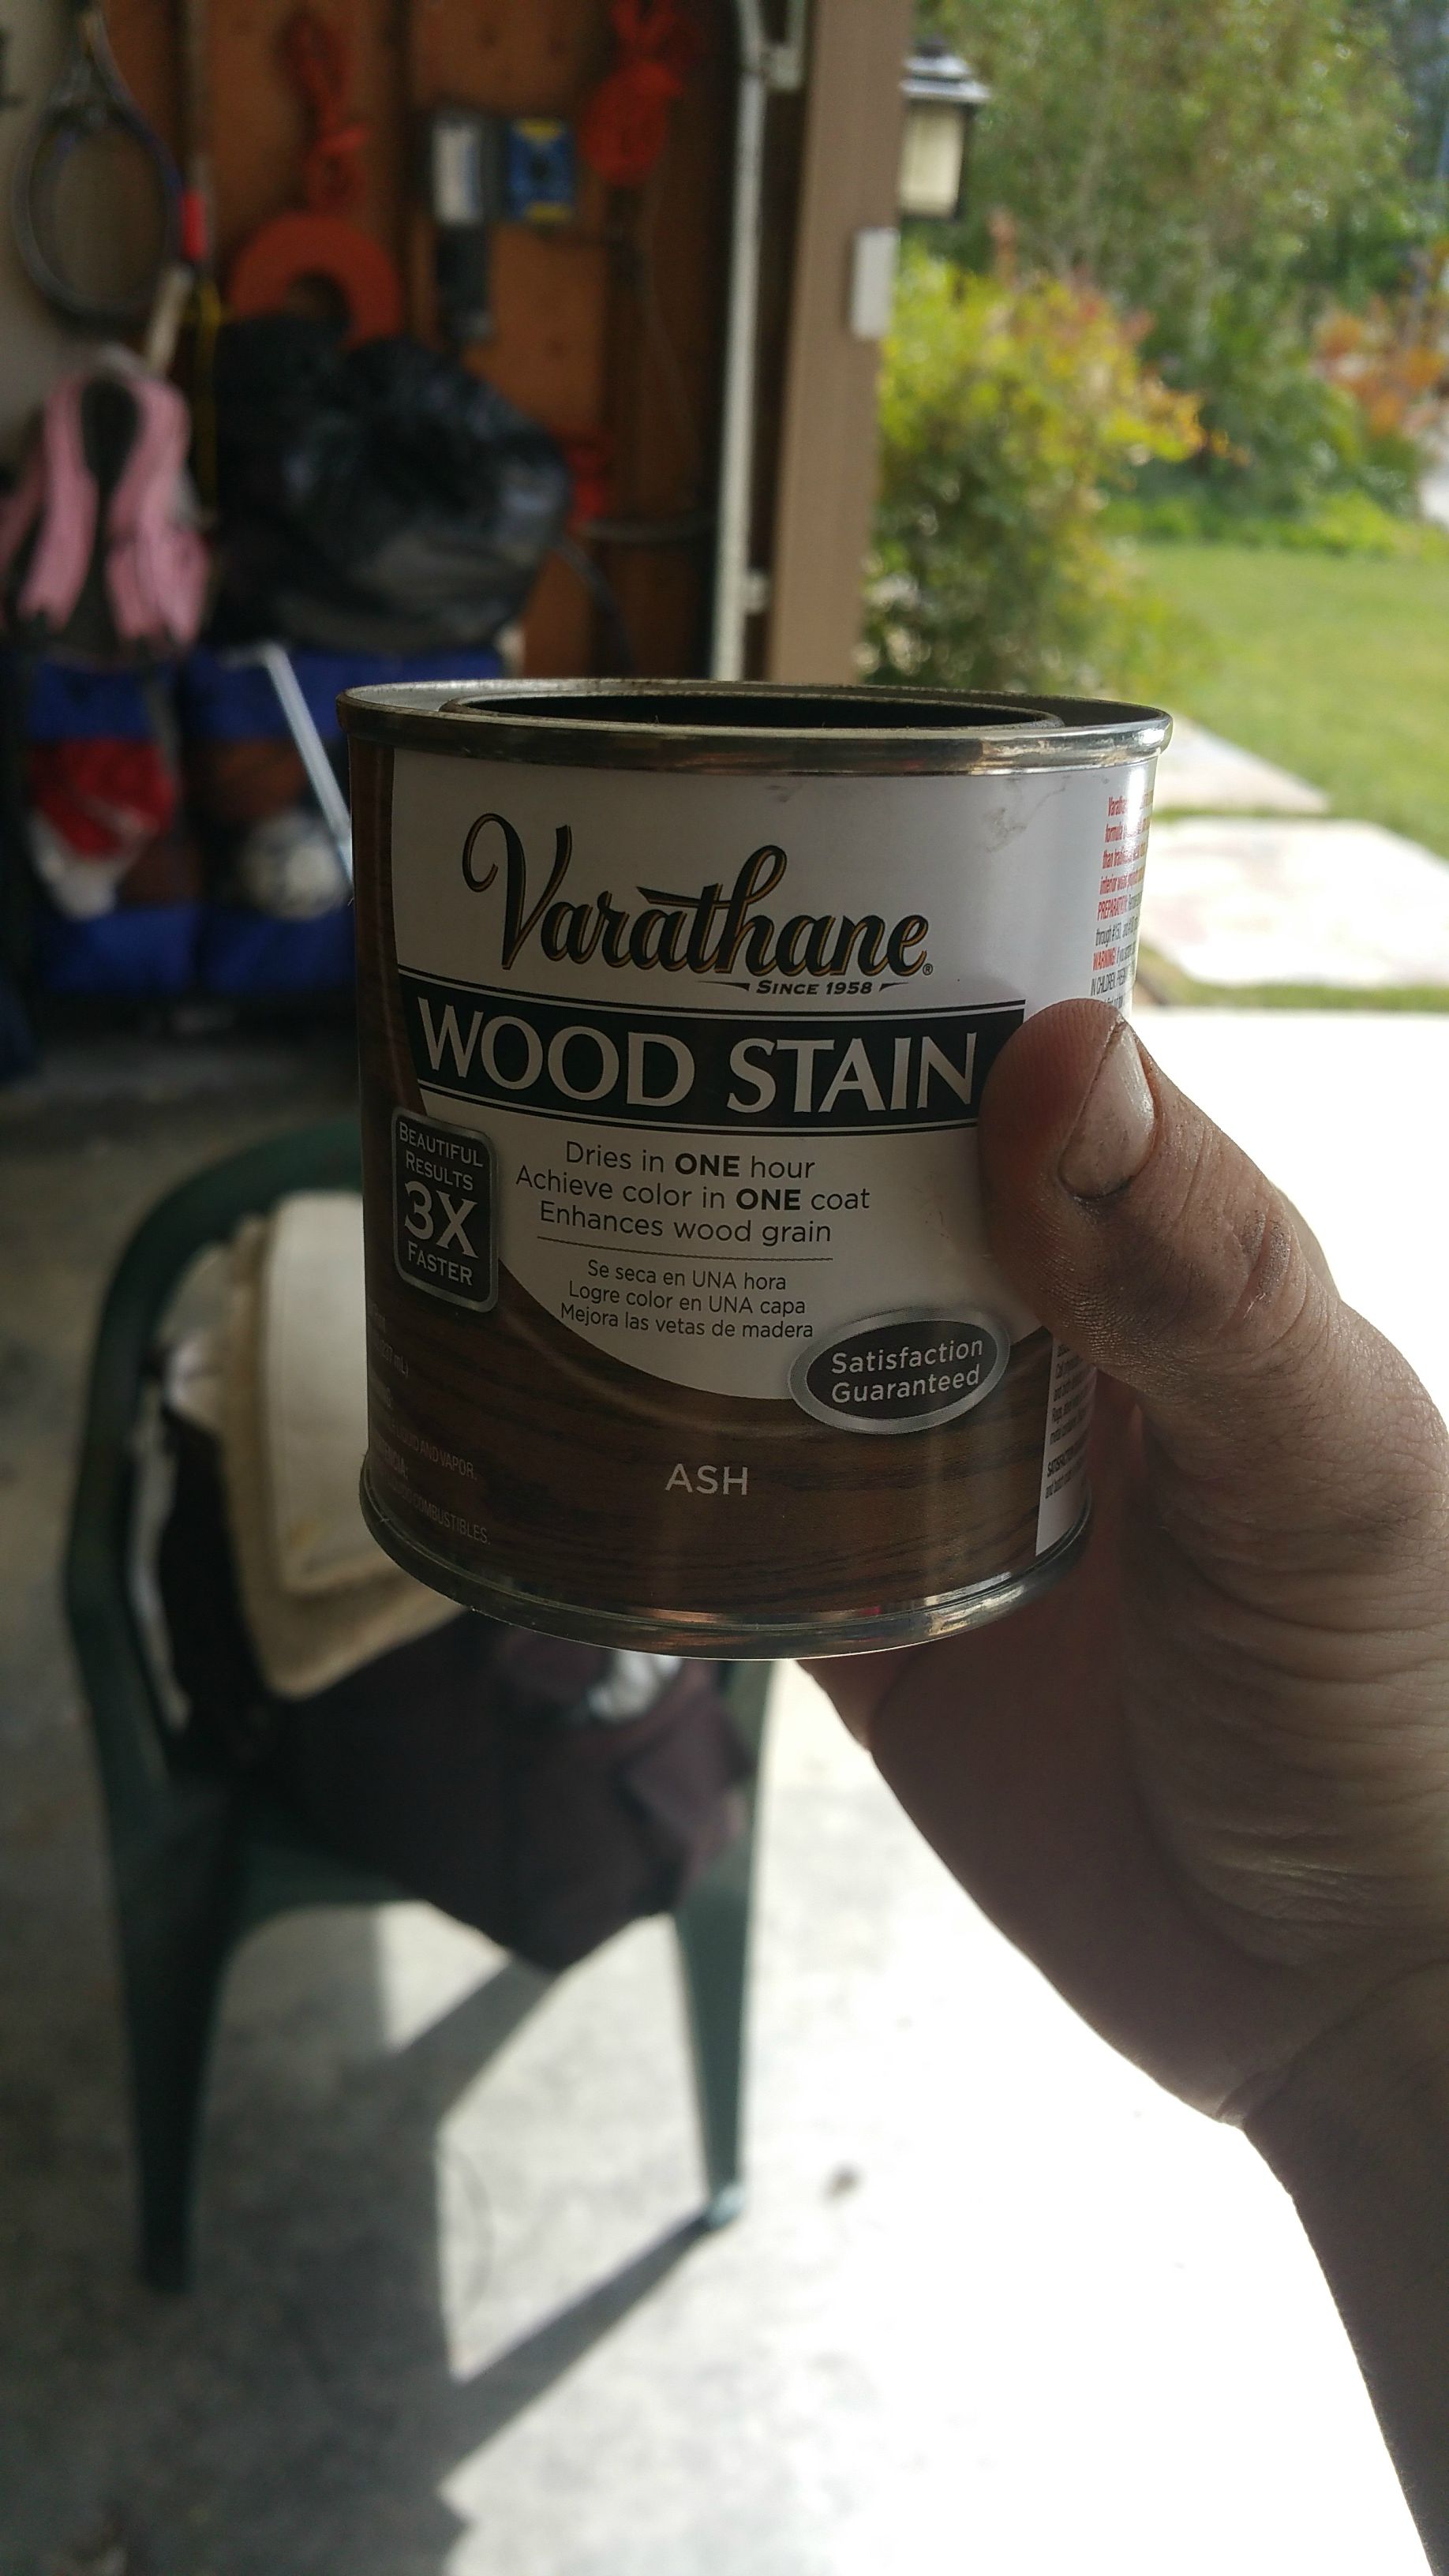
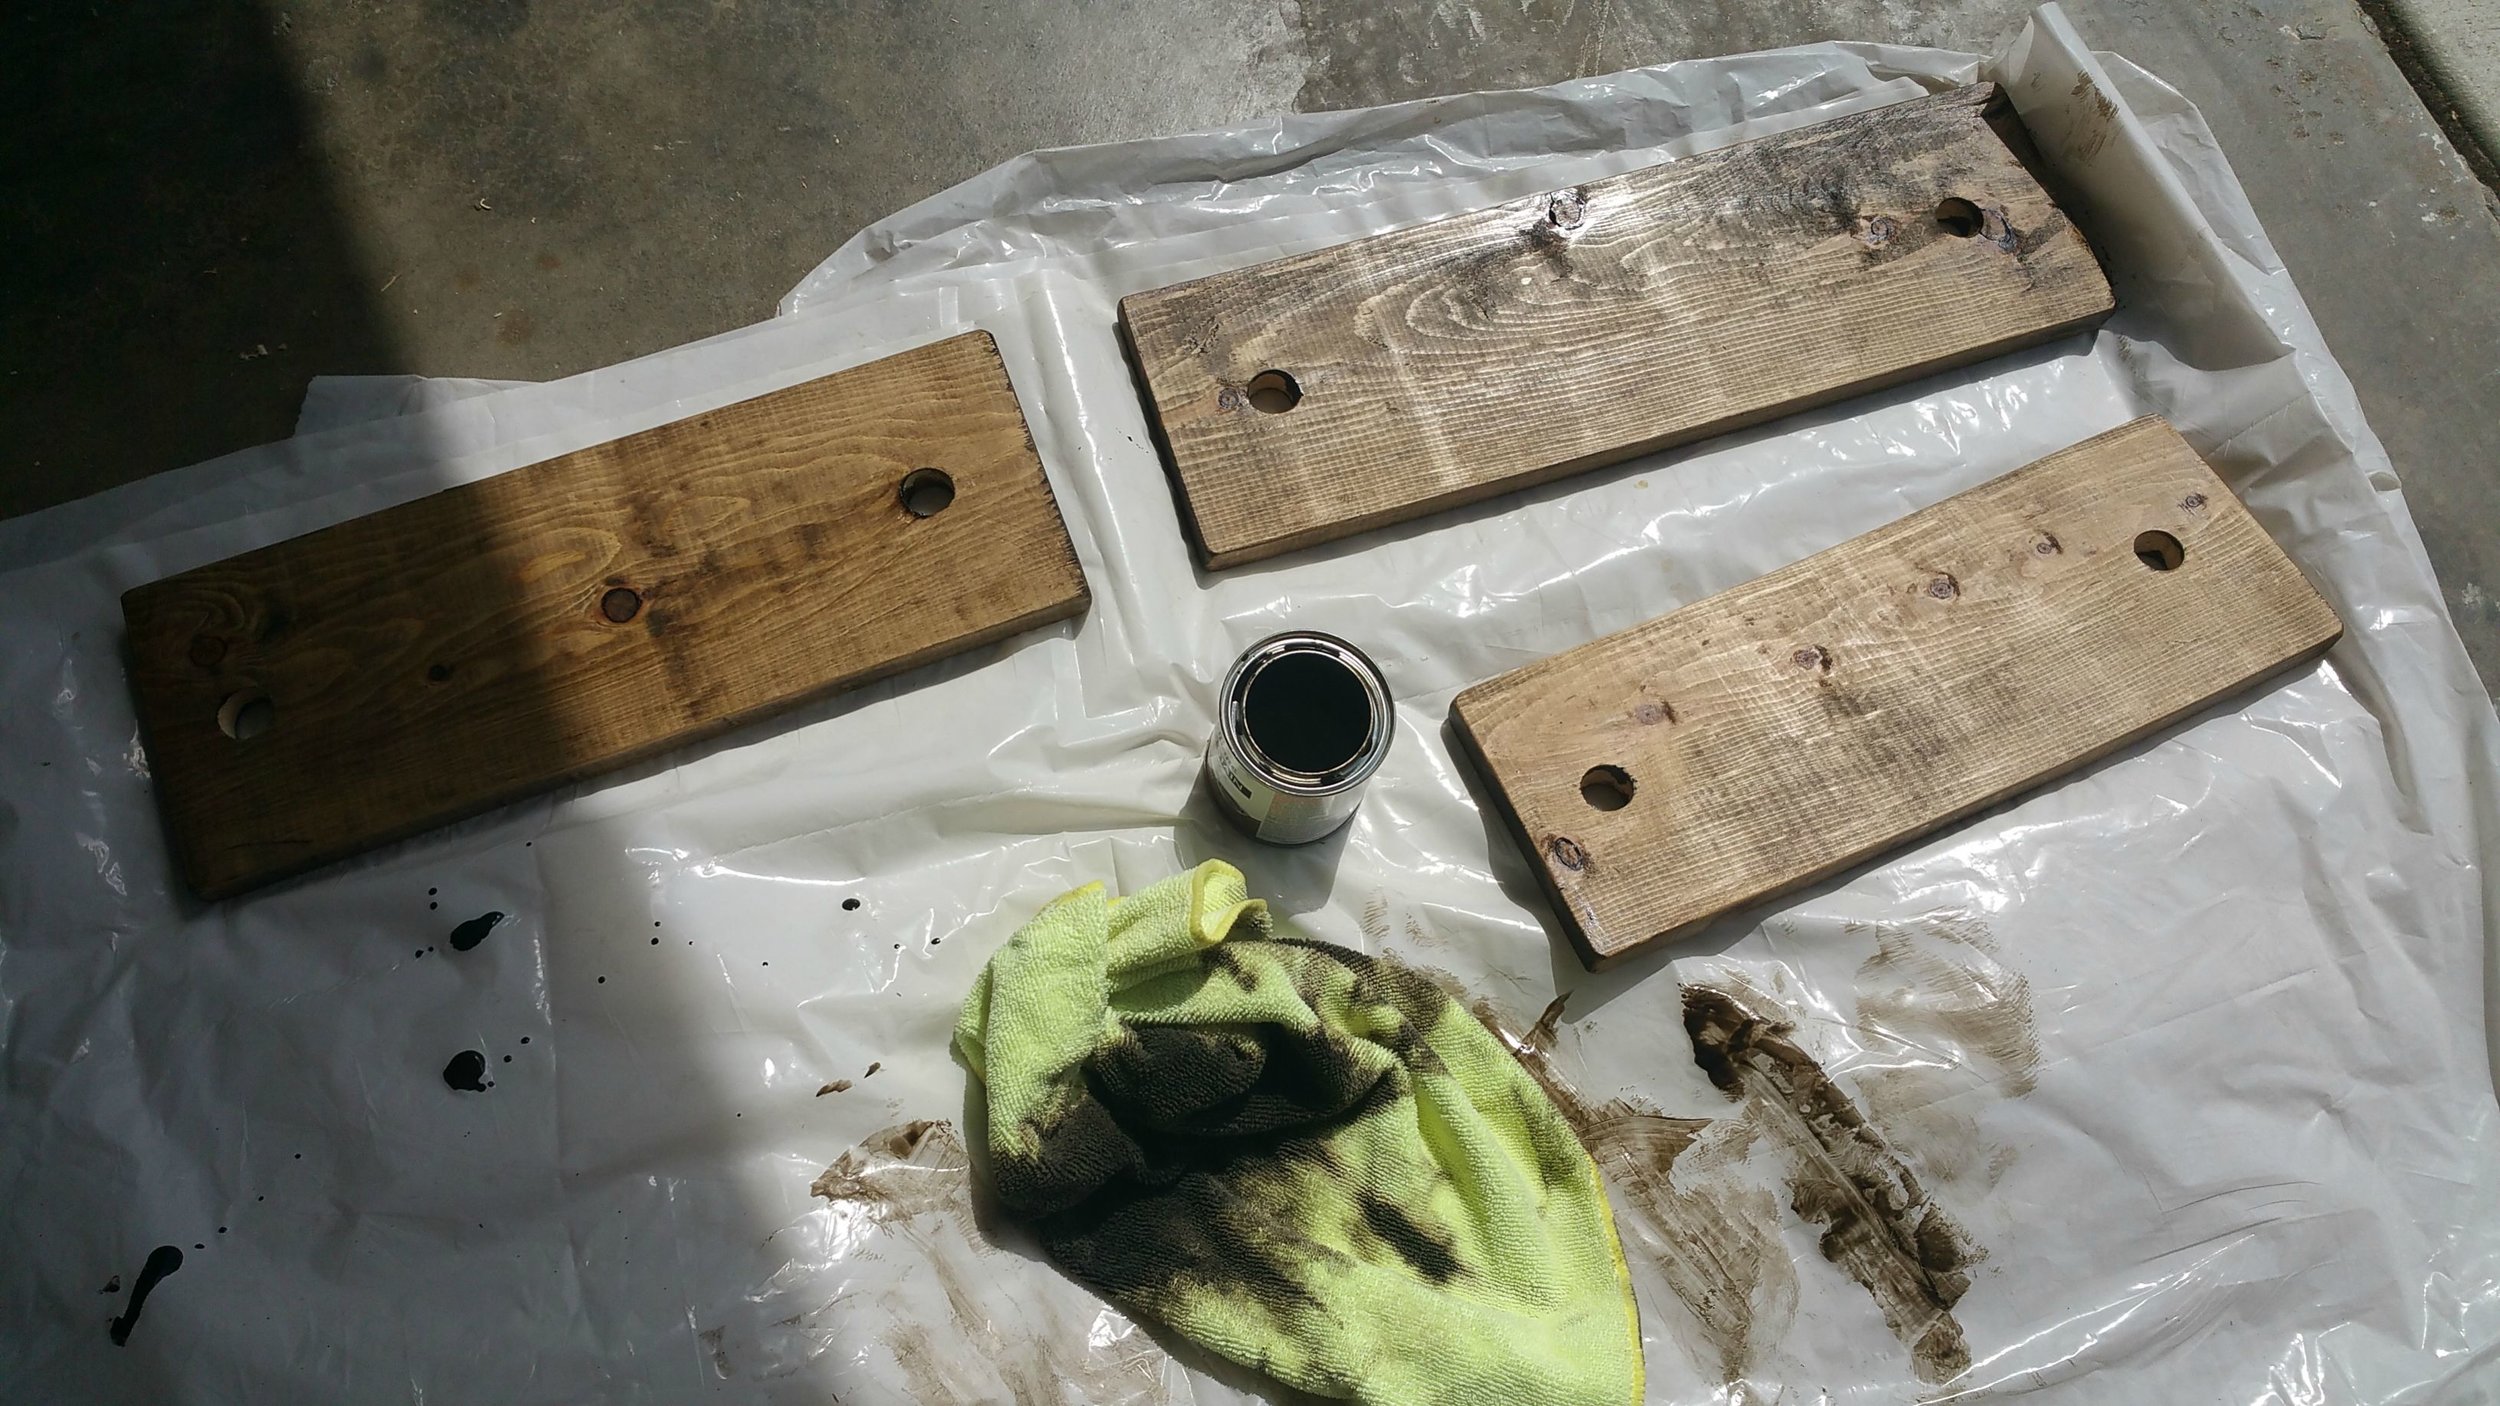
Stain your wood whatever color(s) you want! I chose a darker ash color, but you could choose to paint, or add watery paint for hints of color and then stain - so many options! I did two coats with no pre-stain conditioner and it was all good!

I began assembling my various other pieces.
Picture 1 shows the two outside pieces (left side), and the middle piece (right side)
You can see how using the 0" pieces on the ends (Picture 2) allow you to then pass your pipes through the holes to connect things without using any glue or screws.
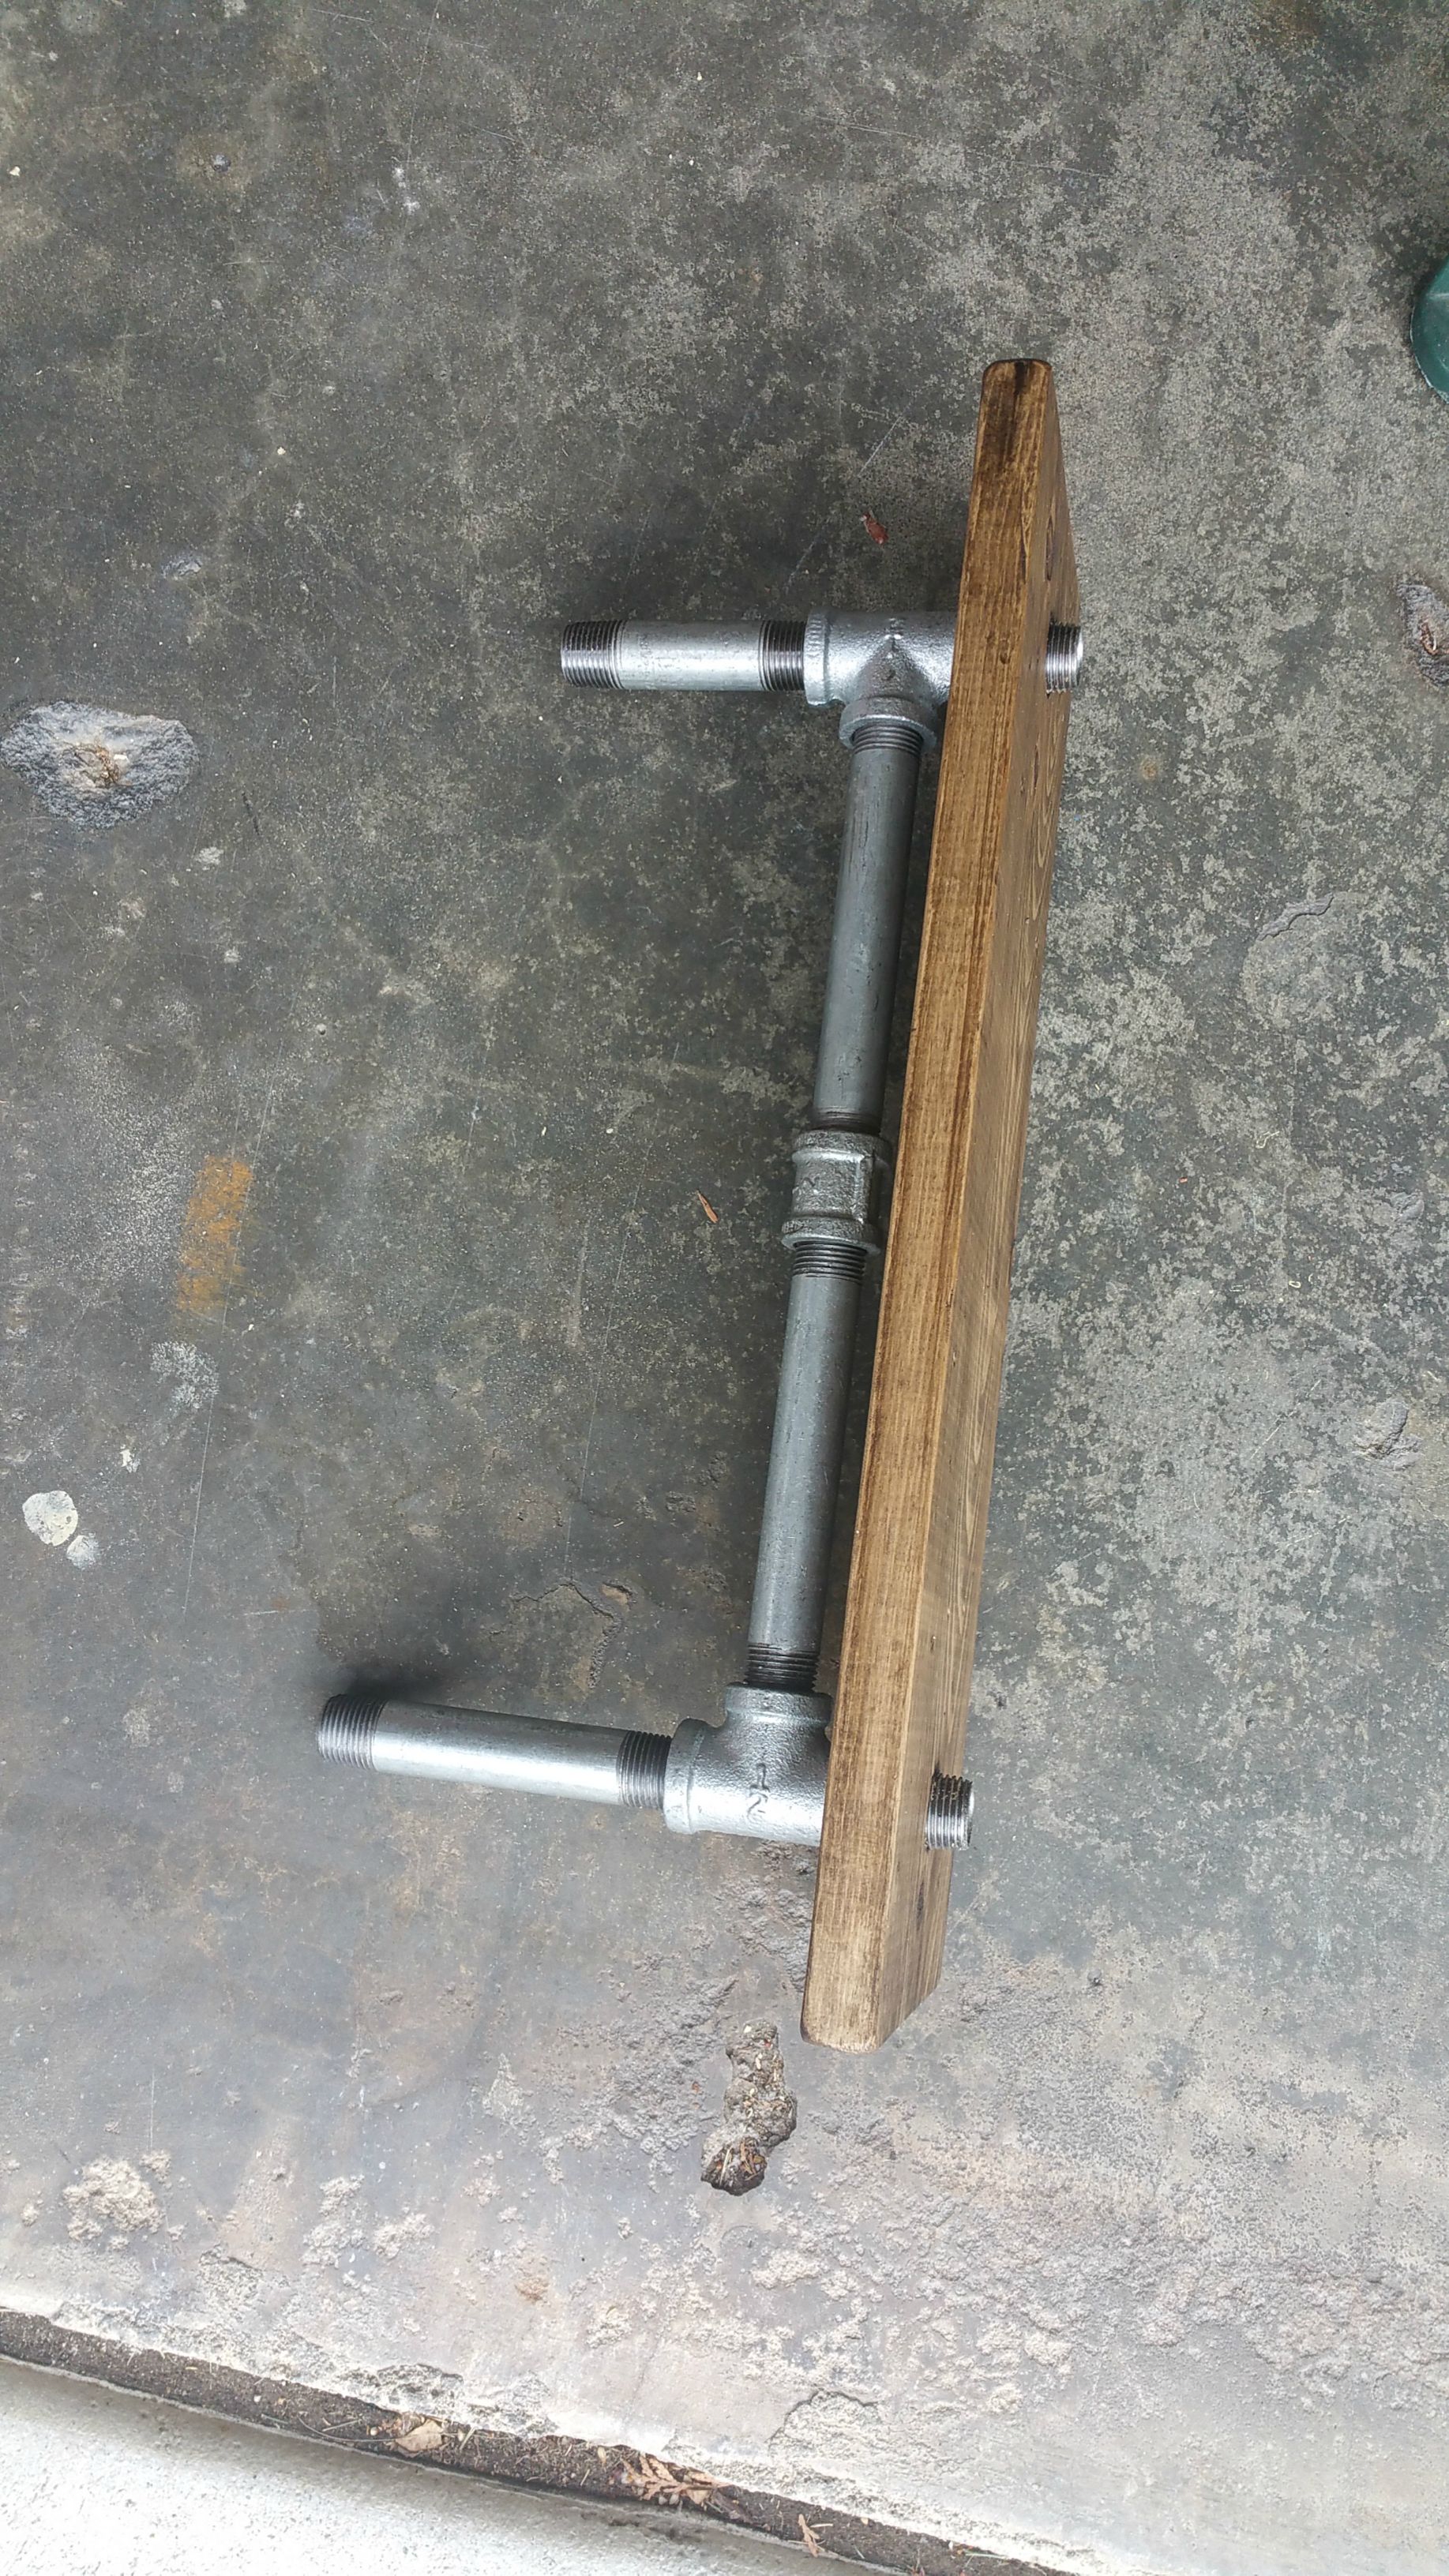
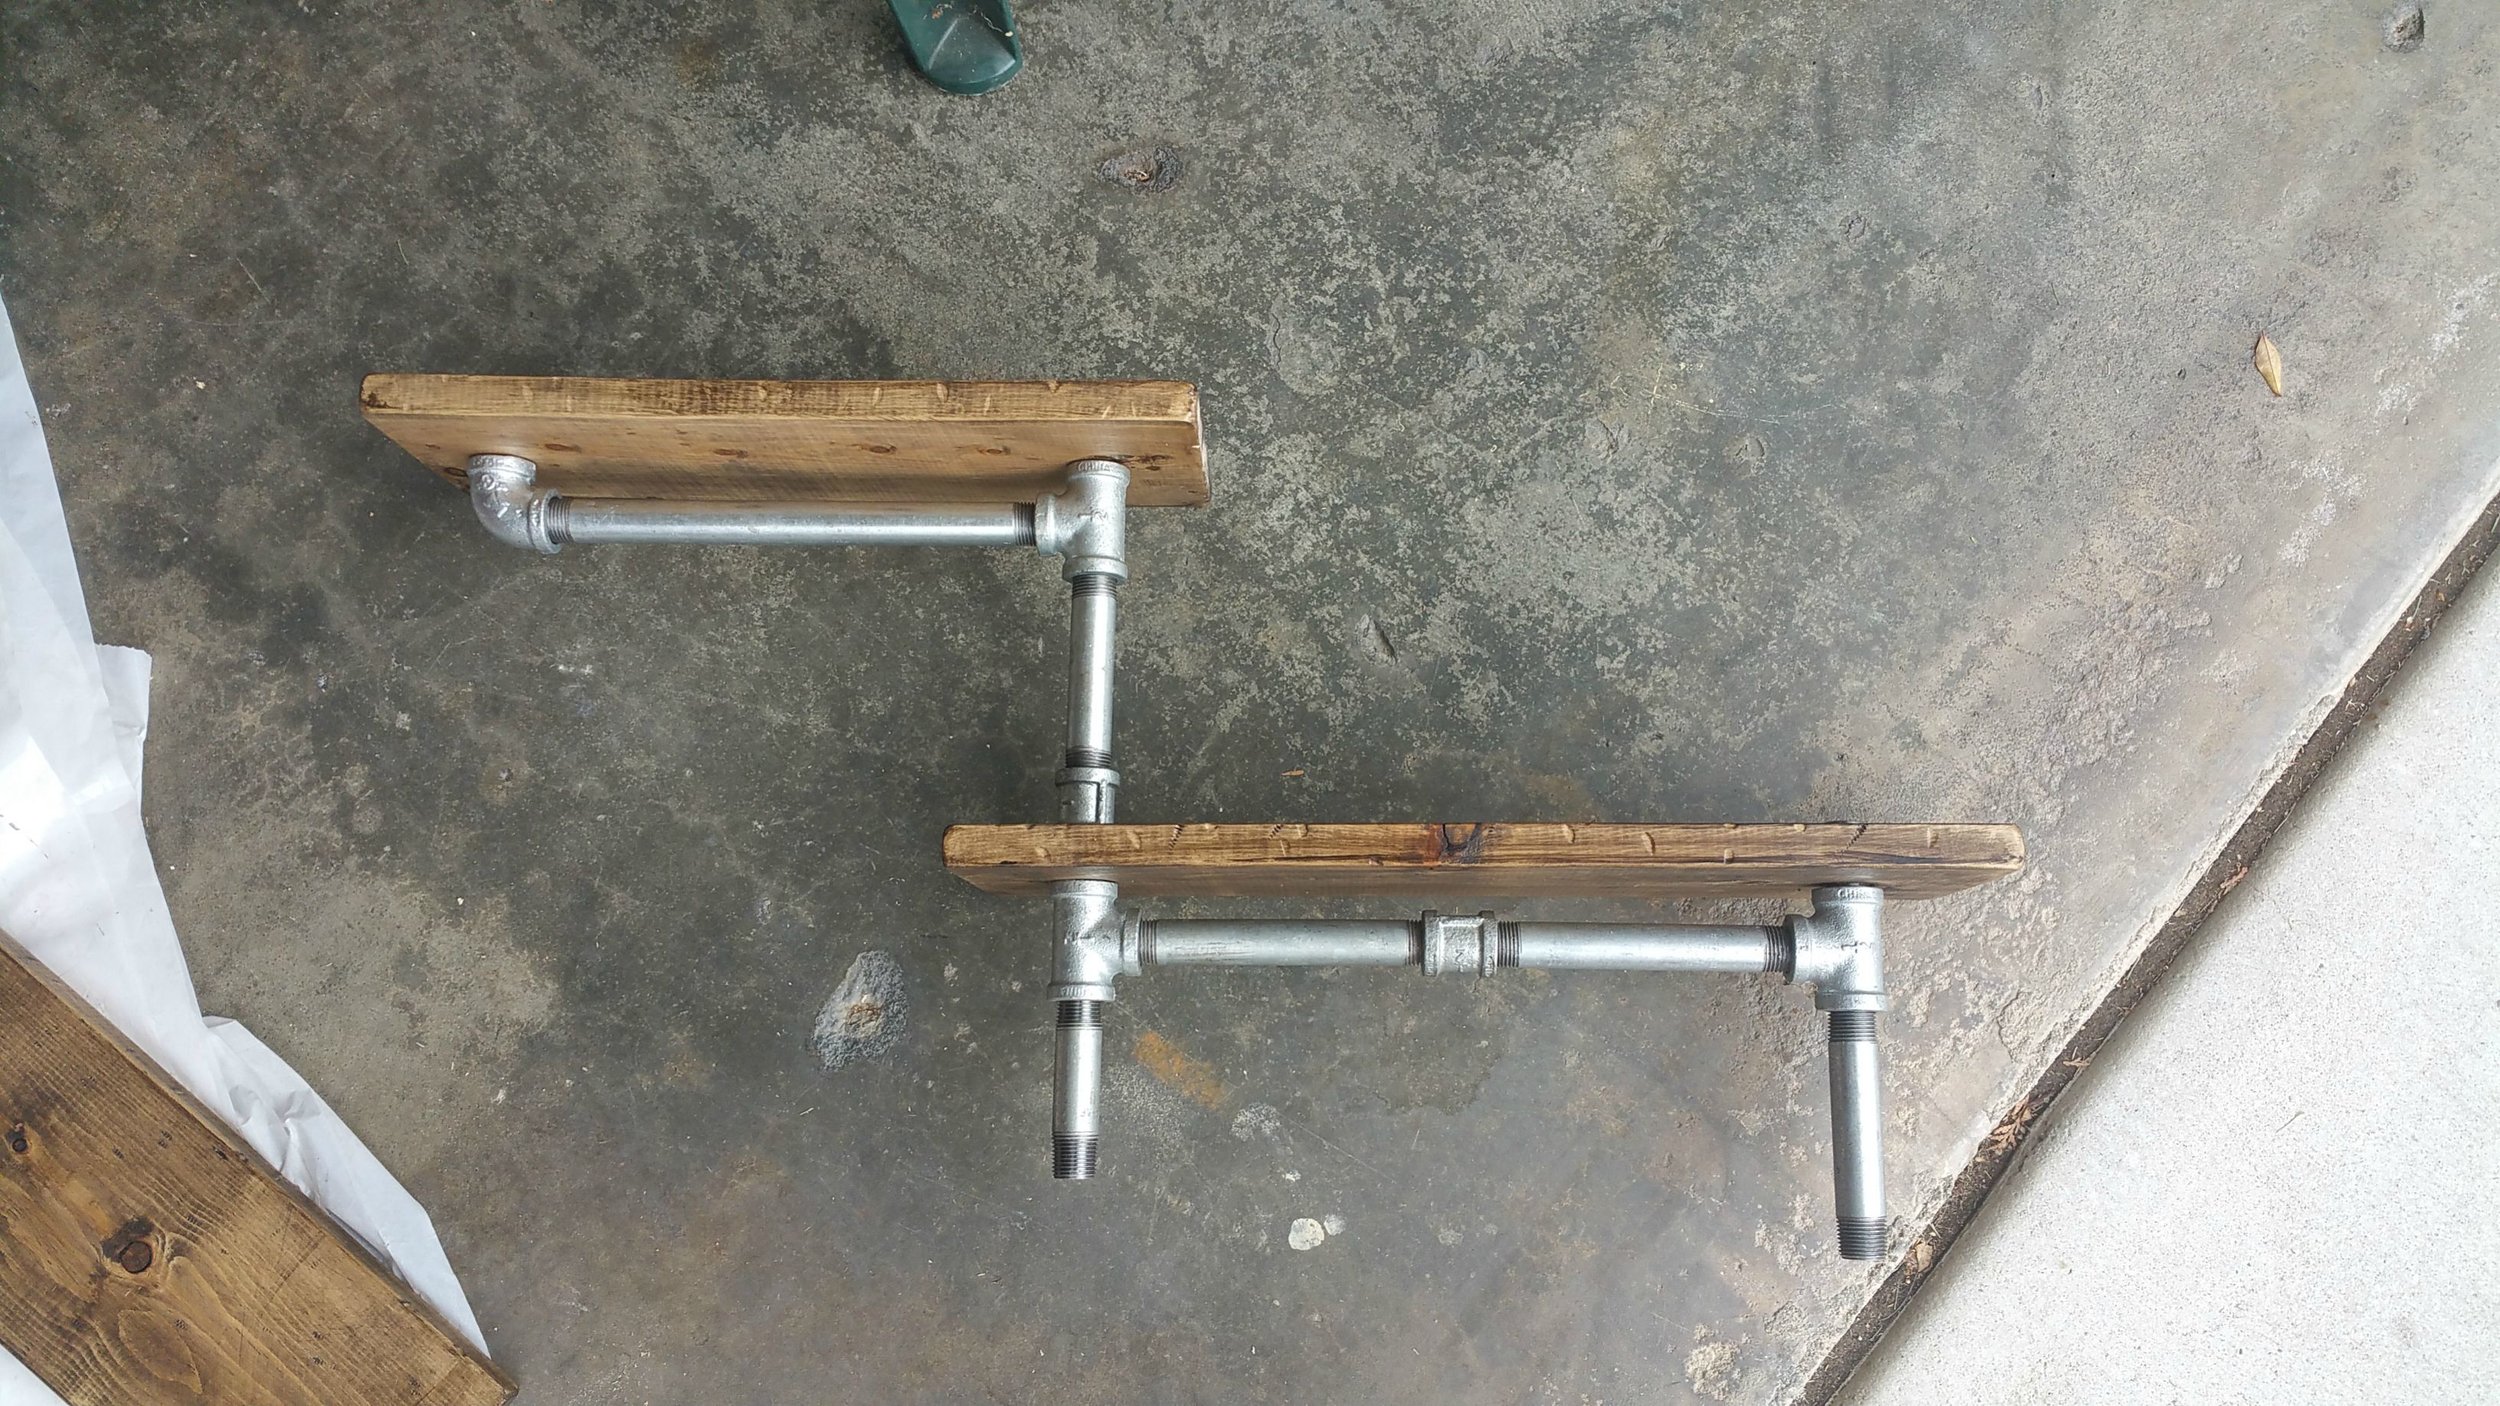
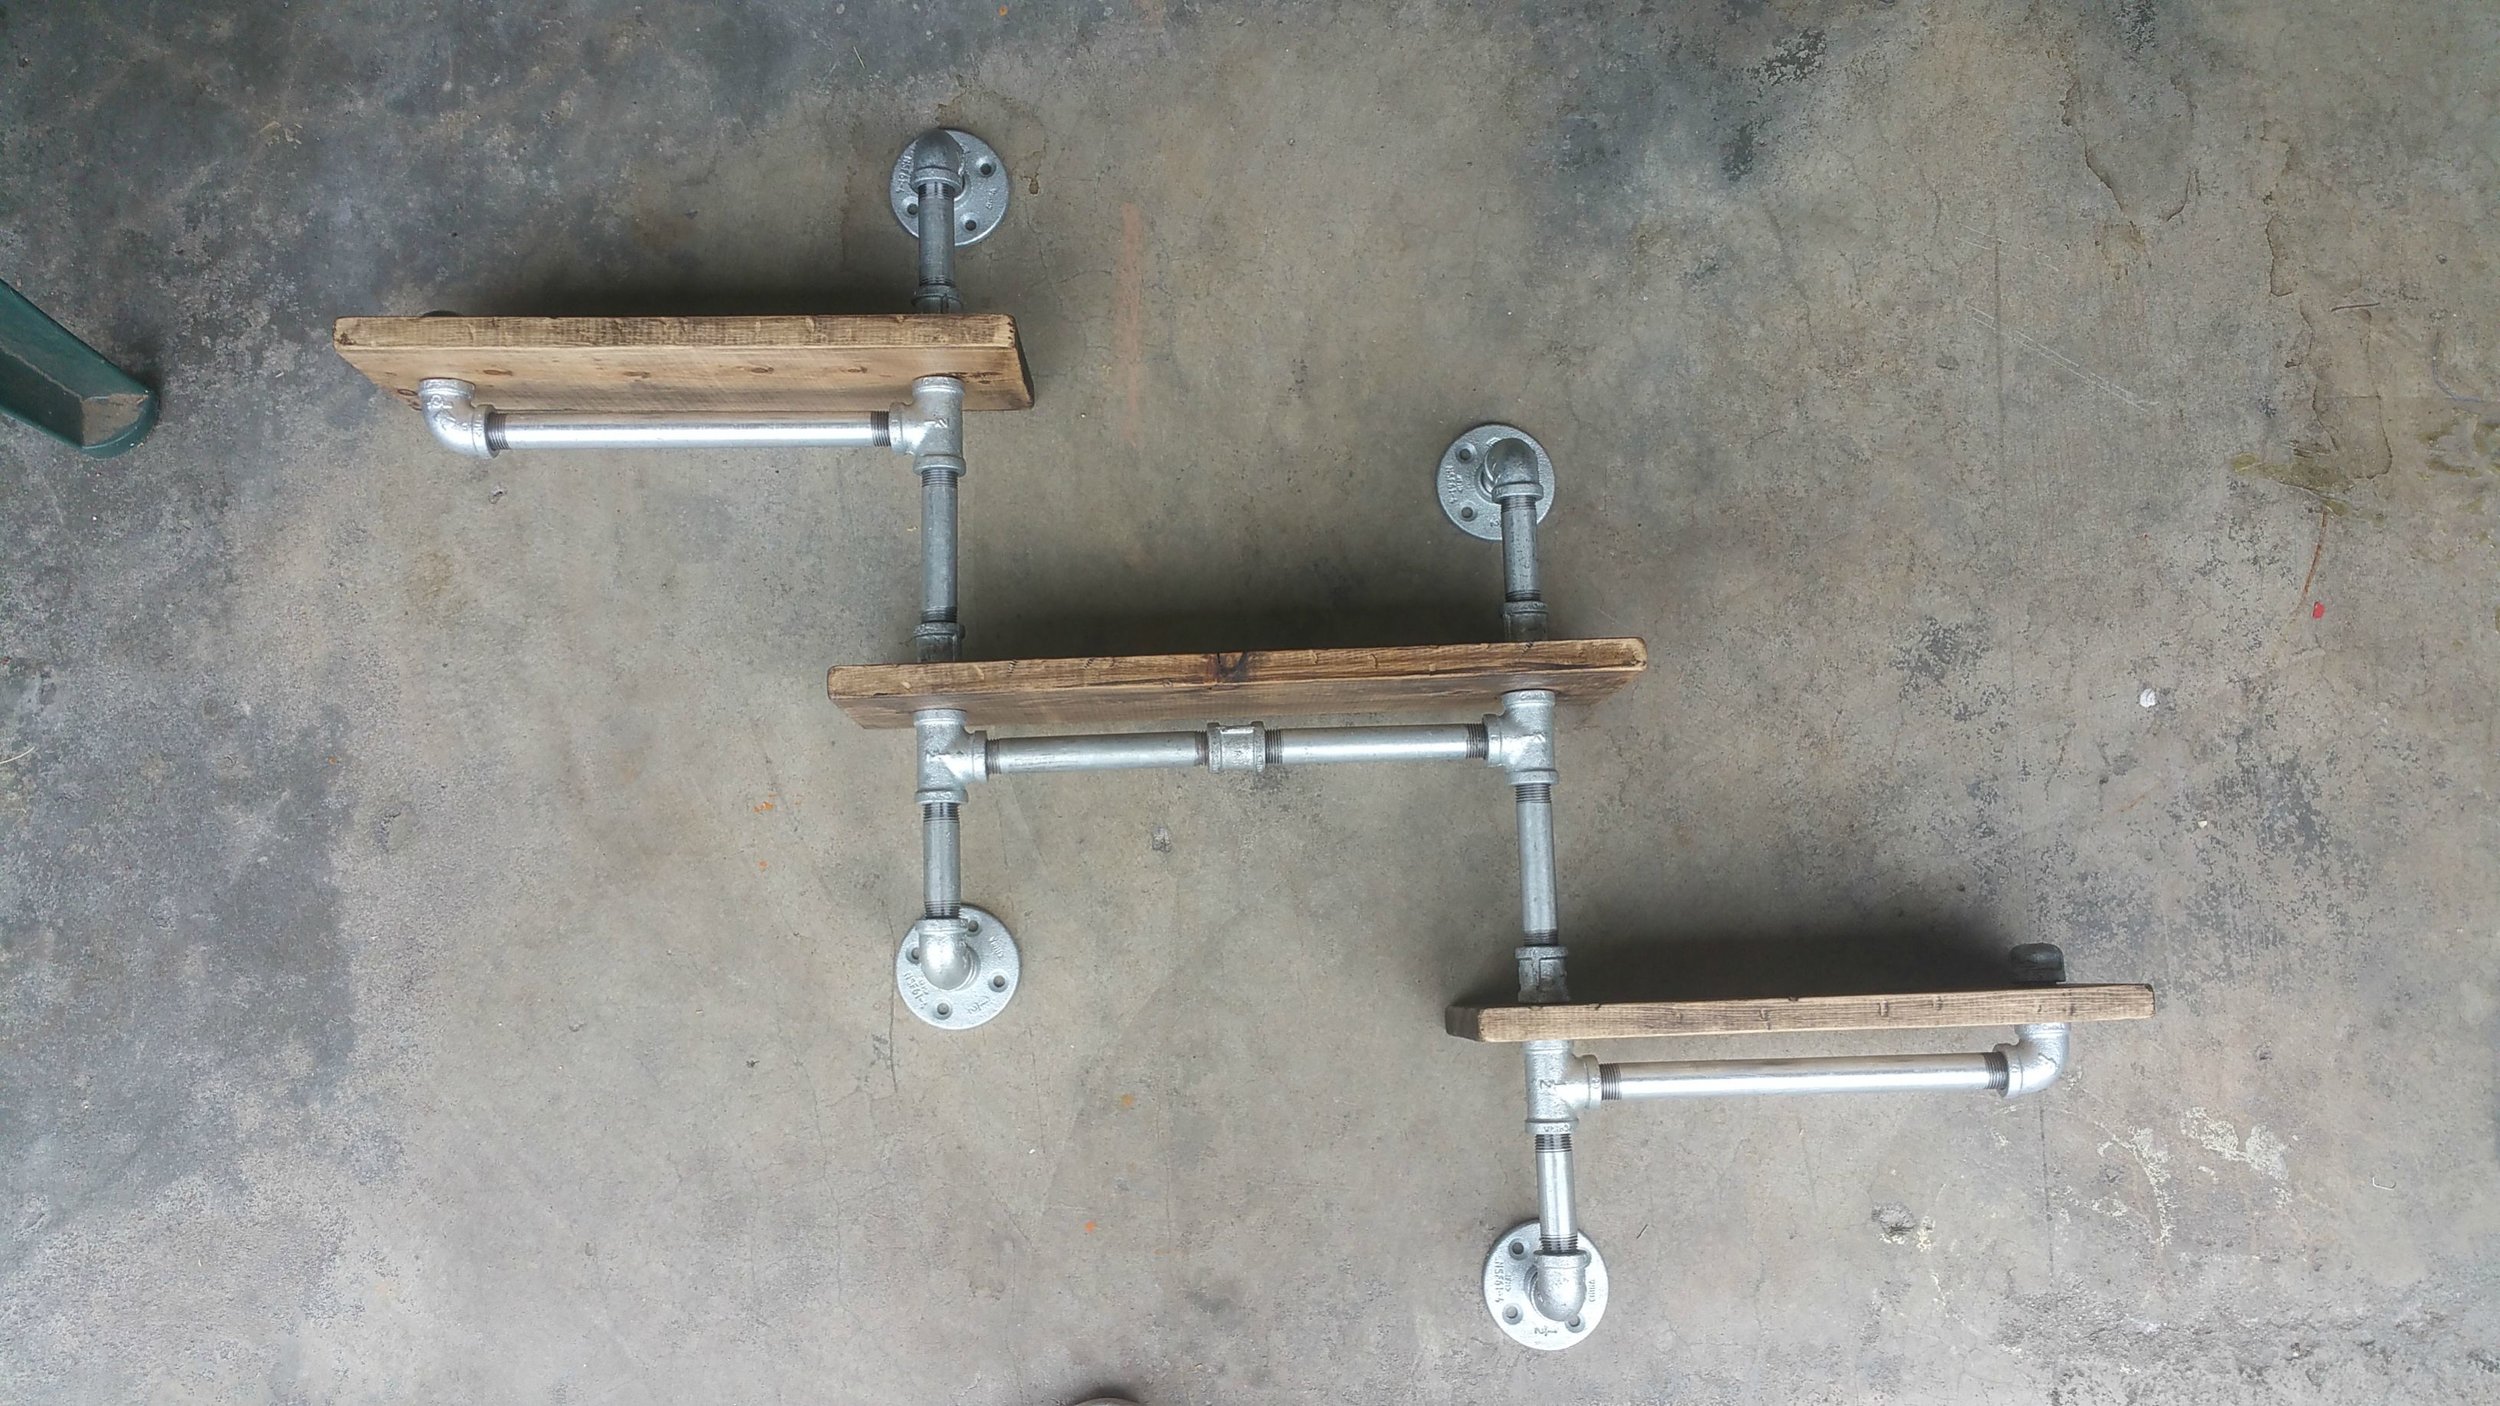
More Assembly. I took all of my assembled sections and inserted the wood via the holes I drilled.
Picture 1 shows the middle piece being inserted.
Picture 2 shows me combining the top outside piece to the middle one.
Picture 3 shows them fully assembled, including the pipe flange pieces I'd use to connect the piece to walls.

TOOLS
RYOBI Circular Saw: http://amzn.to/2q1l5wn
RYOBI Power Drill: http://amzn.to/2q1l5wn
RYOBI Drill Bit Set: http://amzn.to/2oKKWXi
RYOBI Cordless Orbital Sander: http://amzn.to/2oICOaP
Tape Measure
If you want to know any materials, tools, or have any general questions answered, you can check out the second step or contact me via my website, thecuttingbored.com and I would be happy to do answer them.
As always, thank you for reading! I would be so grateful if you could please subscribe to my Youtube Channel for future projects.
I put out videos every few weeks.
Cheers!
Zach