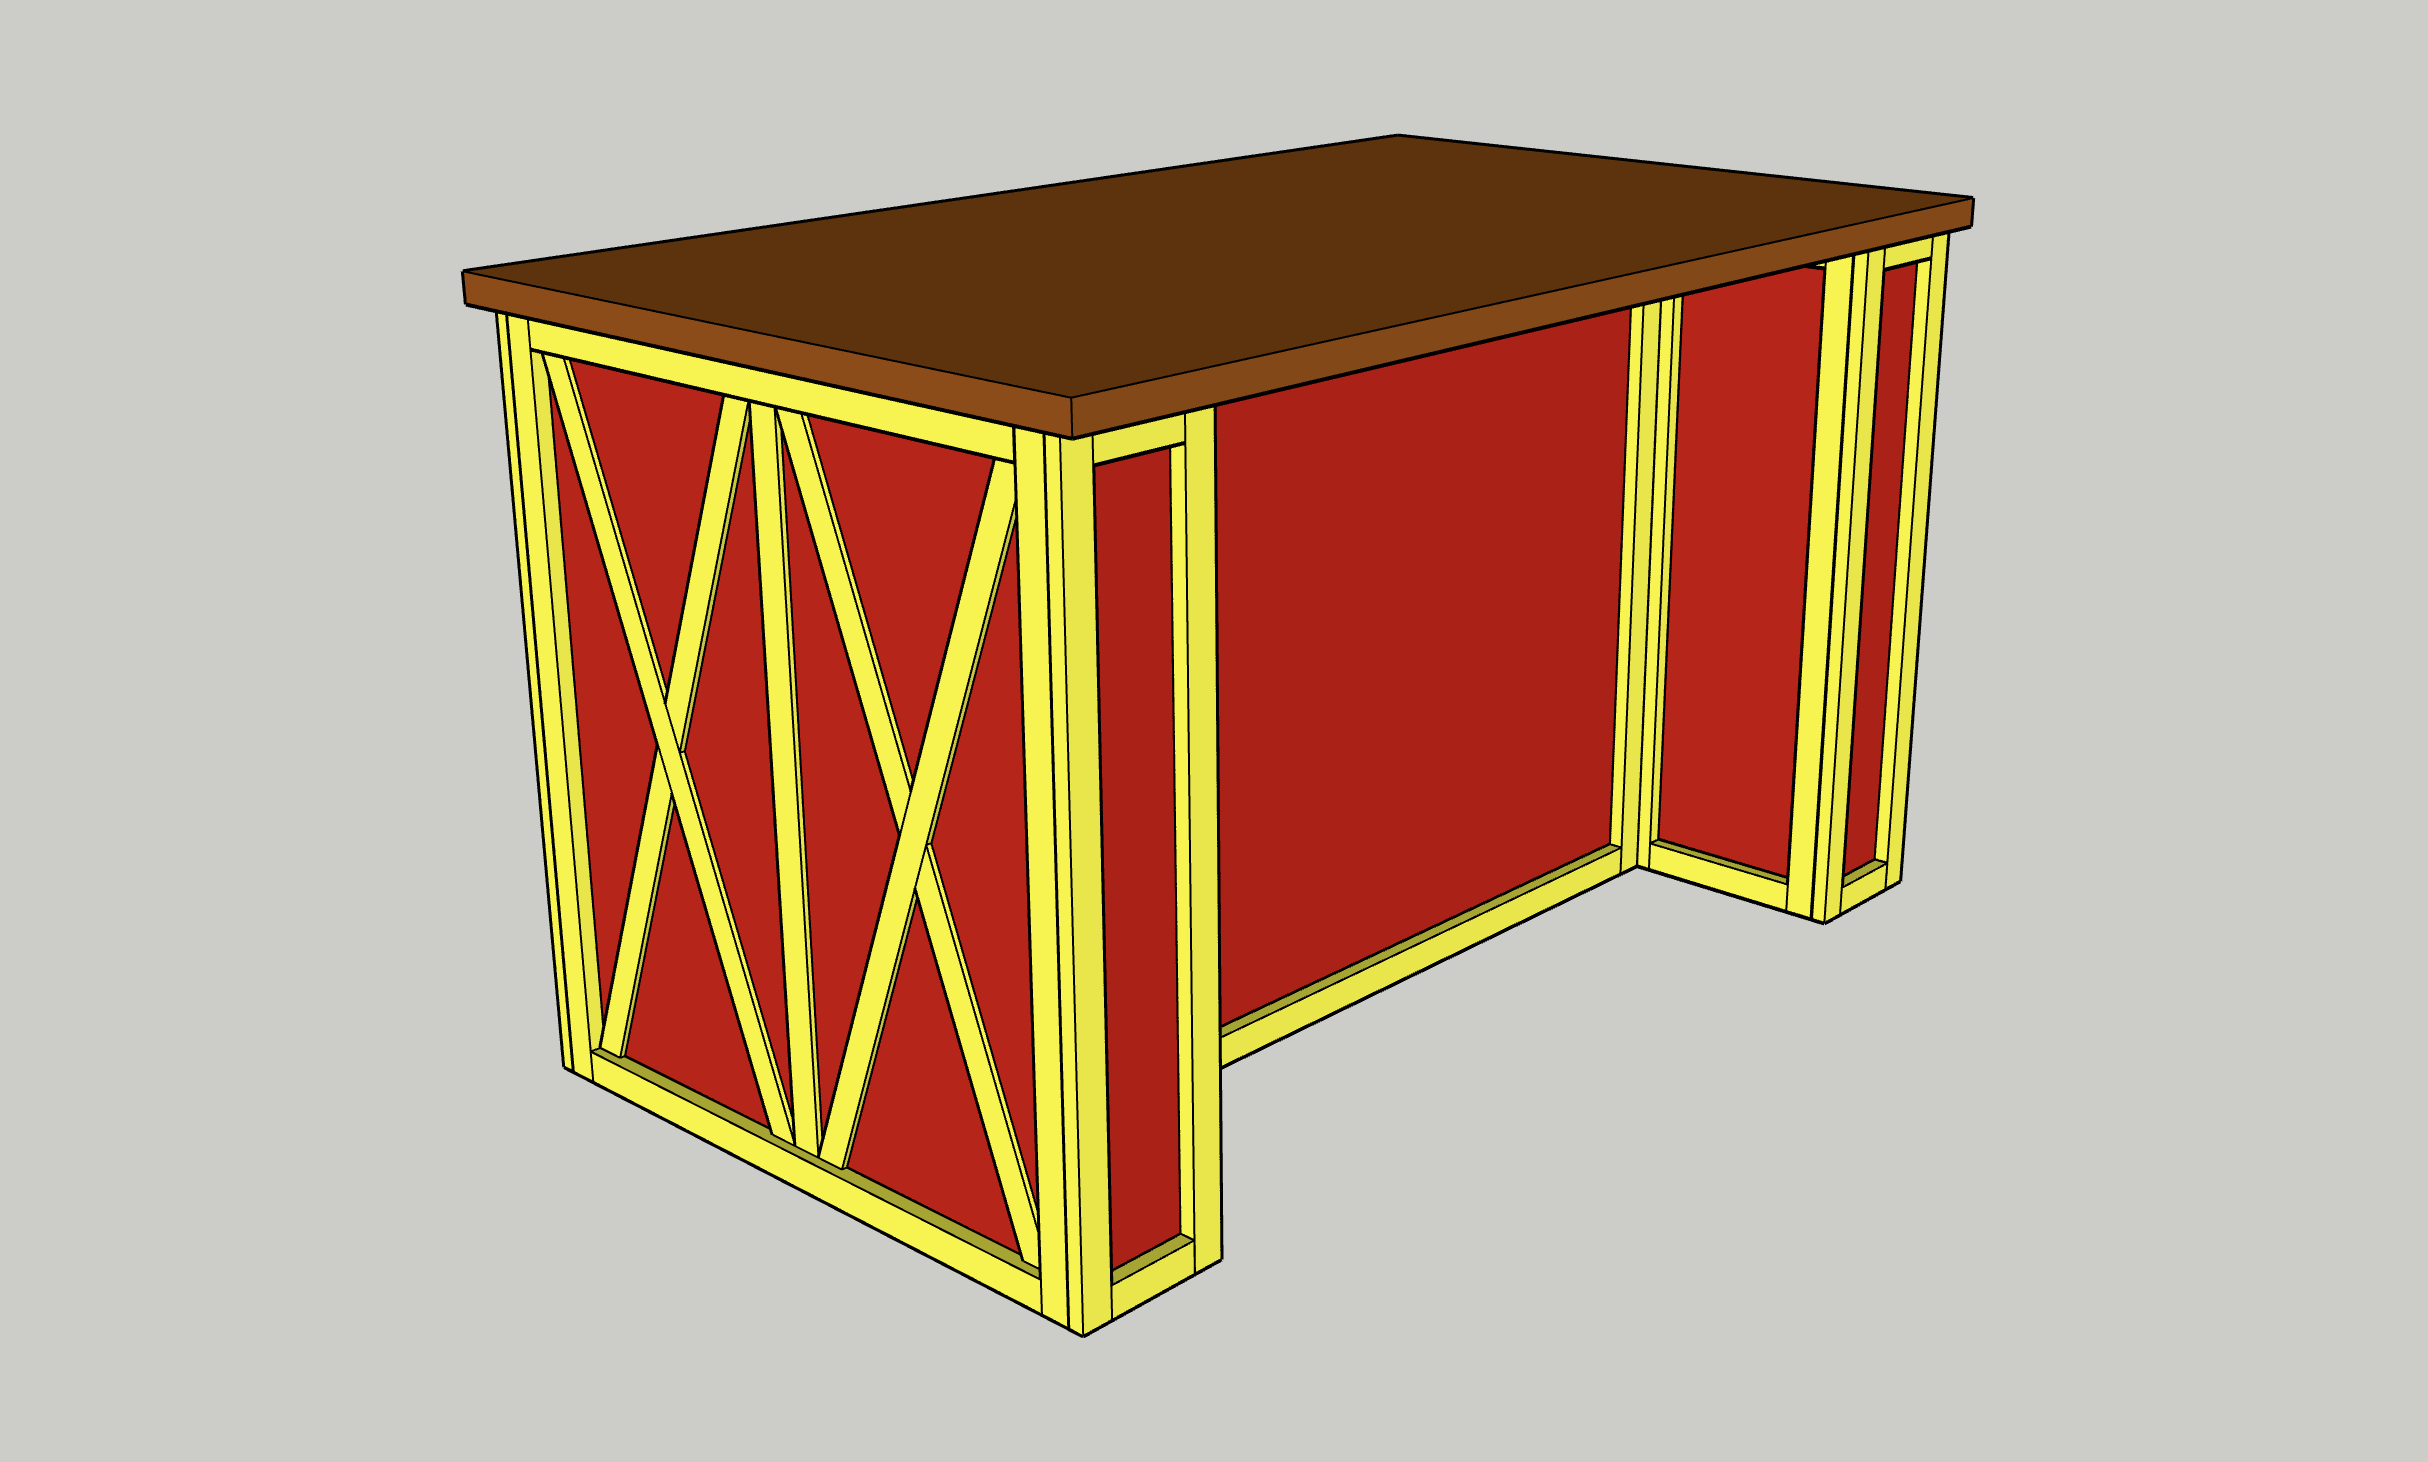
I was quoted ~$3,000 for a custom kitchen island with a butcher block top. No thanks...I'll just make my own for around $850 :-)
This was above and beyond the most ambitious project I've ever tackled. I'm grateful to have done it, so proud of the final result, and happy to share my process. Full video is below, followed by all the tools and materials I used, plus full steps in the article.
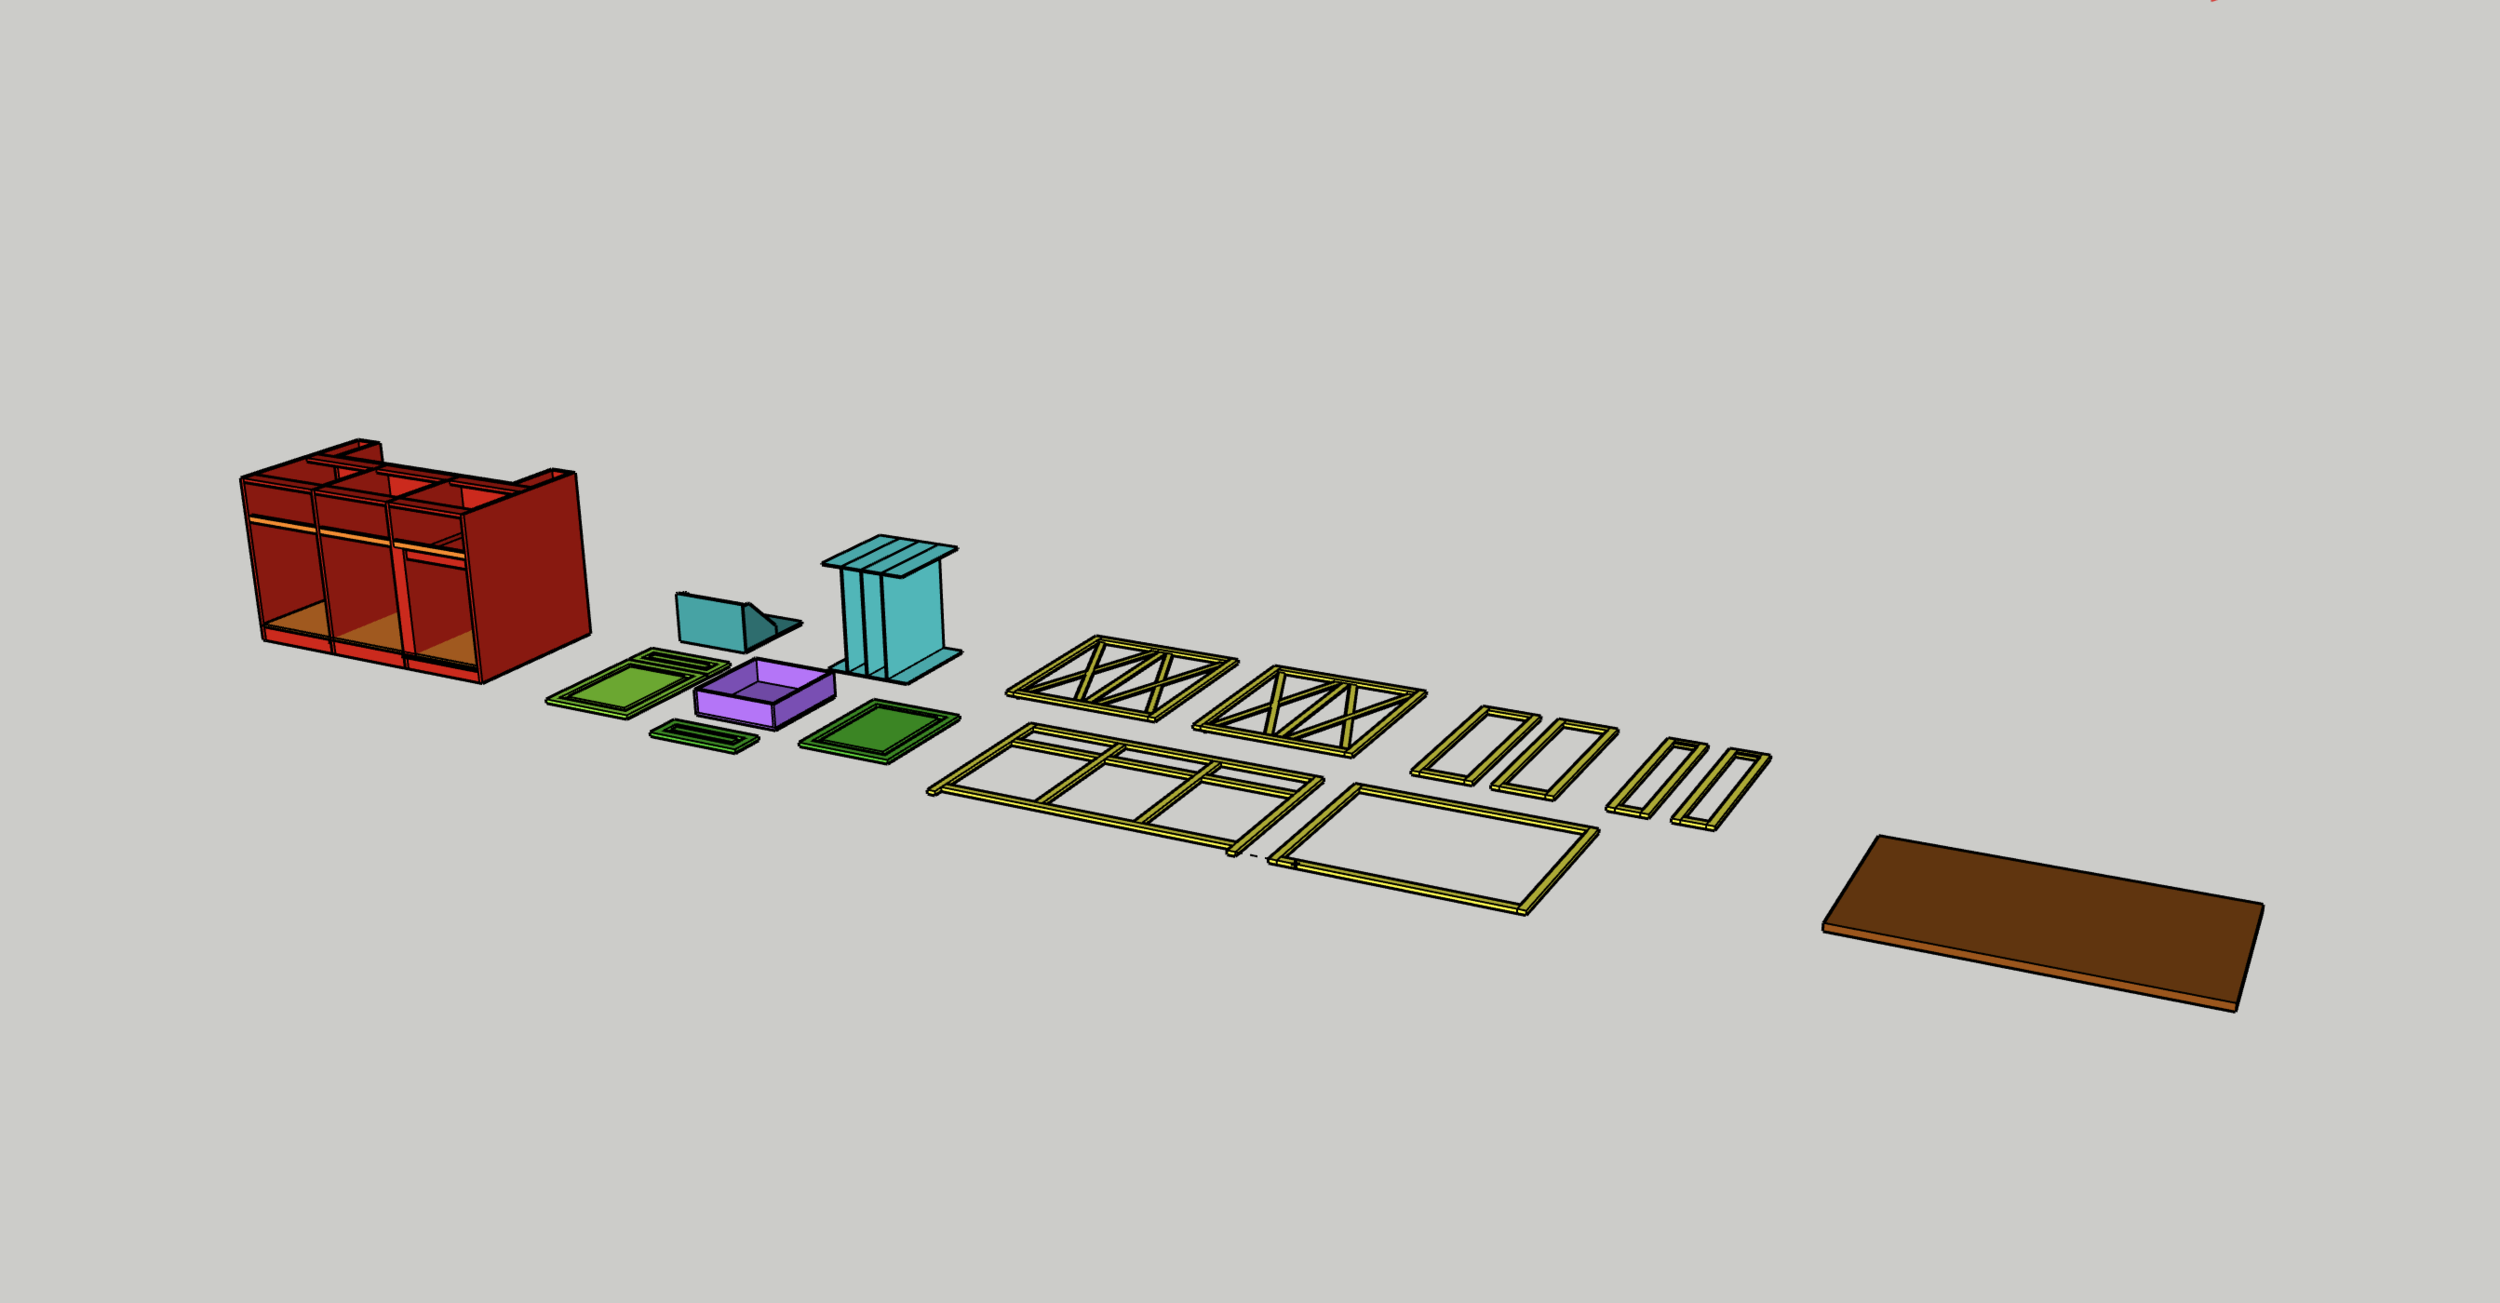
After a year, I finally learned SketchUp enough to properly design all of the components of this. Here is the file for download.
MATERIALS
2 x 3/4" Full Sheets of Purebond Plywood
2 x 1/4" x 4' x 4' Plywood
1 x 1/2" x 2' x 4' Plywood
24 BF of Poplar (Framing)
3' x 5' Butcher Block (Purchased Separately from Perfect Plank)
Primer + Interior Paint
Wood Filler + Sand Paper (80-320 grits)
TiteBond II Wood Glue: http://amzn.to/2peRFus
The Good Stuff for Butcher Blocks: https://amzn.to/2OsLlLp
~200 x 1 1/4" Pocket Hole Screws
Cabinet hardware (recycled), drawer slides (from Home Depot), and drawer pulls (from Amazon)
TOOLS
SAWSTOP Contractors 30” Saw: https://amzn.to/2Luh91q
Circular Saw: http://amzn.to/2q1l5wn
Power Drill: http://amzn.to/2q1l5wn
Impact Driver: http://amzn.to/2q1l5wn
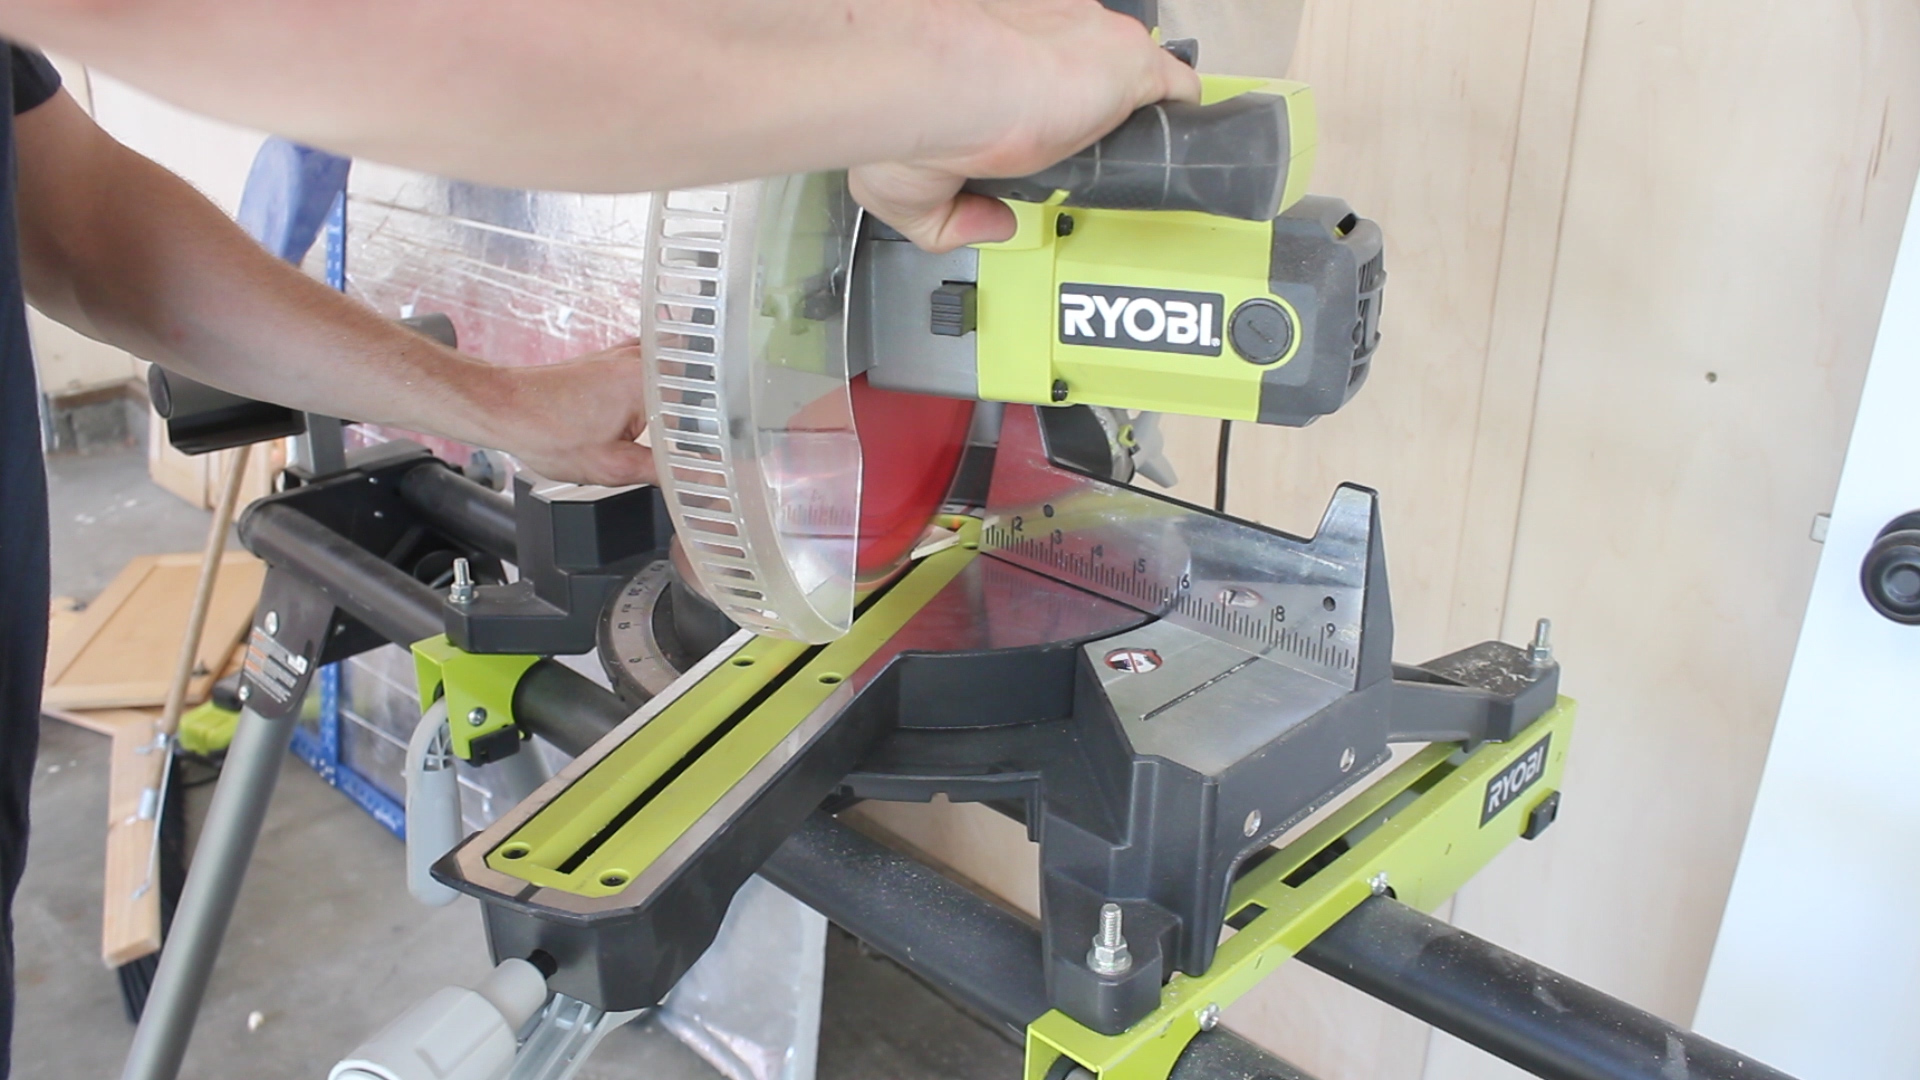
10 in. Sliding Compound Miter Saw: http://amzn.to/2q1klHw
Miter Saw Stand: http://amzn.to/2p1072e
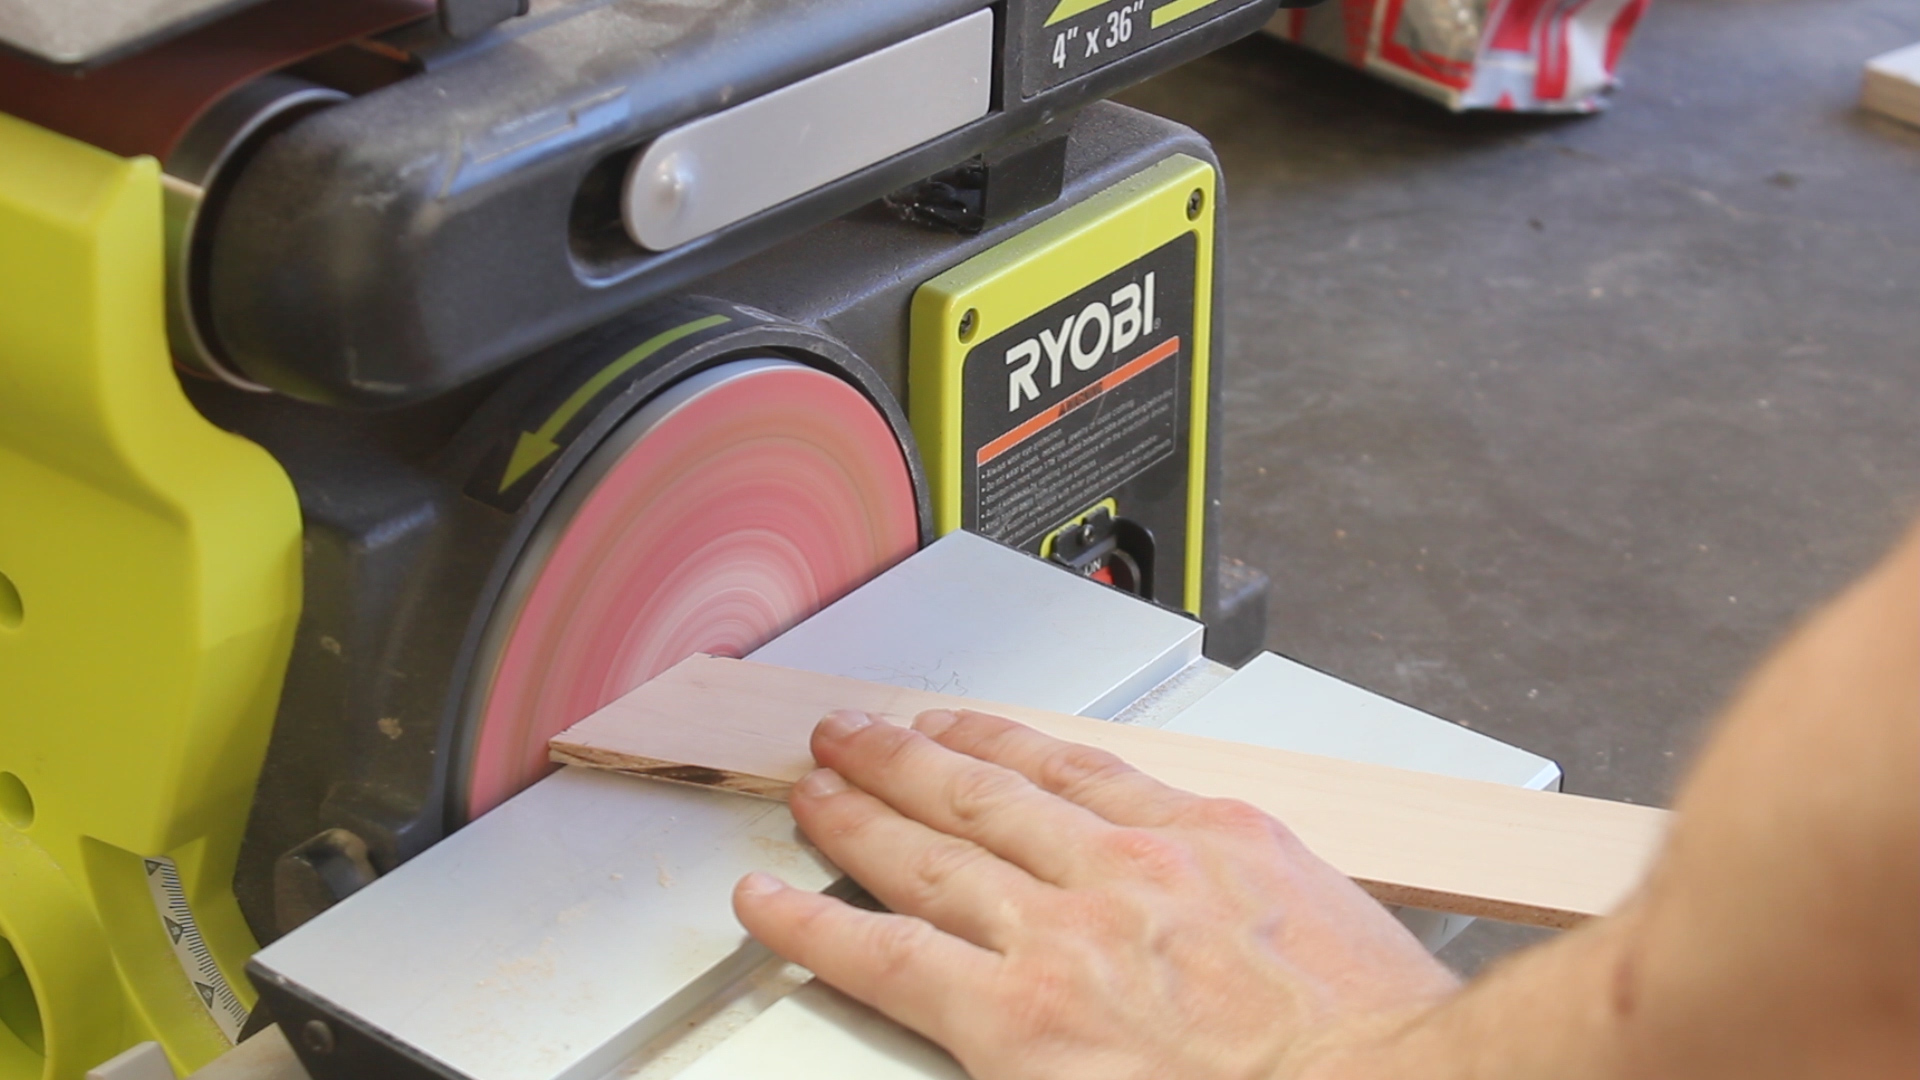
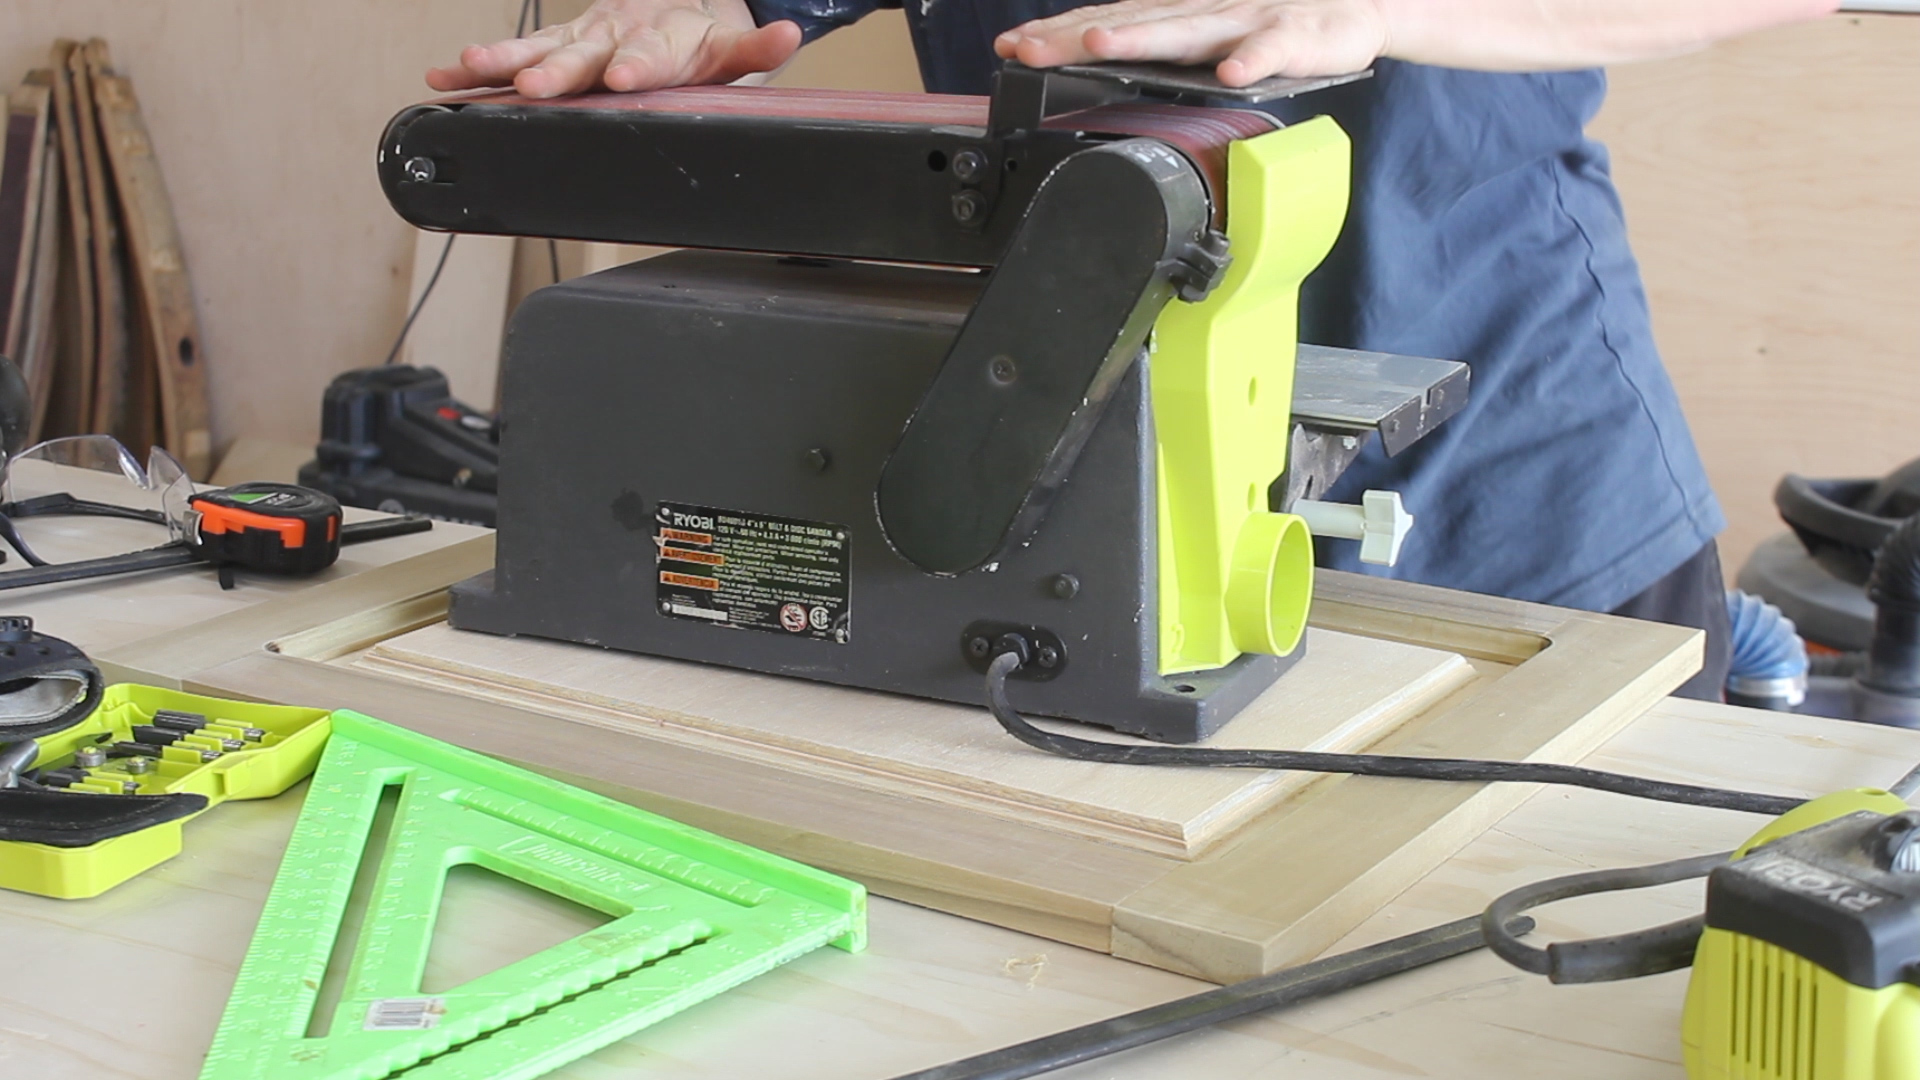
Stationary Bench Sander: http://amzn.to/2q1Cq8k
Cordless Brad Nailer: http://amzn.to/2p1dYFD
Plunge Router: http://amzn.to/2p15eiC
Glue Gun: http://amzn.to/2uLJt7V
Router Bit Set: http://amzn.to/2pwx87Z
K5 Pocket Hole Jig: http://amzn.to/2qb8S7t
Kreg Clamp: http://amzn.to/2riyHU8
Below are a few stills of the SketchUp design of the entire, as well as a layout of all the components of the build.
Time to get to work!
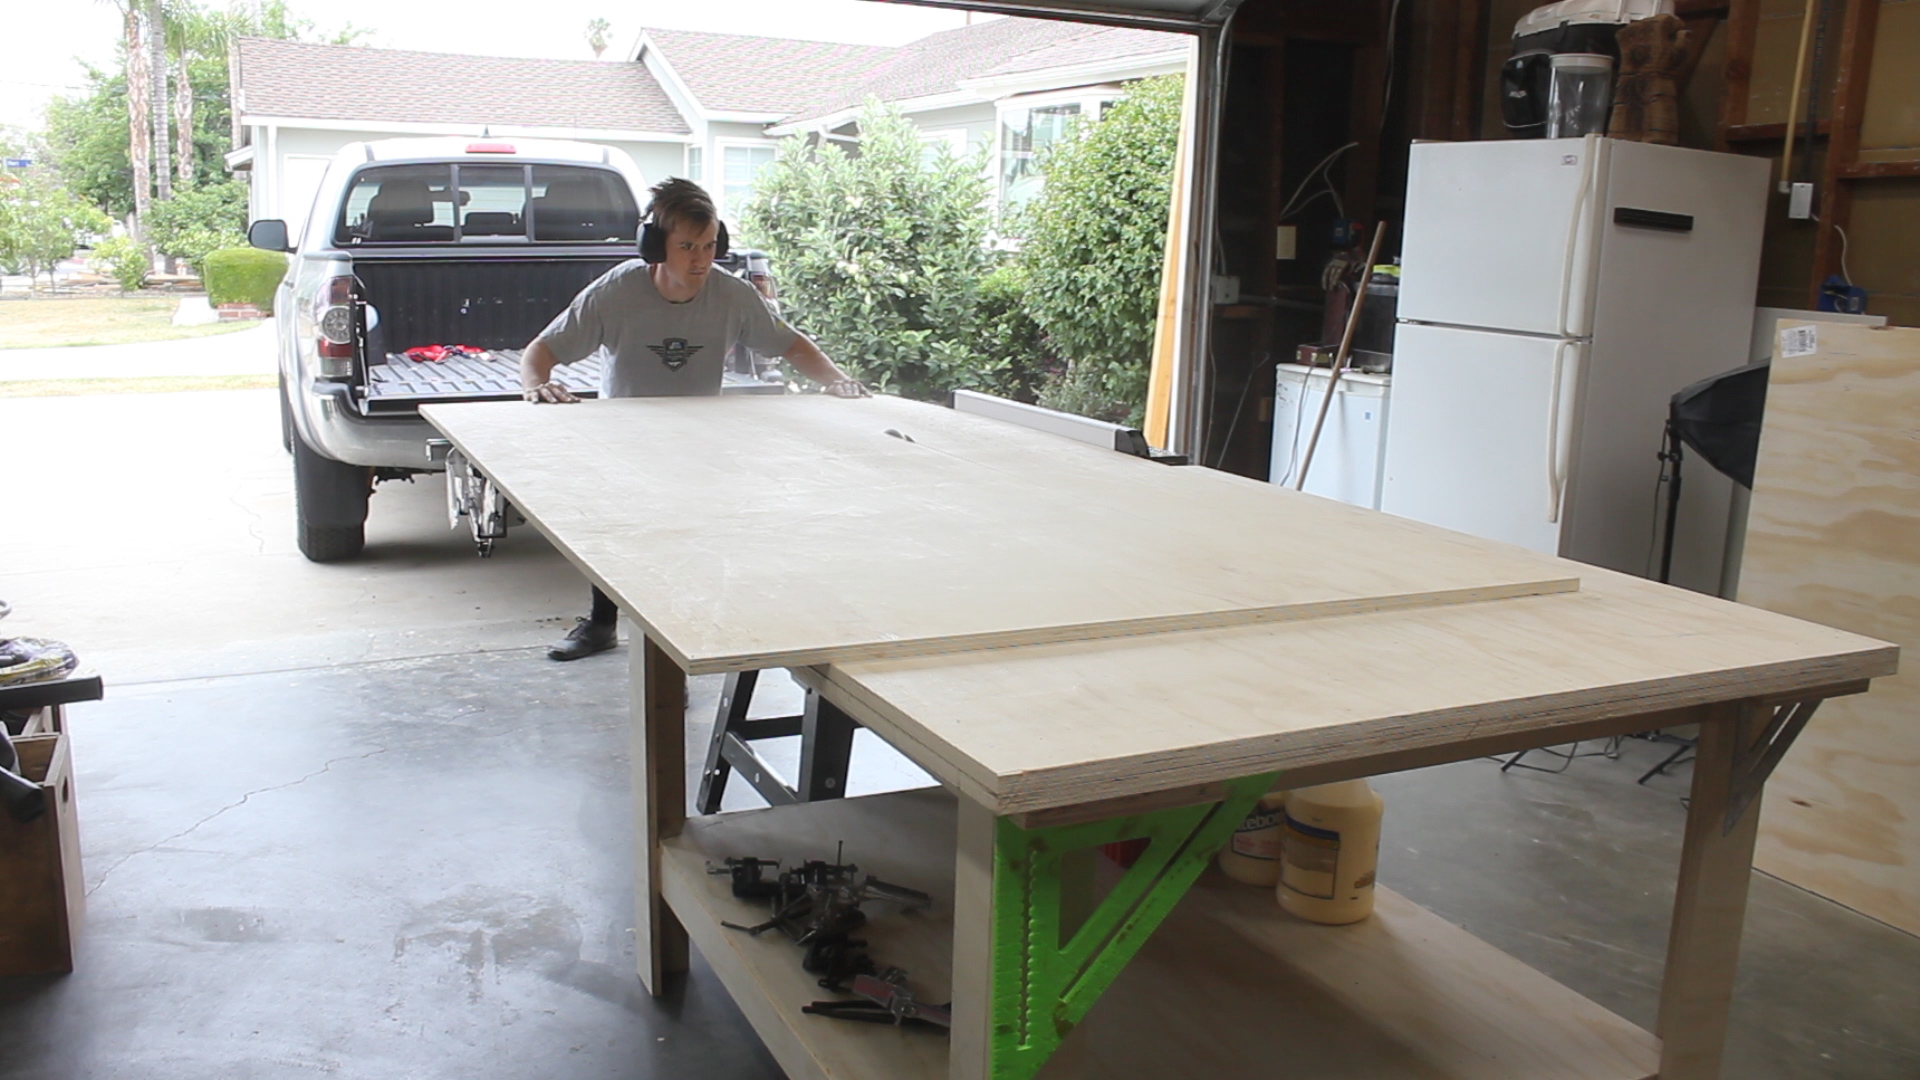

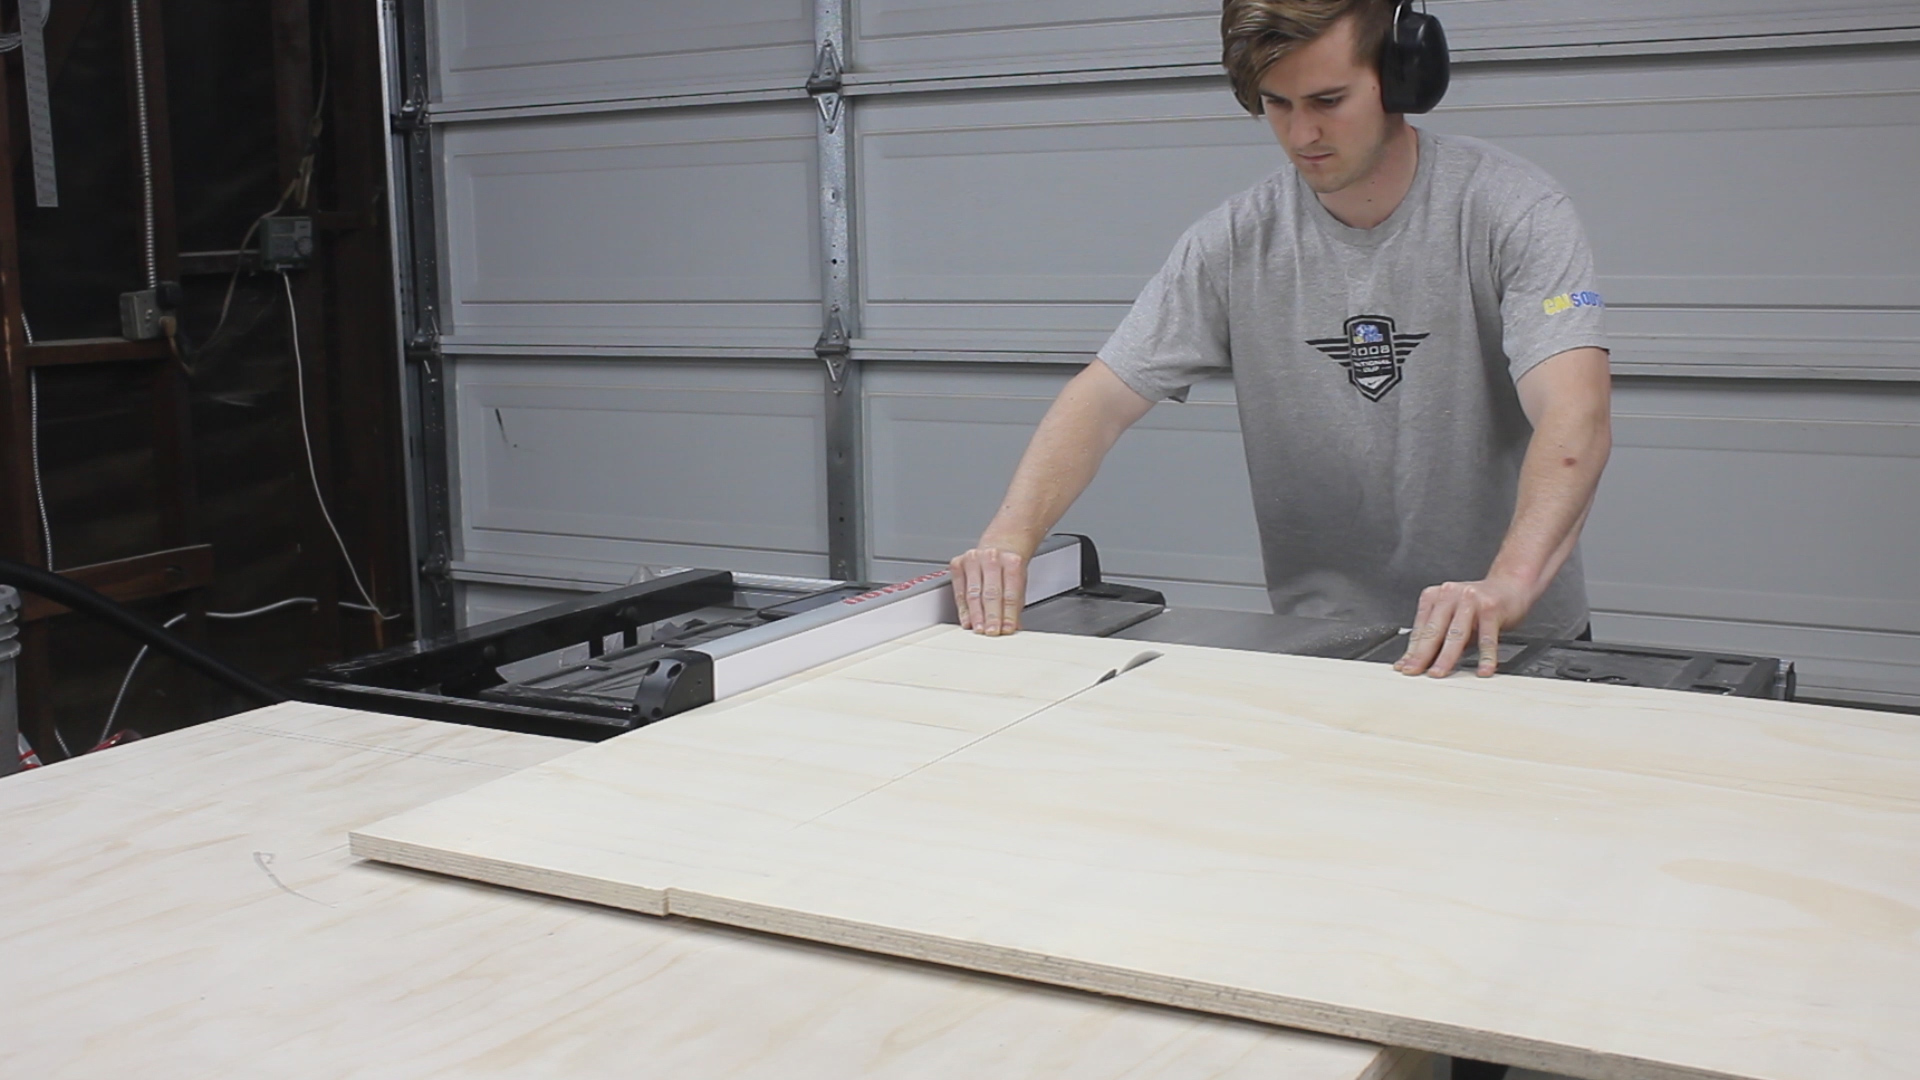
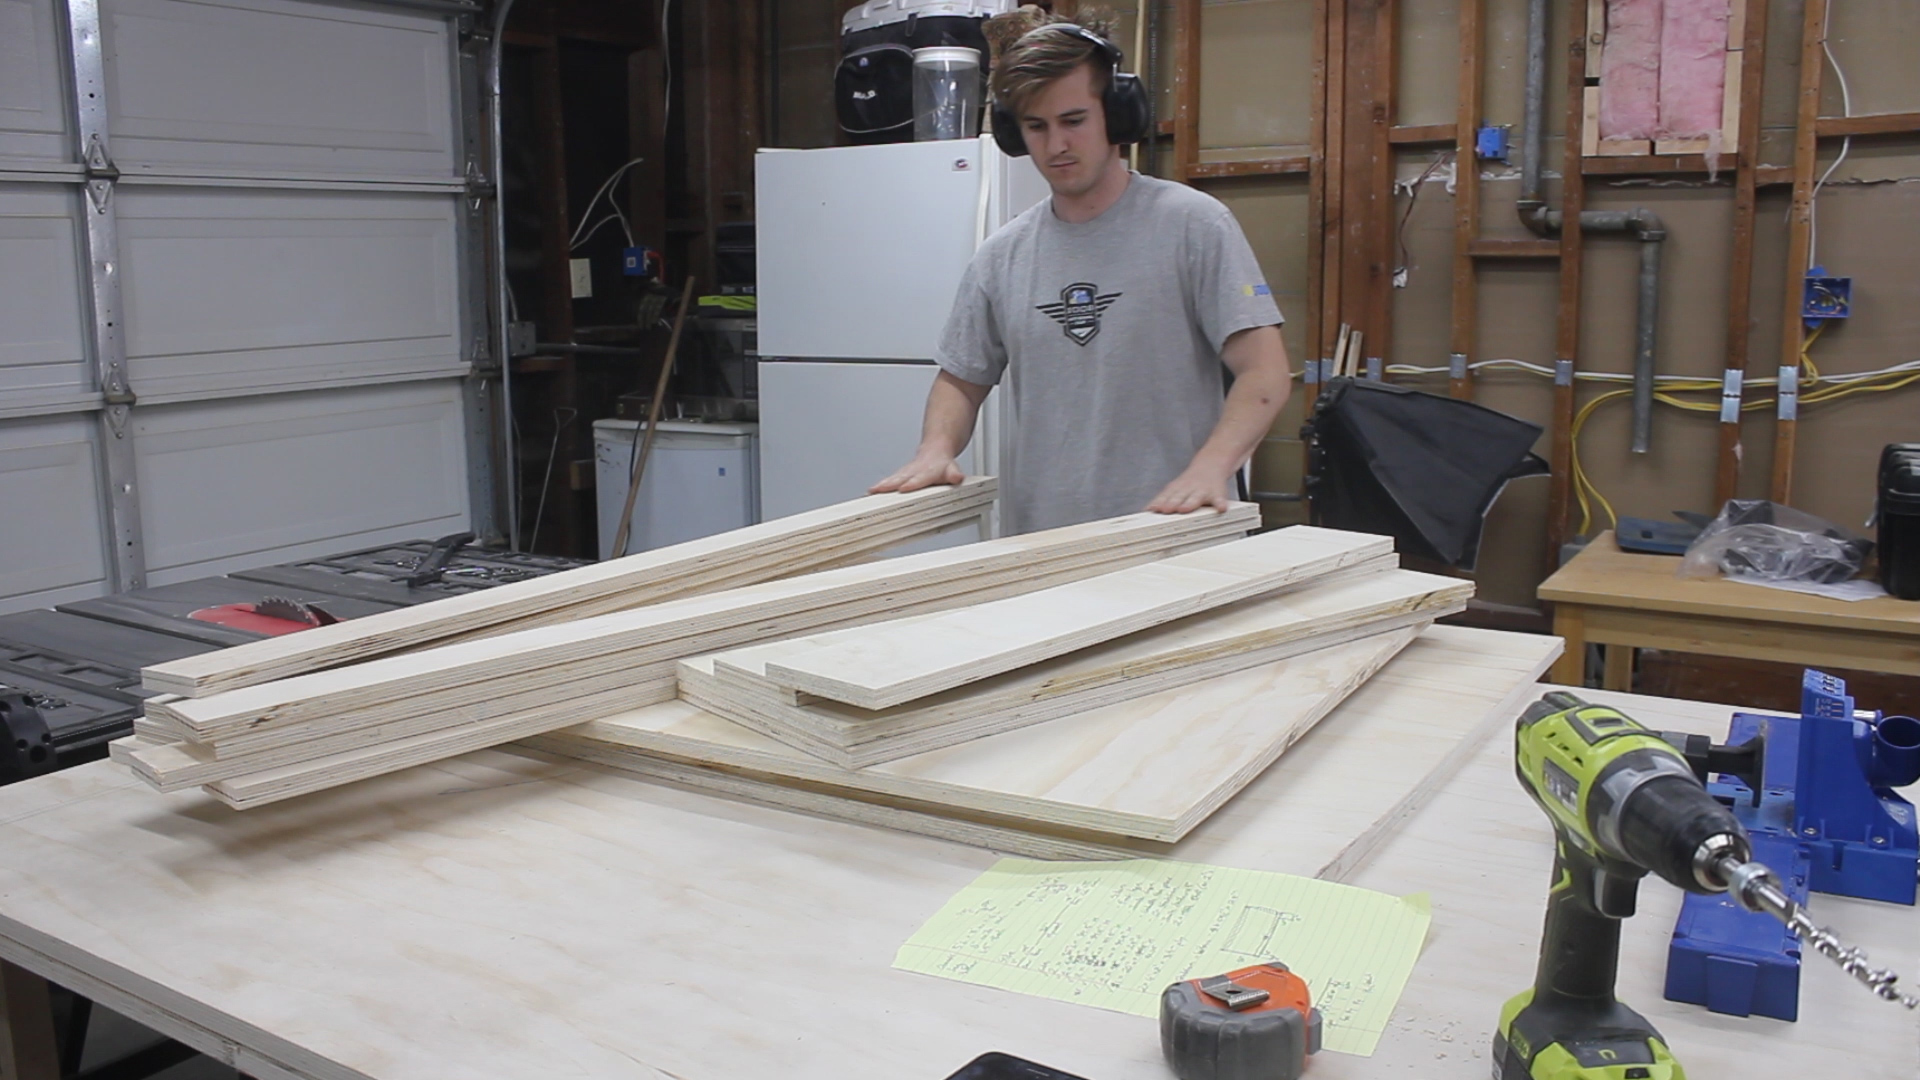
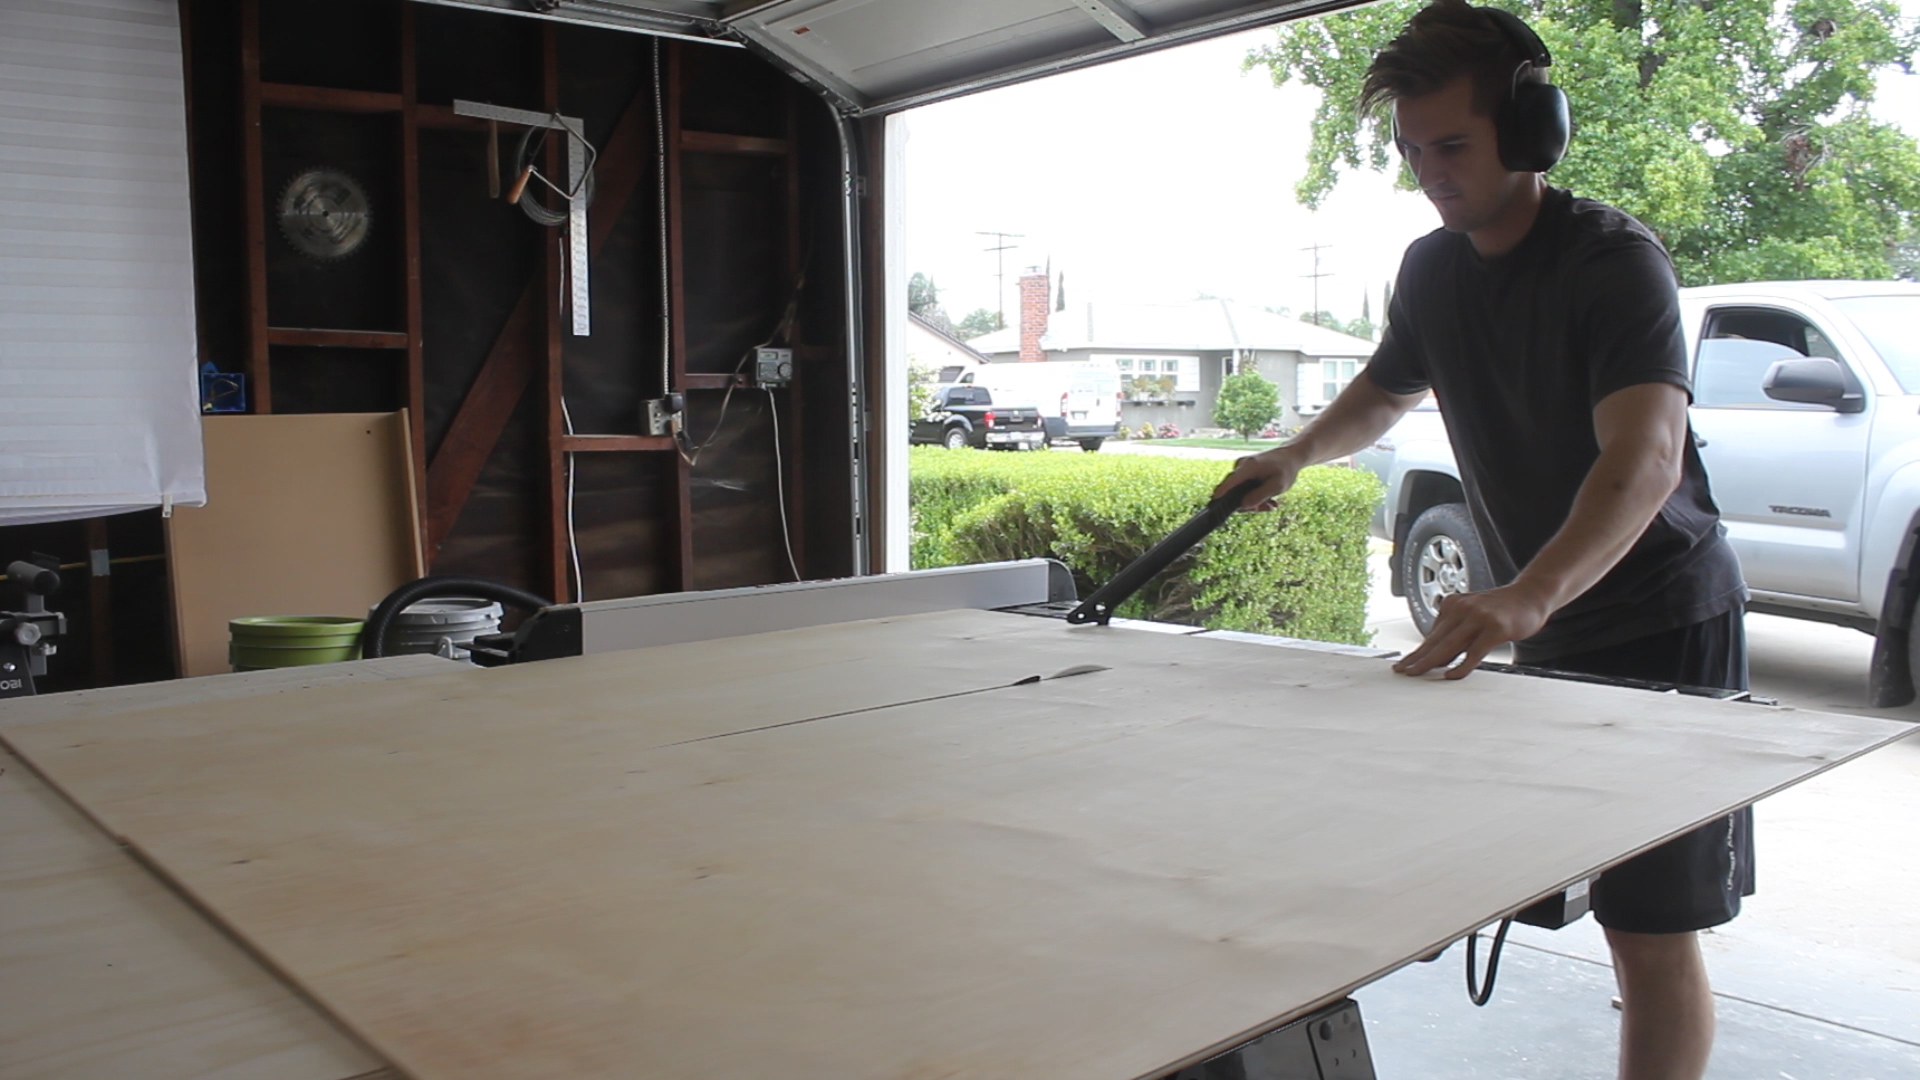
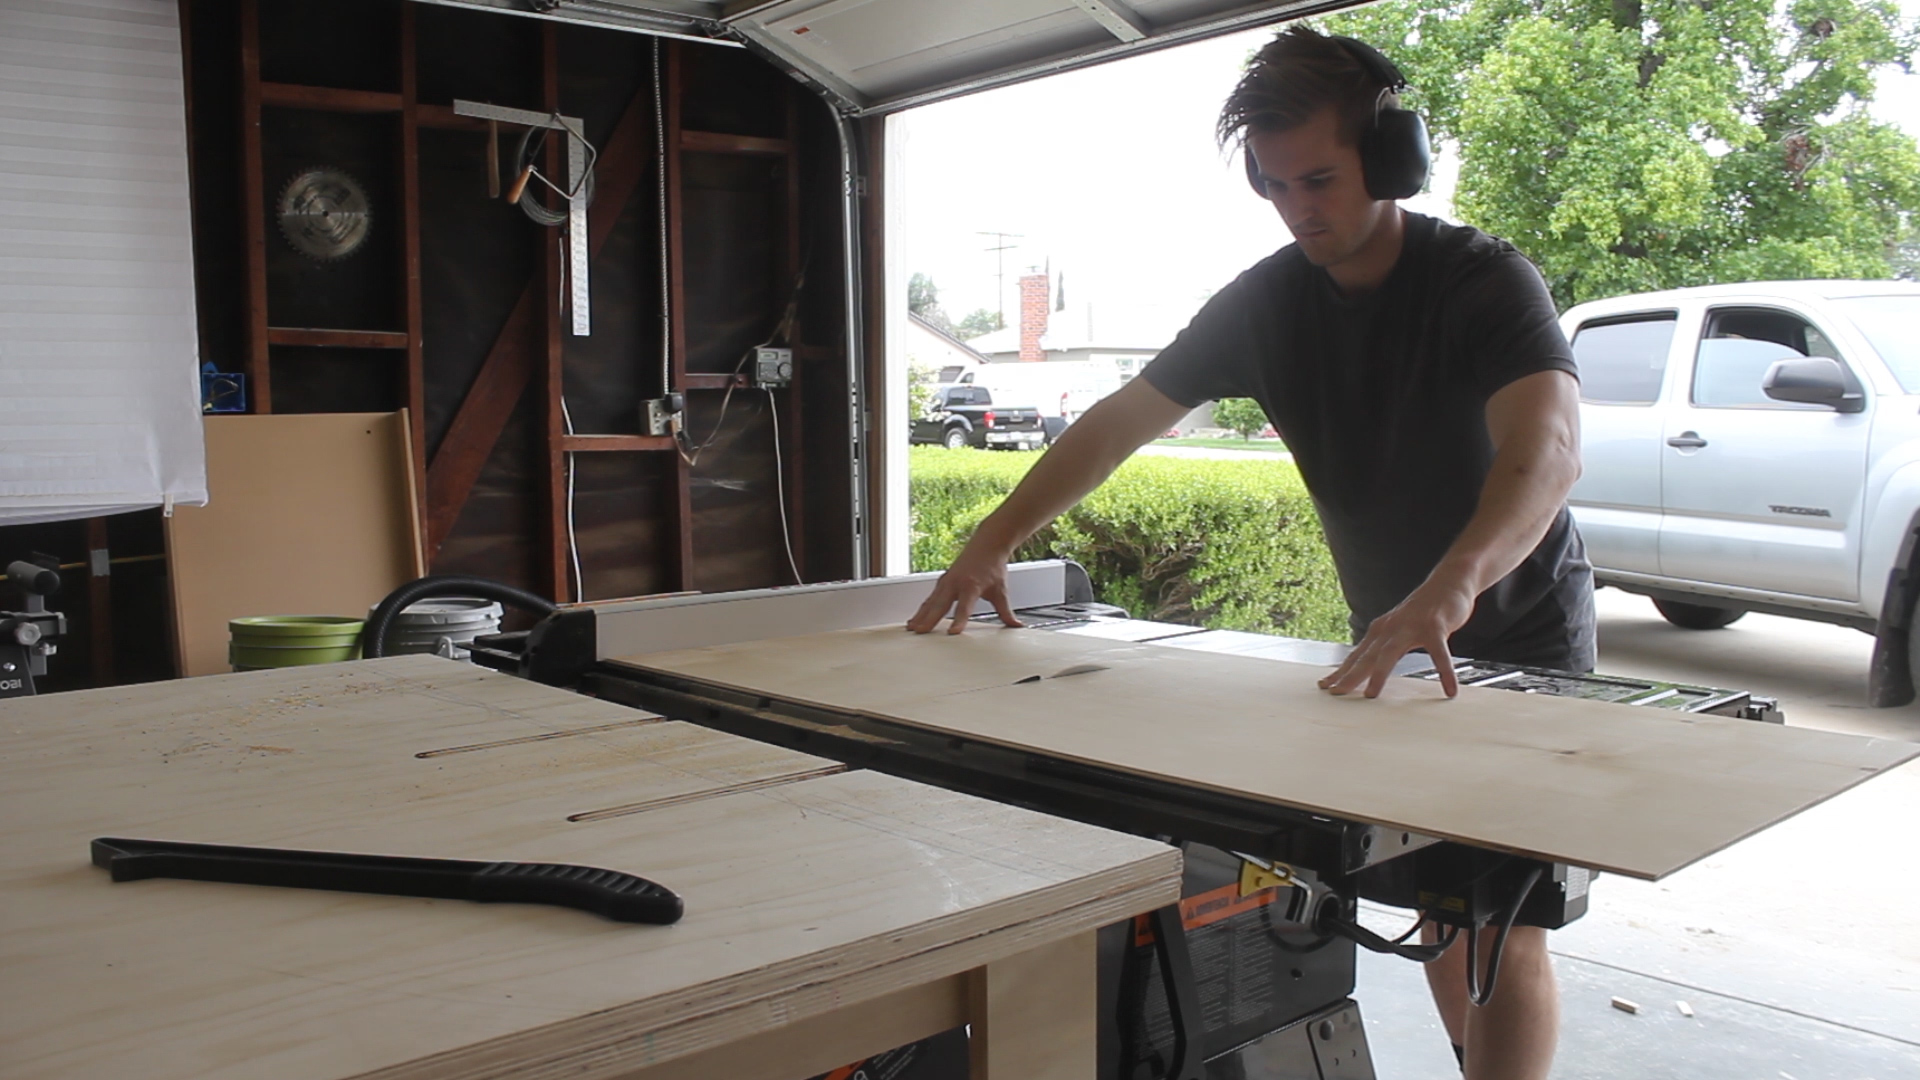
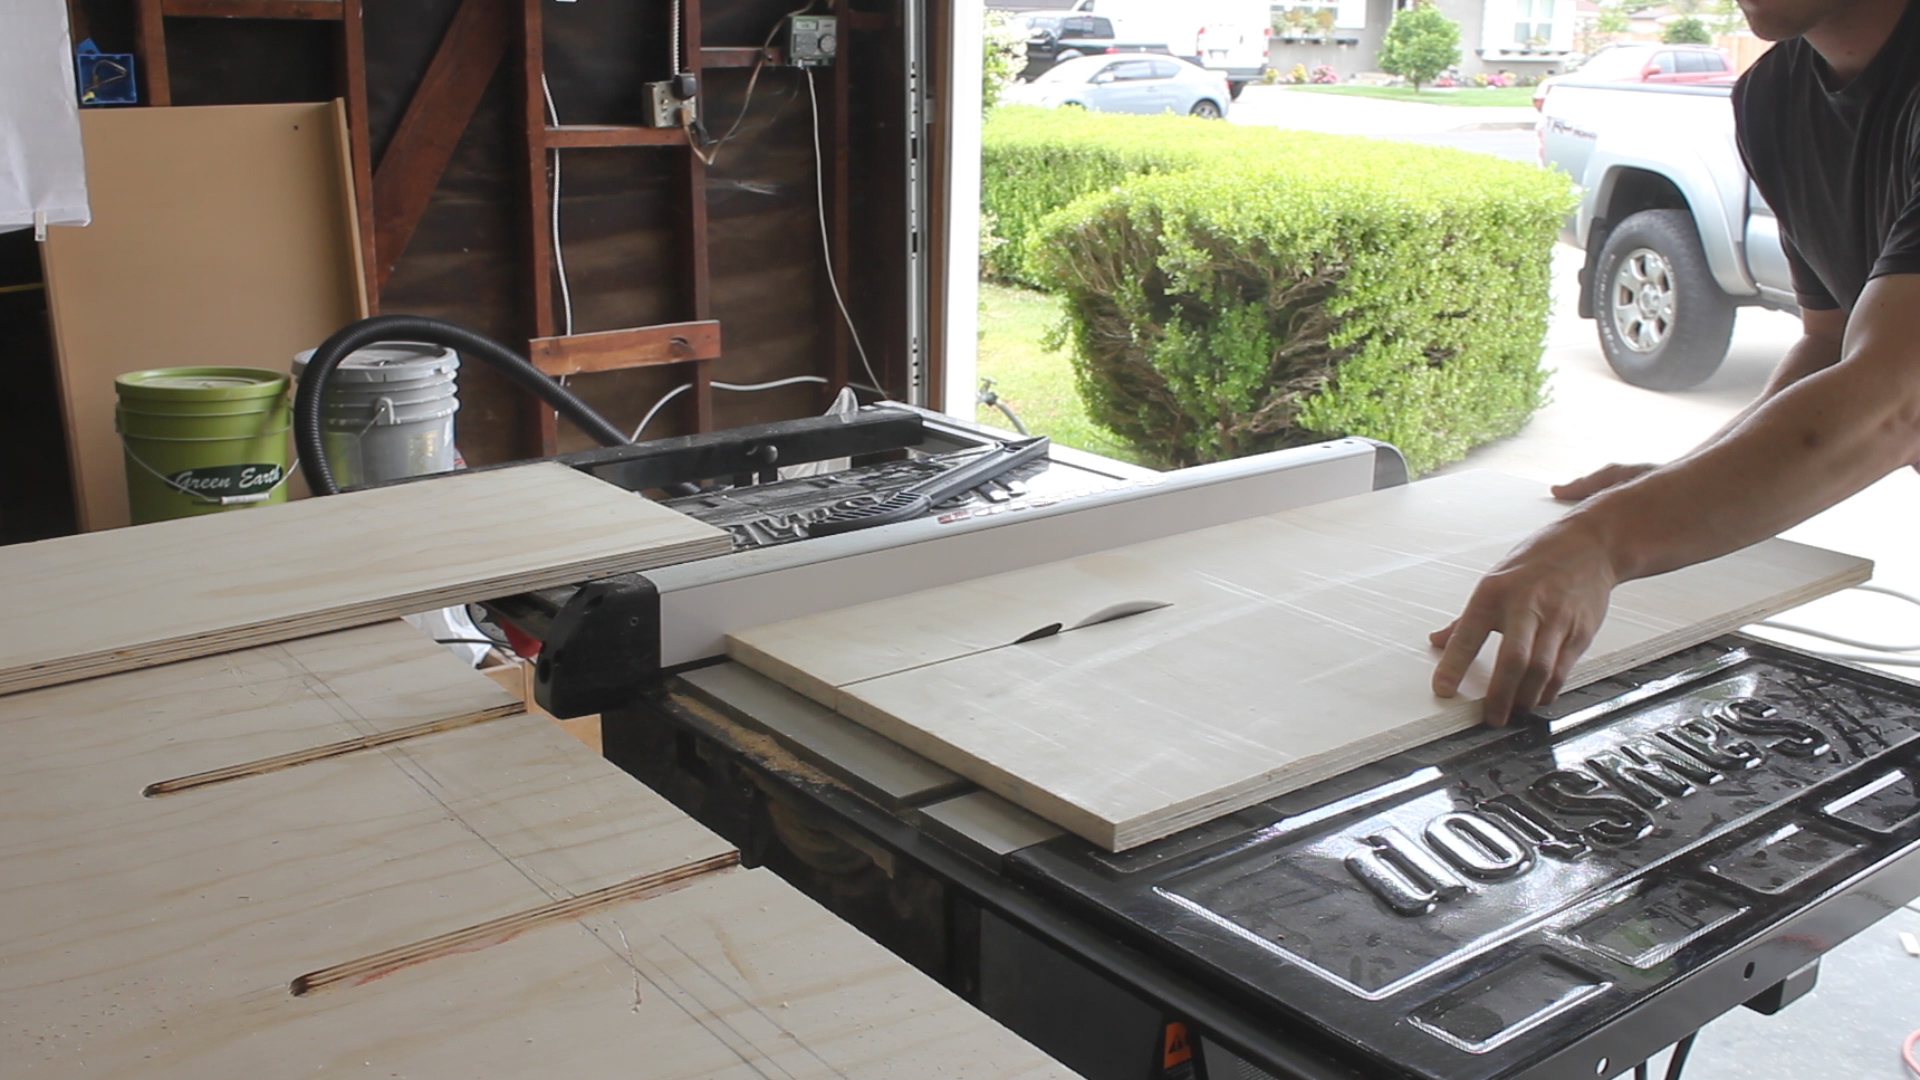
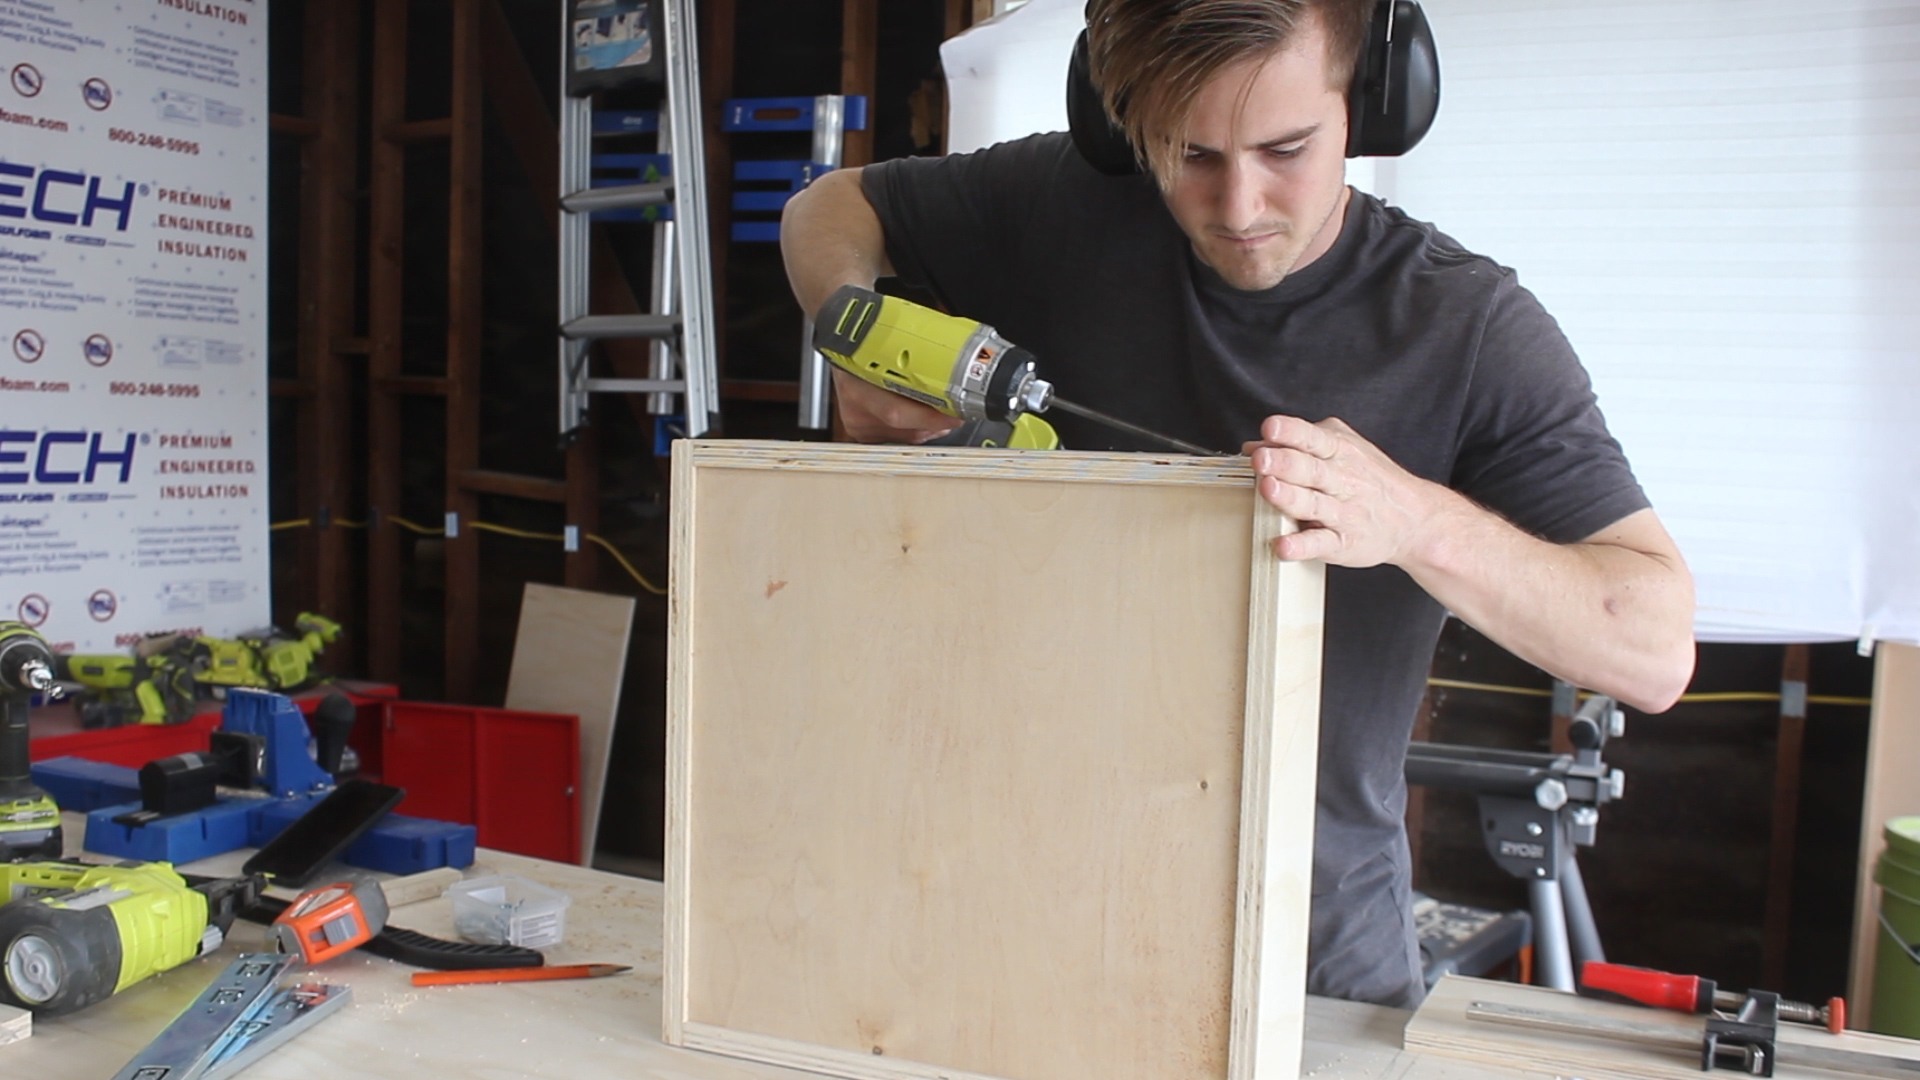
The main structure of this was built with 3/4" plywood - 2 sheets to be exact. Pics 1-3show me breaking it down into the various components for my build. The design of my island would have three drawers and cabinets on one side, and a 12" recessed area on the other side for two stools, and would measure 3' x 5'. Pic 4 shows my final cuts for the structure.
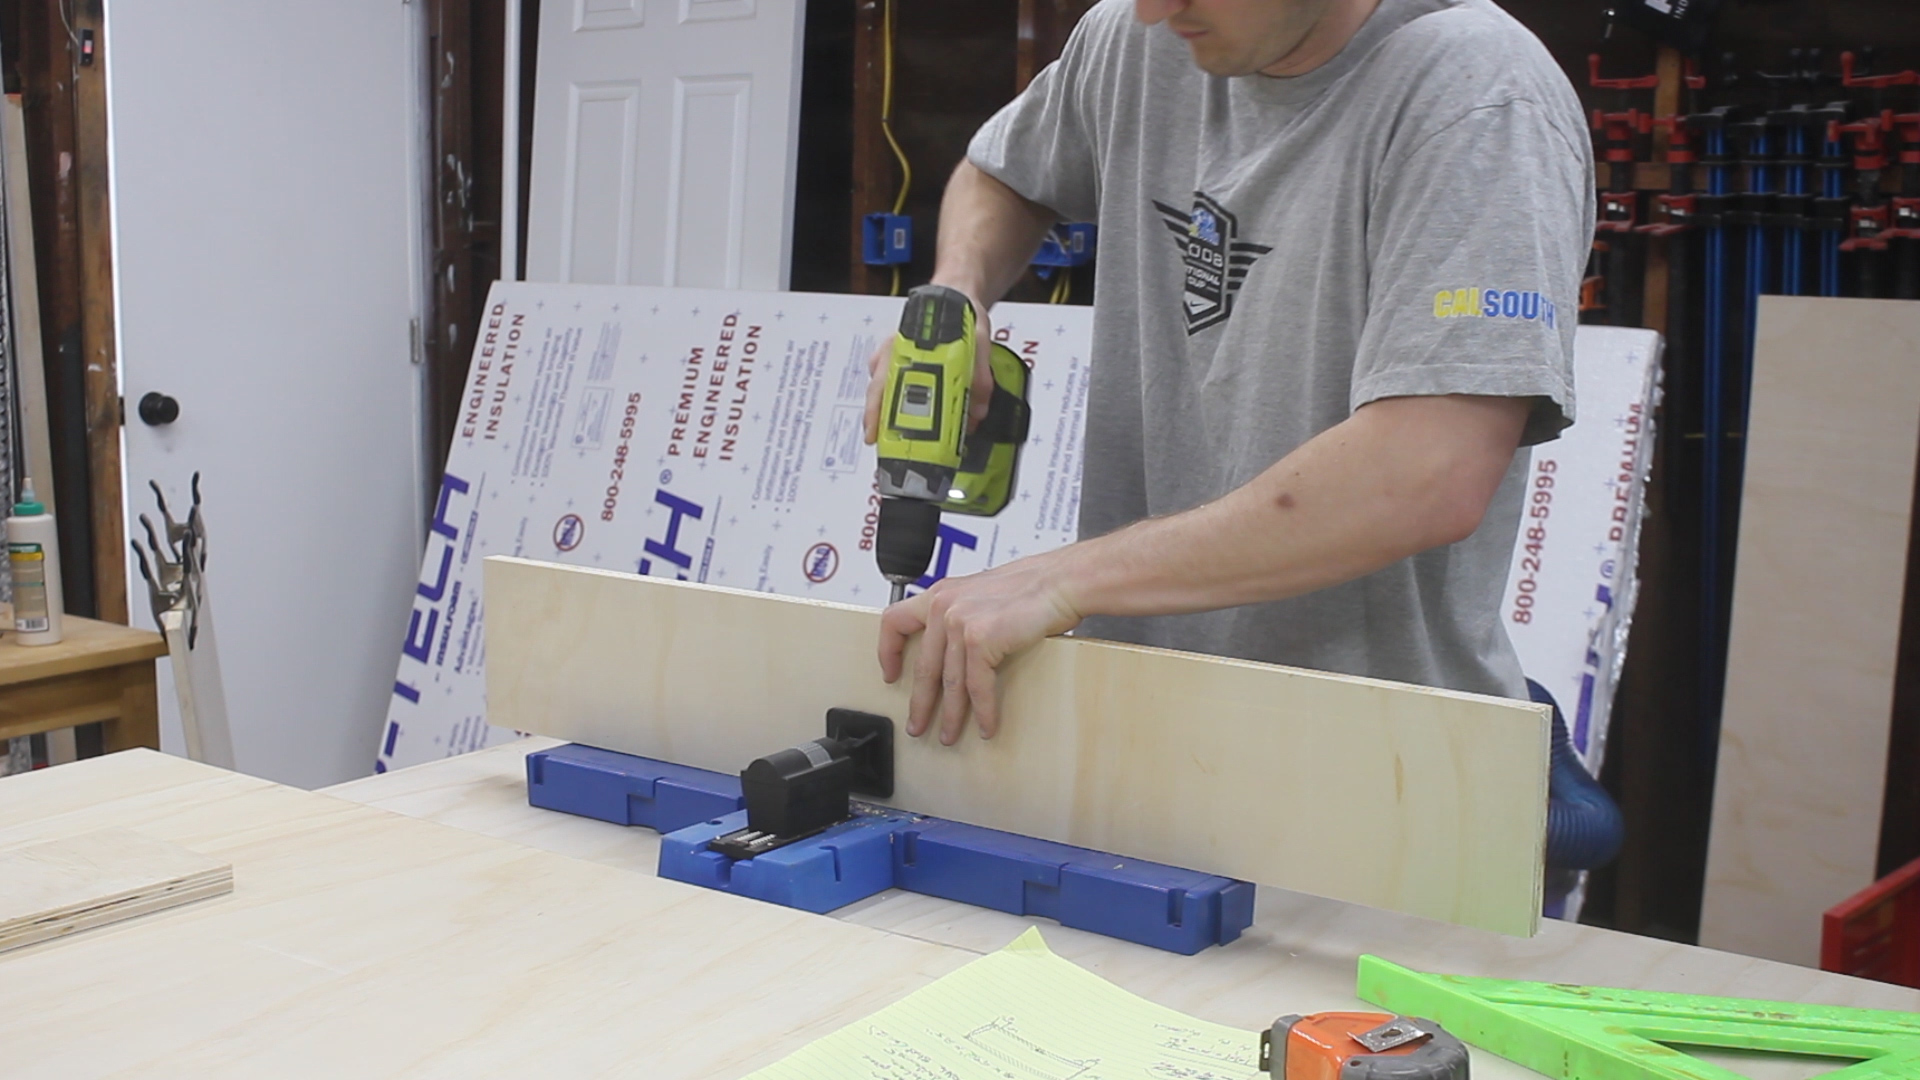

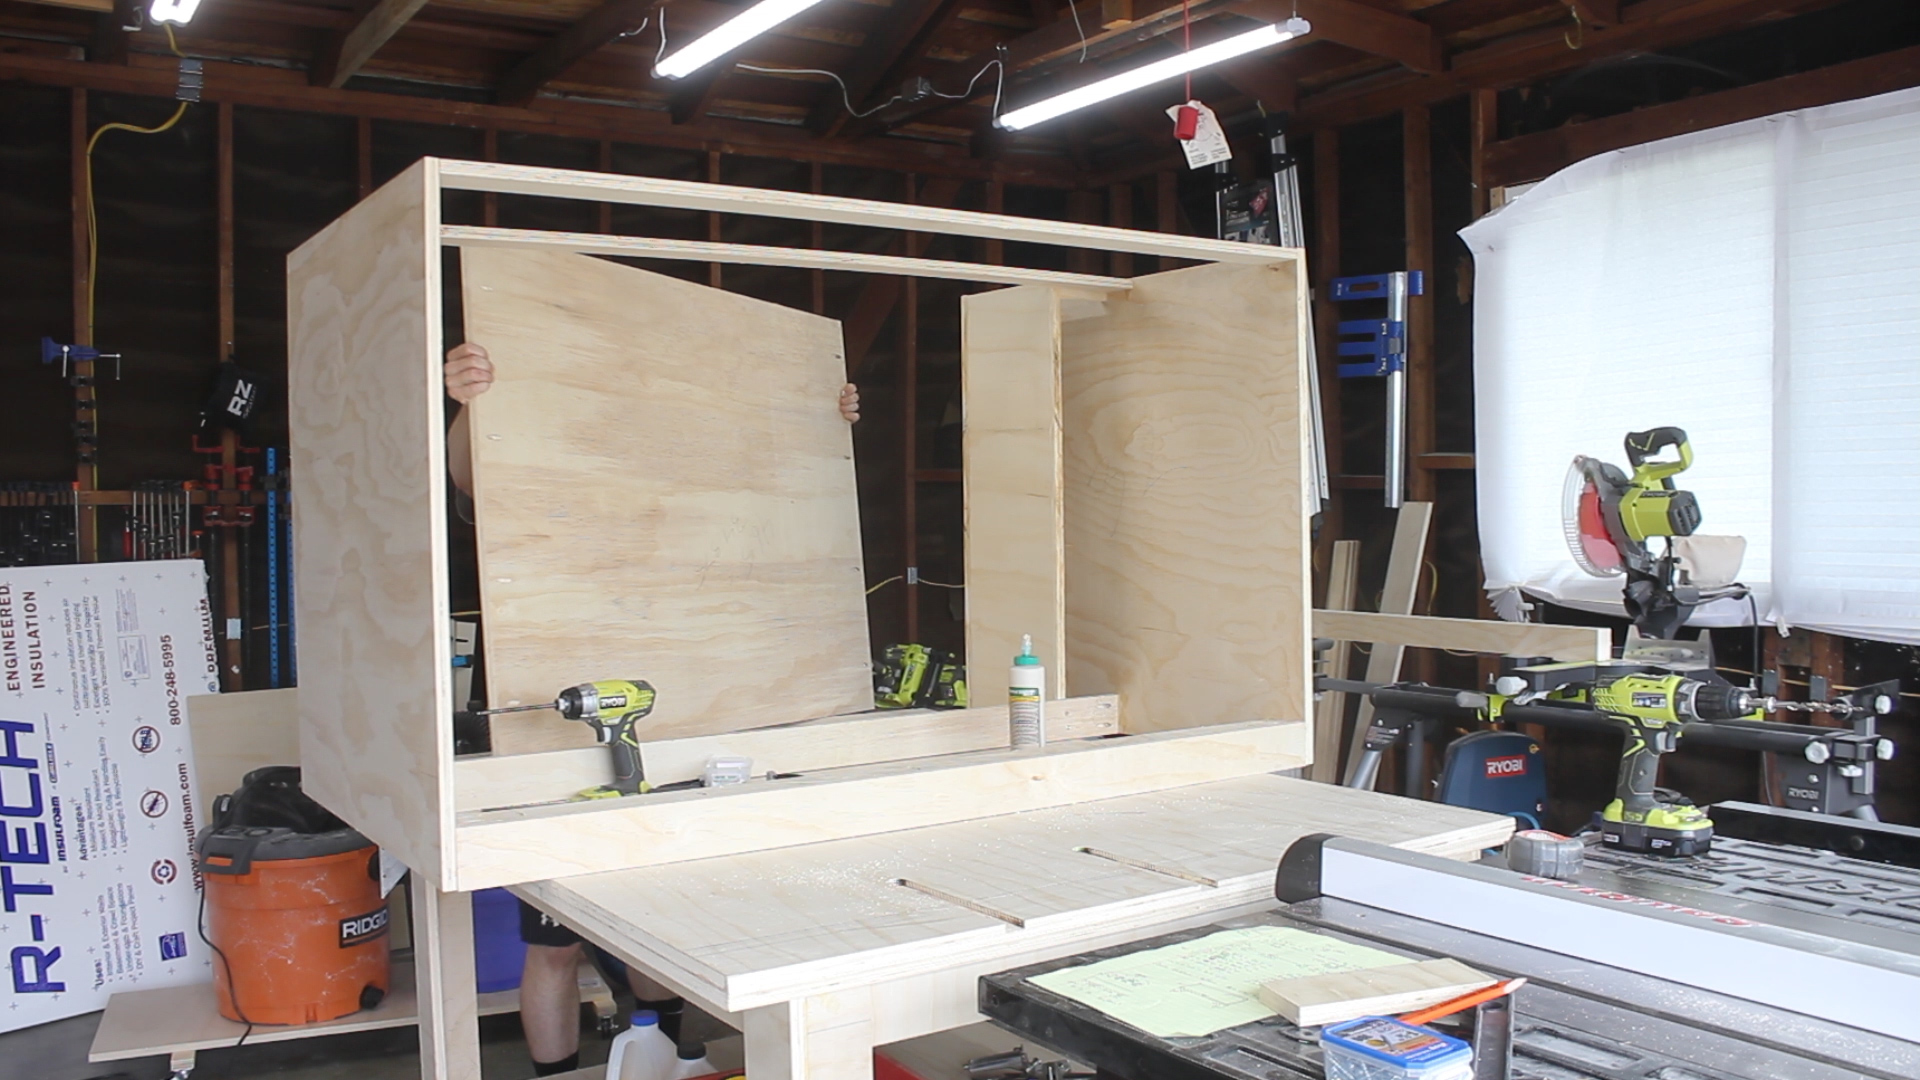
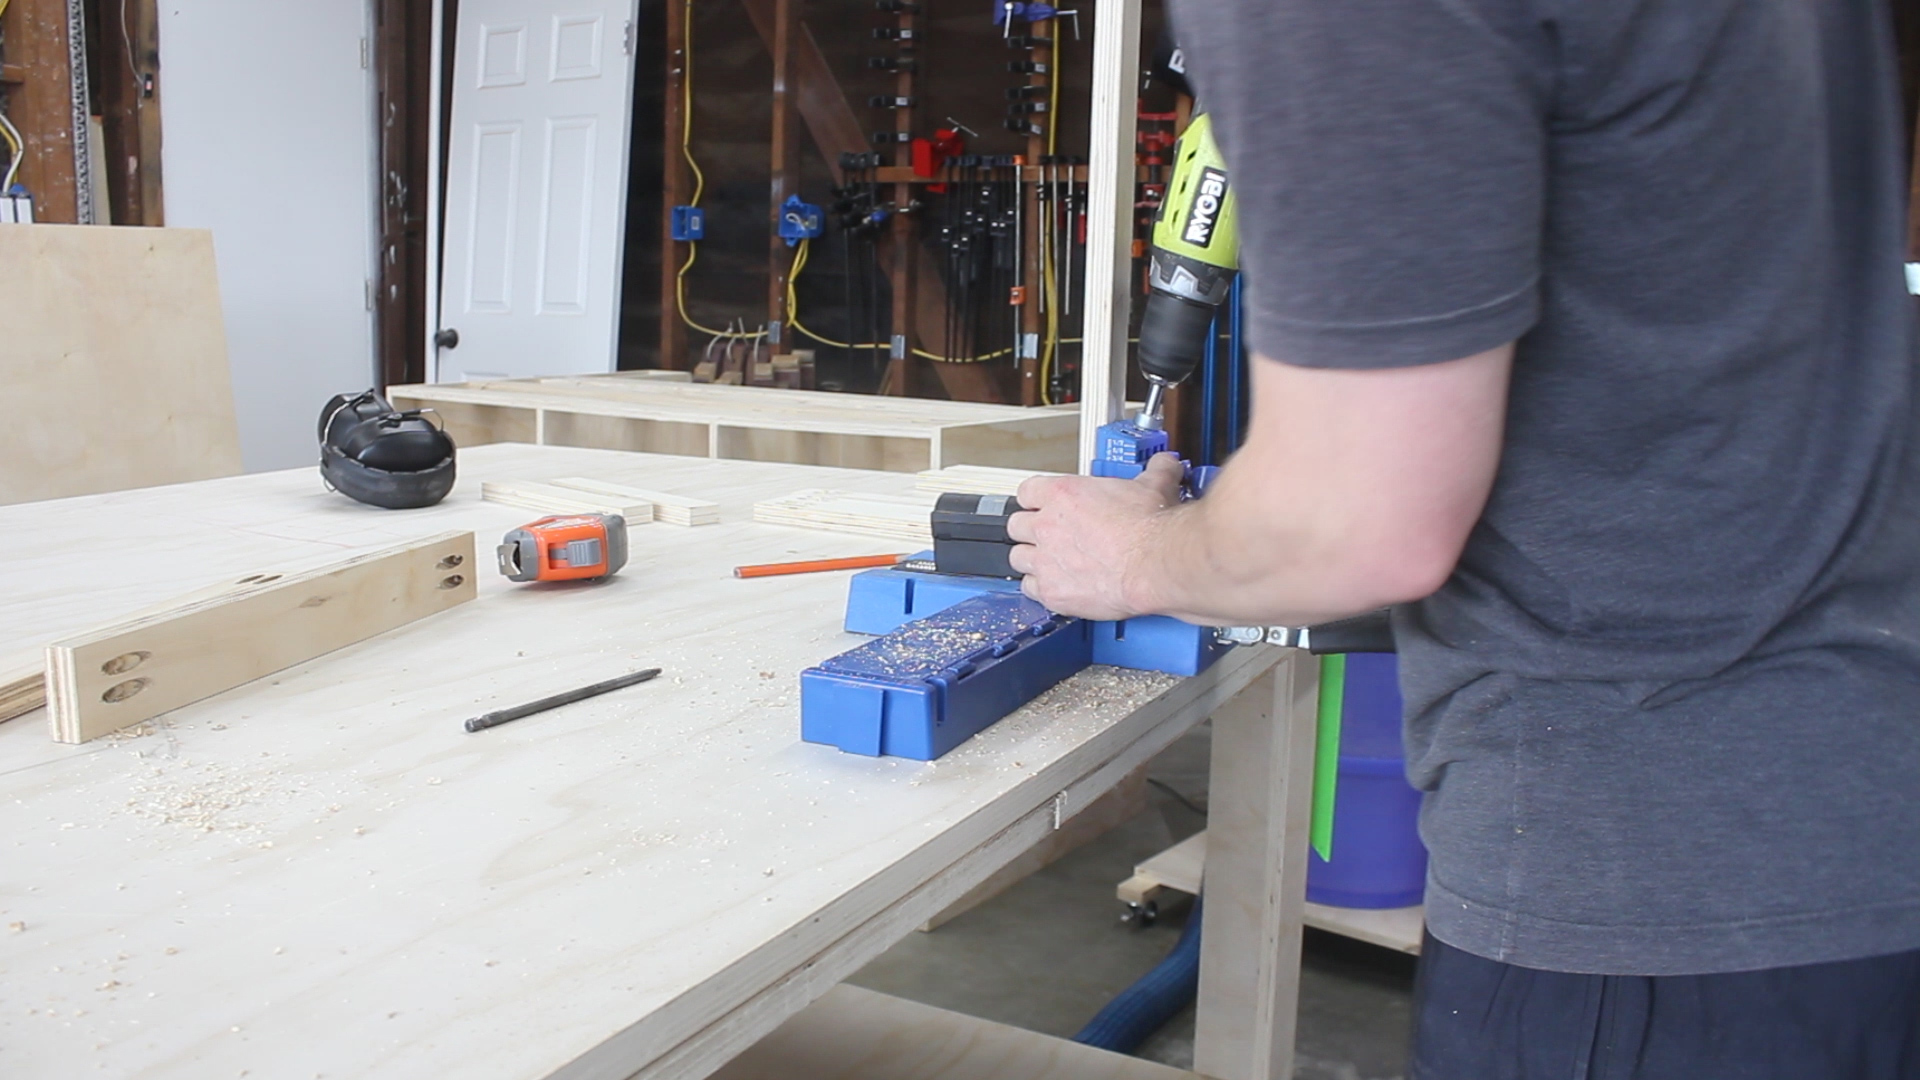
Everything on this project in terms of structure is held together with pocket holes. I think I drilled an used around 200 1 1/4" pocket hole screws for this build. I use pocket holes for nearly every project I work on, and highly recommend the tool!
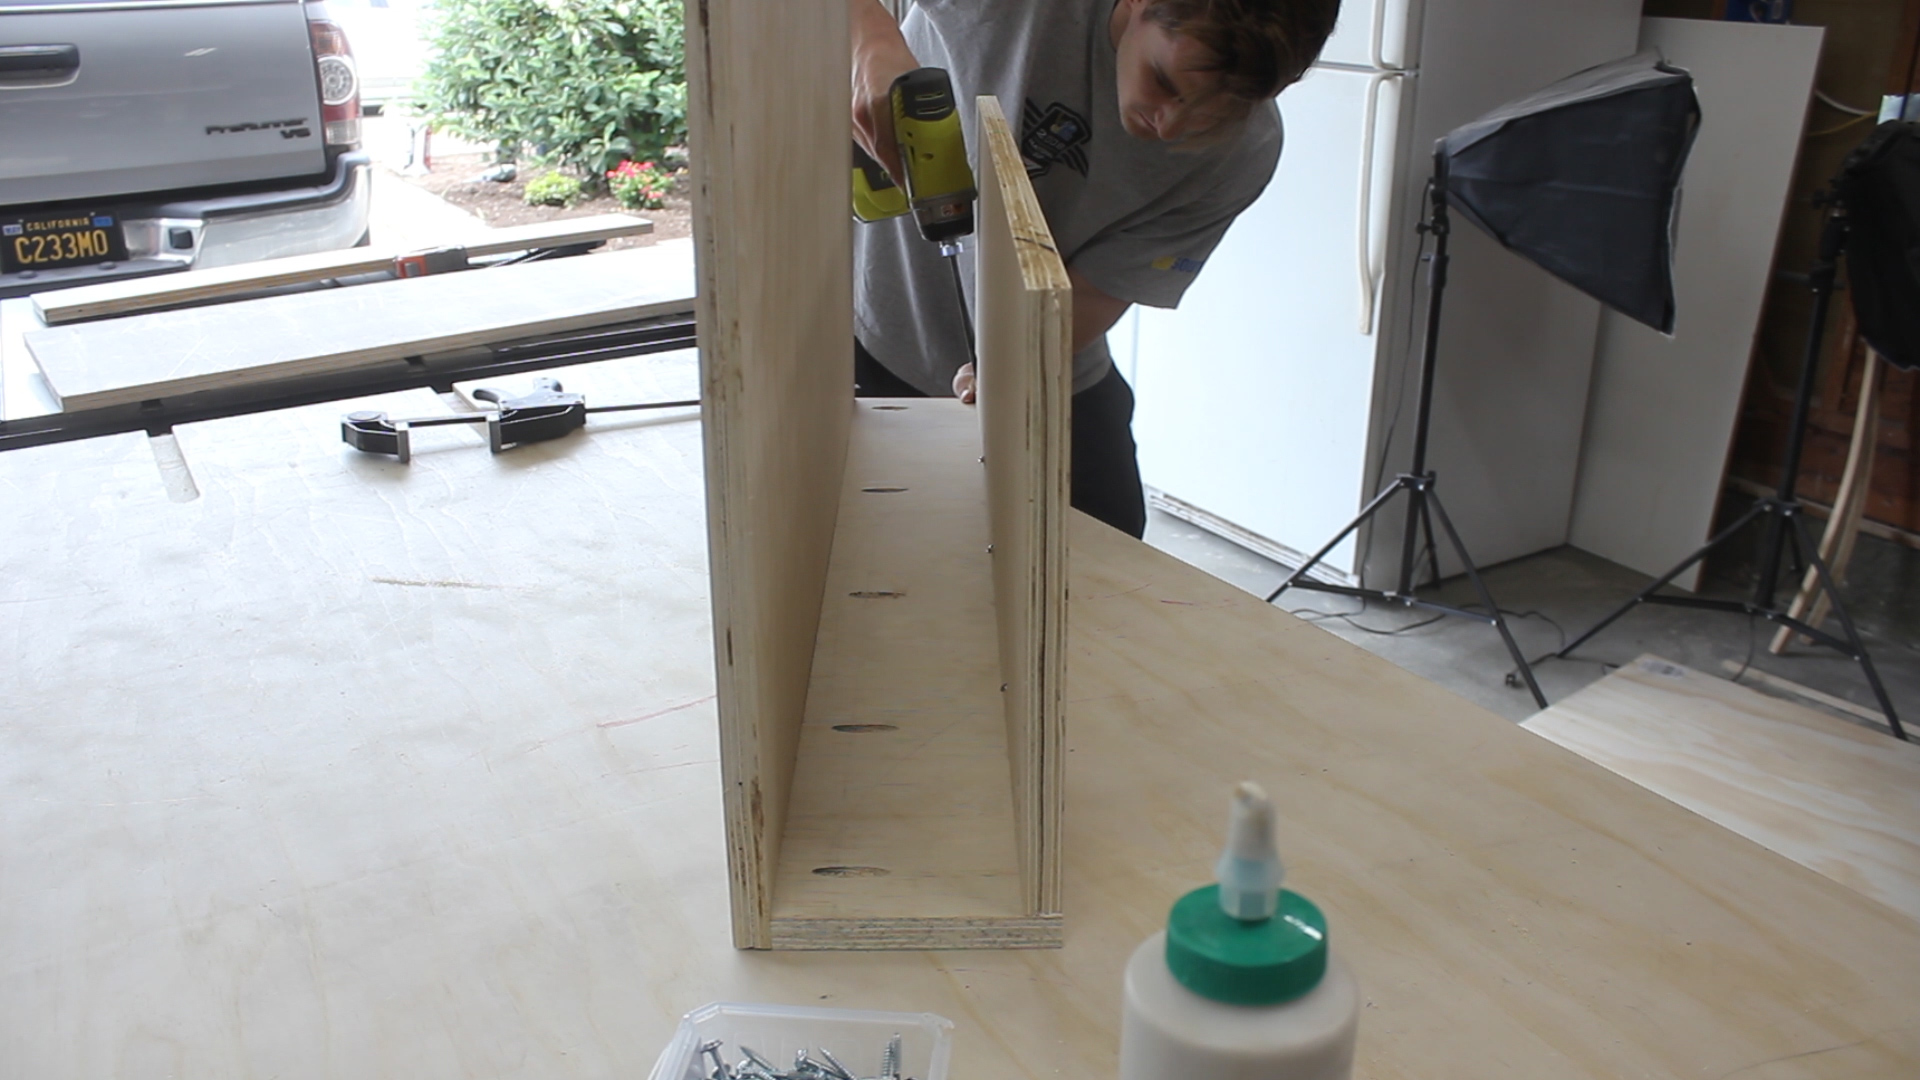
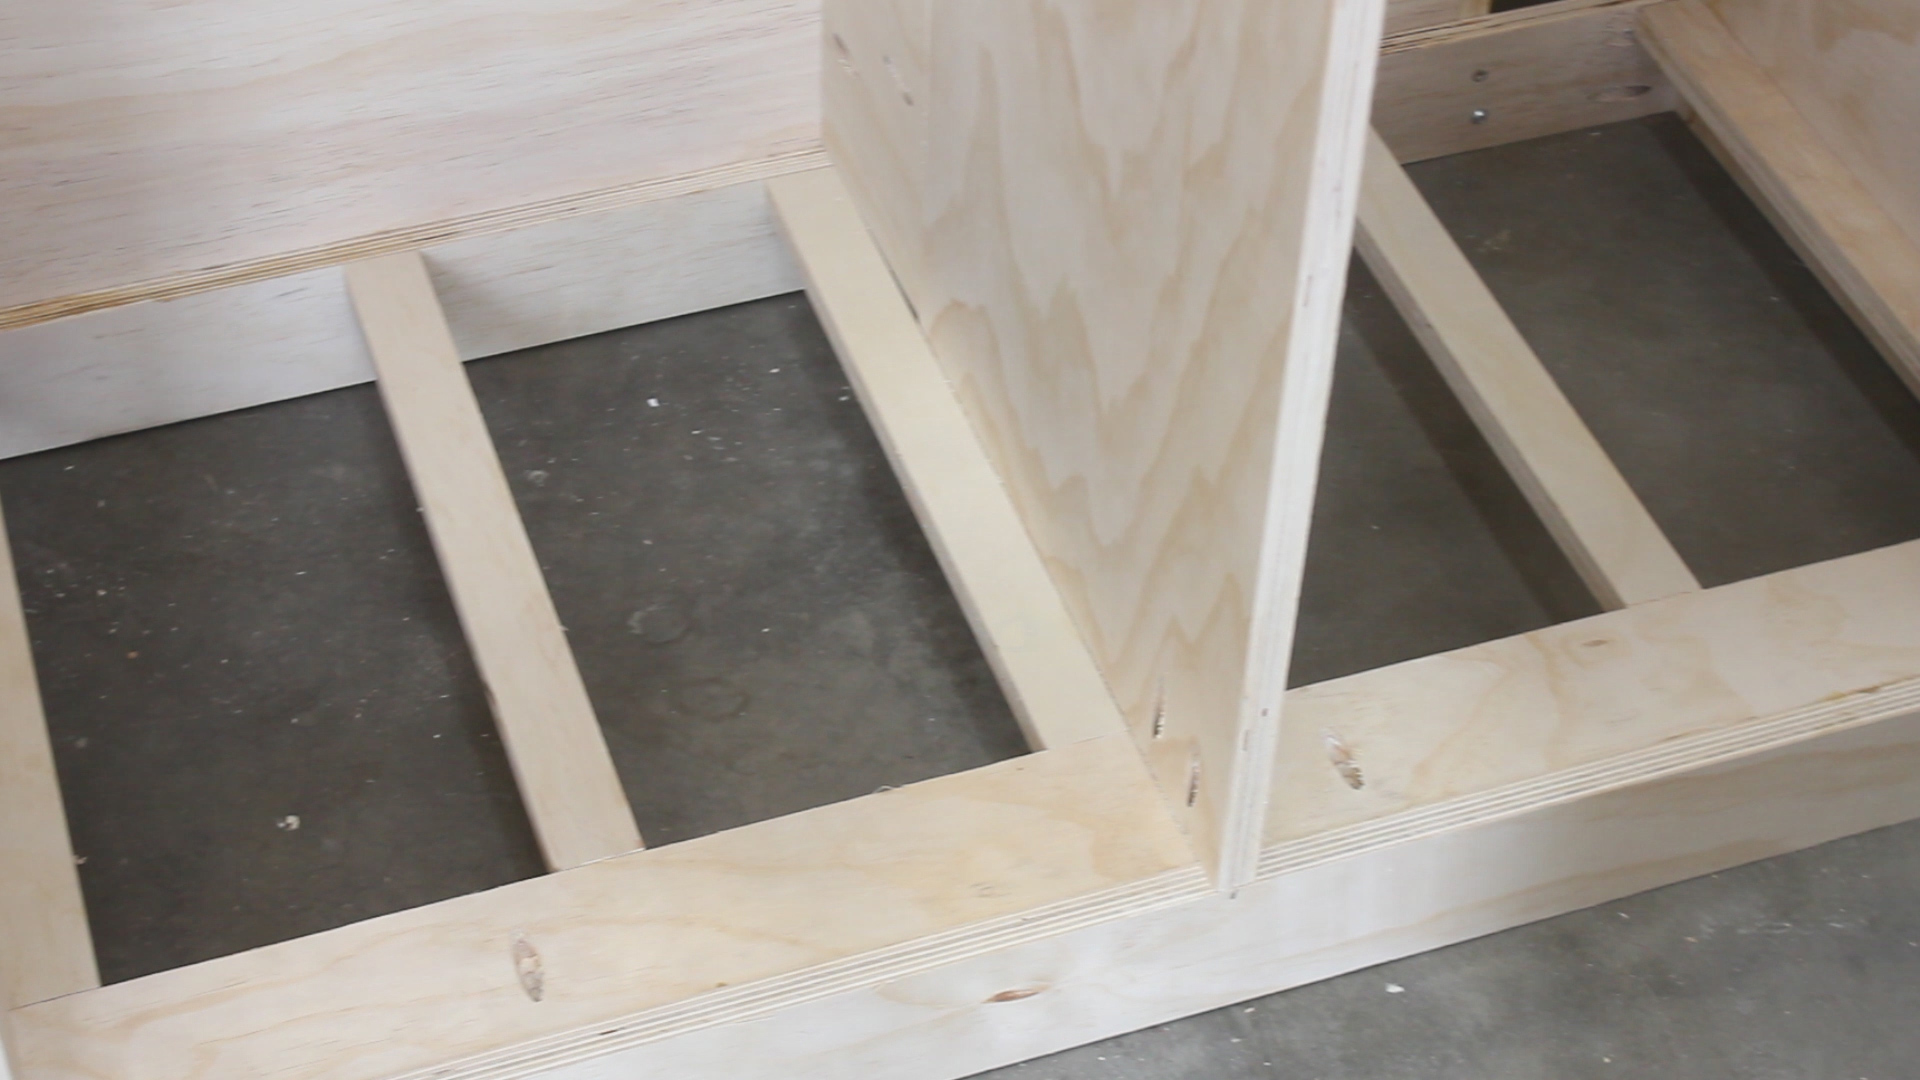
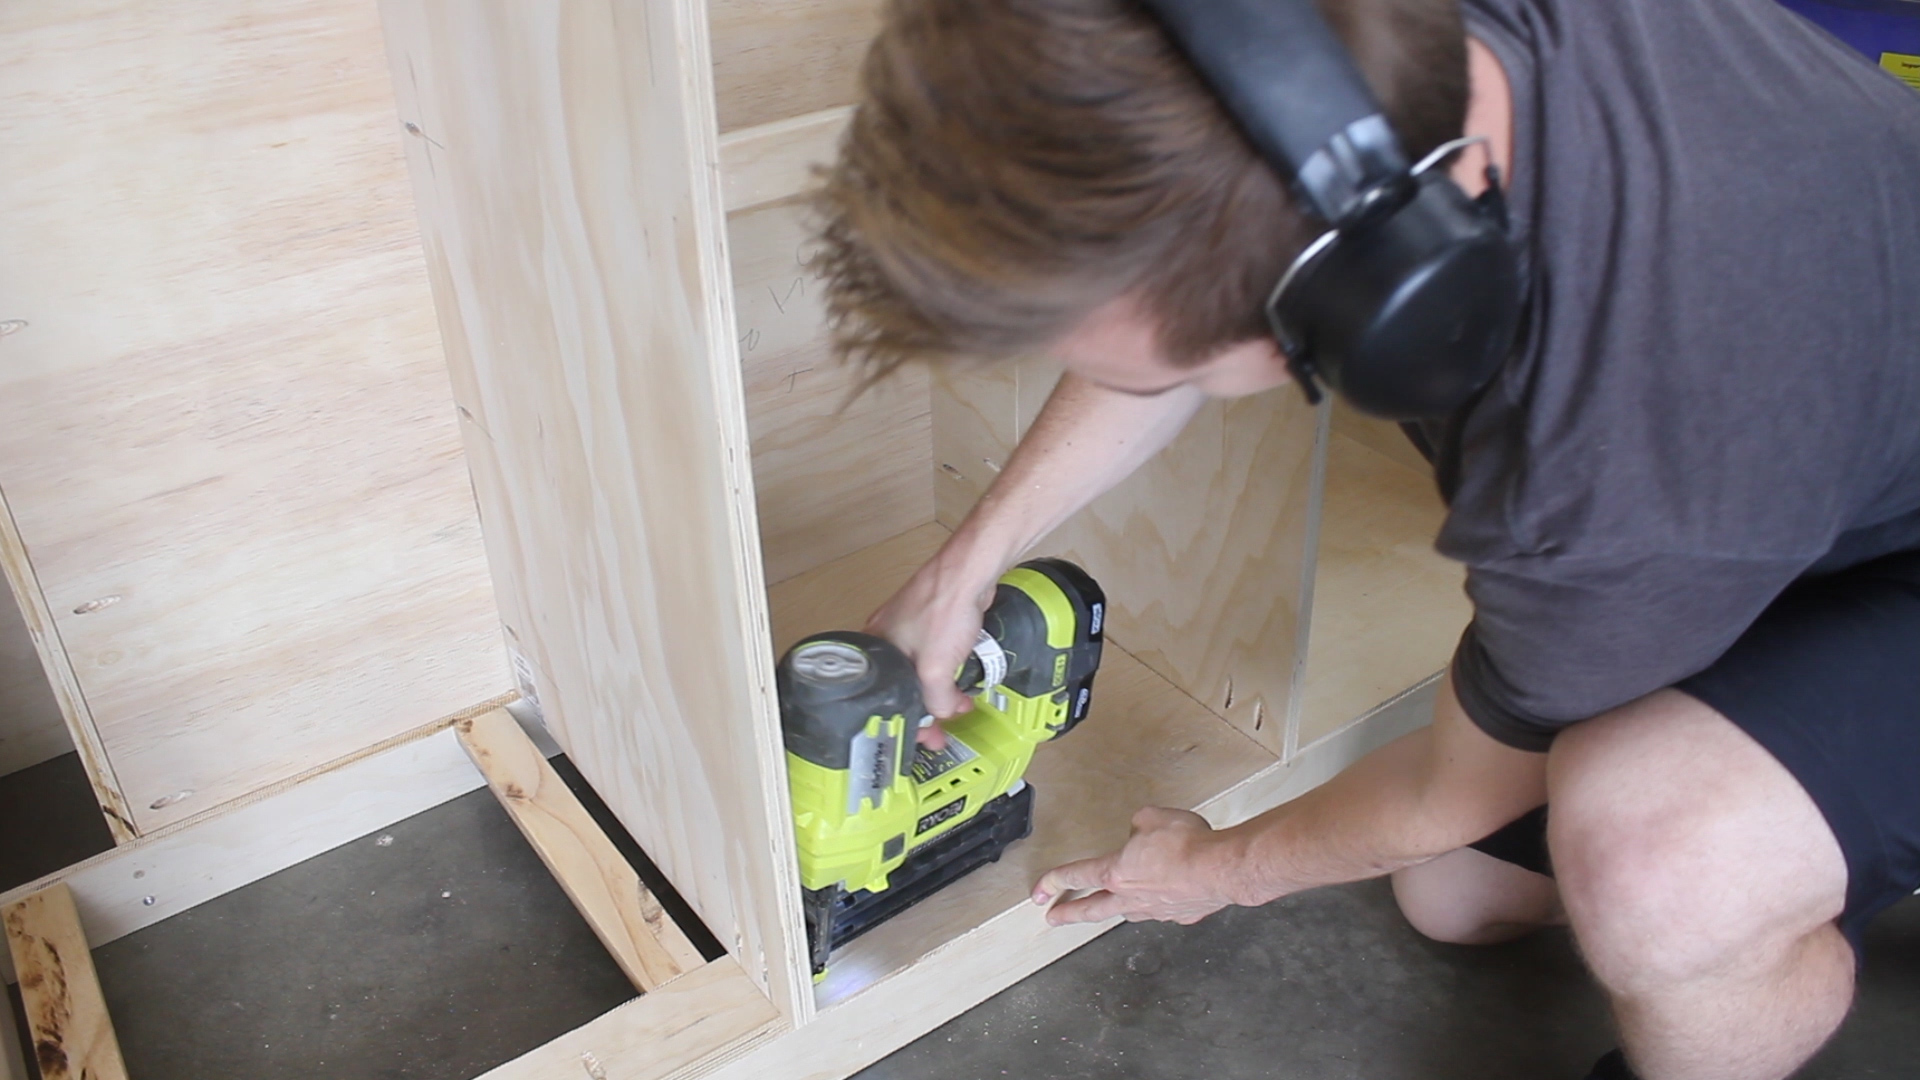
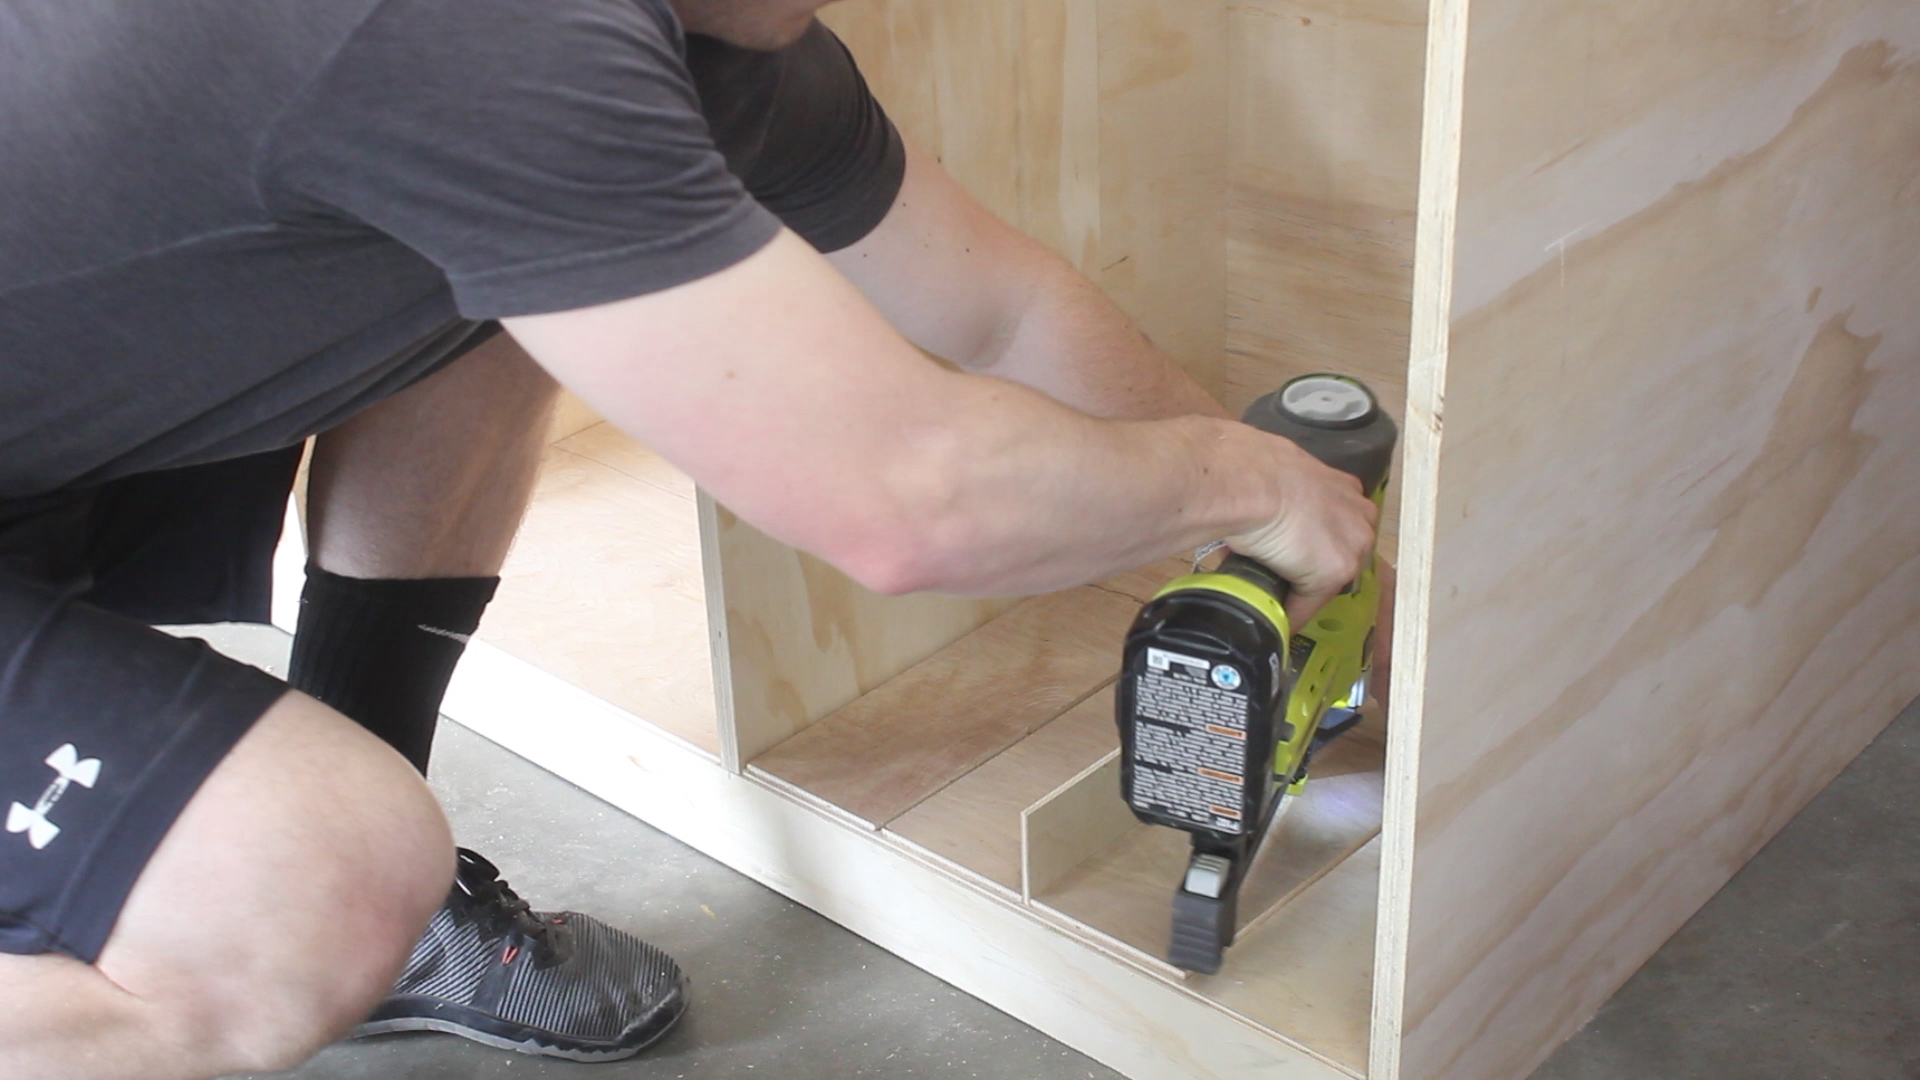
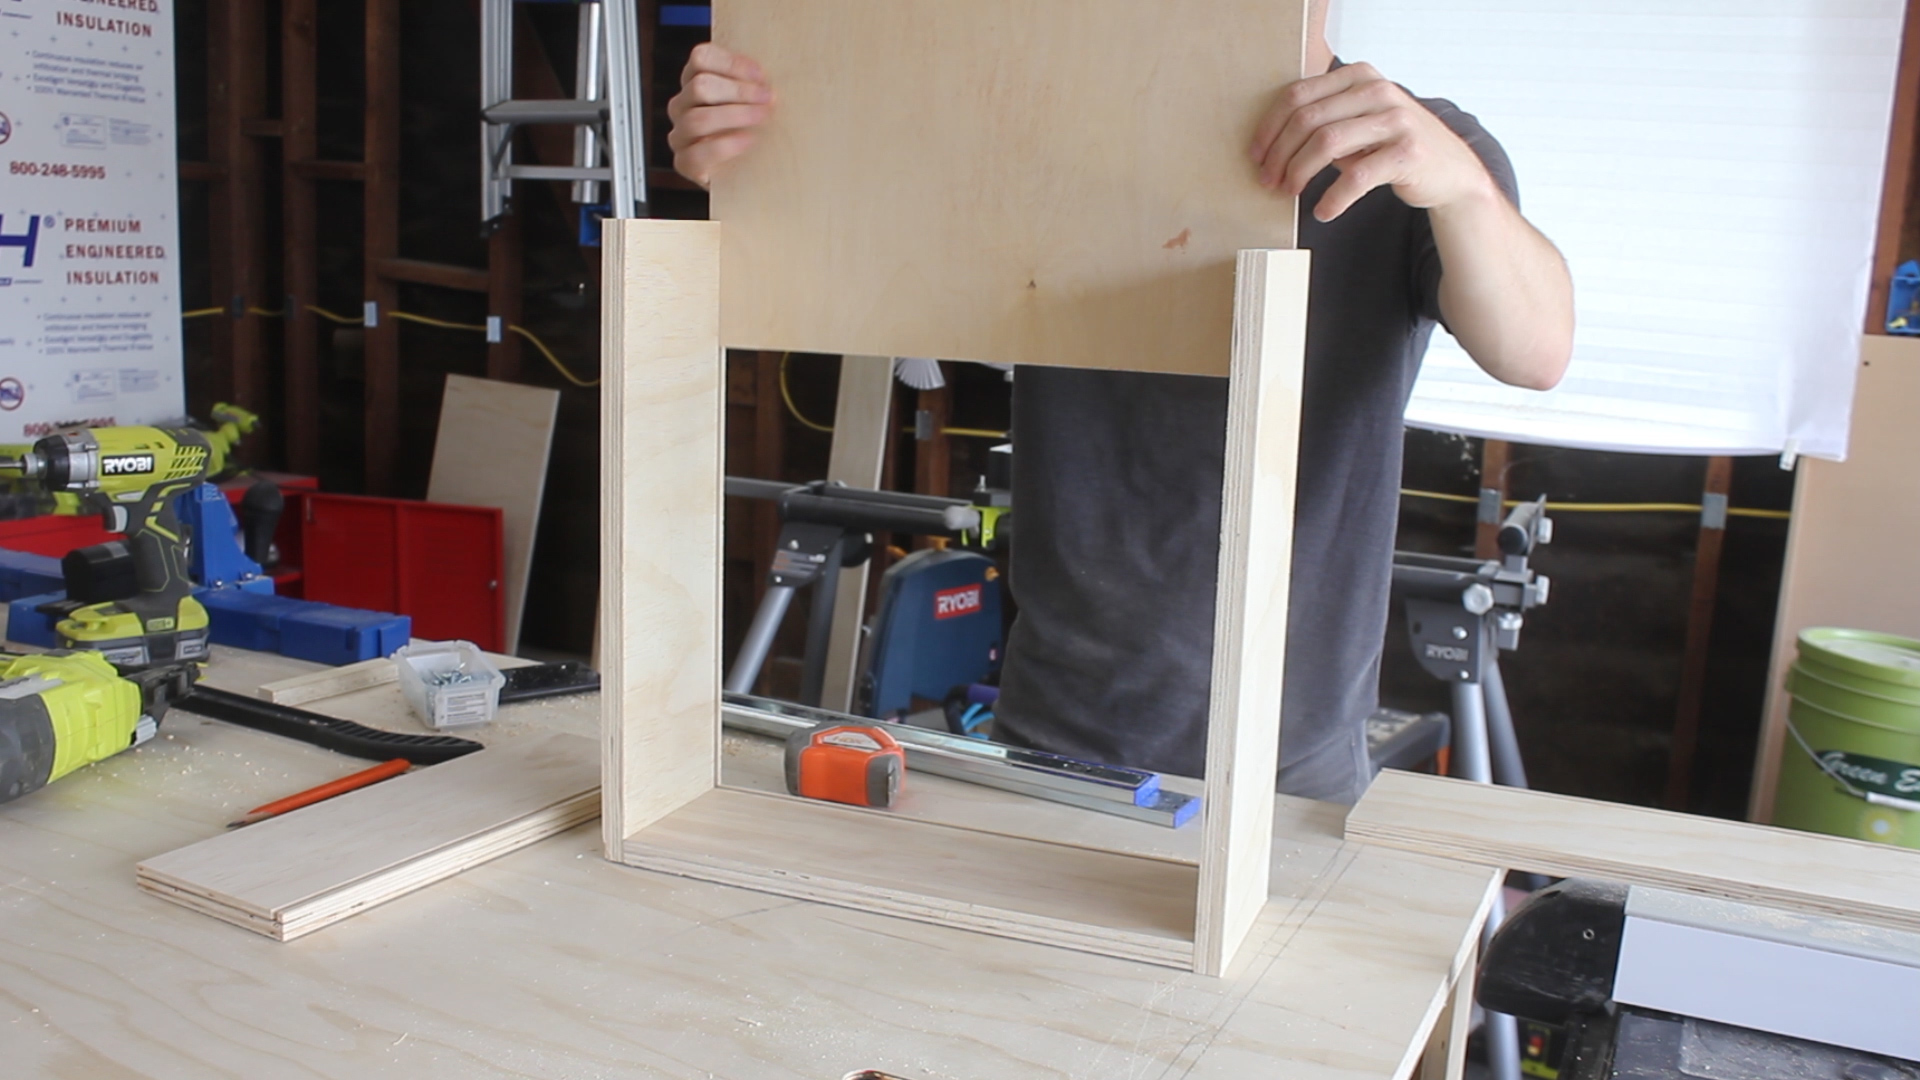
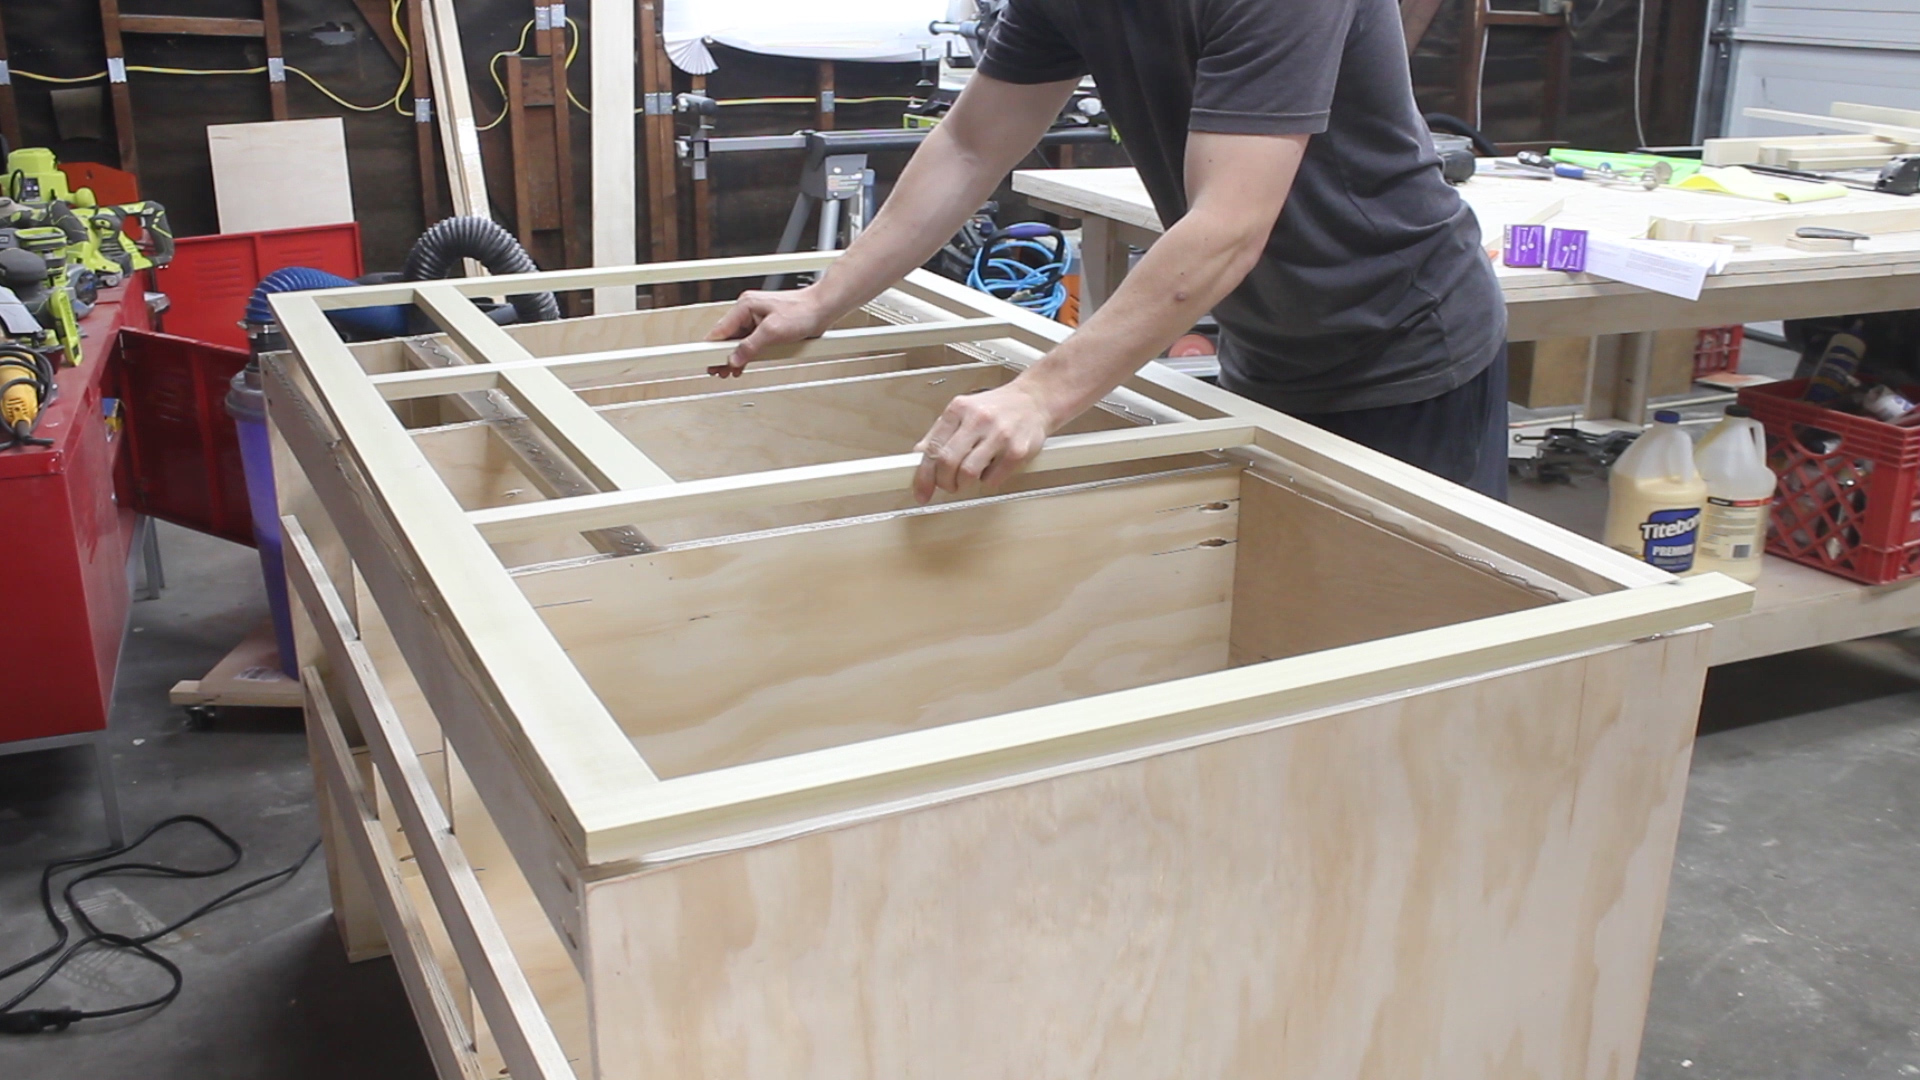
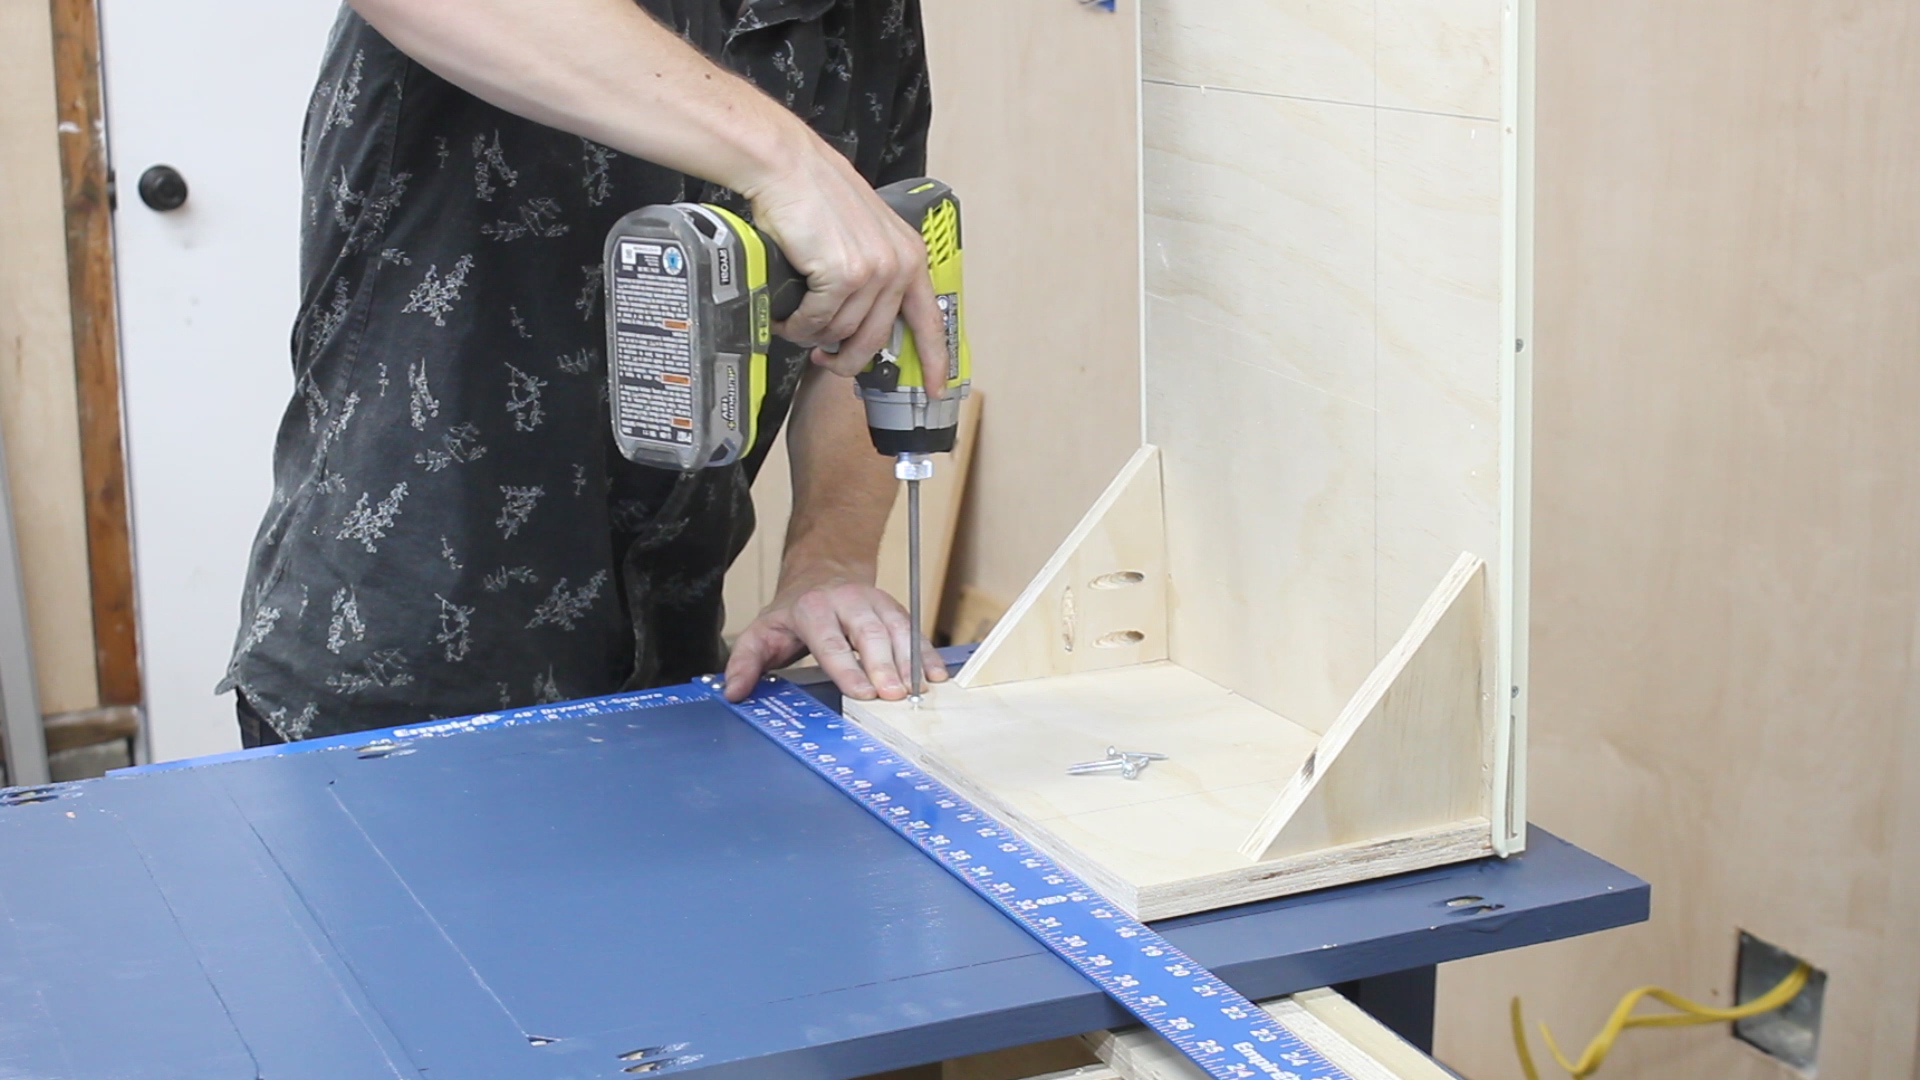
Pics 1-4 show me drilling, gluing, setting in place, and using my impact driver to assemble. I was careful to keep everything as square as possible in this step - this really wasn't the project to rush through! Pic 5 shows one of the two legs that would help form the recess for the two stools - I used a scrap block to help keep the spacing even and not "cup inward". Pic 6 shows me cutting horizontal stretchers (all at once to keep even) that would go across the top and bottom to properly space out each side and add structural support.
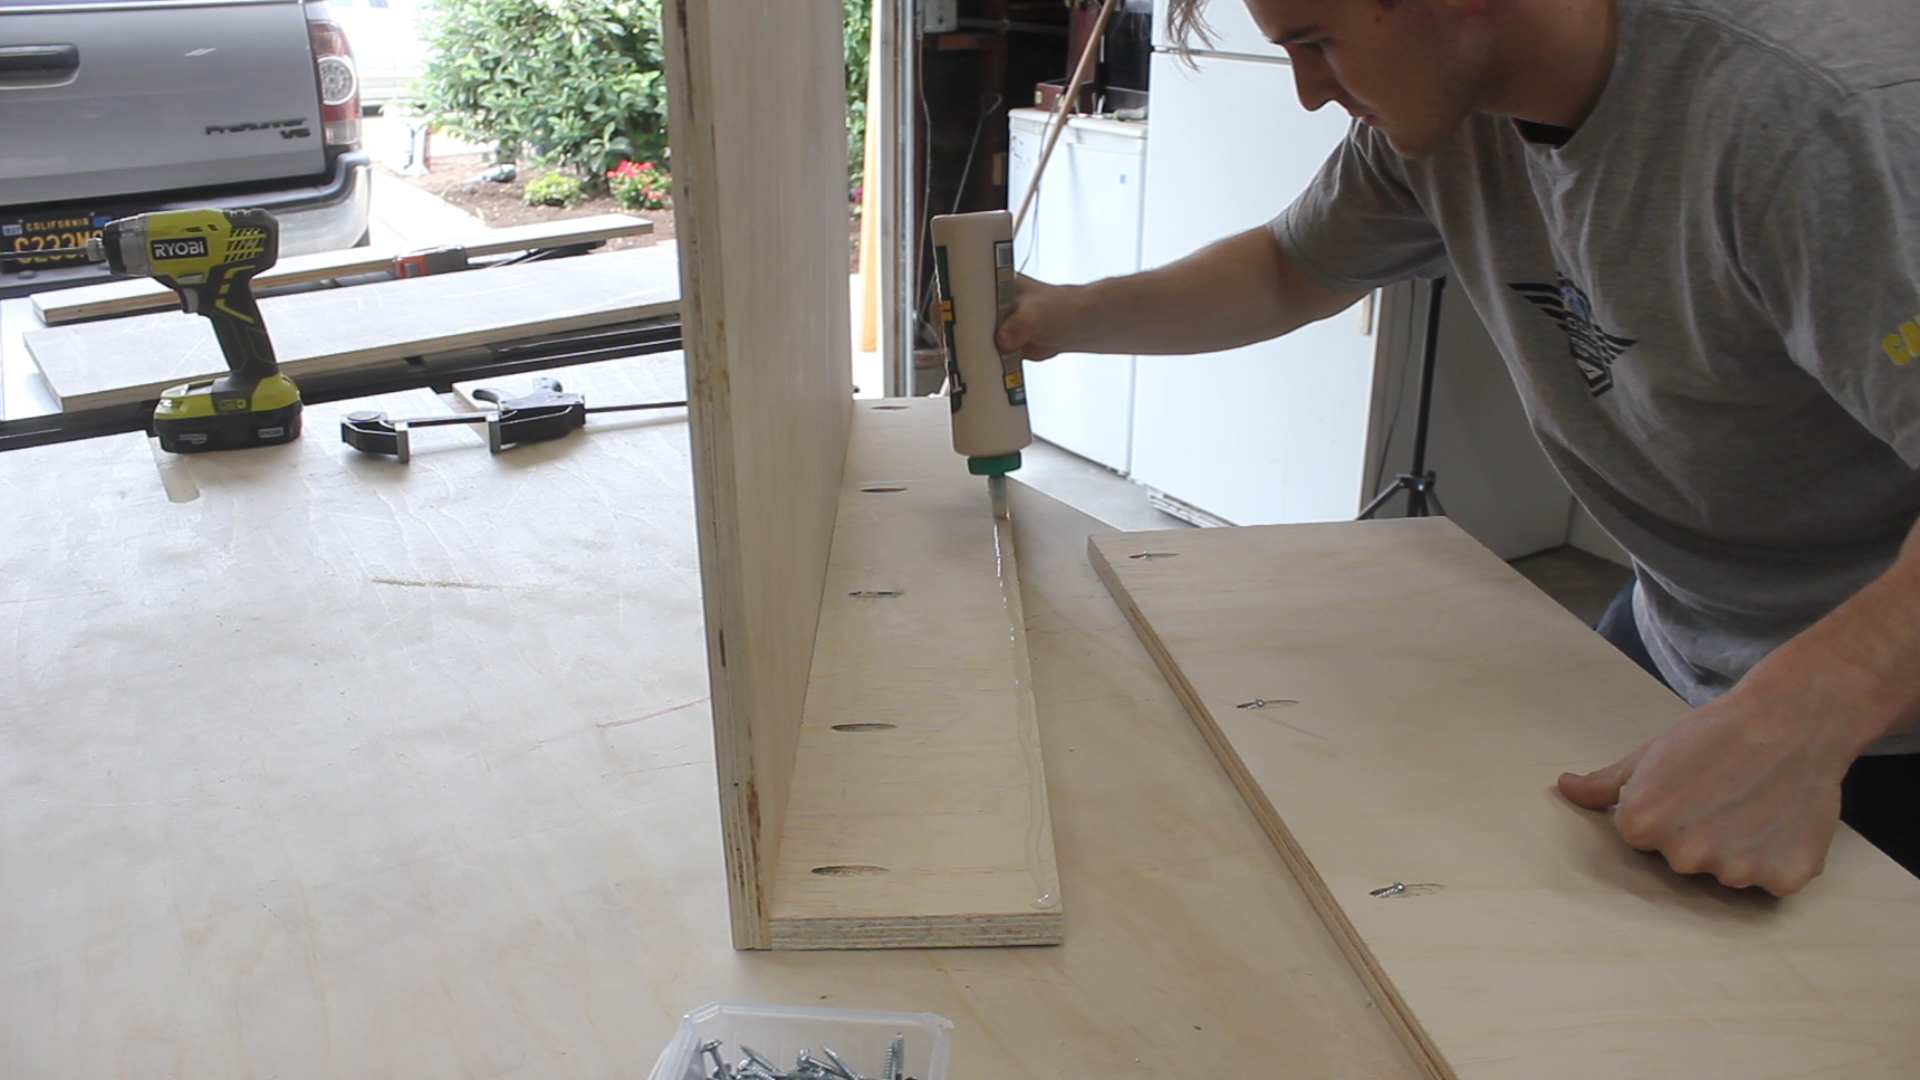
Pics 7-9 show me using more glue and screws to assemble final pieces of the framing. This wasn't hard - it just took a while and some careful measuring to get everything precise and in it's place!
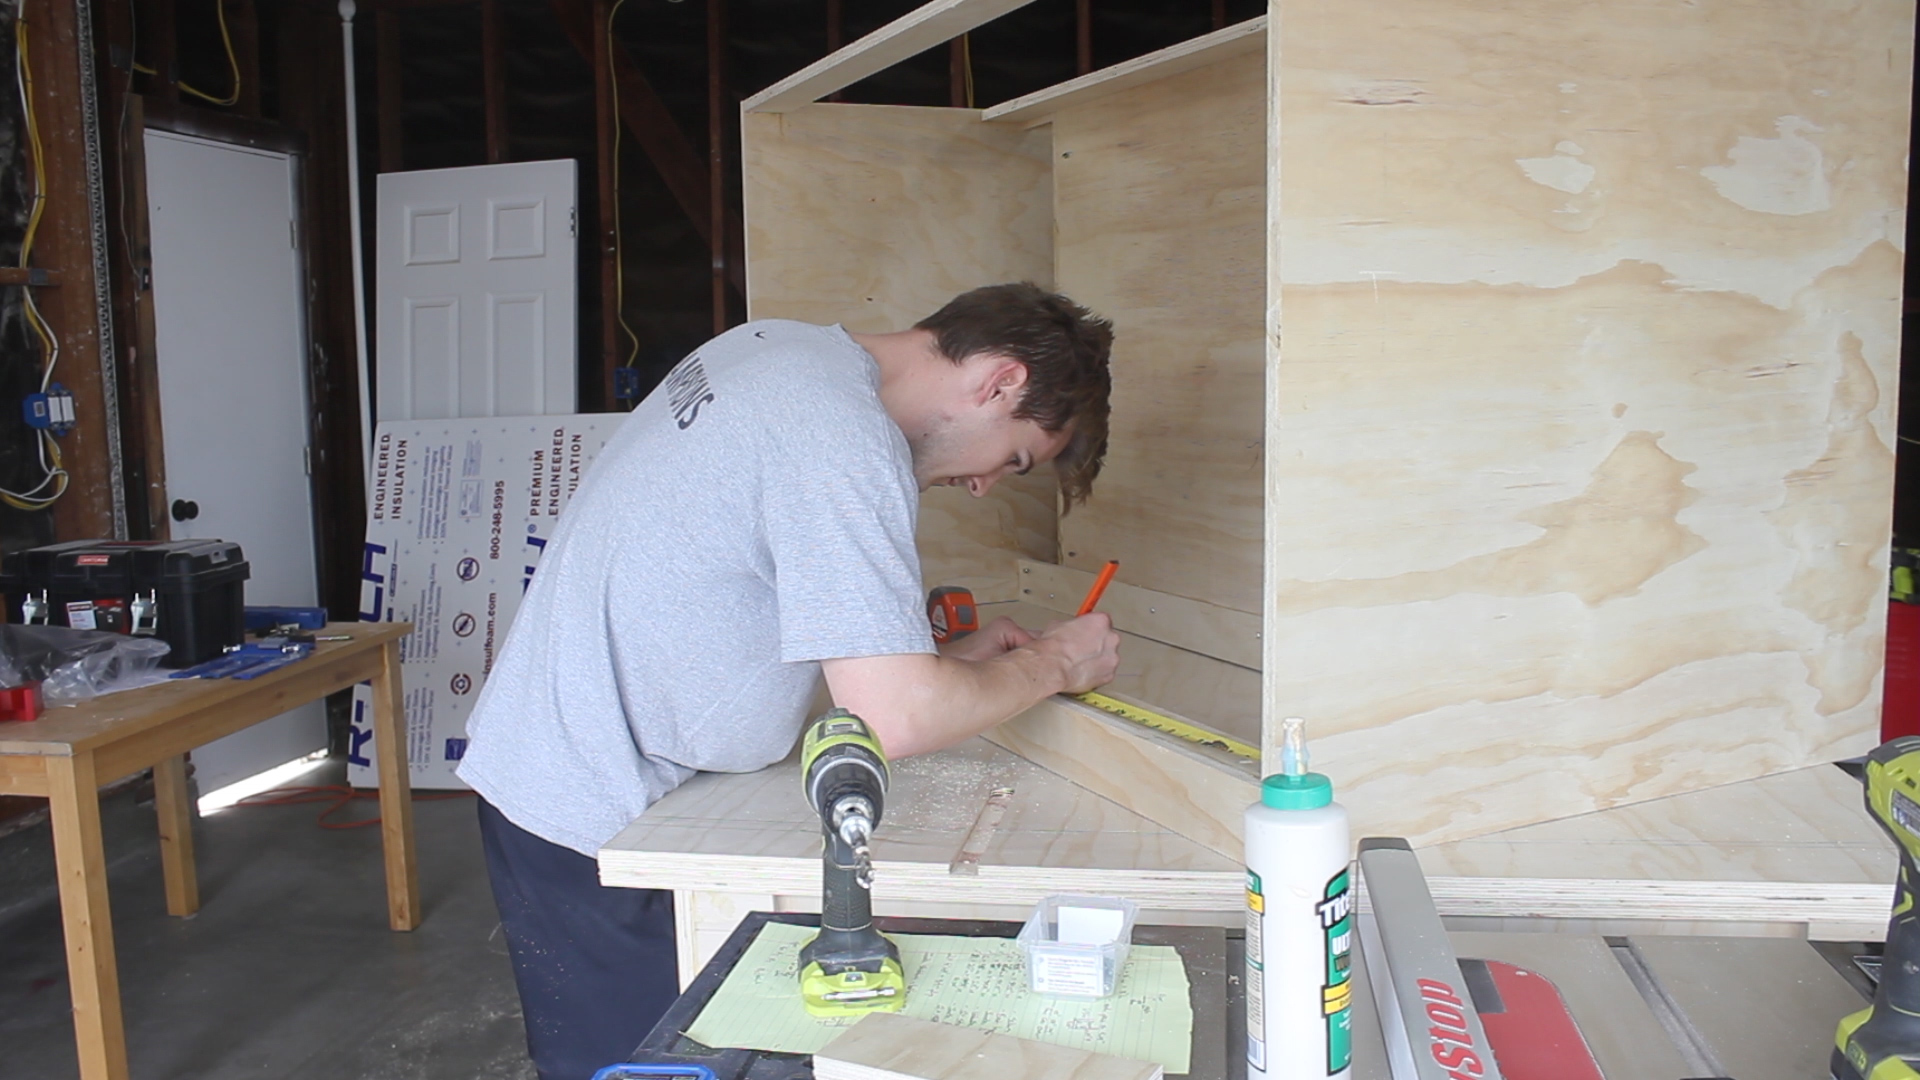
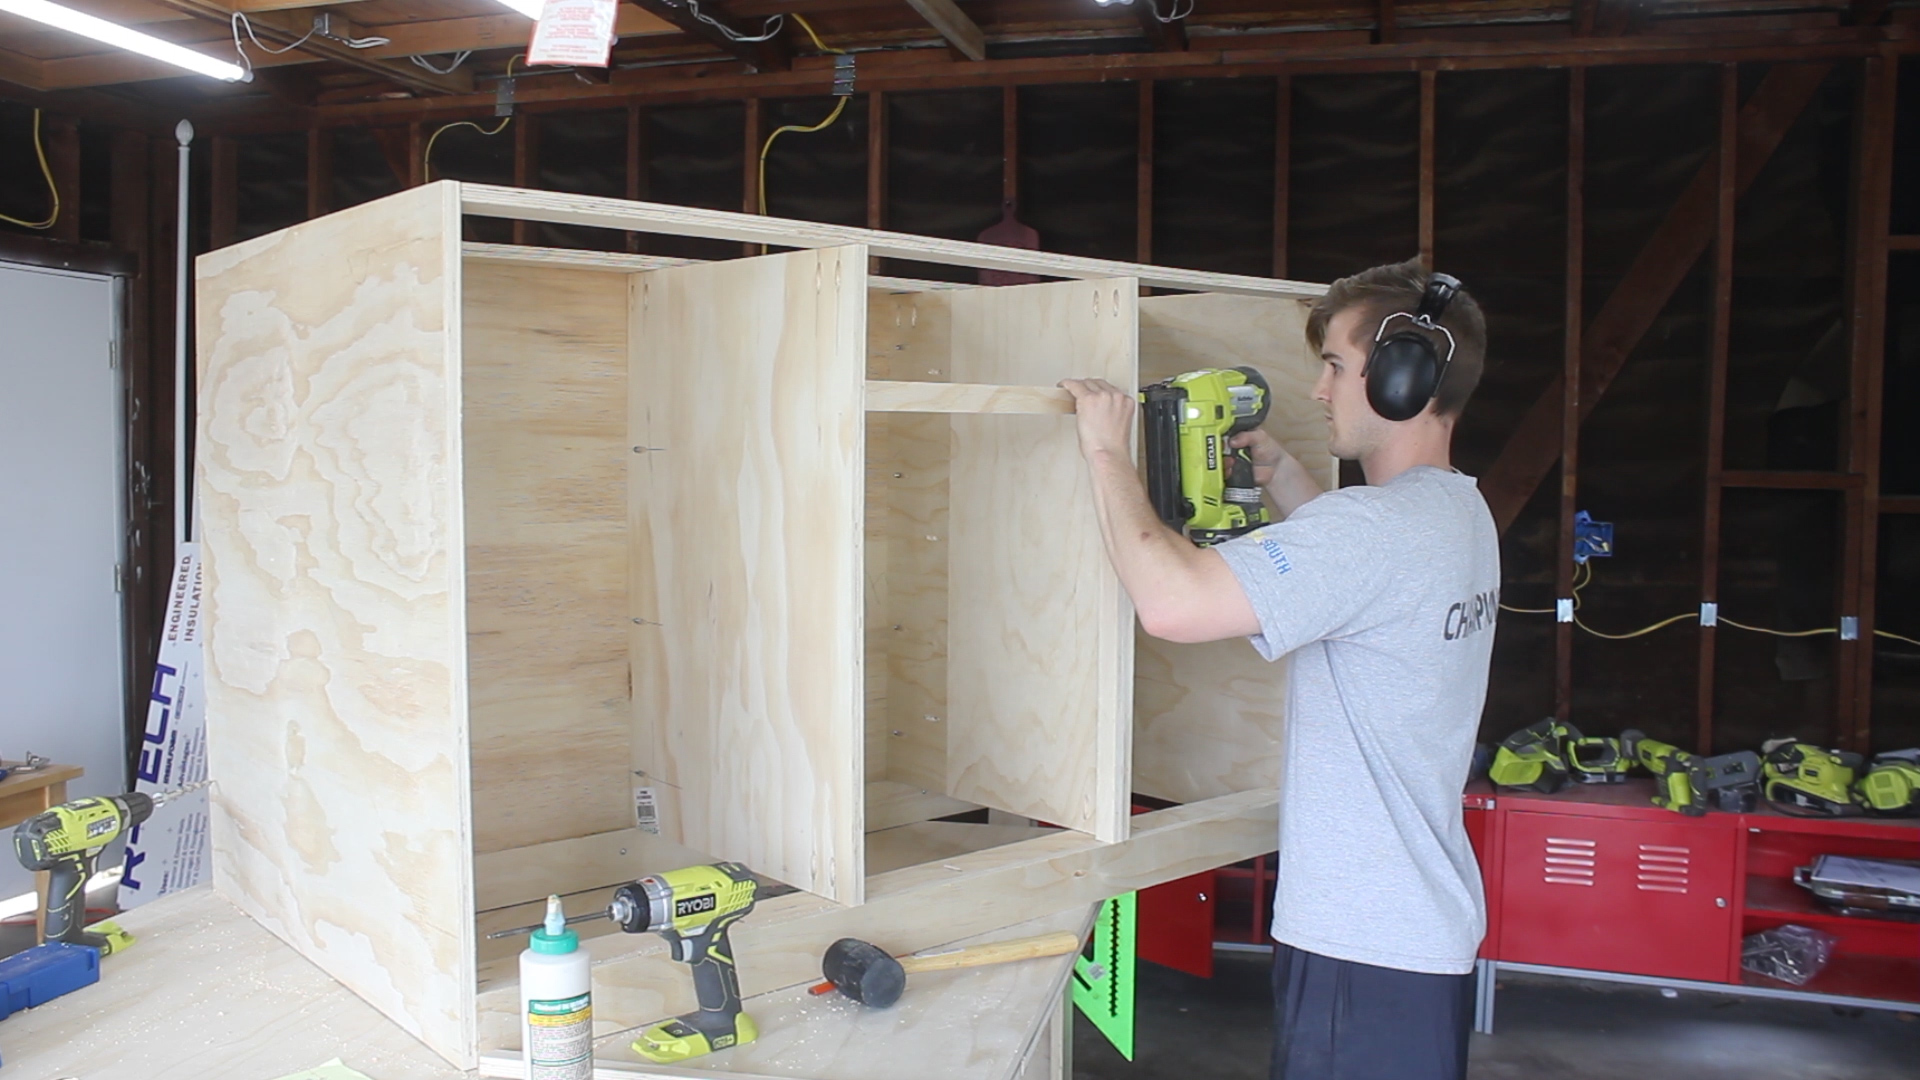

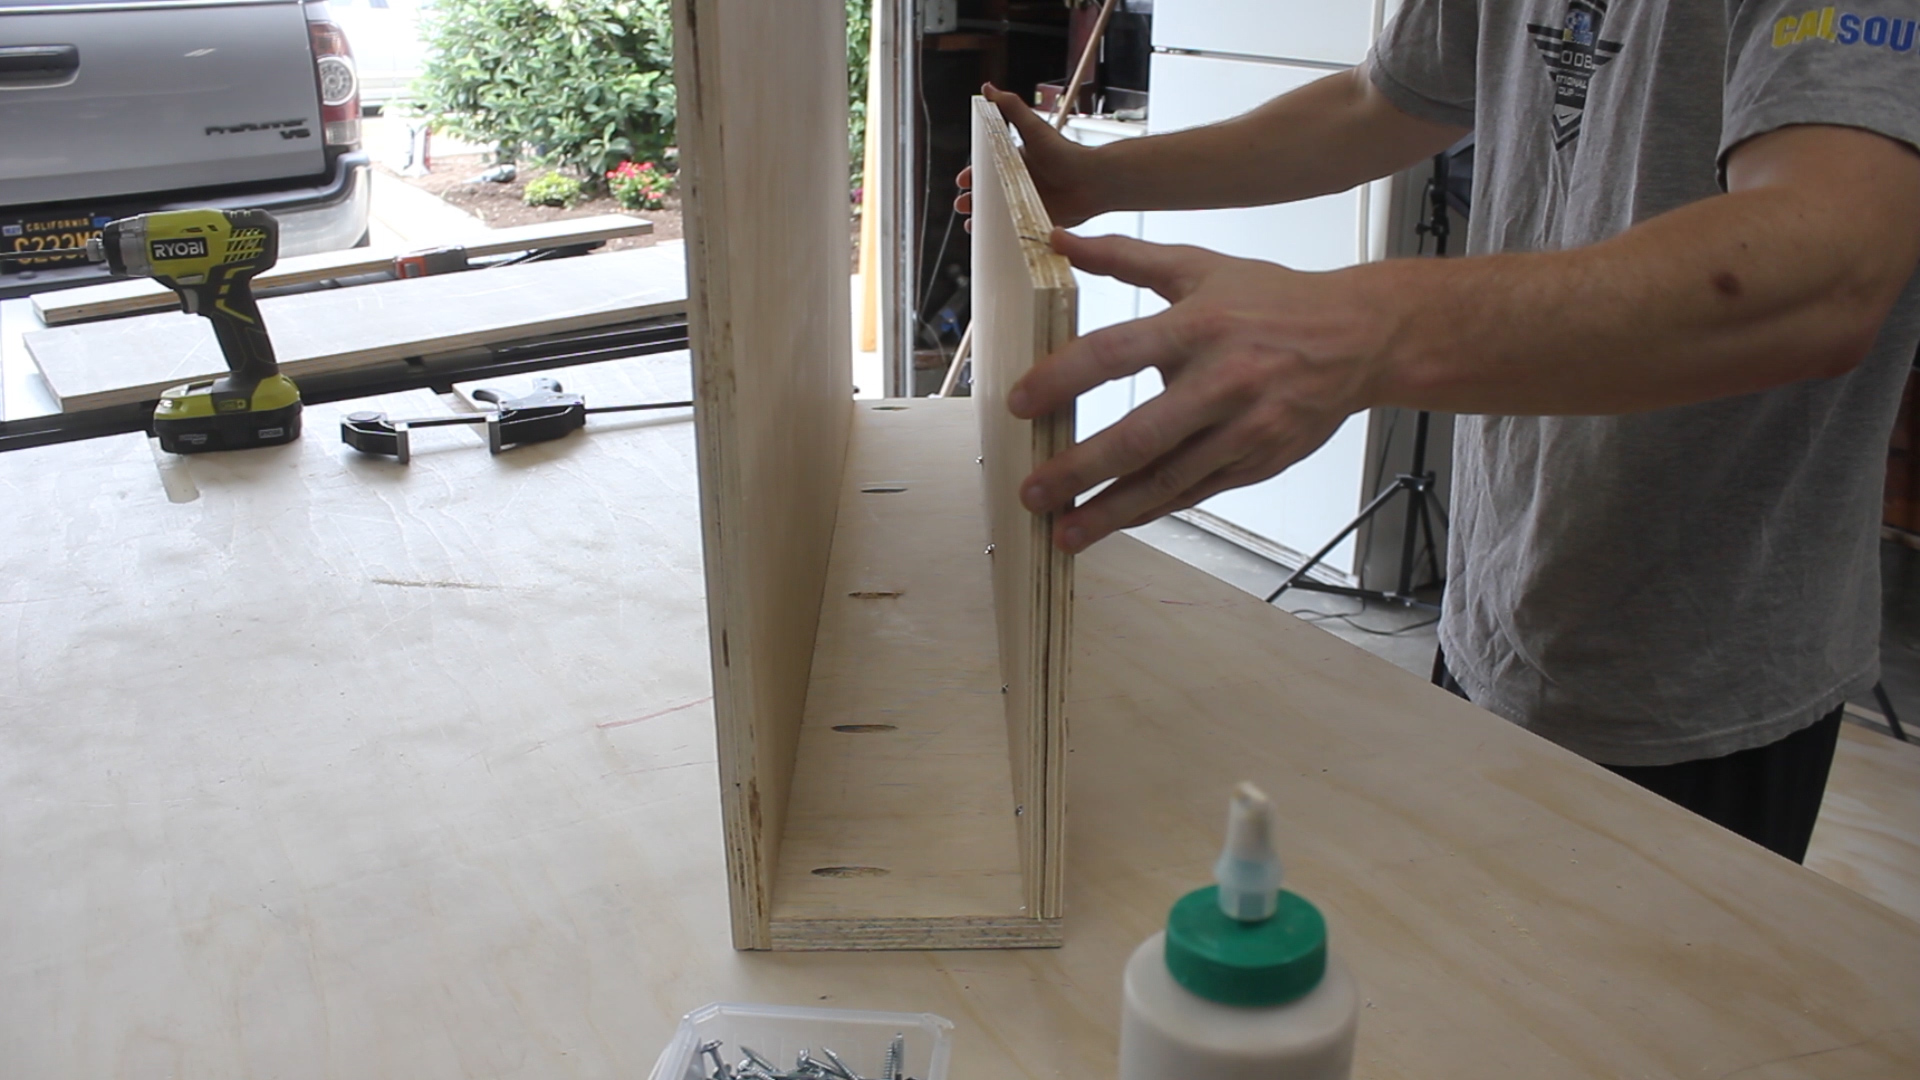
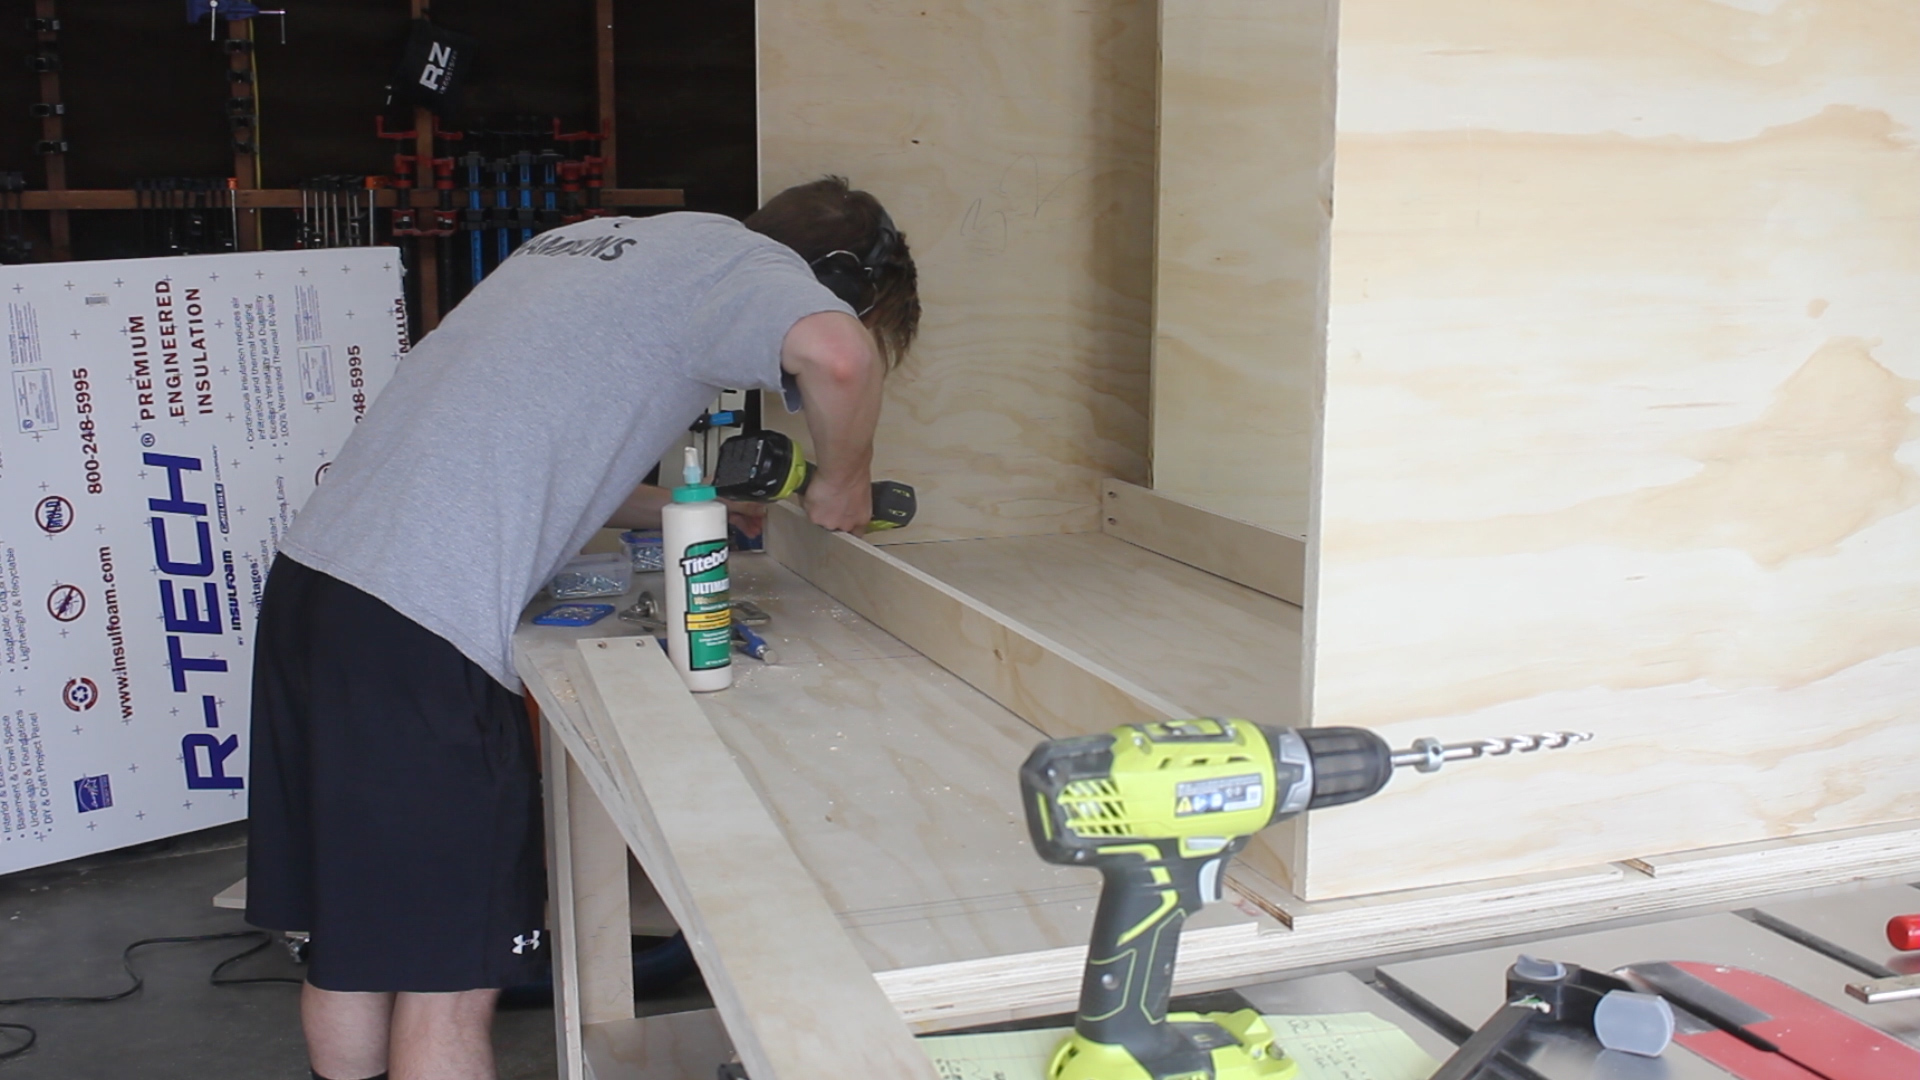
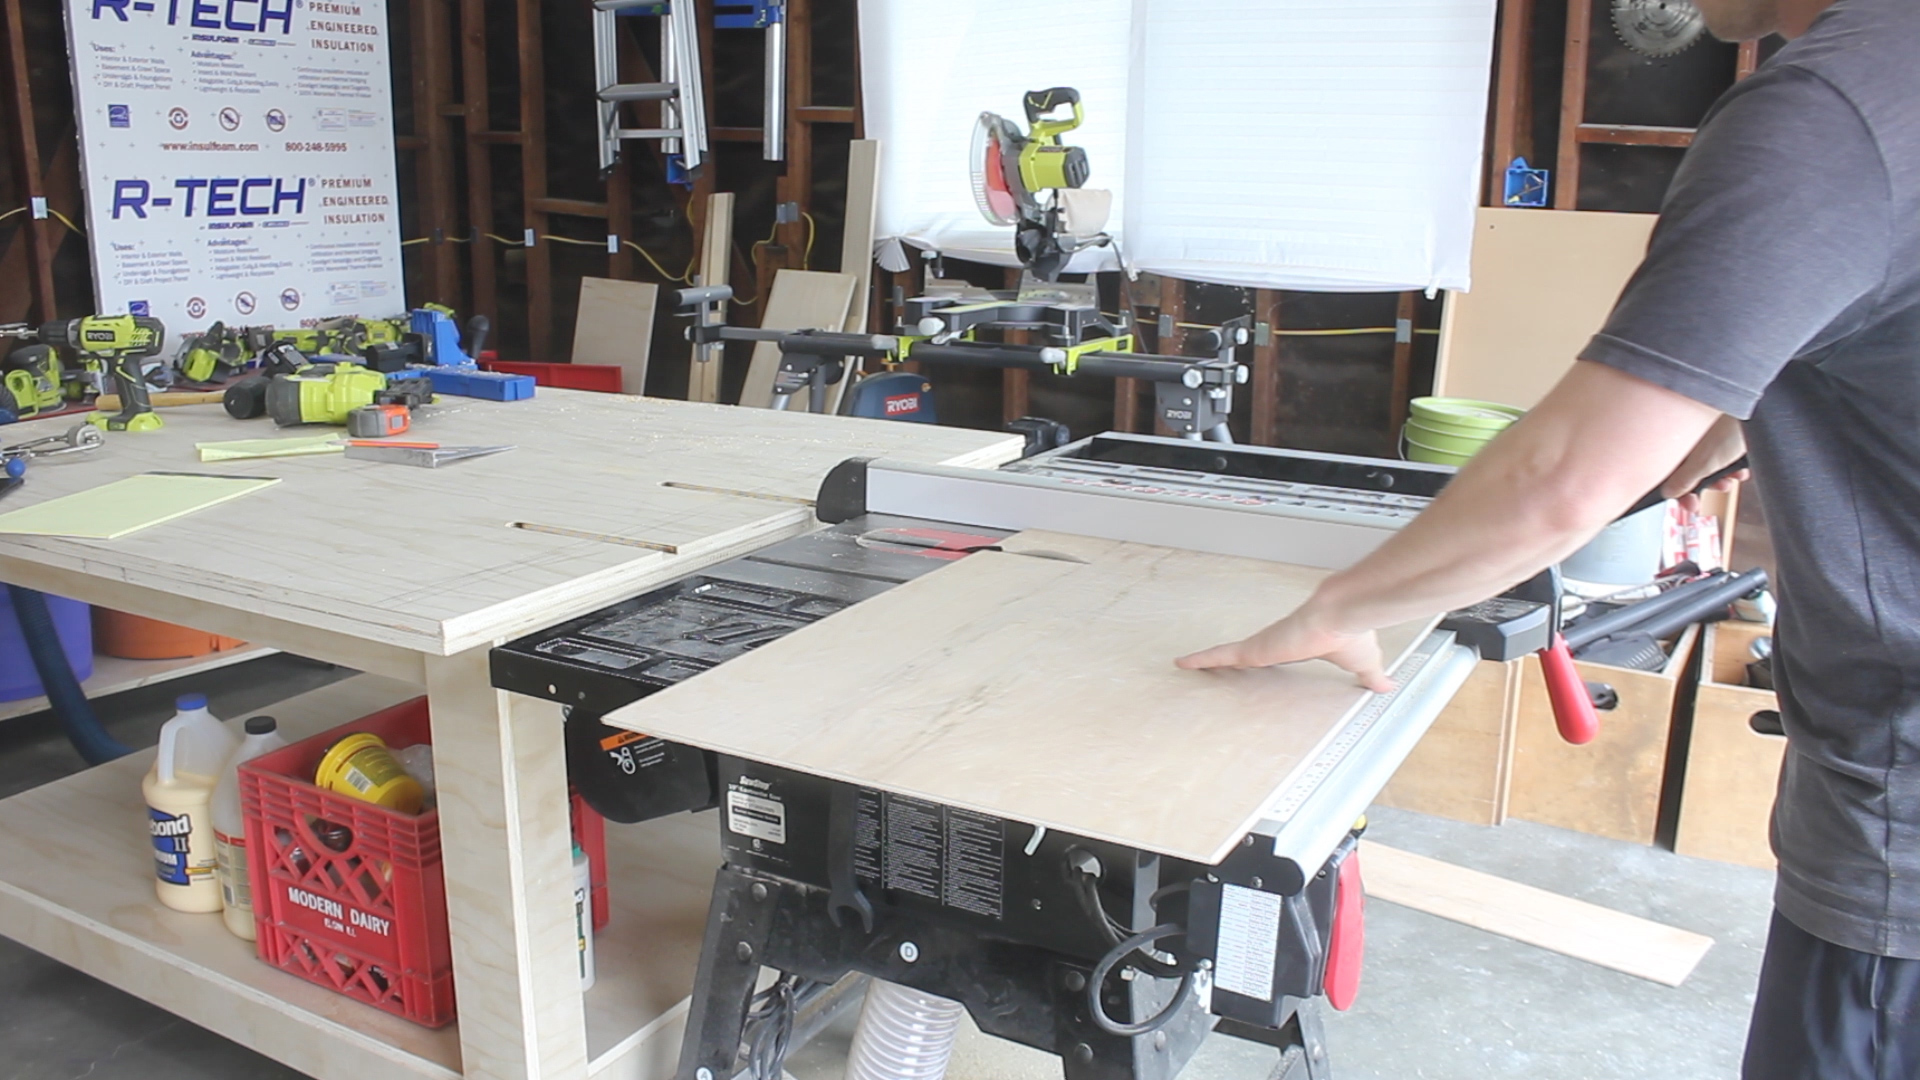
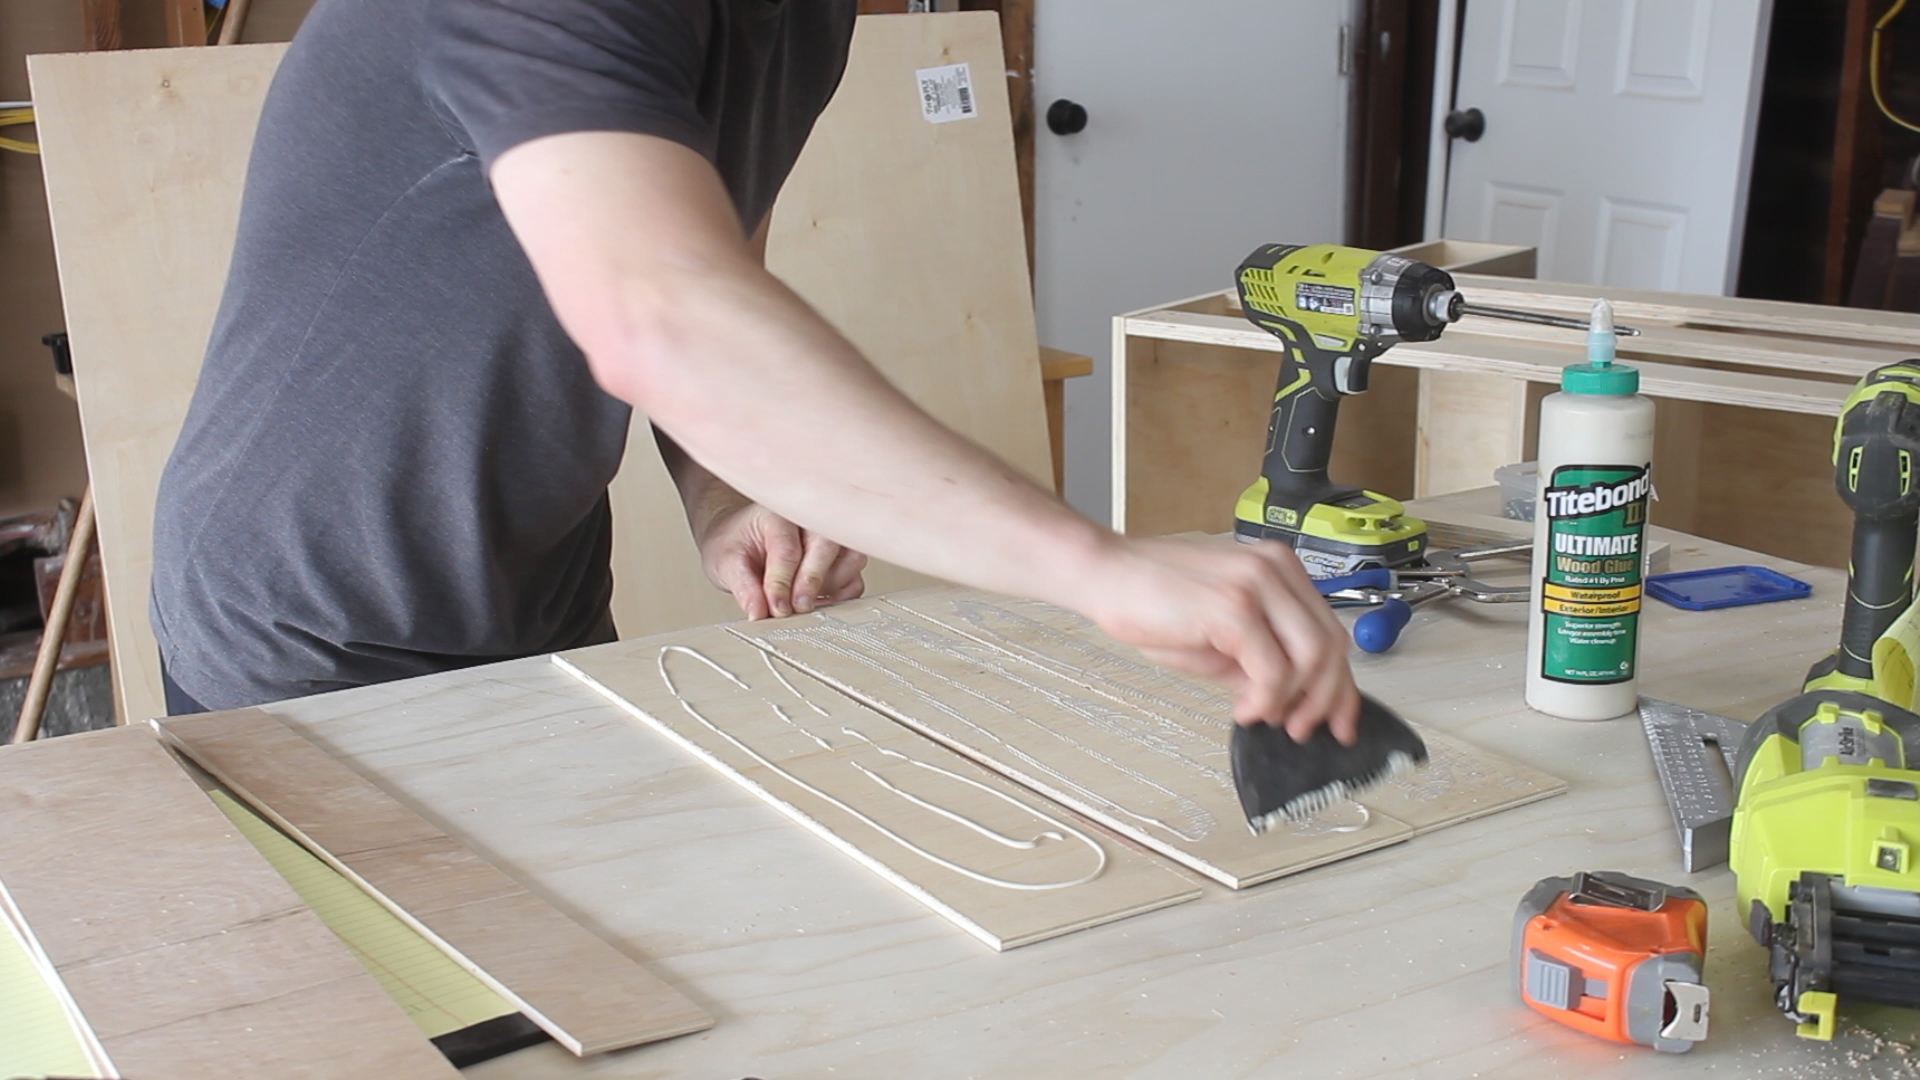
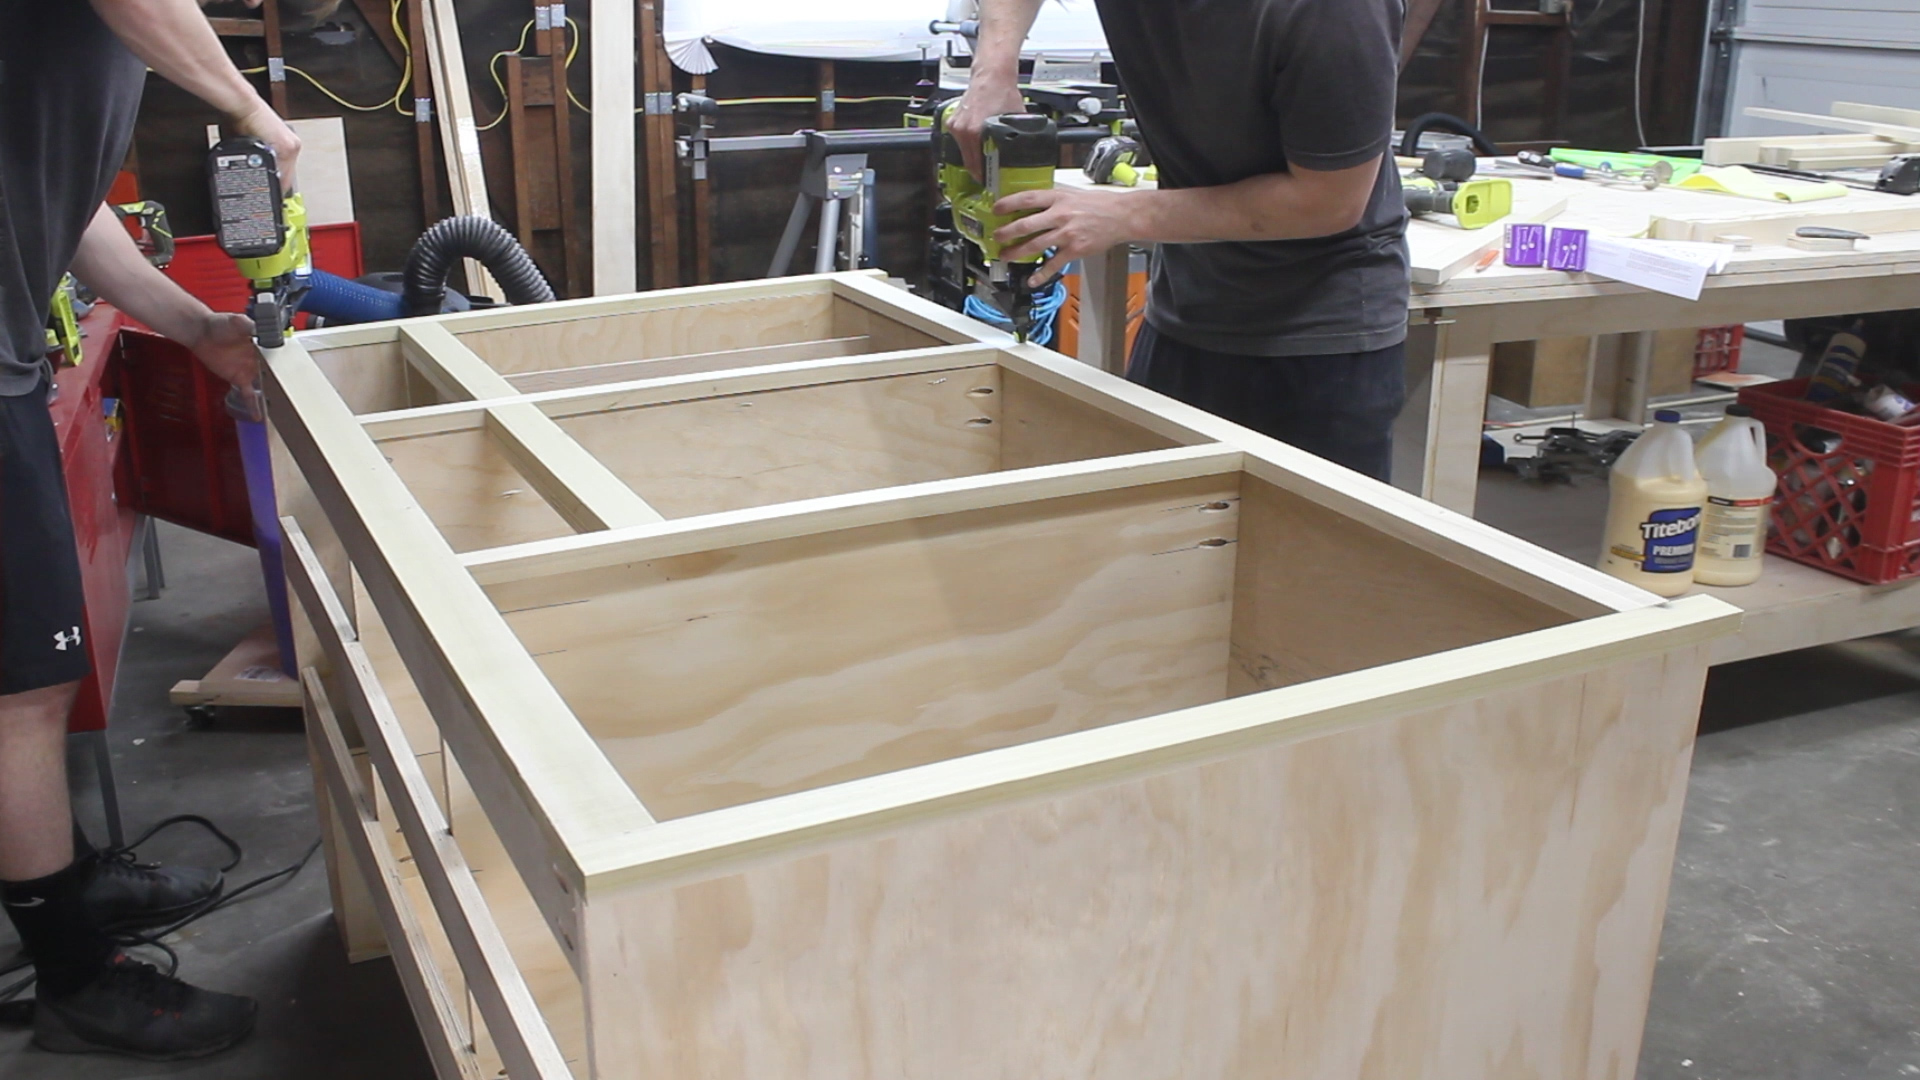
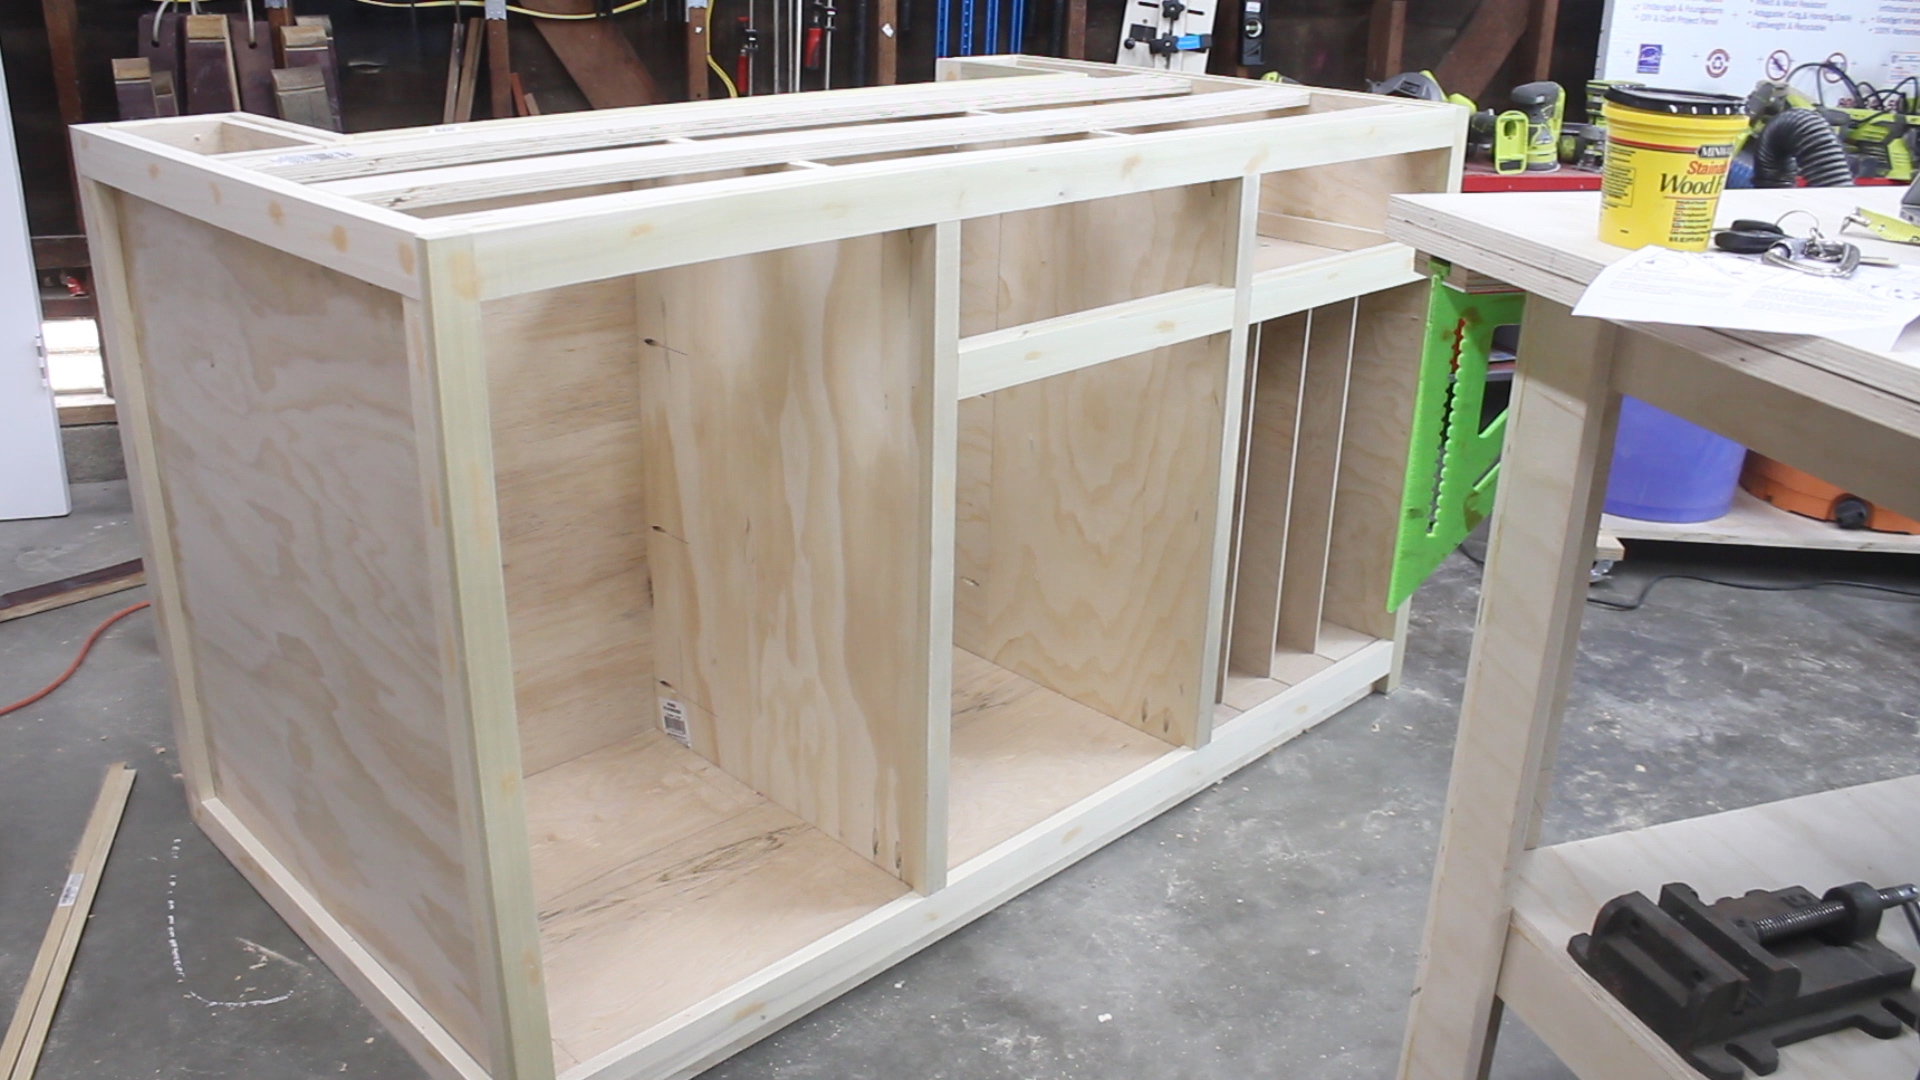
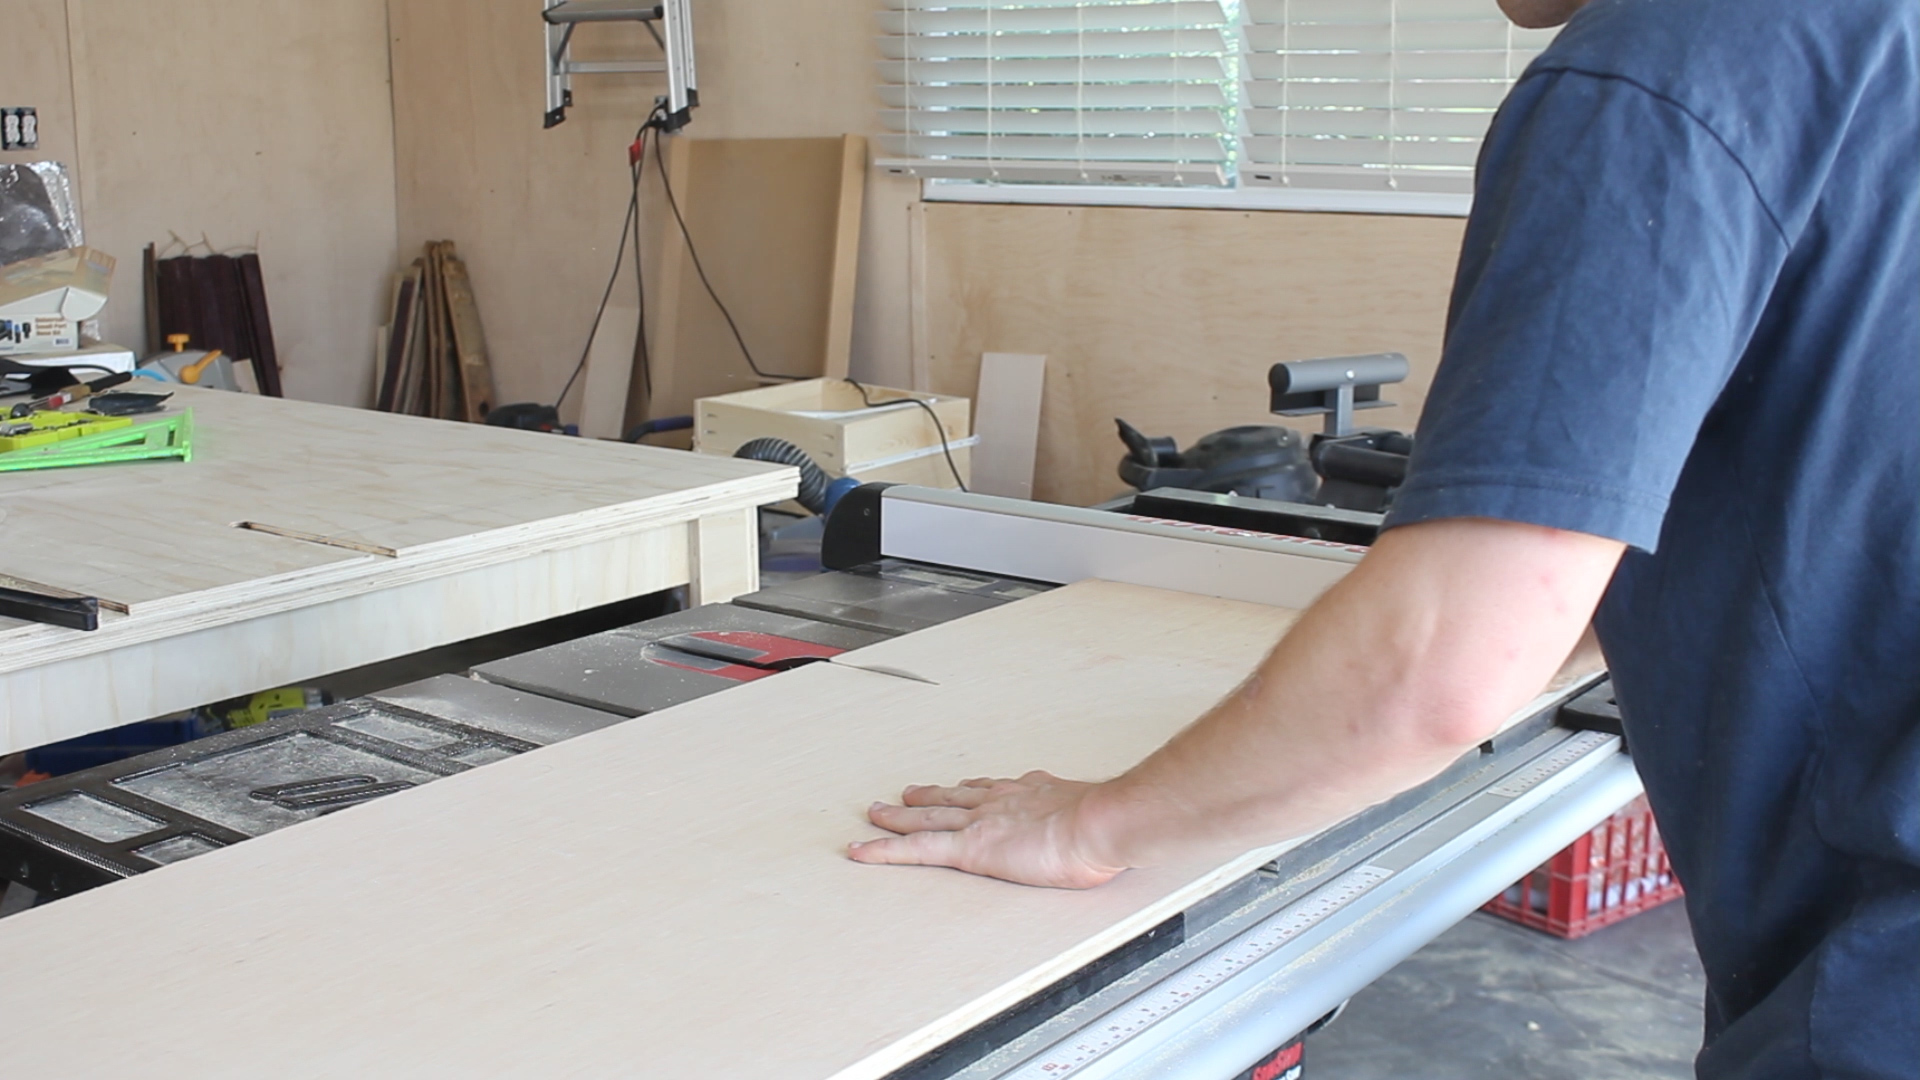
After getting the framing together, I divided the piece into three even quadrants (Pic 1) and ripped additional 3/4" in plywood on the table saw (pic 2). Pic 3 shows those two pieces in place after I used glue and screws to evenly attached. I'm also attaching a few horizontal stretchers in the same piece that will serve as dividers between the cabinets and the drawers.
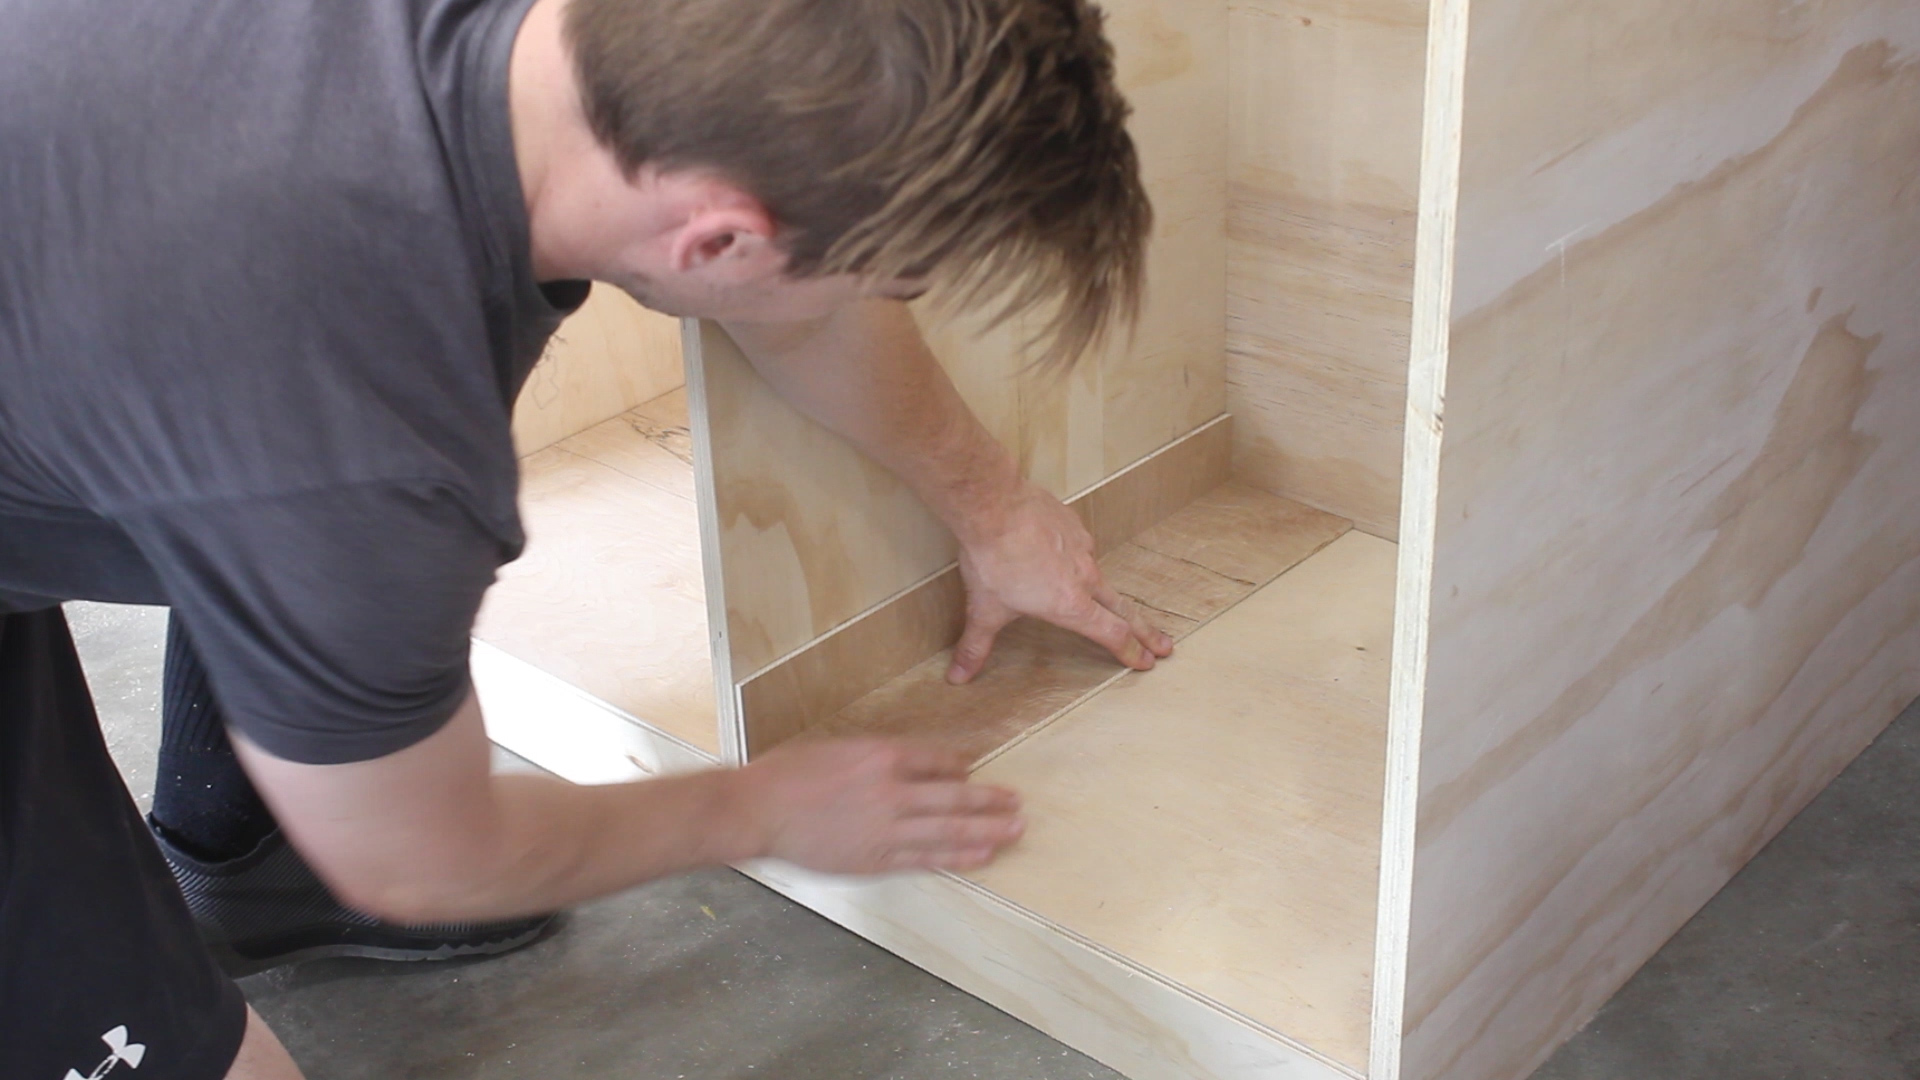
Pics 4-6 show me using small strips of 3/4" plywood and pocket holes to glue and screw in place at the base so that bottom shelves could be attached on top.


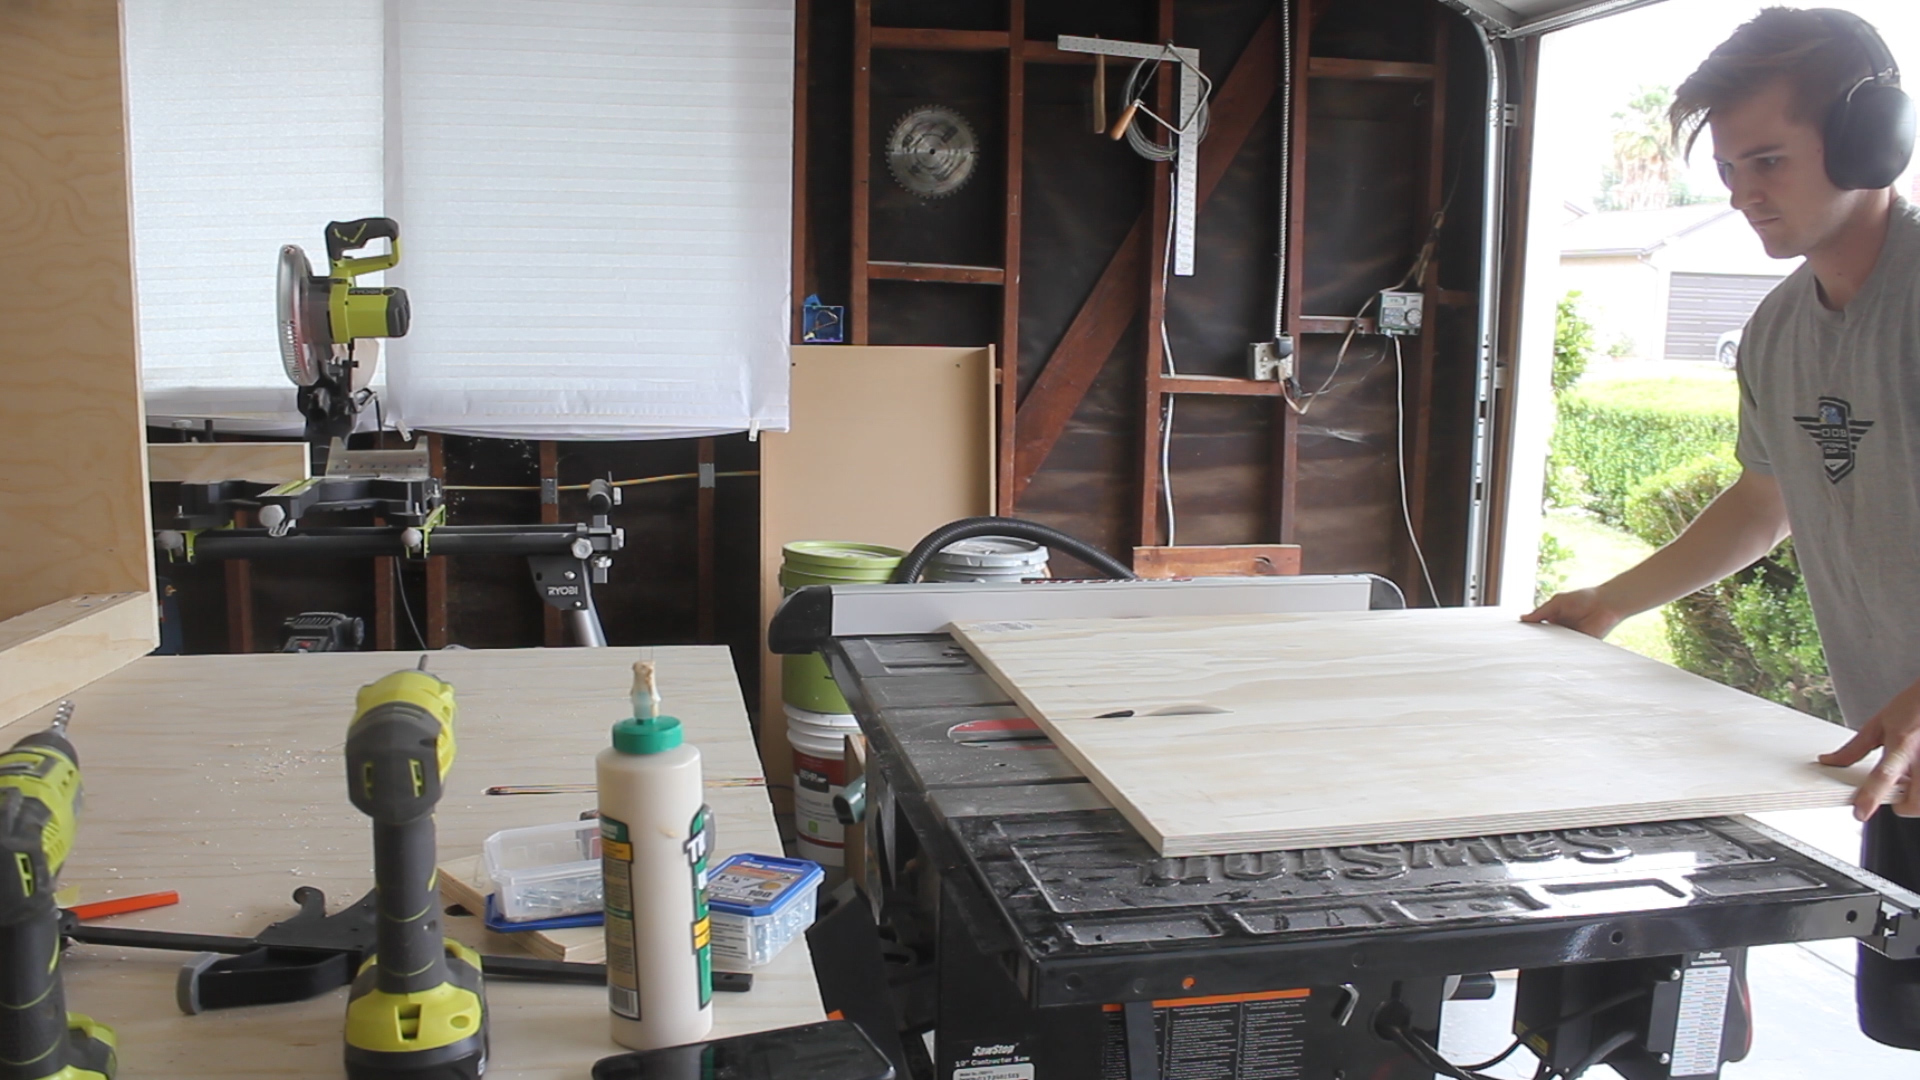
The next step was super easy - I took 1/4" plywood and ripped it to length and width on the table saw (Pics 1-2) and then attached into place - the relative sizes of each piece of plywood are based on the relative size of your bottom shelves - I think mine were around 18" x 20" each. Then, I attached everything using brad nails (Pic 3).

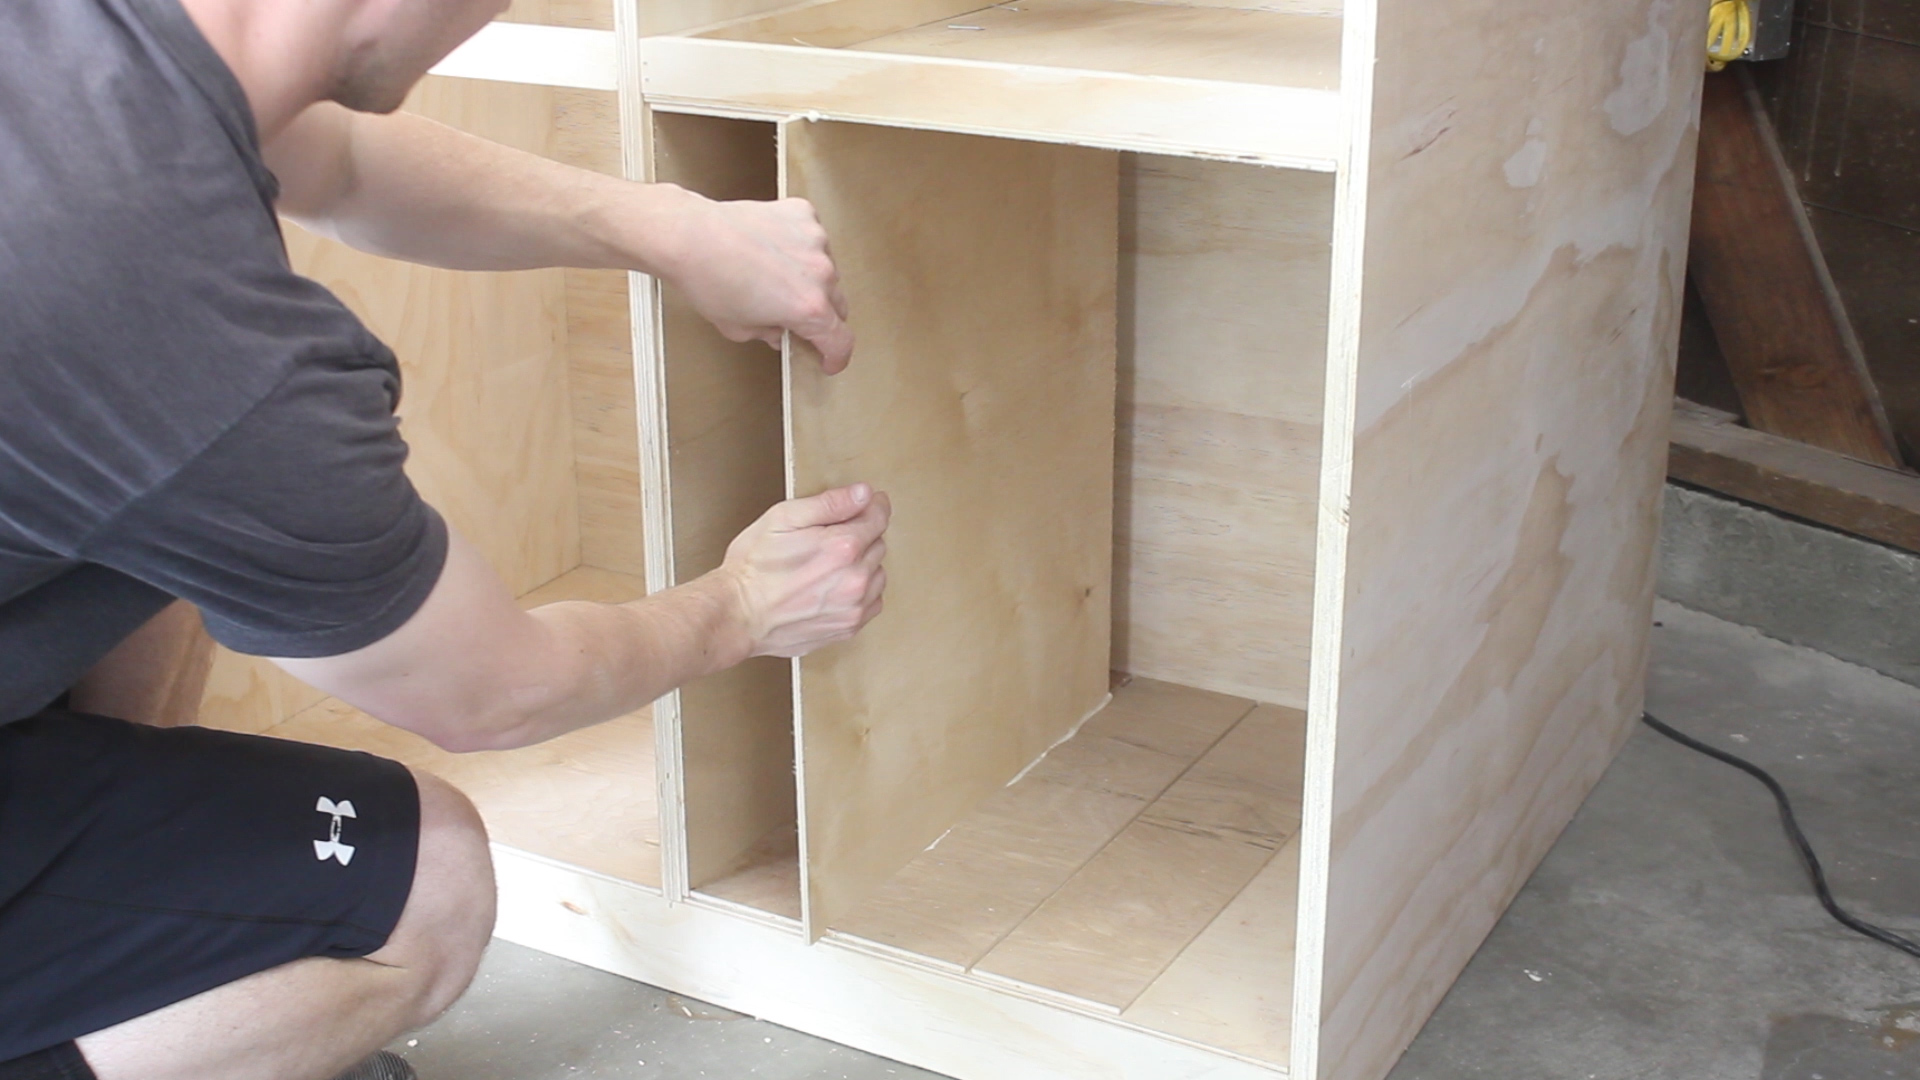
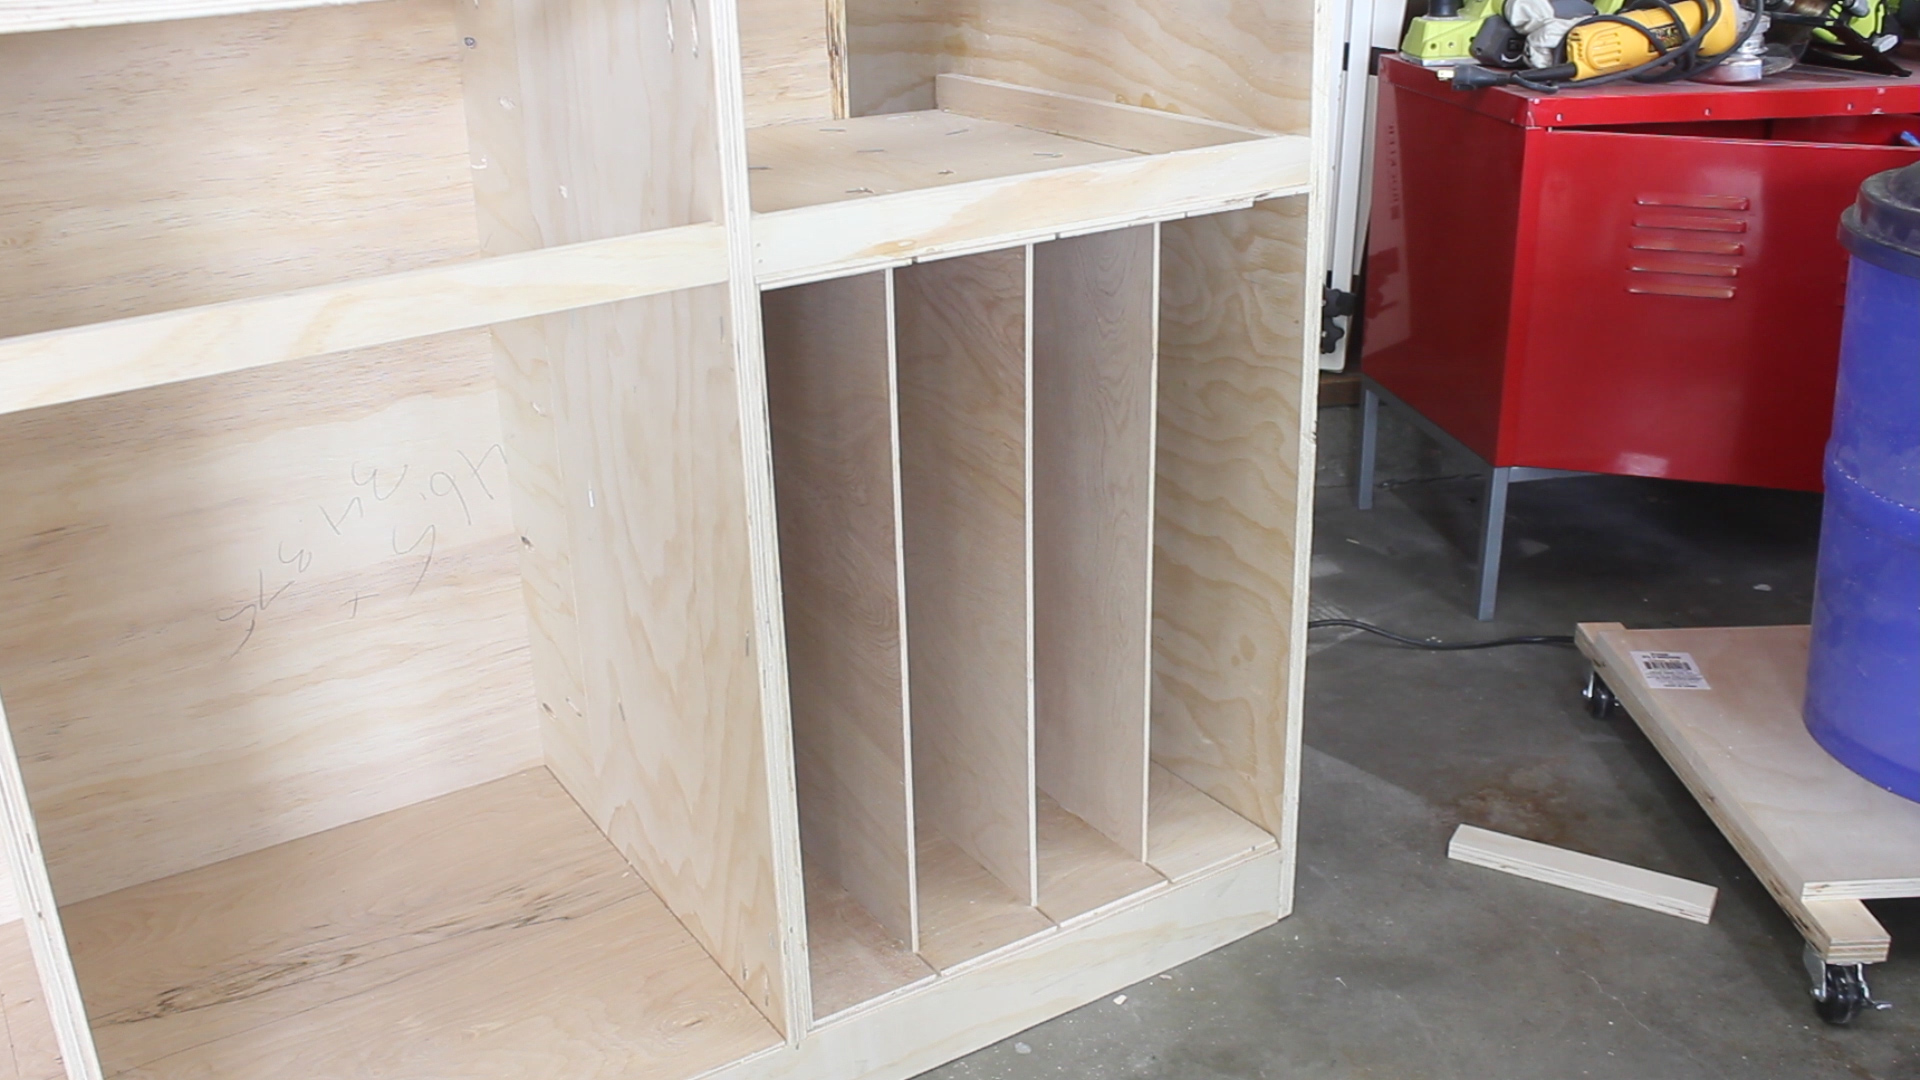
My fiancé wanted one of the cabinets to store really large cooking sheets - something that just isn't readily available in most kitchens. Part me also thought it could store a custom cutting board I build down the road, so I was all for it. To make these, I broke down more 1/4" plywood on the table saw into two sets of wood (Pic 1).
The first set would serve as base and roof dividers (Pic 2), while the second set would serve as the actual dividers (not shown, but featured in Pics 6-7). I applied glue and then started laying them in place (Pics 3-4). I did so by using another scrap piece to properly space them. I then used brad nails to tack things in place (Pic 5).
You can see how using a spacer in this way allowed me to go back after floor and ceiling dividers were attached so I could slide in my larger pieces (Pic 6). These were held in place in their final form (Pic 7) using just glue. This method allowed me to do this quick and efficiently without worrying about cutting even rabbits in the thin plywood, and it was cleaner in design (at least in my opinion!)

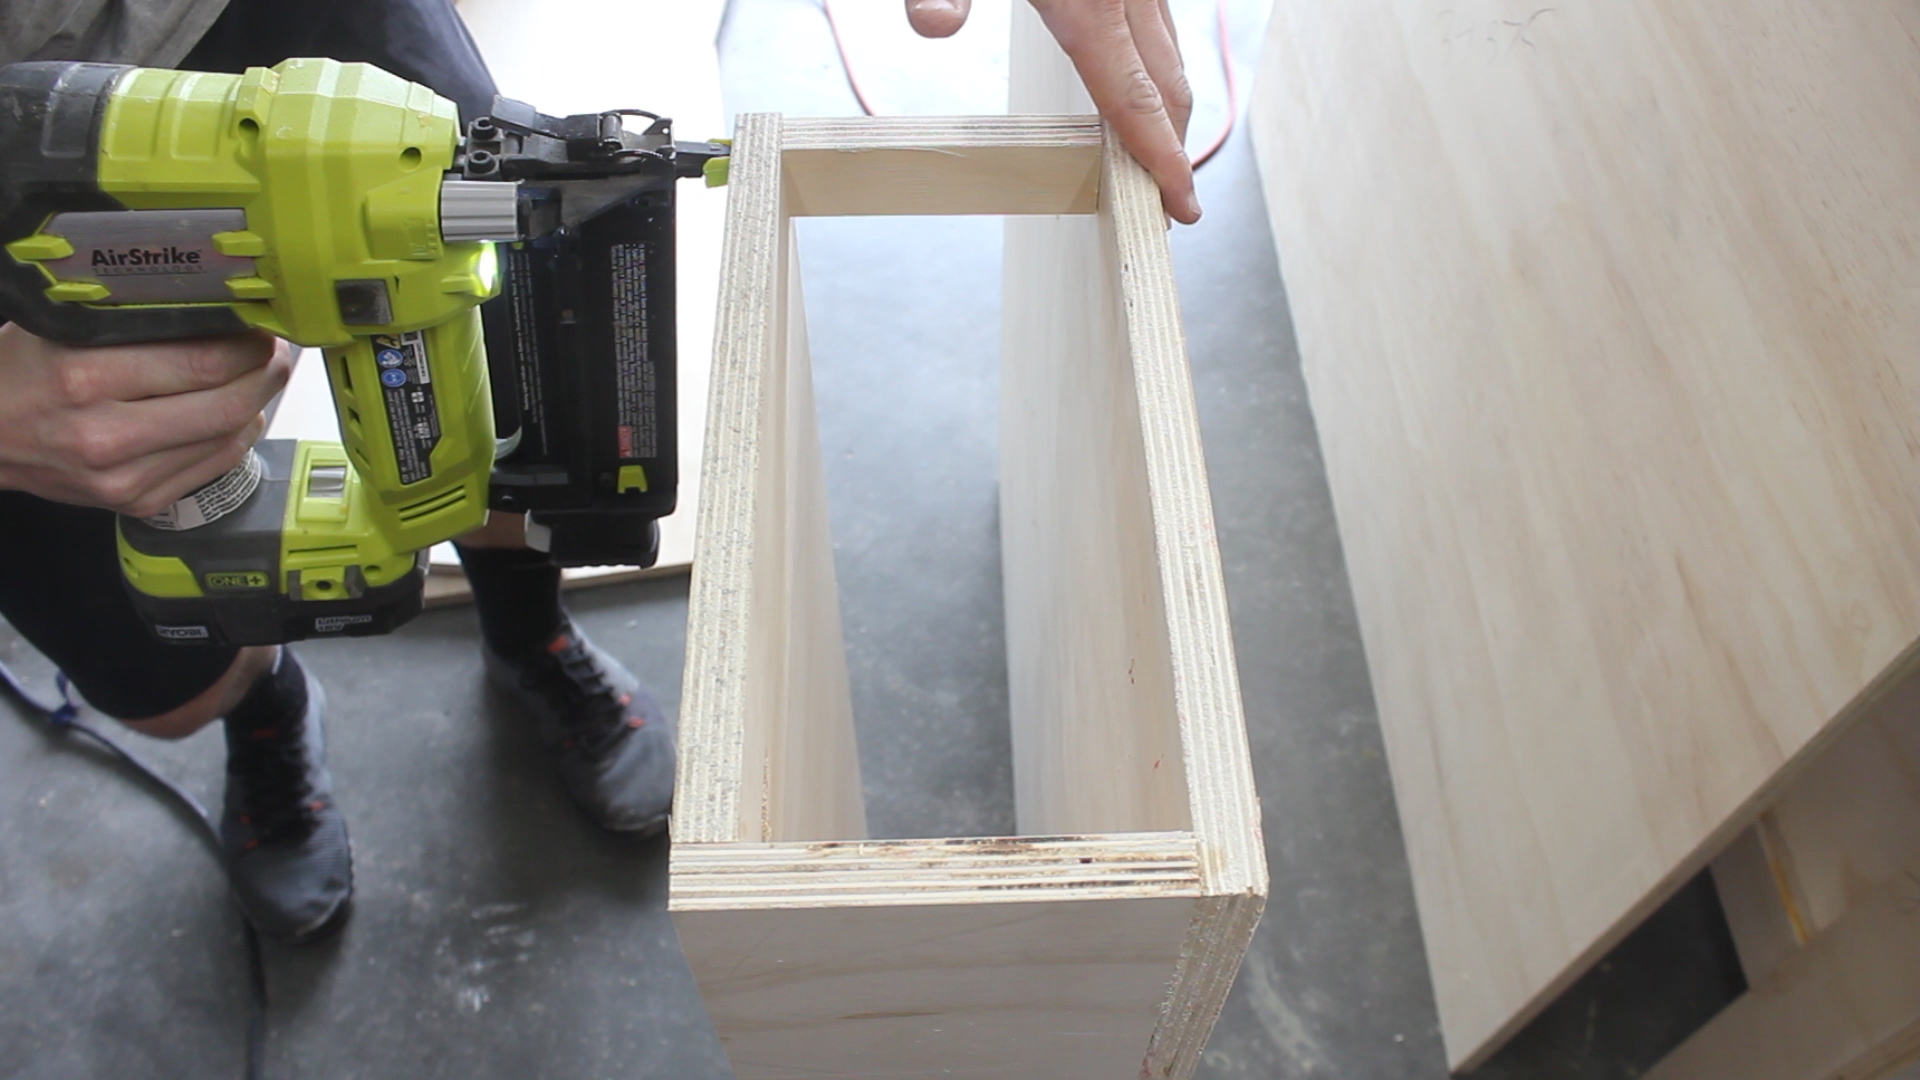
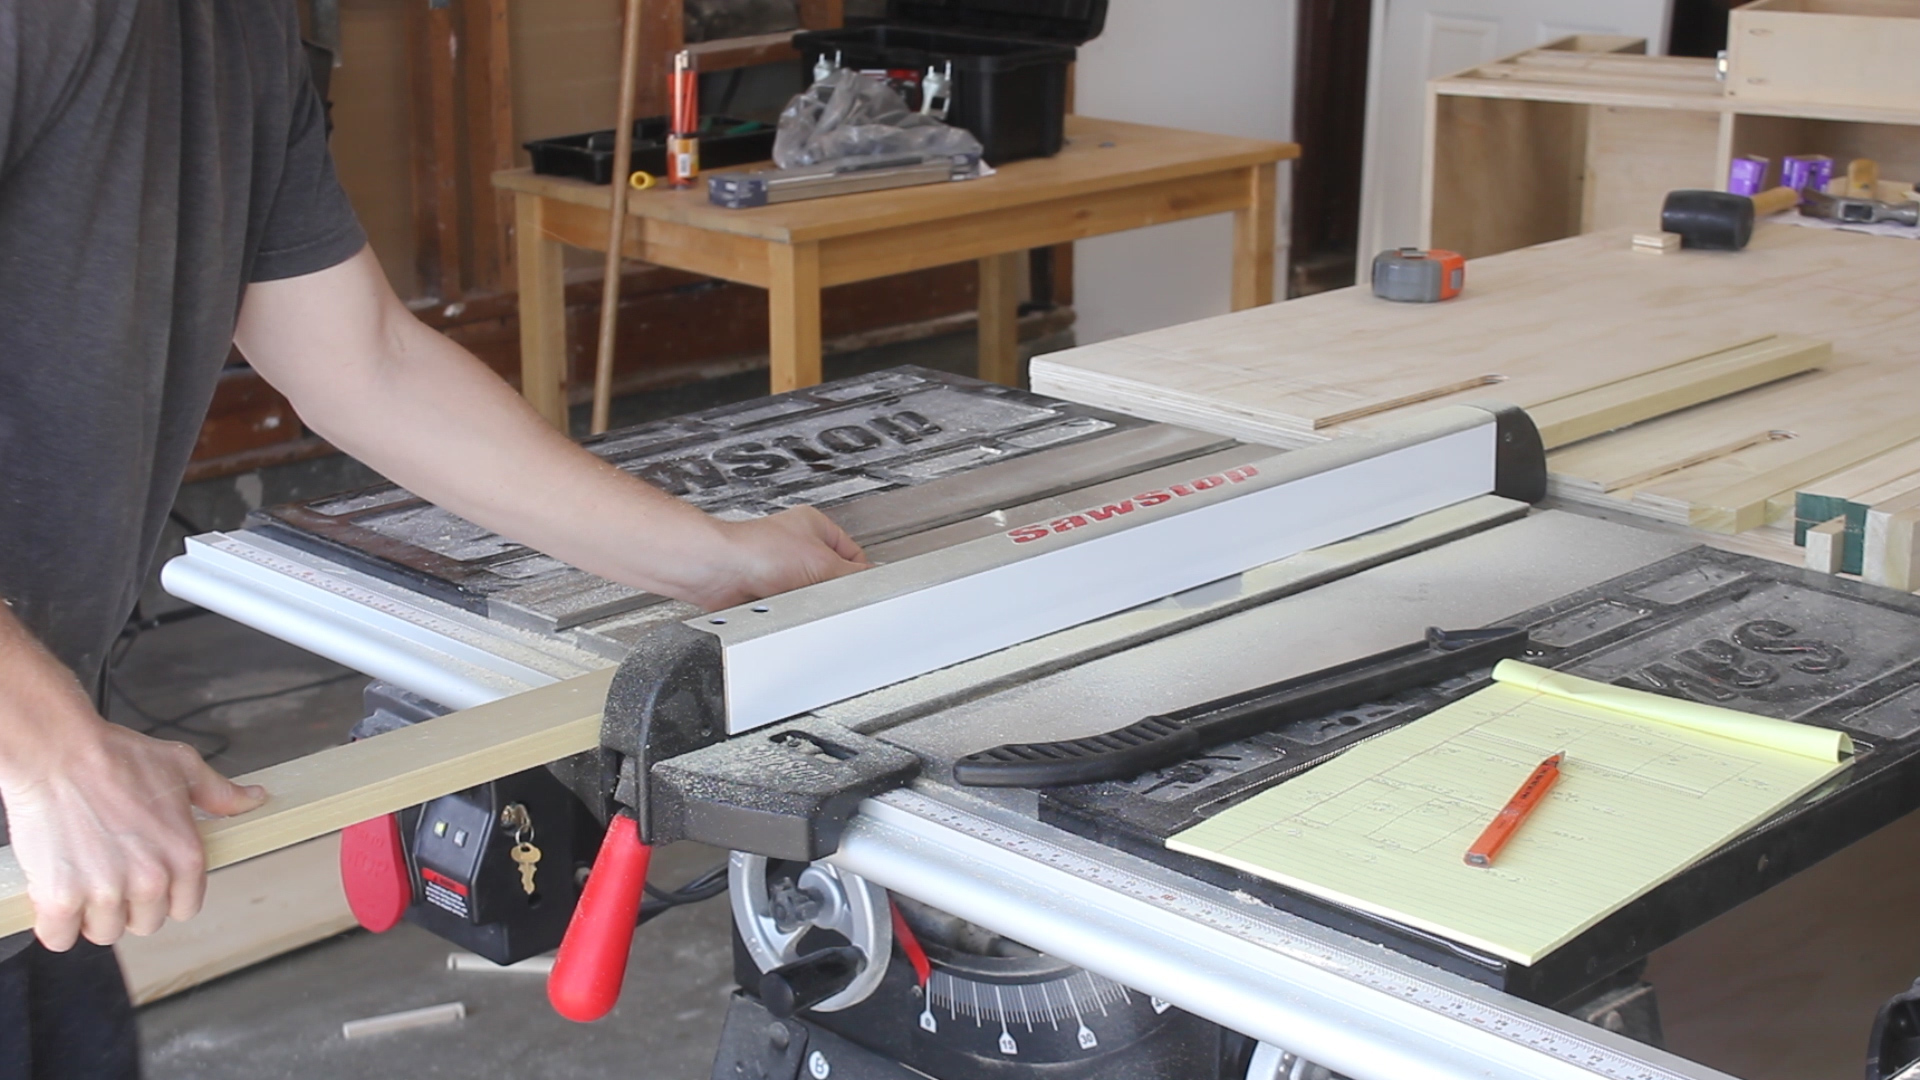
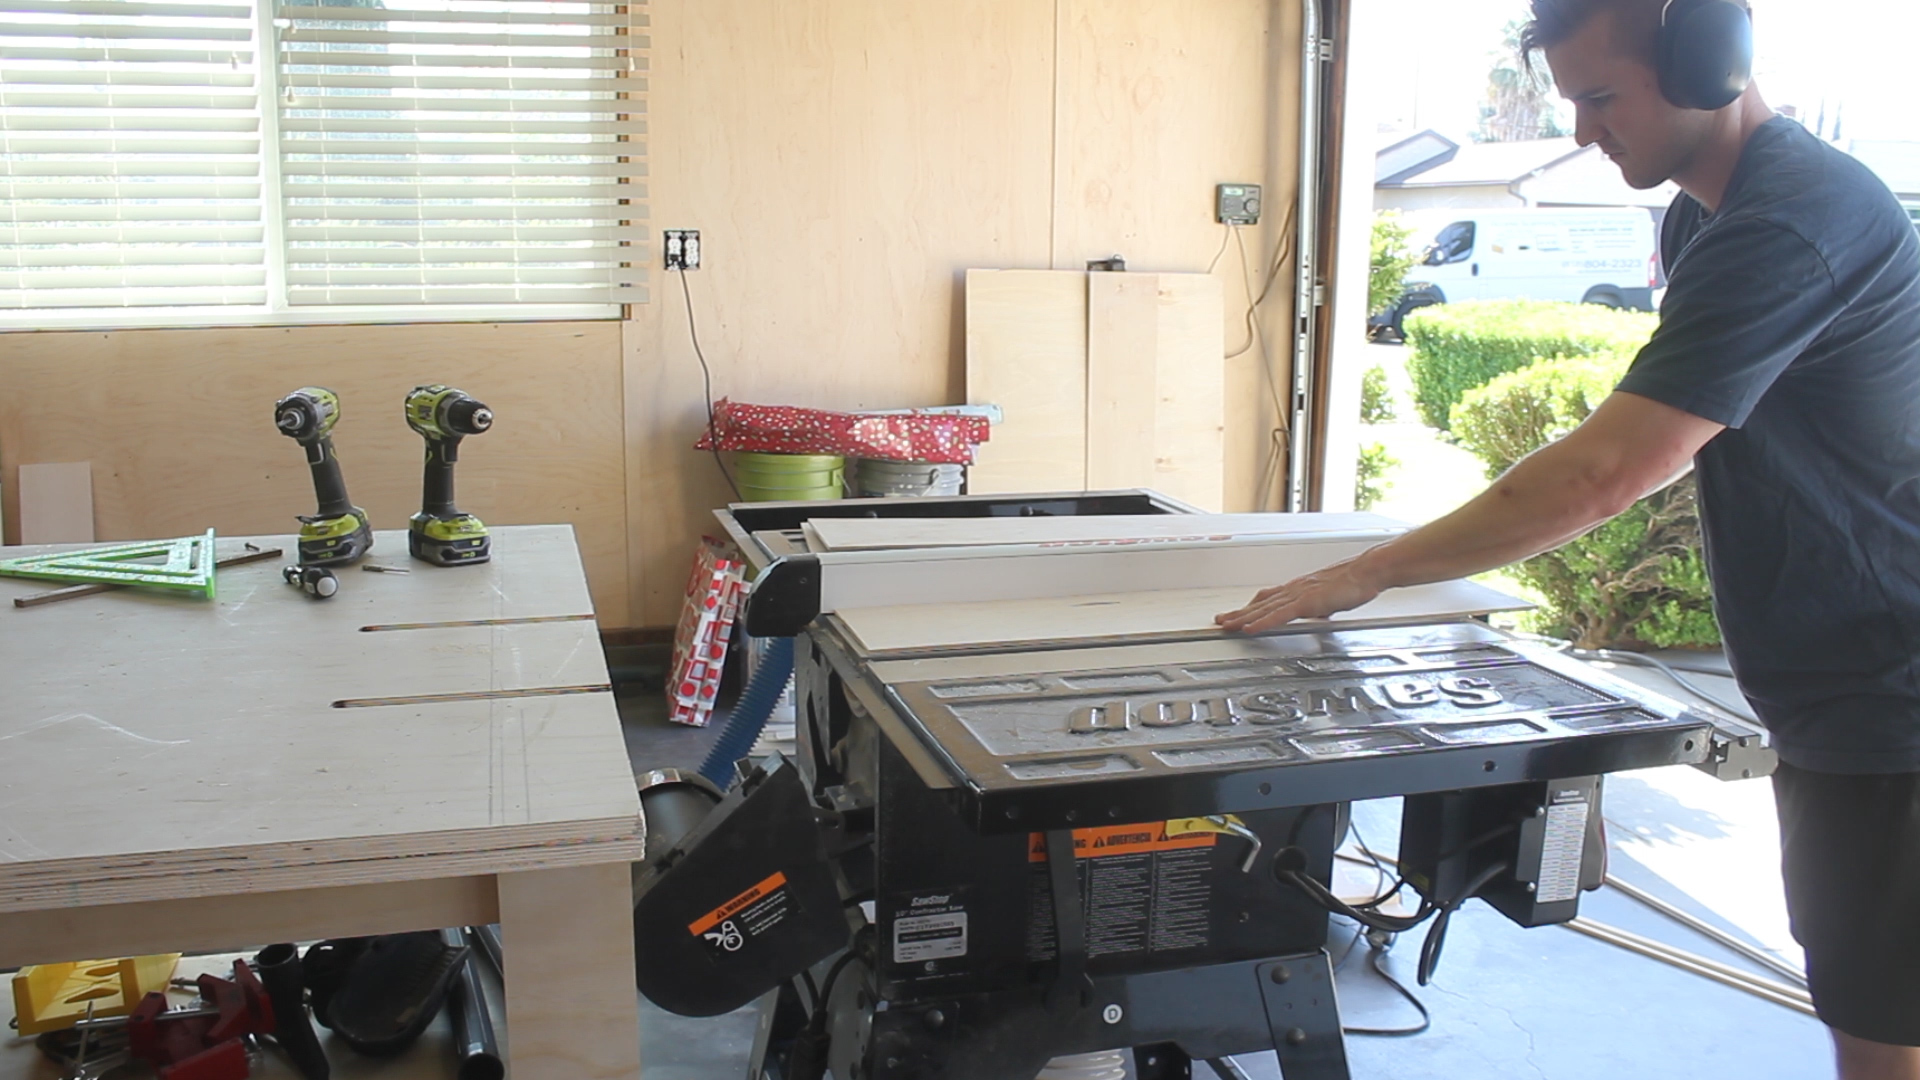
Look - drawers are super boring, so I'll spare you. In Pic 1, I used left over 3/4" plywood from the structure to rip two sets of drawers that were about 4.5" tall. Then, in Pic 2, I lowered my table saw blade and made two separate passes to cut rabbits that would hold the bottom shelf later on. To elaborate - my blade is 1/8" thick, so I made one pass with the blade 3/8" high (half the thickness of the plywood), then moved the fence over 1/8" inch and made another pass, giving me a 1/4" rabbit to insert the bottom drawer shelf later on.
I then drilled and used pocket holes to assemble the shelf (Pic 3). After cutting my bottom shelf (1/4" plywood) to length, I inserted it into the rabbited joints (Pic 4), then attached the fourth side of the drawer (Pic 5) and closed it off with pocket holes.
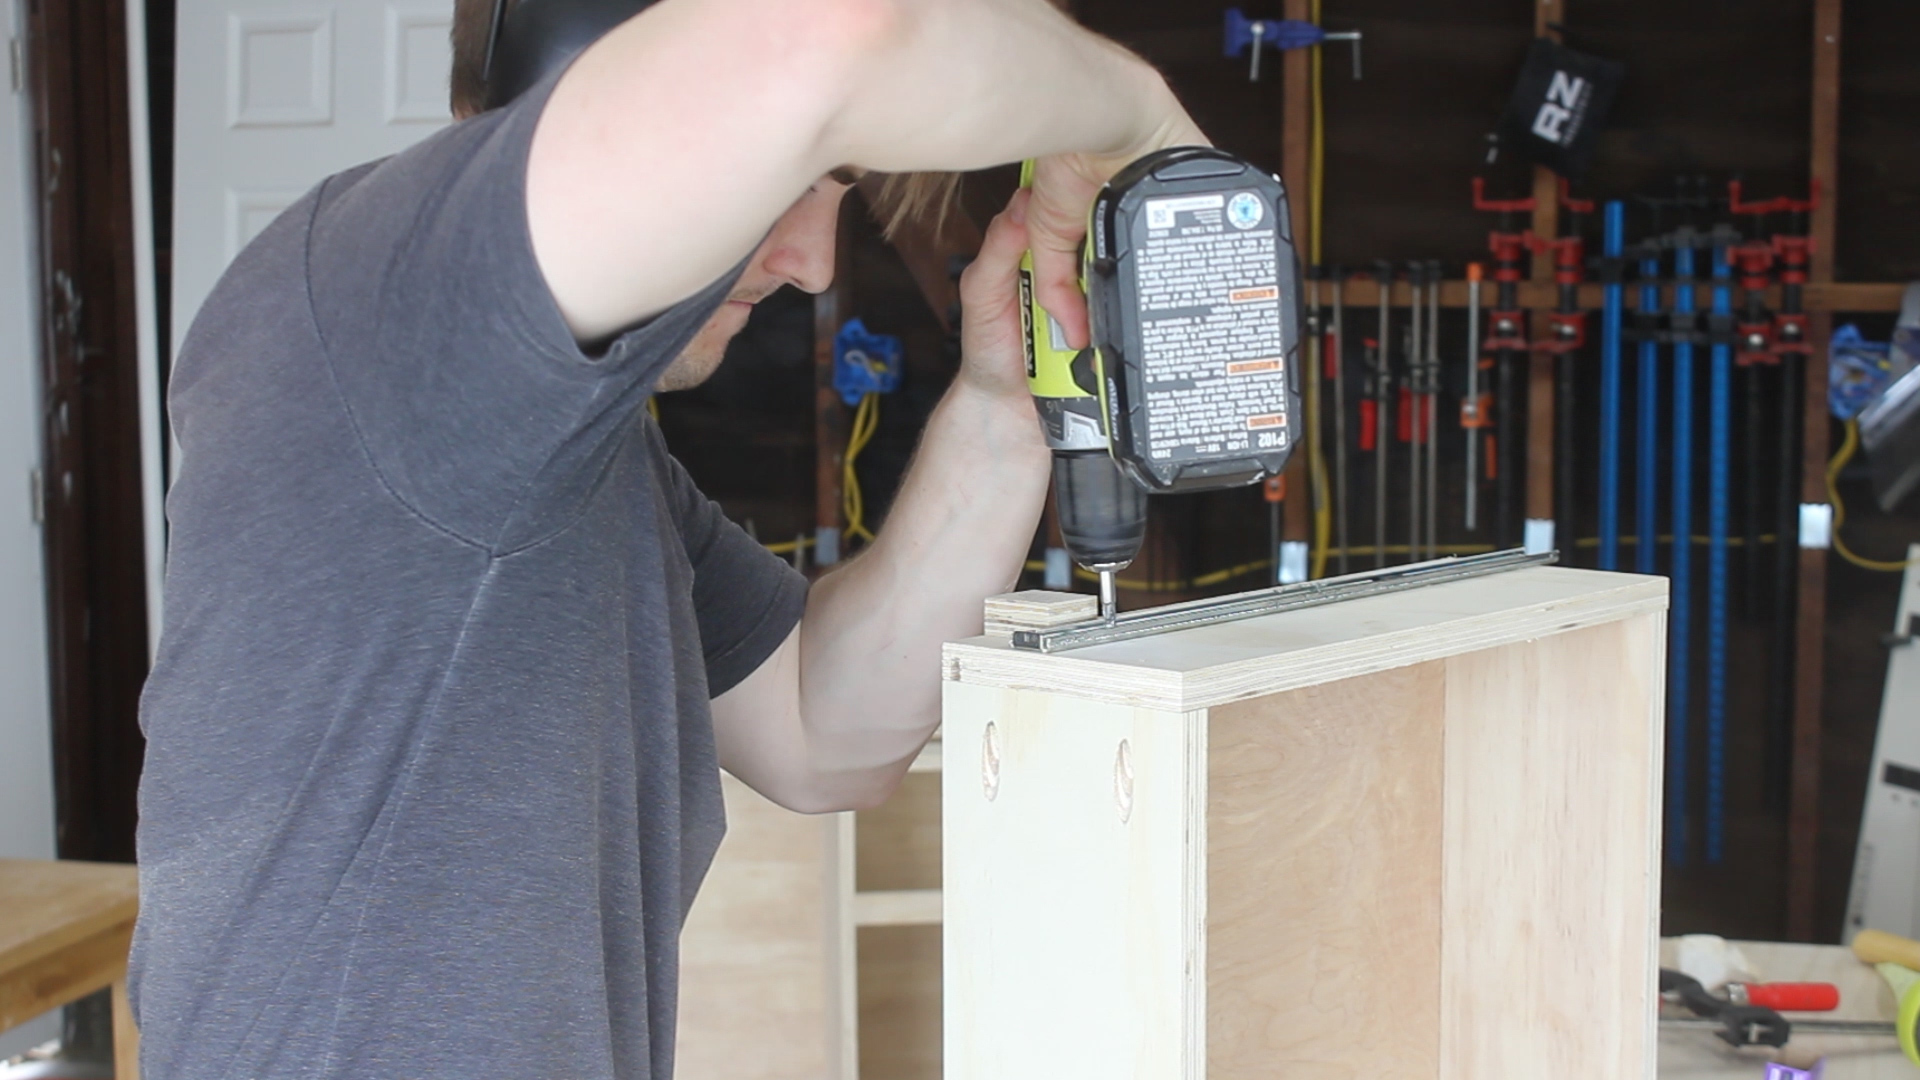
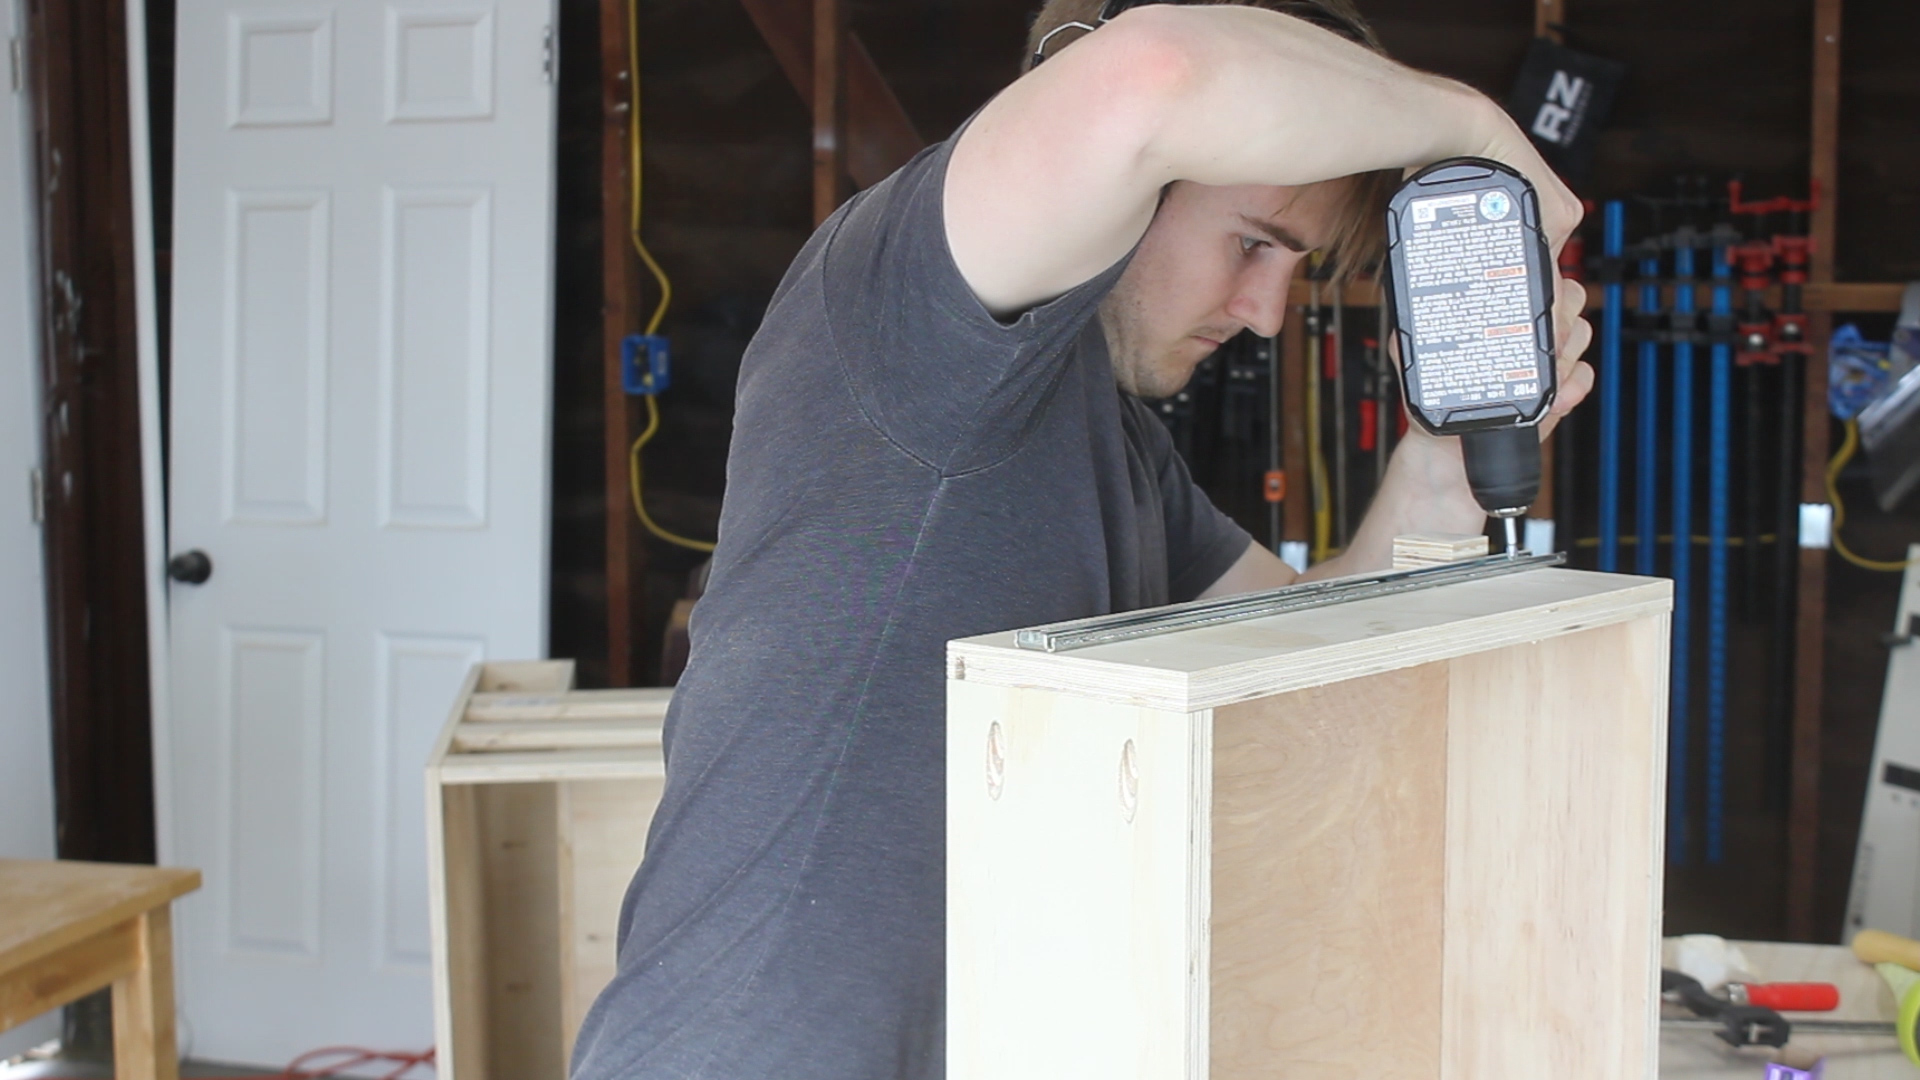
Last up, I added drawer slides to each side, using a spacer block that I cut to keep things parallel and even on each side (Pics 6-7). I hated this part, but it was necessary (obviously!). Pics 8-9 show me installing the subsequent drawer mounts (also not fun, but necessary!).
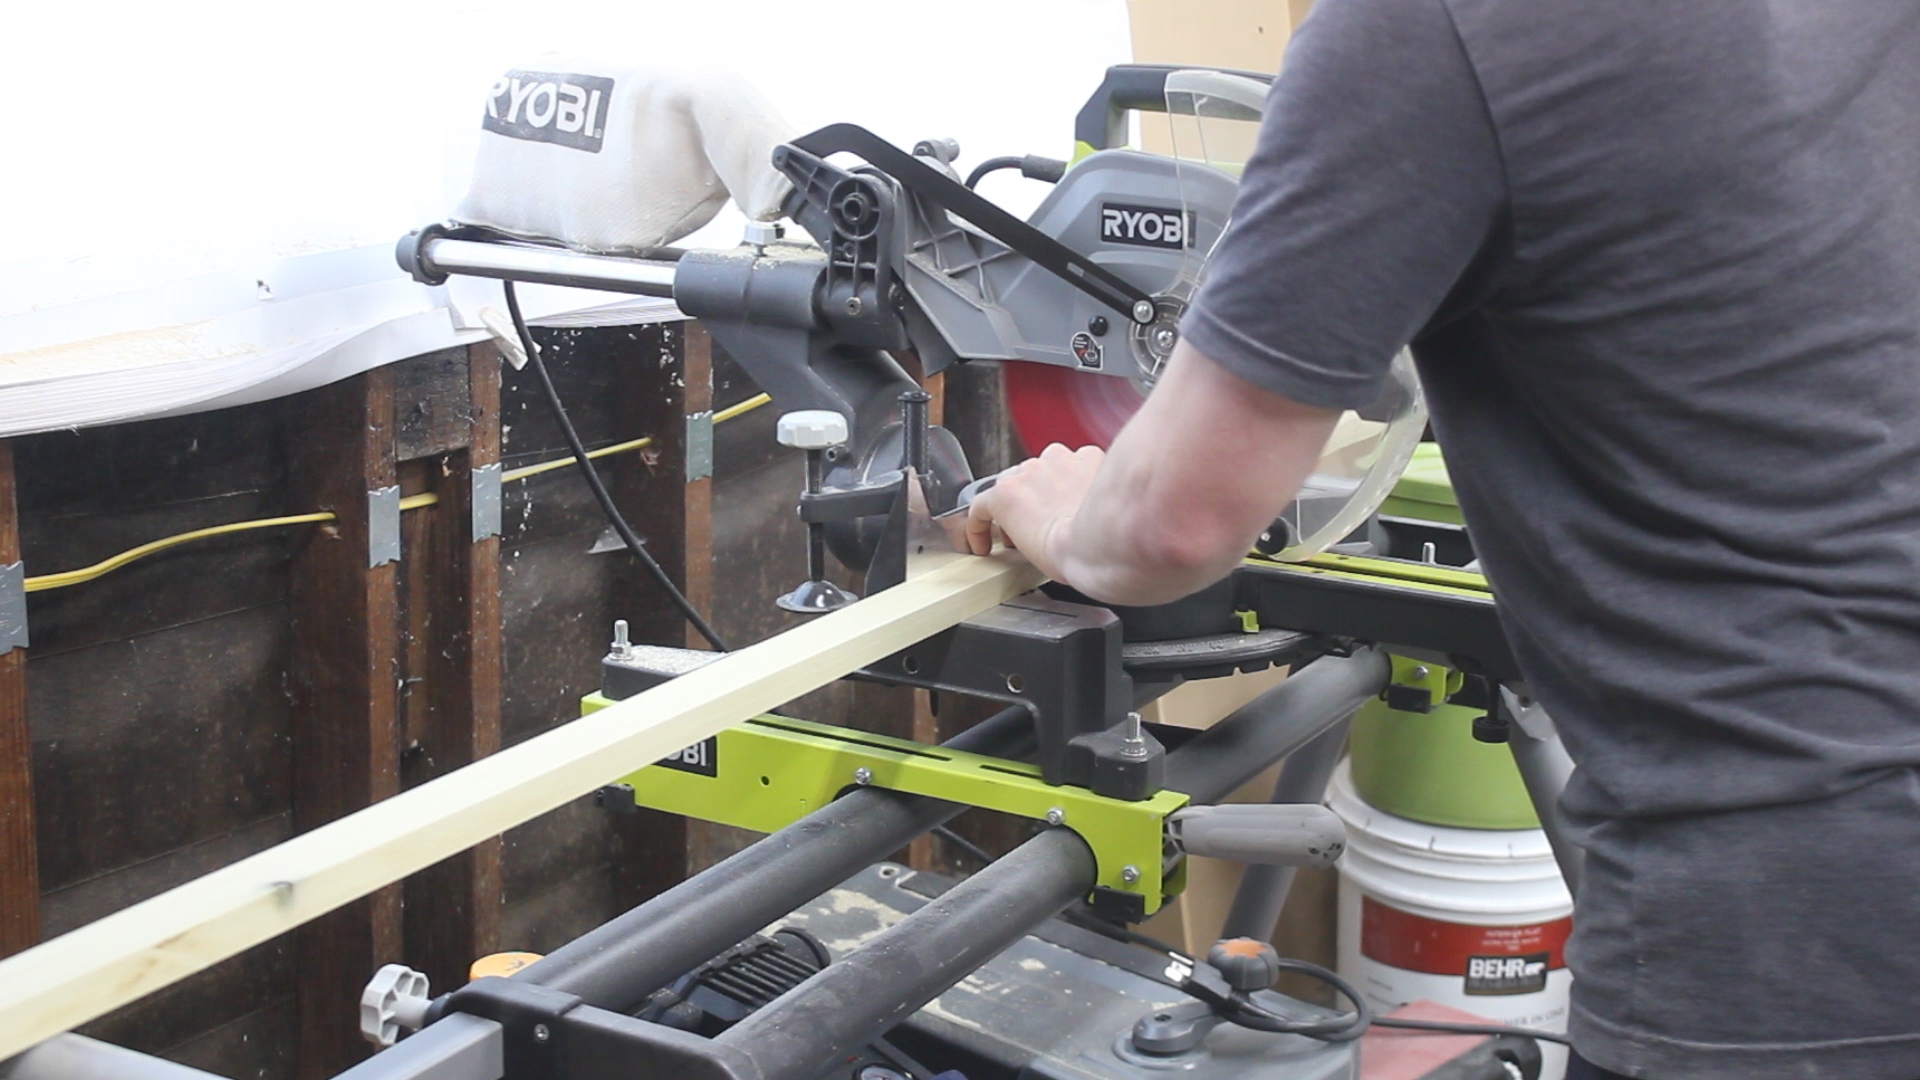


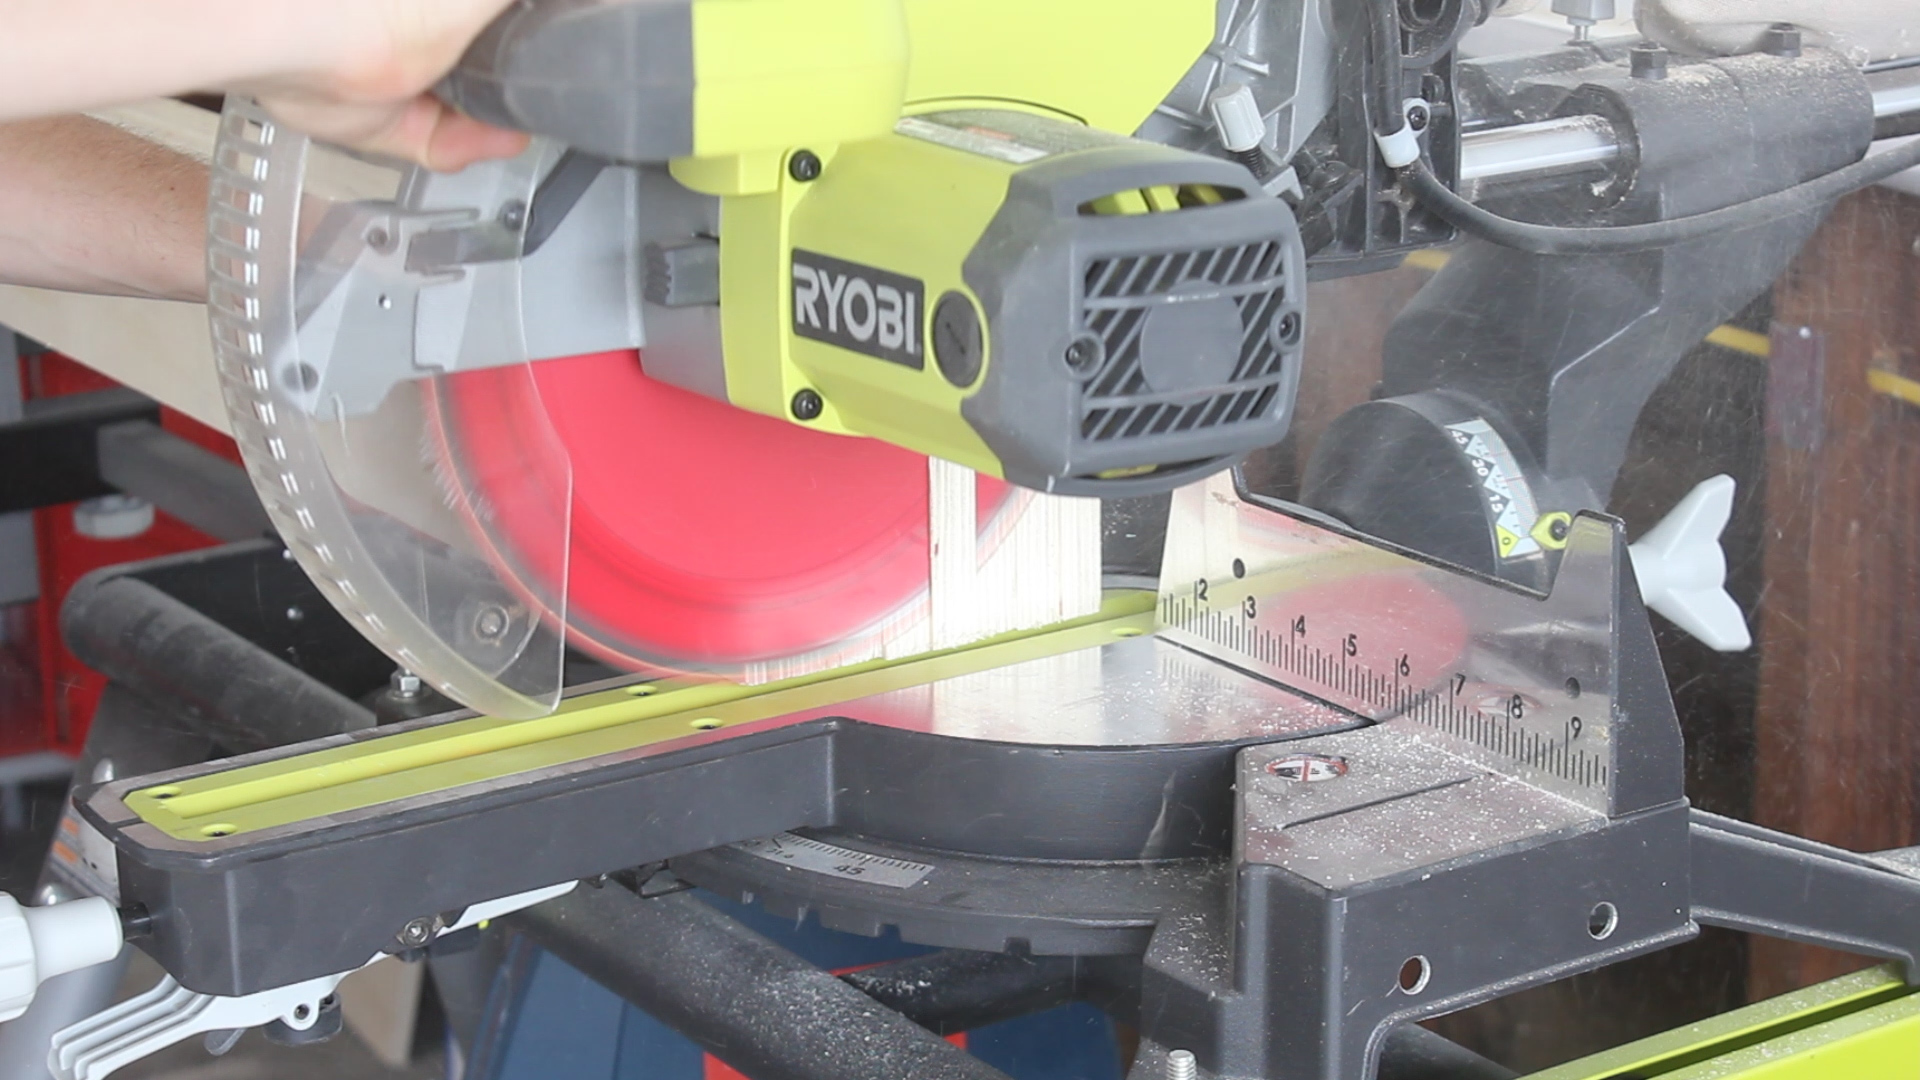
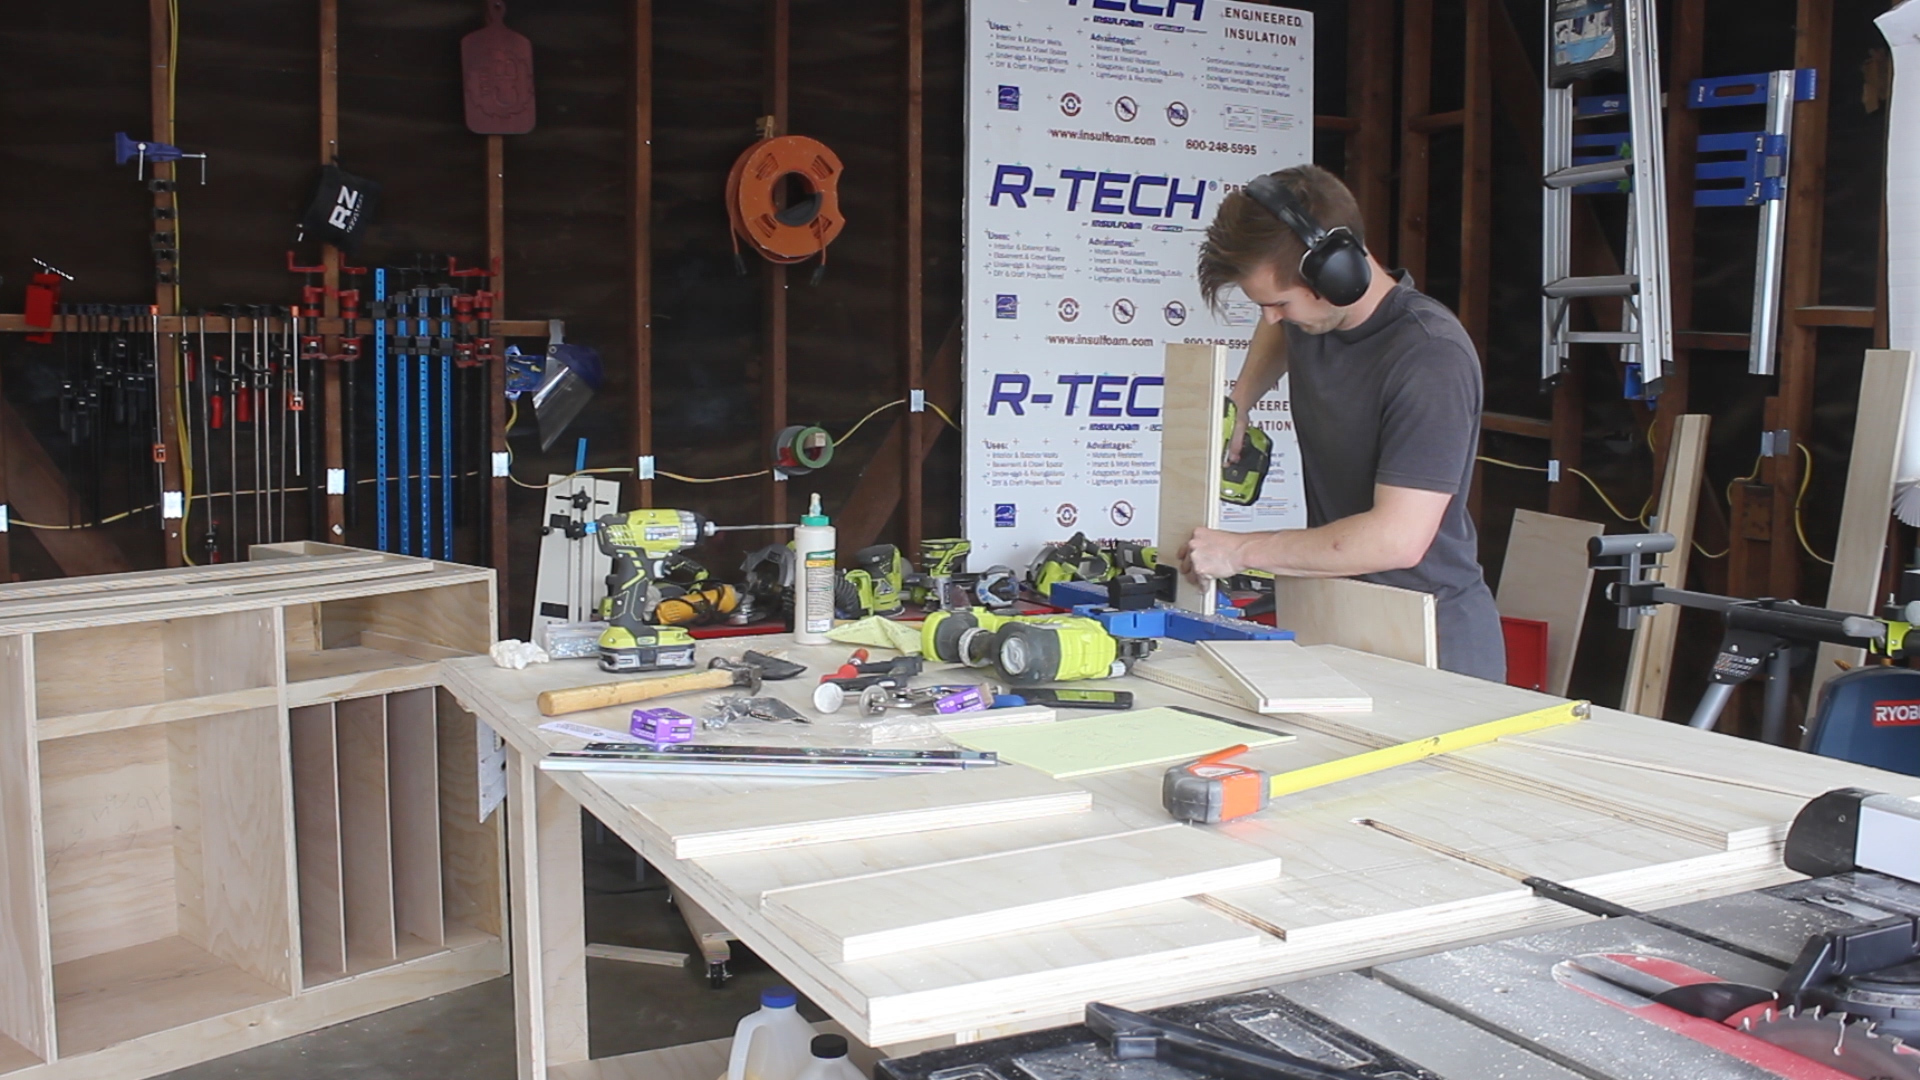
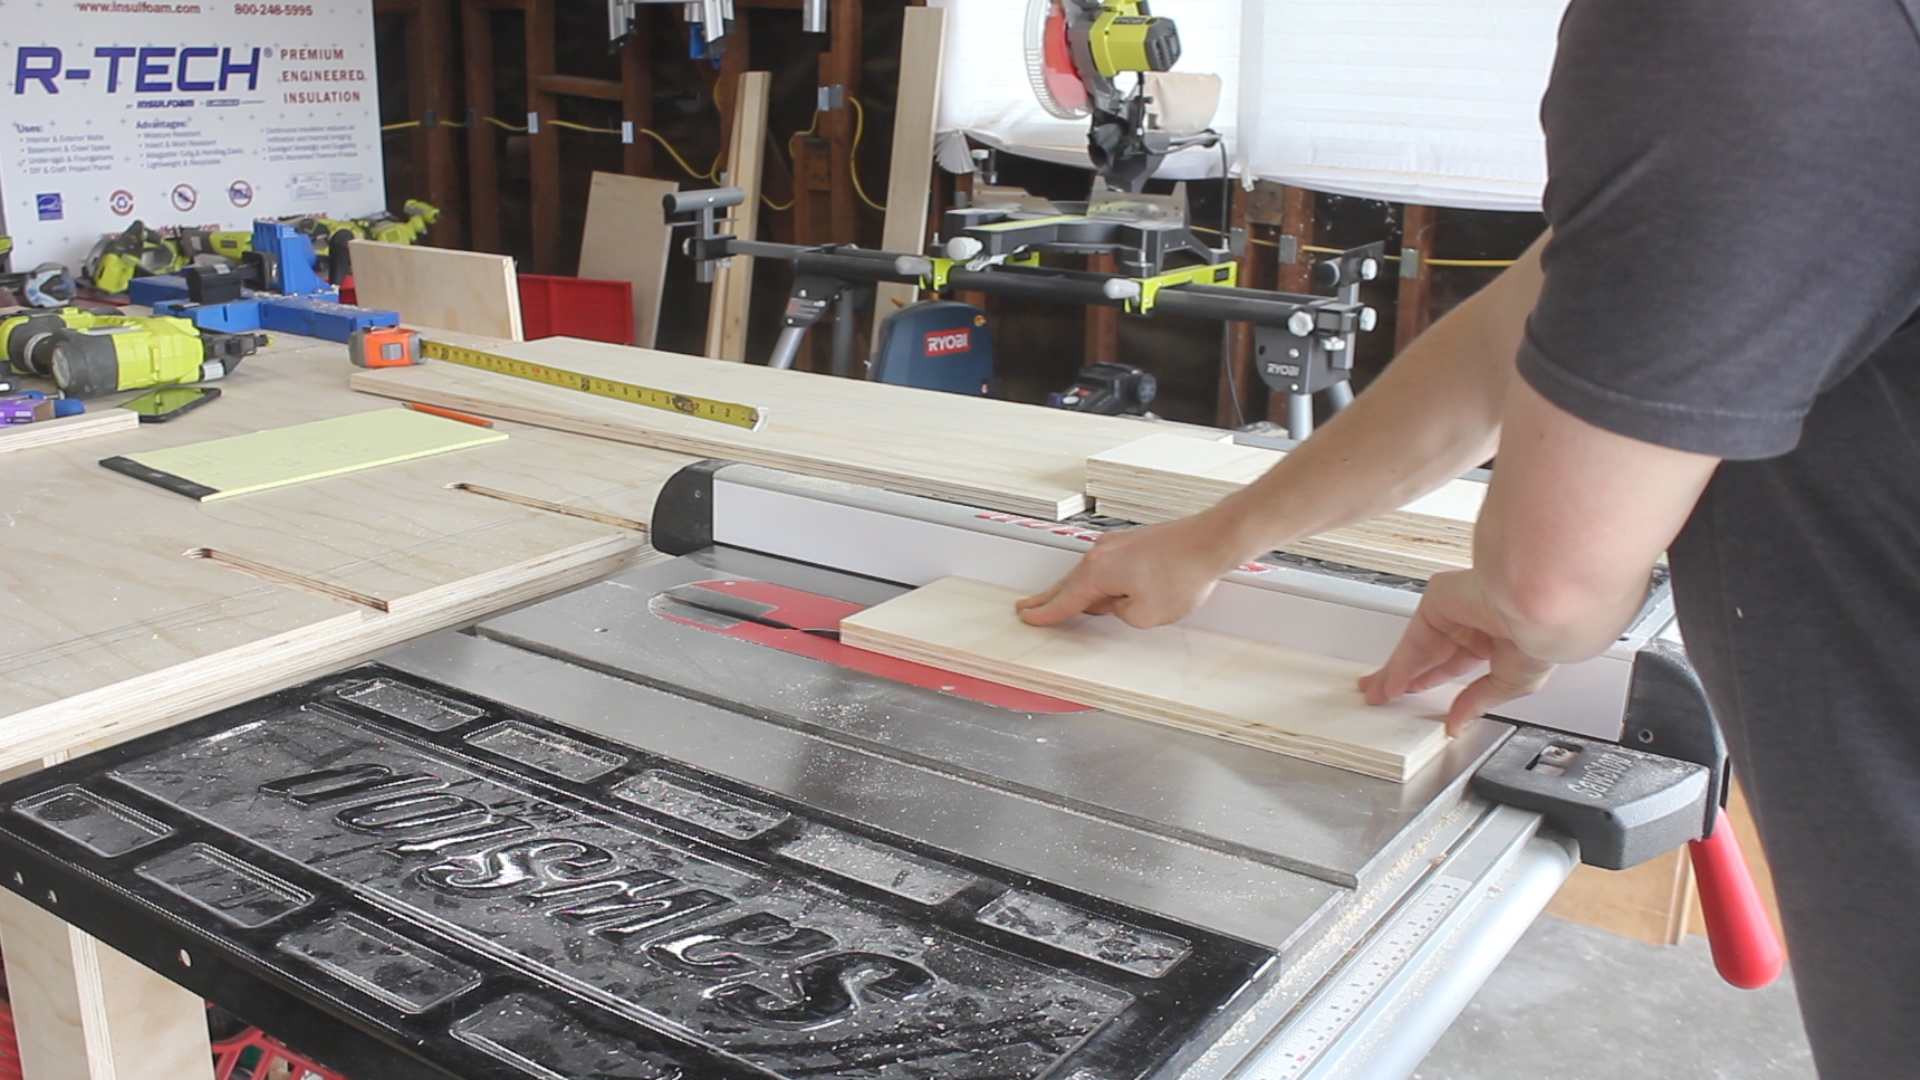
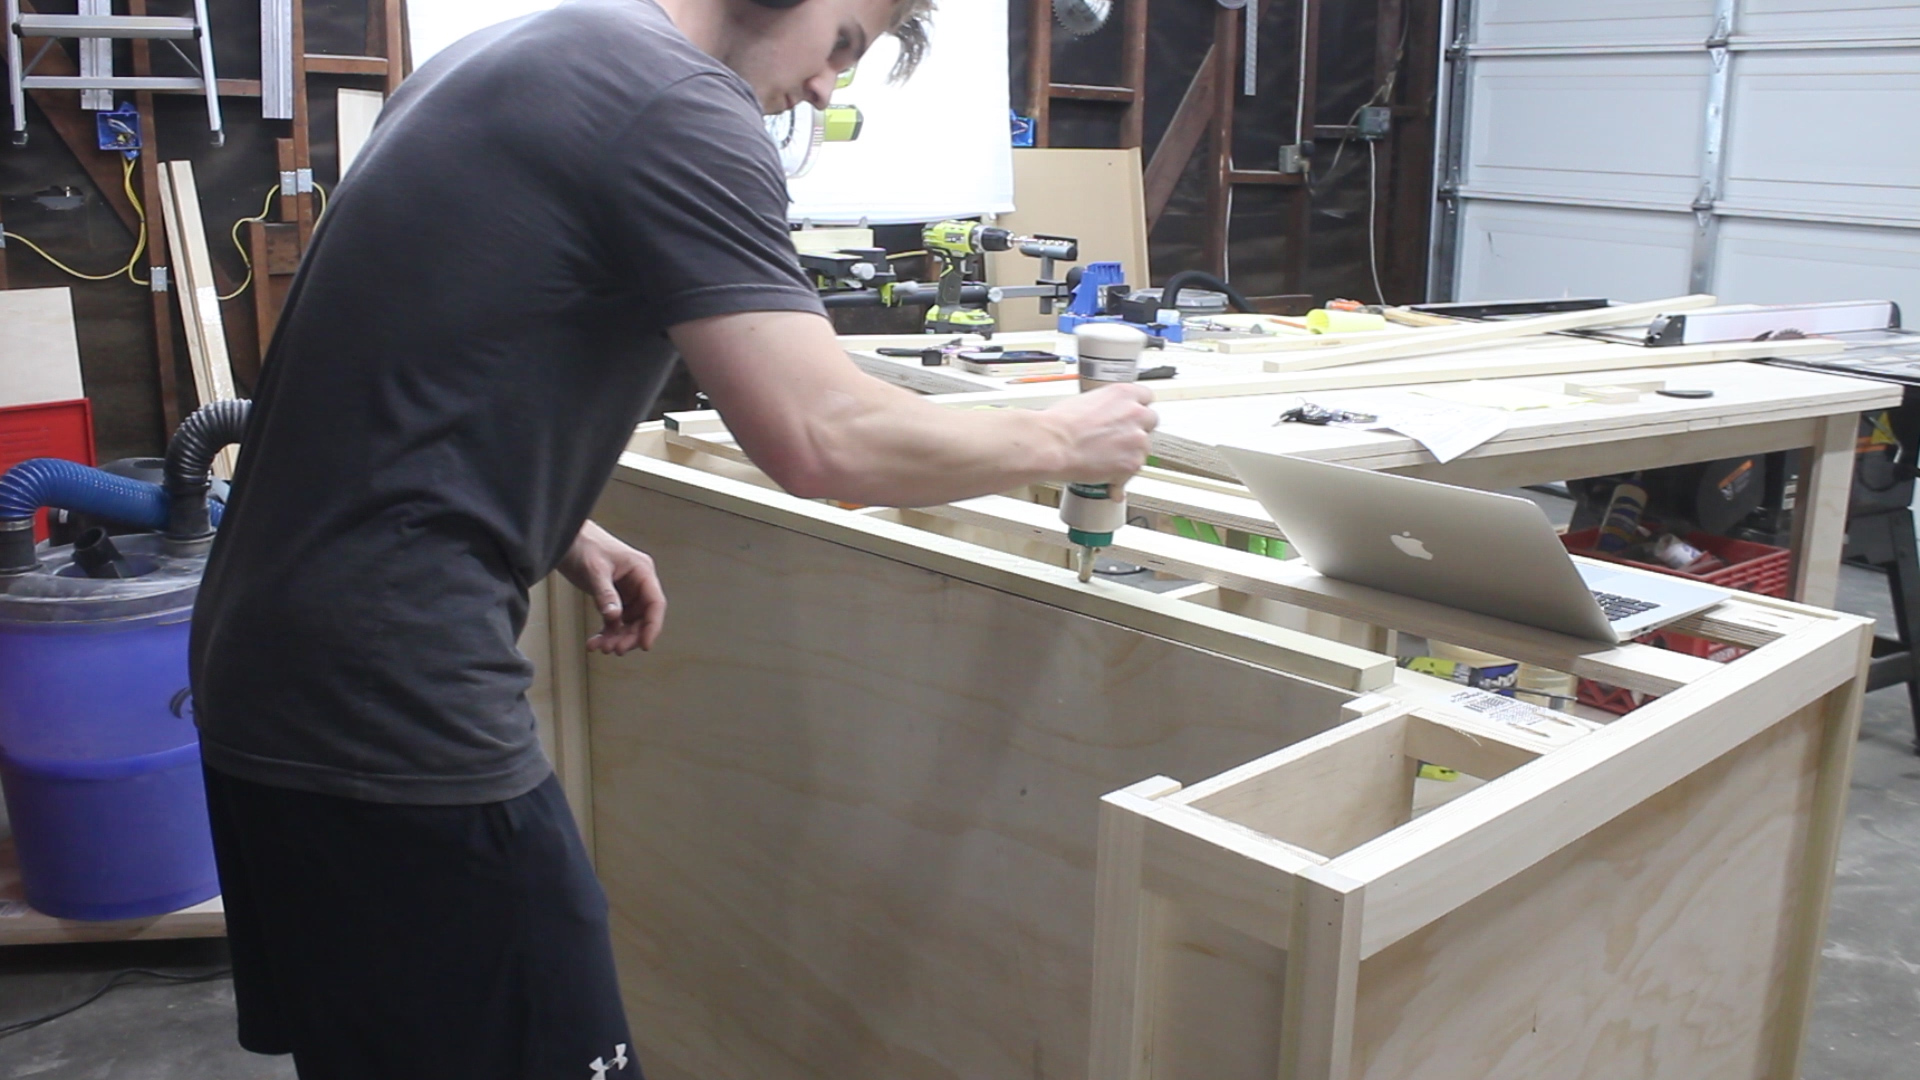
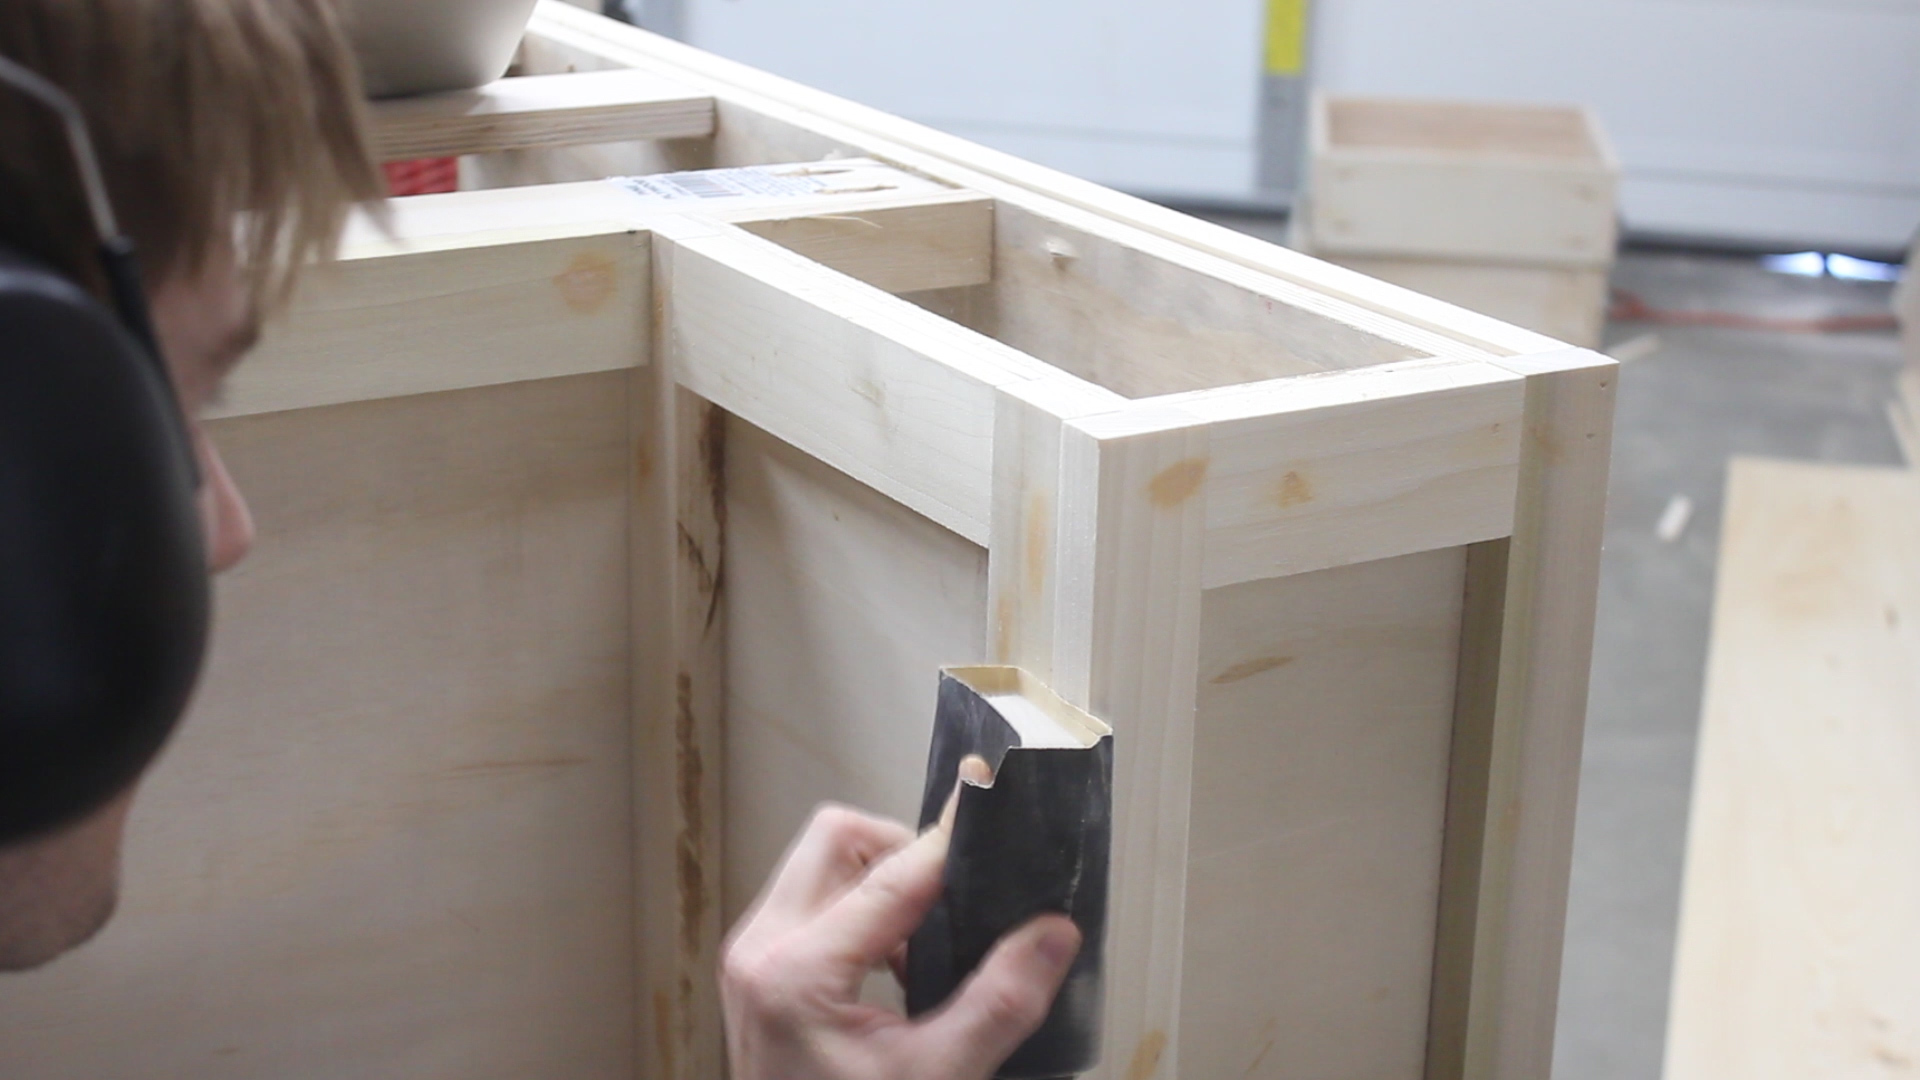
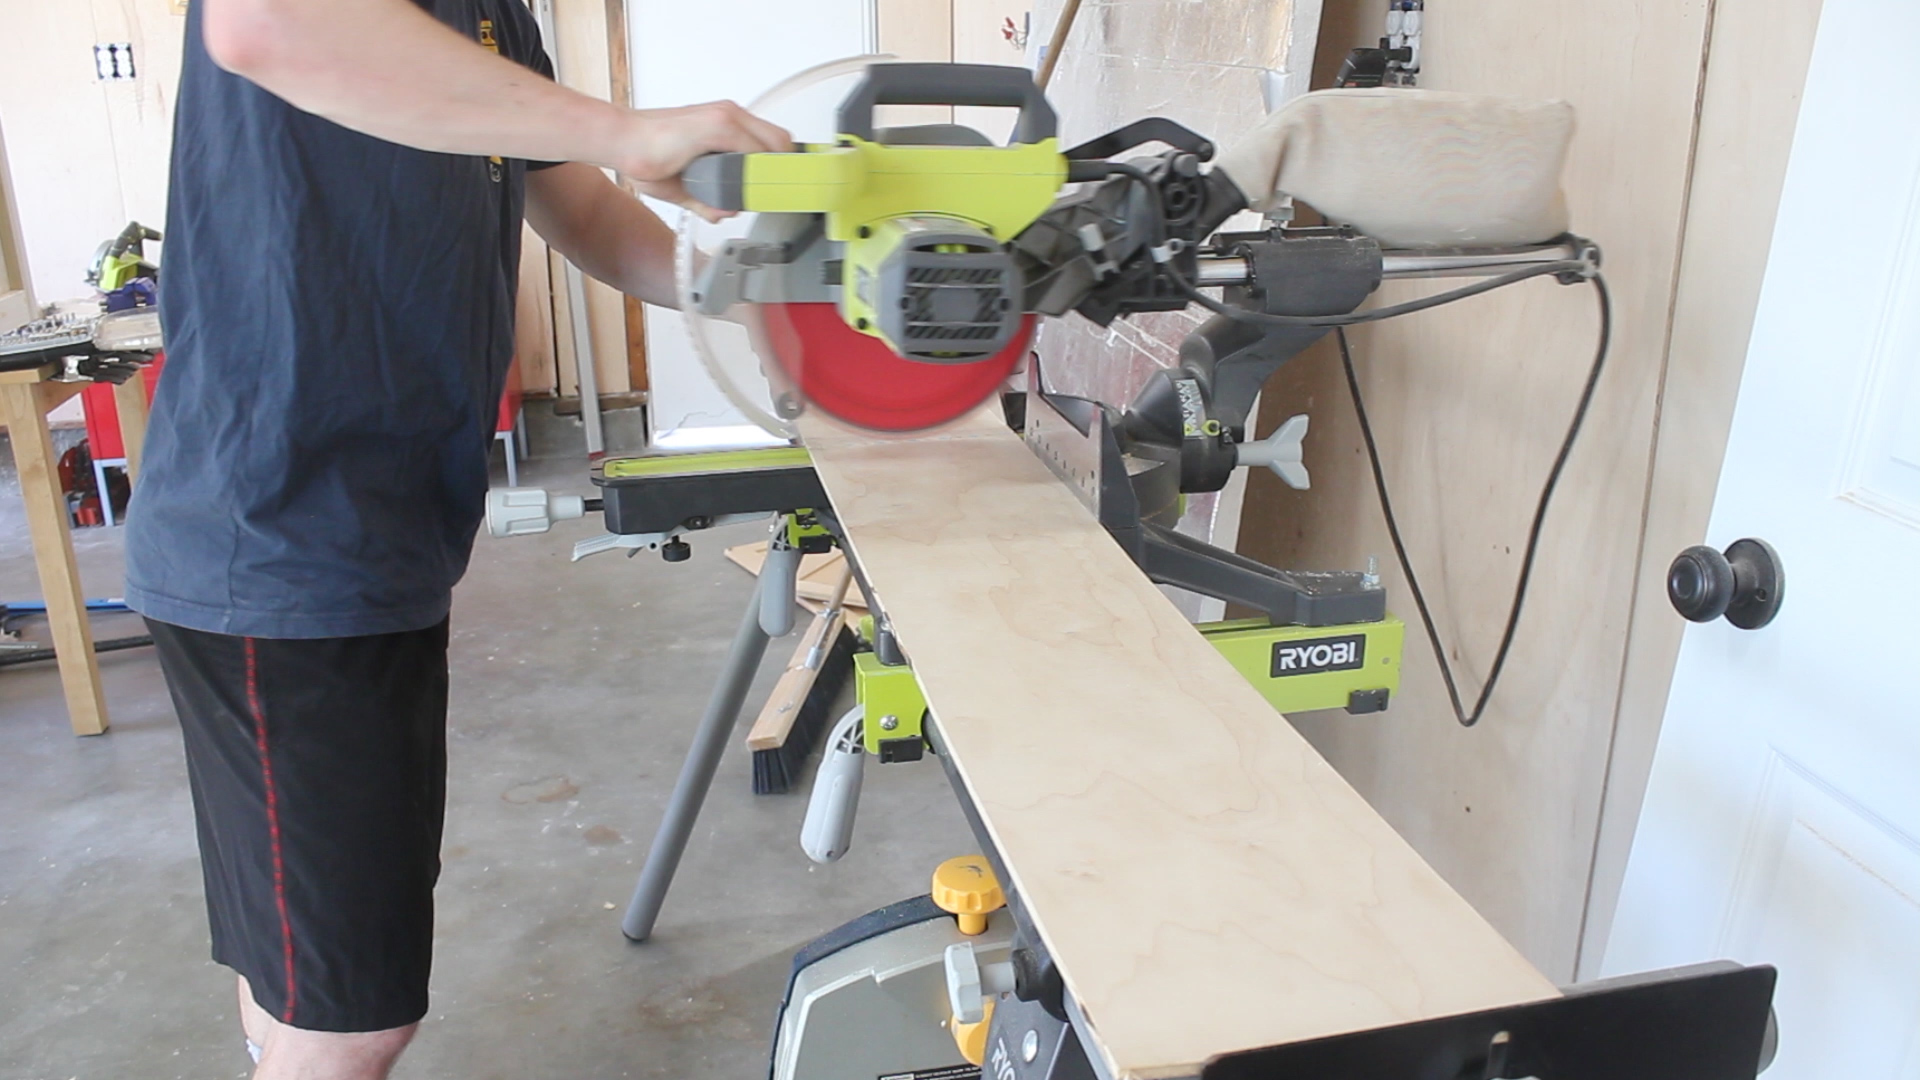
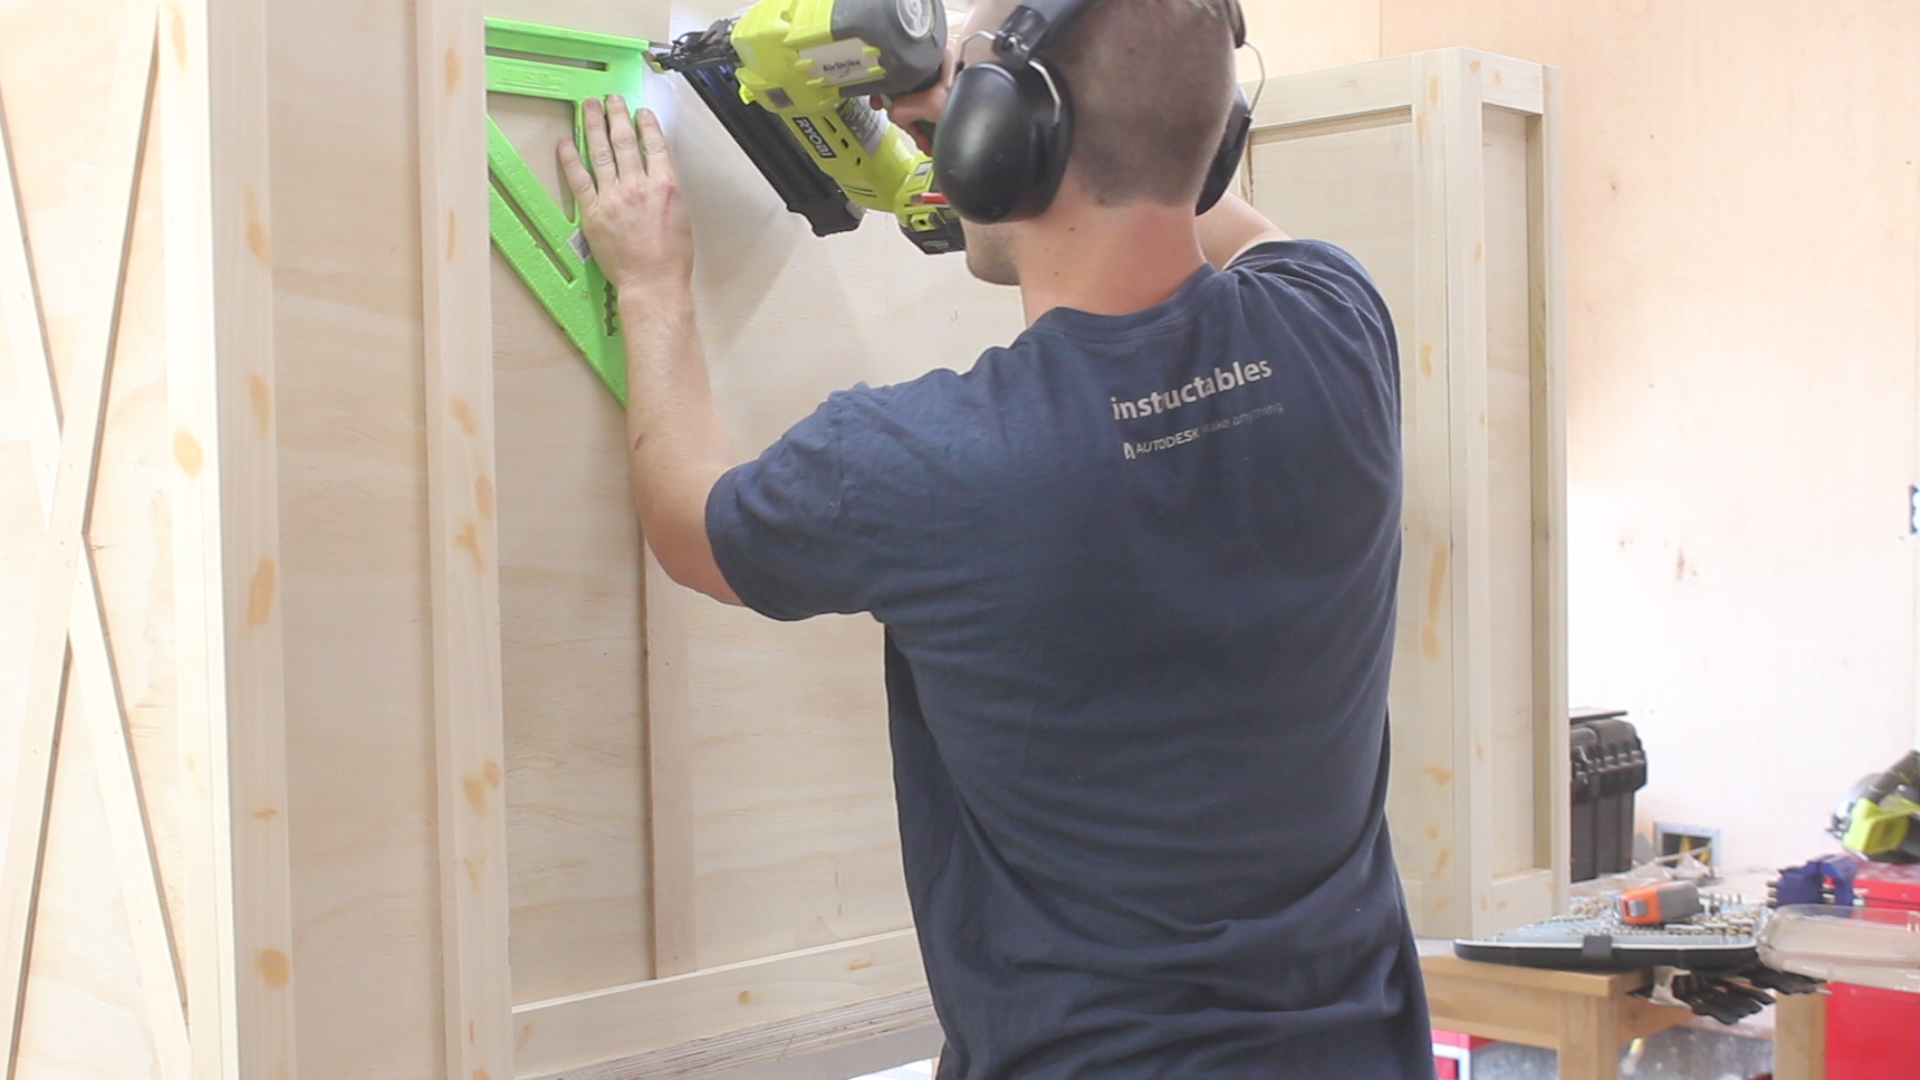
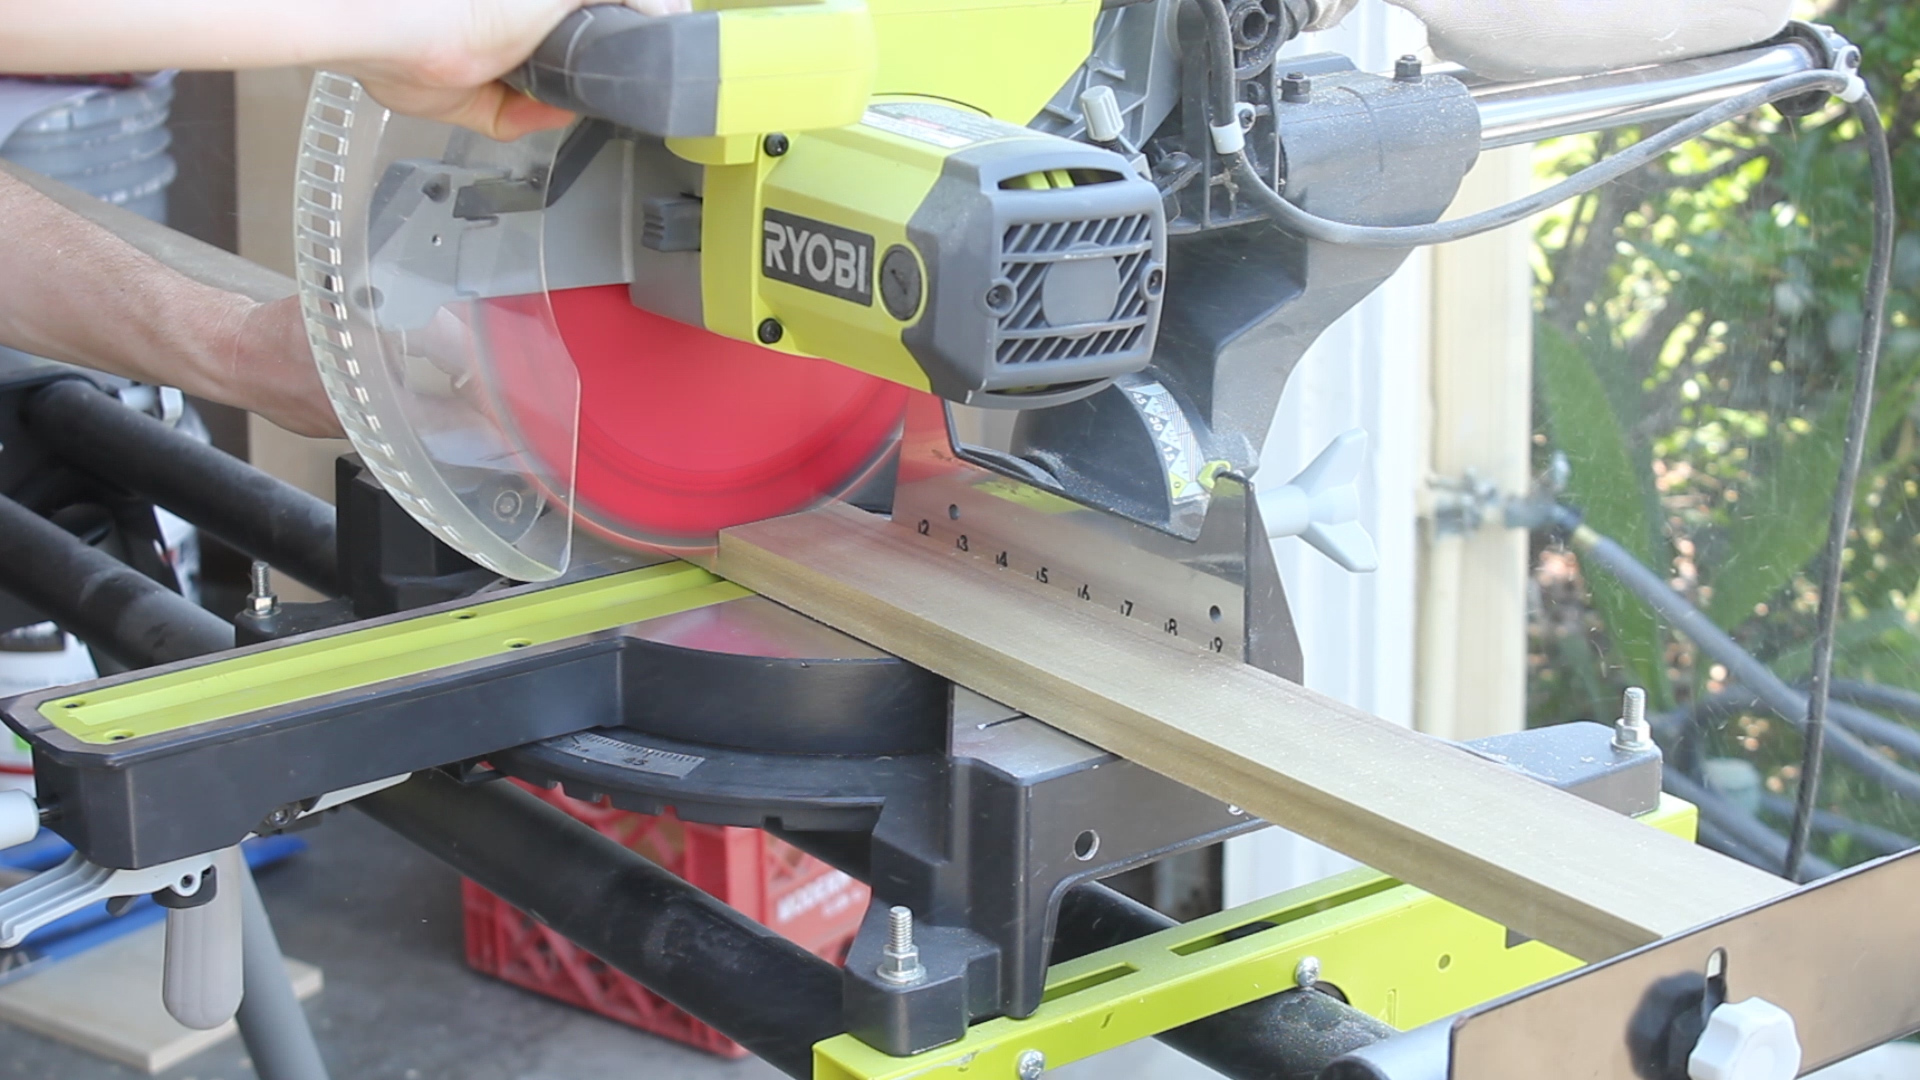
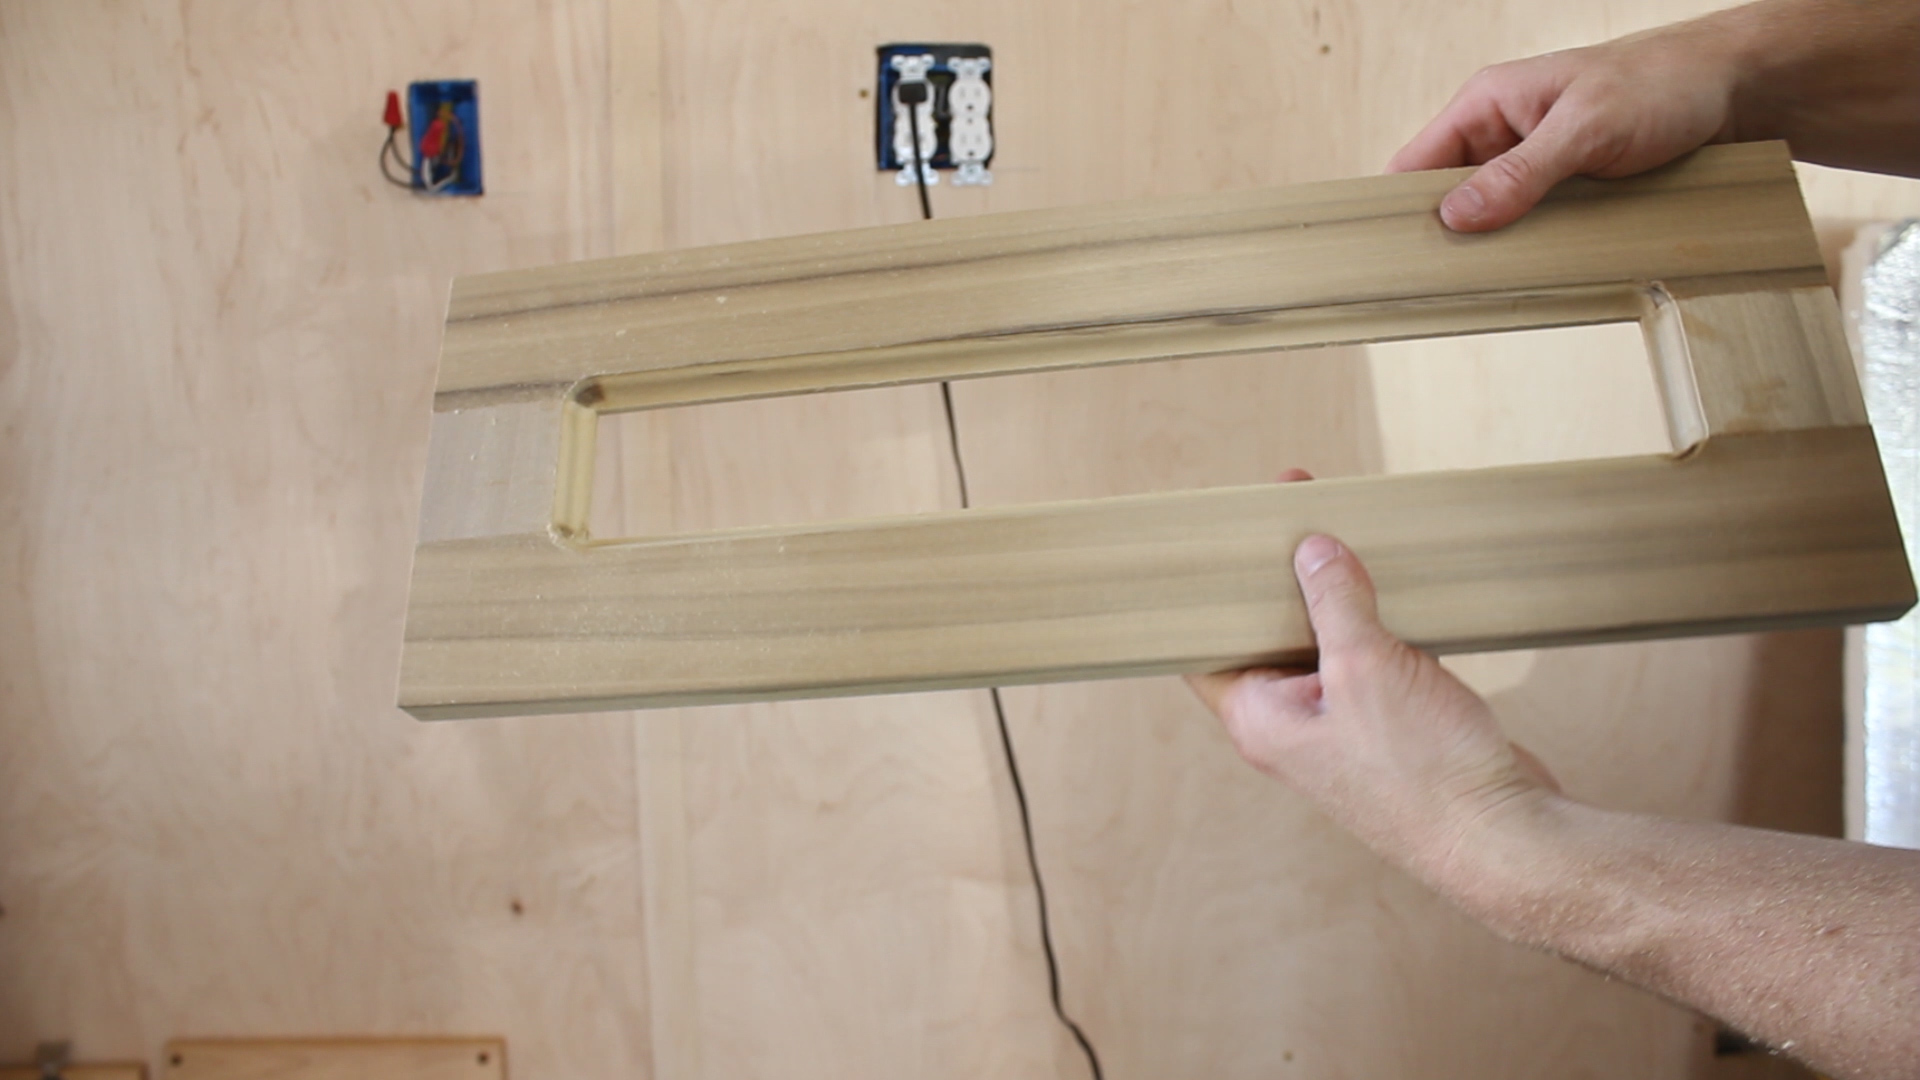
Most cabinet furniture have what are called "face frames", which are really just nicer hardwoods used to give your cabinets a face frame and cover up the layers of plywood. I always planned on painting my island, so using four-quarter poplar was perfect for my needs. I started by ripping all of my material into 1 1/4" strips (Pic 1), and then cut all of my pieces to length on the miter saw (Pic 2). This was entirely relative to my own island, so no need to bore with measurements, but be assured that I took my sweet time measuring out exactly how much material I'd need, the exact lengths I'd need, and how it would all come together.
Pic 3 shows me laying it out to make sure I had everything for the front side of the island (the side with the cabinets). Pic 4 shows me using pocket holes to begin assembly, with Pic 5 showing me using glue and pocket hole screws to assemble the pieces. These screws were all on the backside of the material, so they'd be totally hidden. Much YouTube research would tell me that this is a very common way to assemble face frames. Having a big flat even surface to work on and clamp things down was imperative (Pic 5 again).
Pic 6 shows me checking to make sure things were even. This step was so important for the build - basically, if you start with one side that is basically perfect, you can then do all subsequent sides one after another and things should remain perfect and fall into place properly as you can do them one at a time.
Pics 7-9 show me using glue and brad nails to hold everything in place.
NOTE - I would not recommend using brad nails to tack things in place unless you plan on painting your island as you'll see them and it will look bad. Since I planned to paint this, I knew I could use wood filler to fill in all holes and cover up later.

As I said before, once I had my front faces in place, each piece after was relatively easy as I could use my front side as a reference point and work my way around the island. By doing things one at a time, each side fell into place and things actually somehow ended up pretty damn perfect.
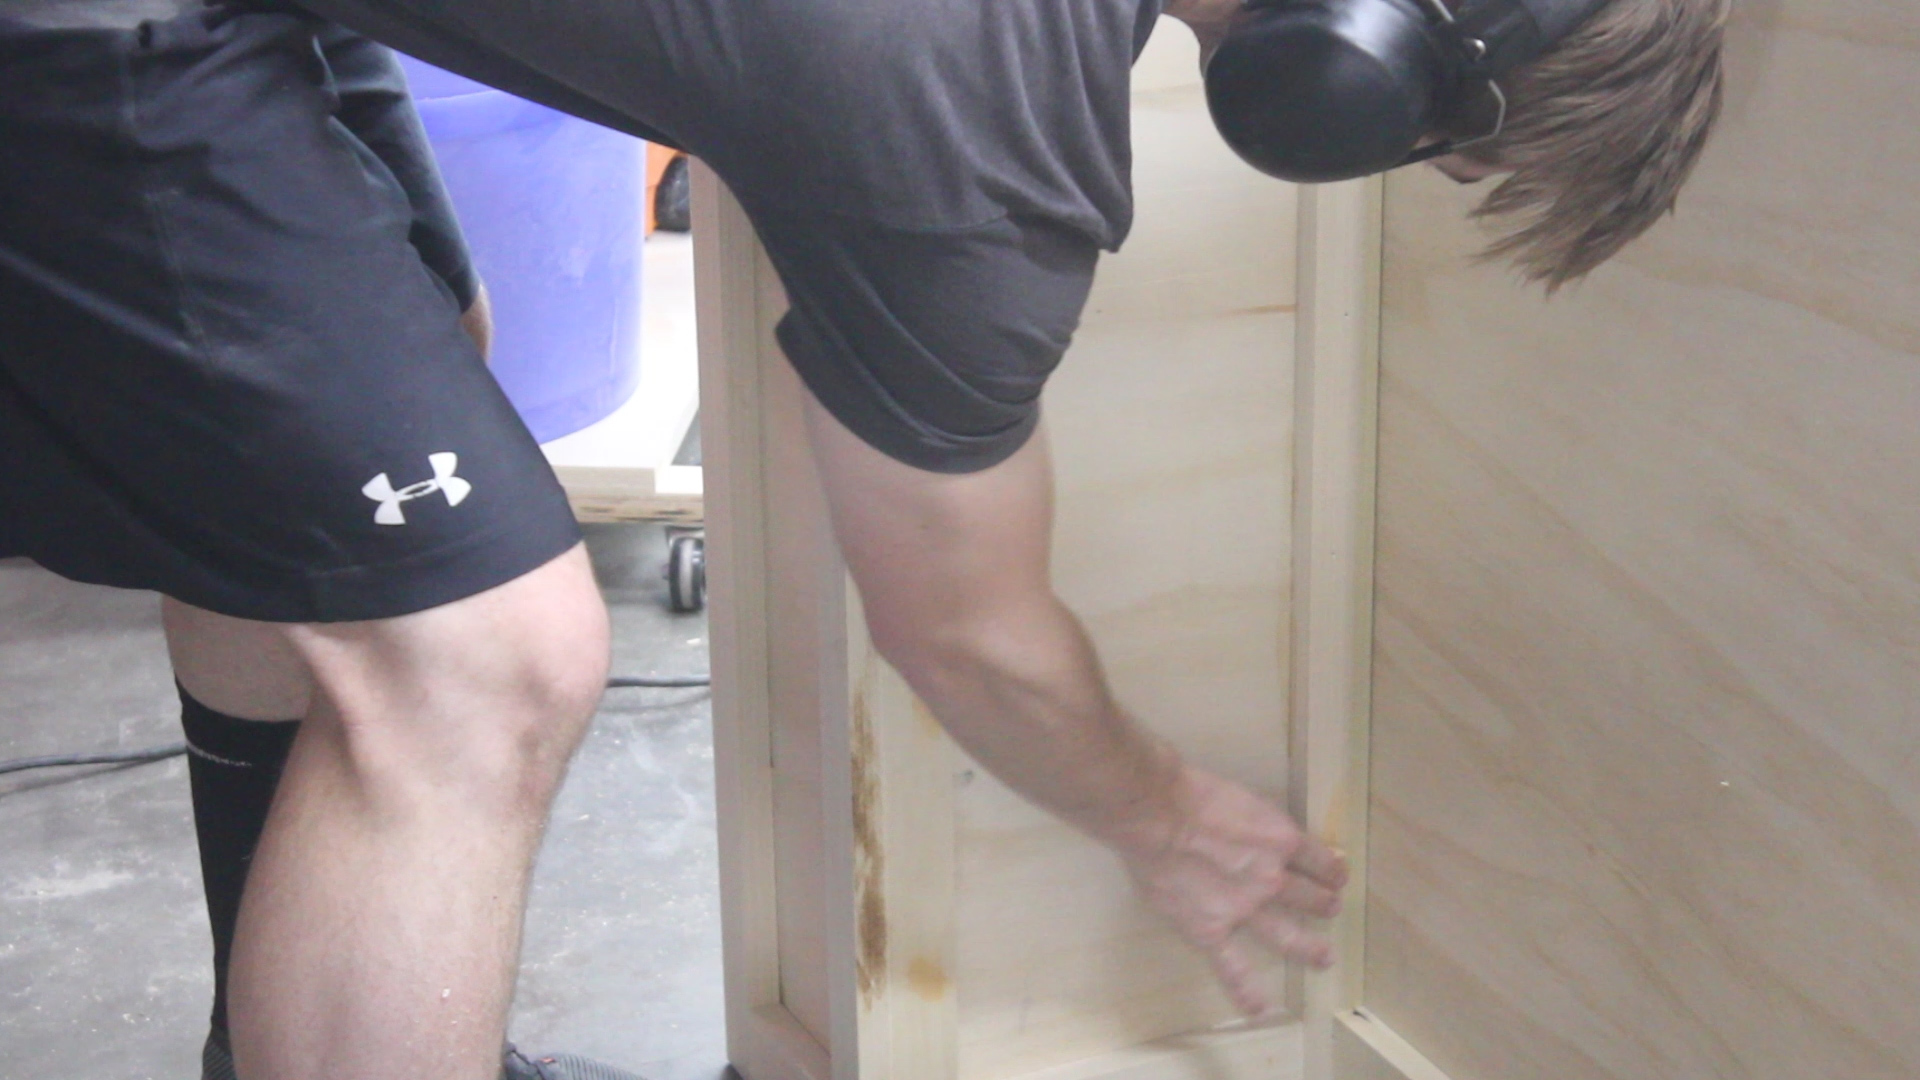
Pics 1-2 show me doing the backside of the island (the recessed area), using clamps, glue, and then brad nails to get things perfect.
I then went back with food filler in Pic 3 to fill in around 80 brad nail holes, followed by sanding with 120 grit sand paper against a wooden block to flatten everything (Pic 4). The result of this was perfect.
Pic 5 shows something that actually kind of looks like an island!
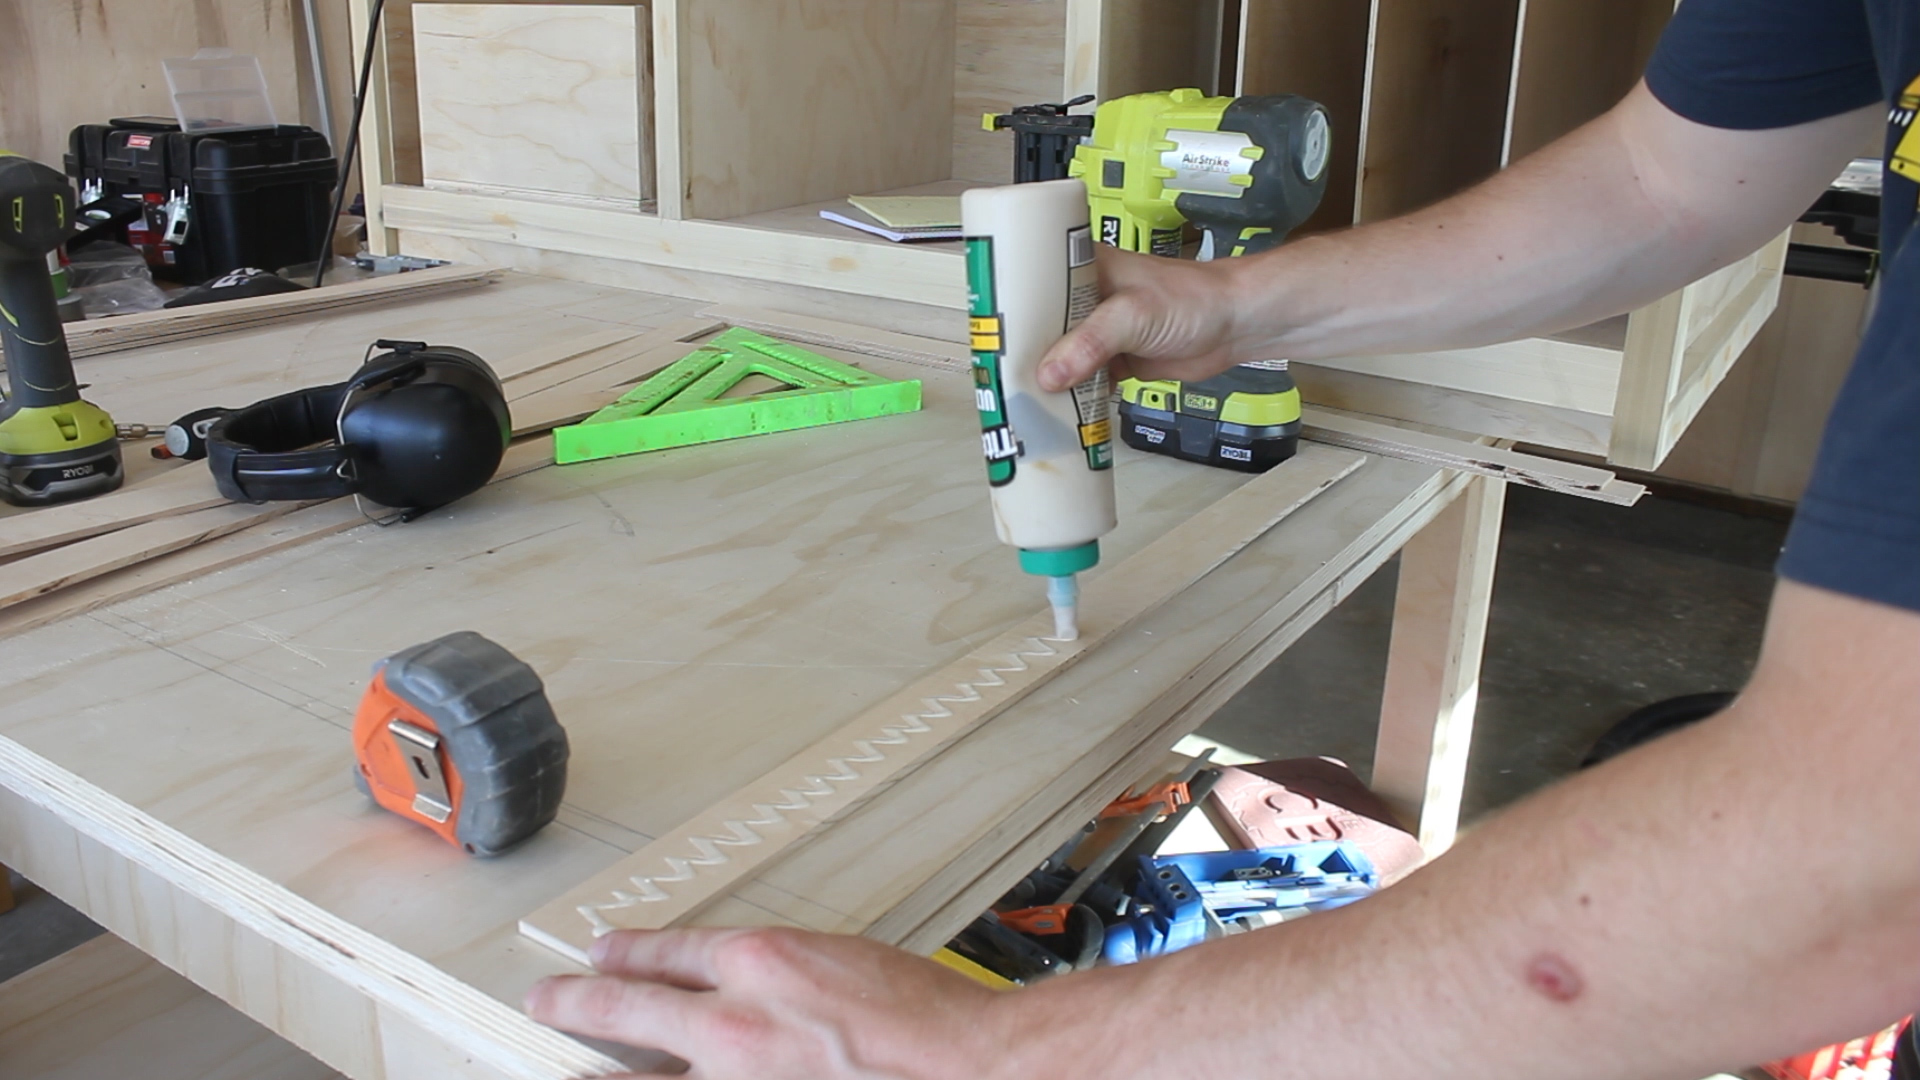

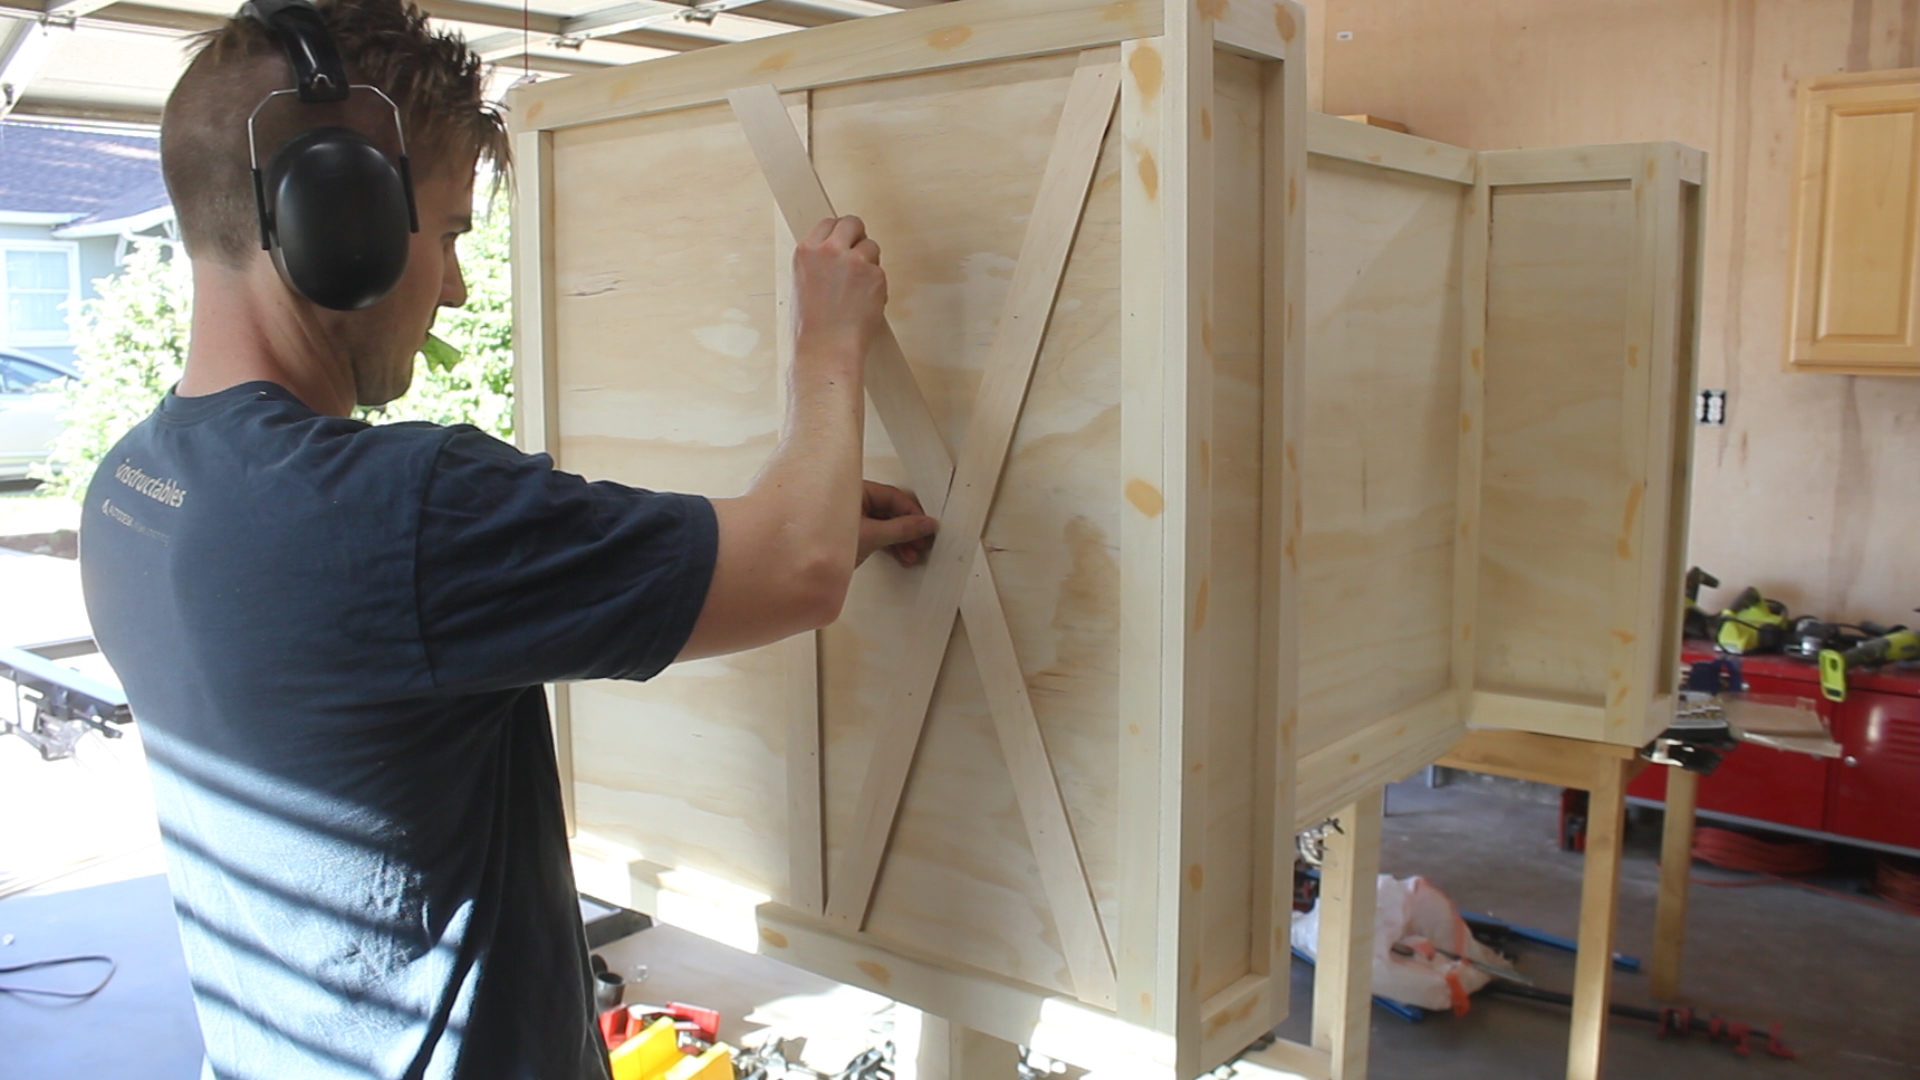

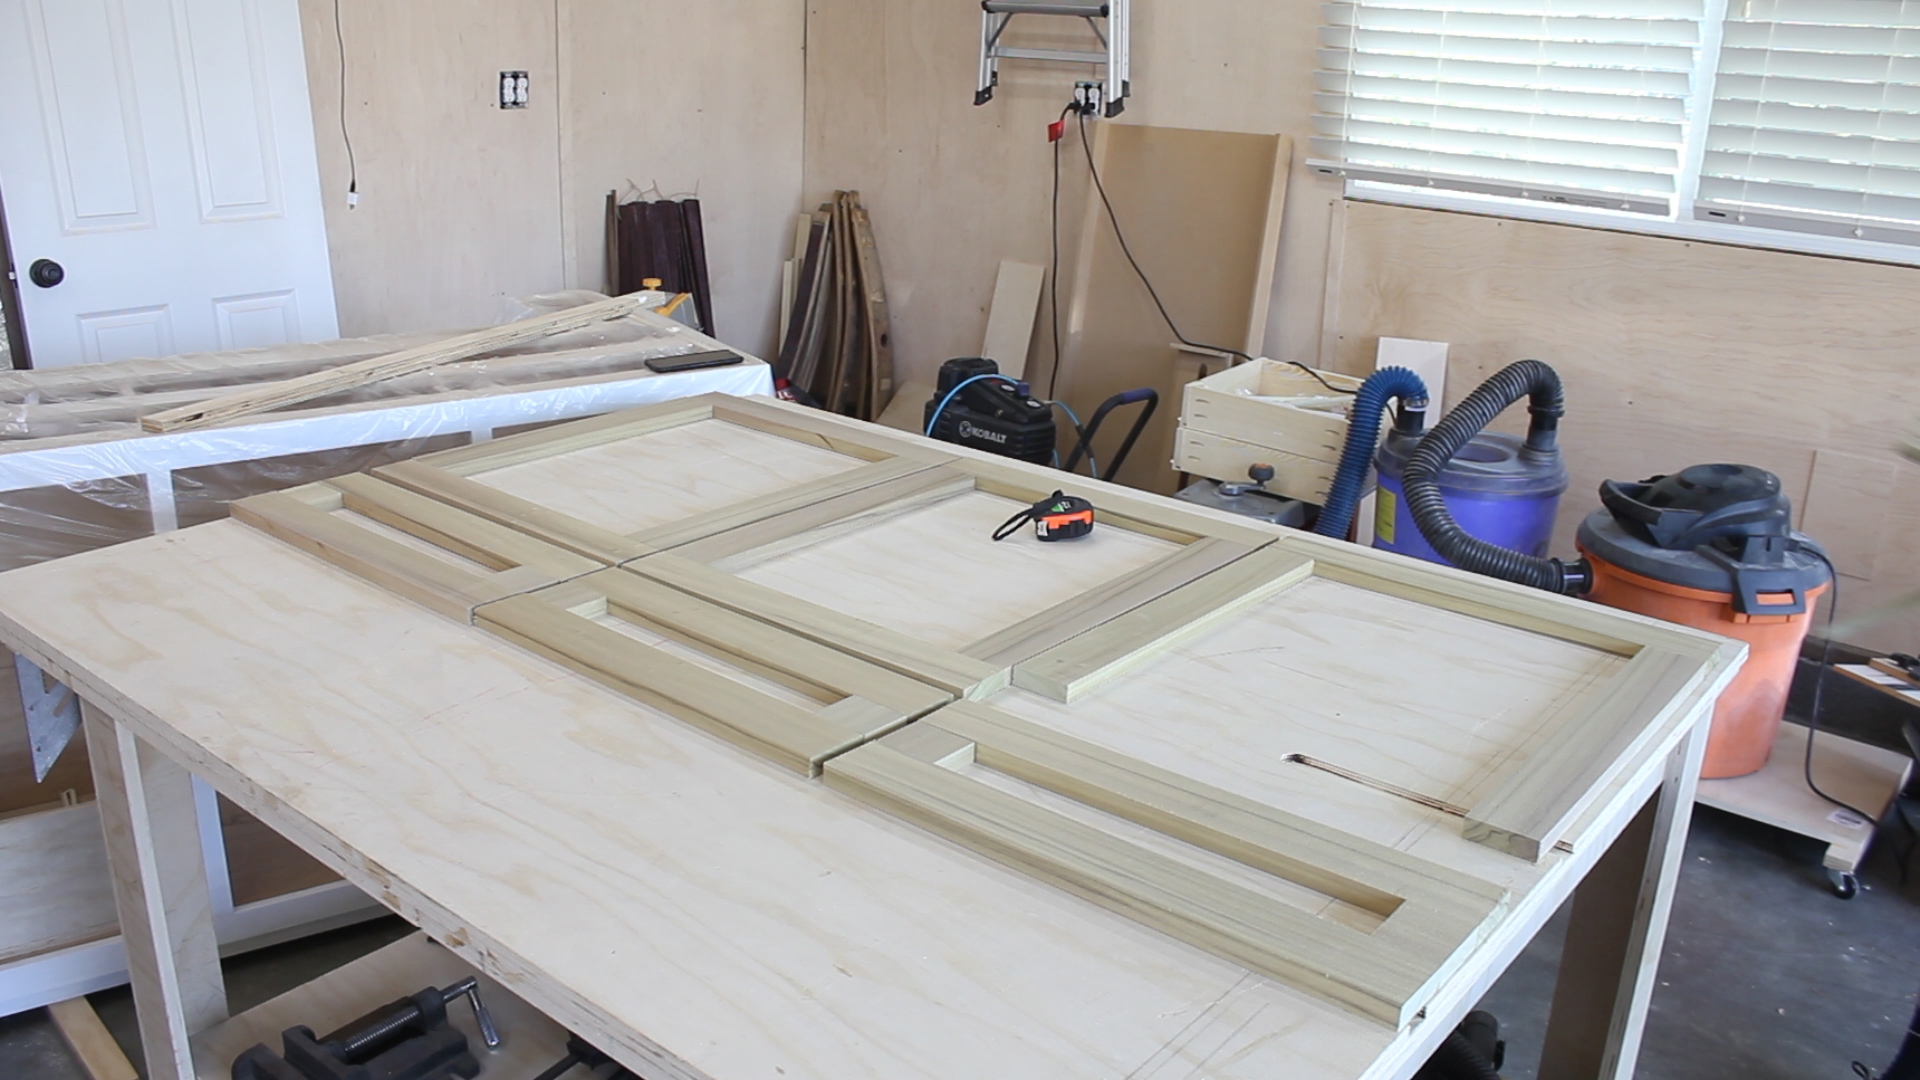
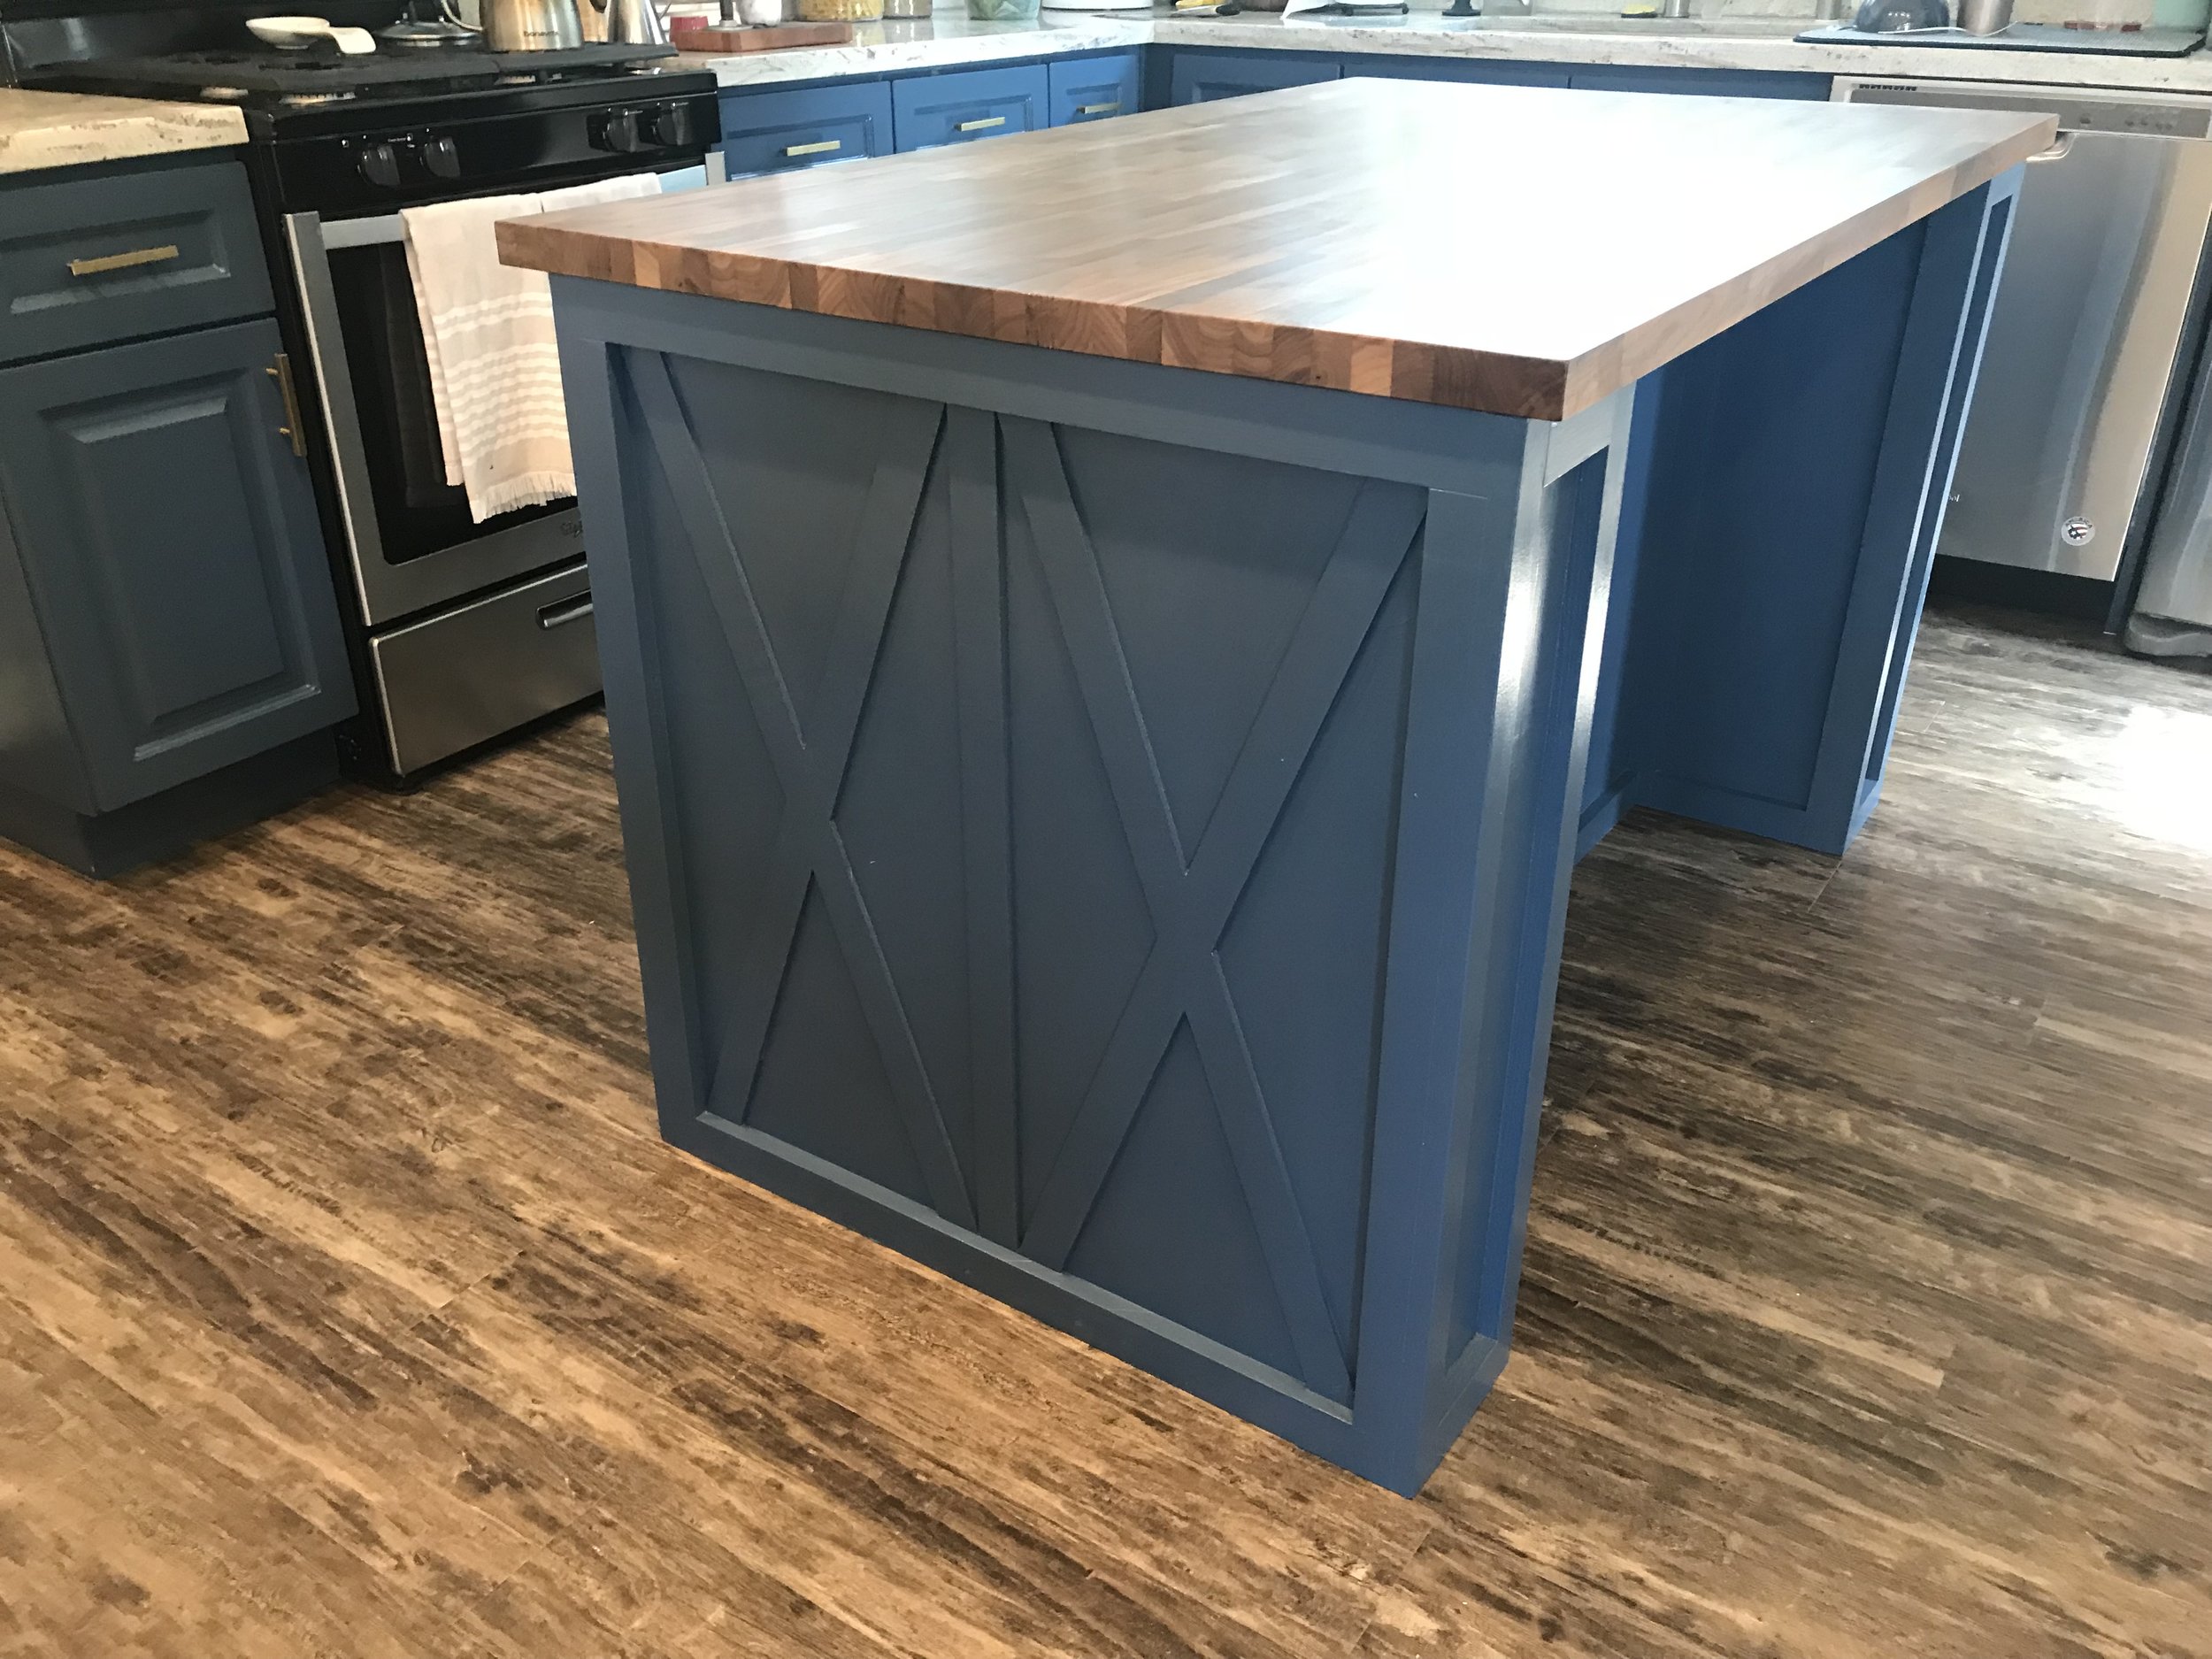
Beyond the hardwood face framing I just walked you through, we wanted our island to have additional accents to it - mainly - in the form of pronounced "x's" that stuck out past the plywood but not as far as the hardwood framing.
To make this, I cut up the rest of my 1/4" plywood on the miter saw and table saw (Pics 1-2) to about 1" wide and roughly the lengths I'd need for the build. Then, in Pics 3-5, I could begin tacking in place each piece.
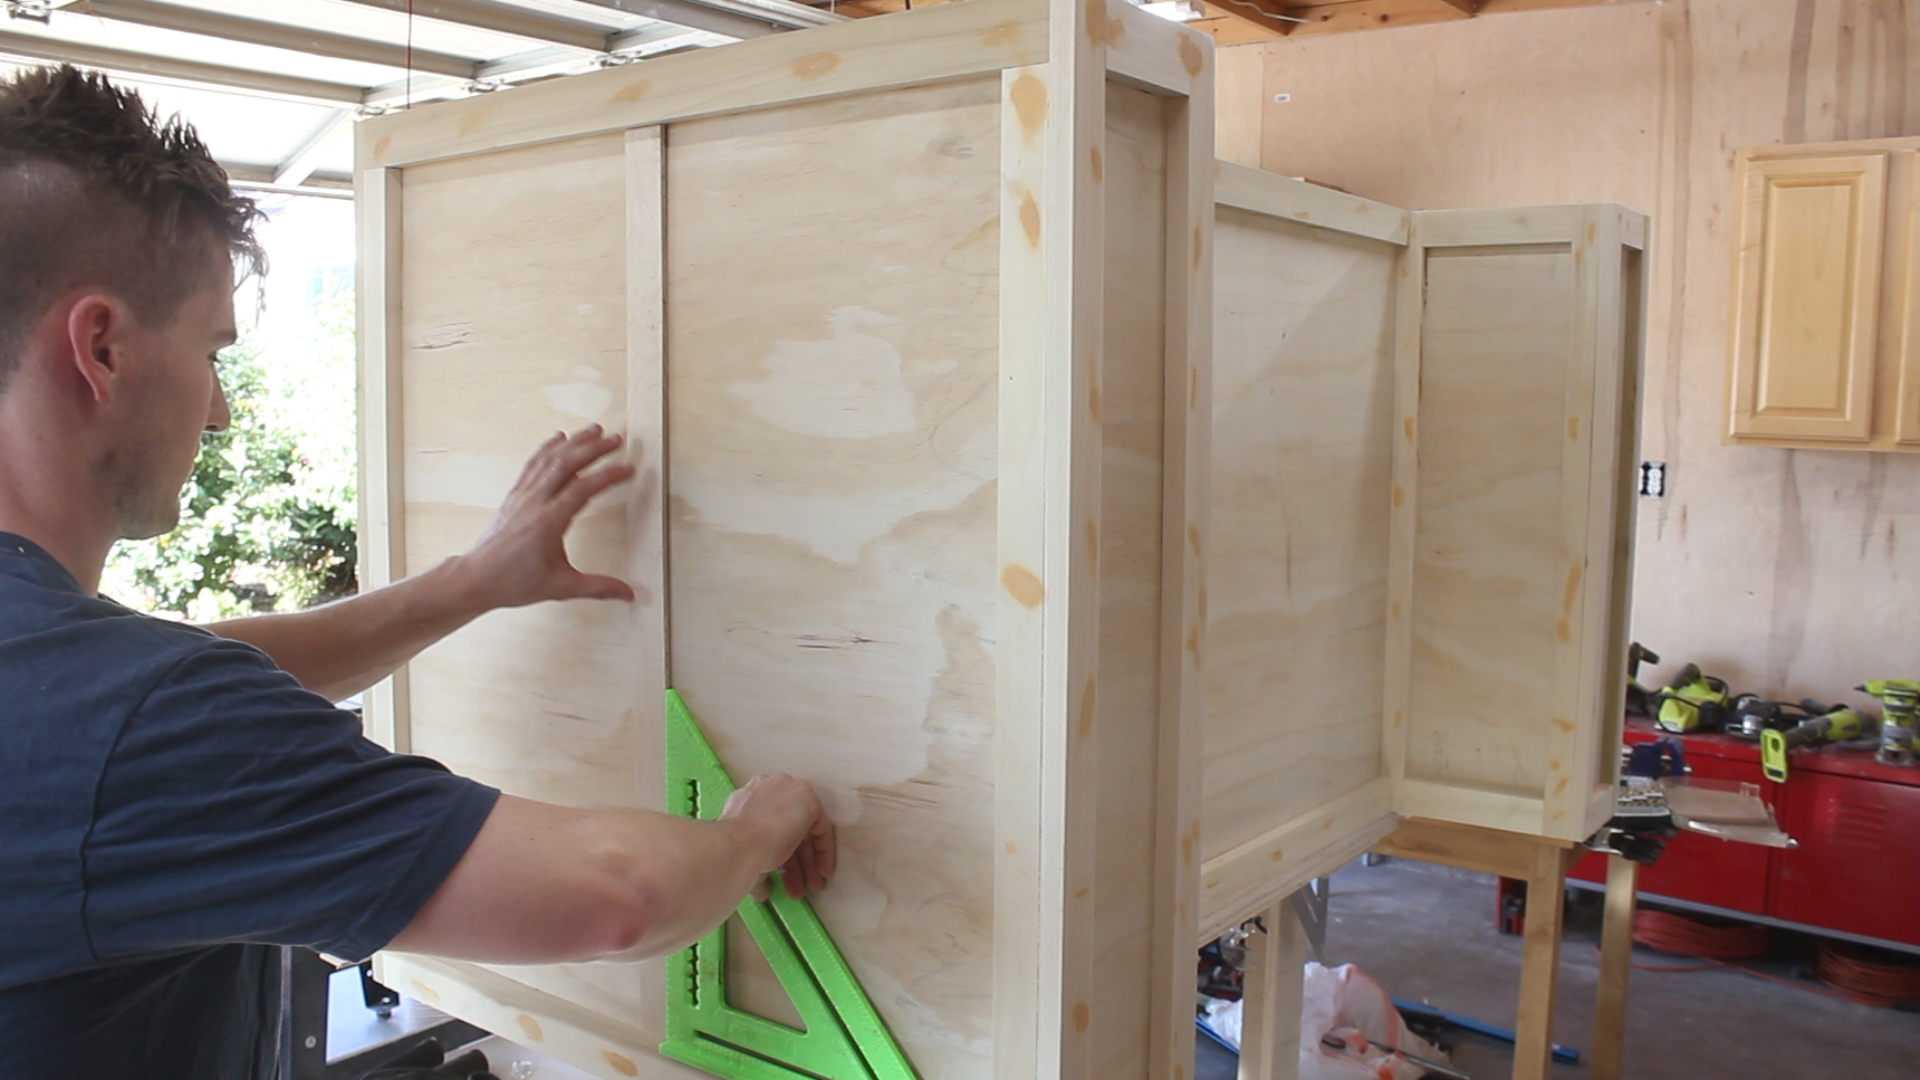
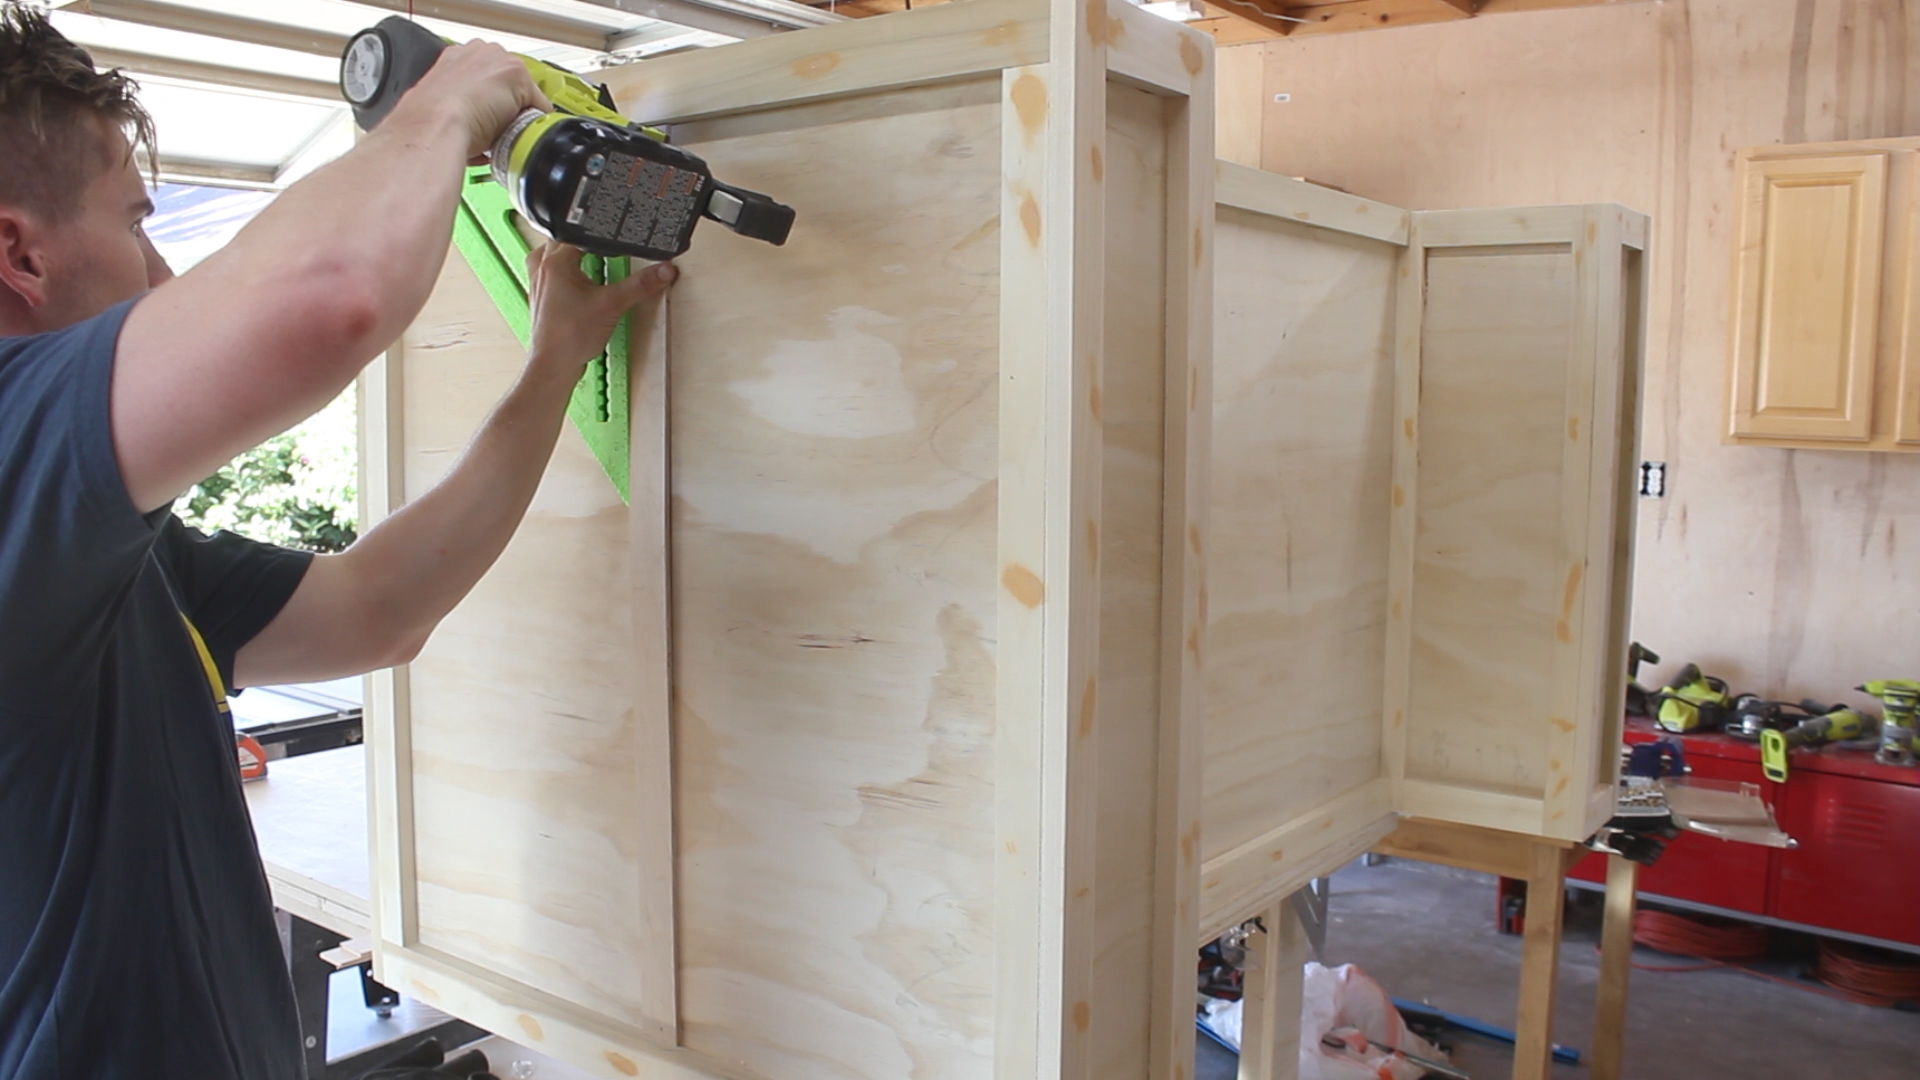
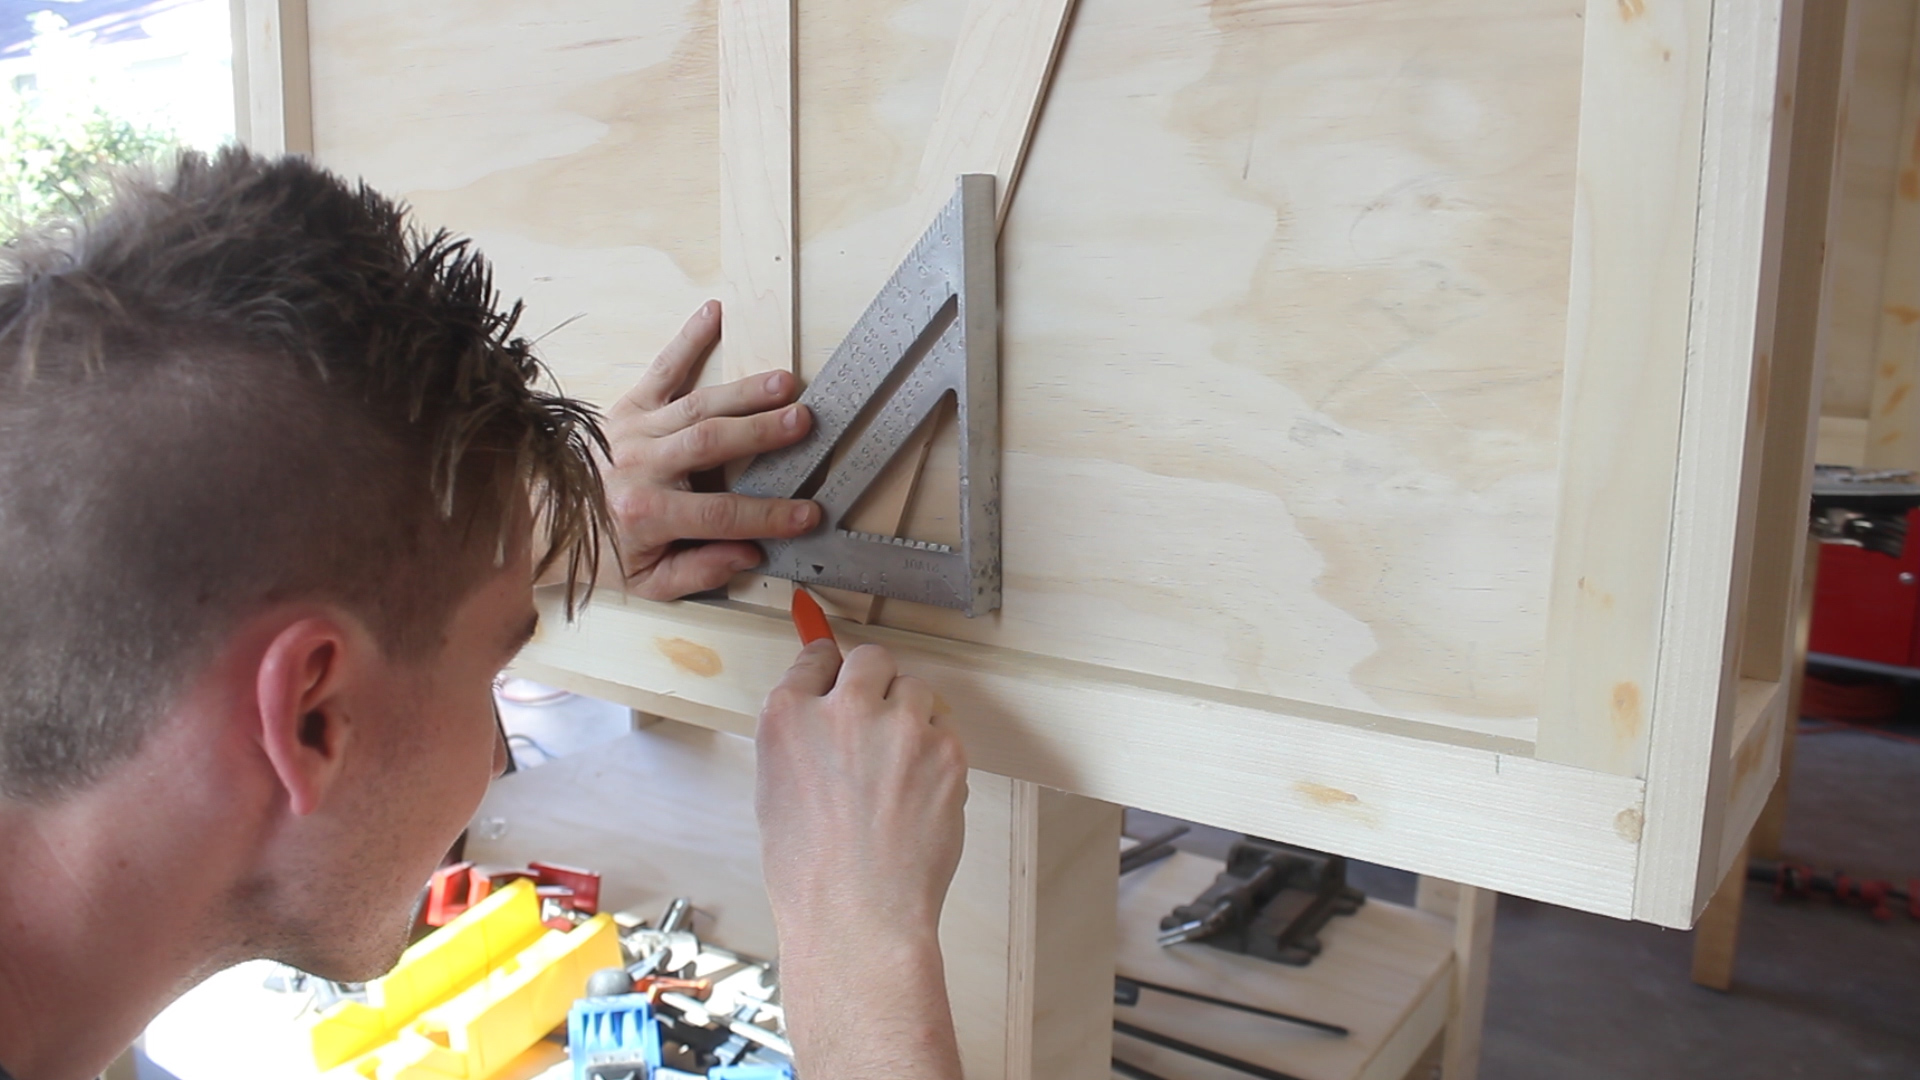
Our design called for a middle divider on each side, with two x's on each side of it. Starting with the middle divider gave me even sides to measure and work from. Pics 6-8 show me then (as best I could), measuring out, cutting on the miter saw, and then using the stationary disc sander to refine the angles needed to fit x's into each side. I then repeated the process of using glue and brad nails to tack things in place in Pics 9-10).
Pic 11 shows the final result of a few hours of careful measuring, cutting, and gluing in place. Pic 12 shows me adding two more vertical pieces on the face of the recessed side - I have no reasoning for this other than I thought it would look cool. It did.
NOTE - I would use thin hardwoods if you are not painting for this step - I only used hardwood plywood because I planned to paint this and thus could cover up any exposed plywood.

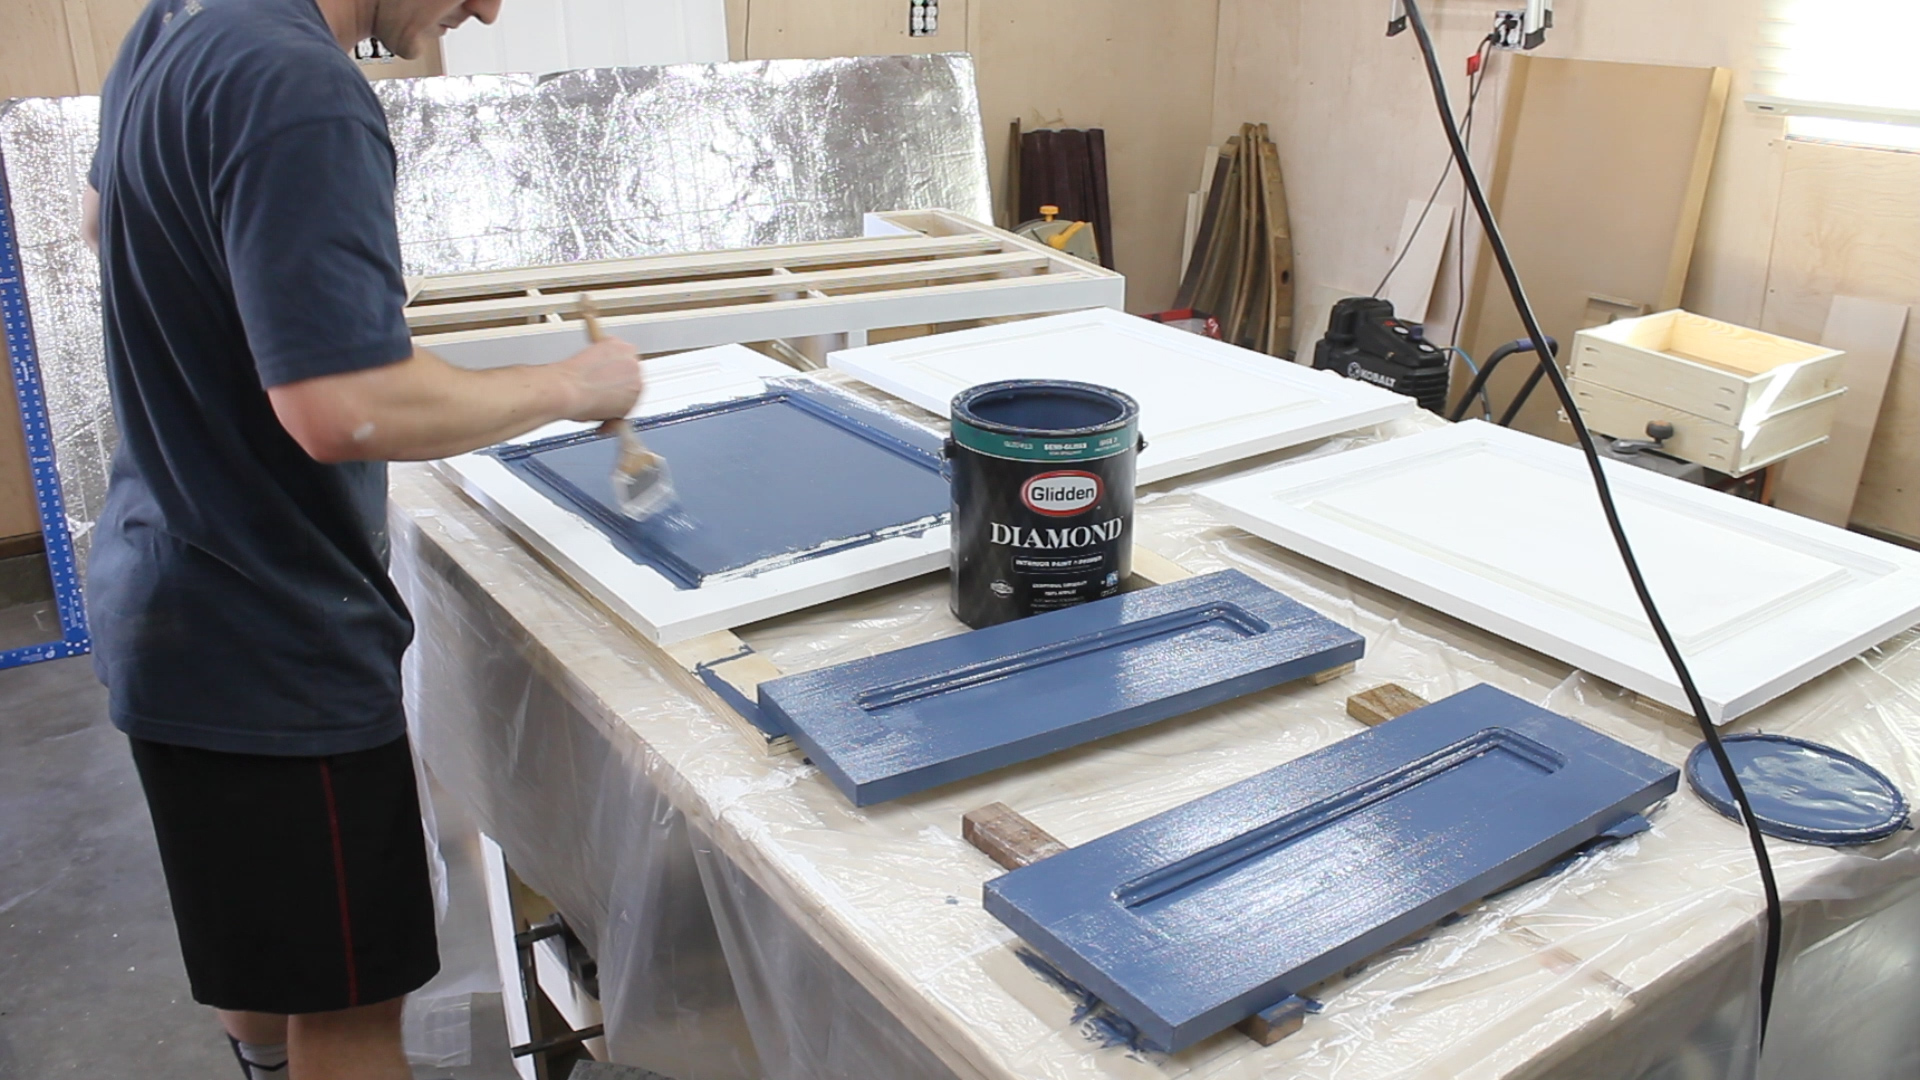
Then, I primed (one coat) and painted (two coats + touch ups) the entire island using a fine foam roller and a nice paint brush. The hardest part was getting into all the corners. I need a spray system.

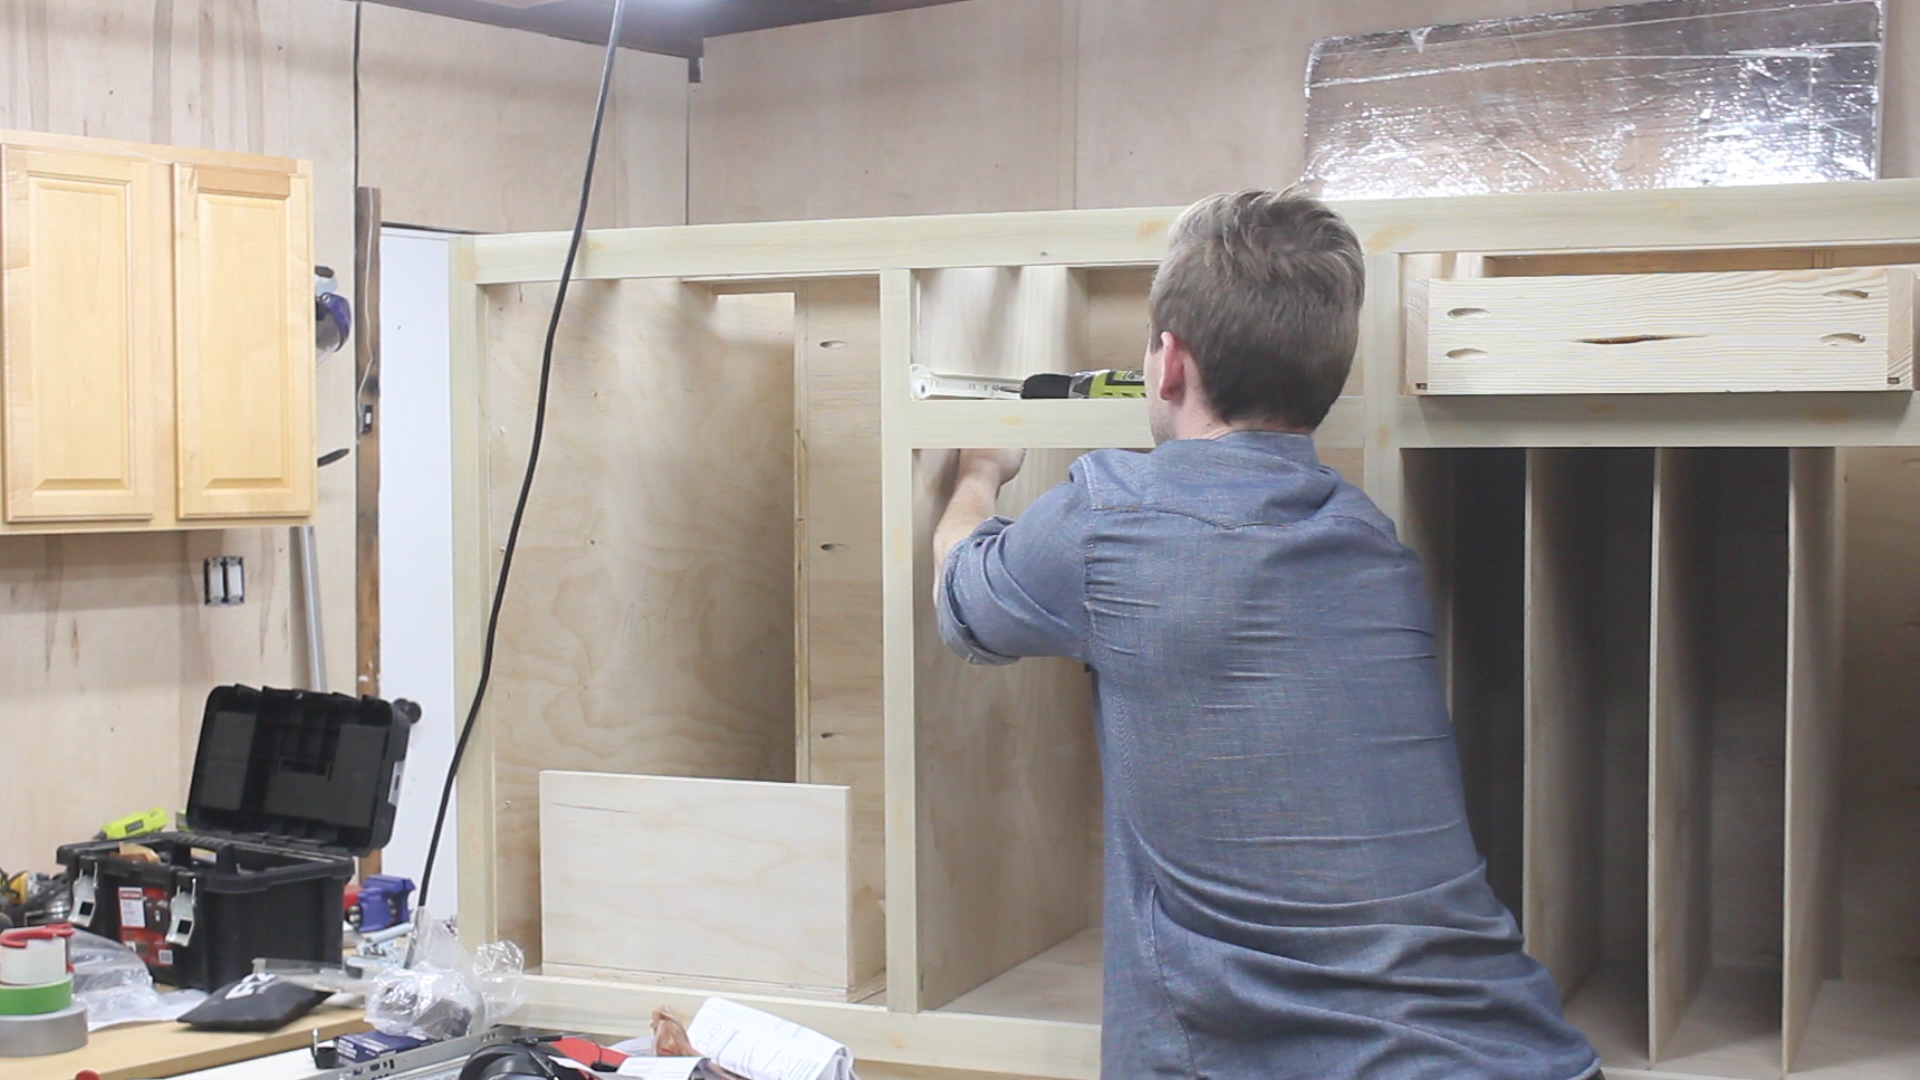
My fiancé and I agreed that if I could match our current kitchen cabinets (not exactly a simple design!) 80% of the way, then we would be good. Buying cabinets, especially bespoke ones, is damn expensive - like $100 per cabinet. I build my entire set for under $100 and they are damn good (for me).
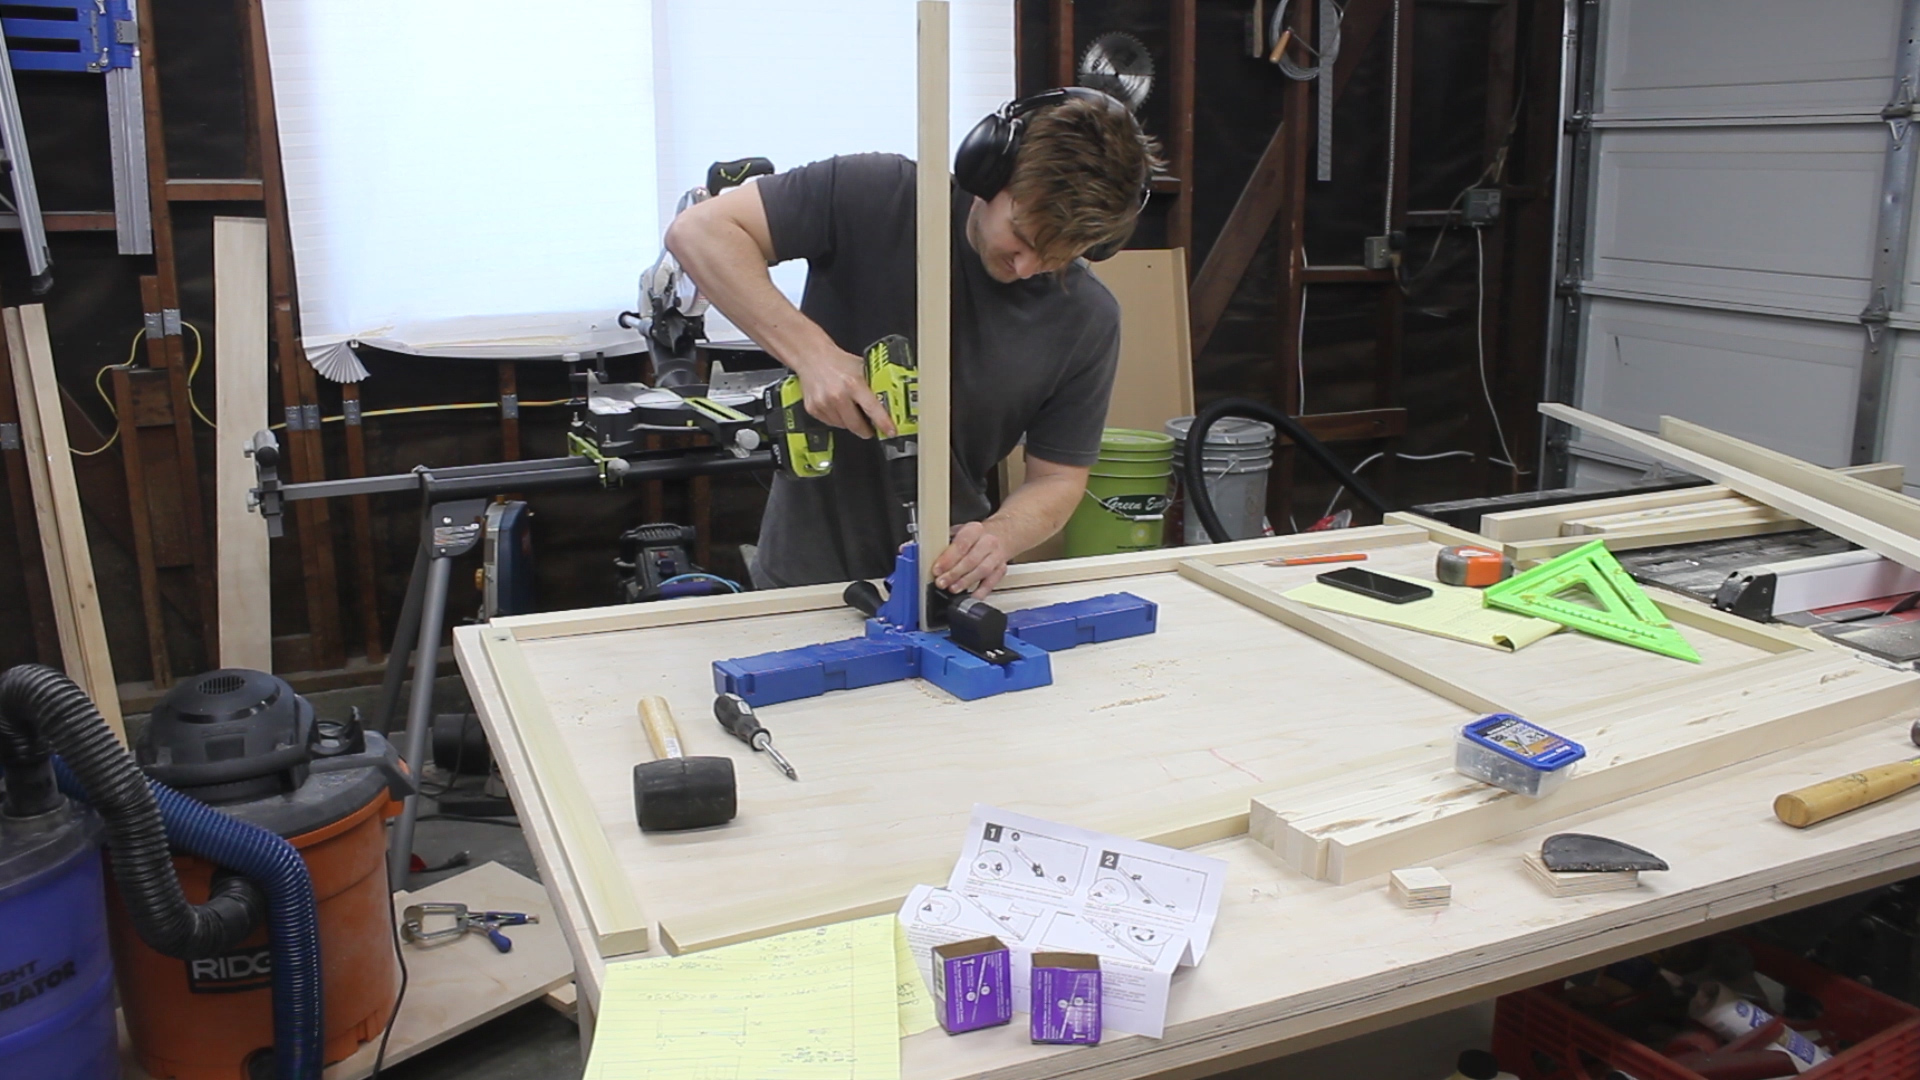
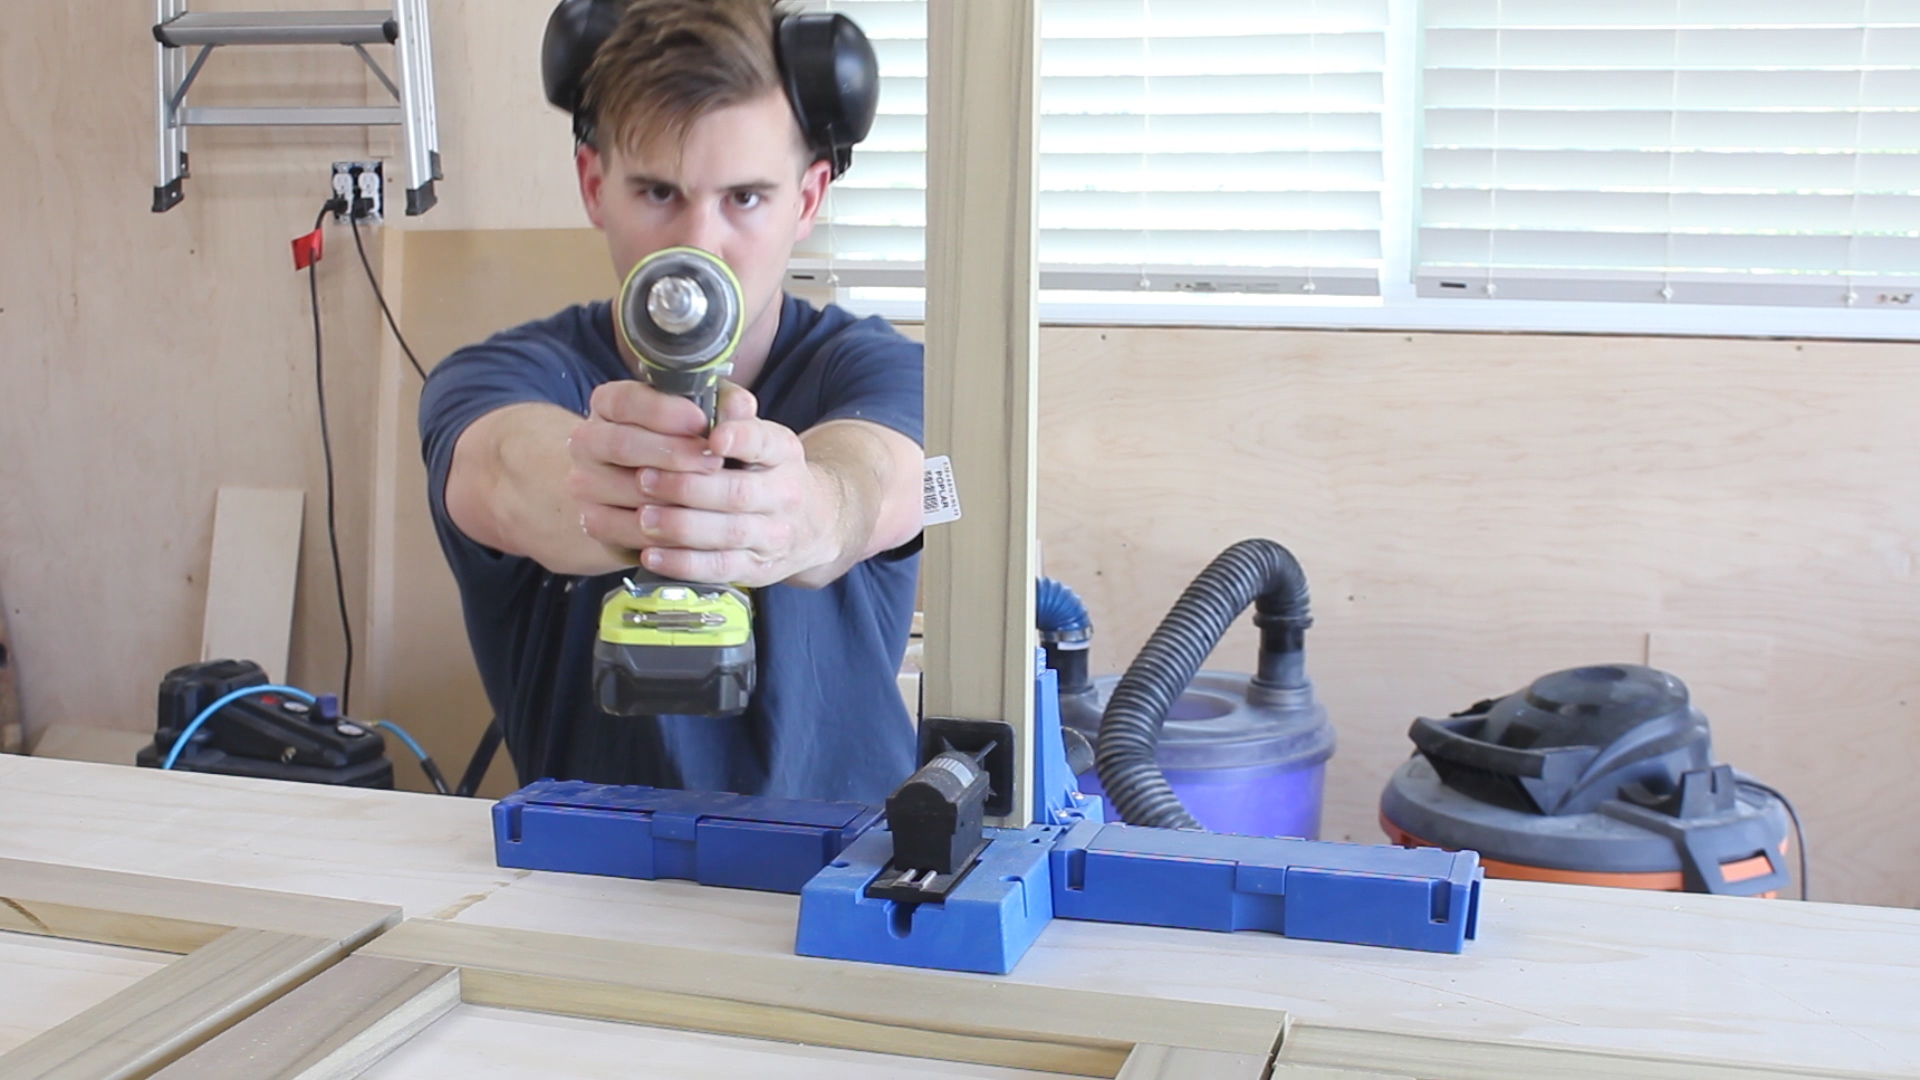
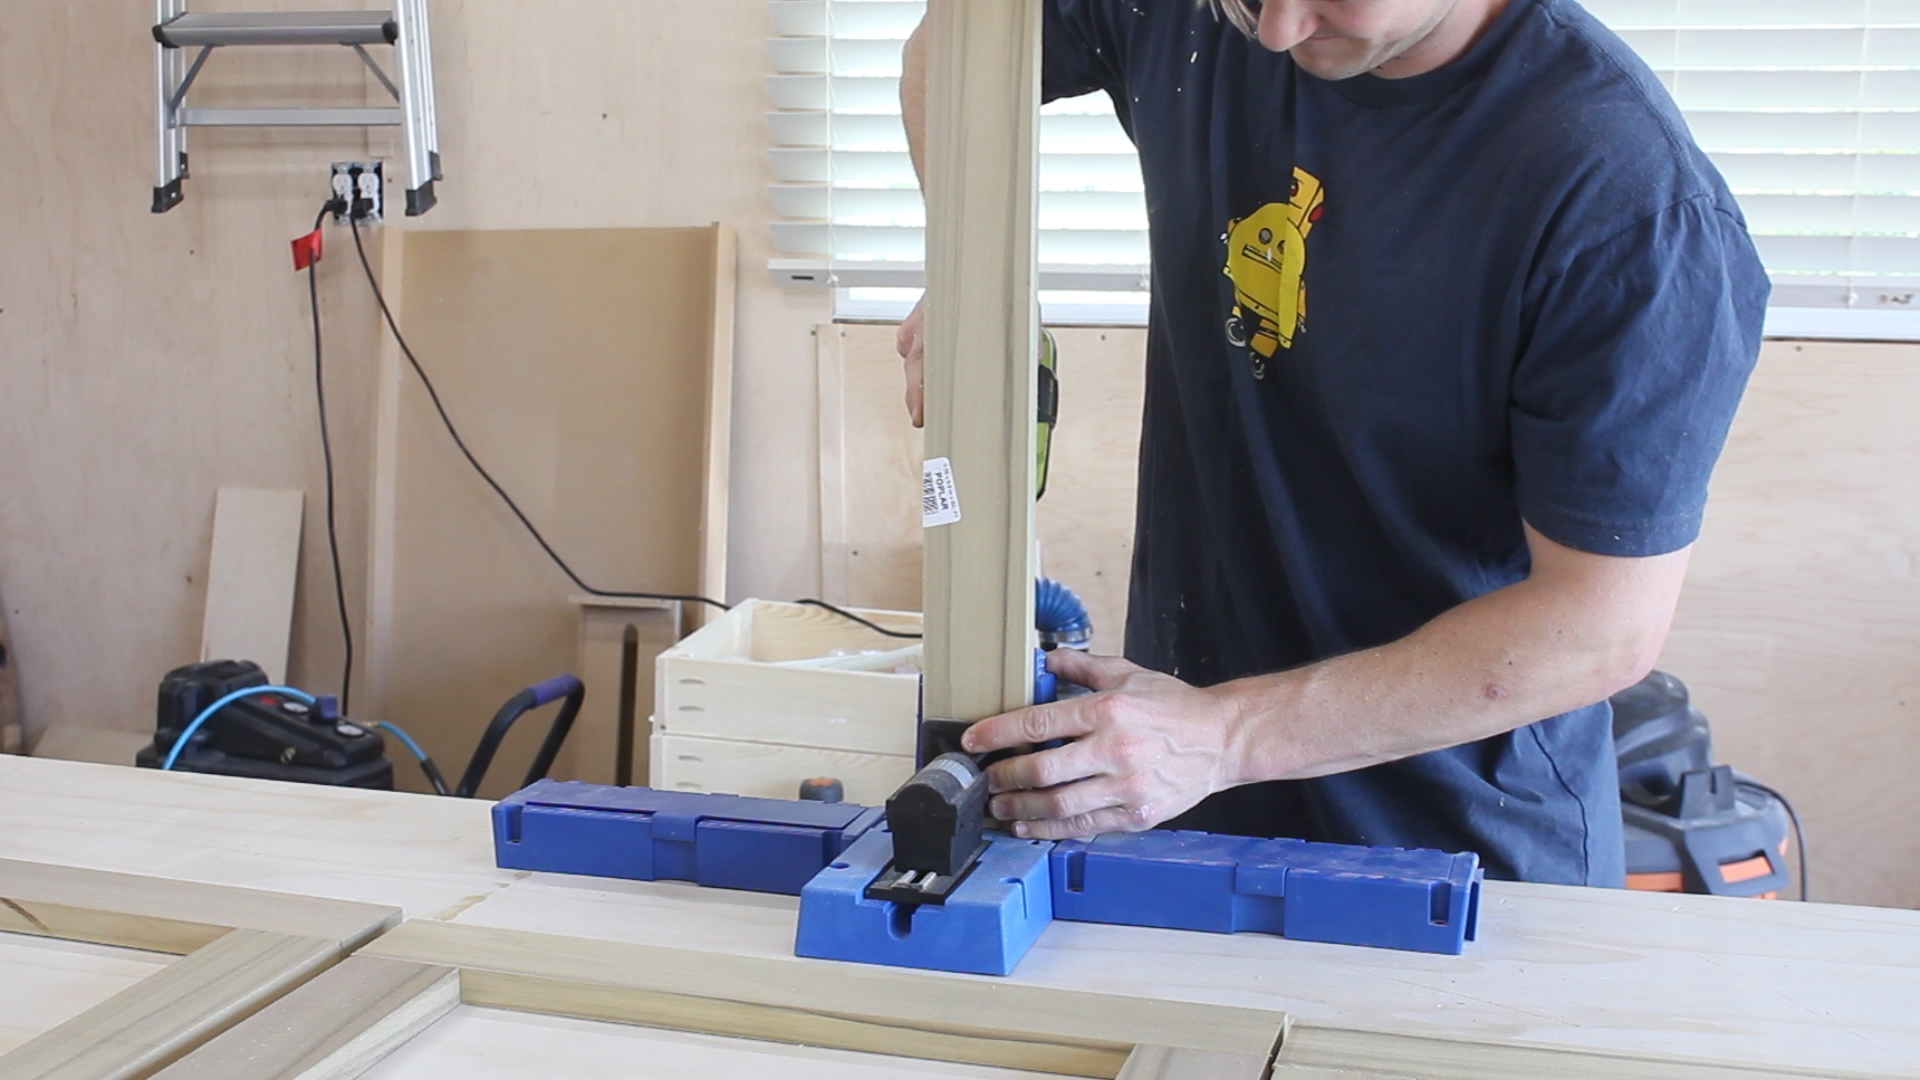
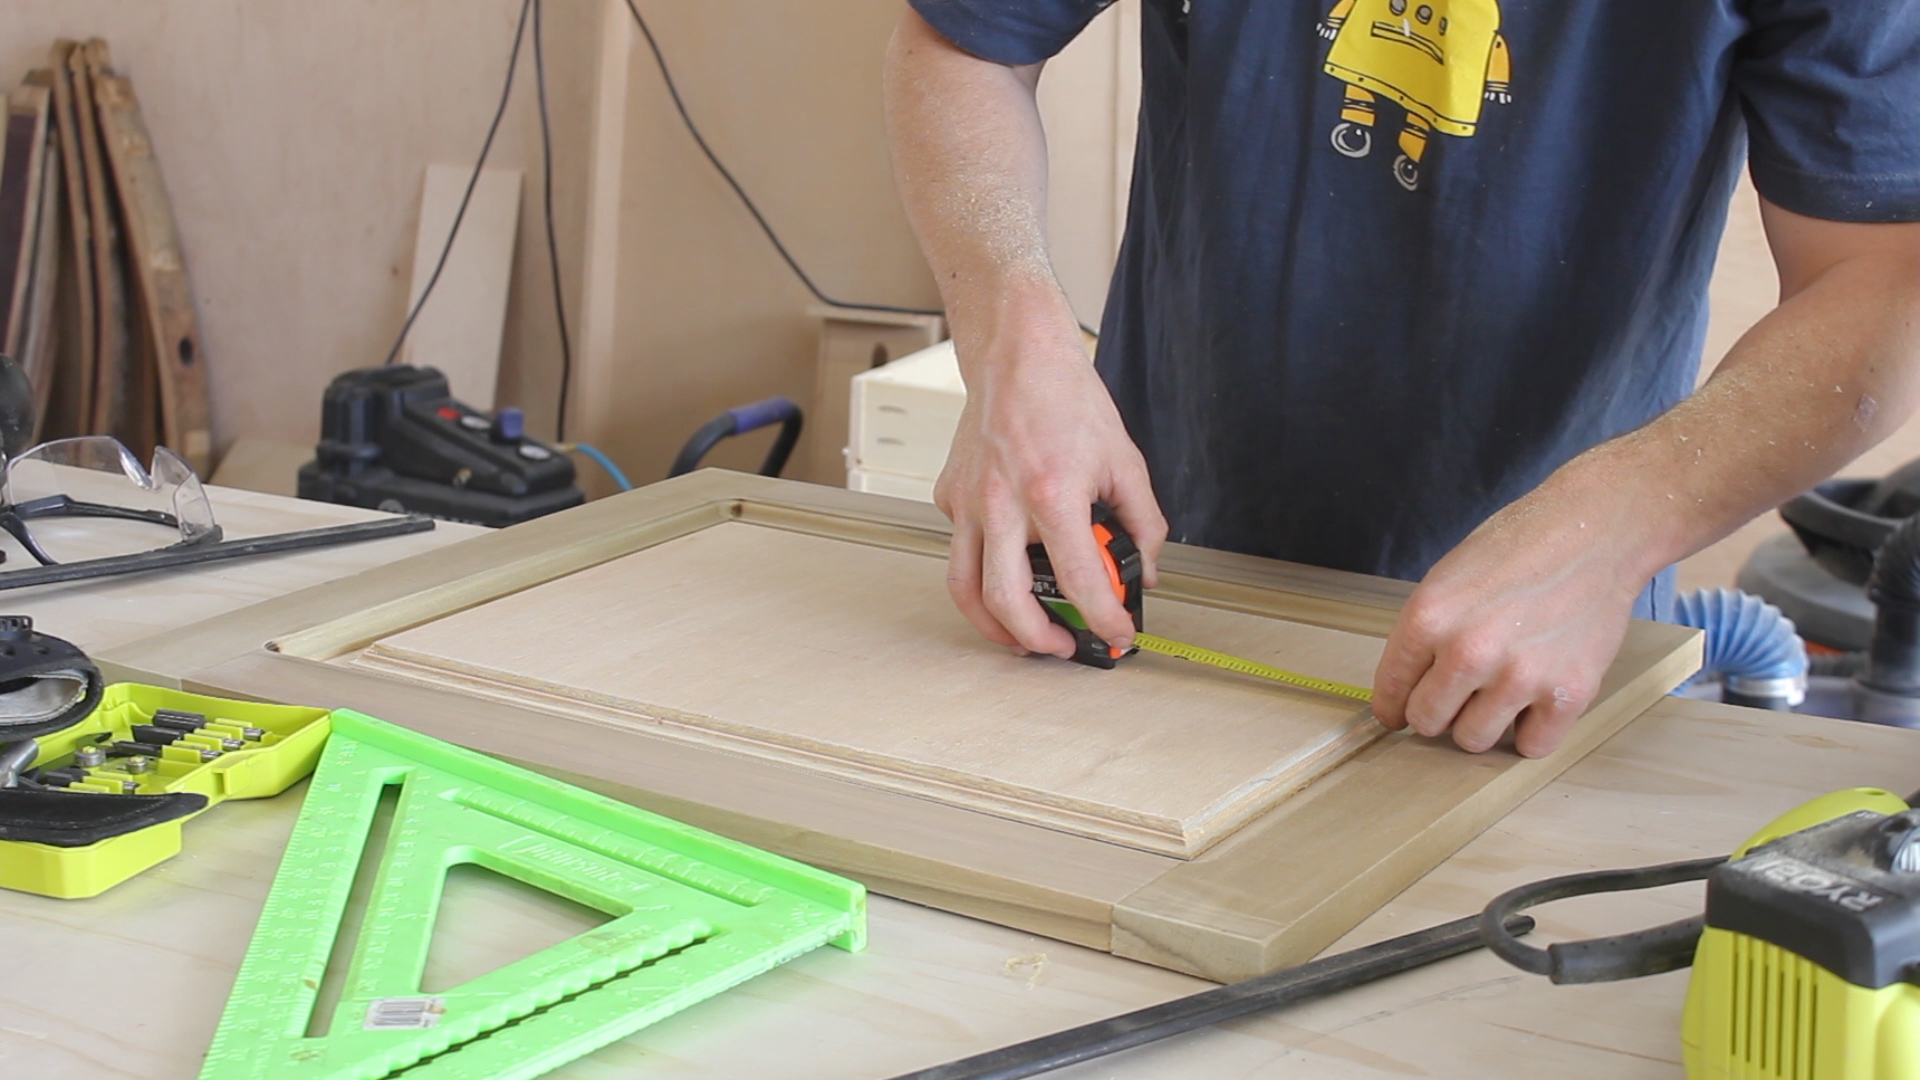
Part one includes me ripping poplar on the table saw (2.25" wide - Pic 1), and then cutting things to length on the miter saw (Pic 2). I bought, ripped, and cut enough material for three cabinets and three drawers. Then, I drilled more pocket holes. For this step, my plan was always to go back after and route a rabbit on the backside of each hardwood frame, so I laid out my pocket holes into places where the router bit wouldn't hit it later on (Pics 3-4).
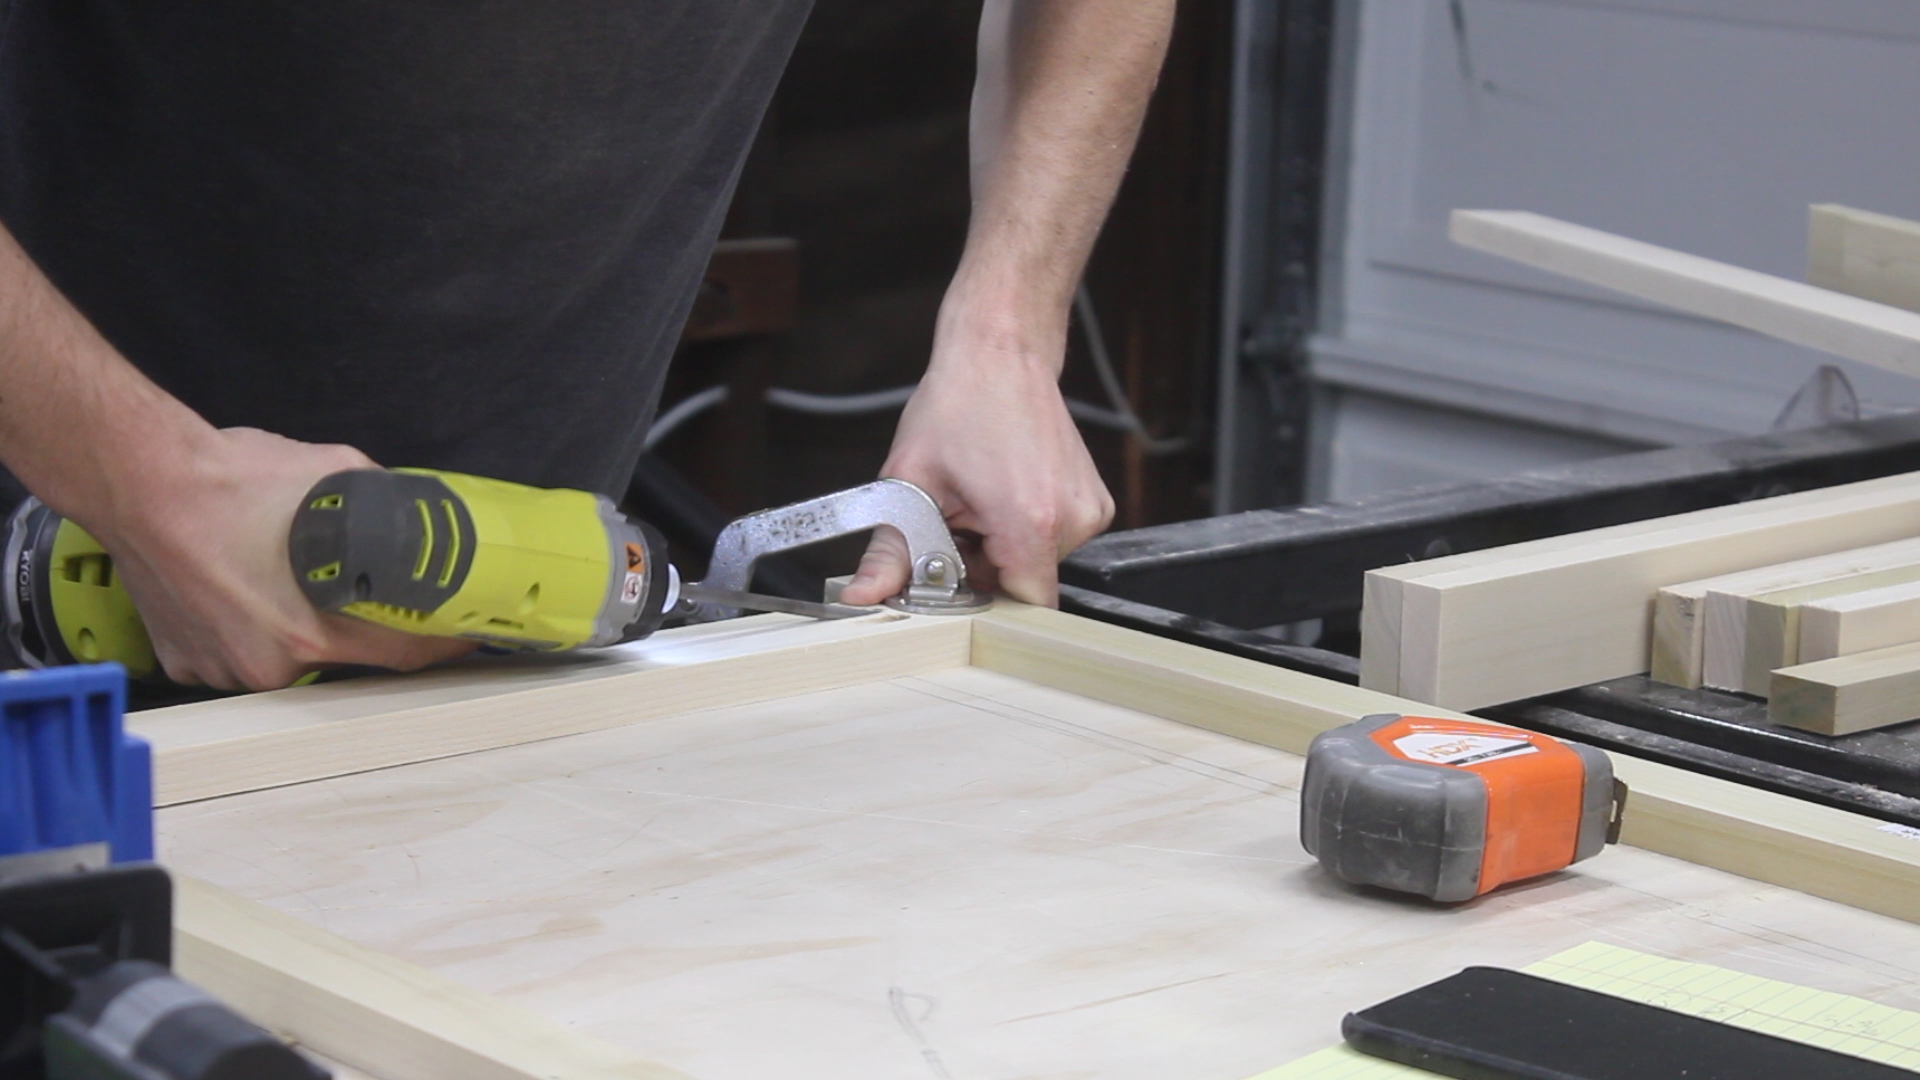
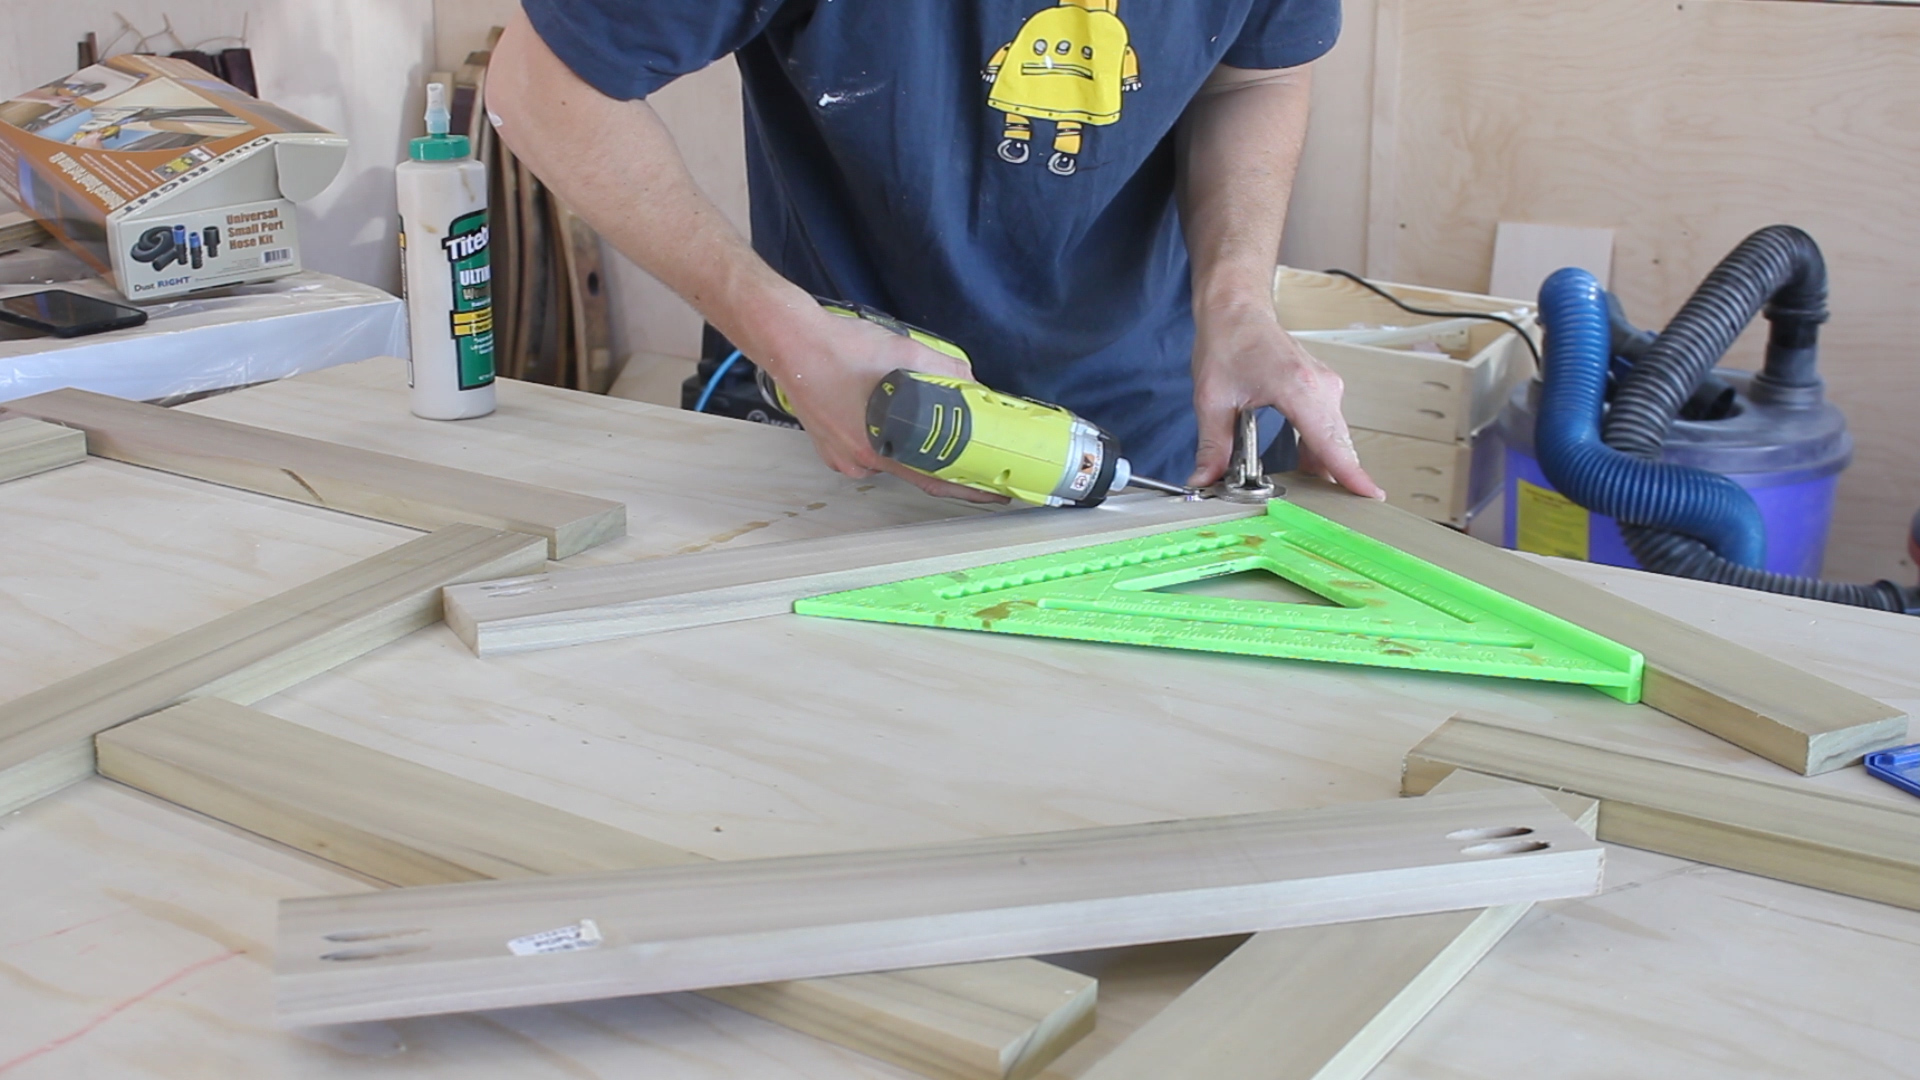
Pic 5 shows how all six cabinet/drawers looked framing-wise. Then, I assembled everything using glue and pocket holes, using a speed square to keep things square and the clamp to keep things flush (Pic 6).
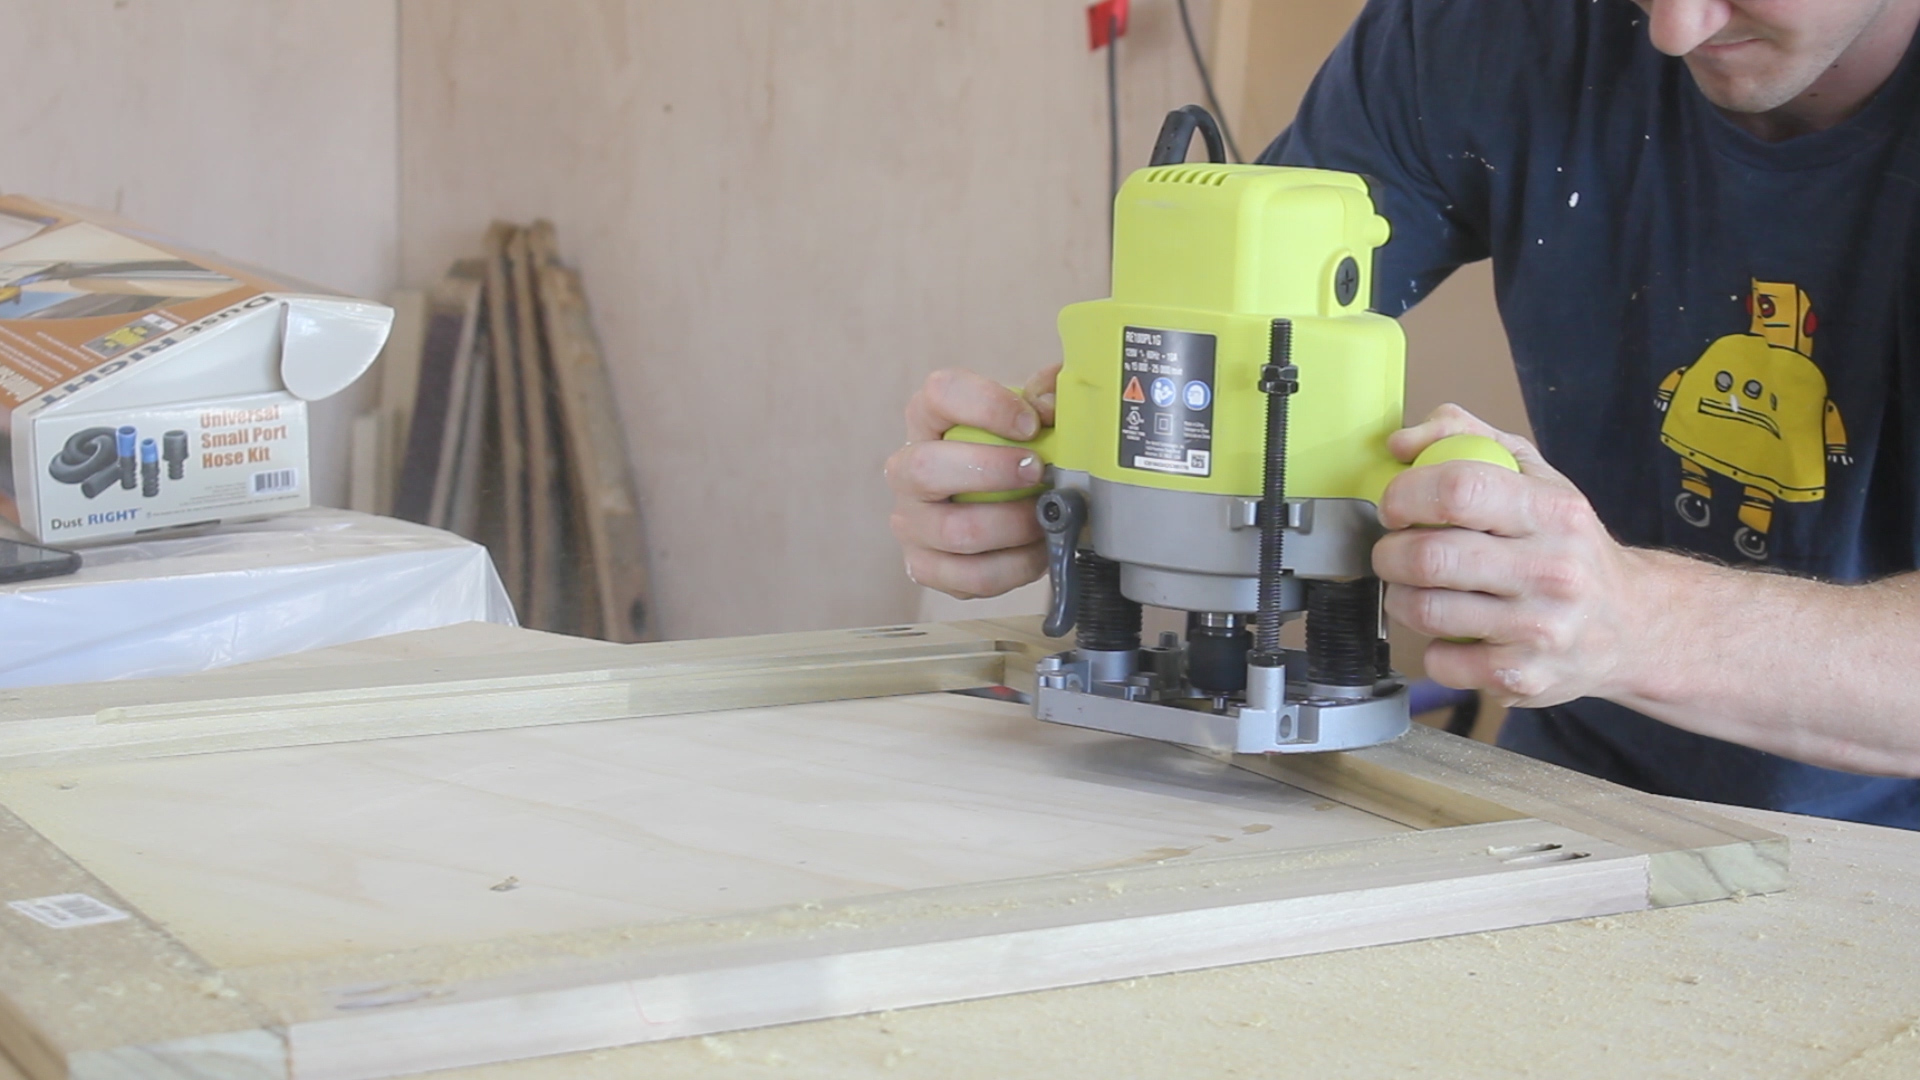
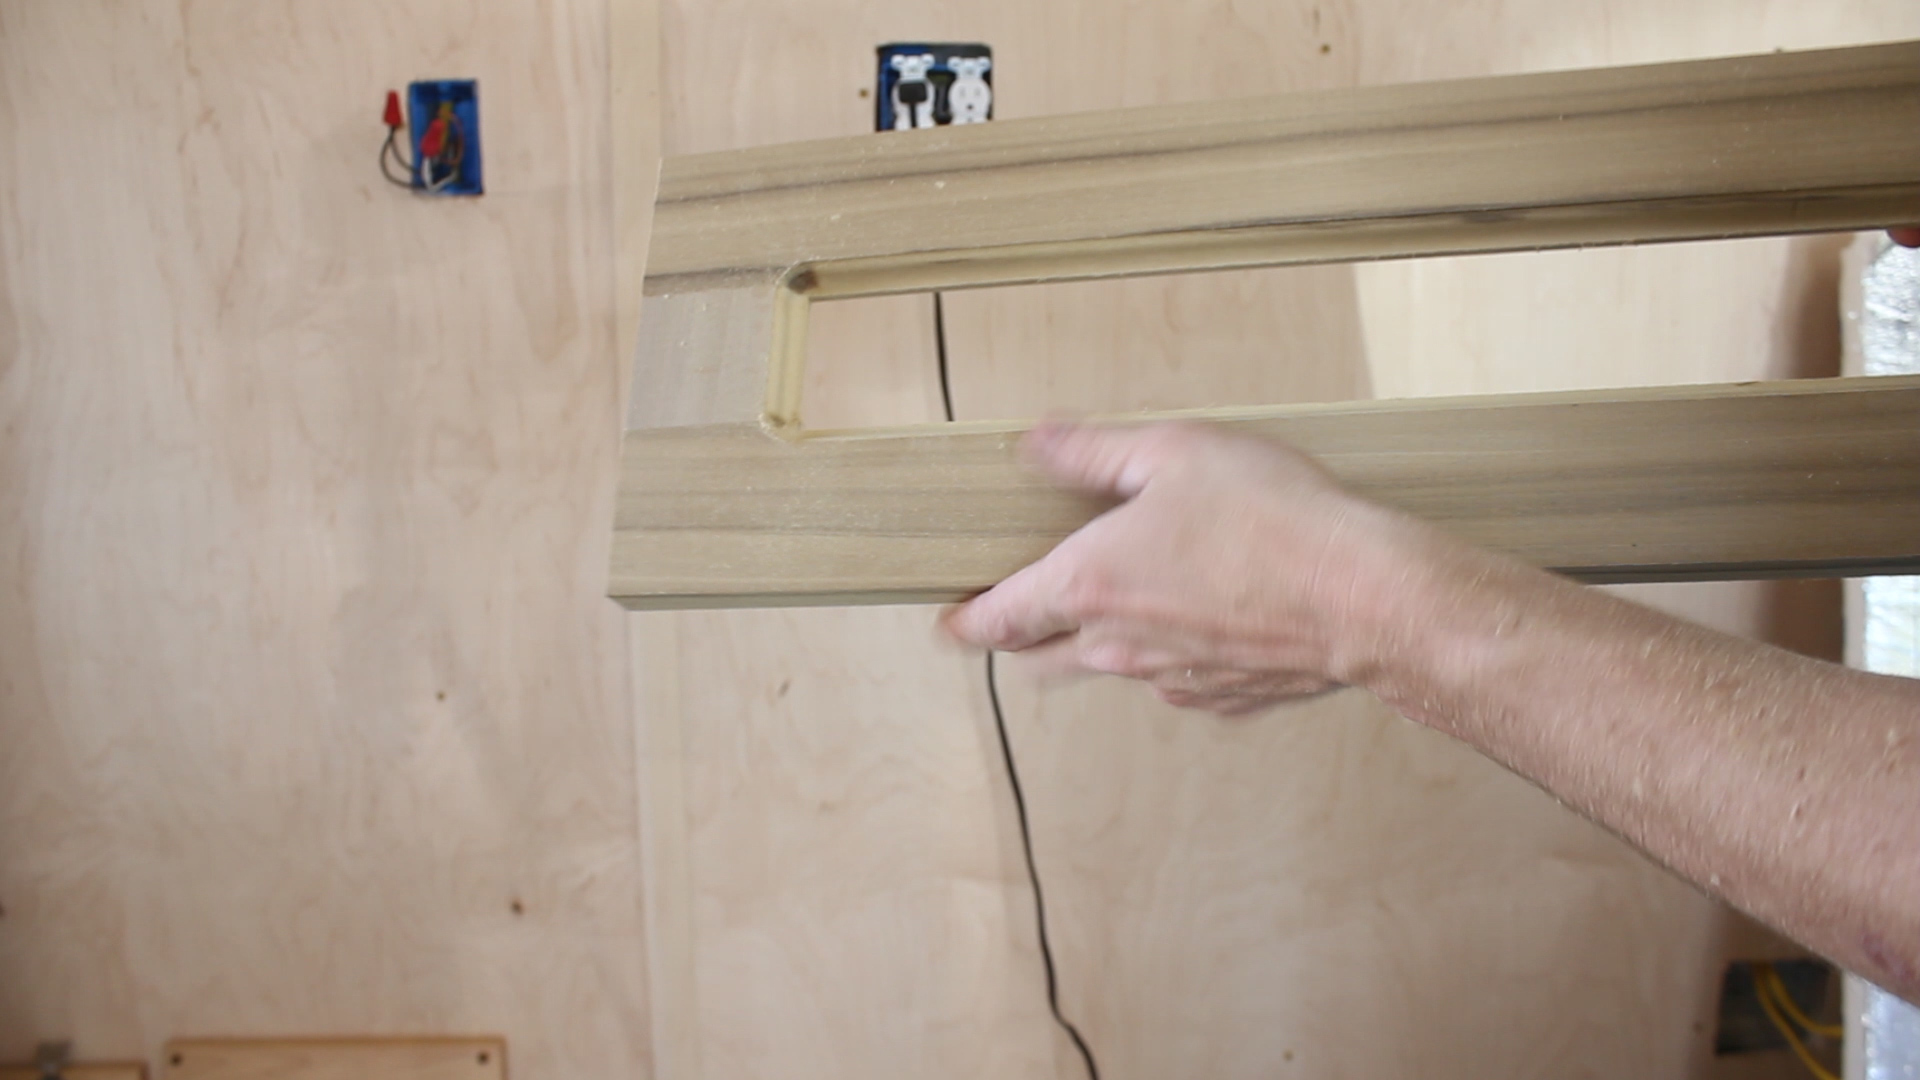
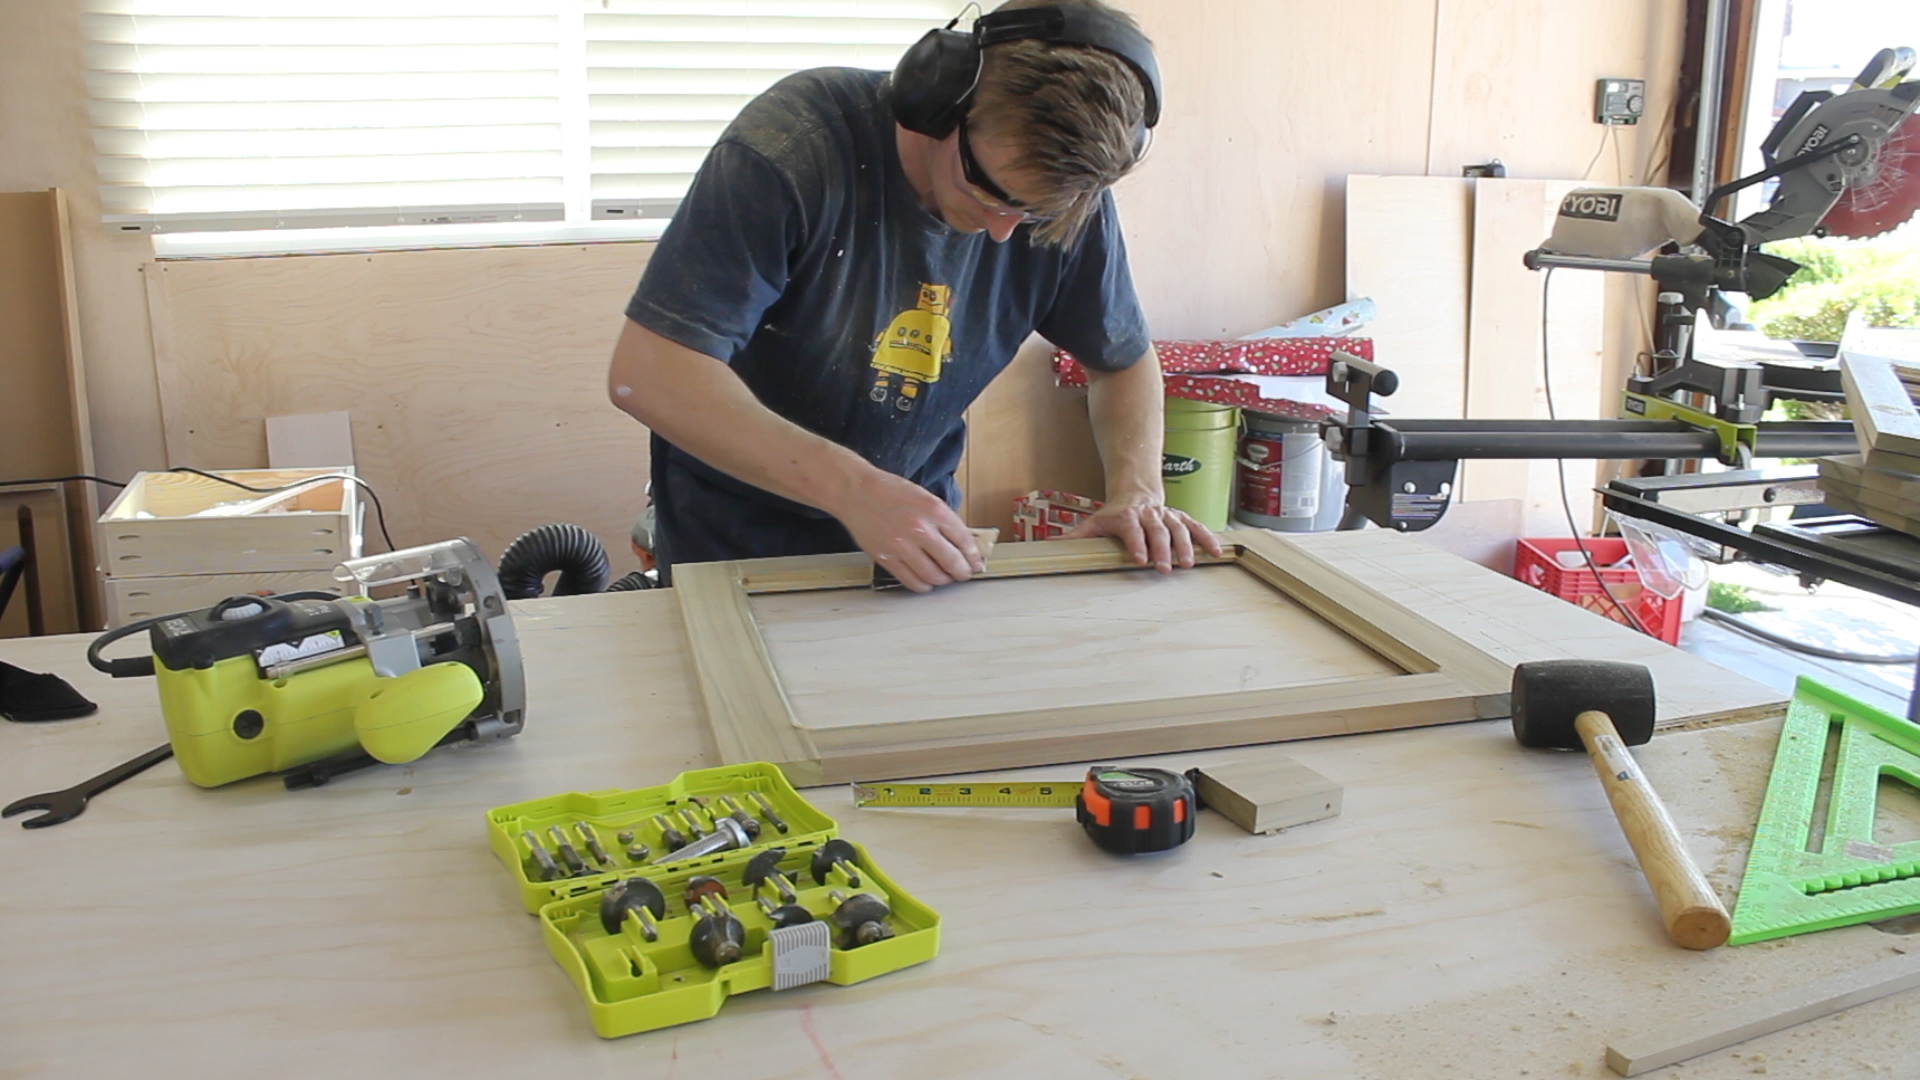
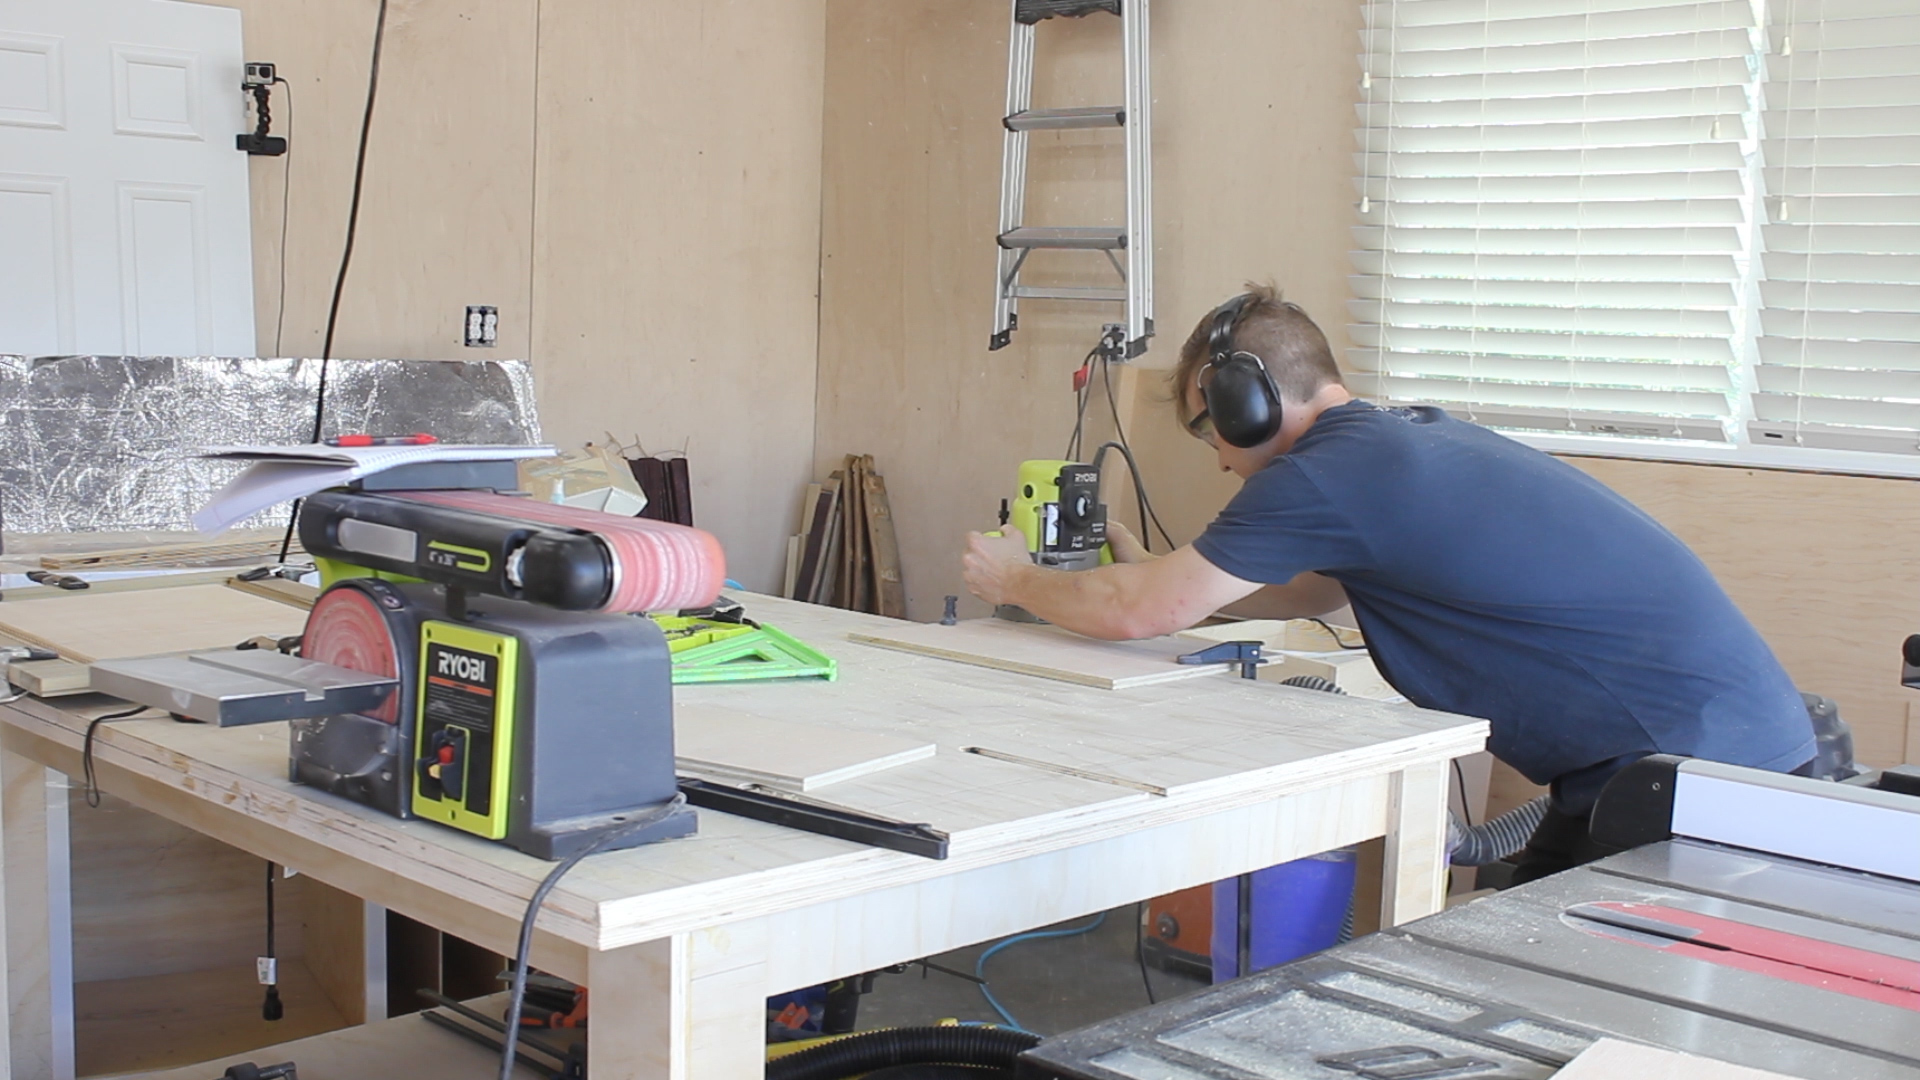
Pic 1 shows me using a rabbit bit on my plunge router to route a groove on the back of each cabinet (as seen in Pic 2). This would be used to accept a piece of 1/4" plywood to fill in the cabinet face.
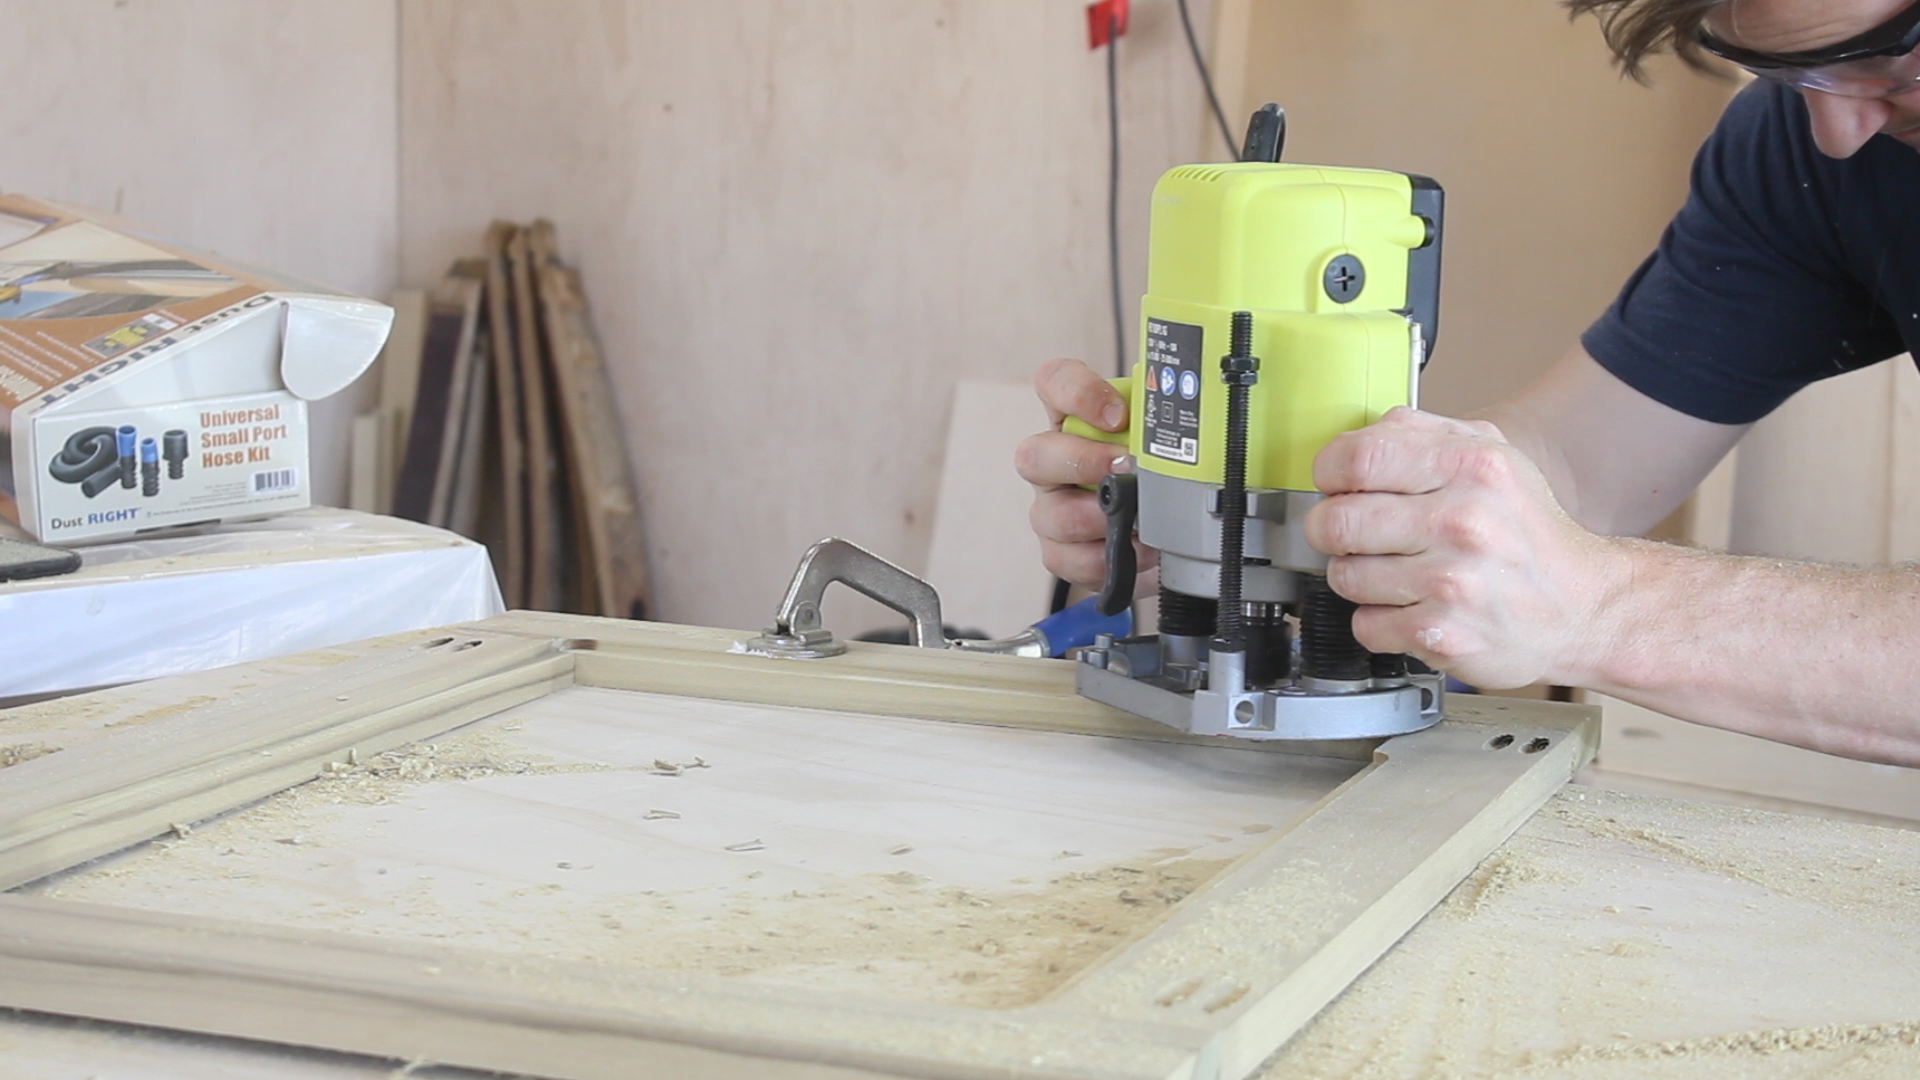
Pic 3 shows me using a special router bit on the front side of the cabinet frame to give it a nice curved profile. This was close to what my cabinets looked like - but not exactly - I simply don't have the tools to make it look perfect. Again - compromise. Pic 4 shows that as a final result.
Pics 5-6 show me using fine grit sand paper to smooth things down a bit compressed air to clean things off.


Now look - I get it - this is not the "Pro Pro" way to make cabinets. But I'm not a pro - and I don't have pro tools - I have some tools, but not enough, so this method work for me - and it's not for everyone, but I will say that the final result is quite good for the mid-level DIYer (and at about 1/6th of the cost!)
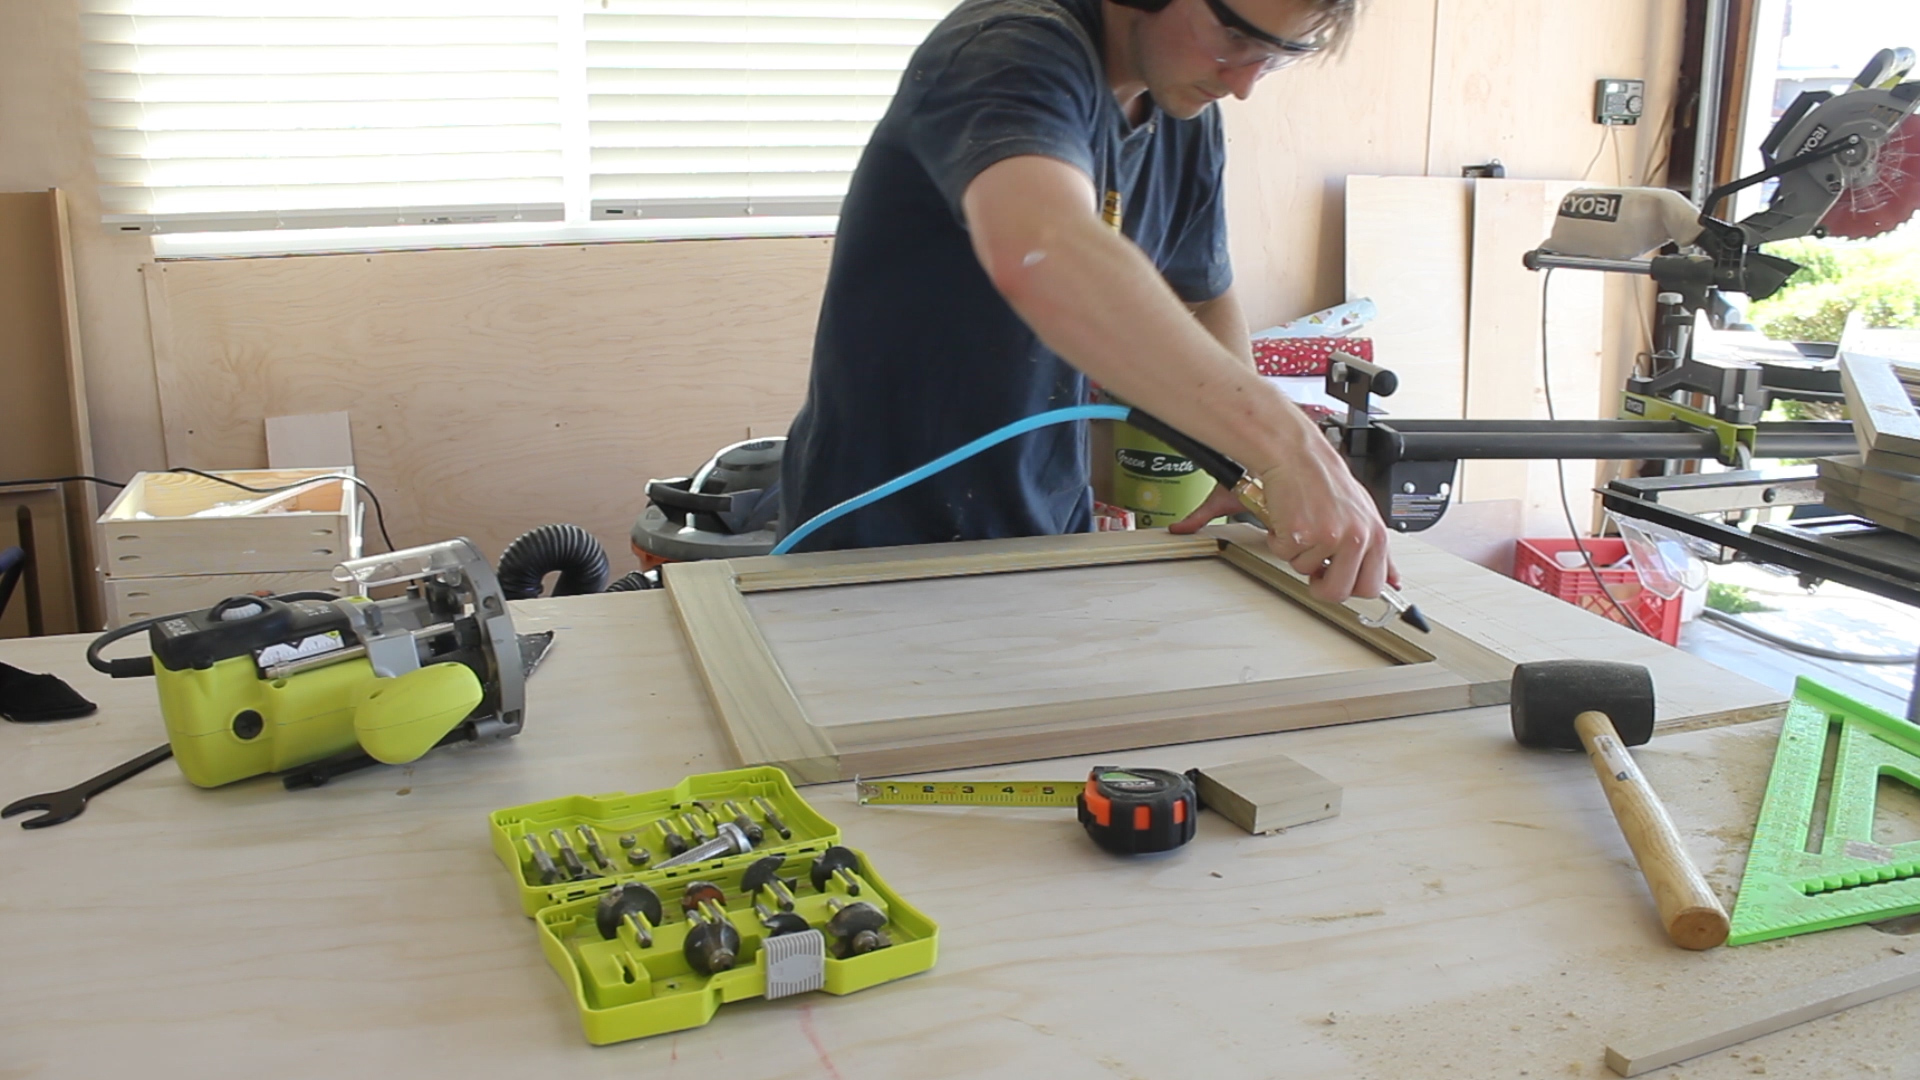
To fill in the space between the hardwood frames, I cut 1/4" plywood down on the table saw (Pic 1). These filler pieces would go on the backside of the frames in the rabbits I cut in the previous step.
Because the rabbiting bit left curved corners, I needed to round over the edges on the stationary sander (Pic 2).Then, using glue and squeeze clamps, I could glue everything in place (Pics 3-5) and let cure for 3-4 hours.
The current drawers in my kitchen are made up of just a hardwood frame and a middle piece - there is no added profile in the middle that is elevated. However, the cabinets have a hardwood frame, a 1/4" backing, and then a middle profile. So I needed to make that for the three bottom cabinets.
I ripped 1/2" plywood down on my table saw (Pic 1) - this was relative to my cabinet sizes - I think they ended up being 1.25" smaller on all four sides than the boarder of my hardwood frames. I then used a router bit from Ryobi to give the pieces a fancier profile (Pic 2) - again - 80% the same to what we currently had. If I didn't tell you they were different, you'd probably never notice...
Pics 3-4 show the final profile, me laying it out and measuring properly for evenness, then using glue and something heavy to glue them down - no finish nails for this step.
Again - I know this is untraditional - but it isn't wrong and I know many others have done things like this before and gotten great results (spoiler - I got great results!). Then I primed and painted everything (1 x primer, 2 x paint + touch ups - Pic 5)
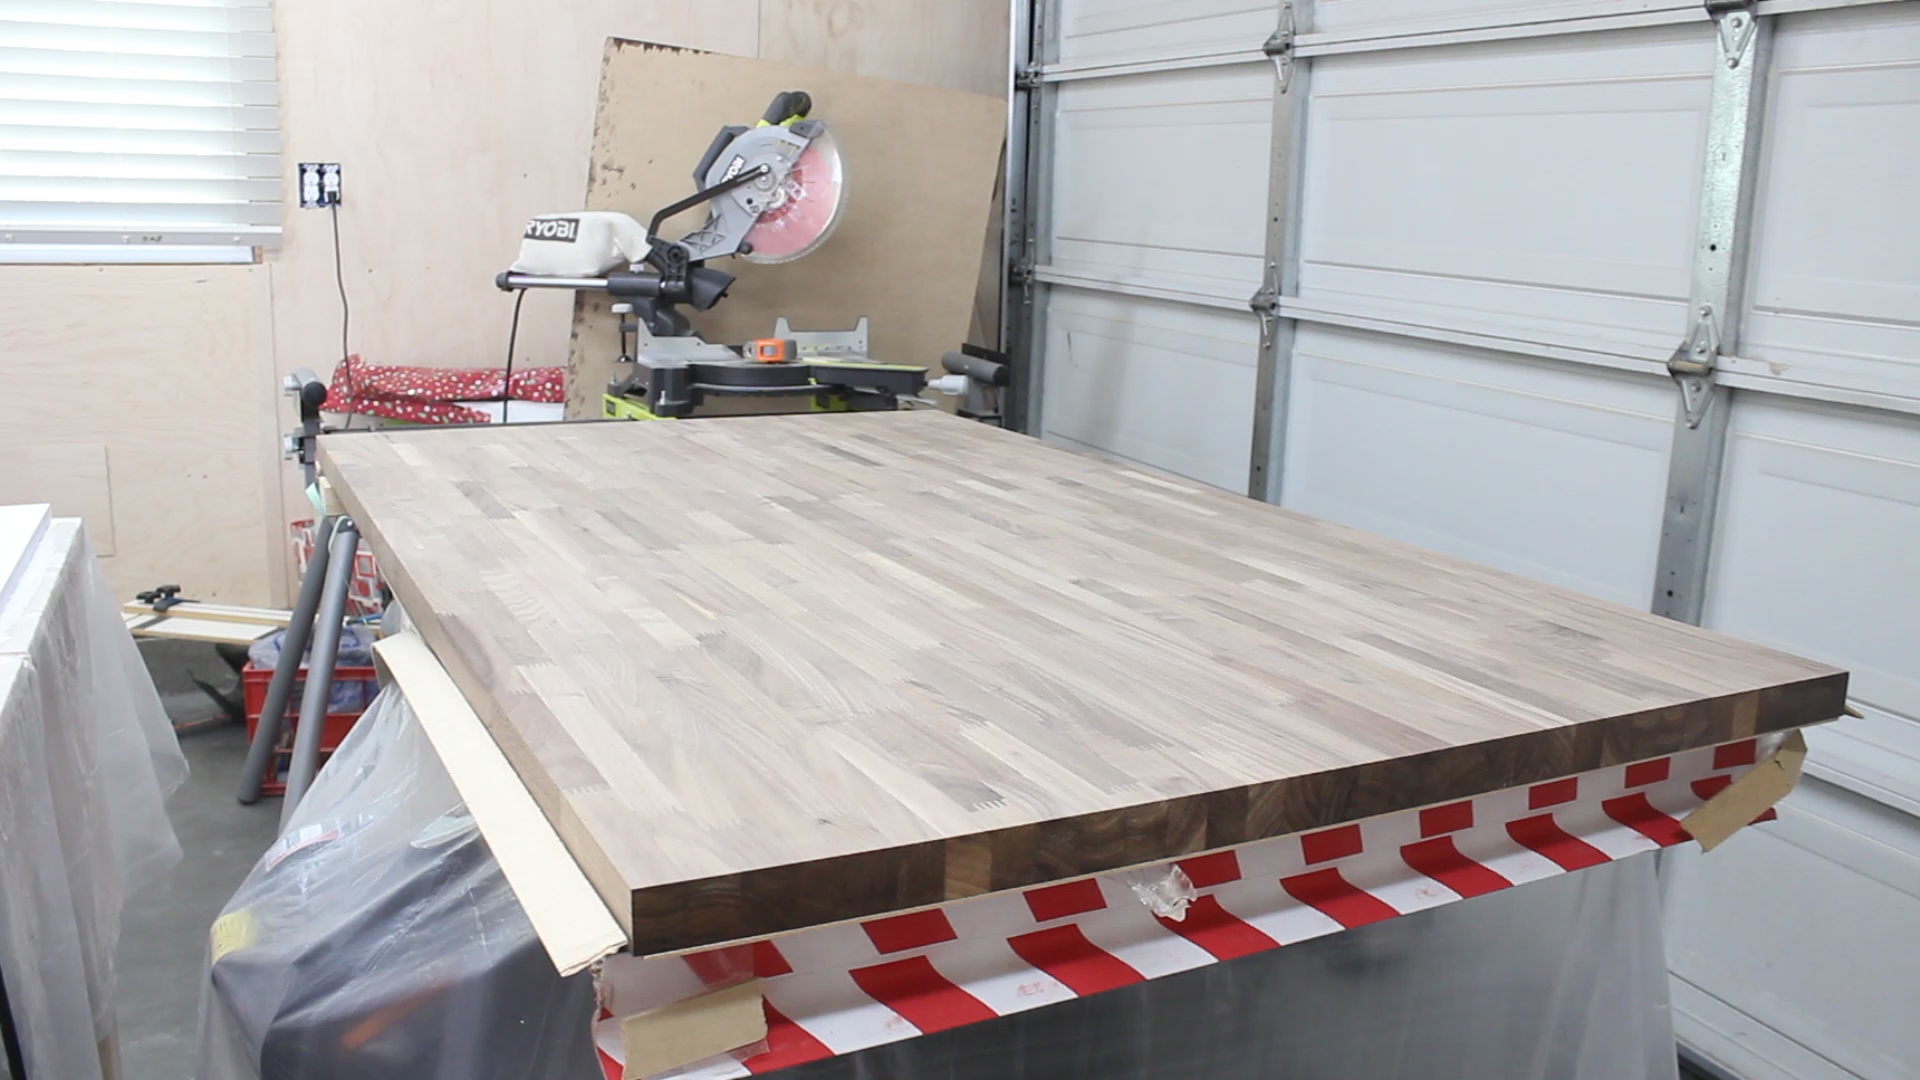
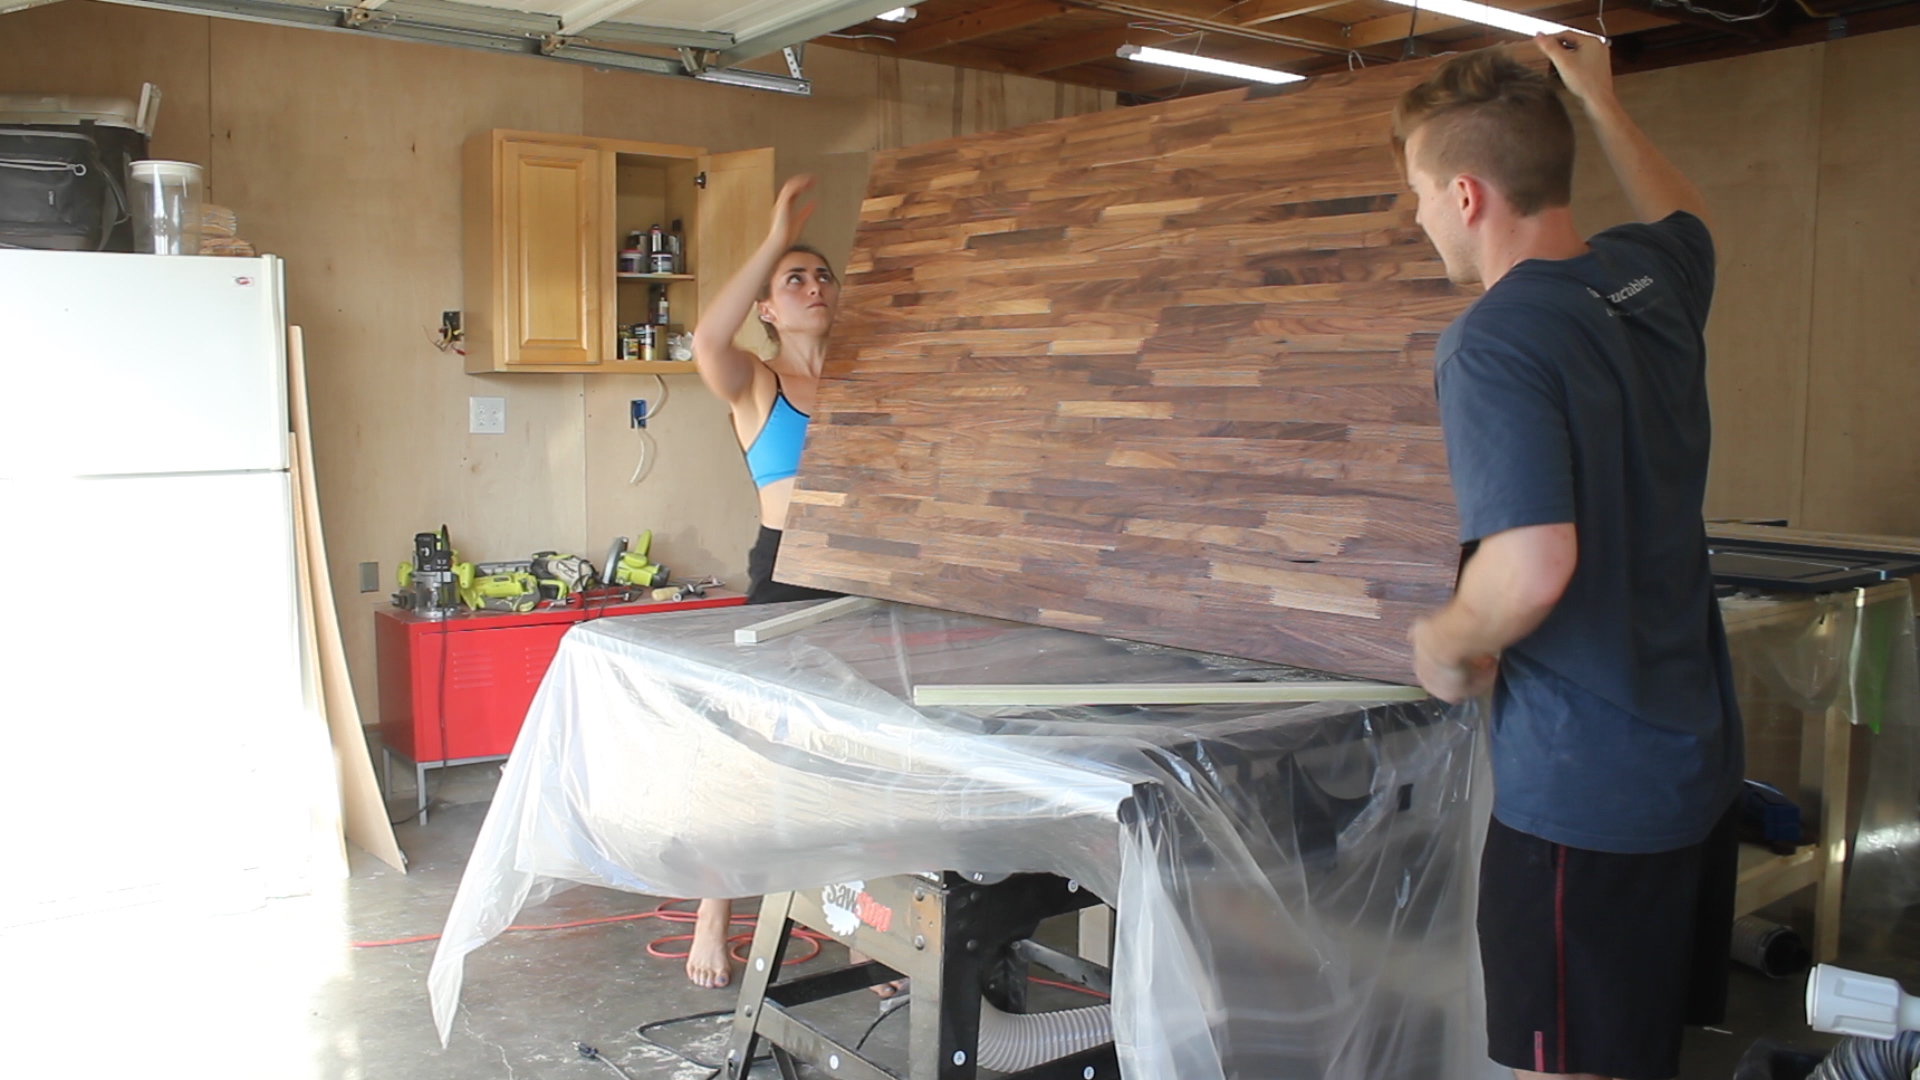
Look, I can make things, and I probably could have made this butcher block top. But there is a risk/rewards thing, and I don't have too much pride to risk hundreds of dollars on nice hardwood only to mess it up later on. Could I have made this myself - yea, probably. Did I want to? Kind of. Do I regret buying it. Hell no.
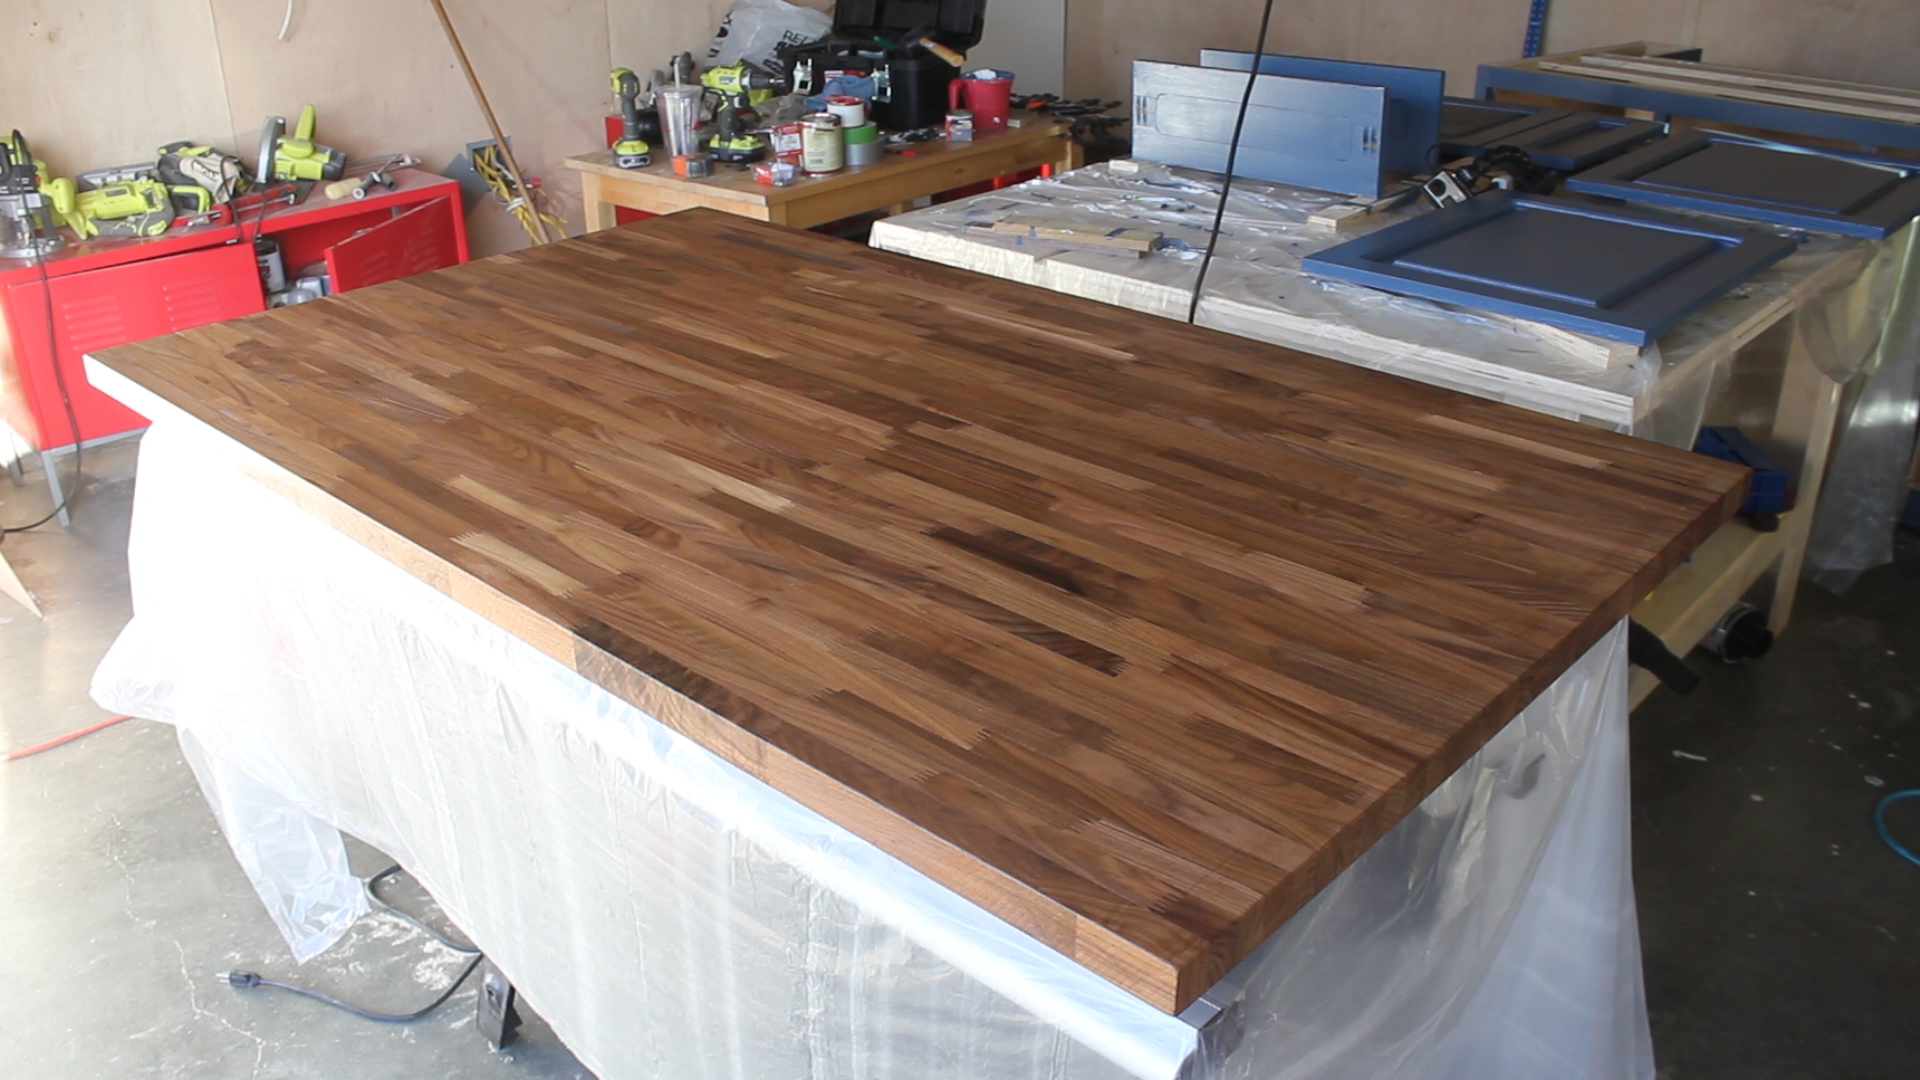
All in all, I paid about $850 total for this island - $550 being this walnut butcher block. The block was bought from a website called Perfect Plank, and I realized that buying and having this shipped would have cost about the same amount to buy the raw materials. So yea, worth it.
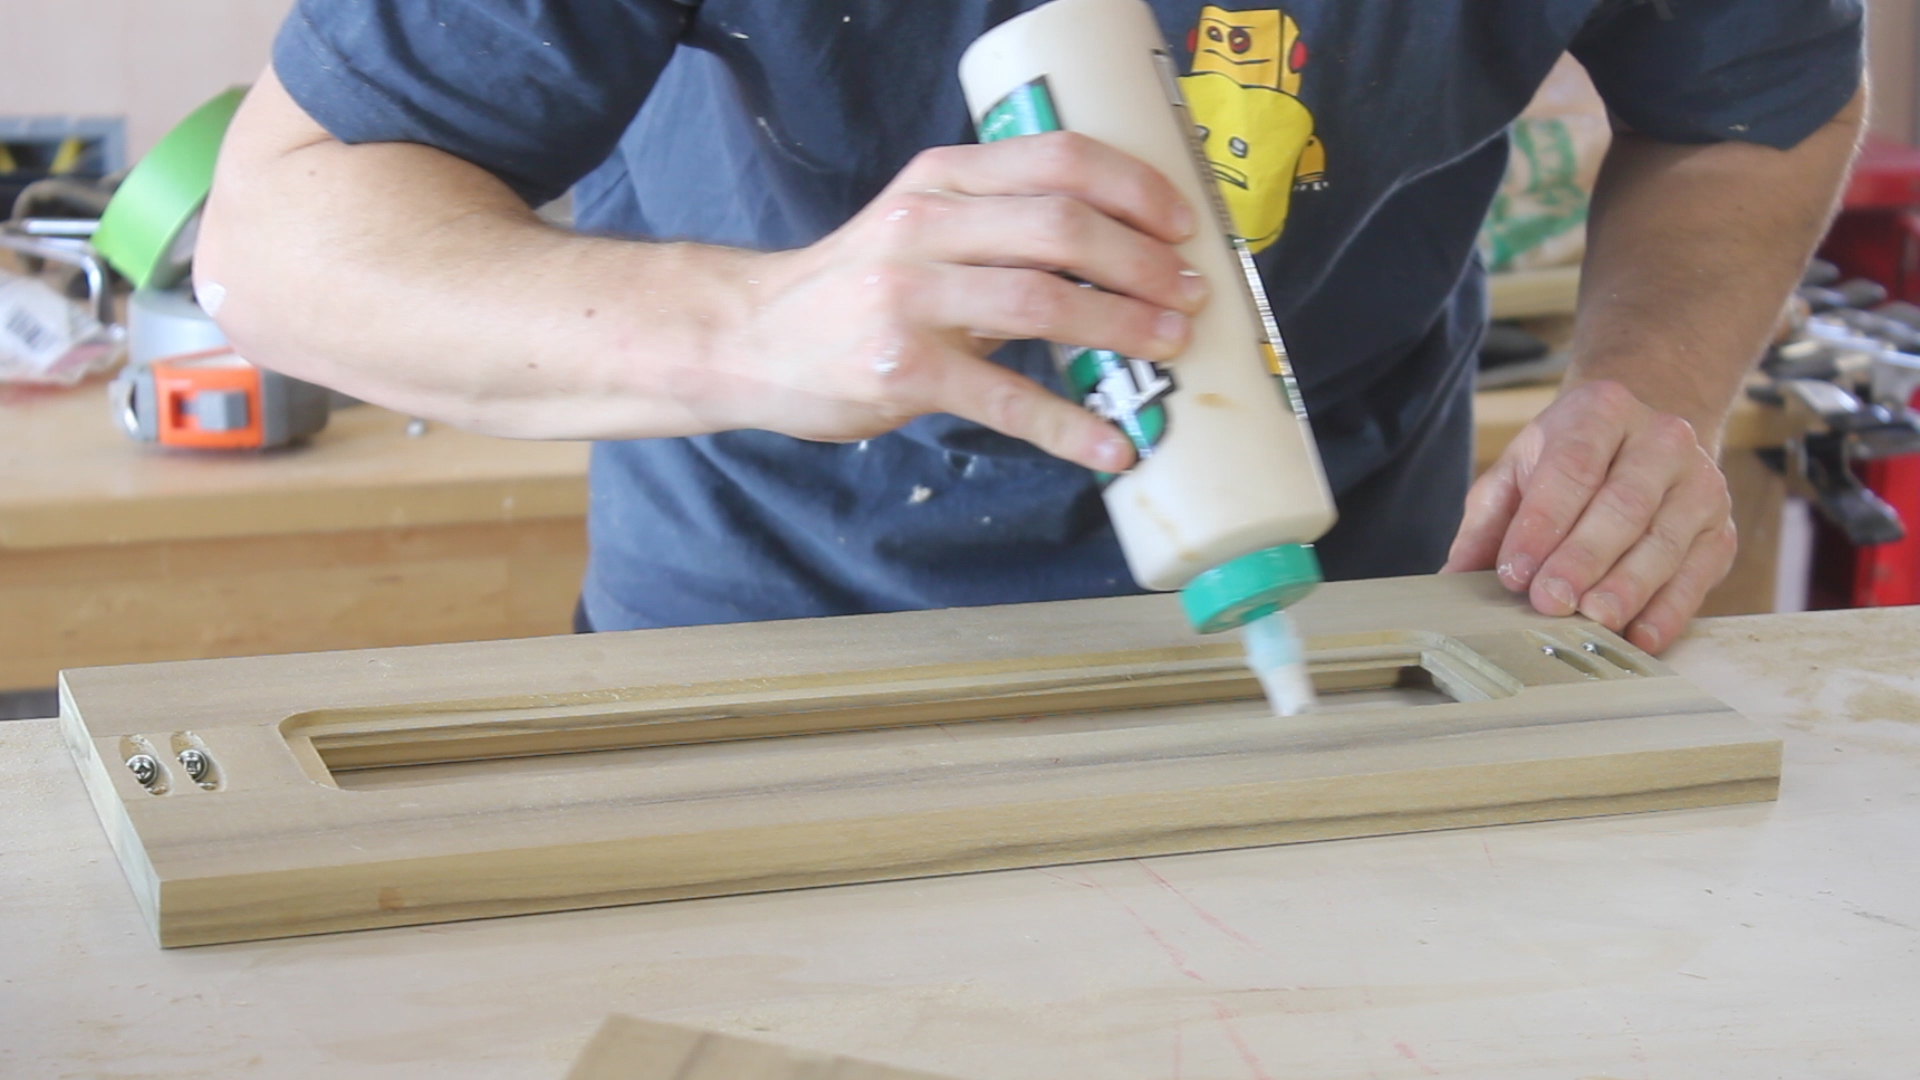
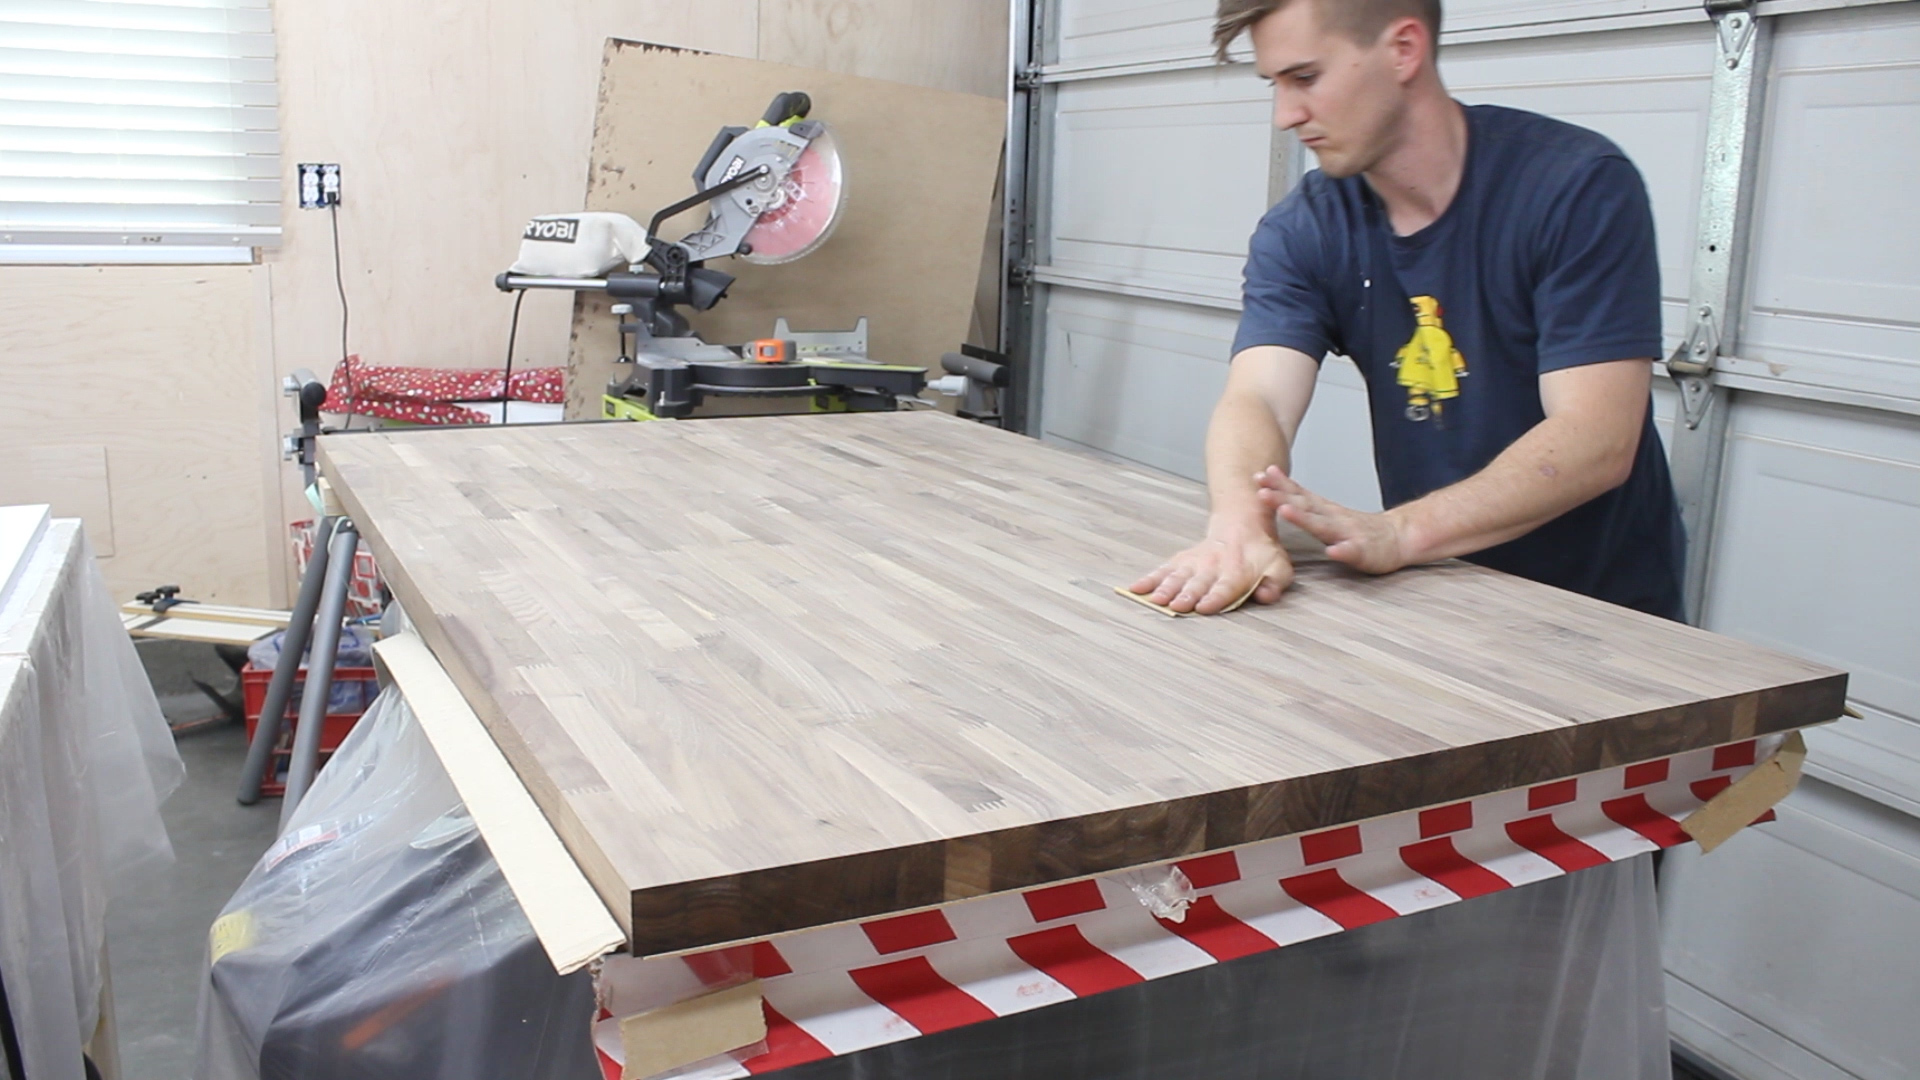
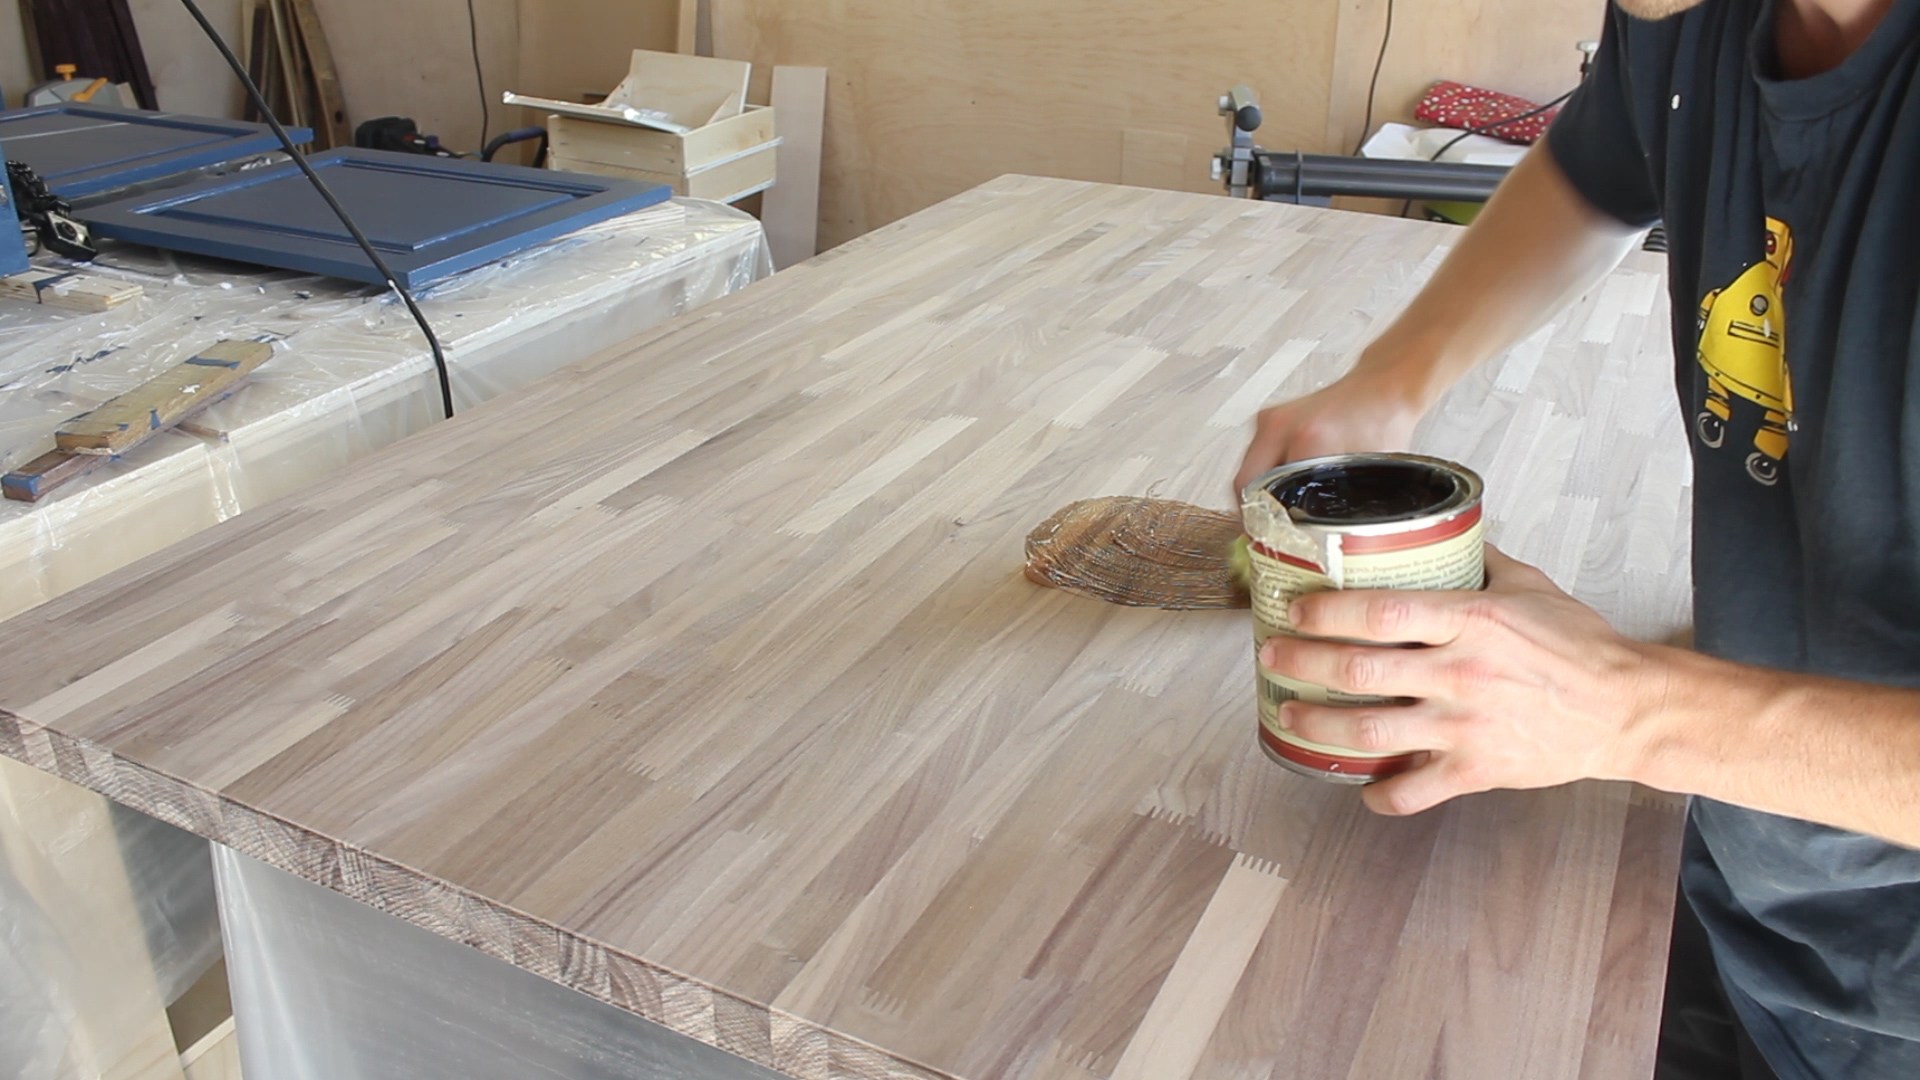
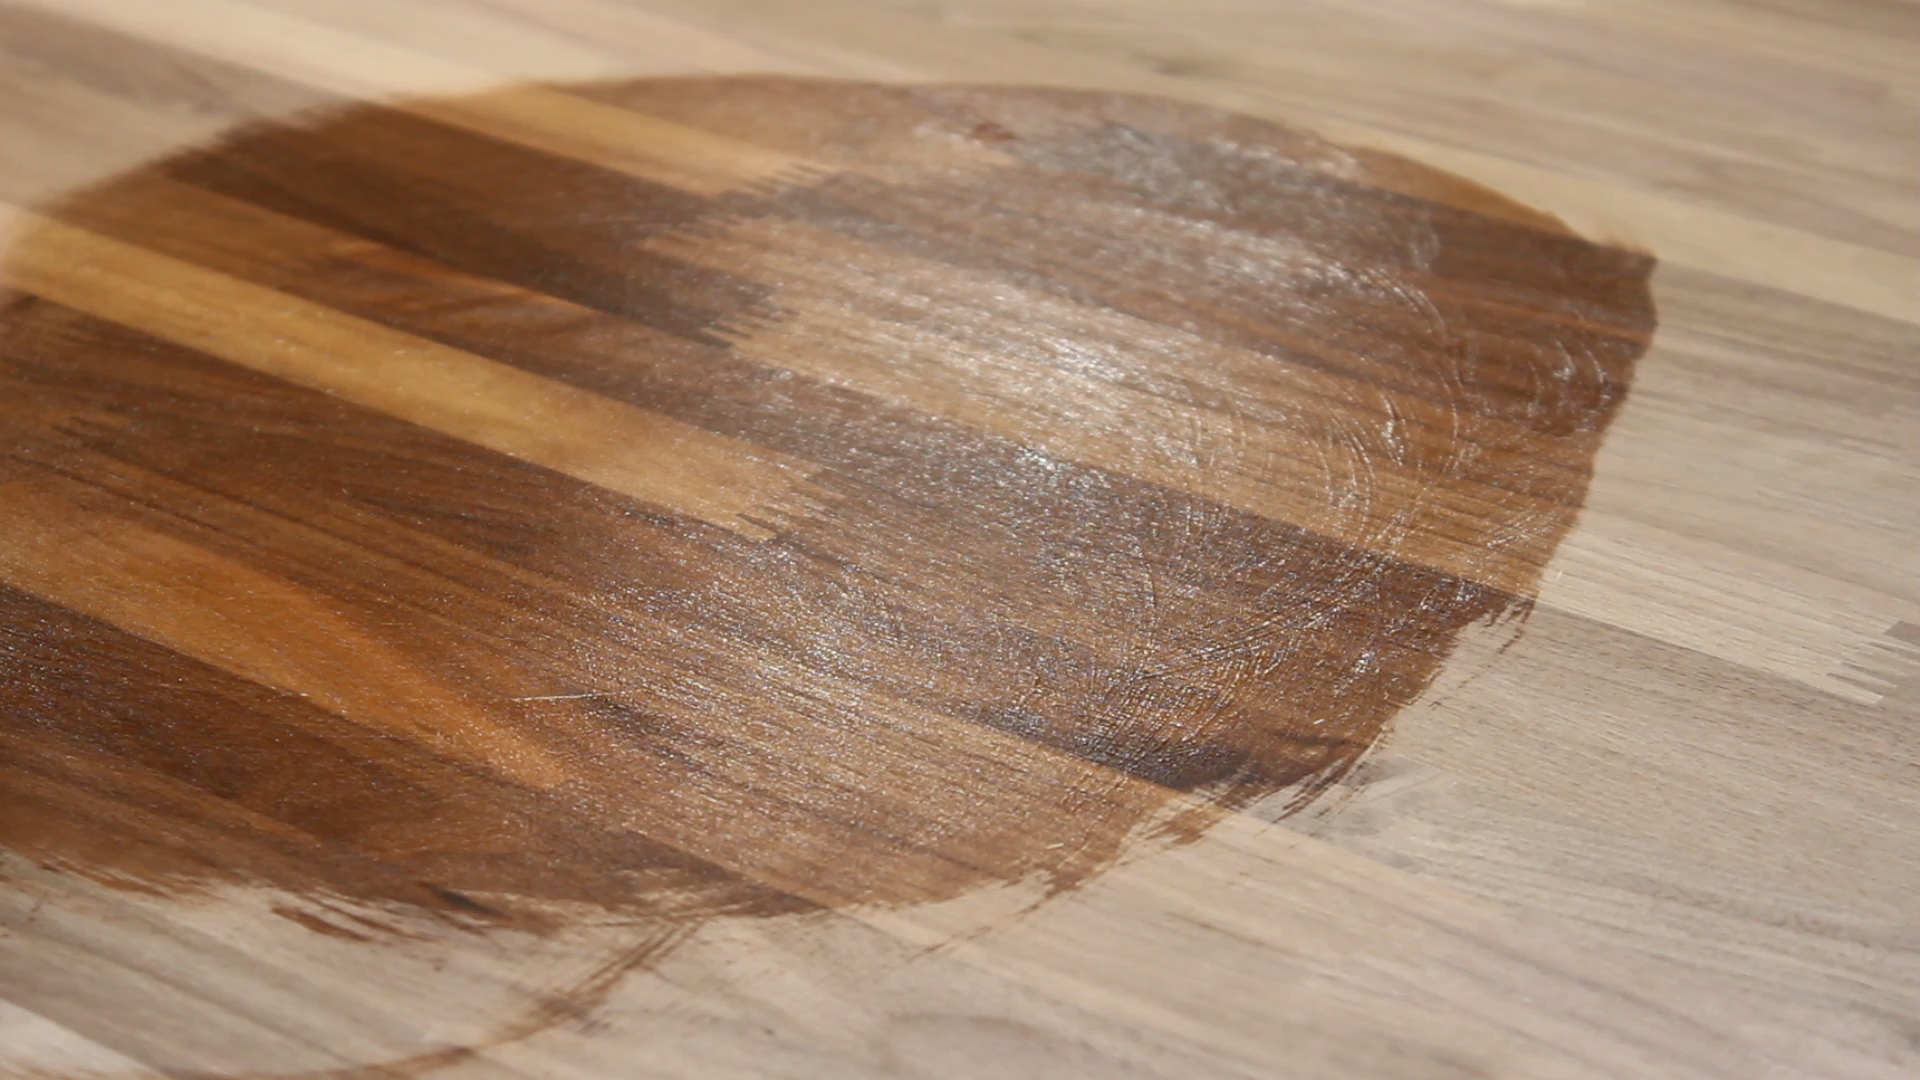
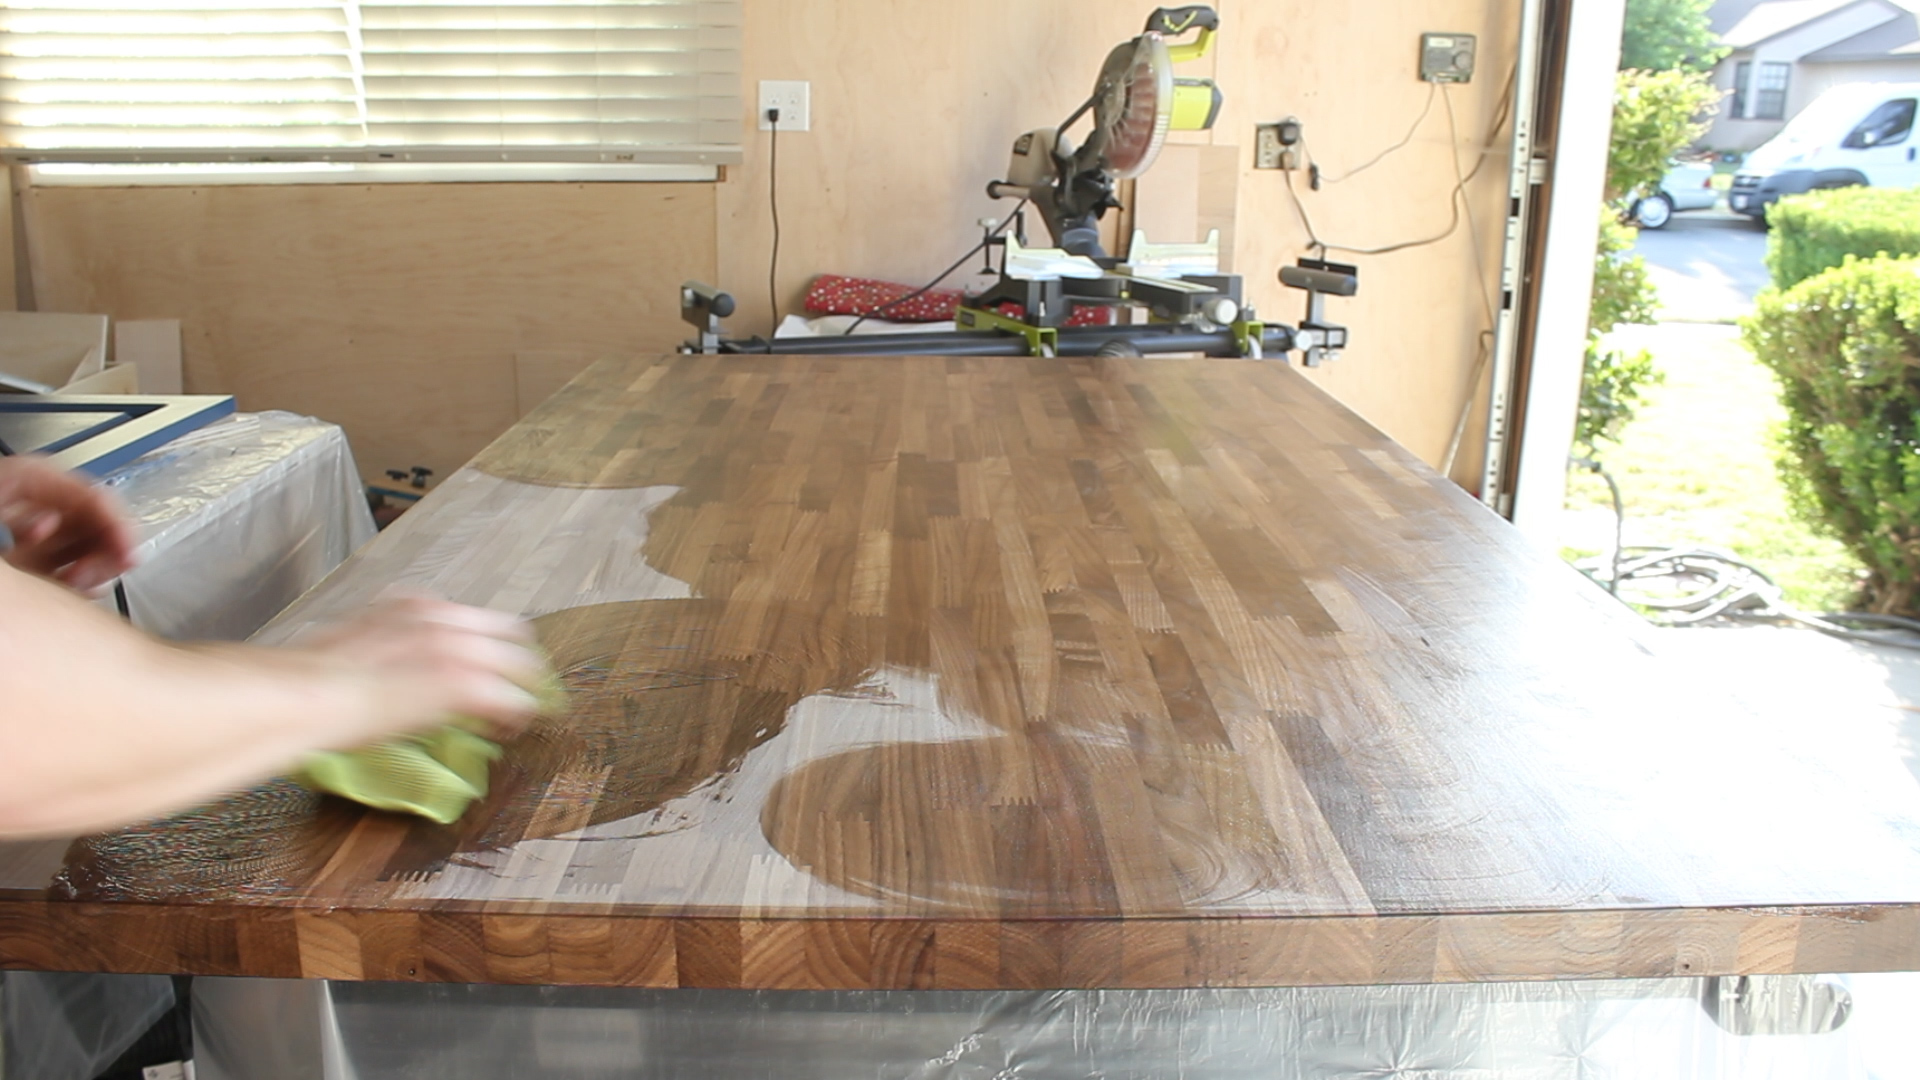
The block comes sanded to 120 on one side (Pic 1), so step one of this (Pic 2) was to sand up to 300 grit as well as break the sharp edges. Then, after cleaning off all sawdust with compressed air (not picture), in Pics 3-6, I used Emmet's The Good Stuff butcher block finisher to finish it. You rub in the goop in a circular fashion, working it into the wood, then come back after 15 minutes and wipe off excess using a straight motion that runs with the grain.
Few tips I got for this. First, finish all 6 sides of the block at once as to avoid uneven exposure to elements which could cause cupping and/or warp. Two, don't spray water on the unfinished wood to raise the grain - that can also lead to warping over such a large surface. I headed their advice and did everything they recommended and it came out freaking perfect (Pic 7). I did go back after 12 hours, sand down with 400 grit lightly, clean off with a damp rag, and then apply one more coat of the finish in the same fashion as before (not pictured).
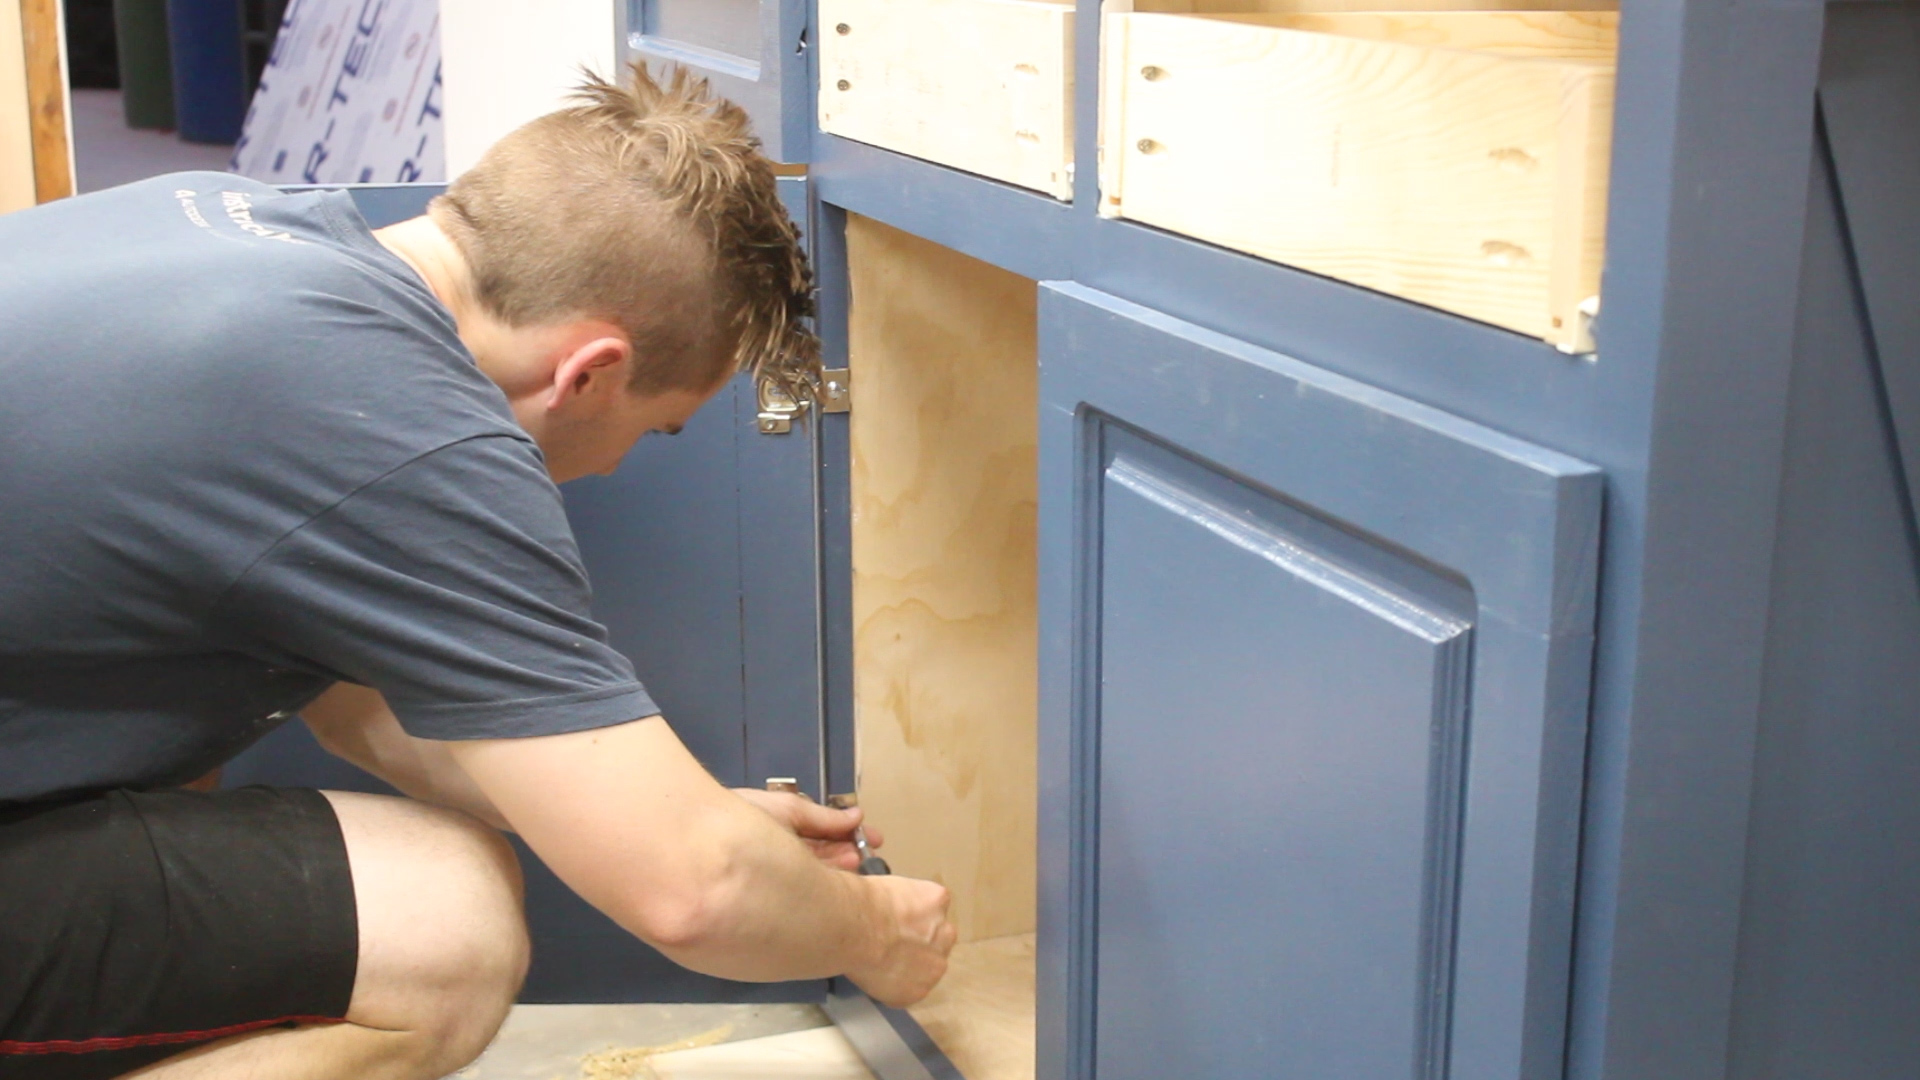
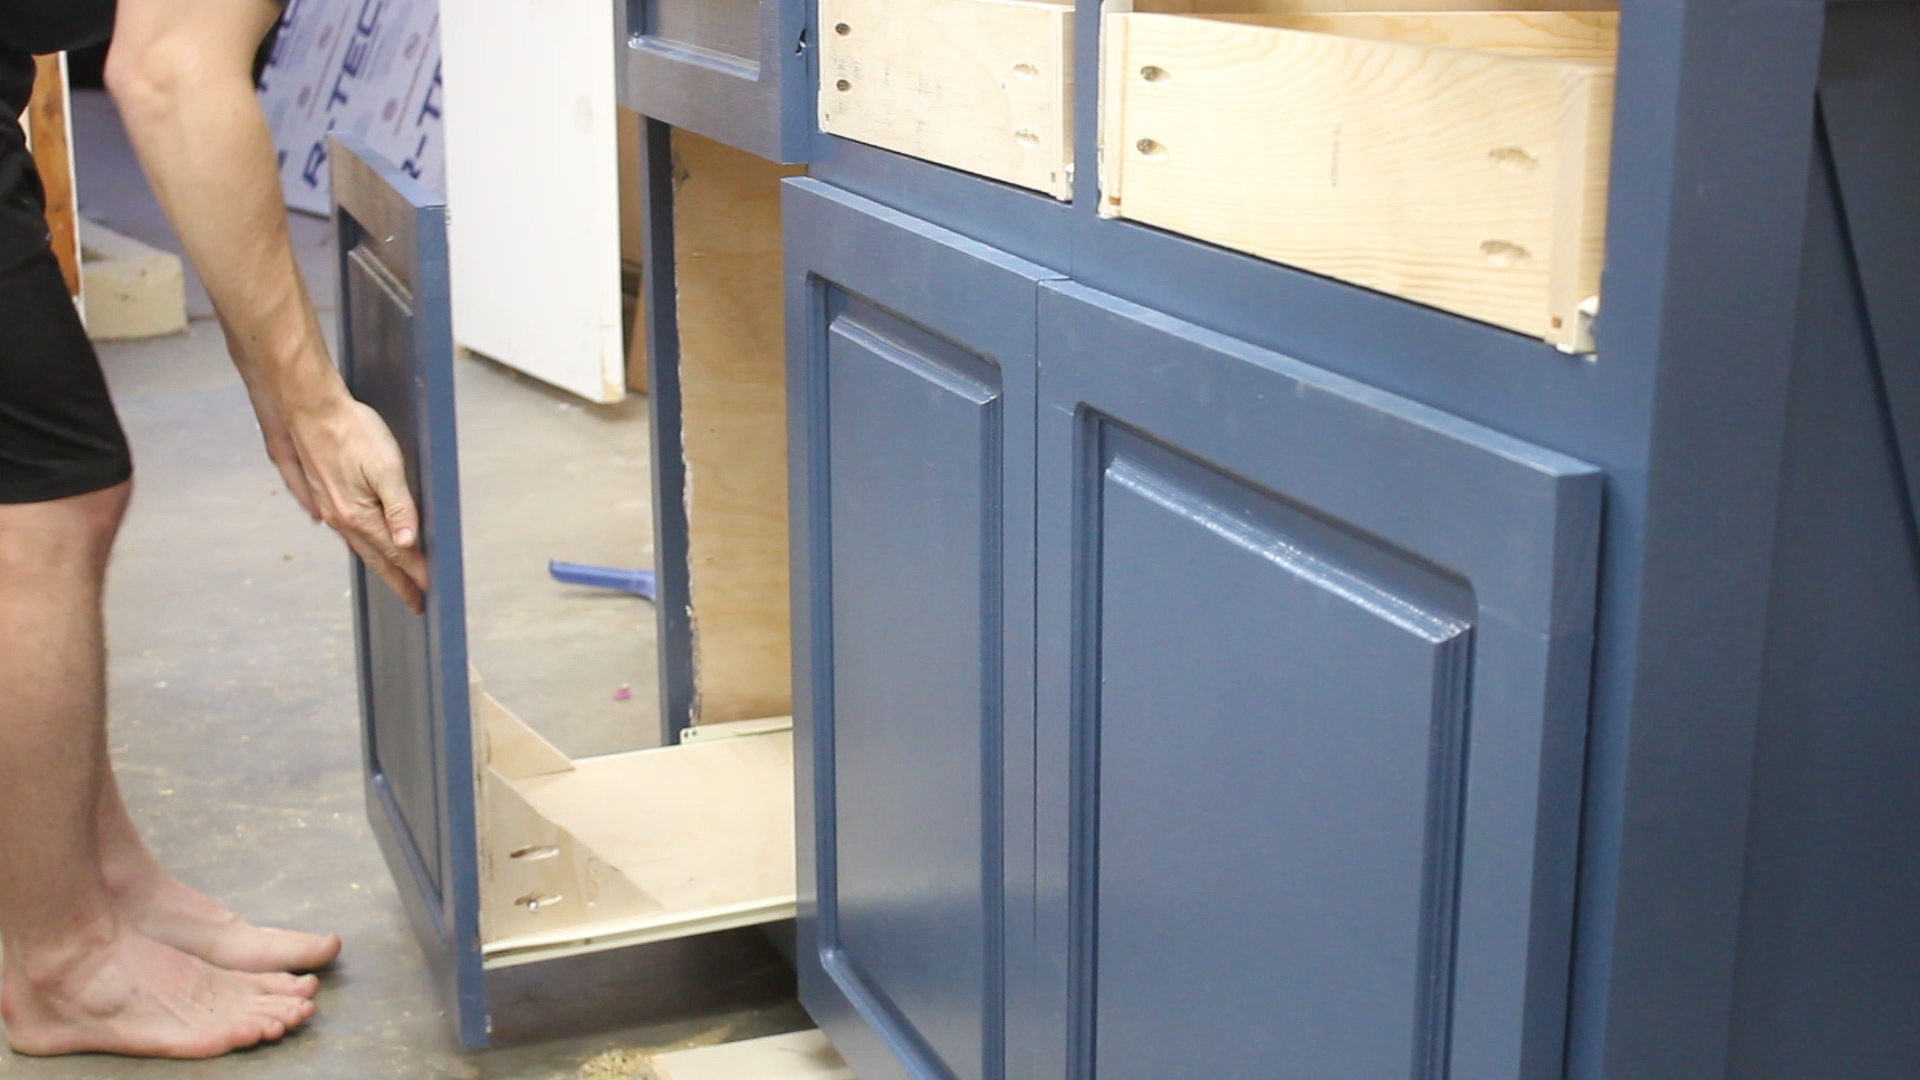
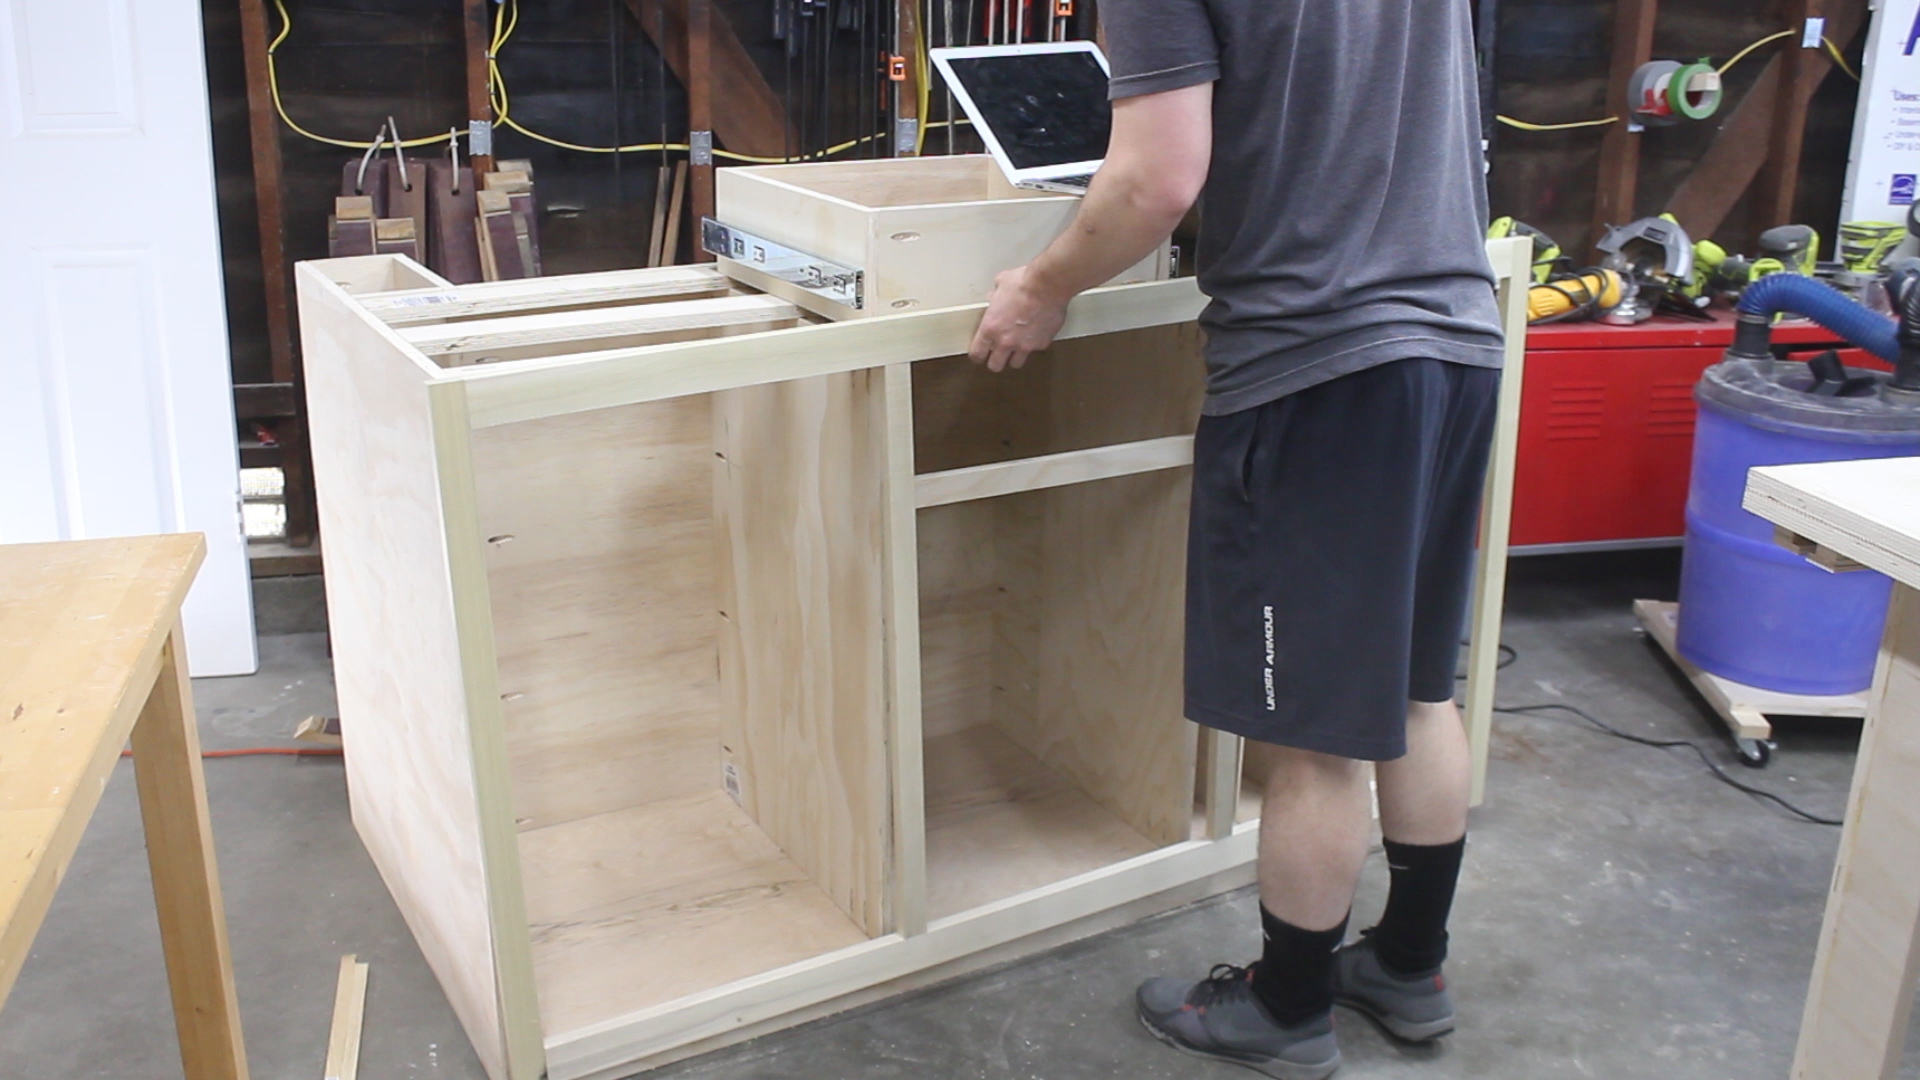
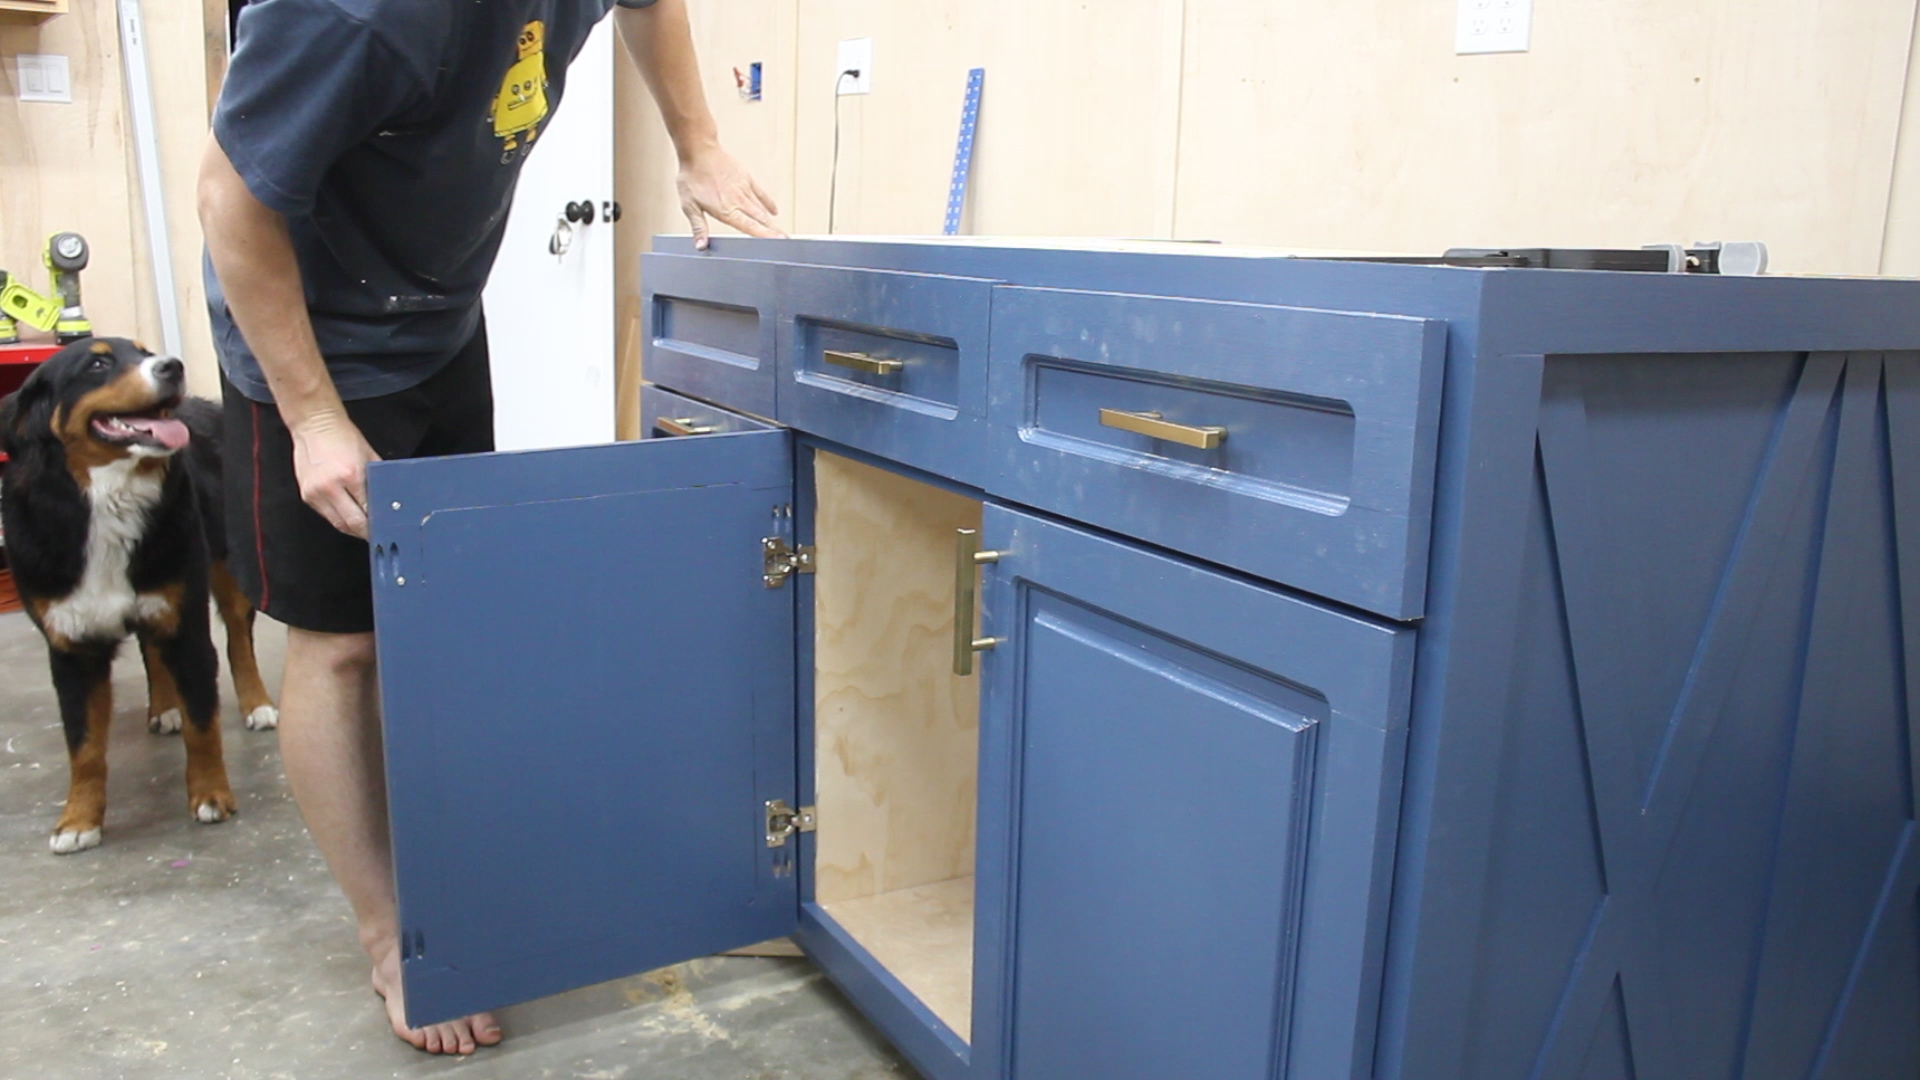
This wasn't very fun and I dreaded it.Pic 1 shows me installing the trashcan slide from the backside. I made this little base out of scrap plywood and attached using 1 1/4" inch pocket hole screws, and then attached drawer slides to the boarder.
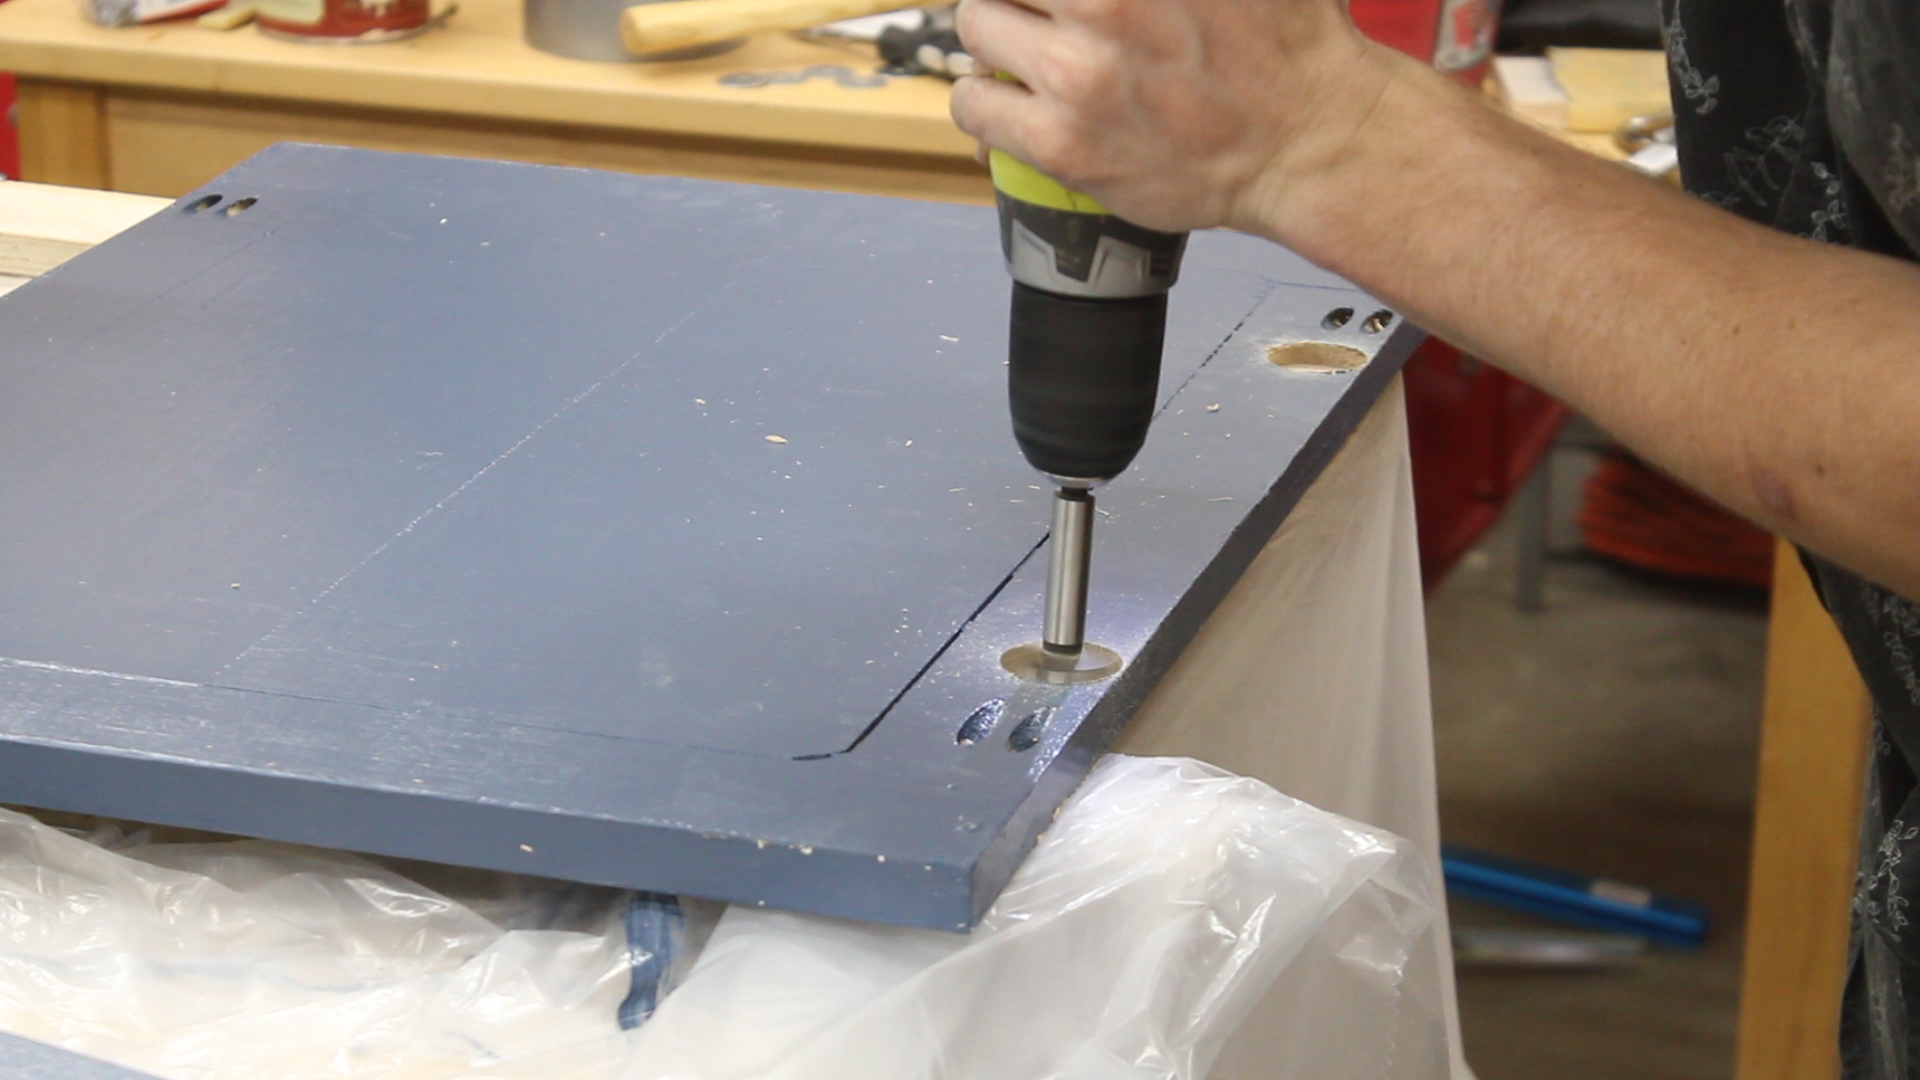
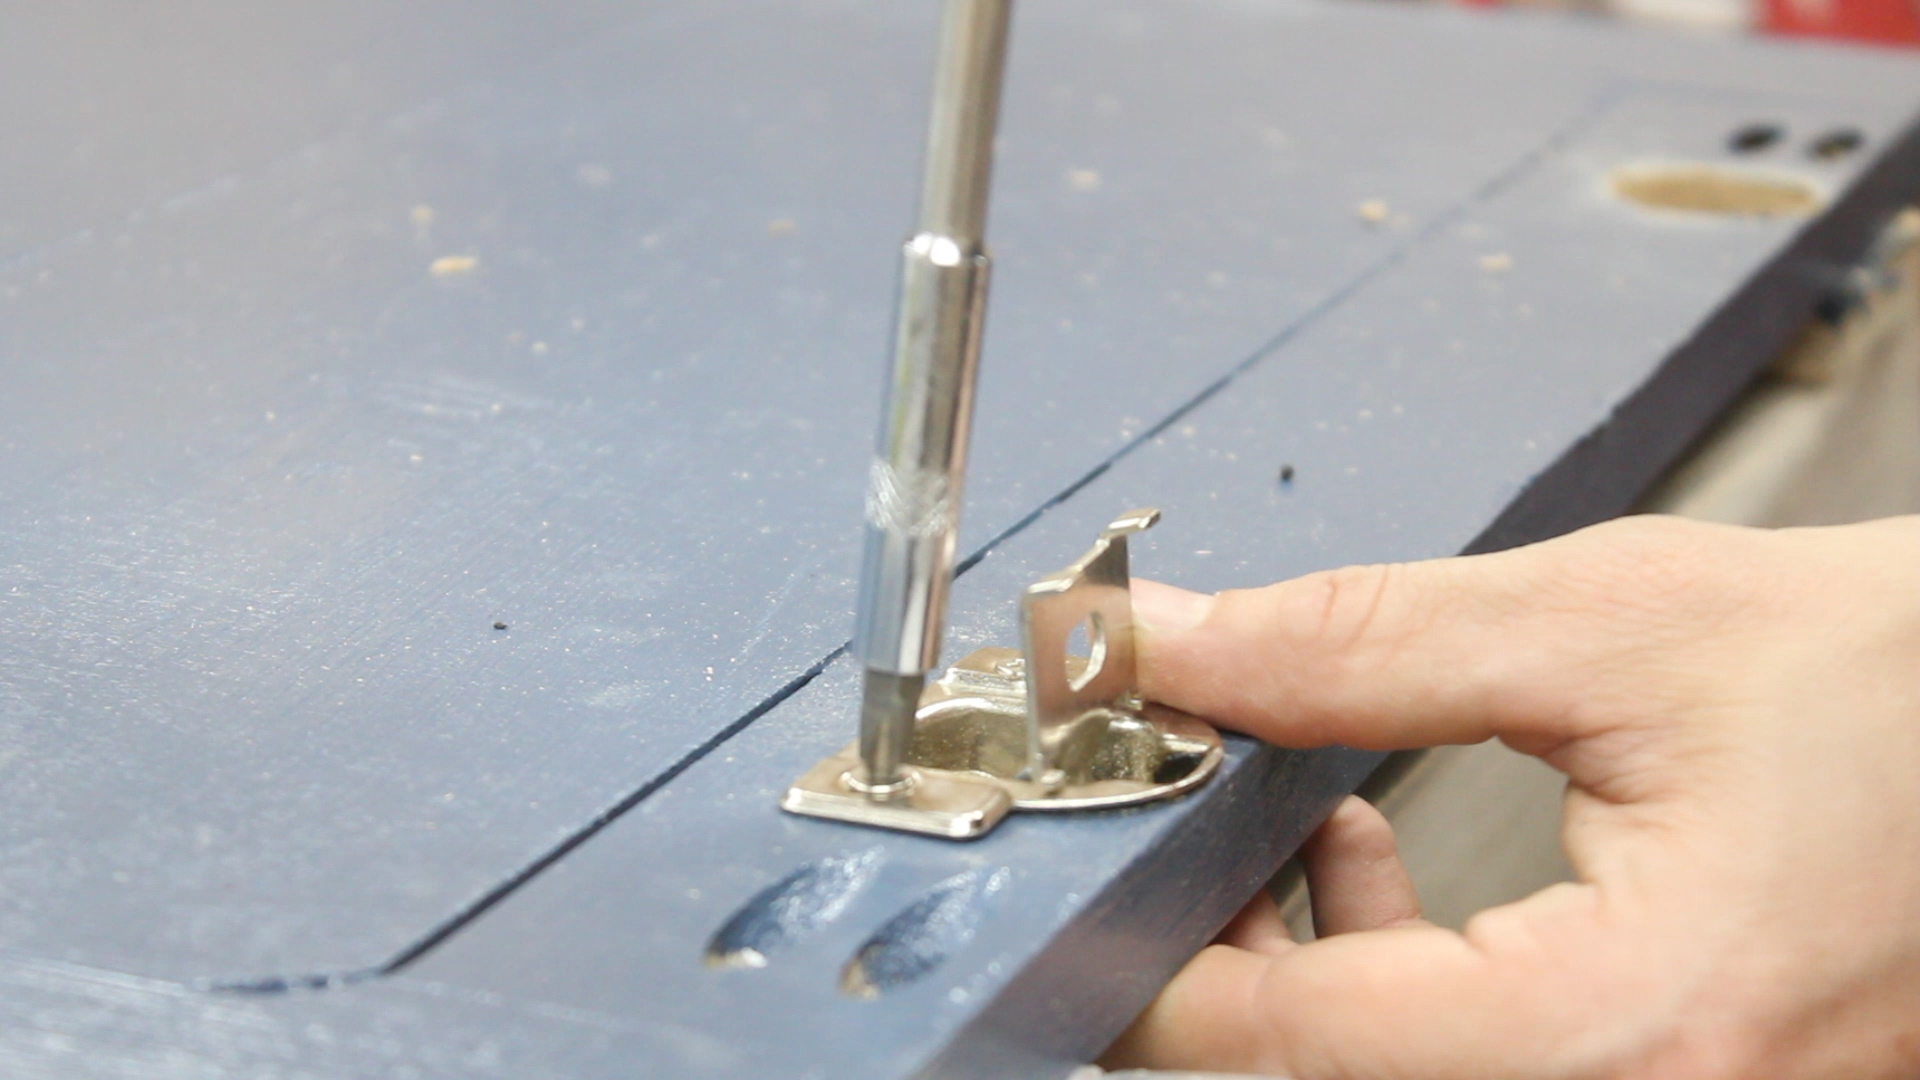
Pic 2 shows drilling a recess in the back sides of the other two cabinets that would accept hinges. This was nerve racking, but worked out in the end. I then pre-drilled, screwed in, and attached the cabinets to the hardwood framing (Pics 3-5).
Few tips here:
Buy new hinges - I used old ones from a kitchen remodel and although they worked, newer hinges allow you to install and adjust things on a micro level to get even. With mine, I had no wiggle room, so I had to be extra precise.
Take your damn time! I spent about 5 hours doing this (on and off) measuring, marking, drilling, checking again, attaching, and just generally getting everything lined up so it was perfect. This has to be perfect, and I had come so far in this build, I wasn't about to waste my efforts
Pic 6 shows me putting in the trash can drawer.
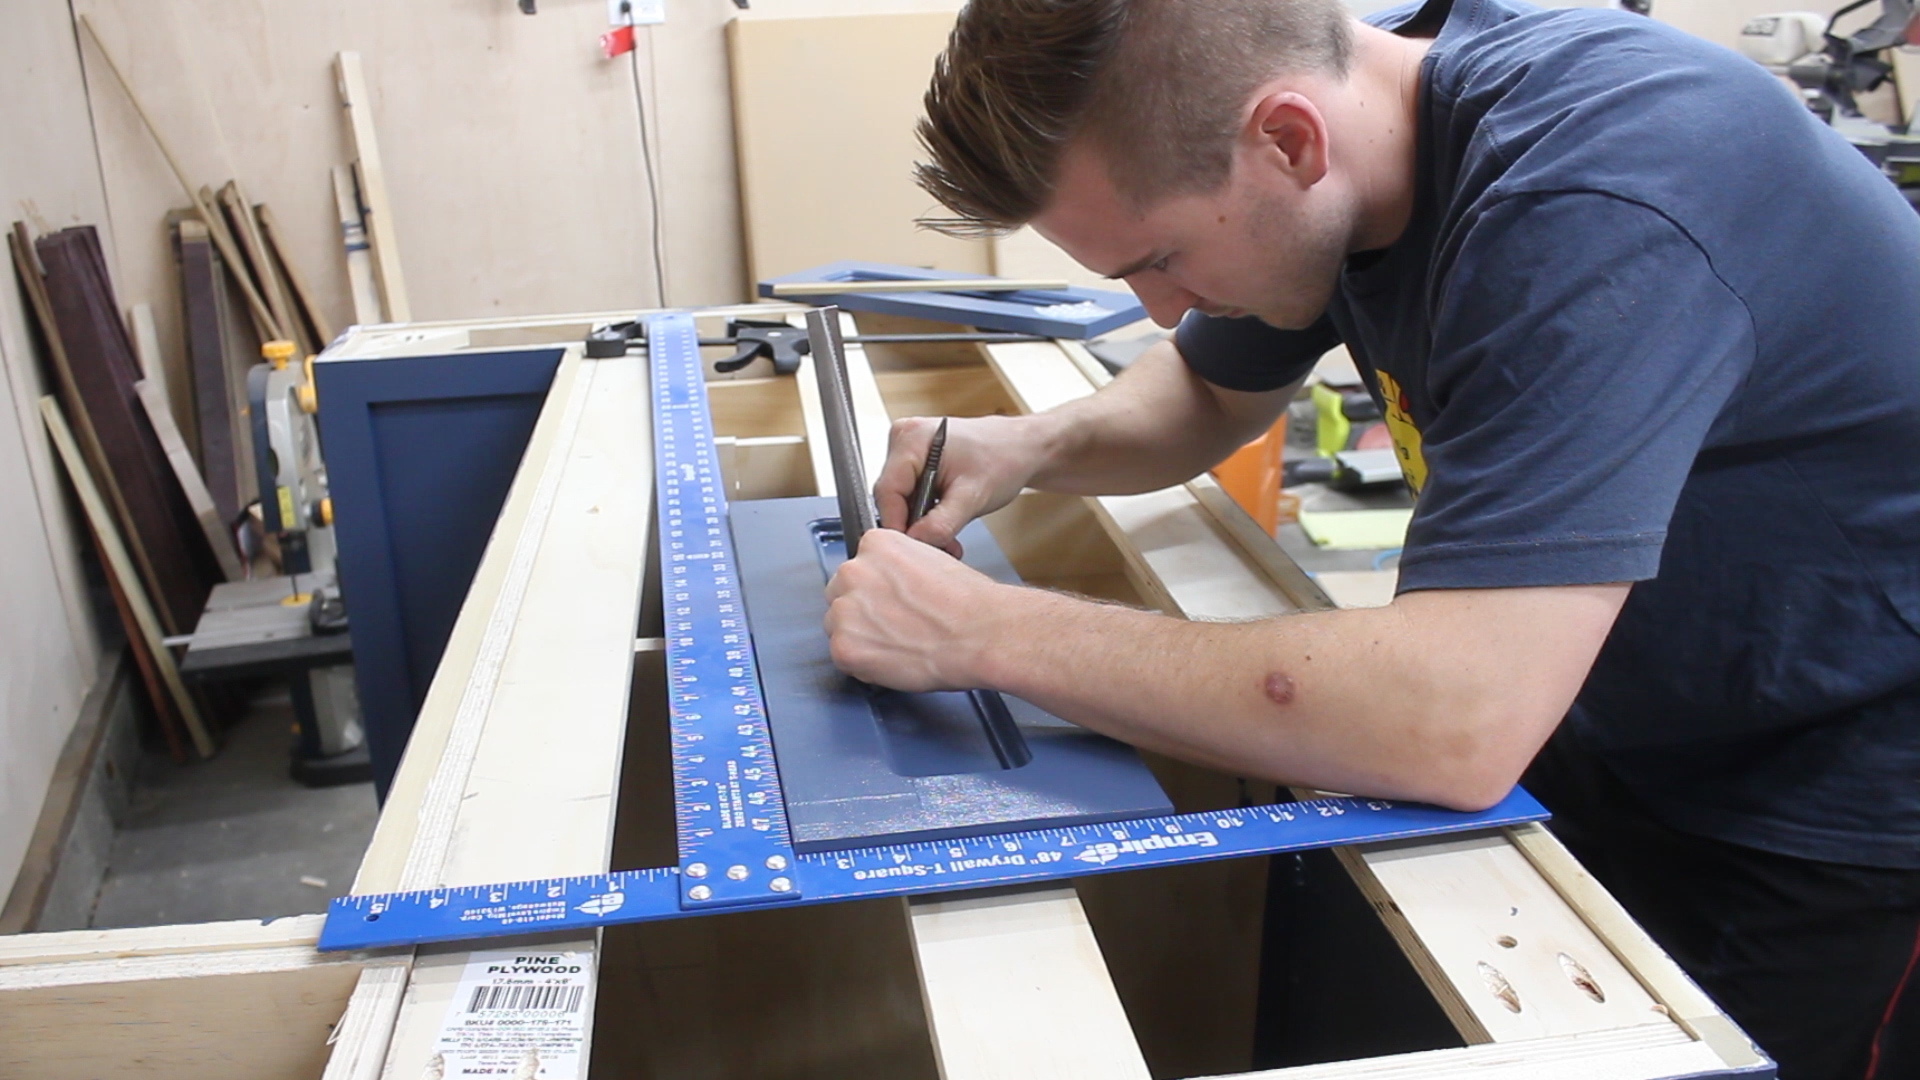
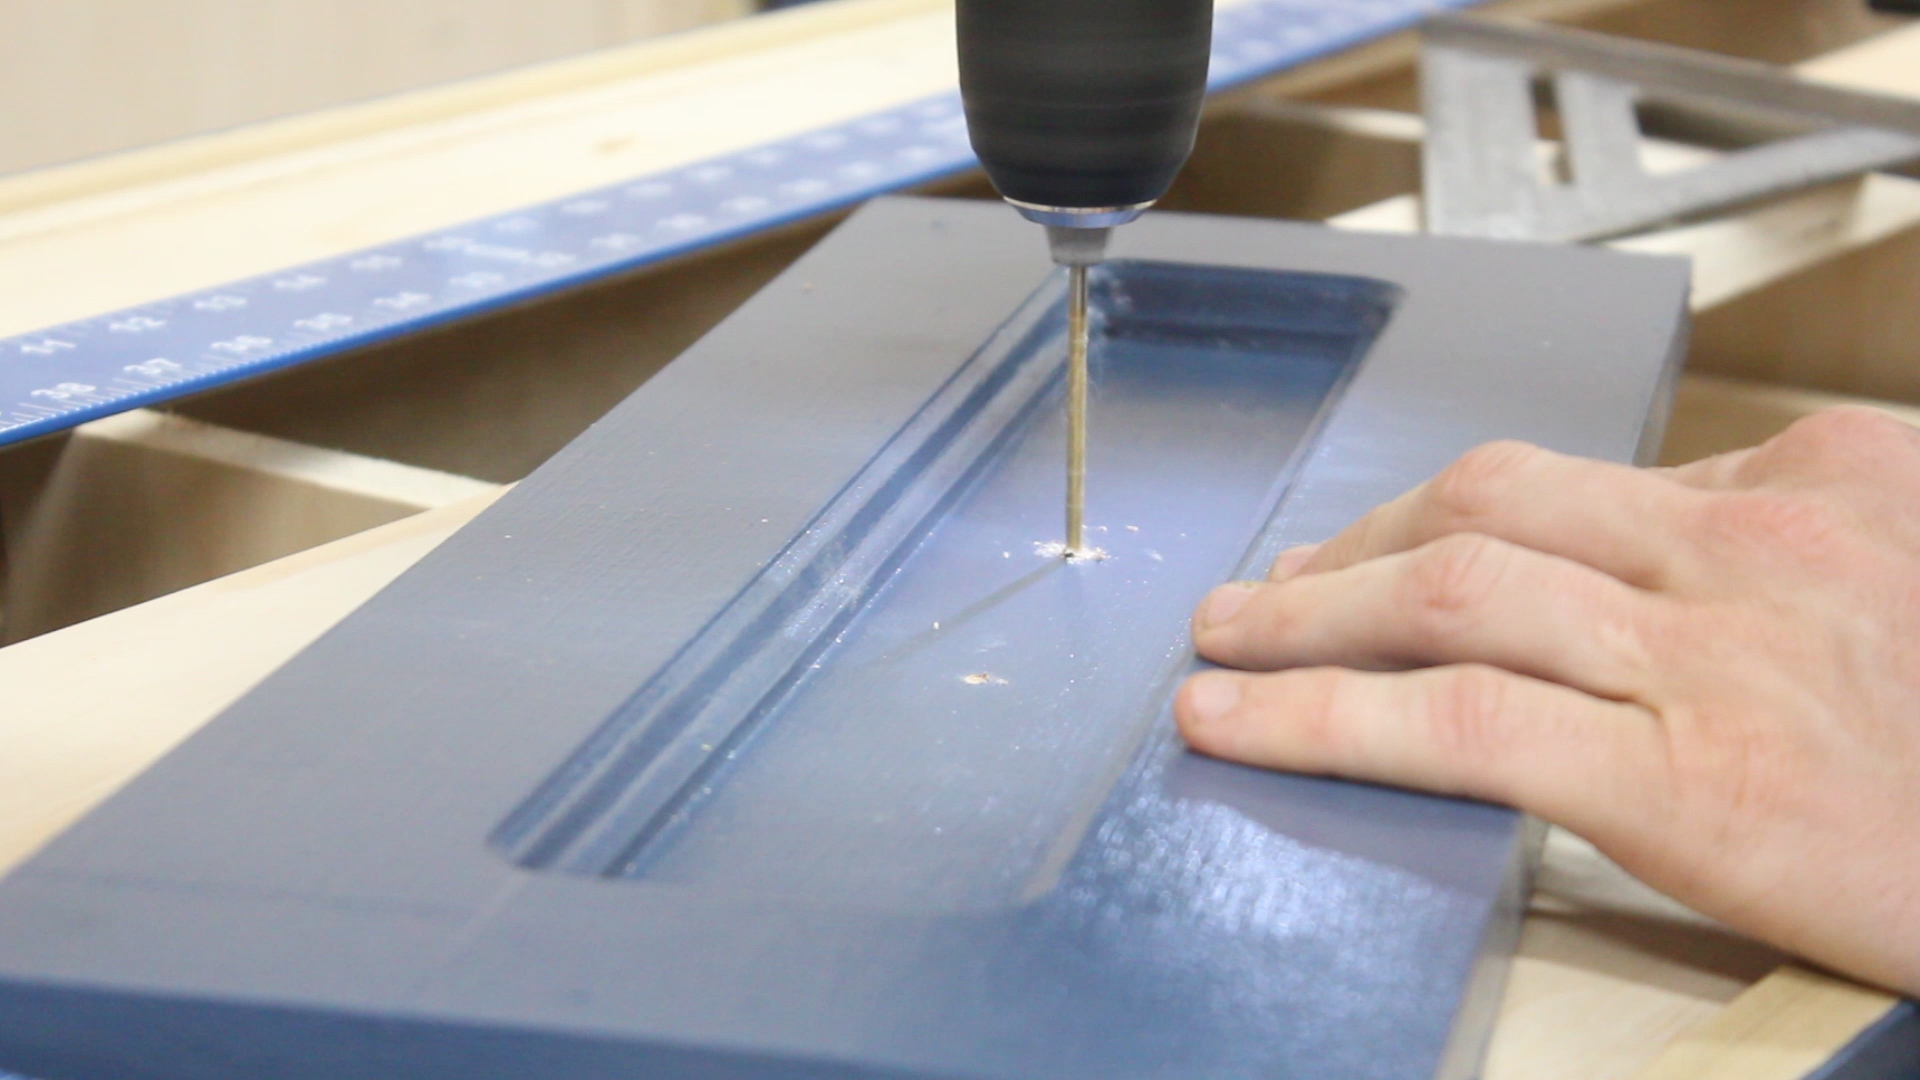
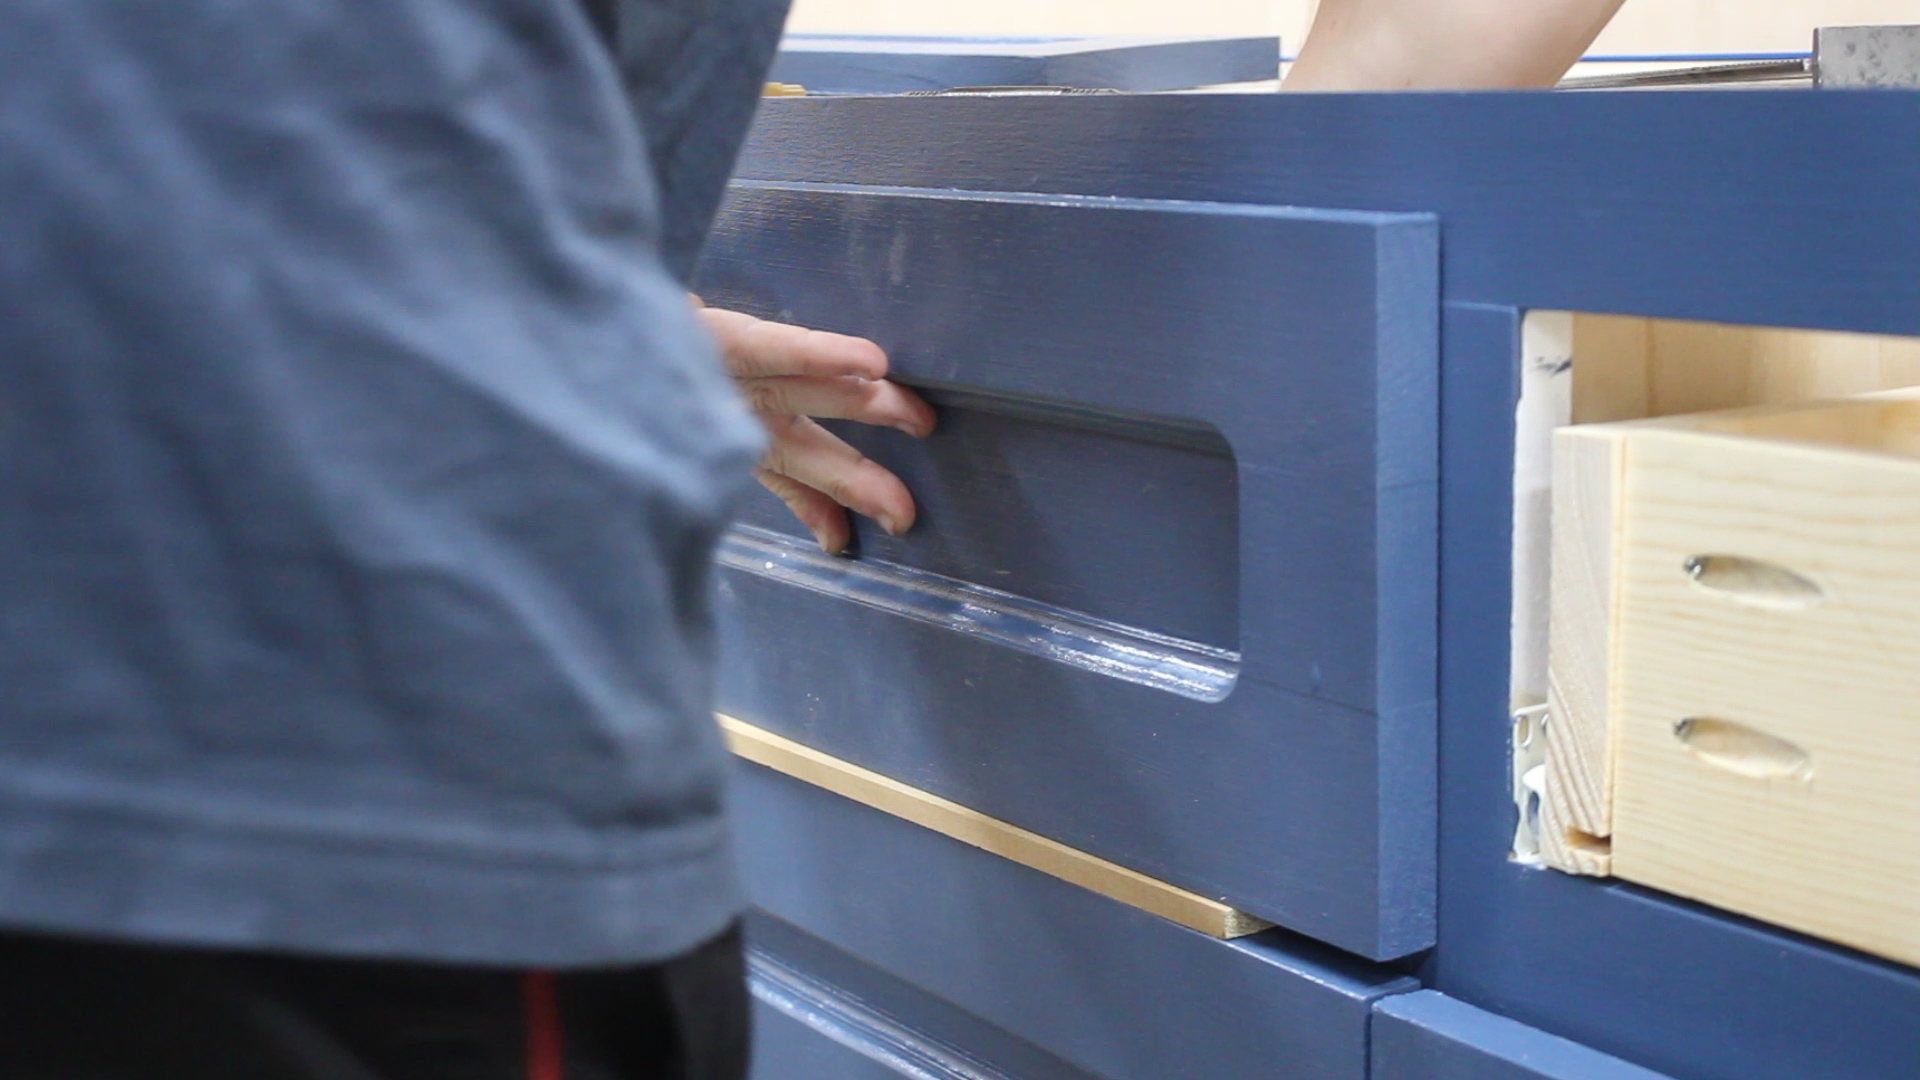
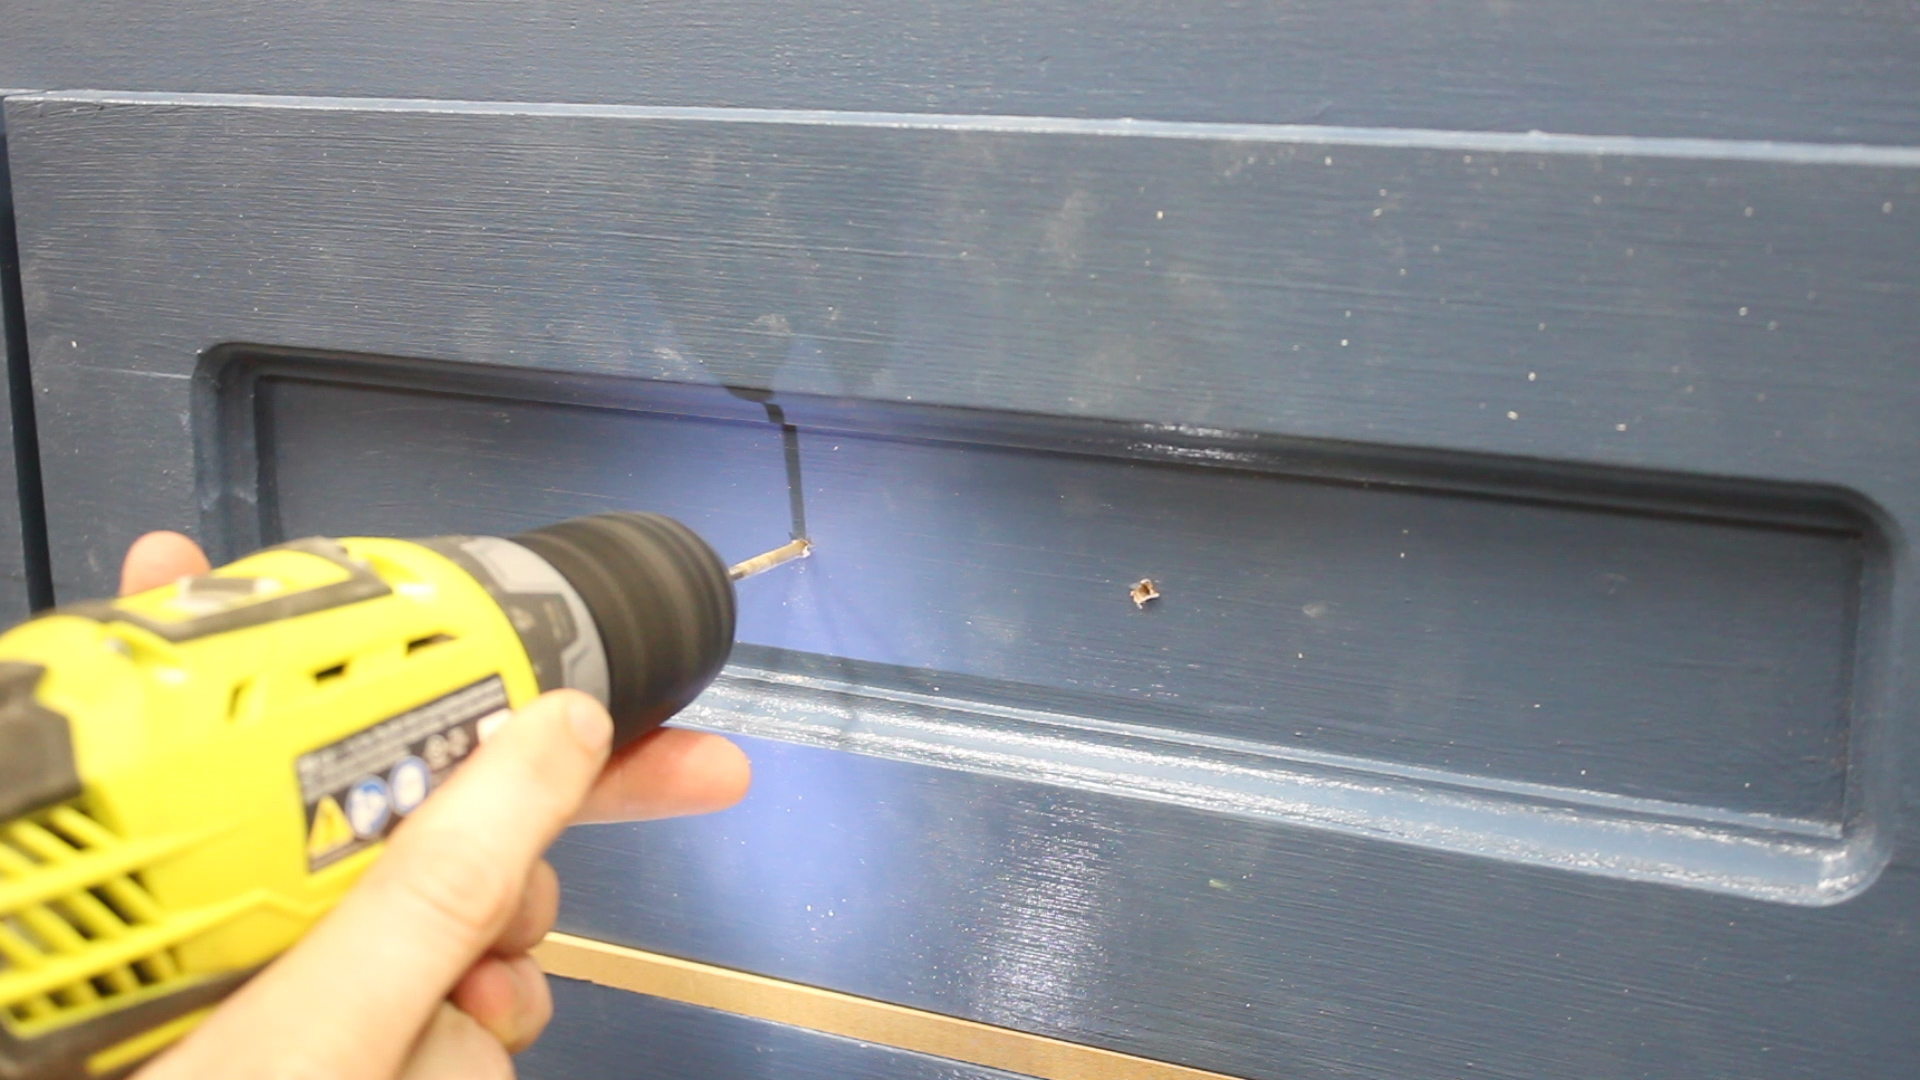
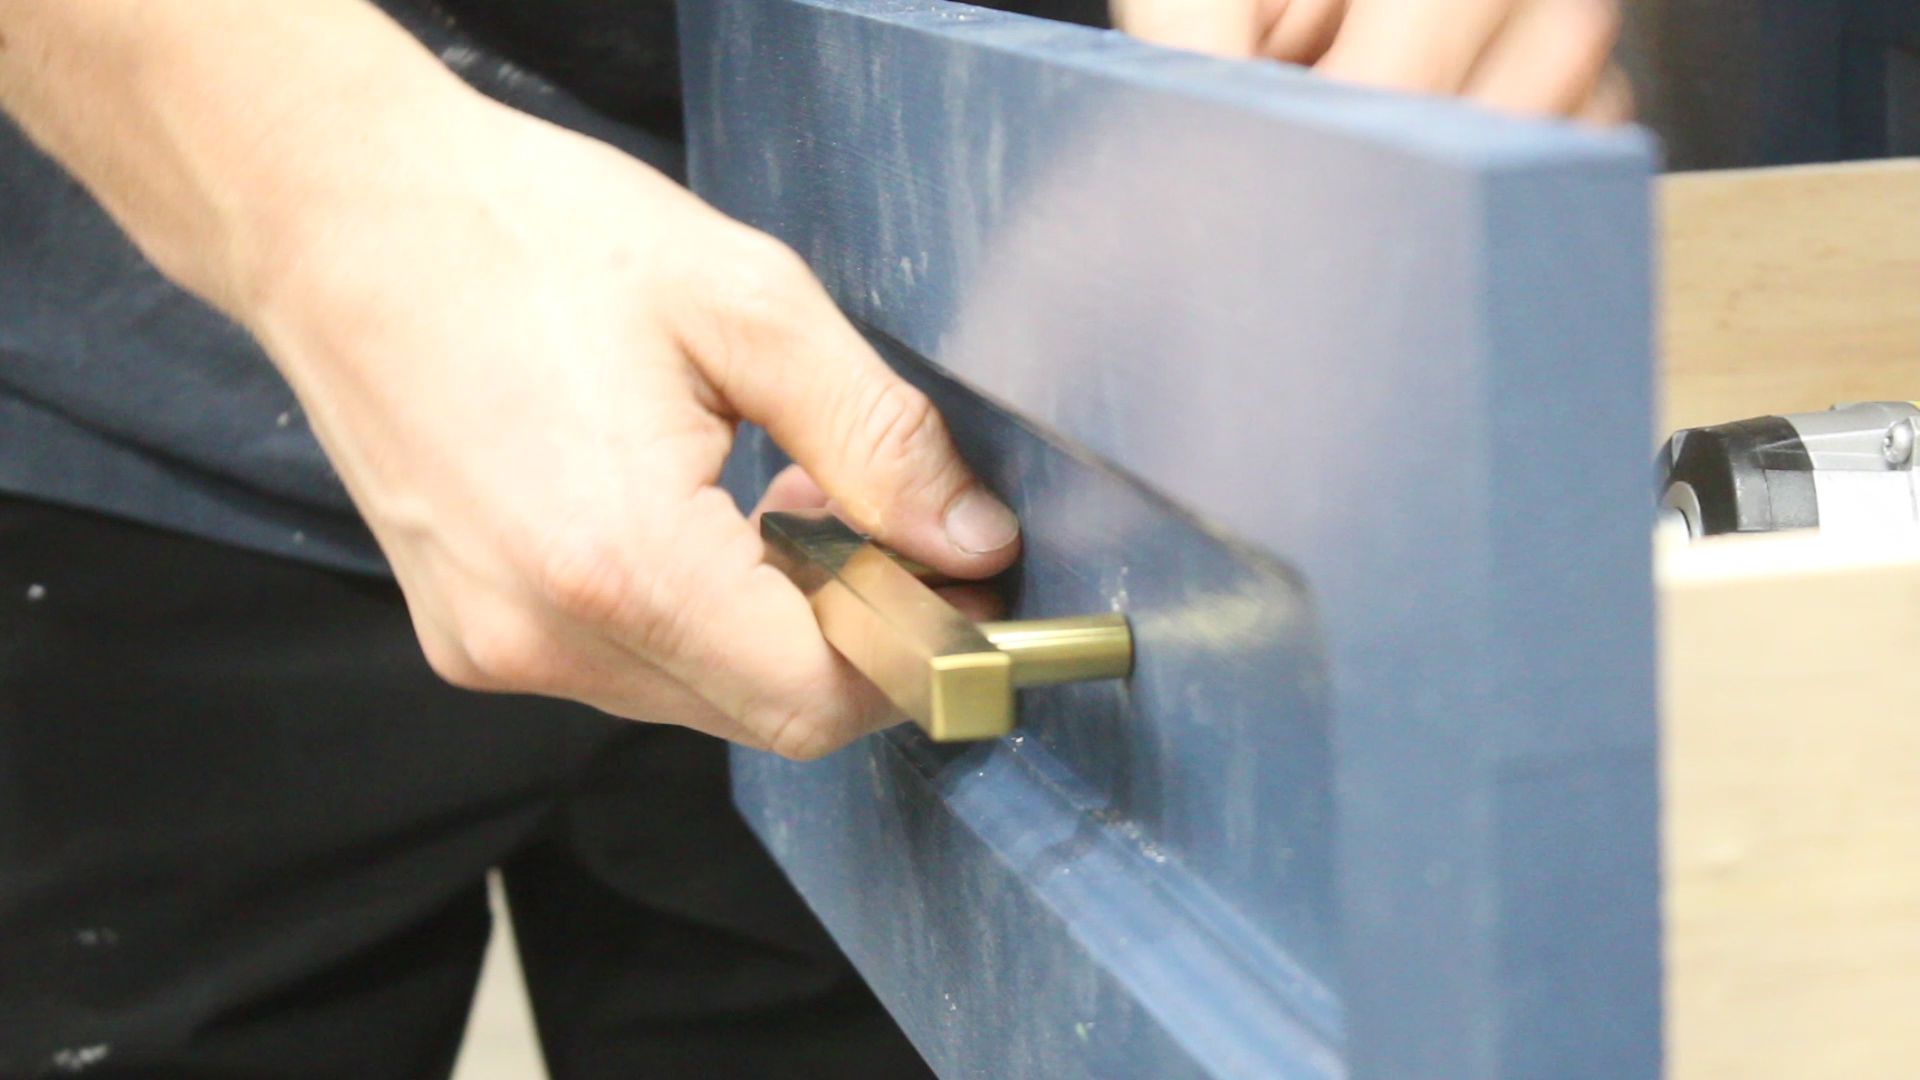
Last up was to install the drawer faces. I carefully mesaured out the centers of each drawer using a drywall square and speed square, and then used a punch to mark the locations for holes (Pic 1). It also helped having one set of hardware on hand to confirm your measurements were accurate.
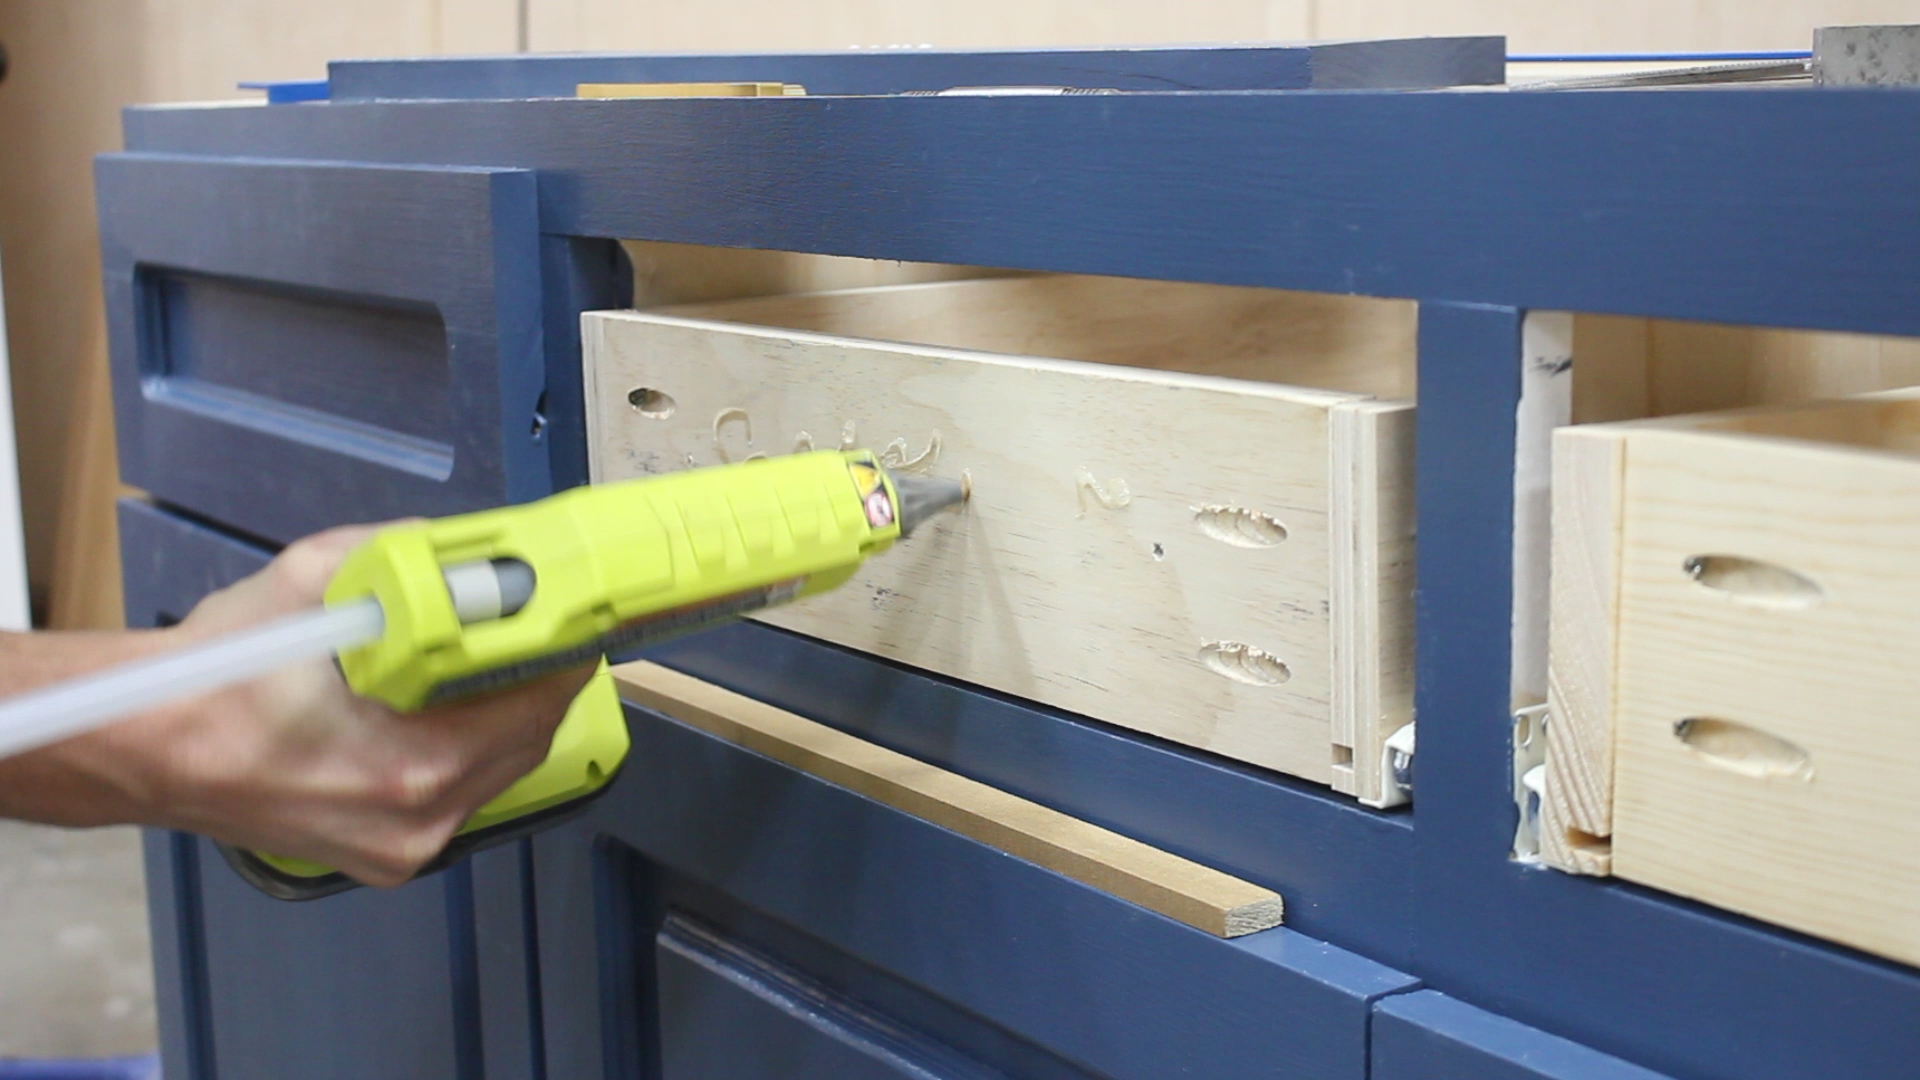
Once I did, I pre-drilled holes to accept screws (Pic 2). To hold drawers in place, I used hot glue and pressed the drawer face up against the drawer itself, using a spacer to keep things even (Pics 3-4). I then could use the same pre drilled holes to drill through the drawer faces and through the drawer (Pic 5).
Finally, I could attach drawer handles from the reverse side using the hardware included in the kit (Pic 6). I repeated this process for the cabinets below and the trashcan in Pic 7 (easy peasey!).
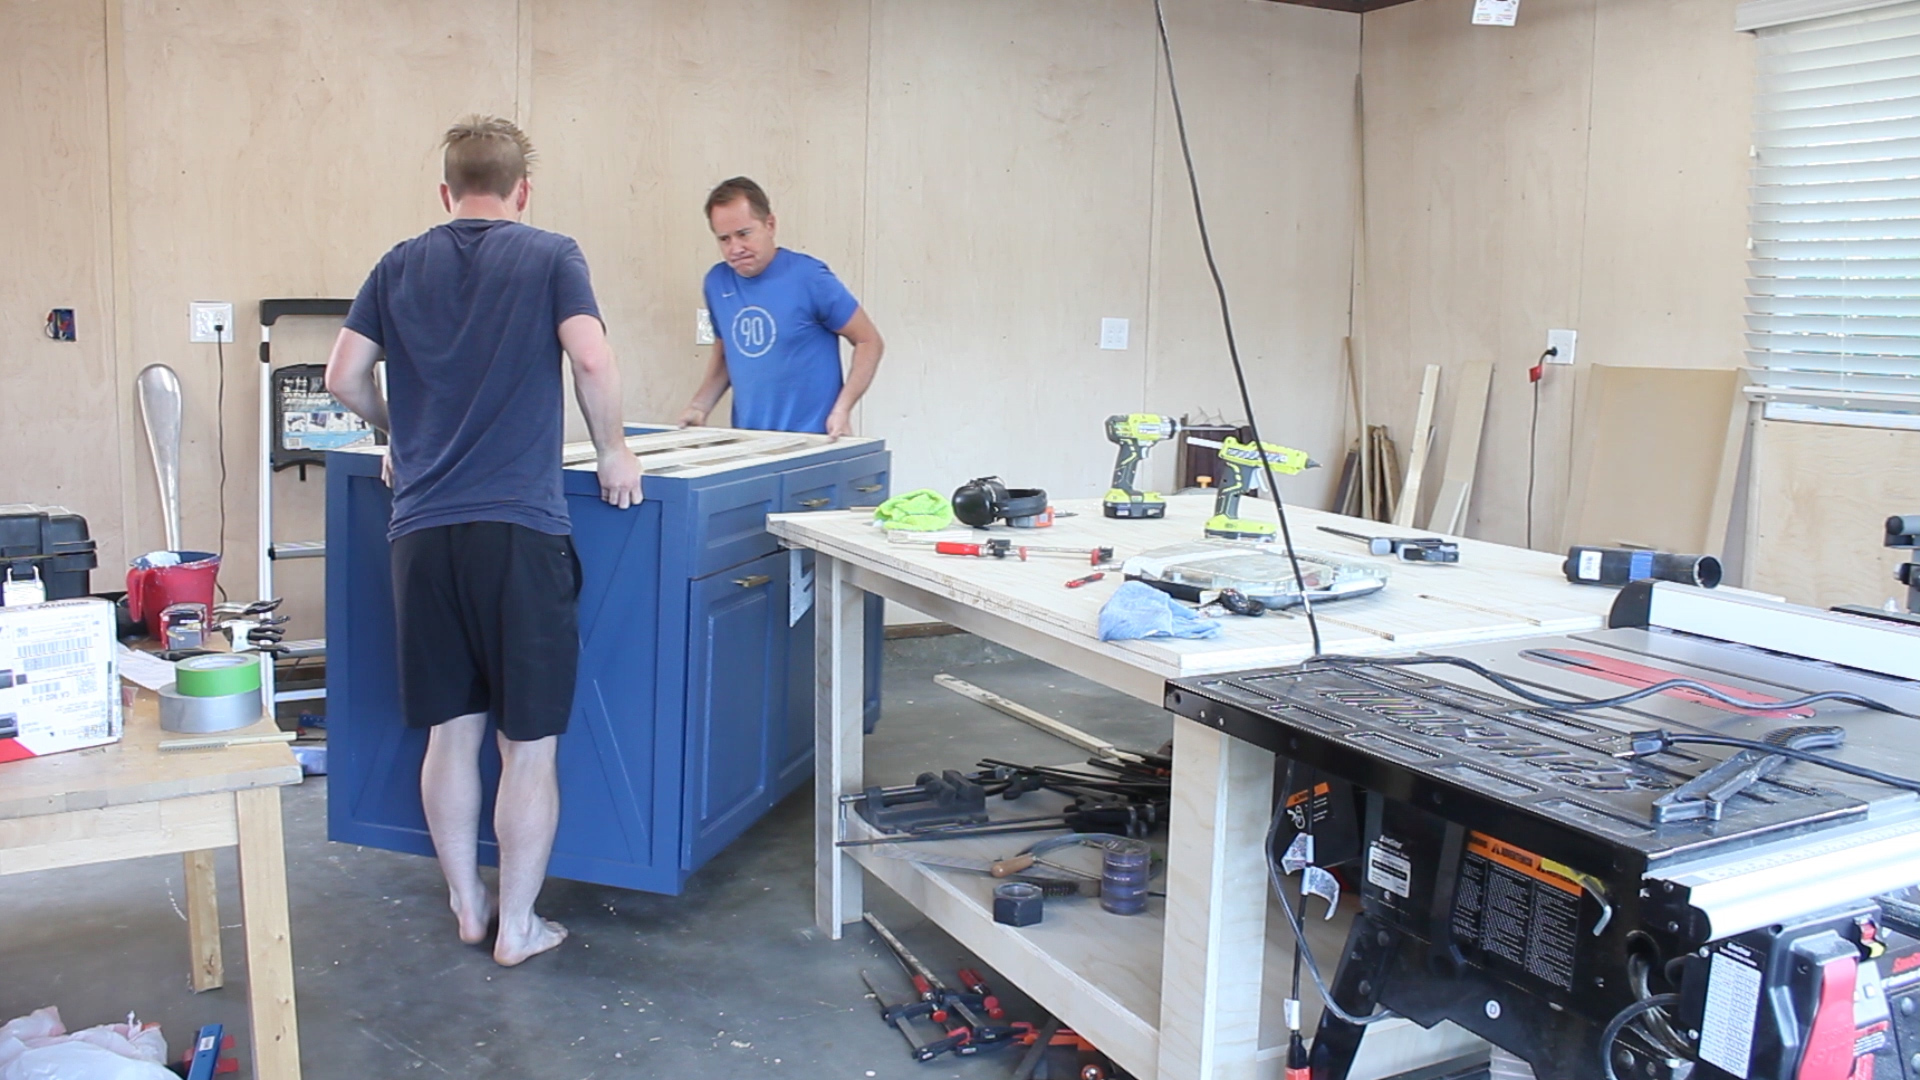
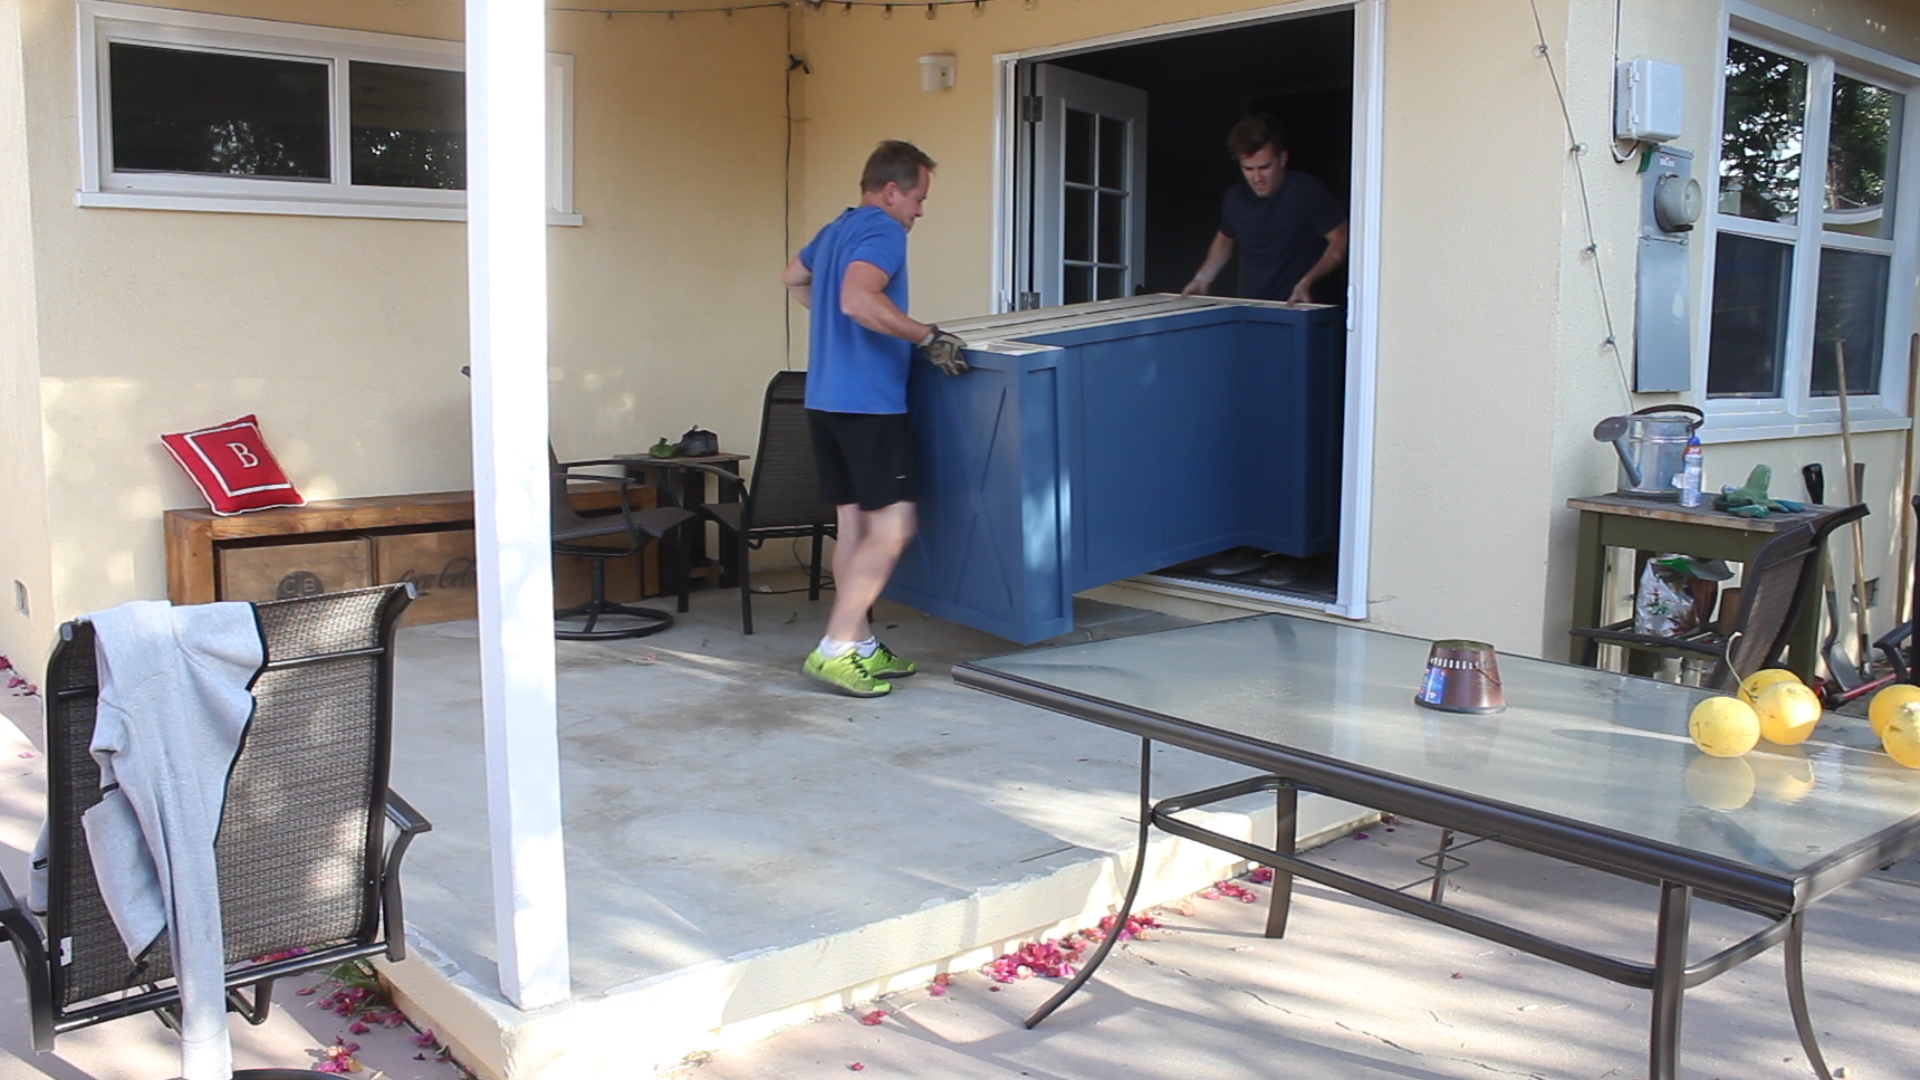
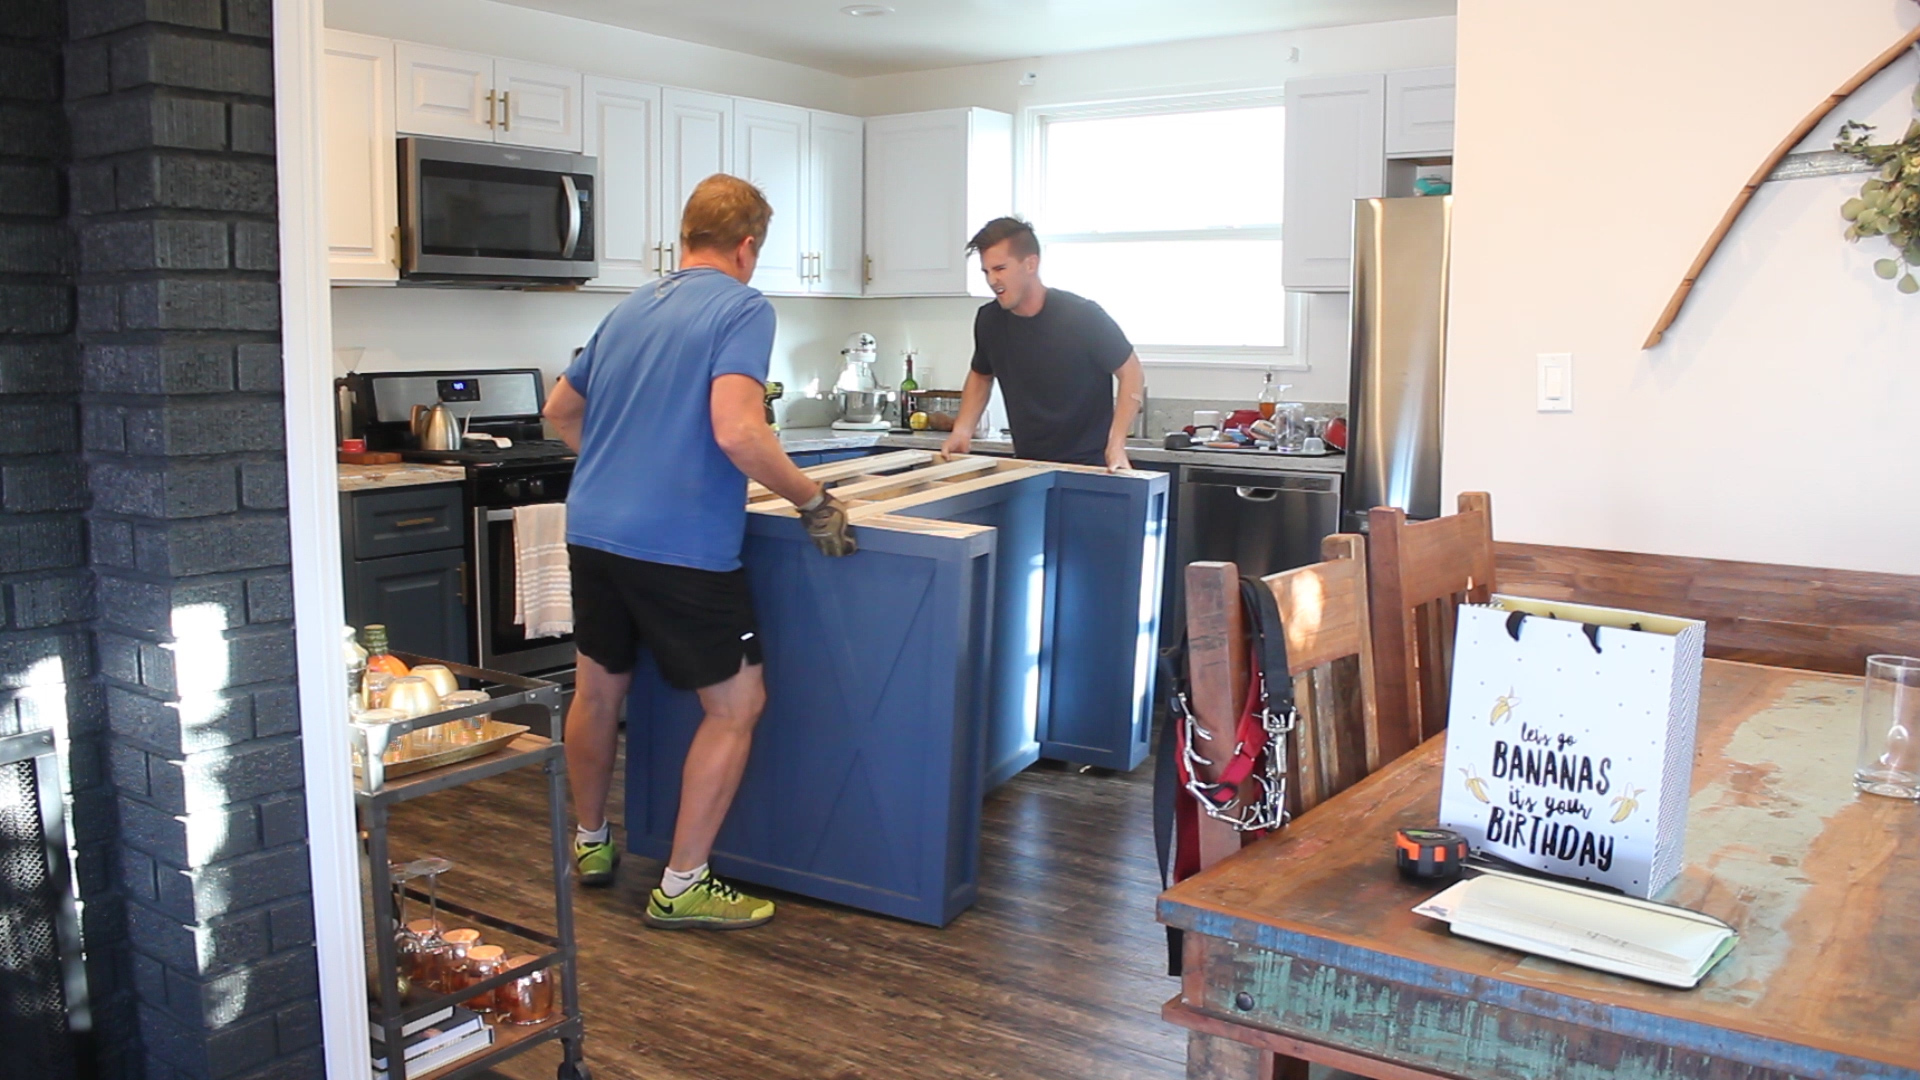
I built my island knowing I could physically move it to its final home. If you don't have a way to move something that is 3 feet wide (Like having double french doors in your backyard - Pic 2), then make sure you account for what you can actually fit!.
My dad and I took the long journey from my garage / shop, around the house, to the back, and into the kitchen (Pics 1-3), and then sat it in its final place. This thing is so dang heavy, I have not and do not plan to actually mount it to the floor.
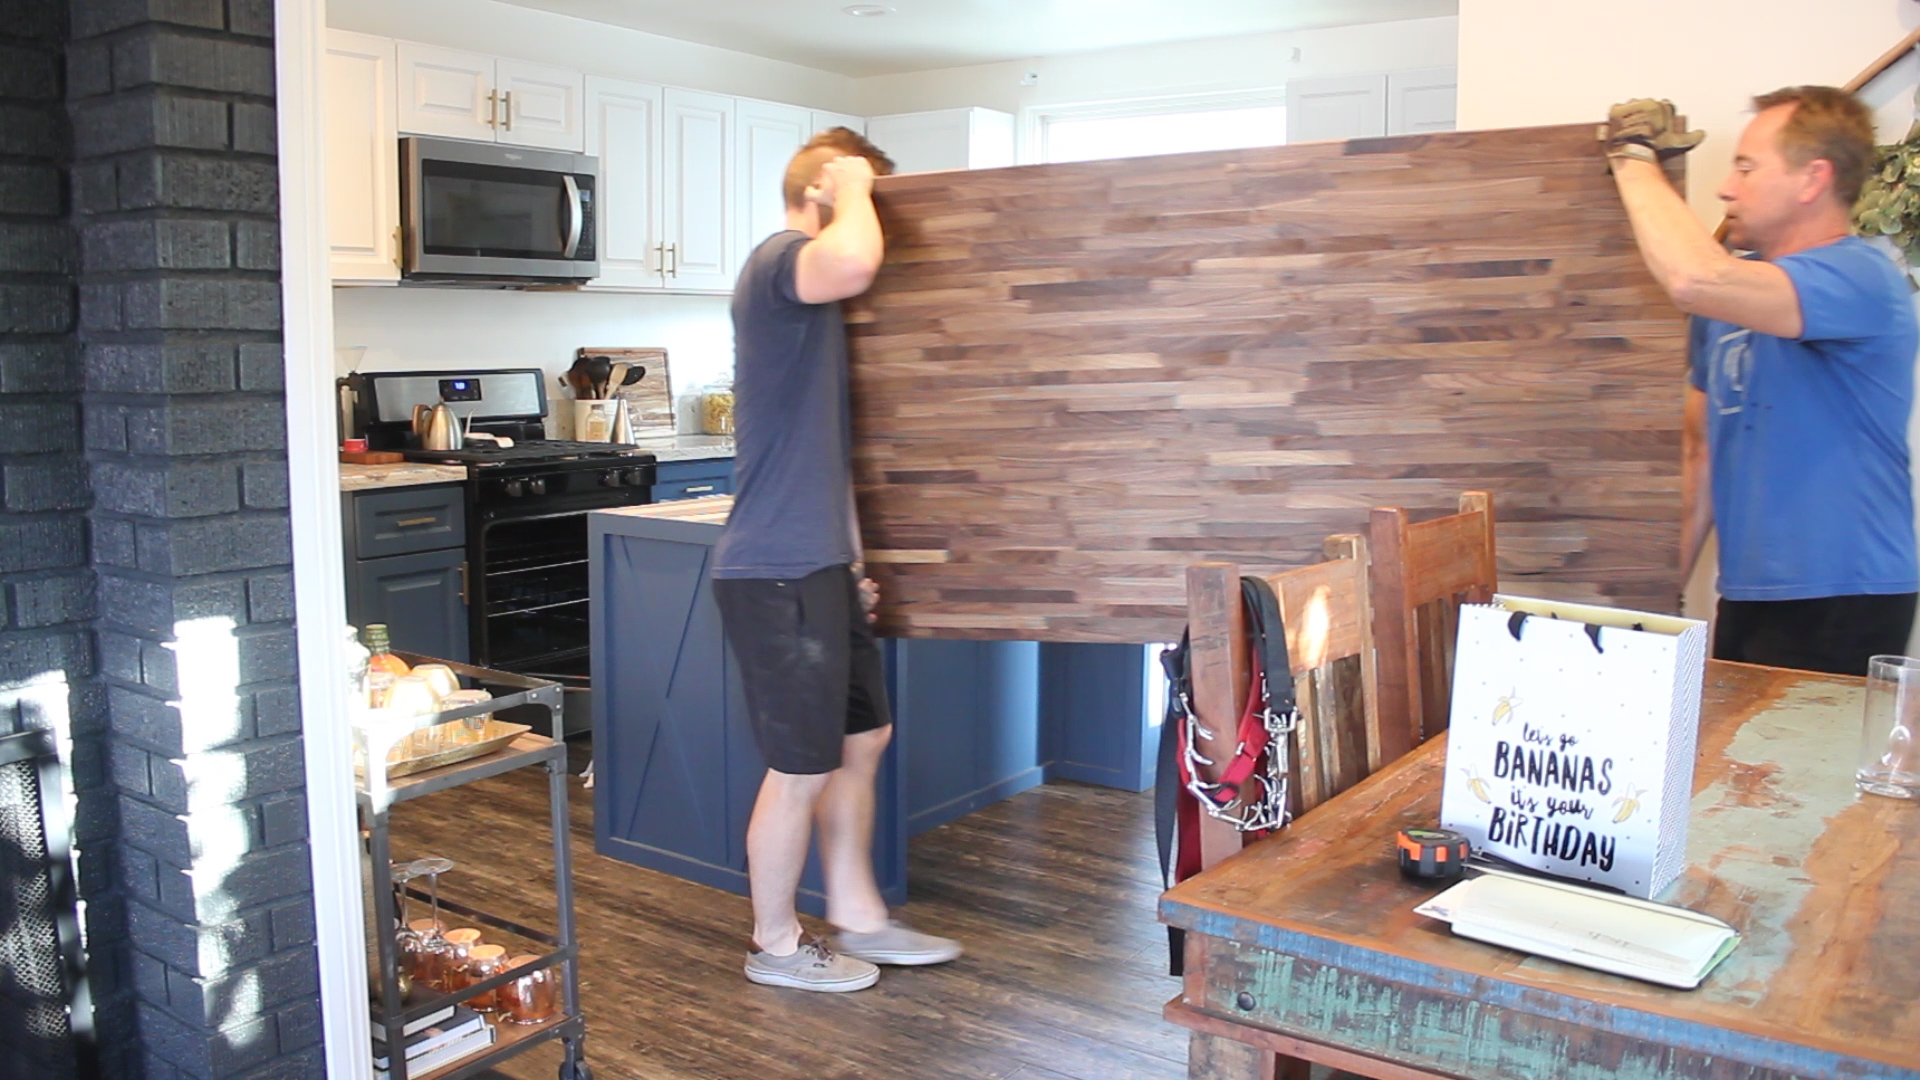
In Pics 4-5, we then moved the butcher block to it's final place. This thing made it even heavier - at this point I could lean and push my whole body against it and it didn't move a millimeter.
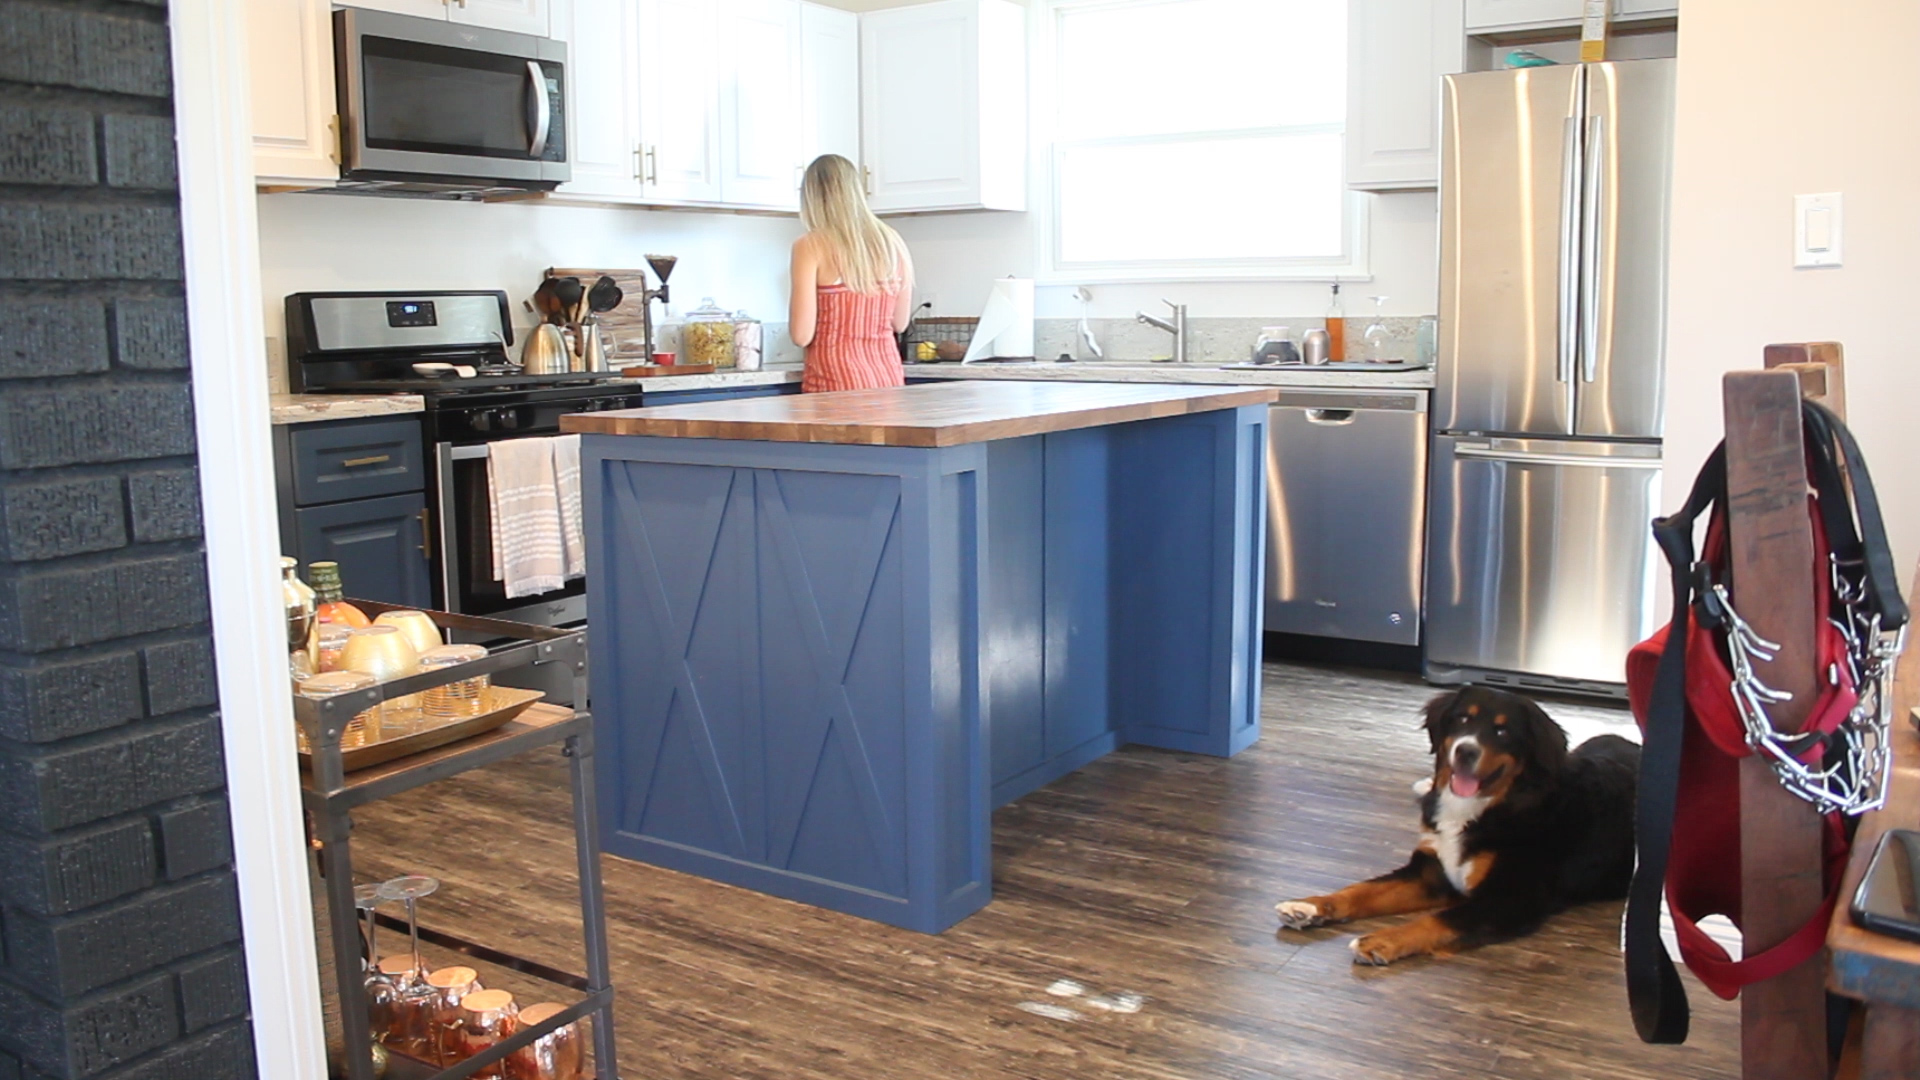
By the way - seeing this beauty in it's near final state in our kitchen was amazing.
Last step! Last step!
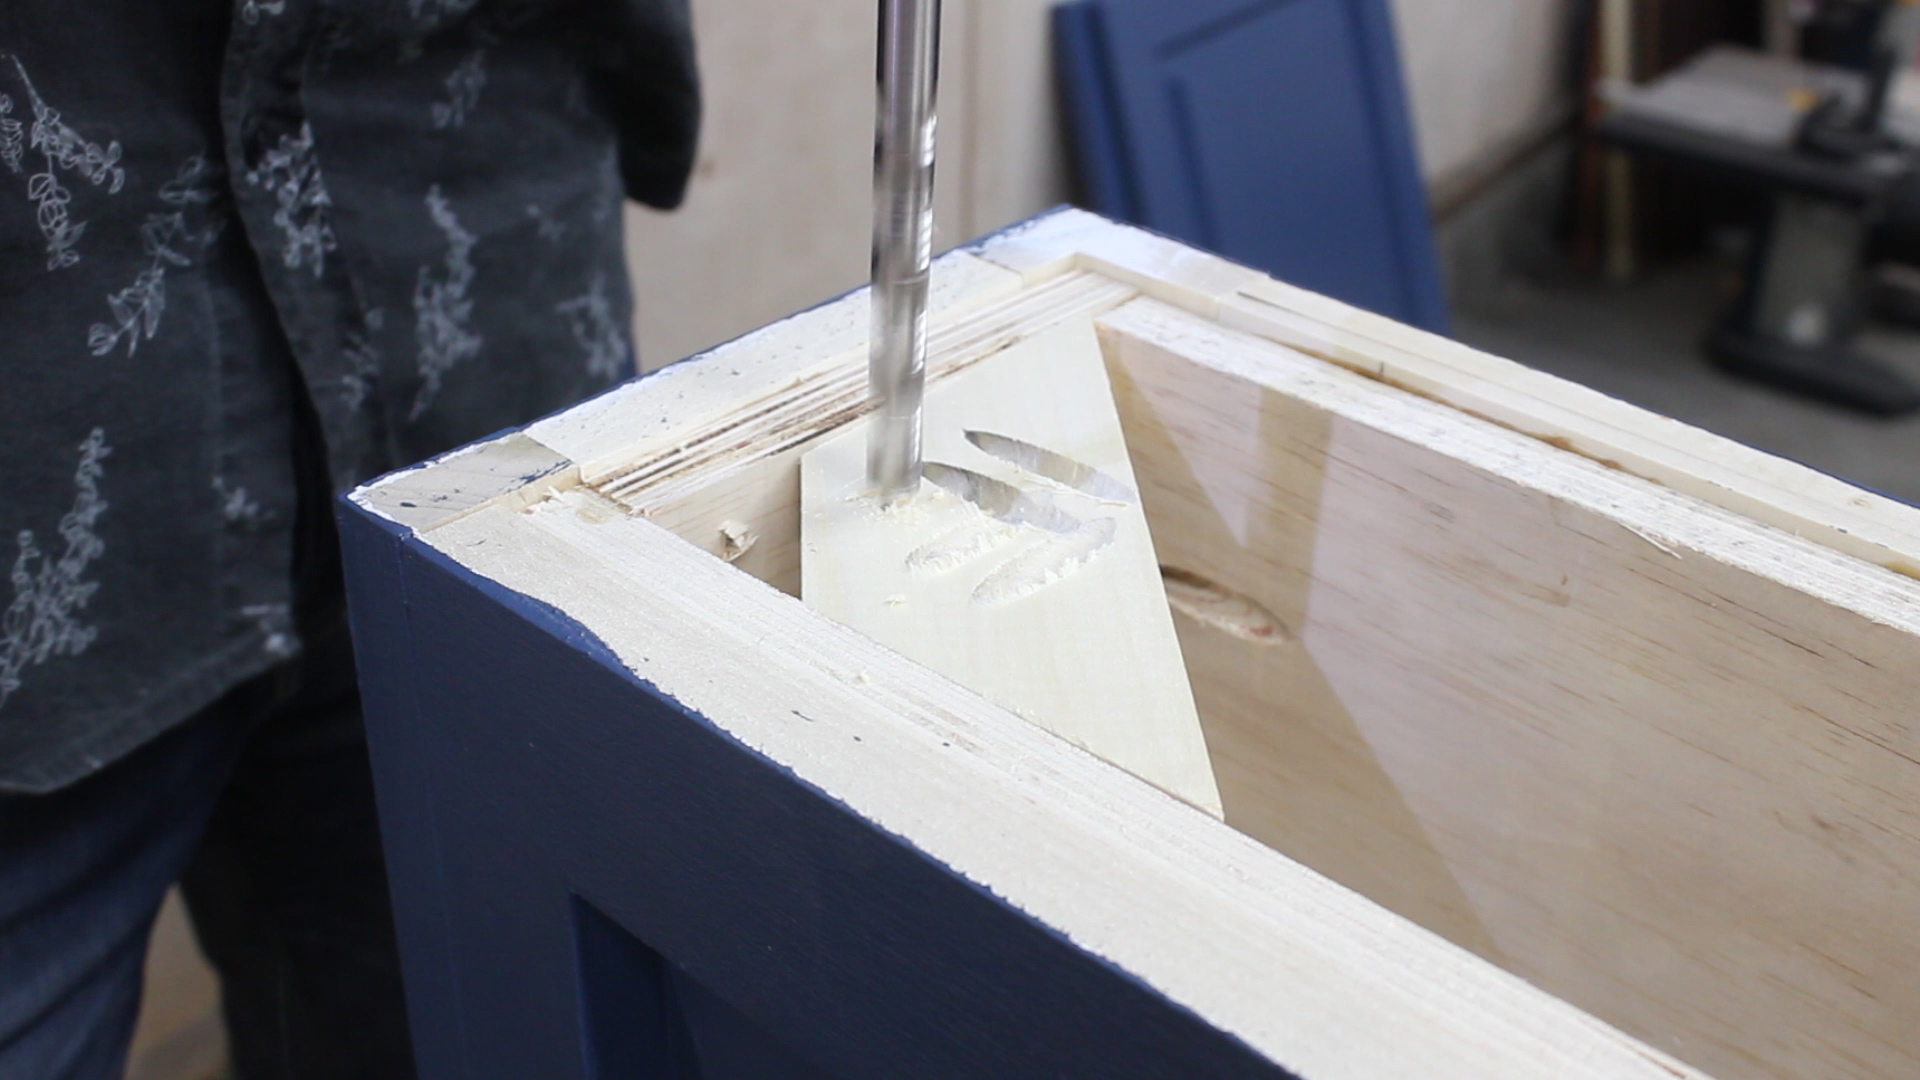
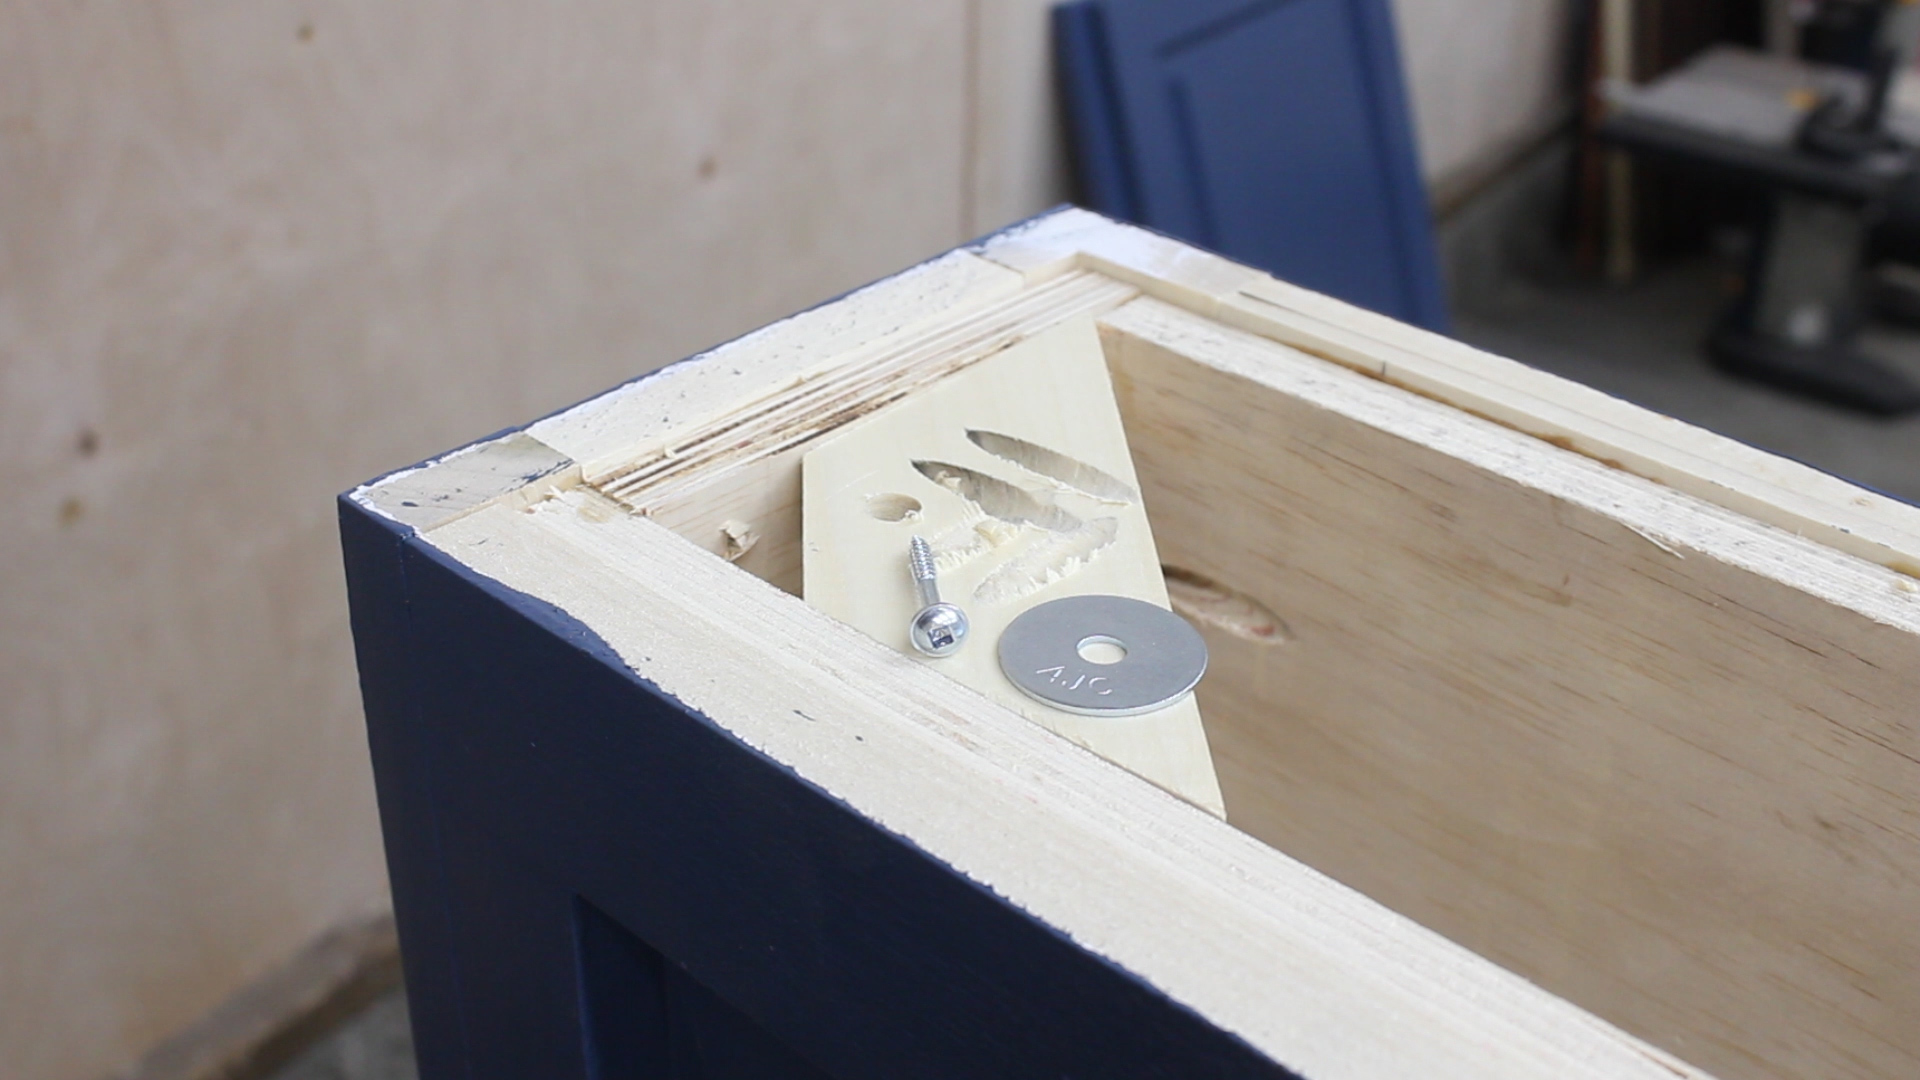
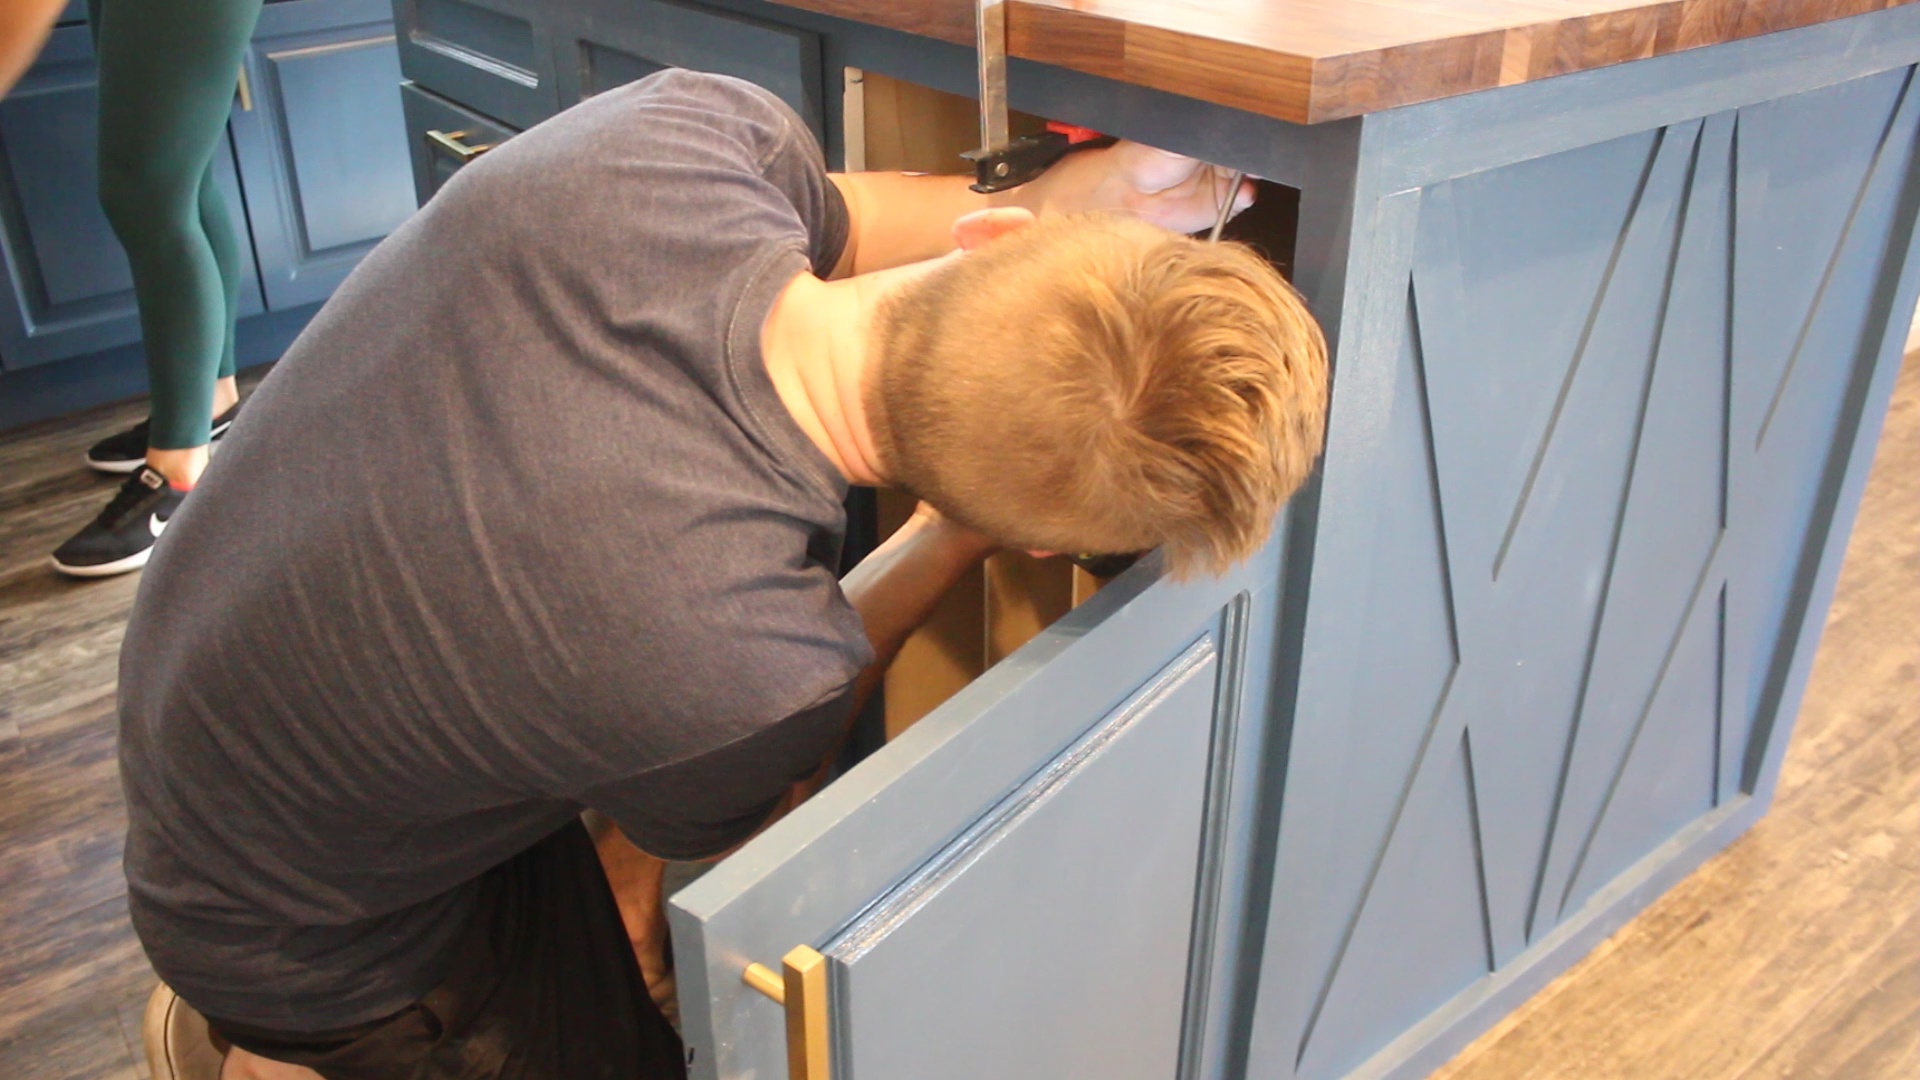
To attach the butcher block to the island, before moving into the kitchen, I drilled four holes in each corner top support piece that was 1/2" wide (Pic 1). To actually attach base to block, I'd am using a washer and pocket hole screw (Pic 2). Drilling a hole larger than the screw and using a washer allows for expansion and contraction as the weather changes throughout the year (advice from my father in law).
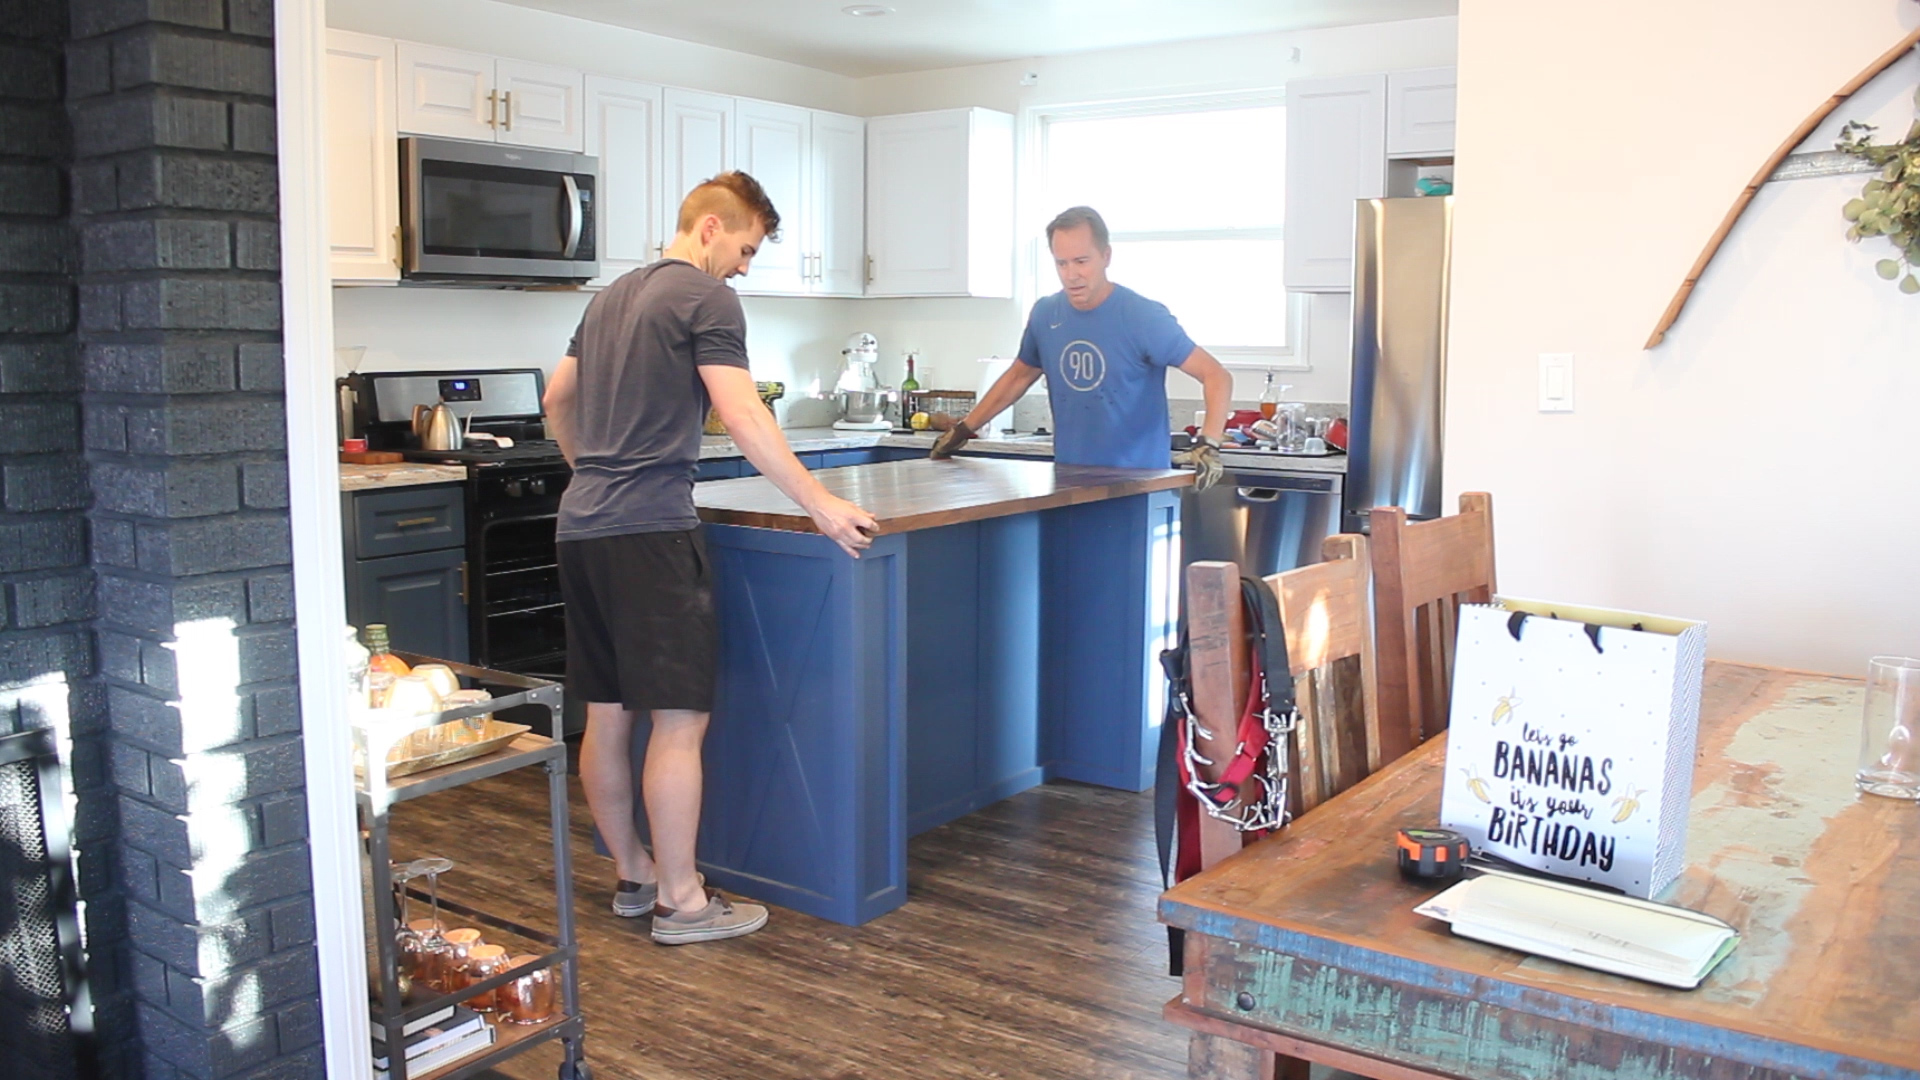
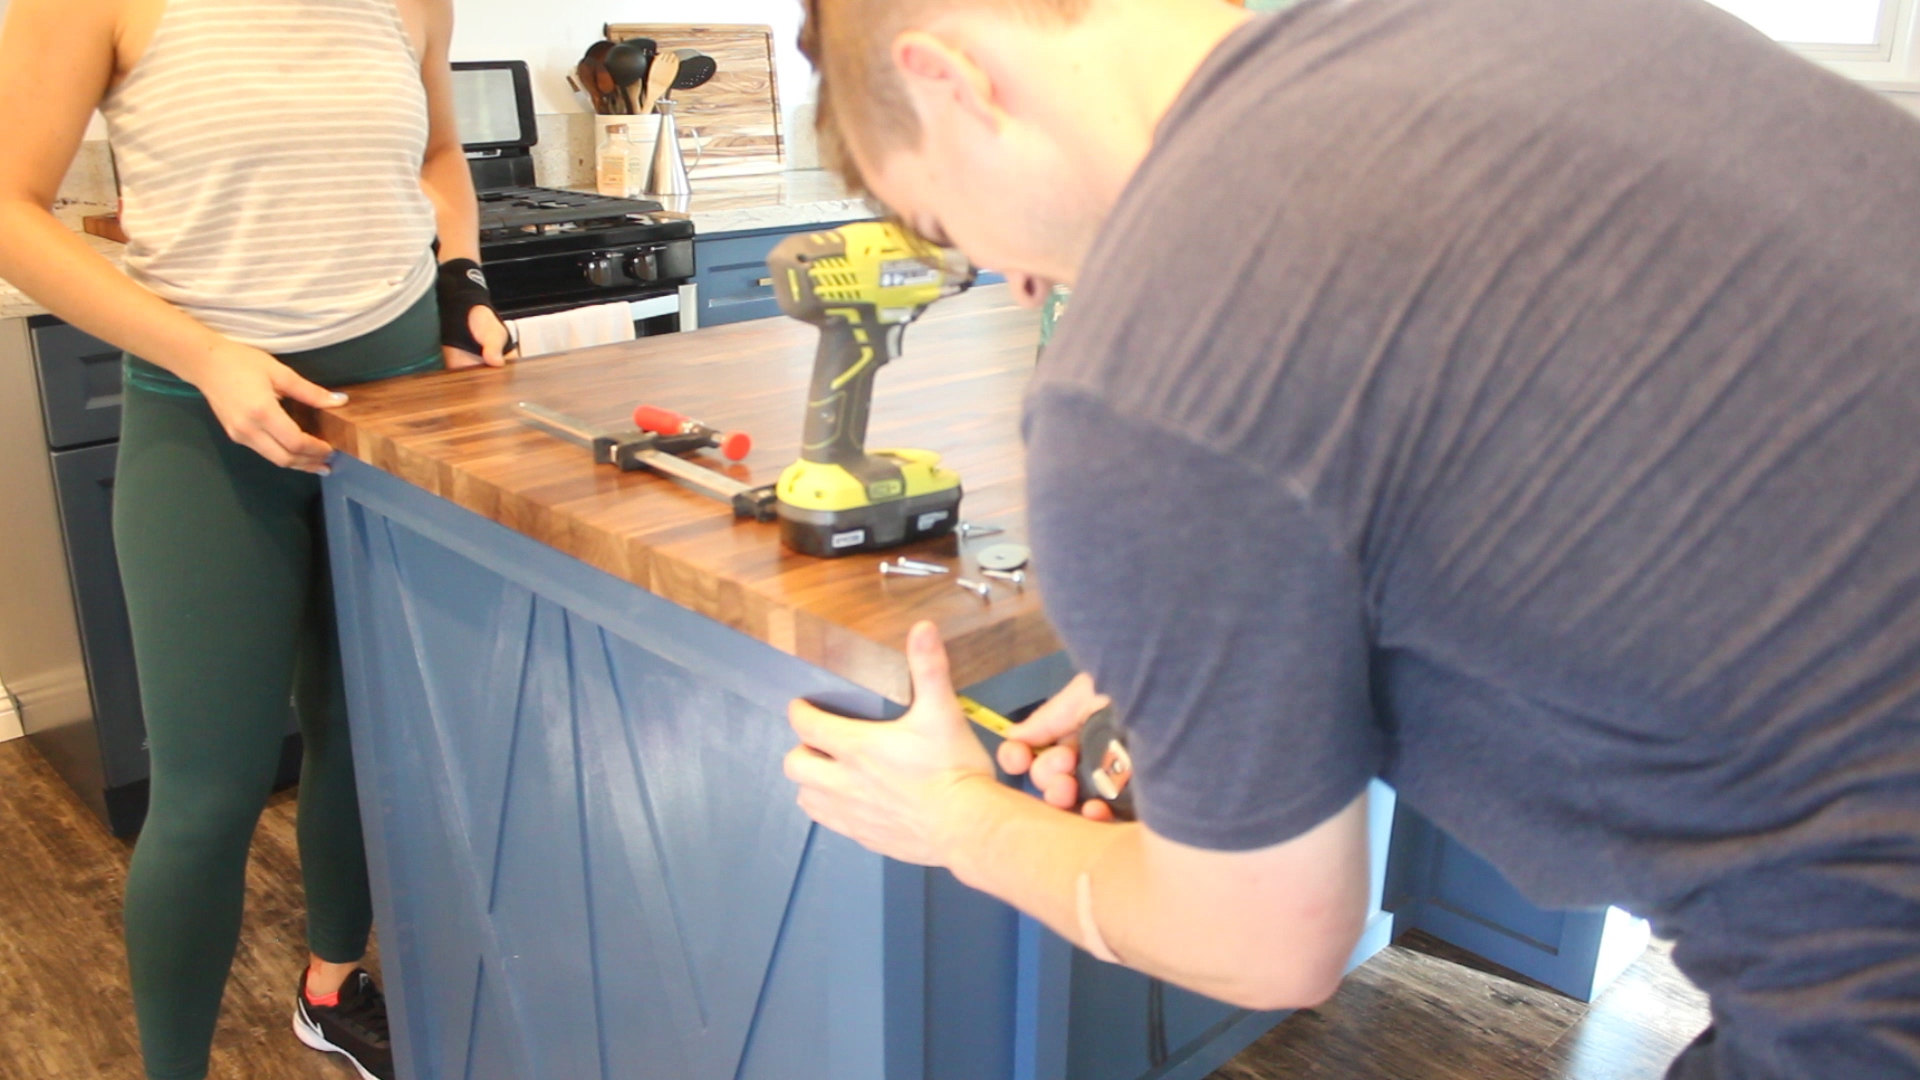
Pic 3 shows my fiancé and I marking and measuring the final location of the block.
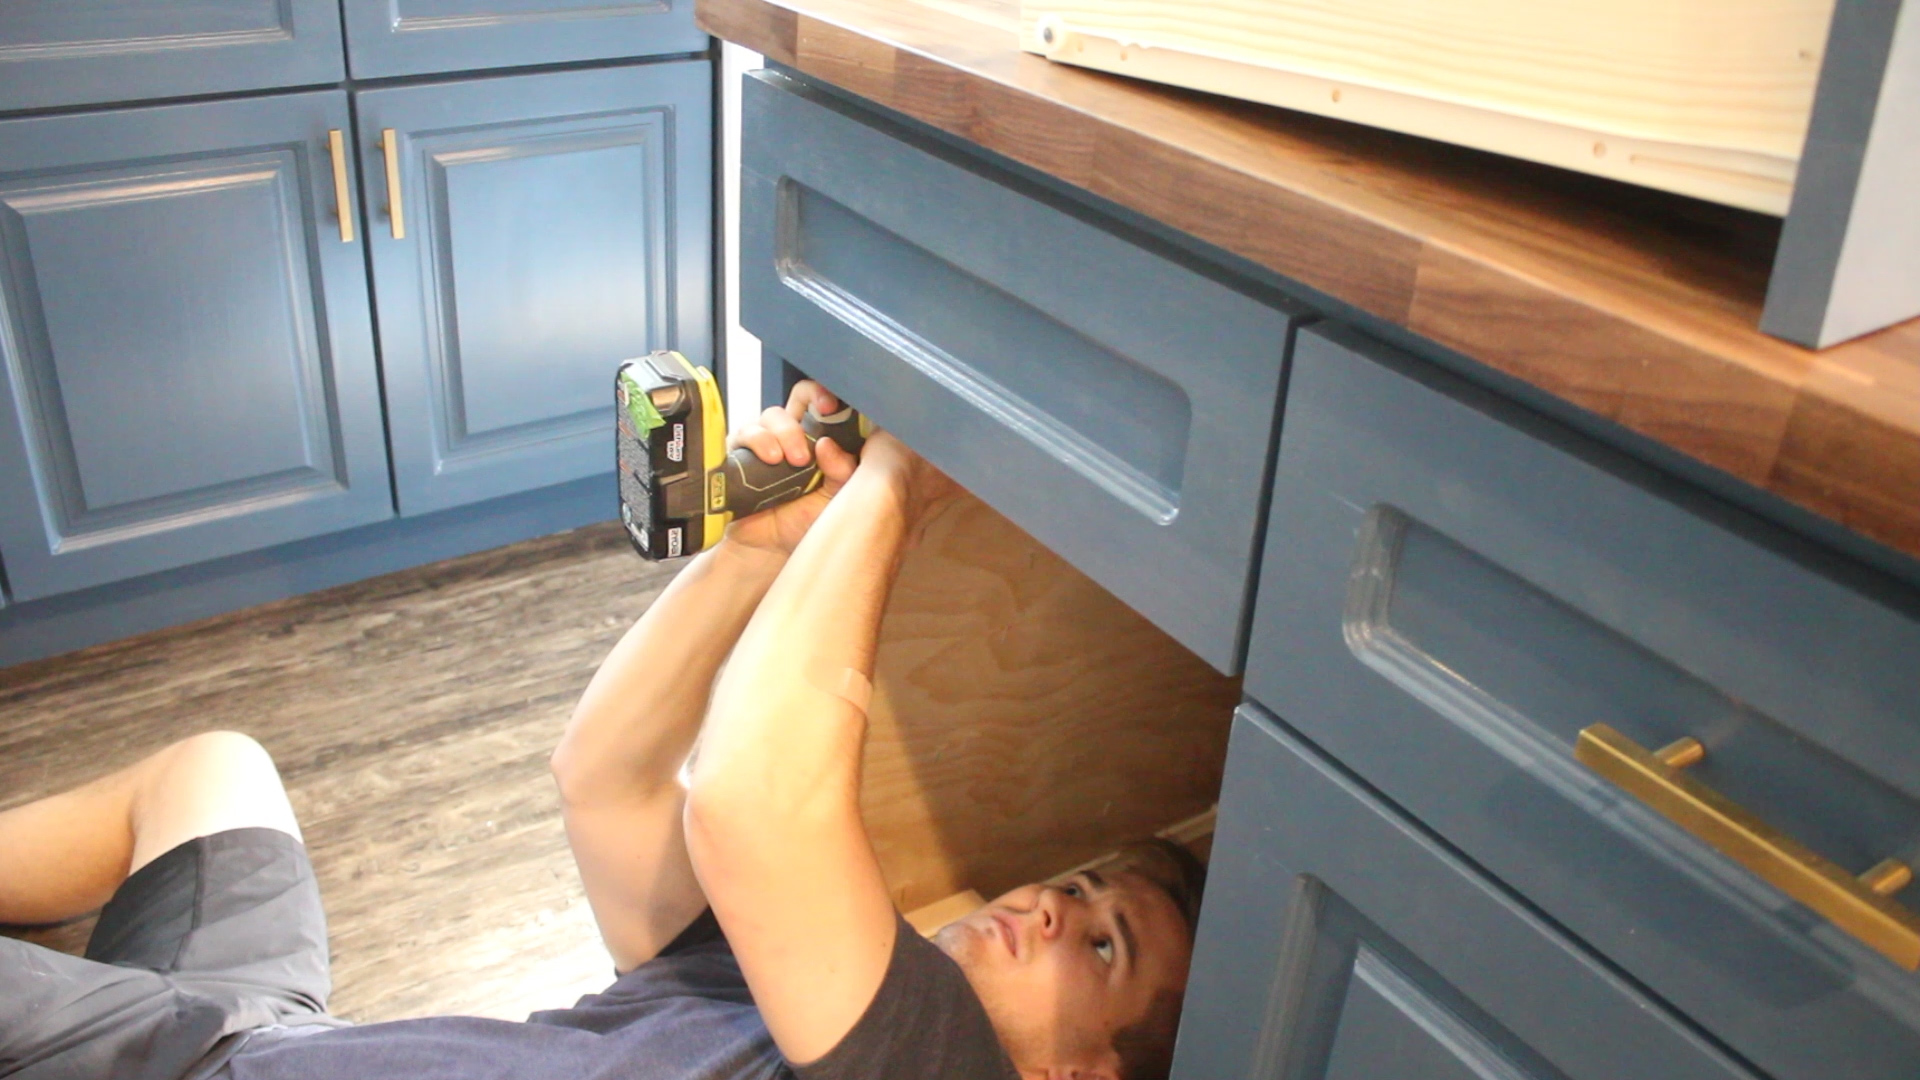
Pics 4-5 show me using my impact driver to drive in the final screws.
AND THEN WE WERE DONE BABY!

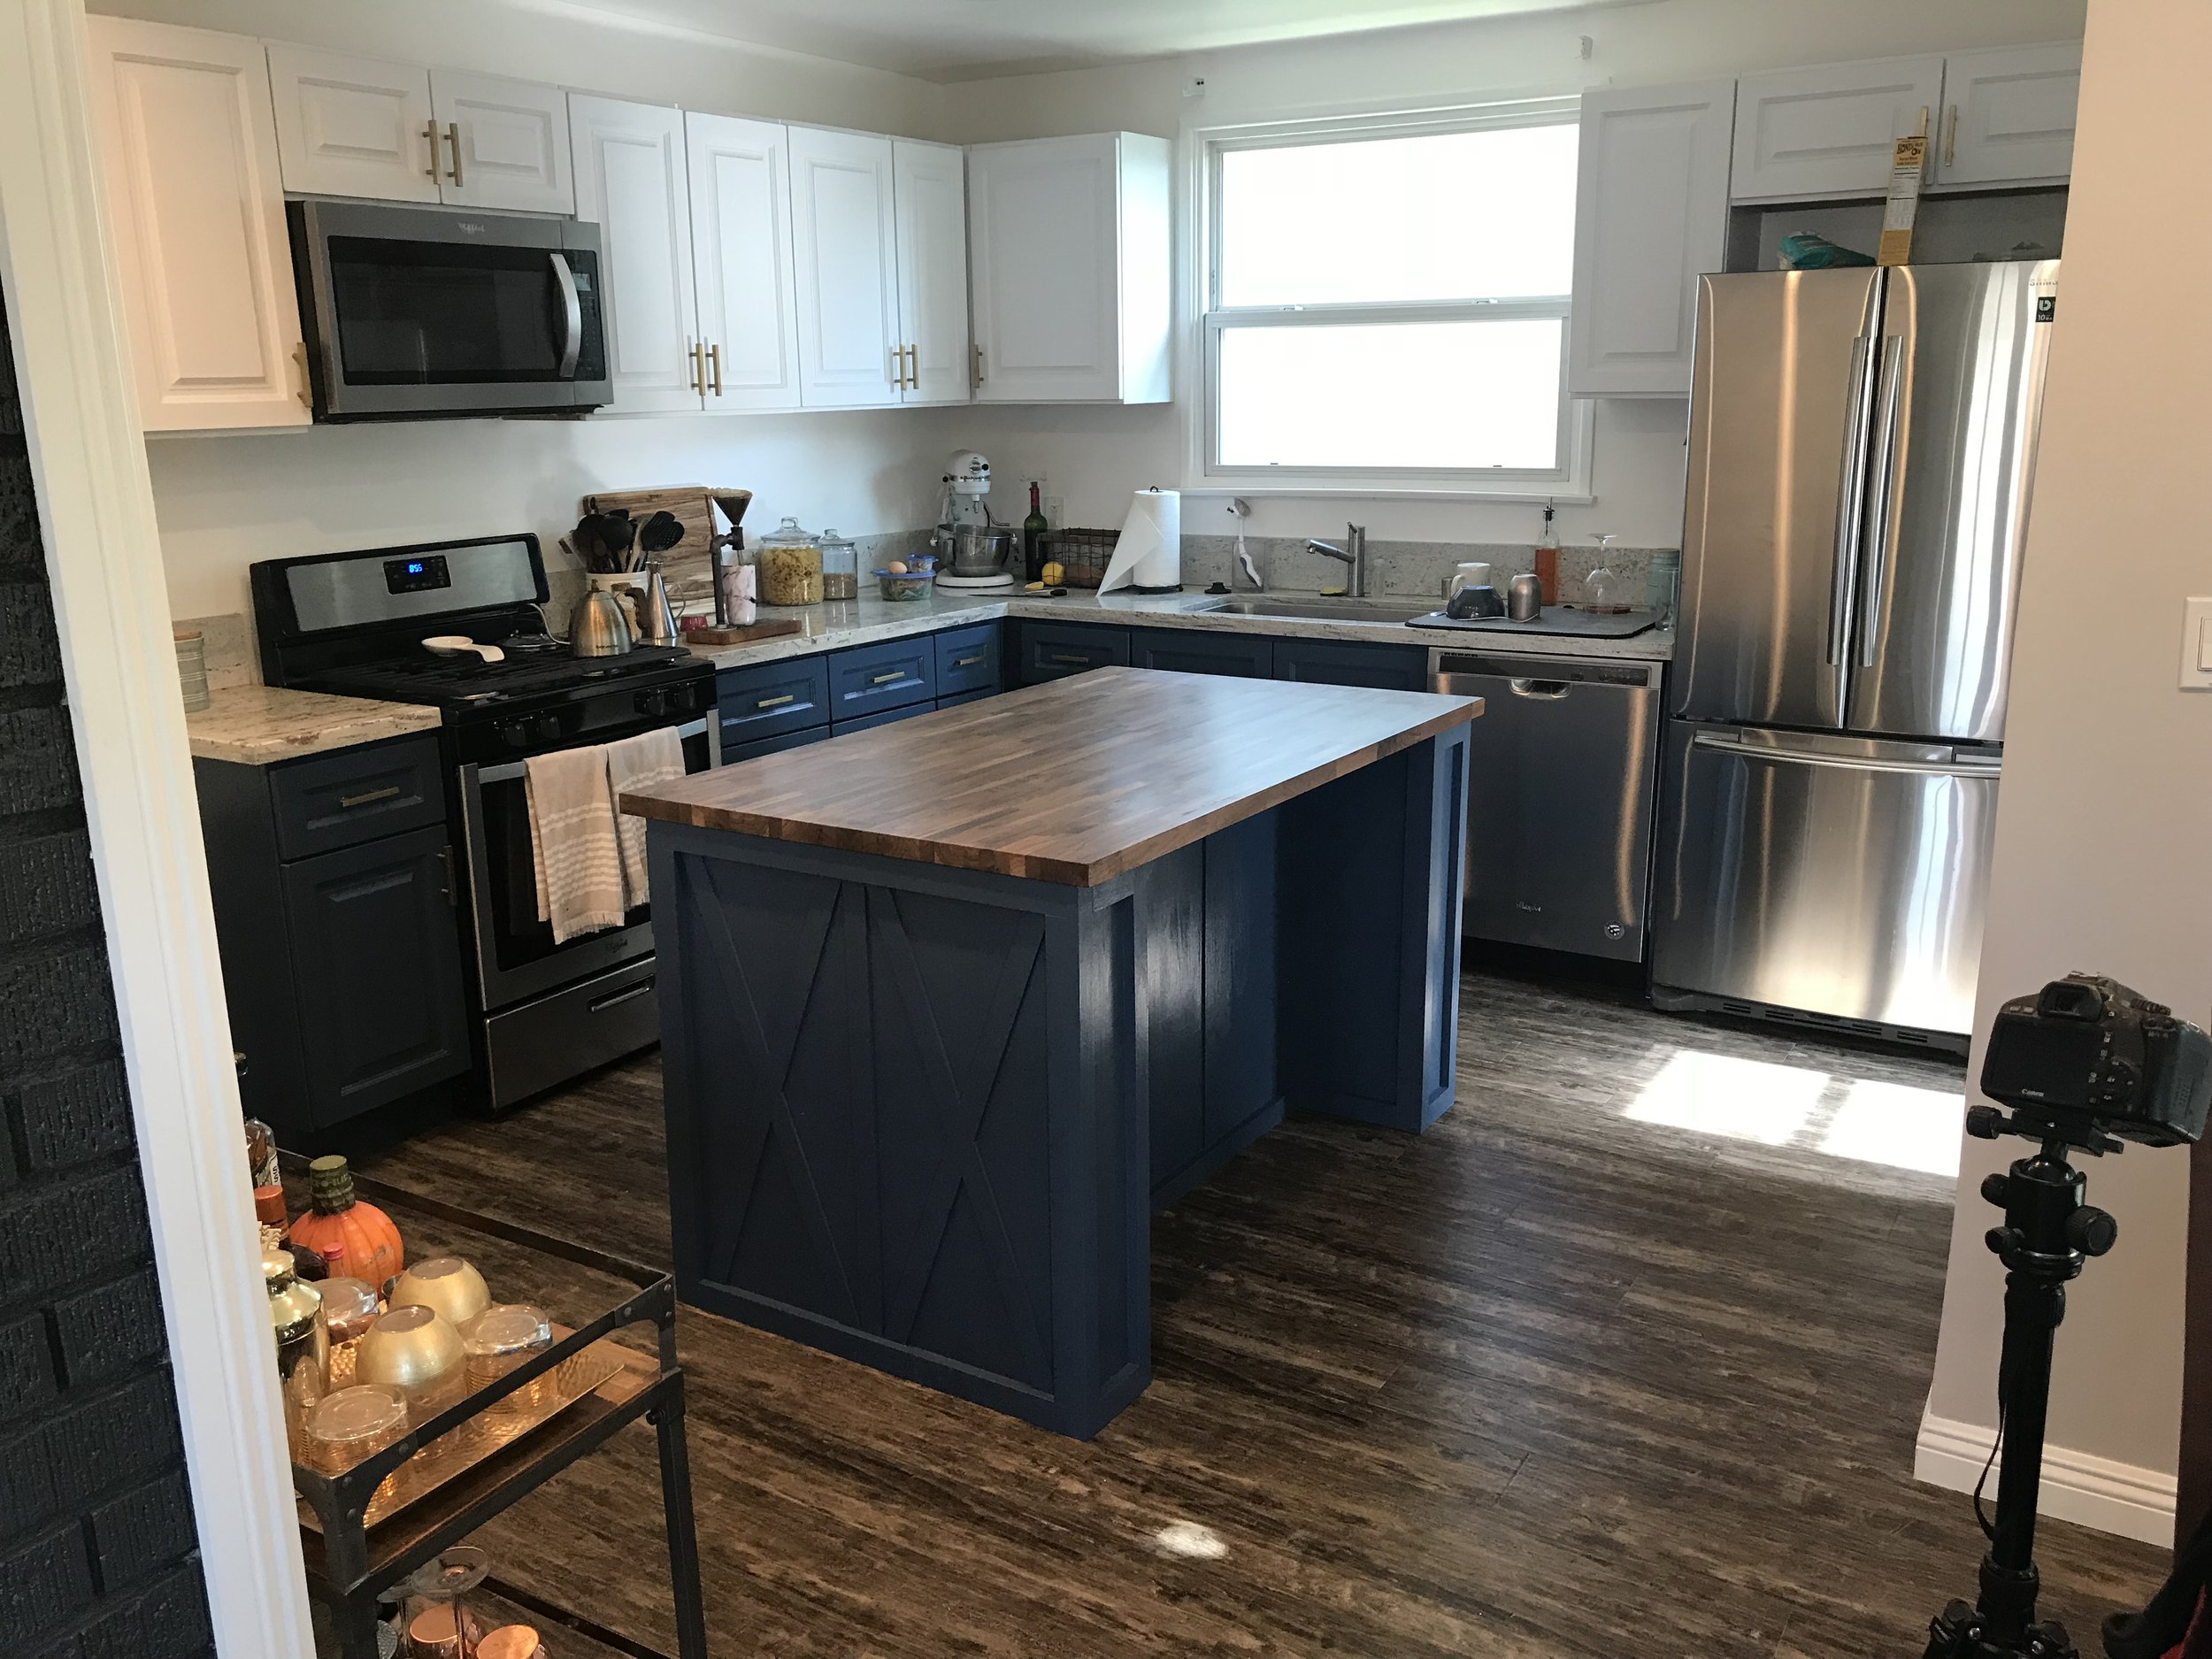
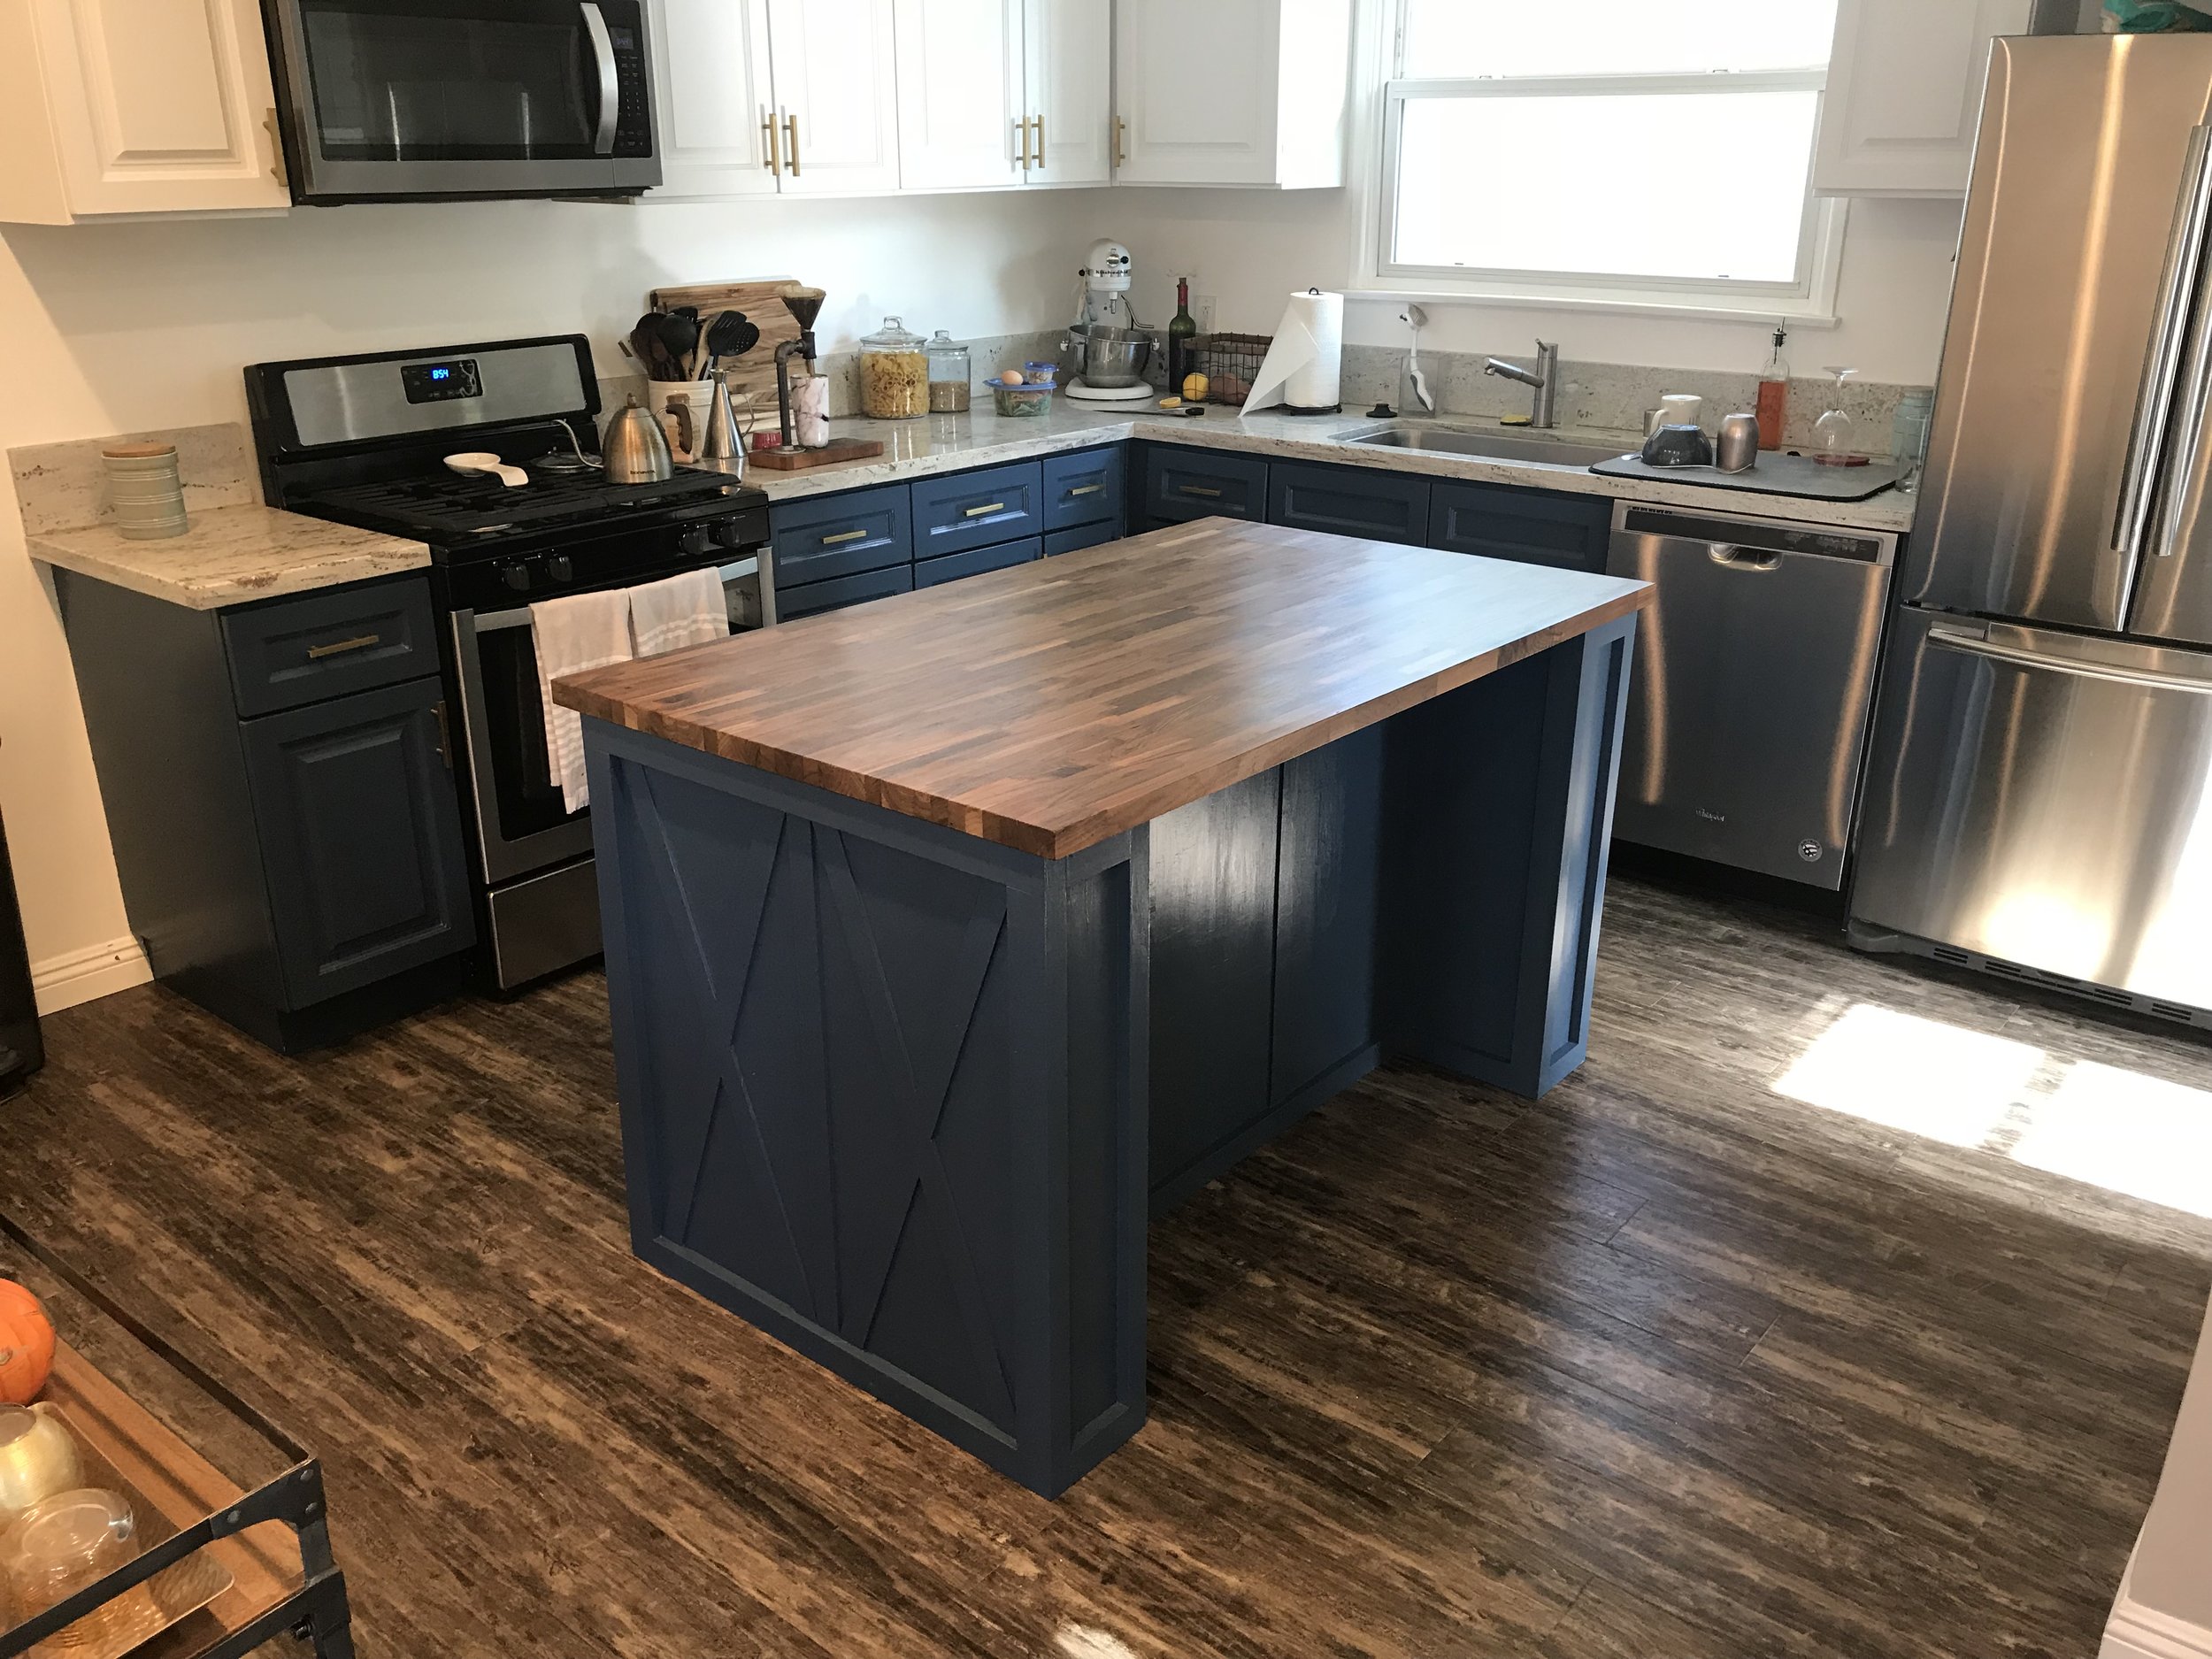
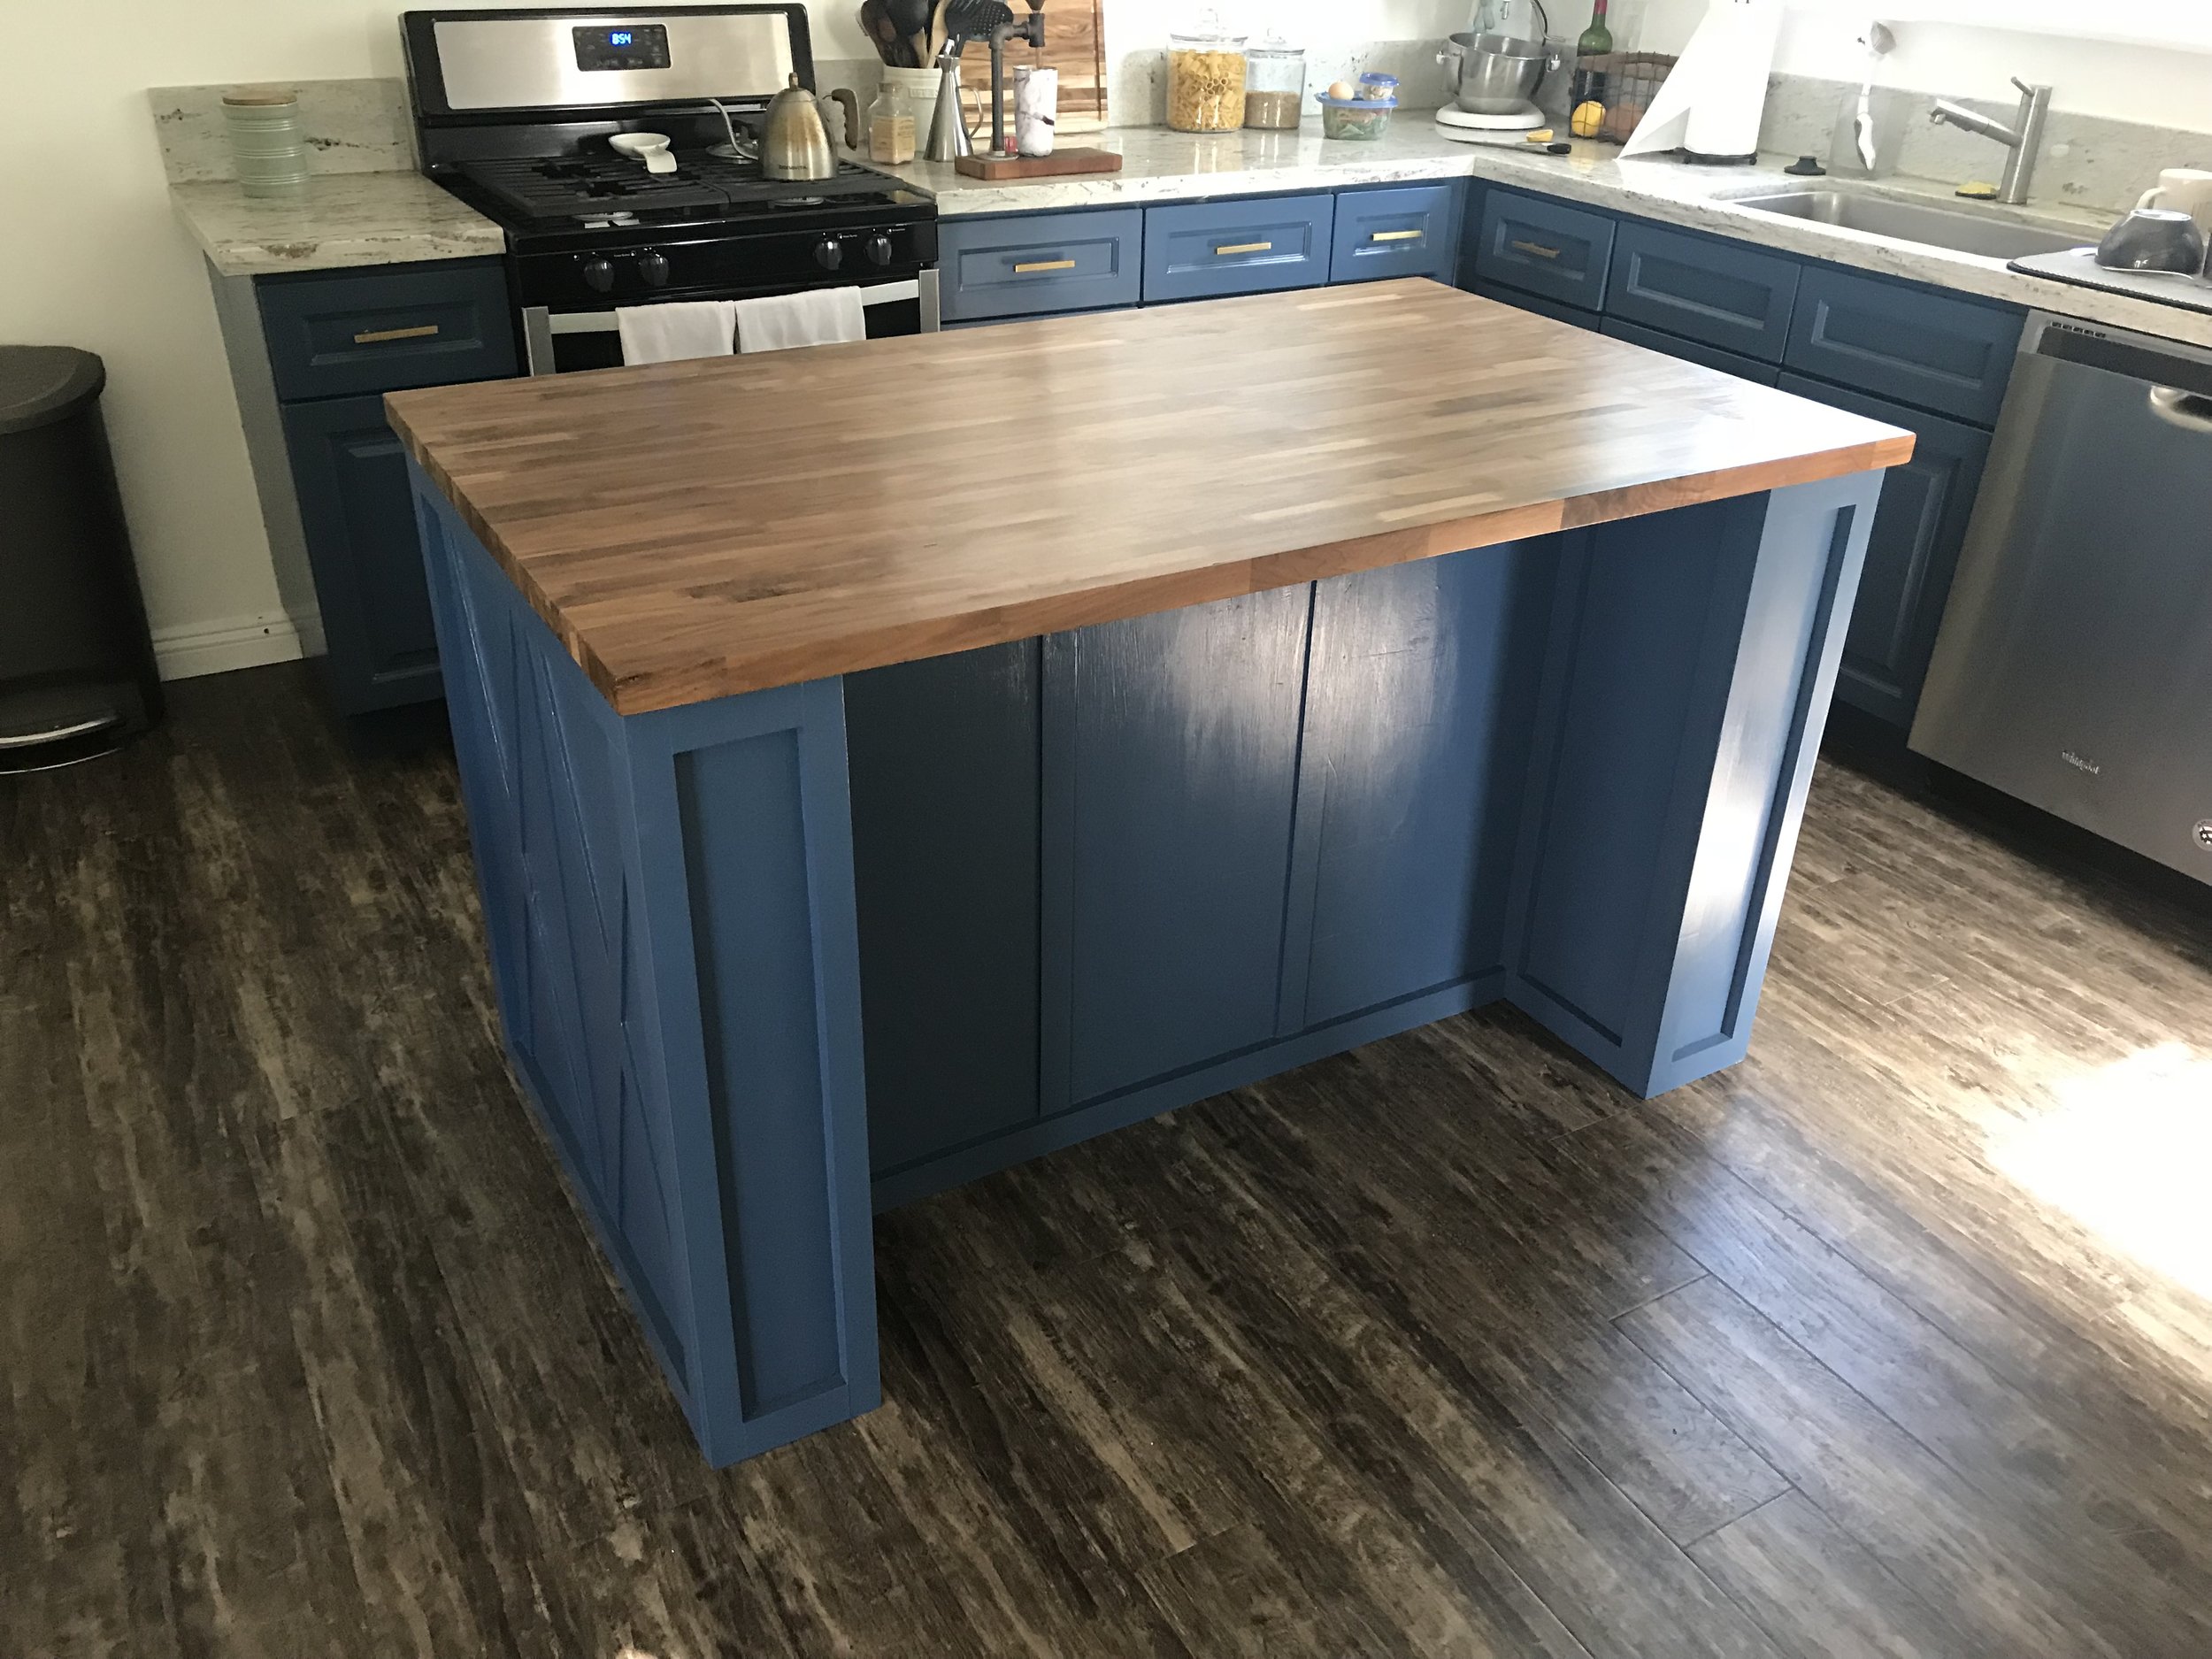


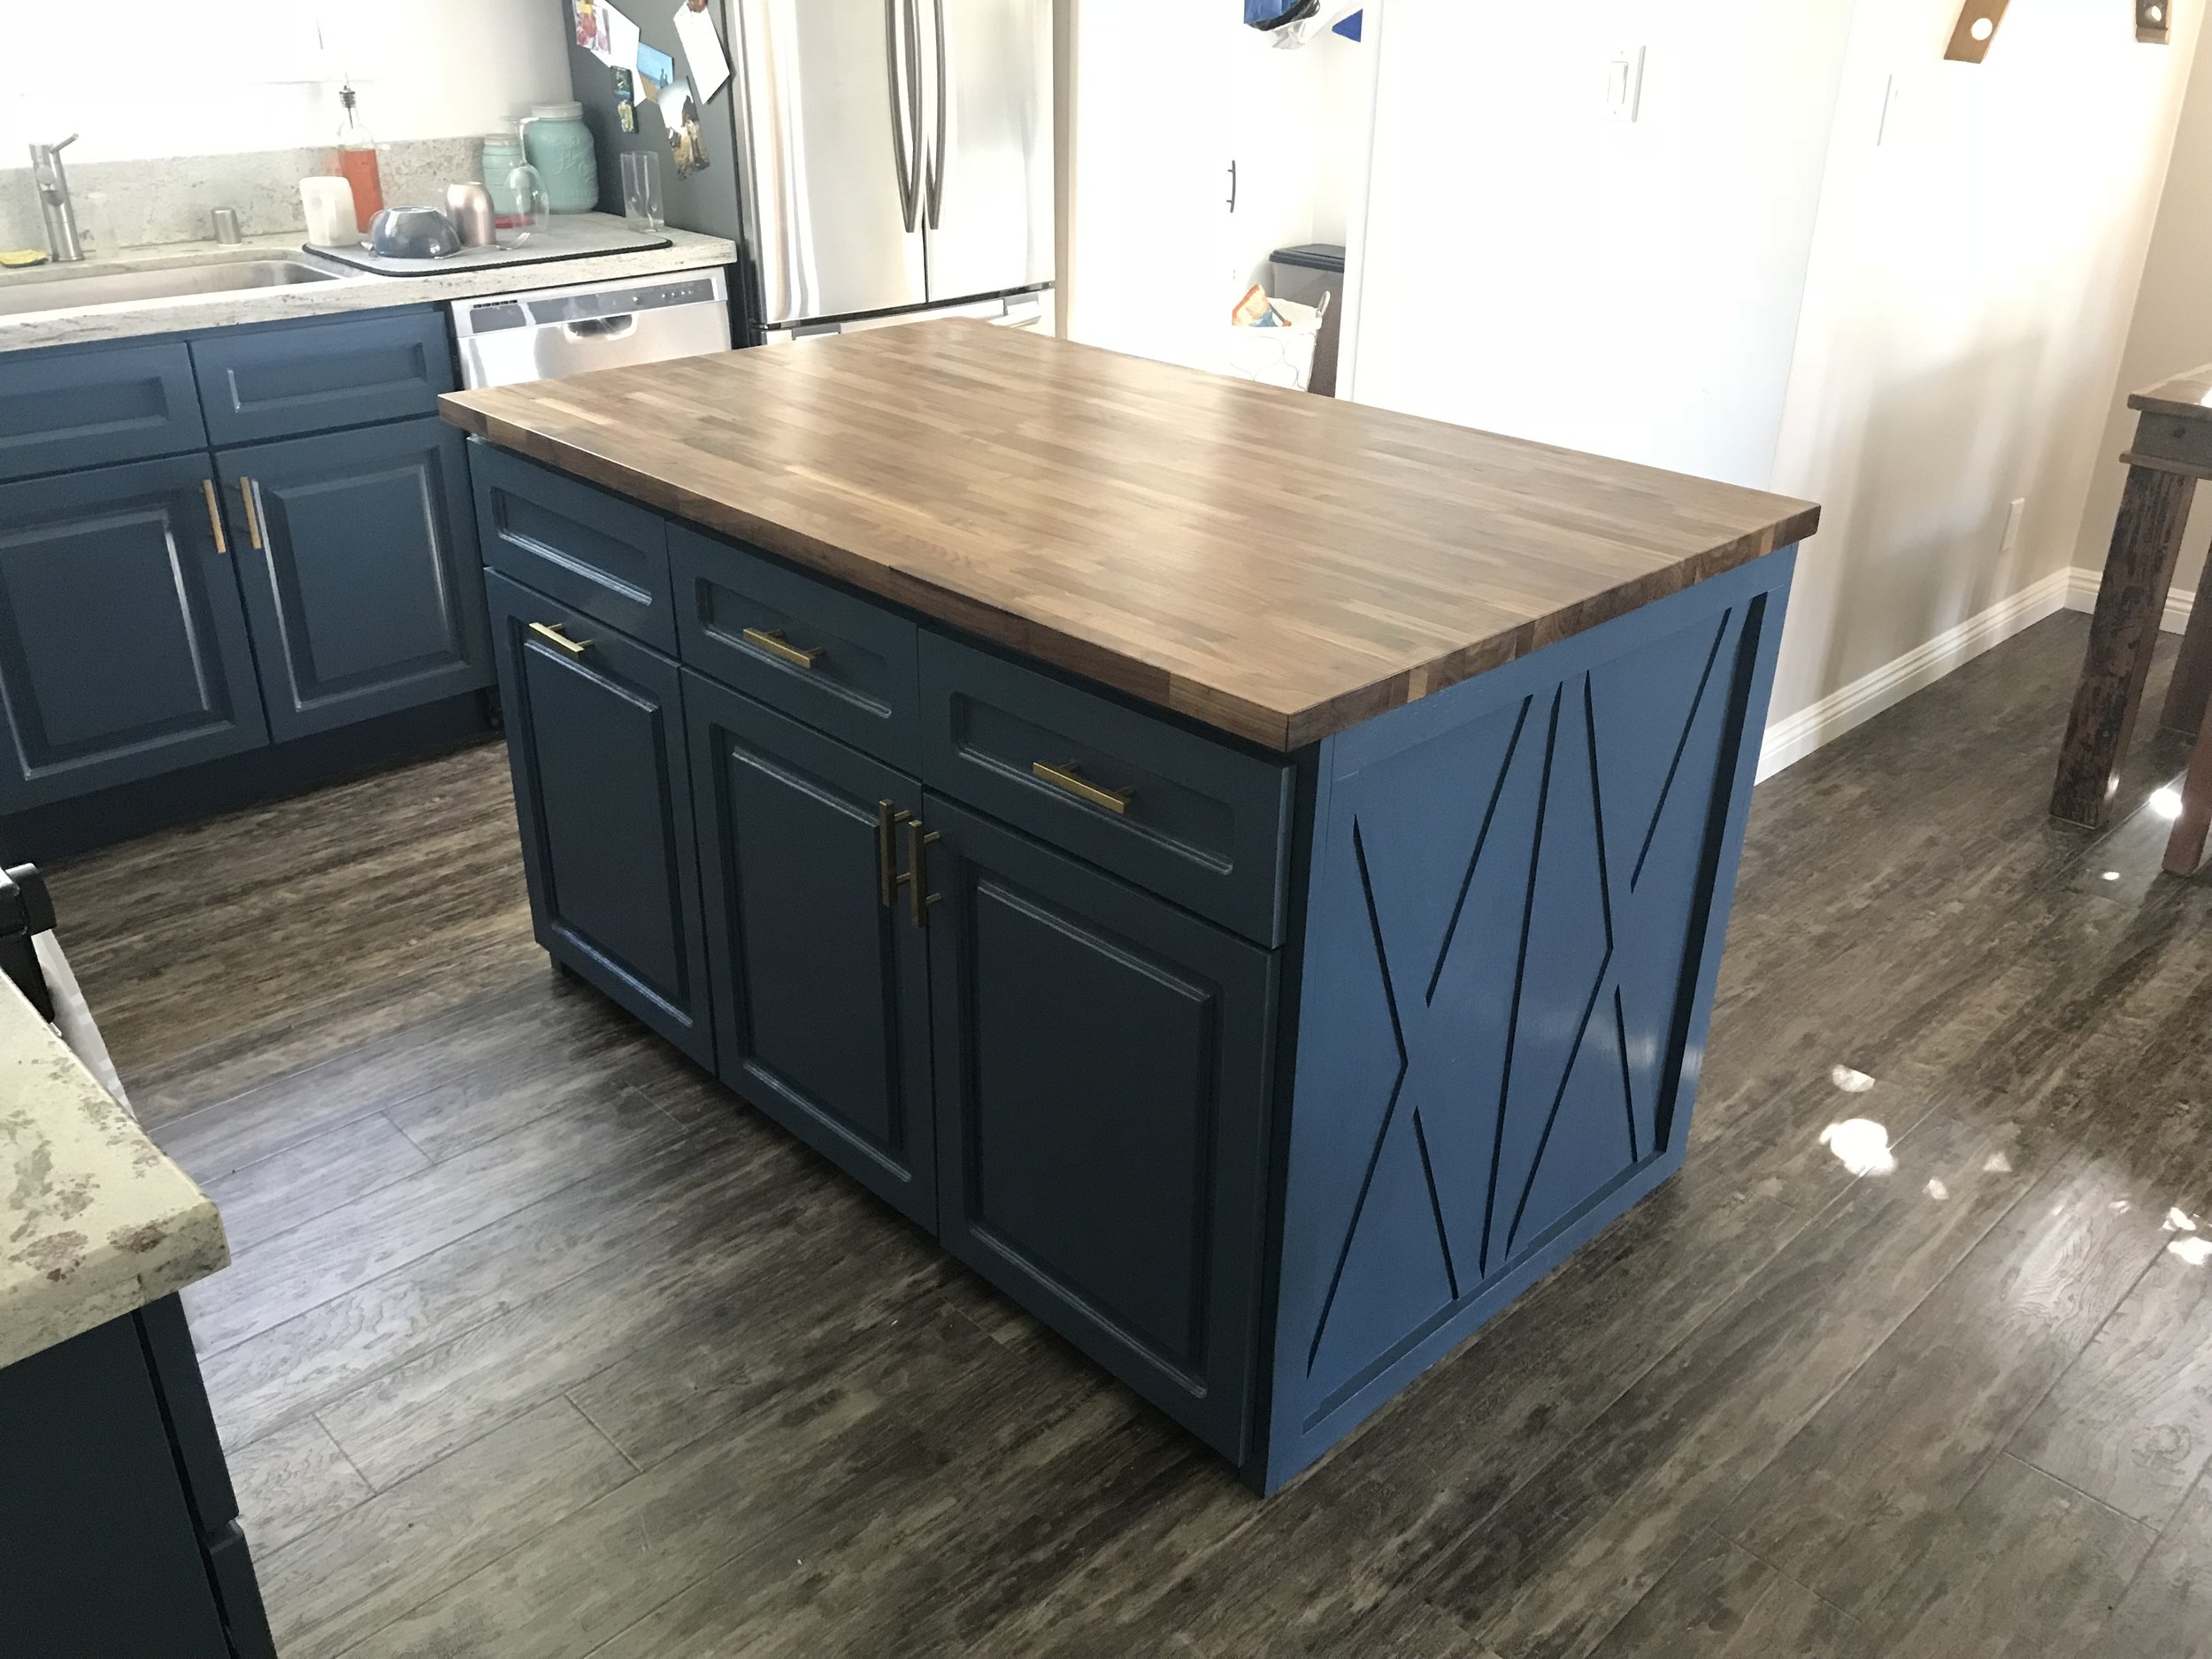
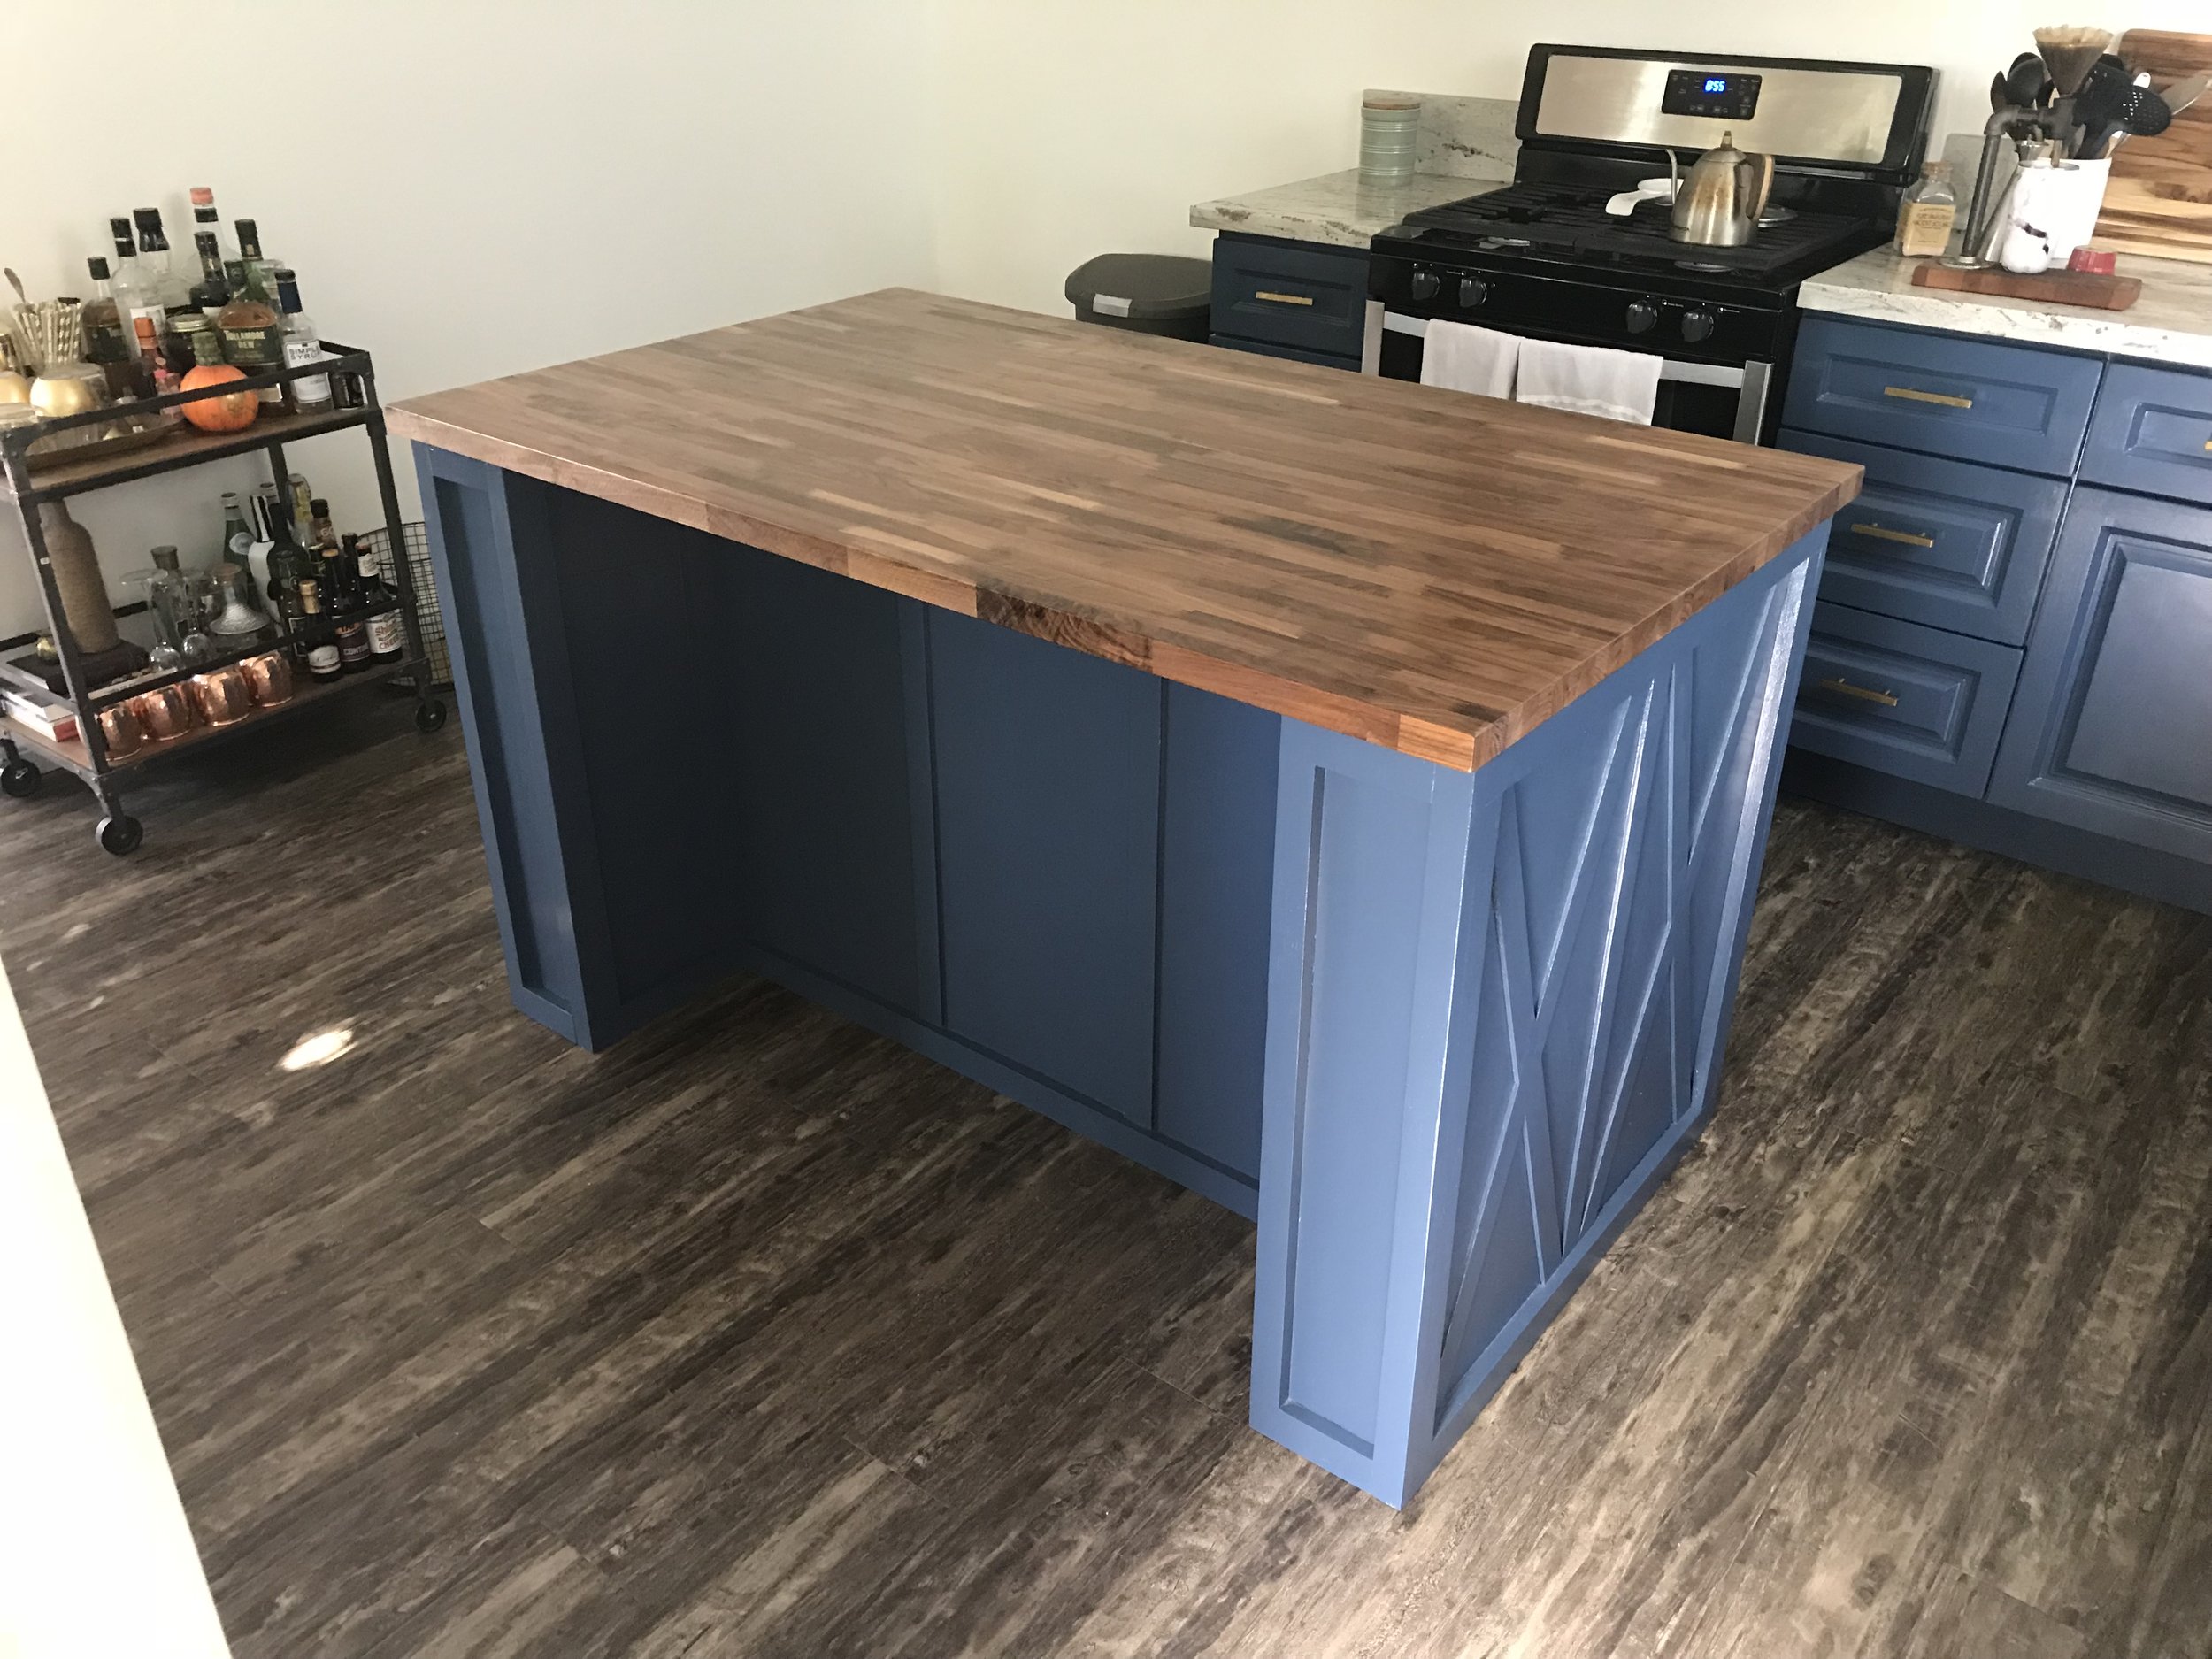
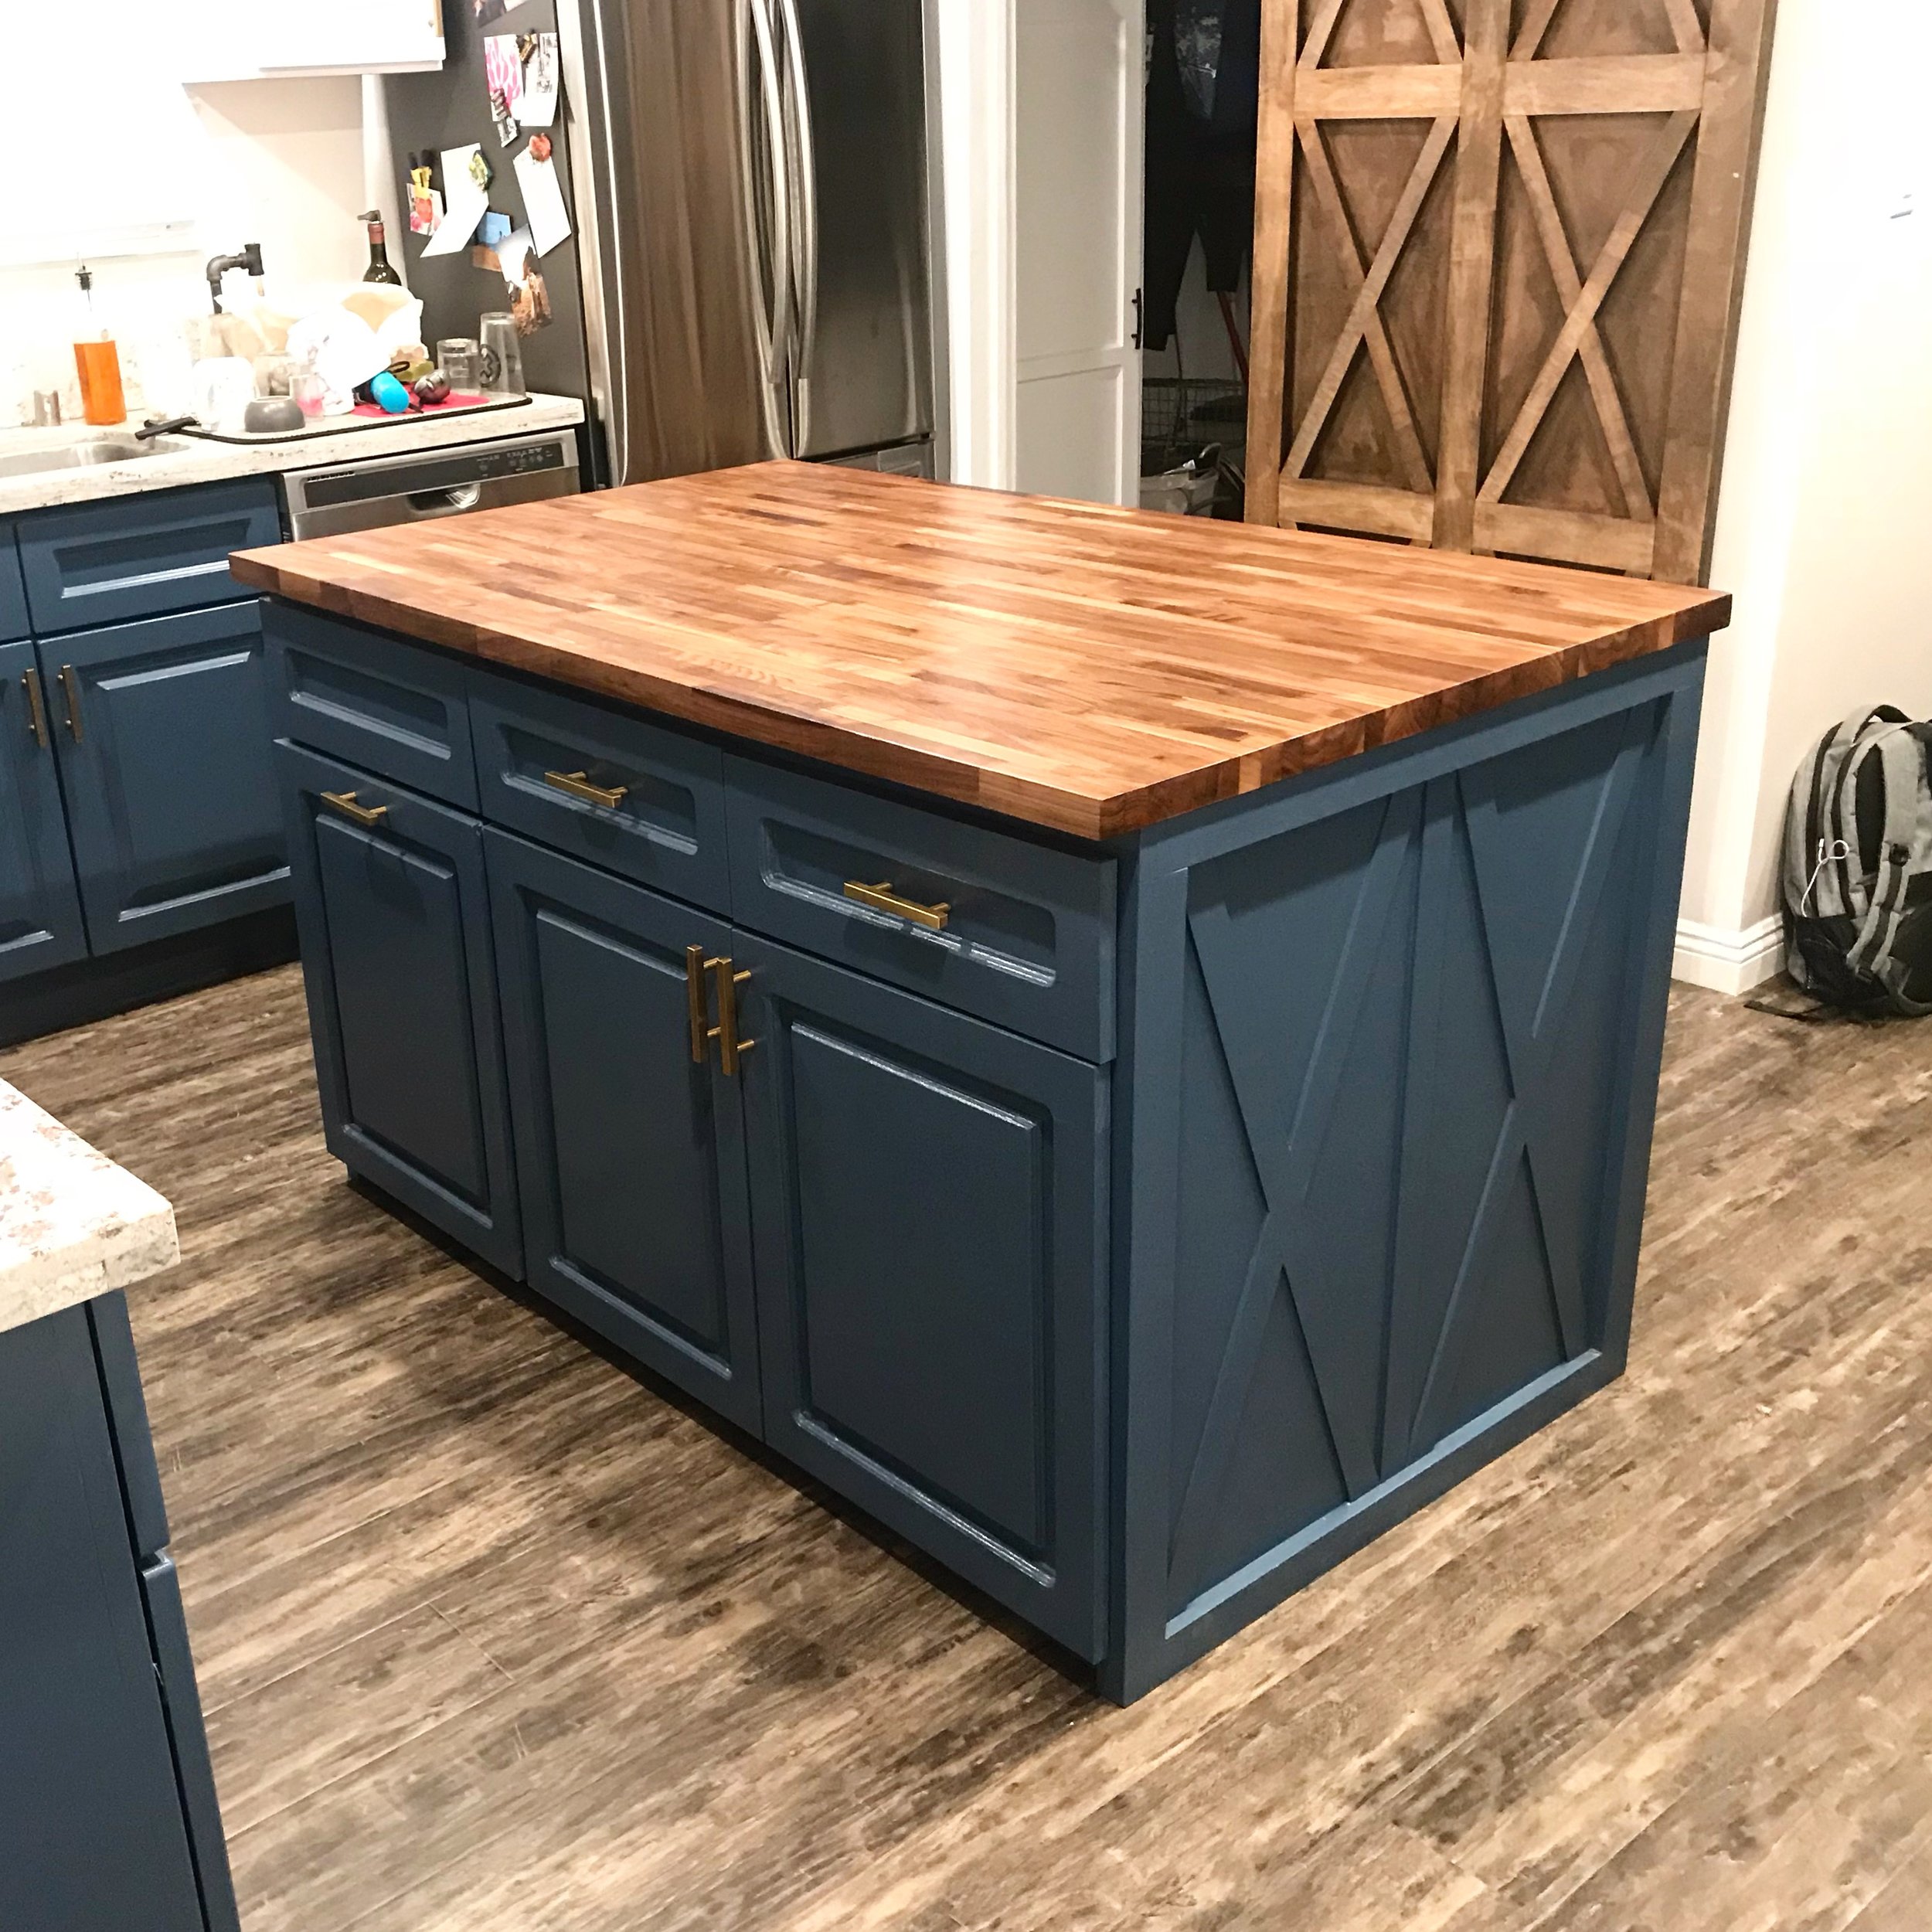


I could not be more excited about this thing. It is just awesome and I'm going to go ahead and pat myself on the back for building something I never knew was possible (in my own skill set). I encourage you to get out there and tackle things outside your comfort zone - cause damn is the payoff amazing. Take a look at the final pics, as well as the last two which show a before/after of our kitchen space (why was there no island there to start?!?).
As always, thank you for reading! I would be so grateful if you could please subscribe to my Youtube Channel for future projects.
I put out videos every few weeks.
Cheers!
Zach