Thanks for checking out the full article!
Full video build is below, followed by detailed instructions with tools and measurements!
You can subscribe to my YouTube channel by clicking here!
Wow! What an insane project. I really never know what I'm getting into with some of these ridiculous builds until I'm deep into it and realized how ambitious of a project it truly was.
MATERIALS
8 x 1" x 3" Ash Hardwood (20 BF milled down)
Natural Danish Oil
TiteBond II Wood Glue
I drew inspiration for this piece from named Caleb Woodard, an incredibly talented woodworker who creates stunning pieces that have amazing shape and contour of all types and sizes. Thanks for the inspiration! Check out his page when you have a sec!
Lissome is a term that describes a shape as thin, supple, and graceful - so that was what I was going to go for with this one of a kind piece.

My first step was to measure out the size of my space and determine a Length x Width x Height for my project. After that, I could determine what I wanted my rough shape to look like, and from that, I could determine the amount of material to purchase.

My methodology for this was as such:
- Determine Length x Width x Height of table
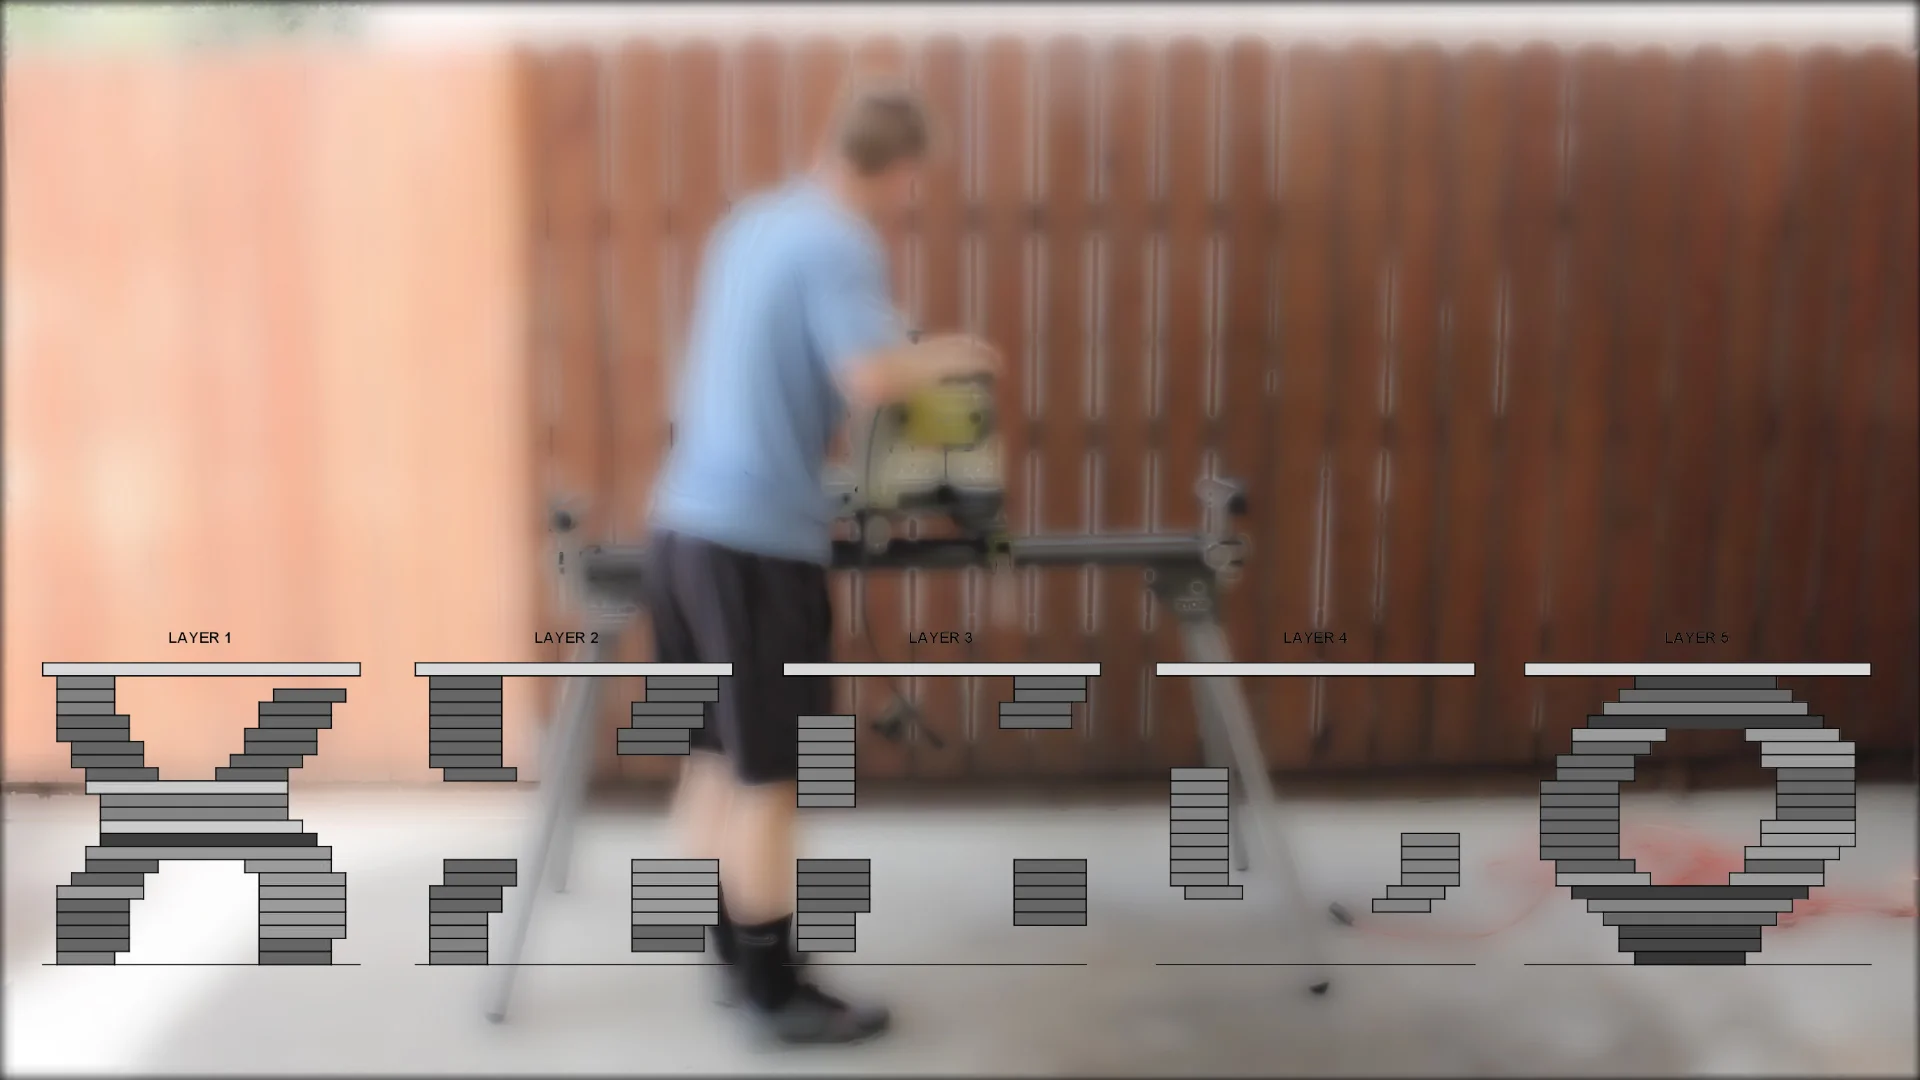
- Divide the depth (width) of my table into "slices" of a certain width (I chose 3") so that I could have five slices at 3" wide to make the final width of 15" for my table
- Determine what I want the outside shapes to look like (roughly)
- Determine the shape of the inner three slices so that I could transition from one outside shape to another - this was a lot of trial and error until I got to a shape I was happy with
- Create a side profile of your shape to make sure the transition is adequate
- Knowing now the five layer/slices I'd wan to build, determine the number of laminated pieces I'd need for each slice shape, and then transition those numbers to an overall lumber order
- The first photo shows my five slices.
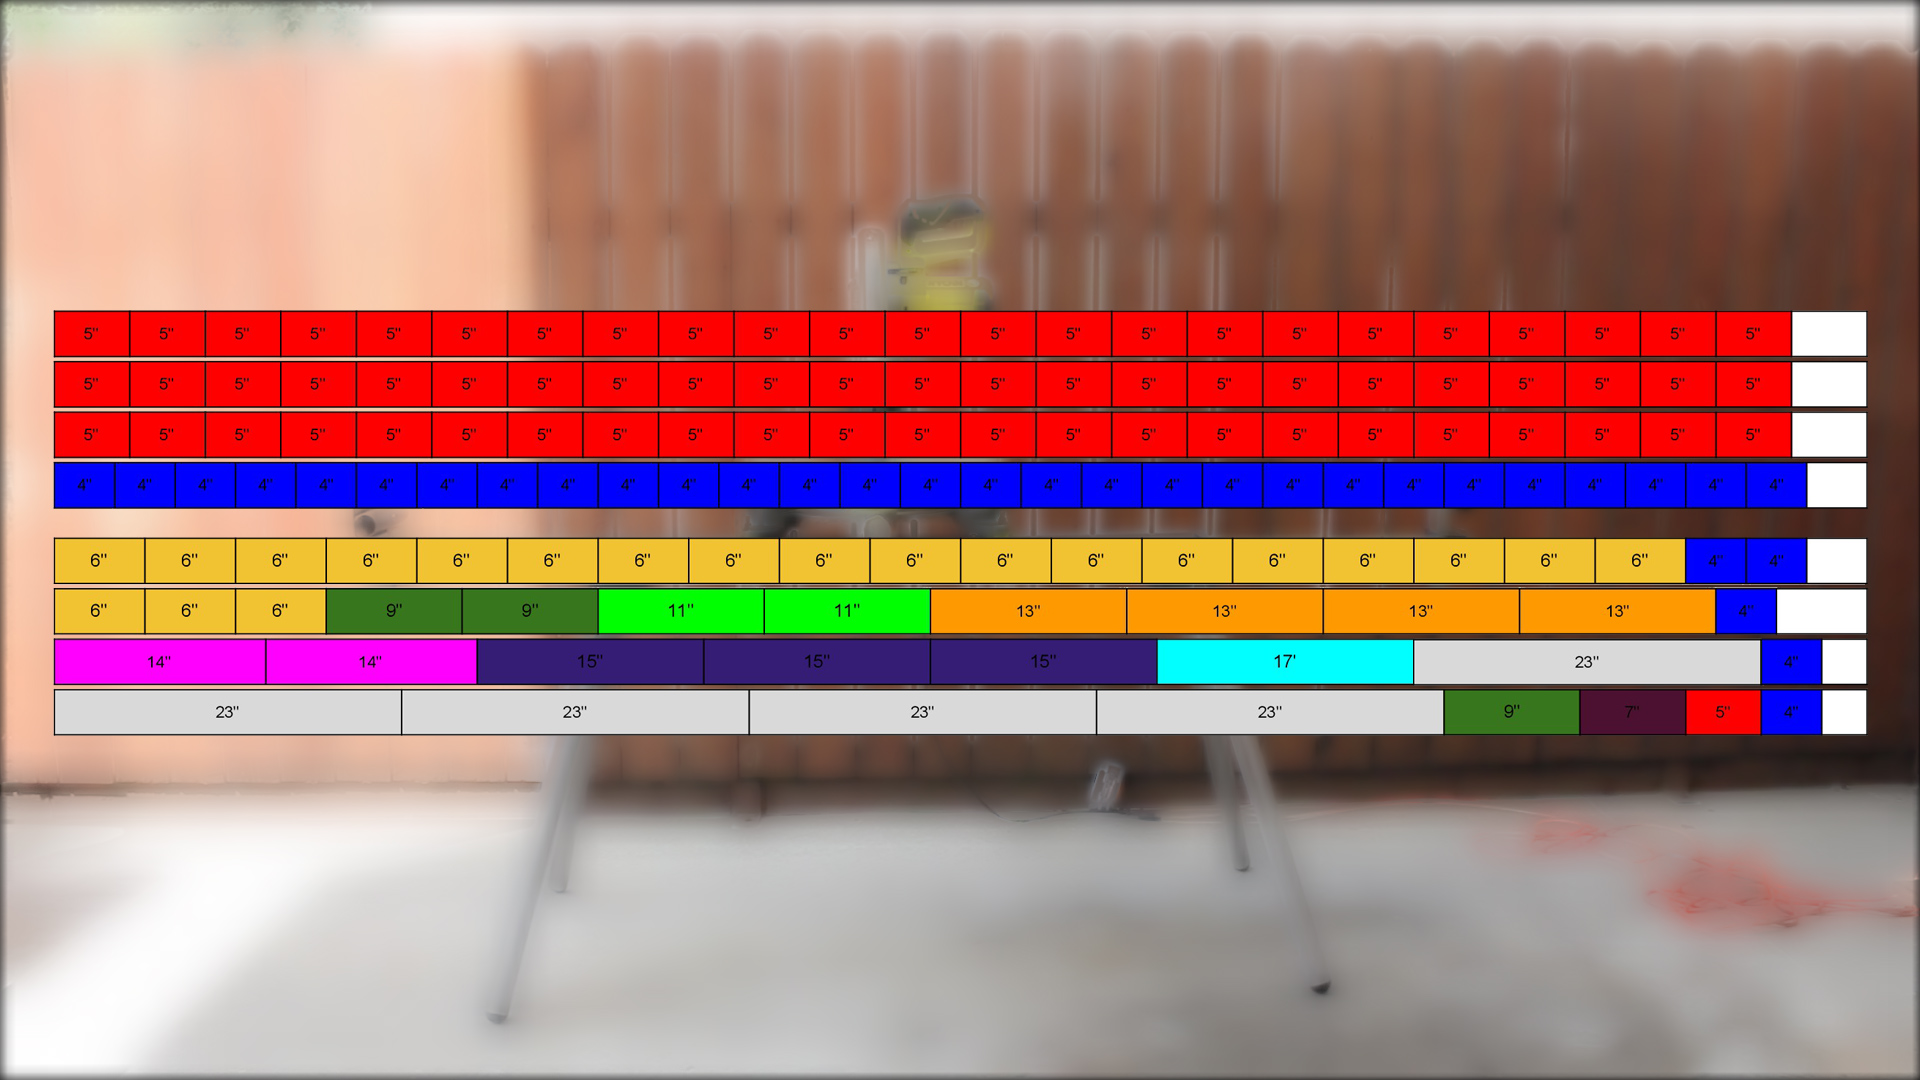
- The second photo shows those slices color coded based on the length of each piece (example: red = 5 inches)
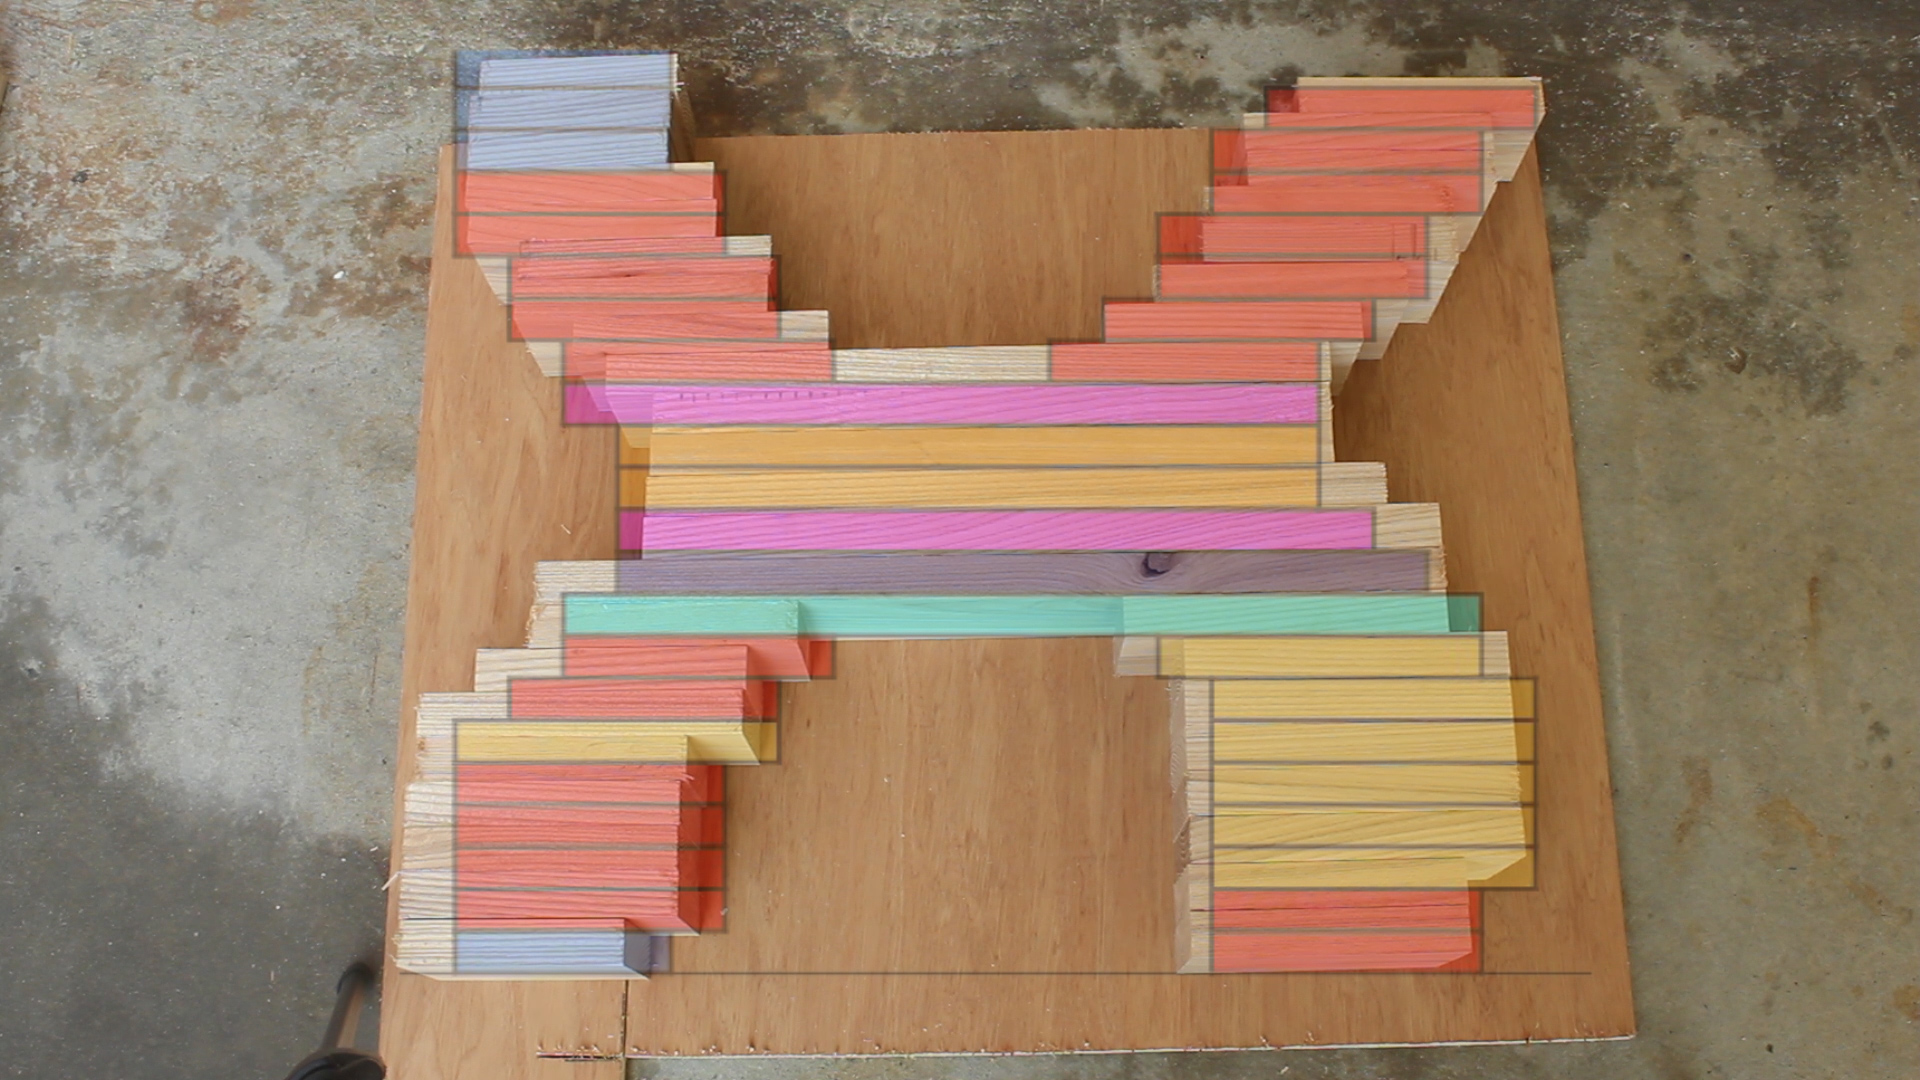
- The third photo is all of my pieces mapped out on dimensional lumber. I determined I'd need to order 8 x 10' x 4/4 stock wood cut at 3" wide each. Thus, each slat would be 10' long, roughly 1" thick, and 3" wide.

Above is the final number of pieces I cut for this project - it was a bit time consuming but probably the fastest part of the whole project! Just set up a stop on your miter saw.
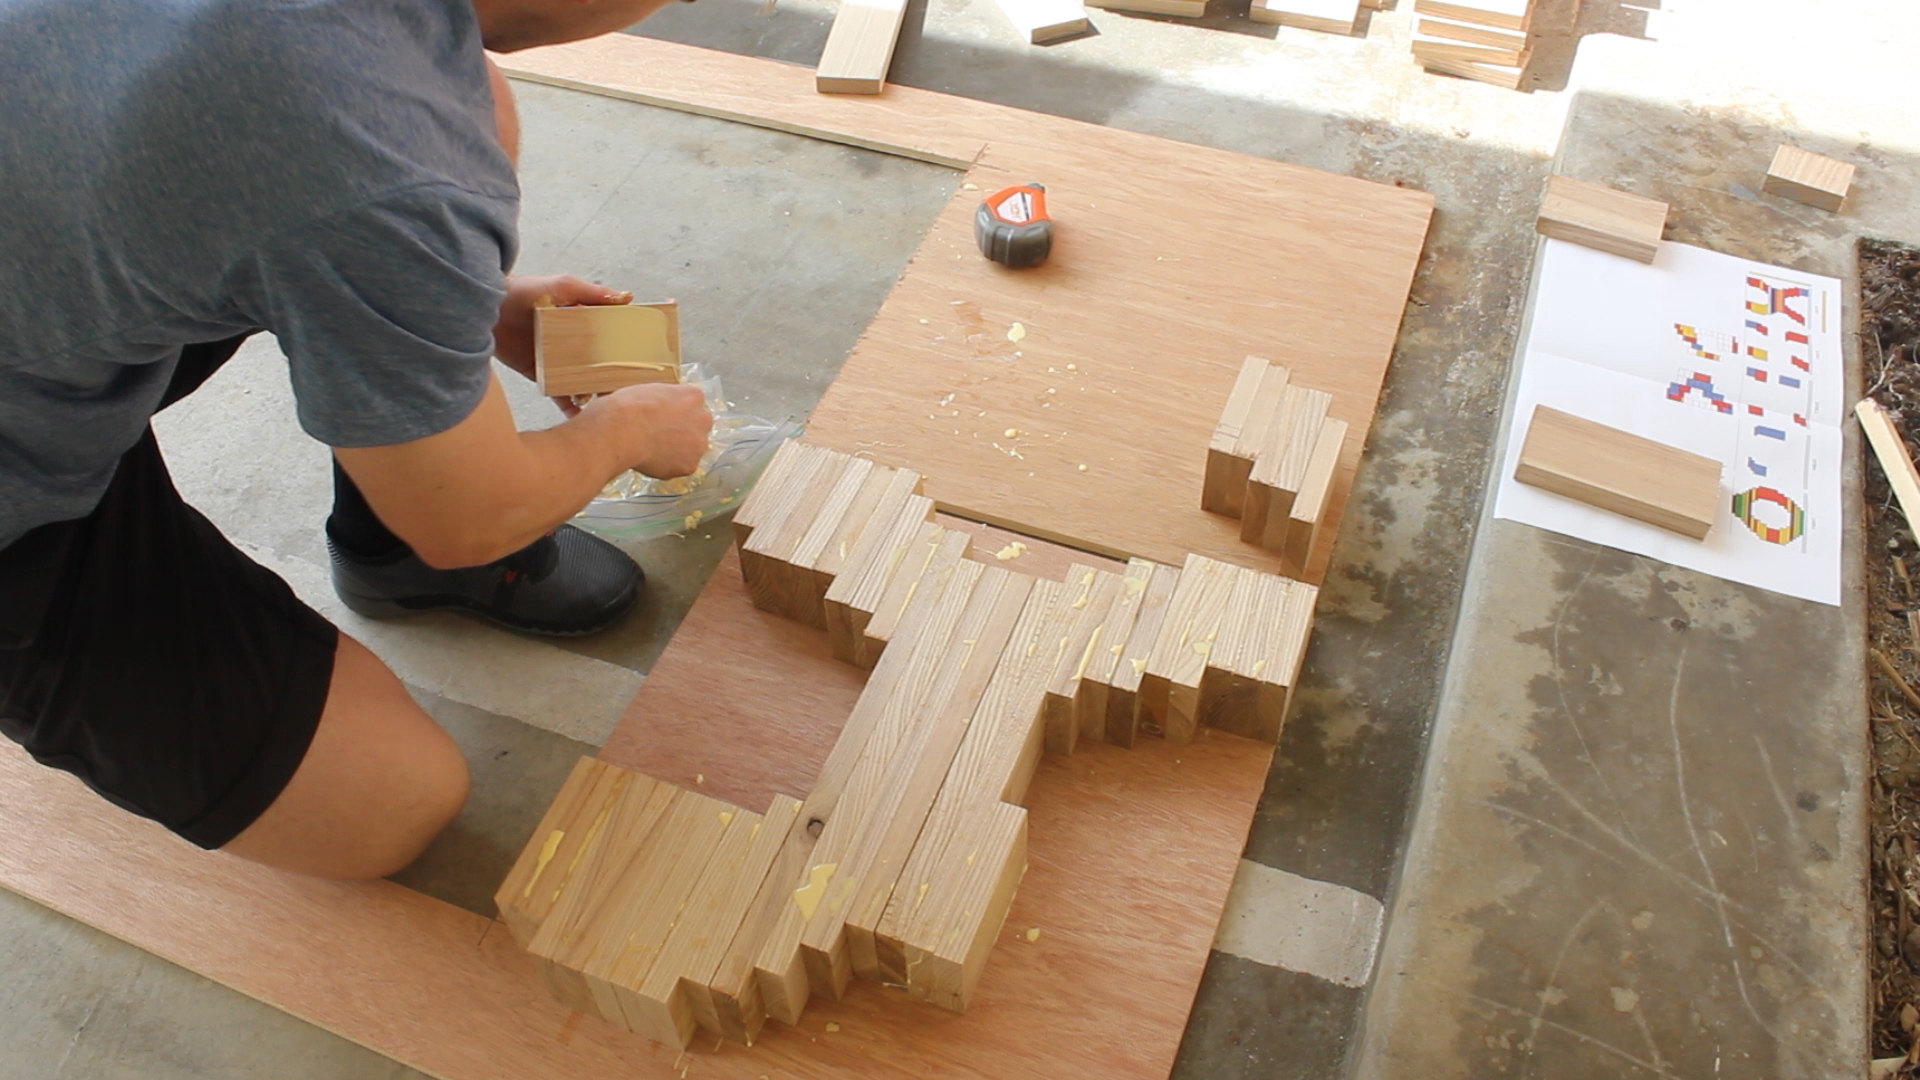
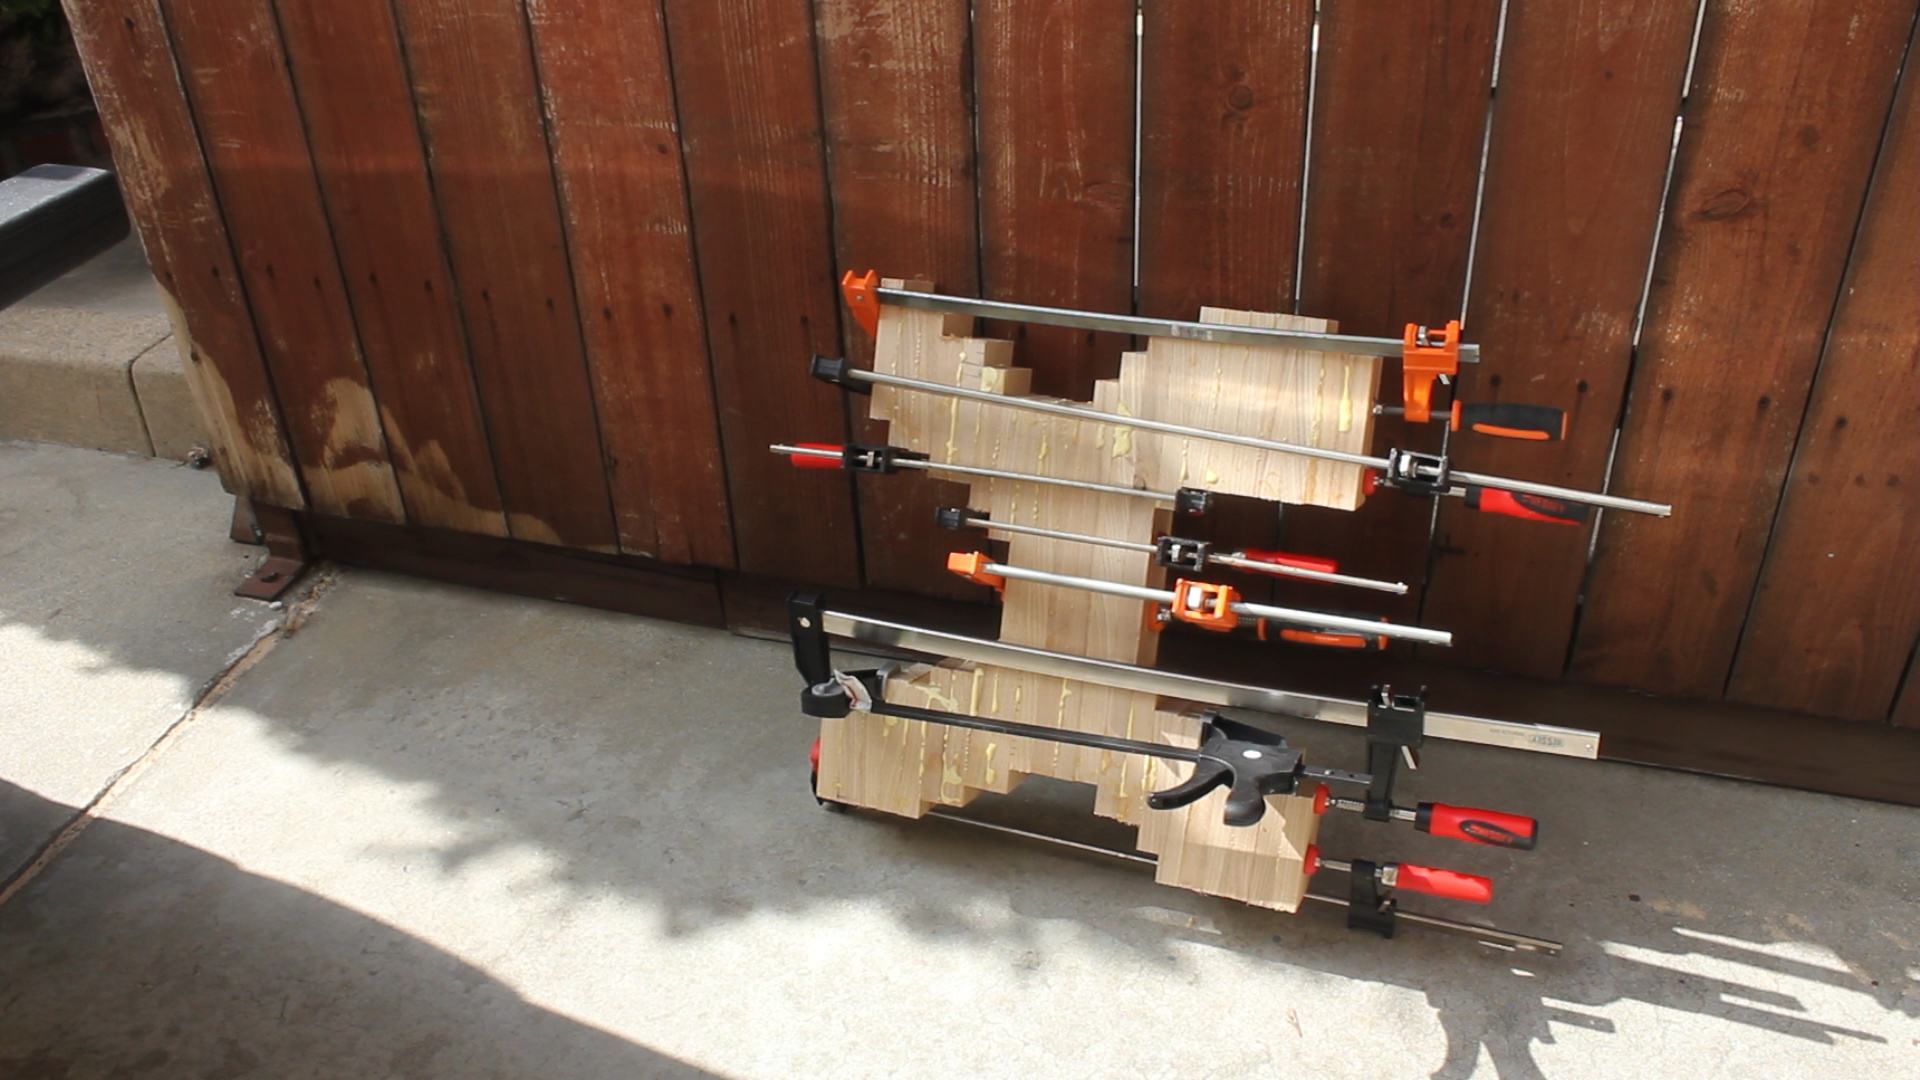
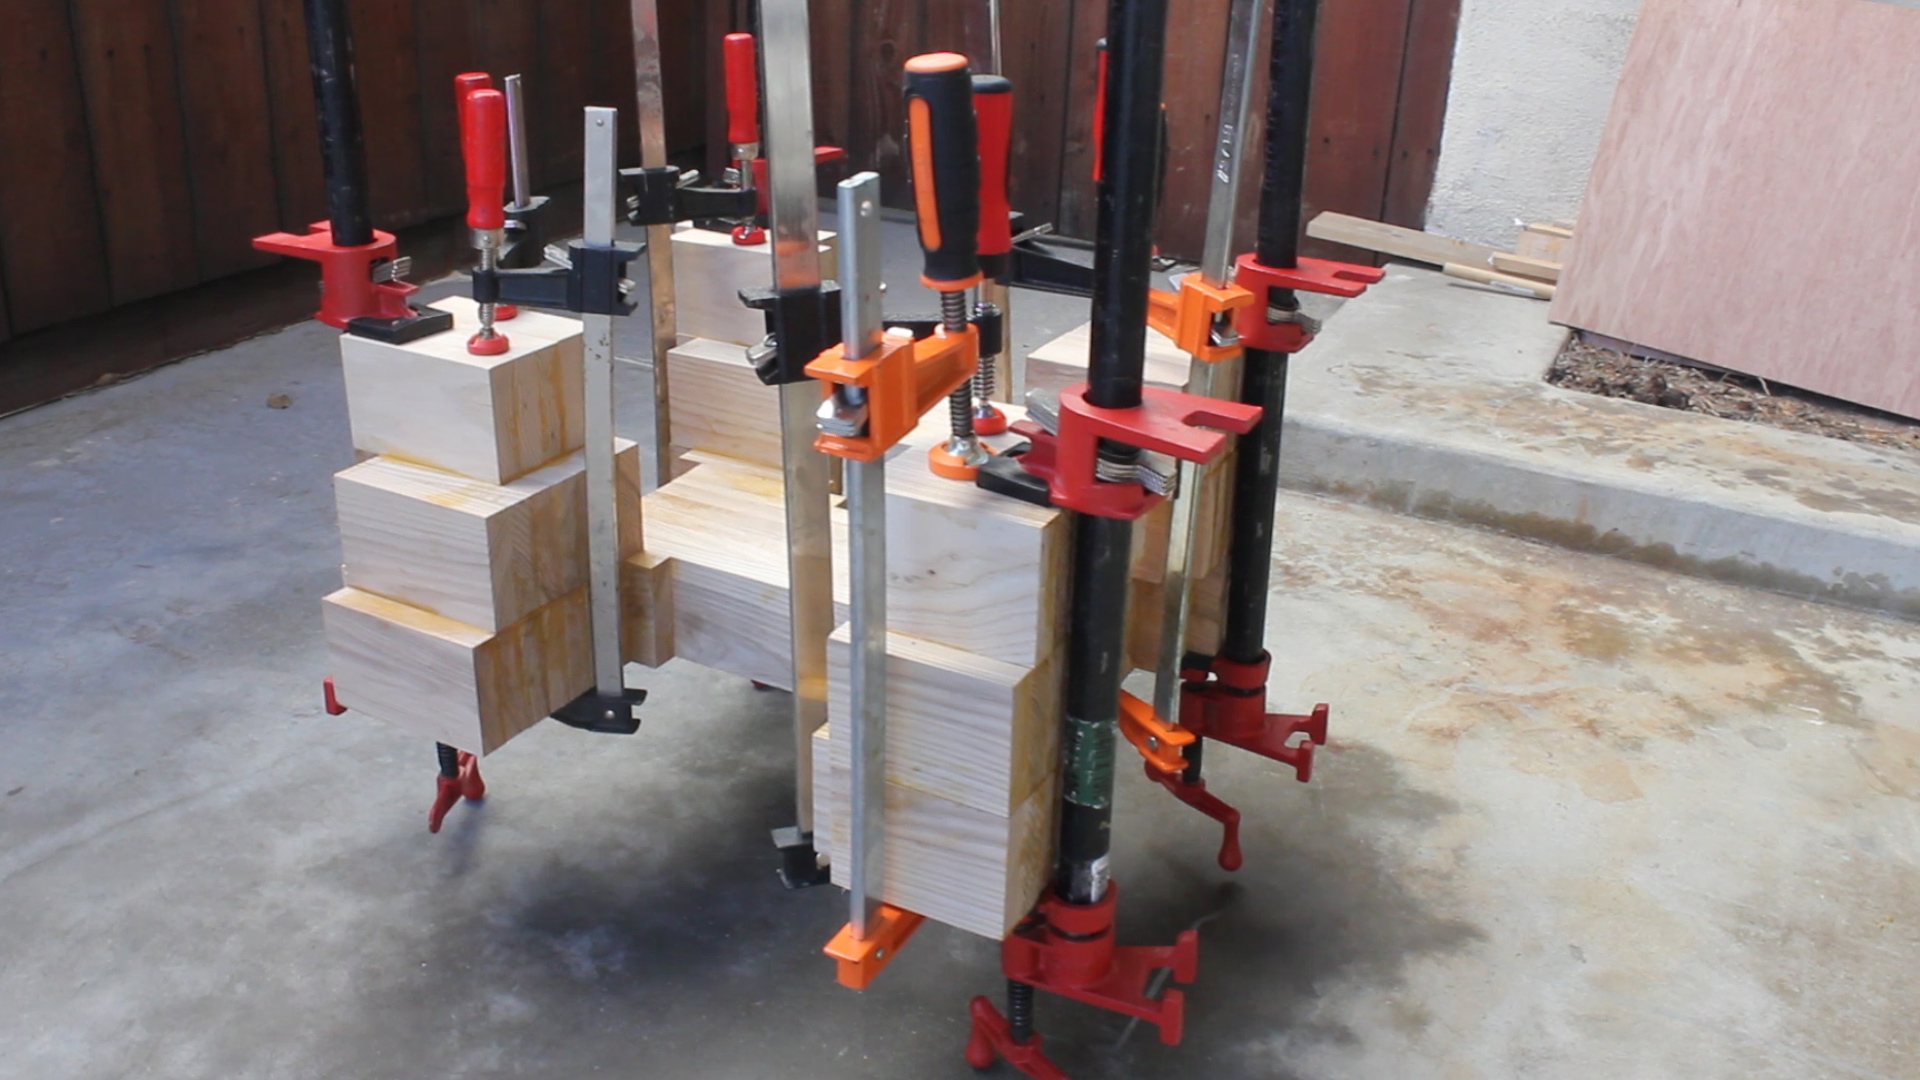
Next, I could begin laminating my individual slices. I took this slow and consistently referenced my design plans (print them out for reference). Since I chose not to use finish nails to hold my pieces in place as I did not want to hit anything when I was eventually carving this piece down, I took the clamping very slowly, just slowly tightening each section so that nothing slipped and it all stayed flat. Doing this on top of a flat piece of plywood was very helpful and avoided any big mess in my driveway.
A tip I picked up from Lumberjocks for spreading glue is to use an old credit card - works quickly and very efficiently for getting a thin, solid layer of glue. I let each glue up cure for 12 hours each.

I repeated this process for each of my five layers. Again - this will take some time, so prep accordingly, as you want to give each section proper time to cure.
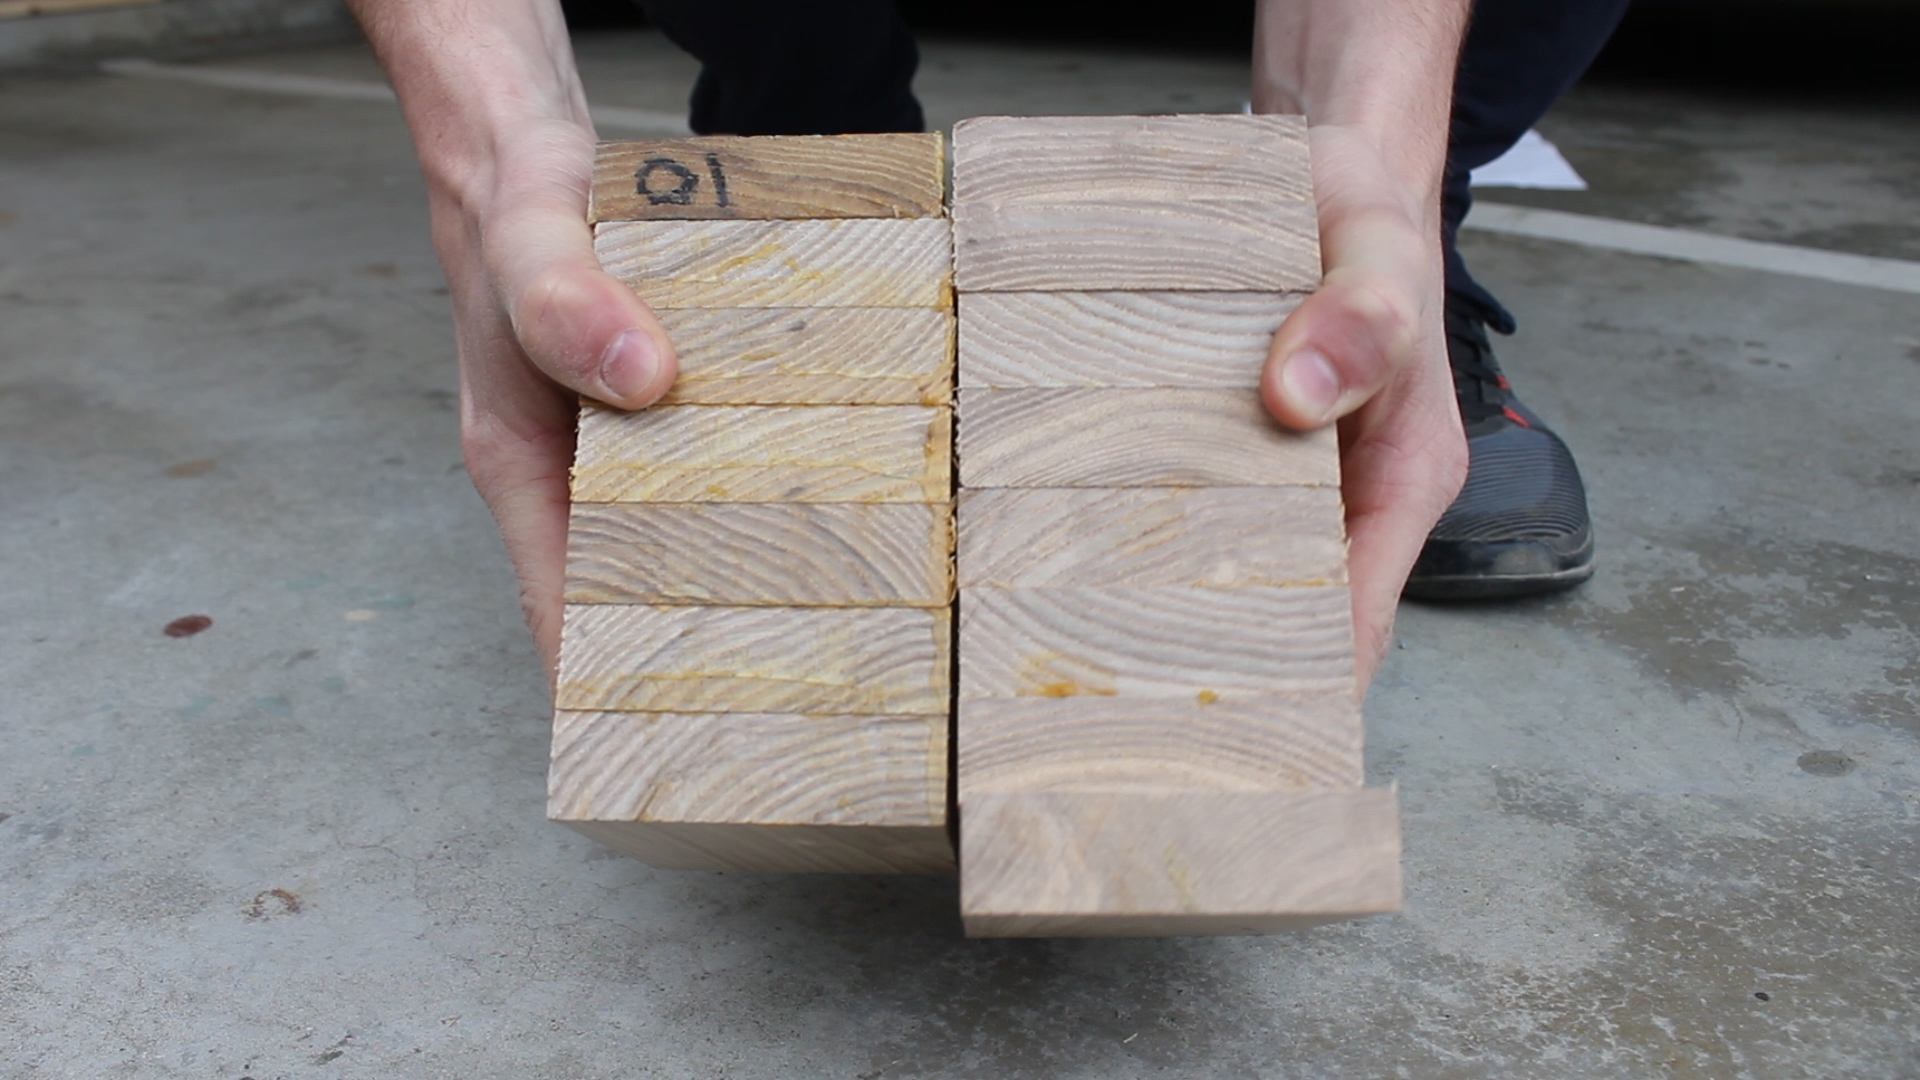
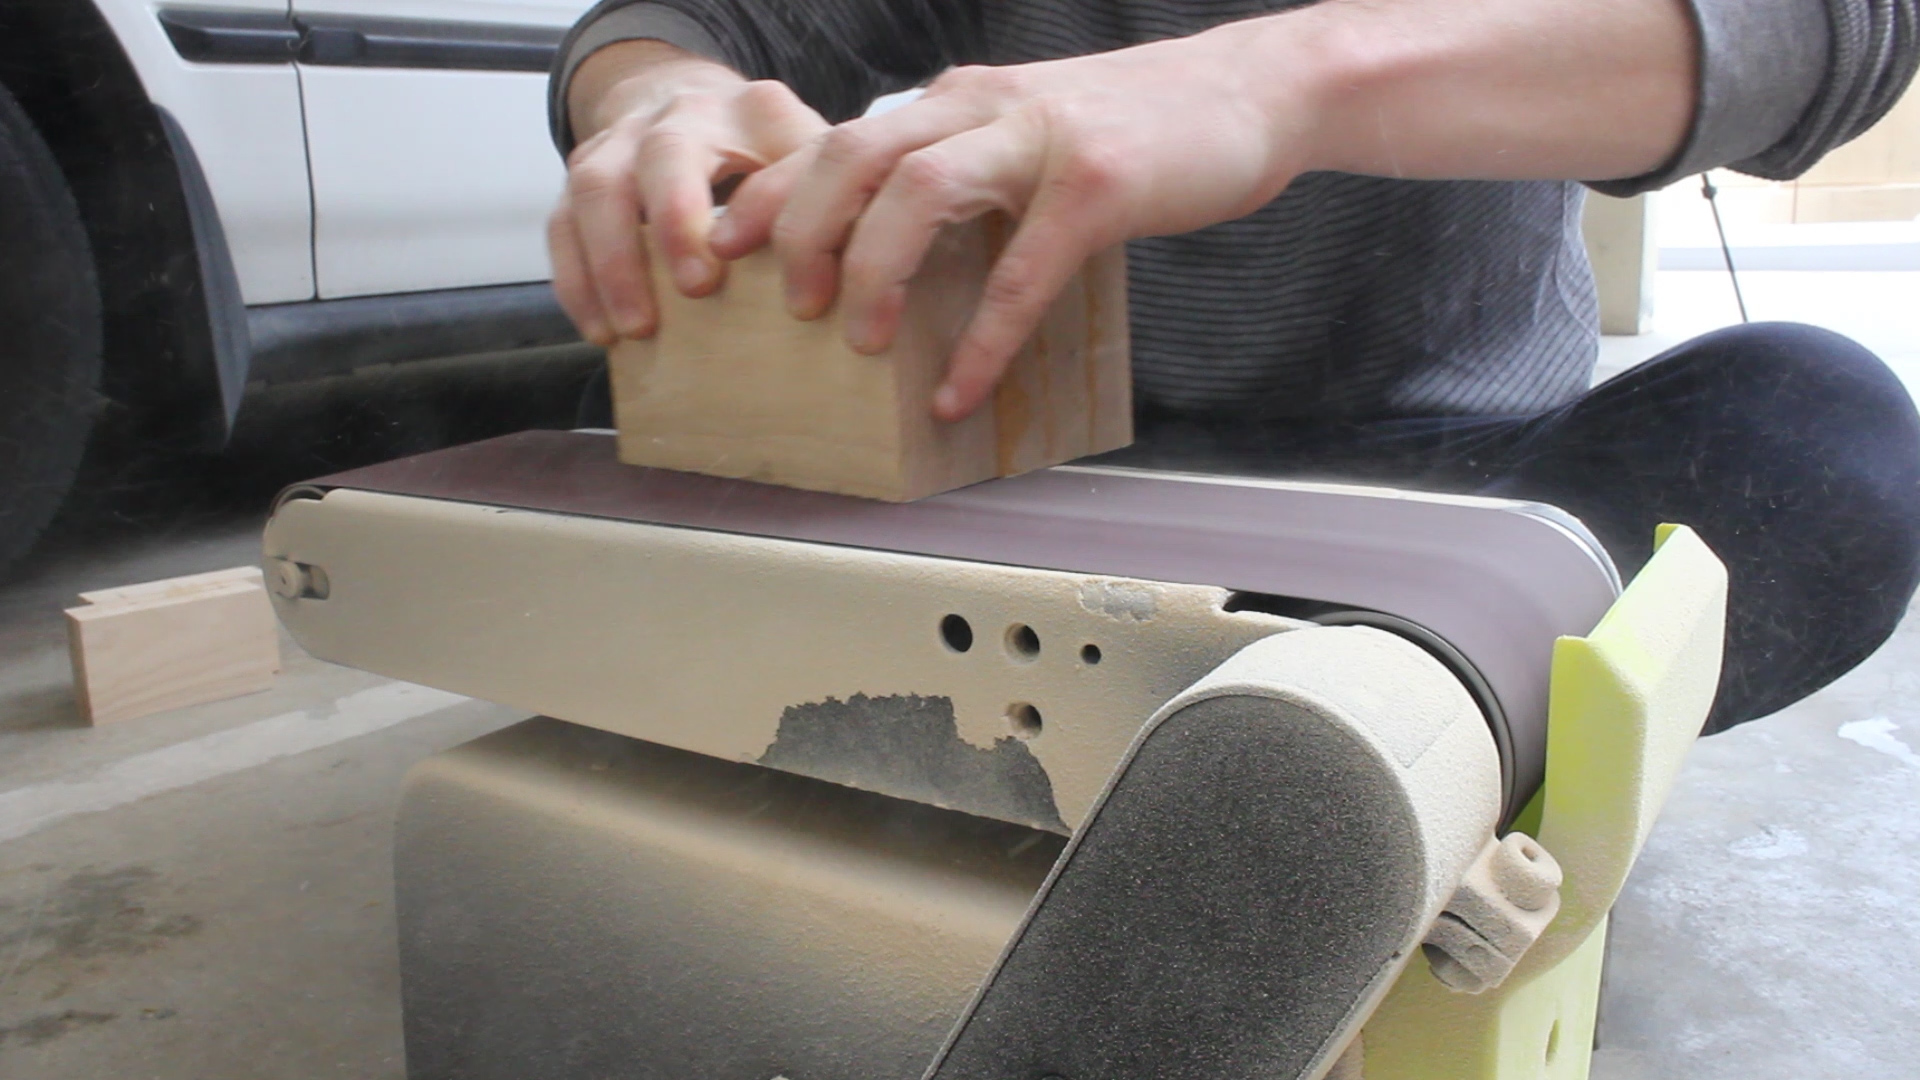
Even though I was careful to keep things flat, the pieces still needed flattening on each end before laminating. I used my stationing belt sander for this - and it was very quick and efficient. You can see the difference in the first and third photo. They were all prepped for final lamination now.
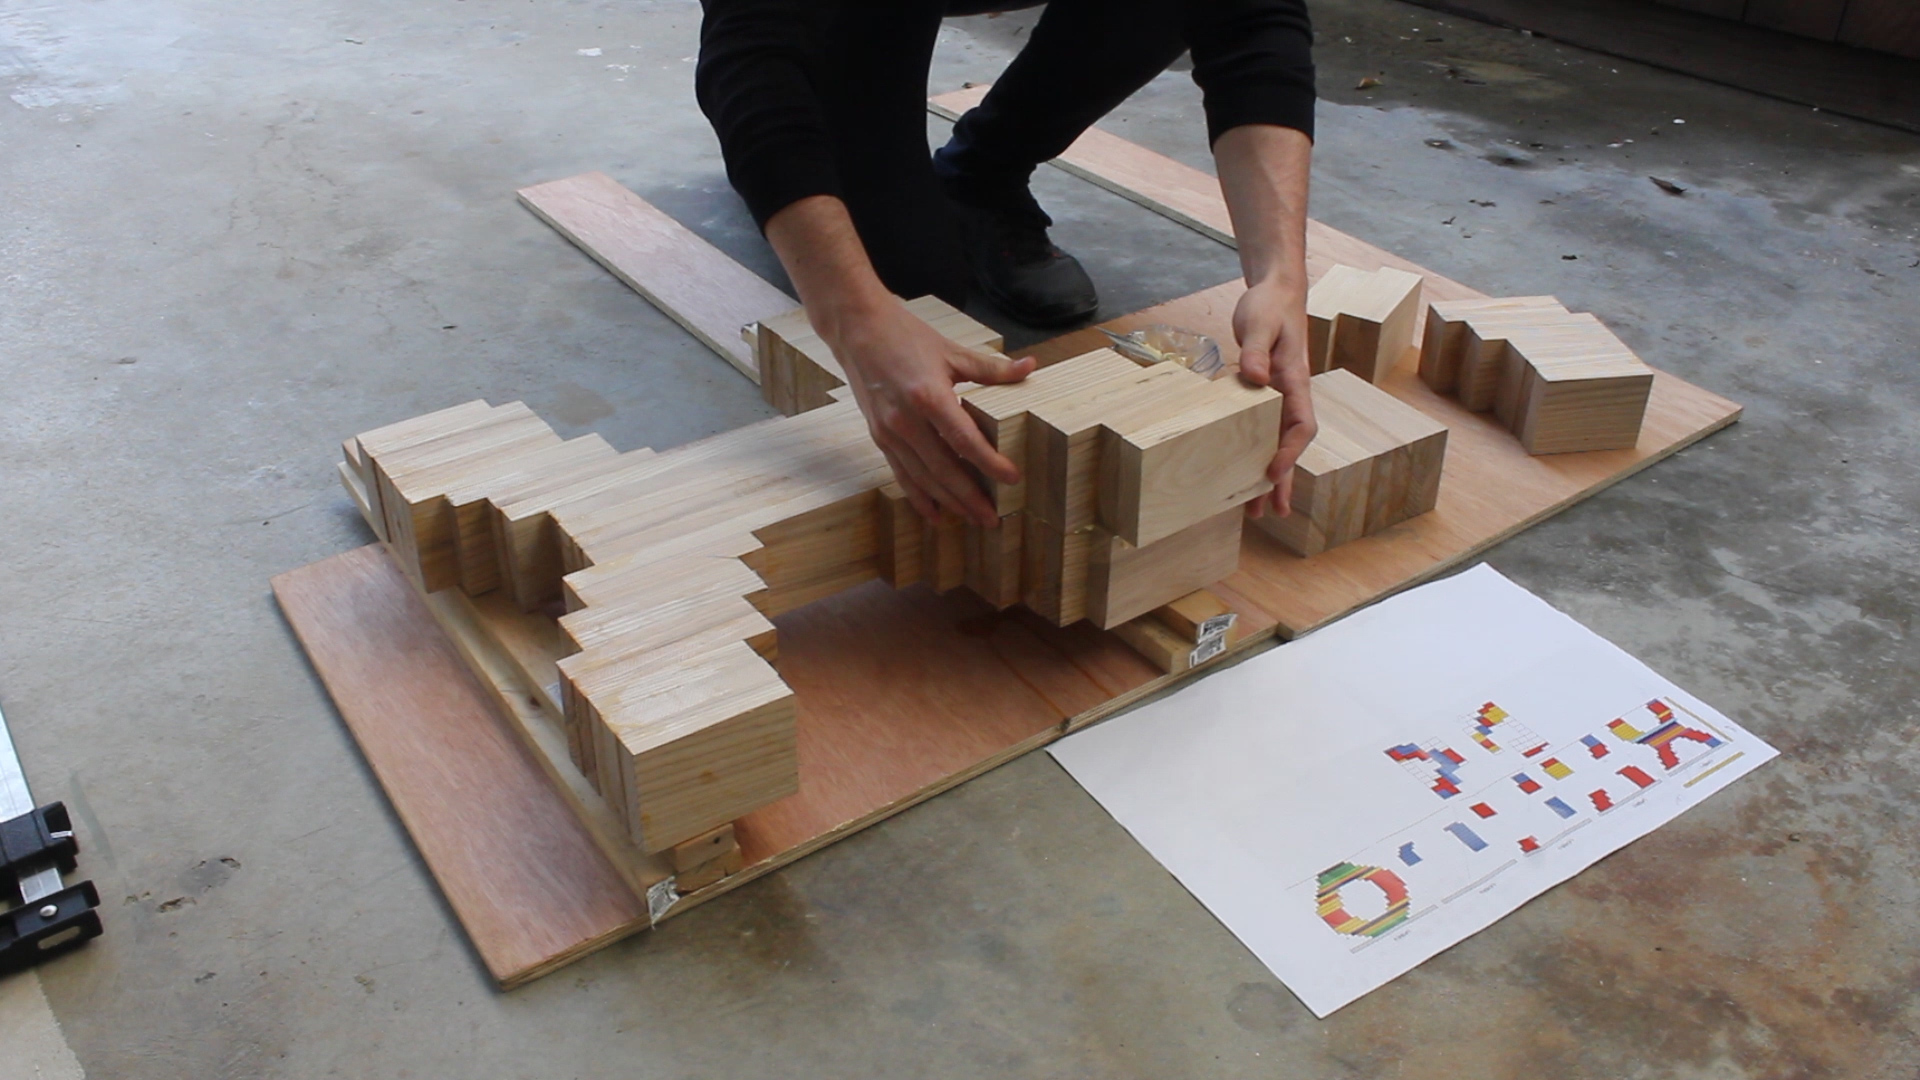

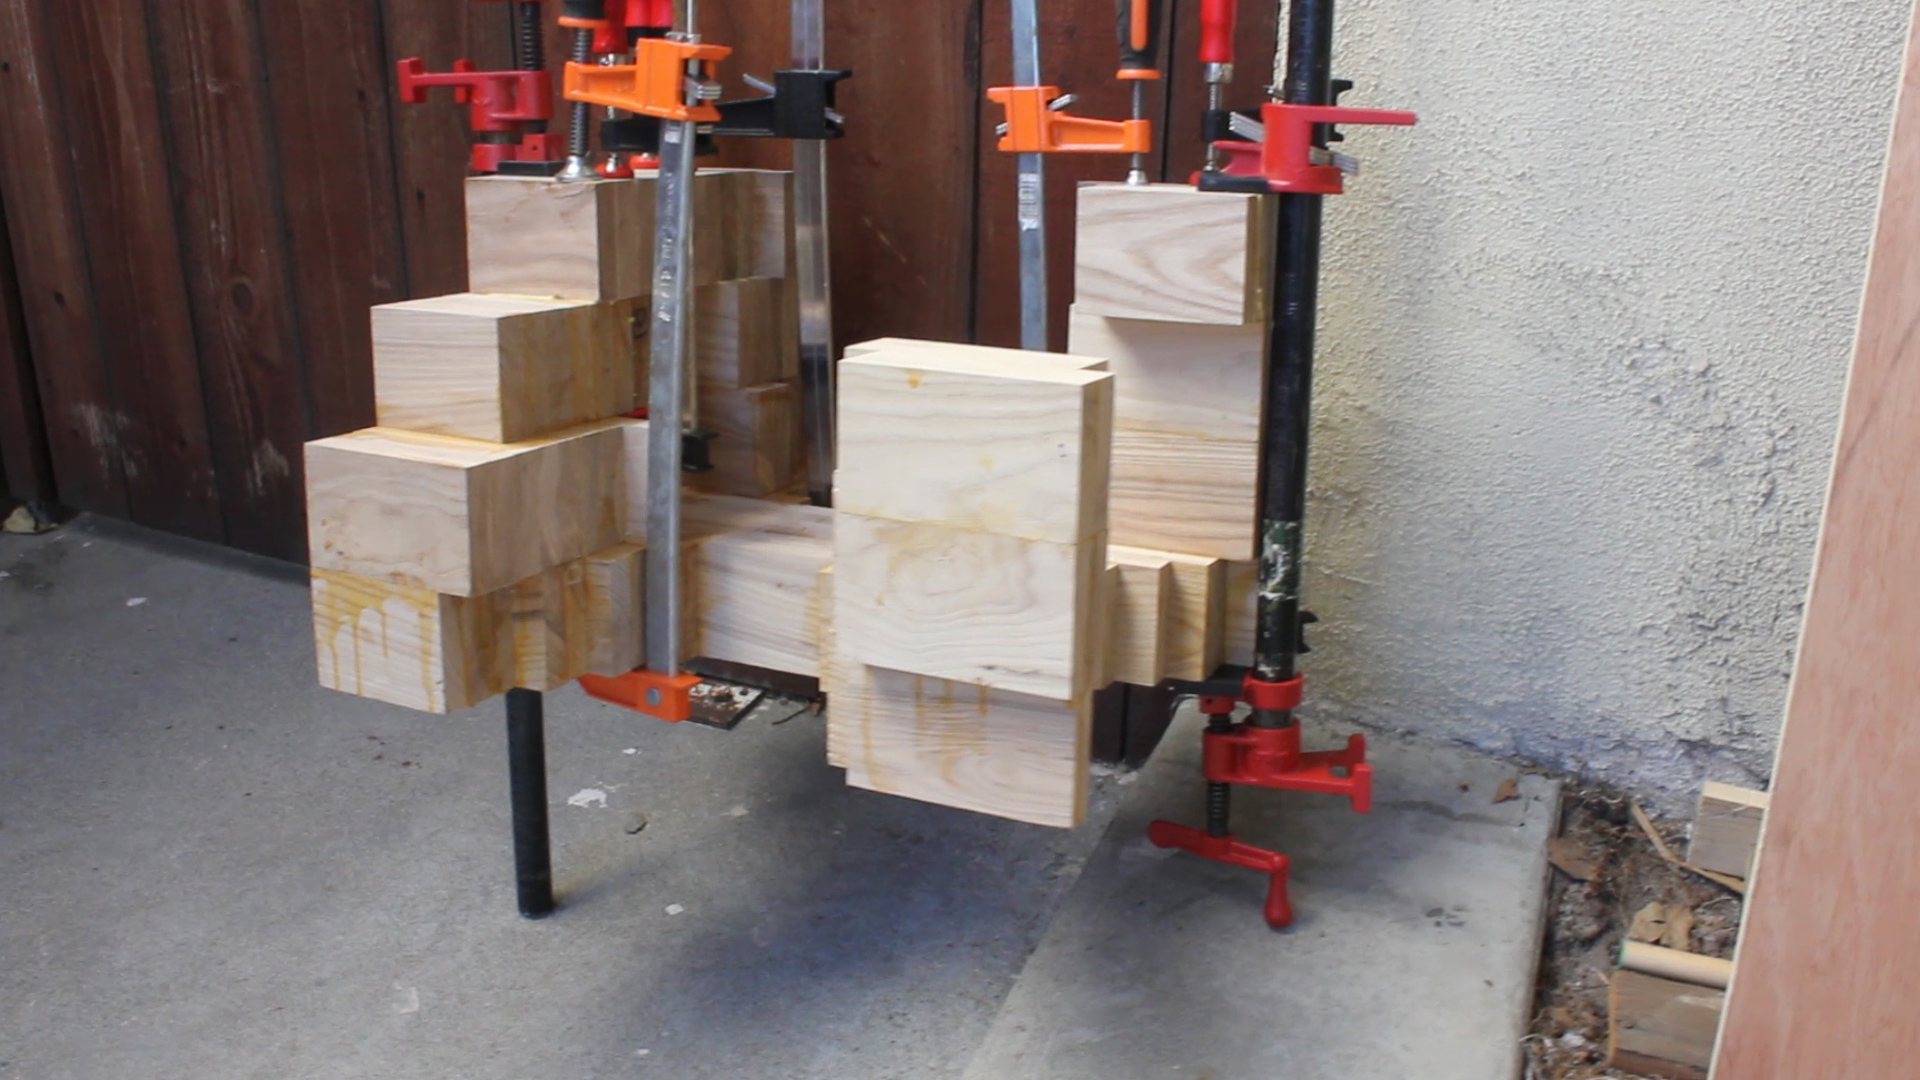
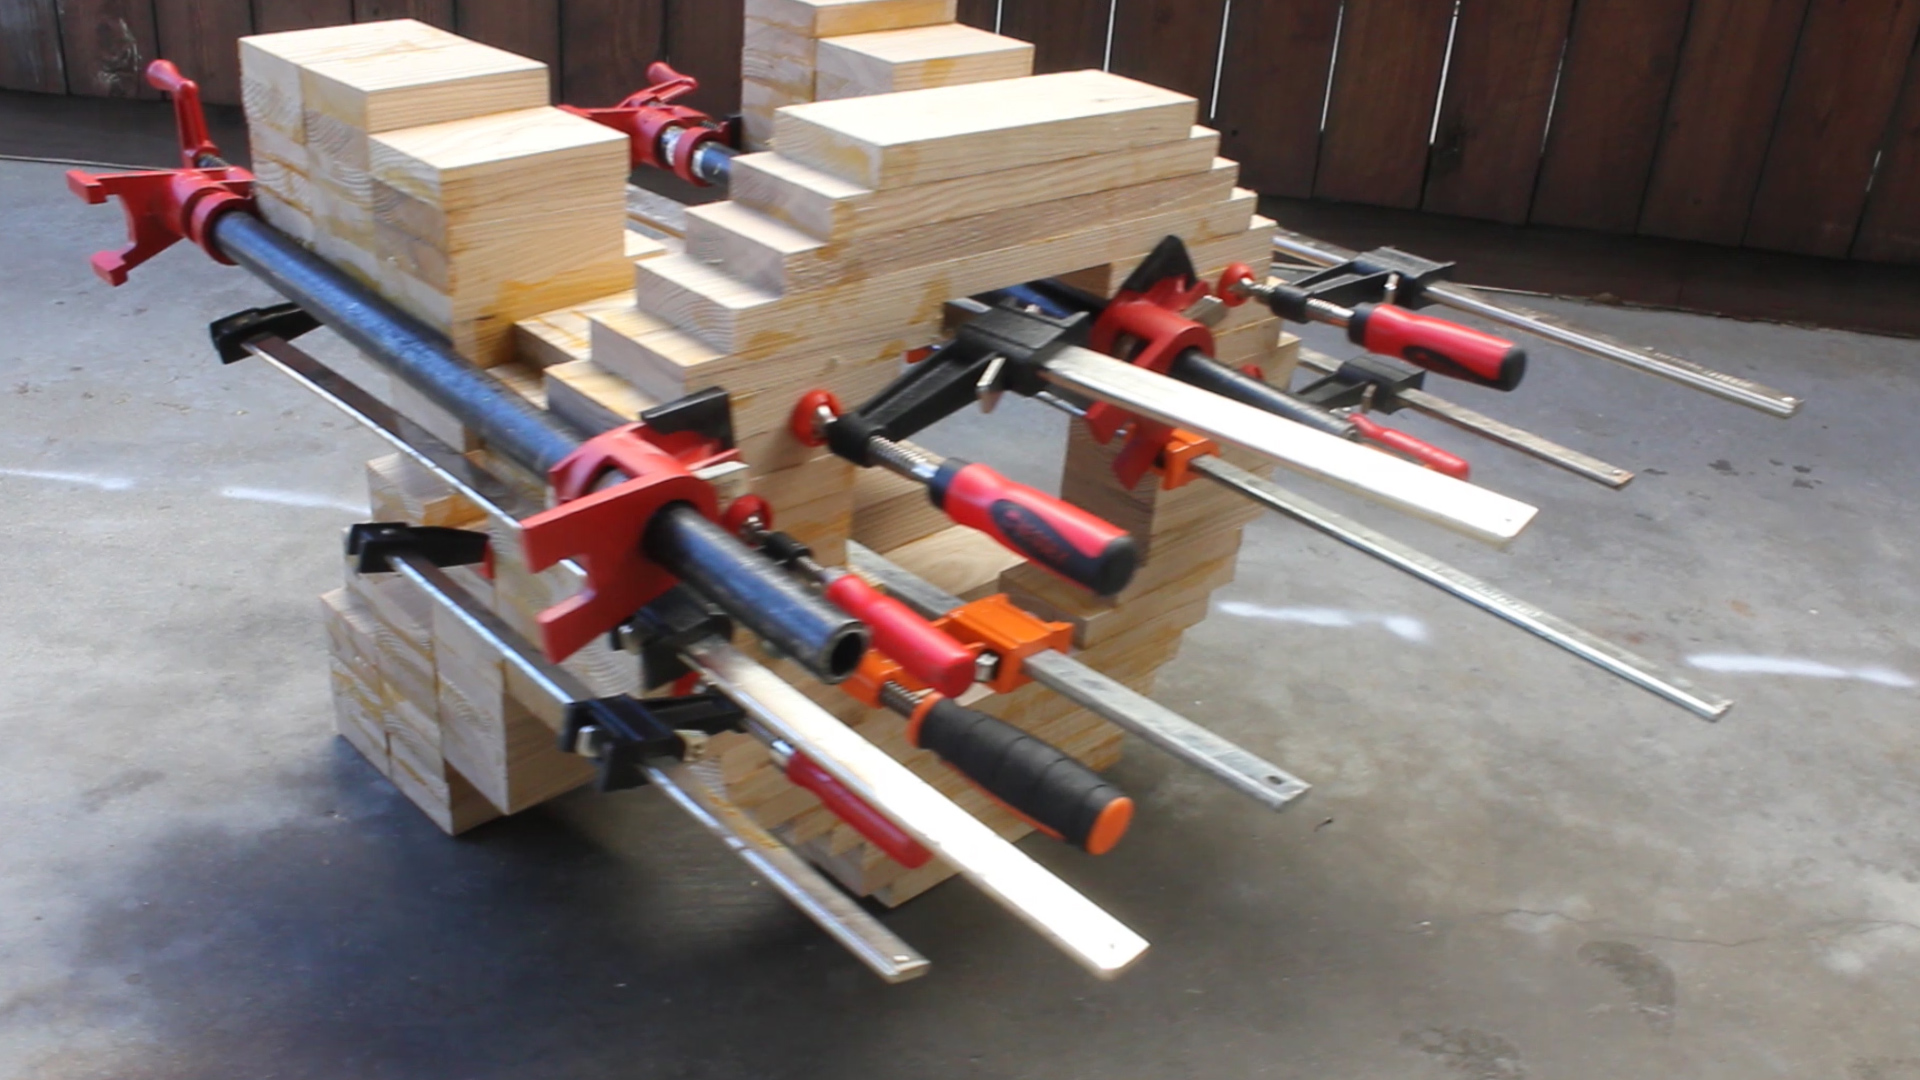
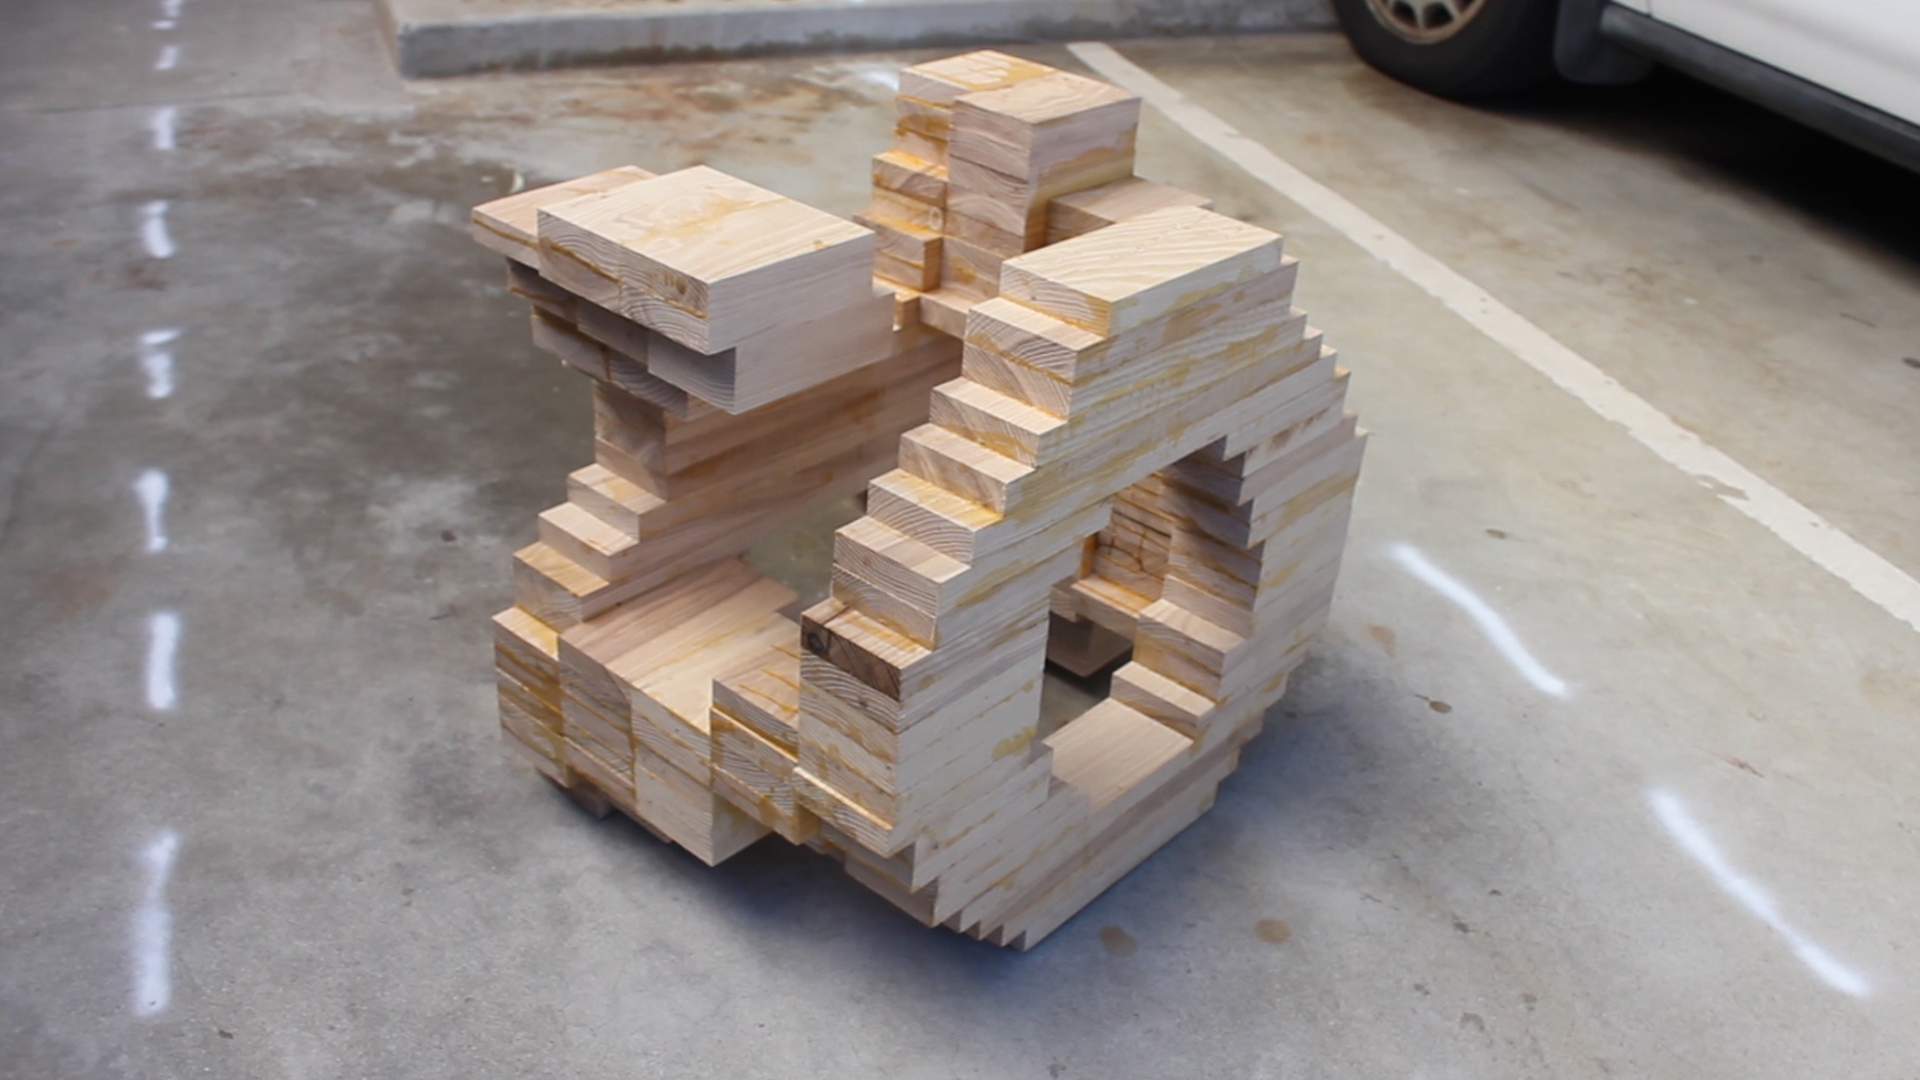
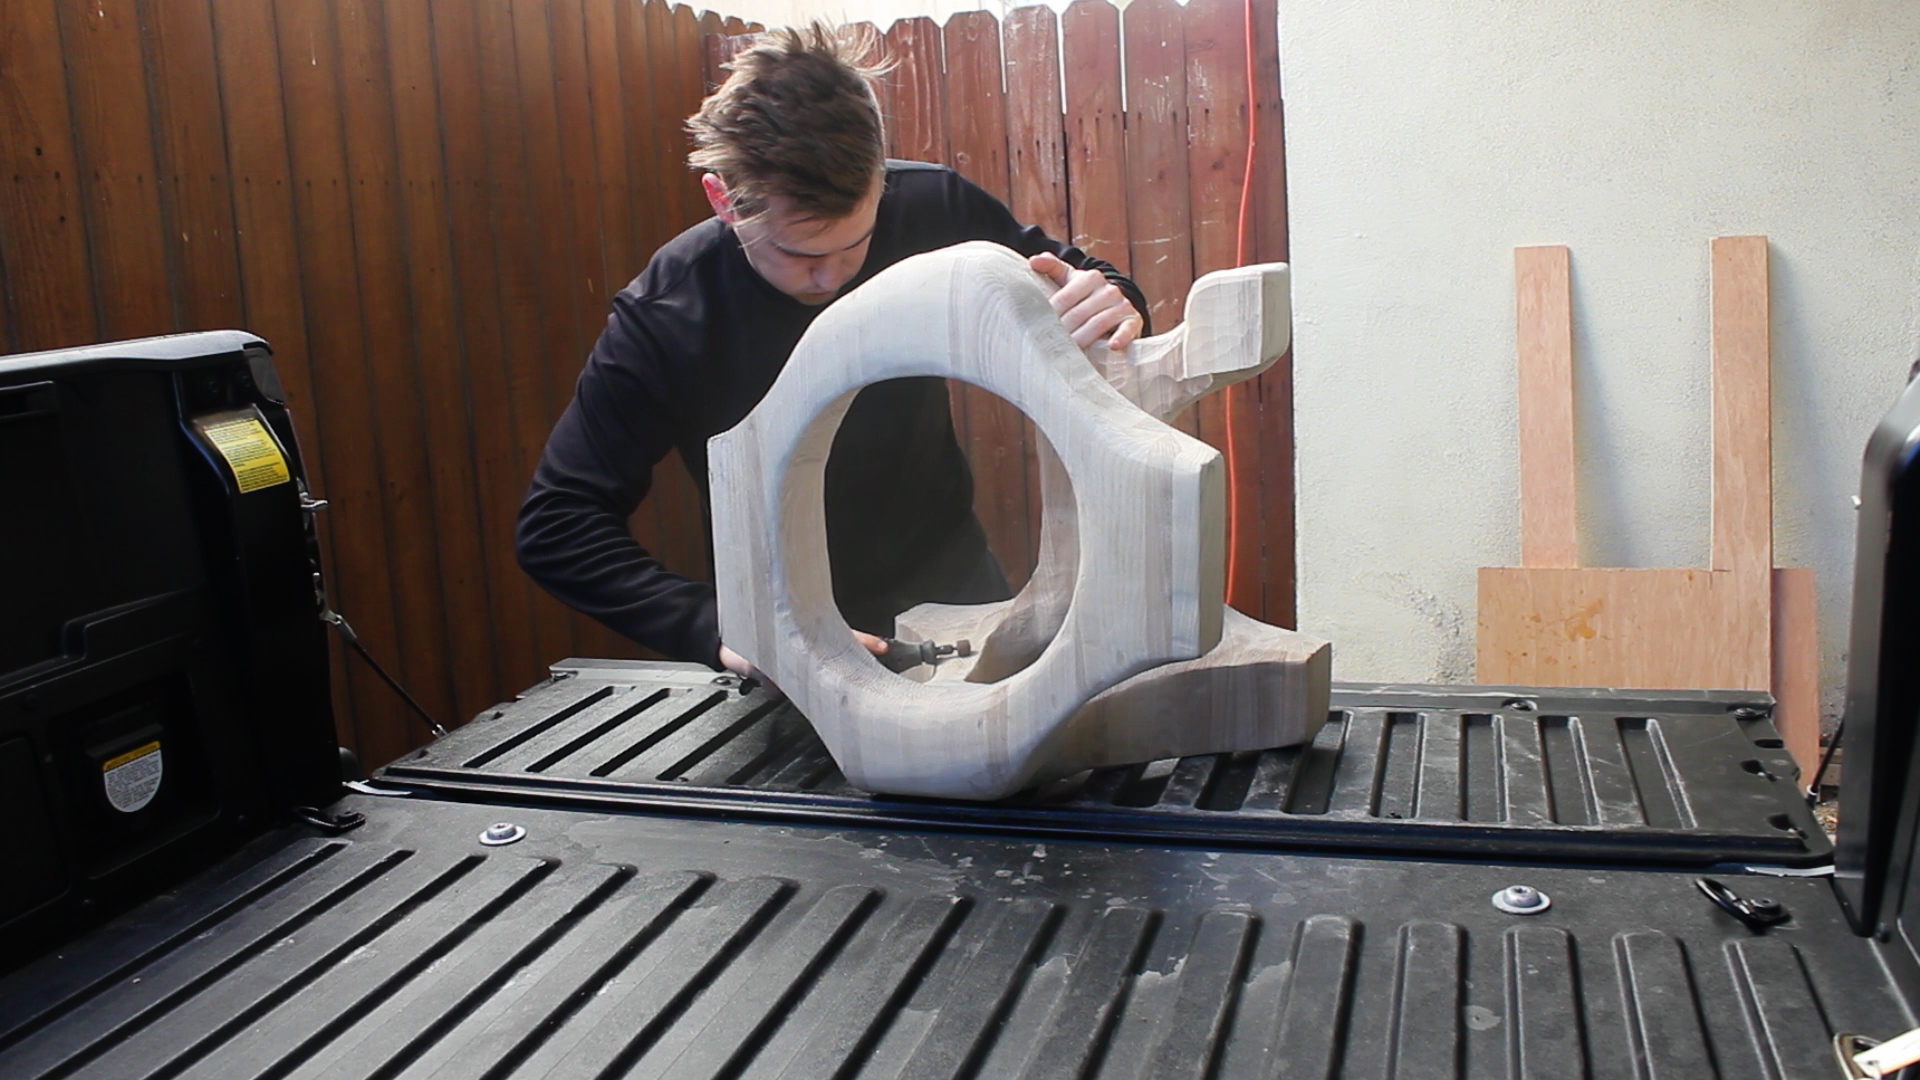
Again - no finish nails to hold this in place, so with each layer I stacked, I took it slow, spread the glue evenly, and clamped up incrementally to avoid slipping. The photos show the progression of each layer, resulting in the final raw shape in the last photo. Not bad right?

I also laminated my table top at this point (my 5 x 23" pieces) - very simple and straight forward - just make sure to use clamps on the top and bottom to avoid any "bowing" and spread the glue evenly. After 10 minutes, you can go back and wipe away excess squeeze out. Let it dry for 12 hours before doing any work on it. I wasn't sure what my final length would be for the top, so I aimed high knowing I could cut away whatever I needed.

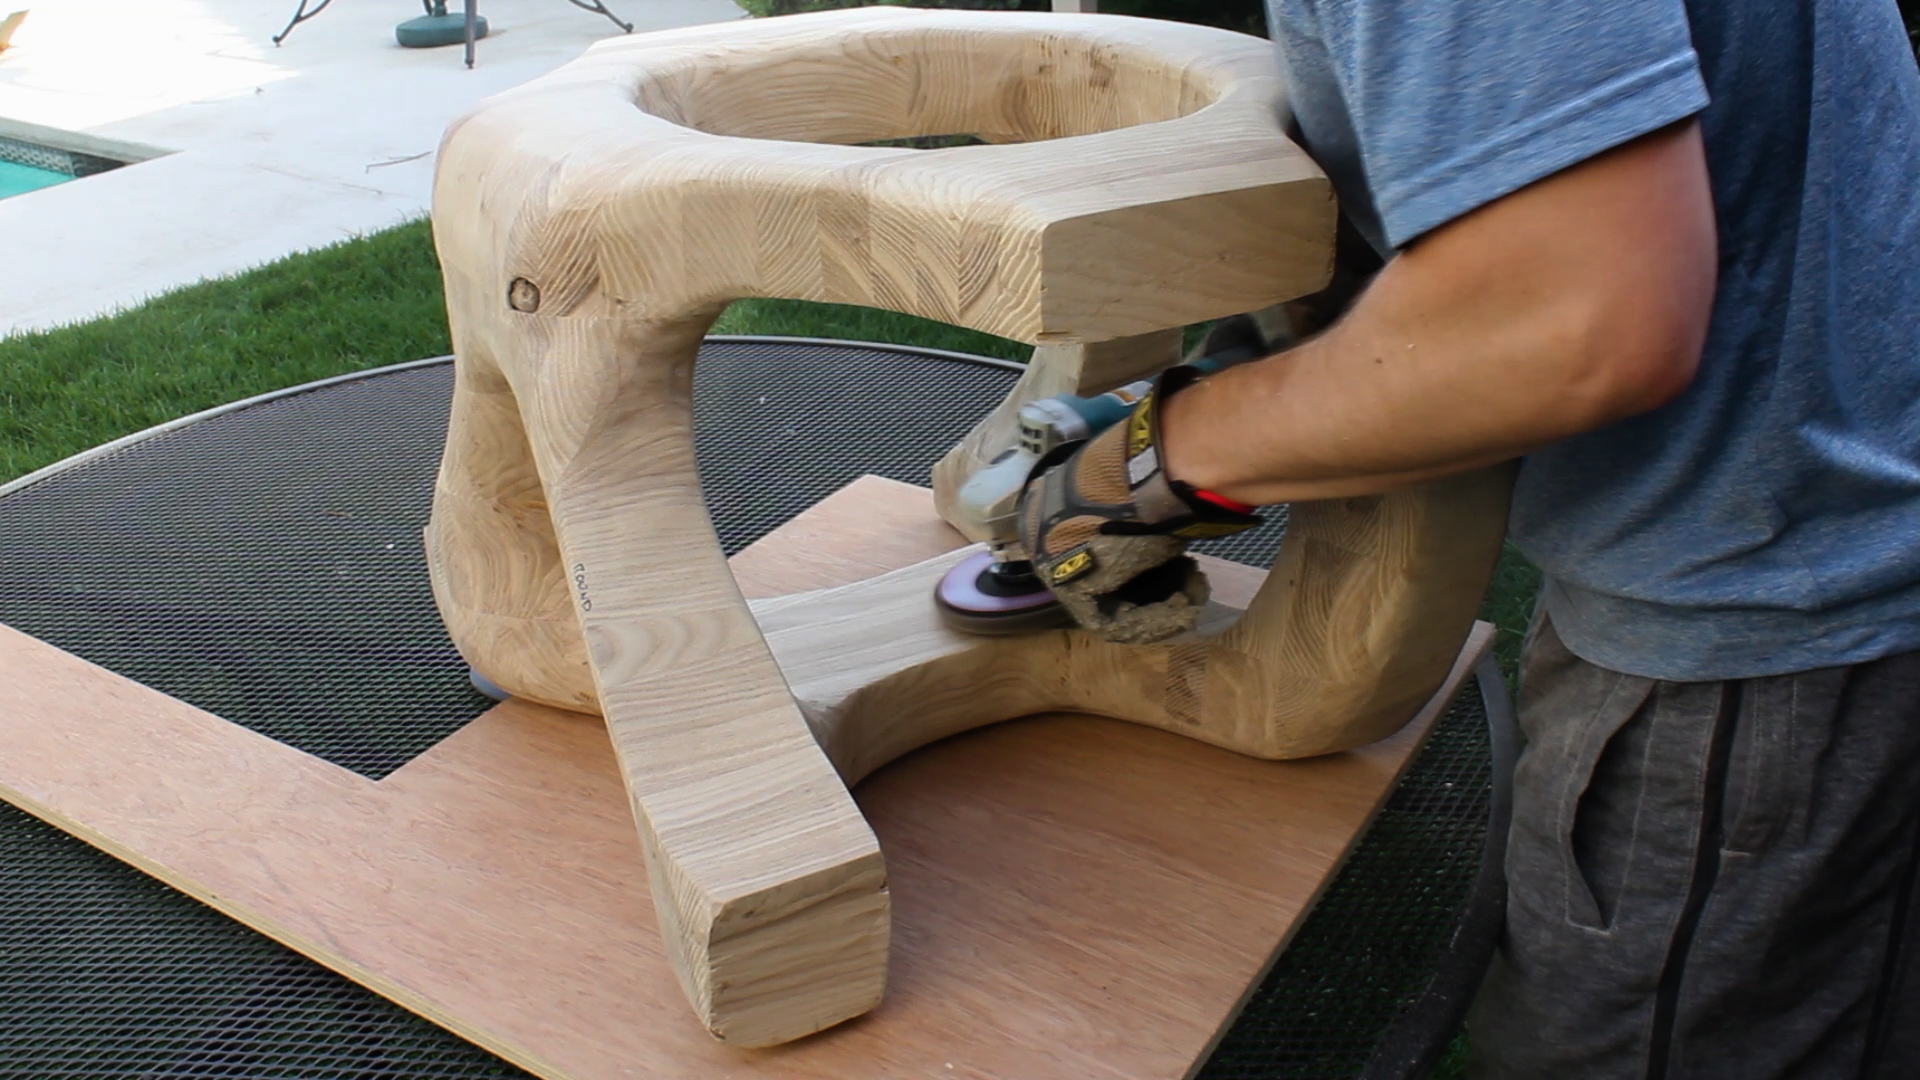
Time to shape! ArborTech sent me their Turboplane Blade for free to use in this project. It comes with everything you need to attach it to your 4" or 4.5" angle grinder.
This thing is POWERFUL. I love it and was so excited to use it to shape my final table. Below is a sequence of photos of me carving up my piece.

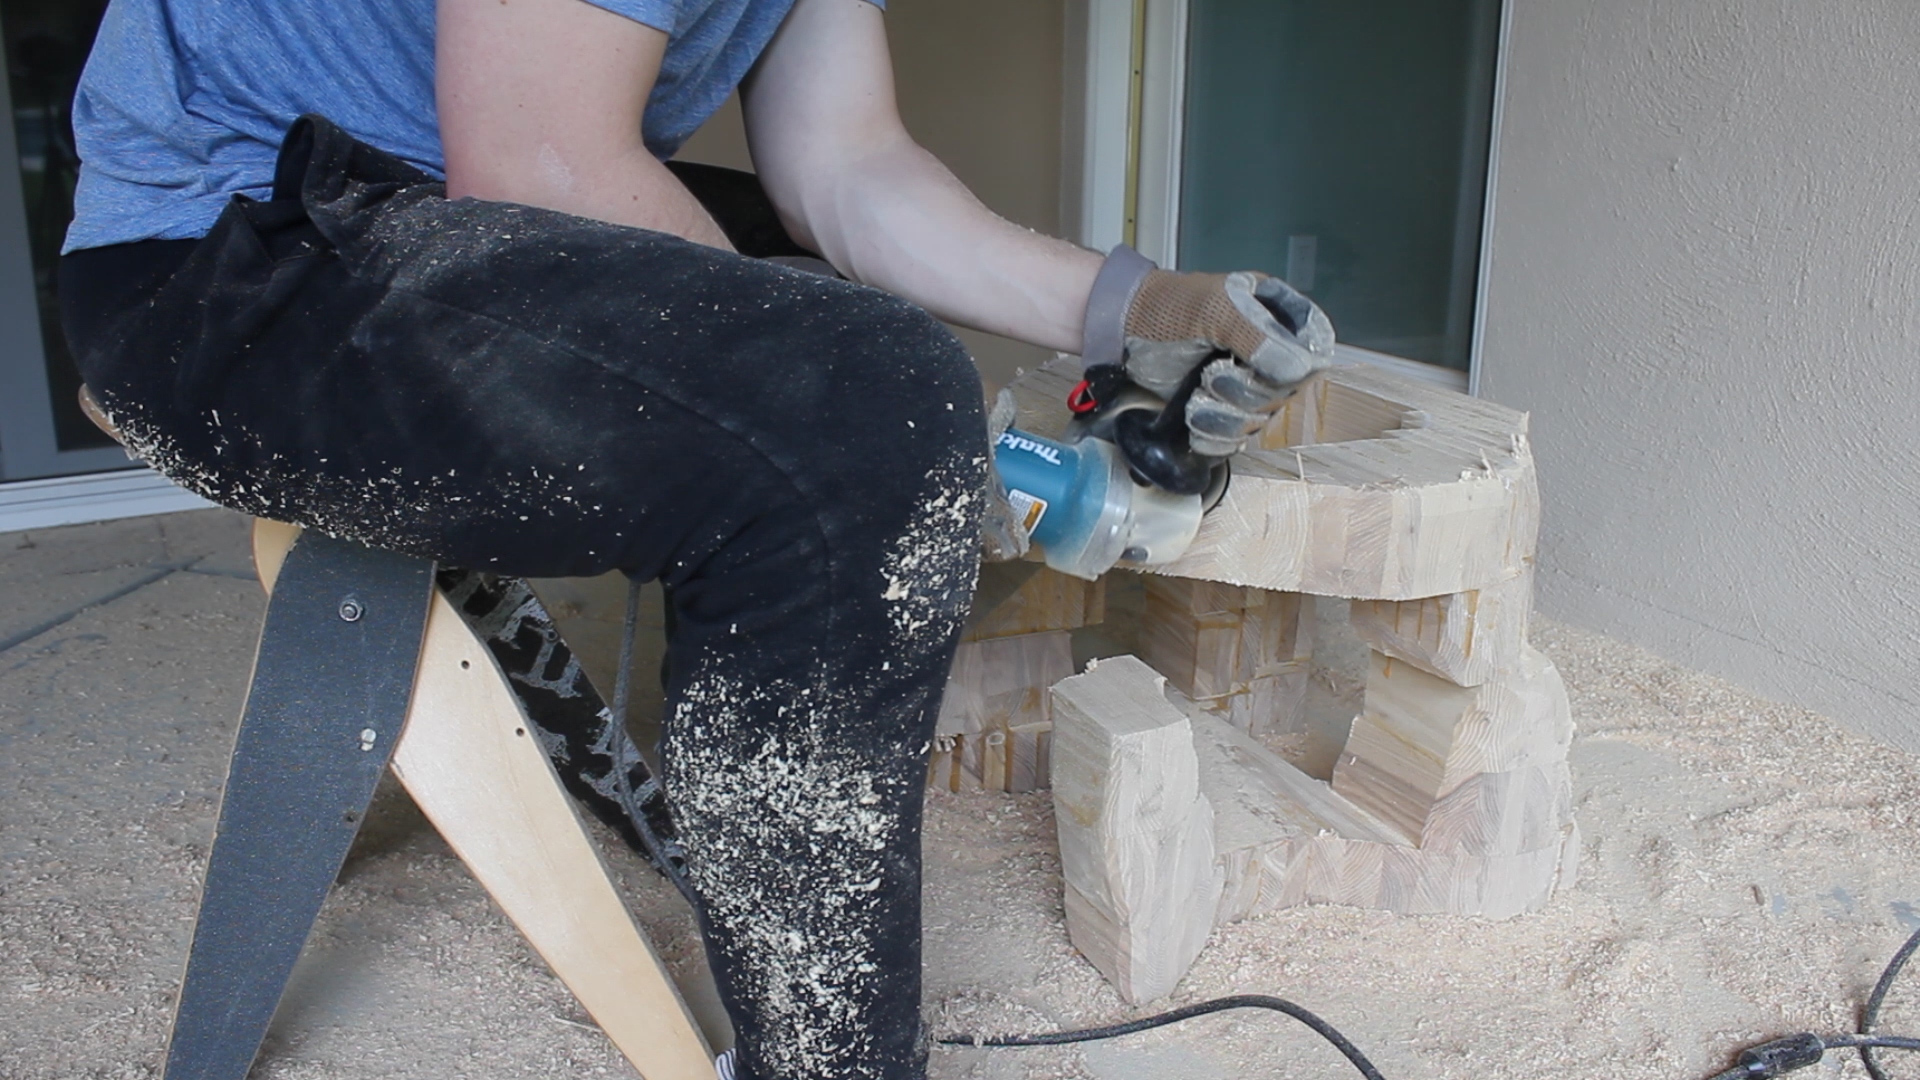

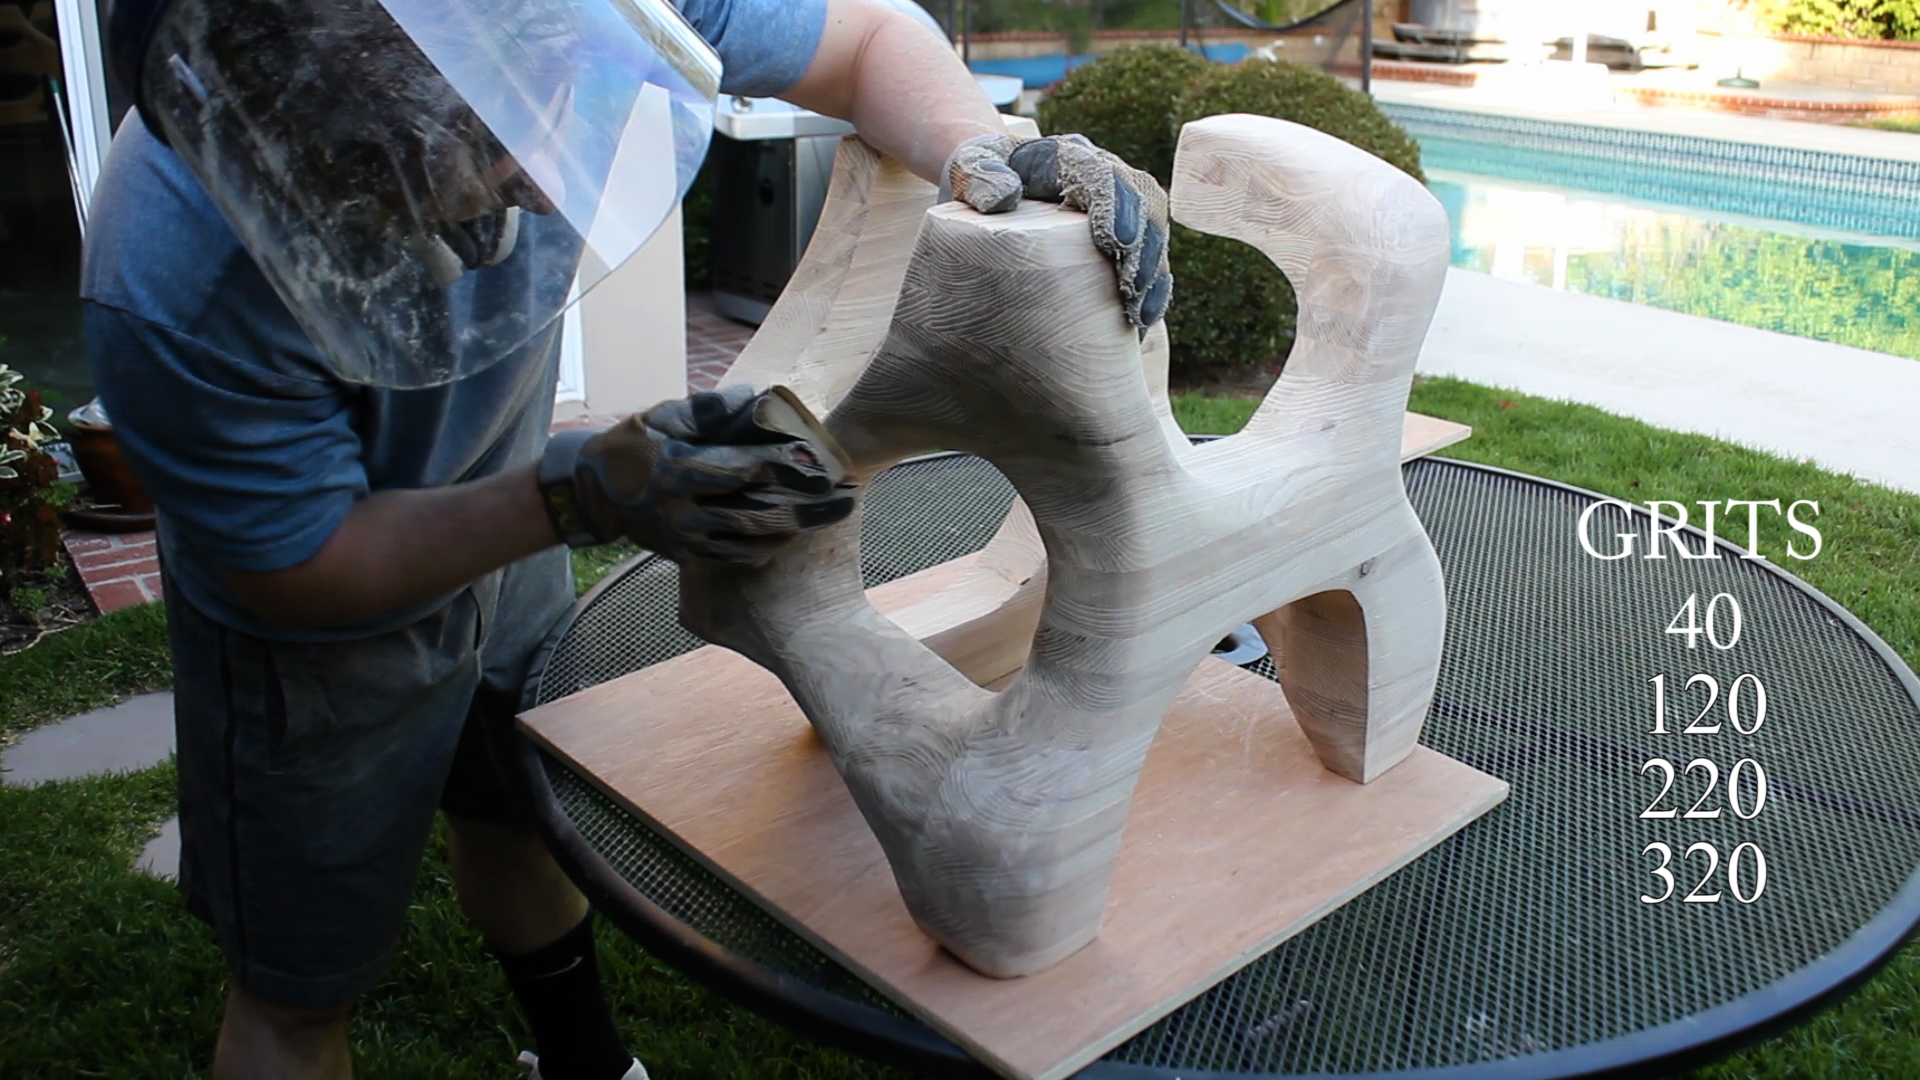
I tried every method in the book to sand this down, starting with belt sanding (80 grit), orbital sanding (60 grit) for curves, more fine shaping with the Turboplane, use of a small dremel sander, and then hand sanding with 60, 120, 220, 320,and 400 grit papers.
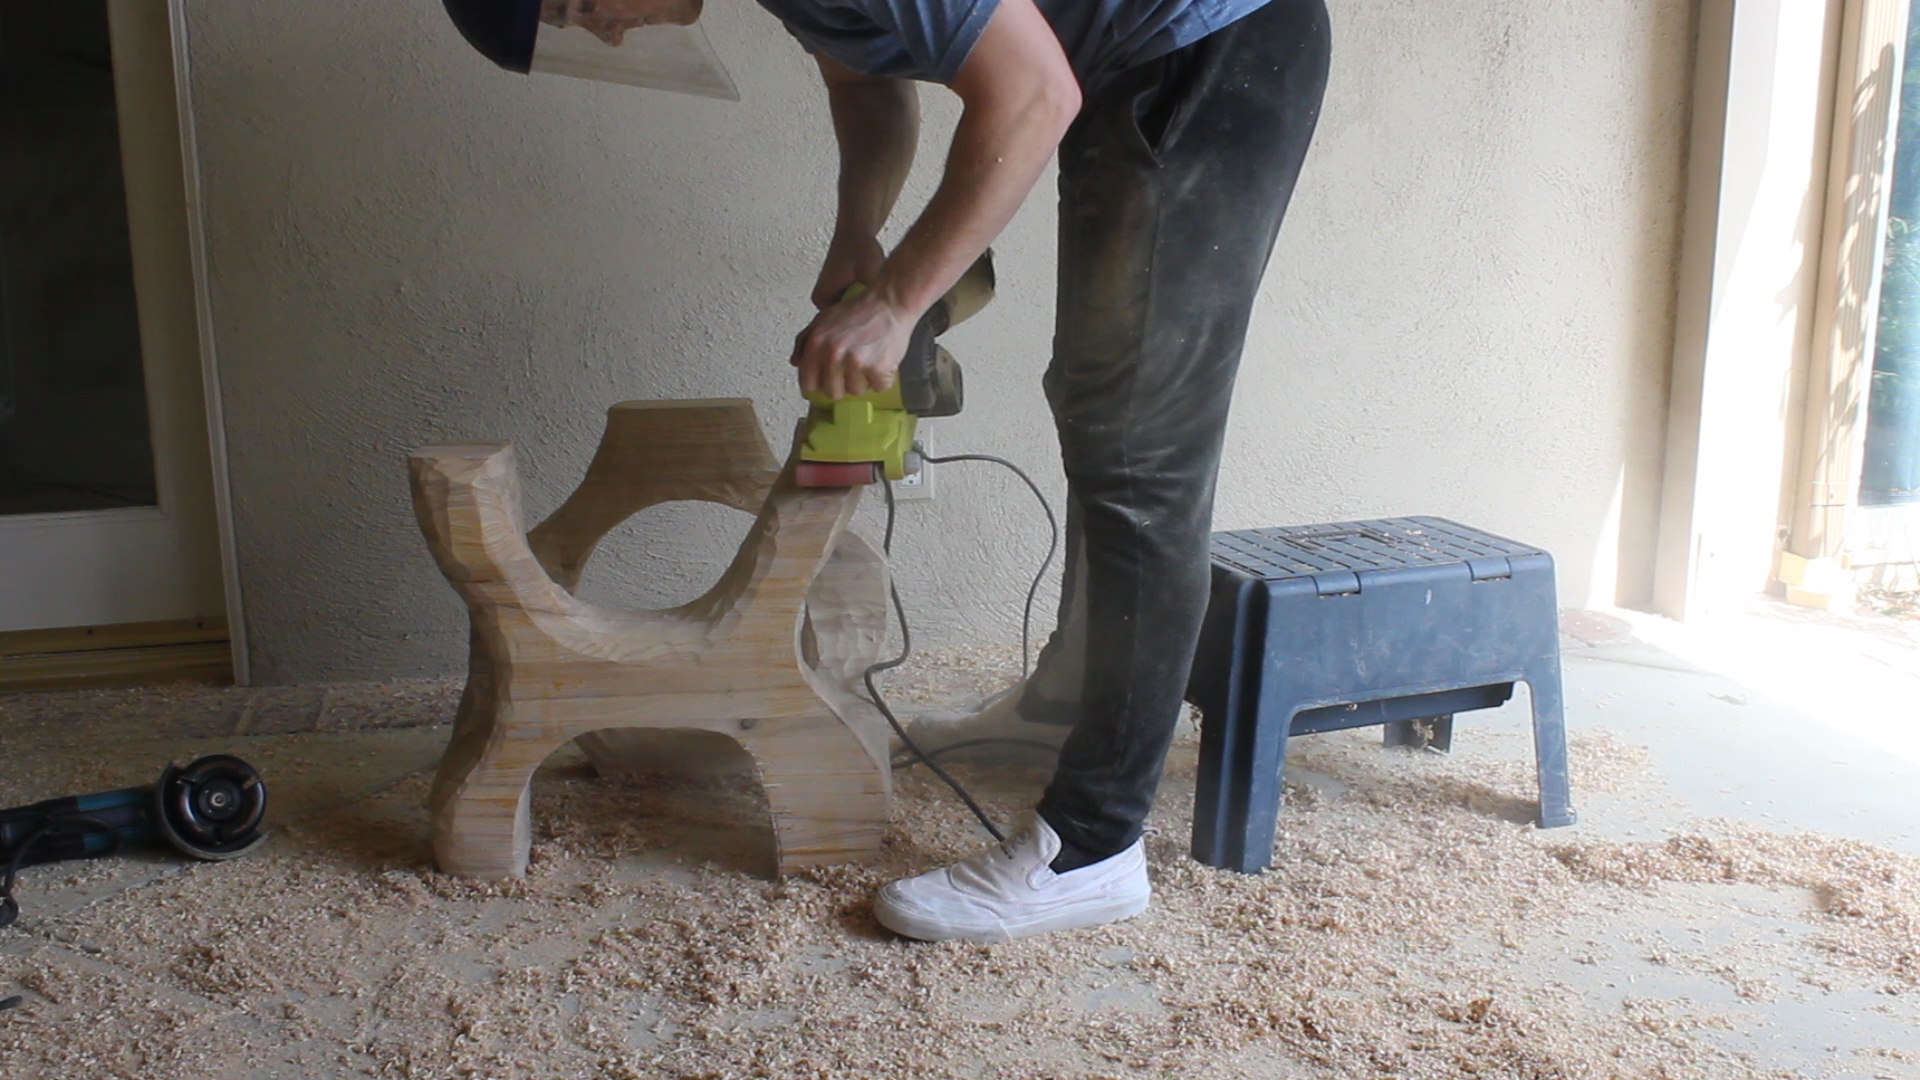


However, no matter what I did - I just couldn't get this thing to flatten out - it was smooth, but it was wavy and frankly, looked like crap. If you reference the second photo where I am orbital sanding, you can see the grooves I am referring to - those just couldn't be flattened with my current methods. At this point, I was very close to giving up (or settle for lame), but chose instead to go through a bunch of channels to figure out how to flatten wood carvings, etc..
Enter - some good advice from Caleb Woodard himself and the 40 grit flap disc. This was a game changer. I removed the blade guard on my angle grinder and went to town on my project. Within an hour or two of consistent sanding - being careful not to push too hard but hard enough where needed or staying in one spot too long to avoid burning, this thing suddenly smoothed out like crazy. Wood shaping at its finest!

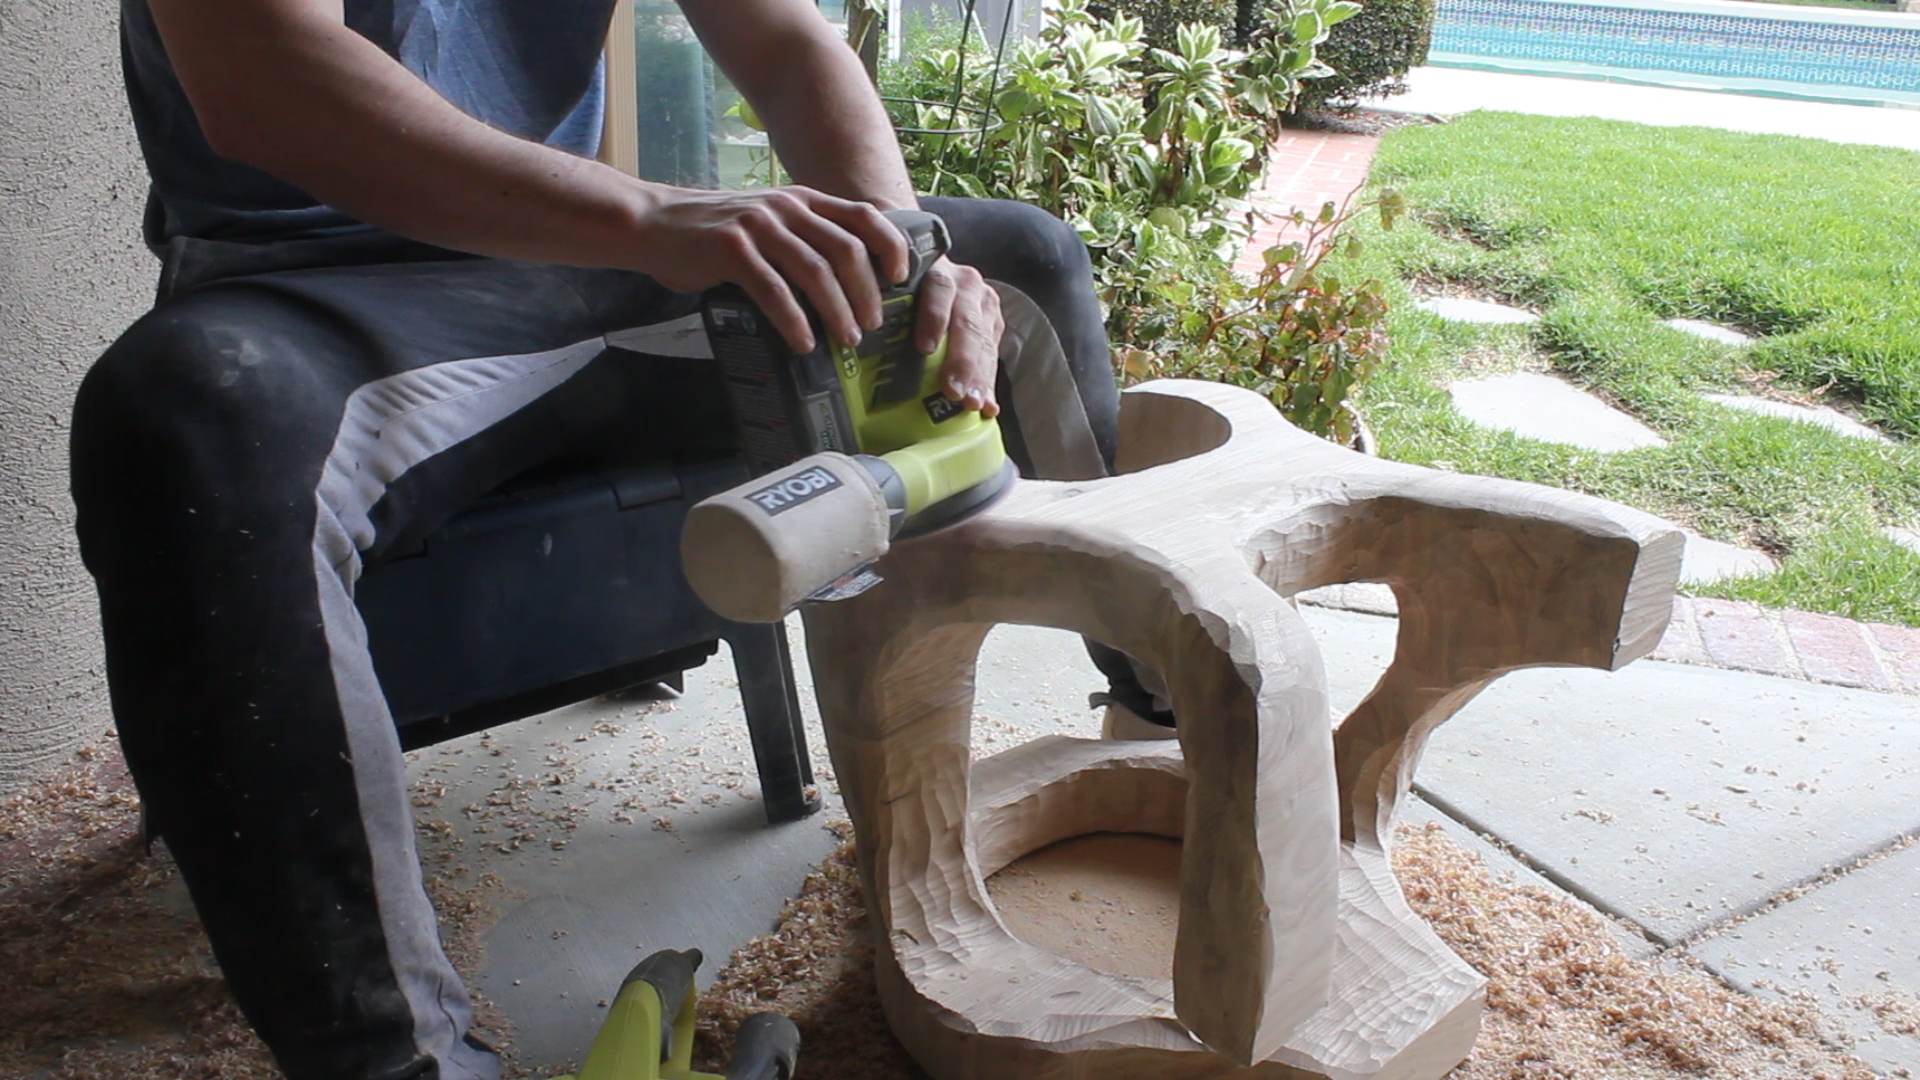
I then could switch to finer sanding (again!!), including orbital and hand sanding at 120 and 220 grit. This really helped bring out the smoothness in the contour of the piece. I finished with a dry and wet sanding at 320 grit, and this thing was ready for finishing. Flat as can be and smooth as ever!

Below are the steps for cleaning up the table top.
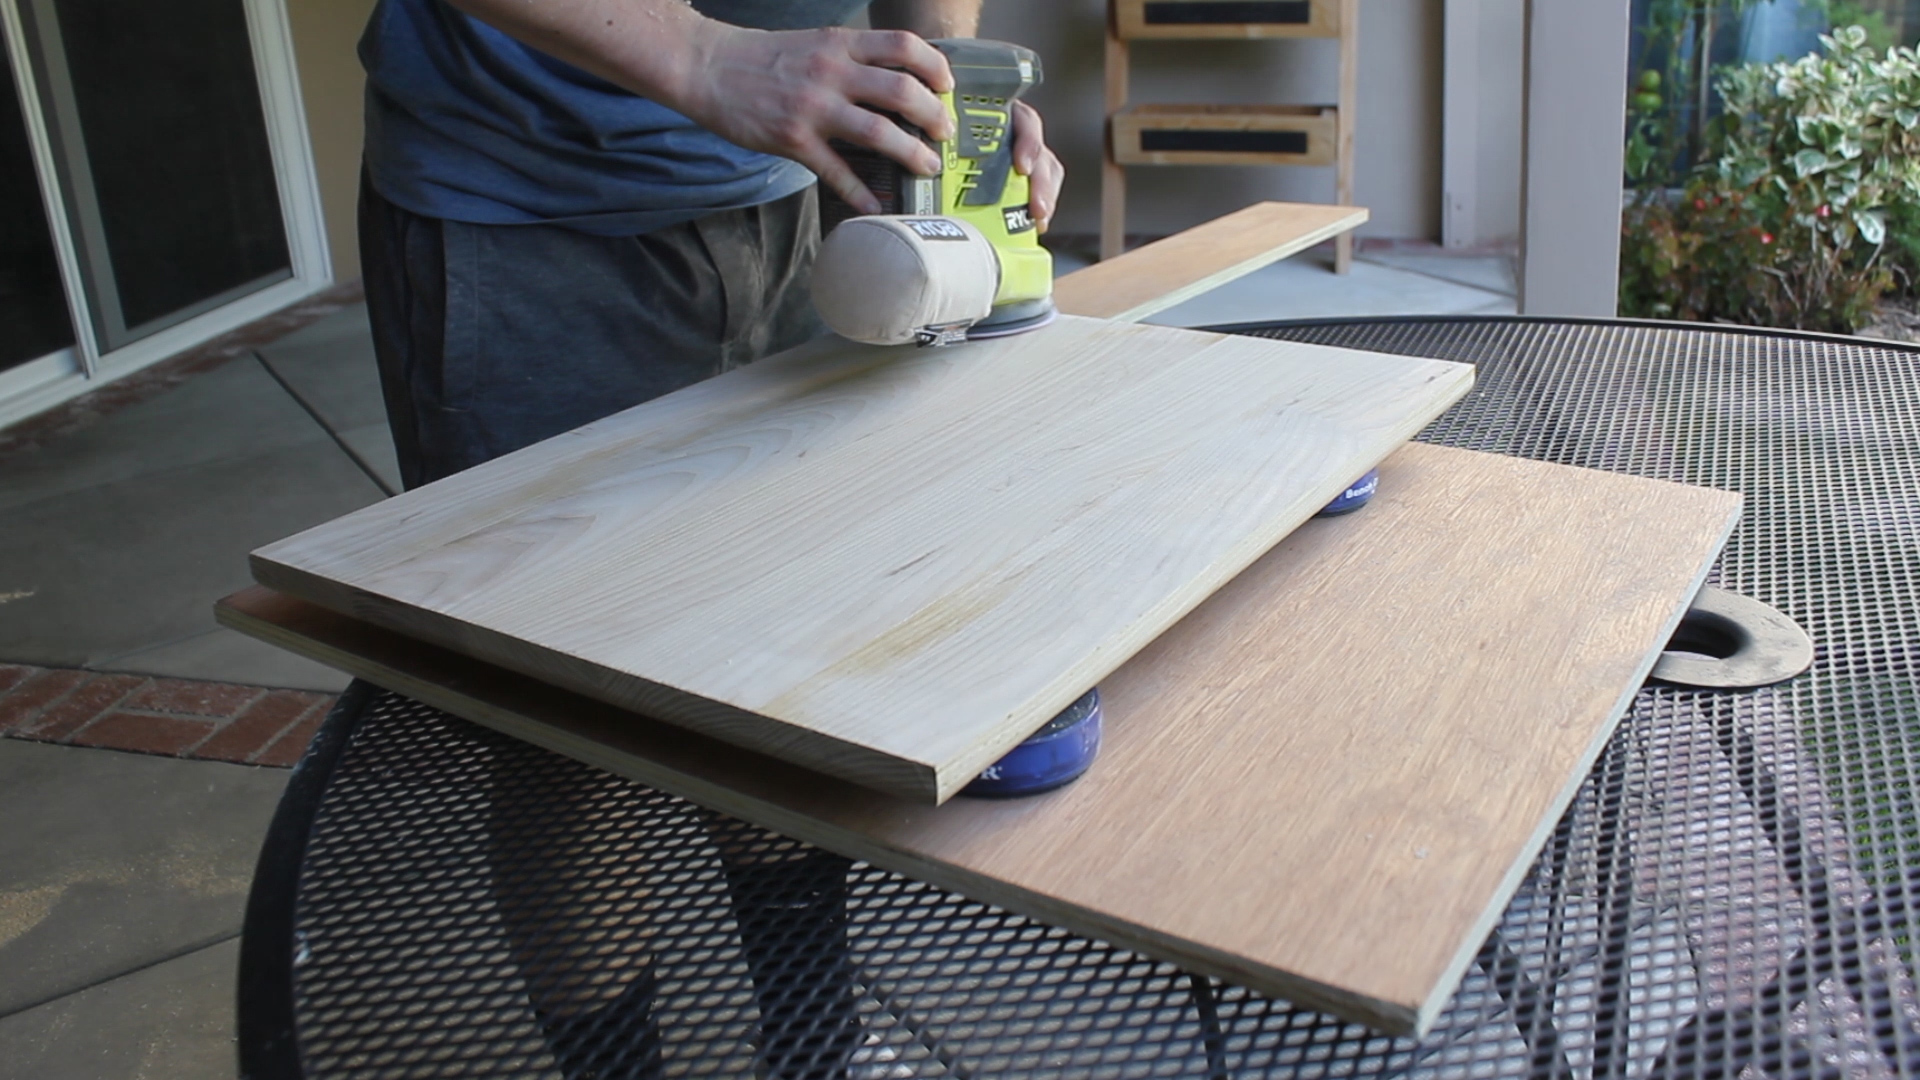
I flattened/sanded down the surface on my stationary sander, which got rid of nearly all of the glue. I then cut to my final length using my circular saw (I also cleaned up the edge straight on my stationary sander as I didn't have a straight edge to follow).
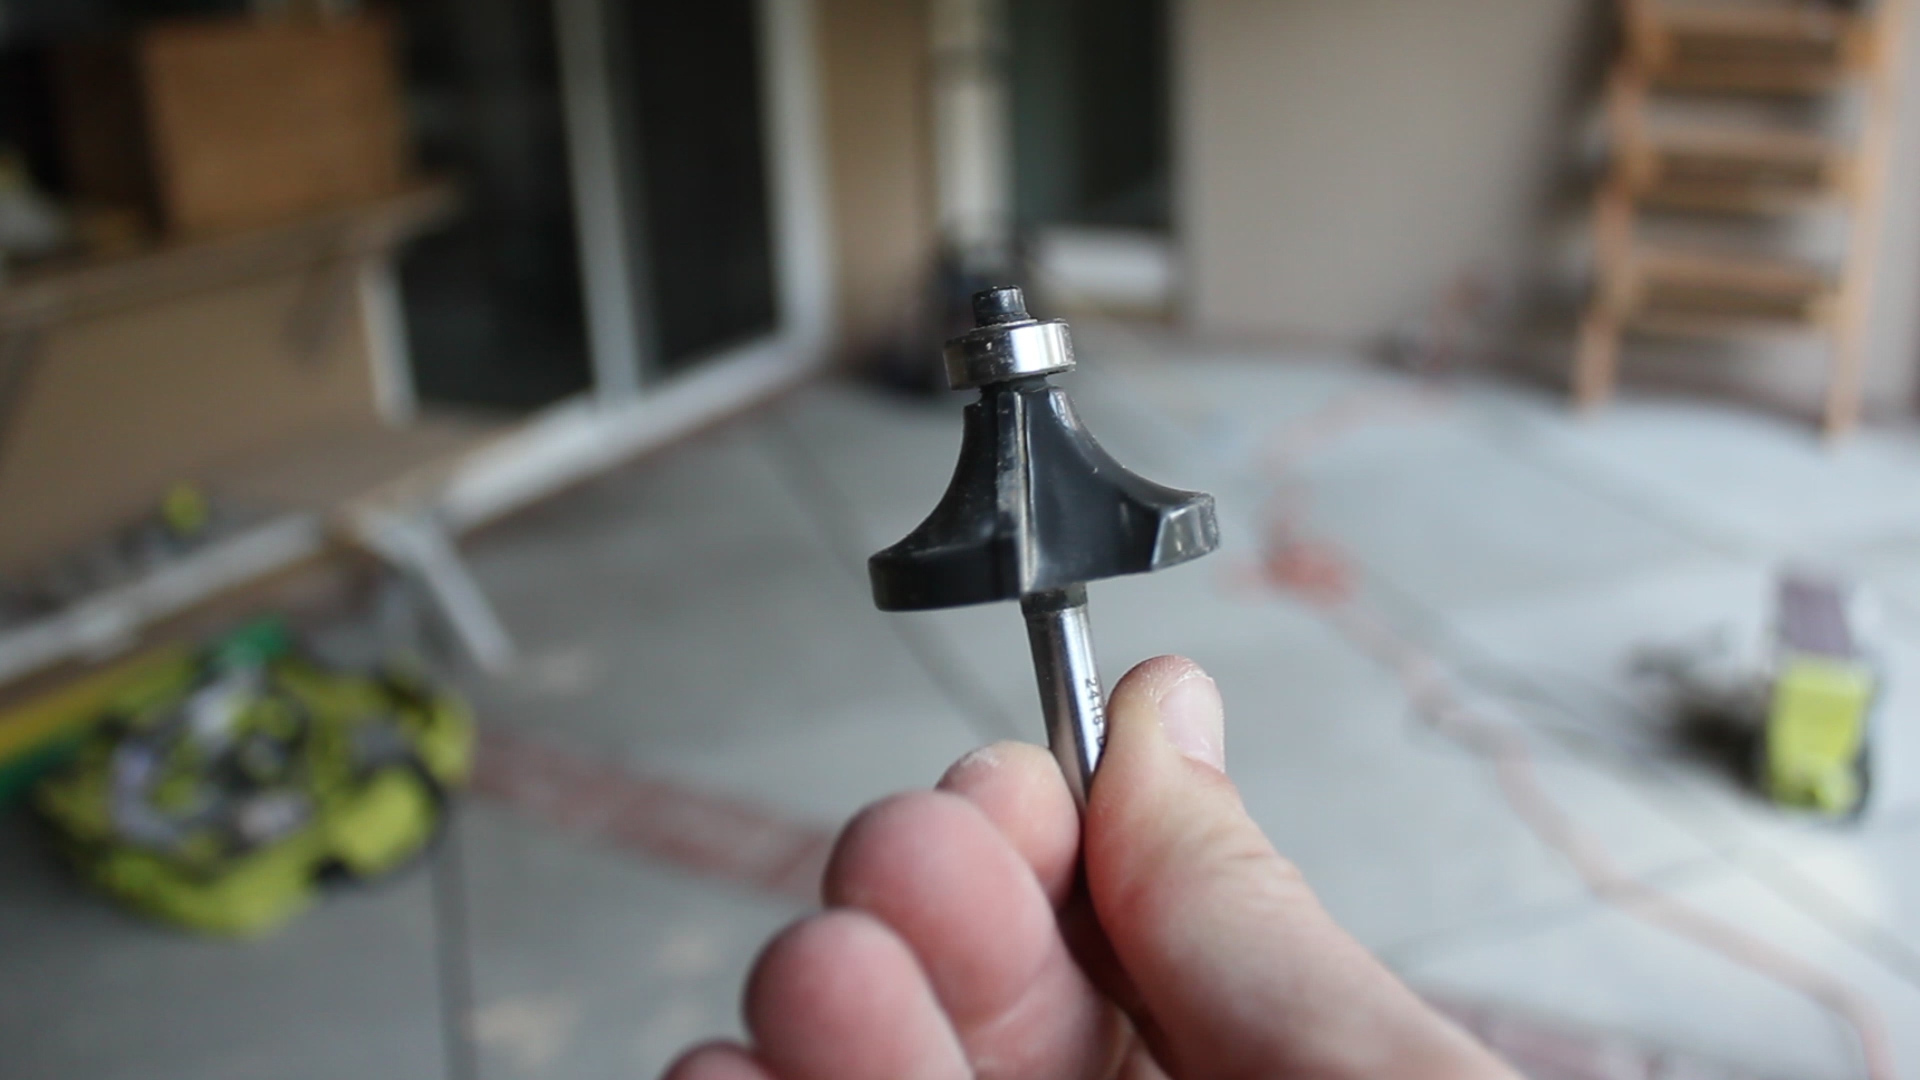
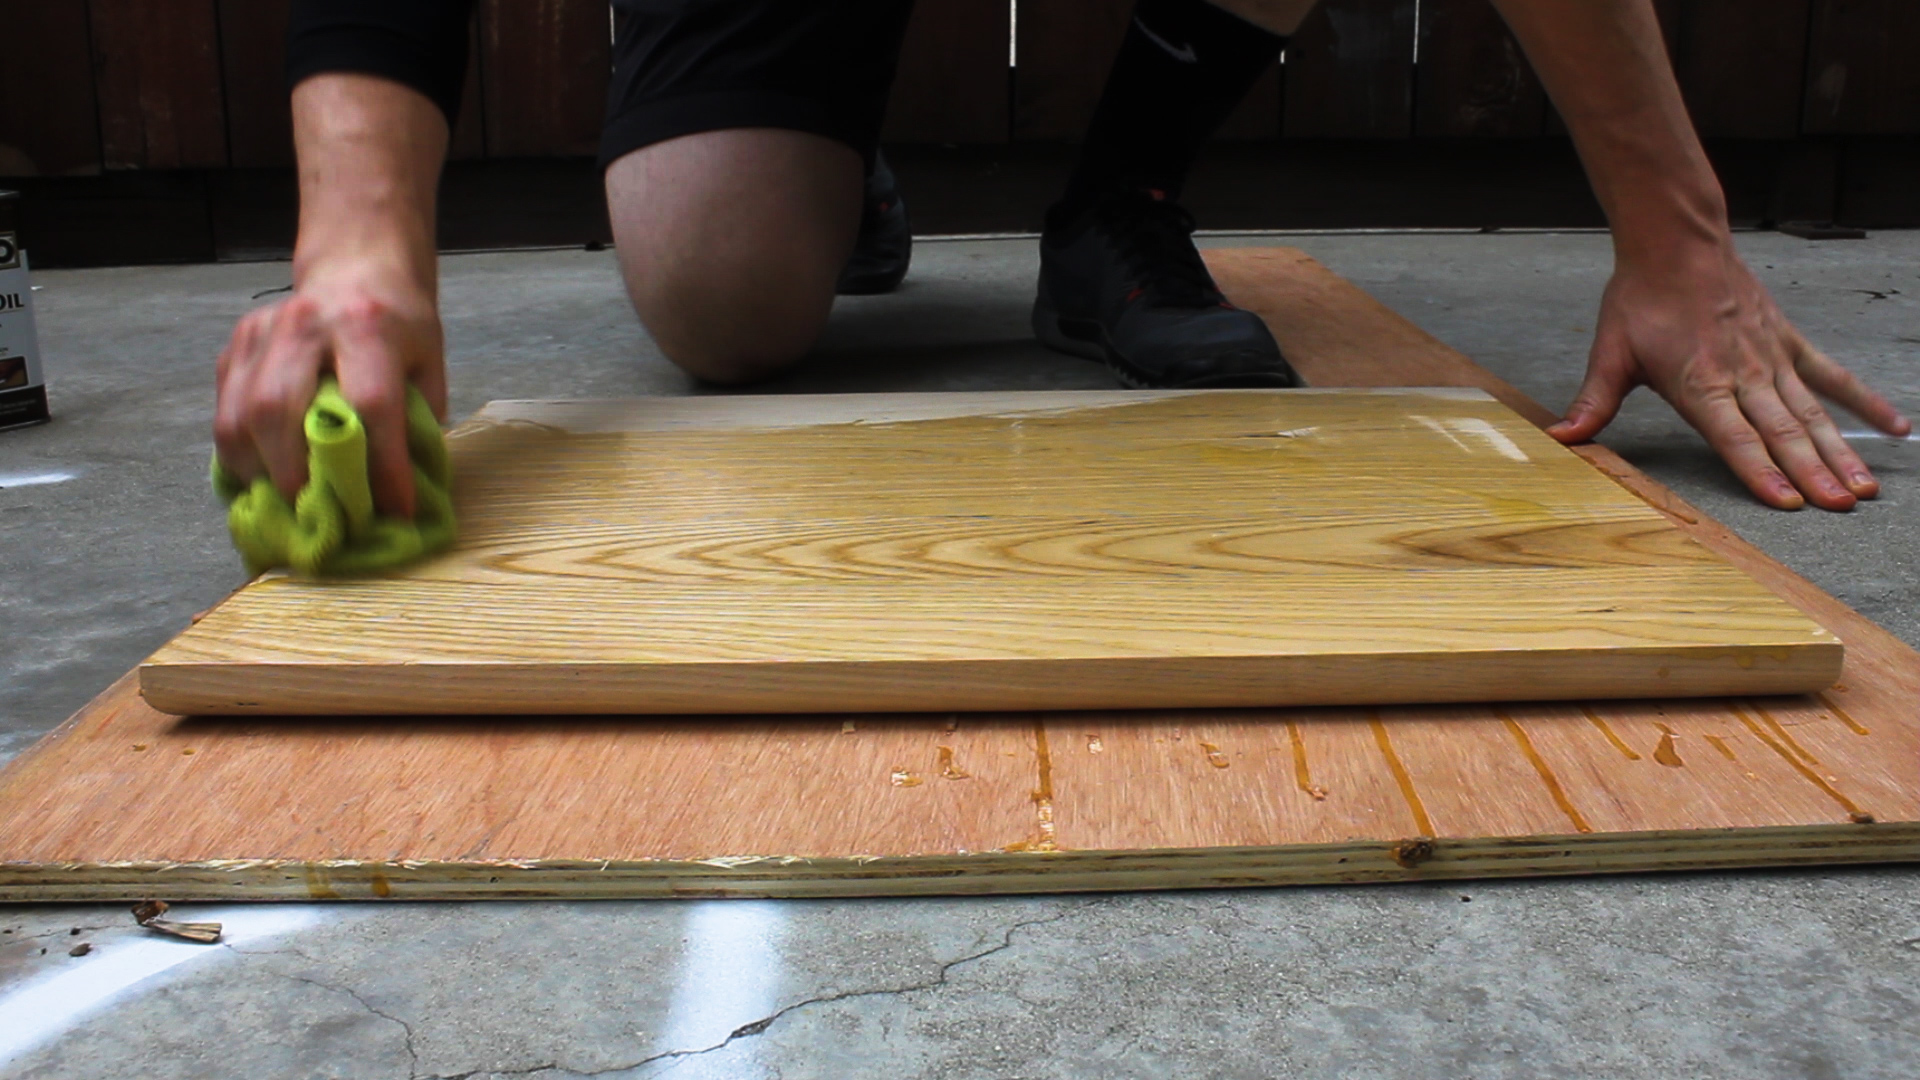
I then used a 1/2" round over bit with my plunge router on the under side of the table to give it a sleeker profile (my first time ever using a router - they're wonderful). Lastly, I went up through the grits from 120 to 320 to smooth down the top in prep for finish.


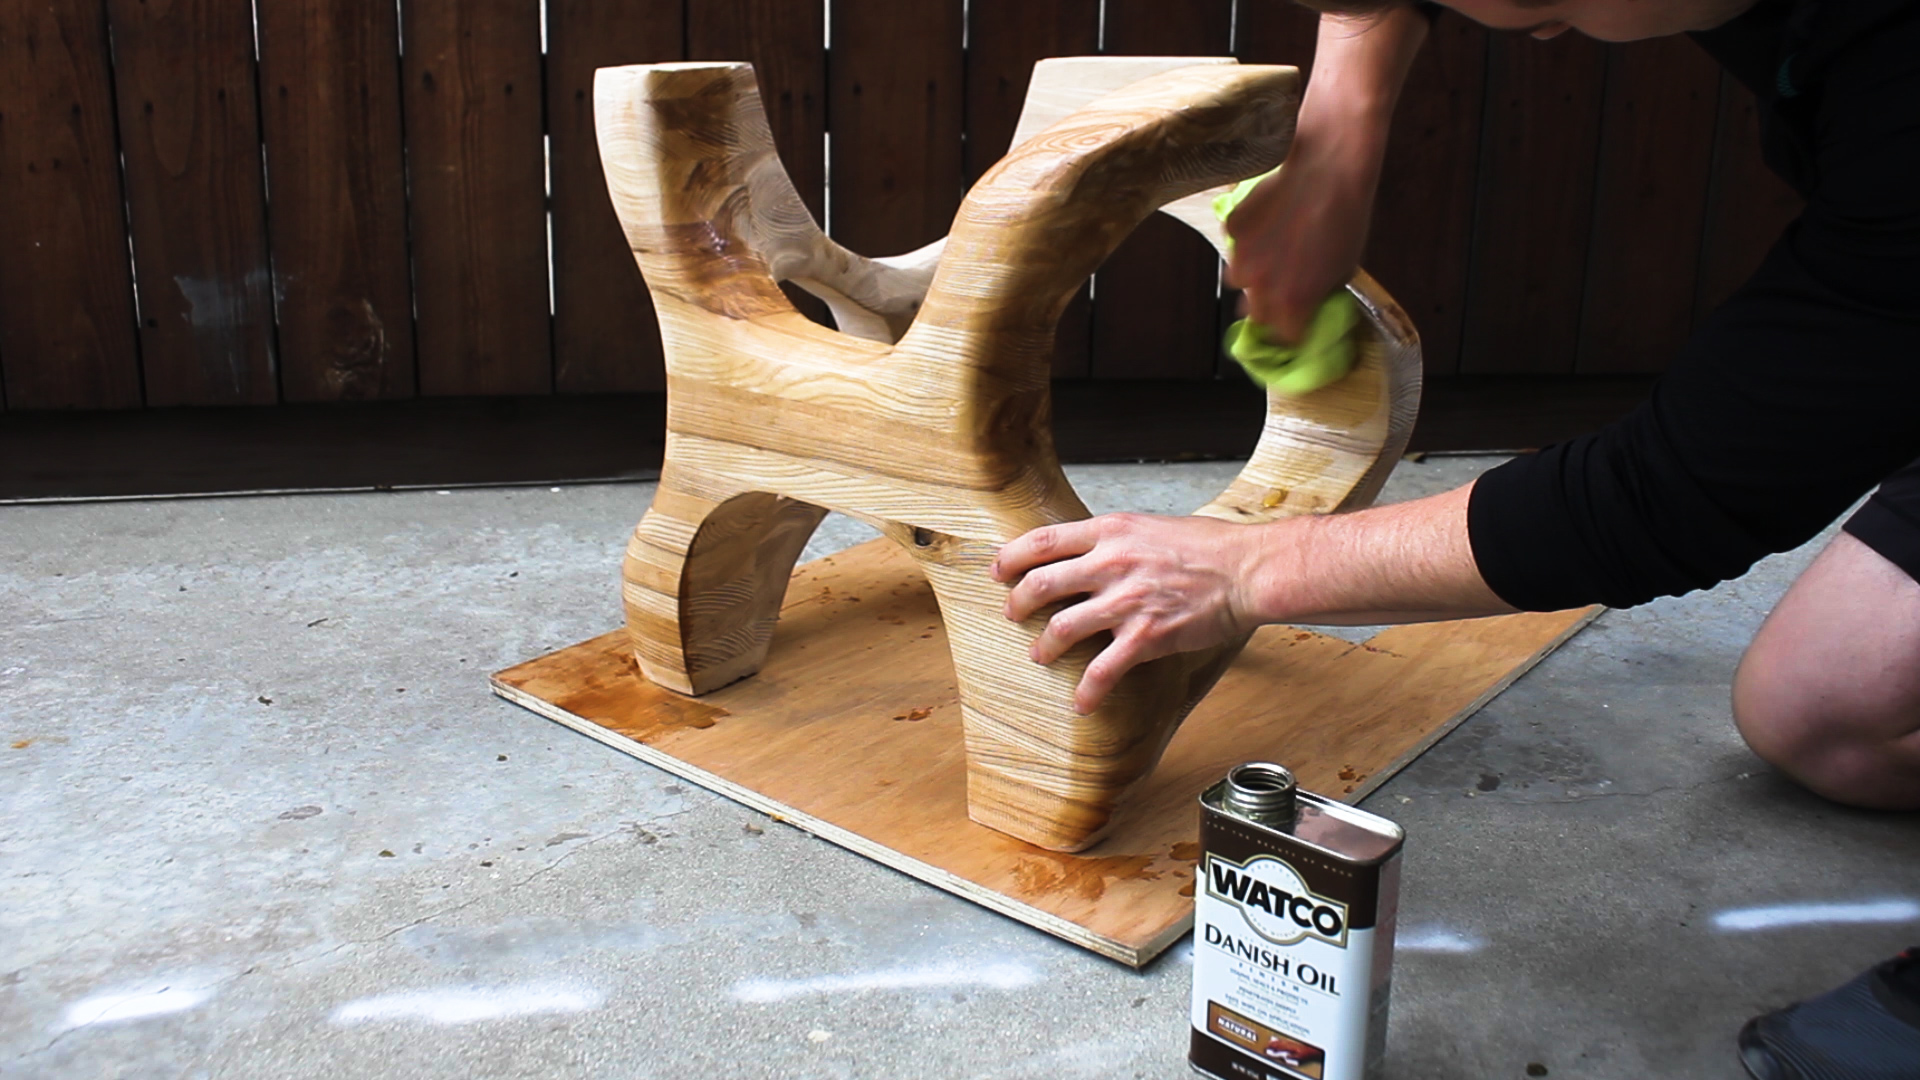
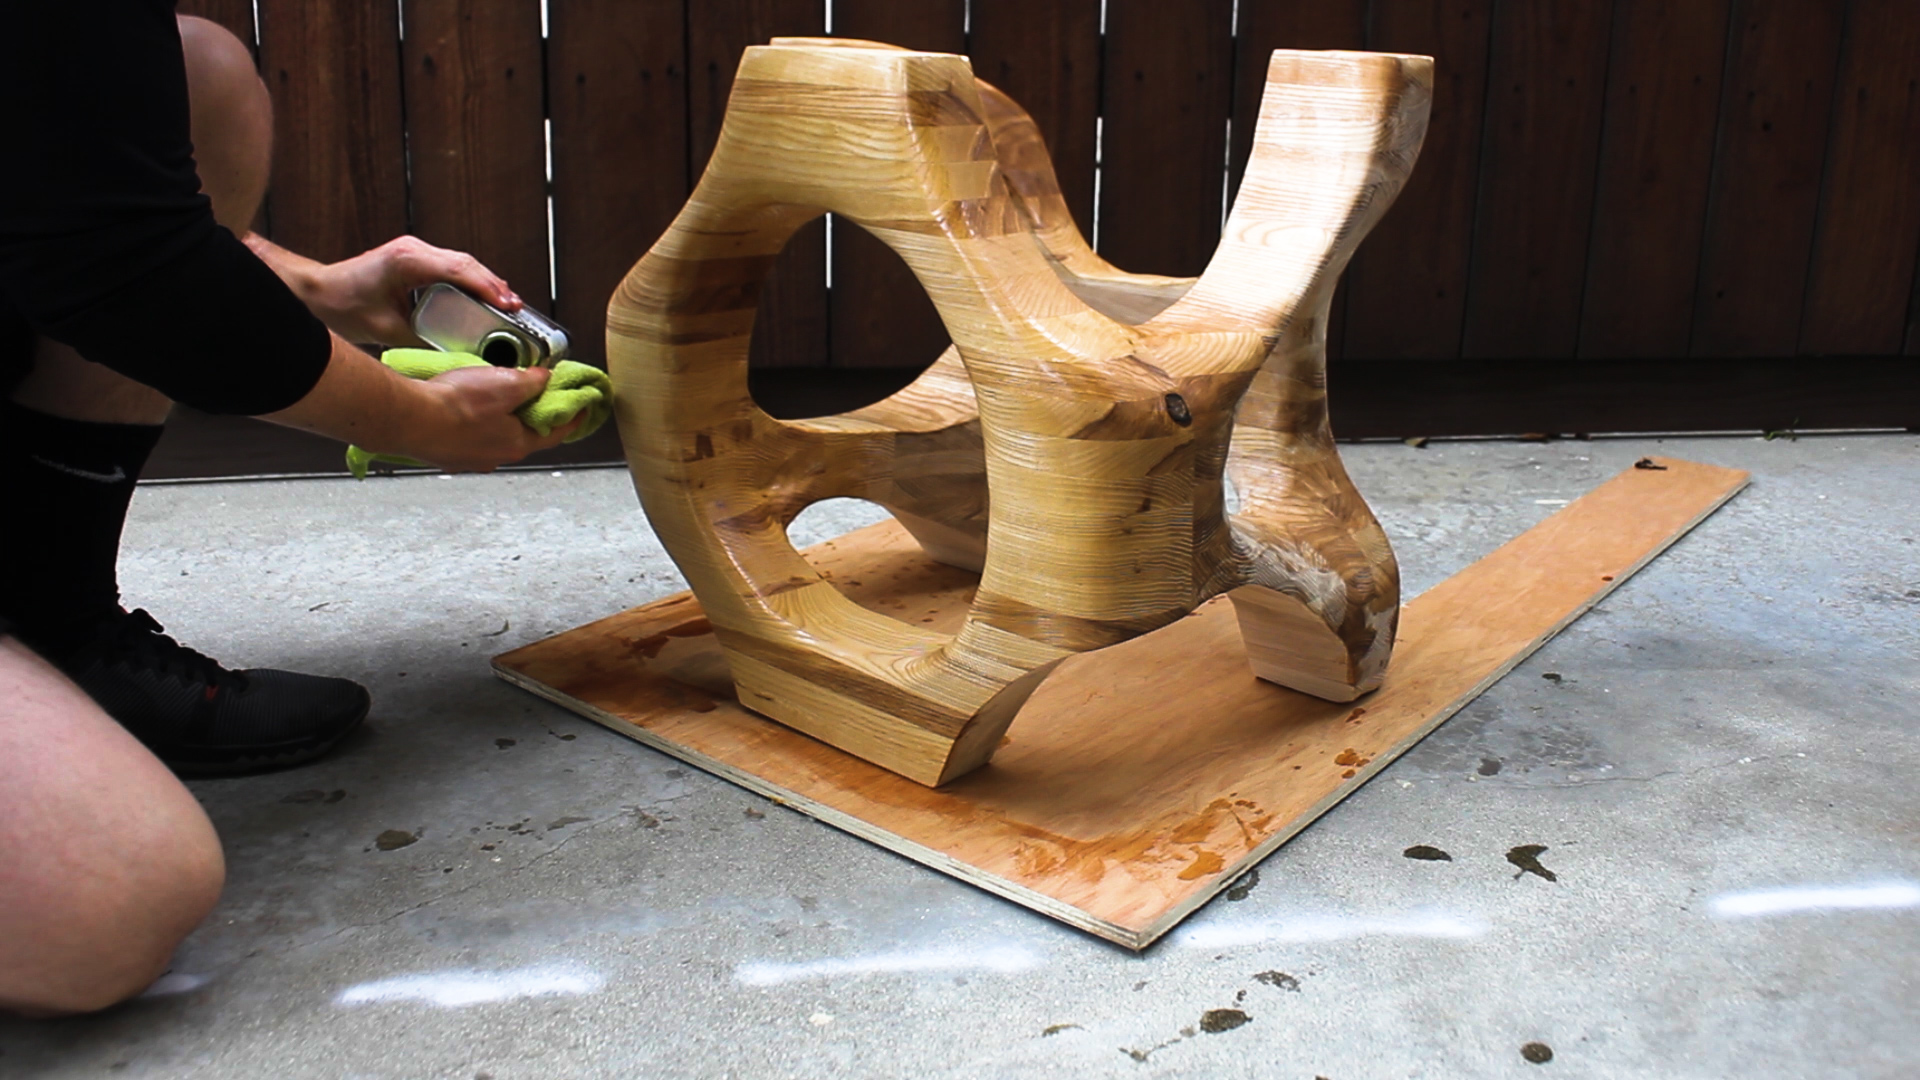
To finish things off, I wiped on a coat of Natural Danish Oil using a microfiber rag to both the top of the table and the table itself. I love this stuff - makes the grain pop beautifully and allows you to feel the wood once it cures. I recommend it for any project where you just want to make it pop!
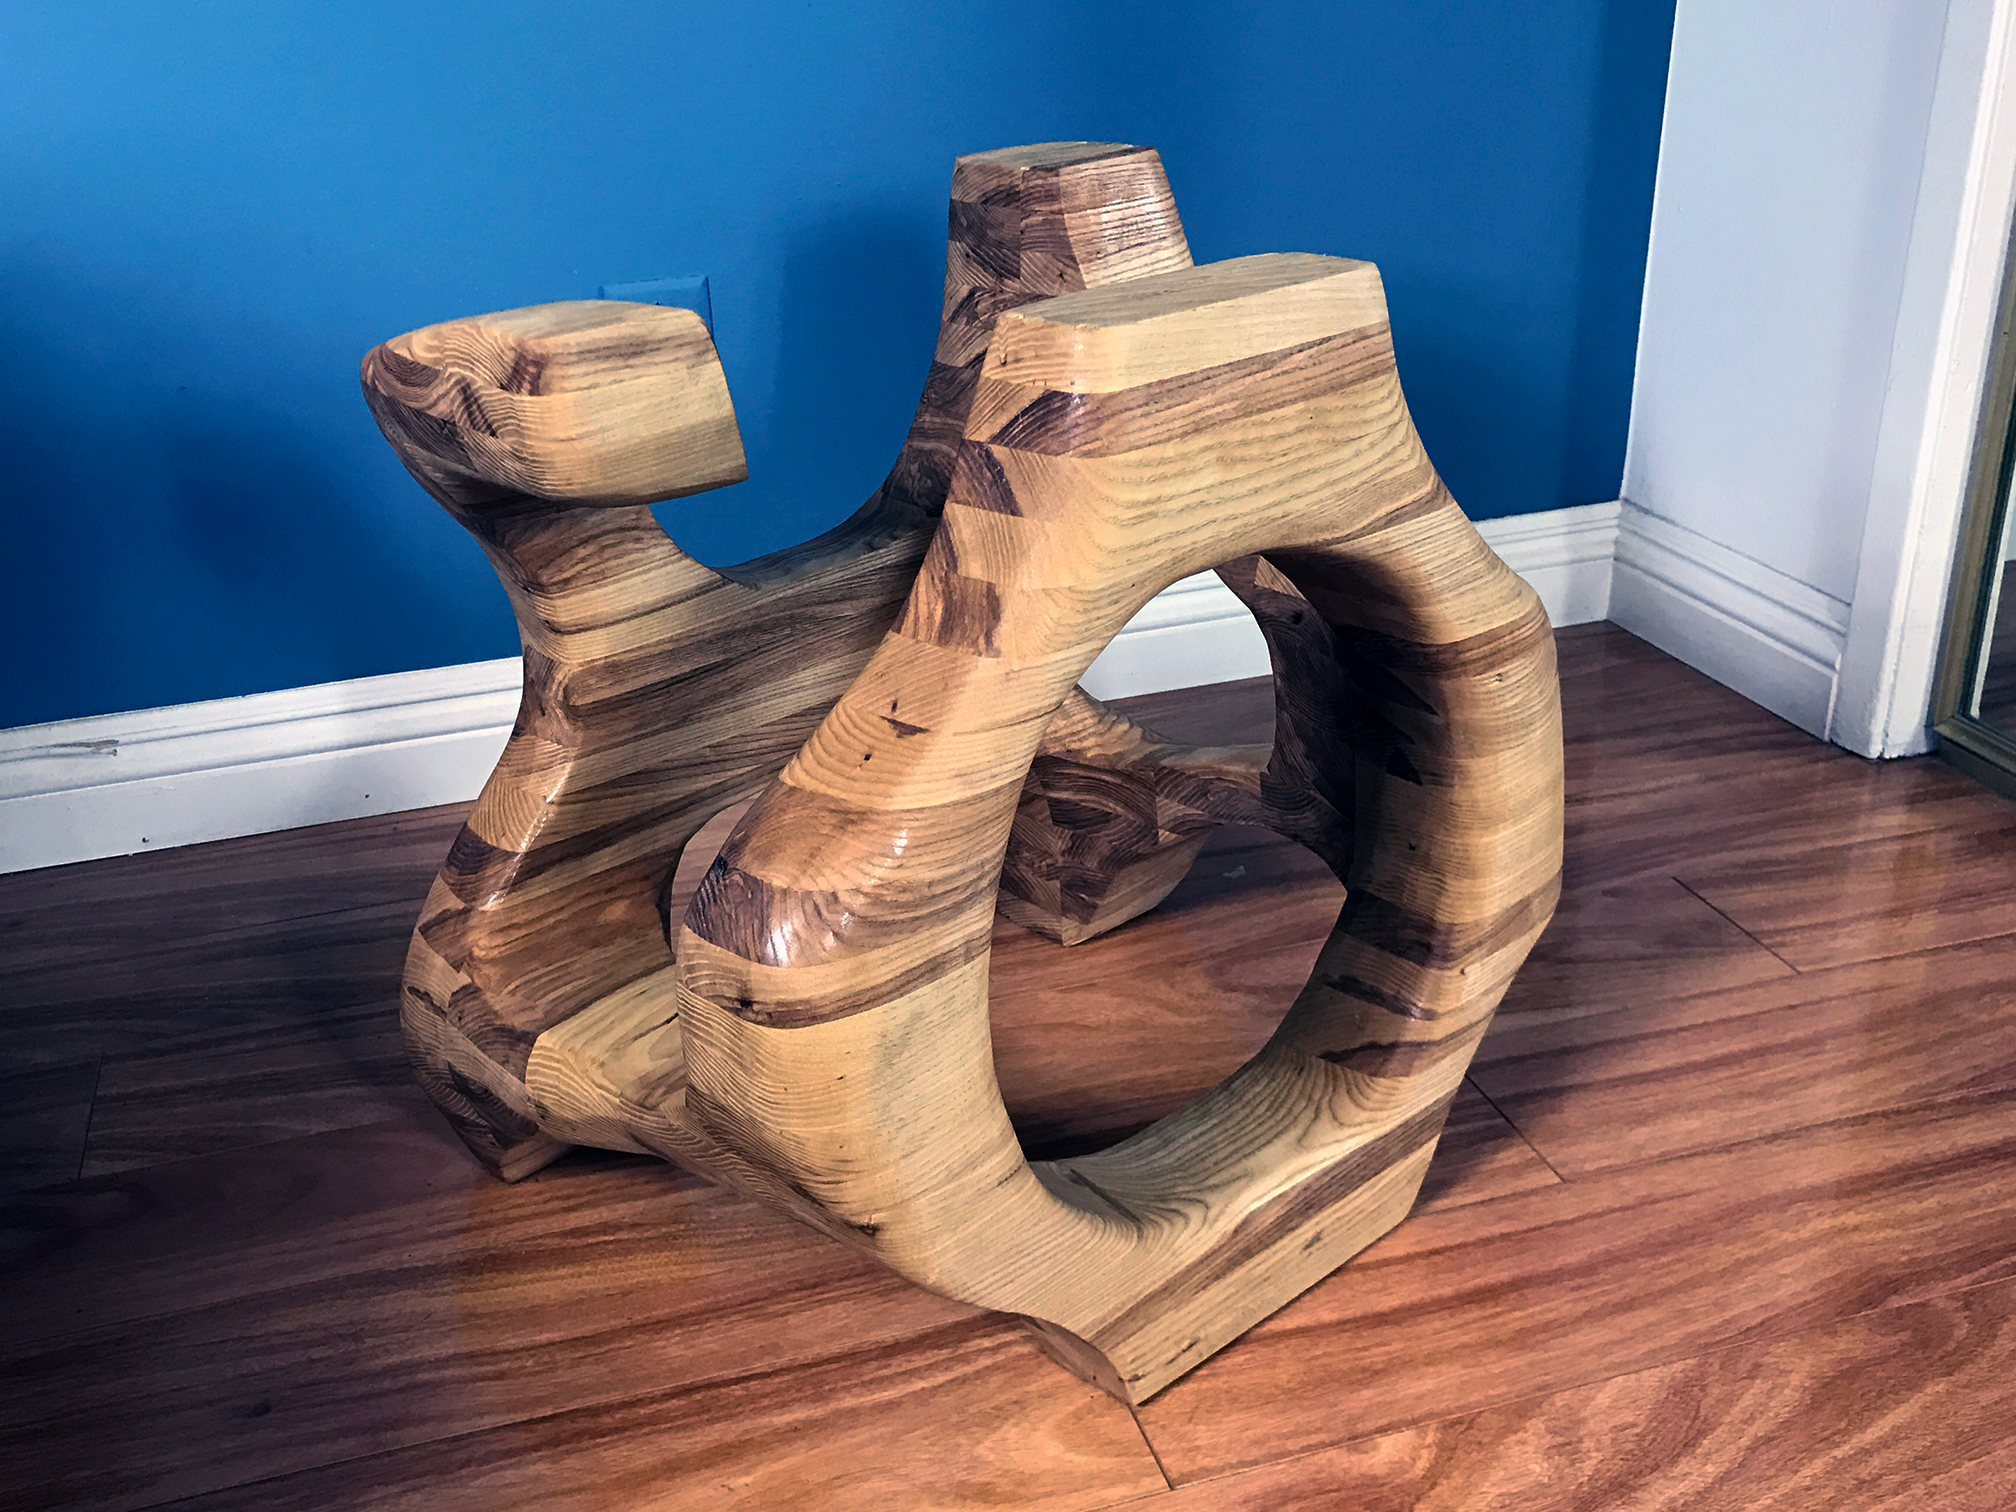
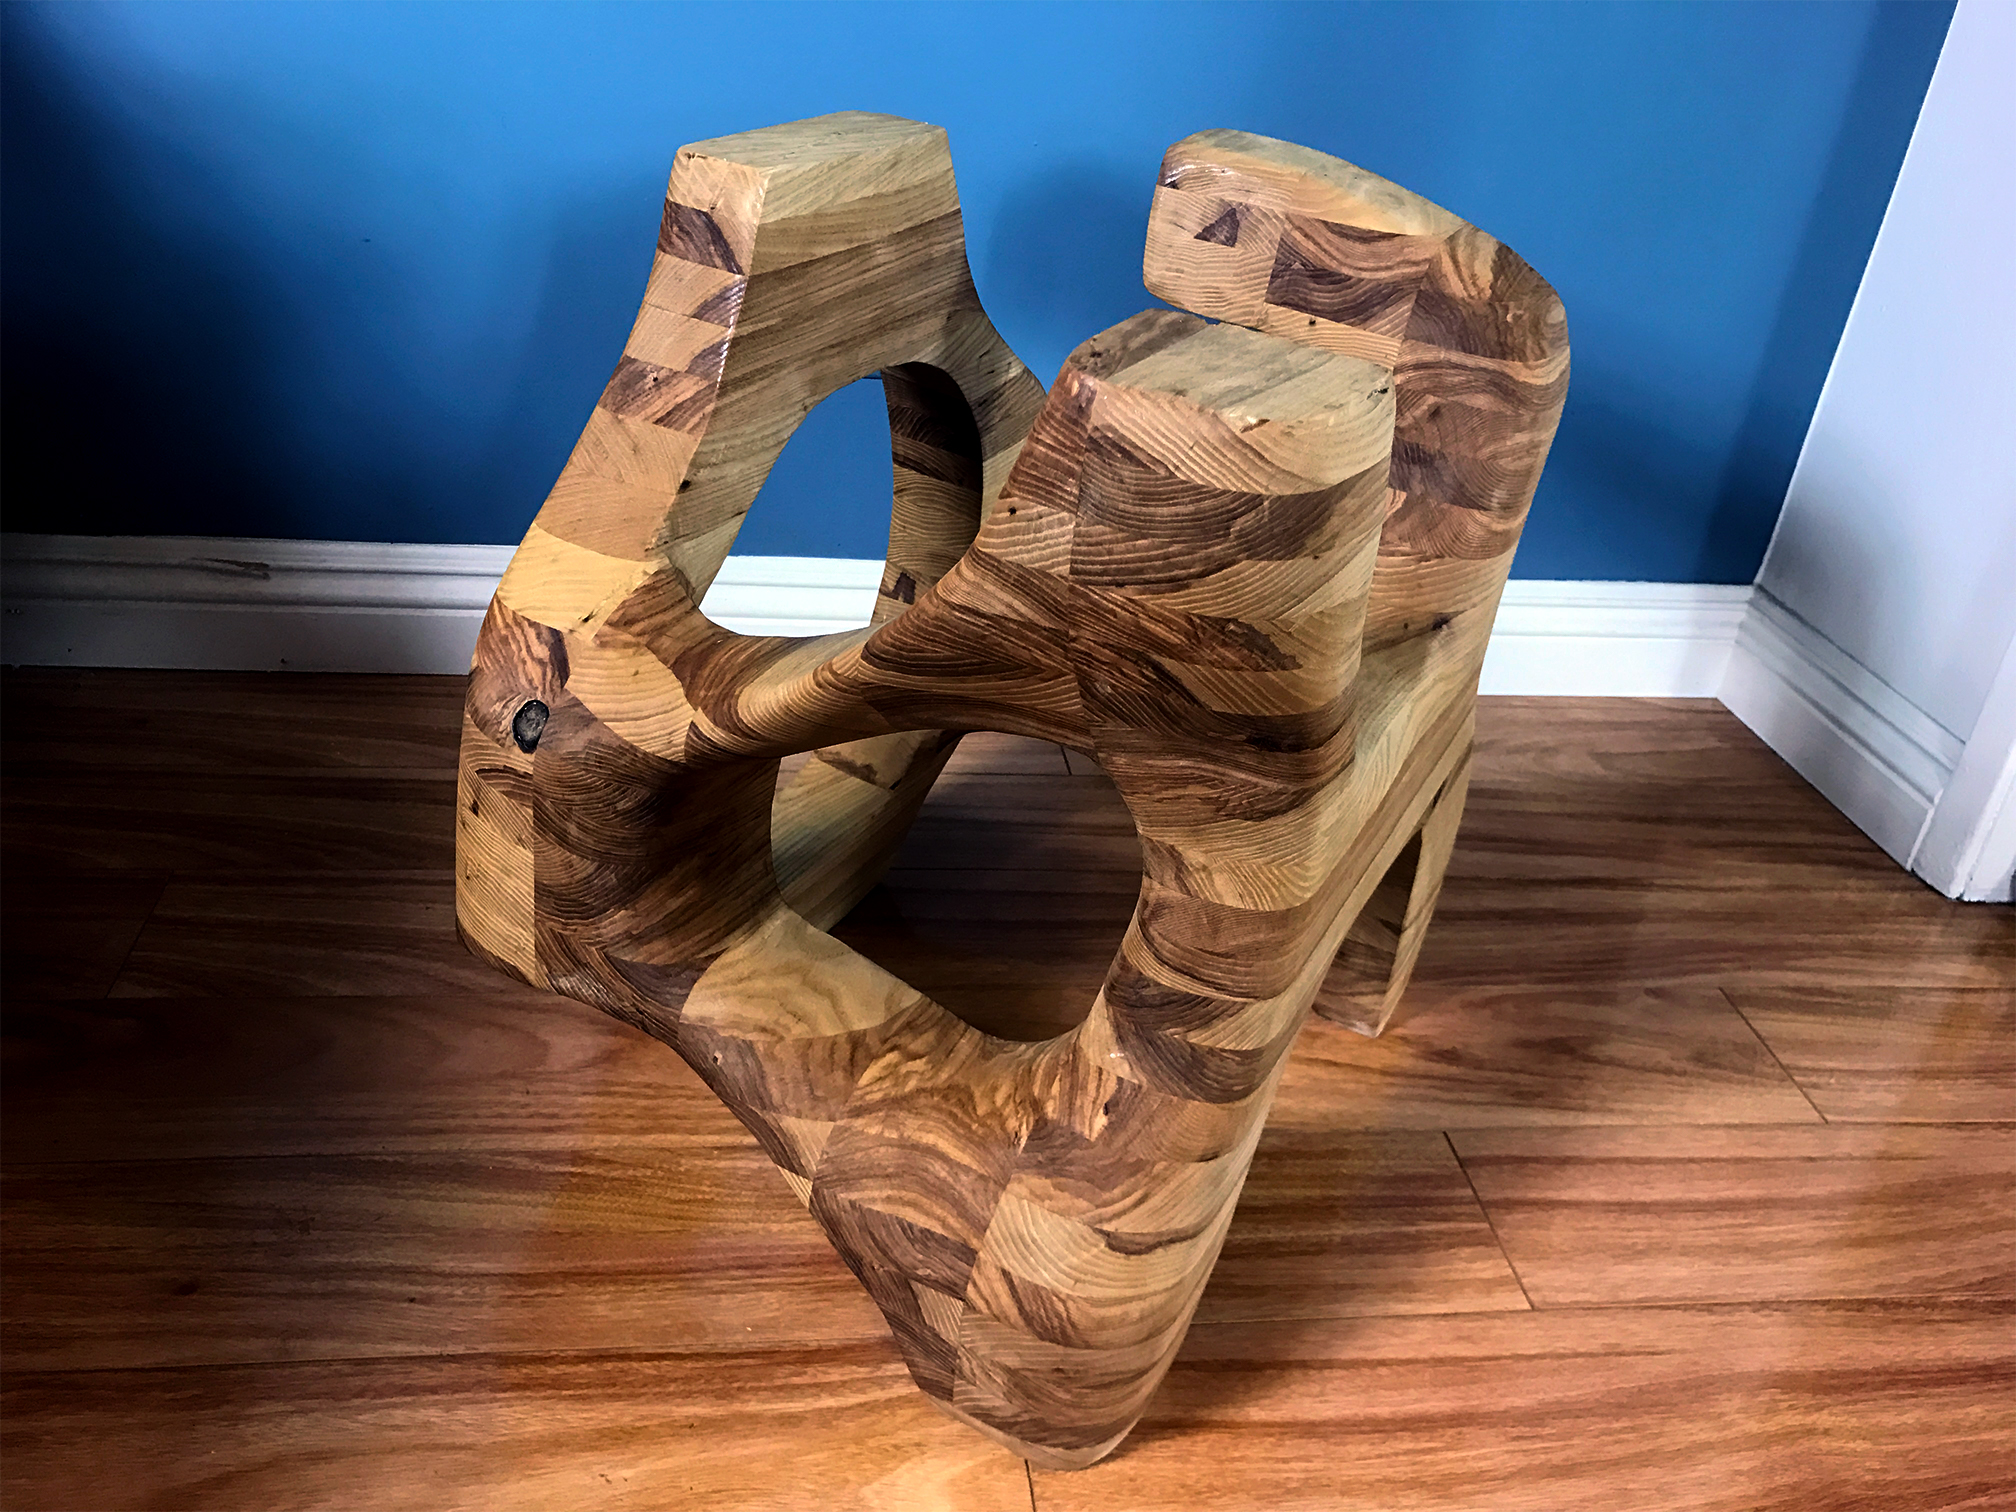
And finally...I was done! the picture below doesn't do it justice (maybe?), but I'm thrilled with the coolness of it. I think my favorite part is the cool transitions between the edge grain and the end grain. And overall, it just looks awesome.
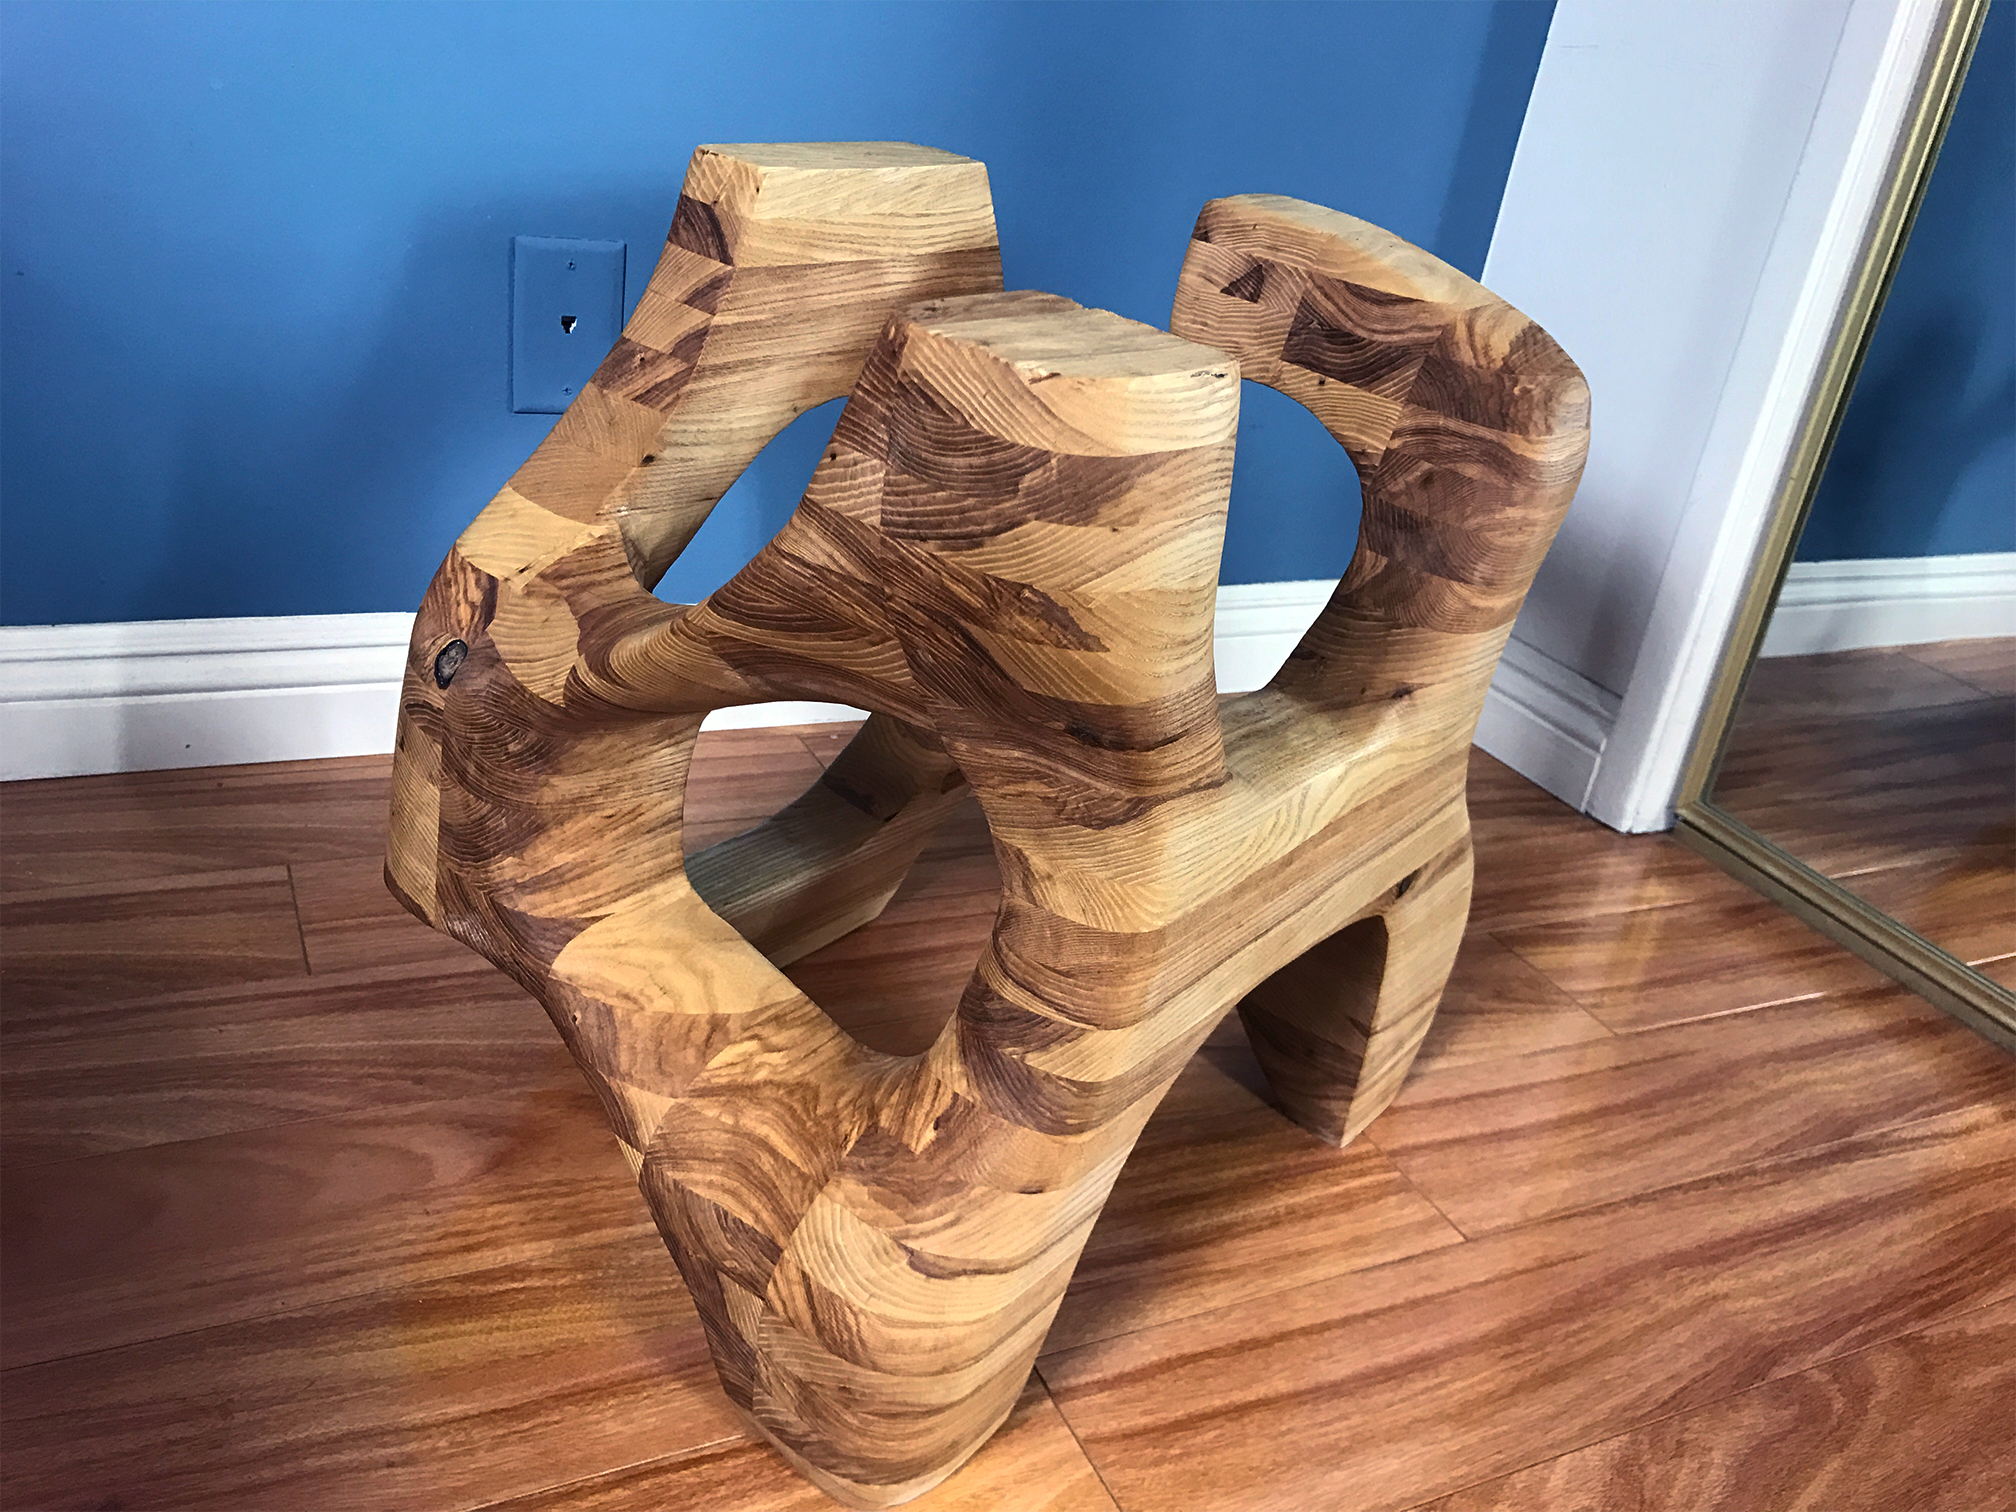
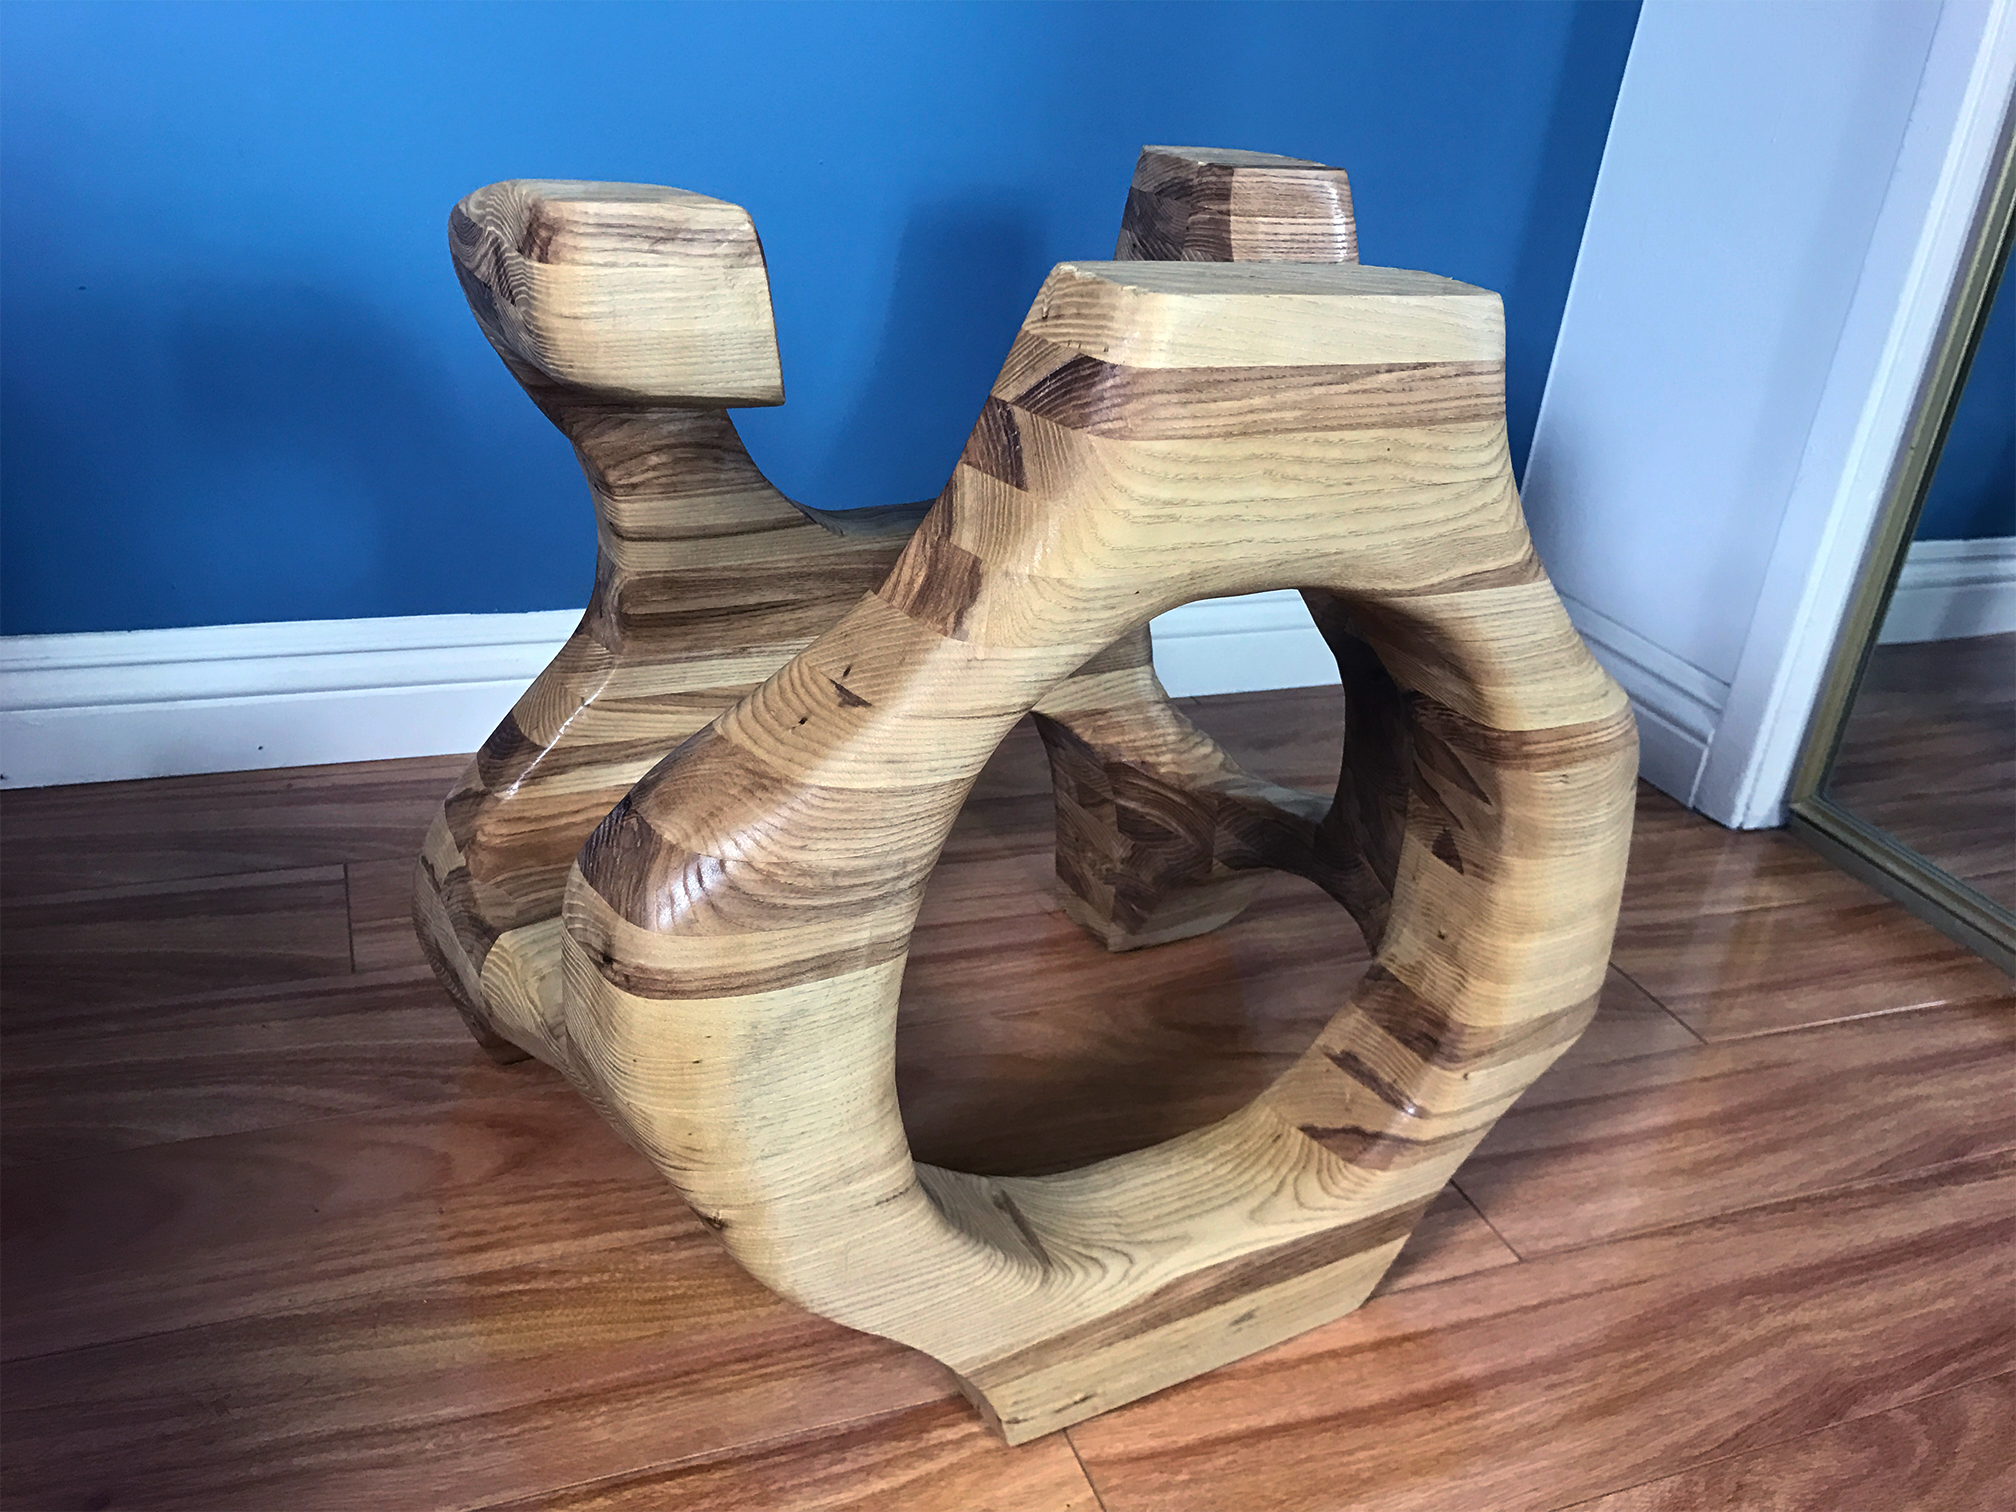
Everyone has asked me if I am planning to ditch the wood table top and substitute in a glass top. I think now, after seeing it all put together, I will do this - but I just won't be able to finalize it immediately - so for now. Enjoy!
Few final tips for you here:
- The TurboPlane works well to carve lots of material away as well as do fine planing - after I carved everything down I went back and did light passes to further shape and contour the project to cut down on sanding
- A flap disc is a must to take down the carving grooves - you will not be able to flatten out the curves to make it smooth flowing otherwise (as far as I can tell)
- An orbital sander works best to begin giving you the rounded smooth shape you want, followed by hand sanding with a sanding sponge.
- The TurboPlane makes a MESS! So be prepared for shavings to be everywhere and you to be covered in sawdust.
- Buy a face protector and gloves for this, and wear a long sleeve shirt when carving/sanding - you'll need to be shielded properly from all the material flying everywhere
- Do not make your blank shape too small - if you do, you'll really struggle to get your angle grinder into the tight gaps and thus potentially ruin your project before it even has a chance
TOOLS
ARBORTECH TURBOPlane Blade
MAKITA Paddle Switch 4.5” Angle Grinder
RYOBI 10 in. Sliding Compound Miter Saw
RYOBI Miter Saw Stand
RYOBI Cordless Orbital Sander
RYOBI Belt Sander
RYOBI Stationary Bench Sander
RYOBI Router Set
RYOBI Drill Bit Set
ROCKLER Bench Cookies (Set of 4)
BESSEY Economy 2.5” x 12” Clutch Clamps
BESSEY Economy 2.5” x 24” Clutch Clamps
BESSEY H Style Pipe Clamps
Hand Sanding Sponges (120, 220, 320, and 400 grit)
Flap Discs (4.5", 40 Grit)
12” Rafter Square
5-Gallon 4.5 Peak HP Wet Dry Vacuum
Air Compressor
Spray Bottle for wet sanding
FILM / EDIT EQUIPMENT:
Canon Rebel EOS T2i:
Canon EF-S 18-55mm f/3.5-5.6 IS II Lens
Rode Microphone
Voice Recording
Adobe Premiere (Editorial)
Thanks for reading! I would be so grateful if you could please subscribe to my Youtube Channel for future projects. I put out videos every other week.
Cheers!
Zach