THANKS FOR CHECKING OUT THE FULL ARTICLE!
PLEASE SUBSCRIBE TO OUR YOUTUBE CHANNEL BY CLICKING HERE.
My full video of the build is below, followed by detailed instructions with tools, materials, and measurements!
I'm a huge Avengers fan, and am so amped up for Infinity War. I thought it would be fun to tackle a unique power-carving project, by trying my best to recreate the Infinity Gauntlet.

Thank you to Purebond for helping support this project! Purebond is a no-added formaldehyde product sourced and manufactured in North America and is the highest quality plywood material I have ever worked with.
Check out their website here for more information: http://purebondplywood.com/
You'll see from the video above and the instructions below that this took me two rounds to get correct (and I still could improve on it a lot). Hopefully my first time mistakes (mostly rushing and not referencing my designs) can be avoided if you're looking to get into power carving.
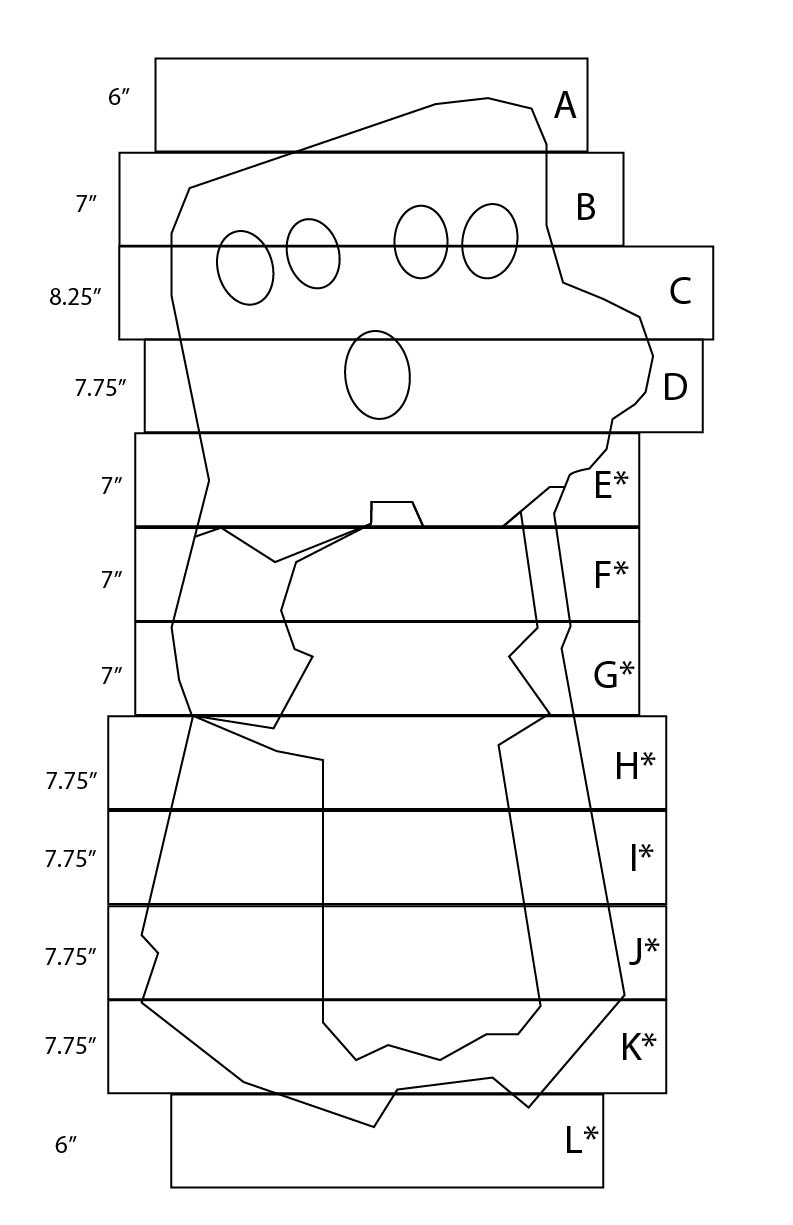
To begin, I found the highest resolution and most "clear" photo I could find of the gauntlet online. I then brought it into Illustrator and sized it to fit in section of blocks that were a little under 1.5" thick (knowing that I wanted to use a 2 x 8 for this project, and that I'd plane it down to something about 1.4" thick).
Then, I used the pen tool to trace out the main armor components of the design of it onto the art board. I then took a picture of my own hand from the side, brought that into illustrator, and traced the same profile of it to give me a side profile view of what a fist could look like.
Had I found any sort of 360 view of the gauntlet, this would have been much easier, but part of the fun of this kind of thing is figuring out ways around not having all the resources you need.
MATERIALS
Round 1
1 x 2" x 8" x 8' Douglas Fir (from Home Depot)
Titebond II Glue
Round 2
1 x 4' x 4' x 1/2" Spalted Maple Plywood from Purebond
Titebond II Glue
Tung Oil
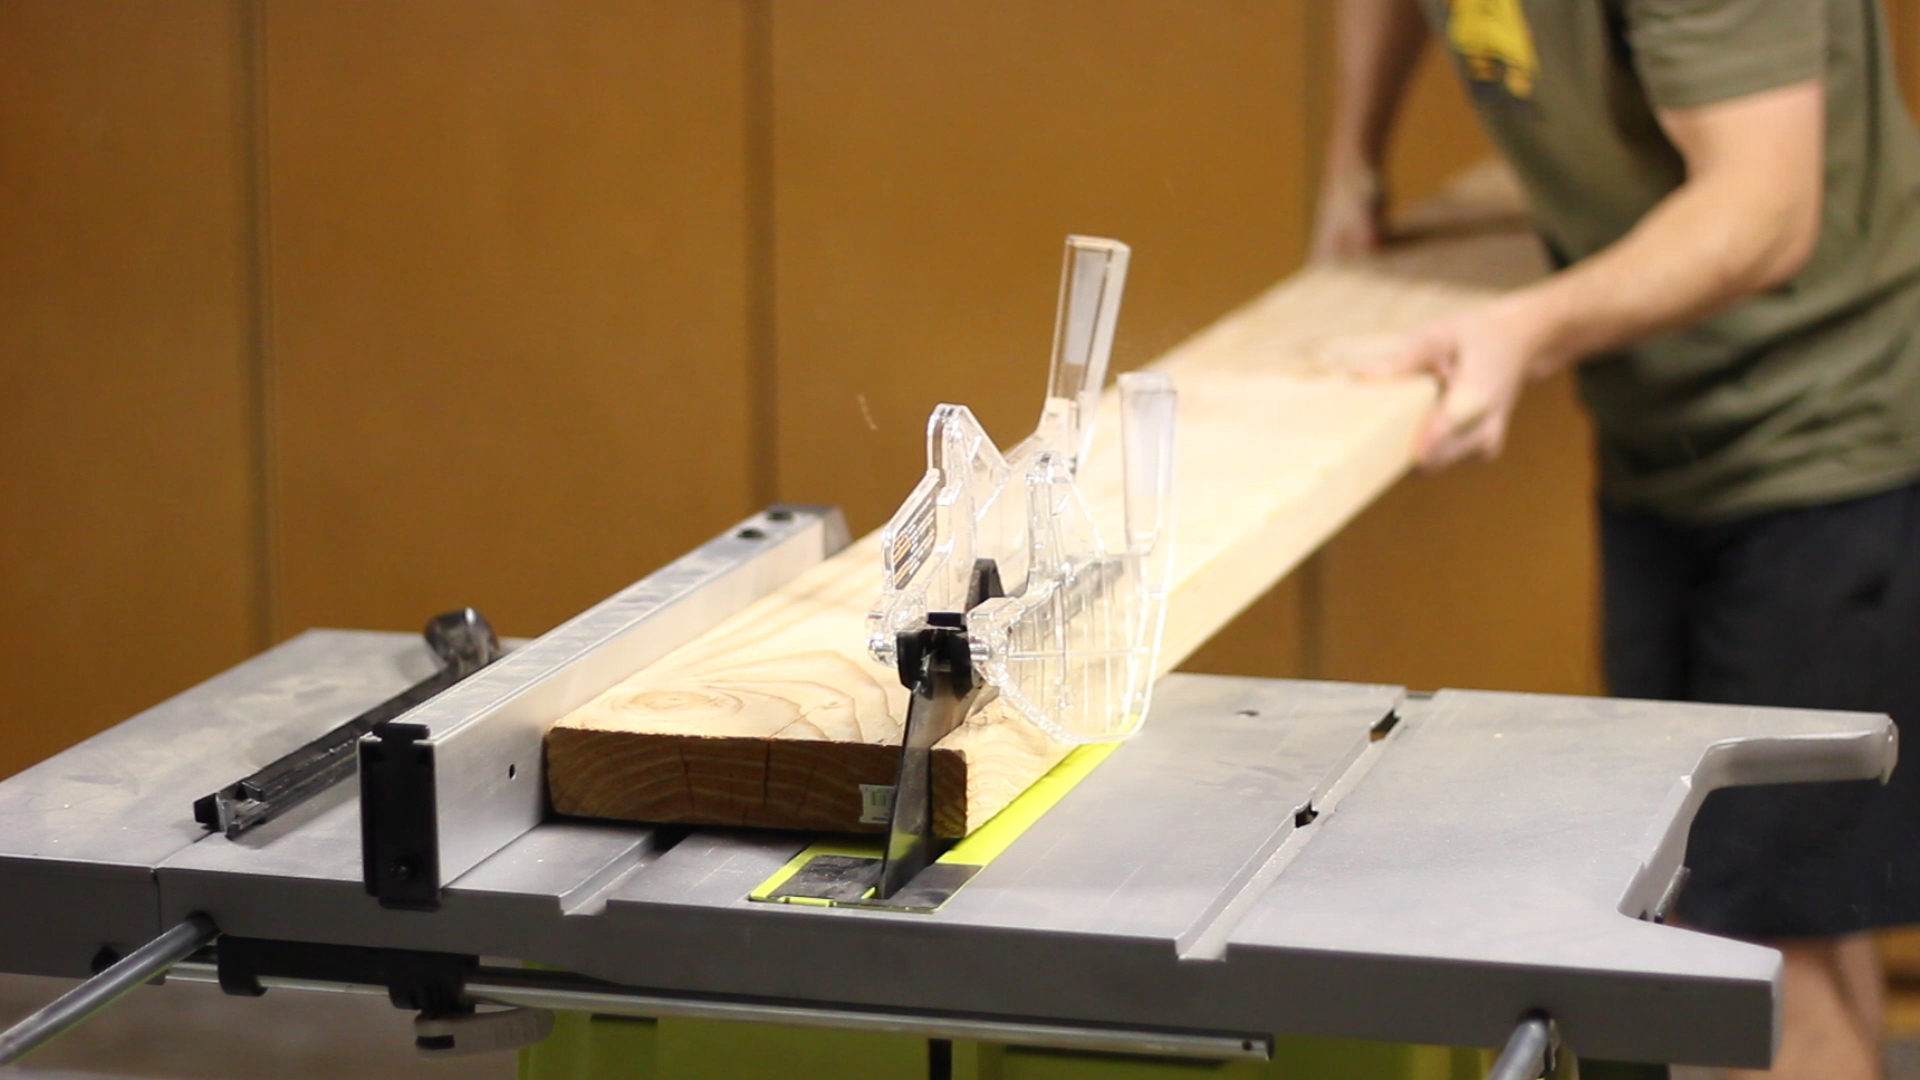
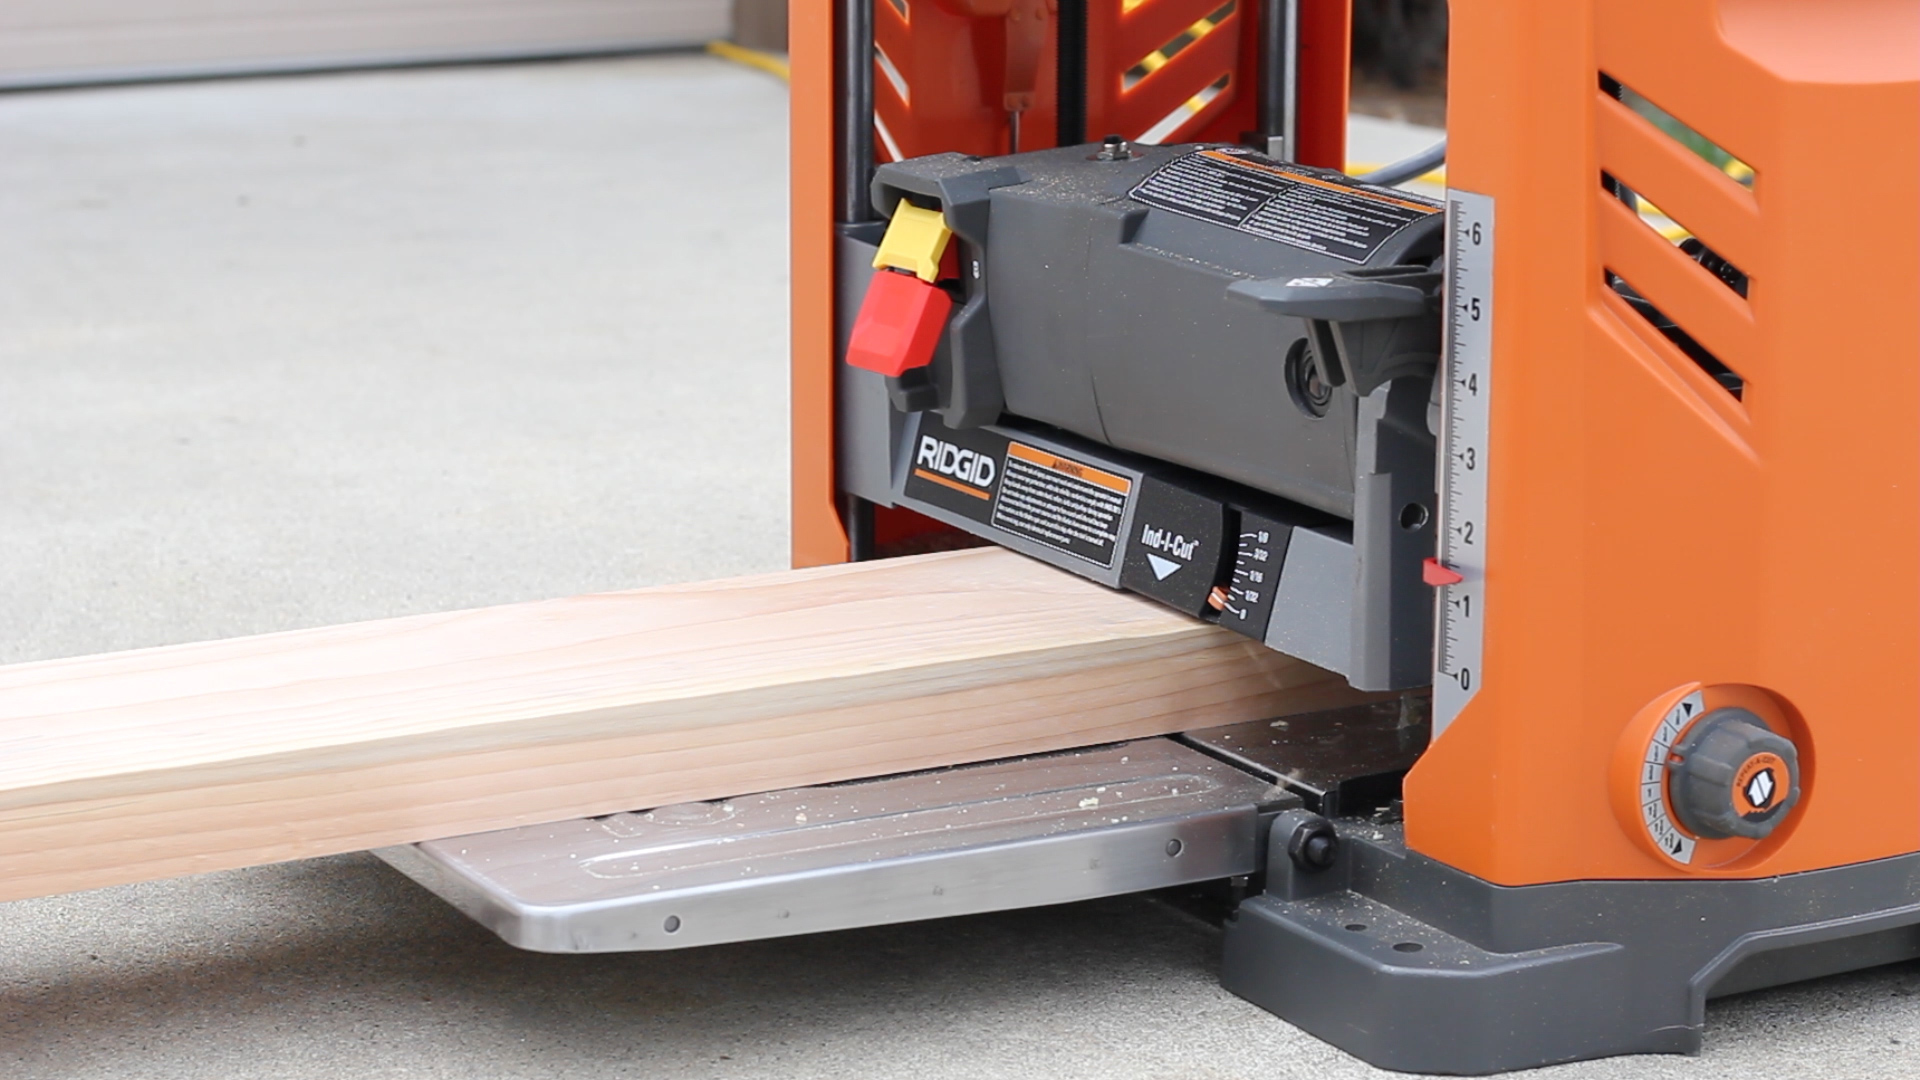
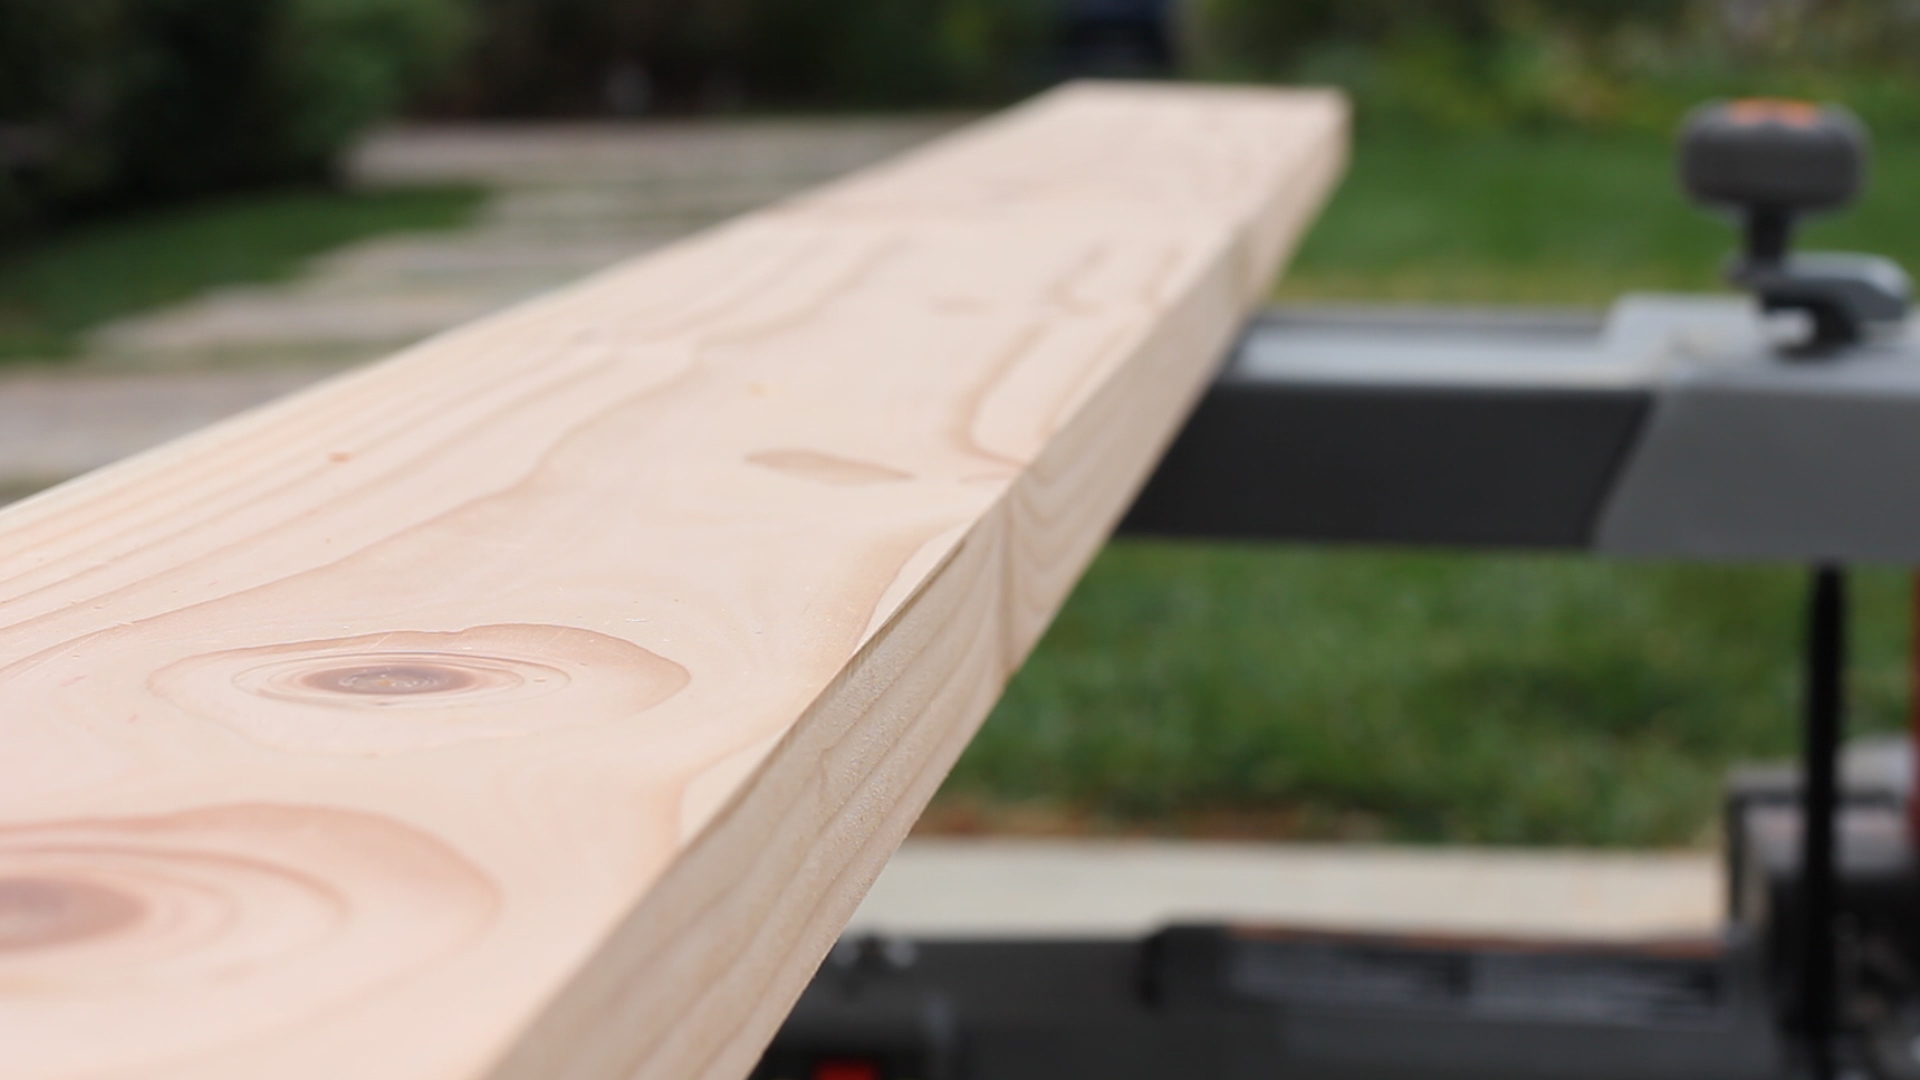
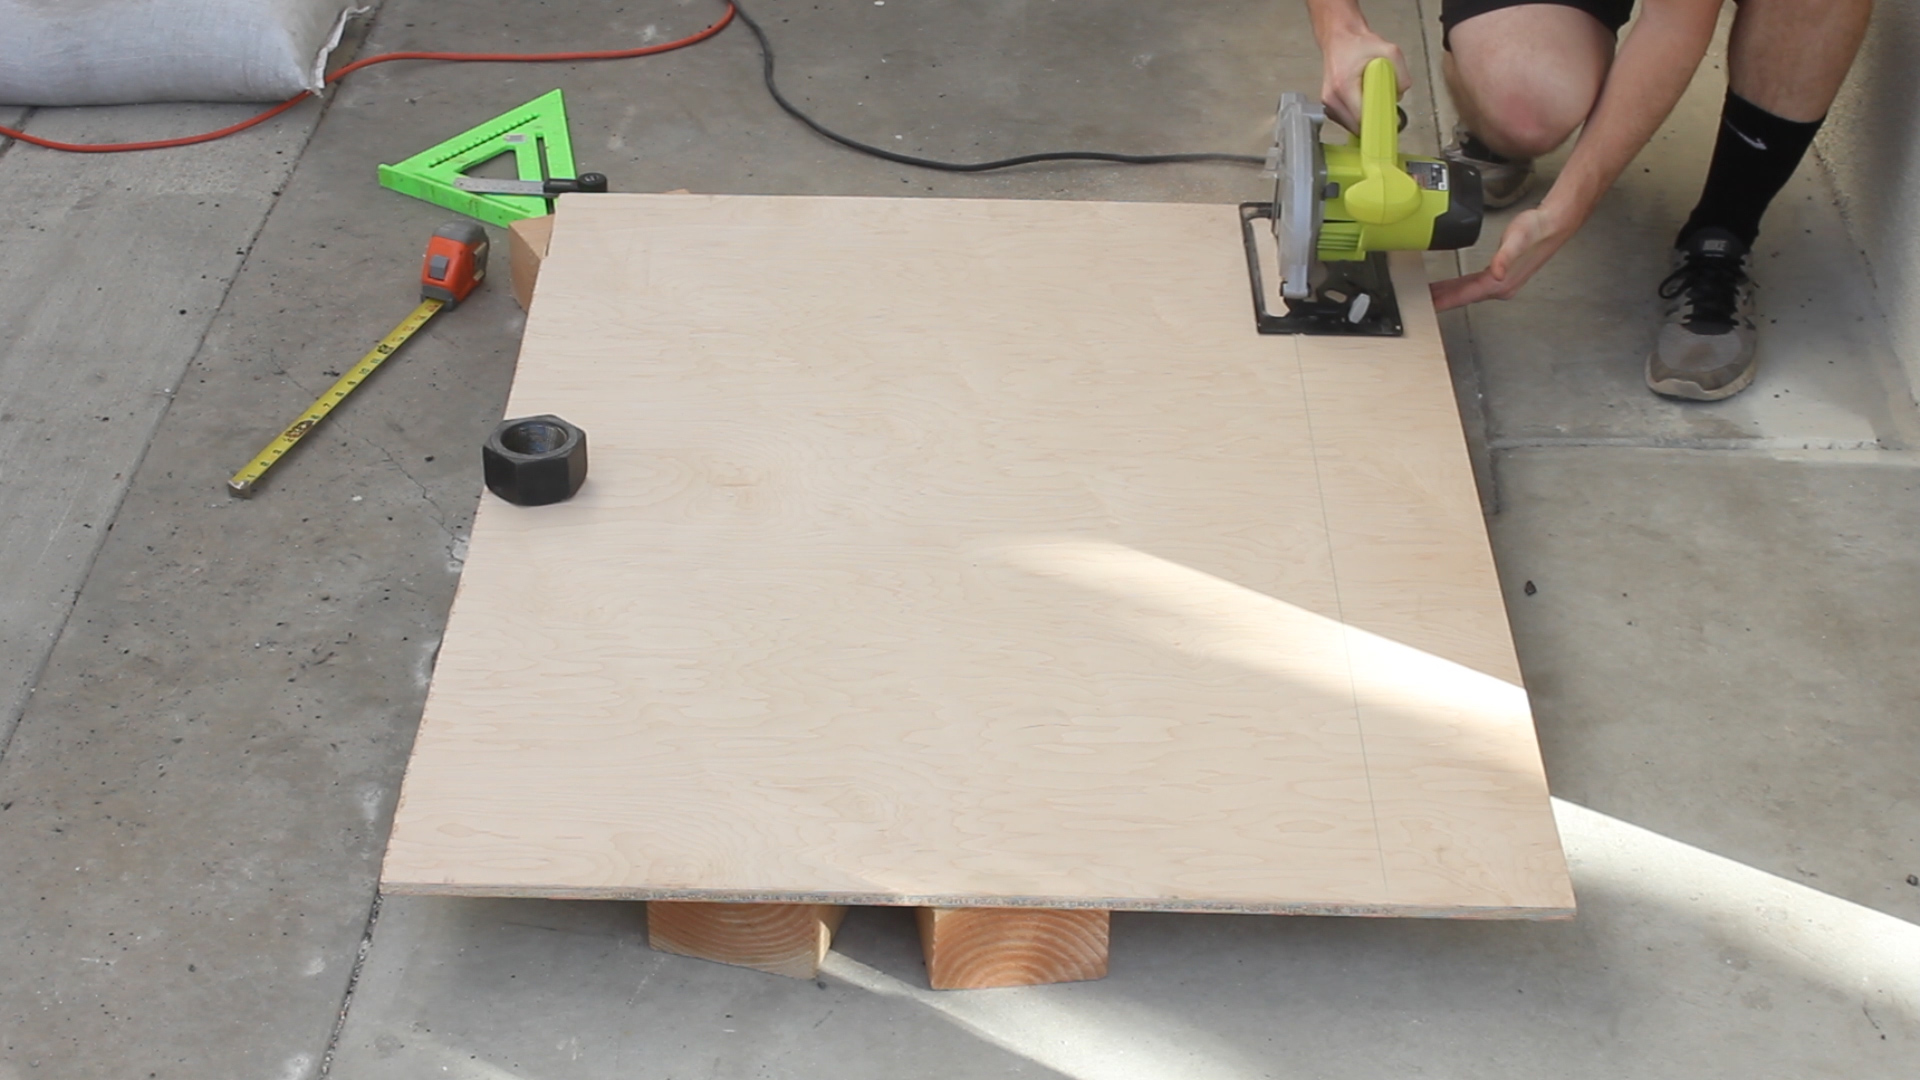
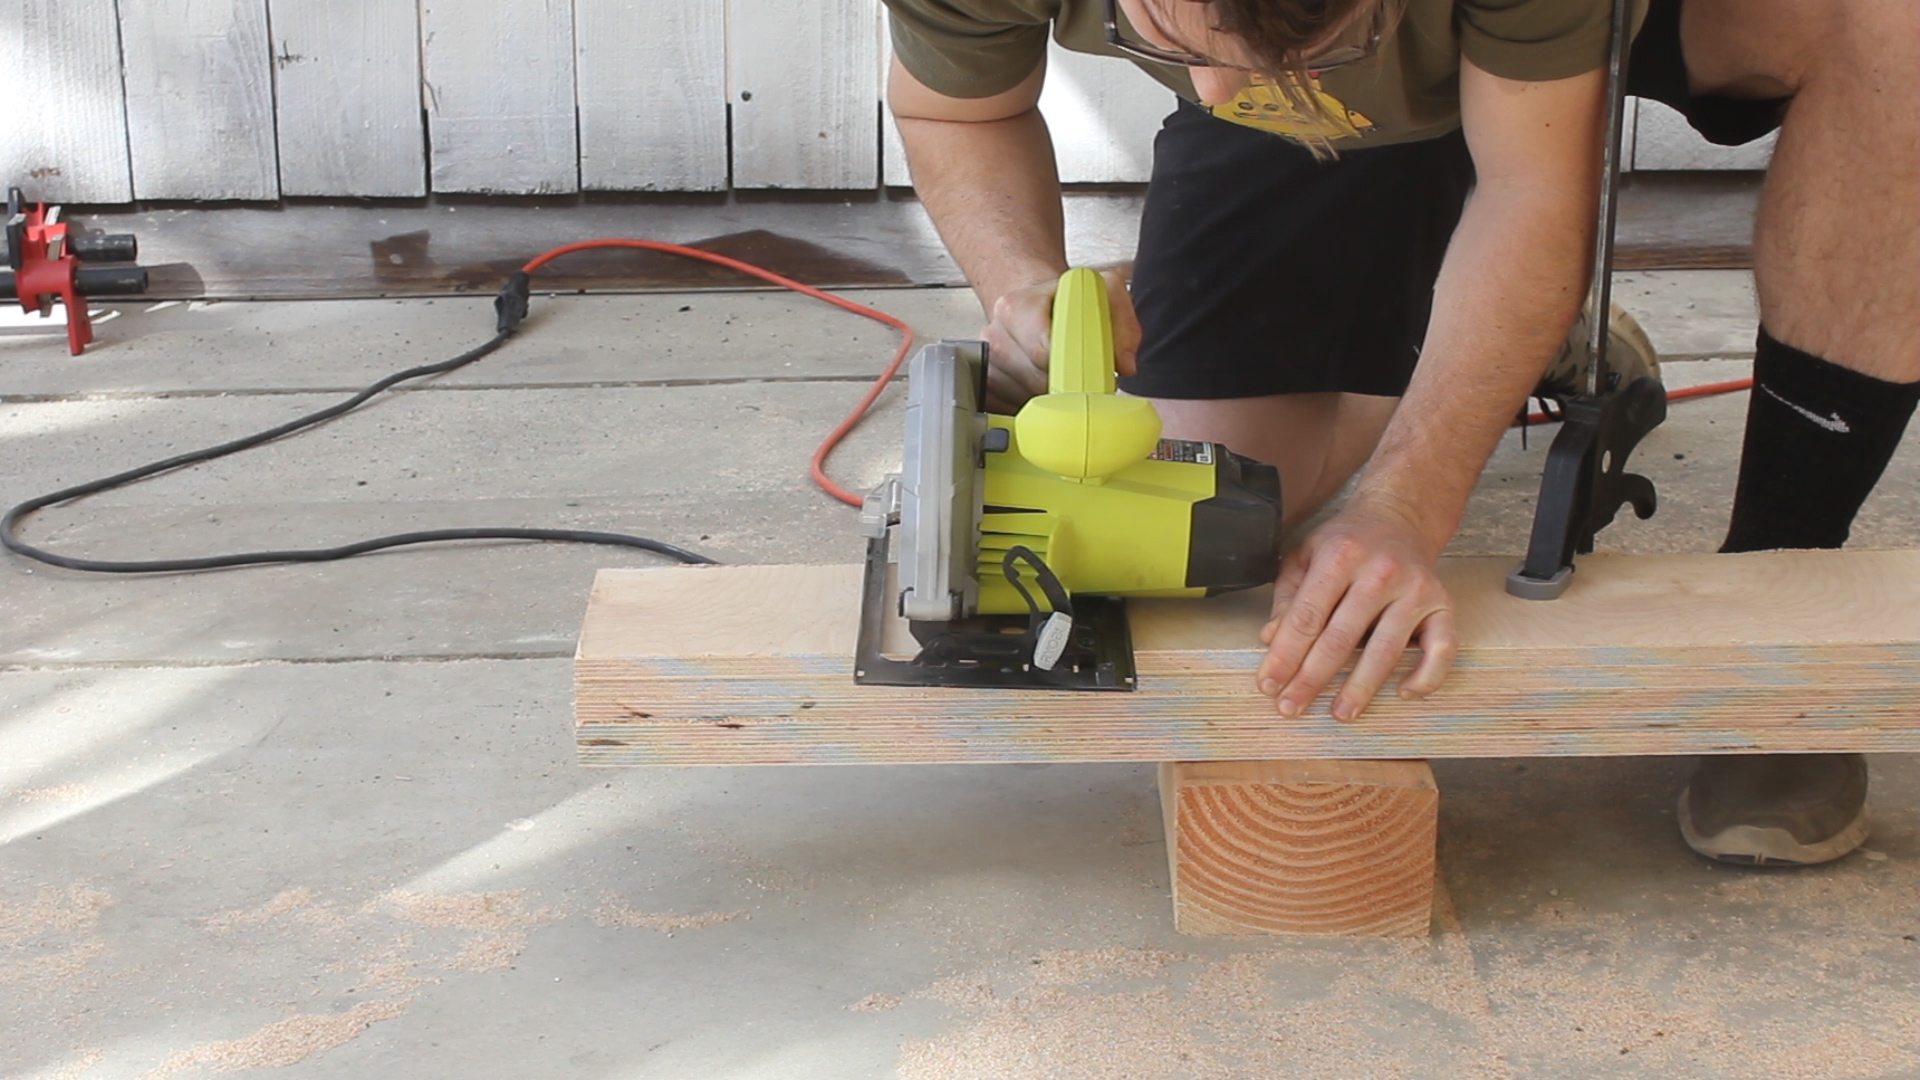
I designed this project to be built with just one 2 x 8 from home depot - that way, anyone could do it. I used my table saw to rip both sides of it to a little under 6", then planed both sides so that they were very flat for laminating. If you want to skip all this, or don't have access to these tools, you can buy S4S lumber from a local dealer.
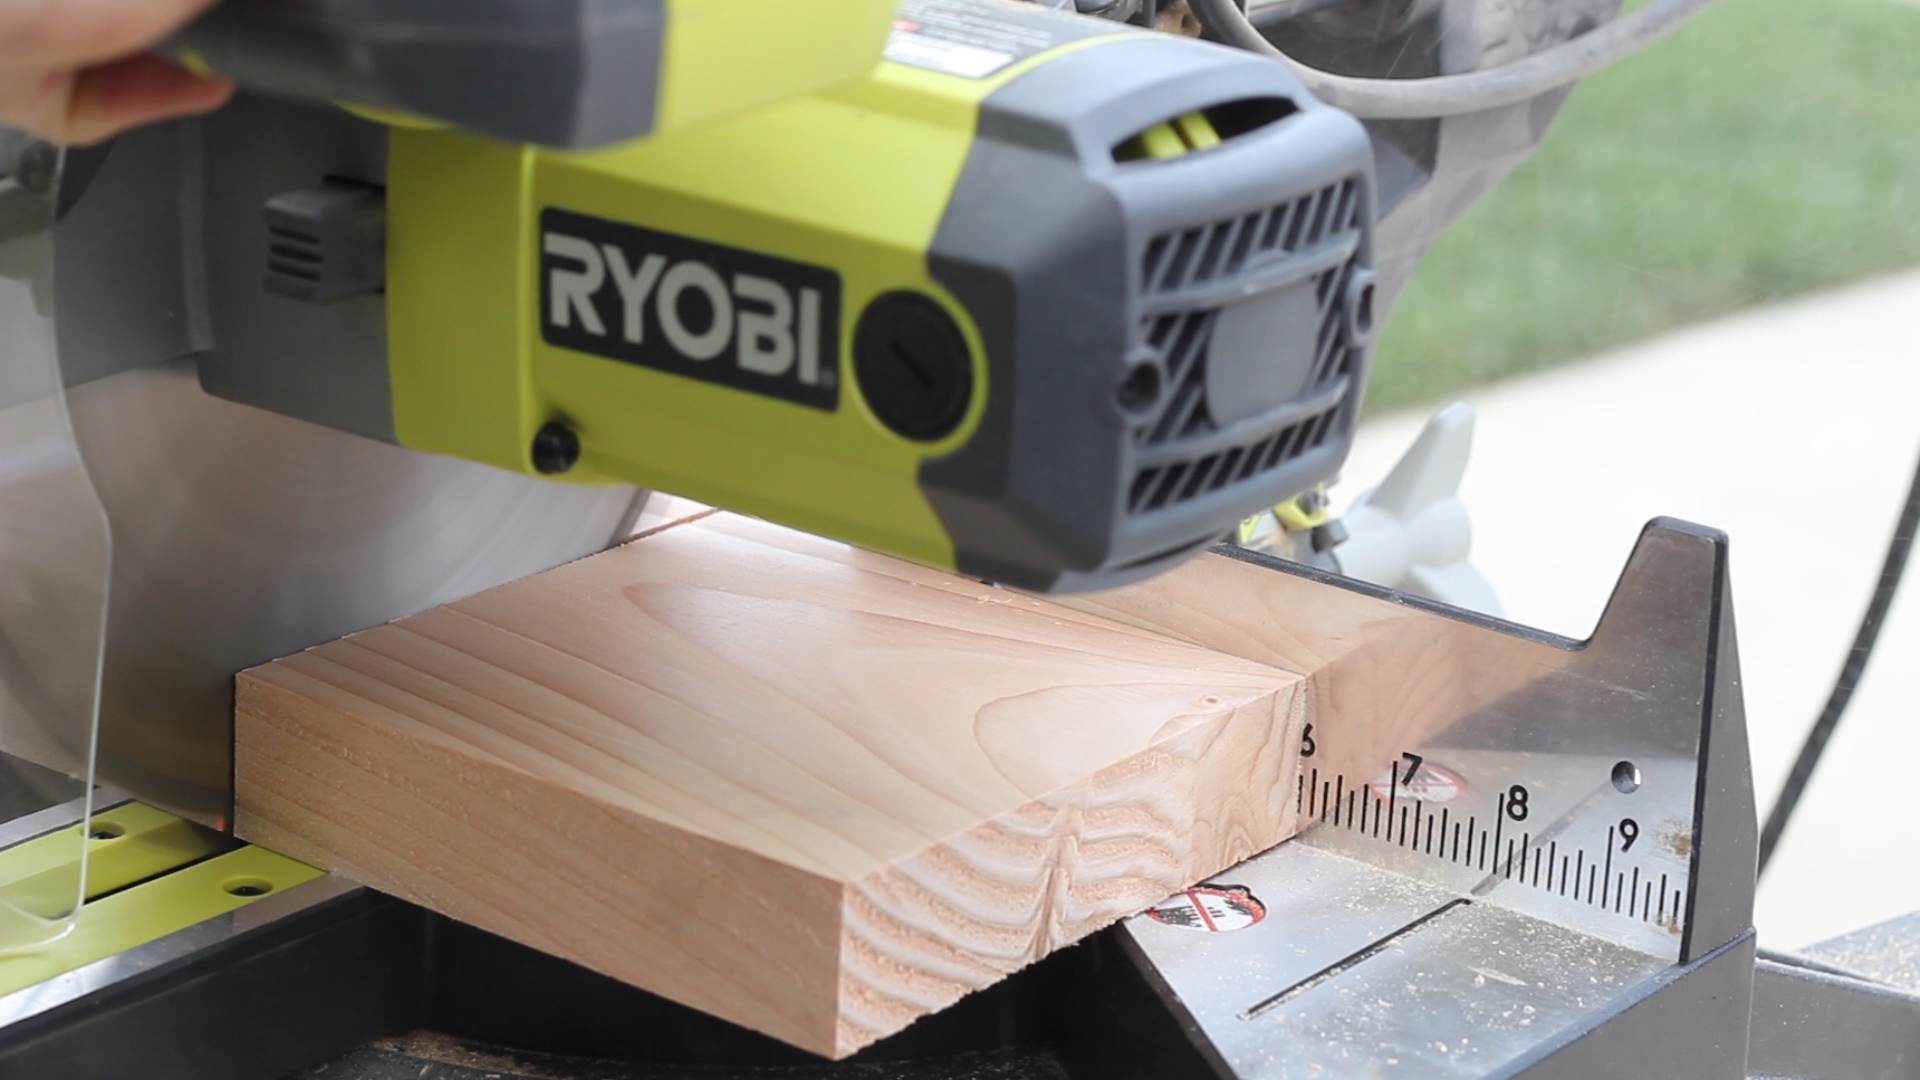
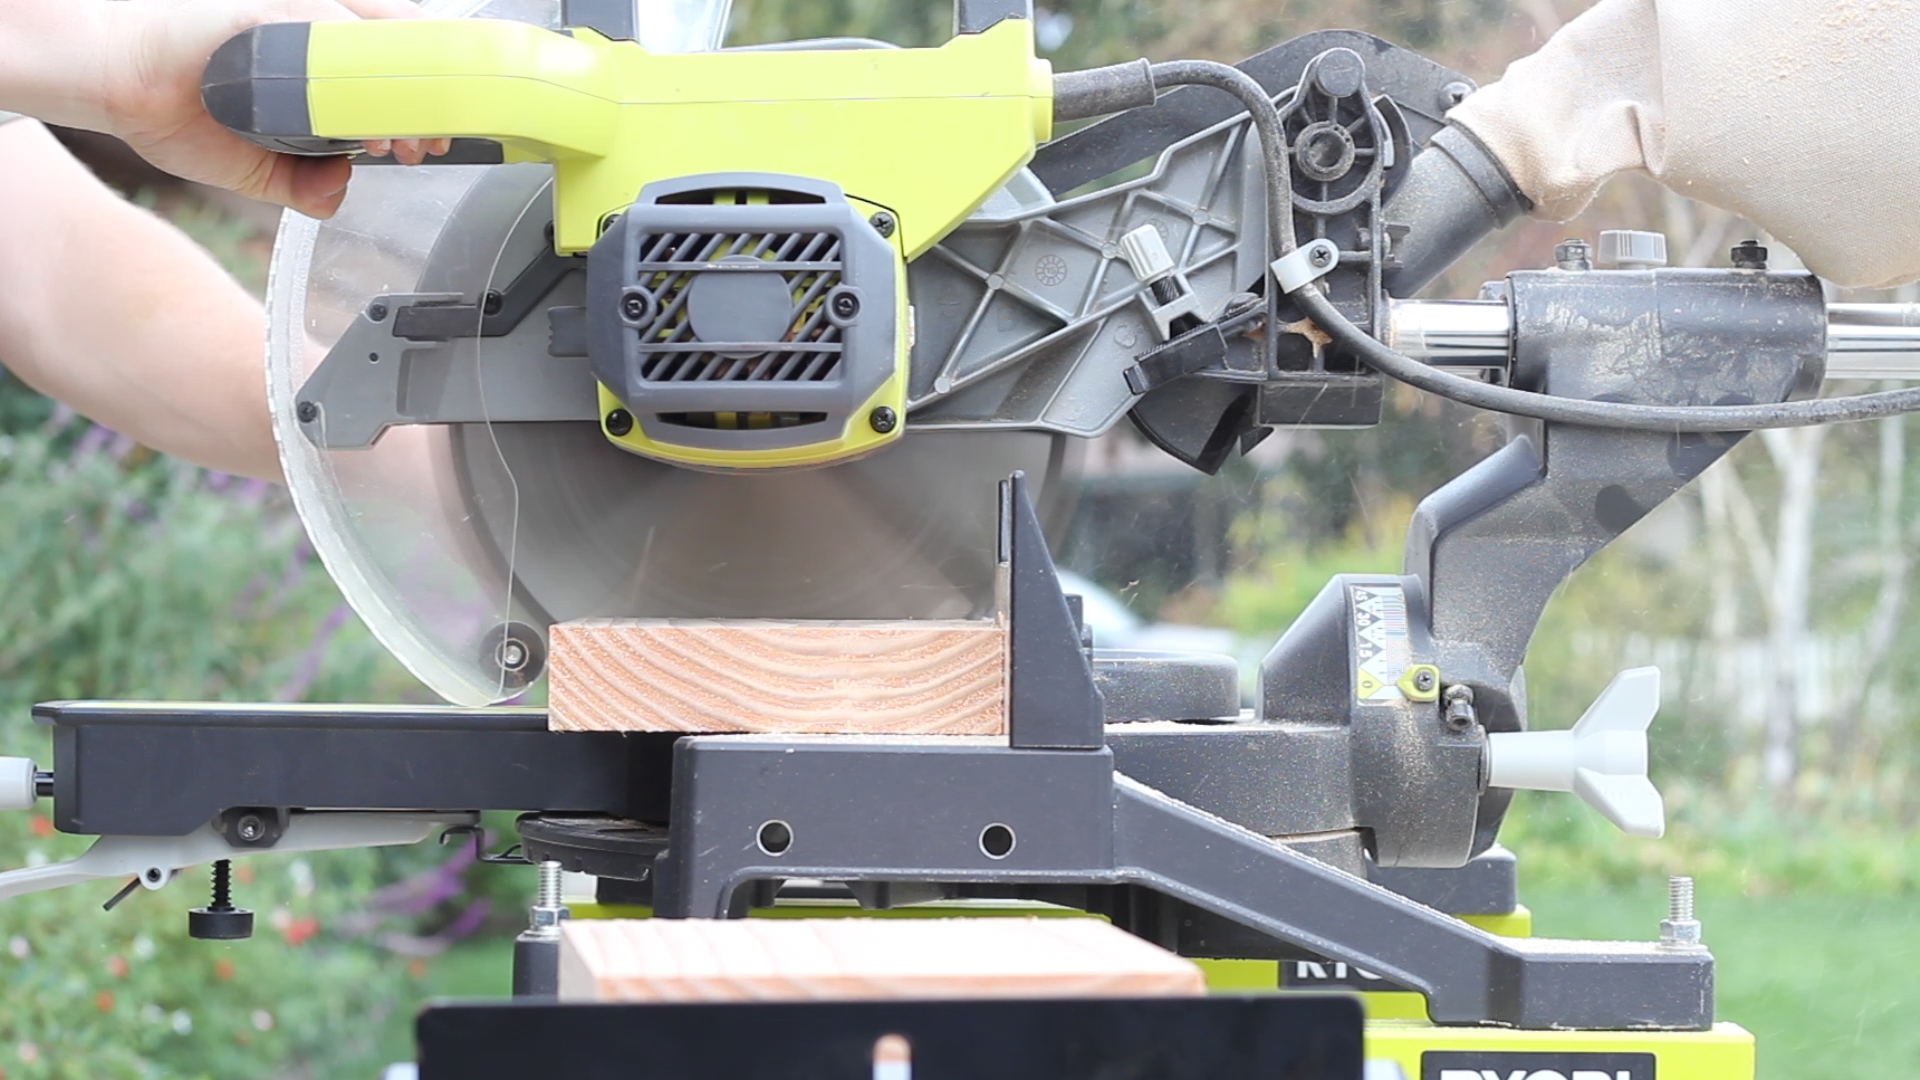
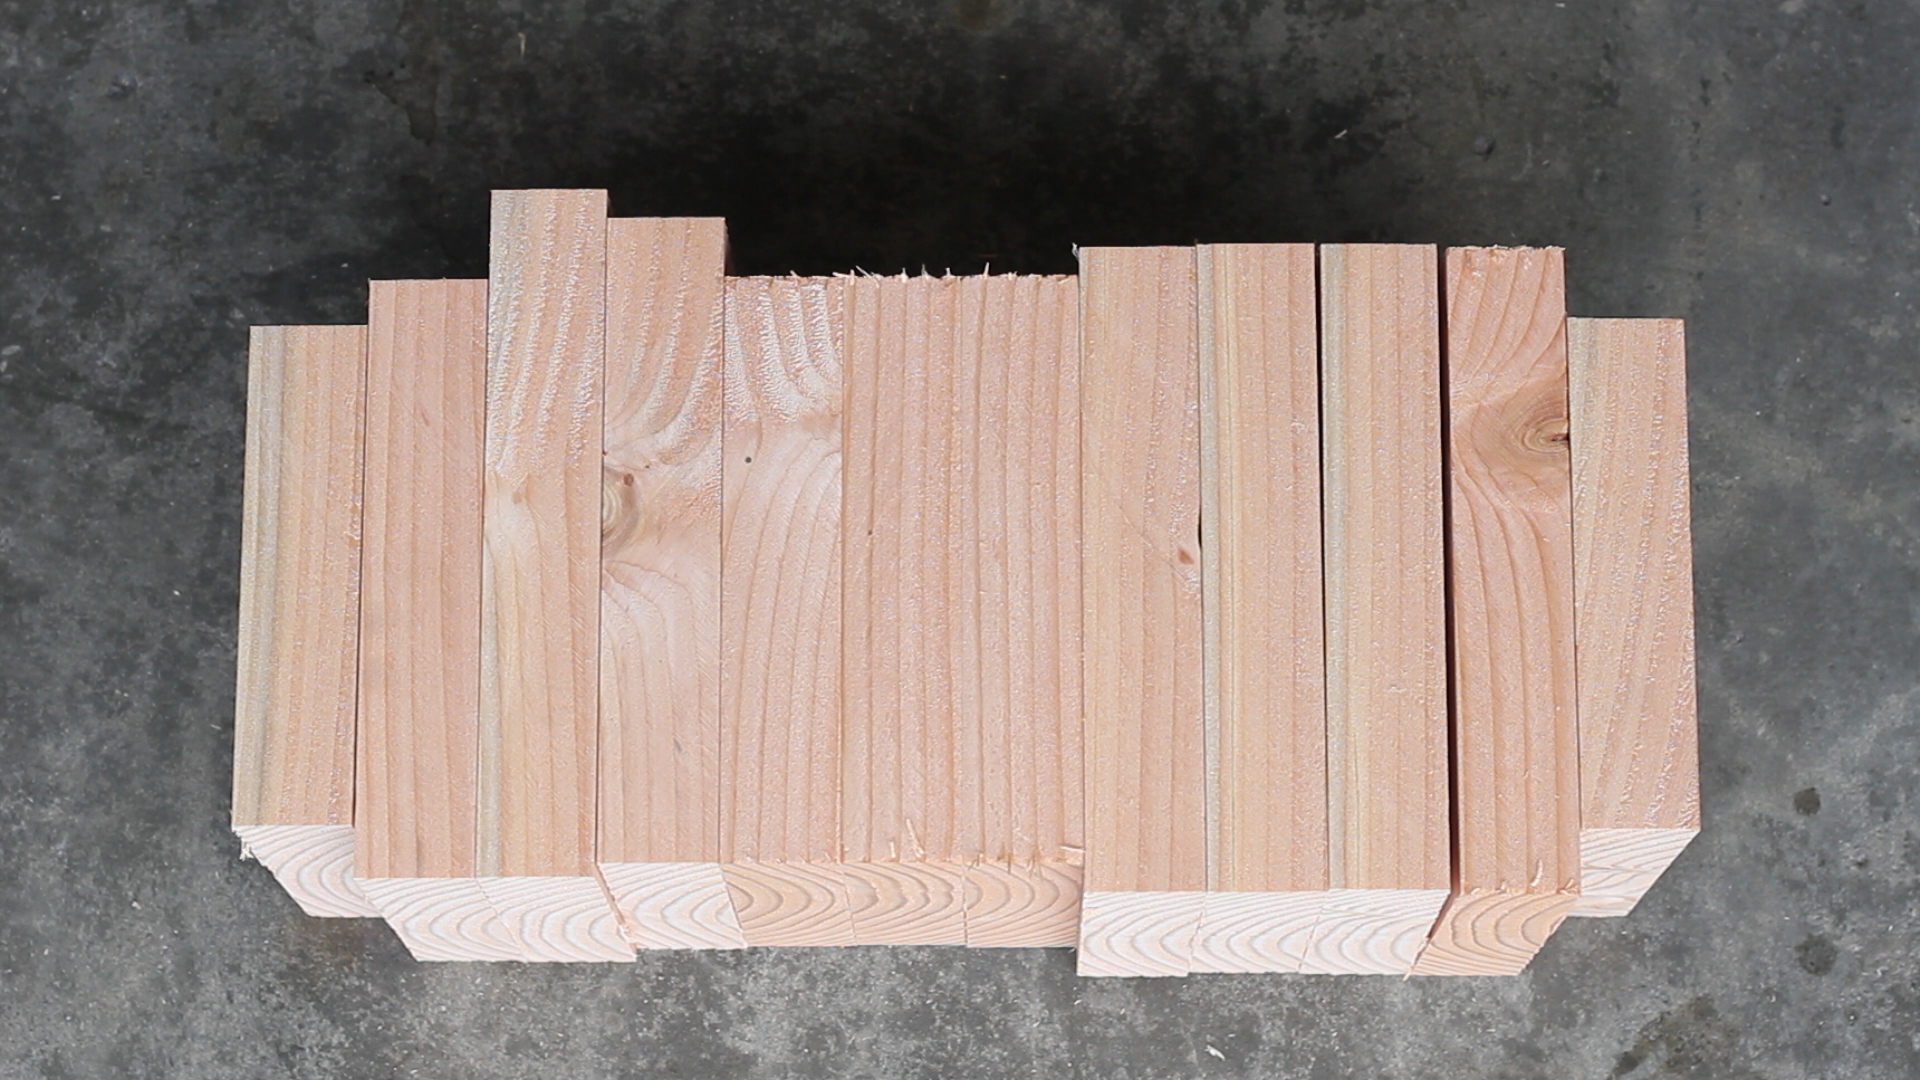
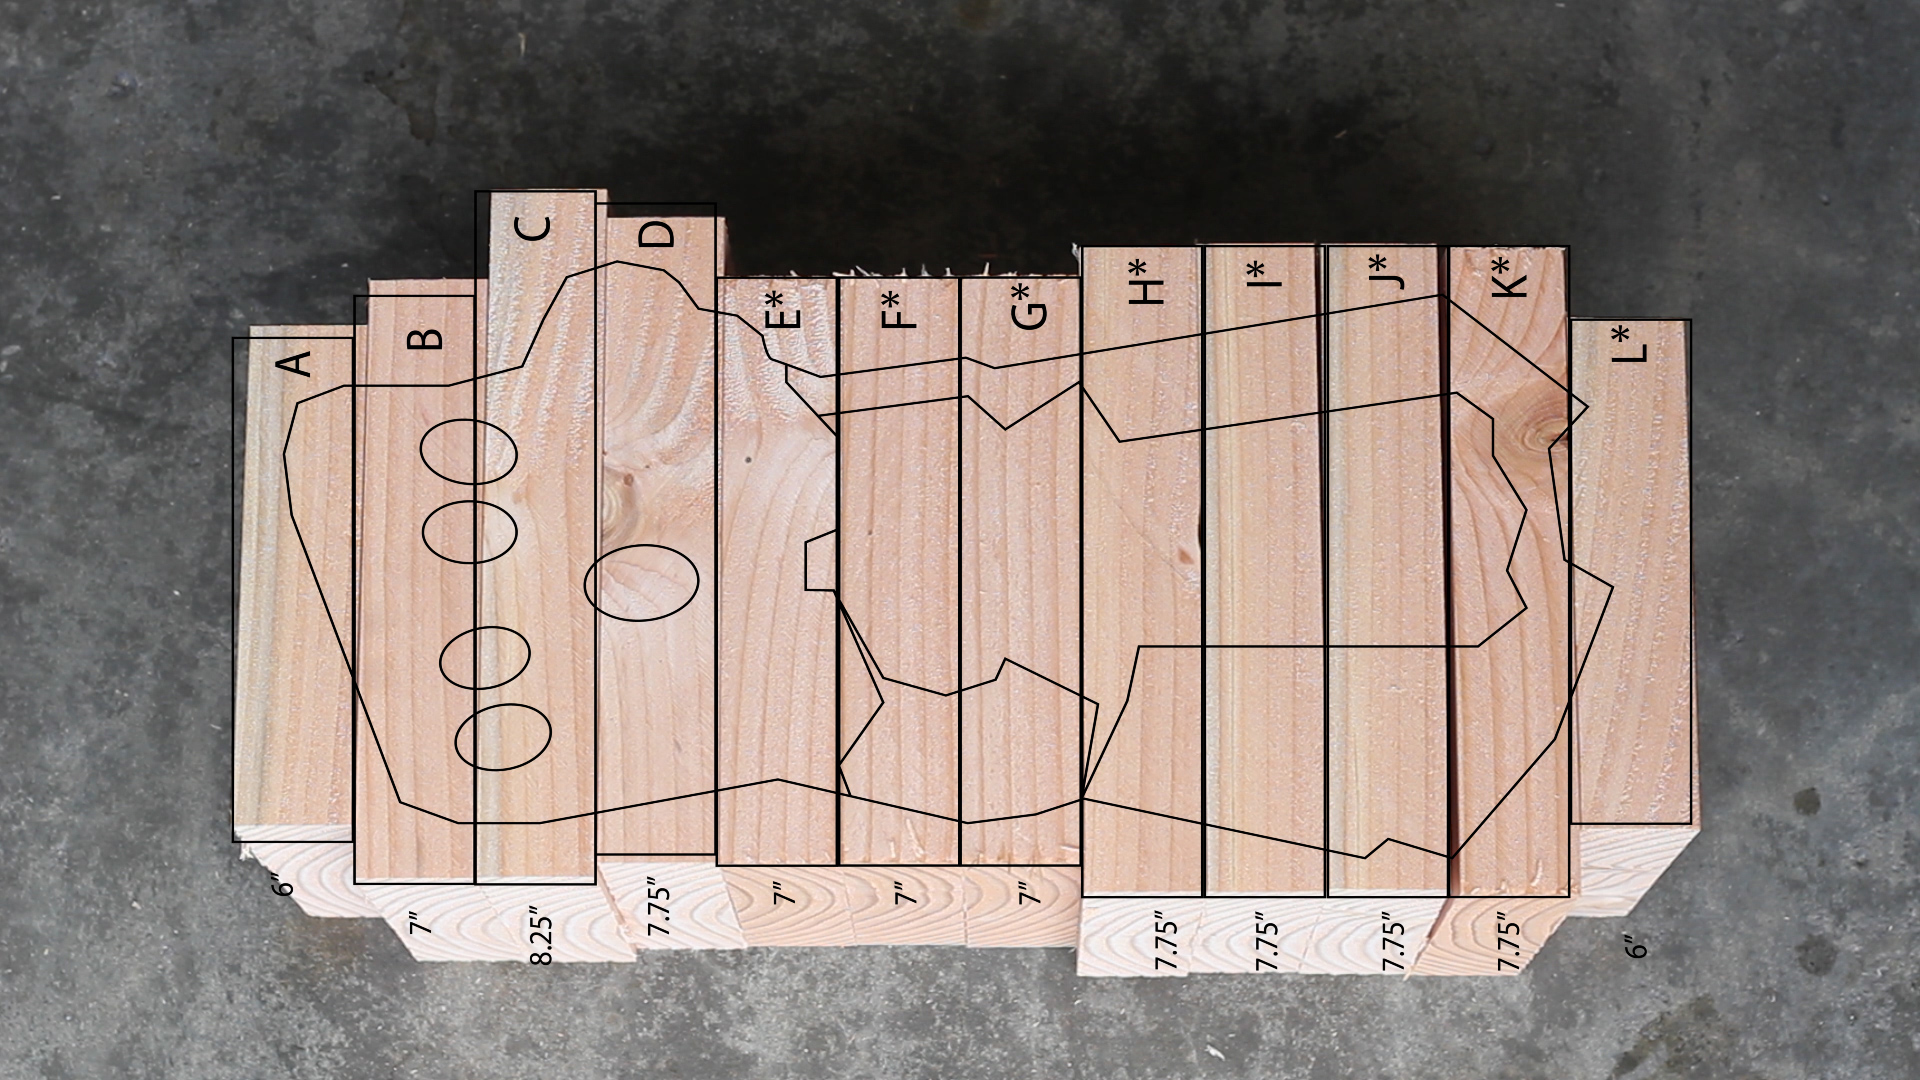
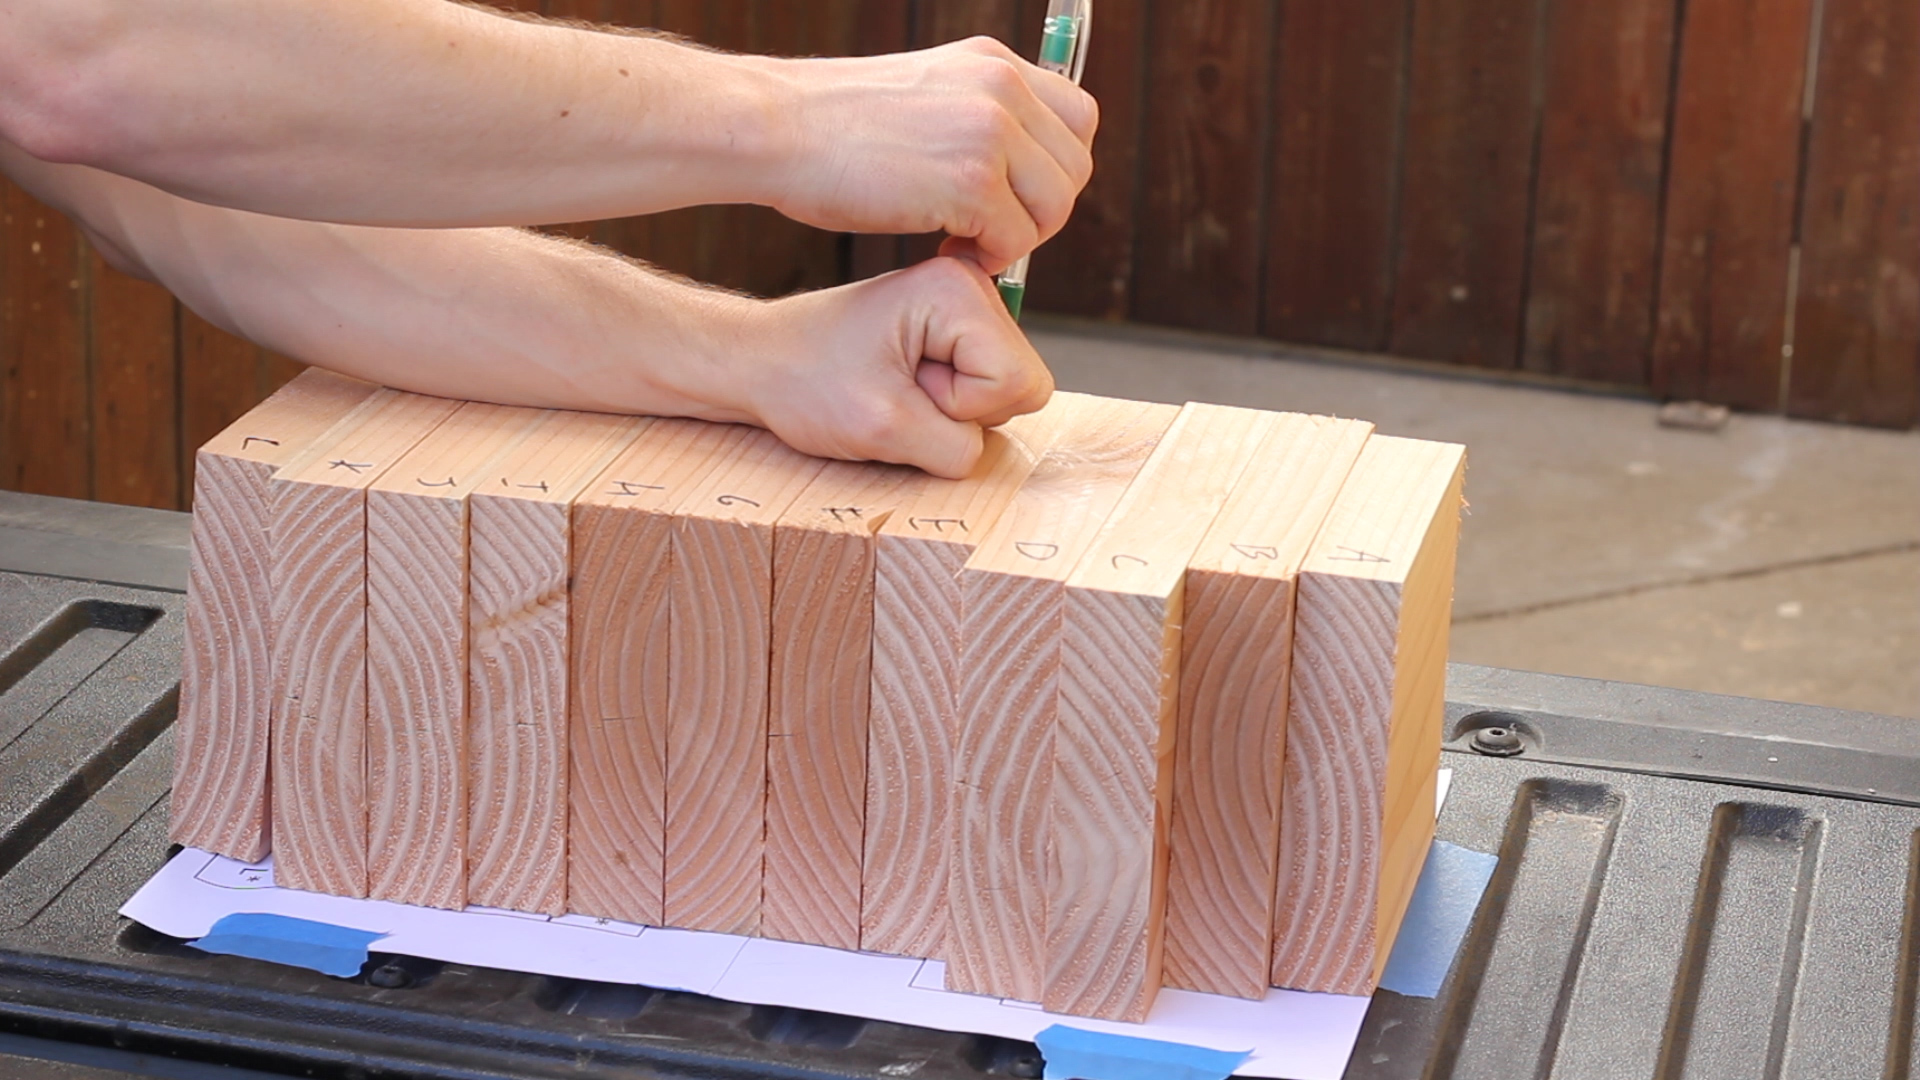
Based on the design, I ripped my material into specific lengths on the miter saw (Pics 1-2), and then laid them out on the ground to match my design template (Pics 3-4).

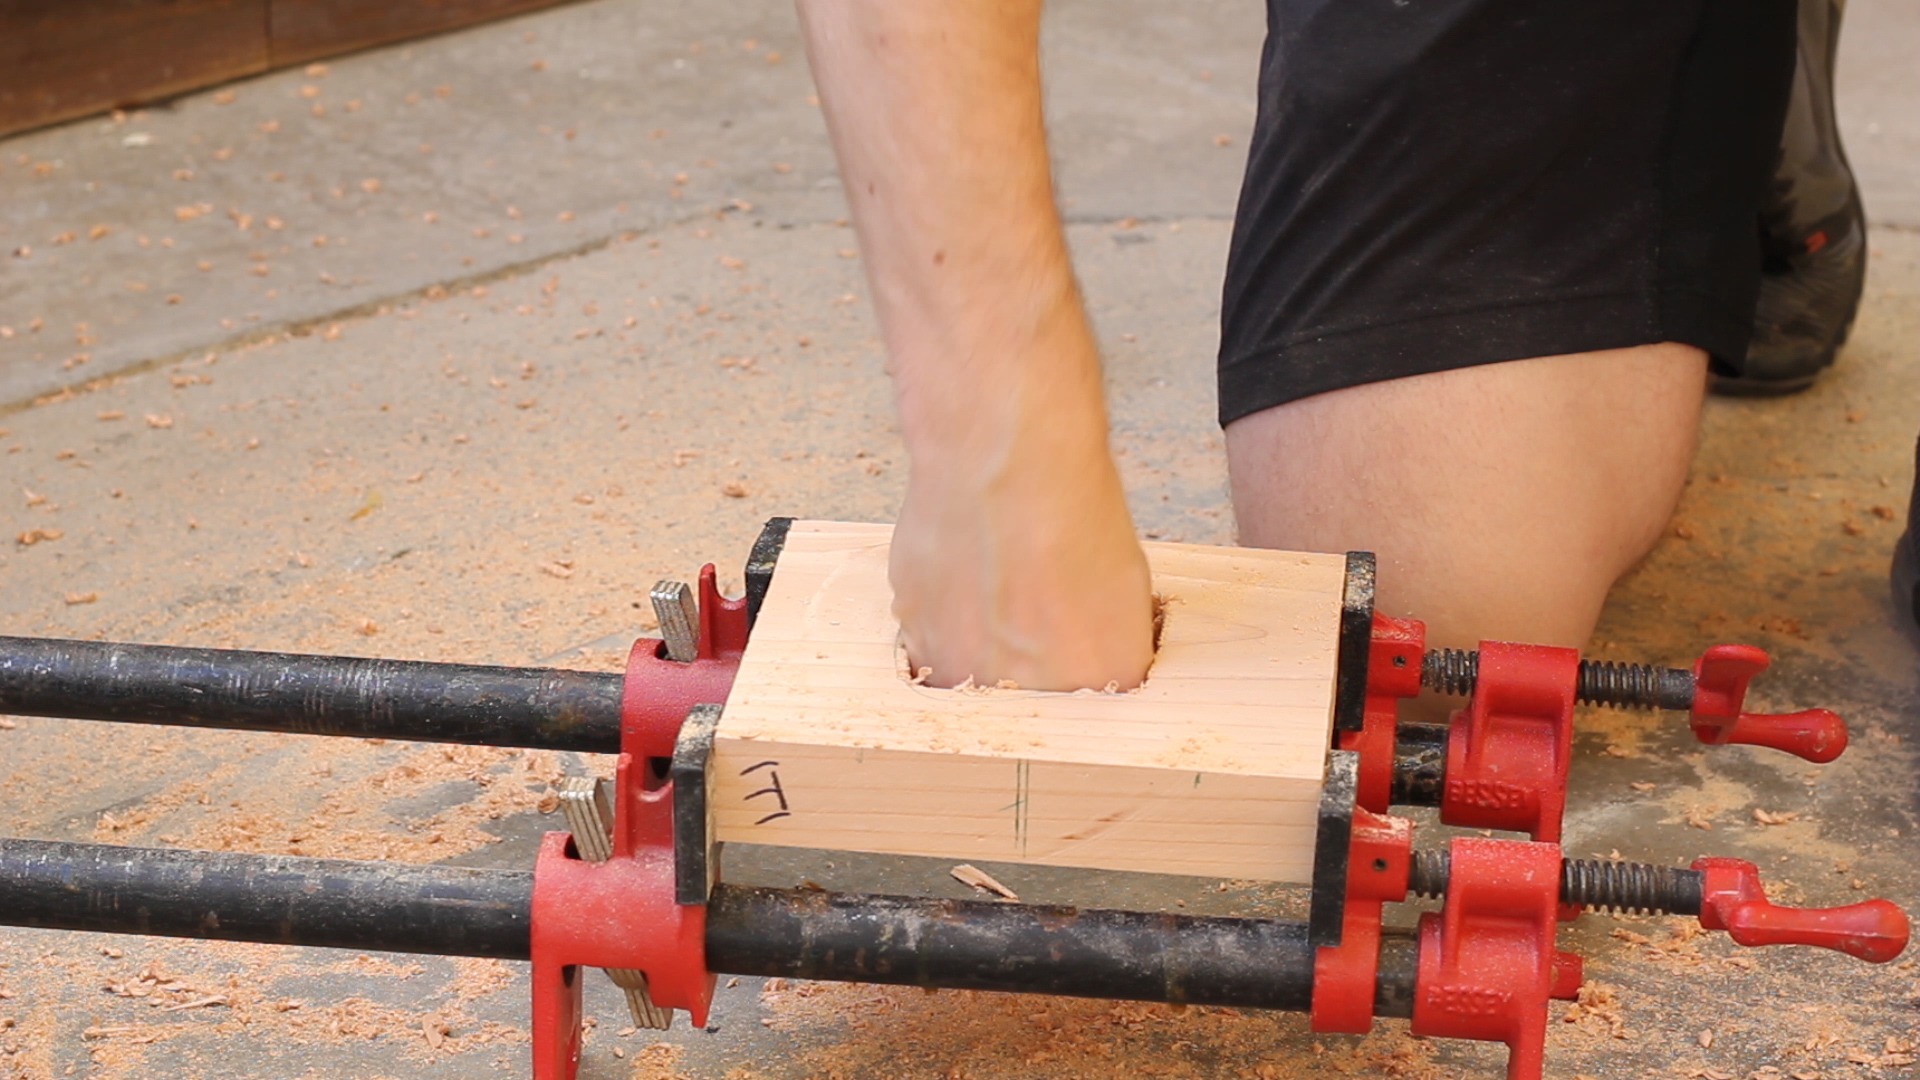

his is not necessary, and I ended up skipping this whole bit the second time around, but if you want to be able to stick your hand in your design, you'll want to cut out holes in the first 9 pieces before gluing up.
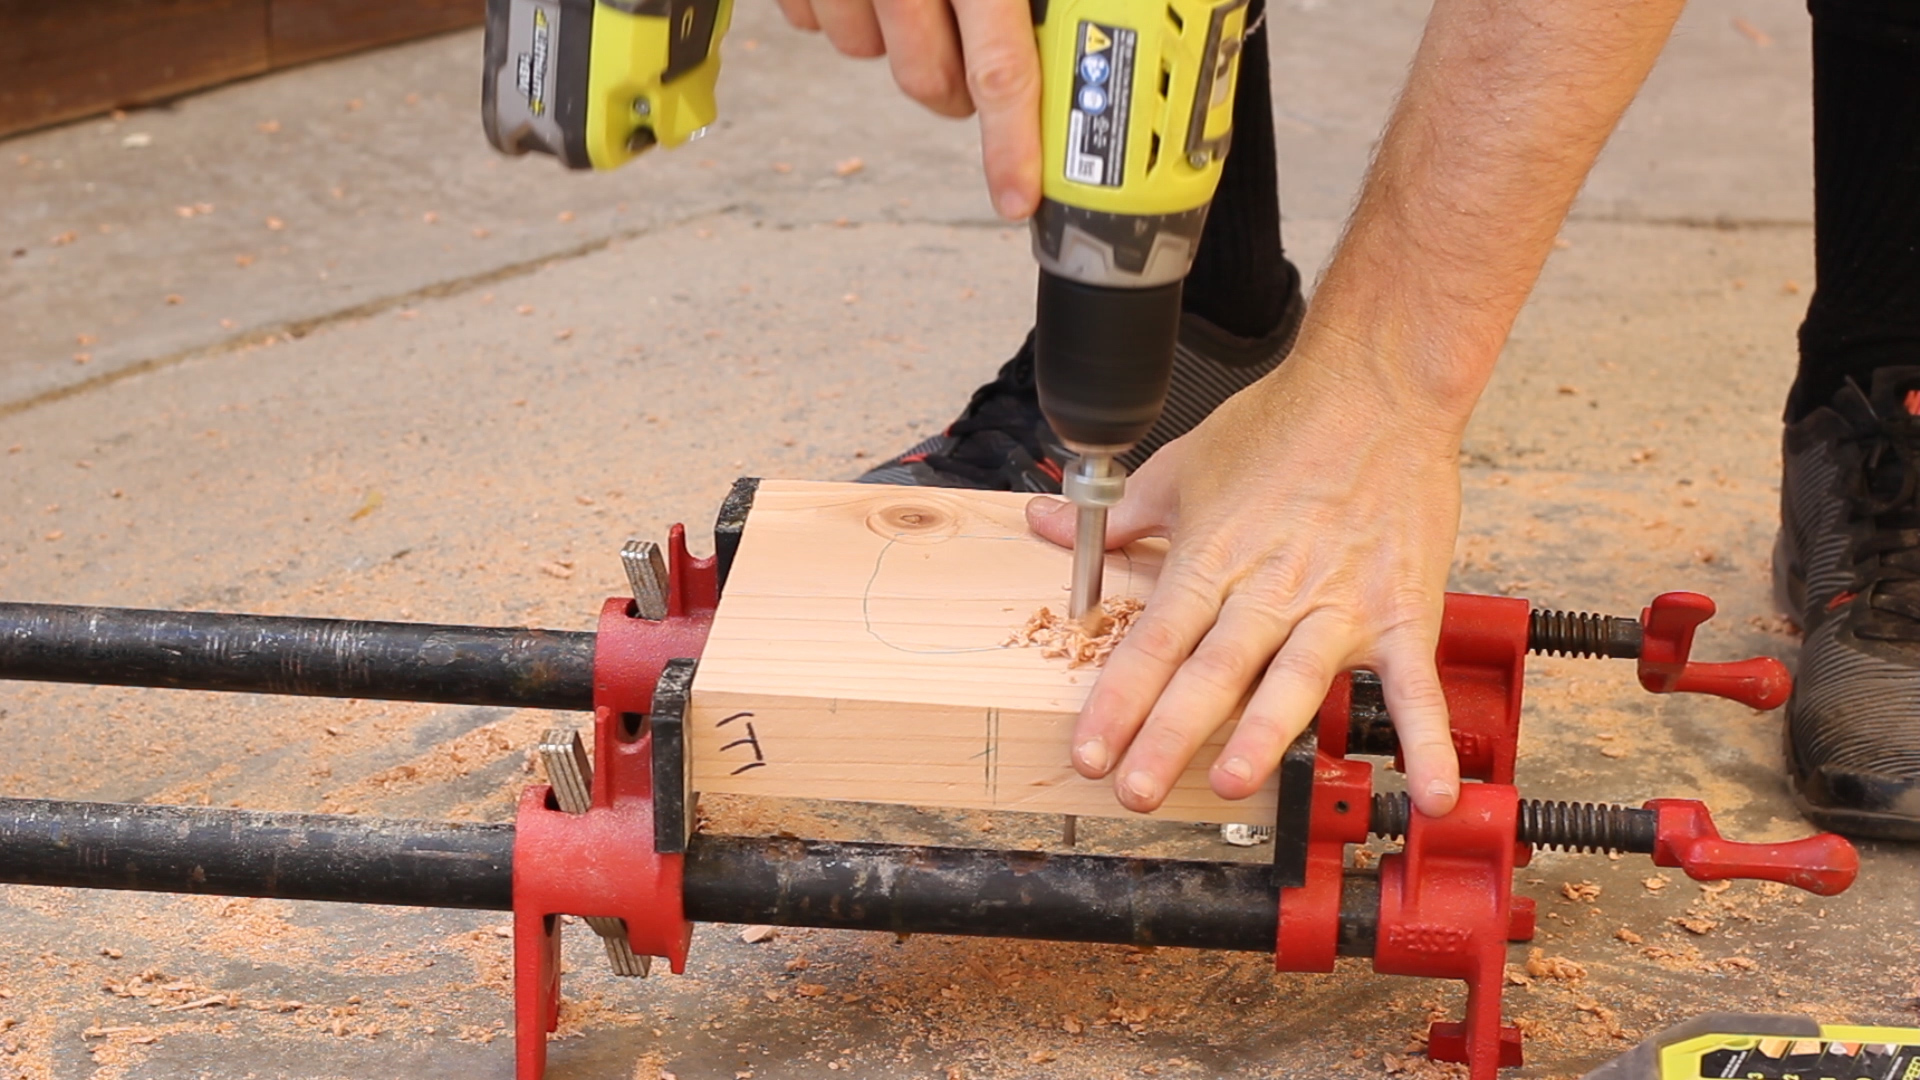
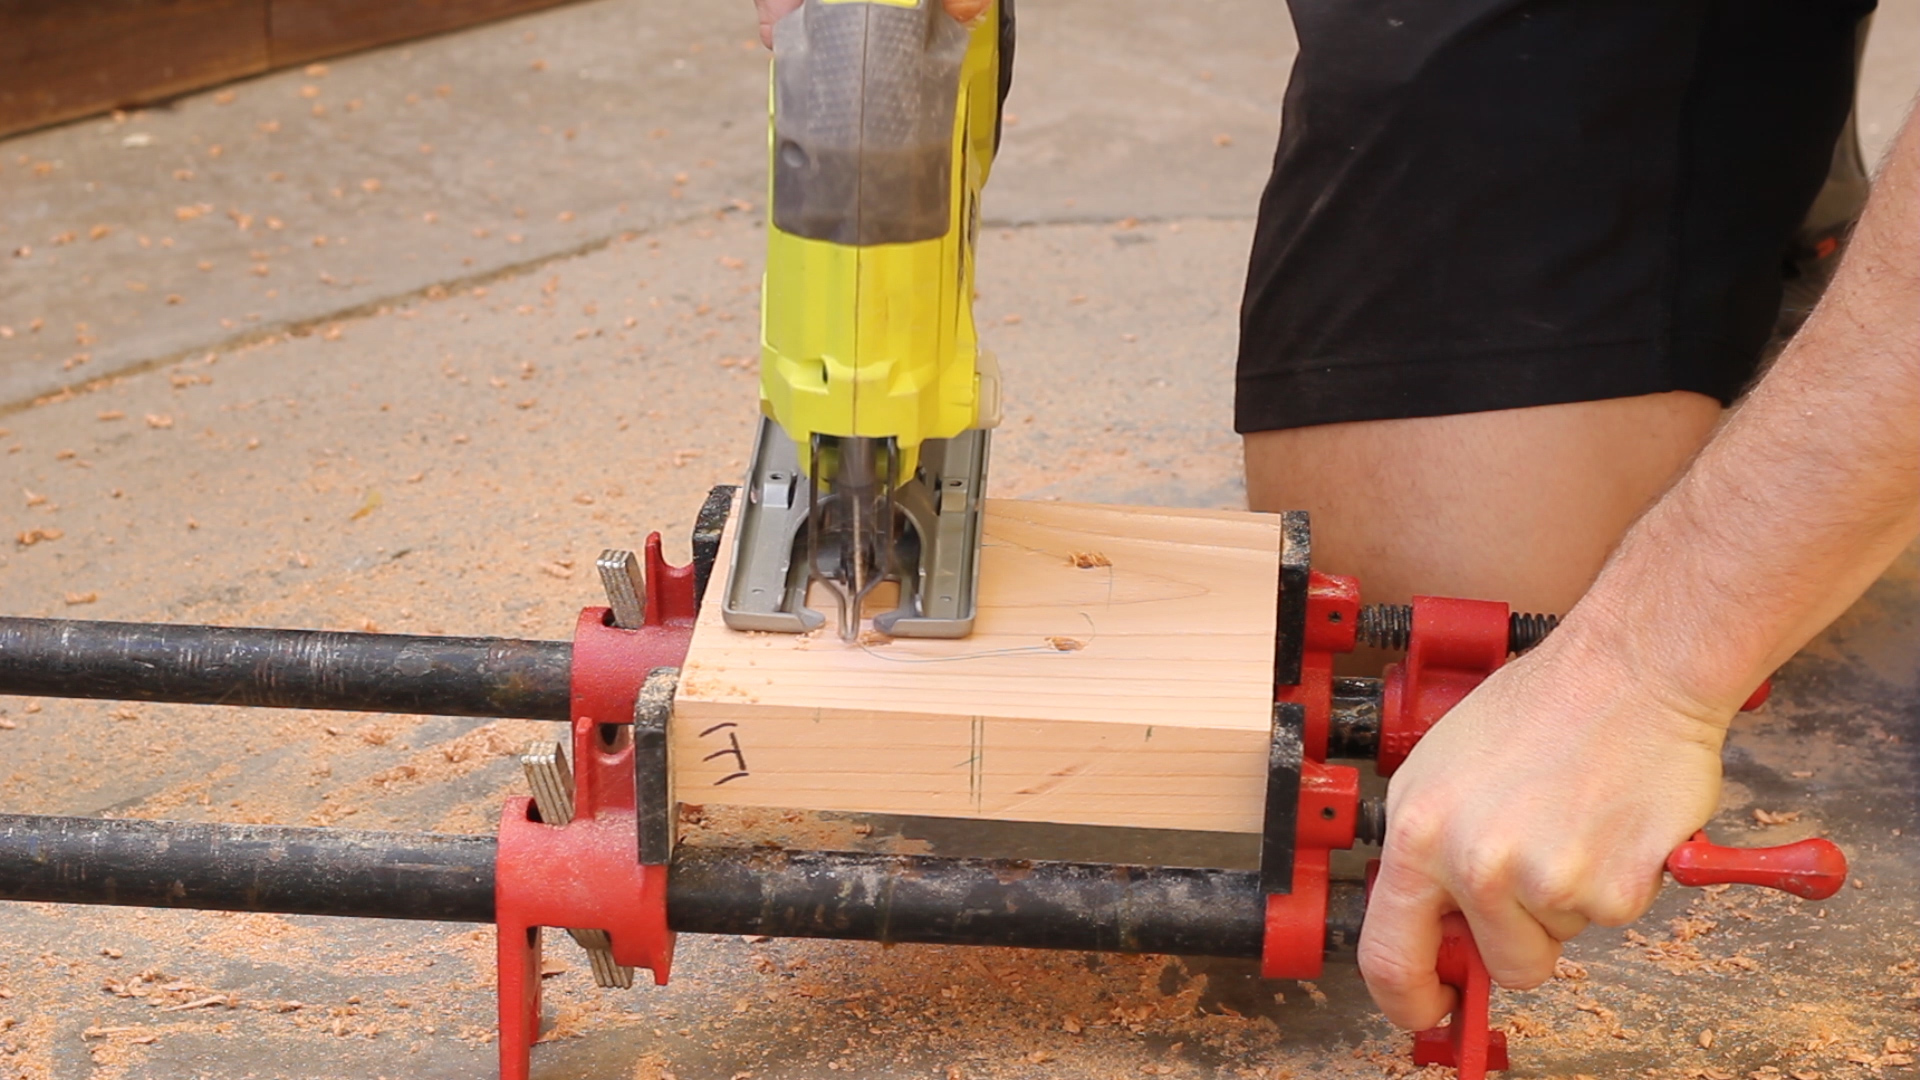
Pic 1 shows me figuring out how many pieces I'd need to cut out a hole in. I used a masking tape ring to make a rough circle in Pic 2. Then, in Pics 3-5, I used a drill and jig saw to cut out holes in each of my pieces, using clamps to hold it steady while I did so. Pic 6 shows me test fitting my hand before gluing.
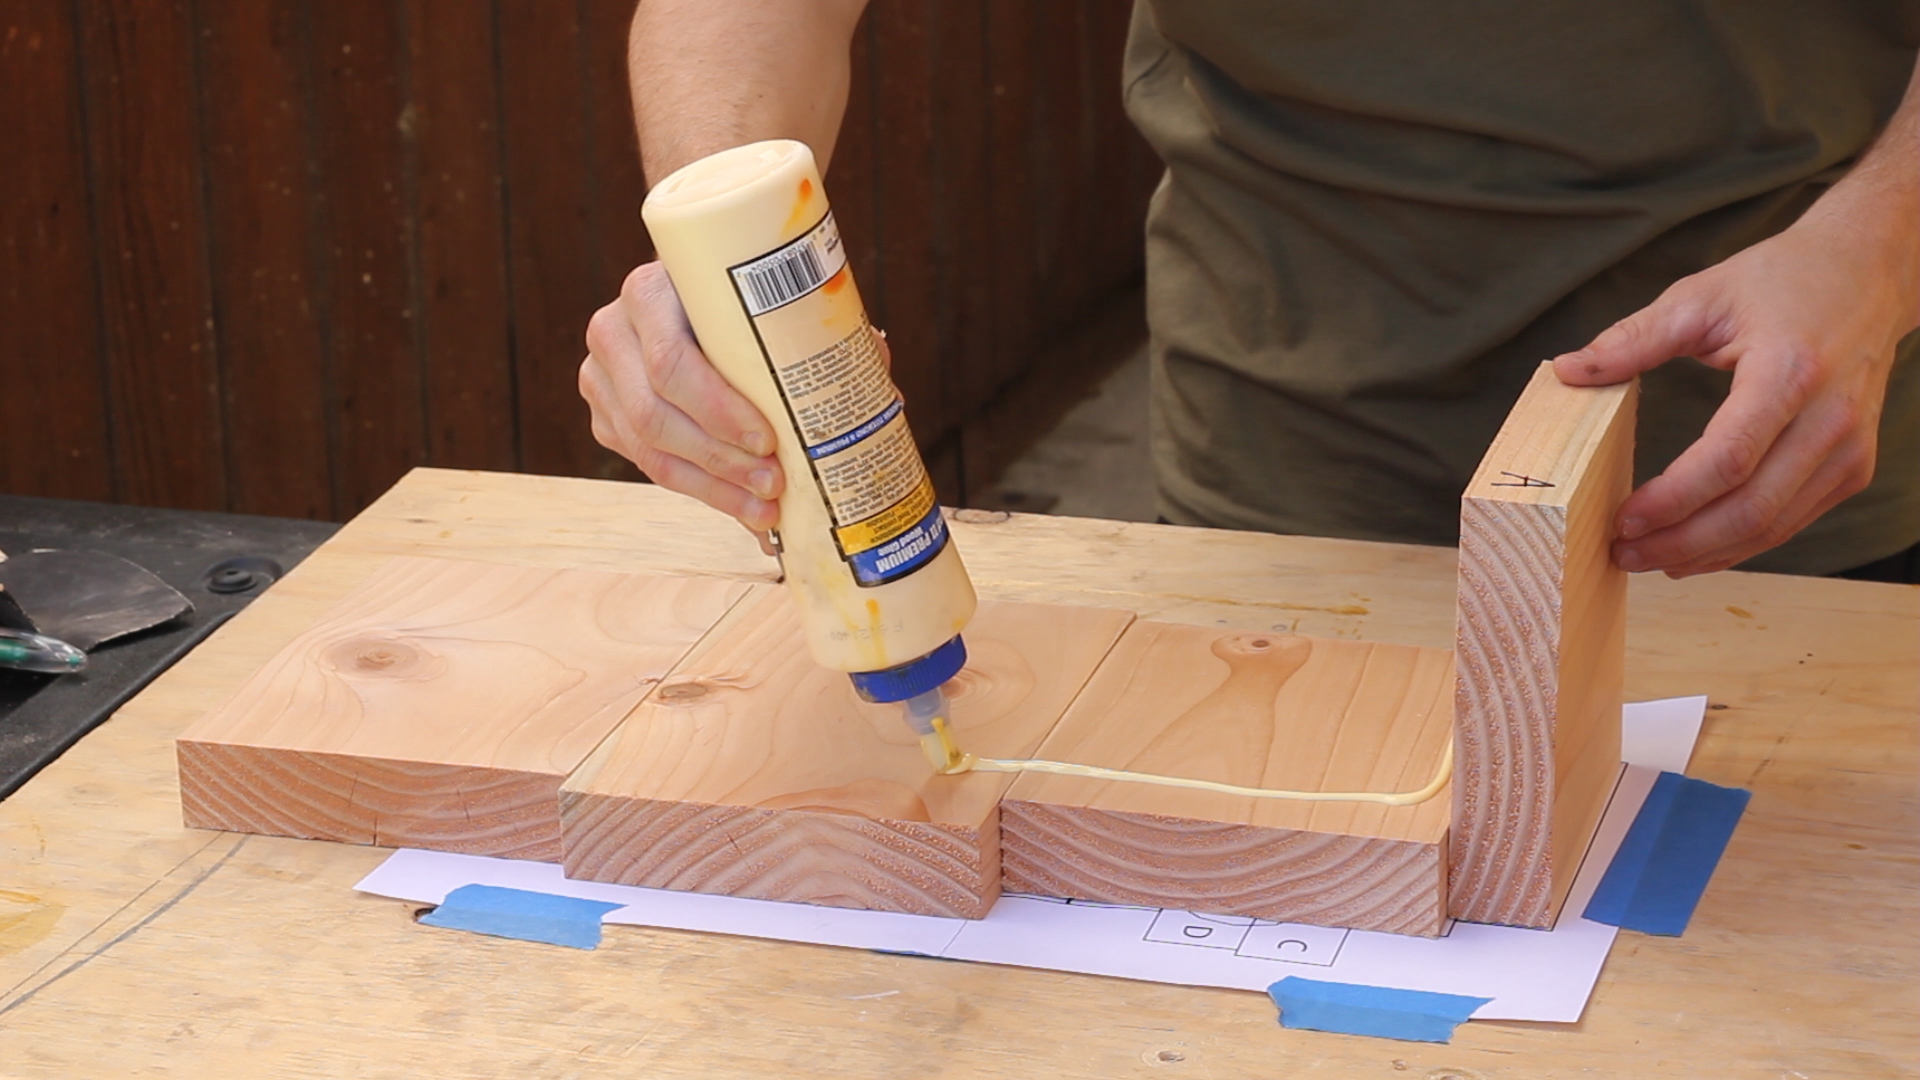
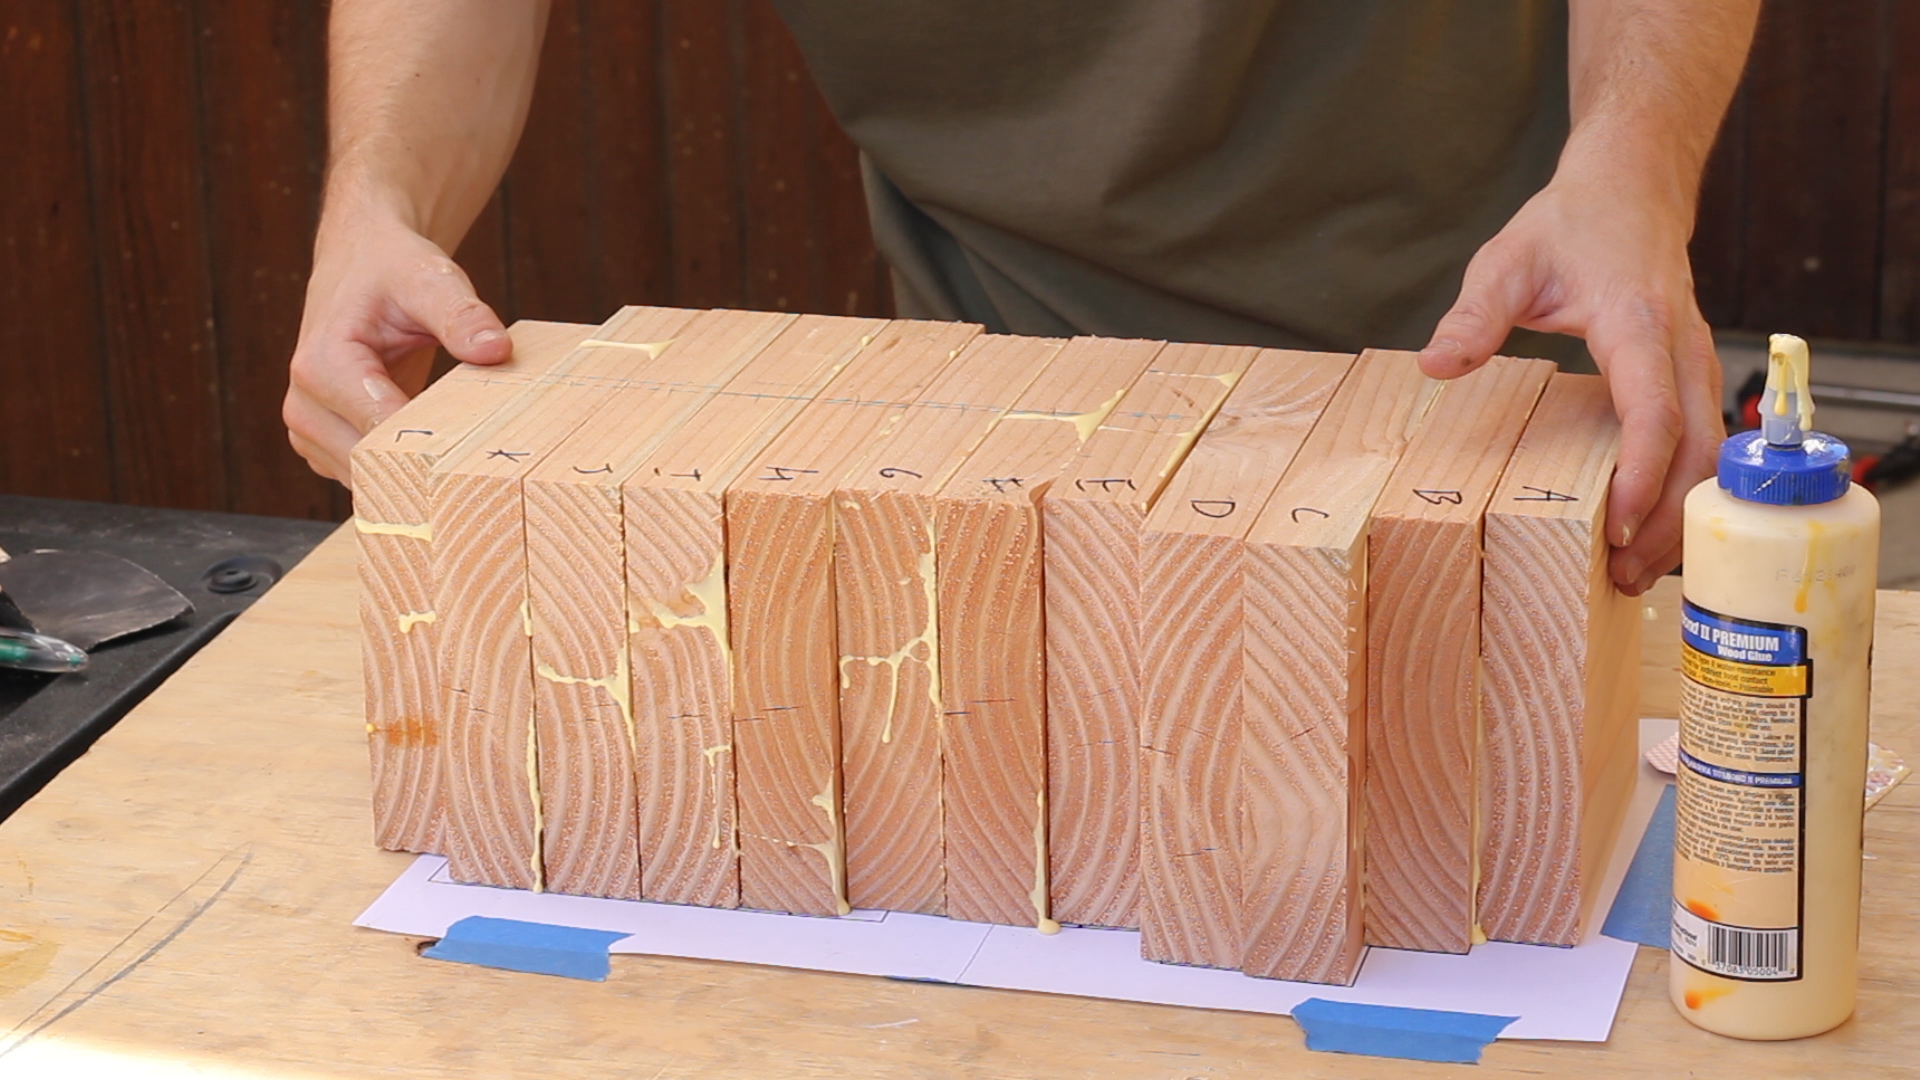

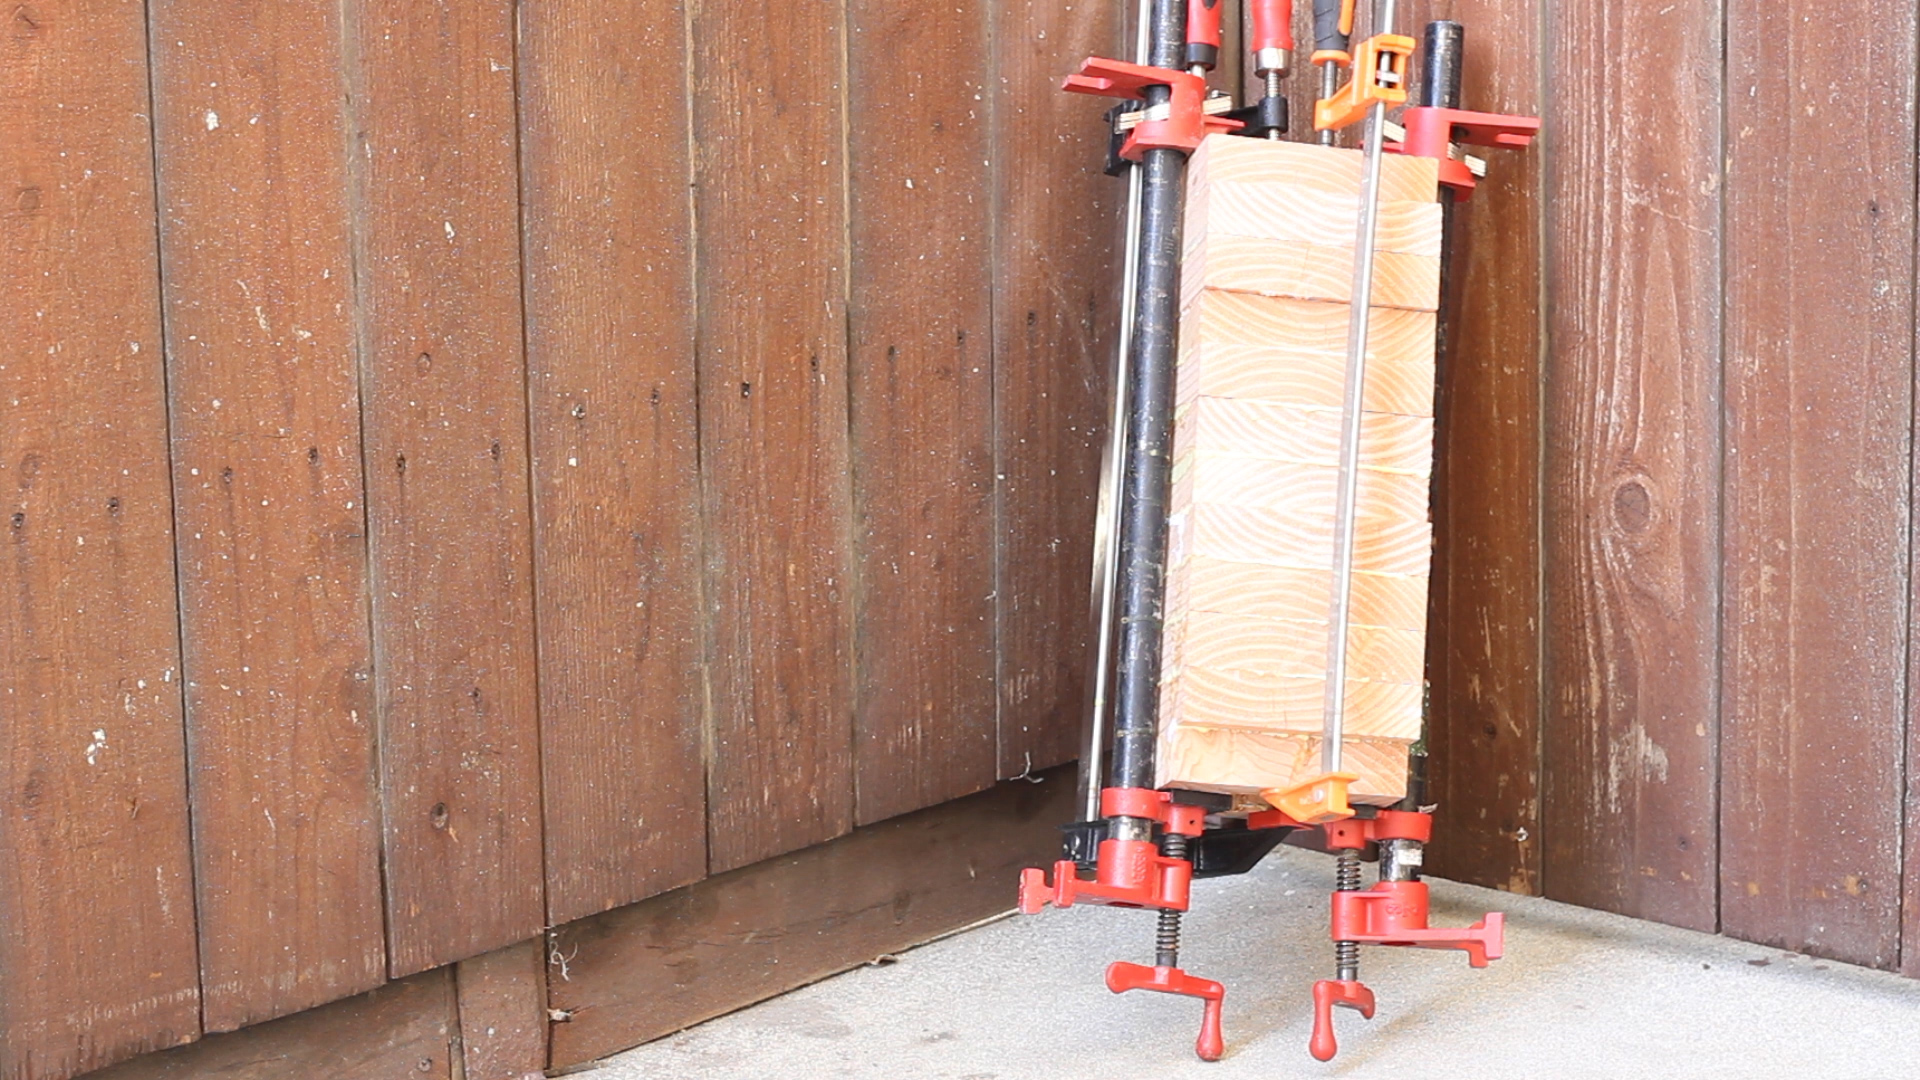
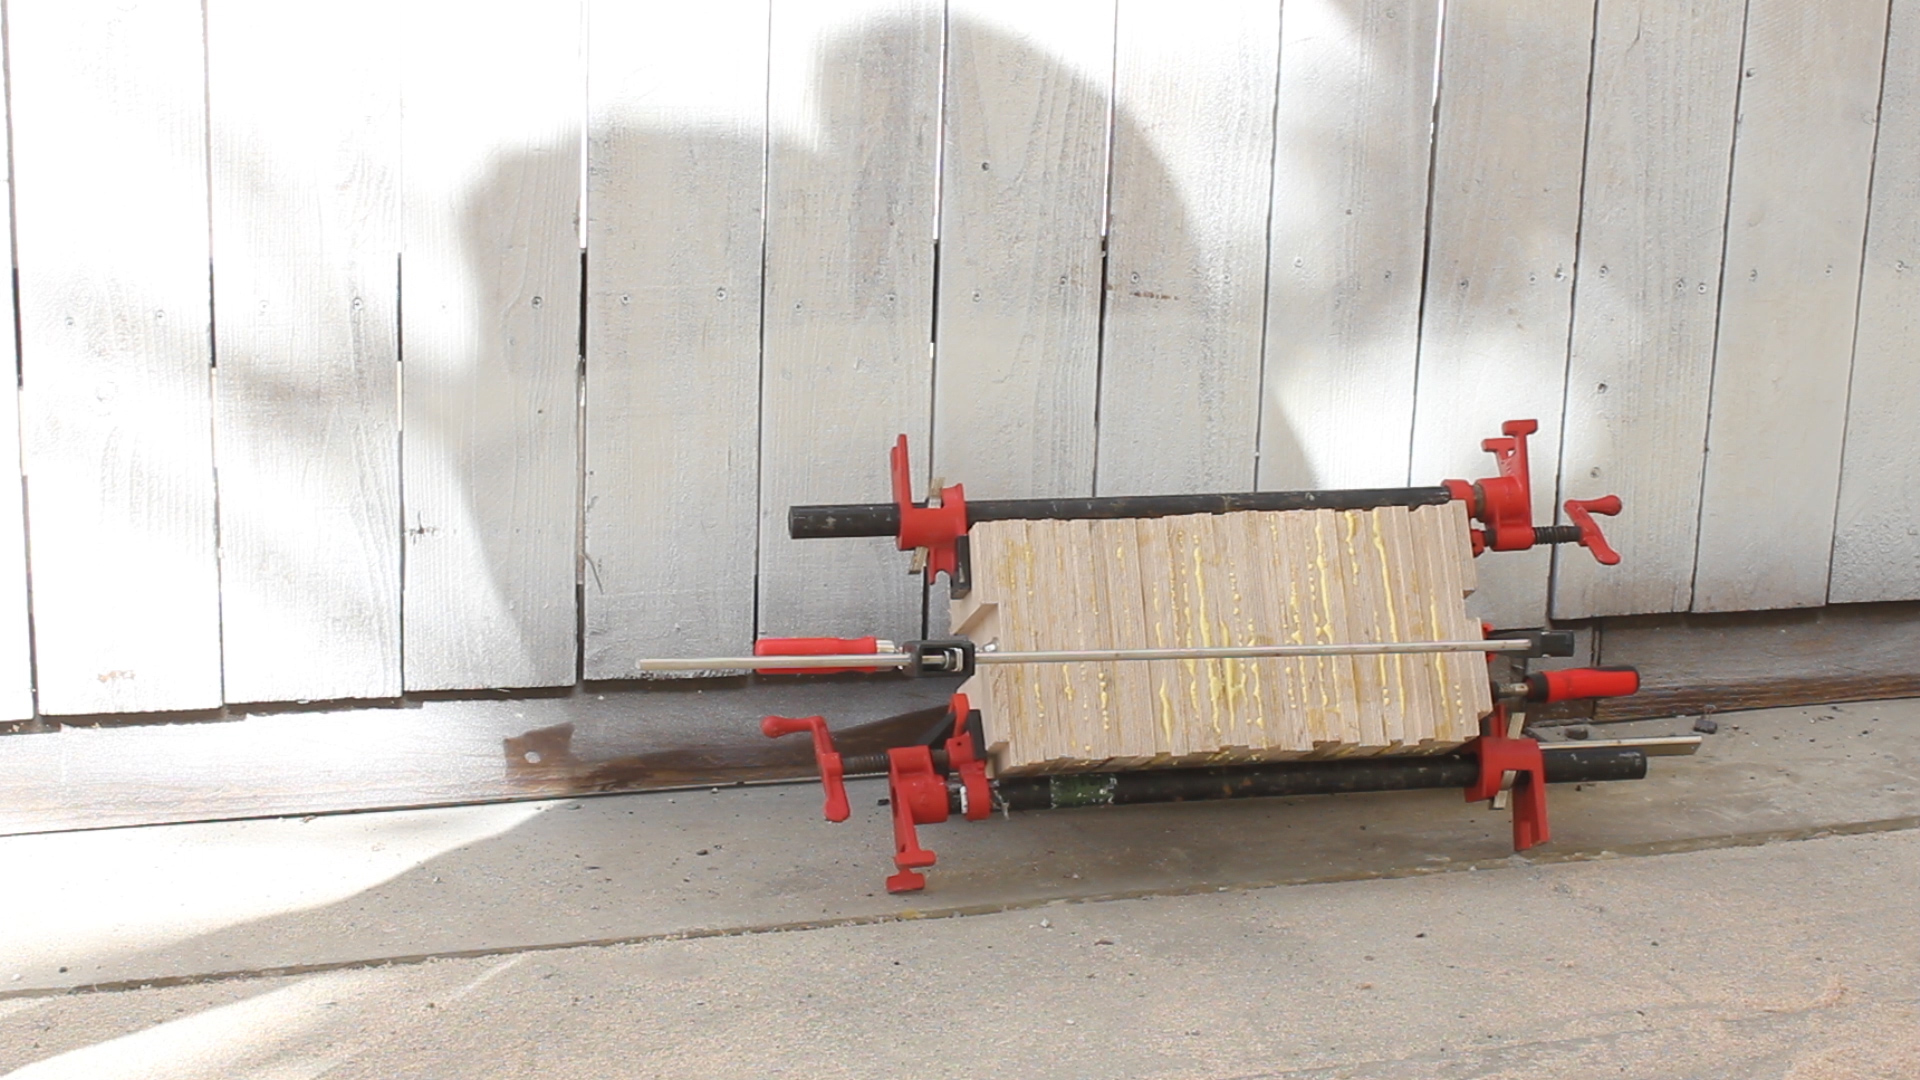
hen, using some Titebond II in Pic 1, I applied an even amount of glue to all the surfaces of each piece for lamination. I used my template in Pic 2 to make sure the pieces were lined up, and then clamped it together and let it dry for 24 hours in Pics 3-4. Simple enough. All of these steps could be skipped if you somehow had a big chunk of wood to carve down (like a tree stump, etc.).
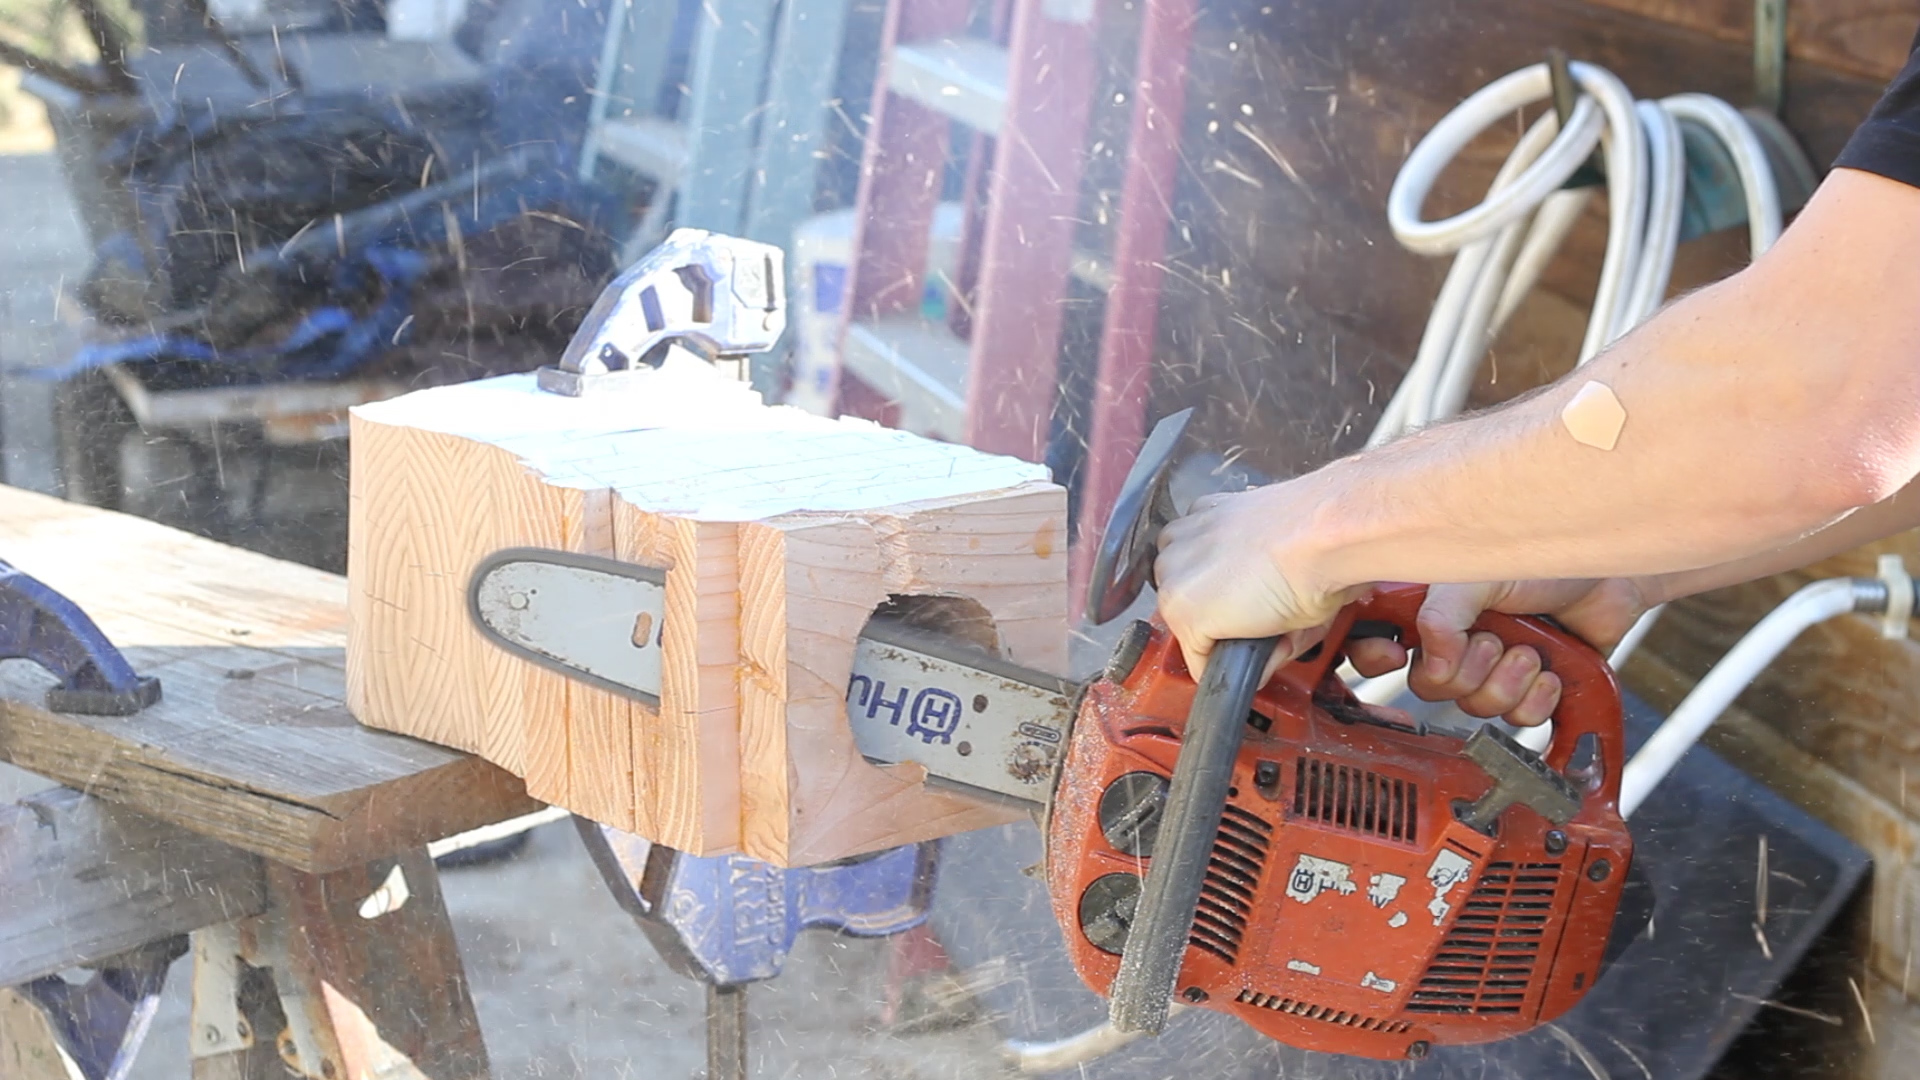
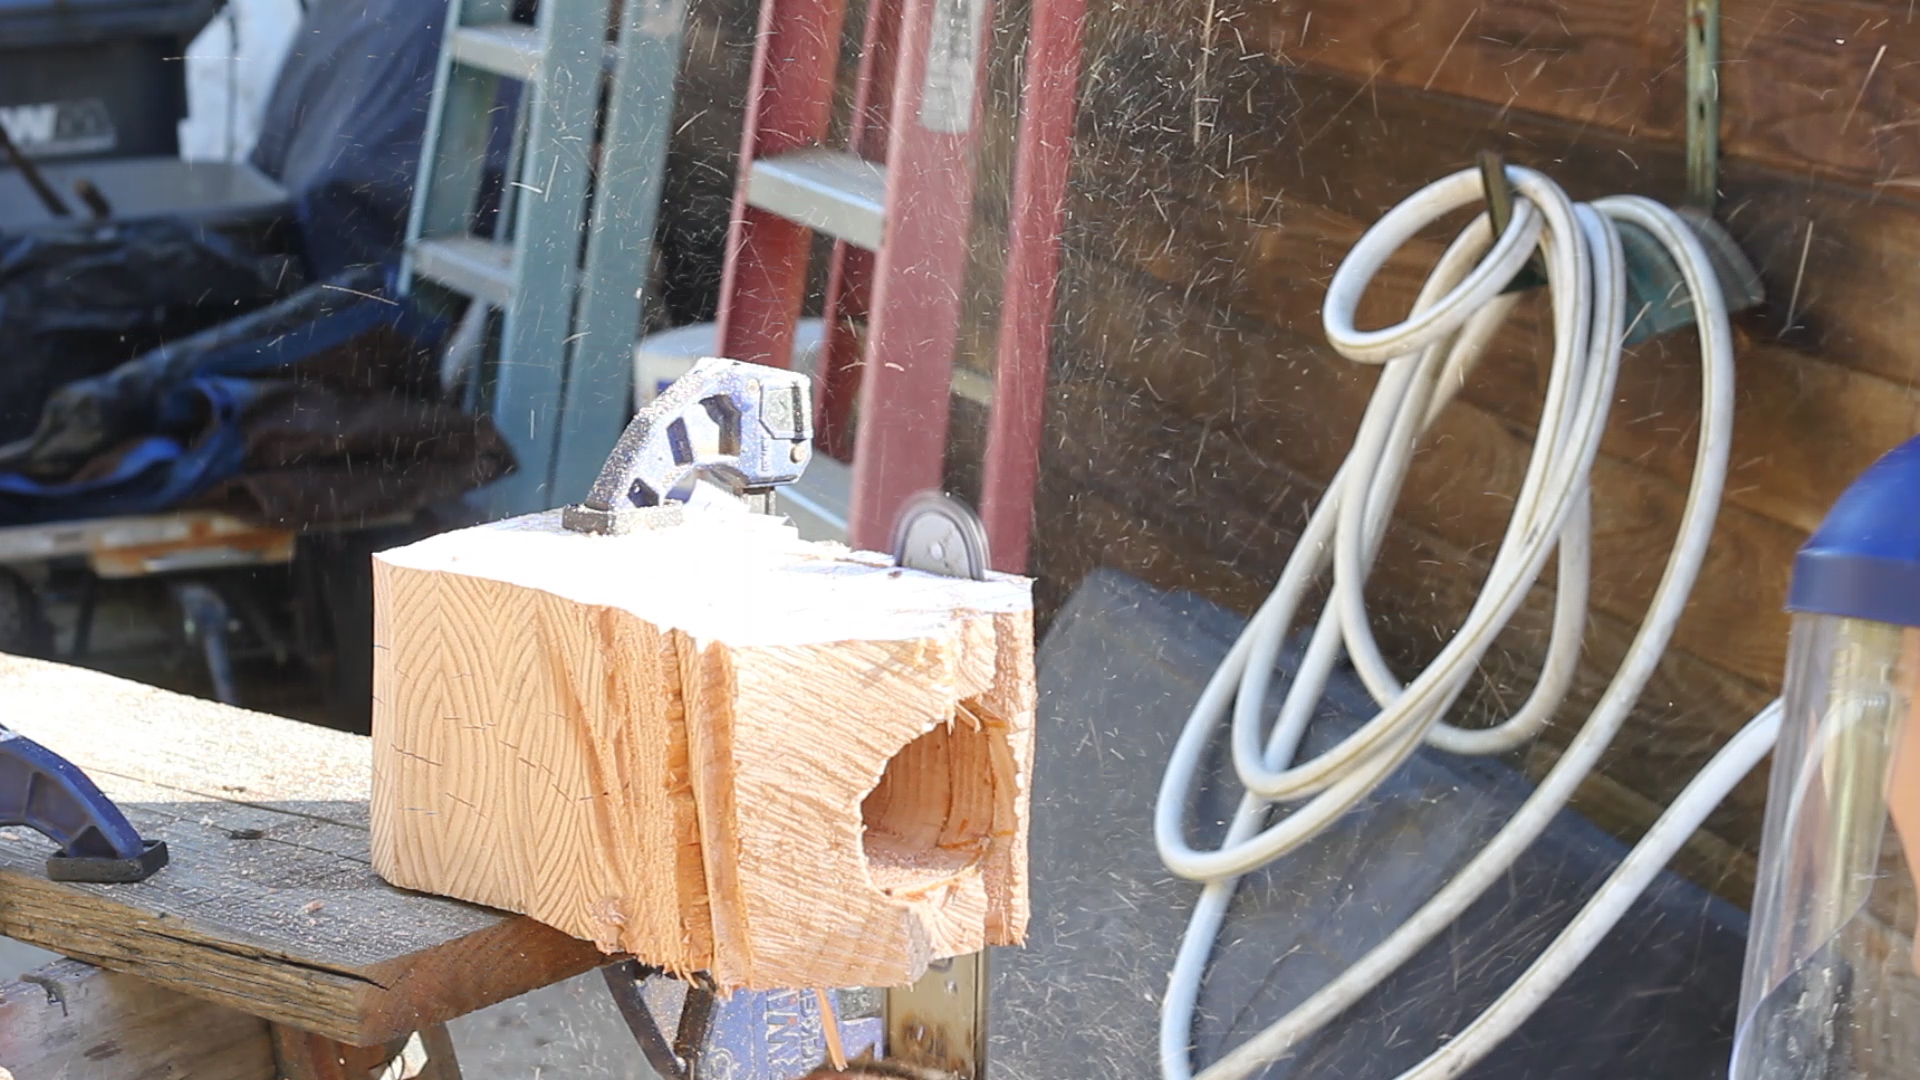

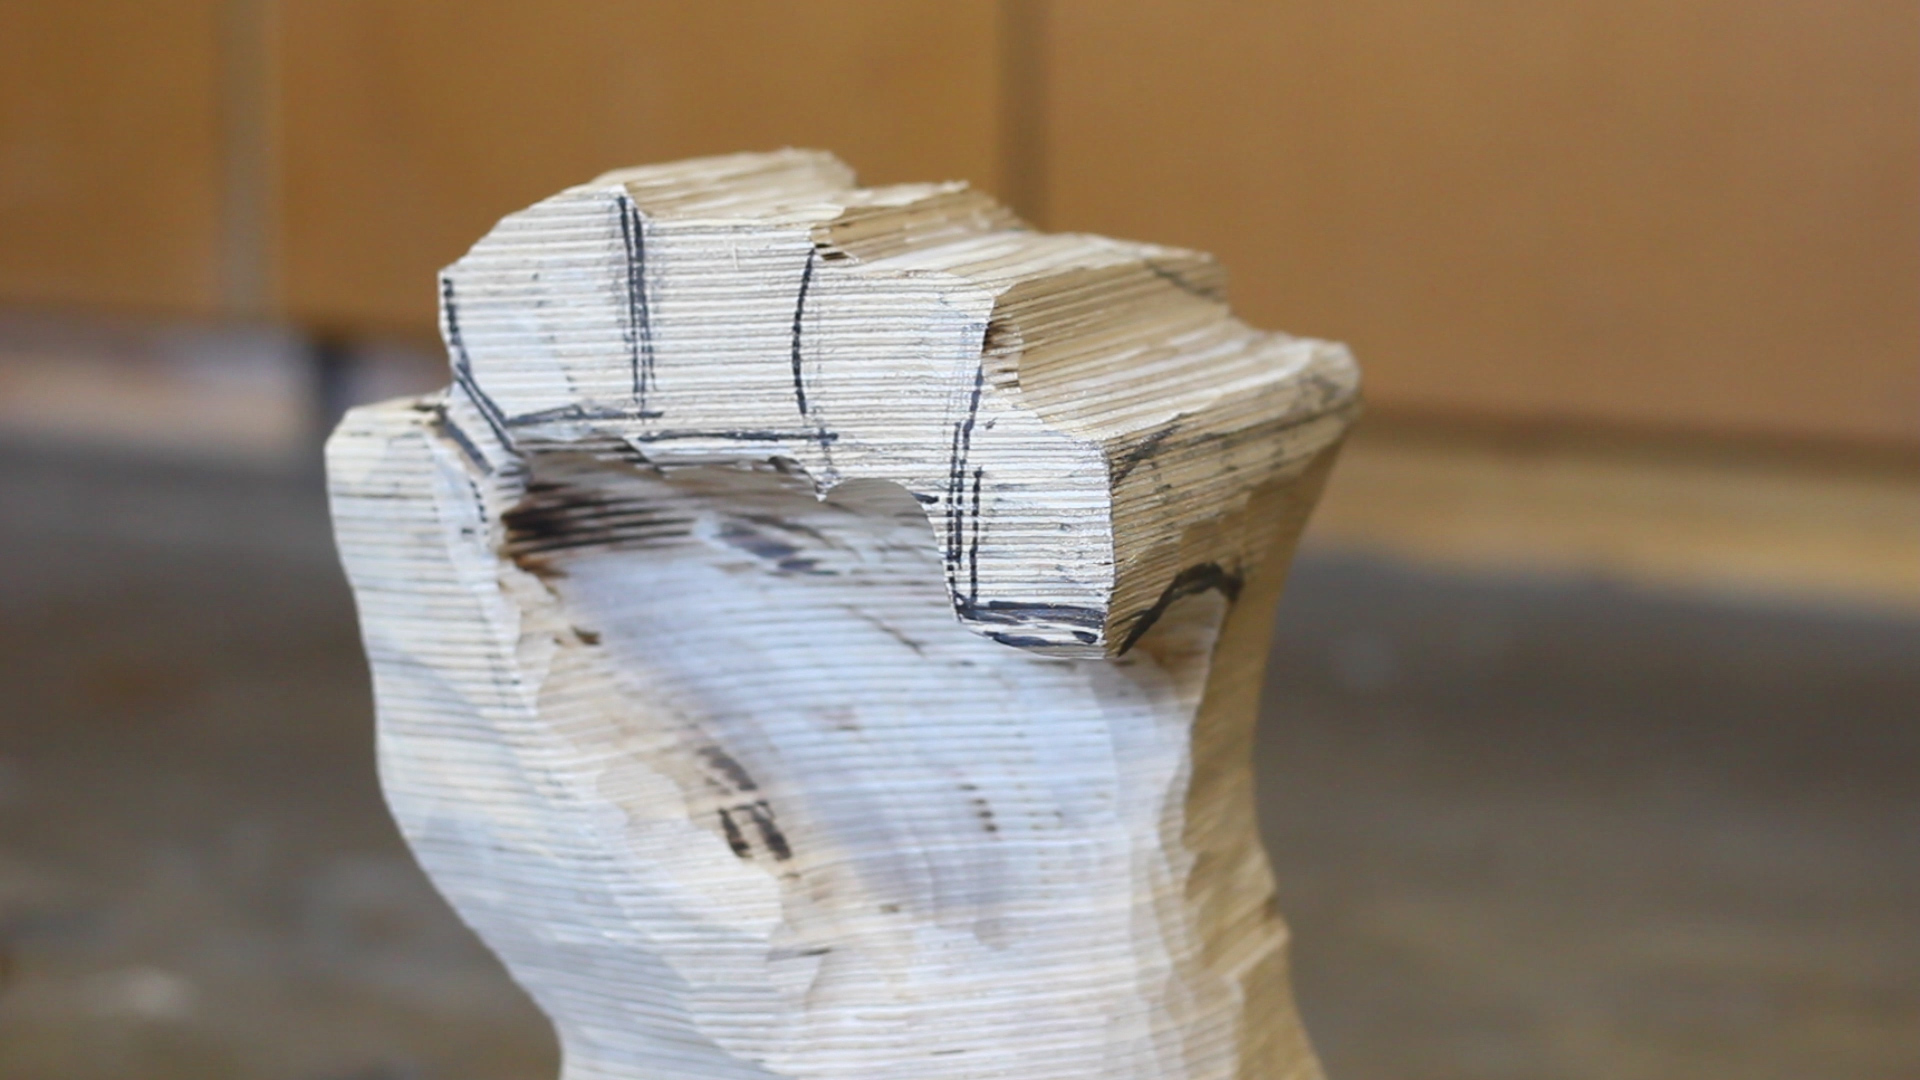
originally planned to use a band saw from my buddy to cut out the outline, hence why I designed the entire thing to be the size it was (so it could fit in the cutting capacity), but it turned out to be too much to handle. So, I used a chain saw instead, which worked much better and was faster anyways.
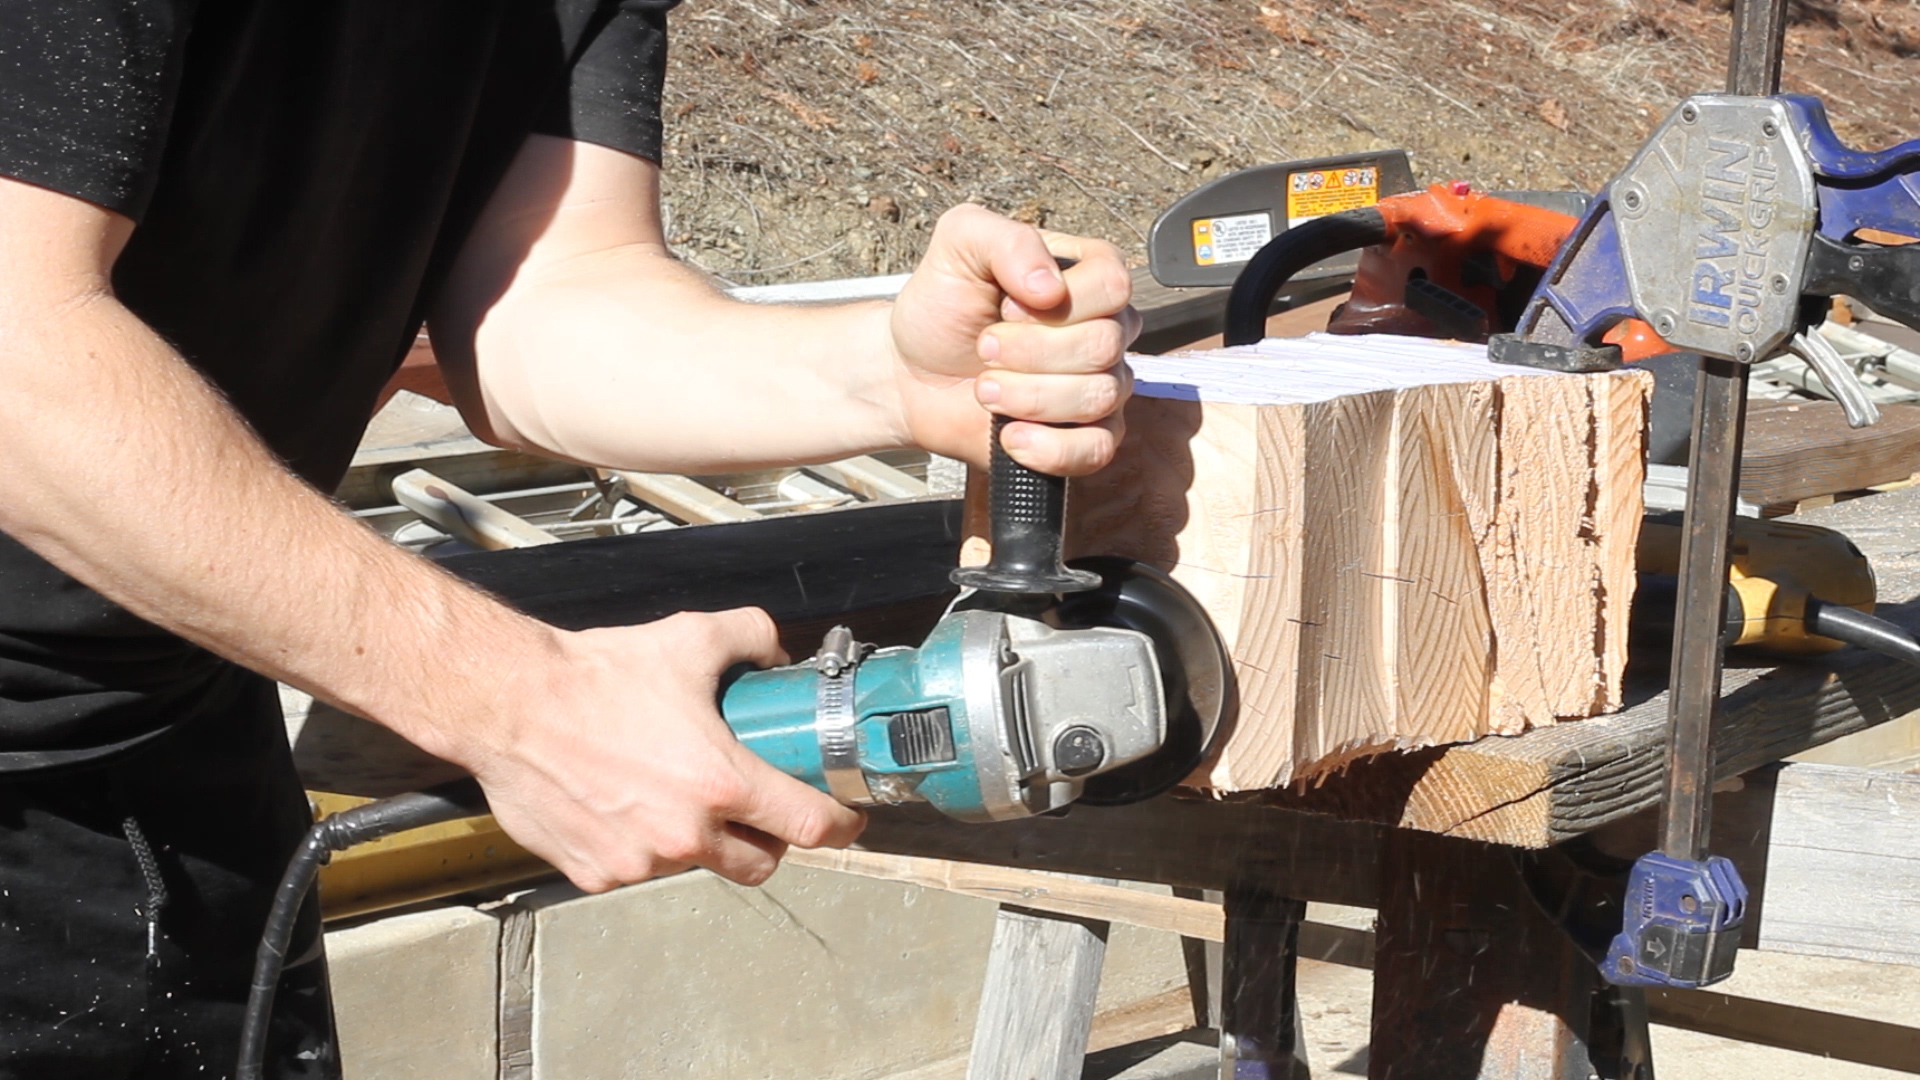

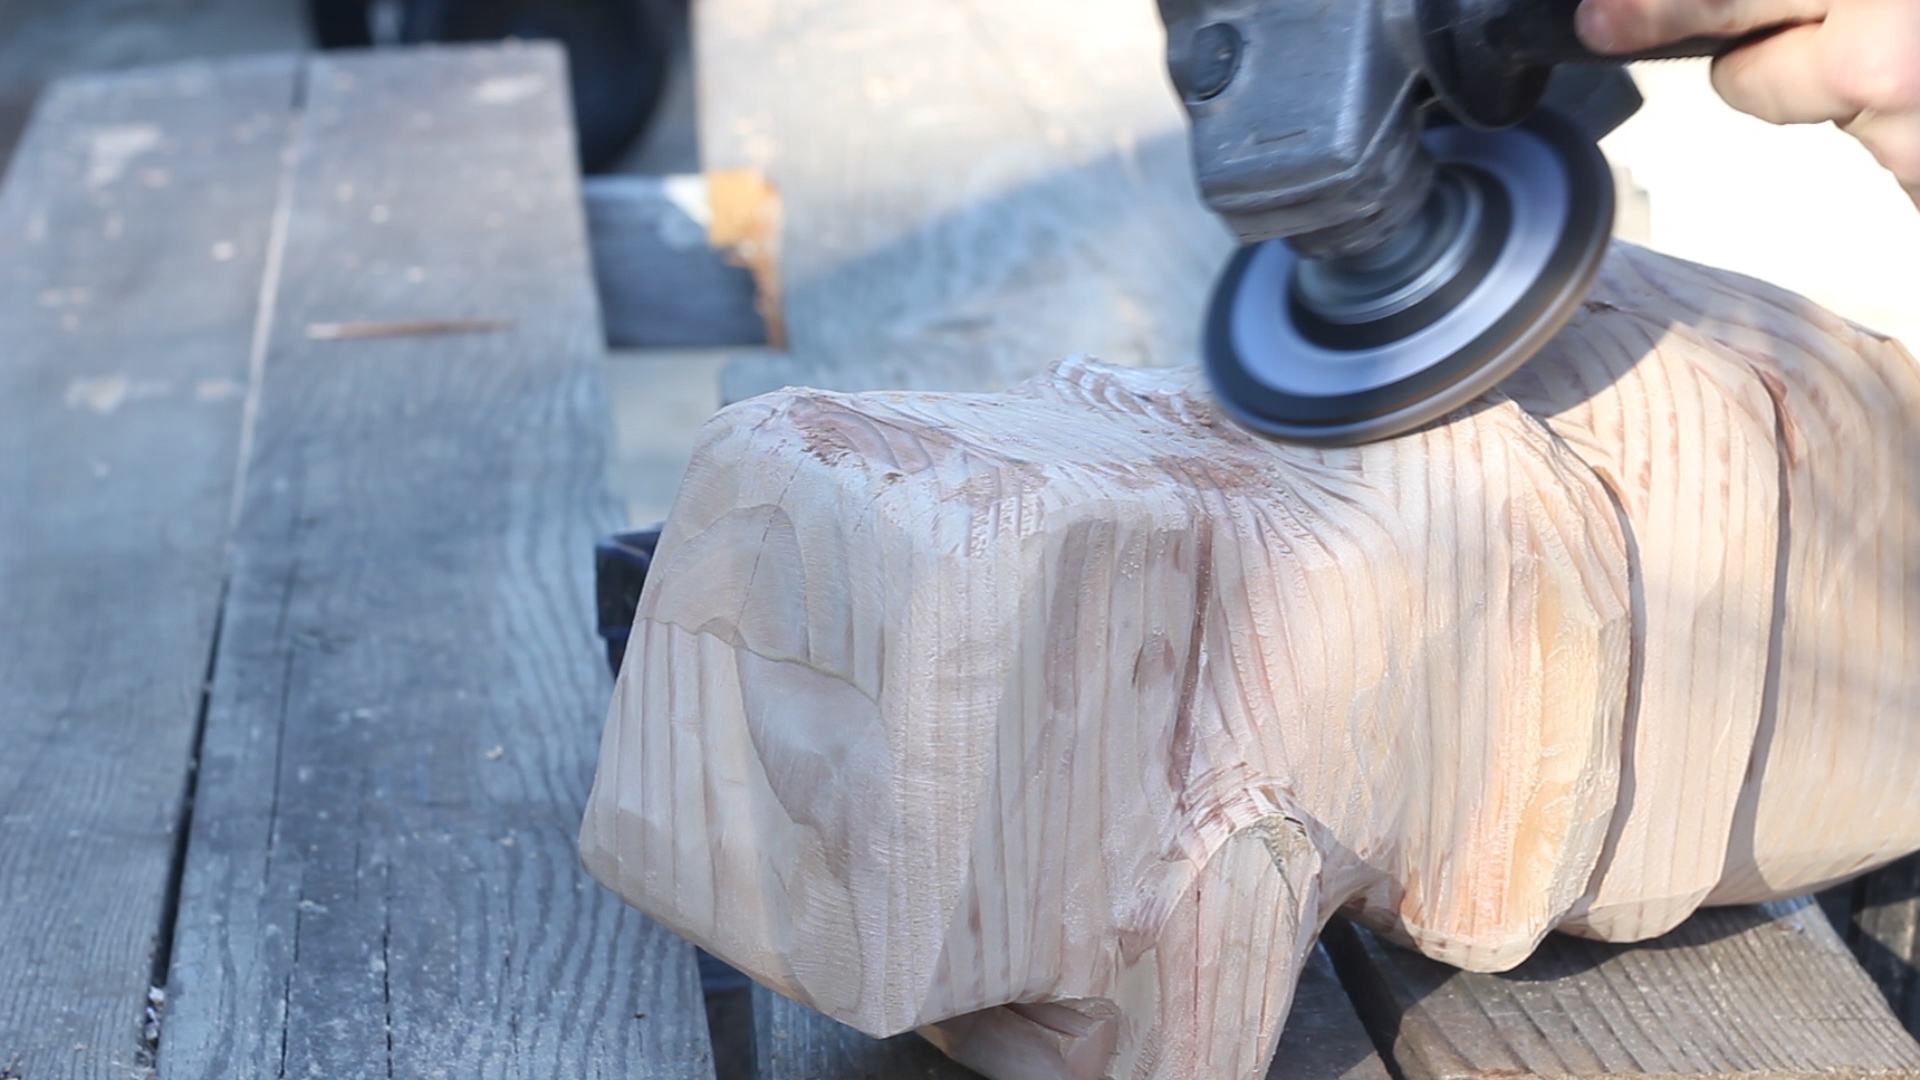

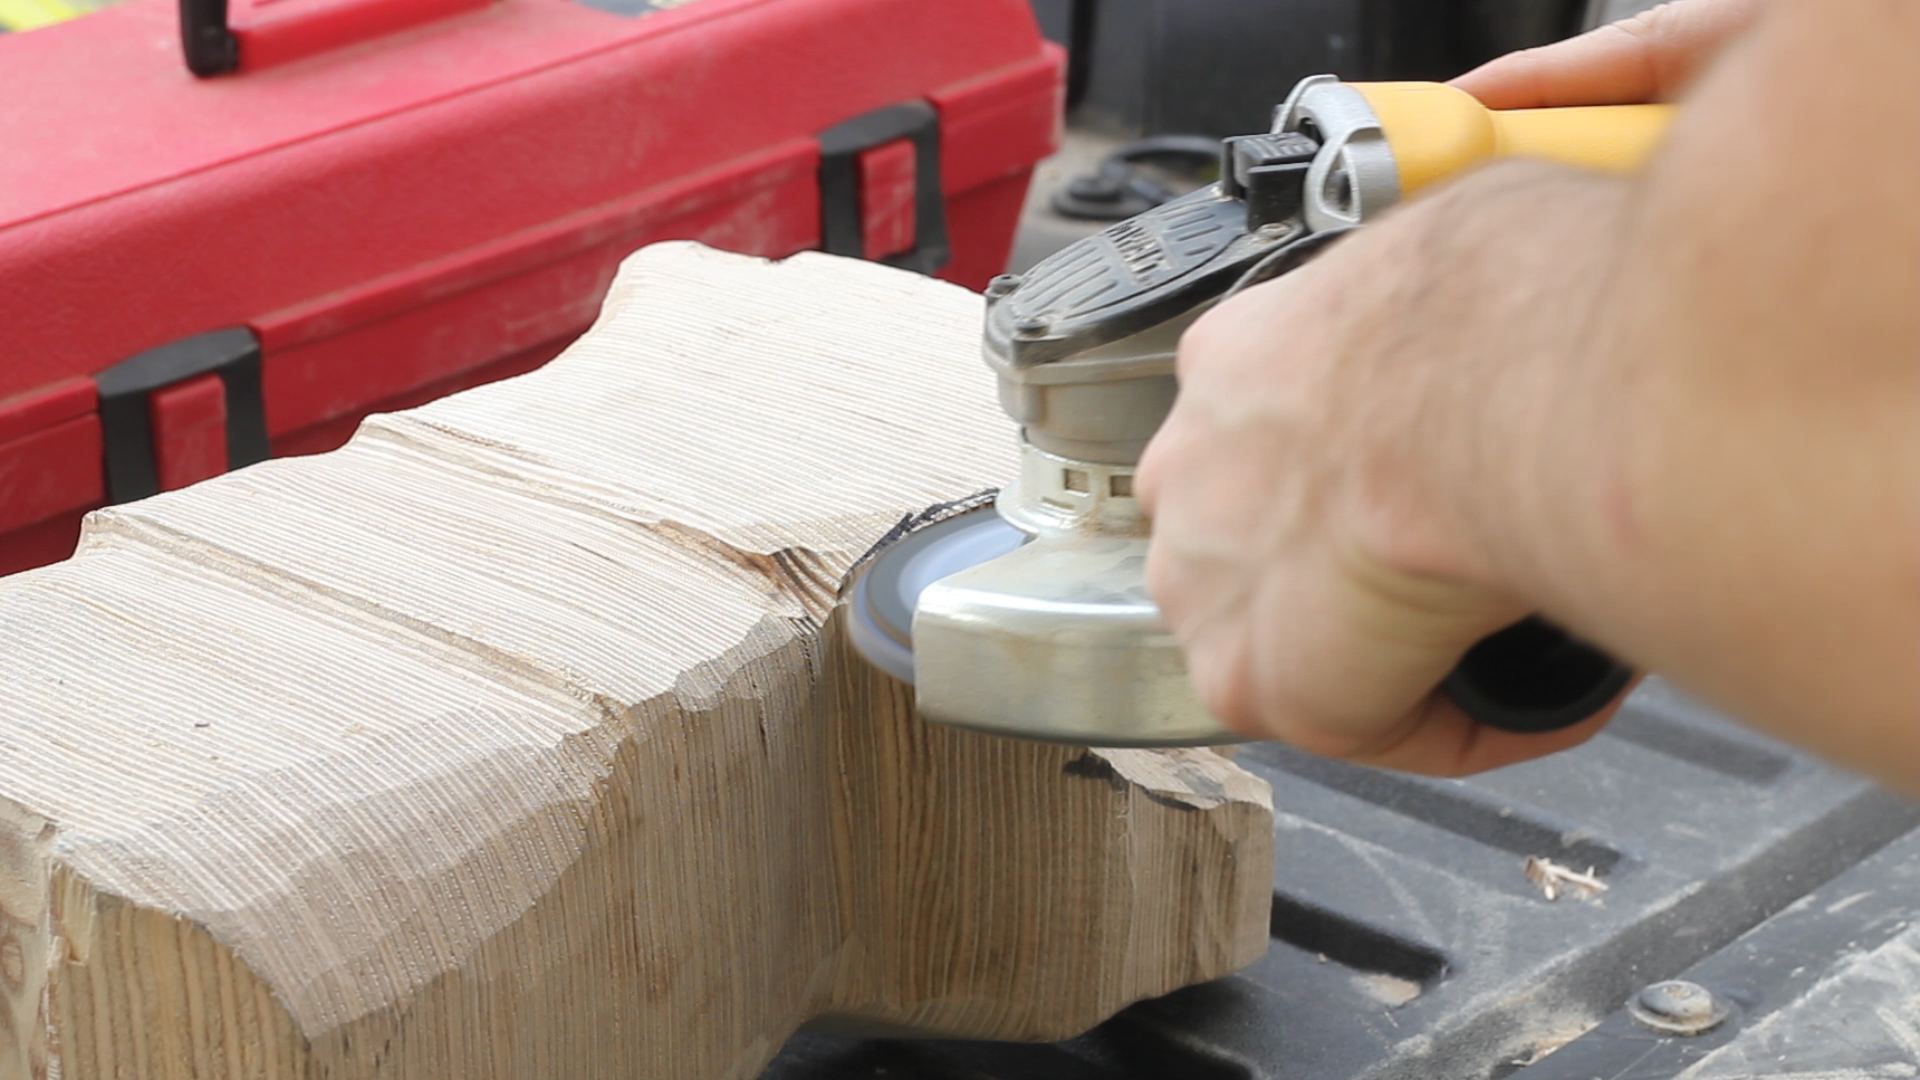
fter chainsawing, I switched to my angle grinder and a TurboPlane to power-carve (Pics 1-2). To smooth things out, I used a 40 grit flap disk (Pic 3). These are wonderful, and are an absolute necessity when power-carving.
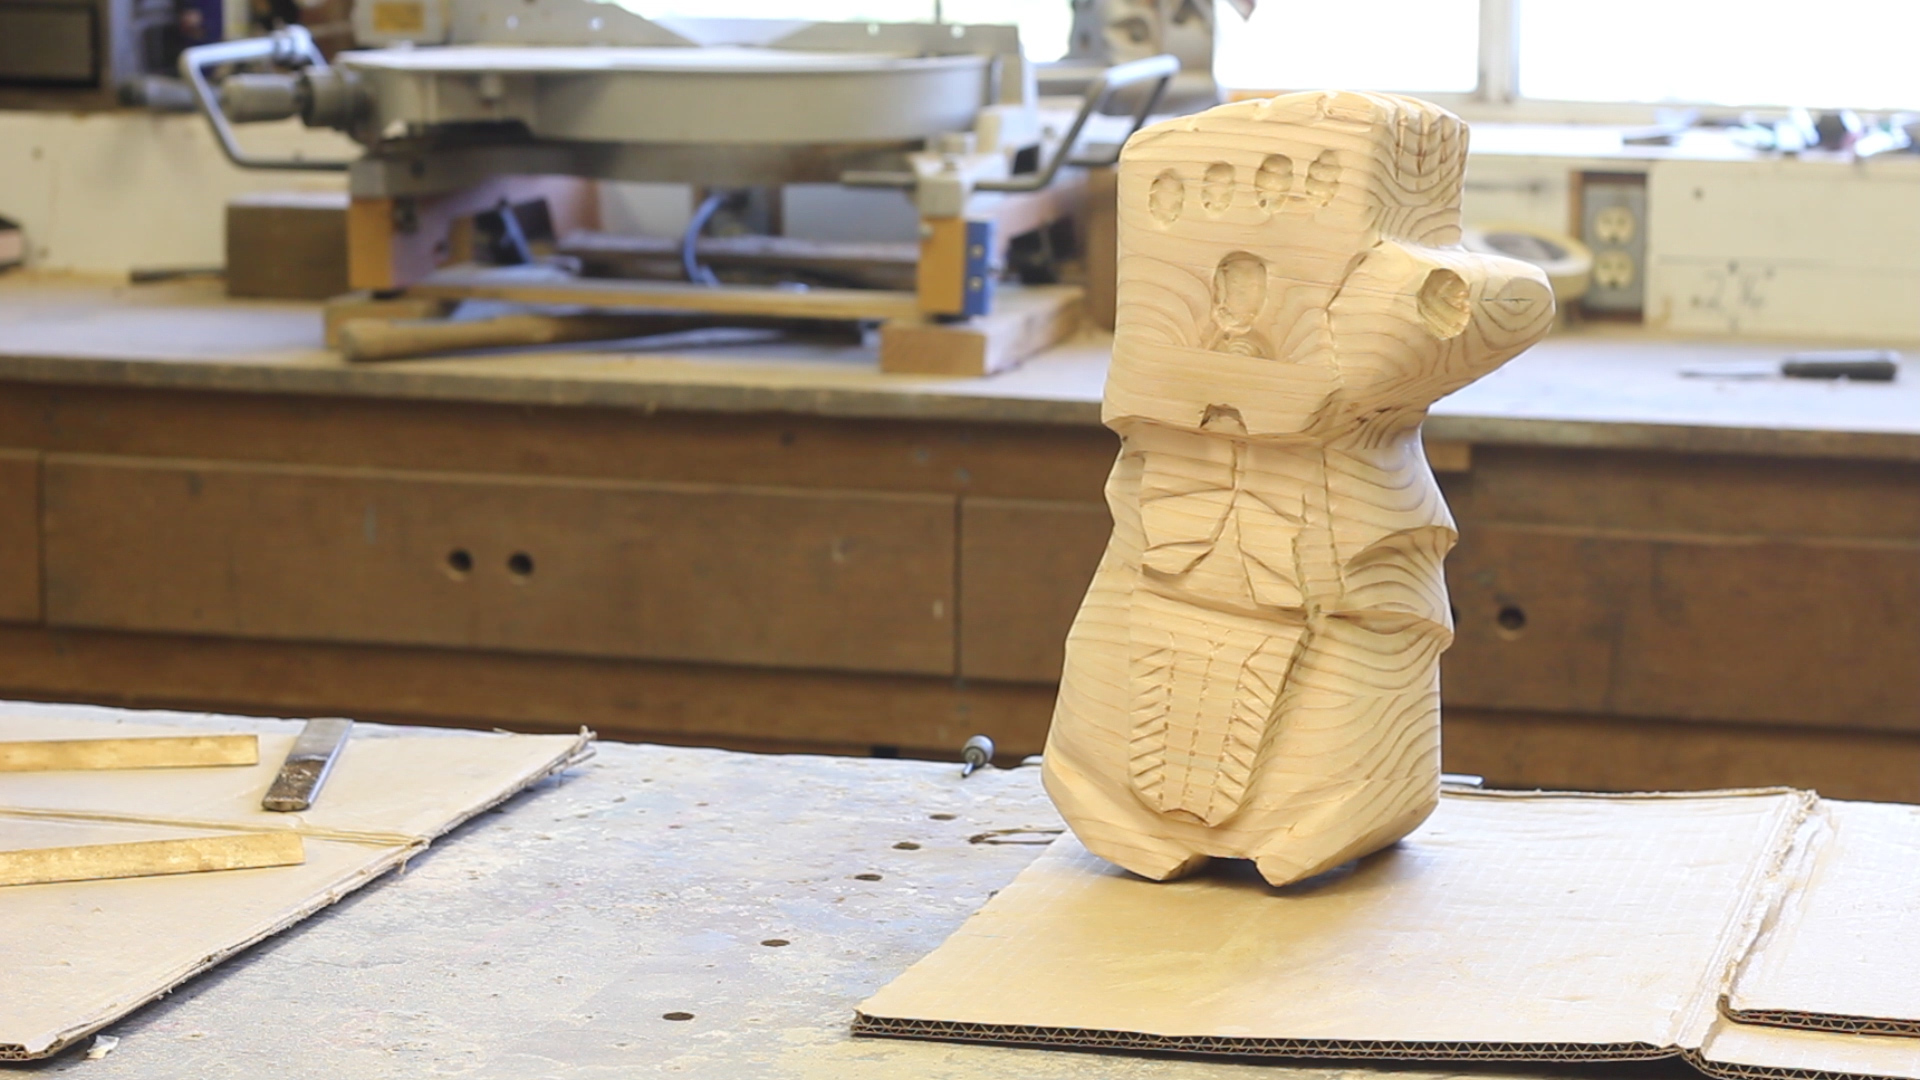
This is where I botched things. I thought I knew in my head how I wanted this to look, and I thought I had a great mental image of what the gauntlet looked like. However, I didn't, and by rushing into carving this, the result was something that kind of looked like a glove (Pic 4), but ultimately would never look like the movie version of gauntlet.
I suppose if you were just trying to create your own take on the glove, then it would be fine, but I wanted mine to be relatively "movie accurate", so I ended up wasting a lot of time trying to fix the problem before just calling it quits and starting over.
s I said in the previous step, I had pretty much botched the carving job. Rushing, not checking my references, and just thinking that I was on the right path all culminated in something that didn't come out how I was anticipating it. That is the tricky part of these carving projects, especially when you design something in 2D and need to translate that into 3D - you do need some sense of artistic design and spacial understanding because once you remove the material, there ain't no goin' back!
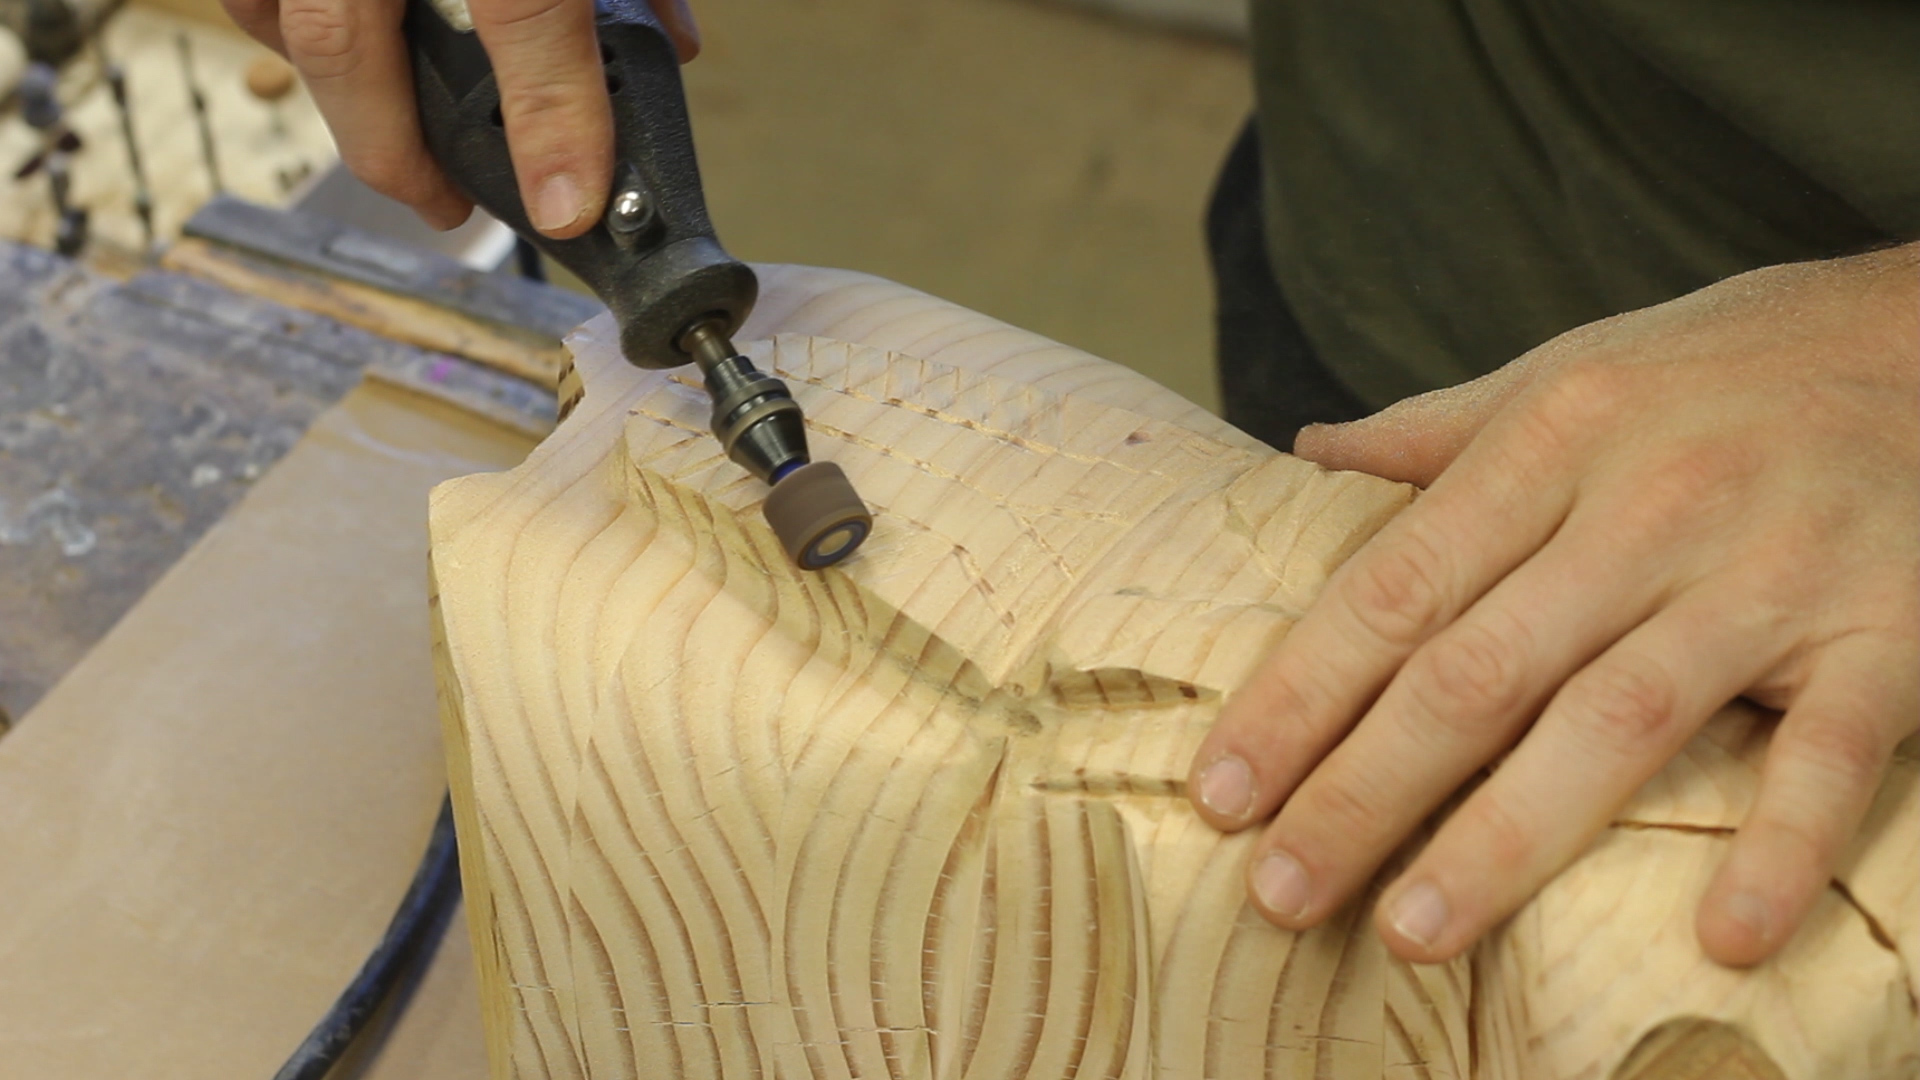
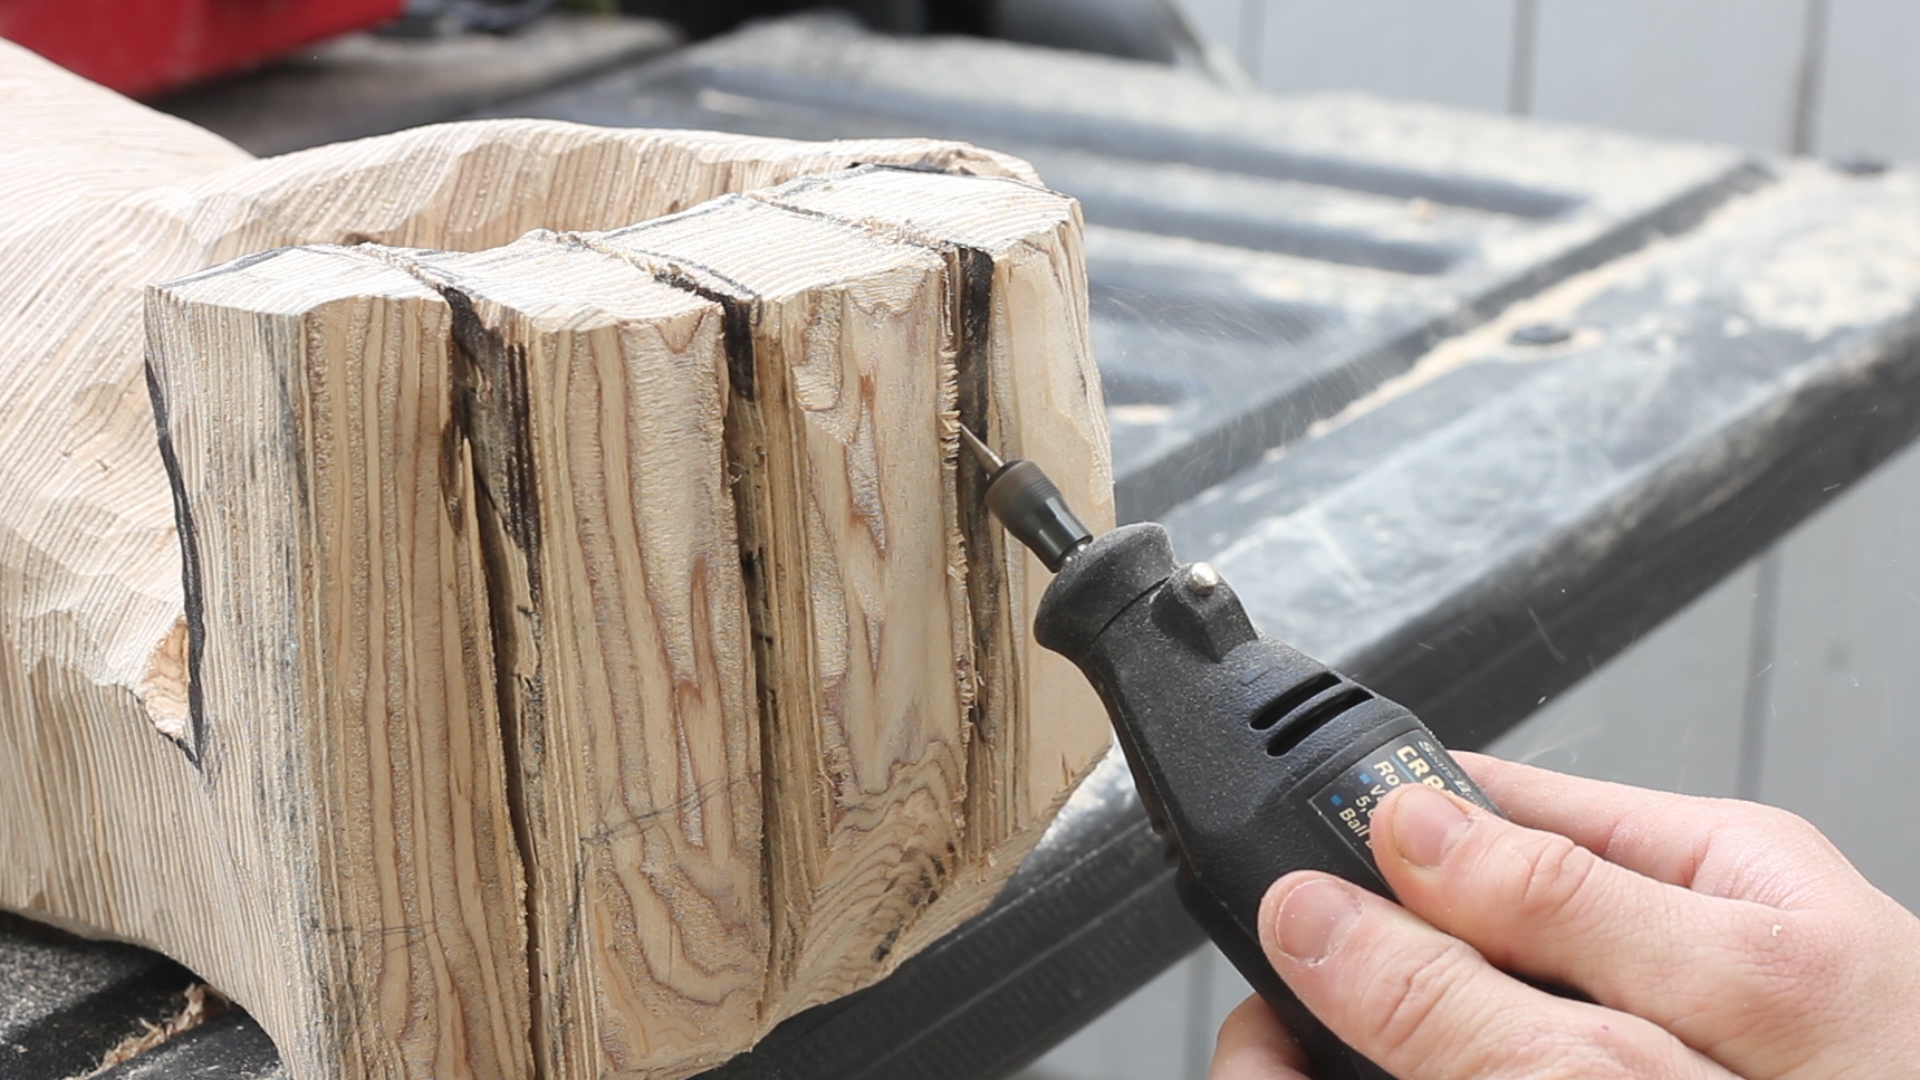
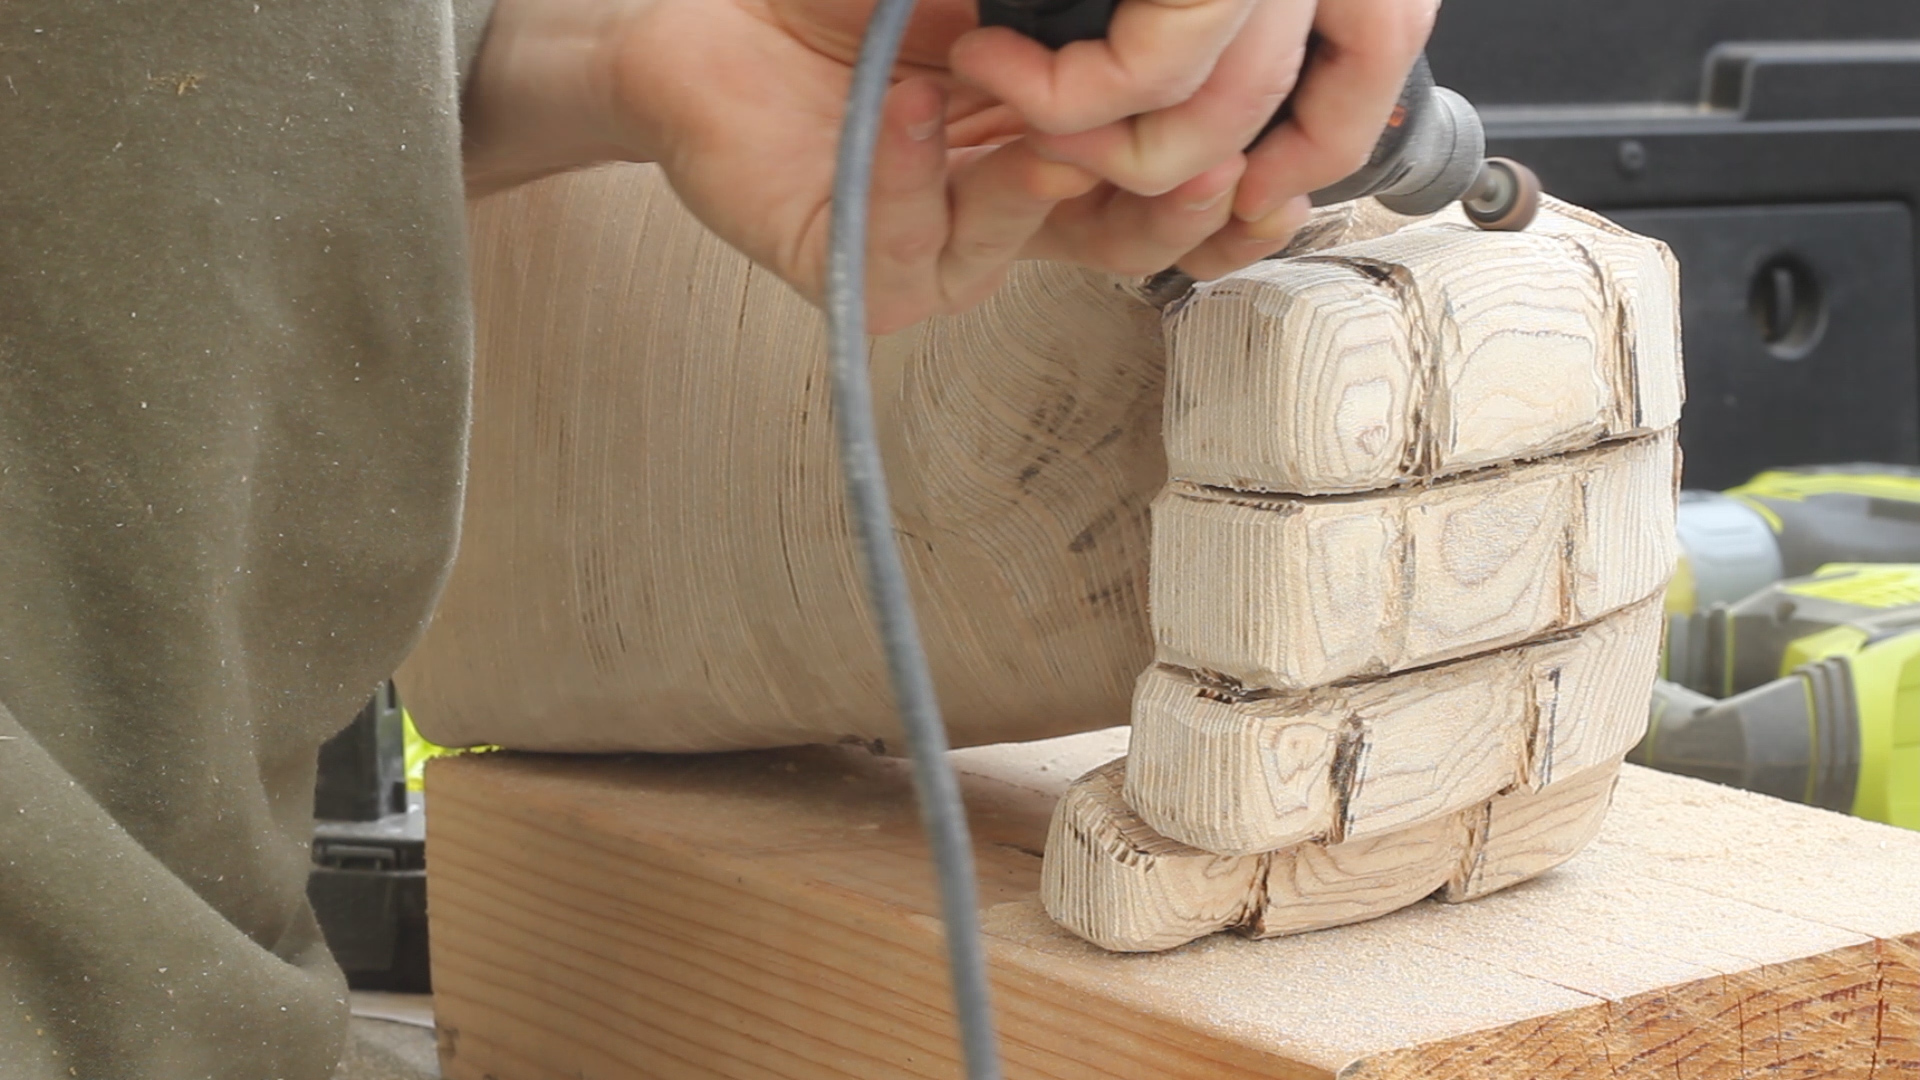
Pics 1-4 show me using dremel tools to add fine details like the the spaces for stones, the finger spacing, and armor details. This took a while, as dremel bits are small and can only do so much at once.
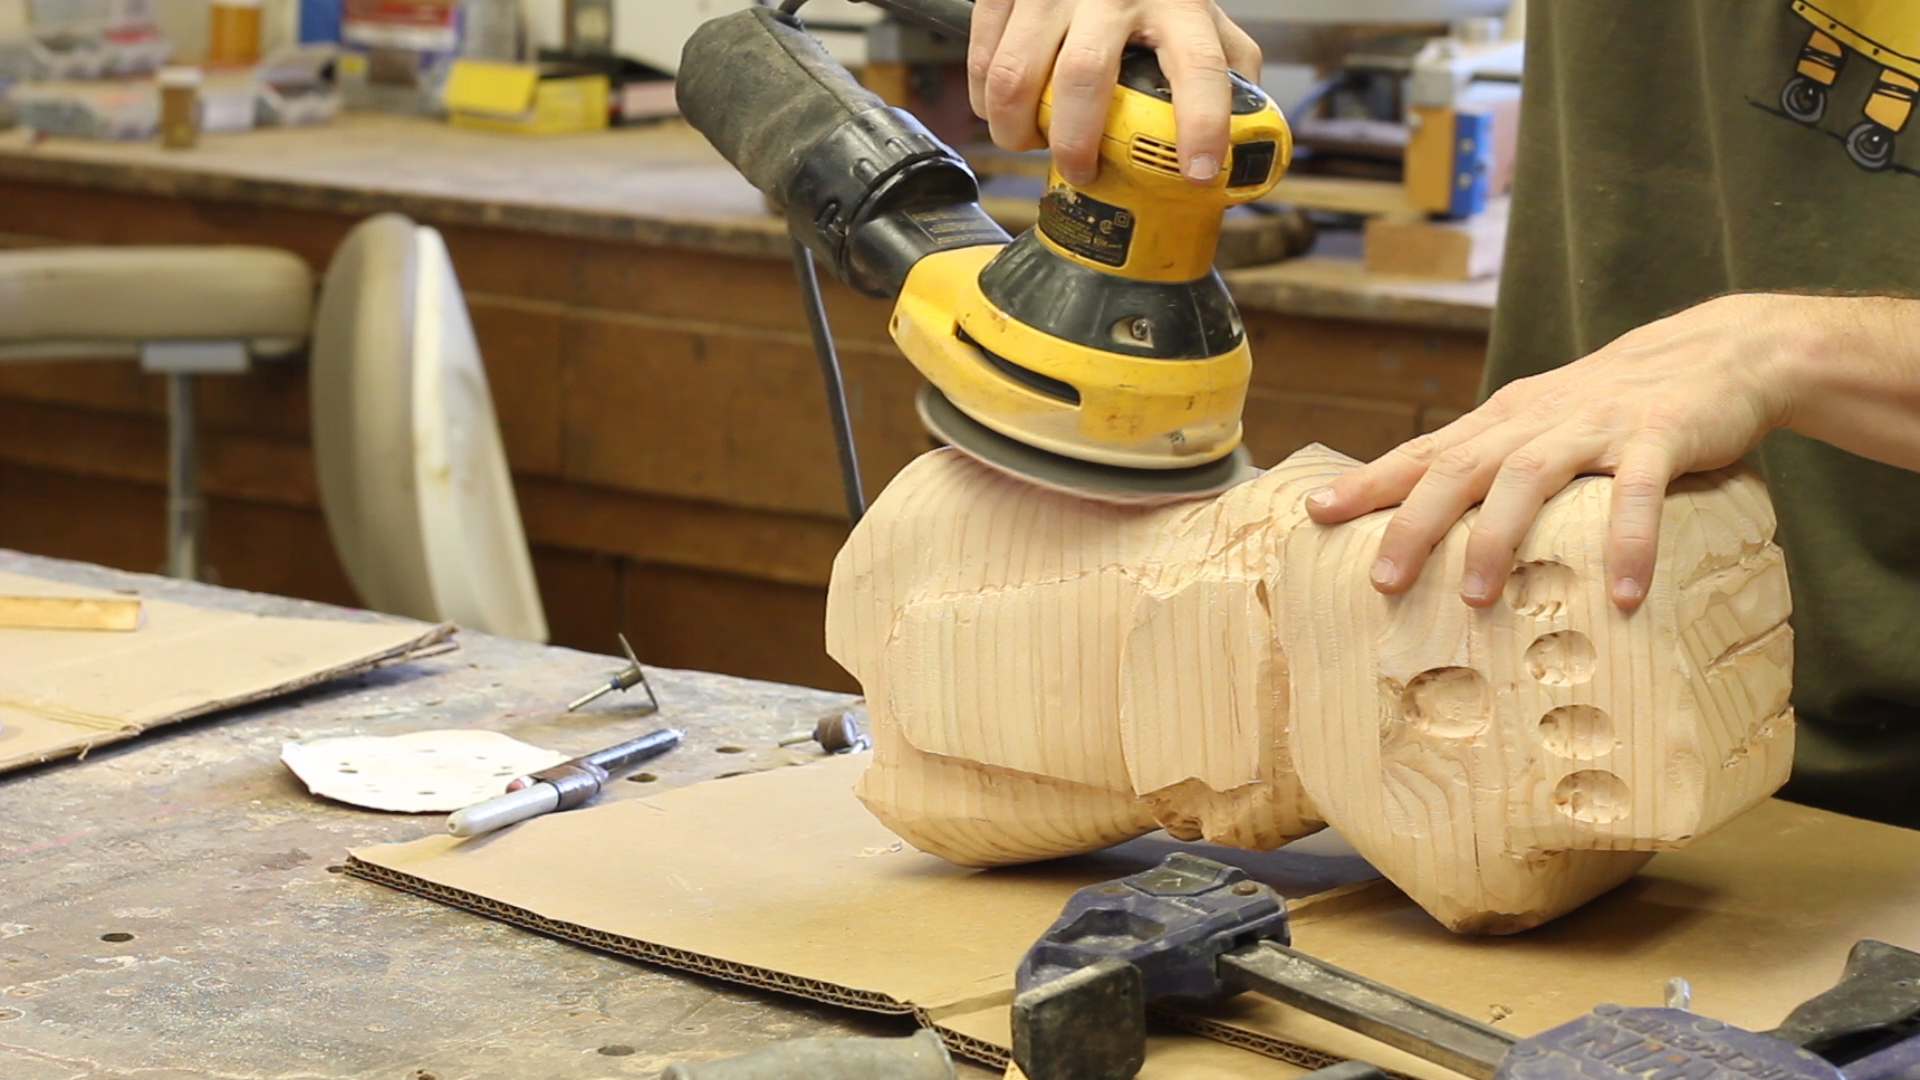
I went through a sanding phase to smooth everything down in Pic 5, and then finished off with more fine dremel sanding and detailing in Pics 6-7. Pic 8 shows a near final result. The stacked wood looked pretty cool, but it just didn't come out how I wanted, and up close, it just didn't quite look like a fist (damnit).
So, as I have repeatedly said in previous steps, I wasn't happy with how this thing came out. I realized that I had rushed the carving design of it without doing my due diligence to double check the reference photos each time. It was inaccurate, the layers of the gauntlet were all wrong, and it was like trying to put a band-aid on a gunshot wound to make it look more "movie real". Again, that is the challenge of creating something 3D from a 2D design...
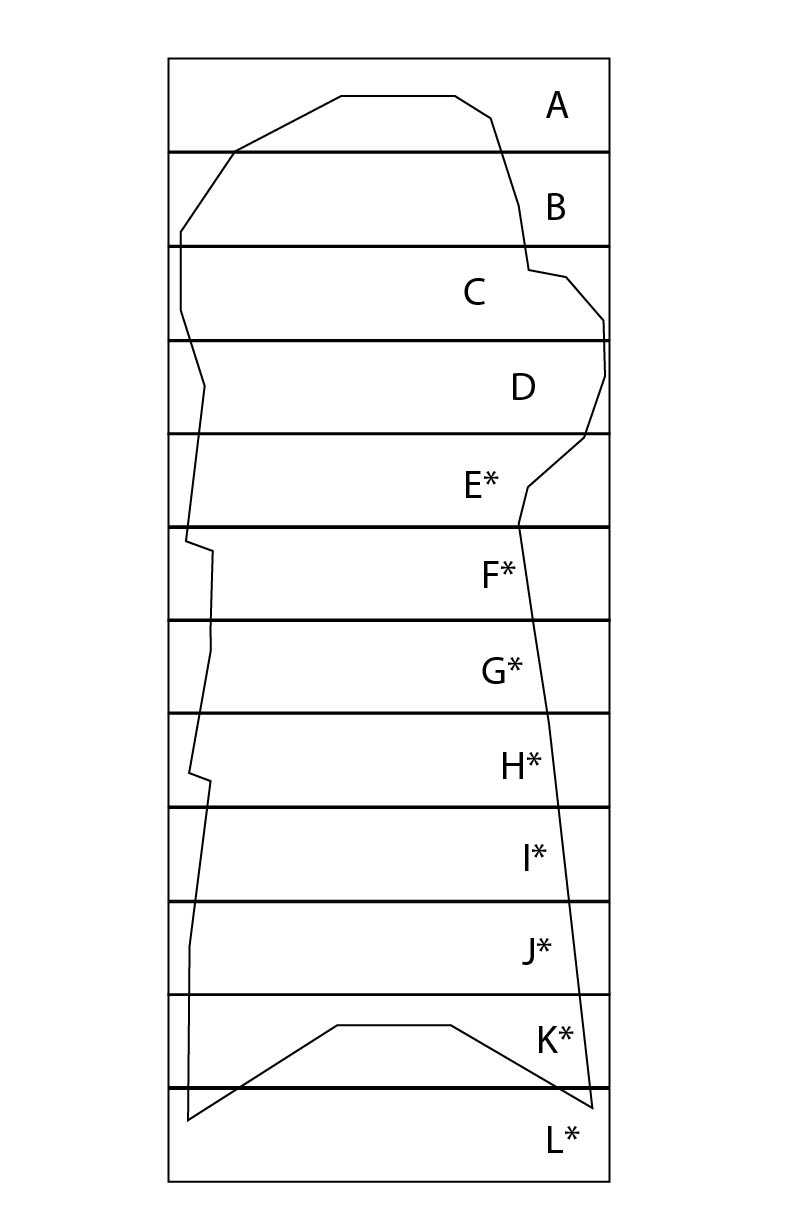
I decided it was time for a redesign - and good opportunity for me to figure out what I did wrong the first time around and fix those things as much as possible. Slowing down was the main thing I needed to do...so take that into consideration (and know that with this kind of thing, there is no sure-fire way to make it perfect).
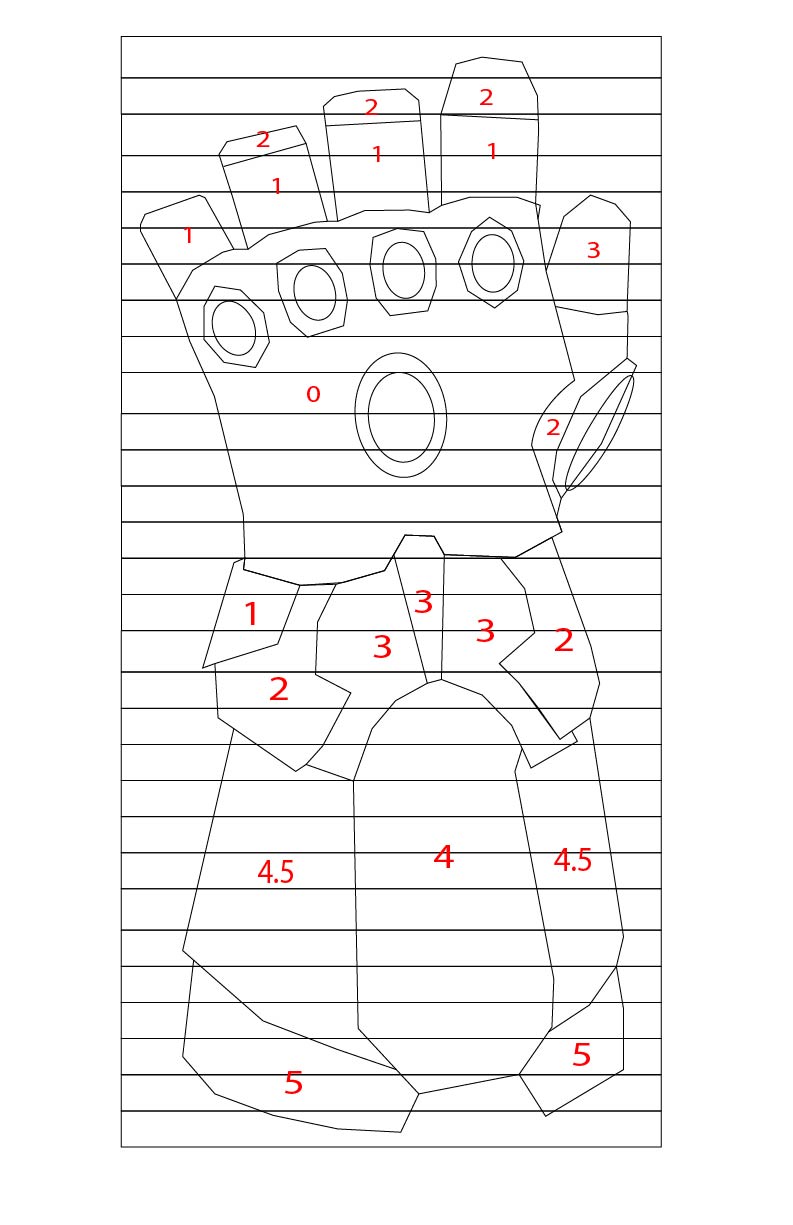
I realized that because I can't 3D model, I'd have to figure out a way to track how deep I was carving. The gauntlet is just a form fitting glove with layers of armor stacked on top of each other, so in order to make them look like layers that slightly overlap, I'd have to come up with a "carve by numbers" system.
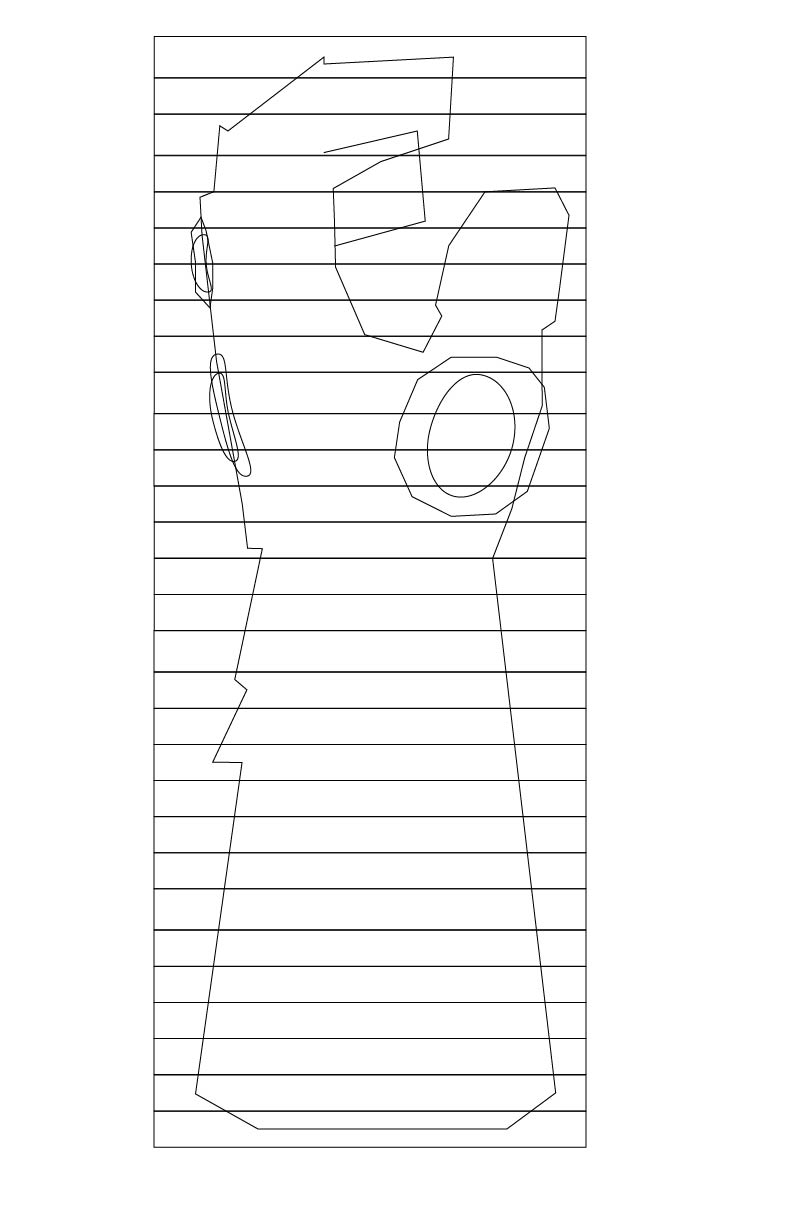
Pics 1-2 shows how I designed that. Each main component of the glove layer would have a number associated with it, which would tell me, in terms of layers, how "outside' or "inside" it would need to be.
Having redesigned the the gauntlet in Illustrator to be made from 1/2" plywood that I got from Purebond, I got to work.
I cut out the squares in Pics 1-2 from a scrap piece of 1/2" spalted maple plywood I had, and then laminated all 30 of the strips together in Pic 3. This actually works better as you don't need a table saw or a planer to get to nice clean cuts for laminating.


Pics 1-2 show me repeating the same method as before. I glued on my template to the piece of wood, except this time, as I didn't have a chain saw, I power-carved everything. In Pic 2, you see my carving out the hand portion of it - I was VERY methodical and careful about this part, stopping frequently to check that what I was carving looked both like a true hand as well as what my reference photos looked like. Remember, you can't put back material once it is gone. Pic 3 shows the glove after the first round of carving (before detailing) - already 100x better than before!
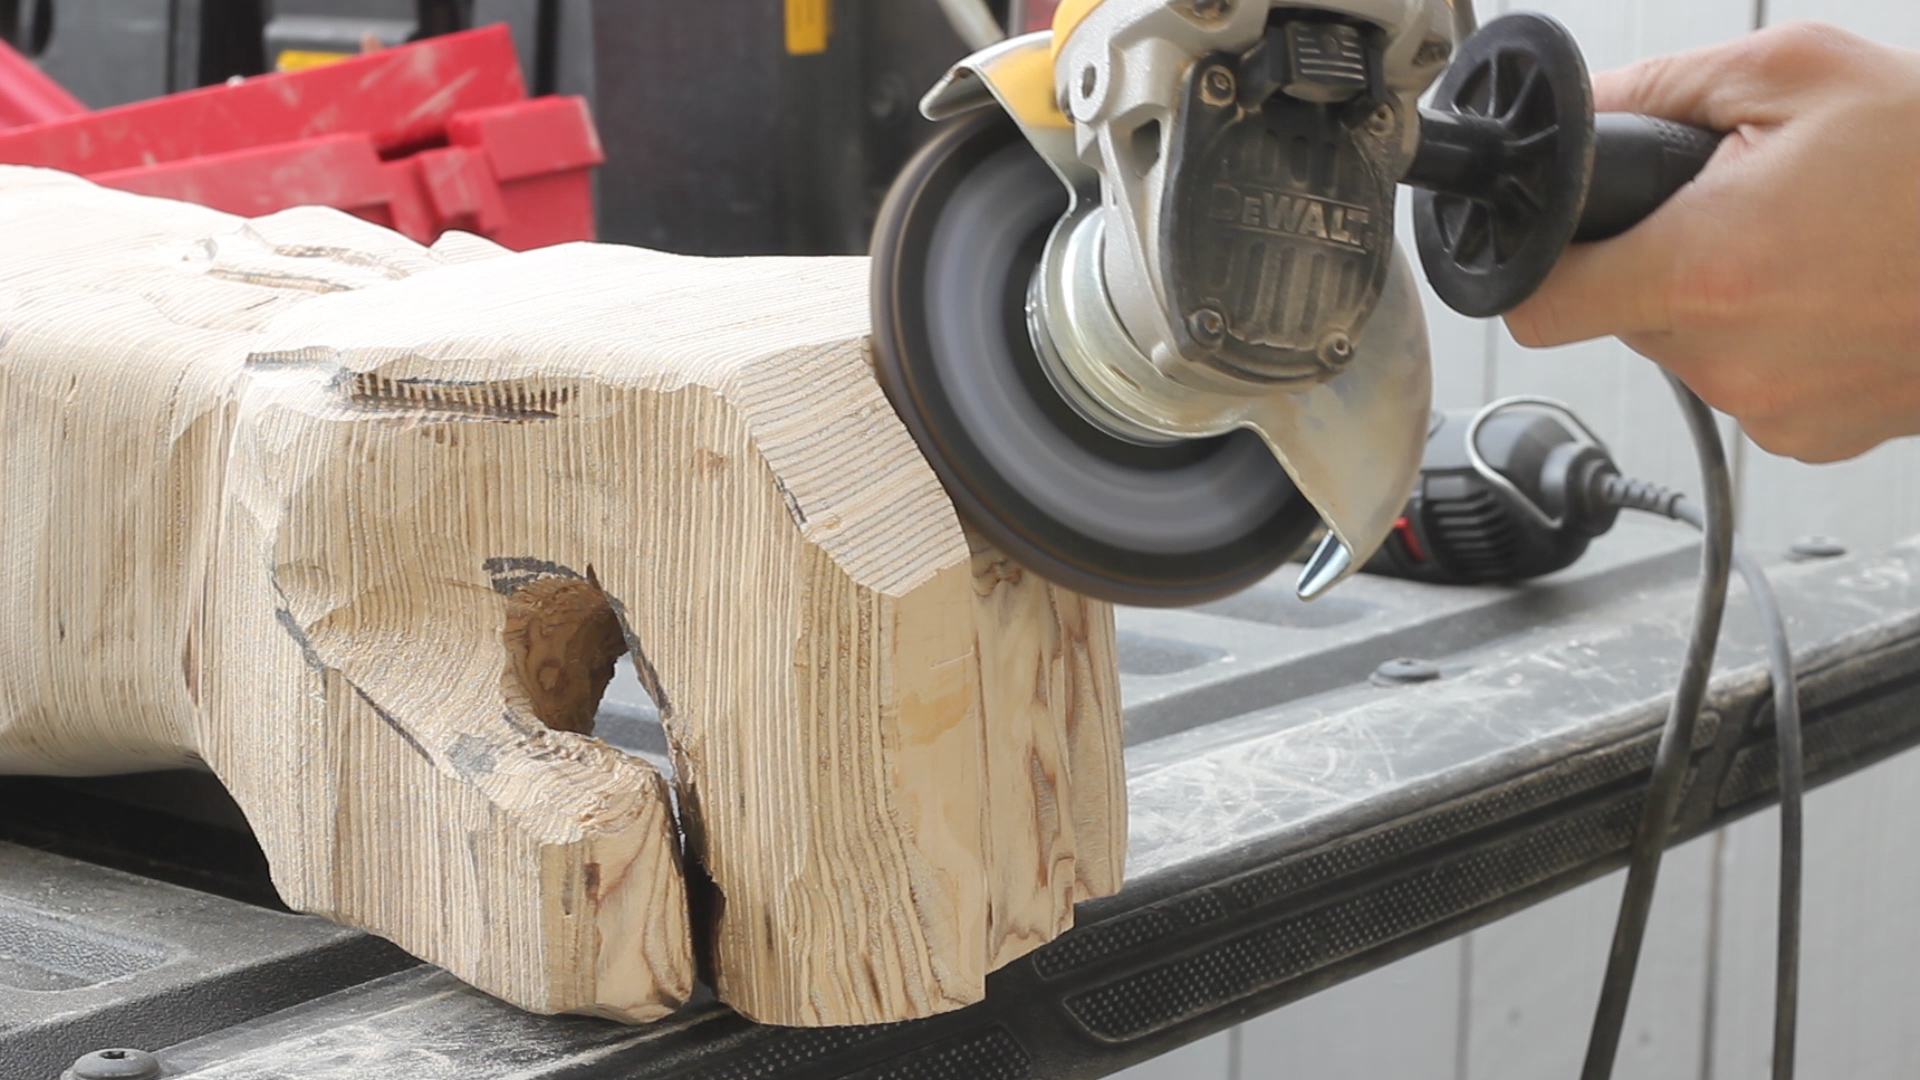
Pics 4 -5 show me using a forstner bit to separate the thumb and fingers (only way I could think of as I don't have a ball gouge or any other tool to get in those tight spaces, and then a dremel bit to separate the fingers. Pic 6 shows the early stages of carving the preliminary "armor" layer (more on this in the next step).

Now comes the moment of truth (and patience). Remember, armor on anything is just a bunch of individual pieces of metal slightly stacked on top of each other to provide uniform protection, and I really wanted to make sure I achieved this look.
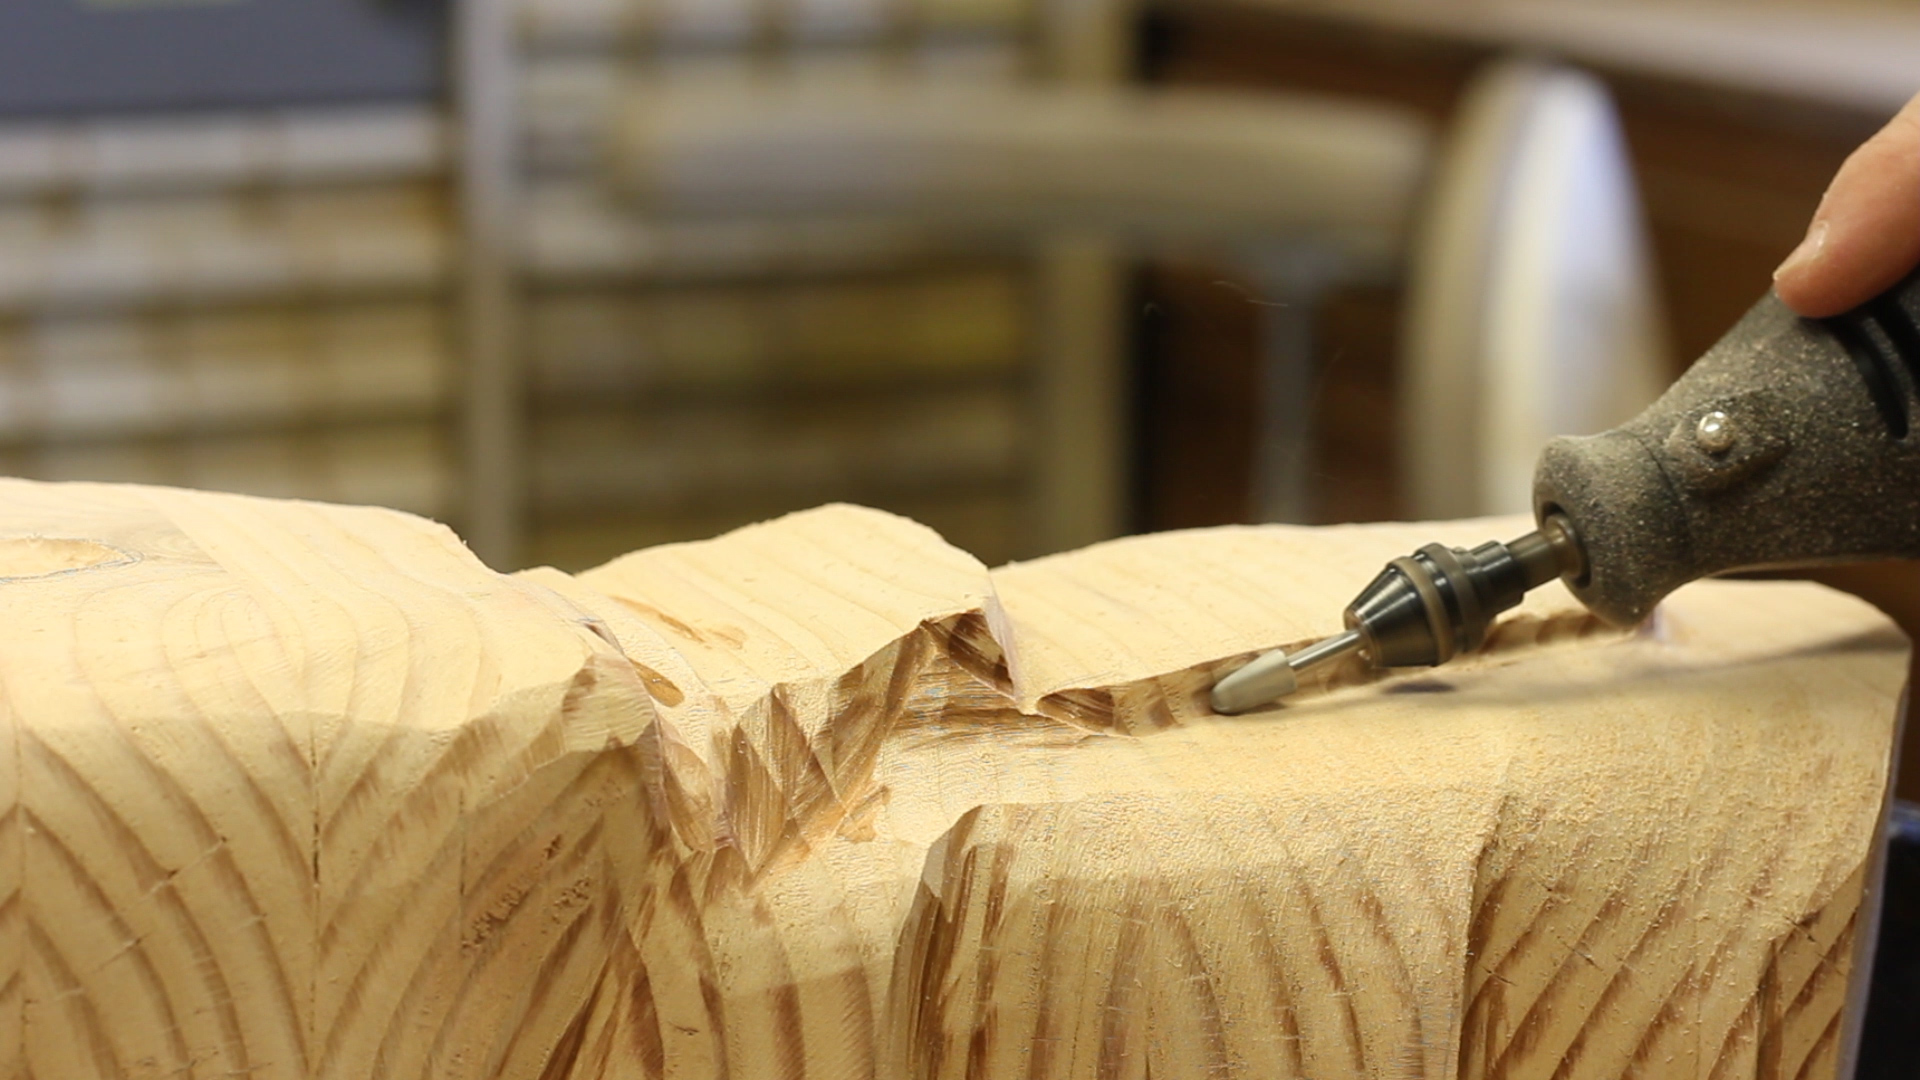
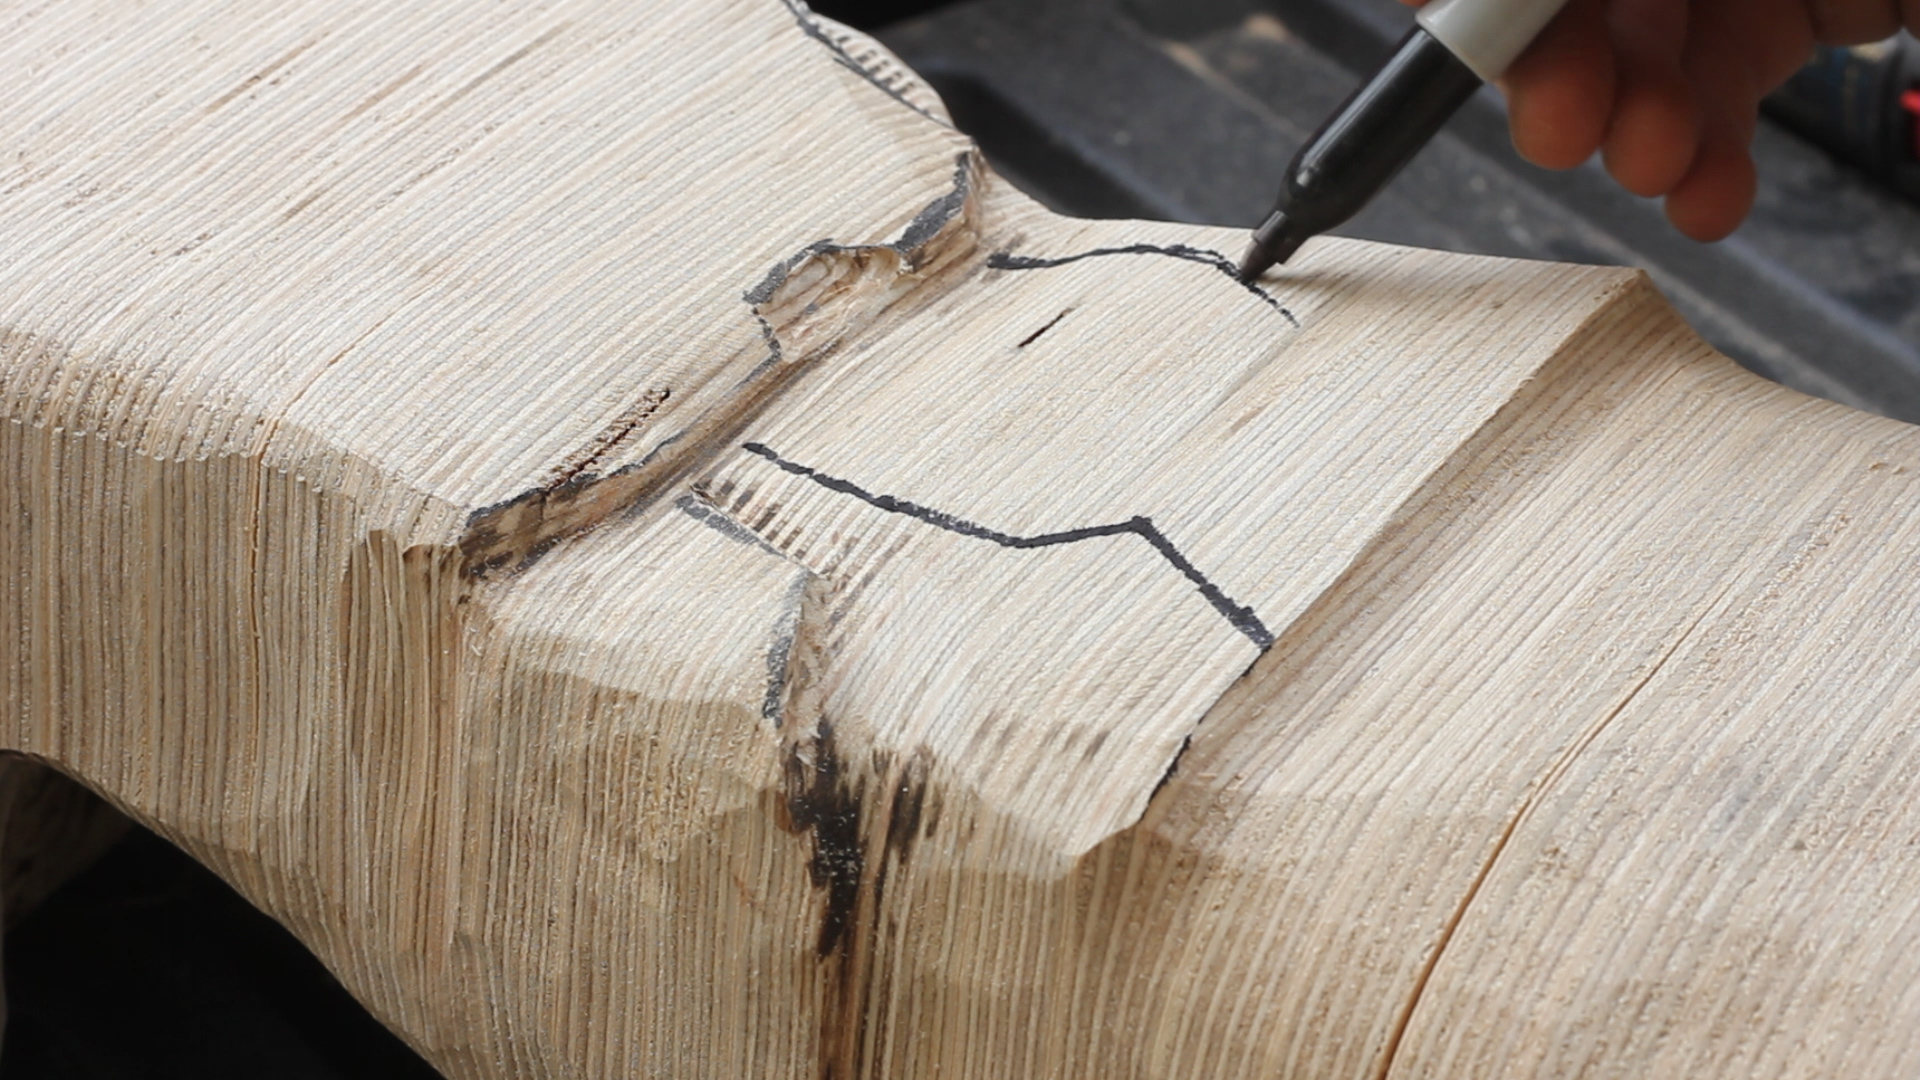
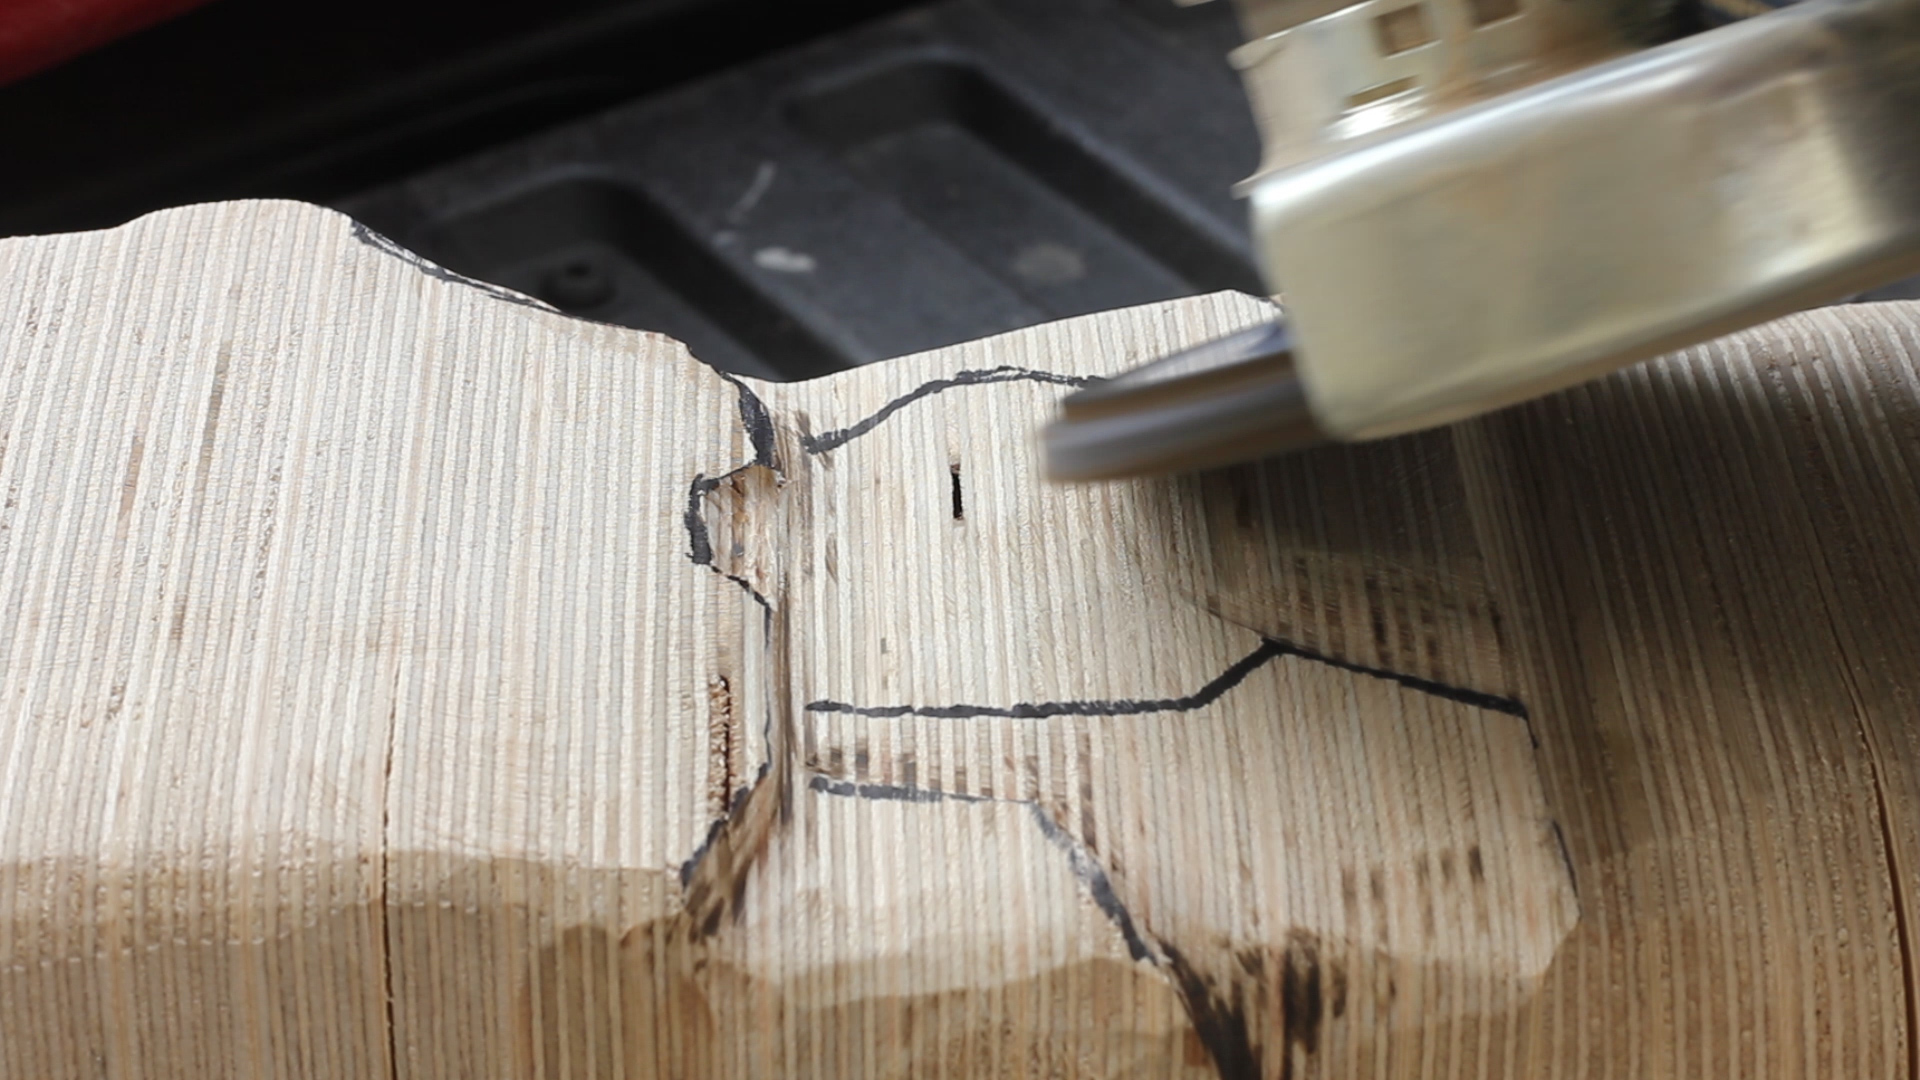
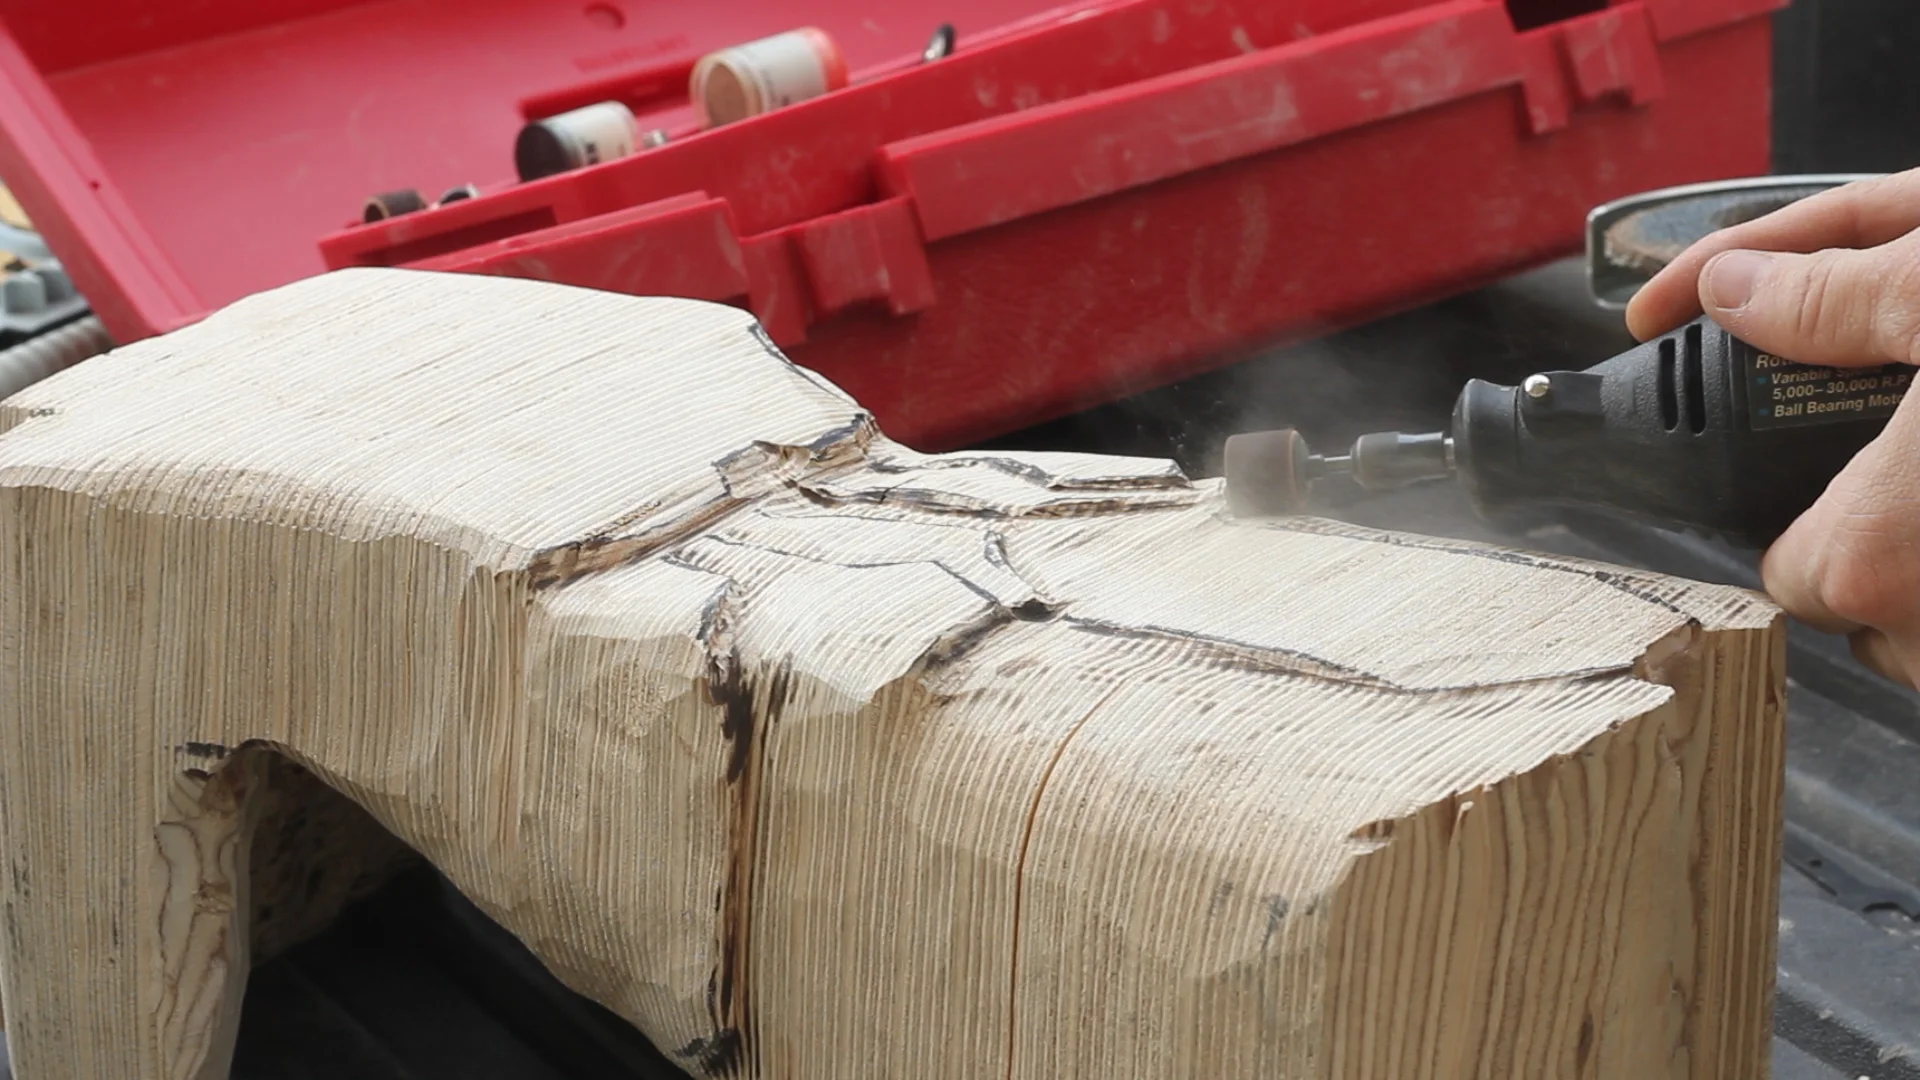
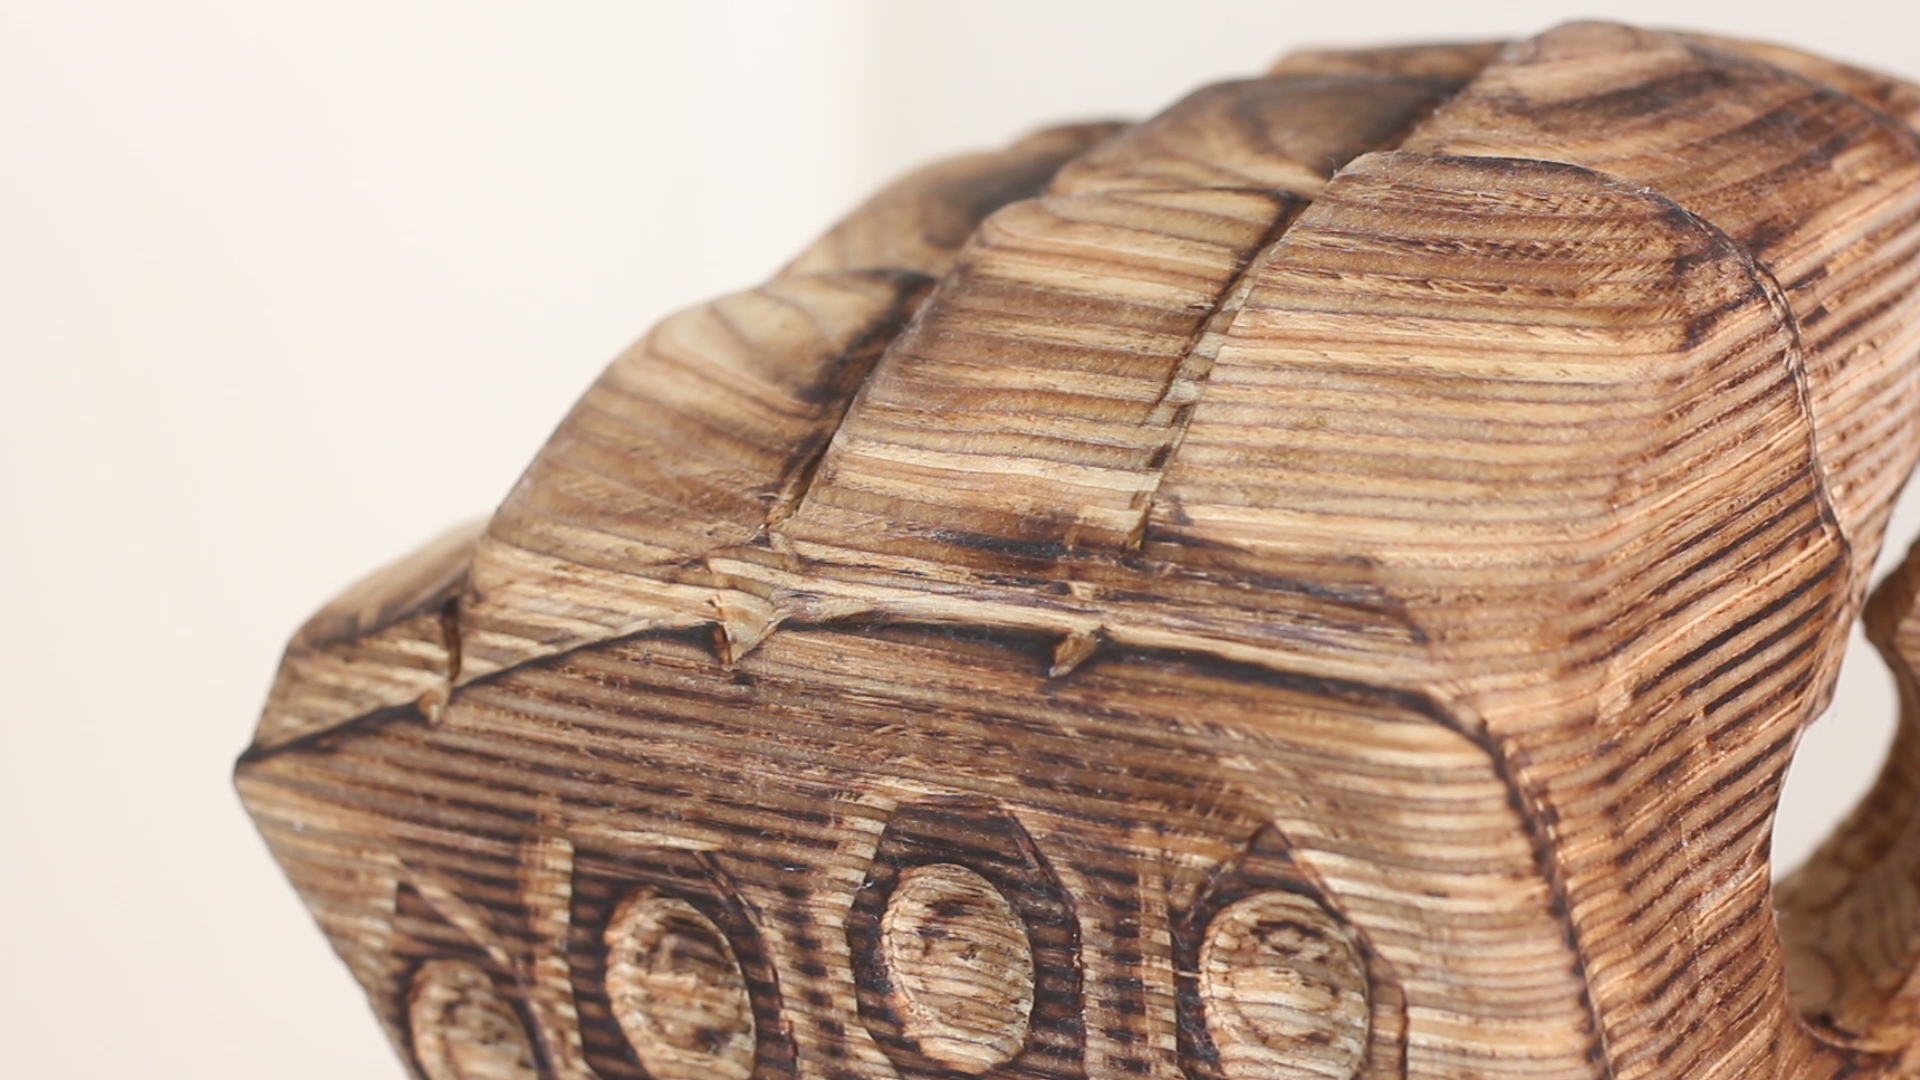
I was very patient with this step, as I didn't want to repeat my mistakes. I used a sharpie to mark out the design of what I was going to be carving and not carving. Pic 1 shows me marking the first layer of armor. Pics 2-3 then shows me using a flap disk to carve away the middle portion, leaving me with a first layer of armor. I then repeated this process over and over again for the five or so layers I had created, carving away a portion each time, and leaving all previous layers untouched. The result were armored layers that looked like metal stacked on top of each other.
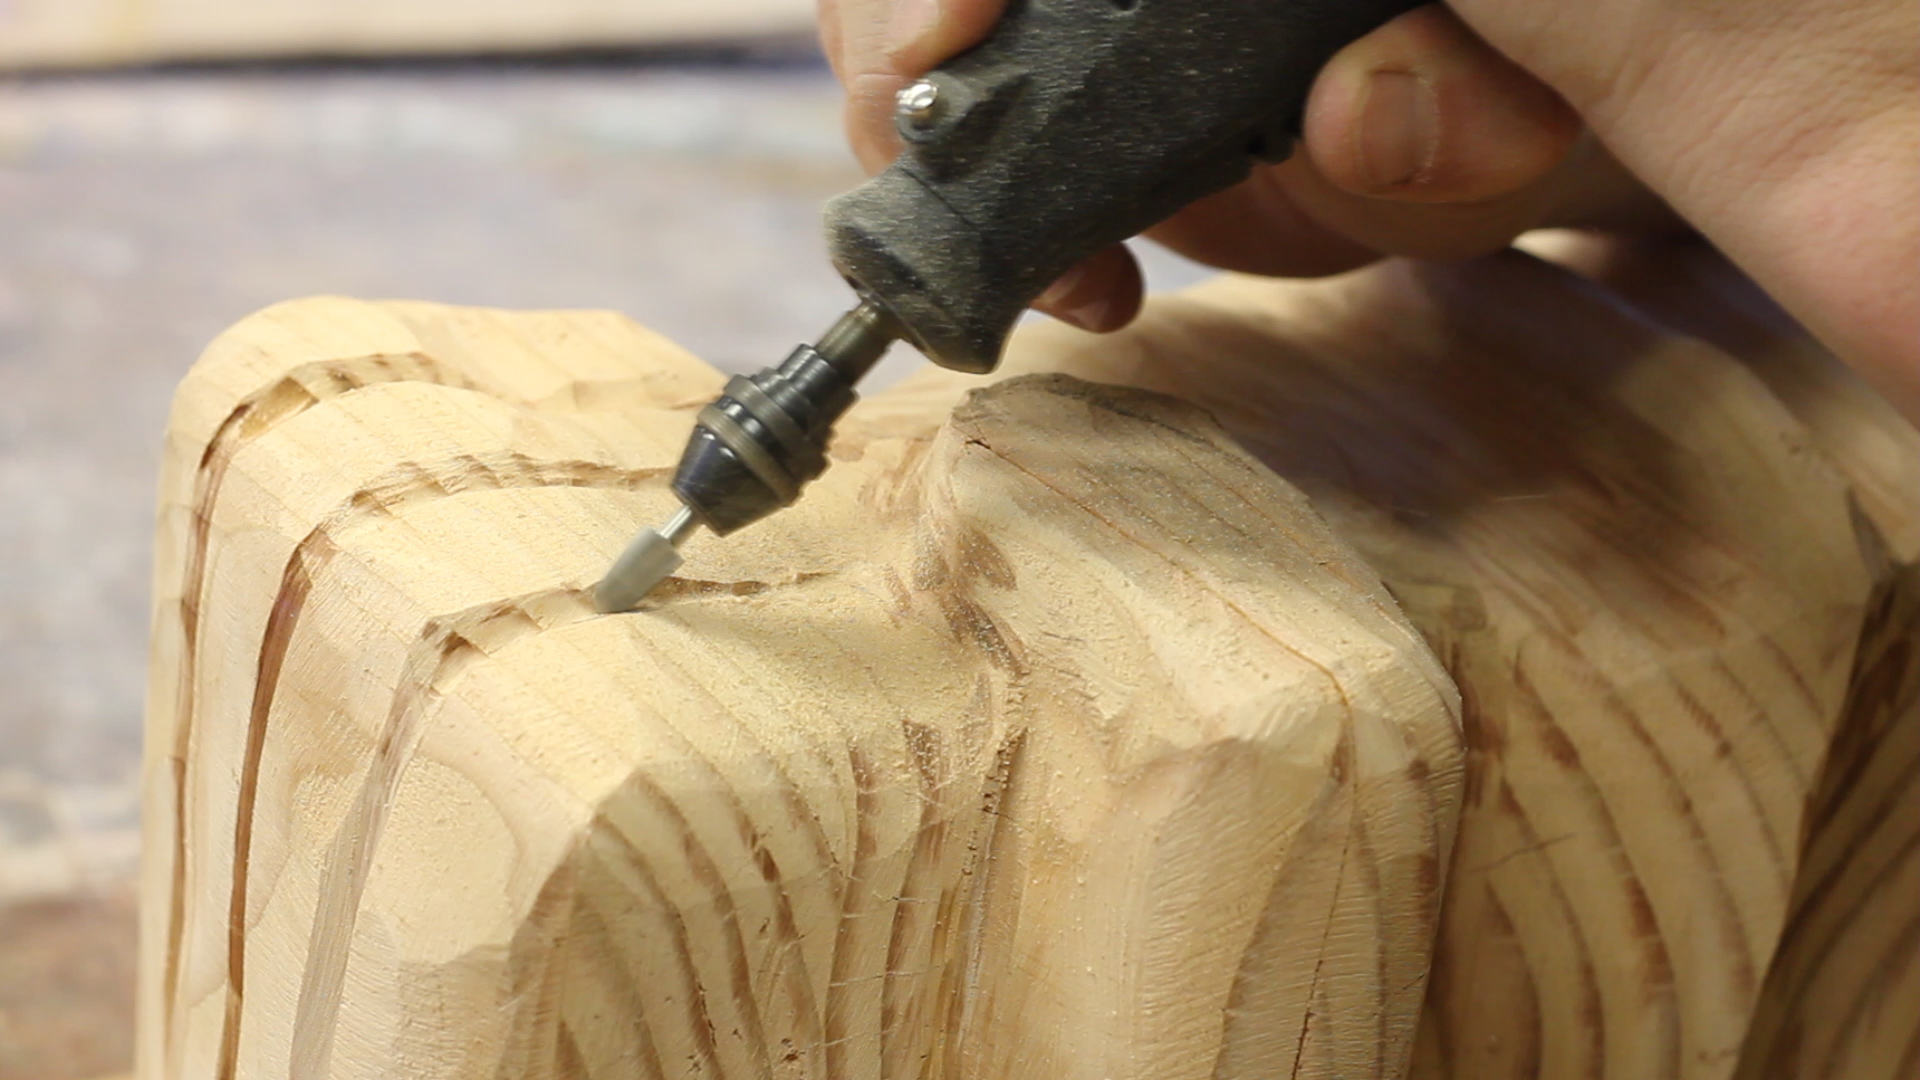
Pics 4-6 show me using a flap disk and dremel drum sander bit to carve out the armor of the fingers (my own design), round over the edges, and add more detail to the main gauntlet armor.This took about three hours, as again, I took it slow, referenced my photos and designs frequently, and in general, took the time to get all the shapes right. I was stoked on the result.

The final steps, like before, were to do everything I could to make the gauntlet as detailed in possible.
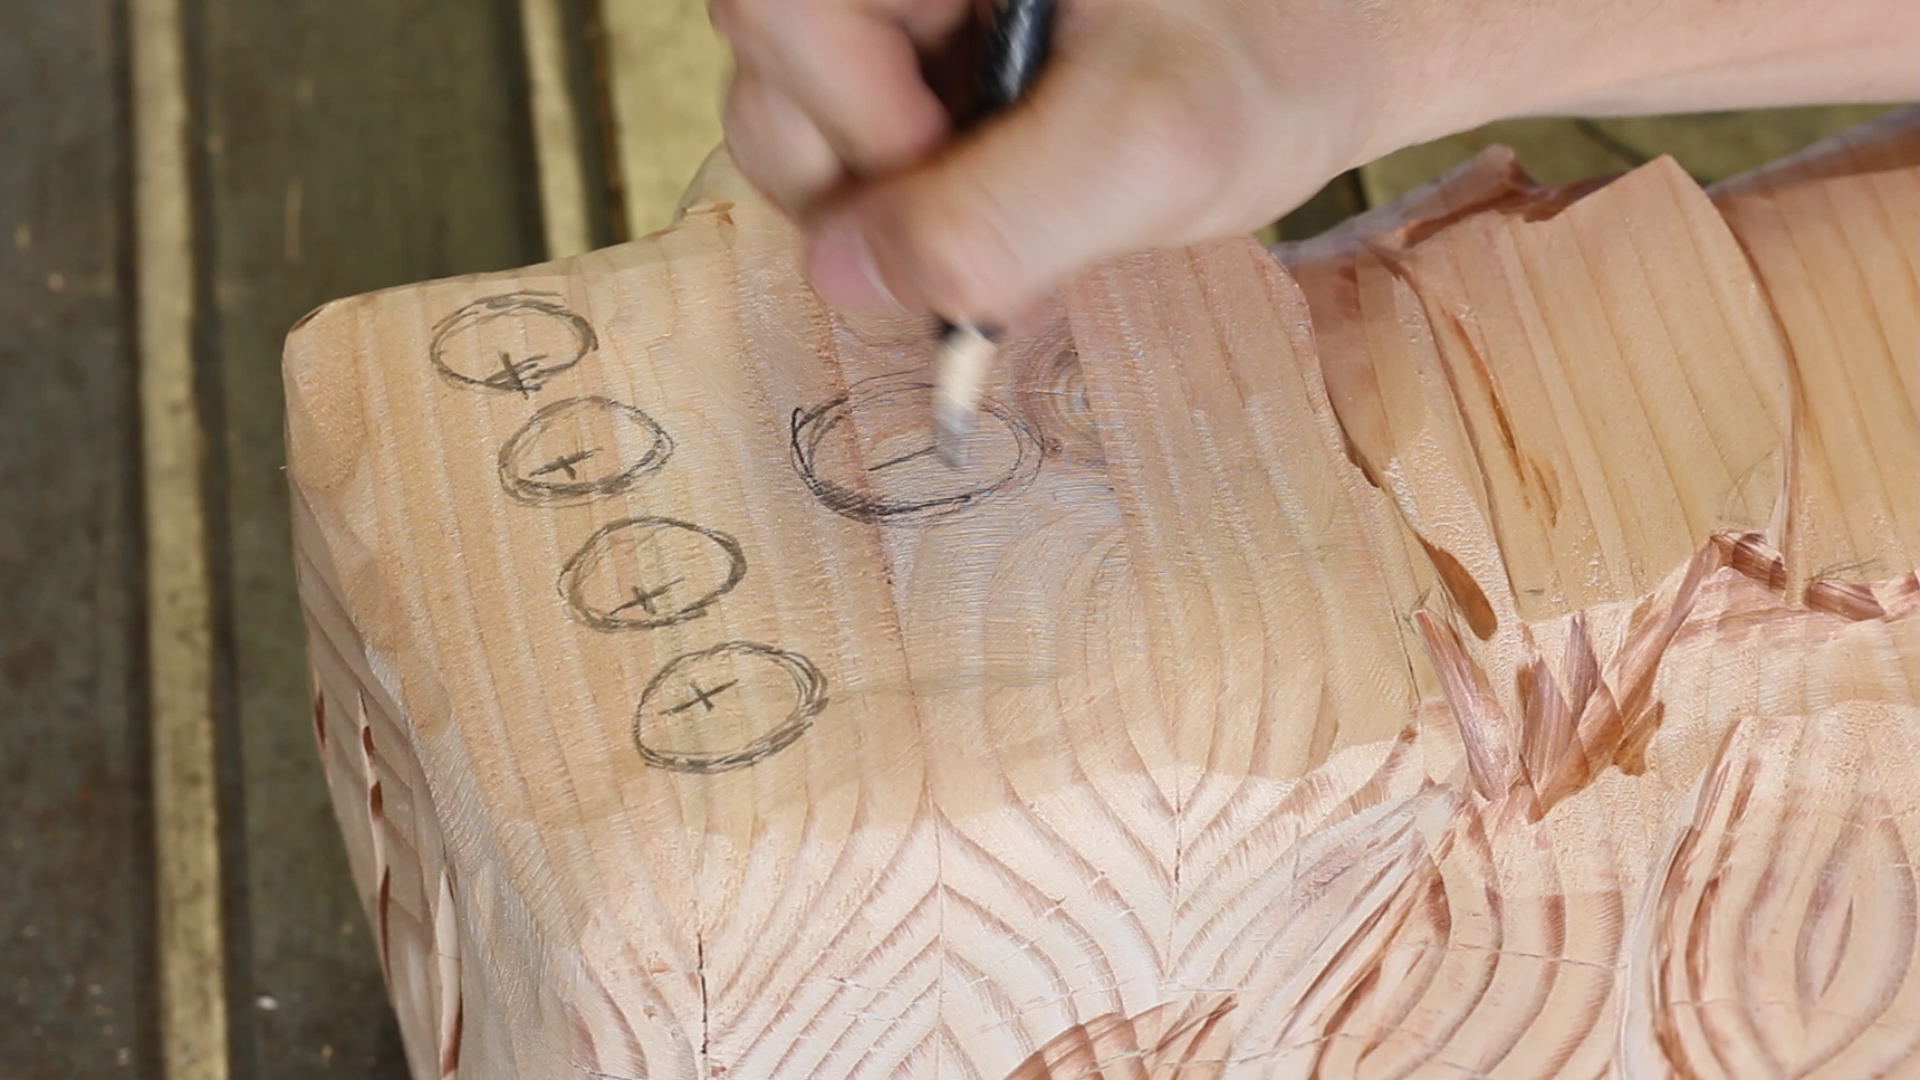
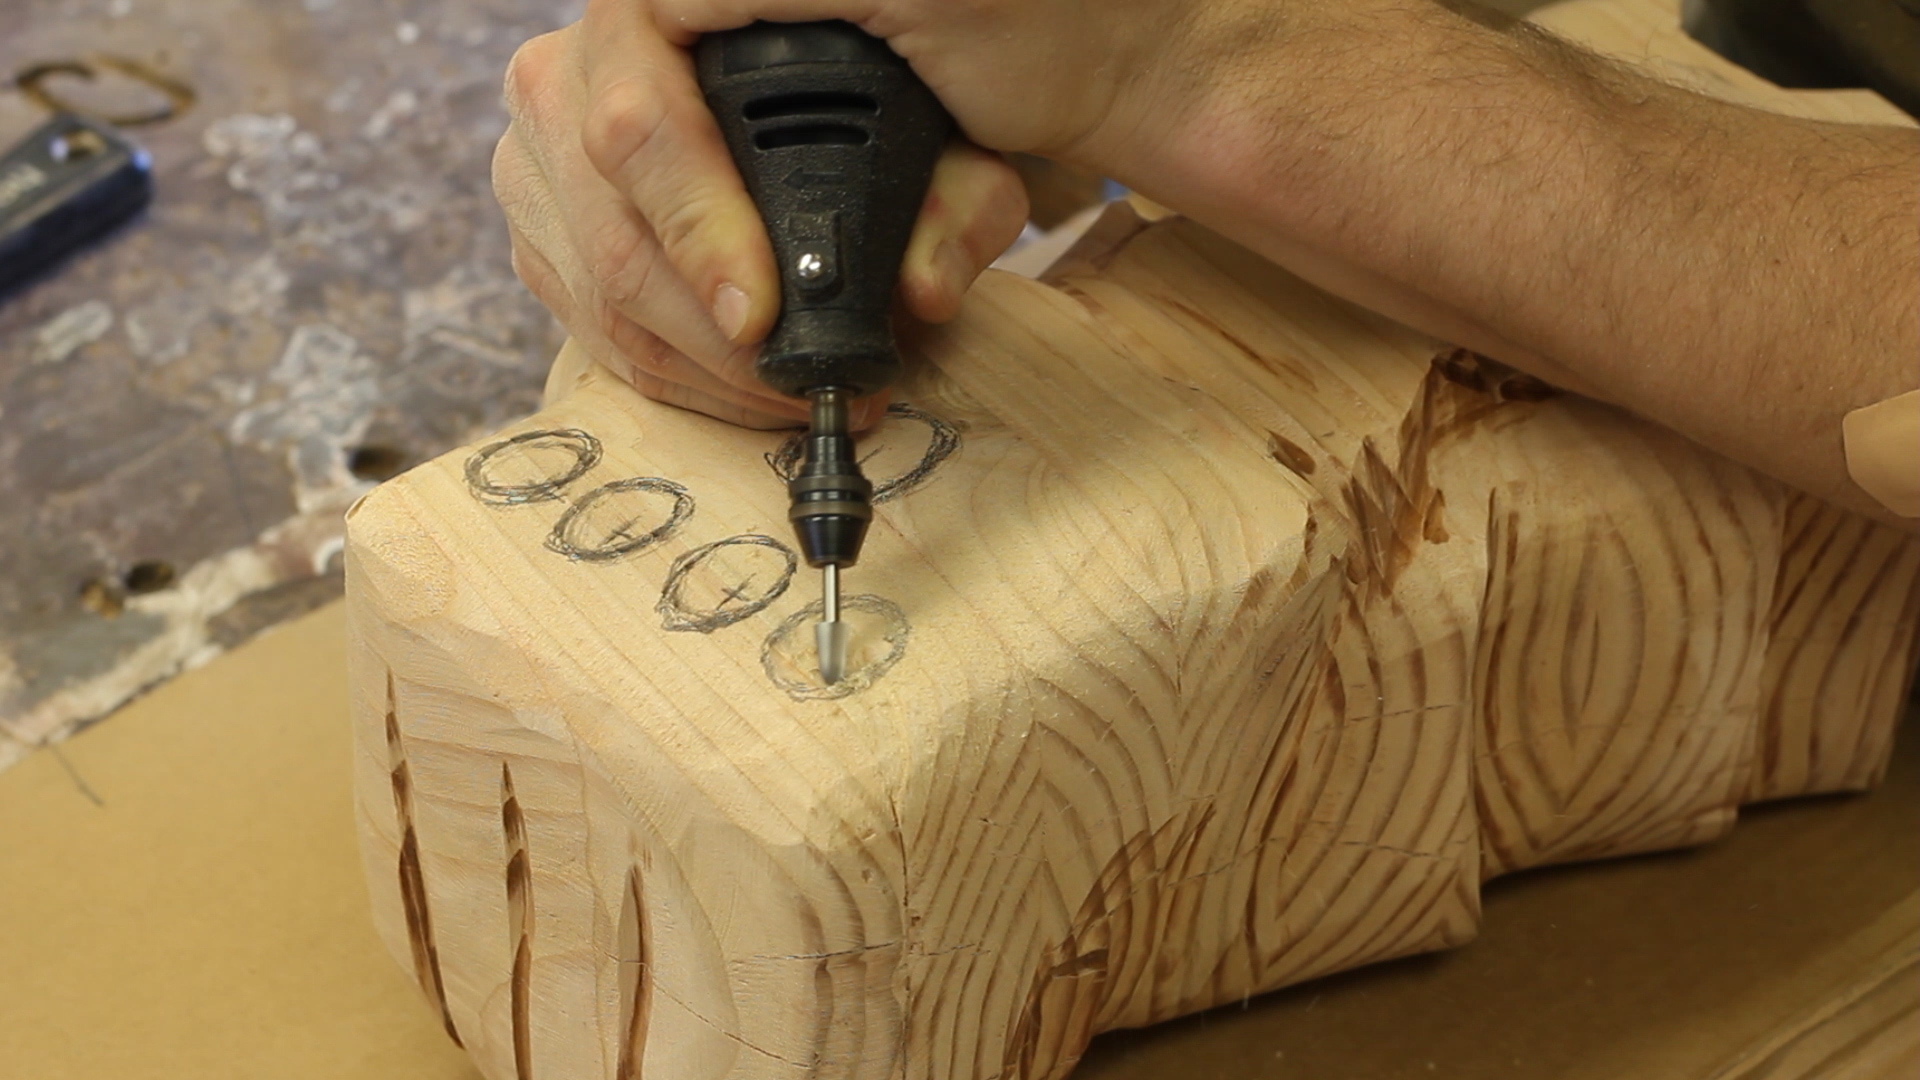
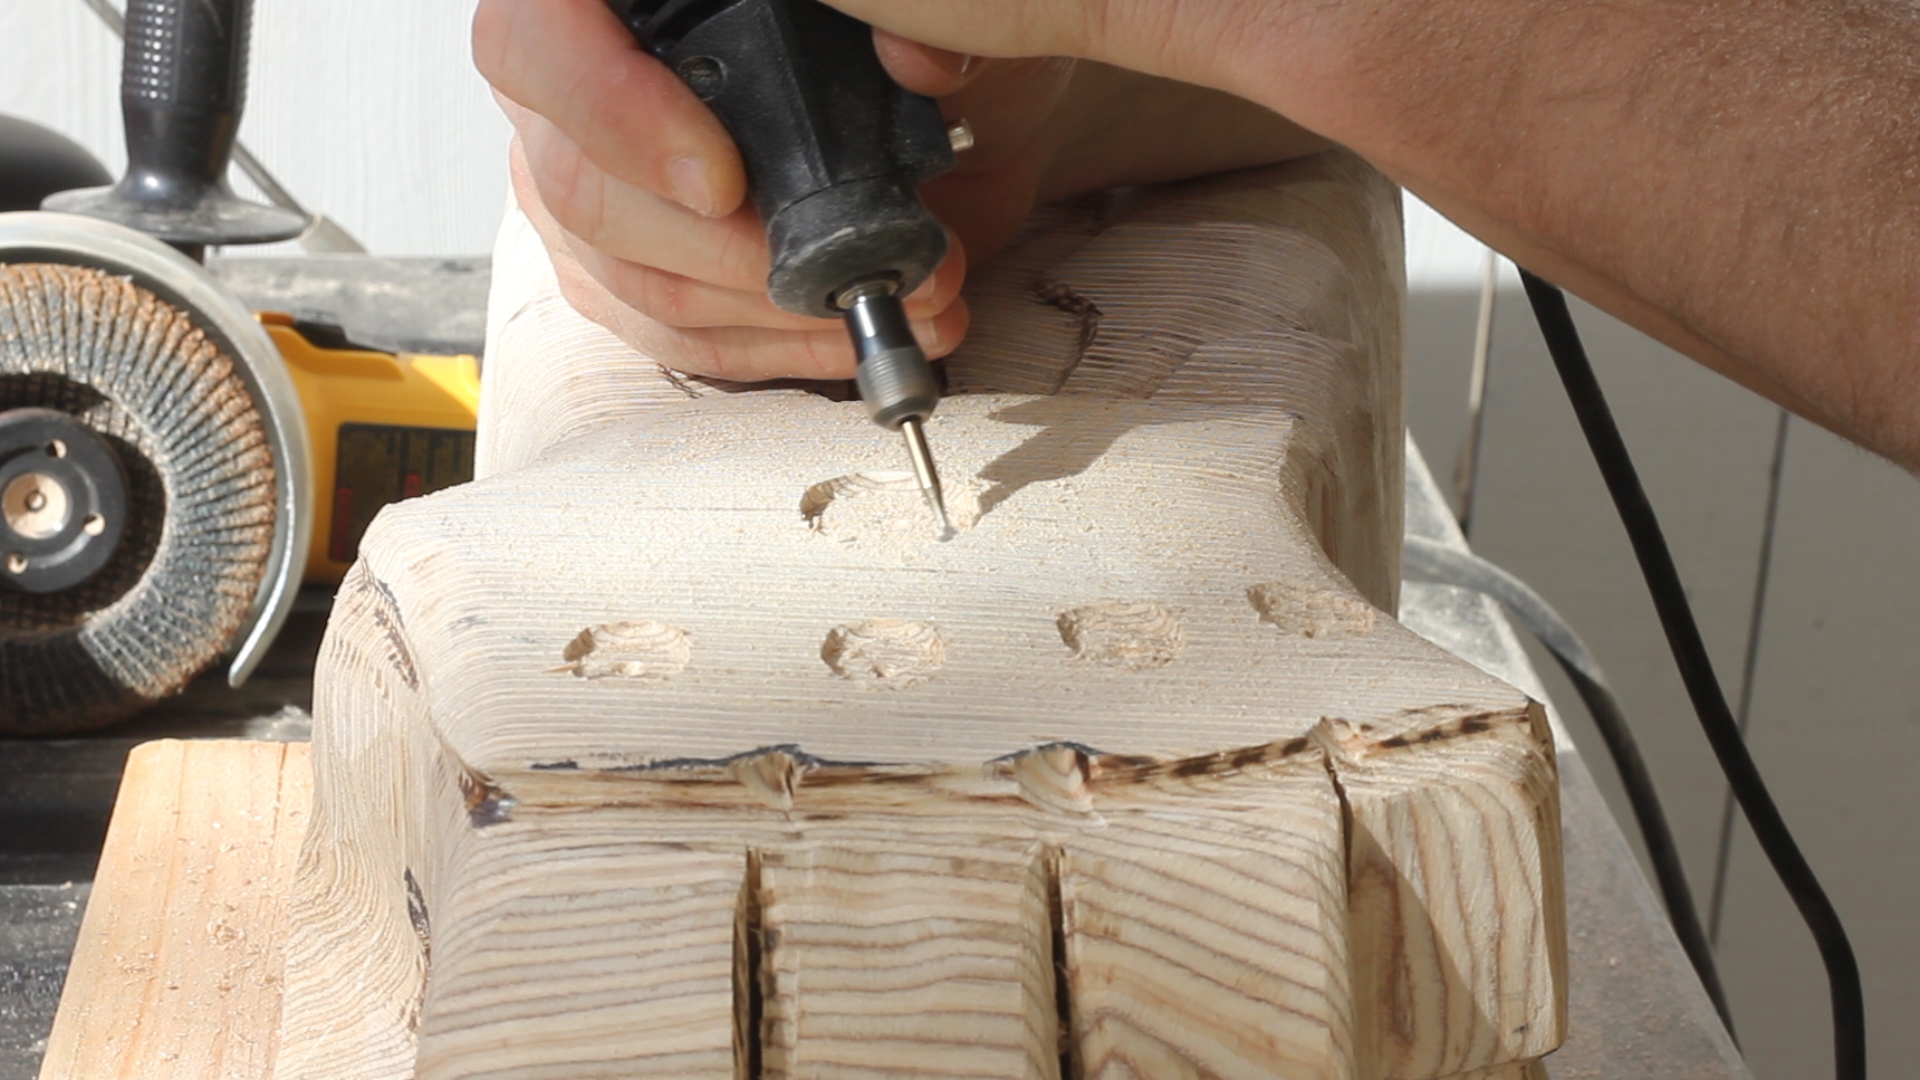
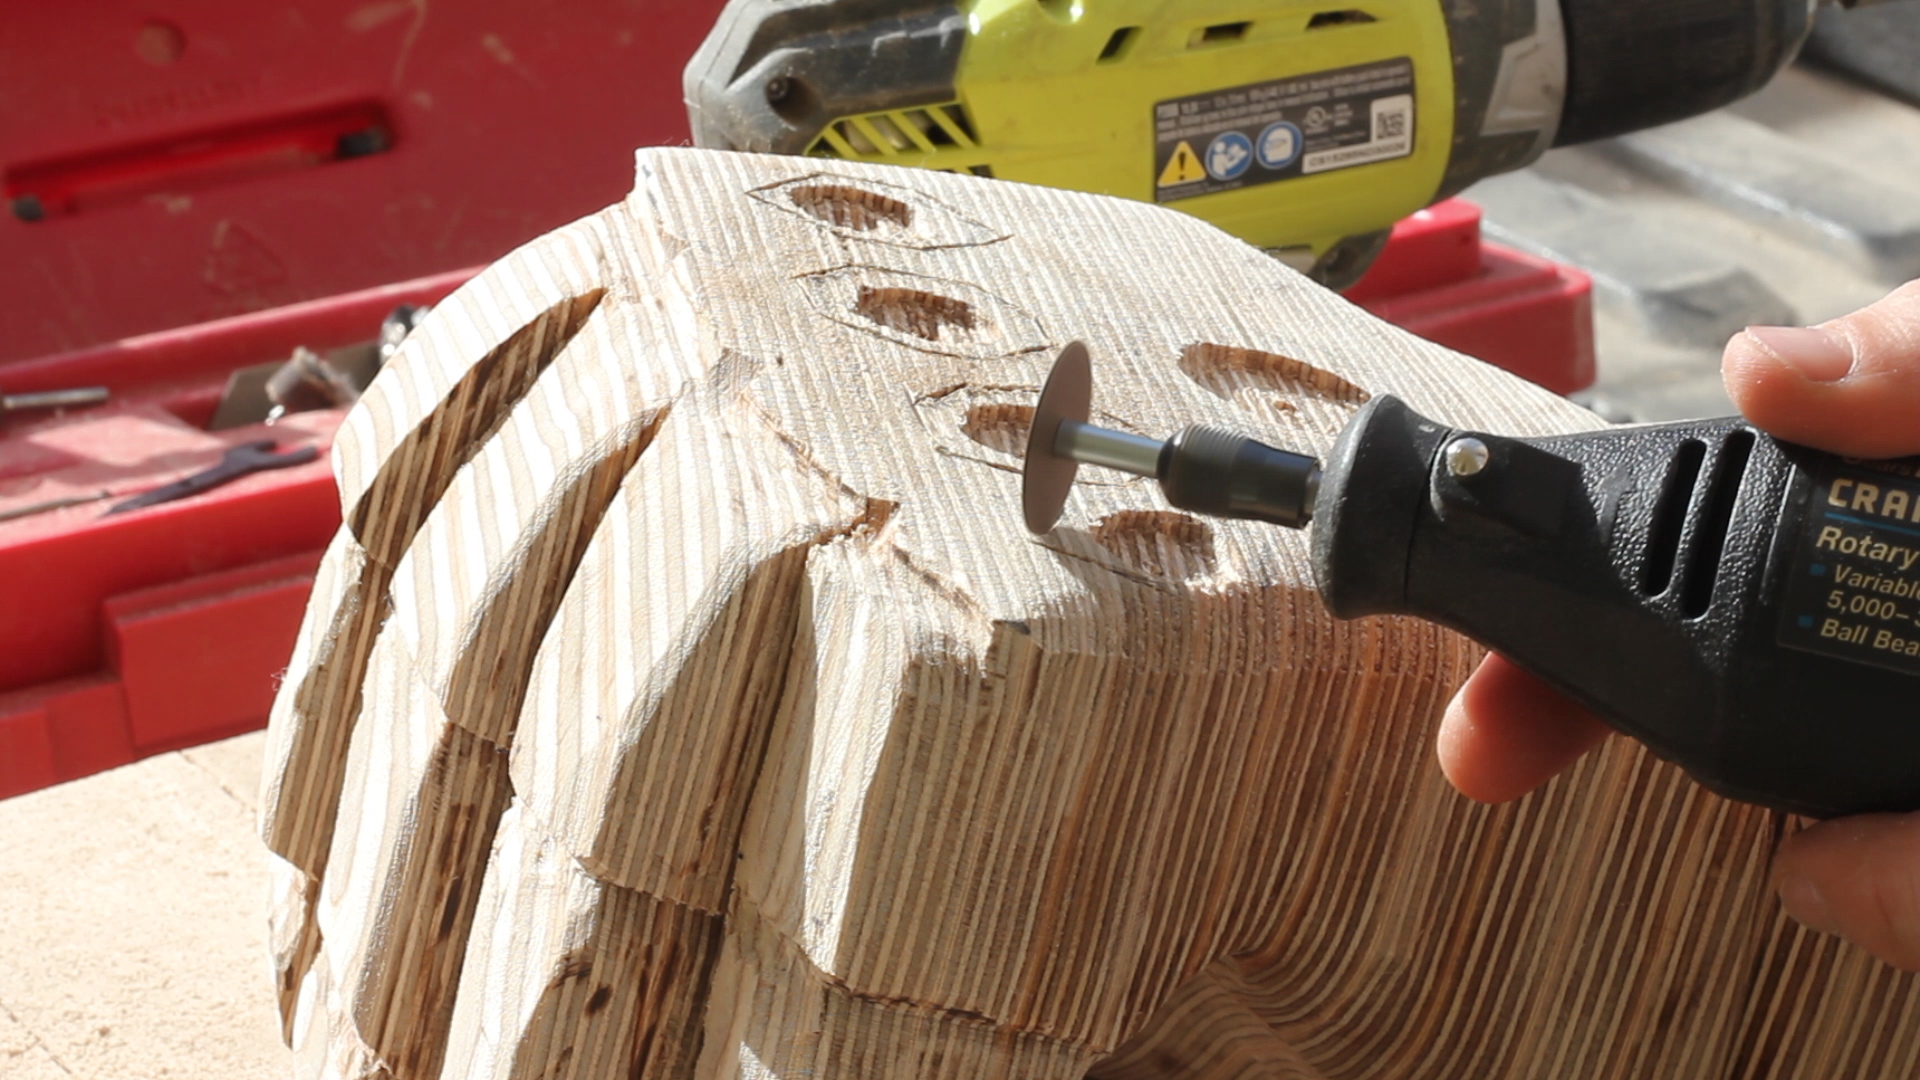
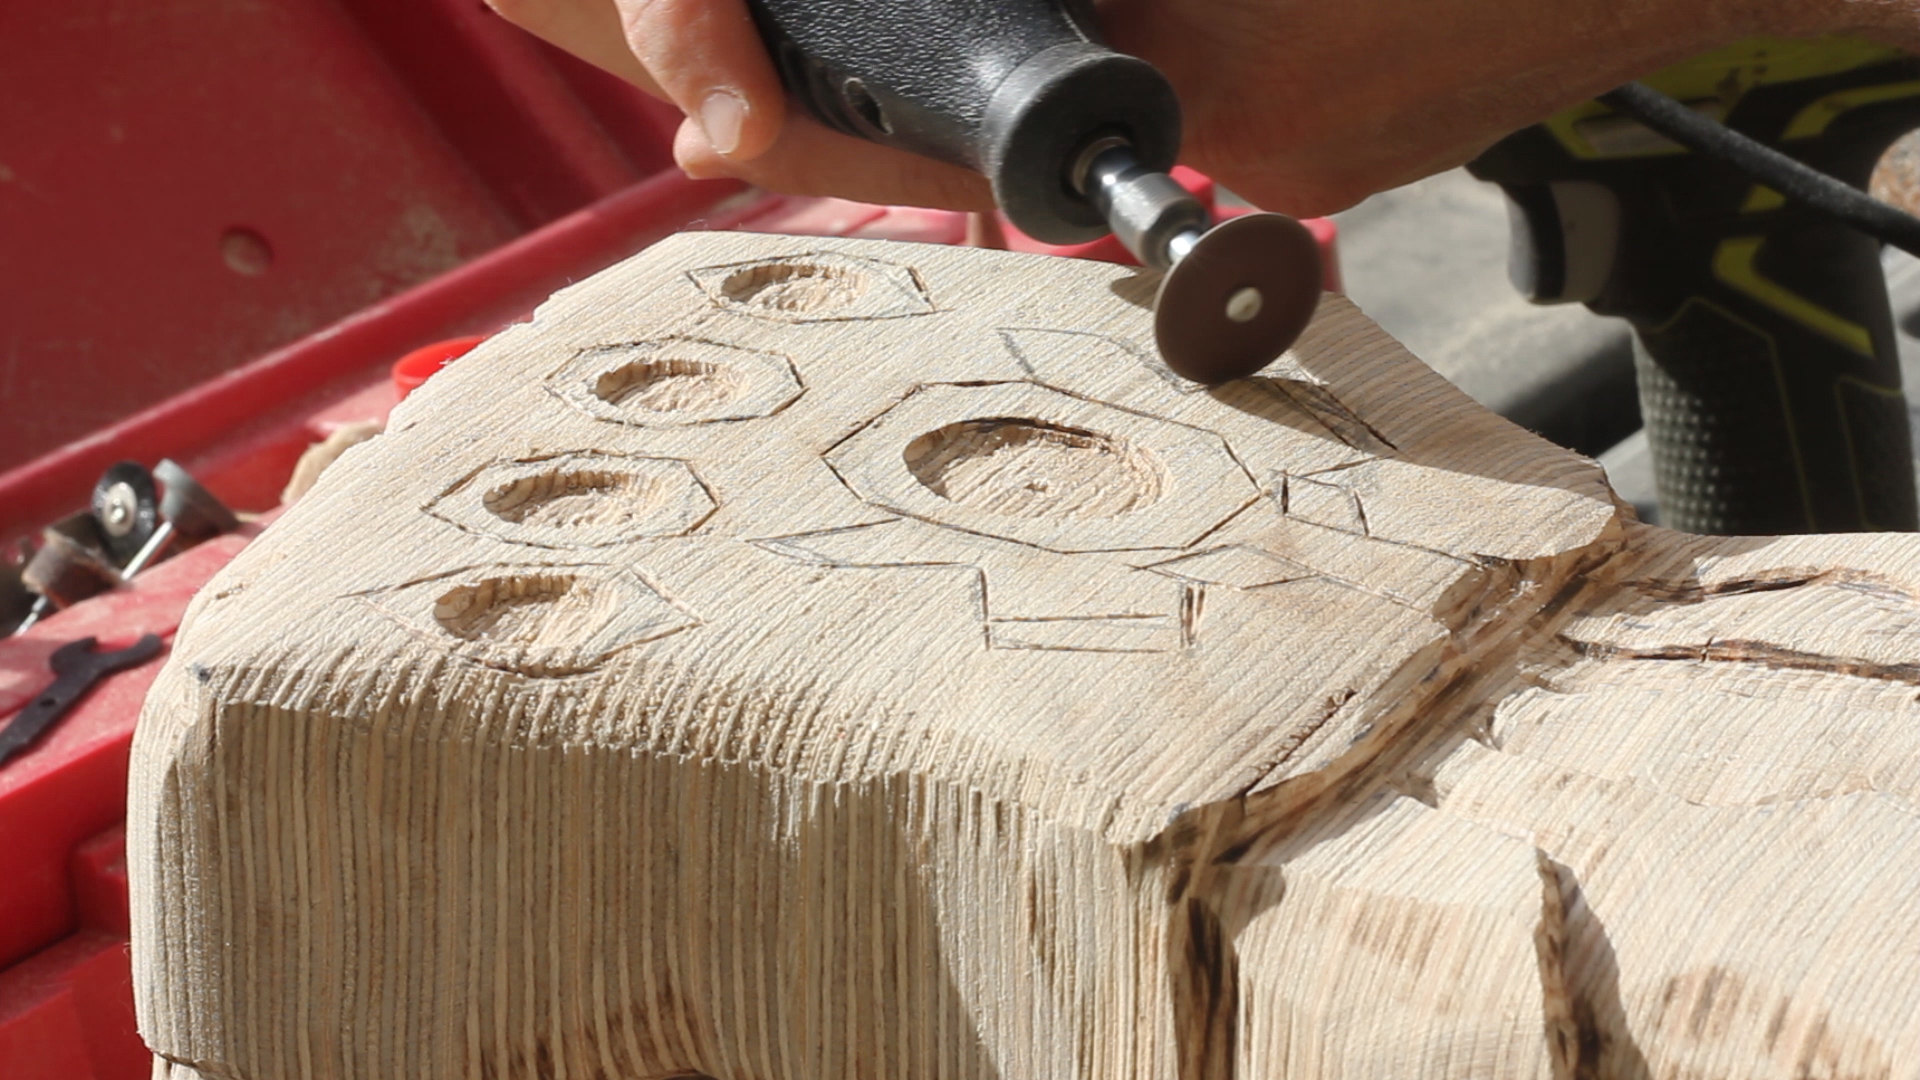
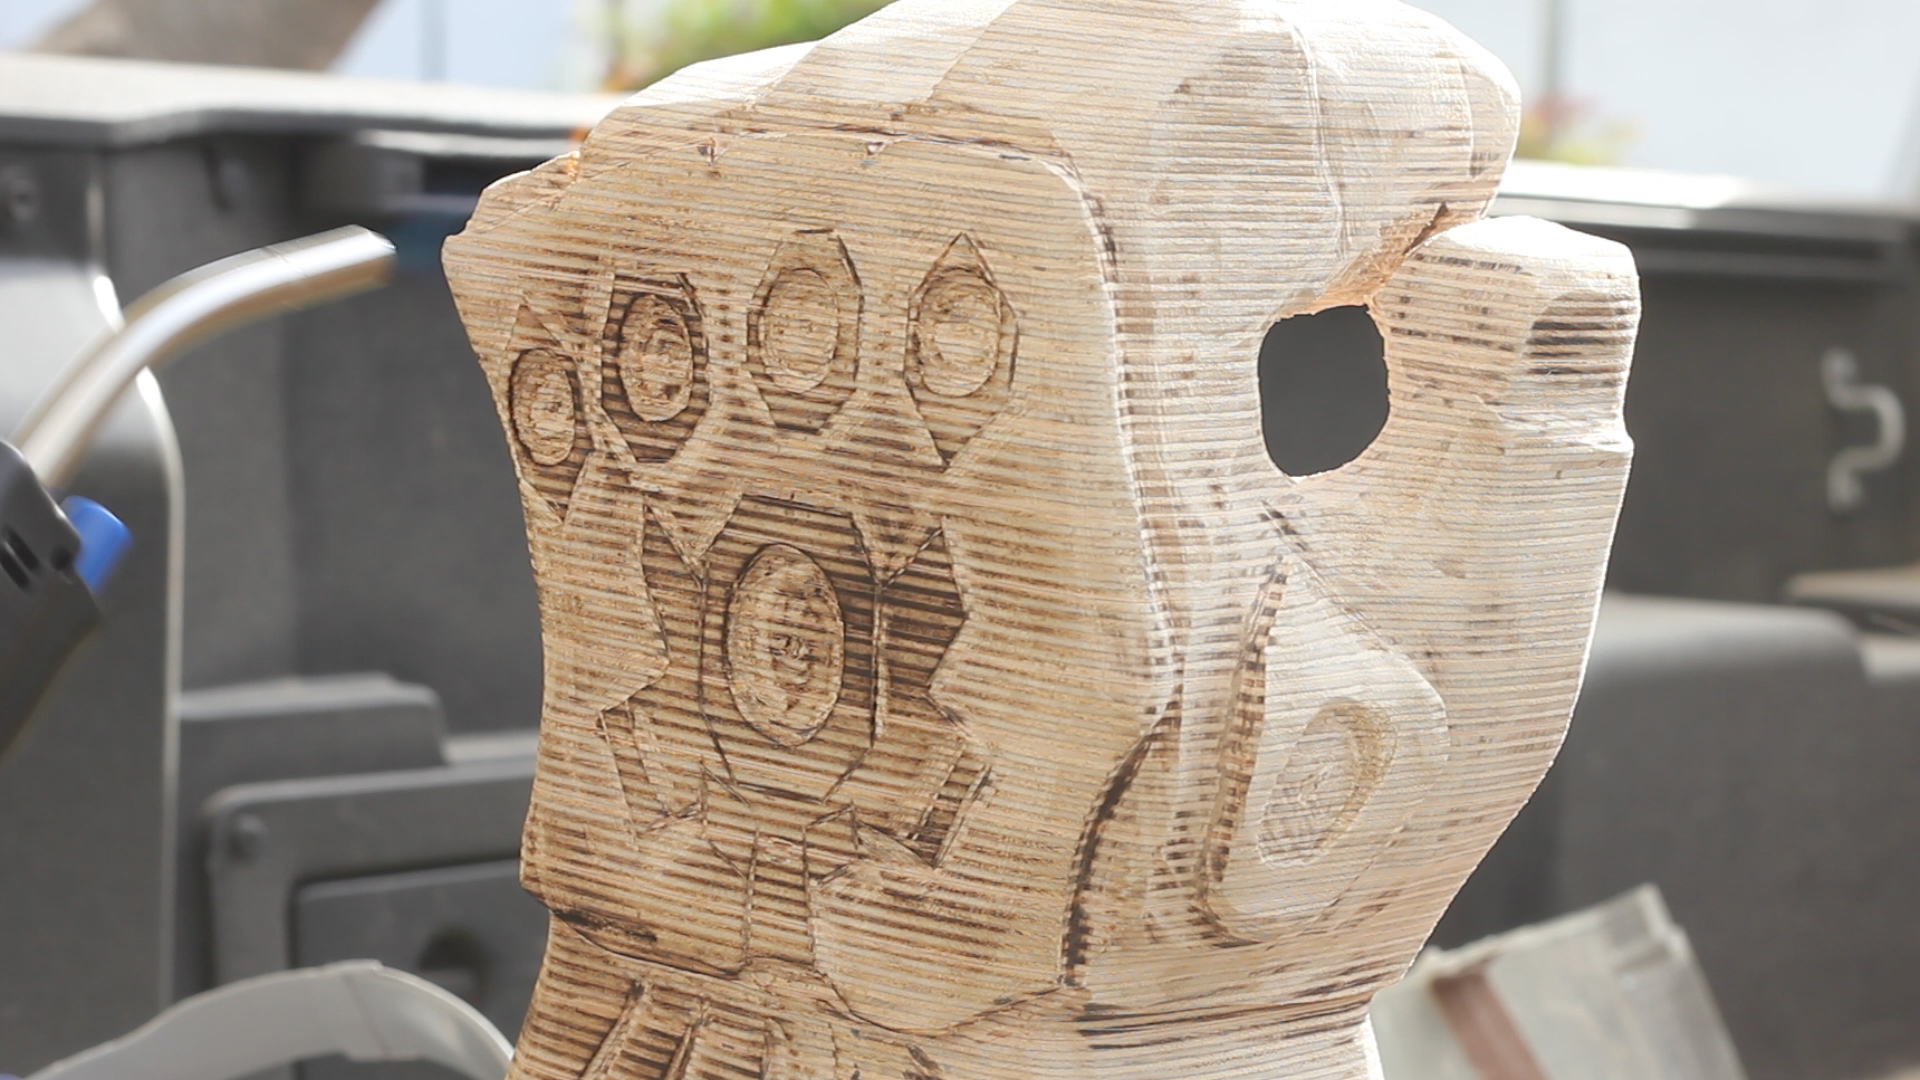
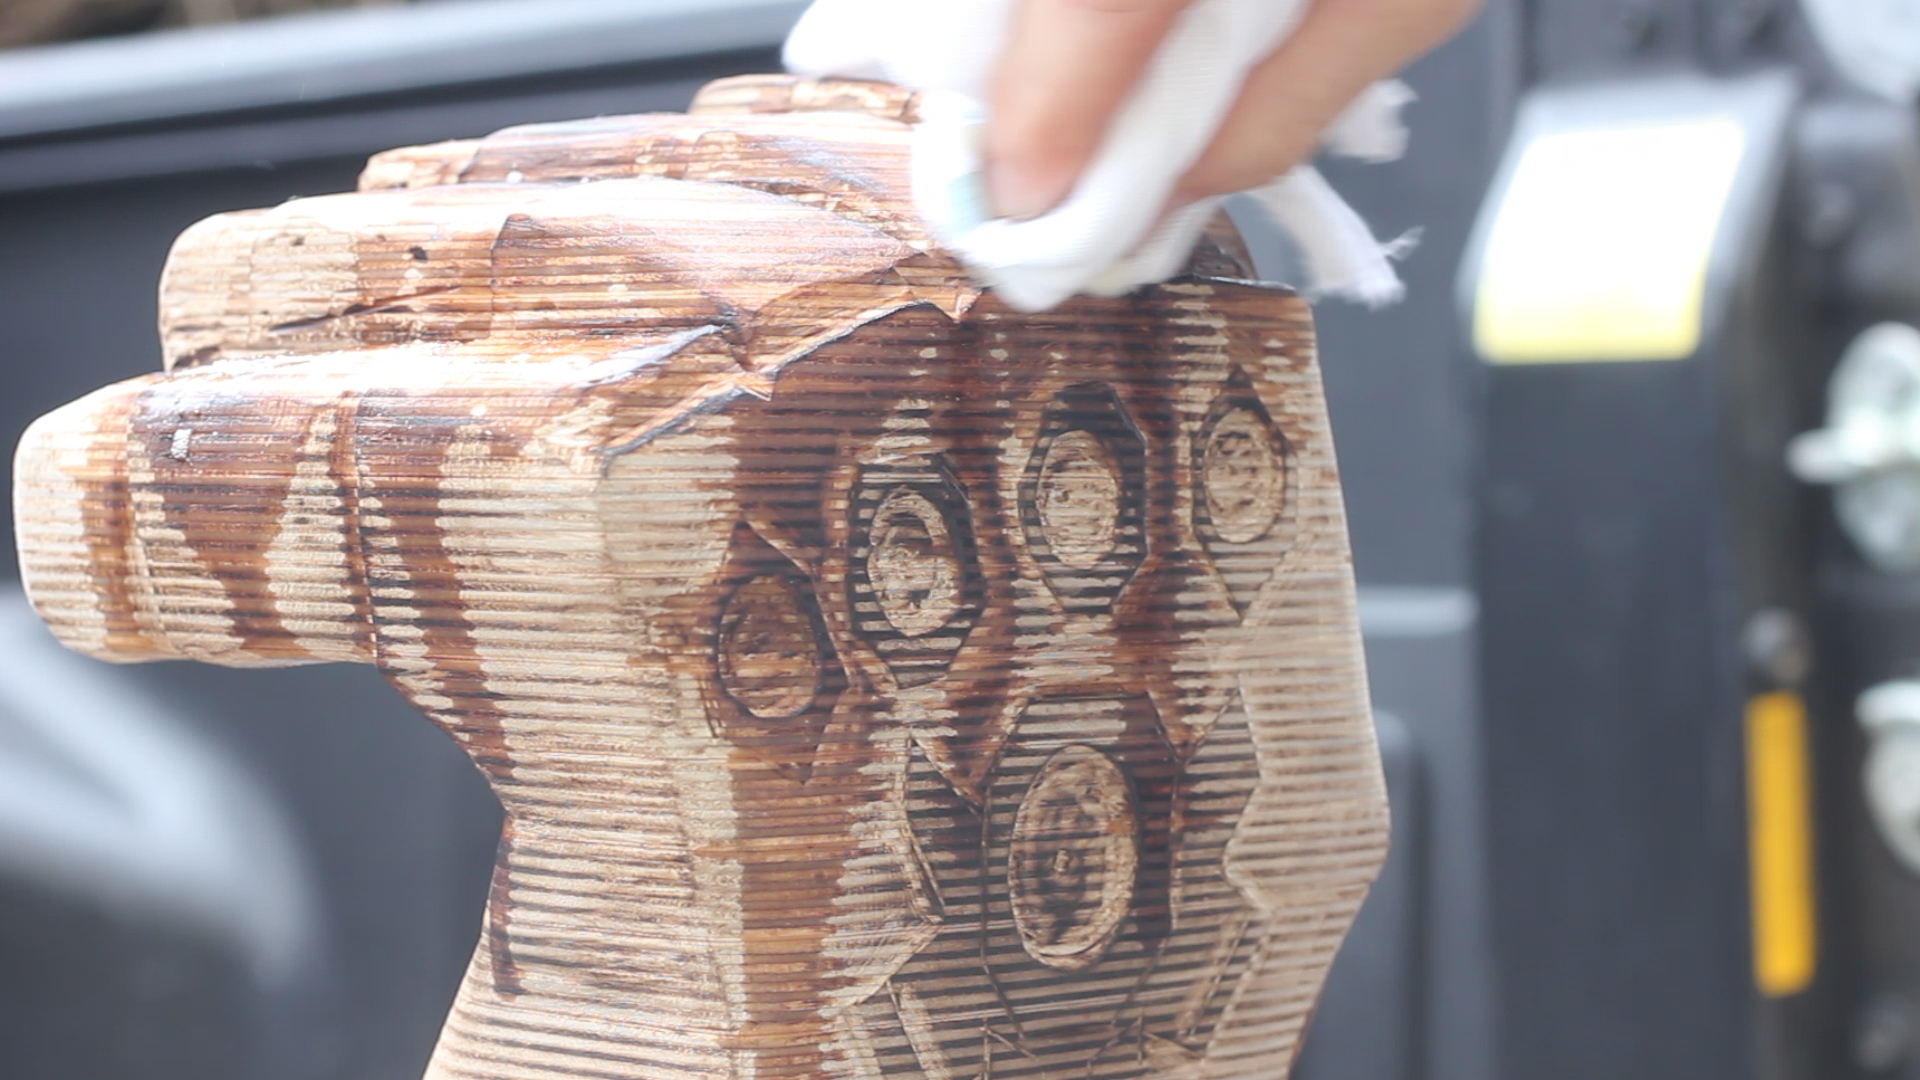
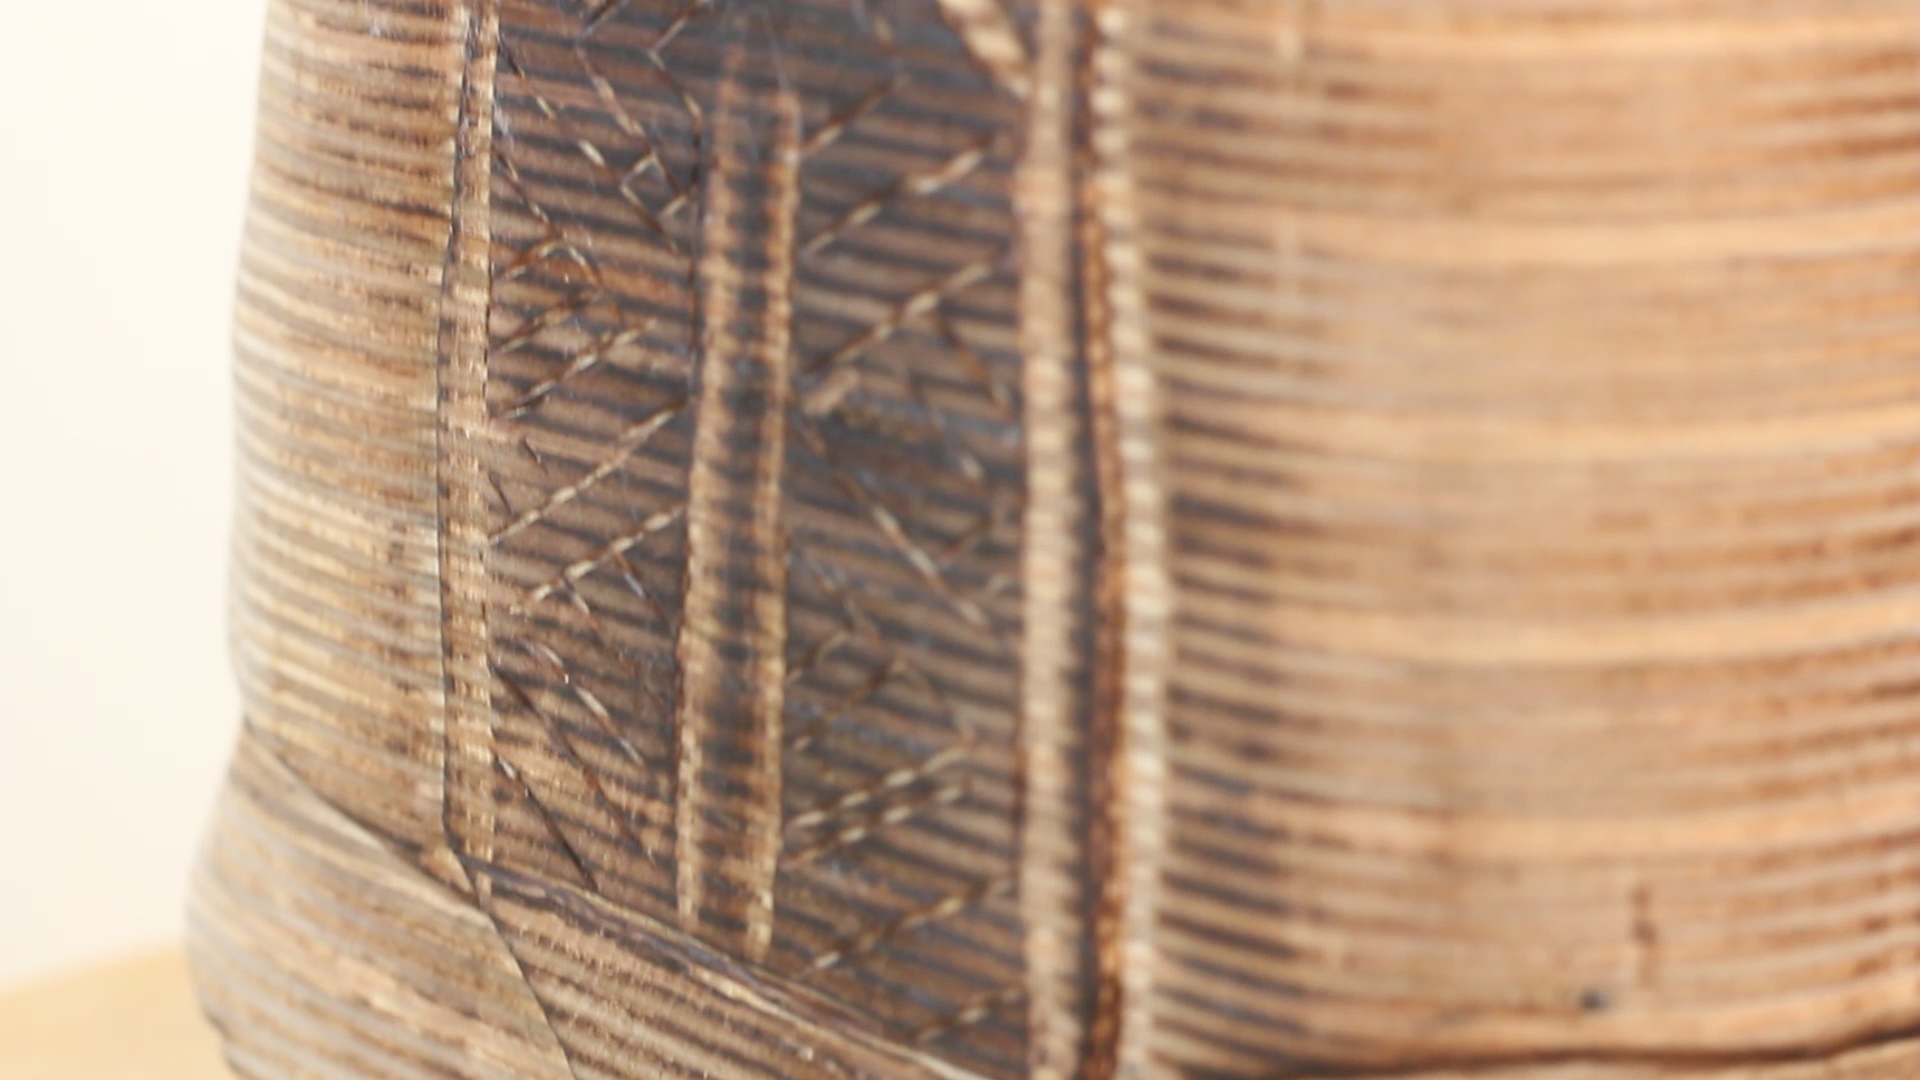
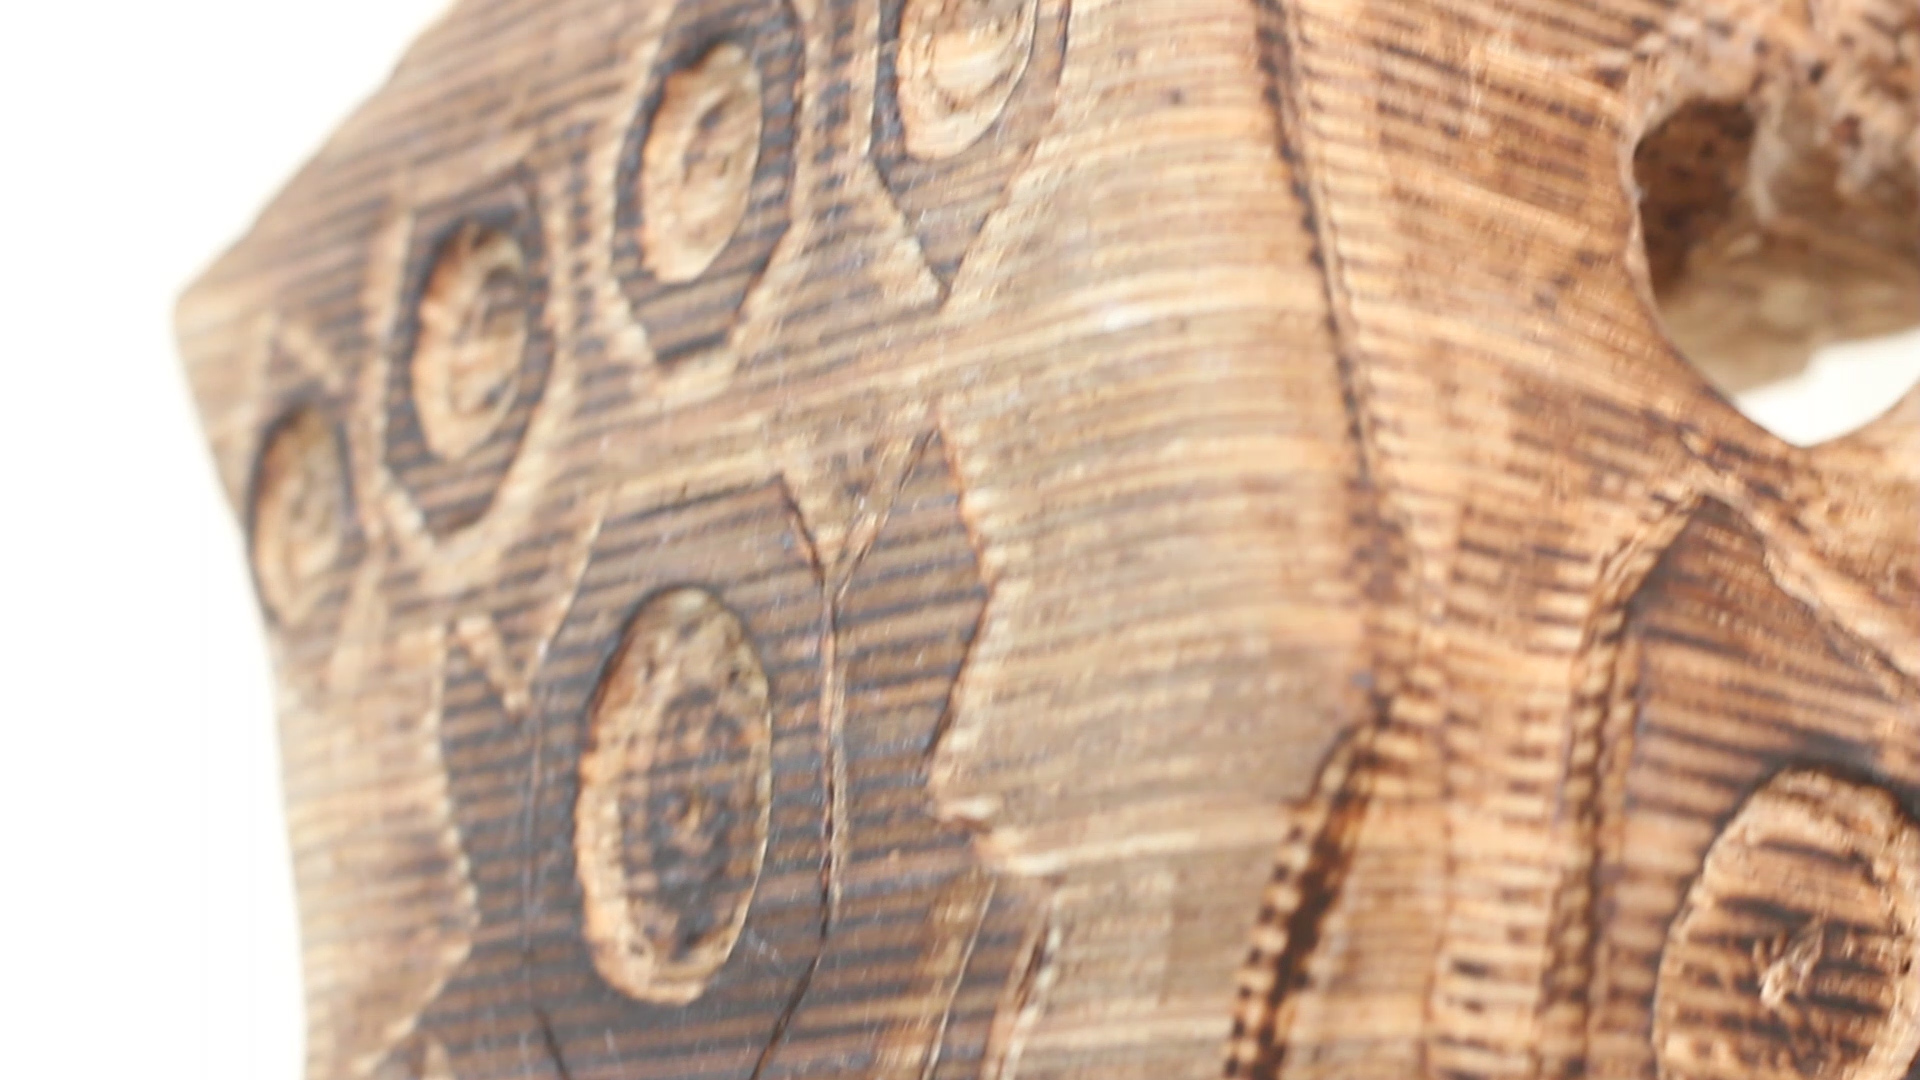
This included adding spaces where the stones go (Pics 1-2) using a forstner bit and rounded dremel bit, adding layered detailing around all the stones accurate in Pics 3 and 4 (somewhat) to the movie gauntlet, and then doing a final hand sanding to smooth everything over with some 400 grit paper (not pictured)
This took about 1.5 hours (again, just referencing photos a lot, taking my time, going back and forth to add more detail) - clearly I was a bit obsessed...


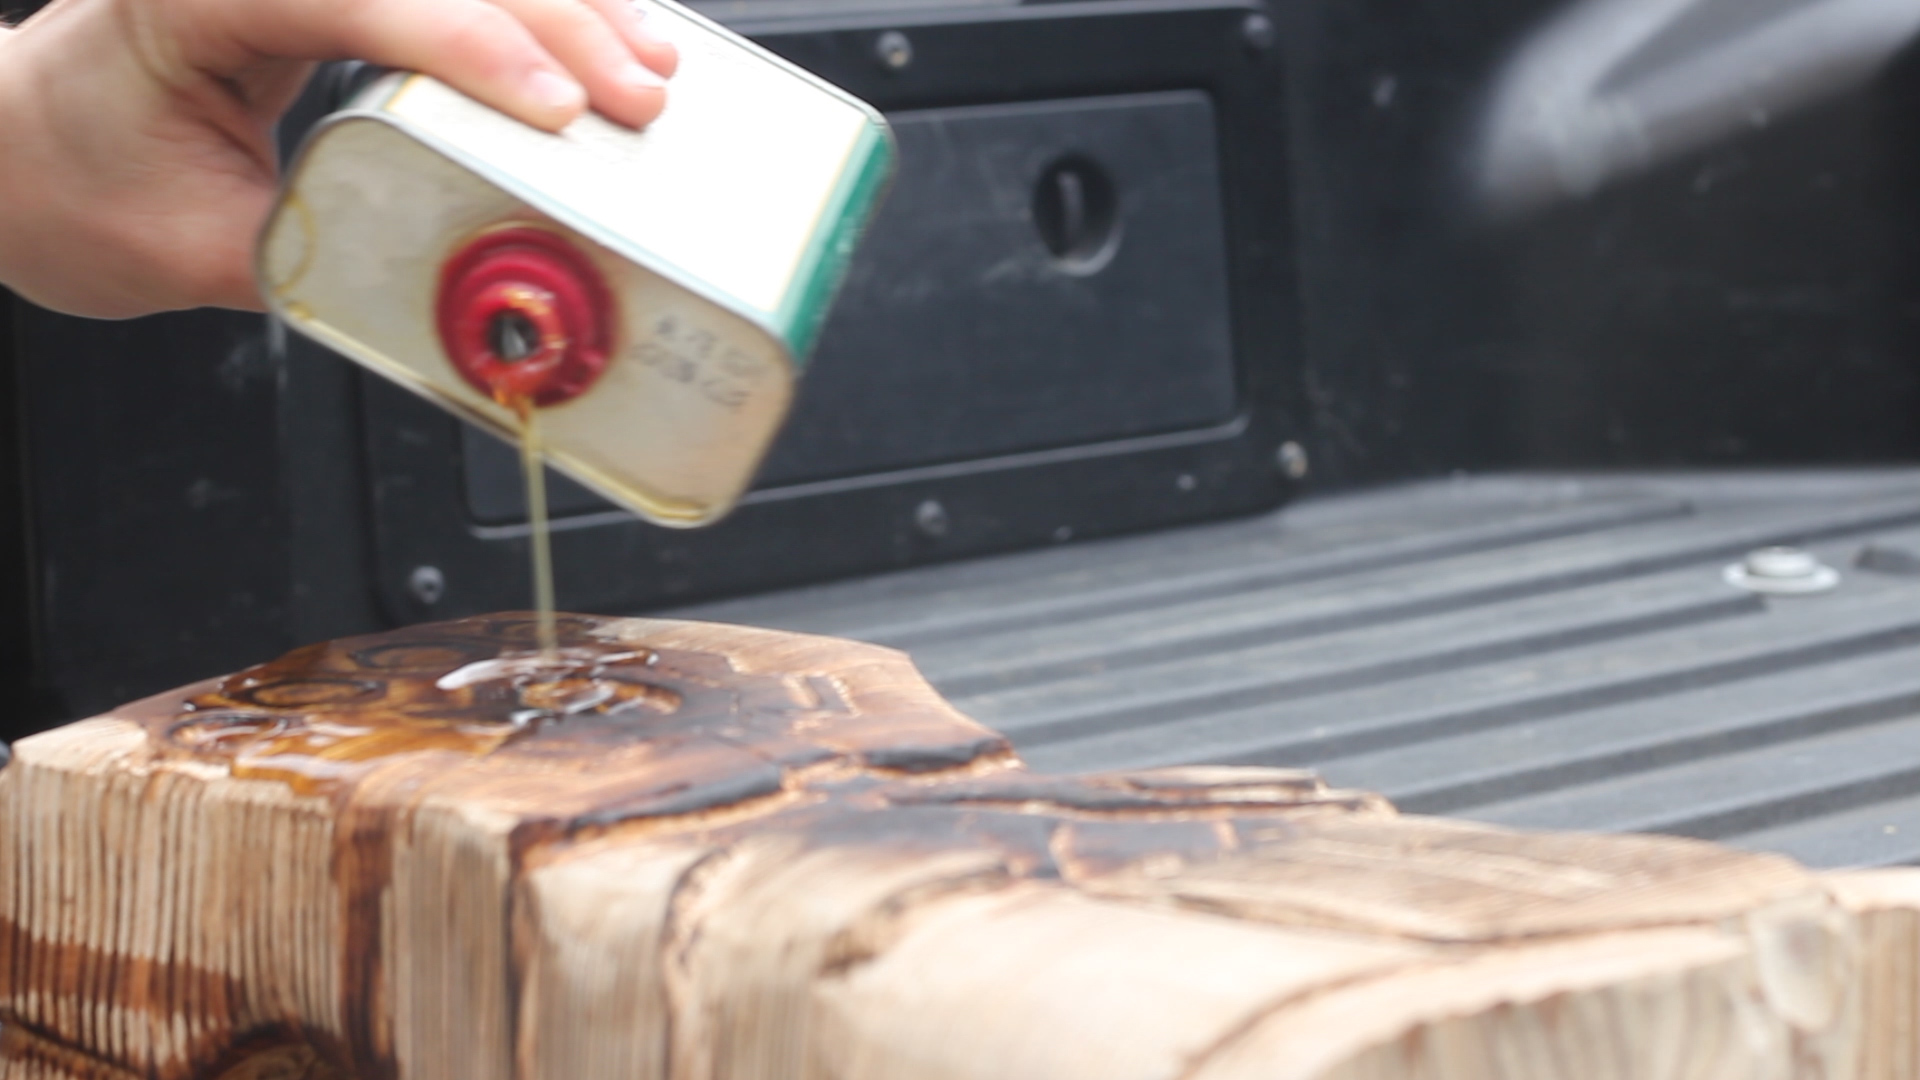
The strata look of stacked plywood turned out as cool as I hoped it would. I thought that burning the outside of the wood lightly could add a cool look to it (darken it to look more golden, burn the edges to add definition, and just spice it up). Pics 1-2 show me doing that, and Pic 3 shows how it came out. Not bad, right? Glad I did that!
NOTE - I did this outside, with extreme caution, and very lightly as to not set the entire project on fire!
To finish it, I applied a few coats of tung oil. In hindsight, maybe just doing a few coats of poly would work better (Pics 4-5). It looks great, but the poly would be cheaper, easier, and give a better clear-coat satin look. Pic 6 shows a not great up close photo.
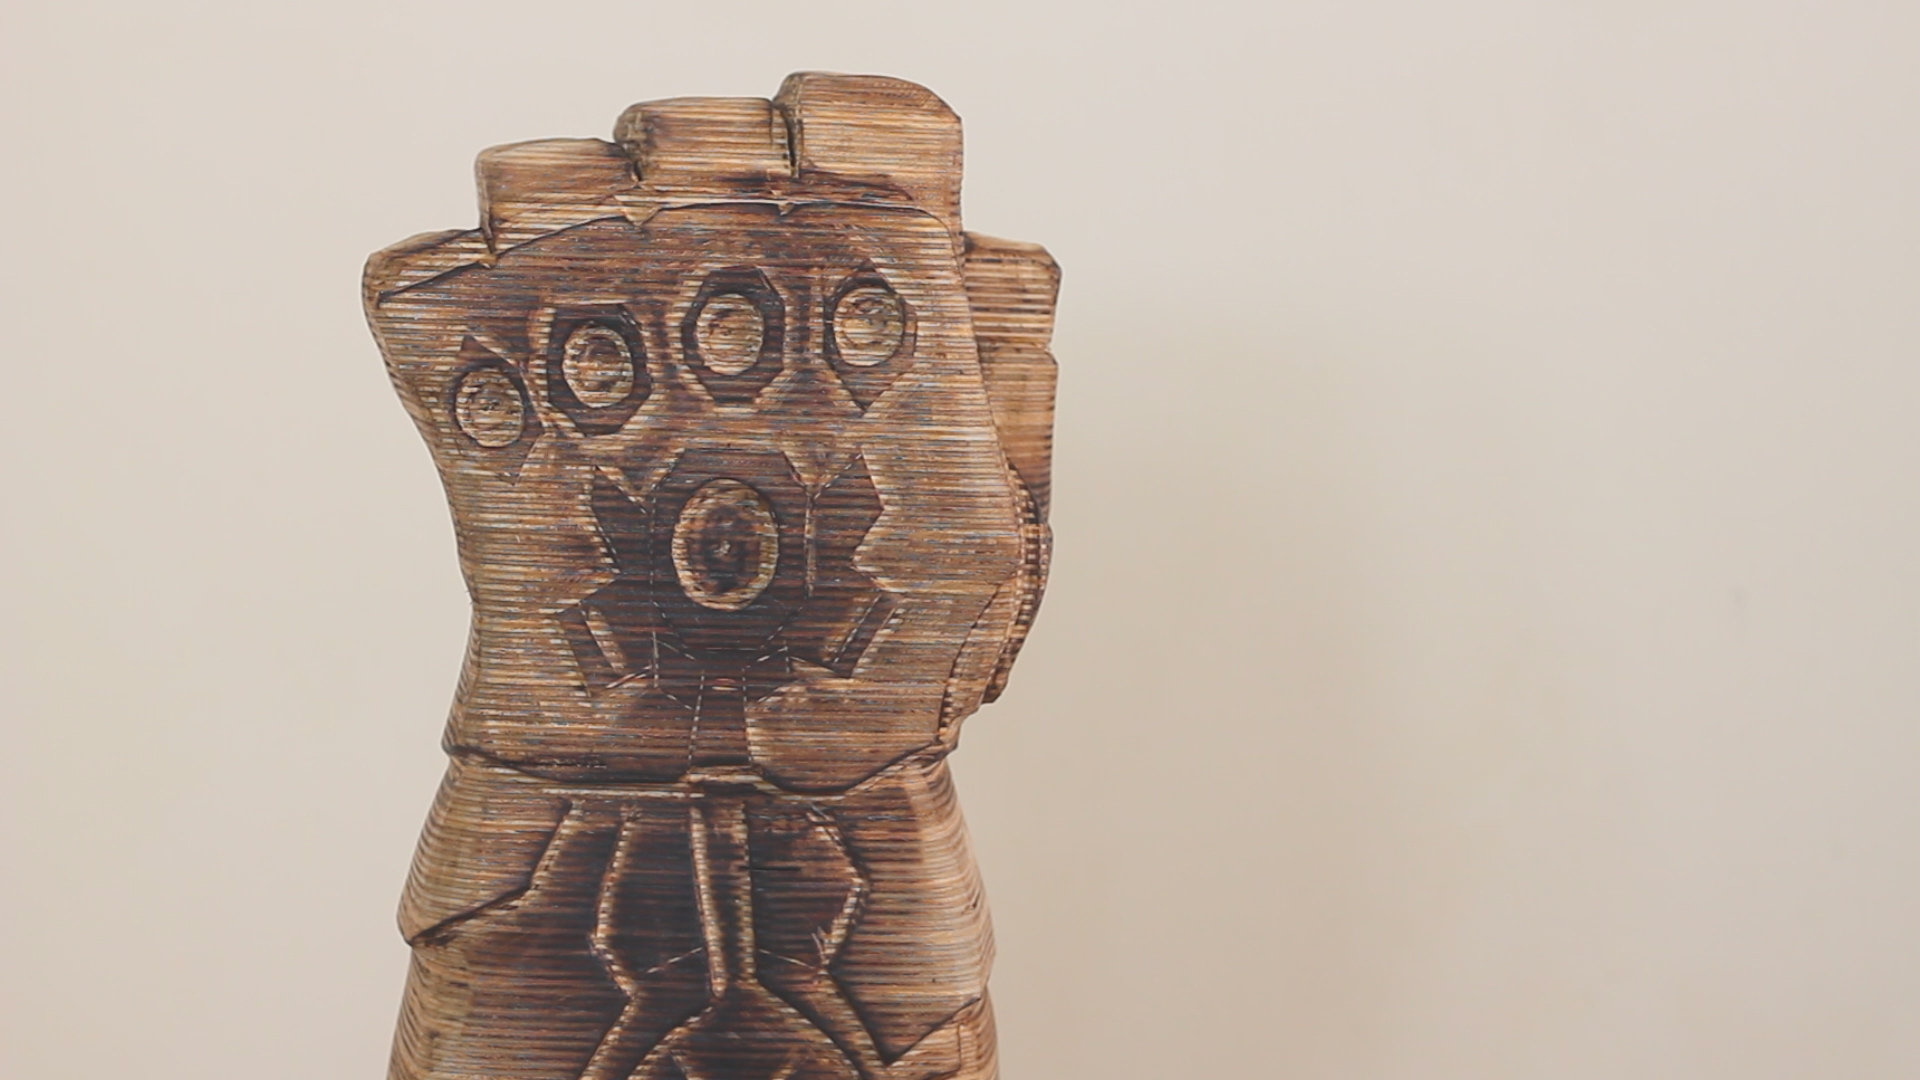
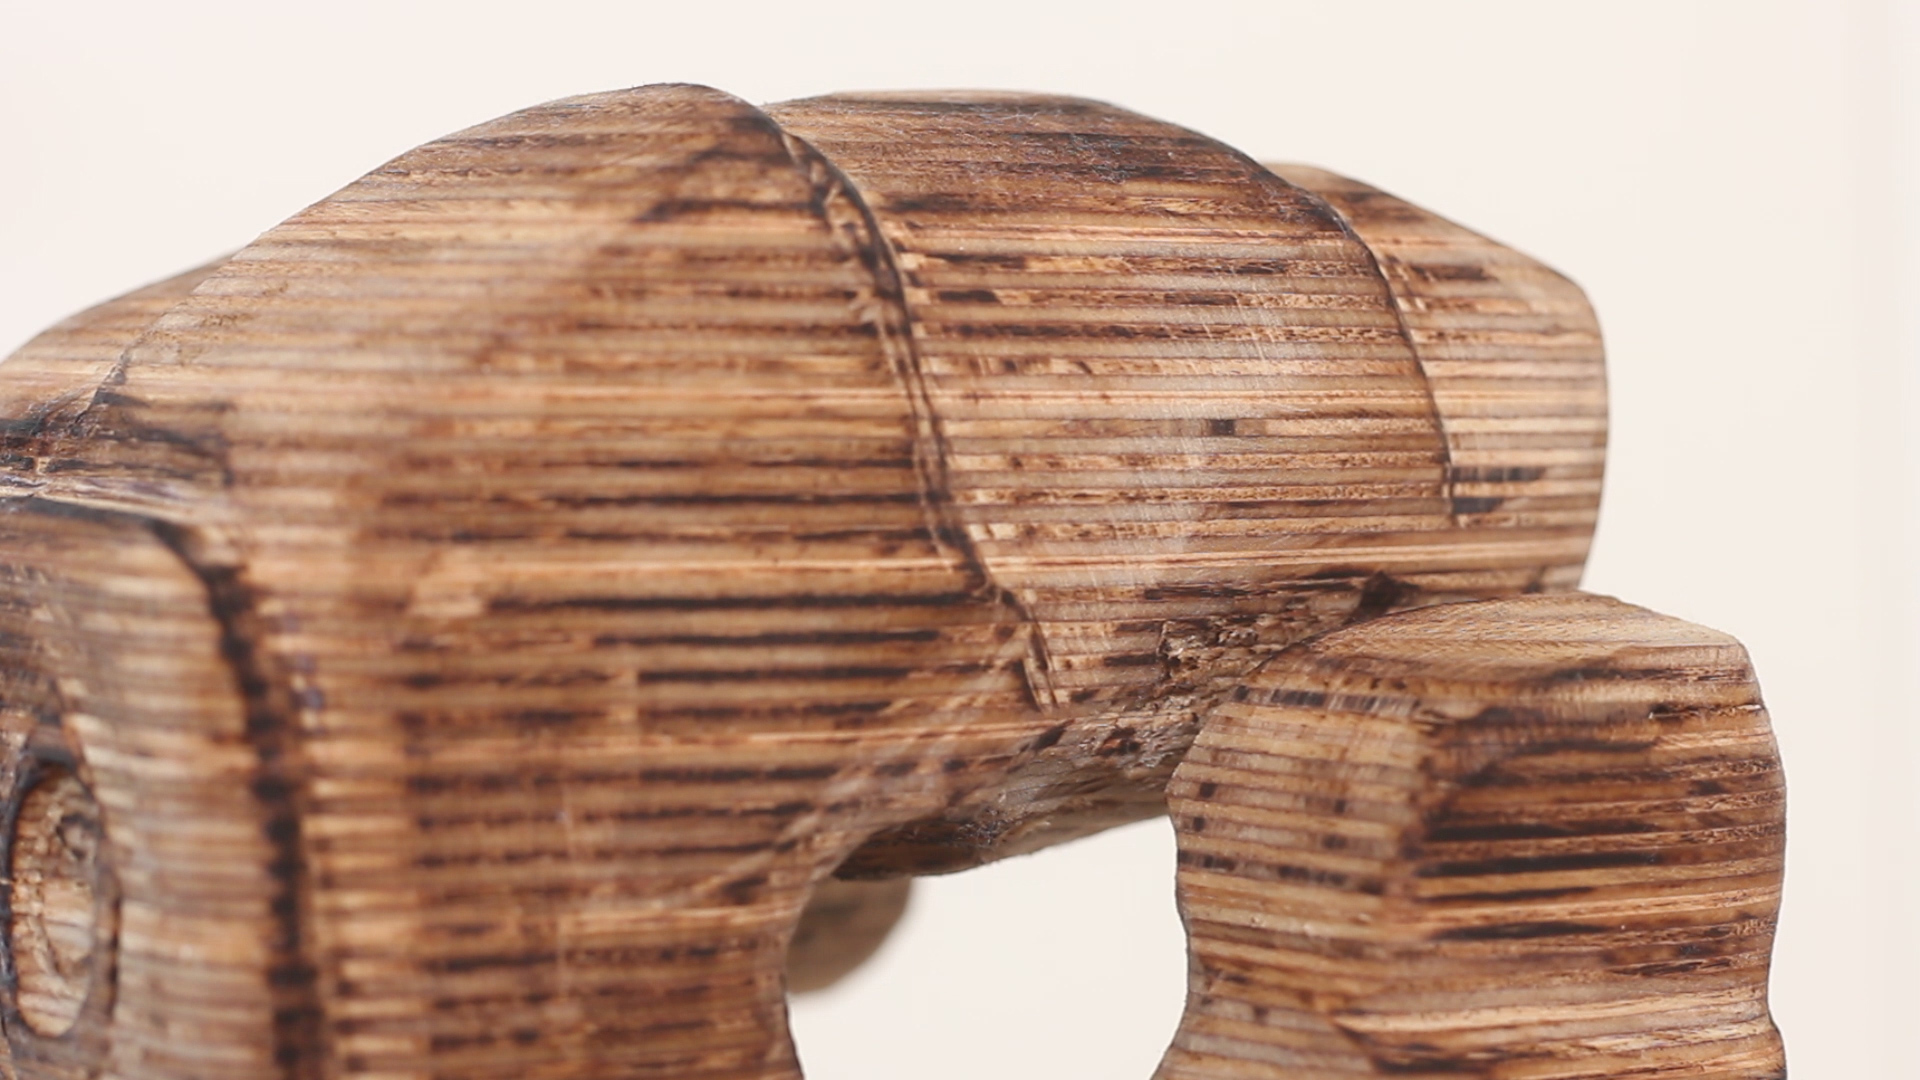
Above are a bunch of close up grabs of the final piece. Pretty cool, right? Not perfect, but nothing is - I'm happy with it, and it was fun to step outside my comfort zone and learn in the process.
POWER CARVING TOOLS
MAKITA 4.5” Angle Grinder: http://amzn.to/2q1xHmV
ARBORTECH TURBOPlane Blade: http://amzn.to/2phWNjF
Dremel Tool + Various Bits
Flap Discs: http://amzn.to/2pwnW35
TOOLS
RYOBI Circular Saw: http://amzn.to/2q1l5wn
RYOBI Power Drill: http://amzn.to/2q1l5wn
RYOBI 10 in. Sliding Compound Miter Saw: http://amzn.to/2q1klHw
RYOBI Miter Saw Stand: http://amzn.to/2p1072e
RYOBI Table Saw: http://amzn.to/2h6ZQc4
RYOBI Cordless Jigsaw: http://amzn.to/2p1bfvK
RIDGID 13” Thickness Planer: http://amzn.to/2u7YrmK
8 Piece Forstner Bit Set: http://amzn.to/2u7zAzk
IRWIN Squeeze Clamps: http://amzn.to/2F7Nj2A
ChainSaw
Sanding Sponges
Blow Torch
FILM / EDIT EQUIPMENT
Canon Rebel EOS T2i: http://amzn.to/2pwwlDI
Main Lens: Canon EF 50mm f/1.8 STM Lens: http://amzn.to/2zt0jK
Secondary Lens: Canon EF-S 18-55mm f/3.5-5.6 IS II Lens: http://amzn.to/2pwmuh
US CAMEL Tripod: http://amzn.to/2hbbVd
Blue Snowball Mic (VO Recording): http://amzn.to/2hd92sF
Studio Lighting Equipment: http://amzn.to/2rtrkg
As always, thank you for reading! I would be so grateful if you could please subscribe to my Youtube Channel for future projects.
I put out videos every few weeks.
Cheers!
Zach