THANKS FOR CHECKING OUT THE FULL ARTICLE!
PLEASE SUBSCRIBE TO OUR YOUTUBE CHANNEL BY CLICKING HERE.
My full video of the build is below, followed by detailed instructions with tools, materials, and measurements!
I have a gooseneck tea kettle we use for making coffee-pour overs. It works great, but it is very basic. I felt like making it a little bit better (12% to be exact). Hope you enjoy this little fun project. I obviously made mine a bit more complicated by using multiple woods, etc, but you can do it quite easily with just a single piece.
I went all out on this one, using pretty much everything I had in my arsenal to make something so simple. I'm sure there are easier ways to do it (no planer, no band saw, no router), but I did it this way. I leave it to you to figure out the best method to up-cycle your equipment!
MATERIALS
Scrap Walnut and Maple woods
TiteBond II Wood Glue: http://amzn.to/2peRFus
Mineral Oil: http://amzn.to/2p1hu2N
TOOLS
RIDGID 13” Thickness Planer: http://amzn.to/2u7YrmK
RYOBI 10 in. Sliding Compound Miter Saw: http://amzn.to/2q1klHw
RYOBI Miter Saw Stand: http://amzn.to/2p1072e
RYOBI Power Drill: http://amzn.to/2q1l5wn
RYOBI Stationary Bench Sander: http://amzn.to/2q1Cq8k
RYOBI Band Saw: http://amzn.to/2rYzJF8
BESSEY 2.5” x 12” Clamps: http://amzn.to/2oIJGVy
Digital Caliper: http://amzn.to/2p360xg
Vice Clamp: http://amzn.to/2q1GfKO
RYOBI Drill Bit Set: http://amzn.to/2oKKWXi
RYOBI Router Set: http://amzn.to/2pwx87Z
Hand Sanding Sponges: http://amzn.to/2oHa6pP
FILM / AUDIO EQUIPMENT
Canon Rebel EOS T2i: http://amzn.to/2pwwlDI
Canon EF-S 18-55mm f/3.5-5.6 IS II Lens: http://amzn.to/2pwmuhi
H4N Zoom Mic (VO Recording): http://amzn.to/2uMeVWL
Studio Lighting Equipment: http://amzn.to/2rtrkg0
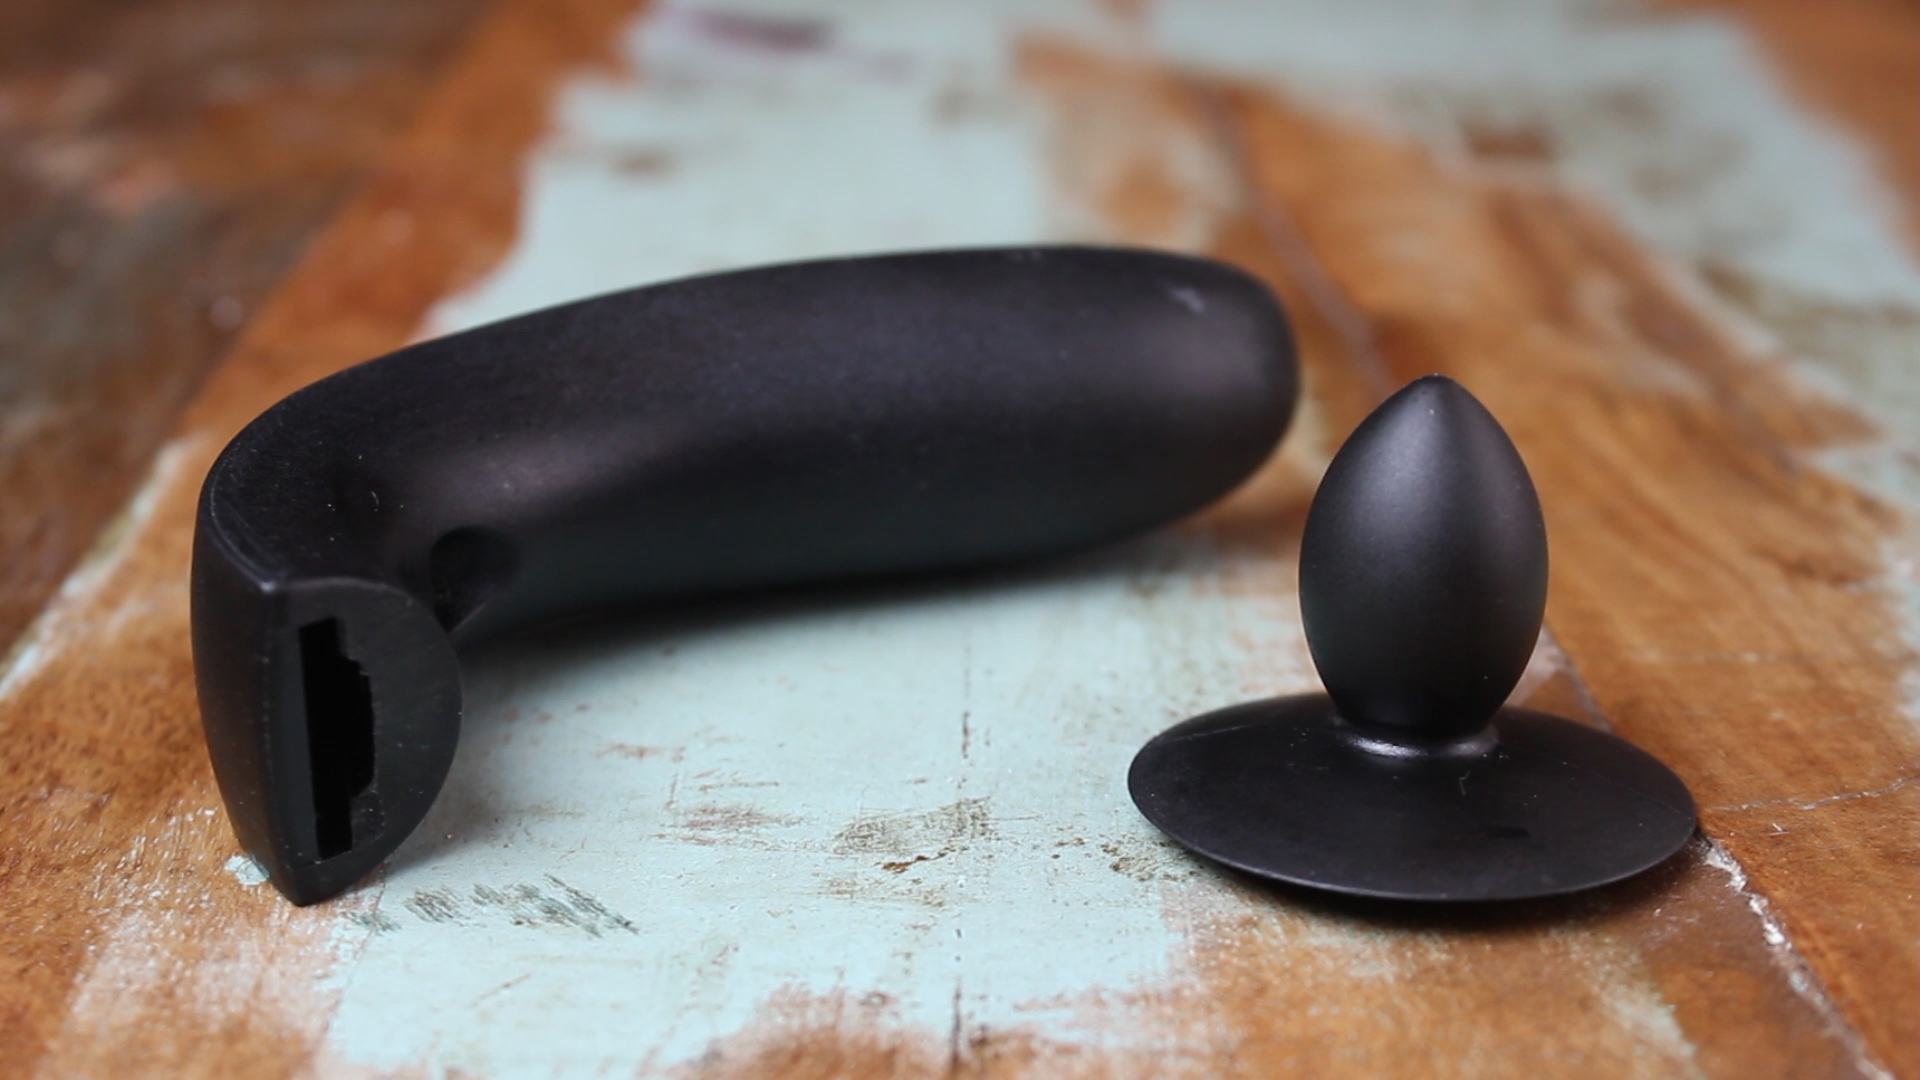
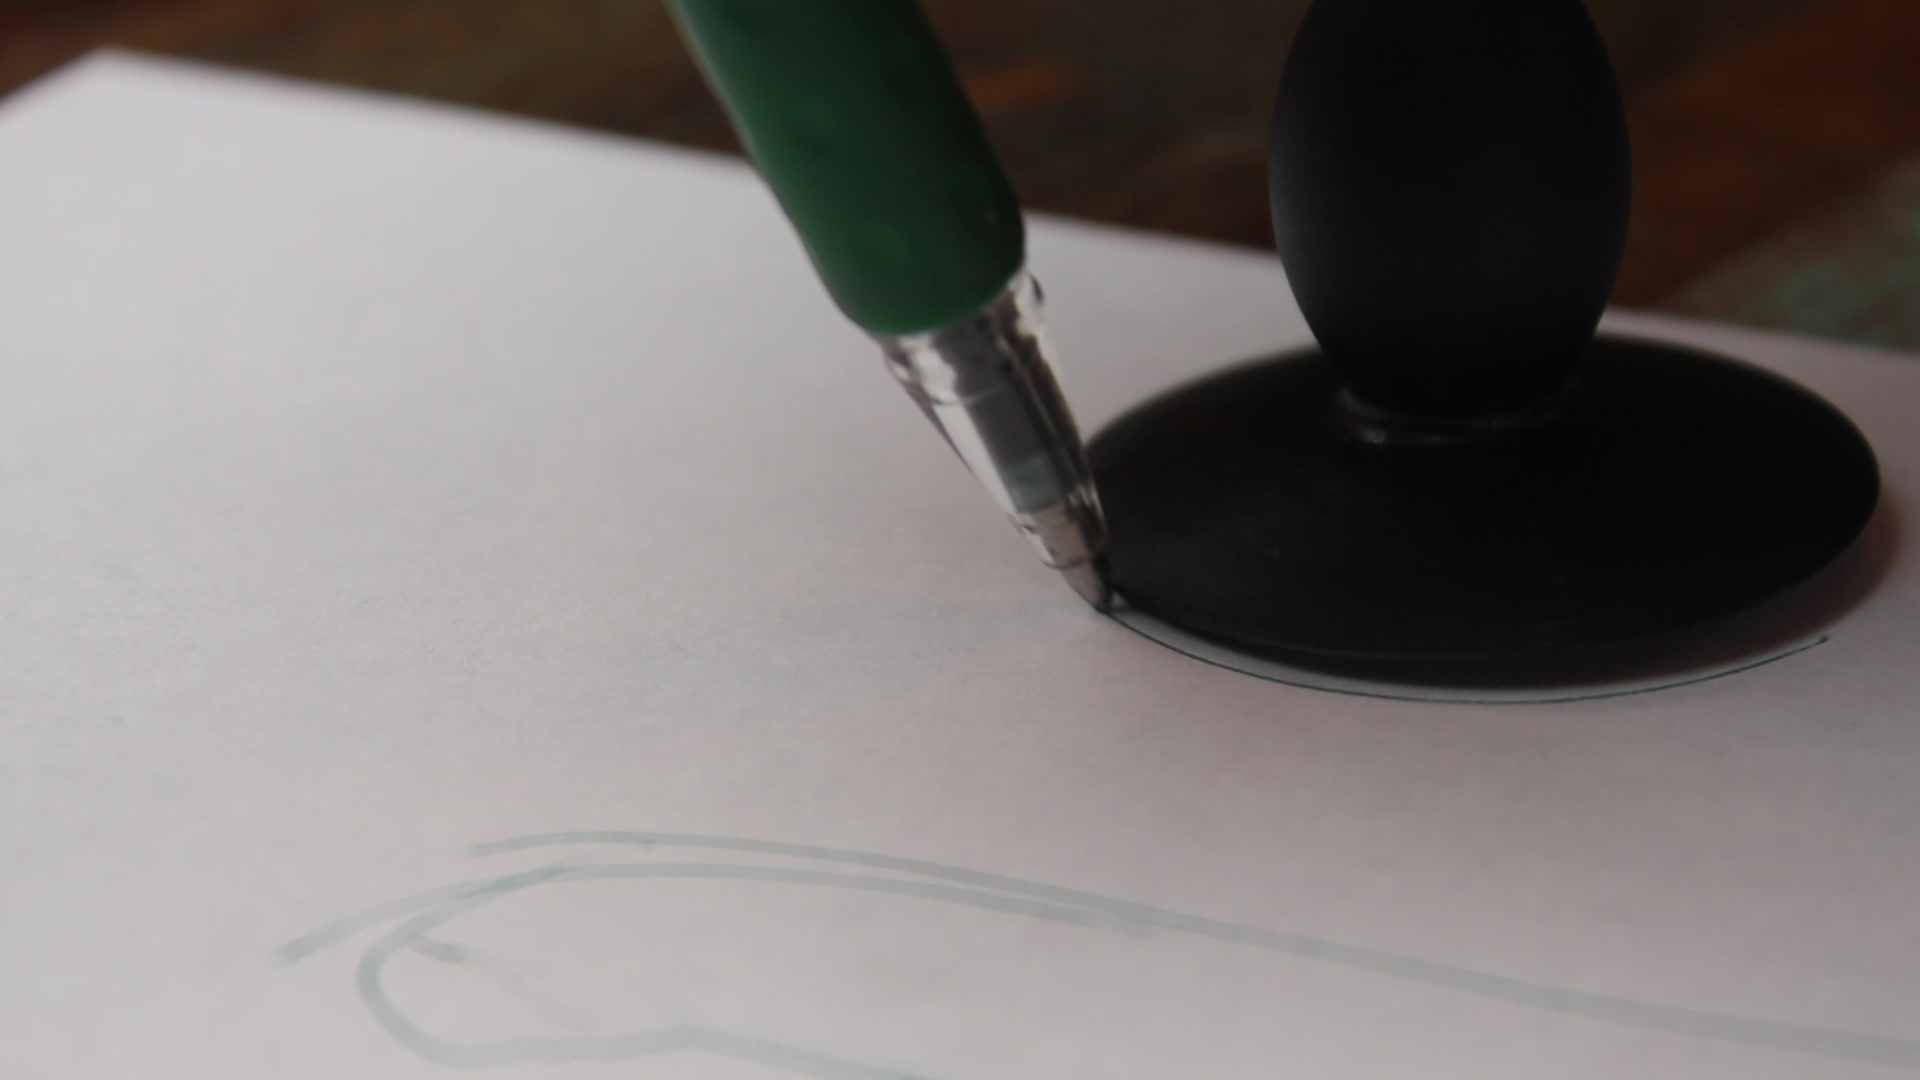
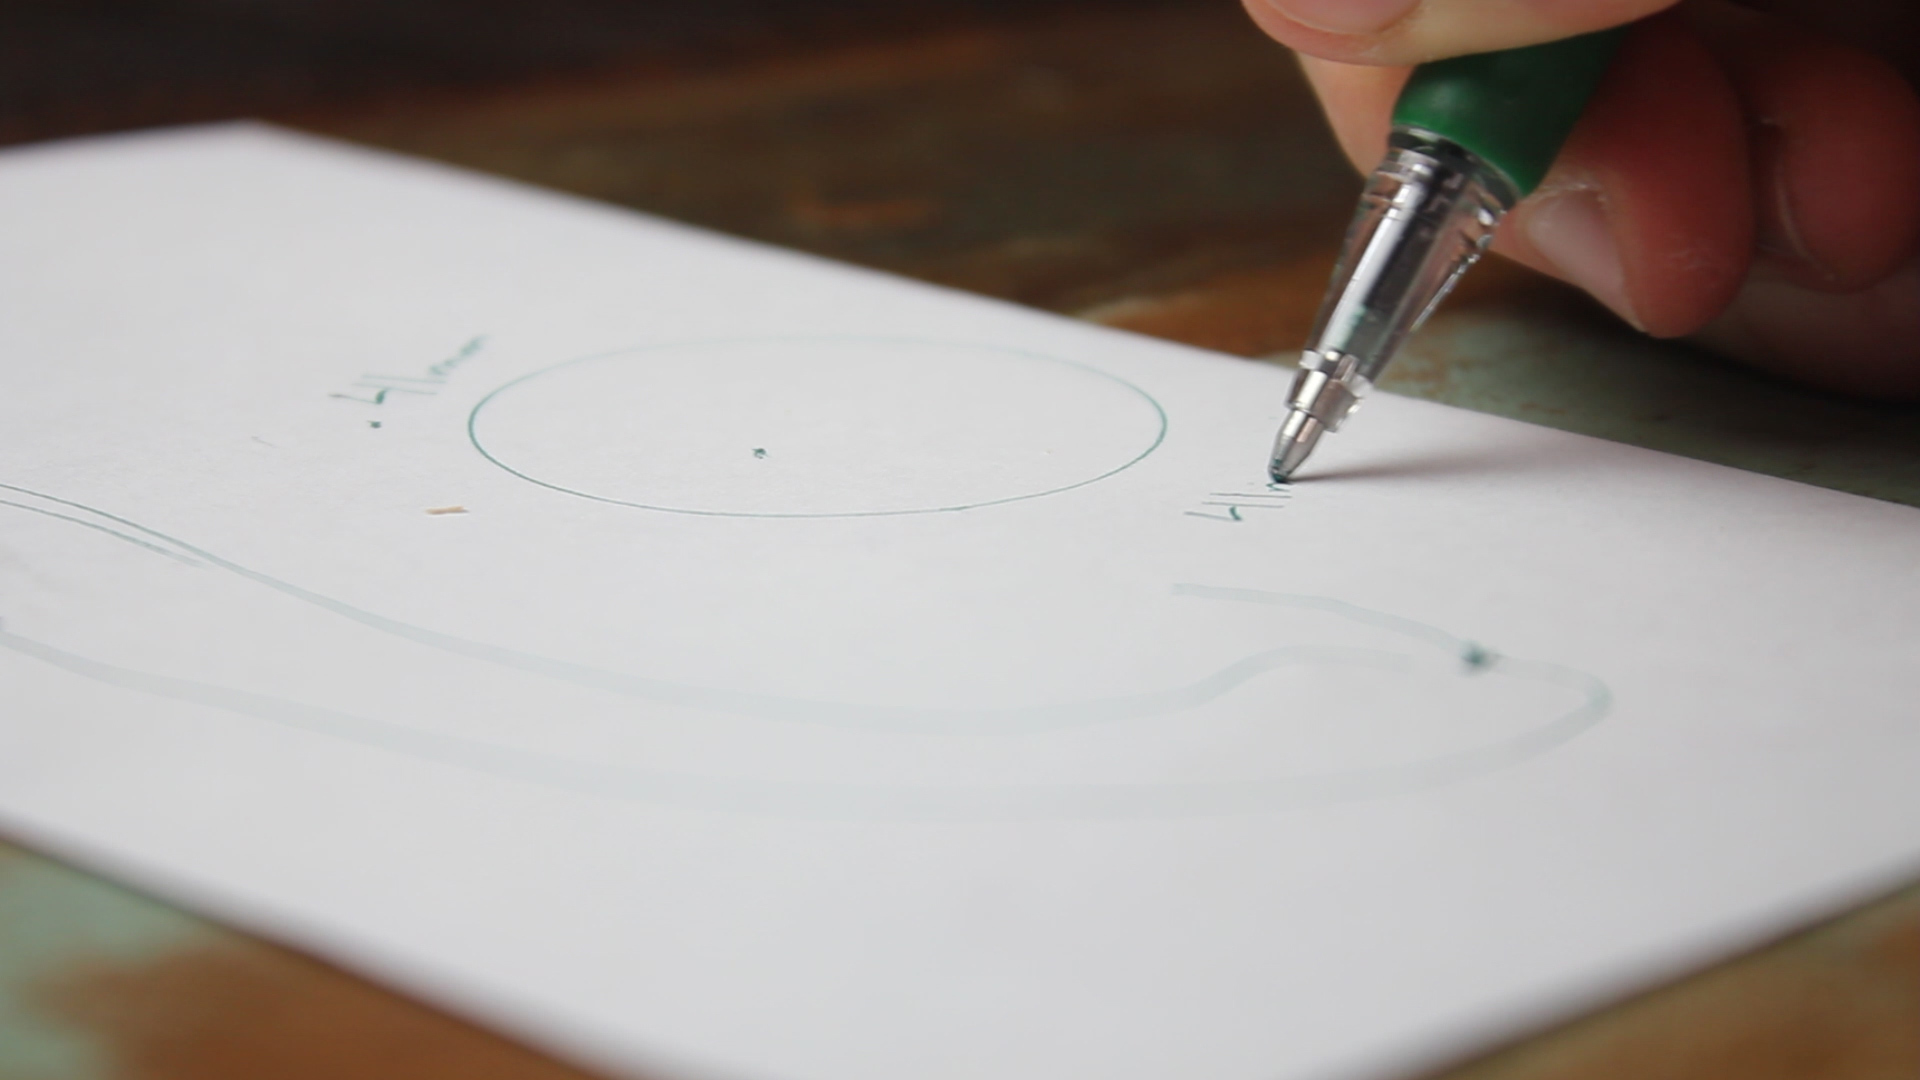
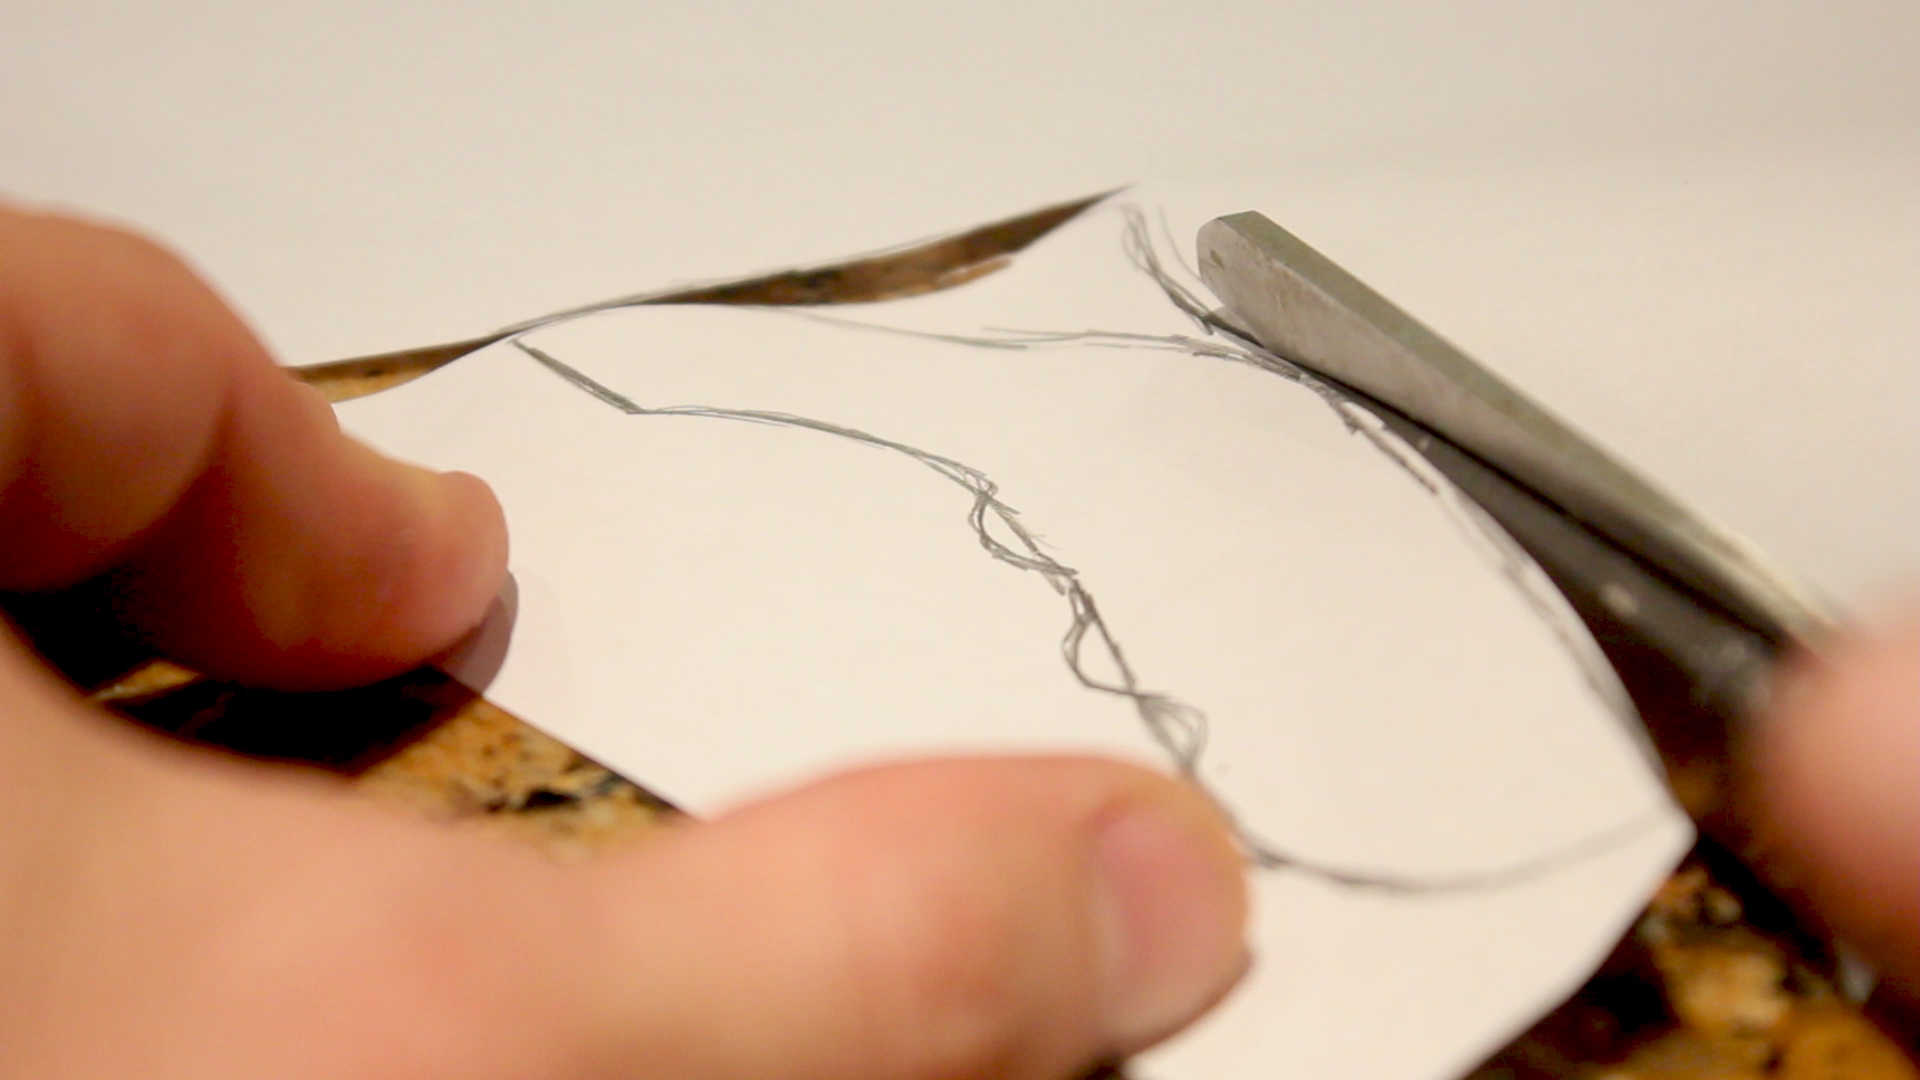
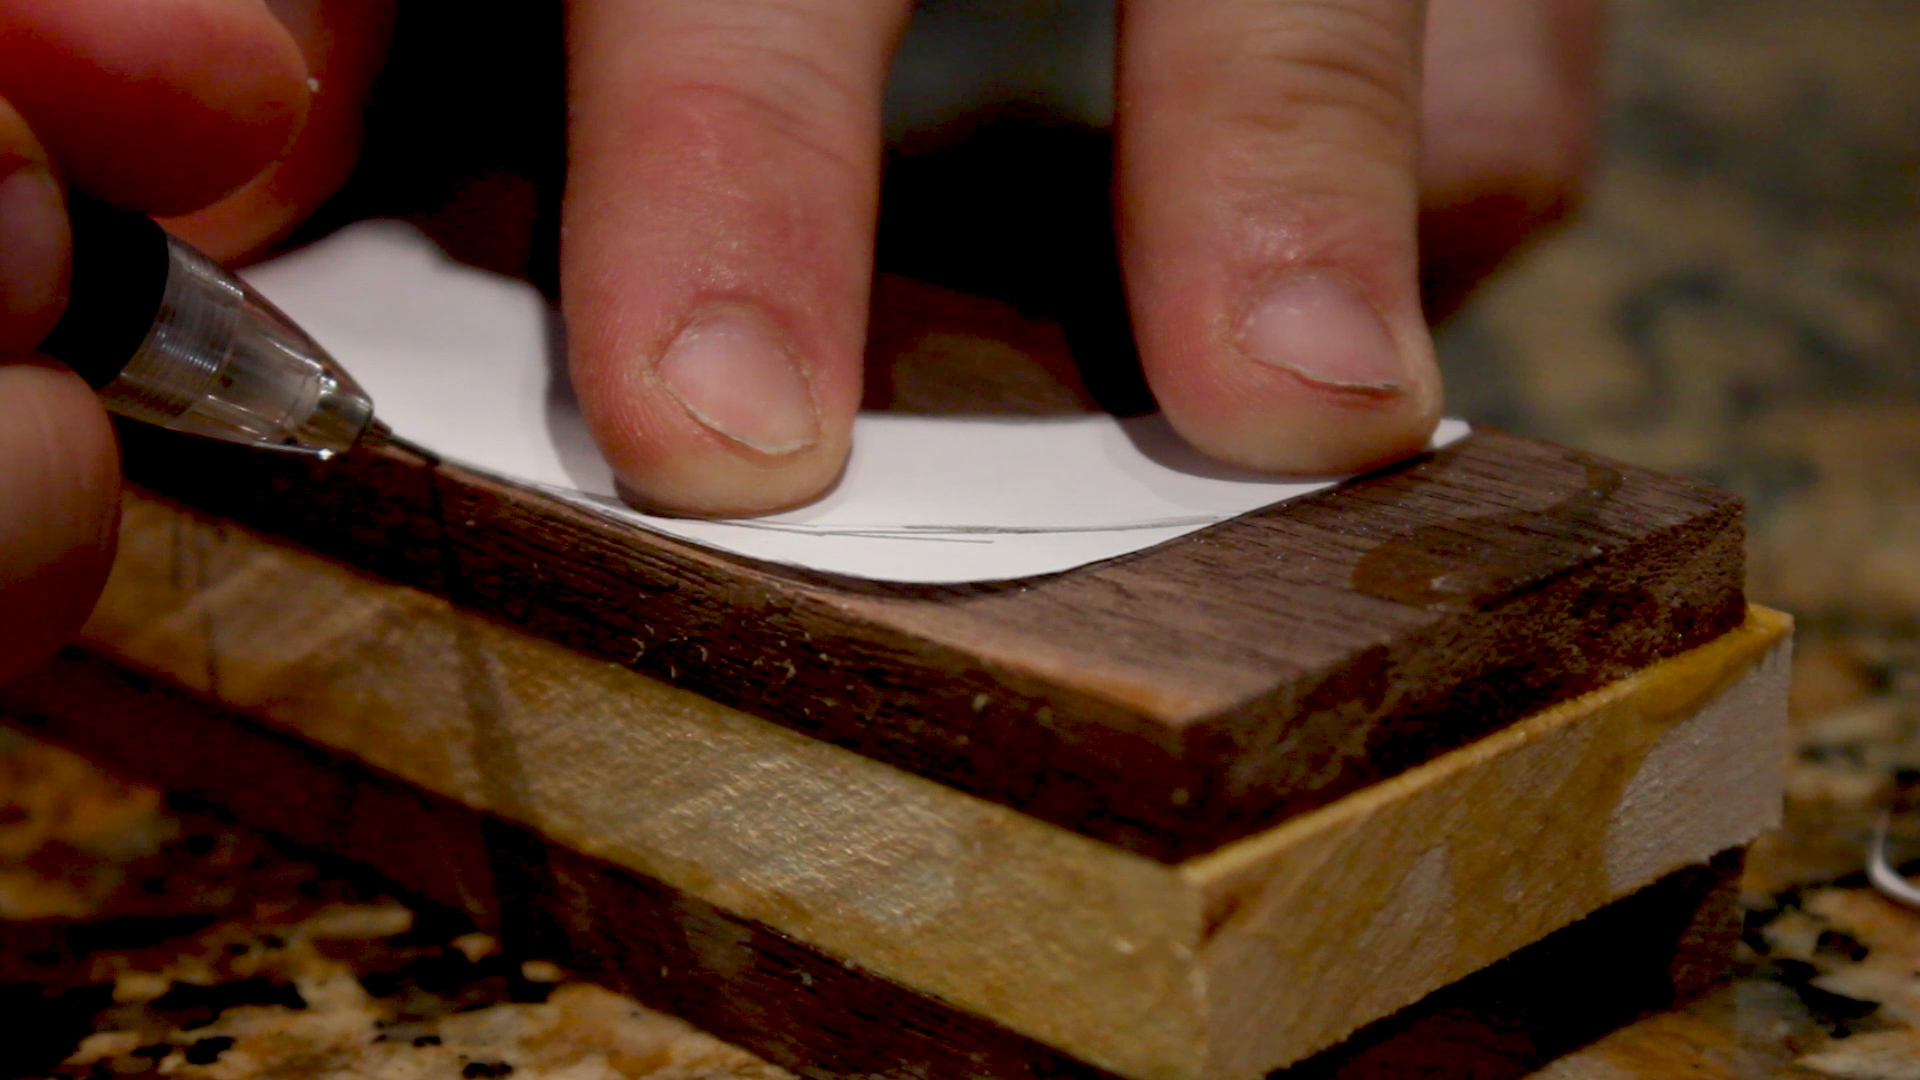
I removed the two components I'd be replacing using just a screwdriver (Picture 1). I then traced (Picture 2) both components and took super detailed measurements just to have on hand (Picture 3) using various measuring tools (digital caliper, tape measure, etc.). These measurements were helpful in planning my scrap material search.
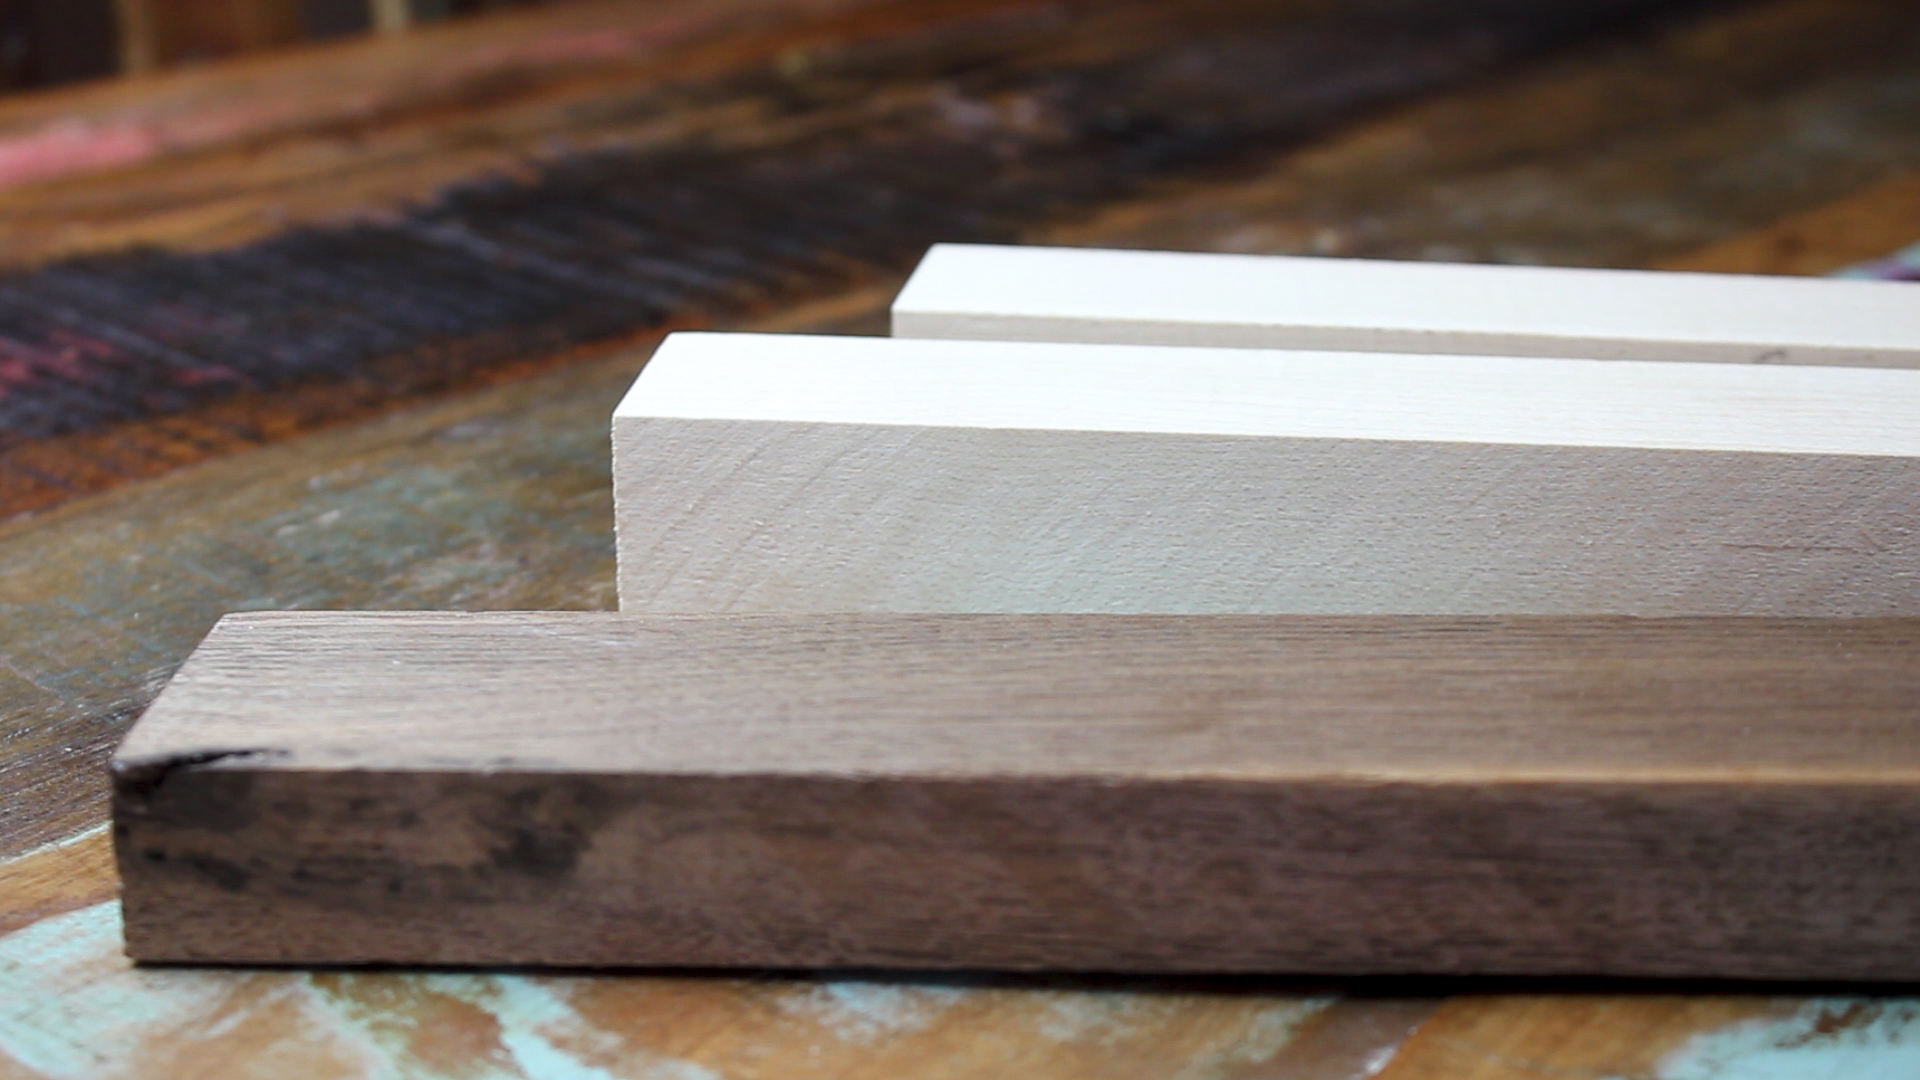

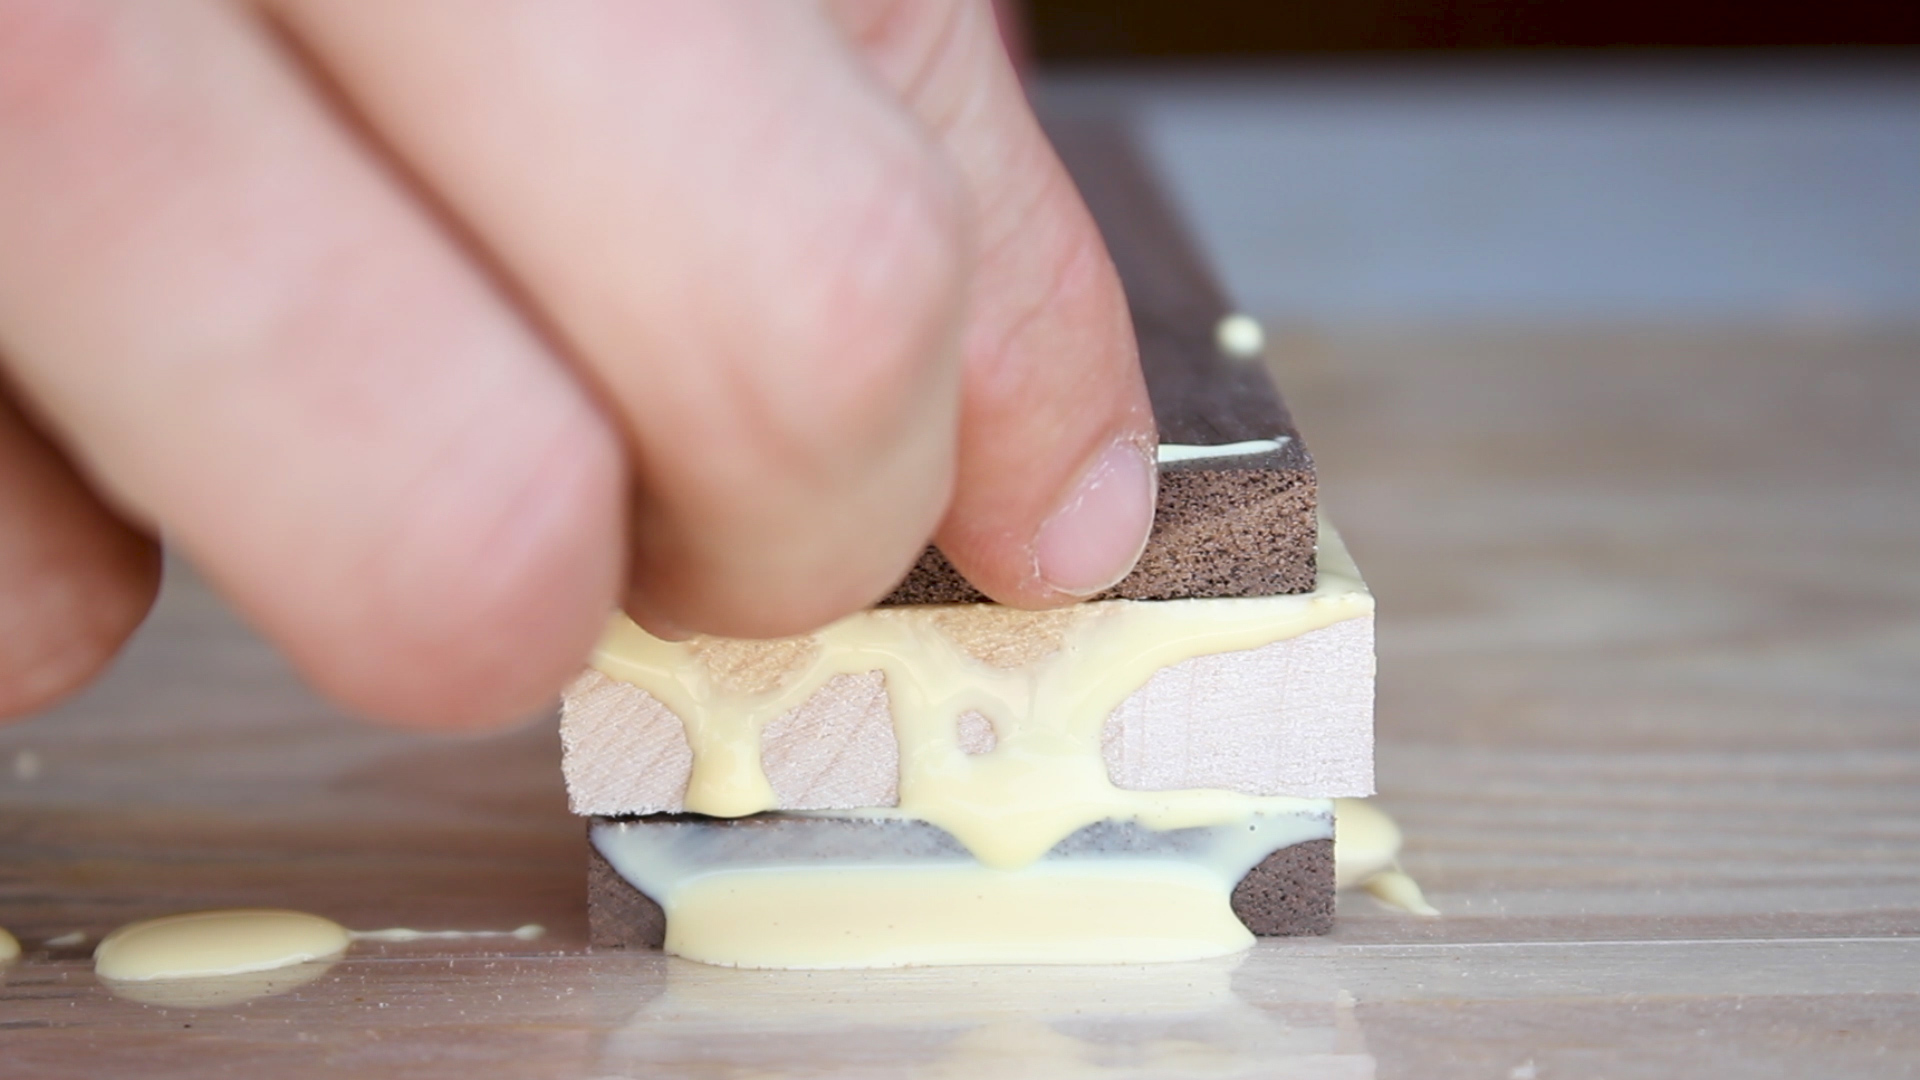
I had walnut and maple laying around (Picture 1). My maple was not wide enough to match my walnut, so I glued up / laminated (Picture 2) and clamped up (Picture 3) to pieces to let dry overnight.
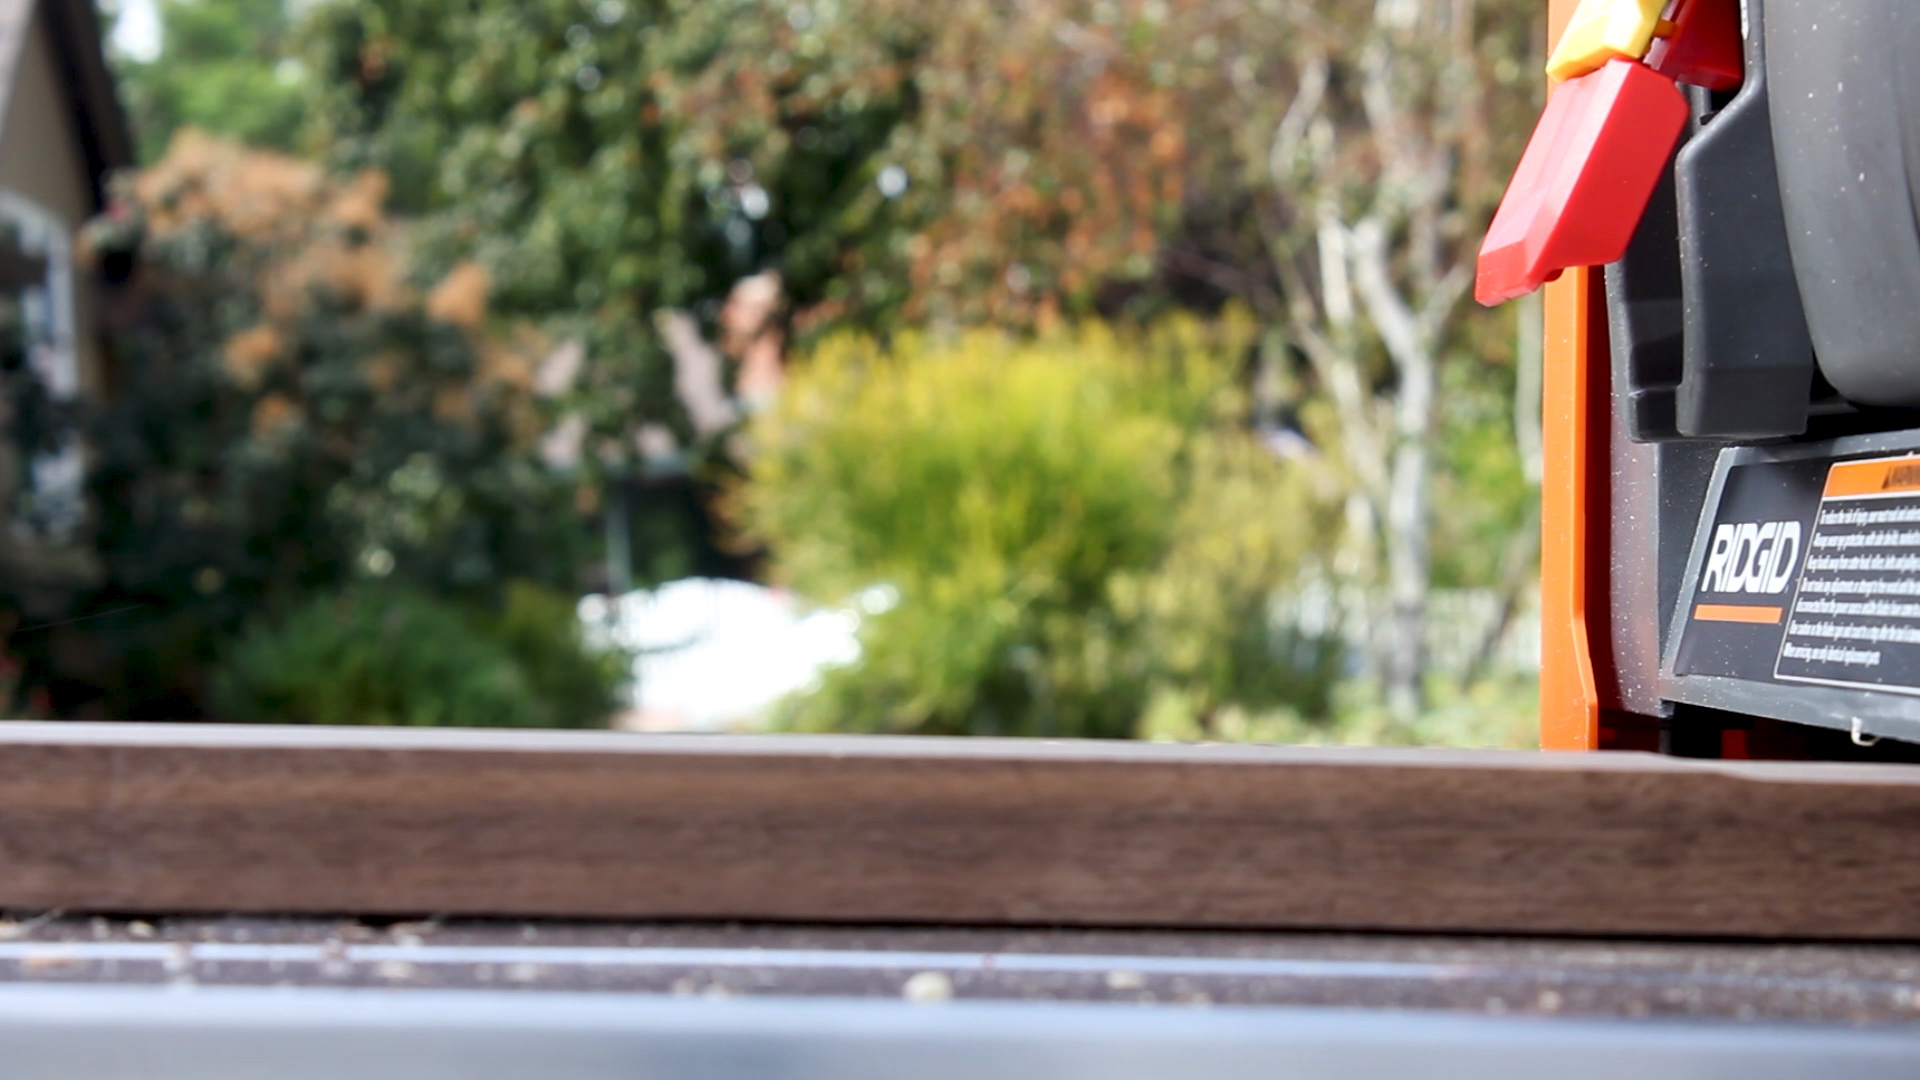
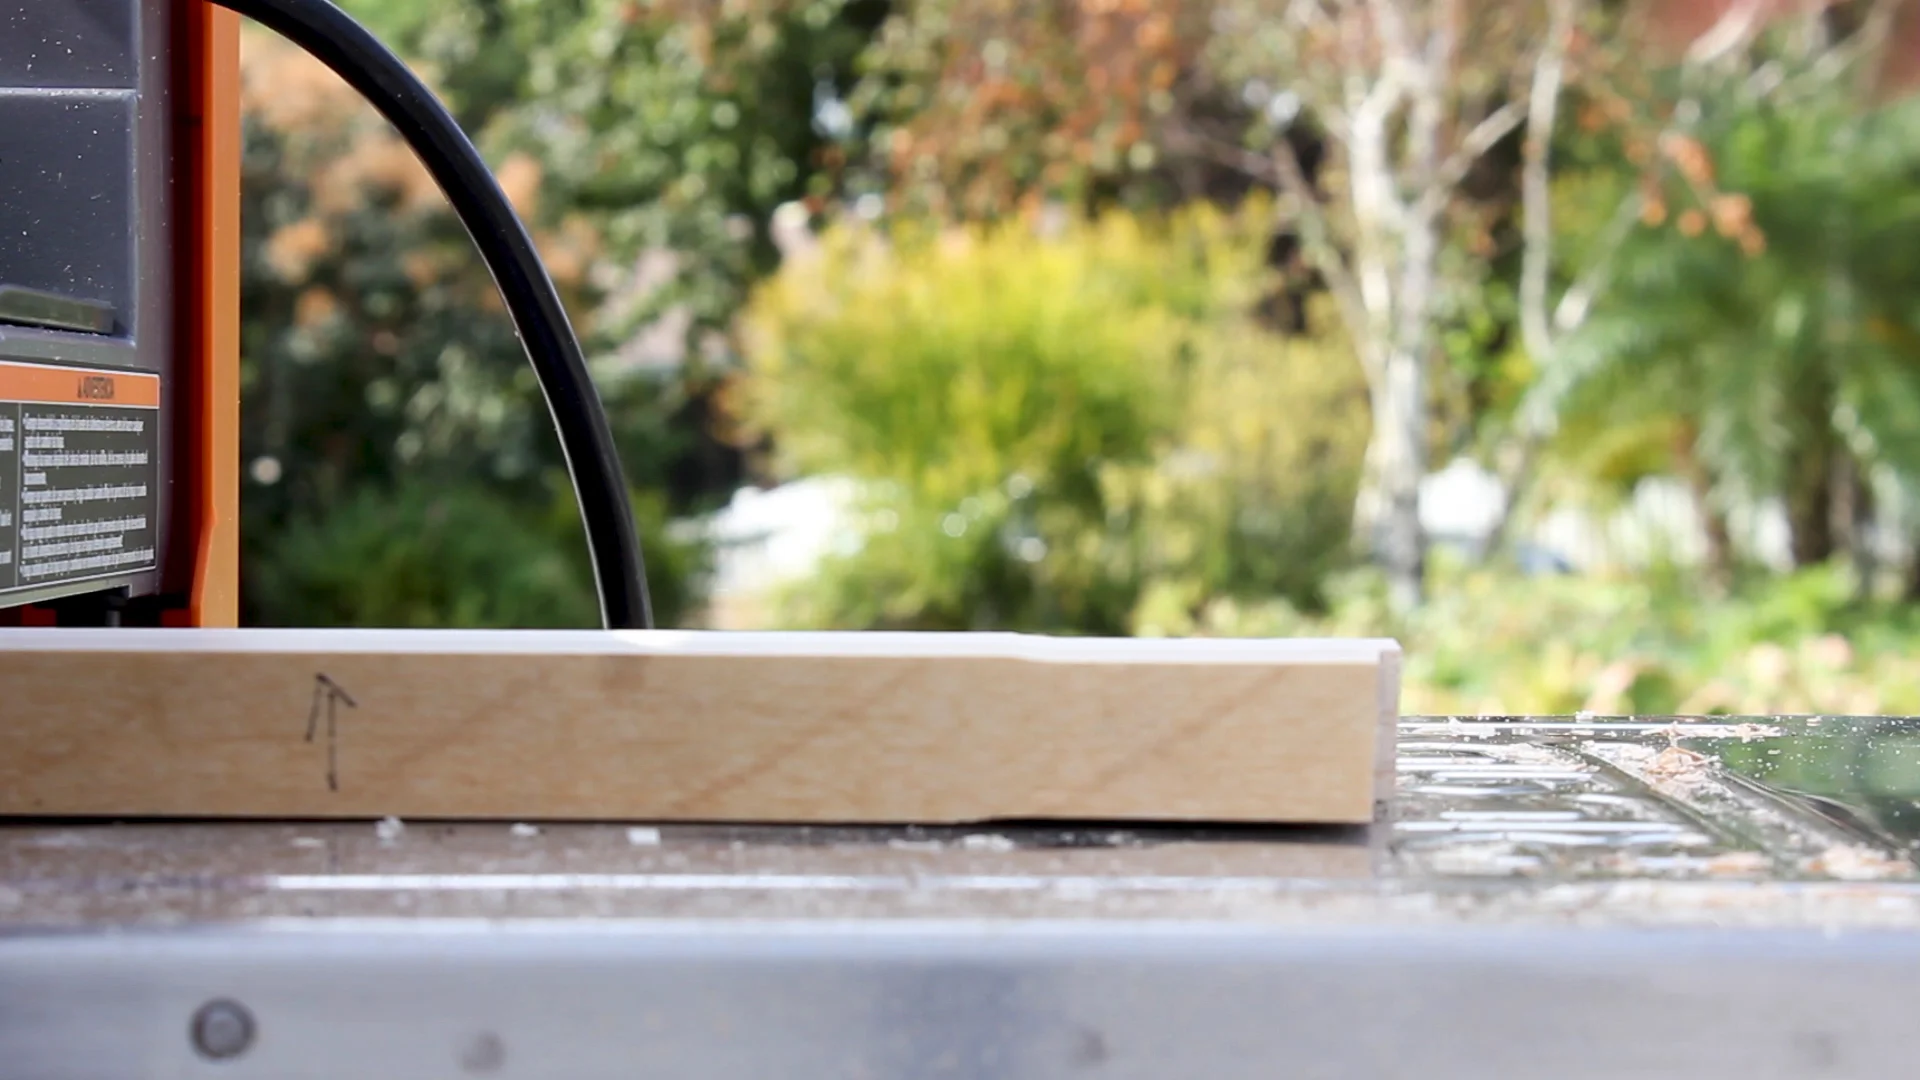
The next day, I planed down the walnut strip to about .25" (Pictures 4 - 5) and the maple strip to about .50" (Picture 6). This was all based on a design I had in mind. If you're not gluing up anything, etc. and it is just a solid piece, you'l want to have clean scraps that will fit the size of whatever you're replacing.
Also, note the snipe in Pic 6 - still working out the kinks on my new planer.
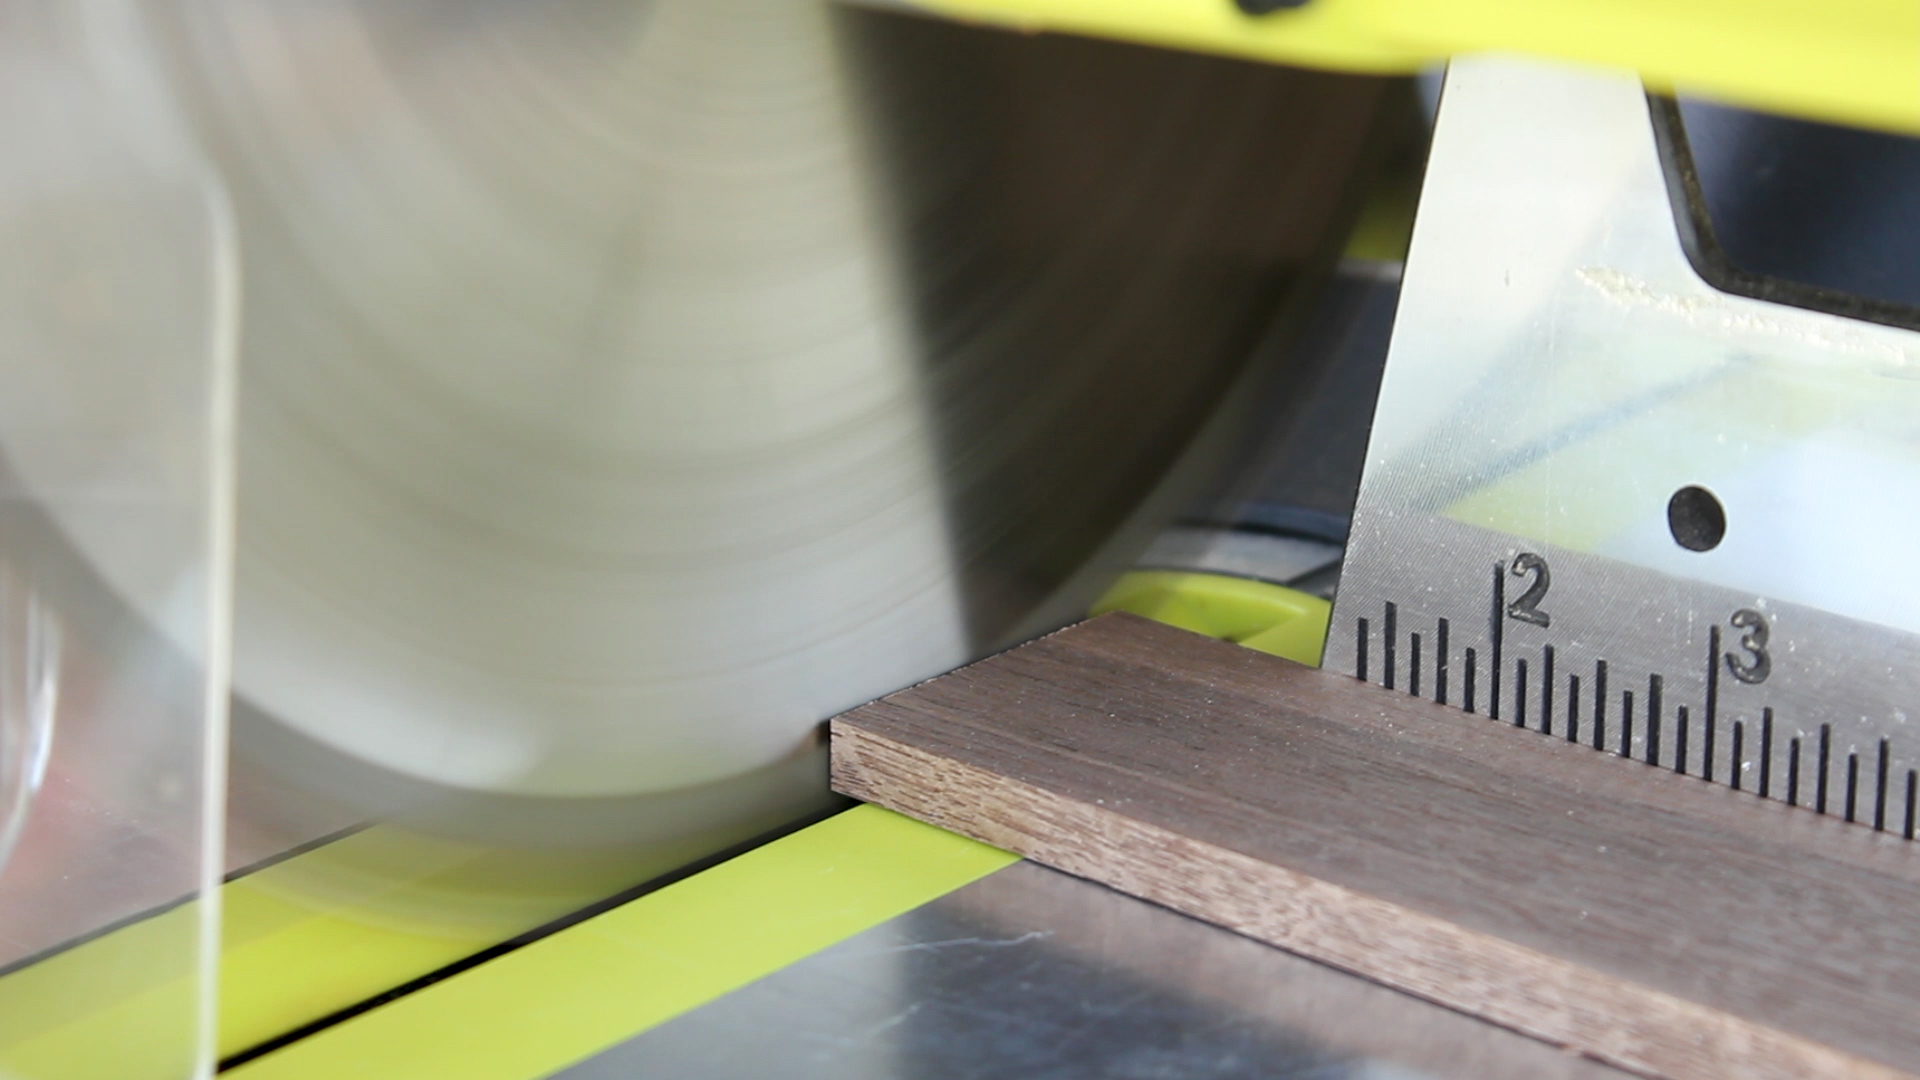
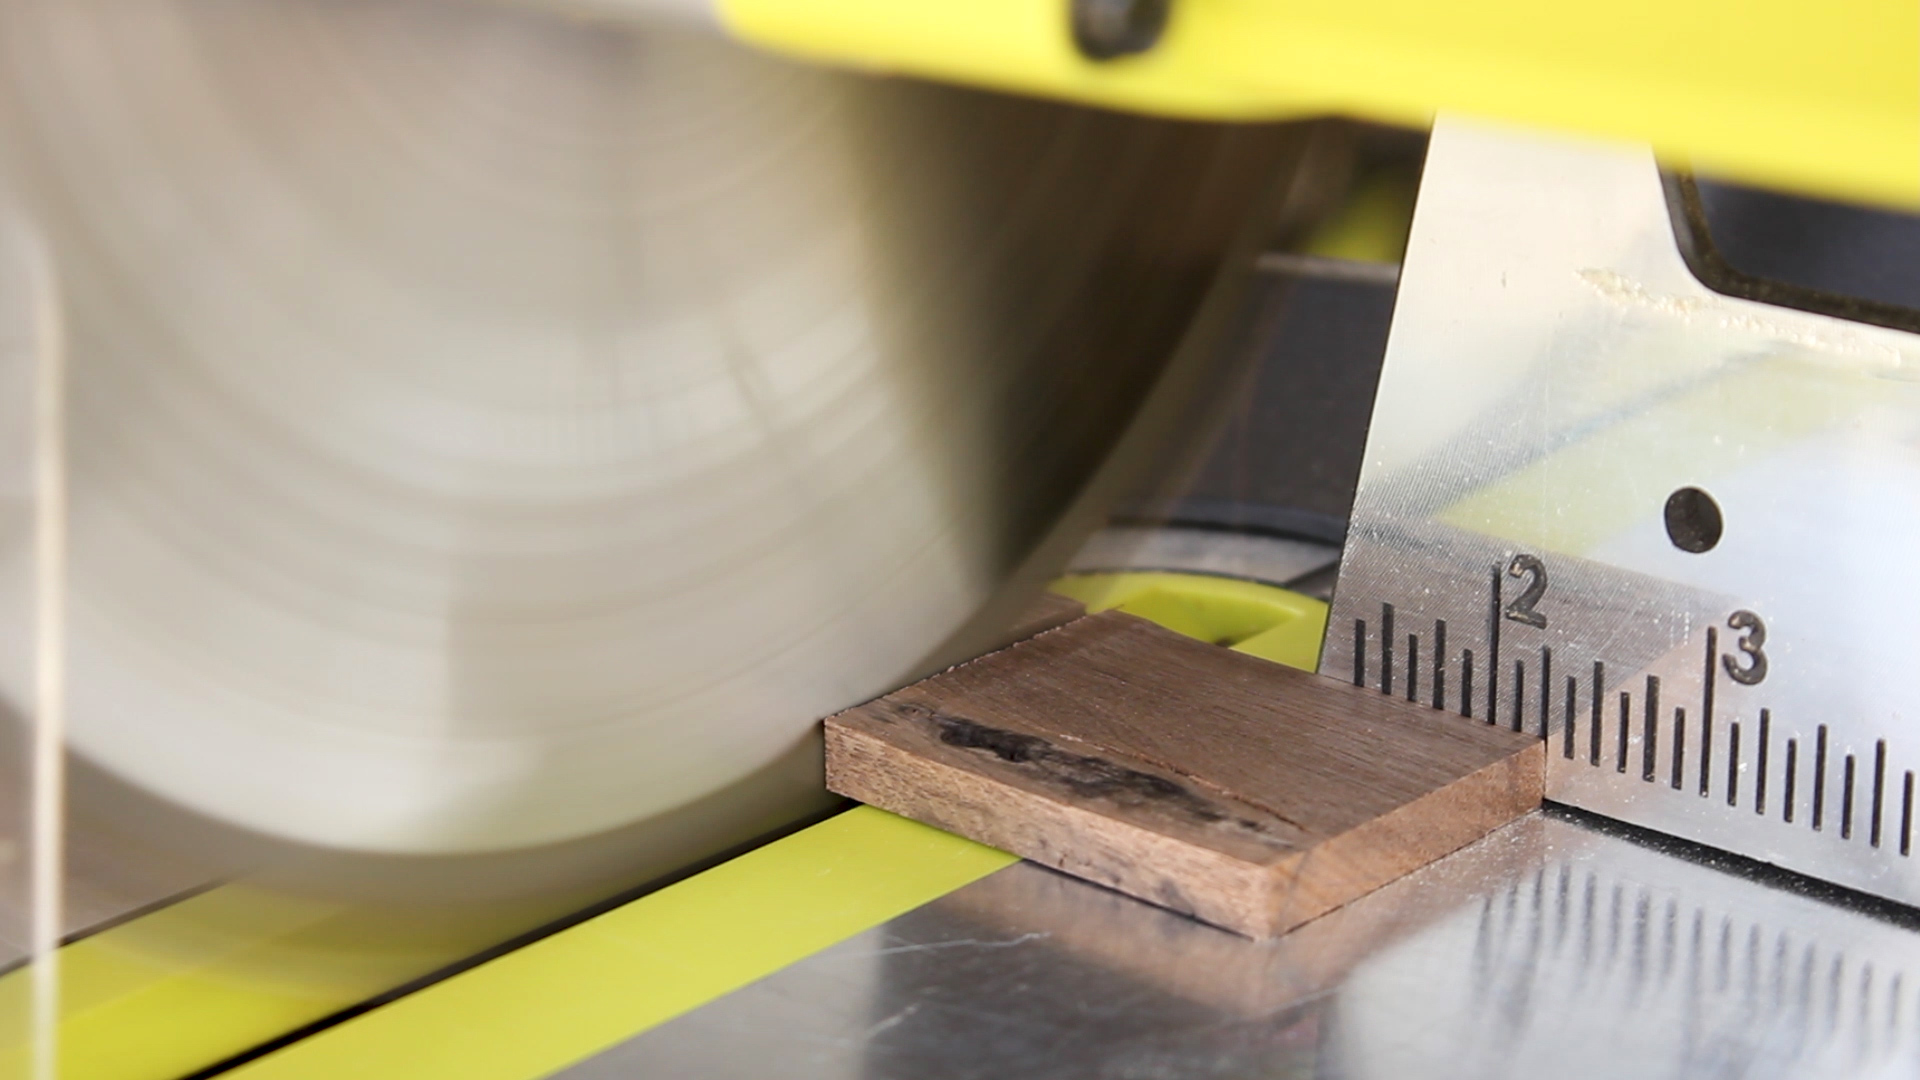


I cut my walnut piece in half (Picture 1), as well as trimmed off the ends that had imperfections (Picture 2). Note - I kept these scraps as I figured I'd use them to help replace the lid top. More on that later.
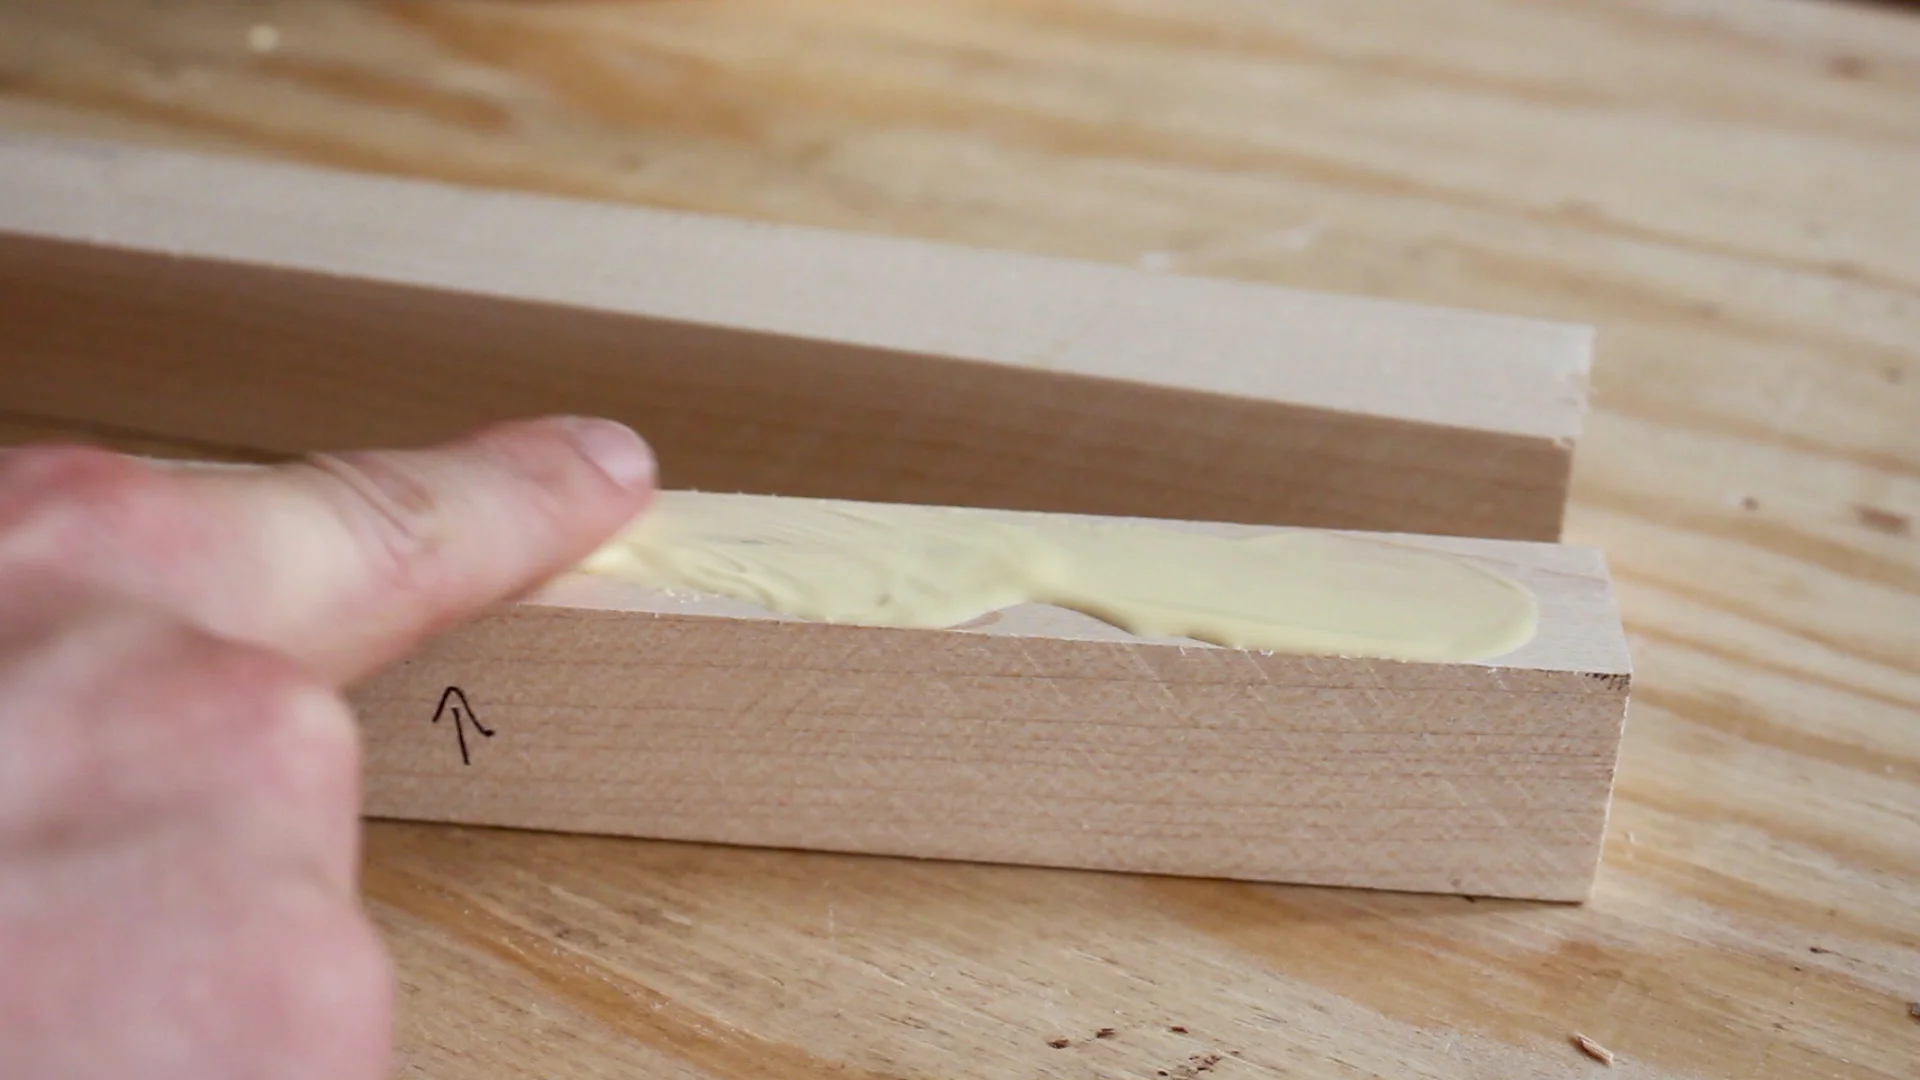
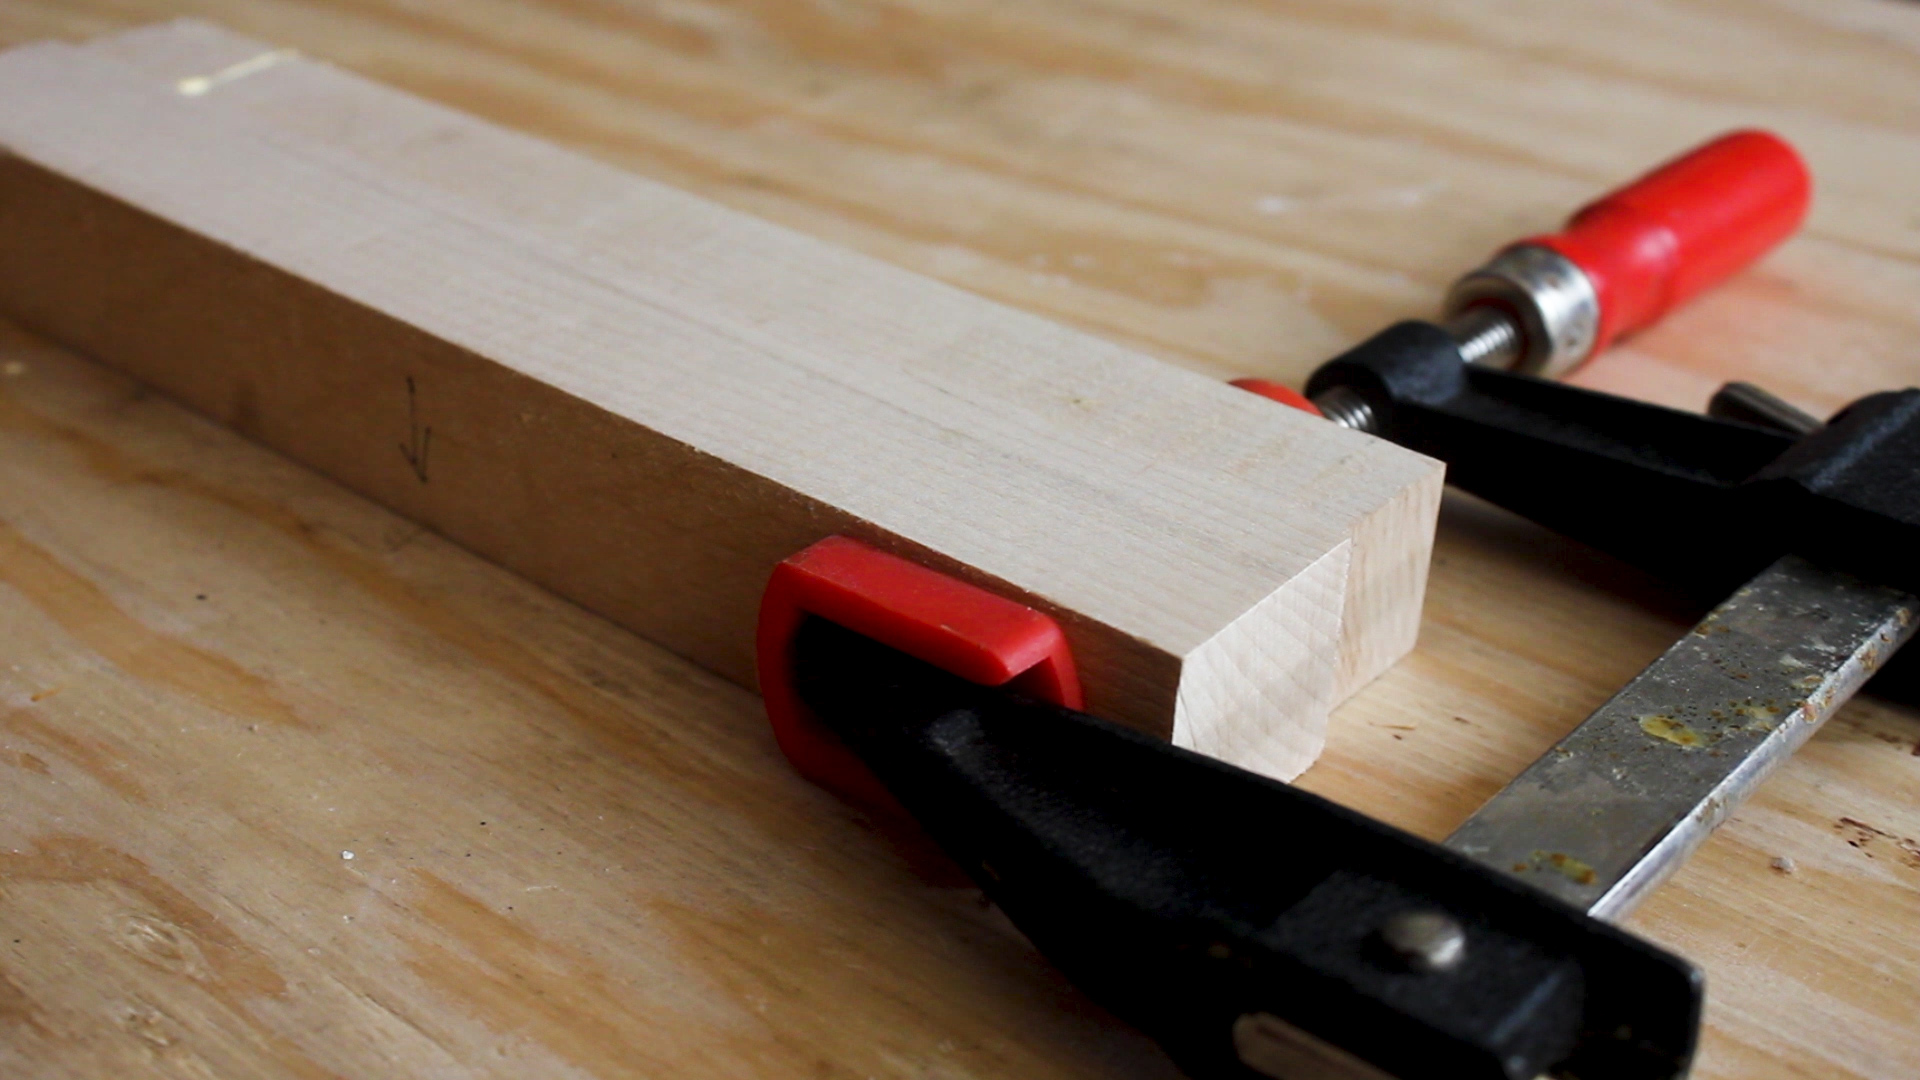
Next, I laid out my final design - you can see how the maple strip was planed to be thicker than the two walnut strips to help make this pattern (Picture 3).I then glued up and clamped up (Pictures 4 - 5) to let my pieces dry overnight. Make sure you spread your glue evenly so everything is covered.
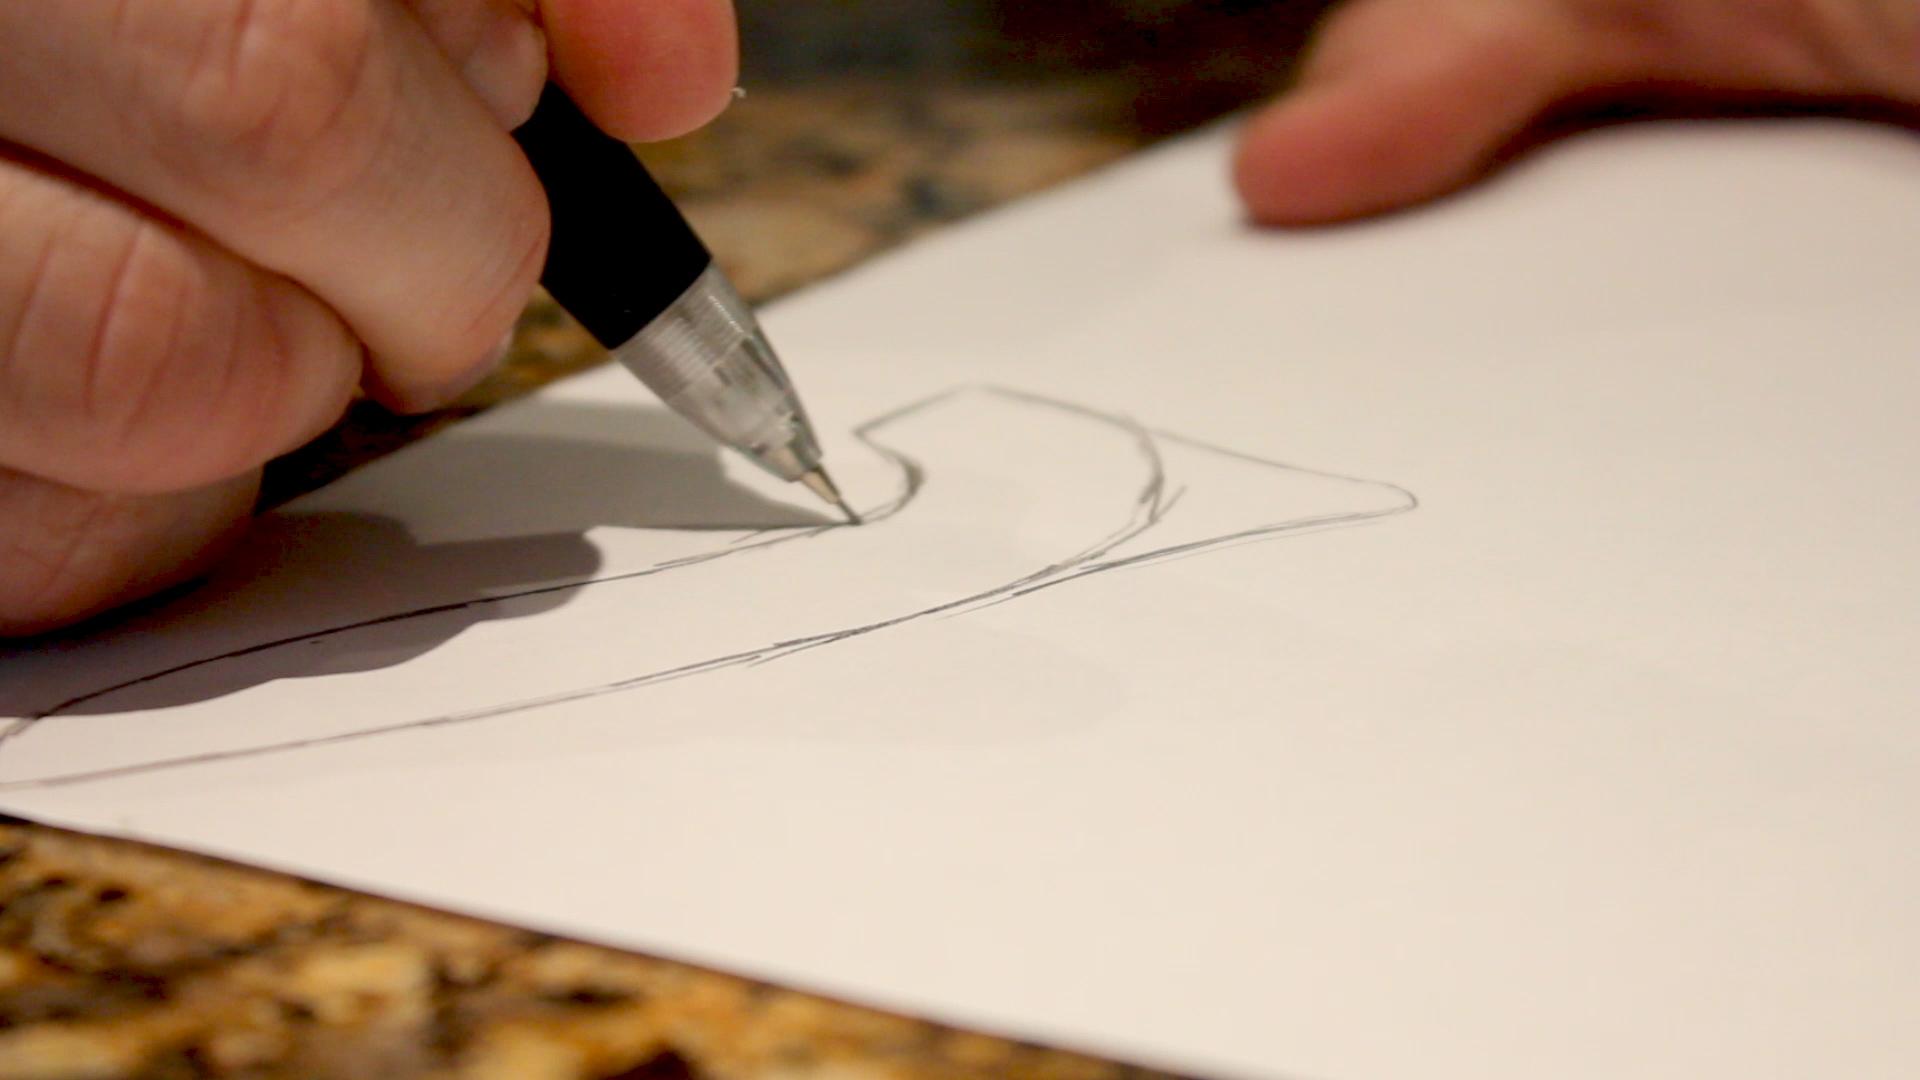
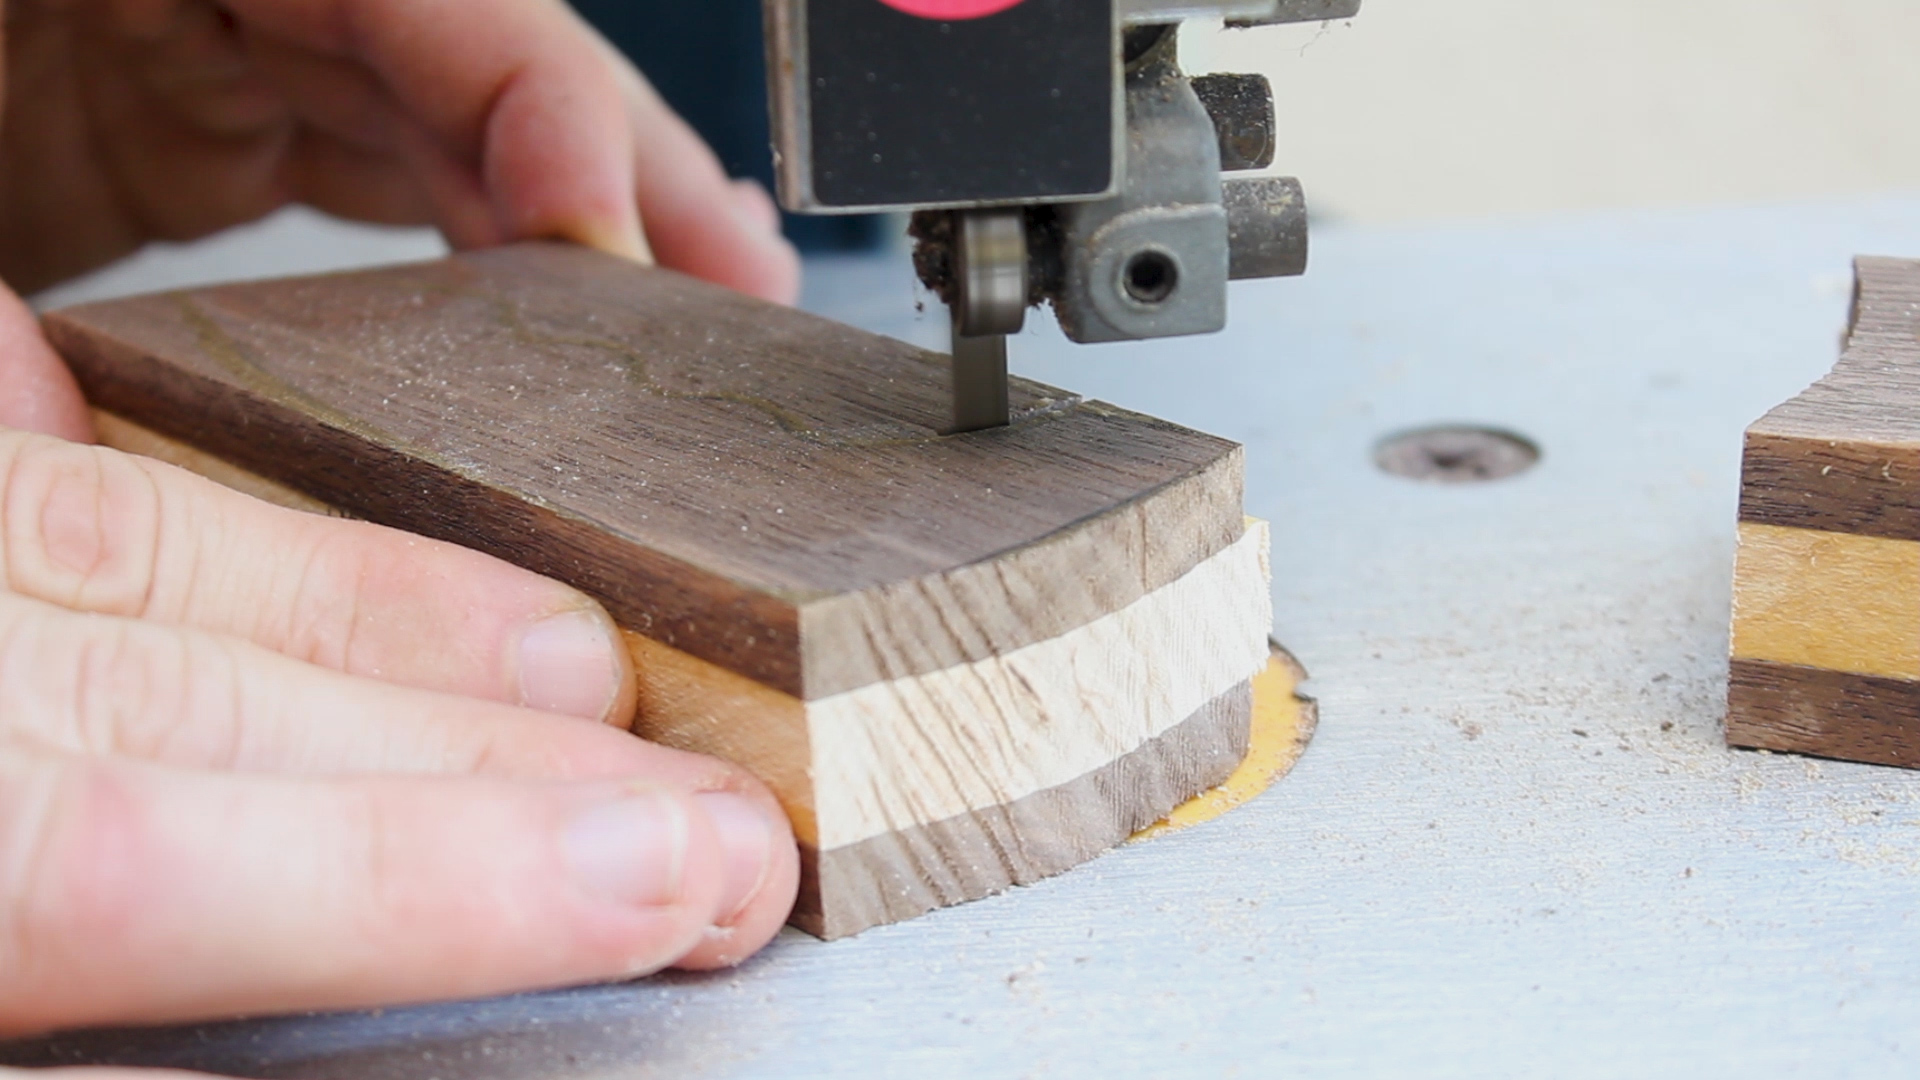
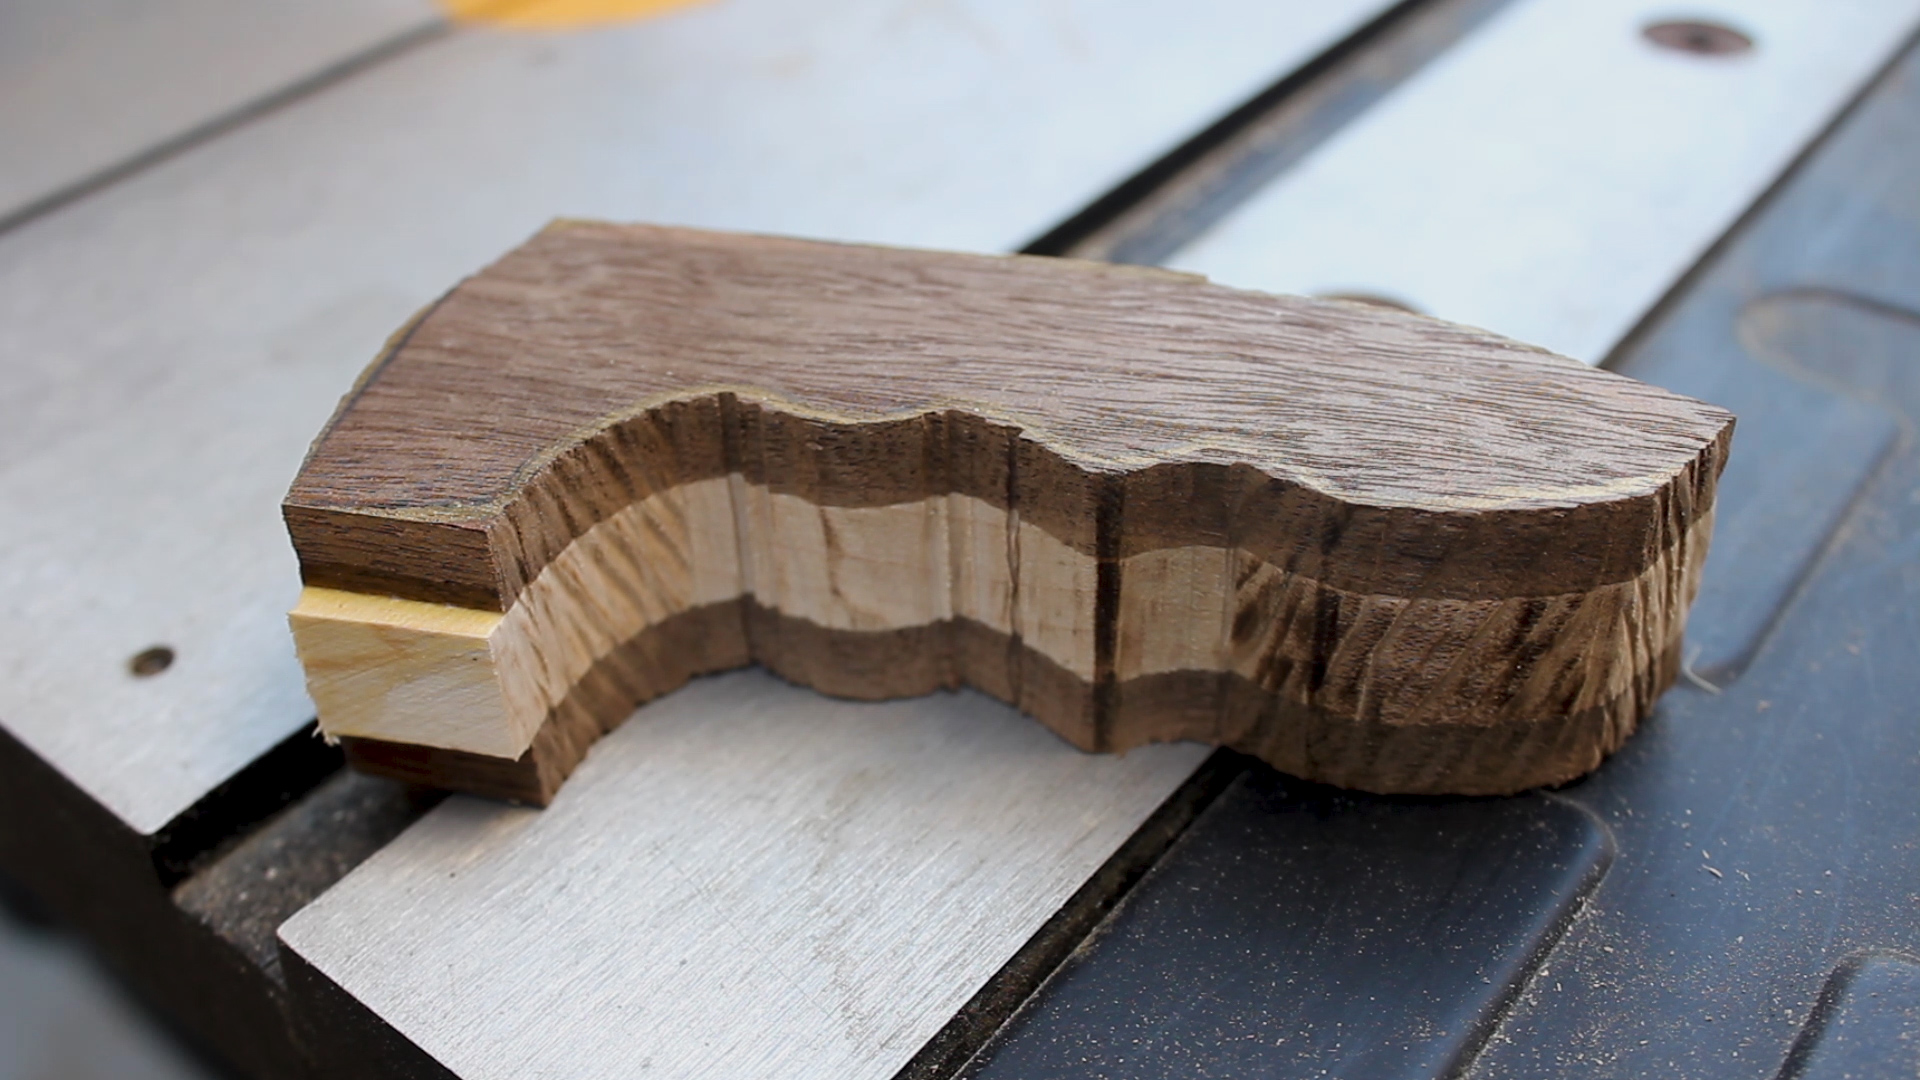
I took my drawings from earlier and revised them to a shape I thought was cool (Picture 1), and then cut them out (Picture 2). I transferred the design to my blank (Picture 3), and then cut out the blank using my band saw (Picture 4). Picture 5 shows the first pass at roughing it out.

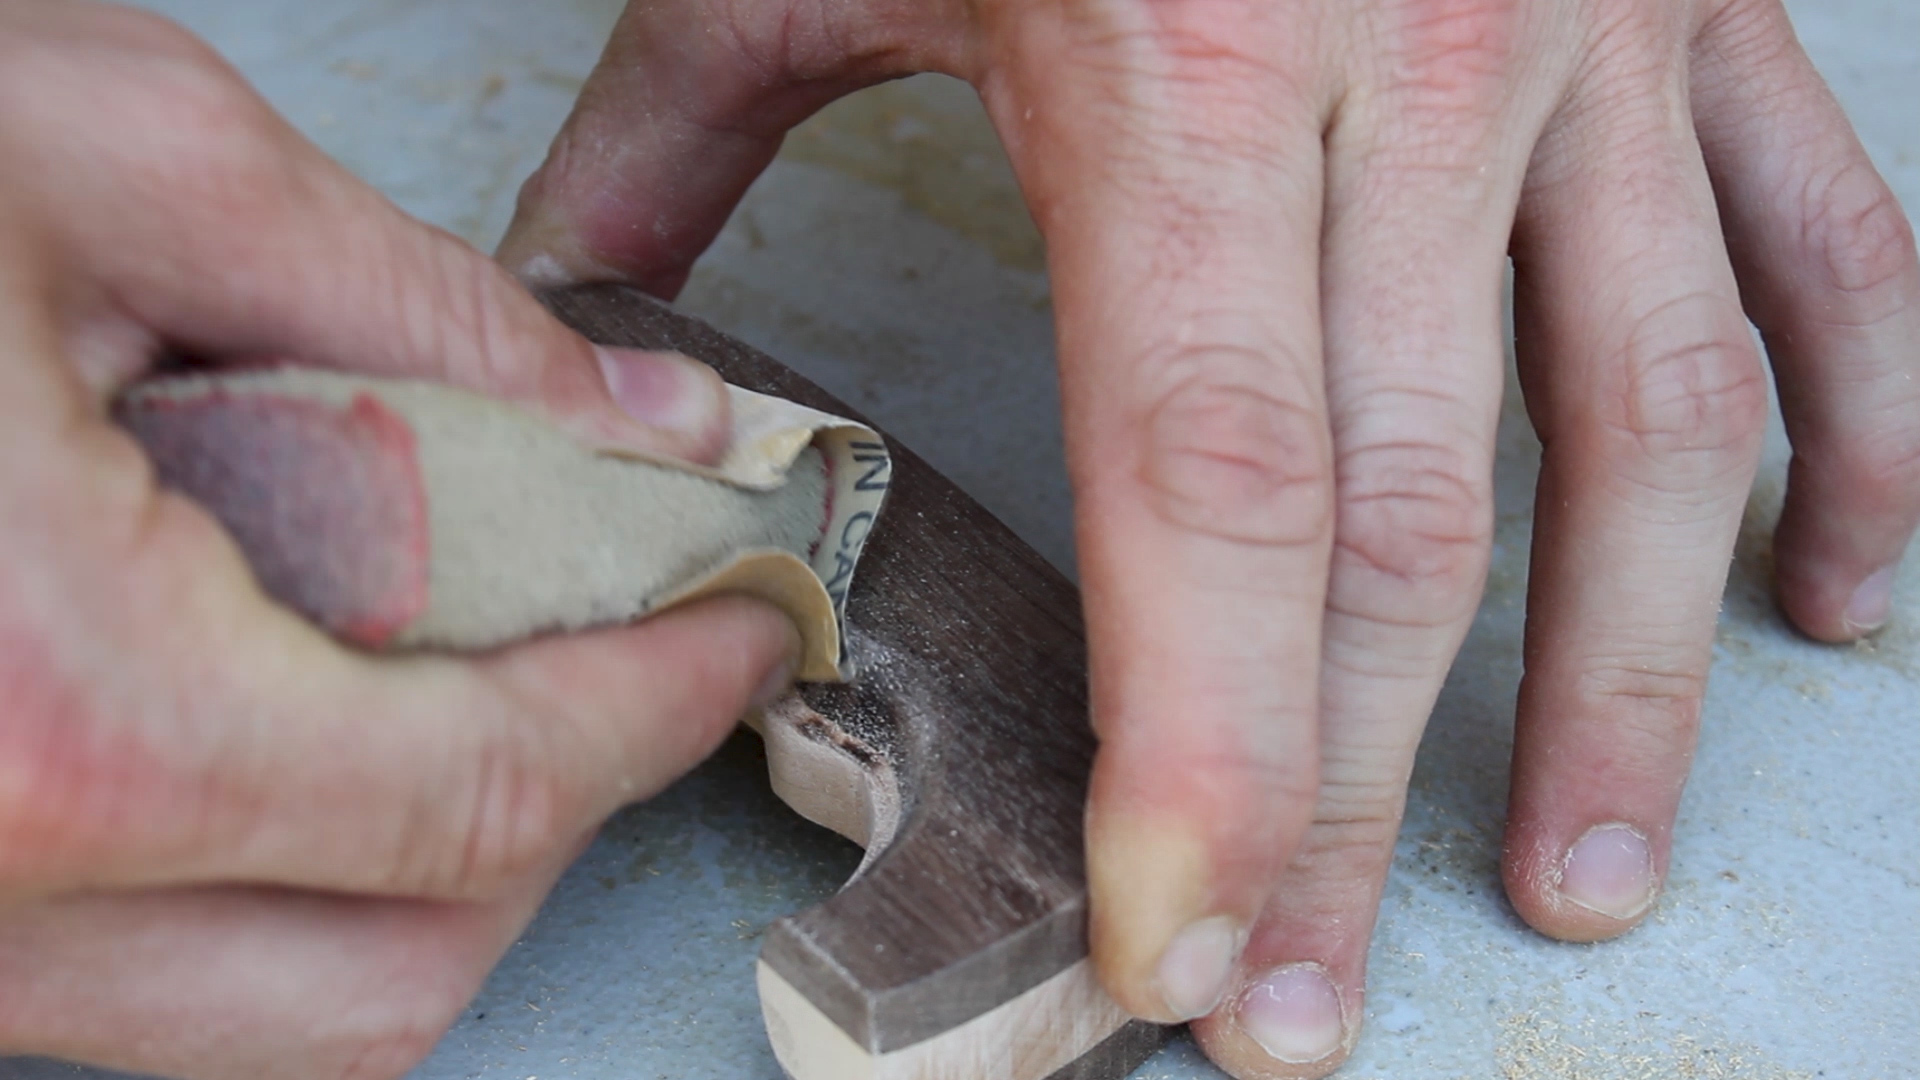

I cleaned up as many surfaces as I could using my stationary belt sander (Picture 1). There were quite a few areas I couldn't get into at this point. This was just to smooth out as many rough surfaces from the band saw blade as I could.
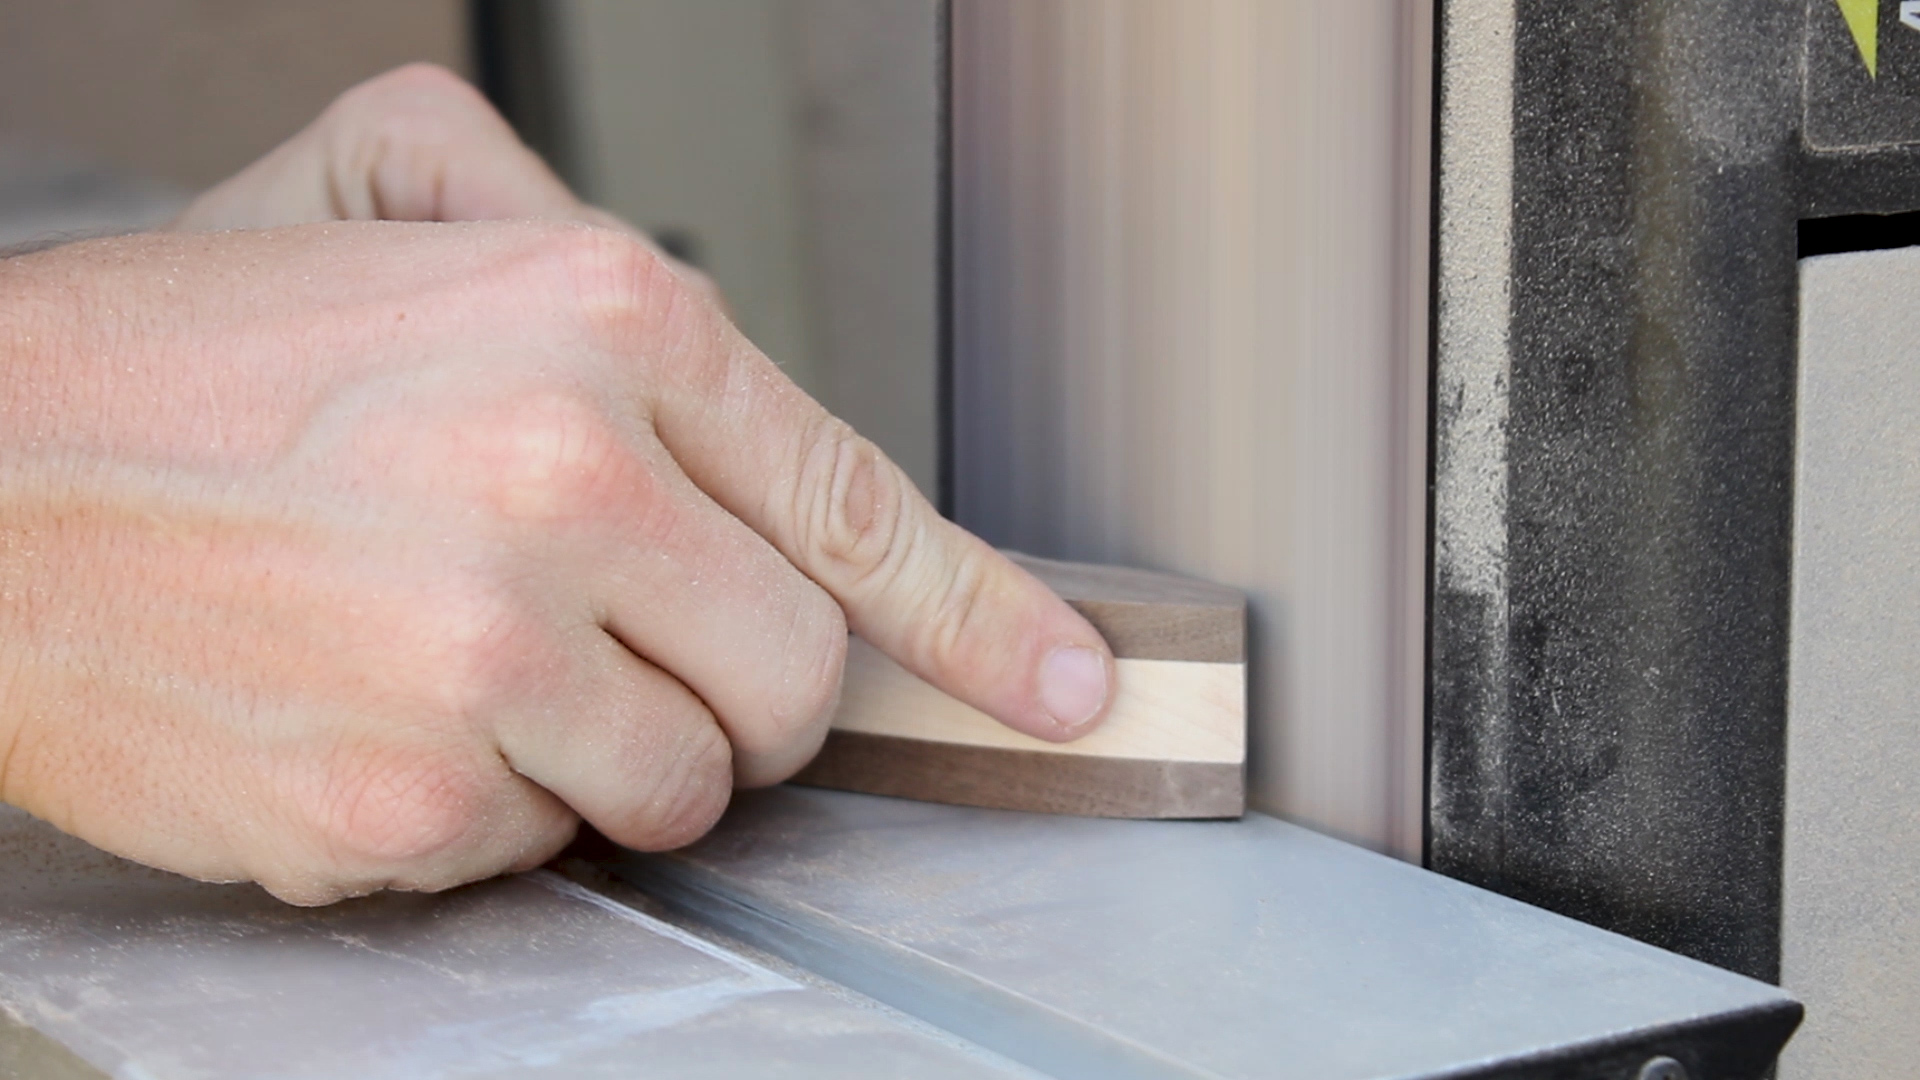
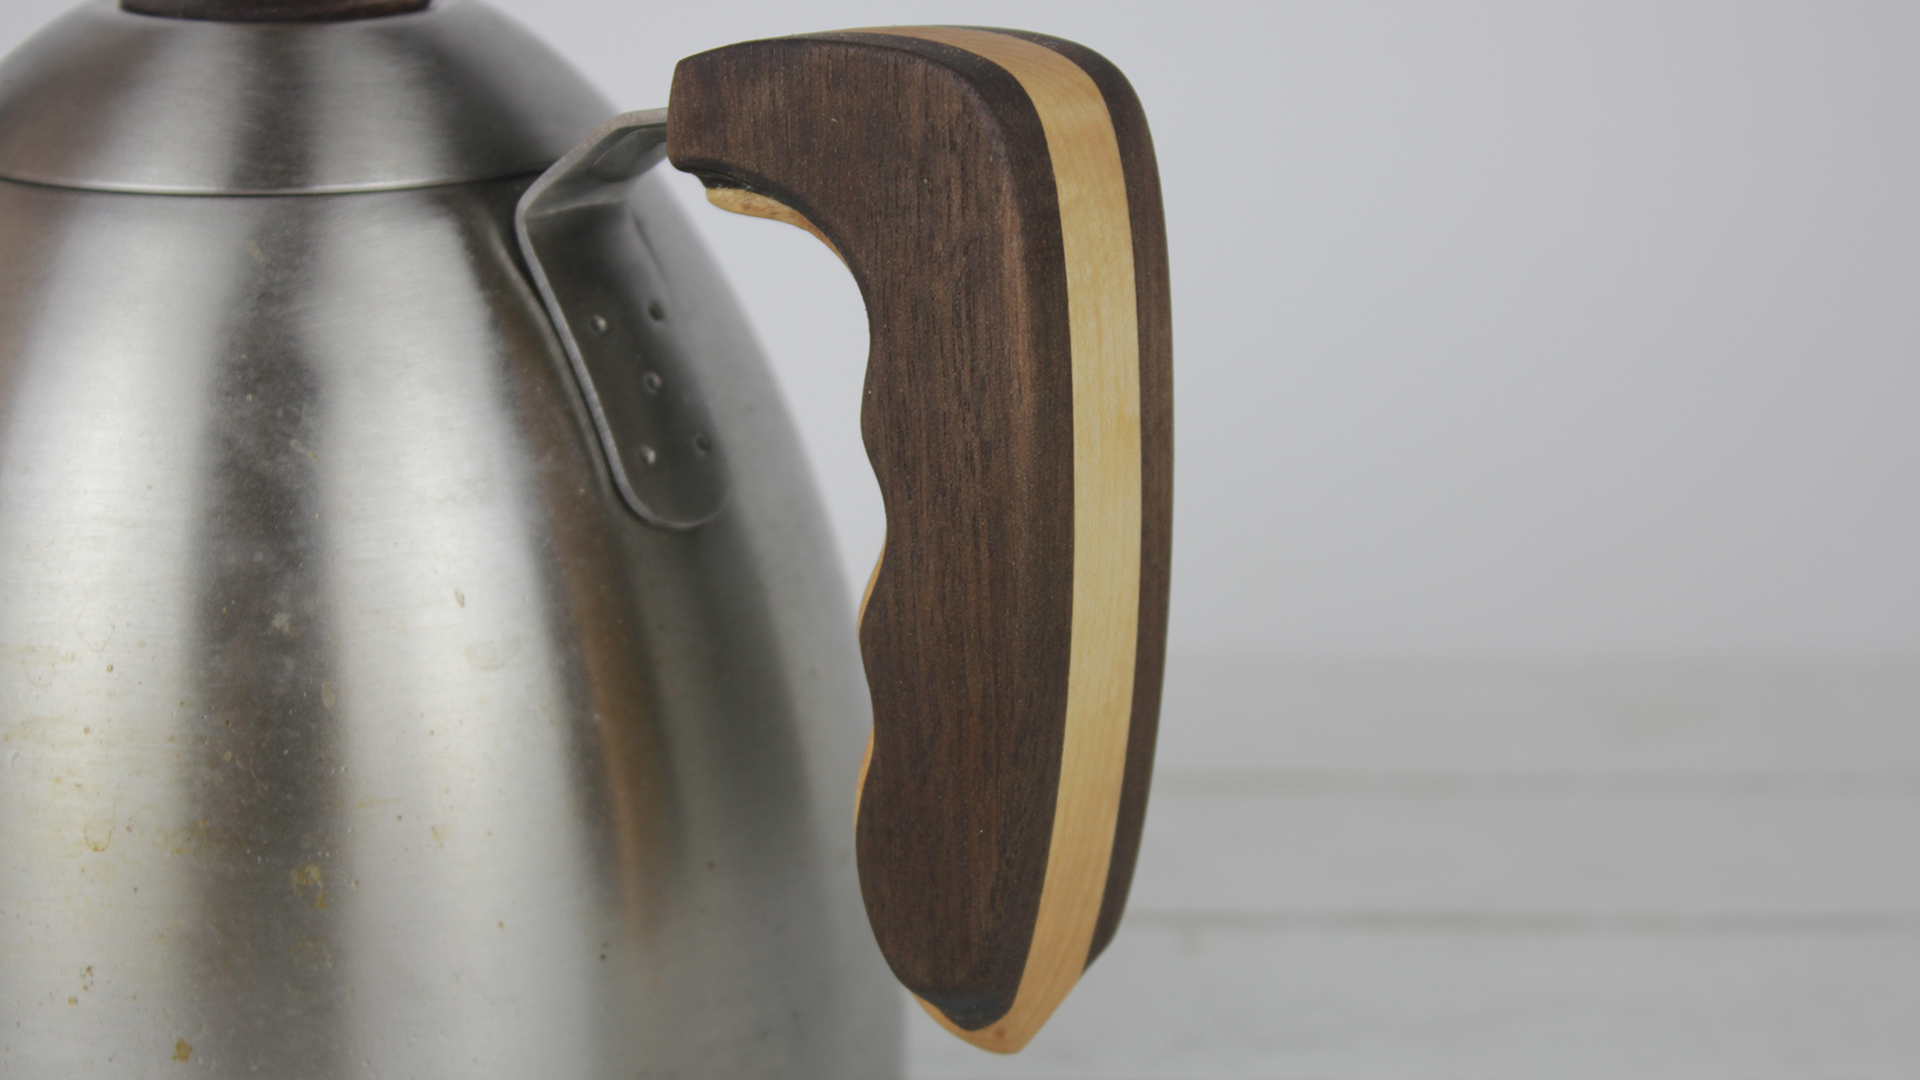
I then used my palm router and a vice clamp to route out a profile on the underside of the handle (Picture 2). I didn't know exactly how this would come out, but the goal was to make it more ergonomic to hold as well as help better highlight the different wood species.
I cleaned up the rest of the piece, including the curves, any burn marks, and overall just rounded and smoothed over the piece (Picture 3) using some fine grit sand paper (I did this both as a wet and dry sanding to raise the grain and eliminate that issue down the road when the tea kettle got wet).
Picture 4 shows the final piece - you can see how everything was smoothed over (as best I could) and routed to make it easier to hold. Not bad right?


Again - I had no idea what this should look like, so I just experimented until I was happy.
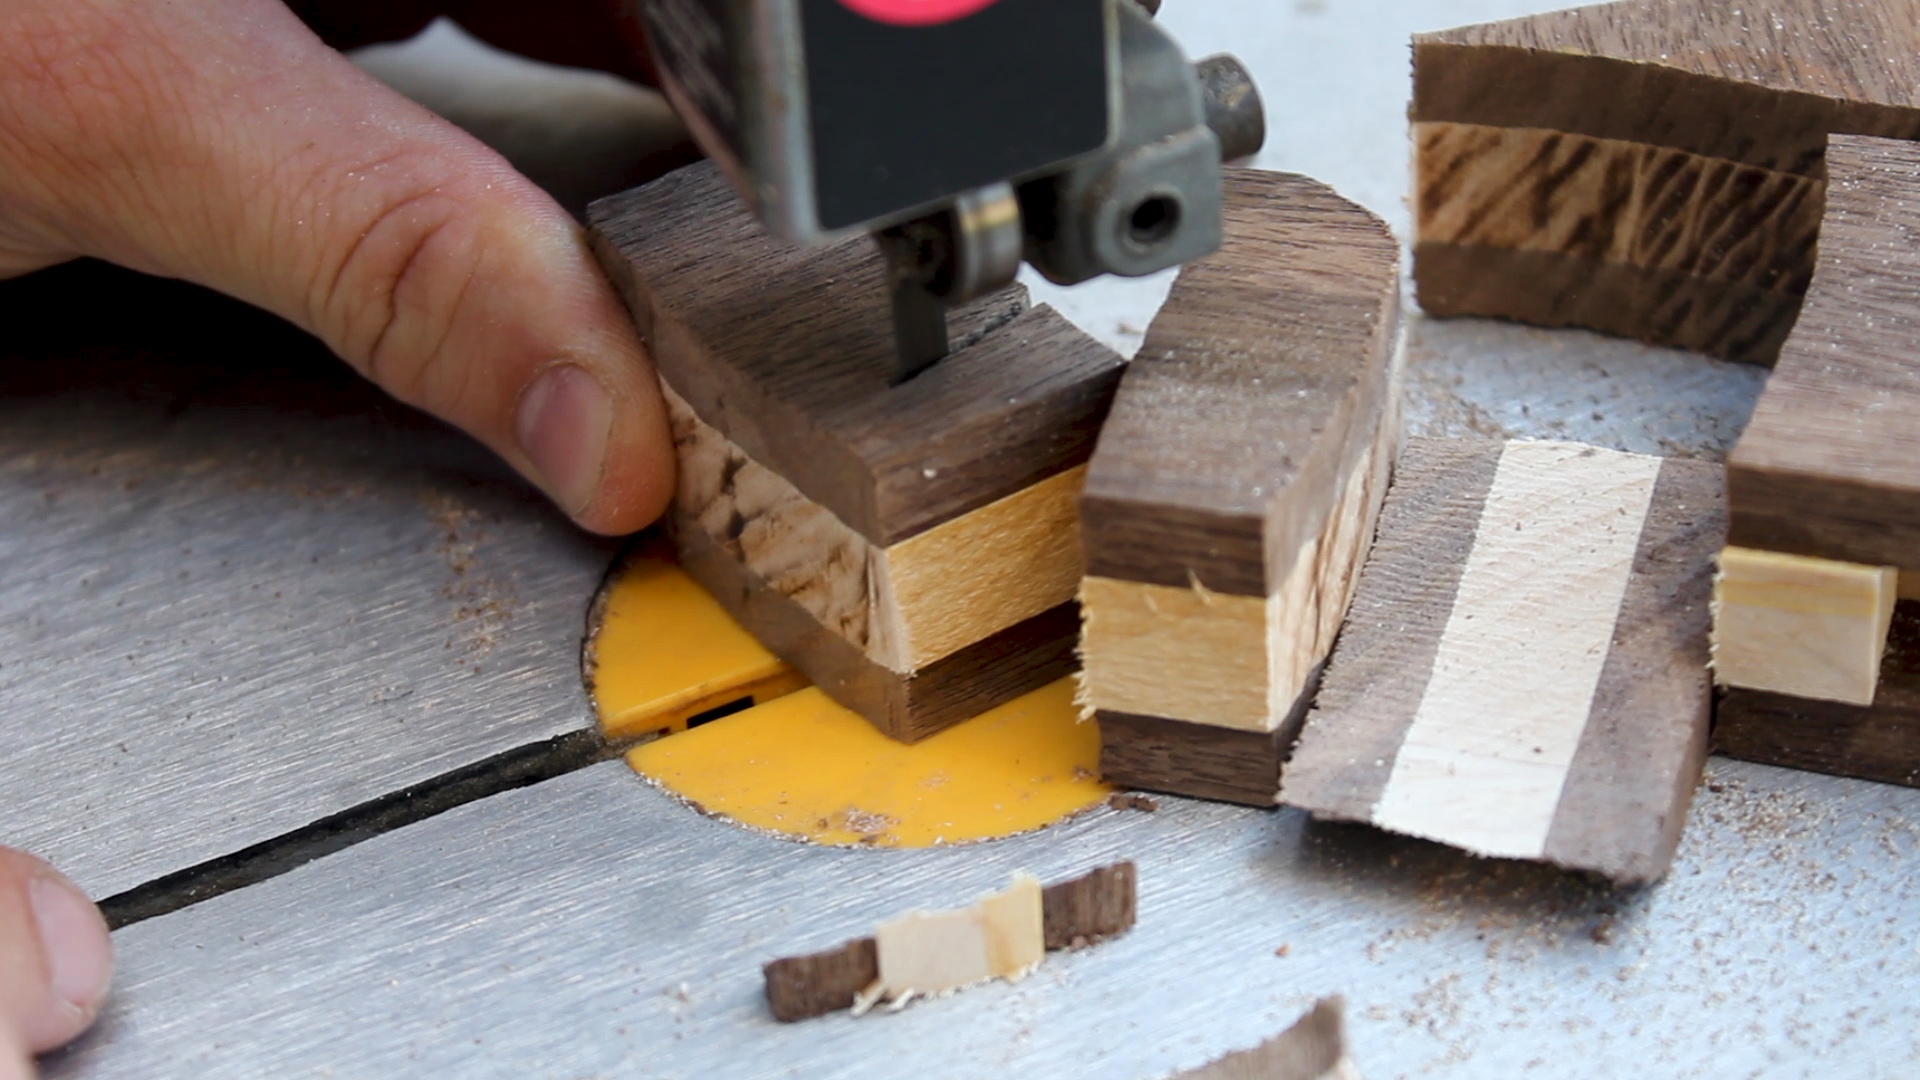
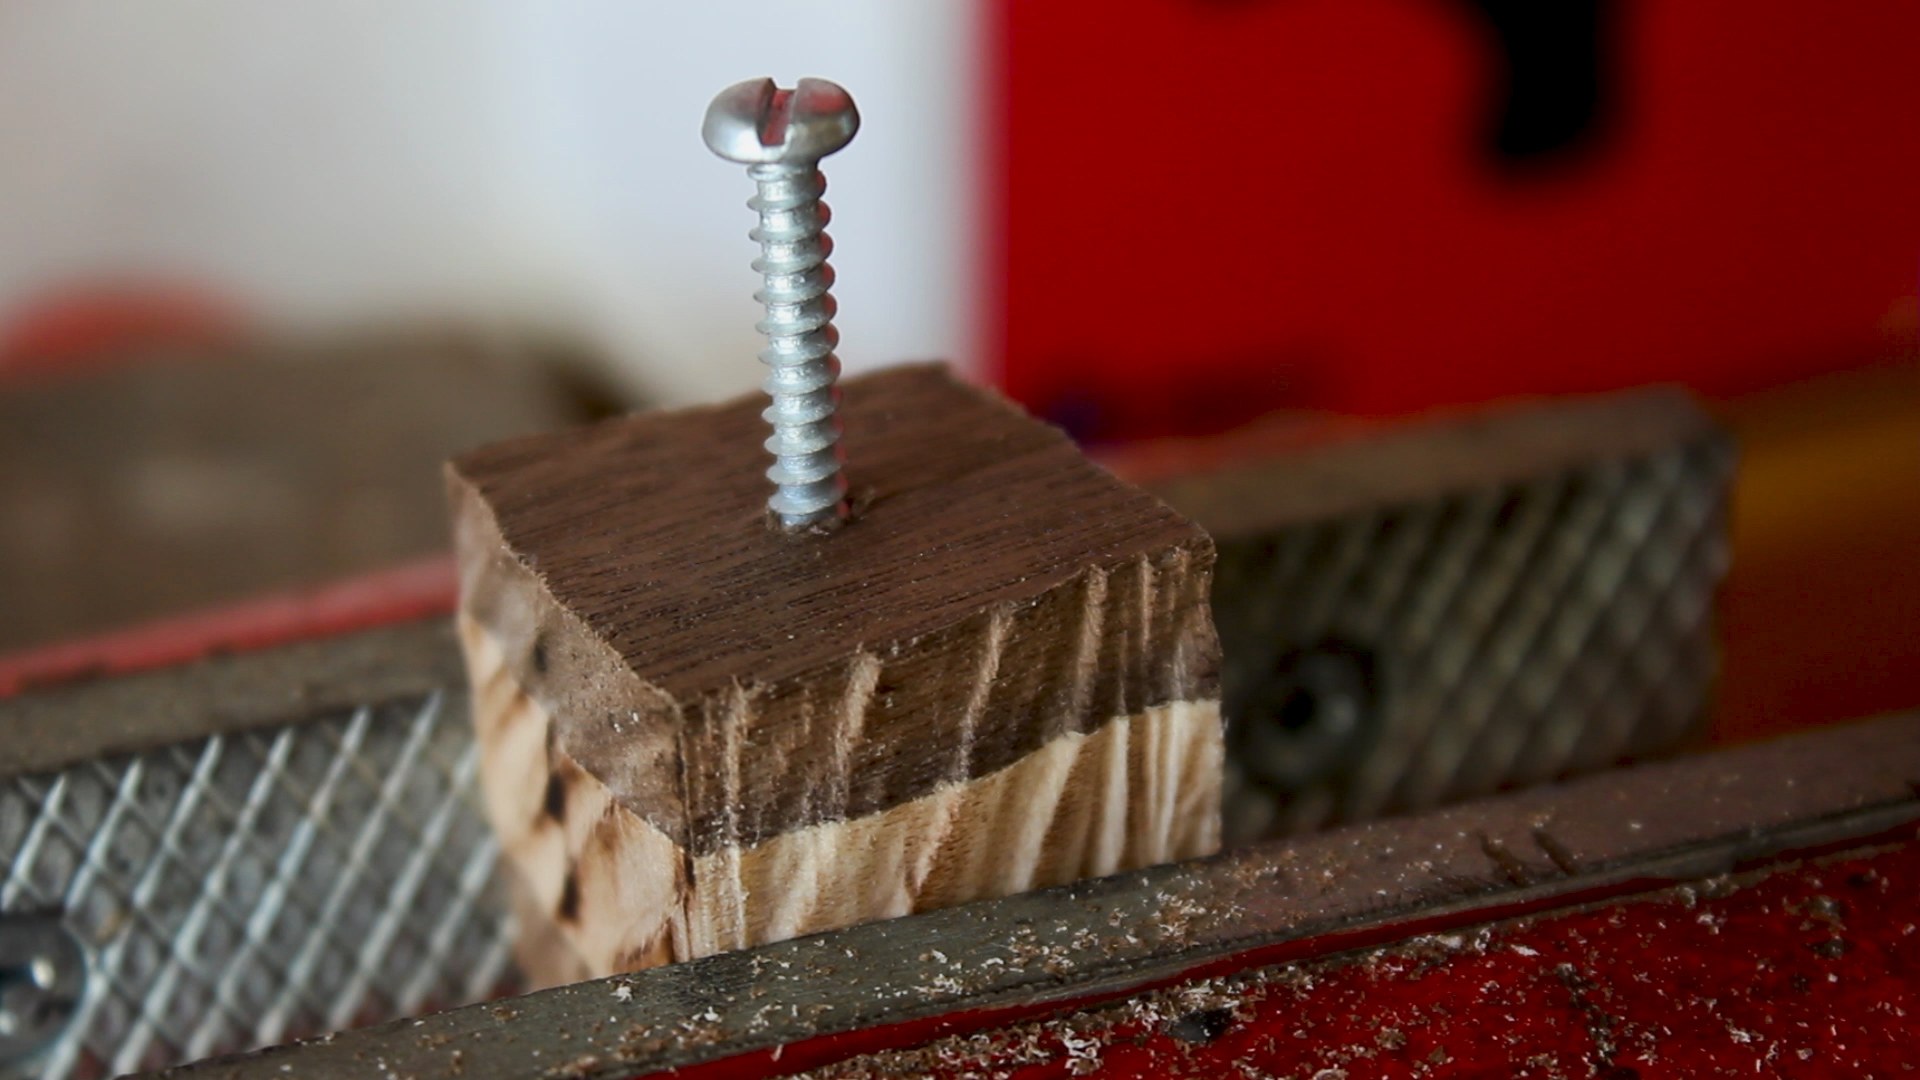
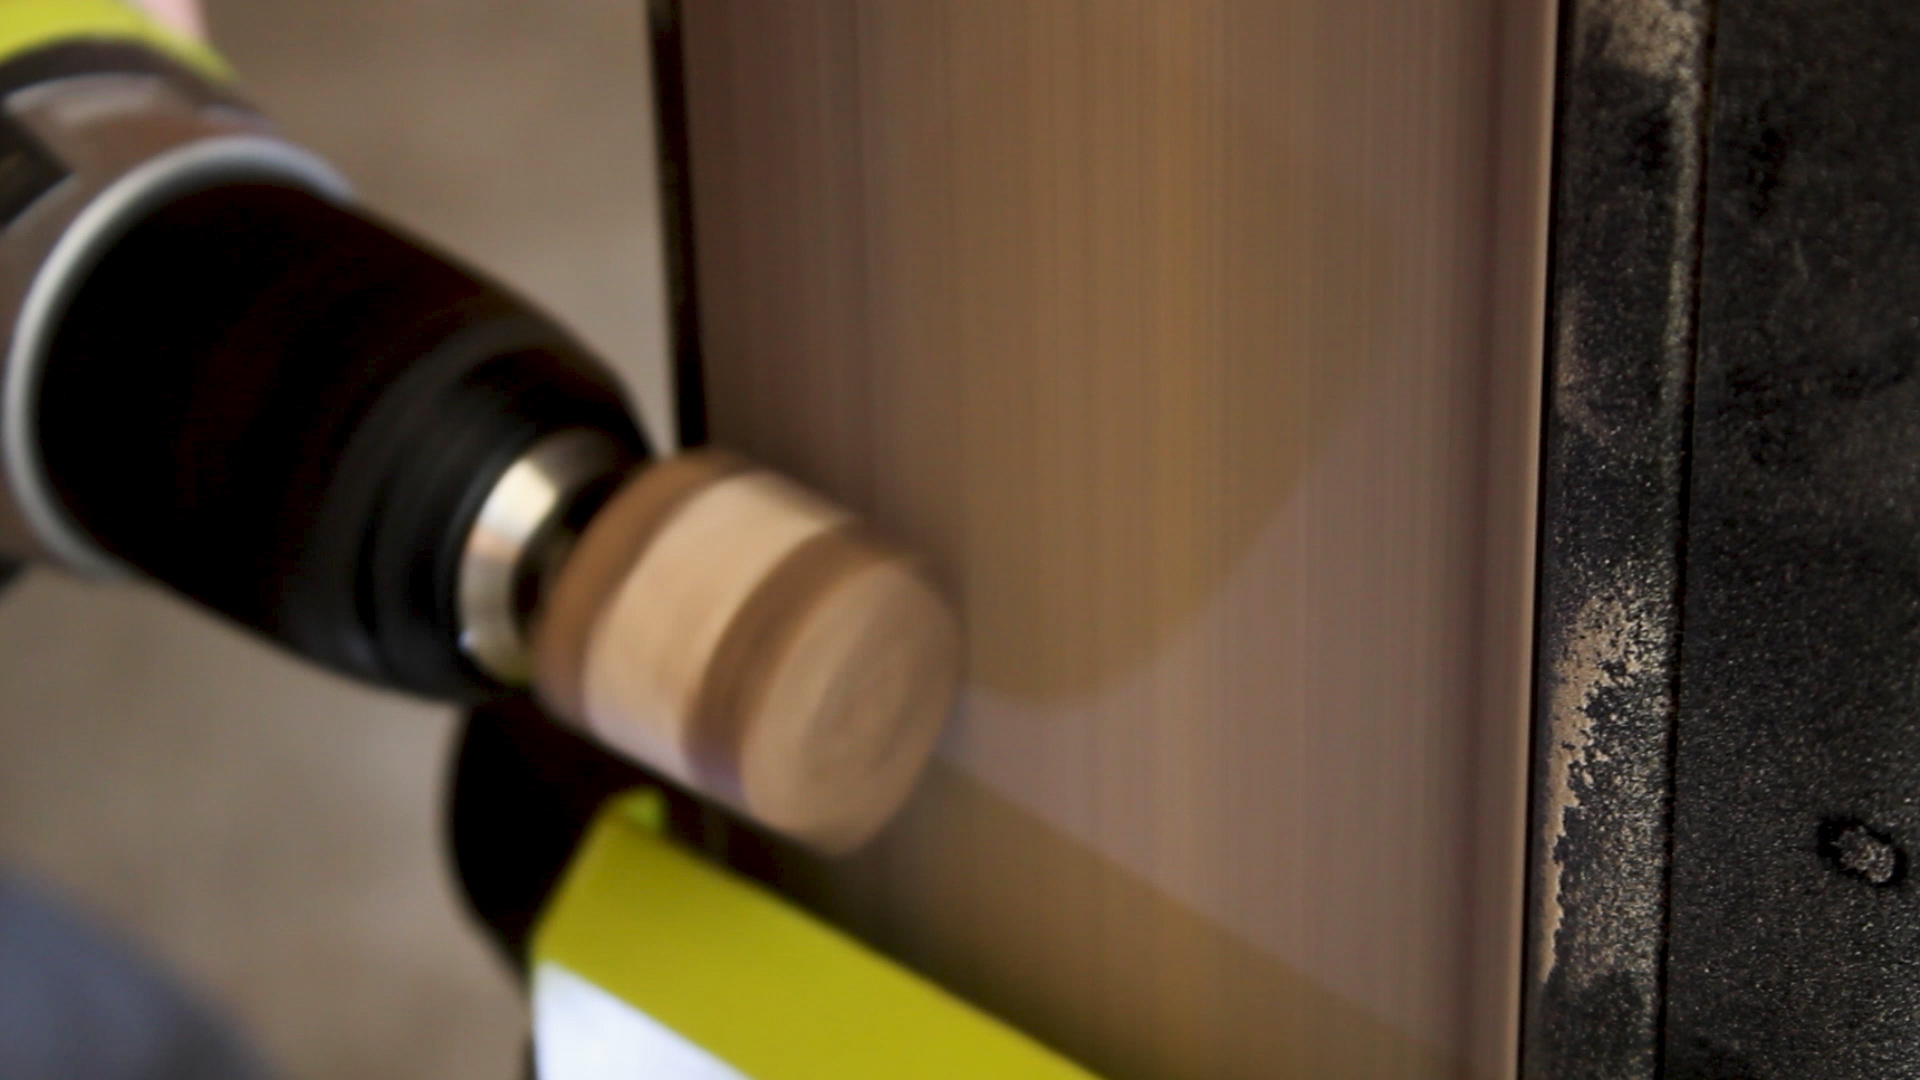
Pictures 1, 2, 3, and 4 show a sequence of me cutting out another small blank from left over glued up wood, drilling a pilot hole, inserting a screw, and putting that screw into my drill. My goal was to create a sanding lathe type thing using a drill and my stationary bench sander as I don't have a lathe to turn.
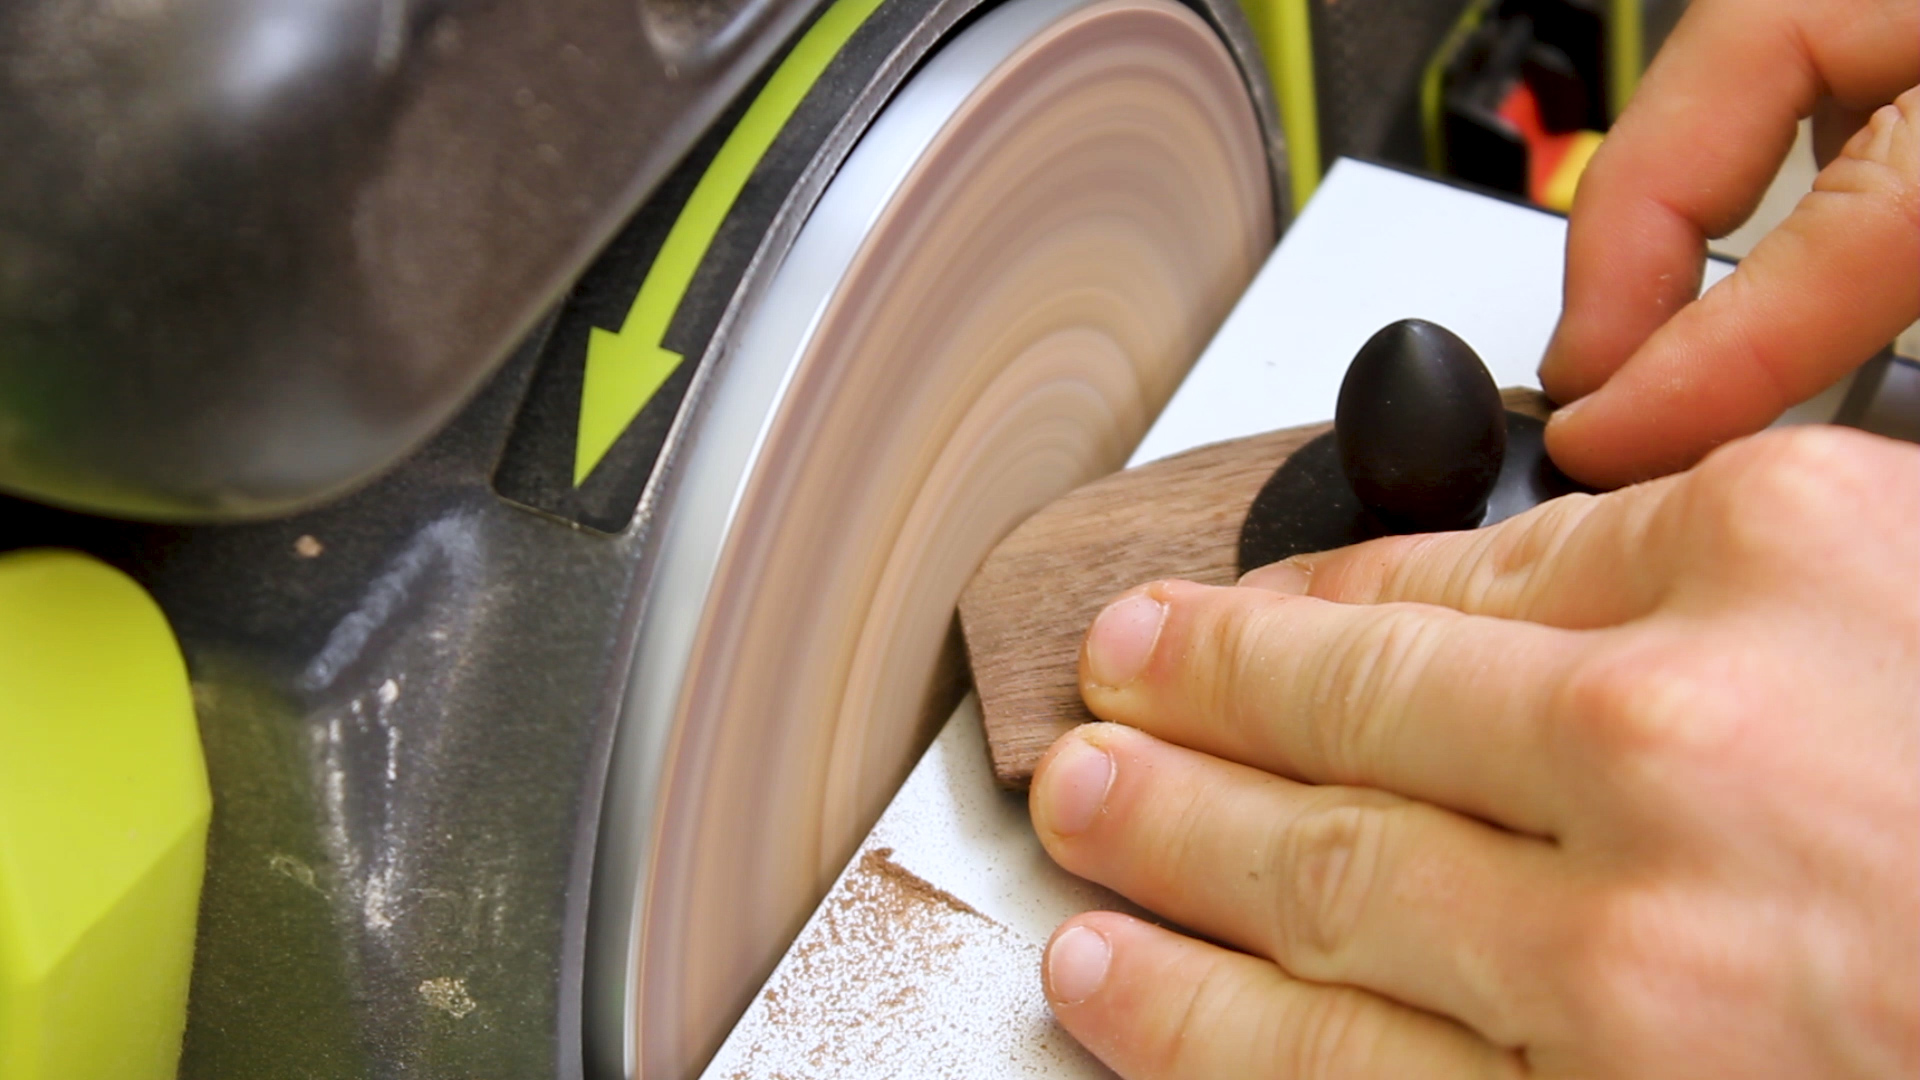
Pictures 5 show me spinning the drill at high speed against the moving belt sander, resulting in a (mostly) round top. I thought it was a bit clunky though (Picture 6).
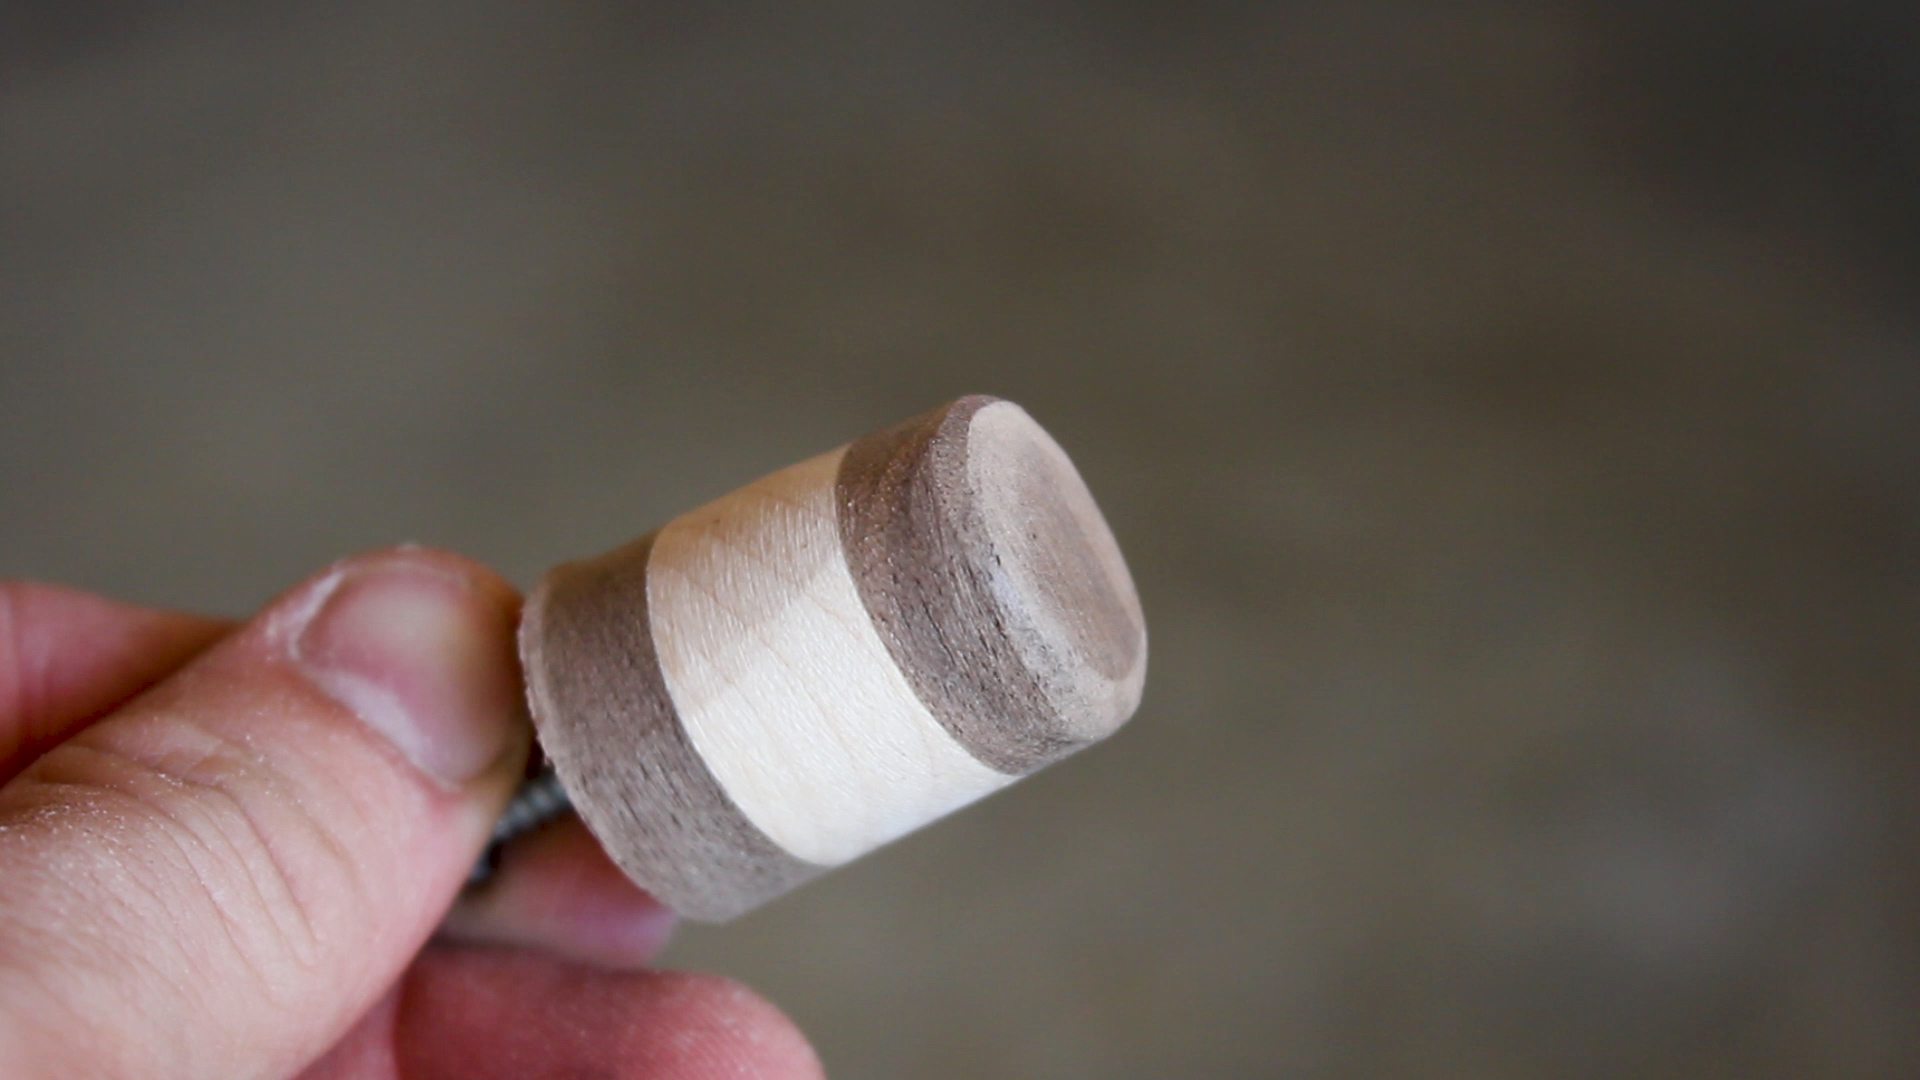
In Pictures 7 - 8, I took the top back to the bench sander and just smoothed out what I felt was a cool geometric shape. No real design in mind, just flattened in a pyramid shape until I thought it looked cool!
I then took the original lid piece and screwed it to one of the scrap pieces of walnut (Picture 1) that I had from earlier (remember I said to save those just incase!).
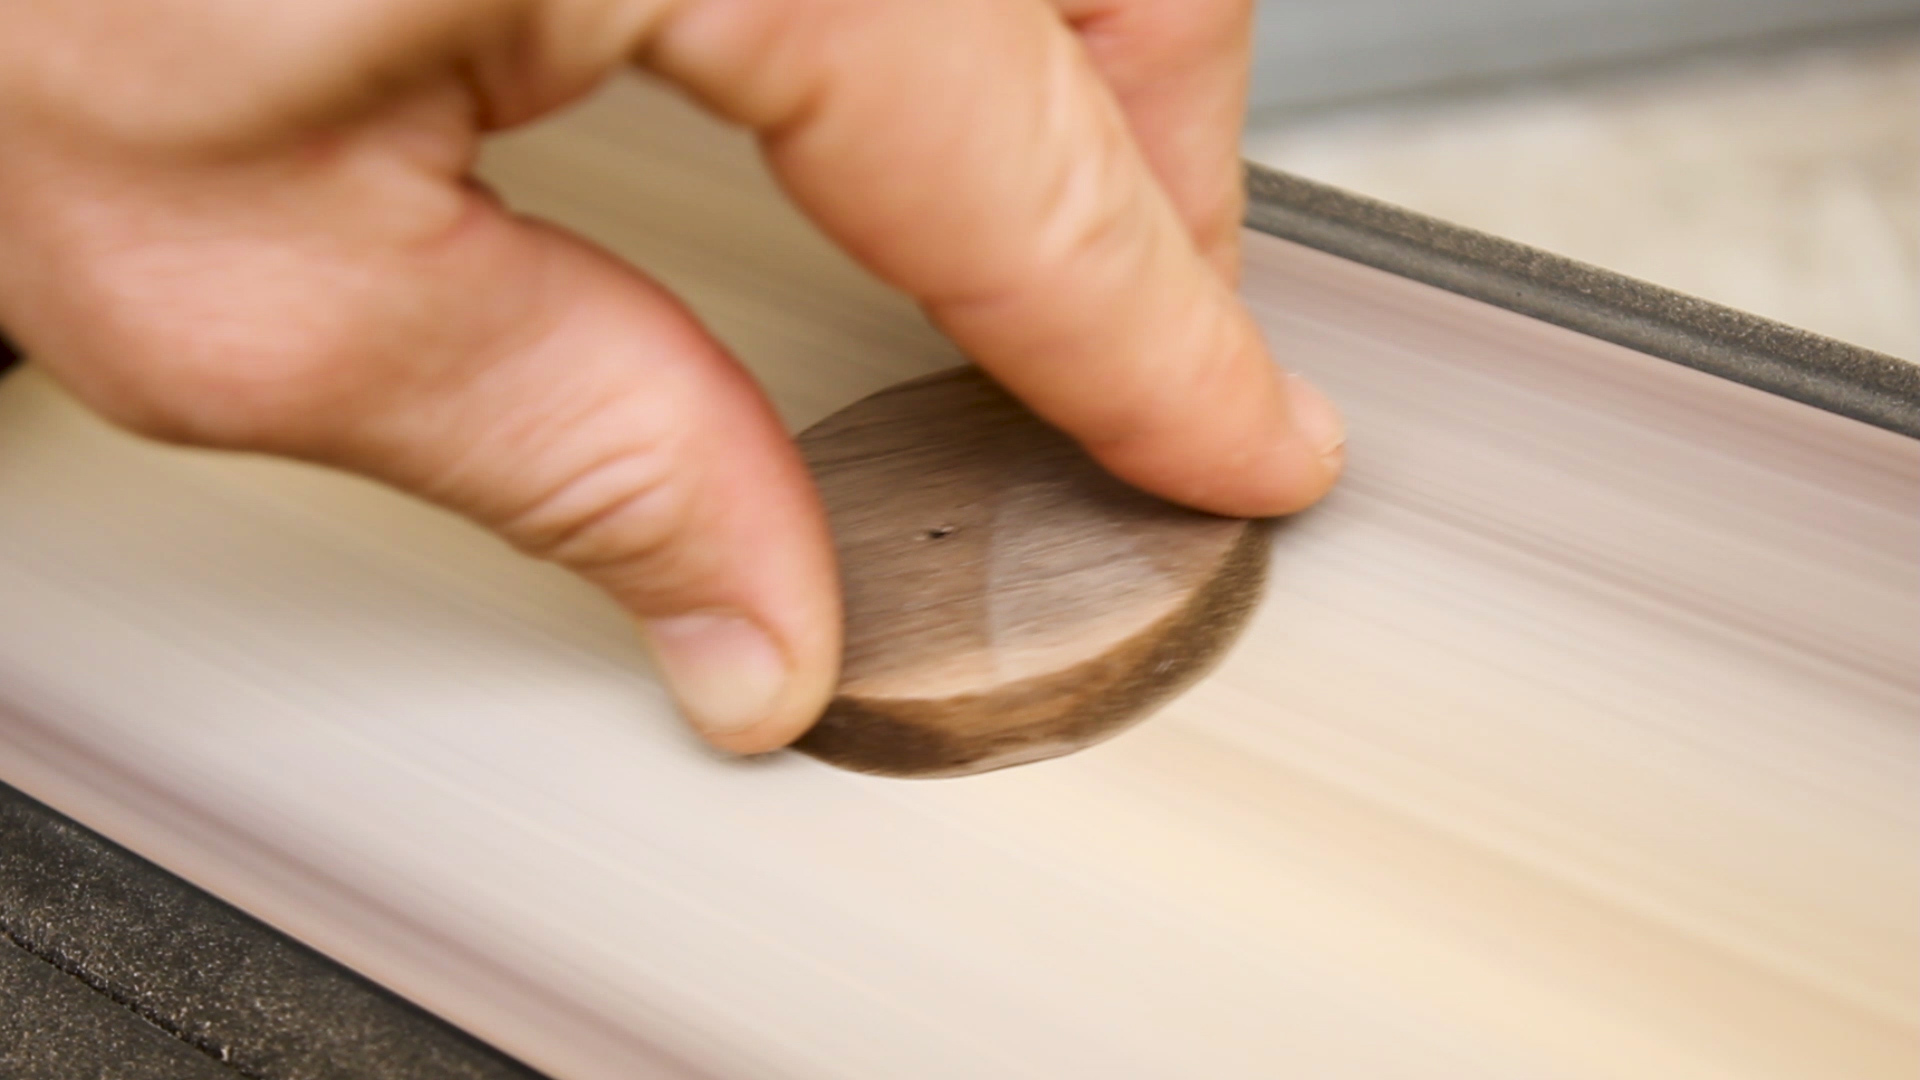
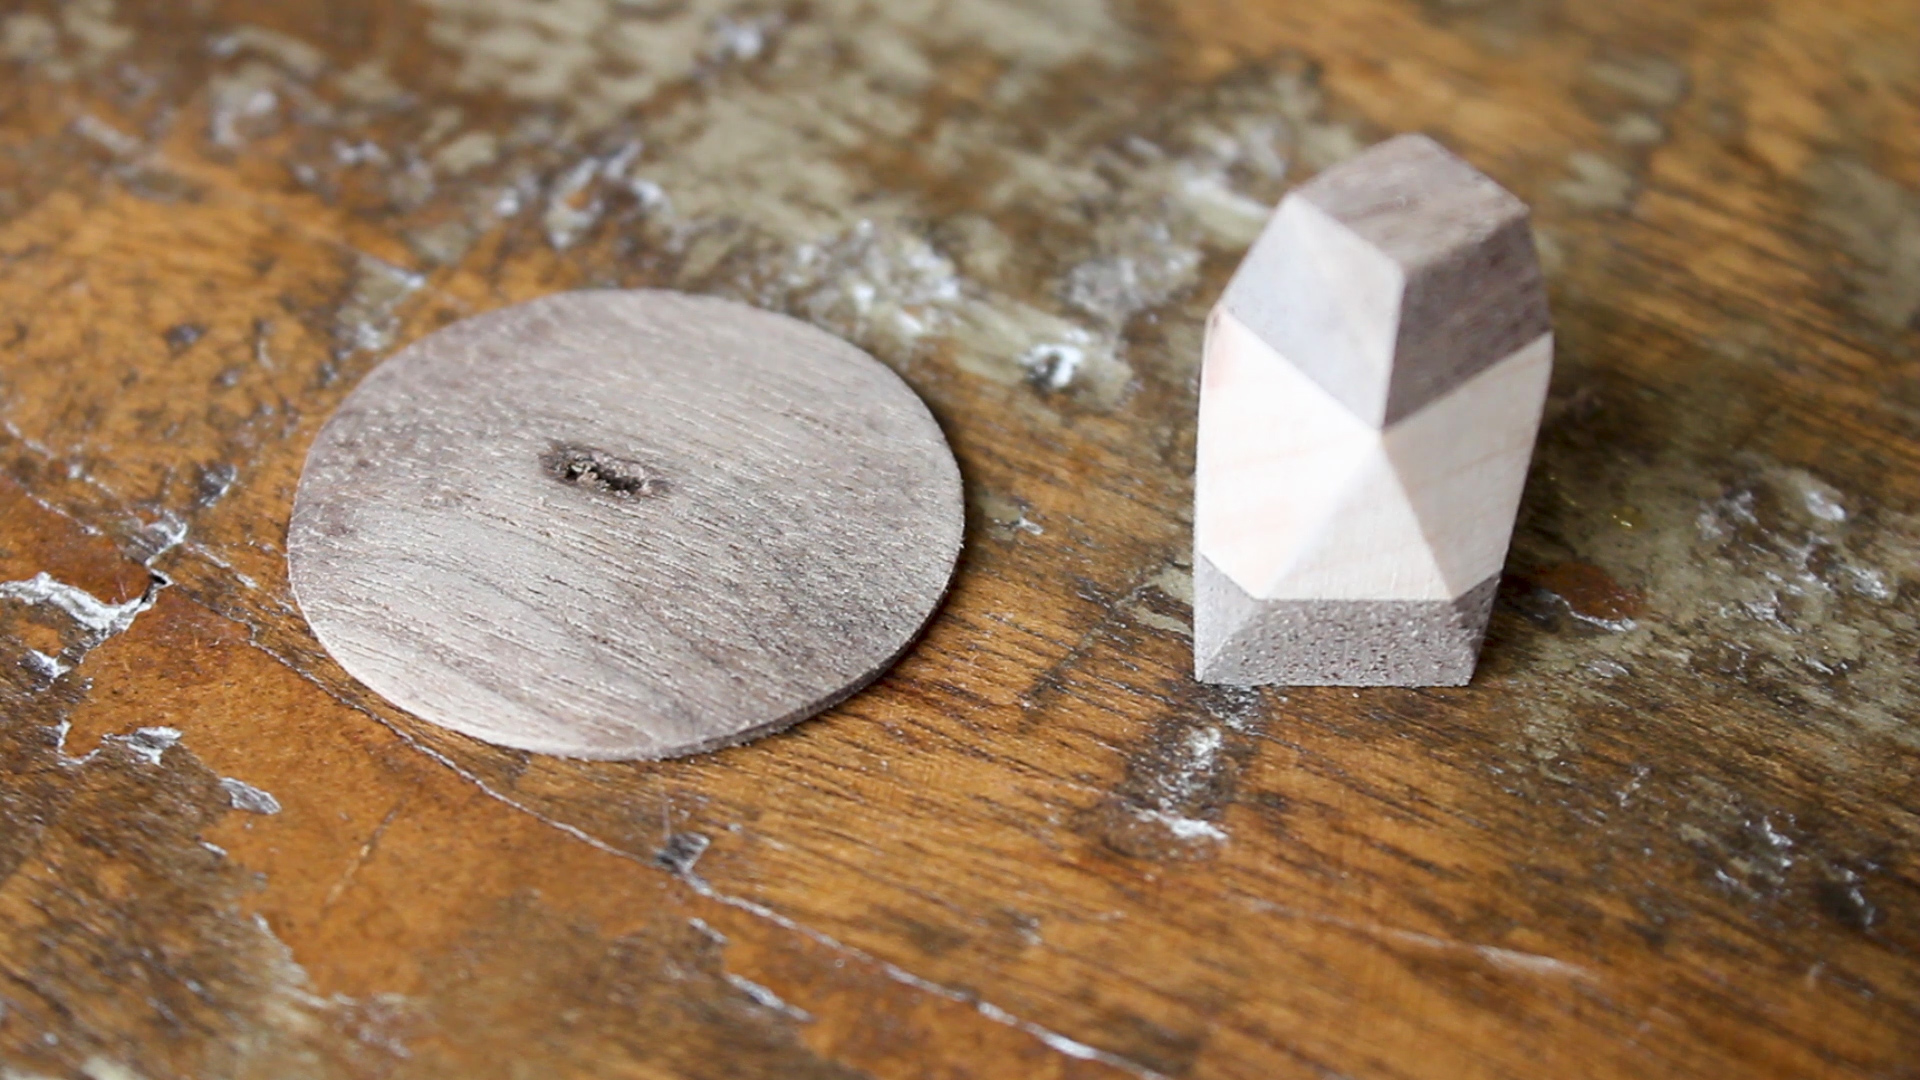
I then crept up on the circular shape of that same top using the disc sander (Picture 2), and then flattened it out and gave it a bit of a taper (Picture 3) so that it would be flat, very low profile, and fit within the lid top of my tea kettle. Picture 4 shows the final two pieces. I then glued these pieces together and let them sit overnight.
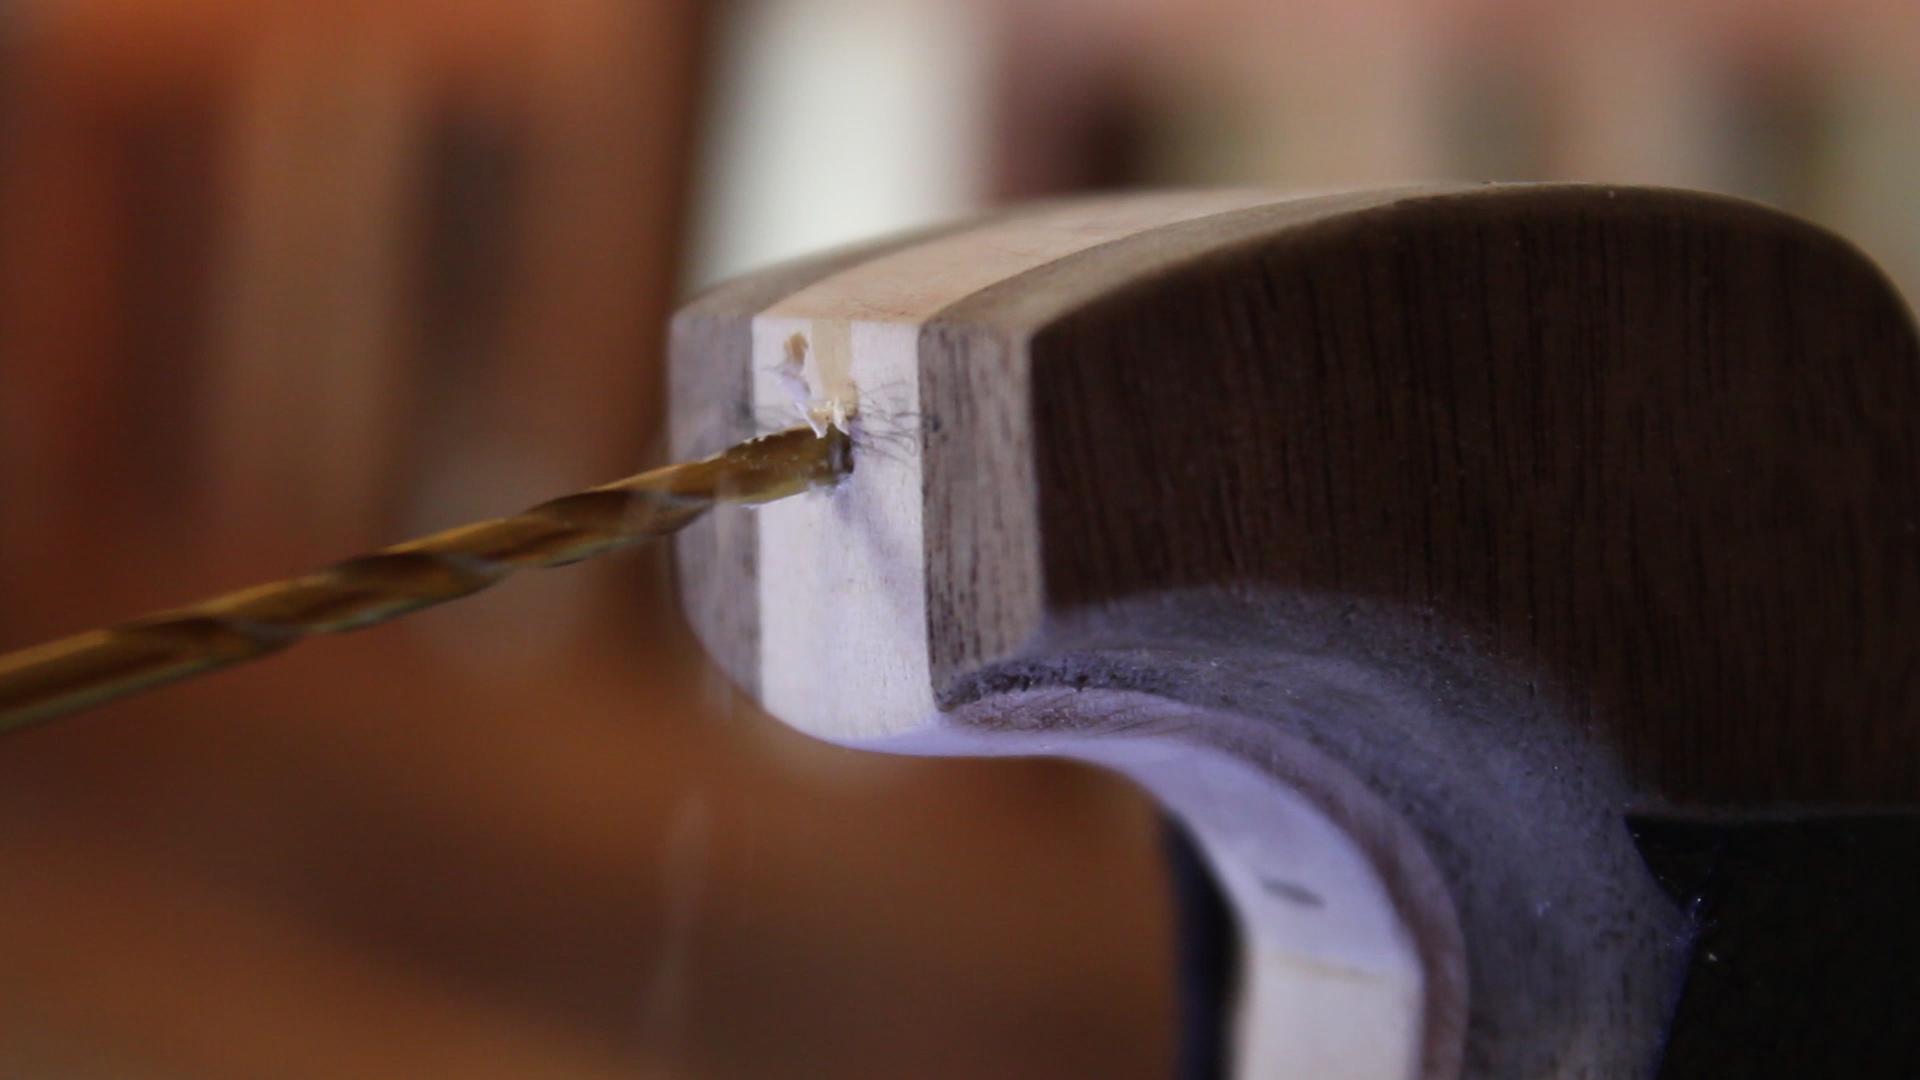
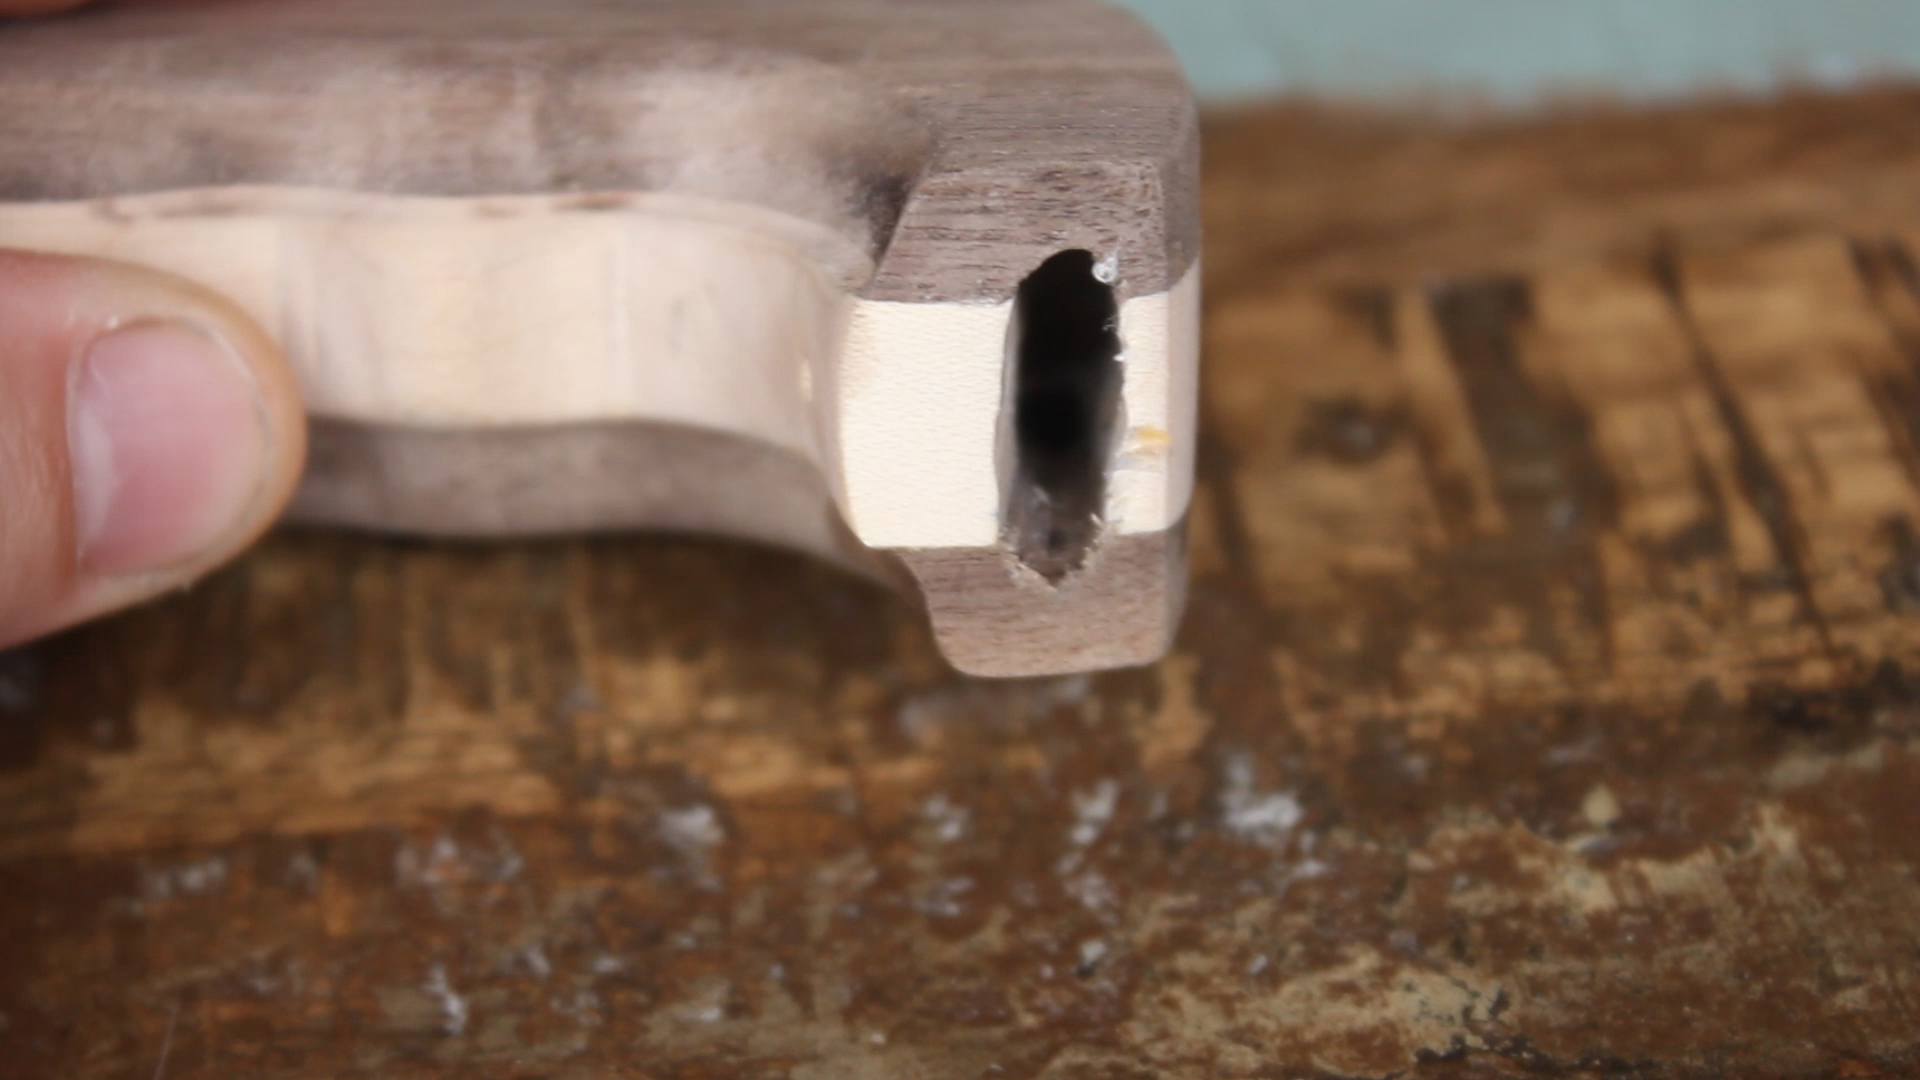
Using my vice again and a small drill bit, I drilled a bunch of holes (Picture 1) to create the larger hole that the tea kettle would slip into (Picture 2). To make this easier, I'd drill small holes, then slowly increase the drill bit size so that they'd all slowly come together to form one large hole, testing the fit in the process. The goal was to make it fit, but make it very snug.

After all was finished, I used some food safe mineral oil to finish the wood, protect is slightly, and bring out the grain. It looked great!
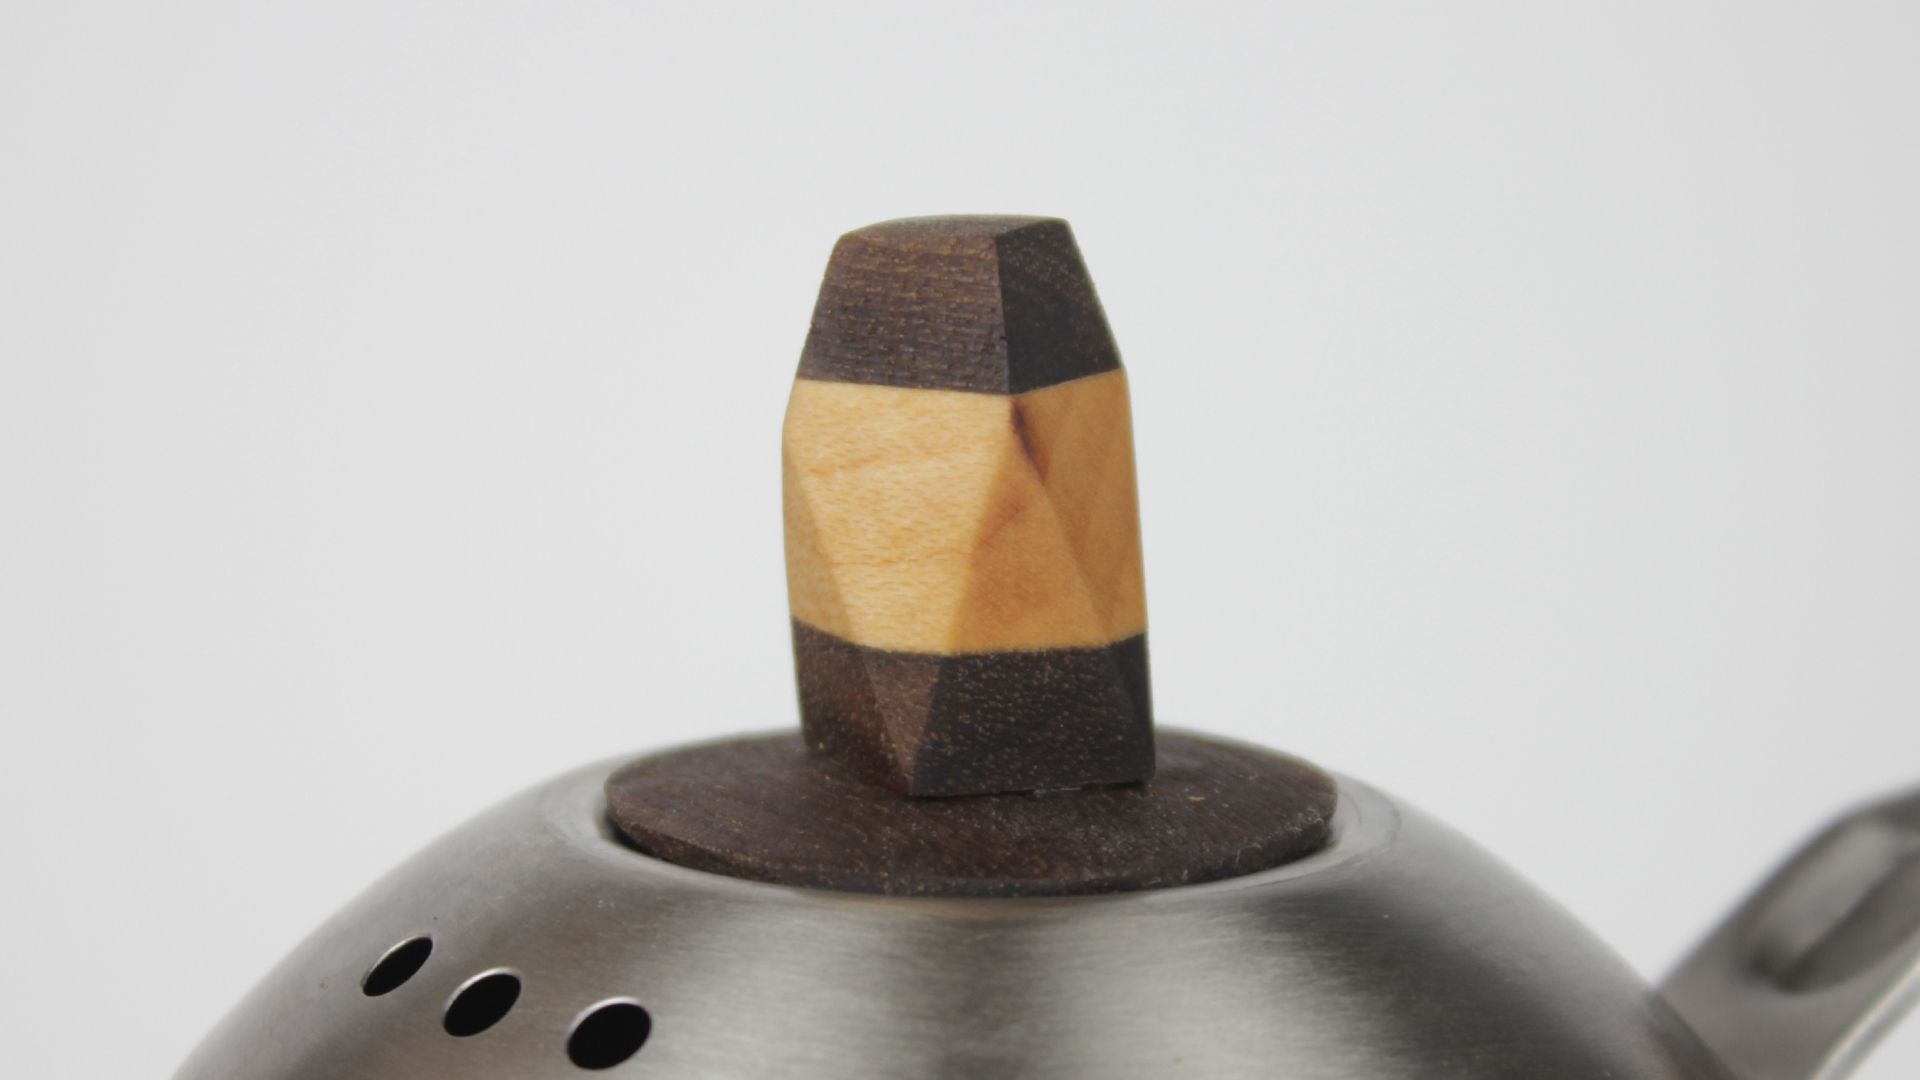

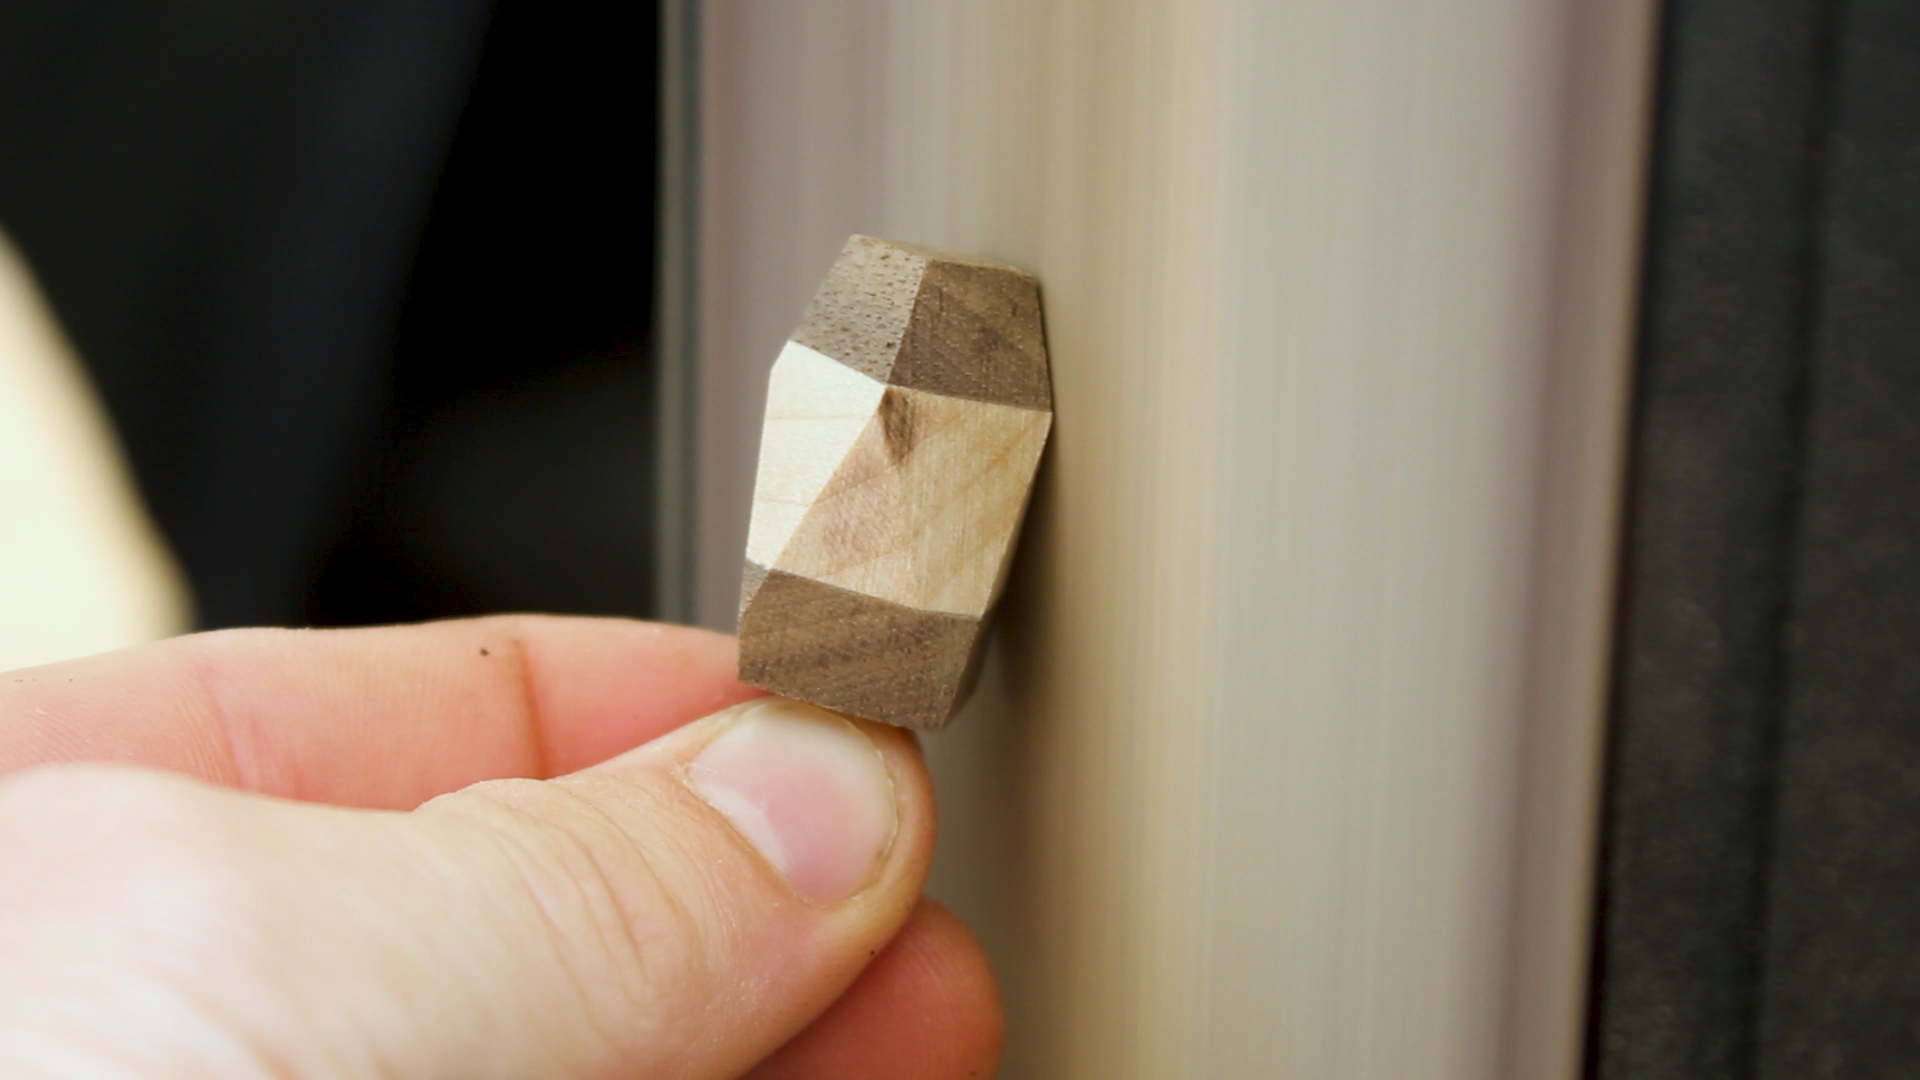
Then, using the hardware from the lid, I installed the new top (Picture 1) - it looks..."okay".
Then, using just pressure and friction, I forced / hammered on the new handle (Picture 2 and 3). It fits very well and doesn't require any hardware. If, for whatever reason, I eventually need to secure it more, I think I'll just use some 5 minute epoxy.

Thanks for reading!
The above gif shows the transition. Obviously this is a small and subtle overall change, but as a woodworker / maker with a desire to do a bit more "fine" woodworking, I thought that this would be a fun project to tackle in my free time, film in a macro sort of way, as well as share with the maker community for inspiration.
As always, thank you for reading! I would be so grateful if you could please subscribe to my Youtube Channel for future projects. I put out videos every few weeks.
Cheers!
Zach