My sister was in the market for a modern looking coffee table. I found a reference to a very very expensive coffee table that i thought I could emulate with some furniture-grade plywood. Everything was designed in the free version of SketchUp!
The free SketchUp file can be found here for download
Thanks for checking out the article and video!
MATERIALS
2 x 4’x8’x.75” Furniture-Grade Plywood
Wood glue
Wood stain, conditioner, and painters tape
1” Brad nails
1/2” Dowel
Rubber Feet
TOOLS
Tracksaw https://amzn.to/38DozKA
Sawstop Table Saw: https://amzn.to/2Luh91q
Table Saw Sled: https://amzn.to/2t2qVjD
Brad Nailer: https://amzn.to/2Uz6tCI
Power Drill: http://amzn.to/2q1l5wn + Drill bits
Orbital Sander: https://amzn.to/2ALtz16
Band Saw (not totally necessary)
A Mallet
Flush Trim Saw
A variety of clamps!

Above is the design for the table. You can access the SketchUp file of this in the link at the top.
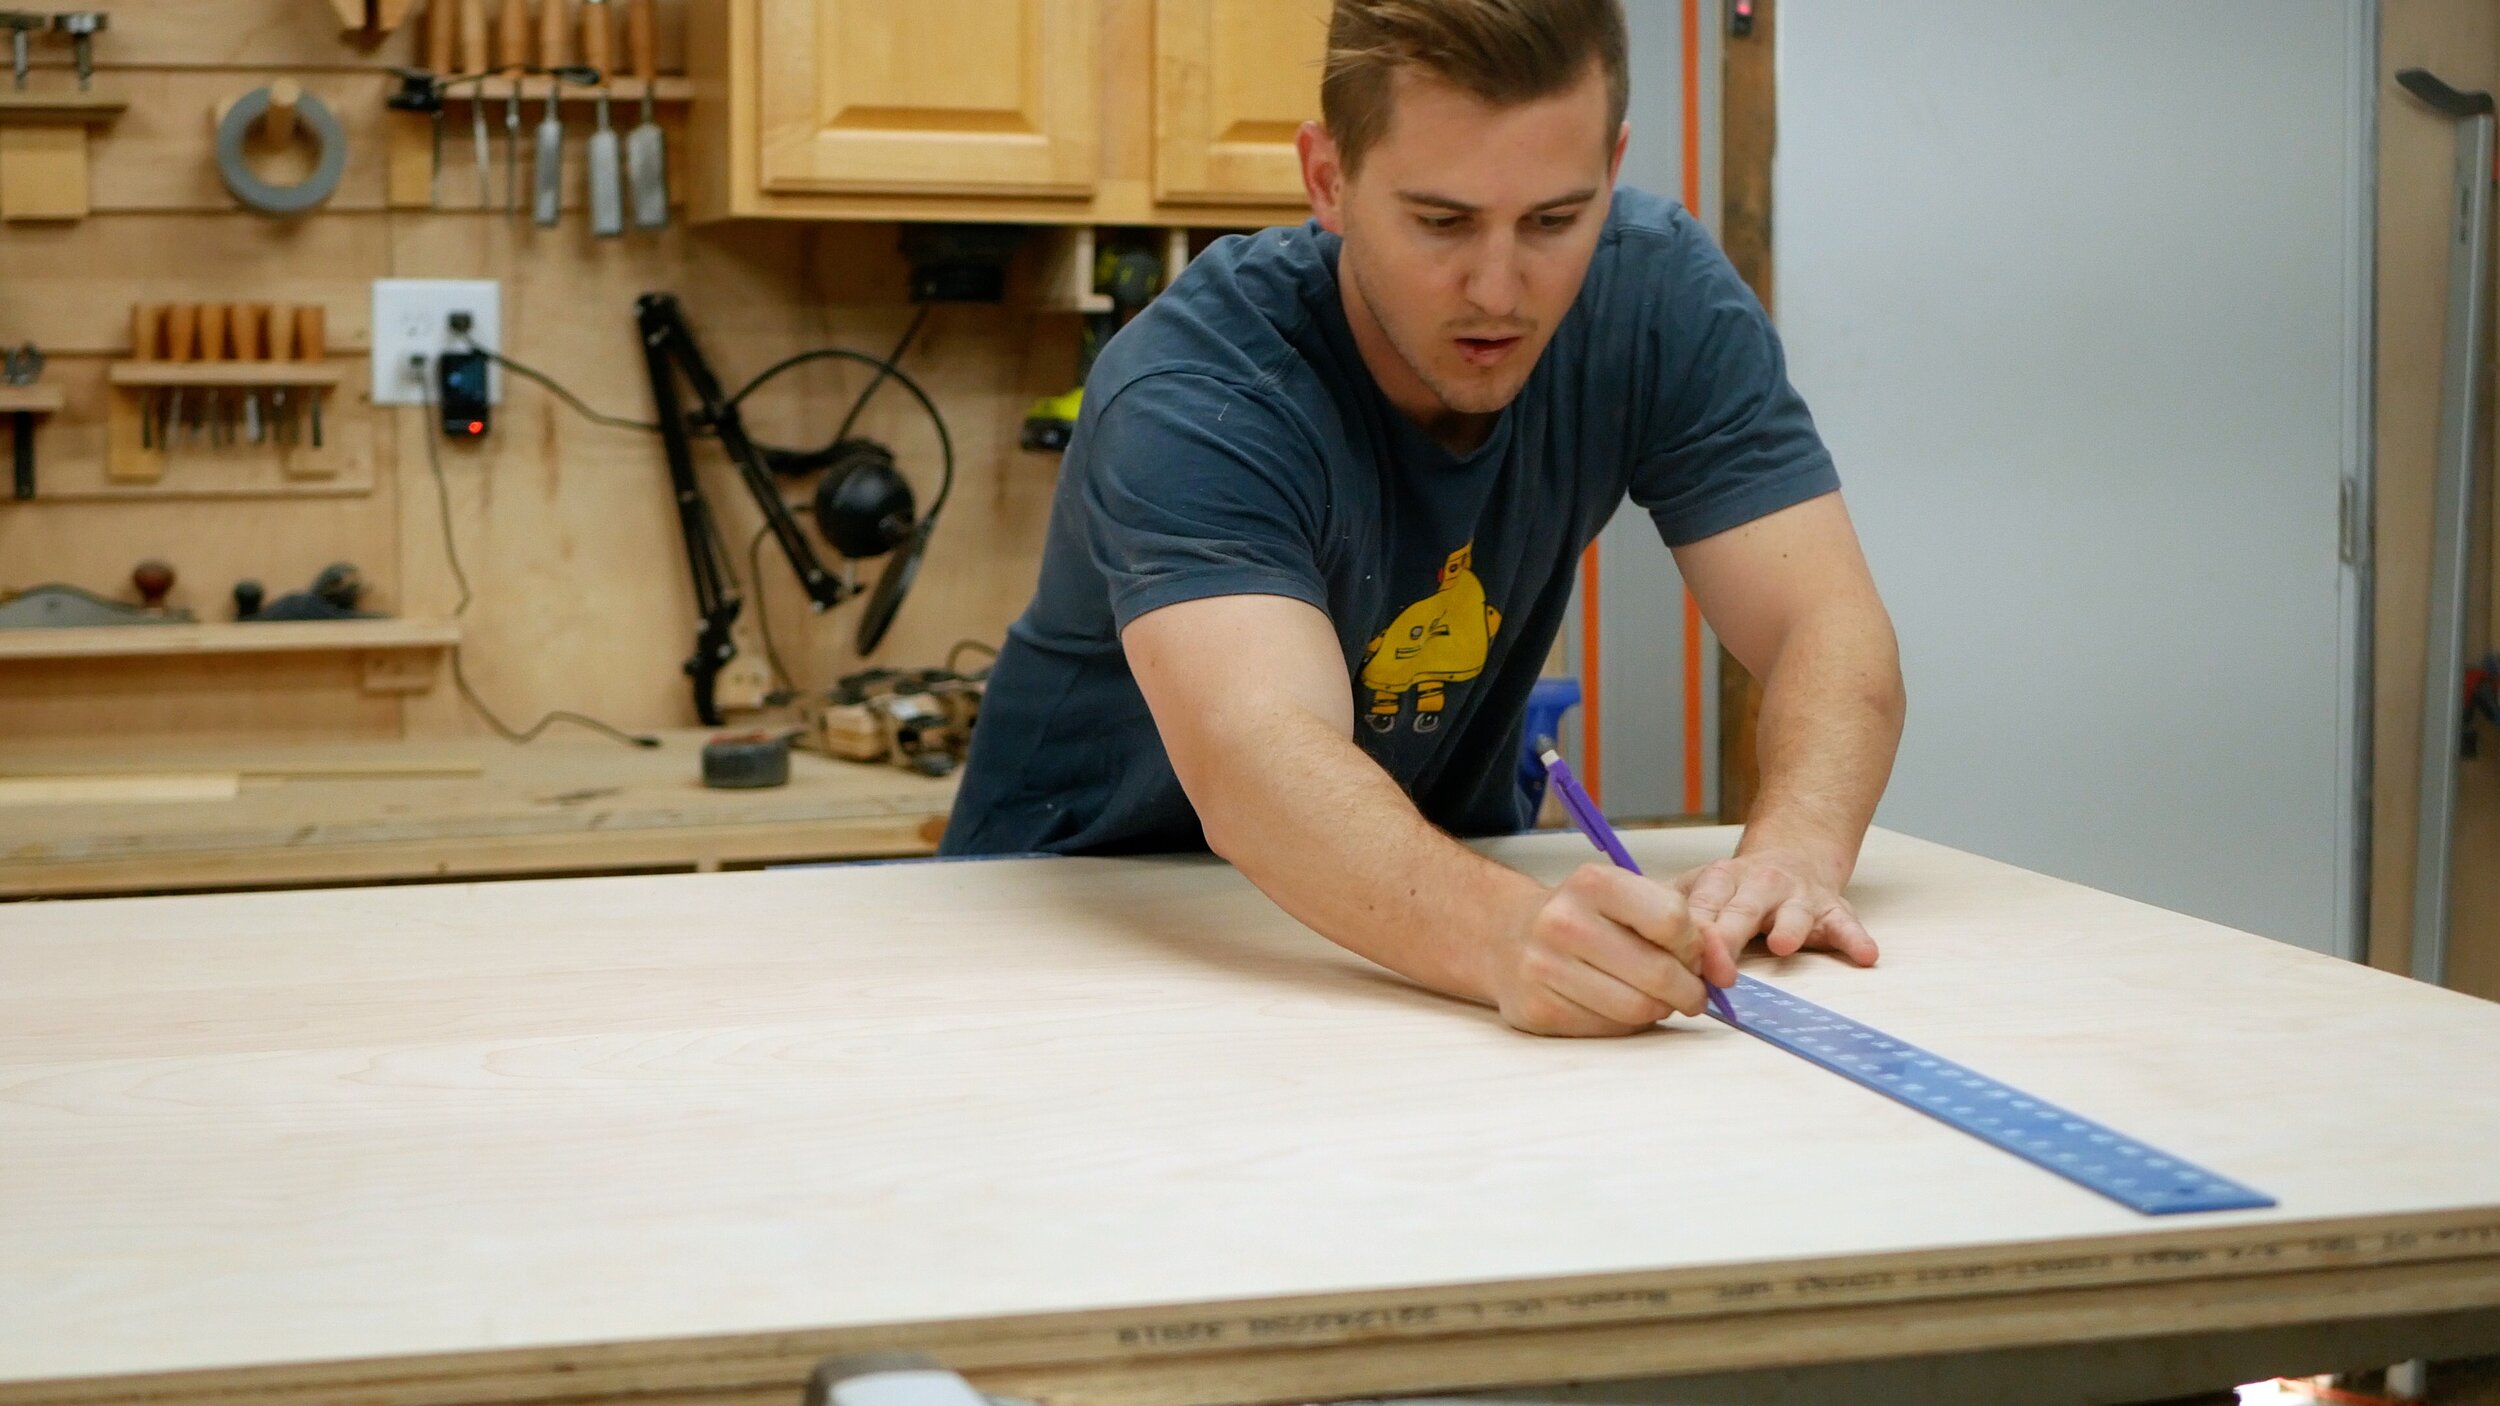
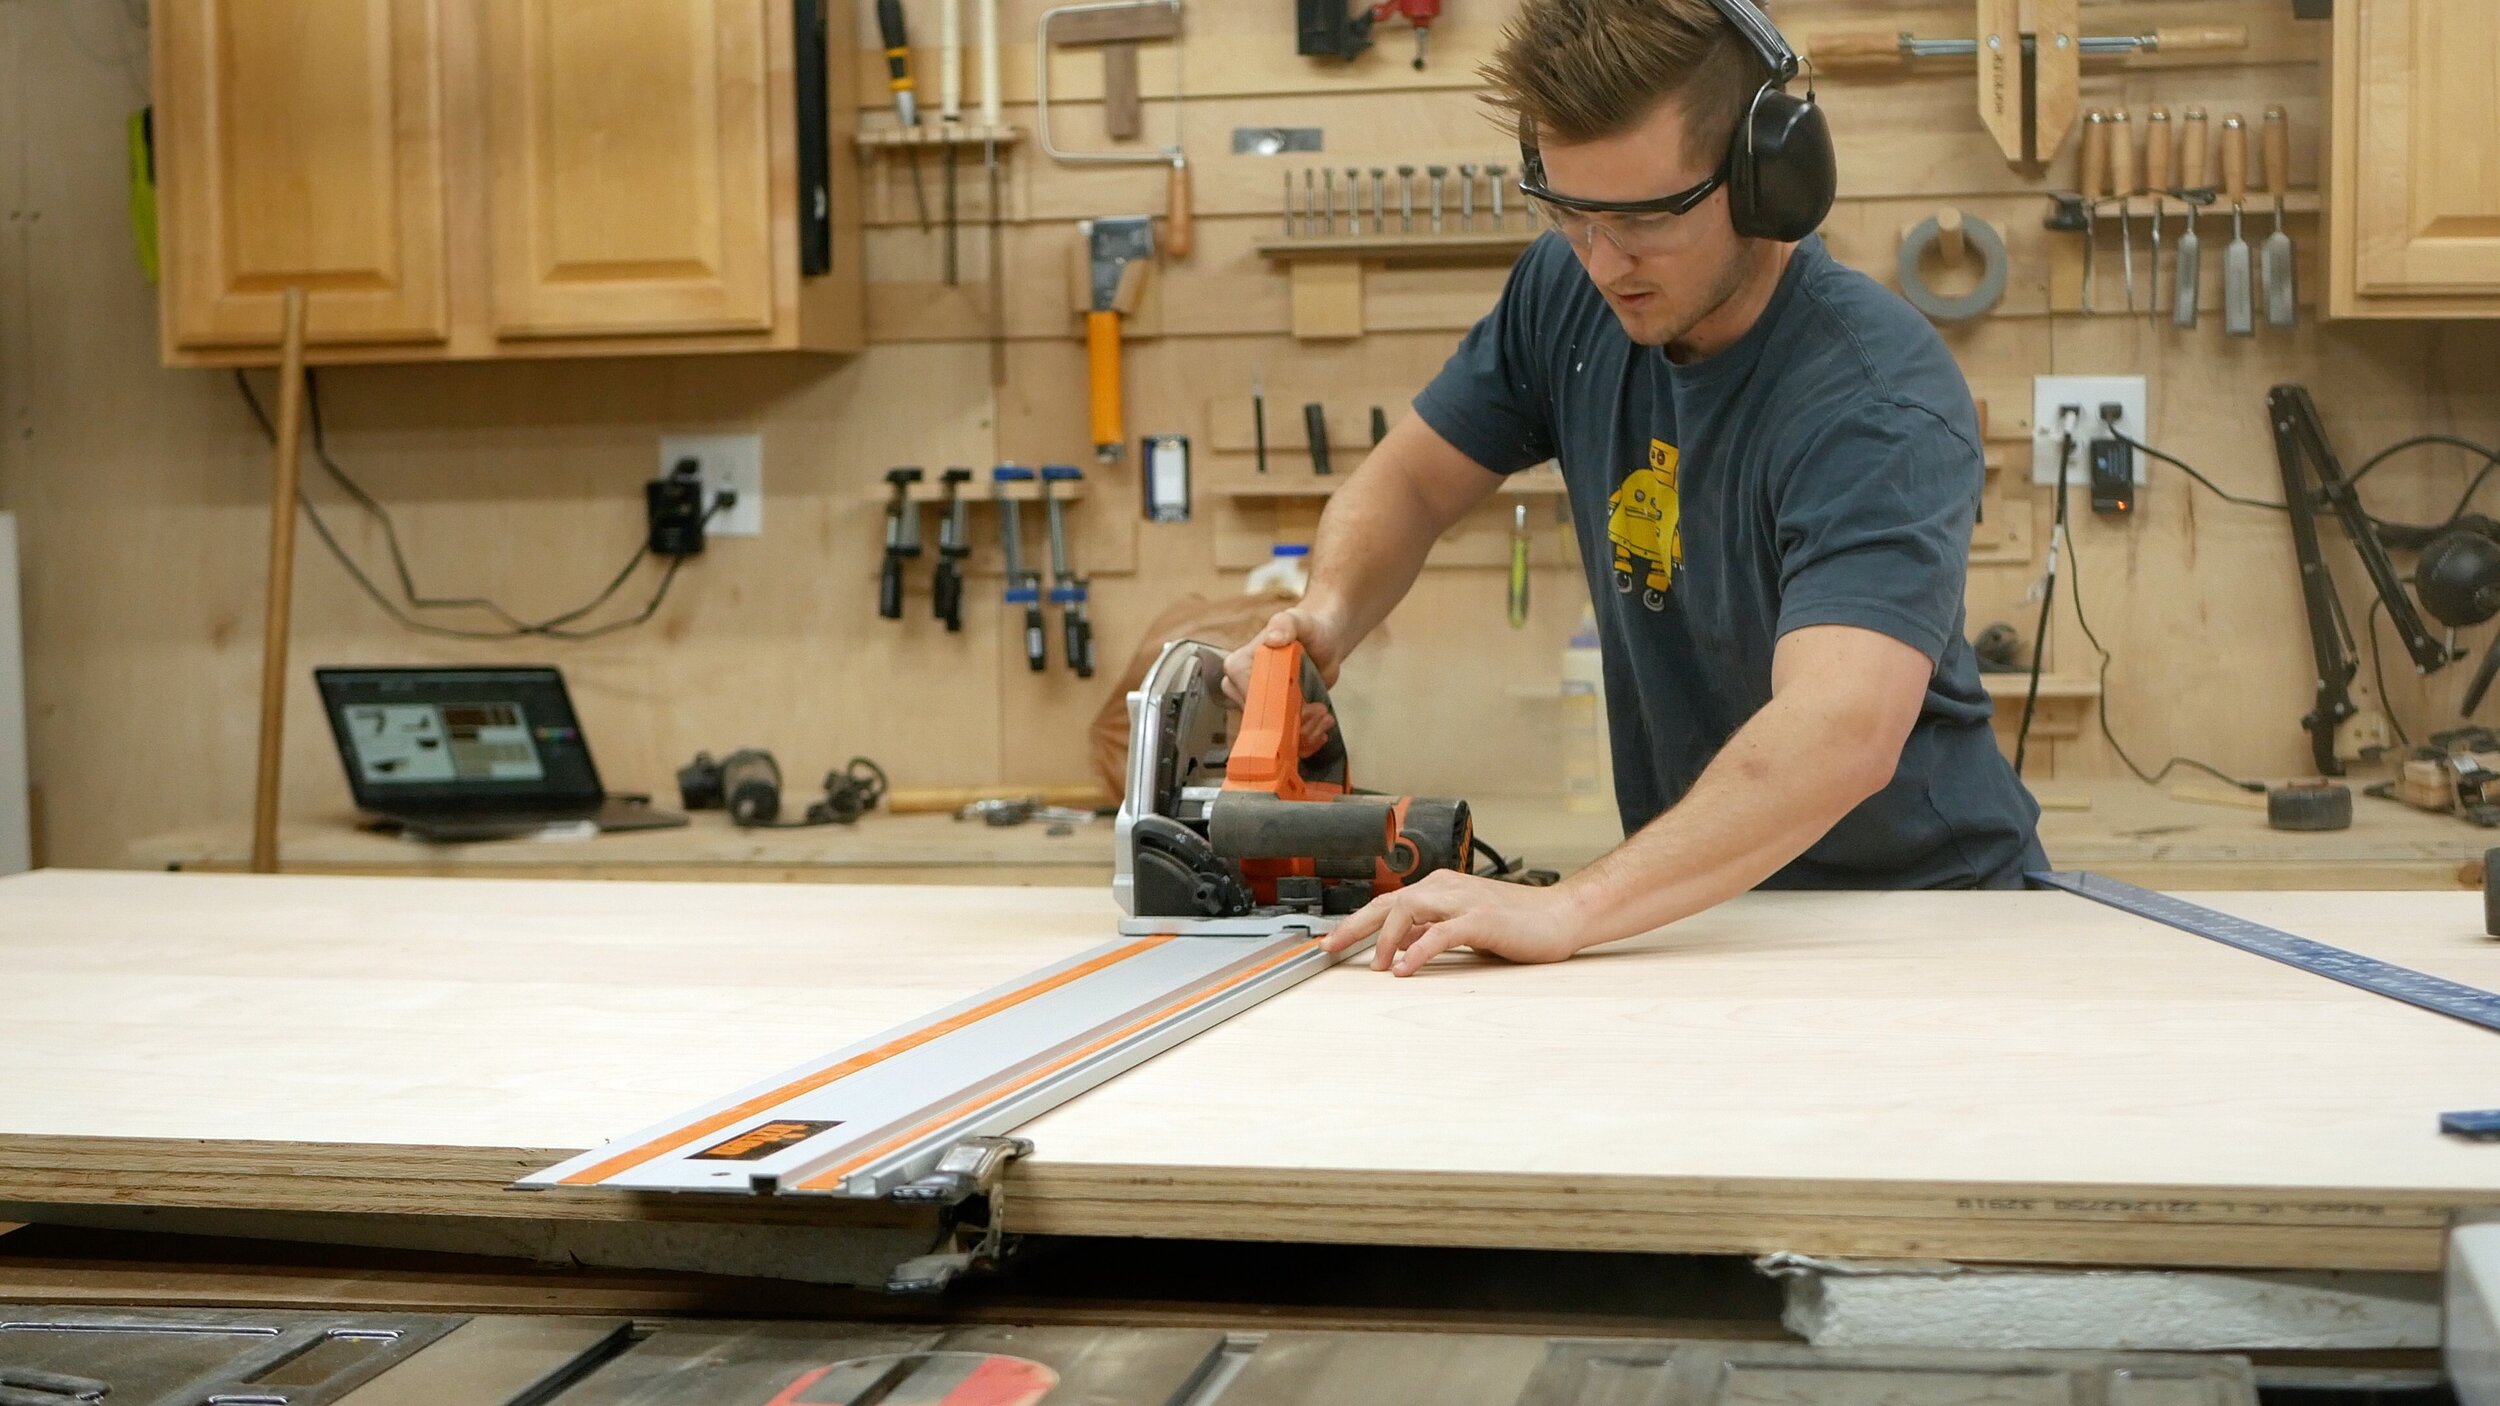

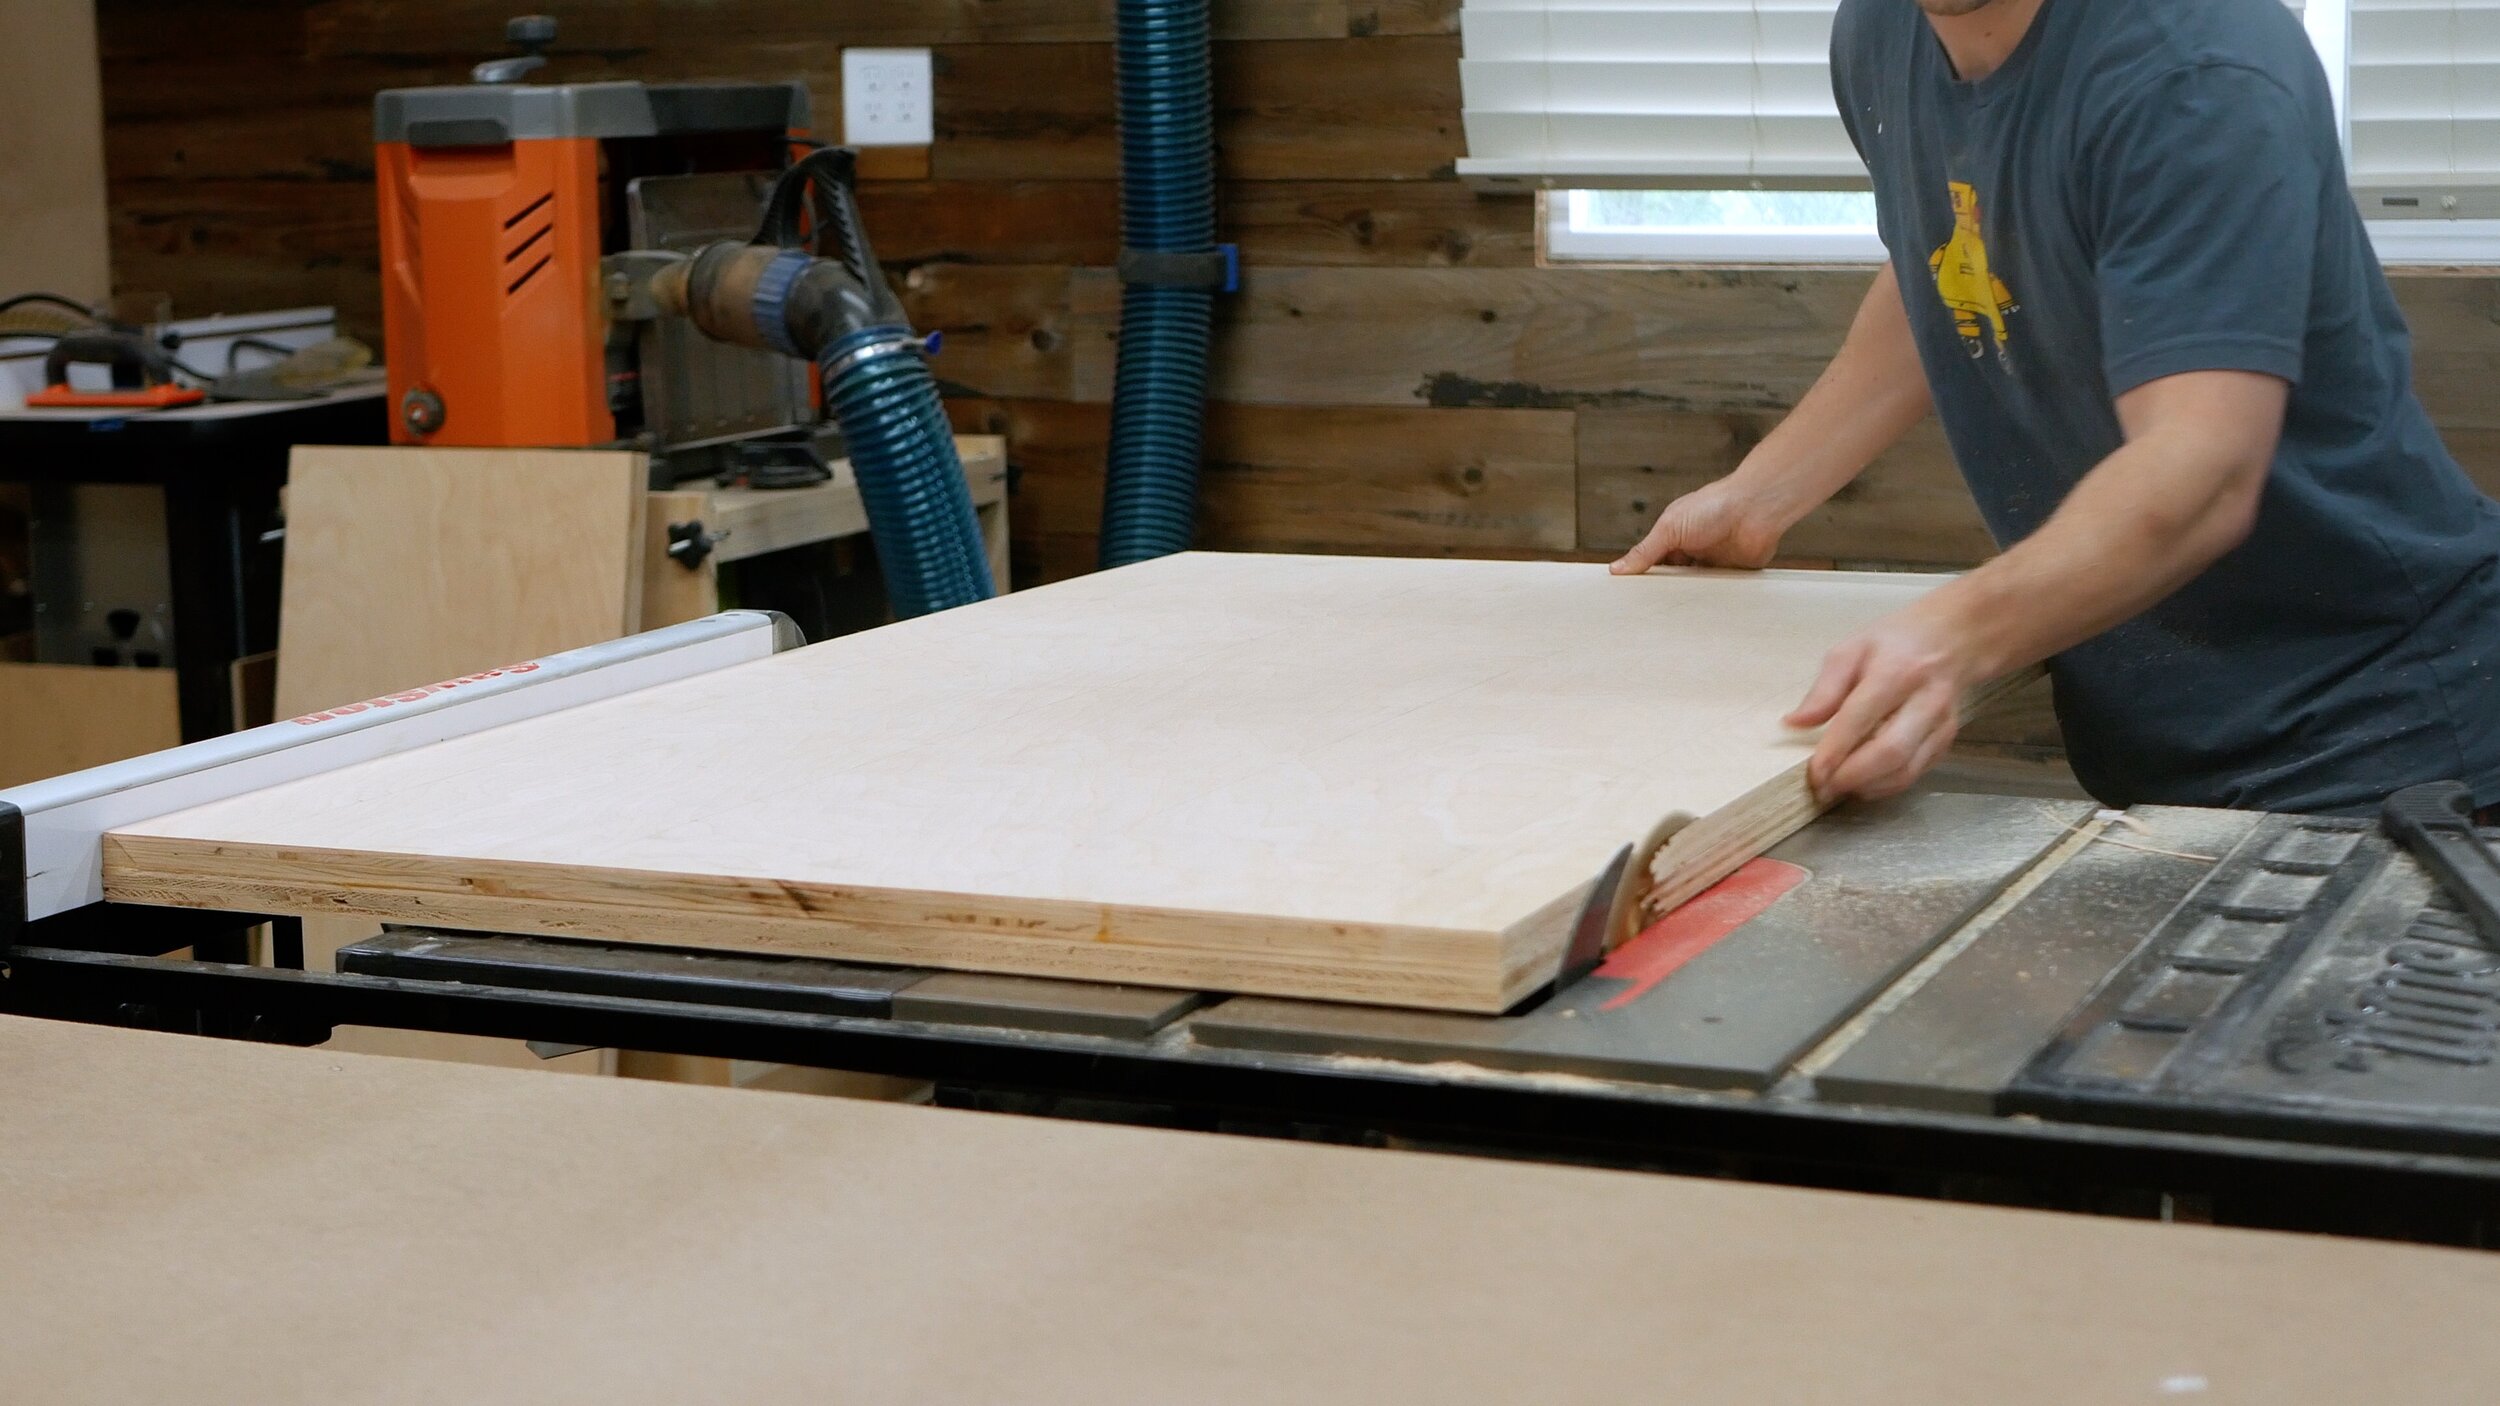
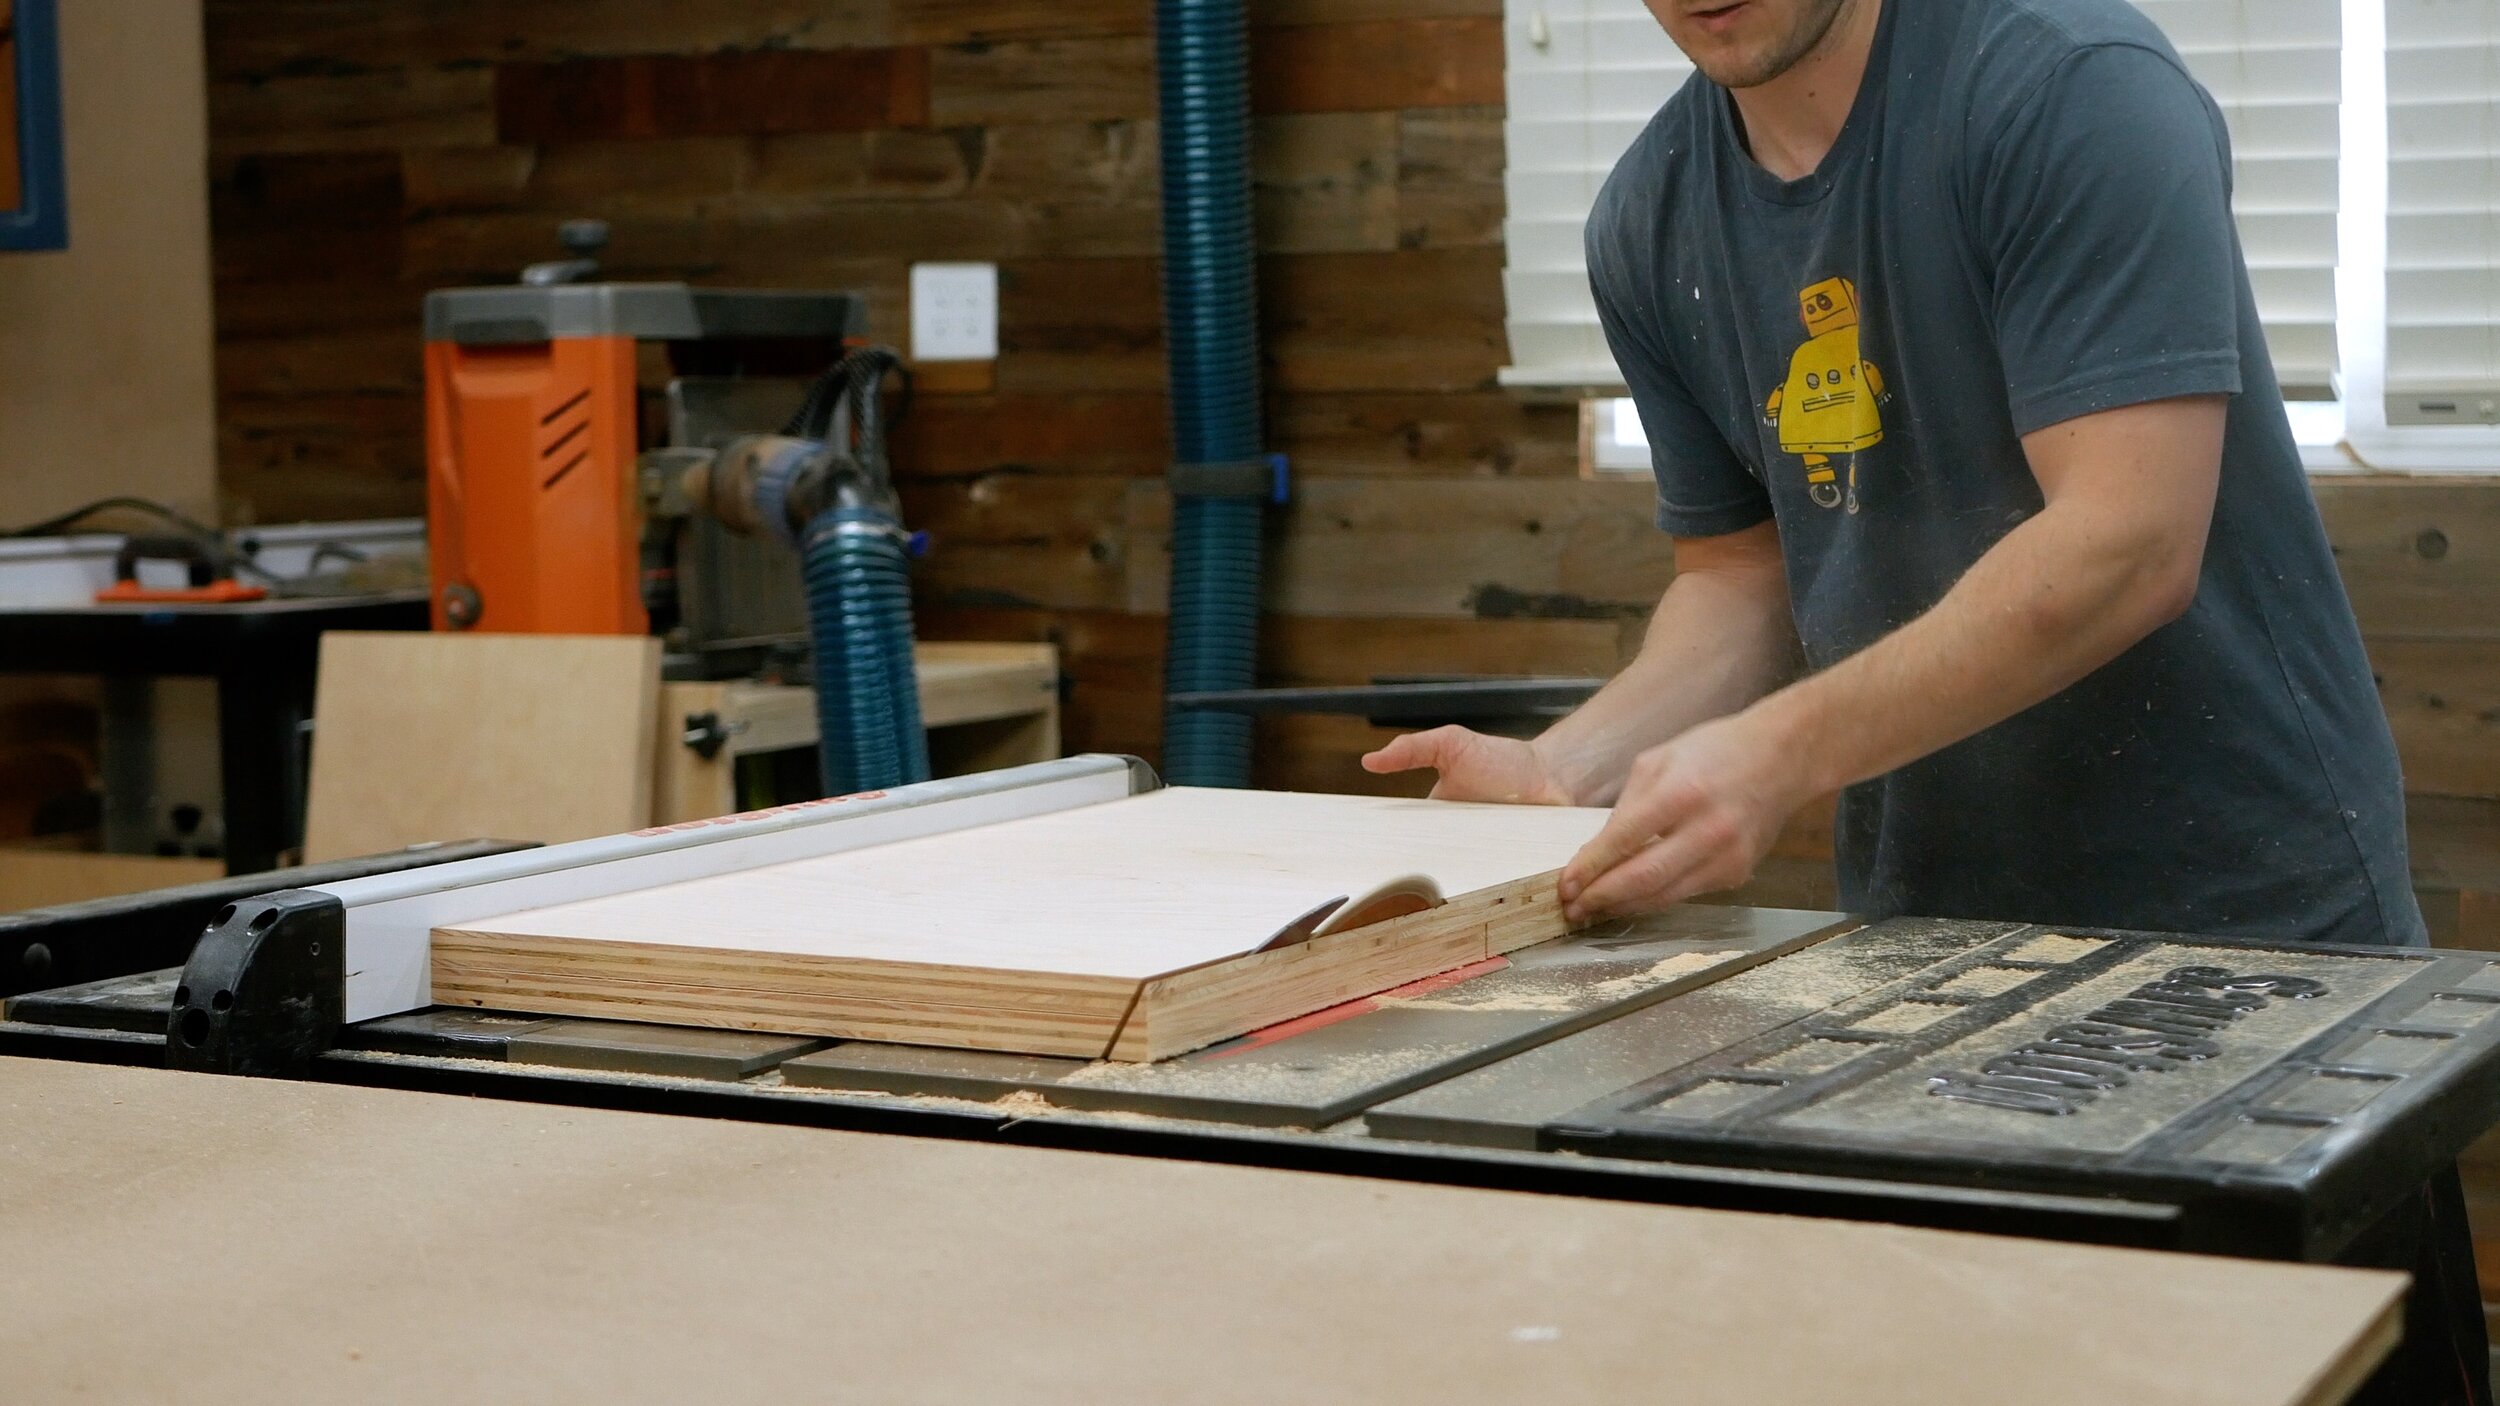
This coffee table is built using 2 sheets of ¾” furniture grade plywood (if you make a smaller table, you can probably get away with one sheet) and ½” dowels. I began by breaking down my materials into all of my pieces using a combination of my track saw and table saw - I cut two of each piece because the table will be double stacked laminated sheets for each component. I cut them oversized so I could trim them down to their final size after Step 2. Initially, I intended for my table to have a bottom section, which is why you see more pieces than you’ll need if you build the table in the same final way I did.
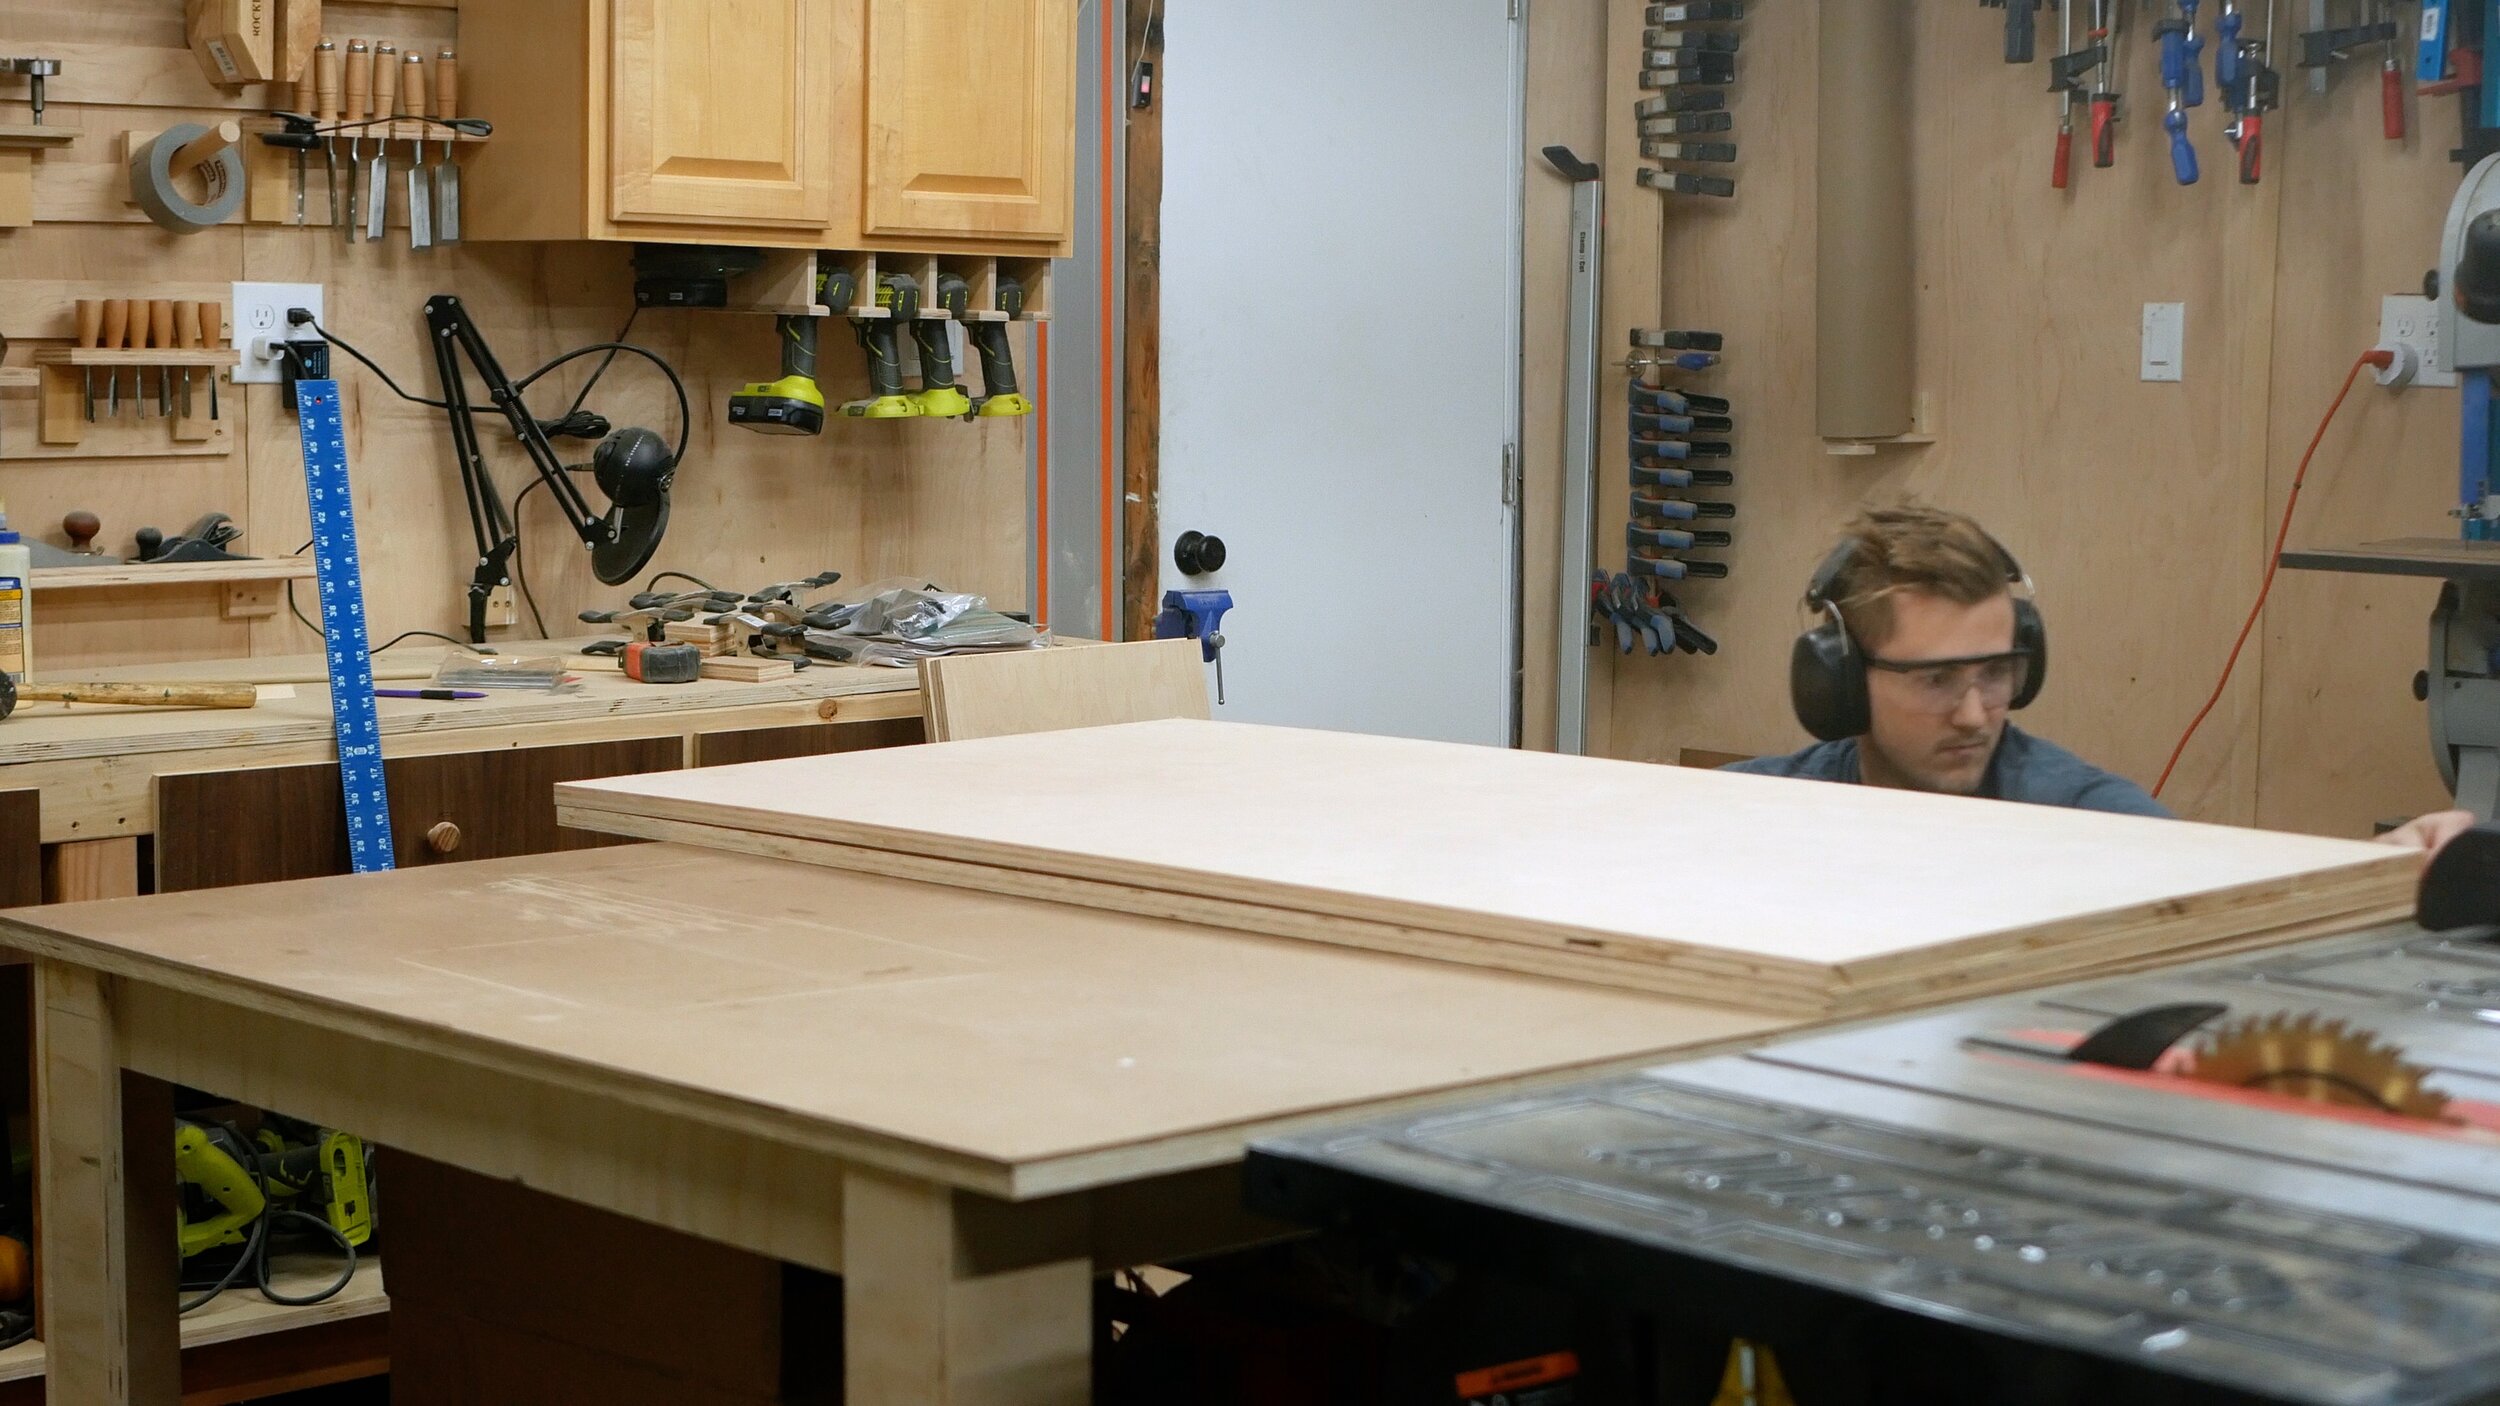
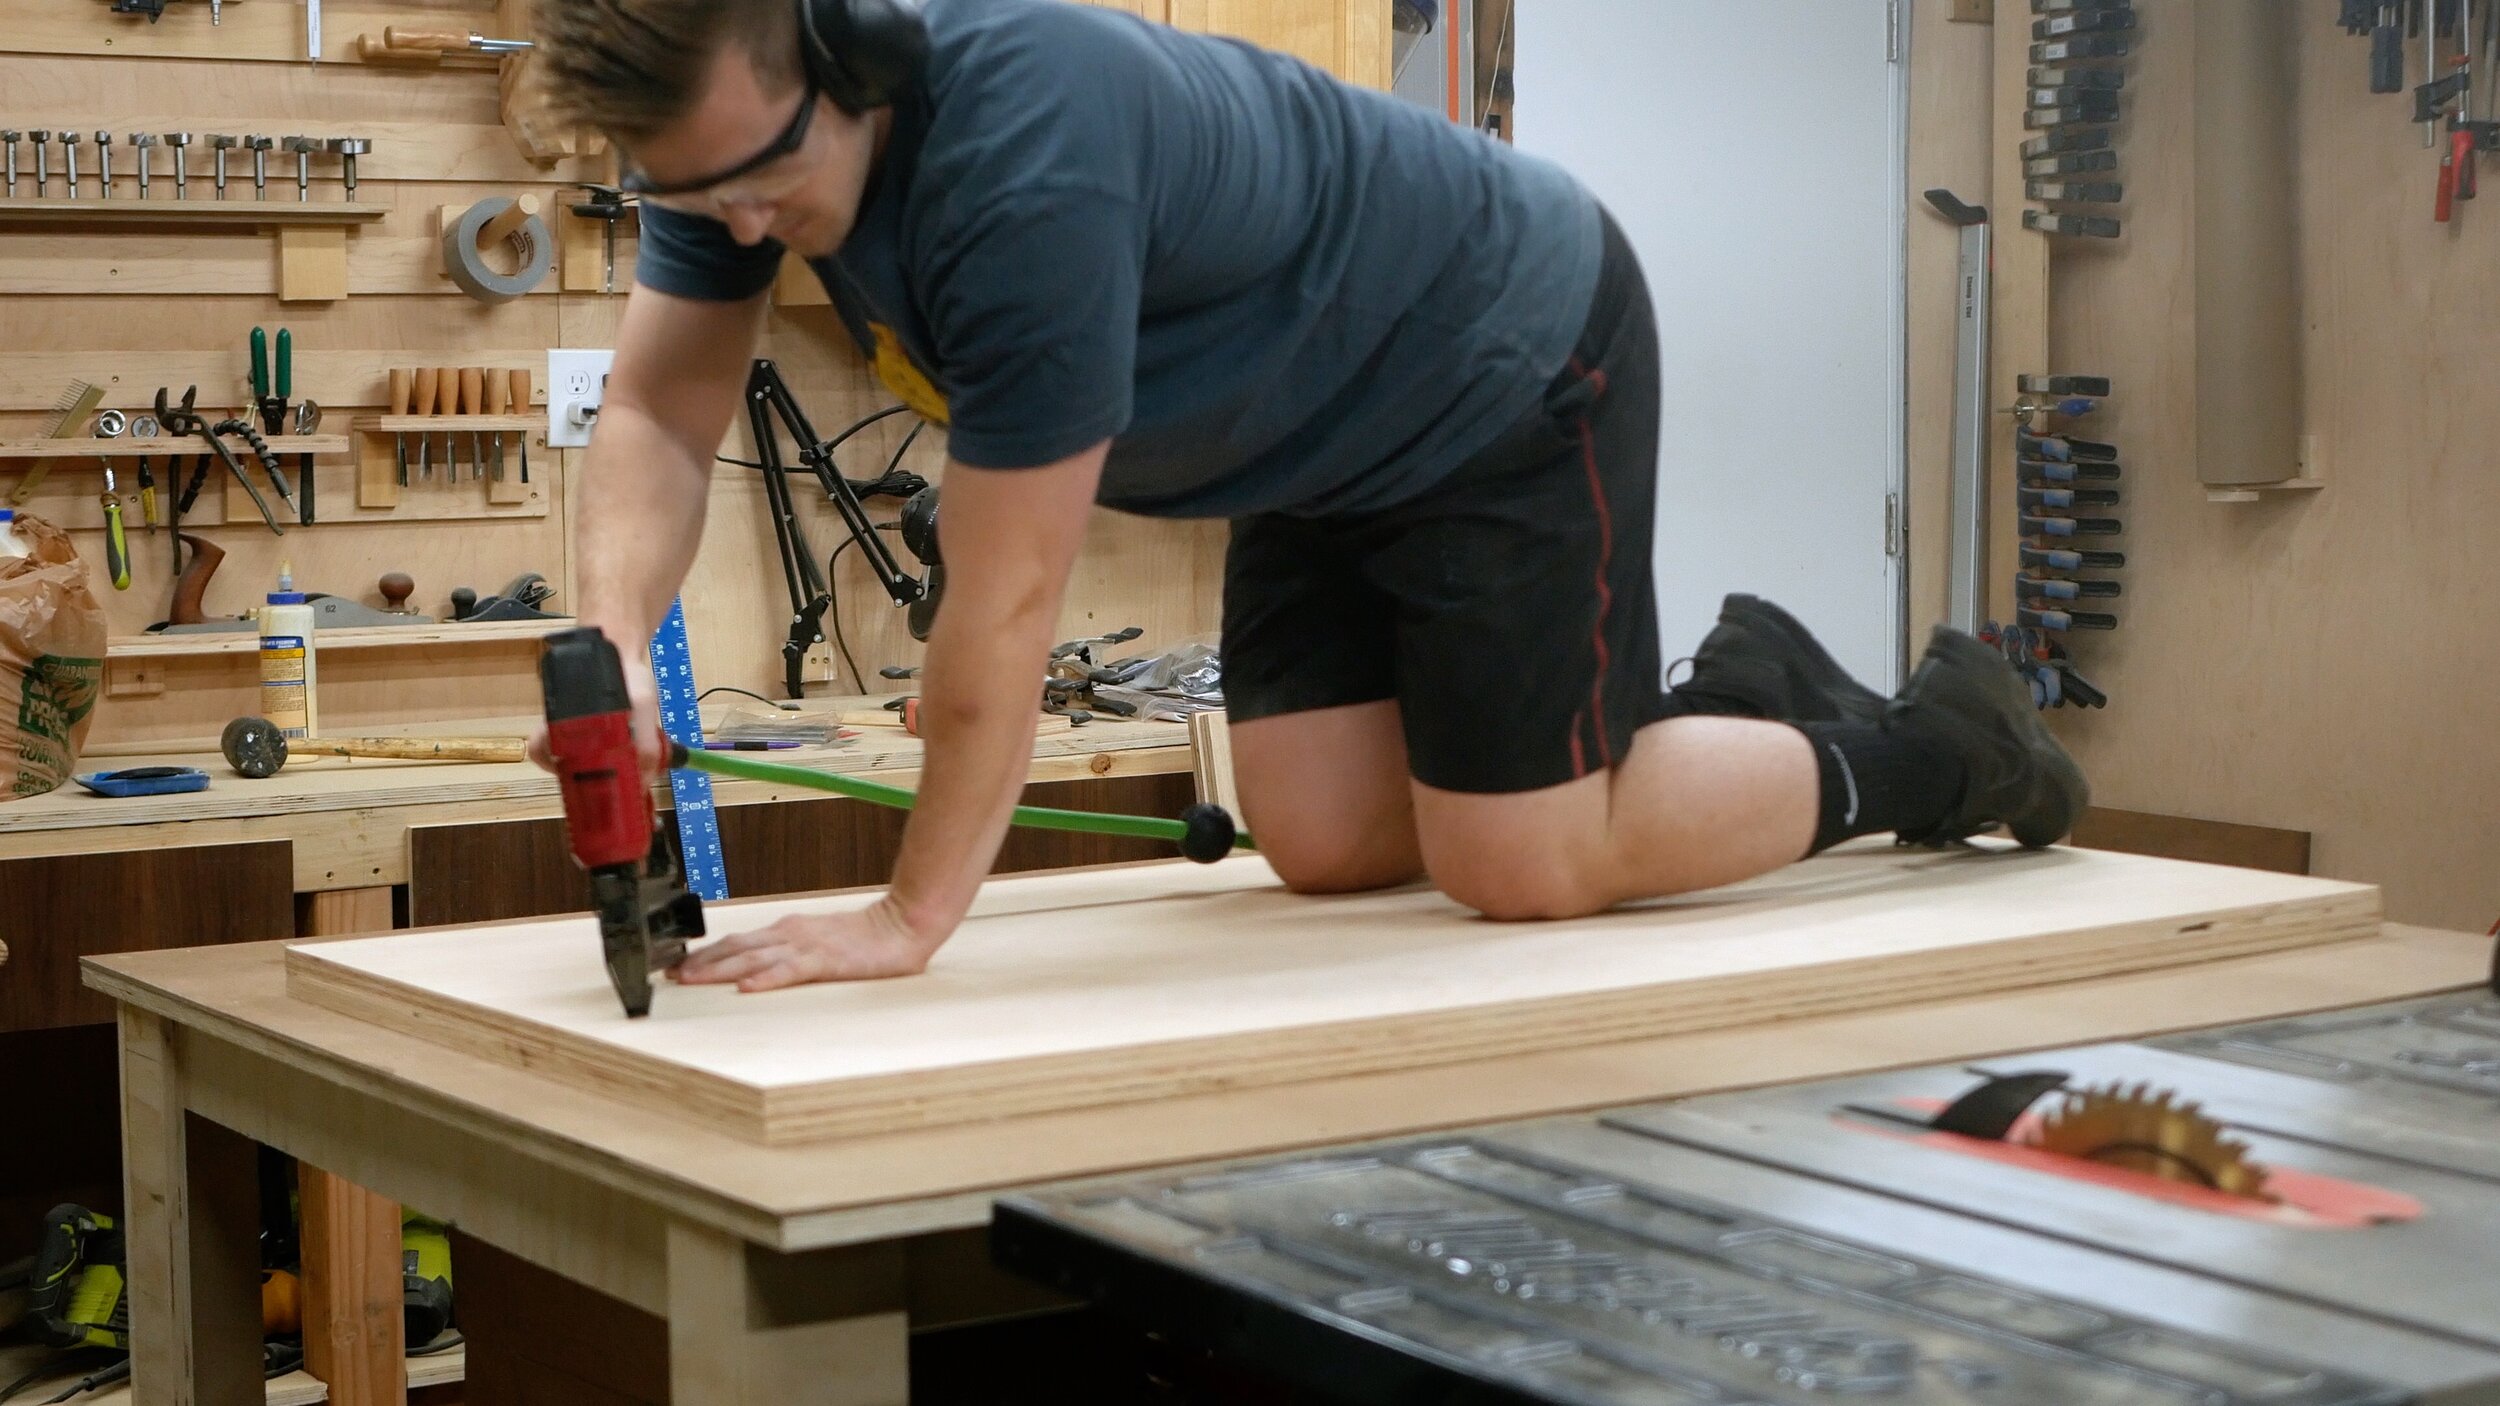
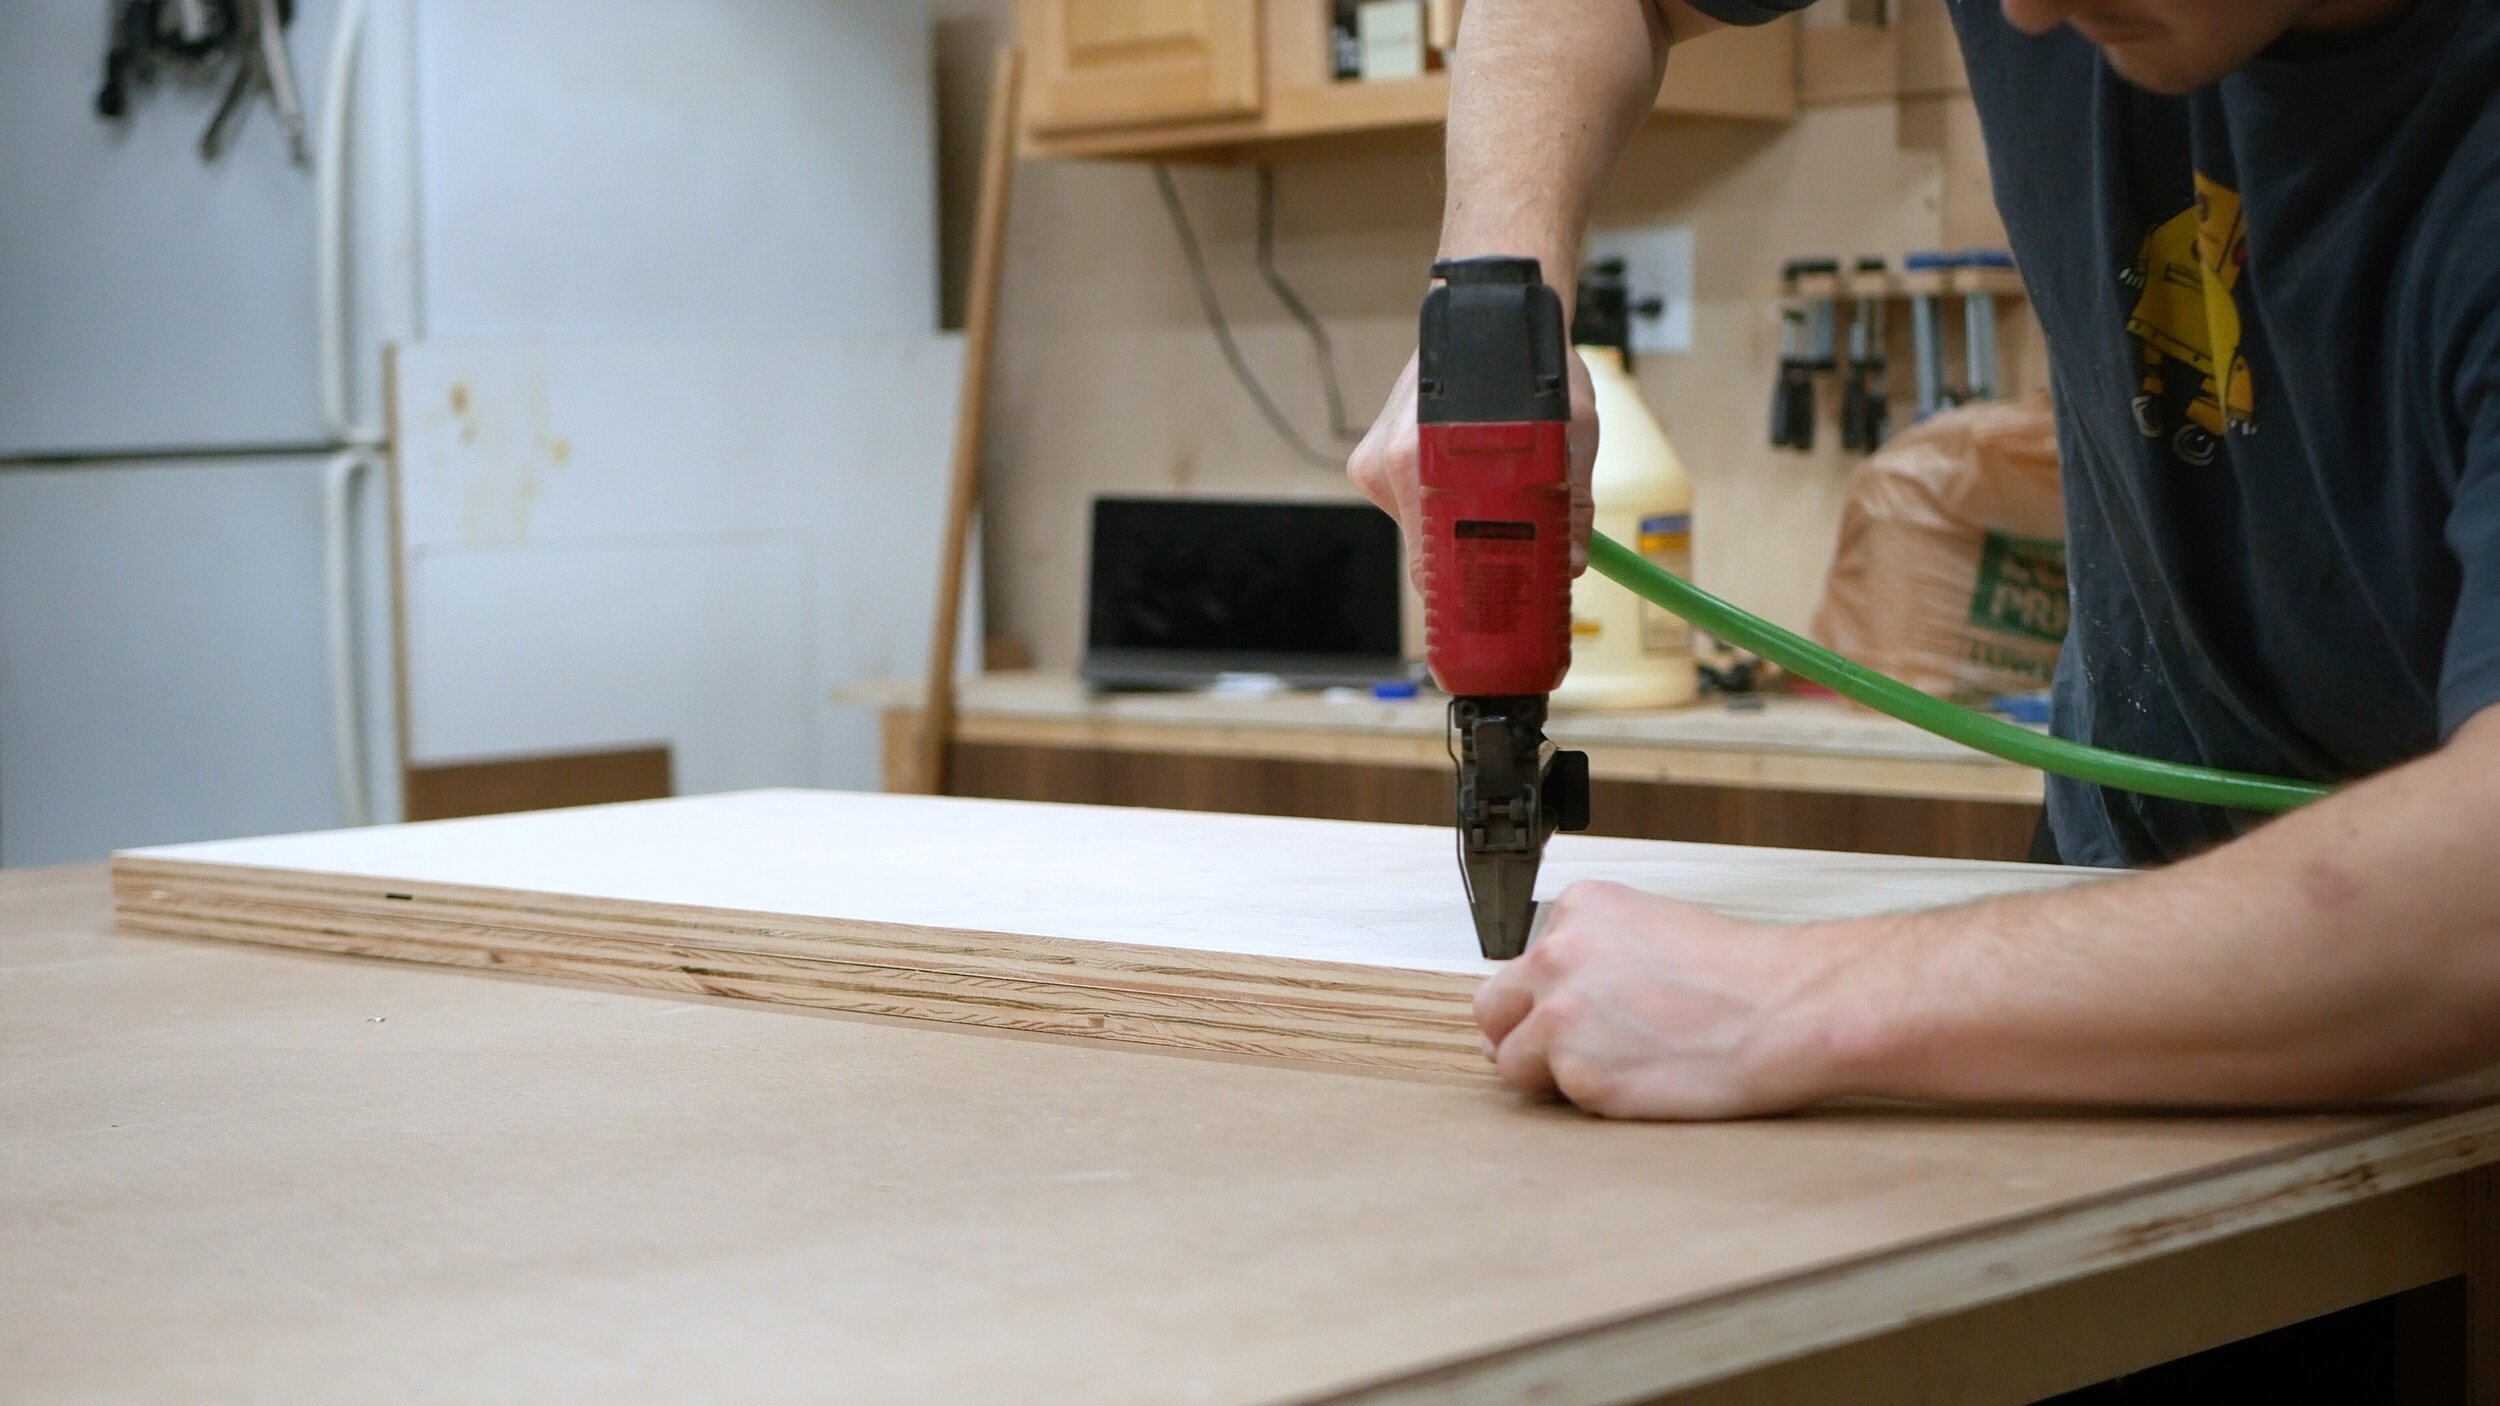
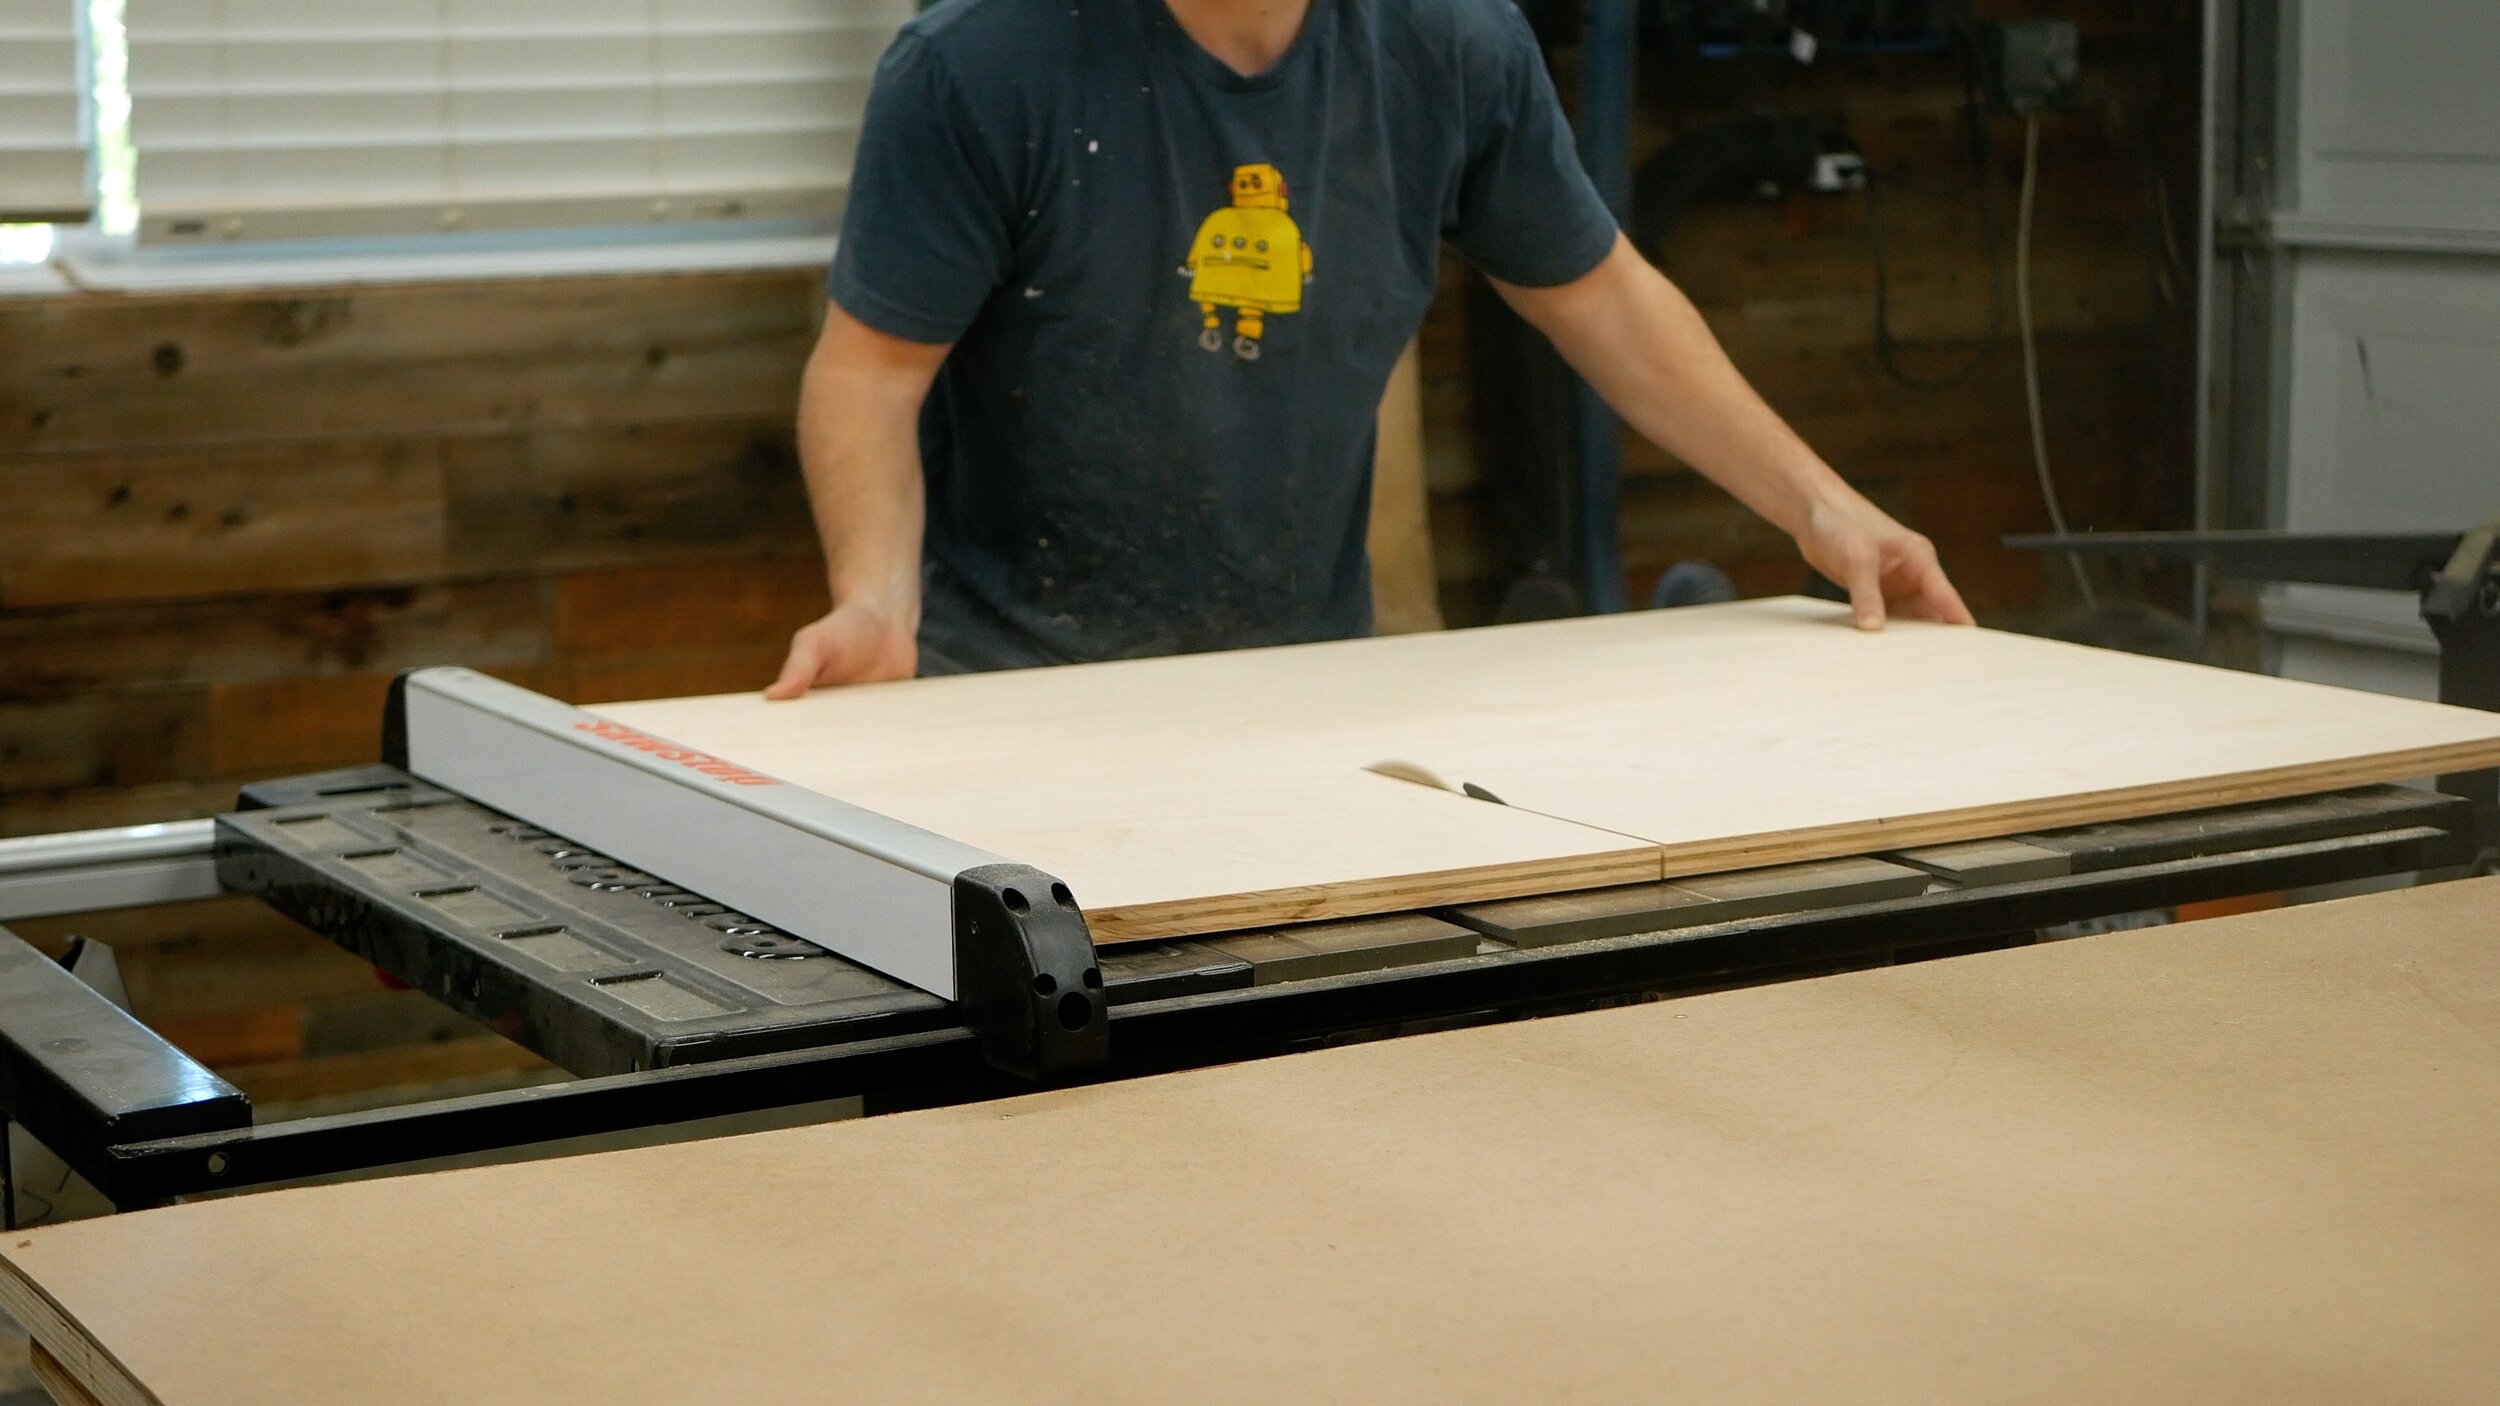
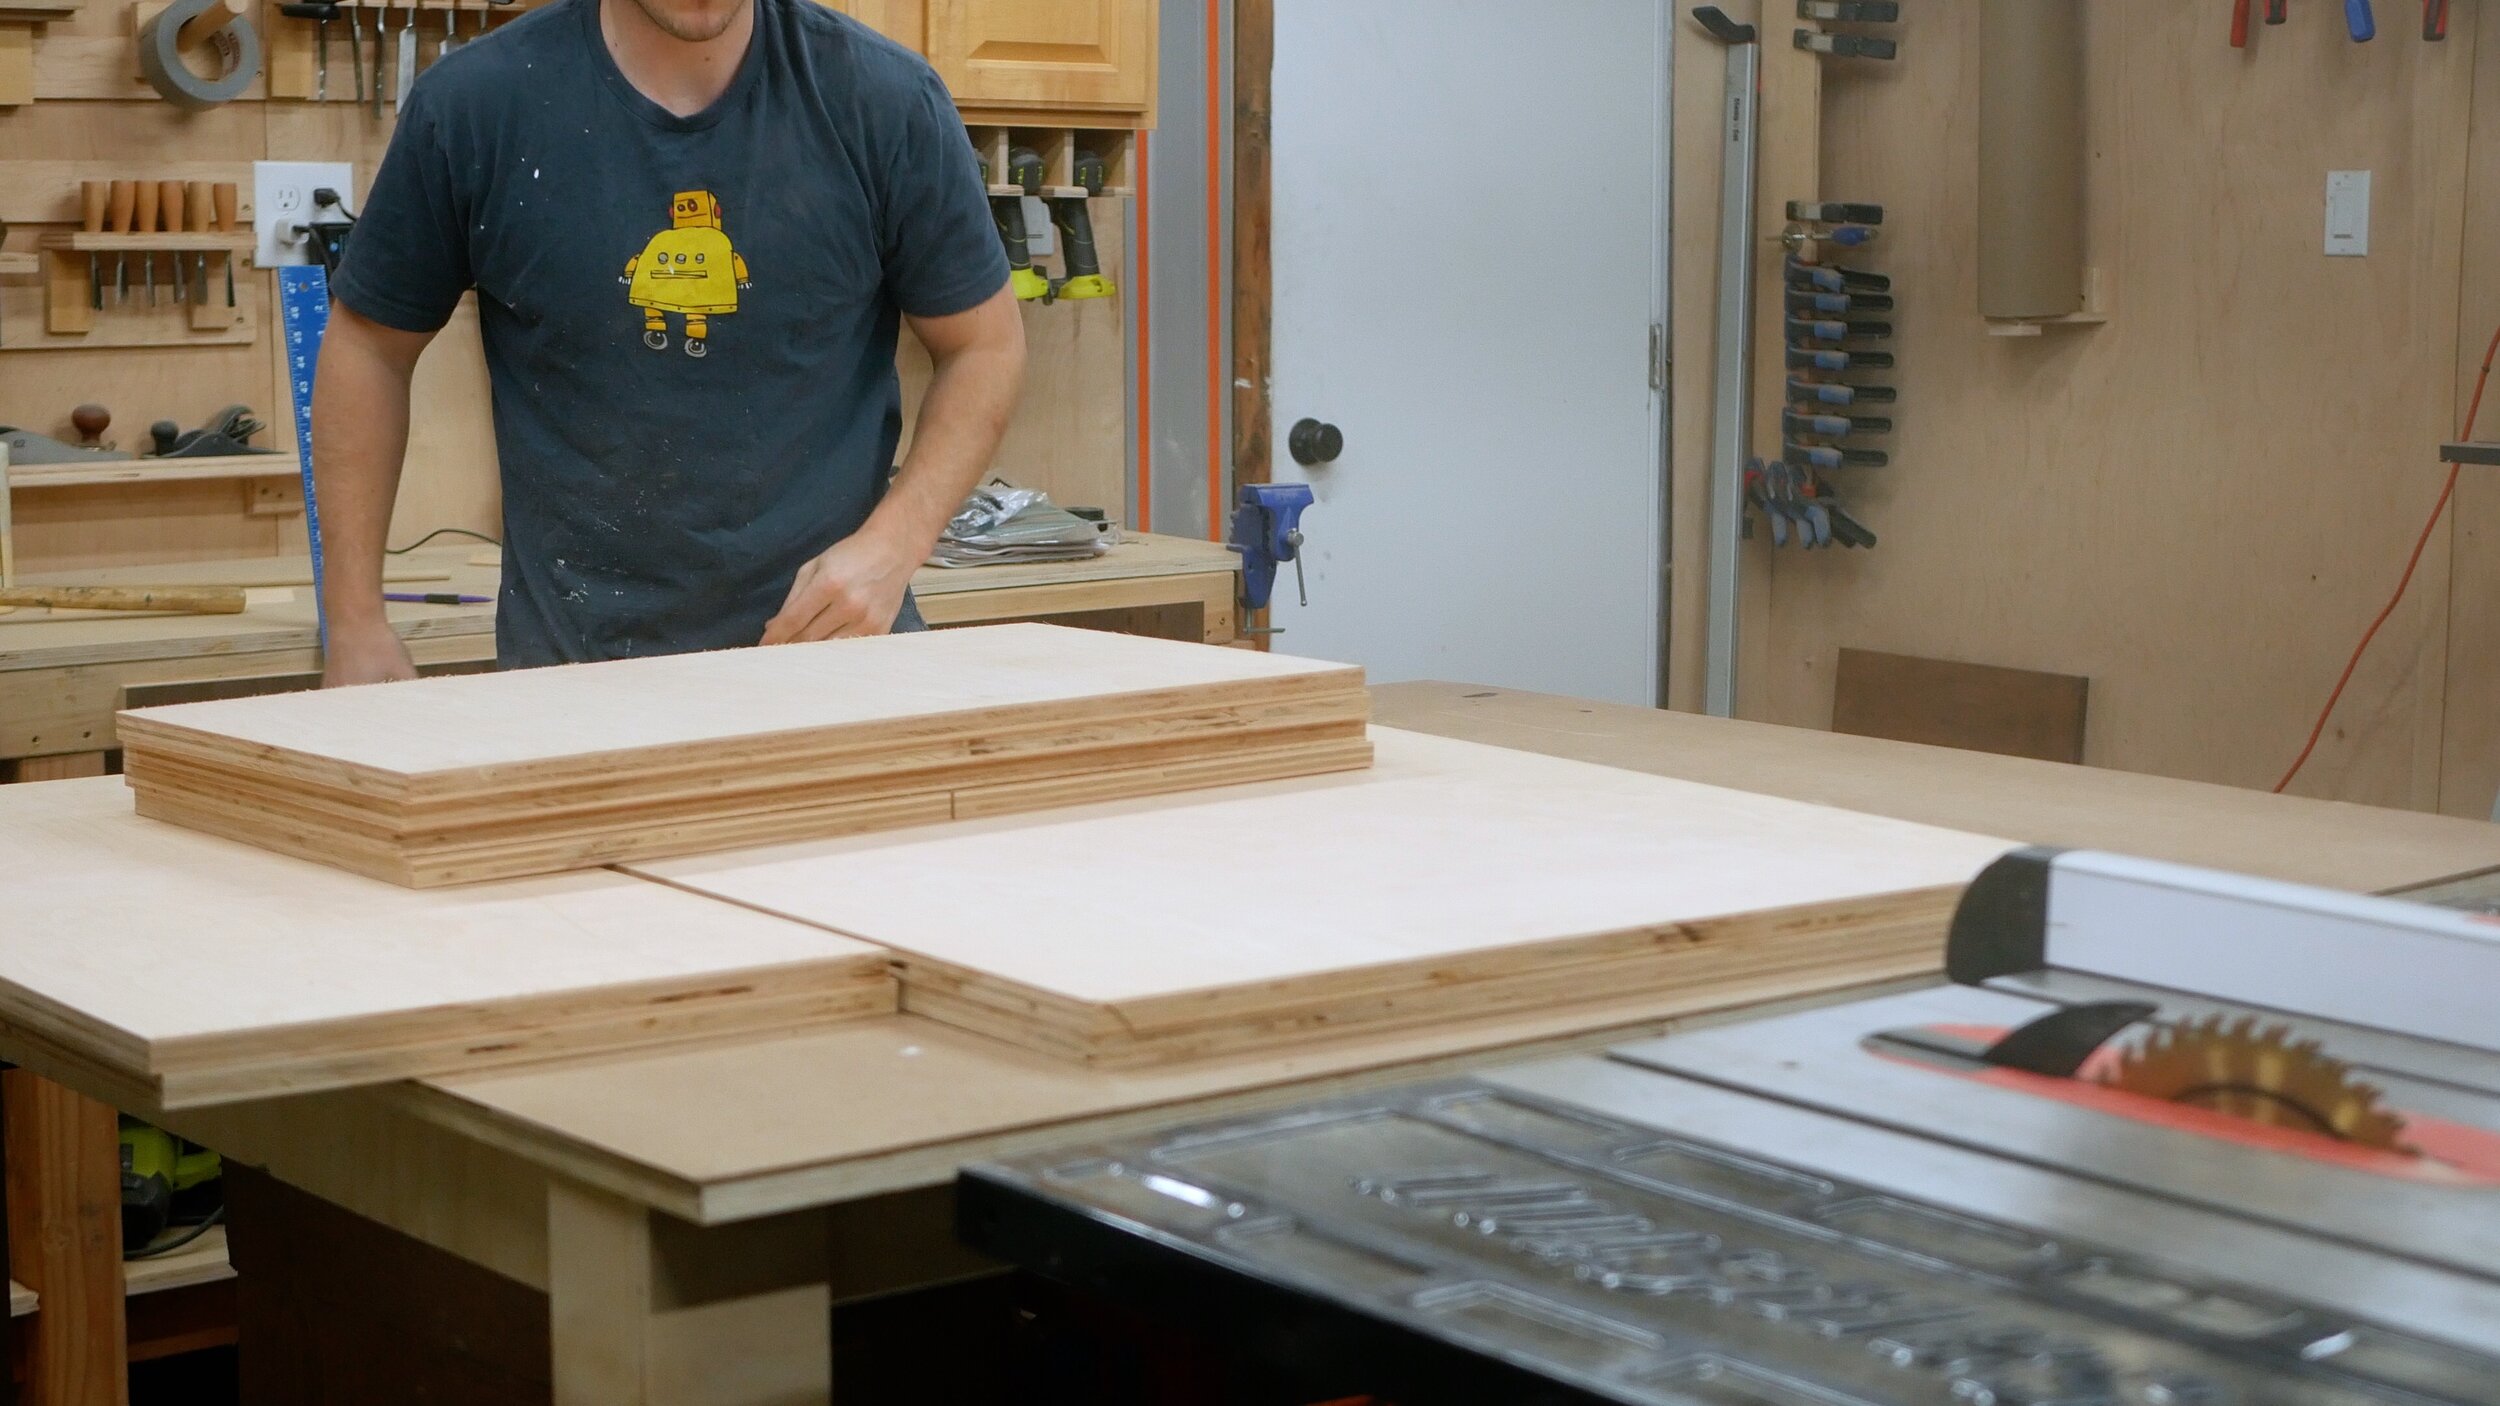
Next up was gluing and nailing. This design is perfect for using the Arrow Brad Nailer because it allowed me to laminate each sheet of plywood together without needing a special clamping system and they’d stay hidden on the bottom side of the table. I spread glue evenly across the surfaces of my pieces, stacked each respective piece on top of its counterpart, and used 1” brad nails to tack things in place. I was strategic about where I put these nails to make sure they evenly covered the space.
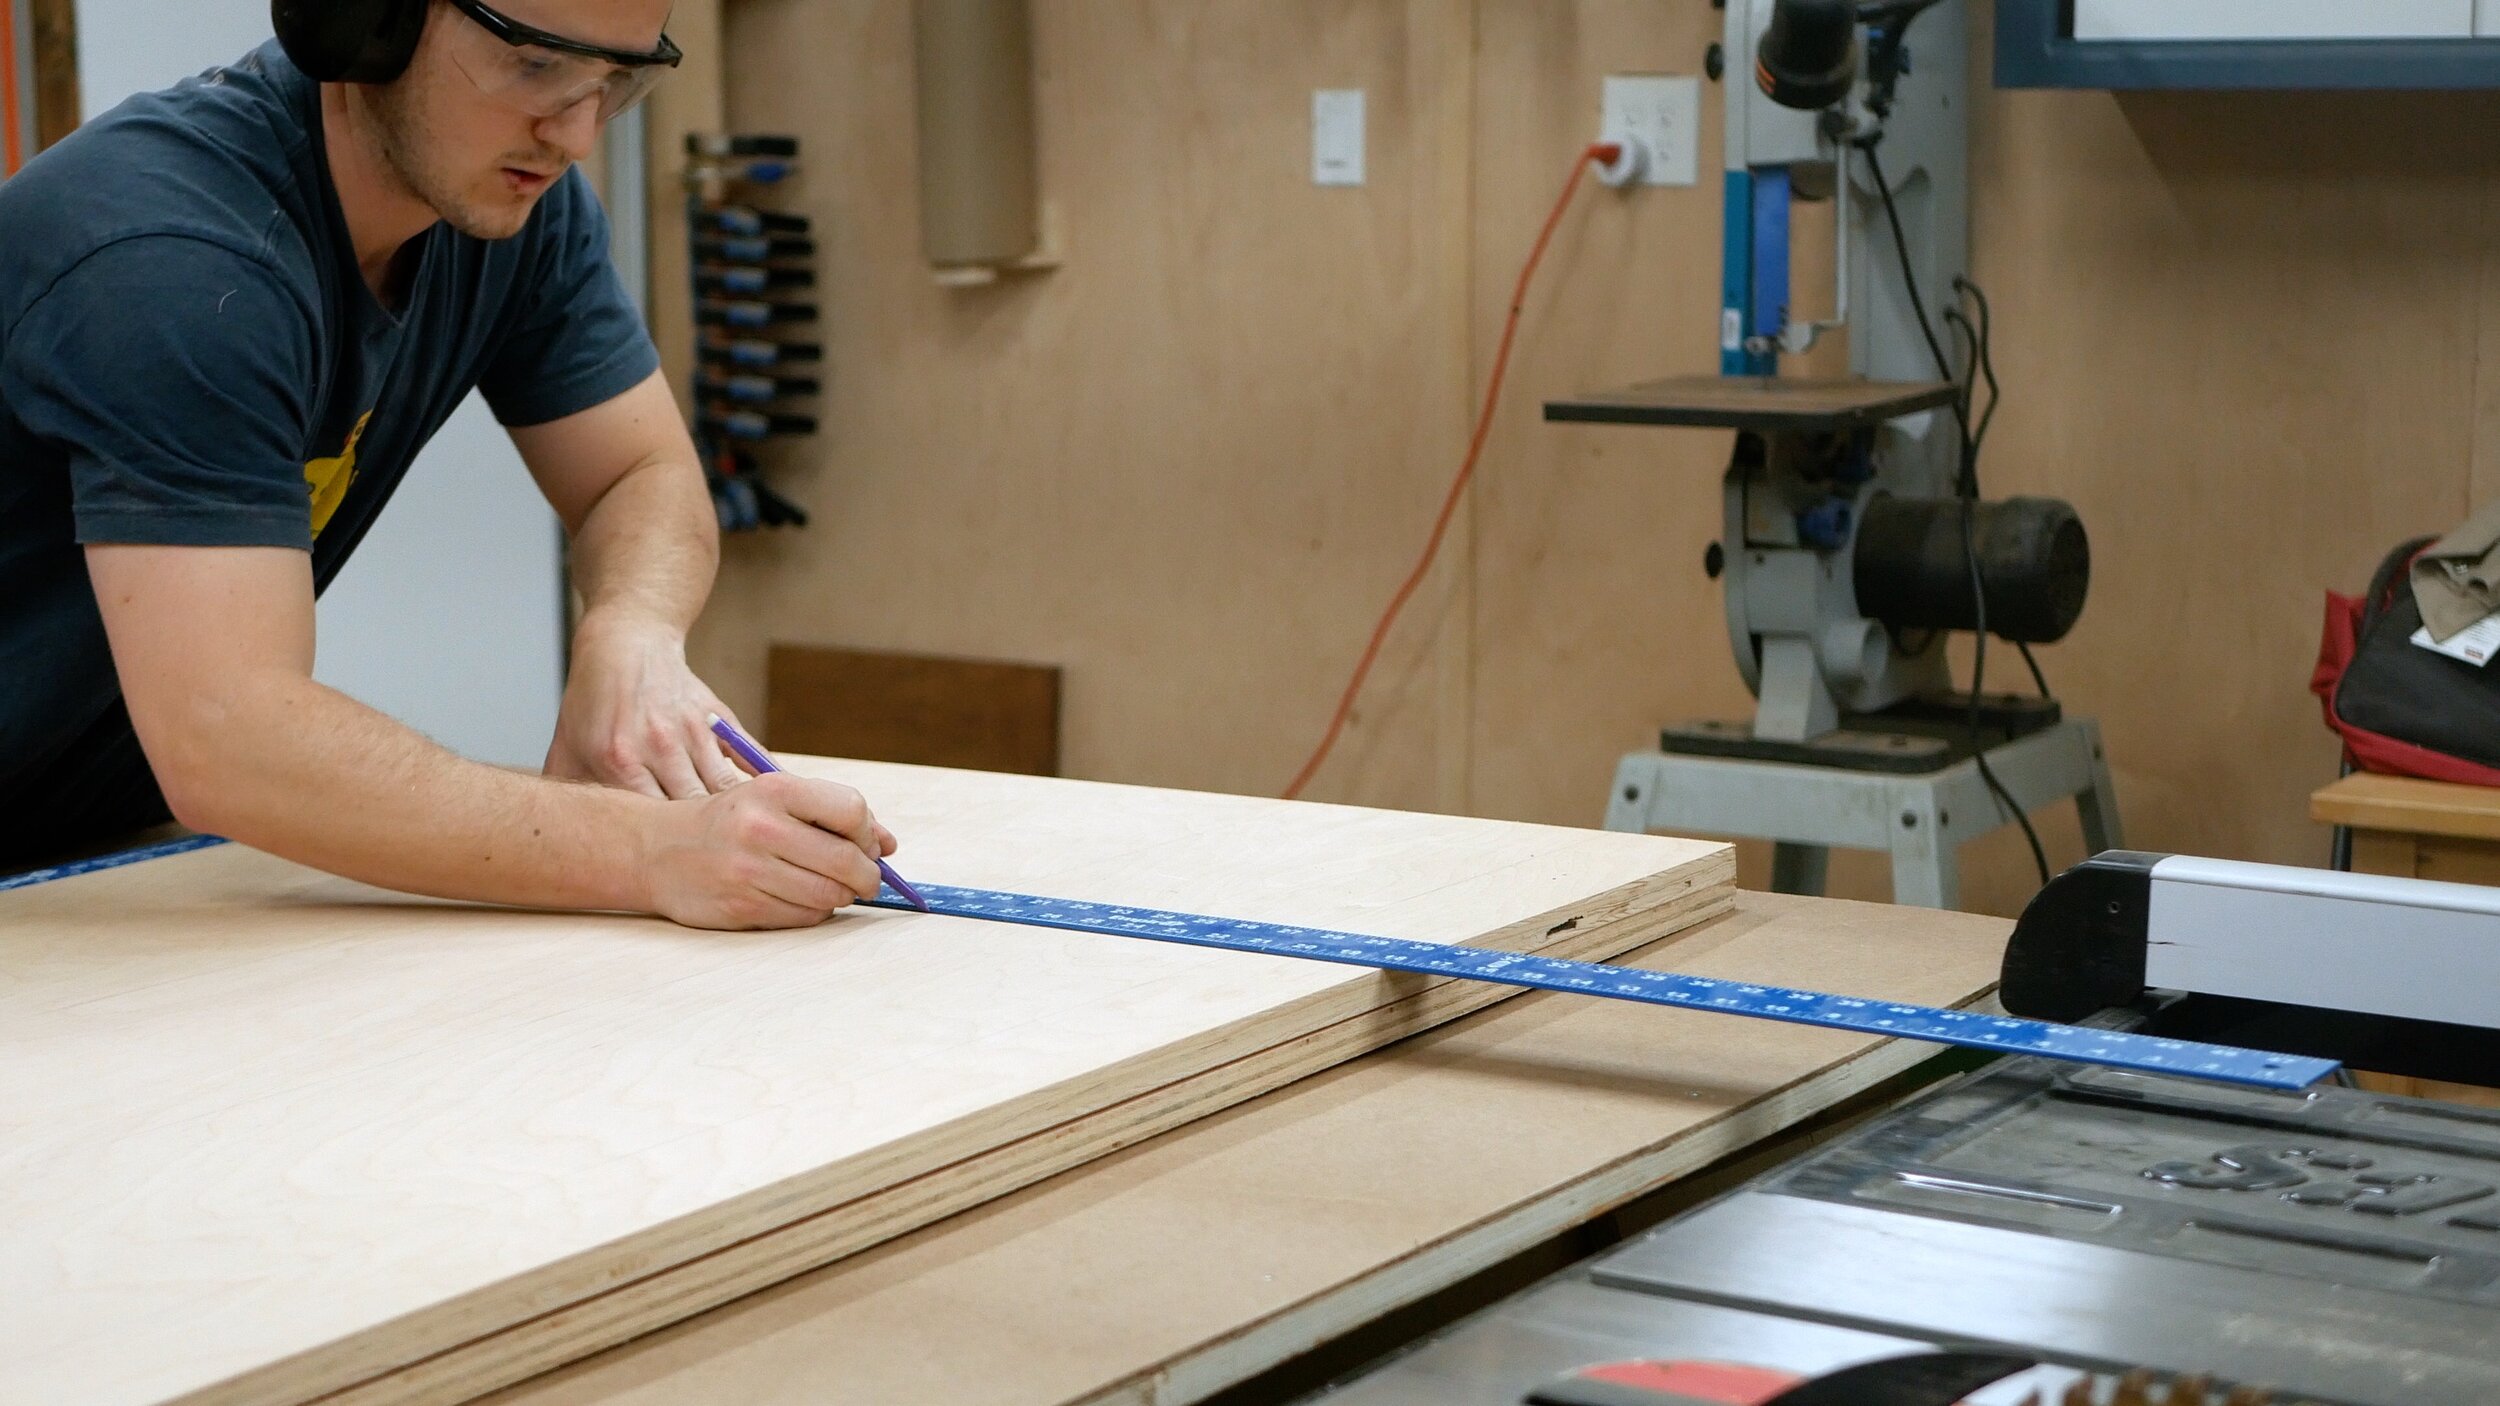
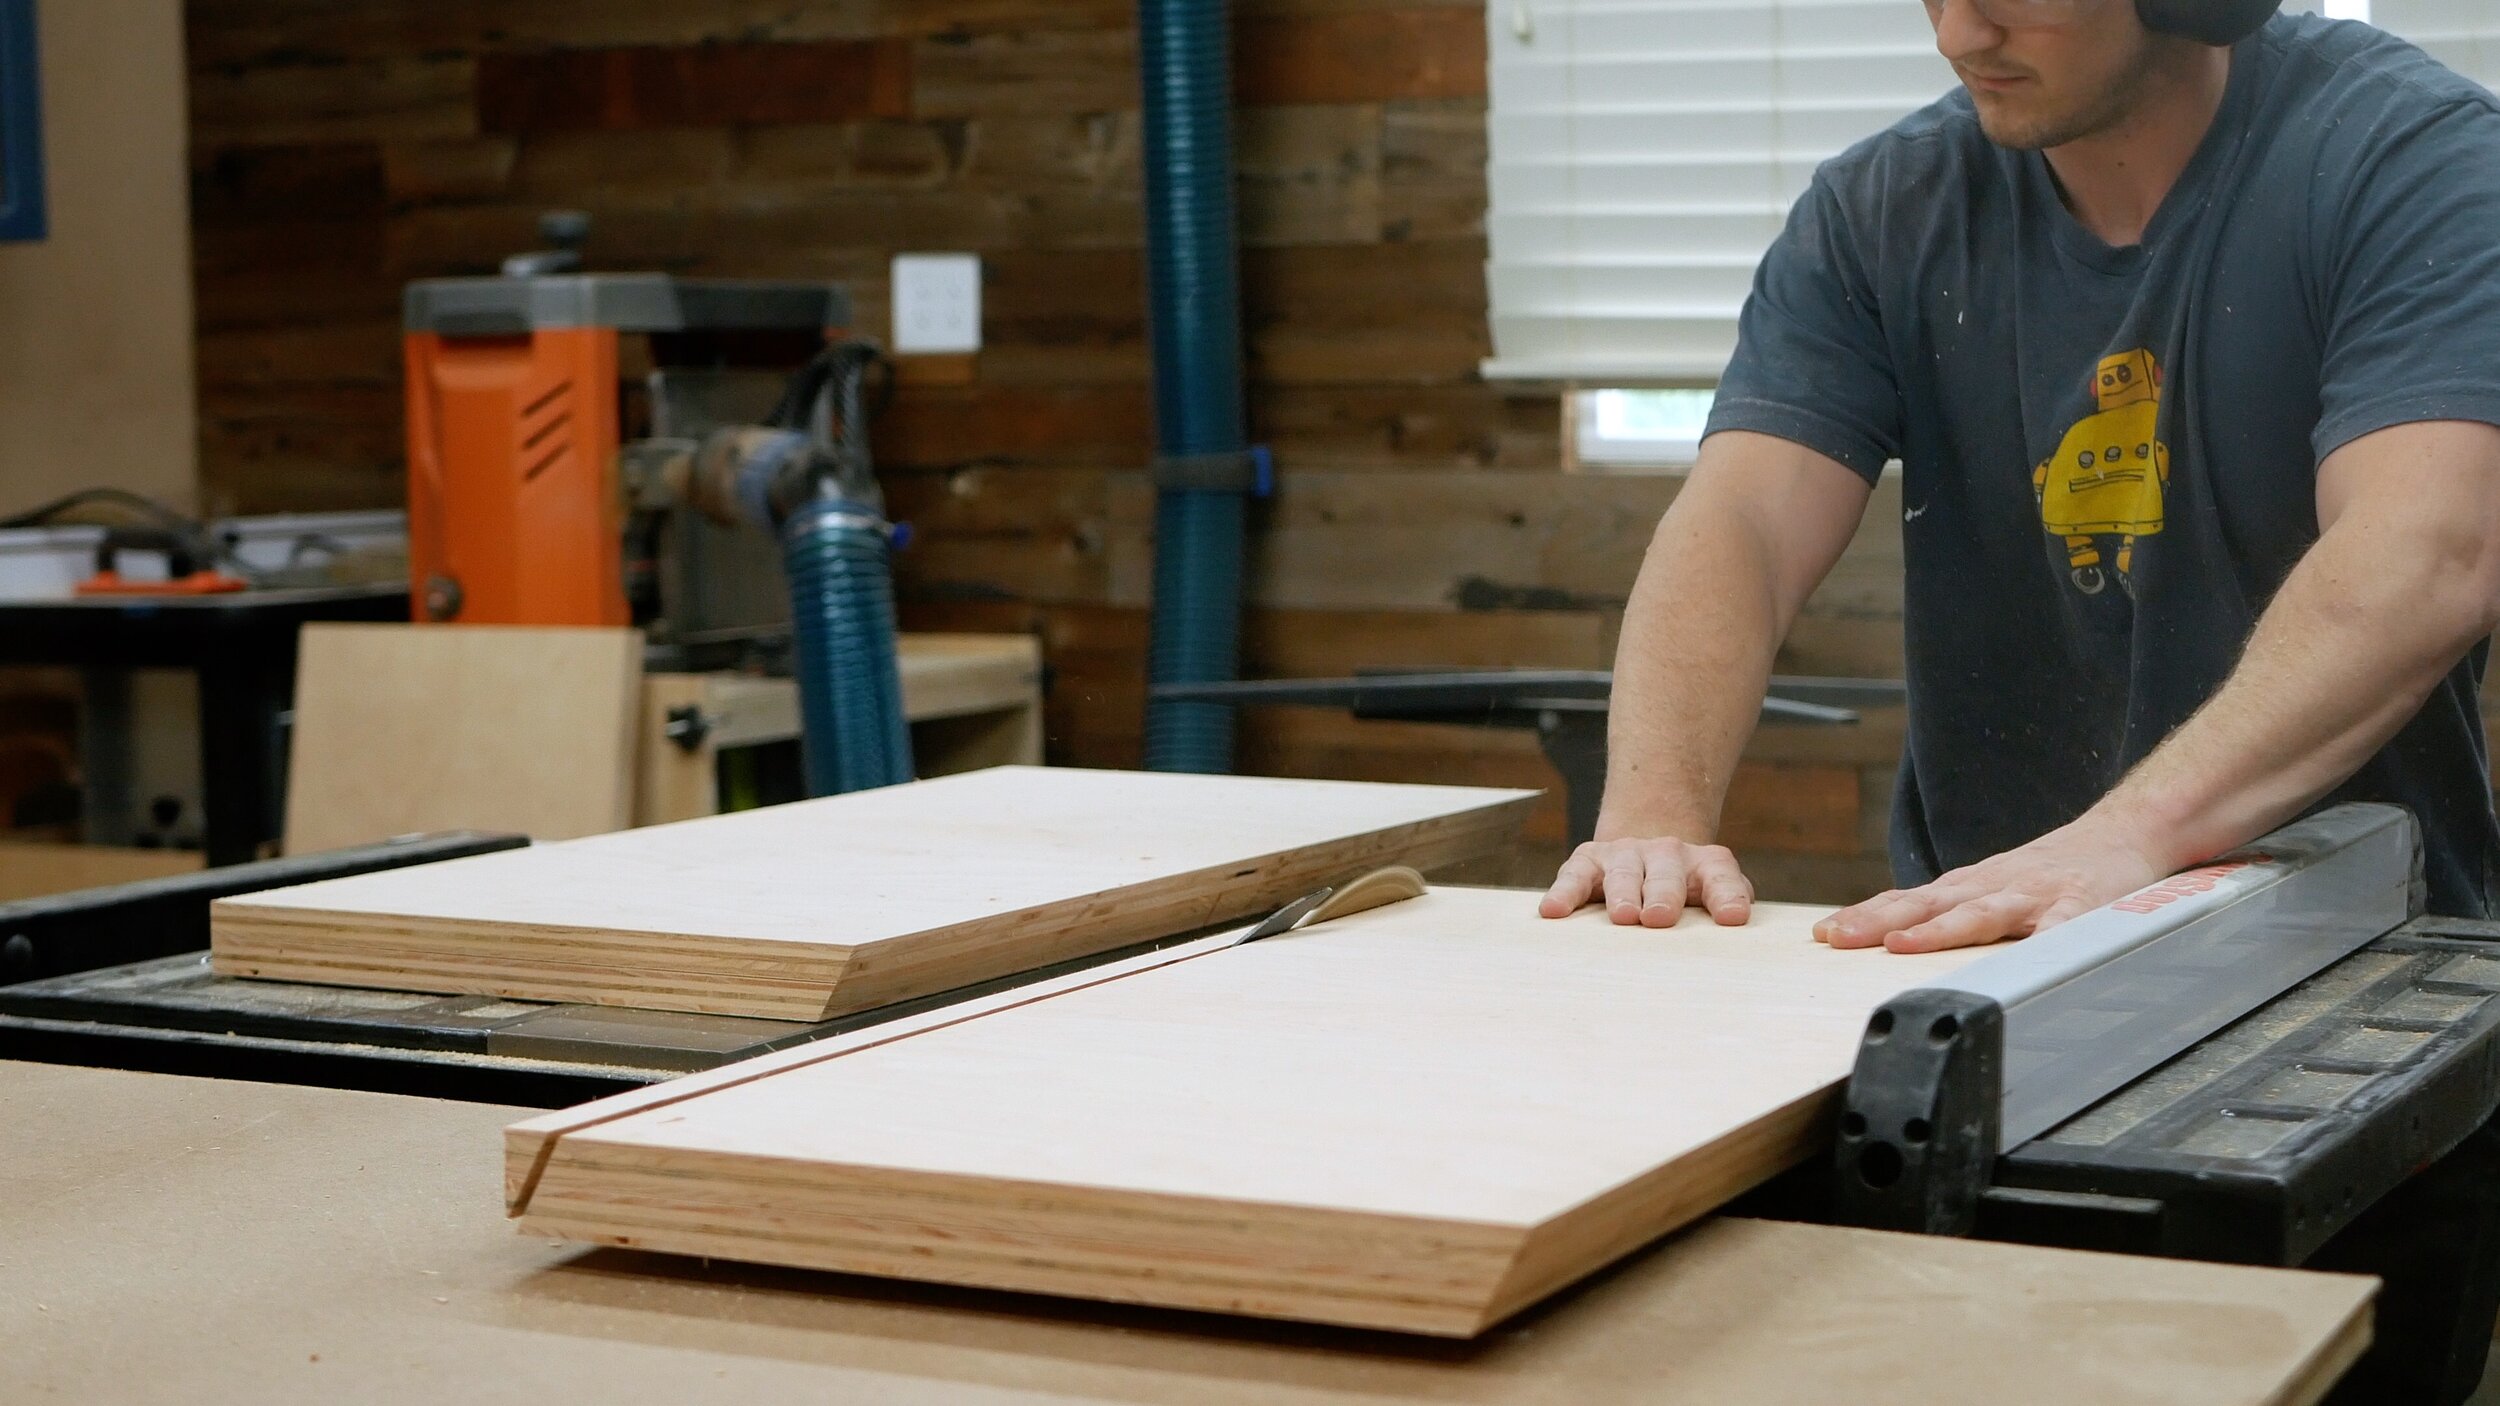
The next day, after the glue cured, I could trim all of my pieces to their final size. My table was 15 inches tall, 30 inches wide, and 54” long. Your final cuts and cut list will be determined by the size of your table.
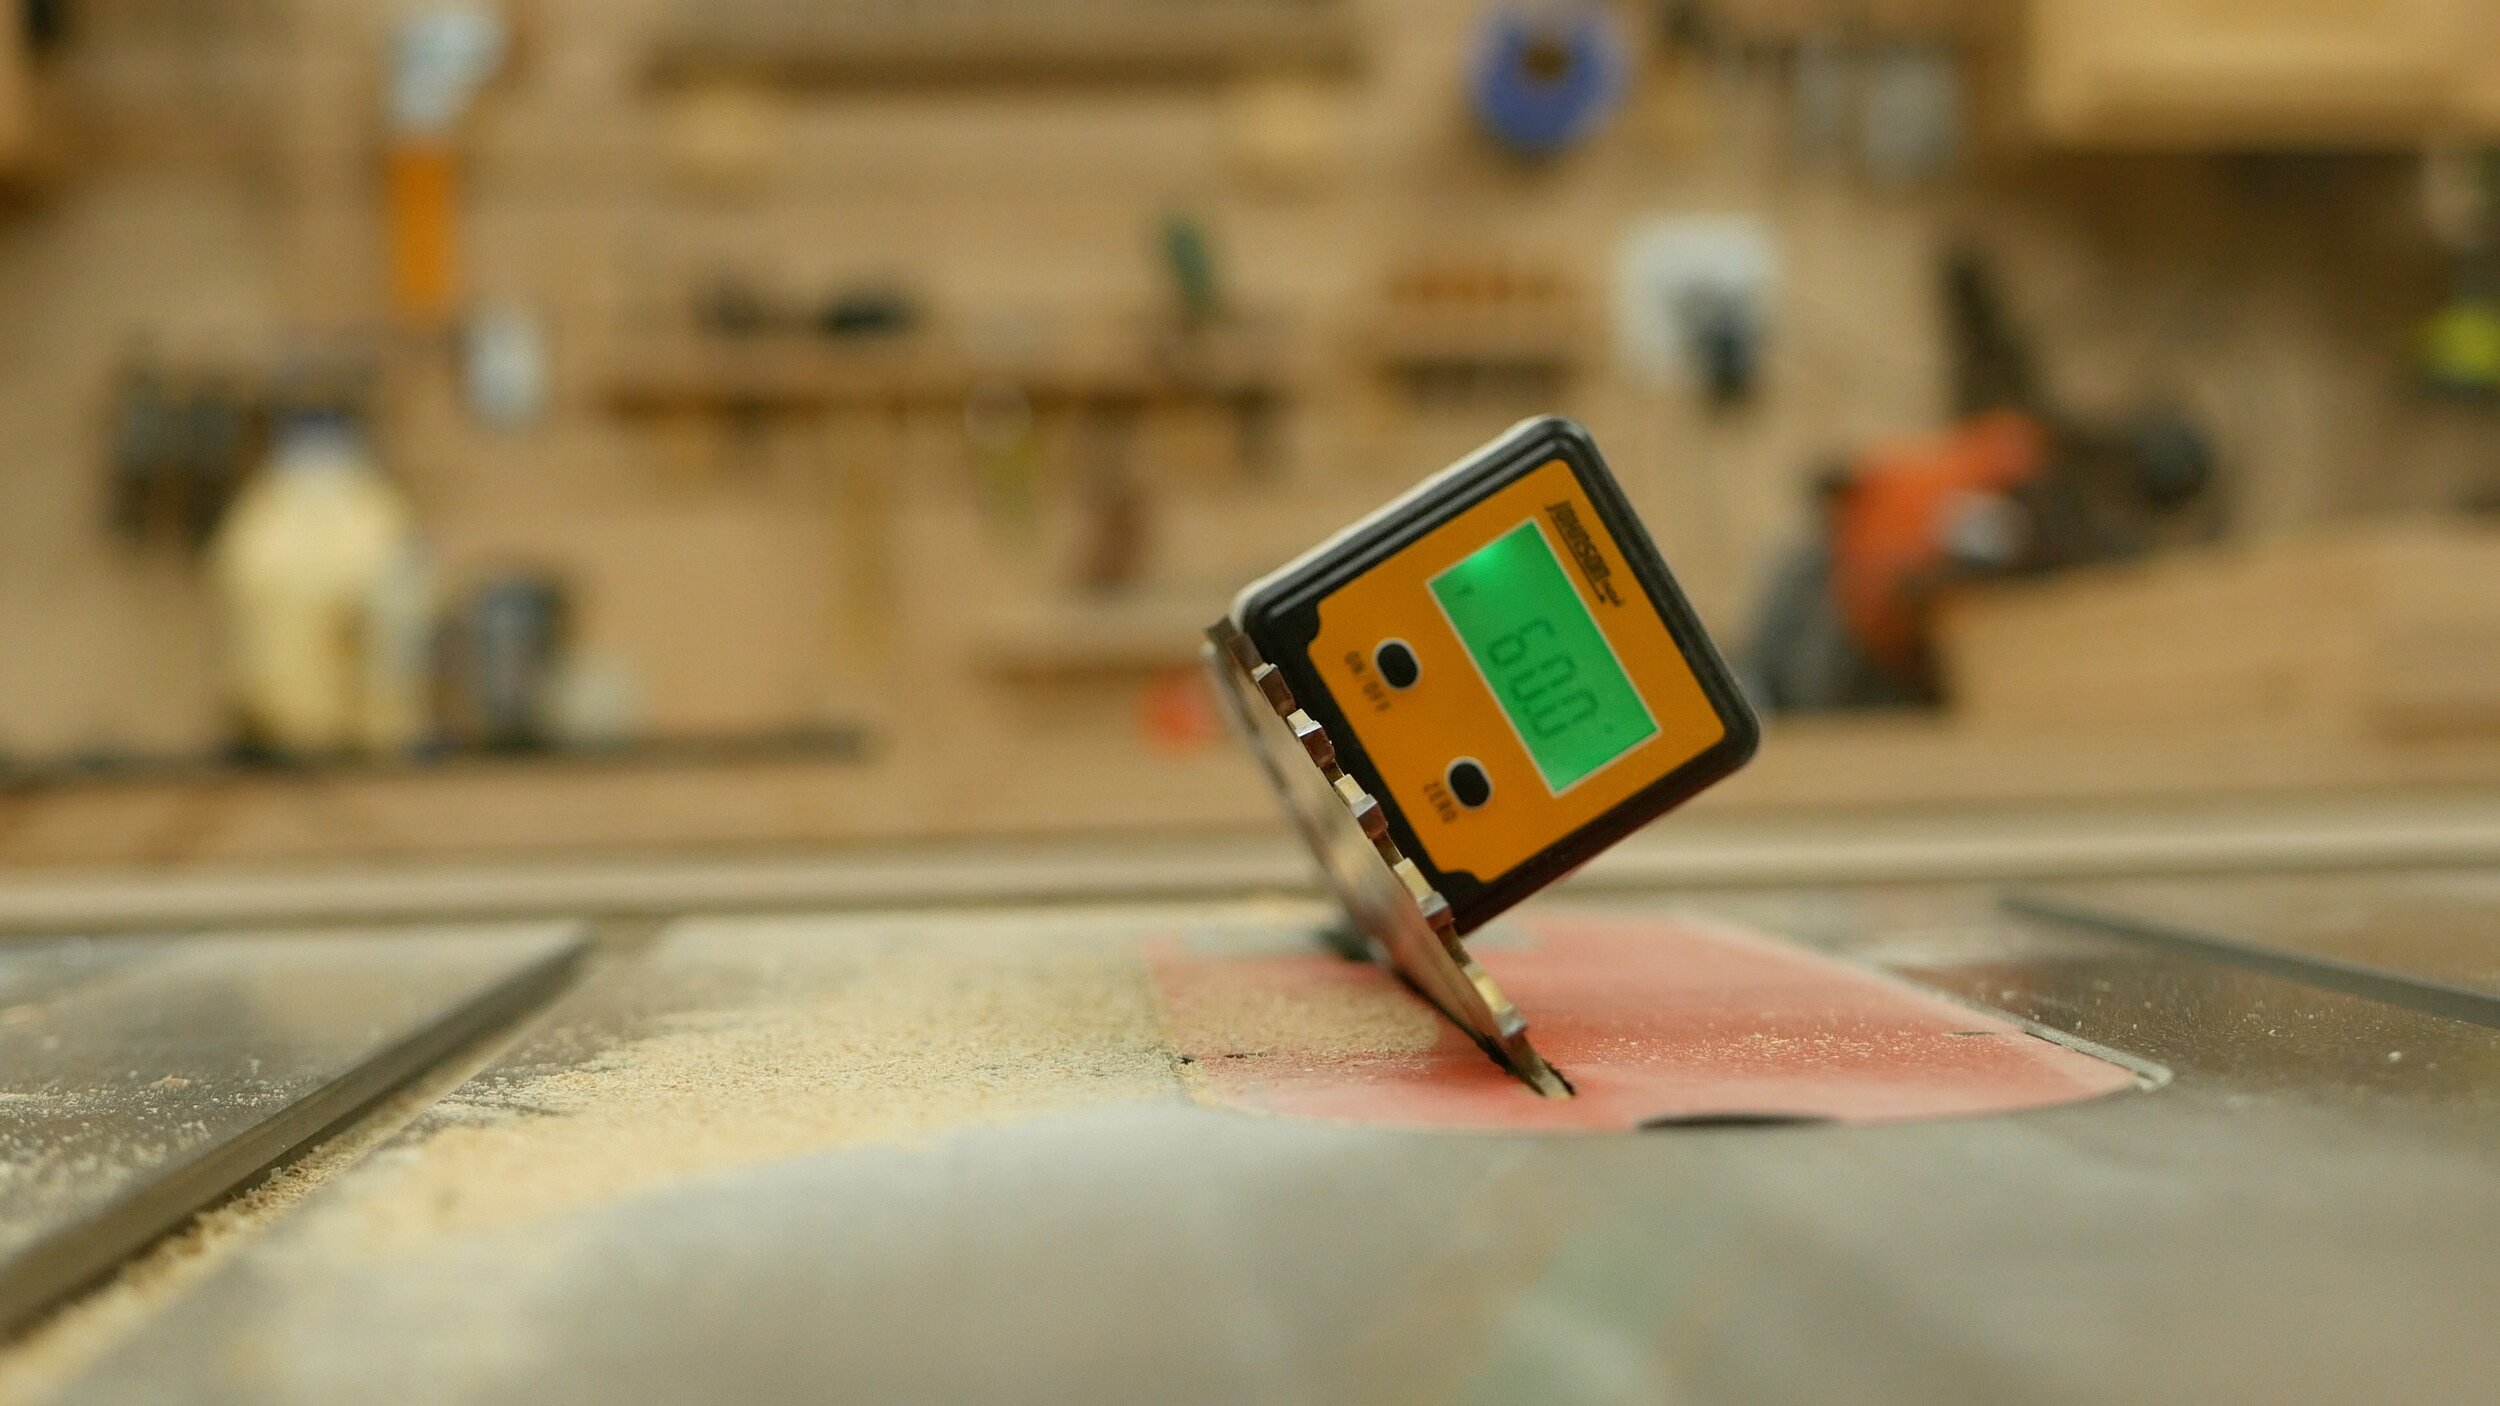
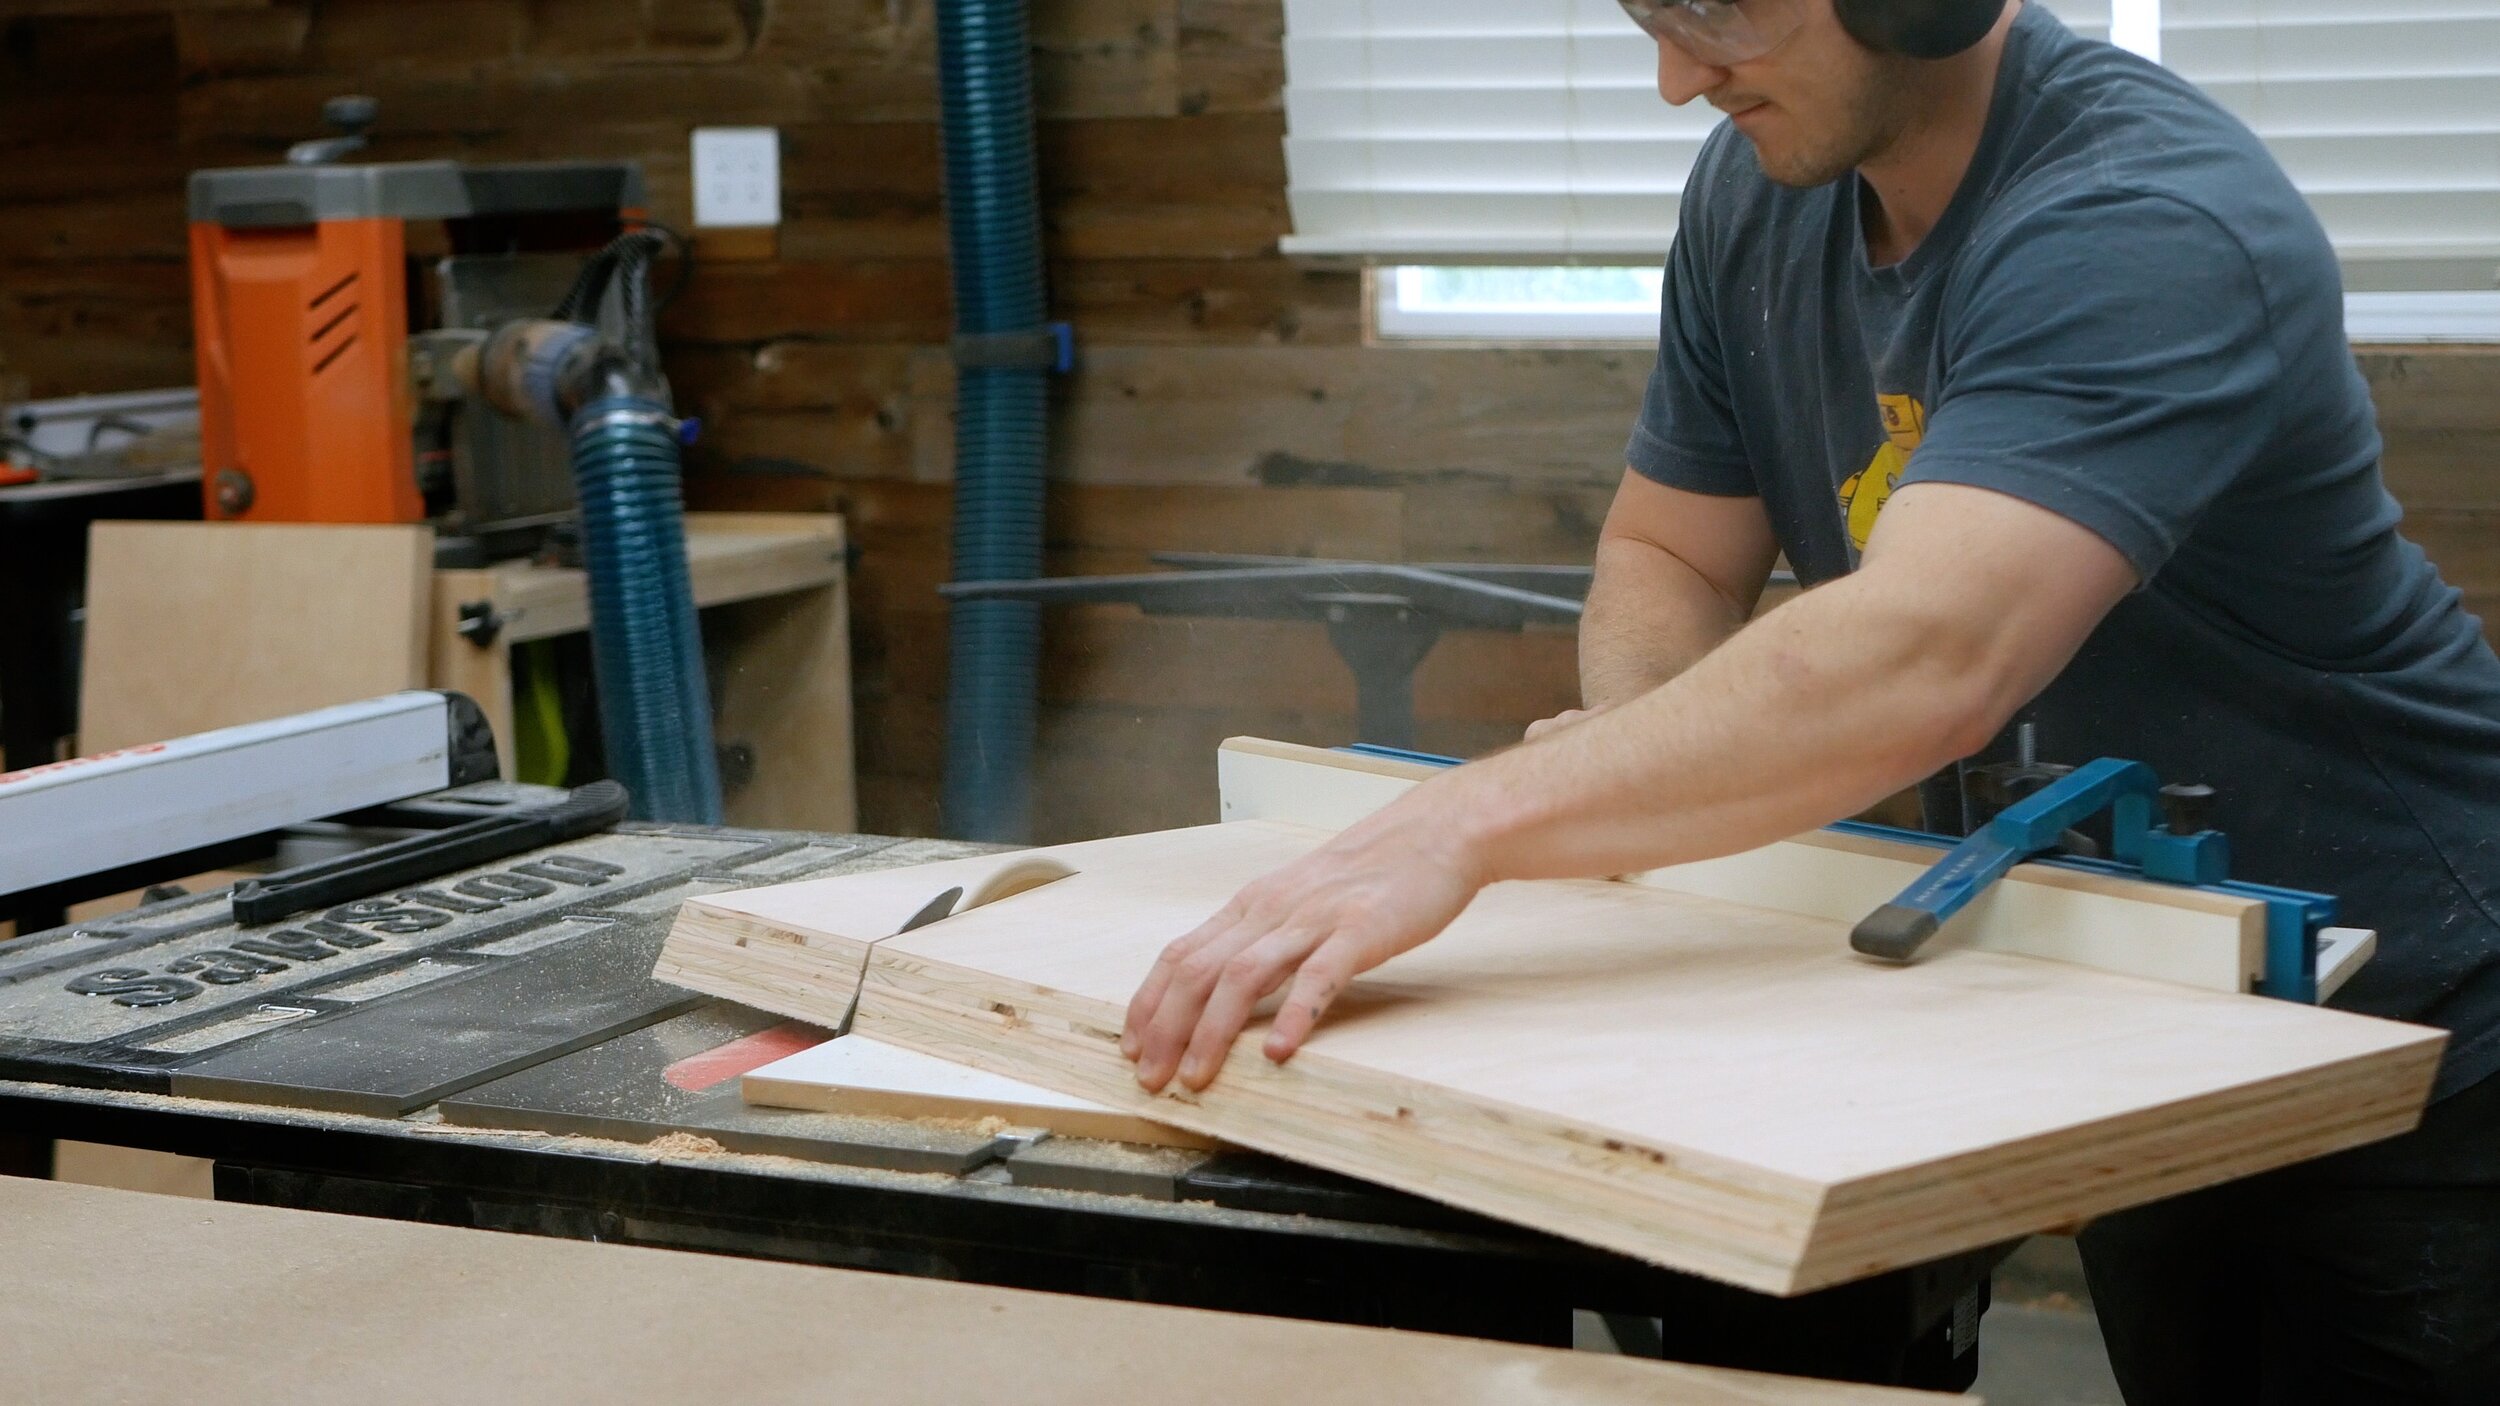
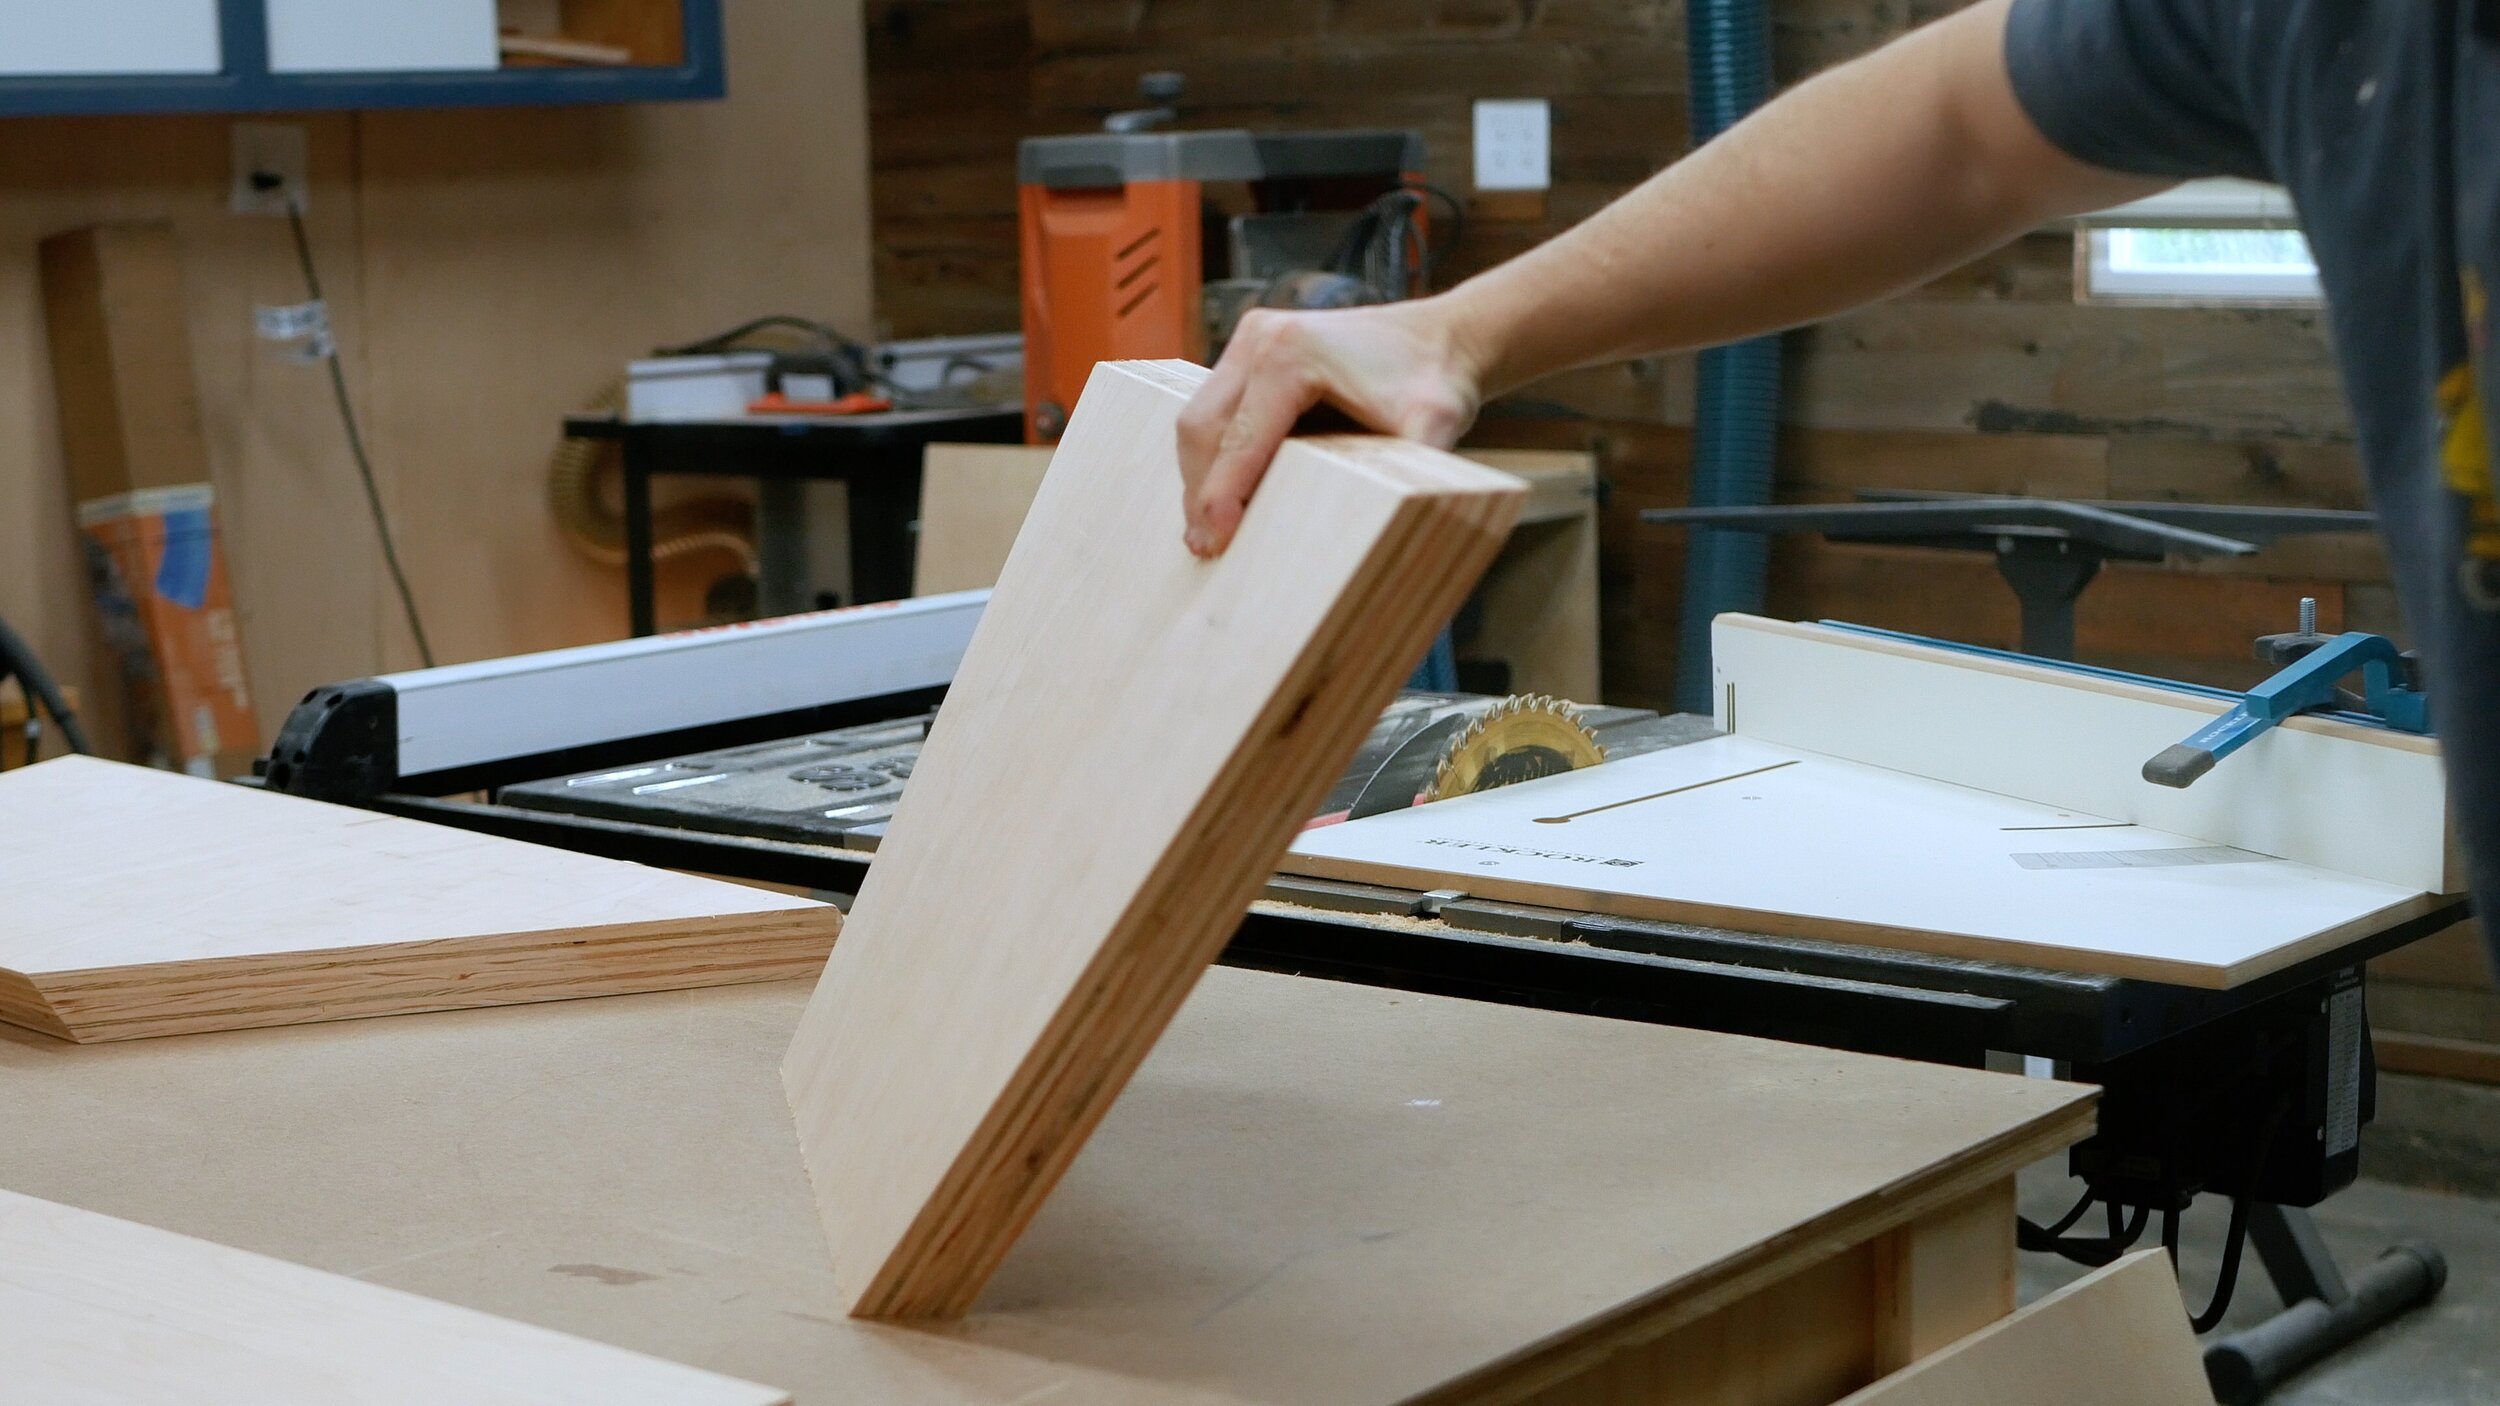
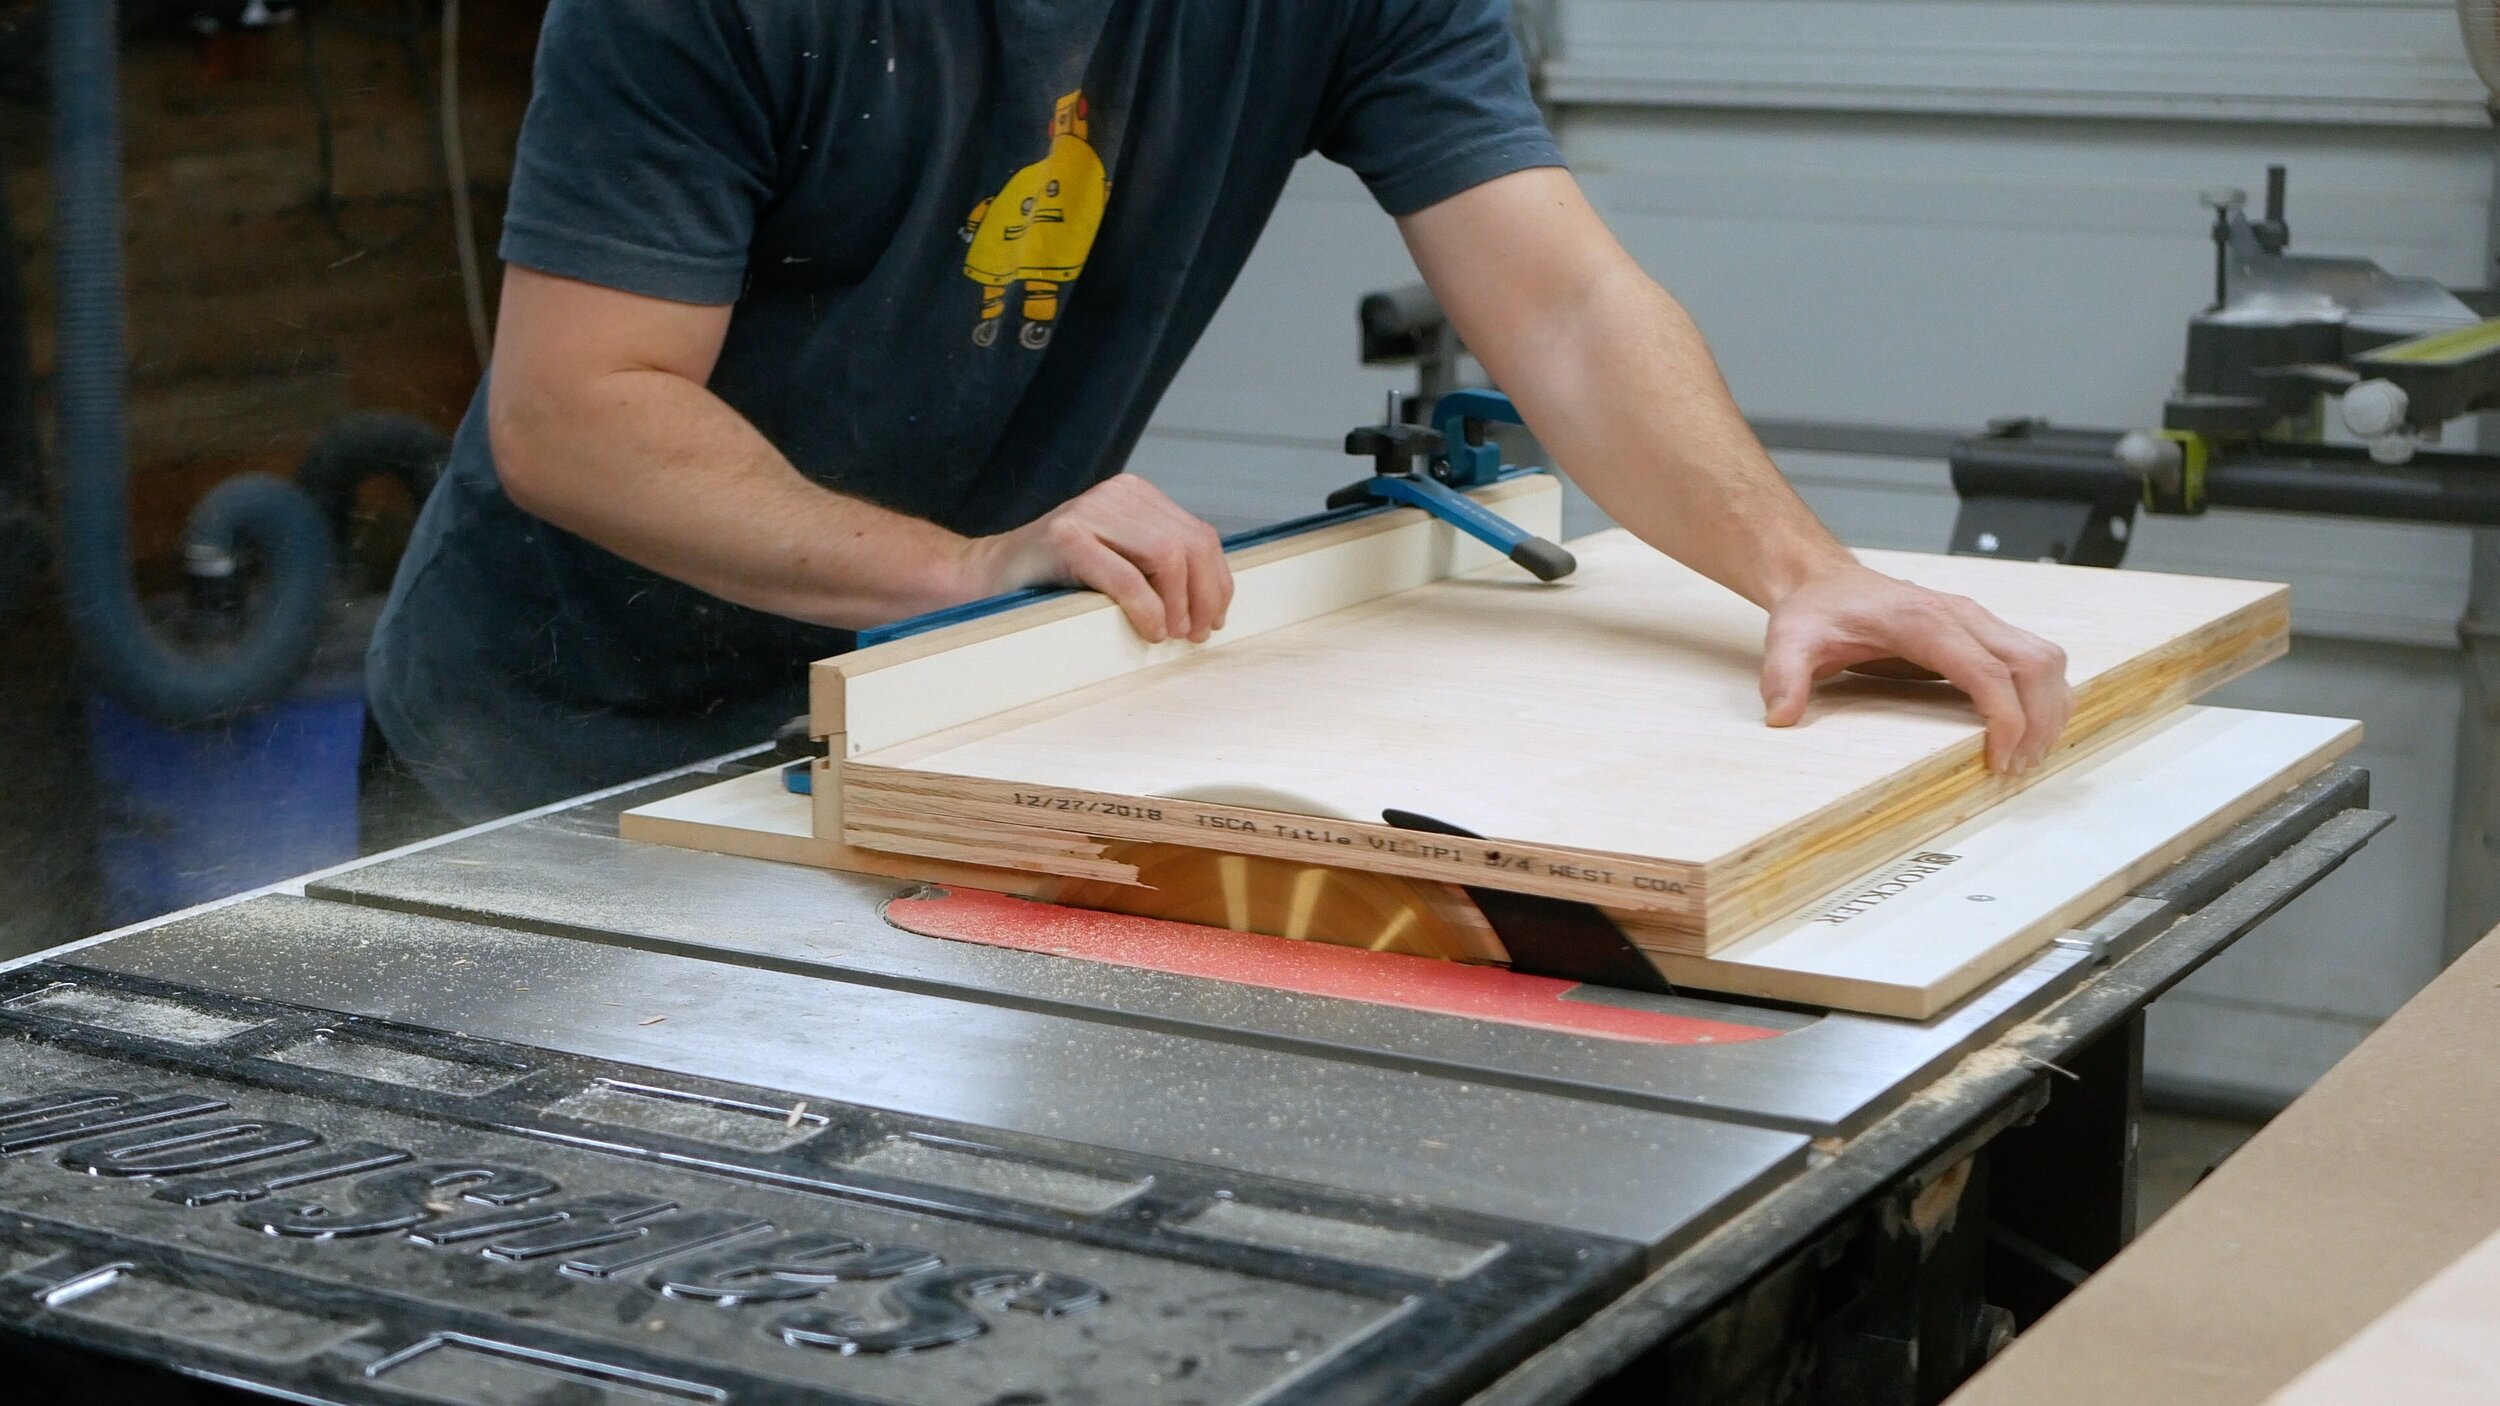
Once my size legs were cut to their final length and width, I turned my table saw blade to 30° and cut each of them into parallelograms - the two 30° angles should be parallel to each other. I did this by cutting one side, moving the fence, and then passing the other side through. The 30° angle was my own choosing - I thought it has the best aesthetic. I then used my crosscut sled set at 25° to cut tapers on each side of the leg. One small note I don’t mention in the video is that I turned off my SawStop safety feature for this - I didn’t want to hit a brad nail accidentally - even though I knew where they were placed, and trigger the brake system. I was left with pieces that sat at 30° to the ground and tapered in at 25°.
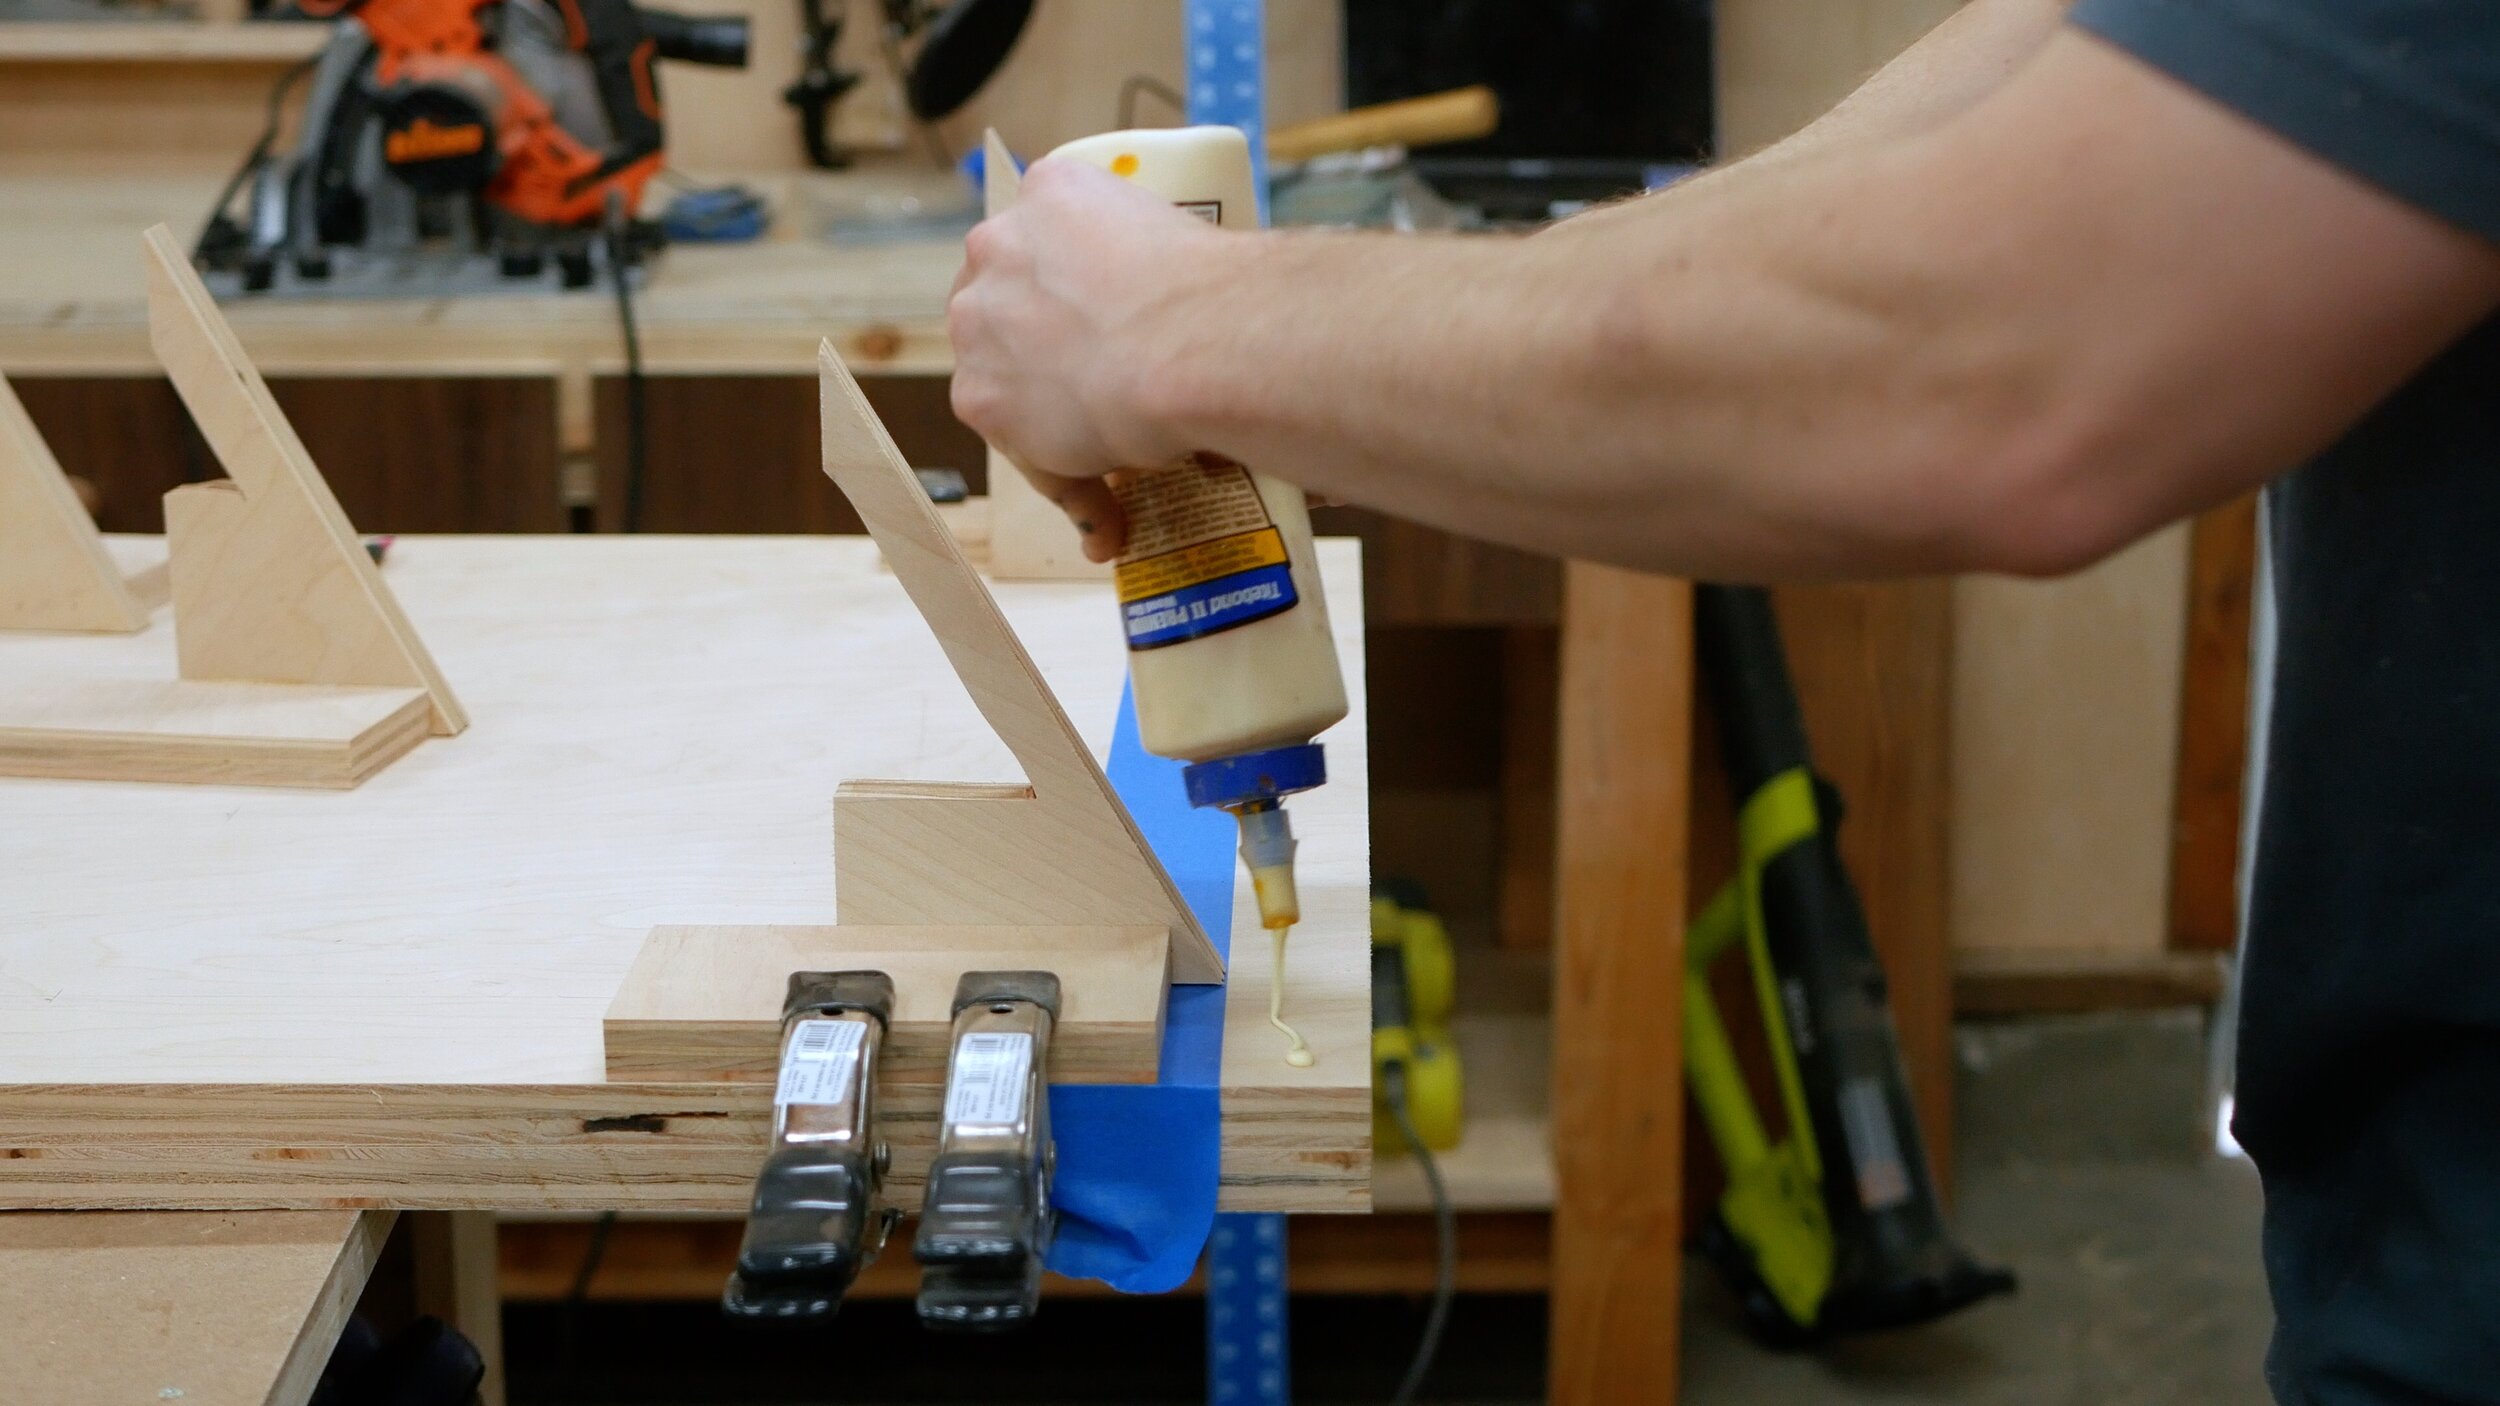
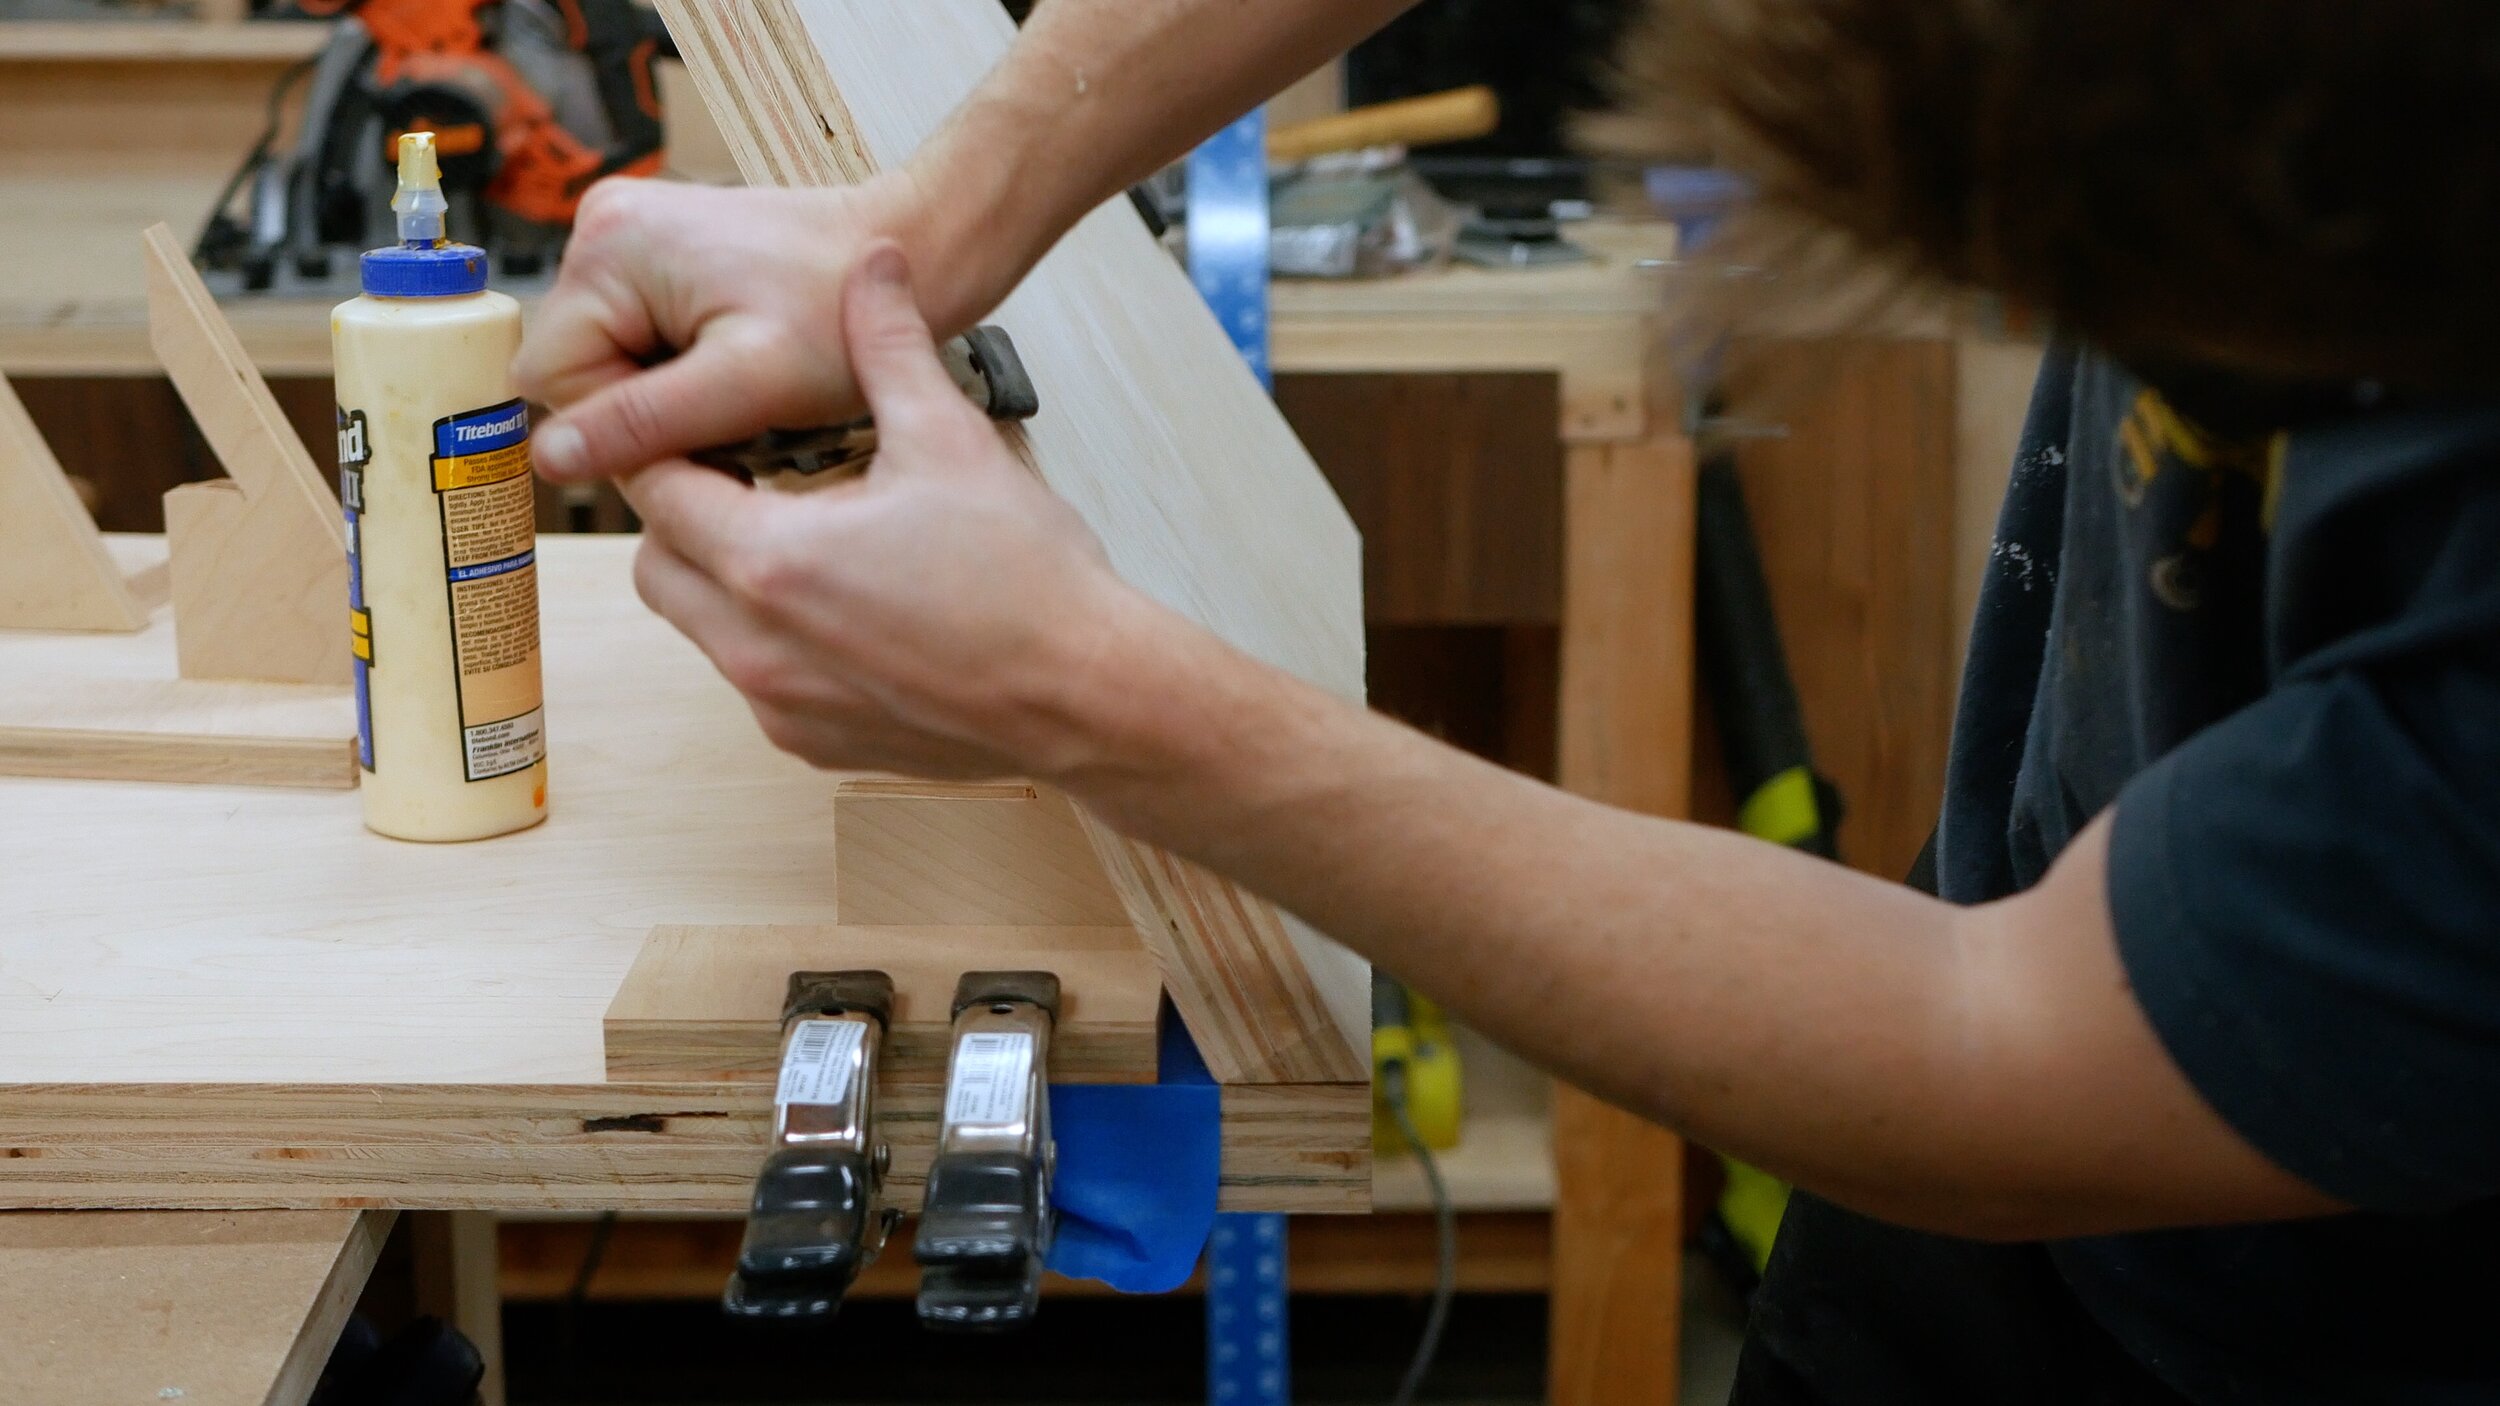
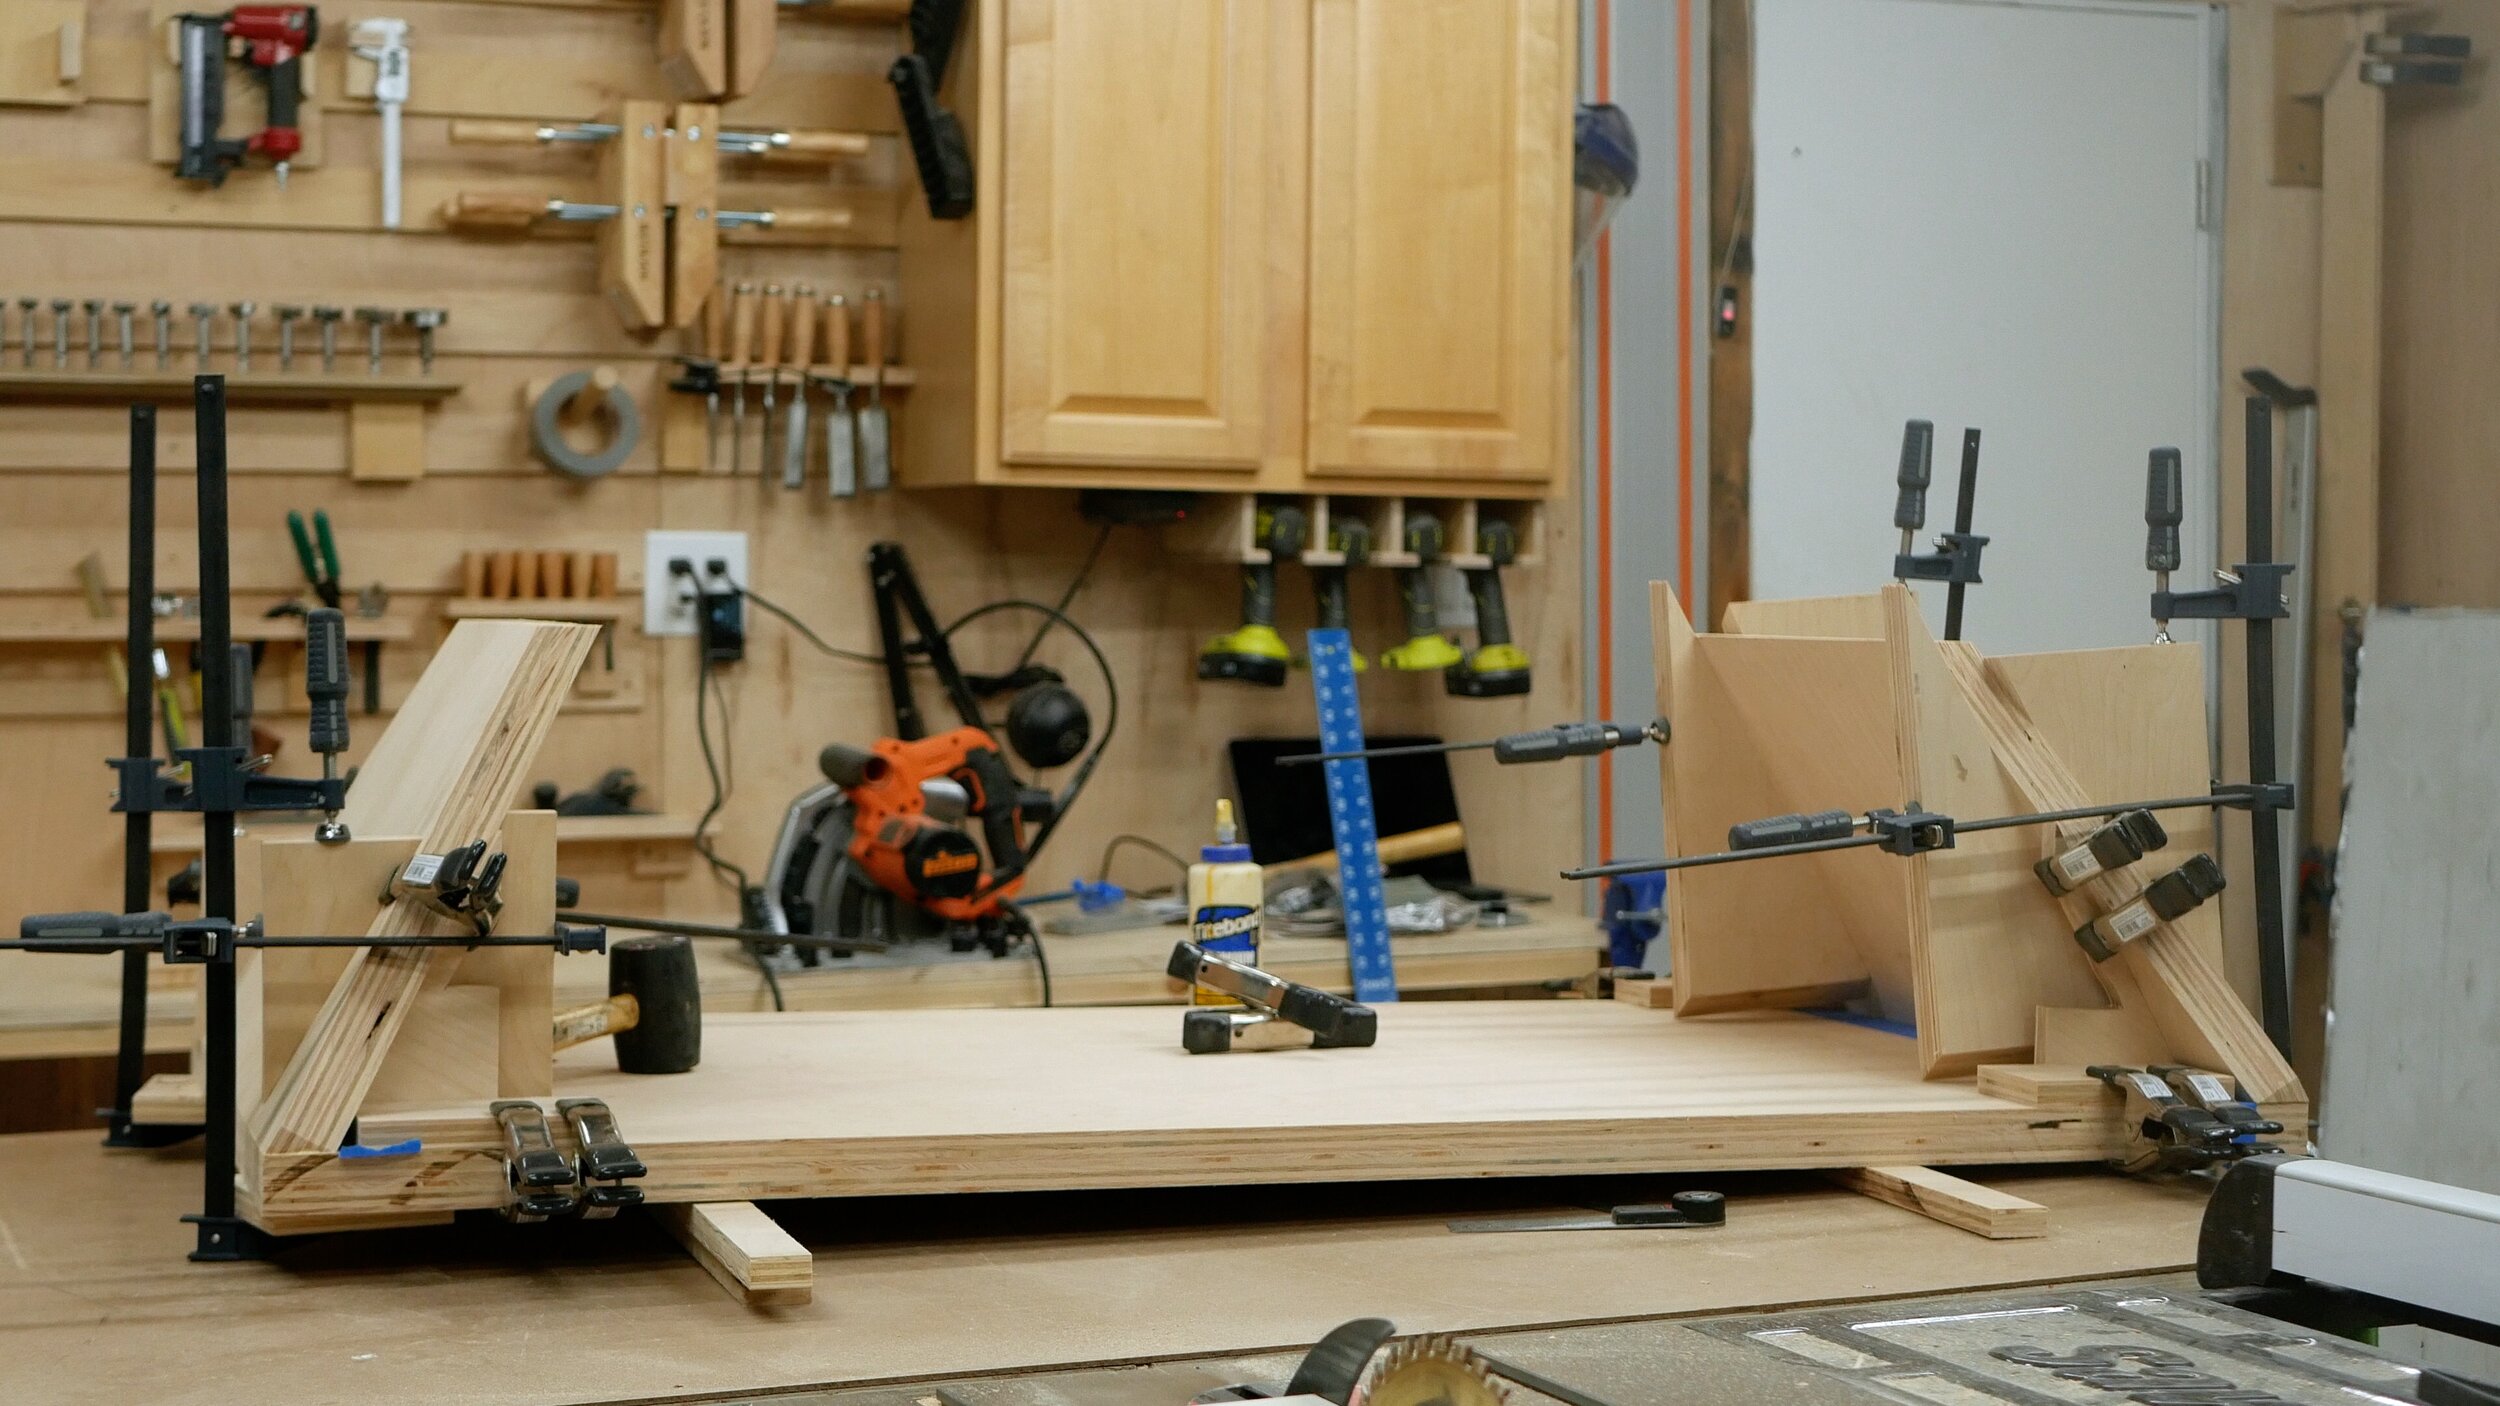
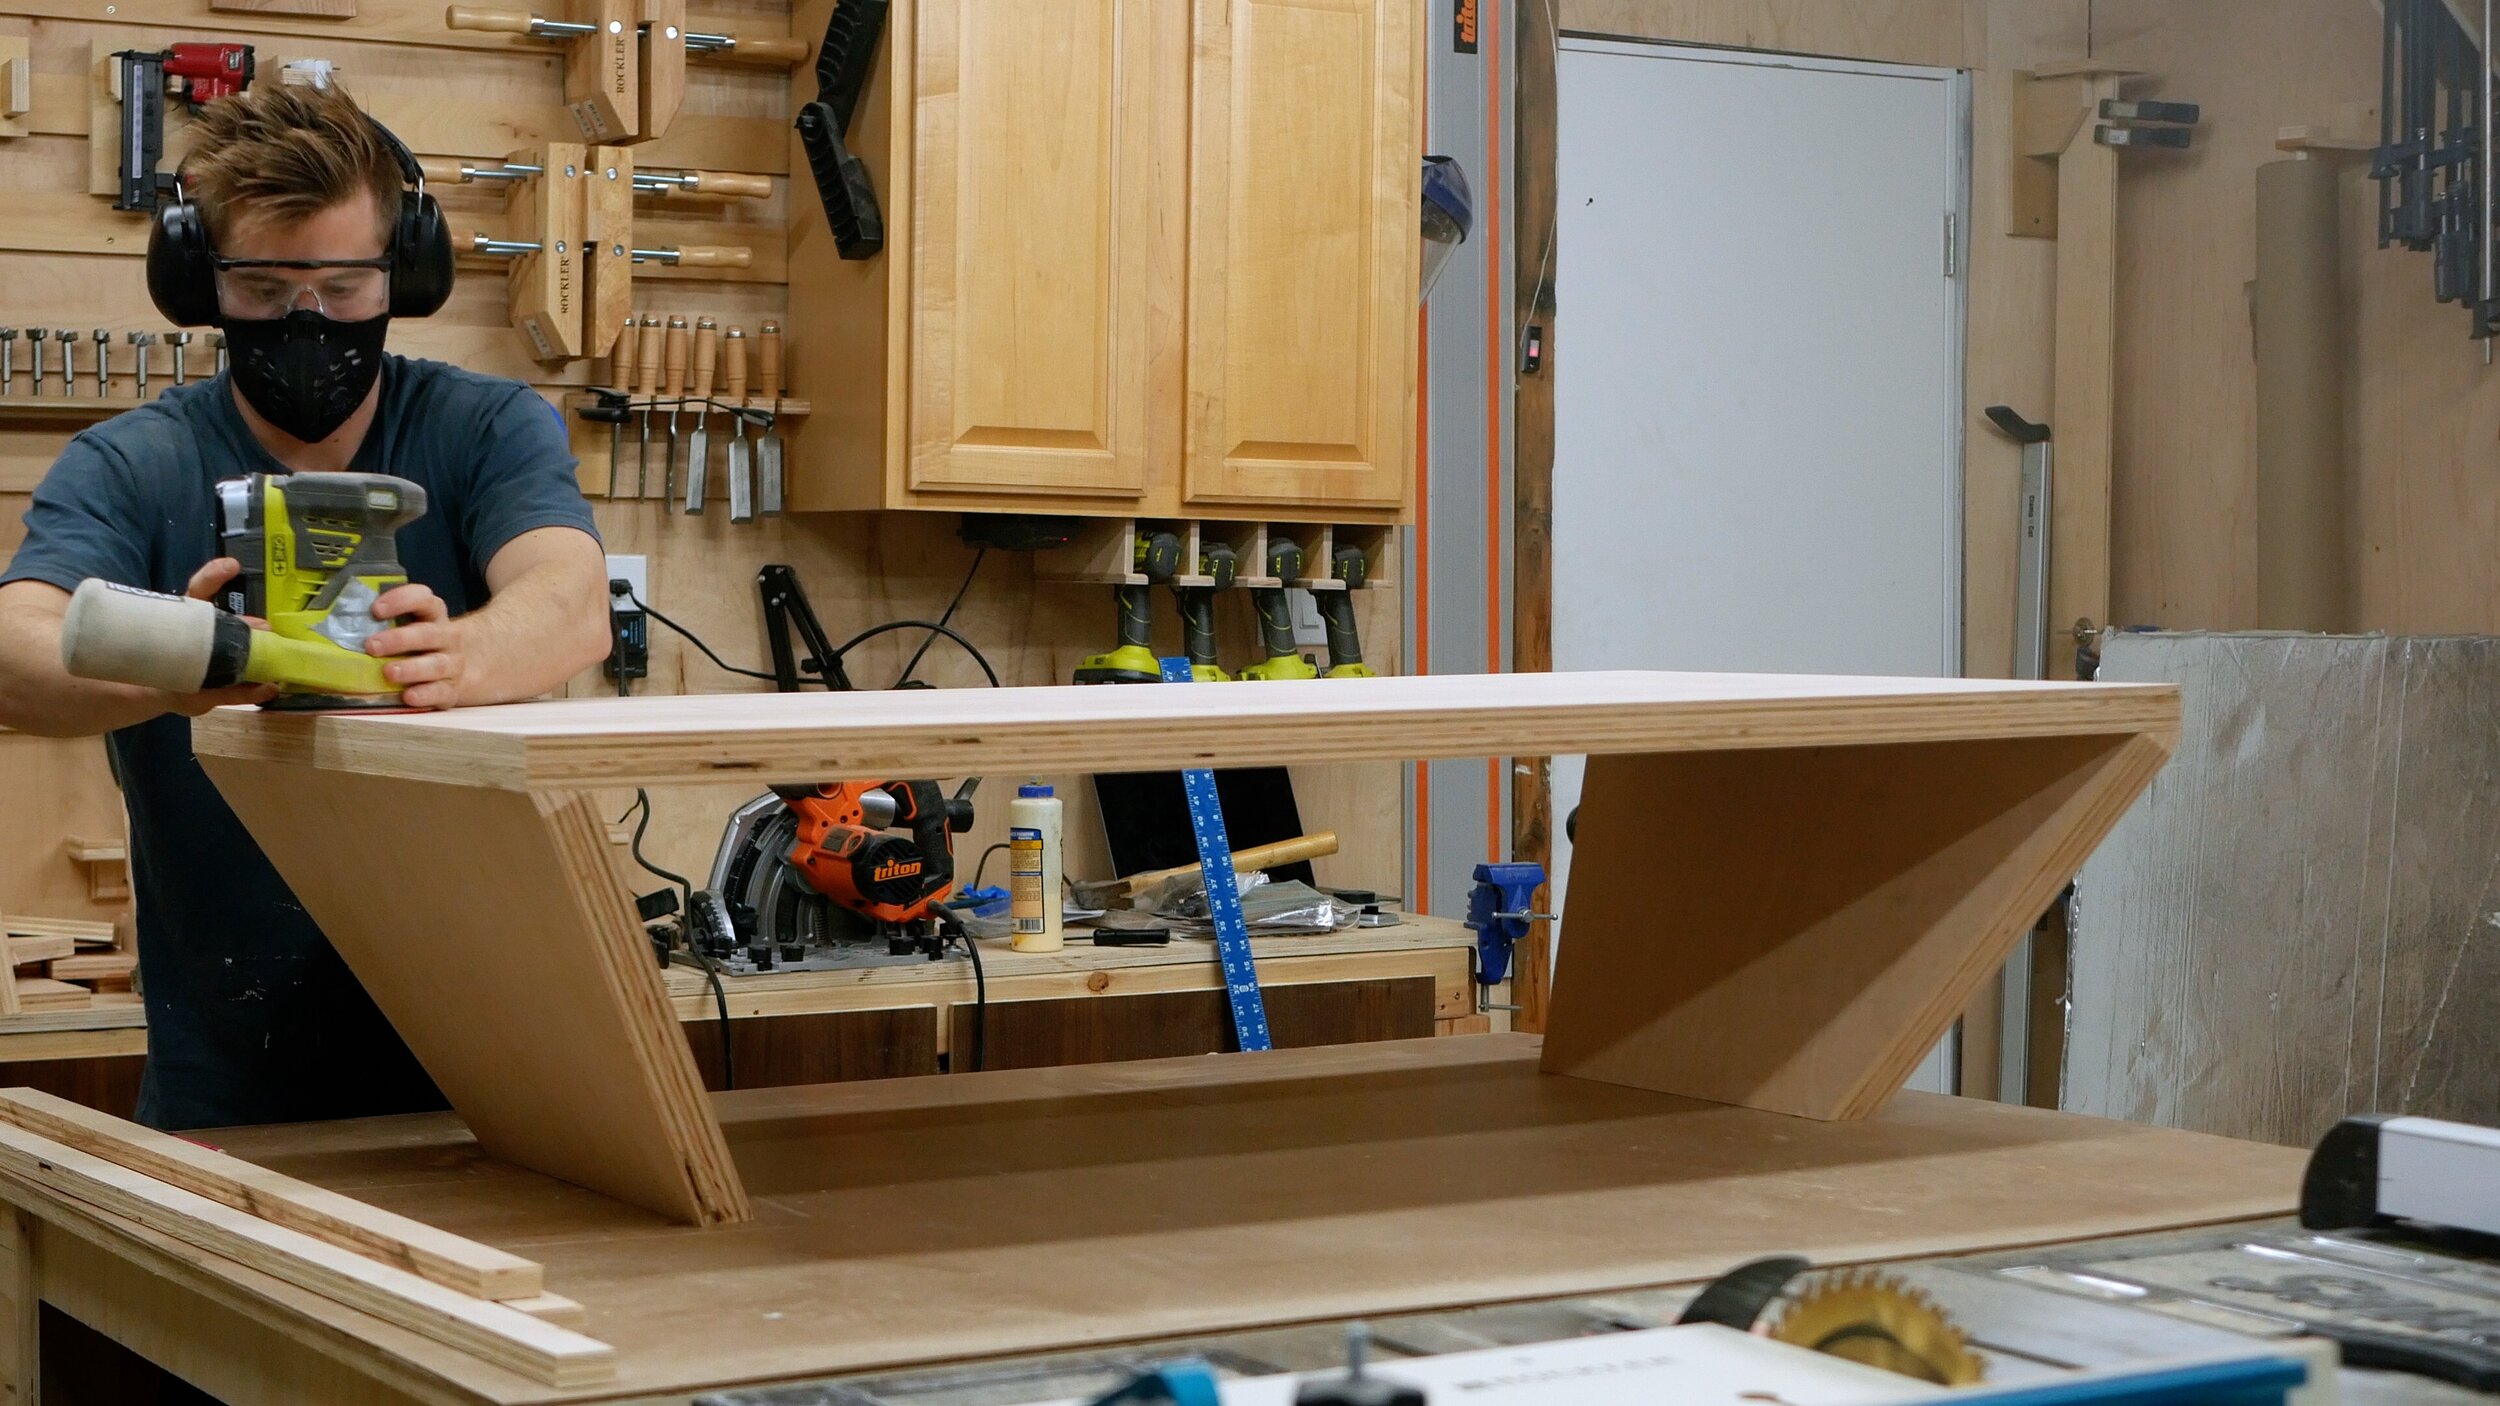
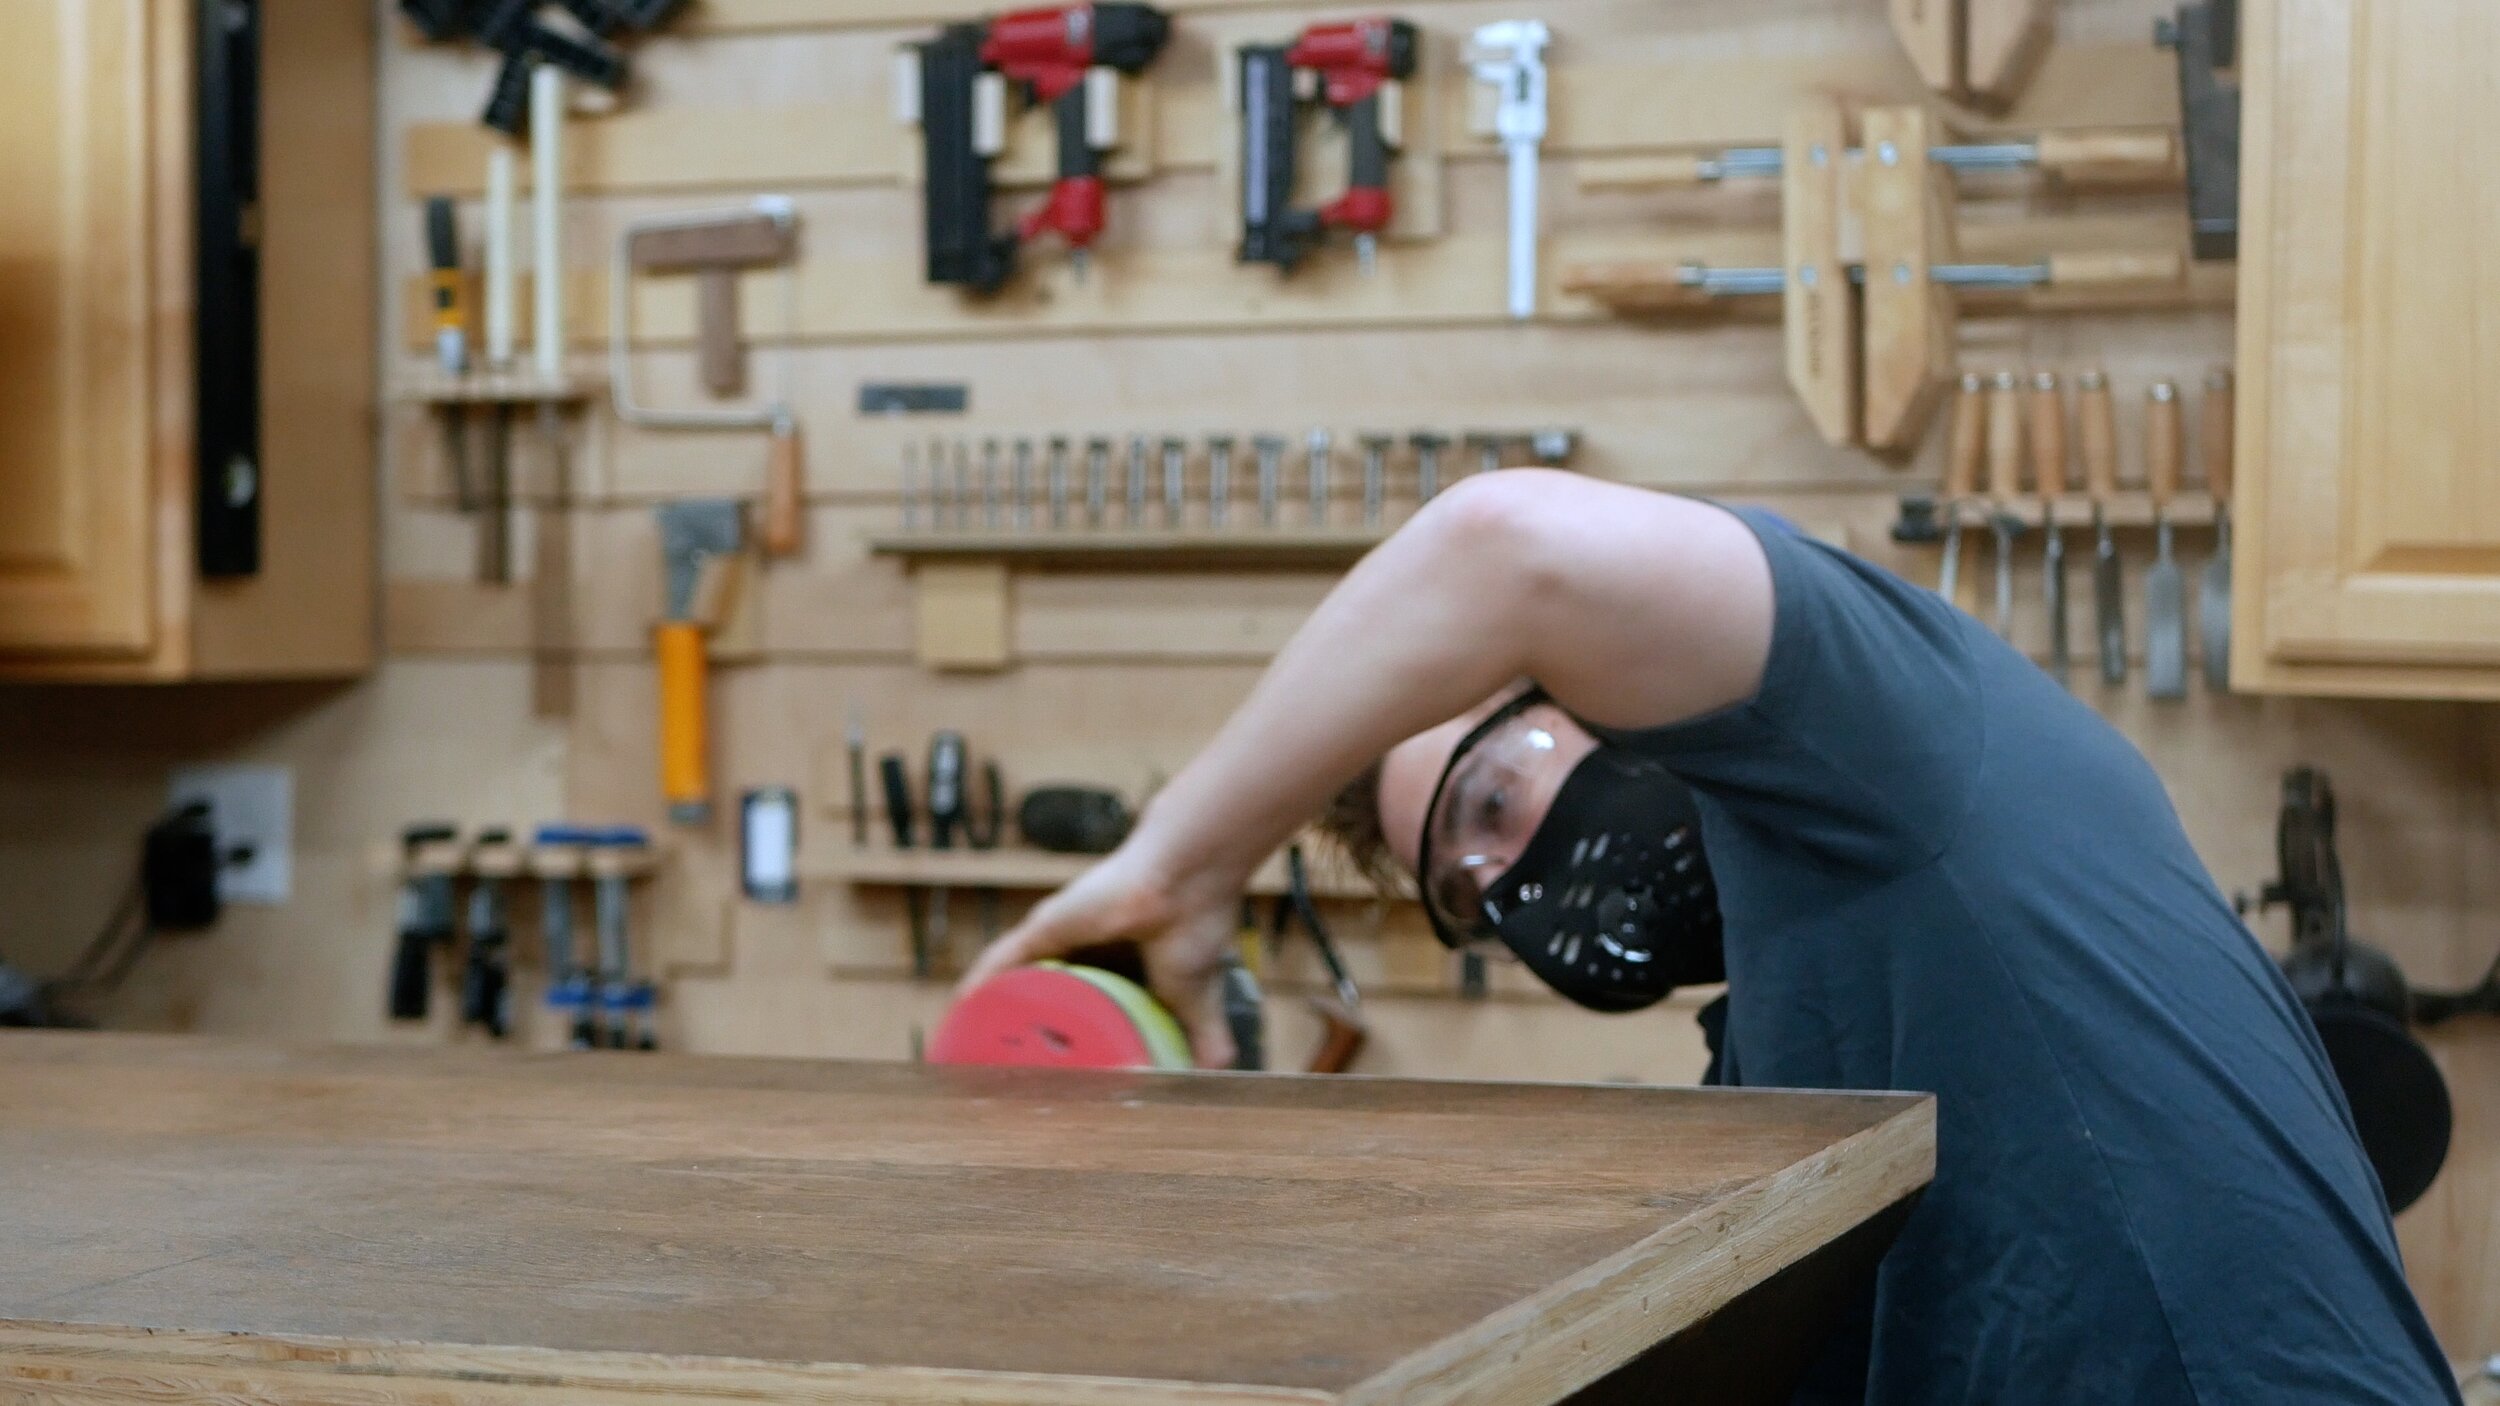
To glue my legs, I created four little jigs that could be clamped both to the table top and the leg using squeeze clamps - these were angled the same as the legs - 30° and were built using scrap wood and a combination of my table saw, band saw, and held together with glue and and more brad nails from my Arrow Brad Nailer. By clamping it this way, I could apply glue, put the piece in place, and then use a series of angled scraps to clamp both horizontally and vertically to the table - thus holding the legs in place but applying vertical pressure to the table. The result was a very strong joint. I used painters tape on the underside interior by the leg to avoid any future glue squeeze out clean up issues. After the glue cured 4 hours later, I sanded down all surfaces with 120 grit paper on my orbital sander and broke the edges with hand sanding at 220 grit.
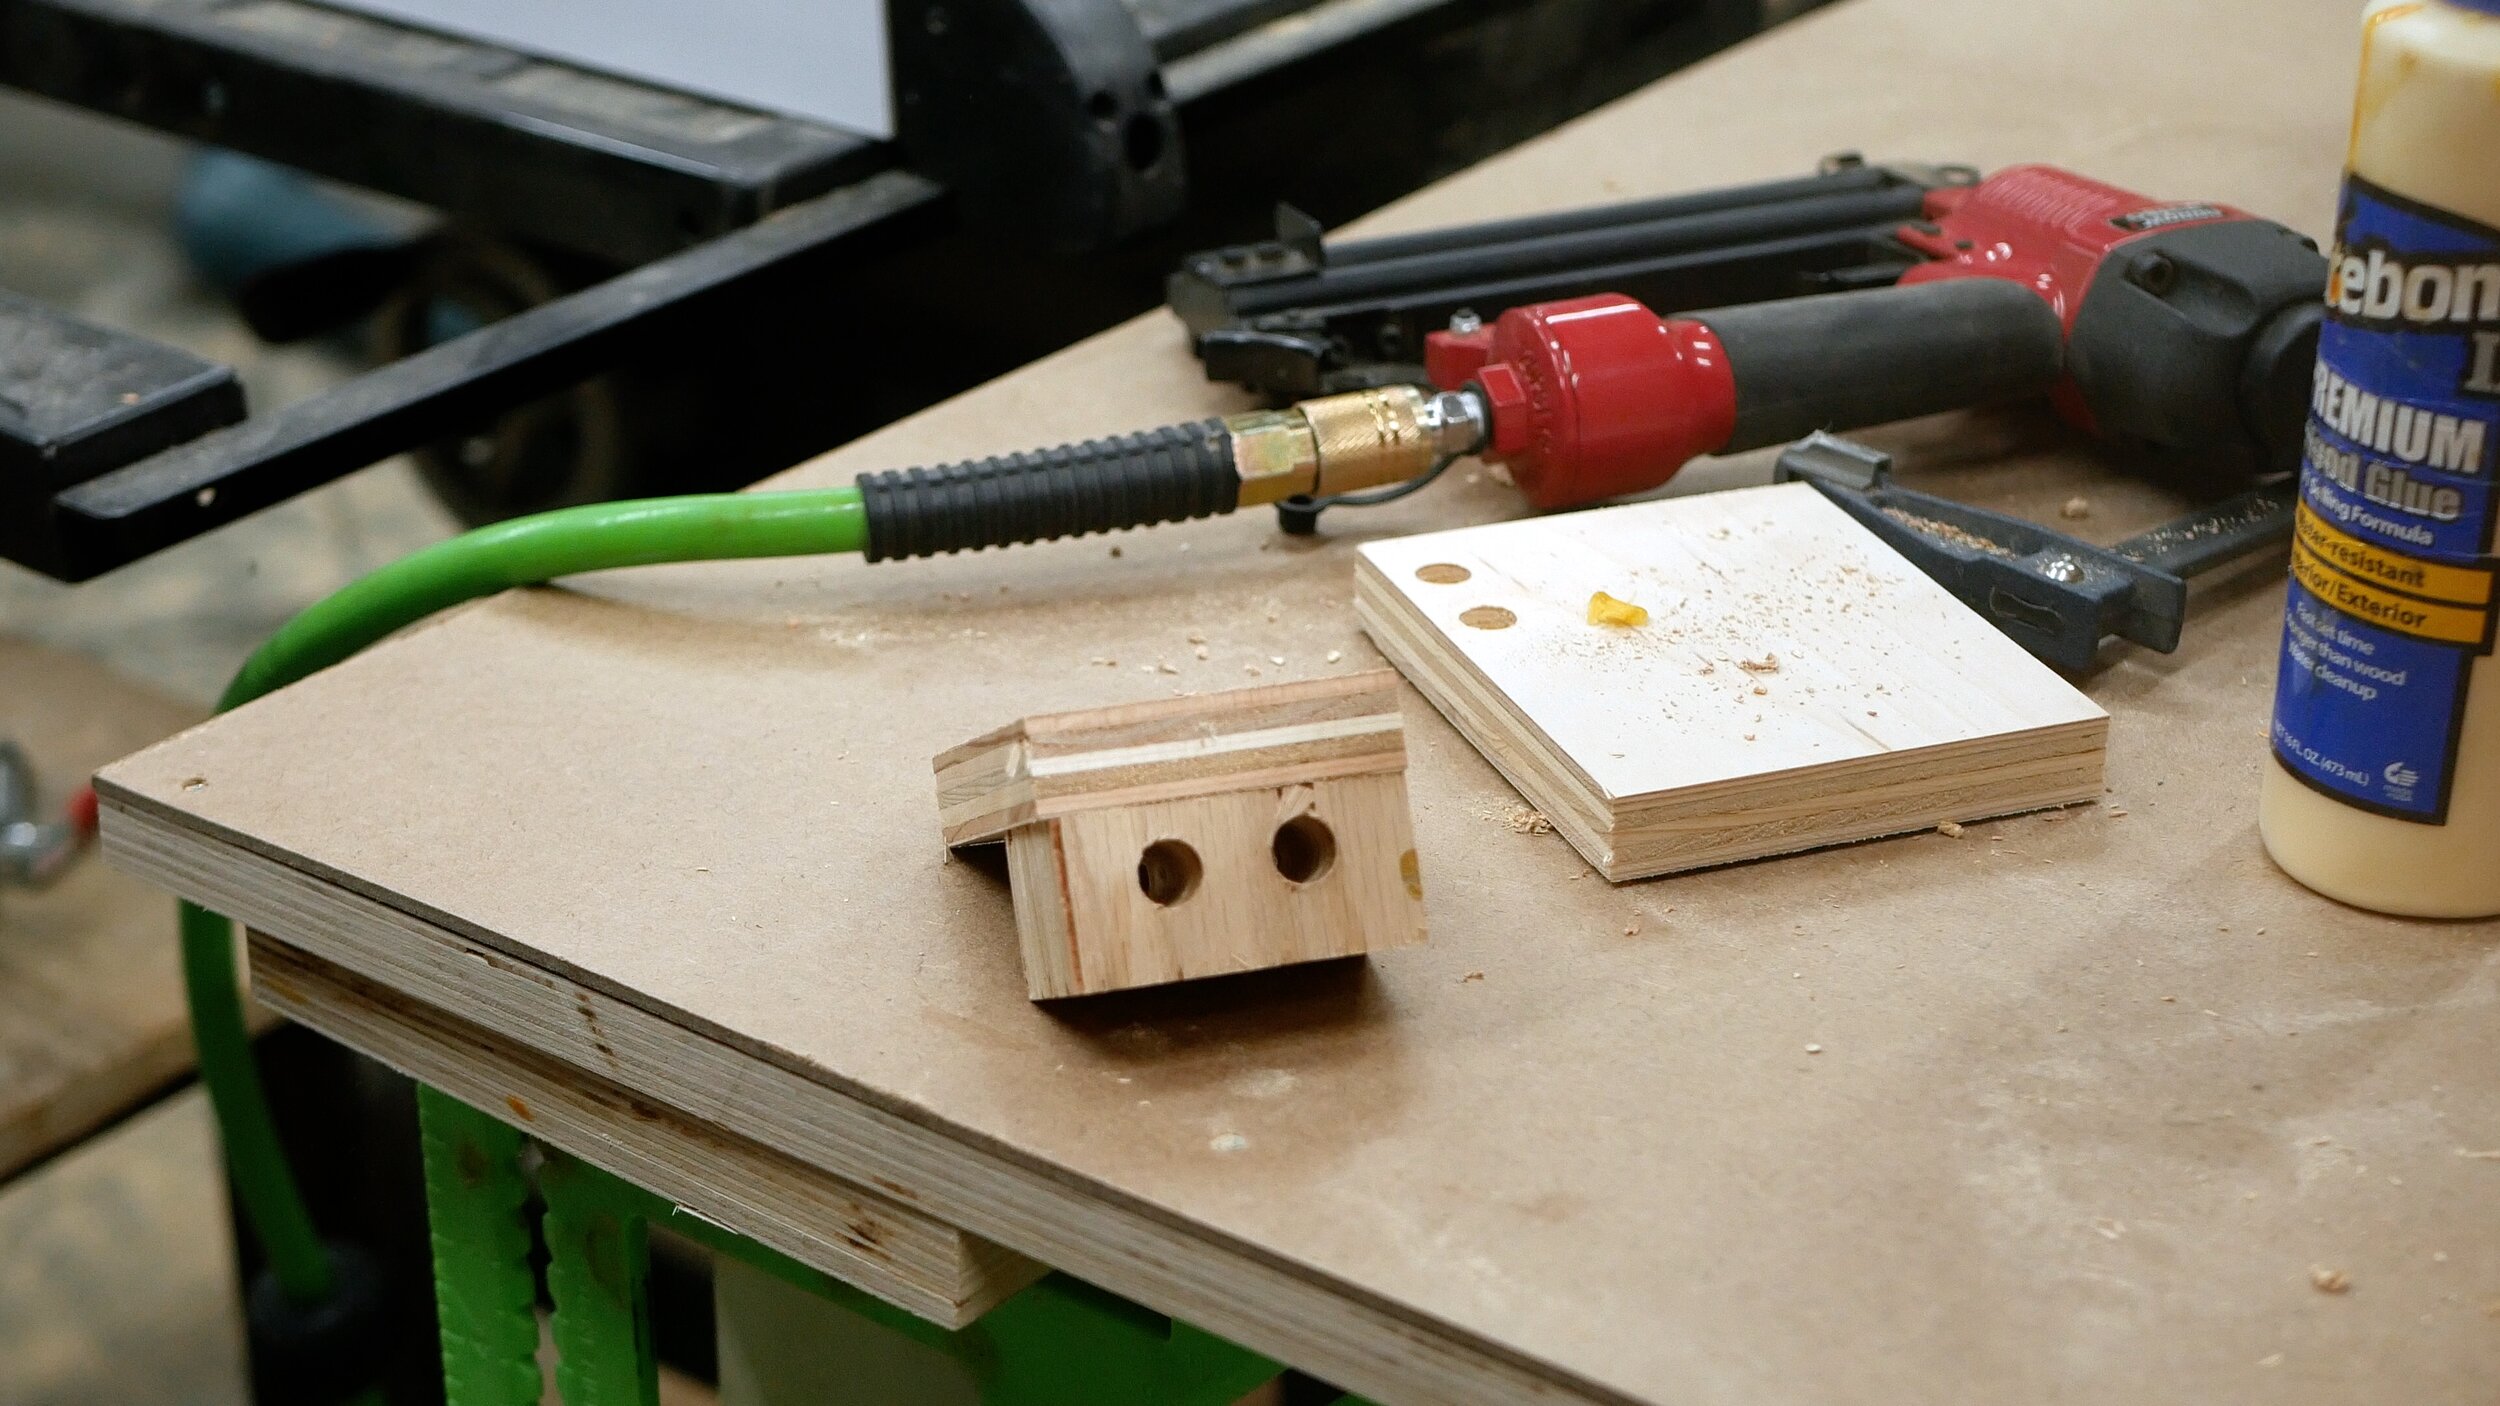
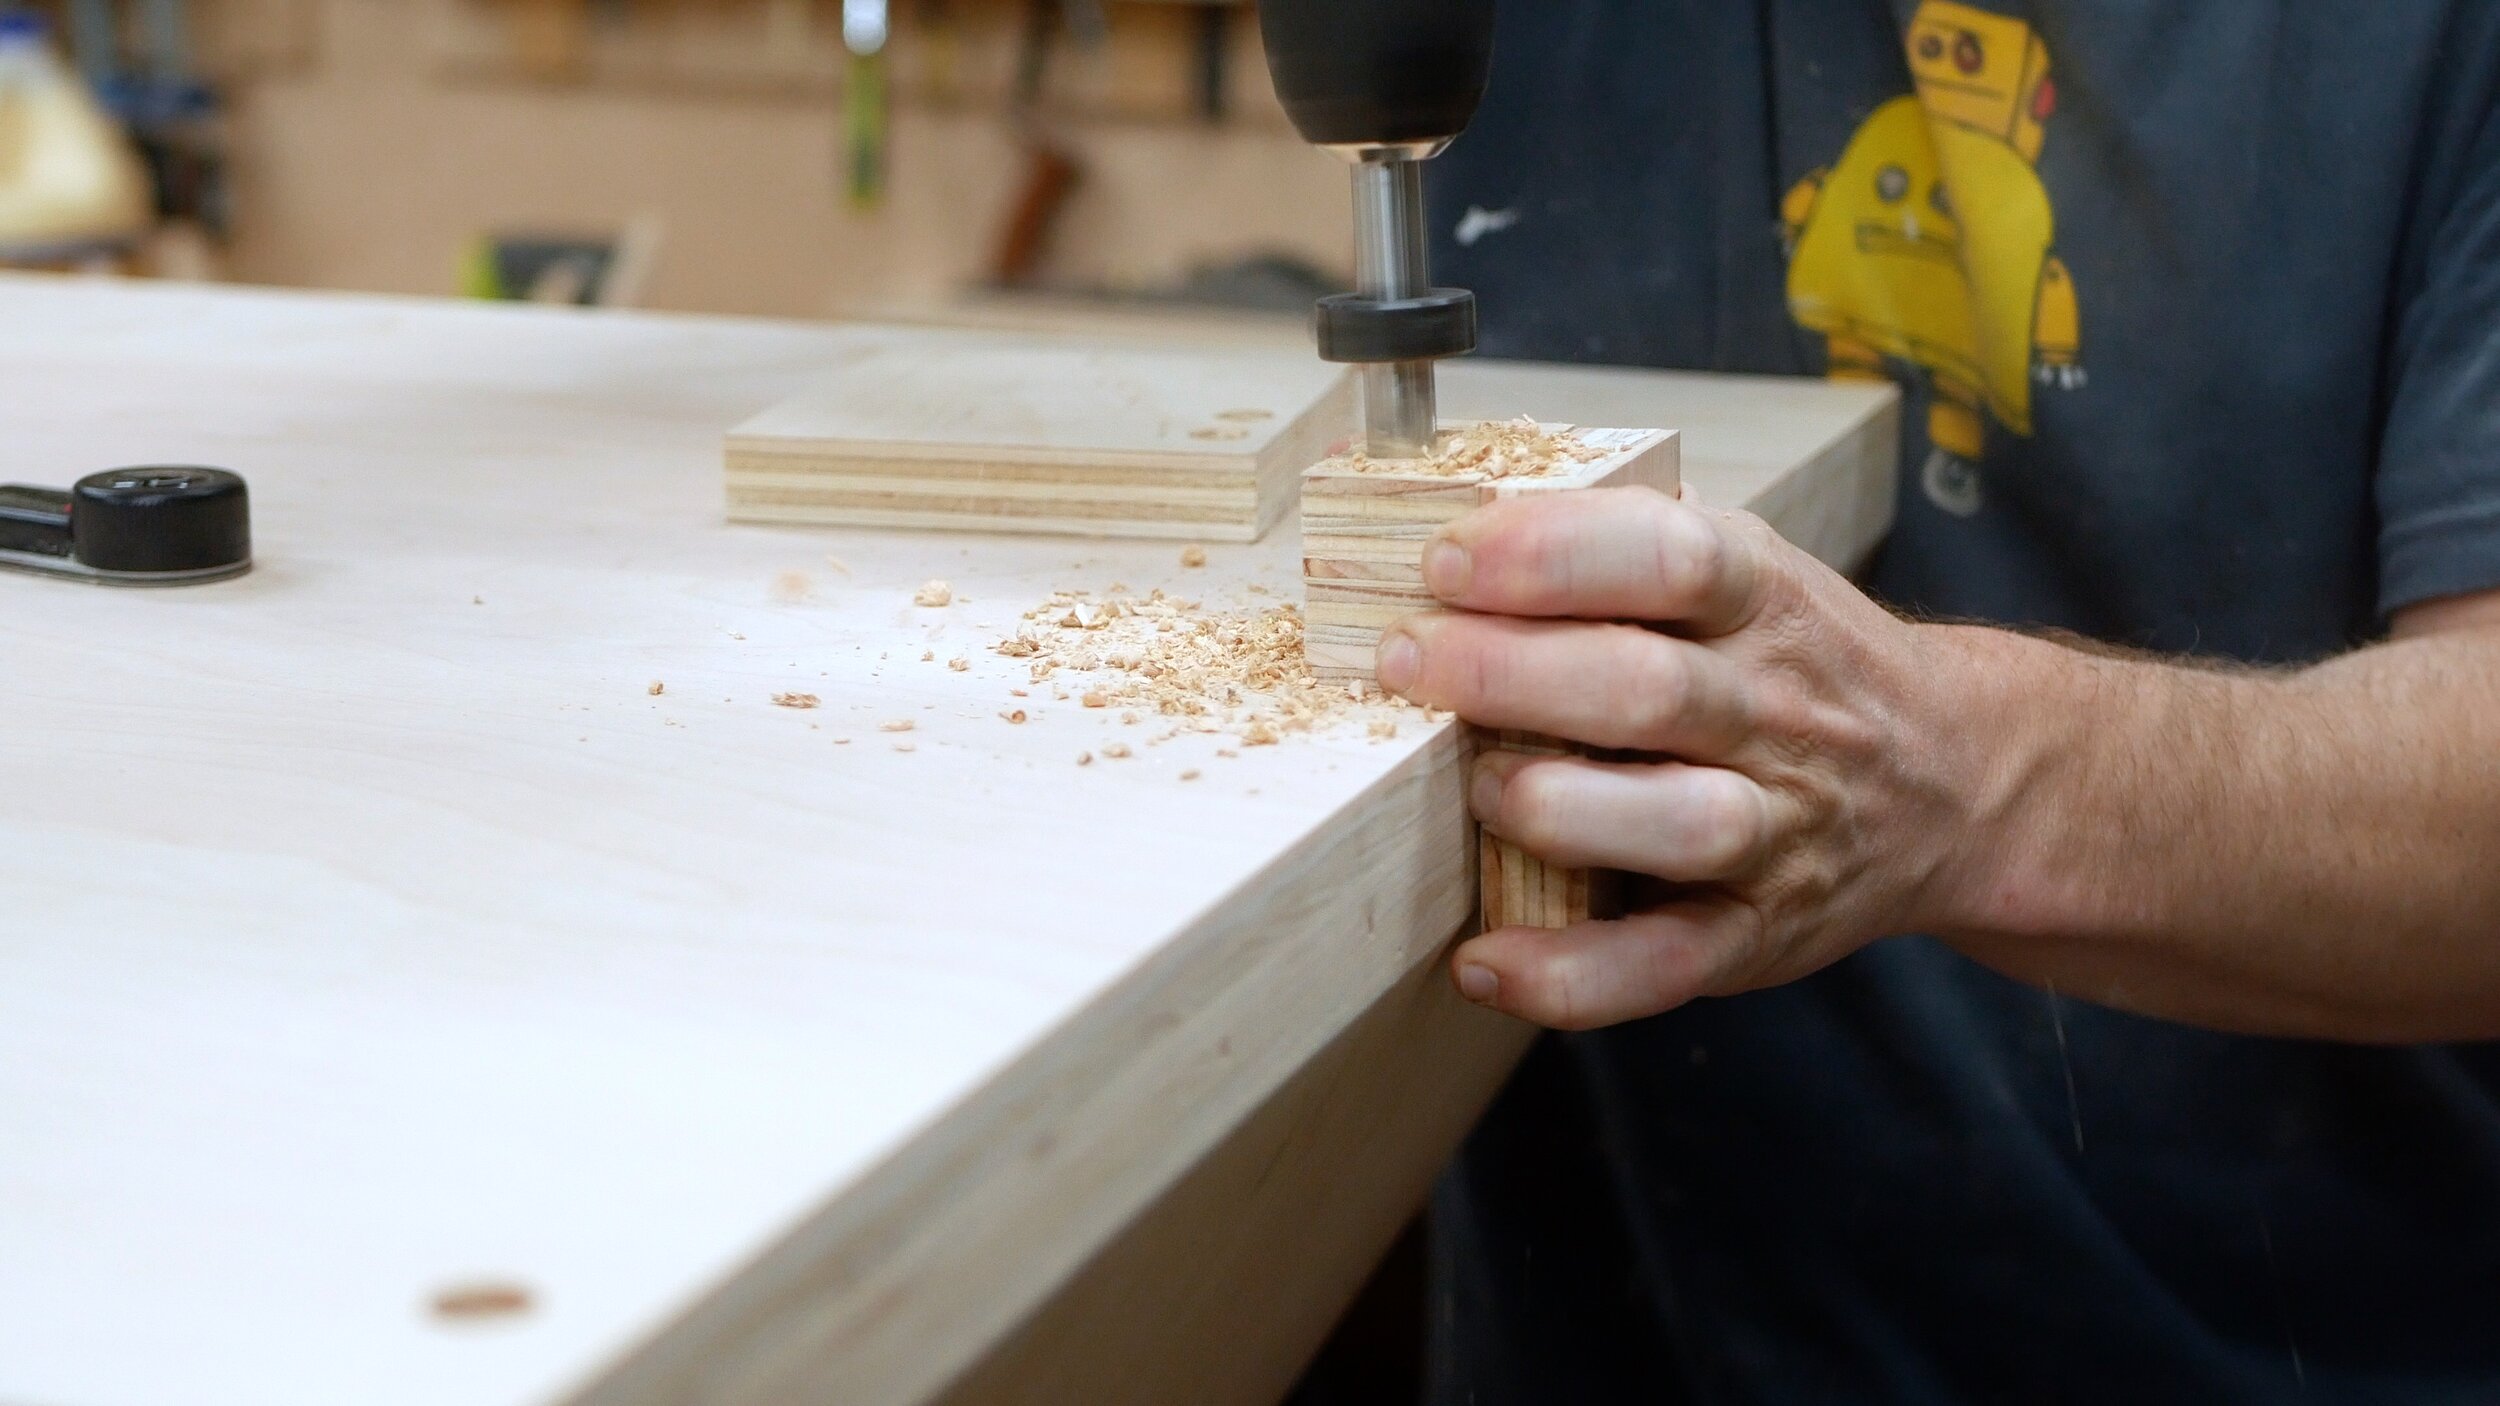
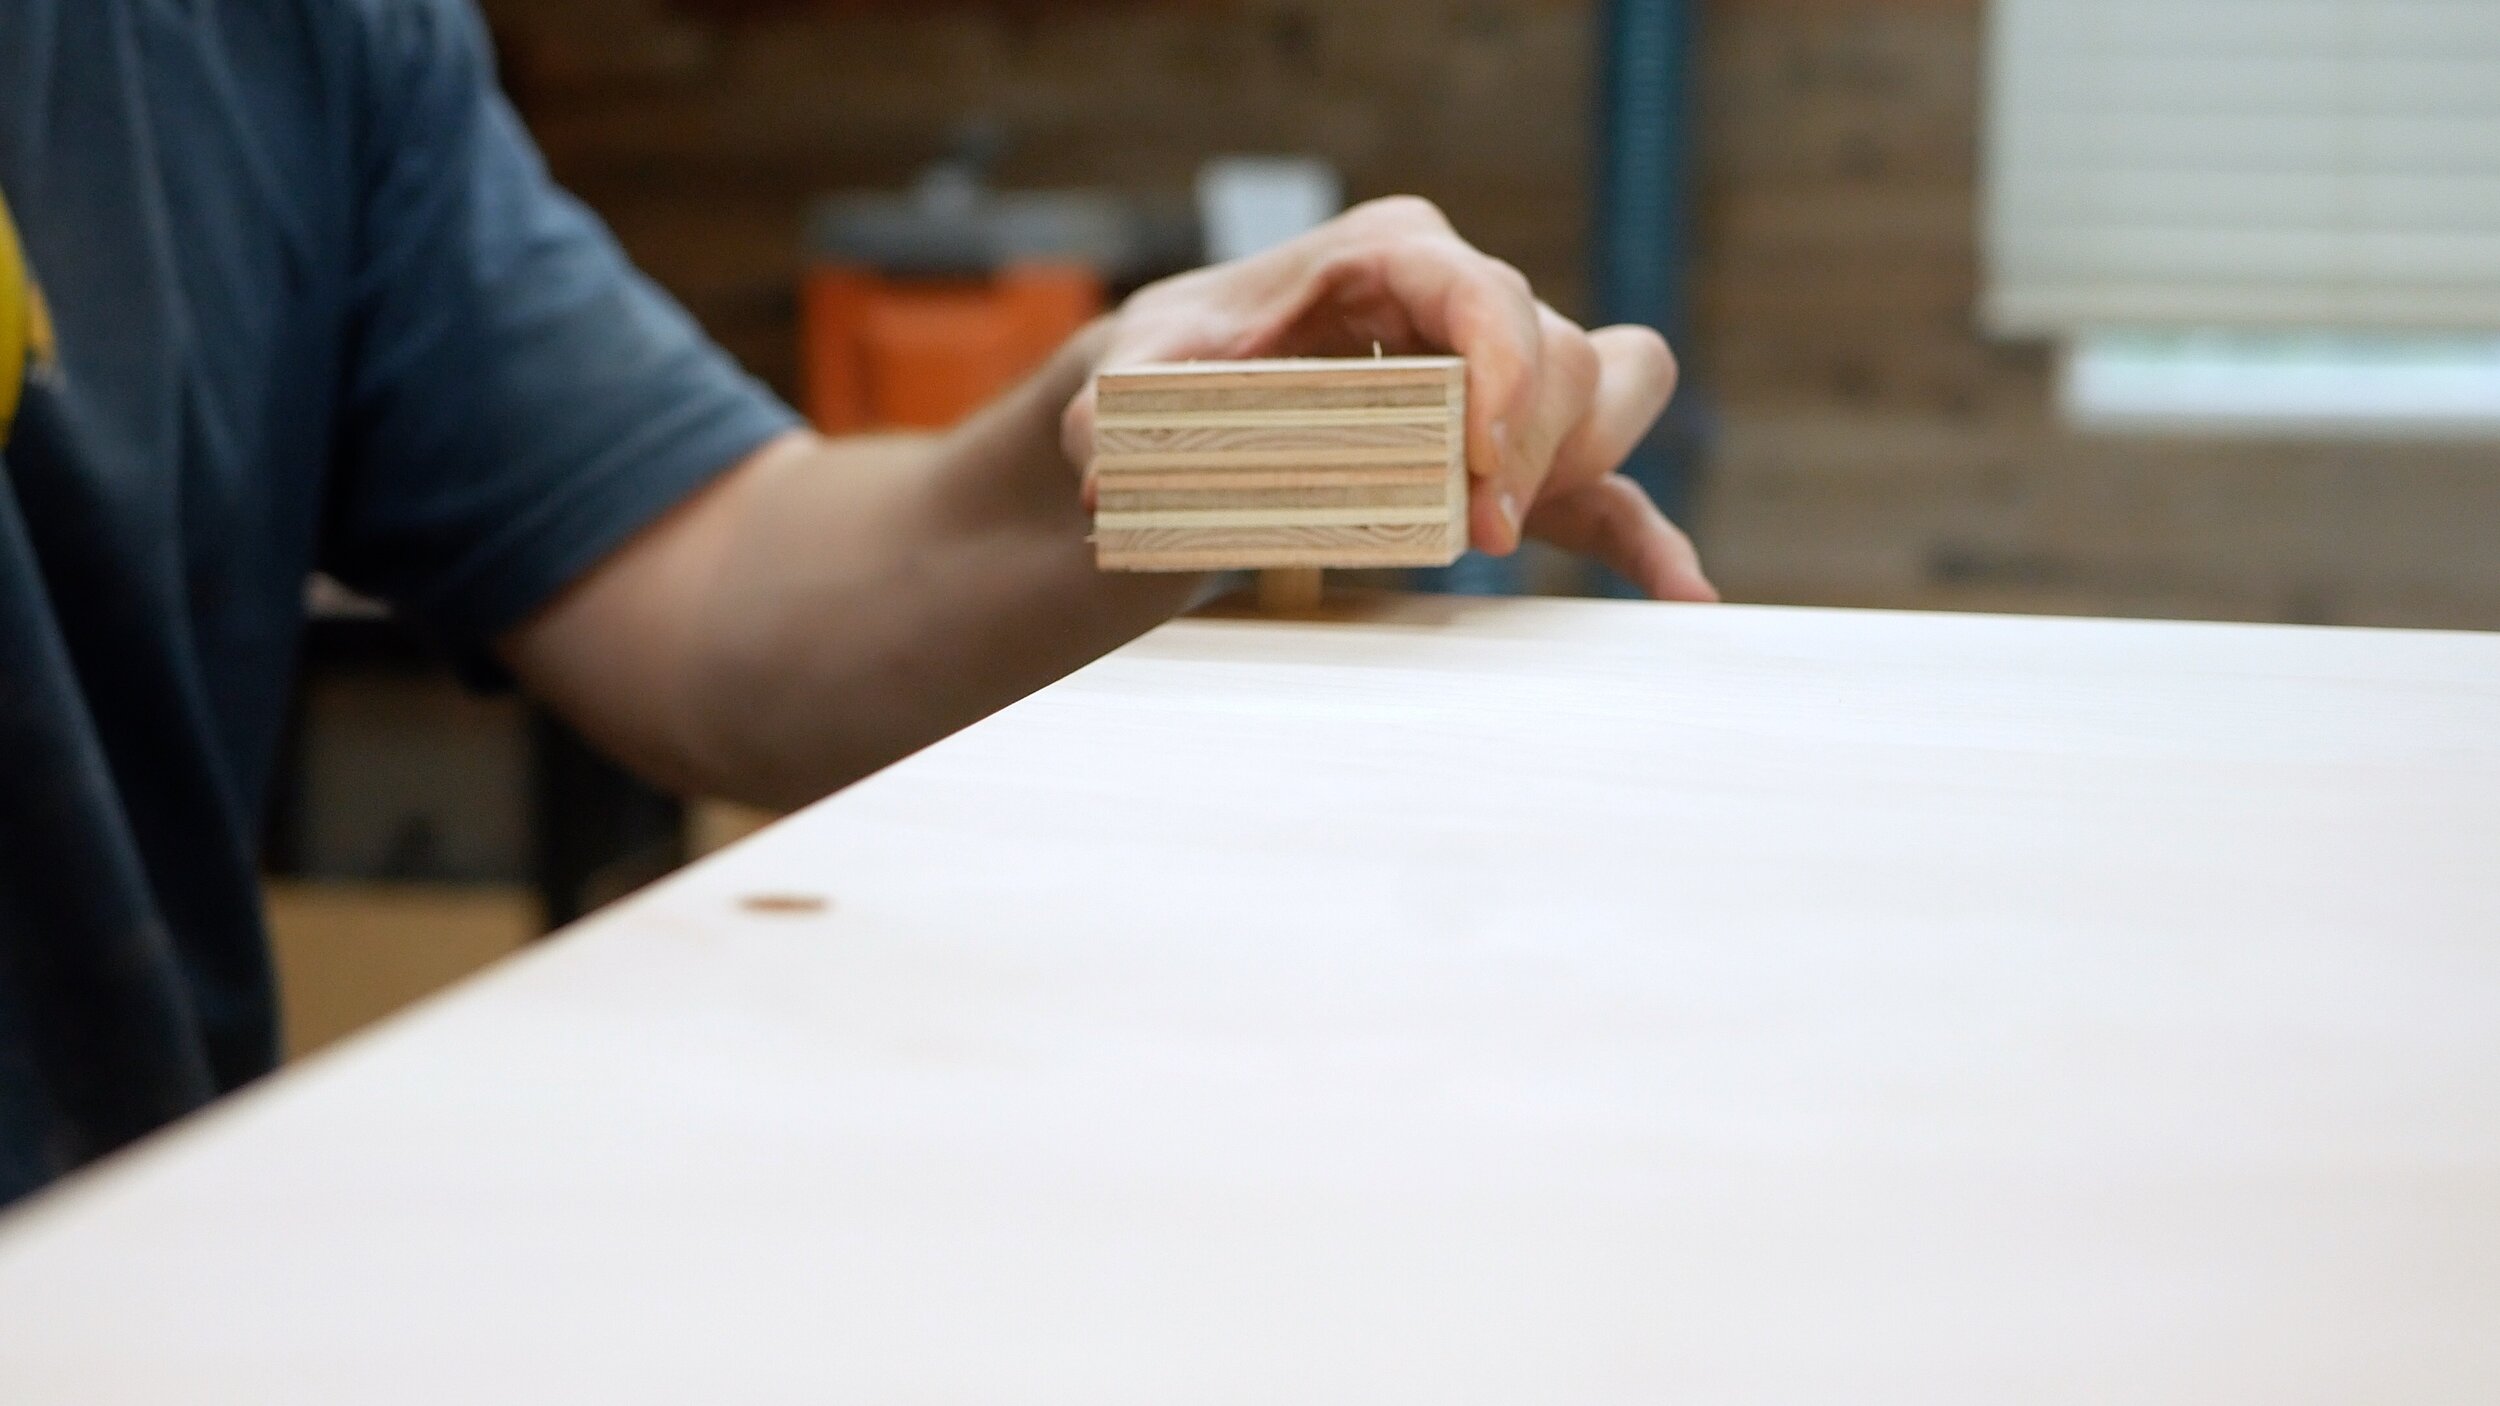

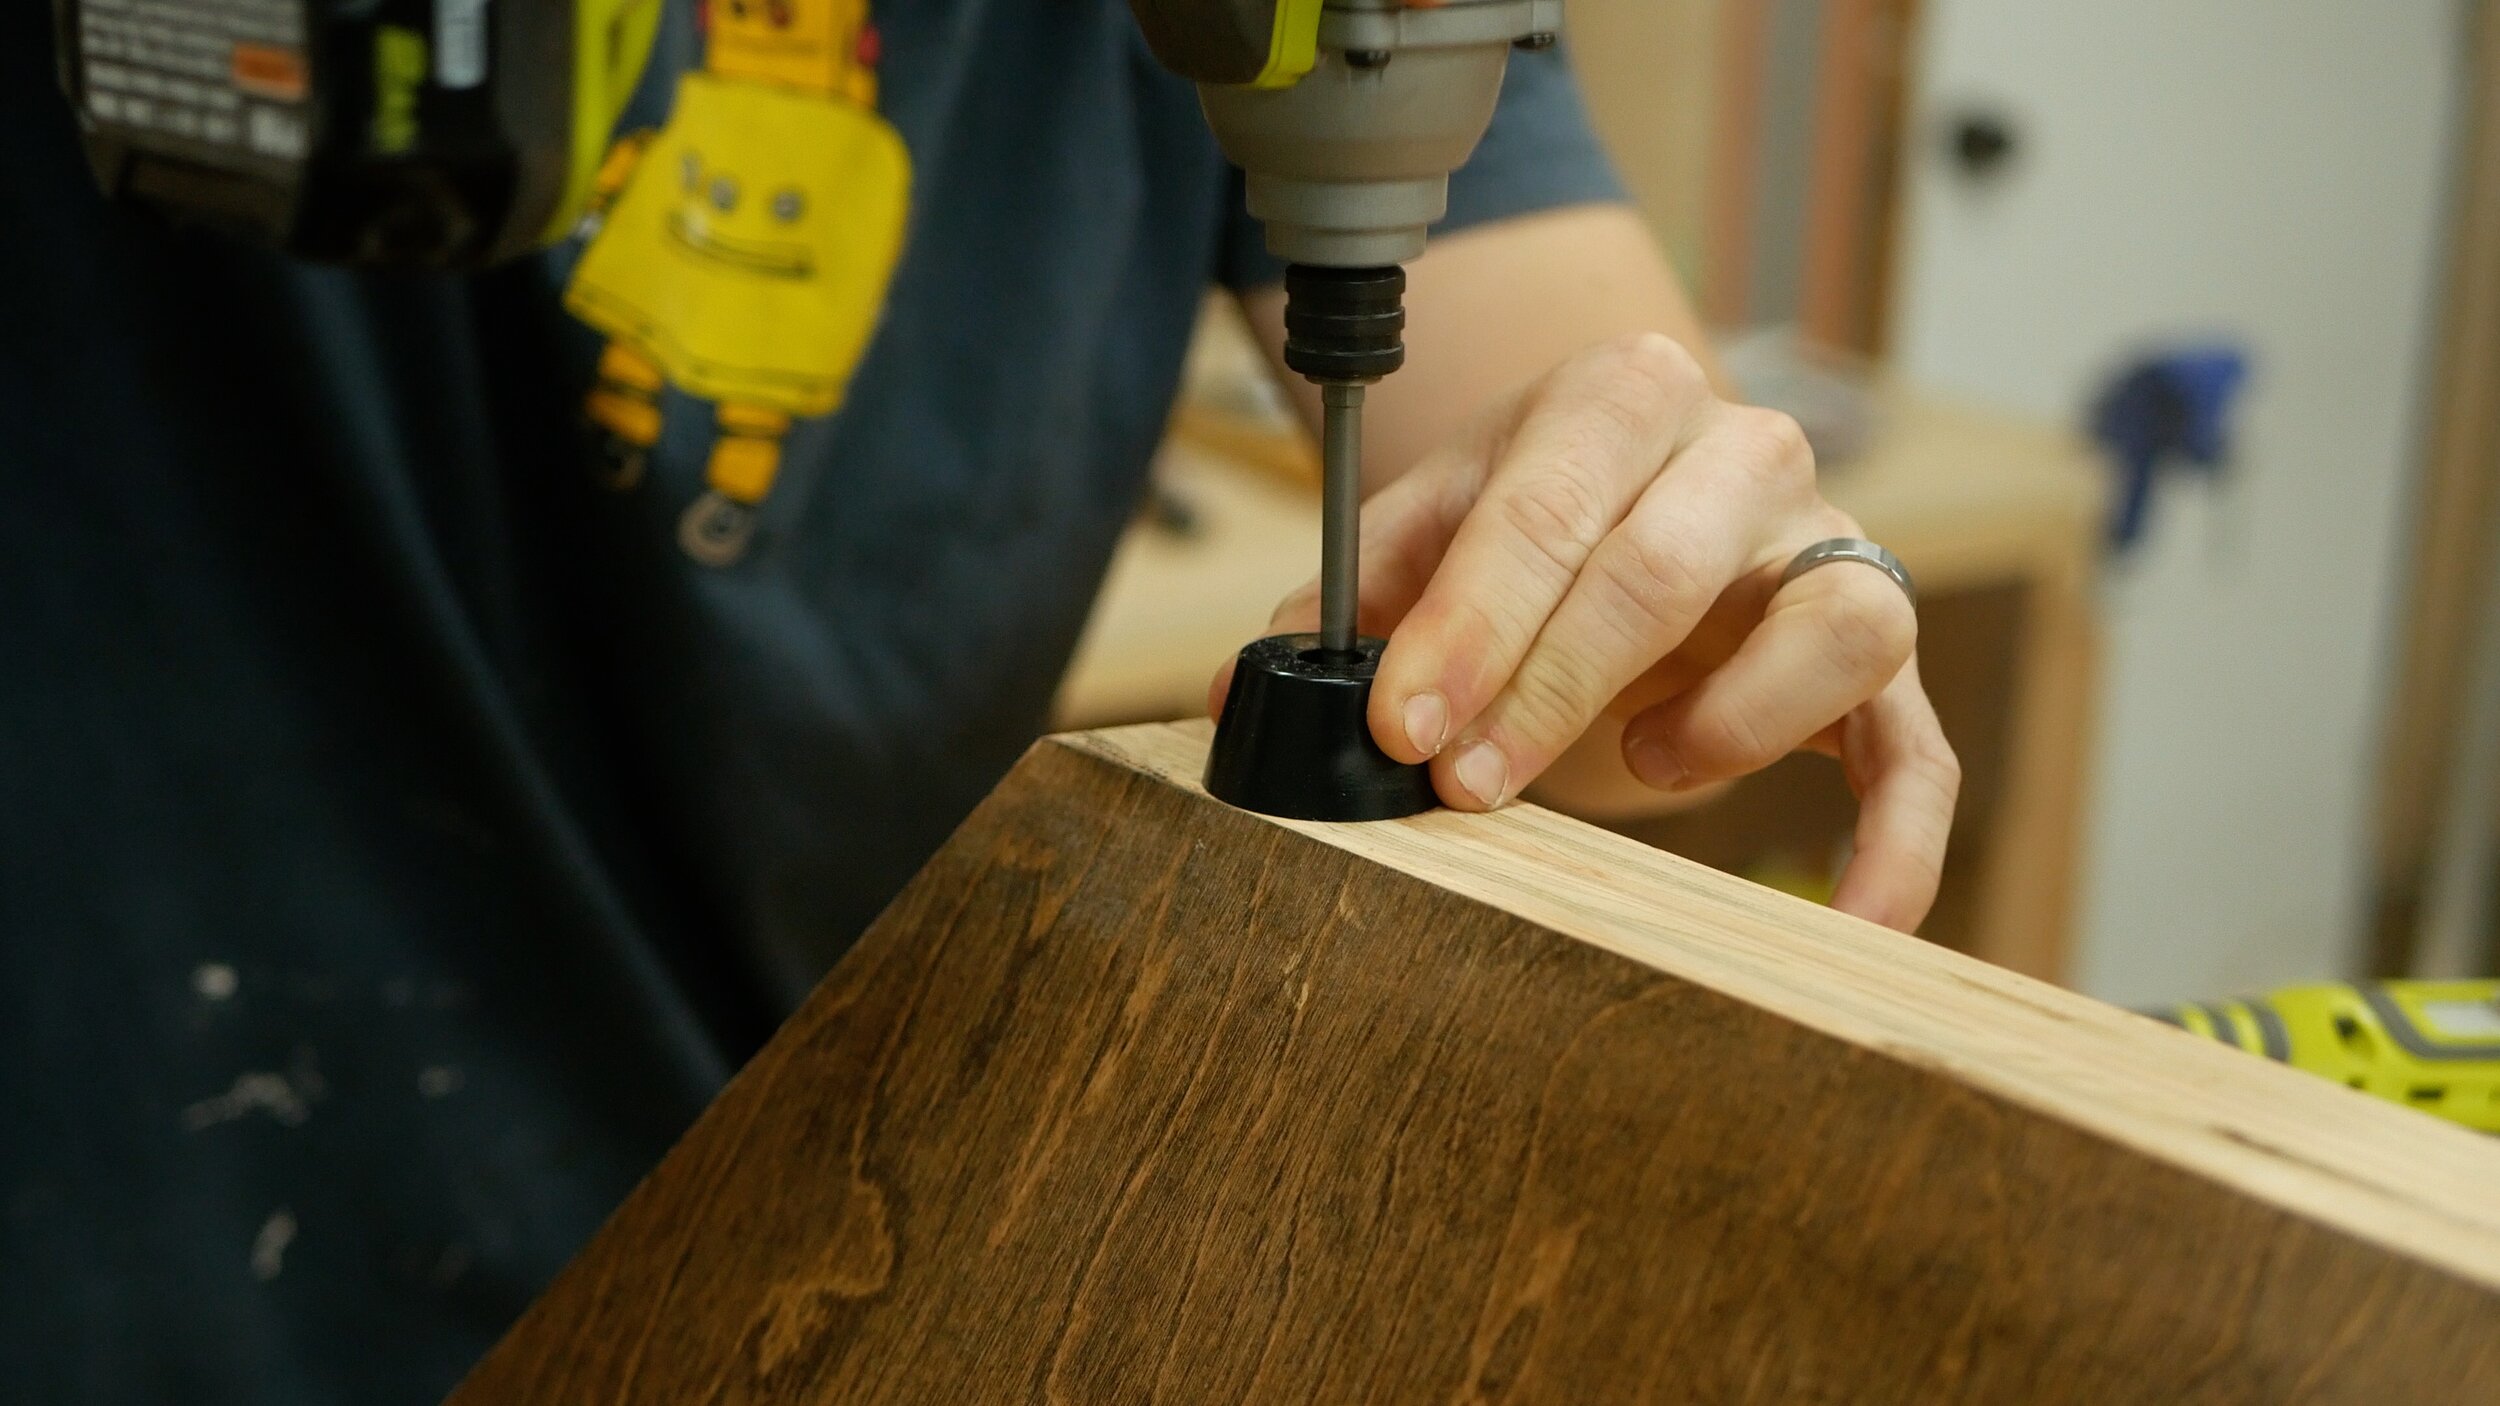
I chose to use ½” dowels to reinforce the joints on this table. Honestly, it felt strong, but since it was end grain plywood into veneer, it felt like a no brainer. I have a dowel jig, but it only reaches so far over the corner of a piece, and I needed my dowels to be drilled further into the piece to make a difference structurally - so I made my own dowel jig using stacked plywood and my Arrow Brad Nailer. I then used my ½” dowel drill bit and drilled dowels in all four corners of the table top down into the legs as well as the middle of the edge of the table - thus giving me 6 points of reinforcement. I then cut dowels on my table saw, glued and hammered them into place, and cut them flush with my hand saw, sanding them down flush with my orbital sander. This table easily held my 165 pound weight - I’m guessing it could hold 300+ pounds.
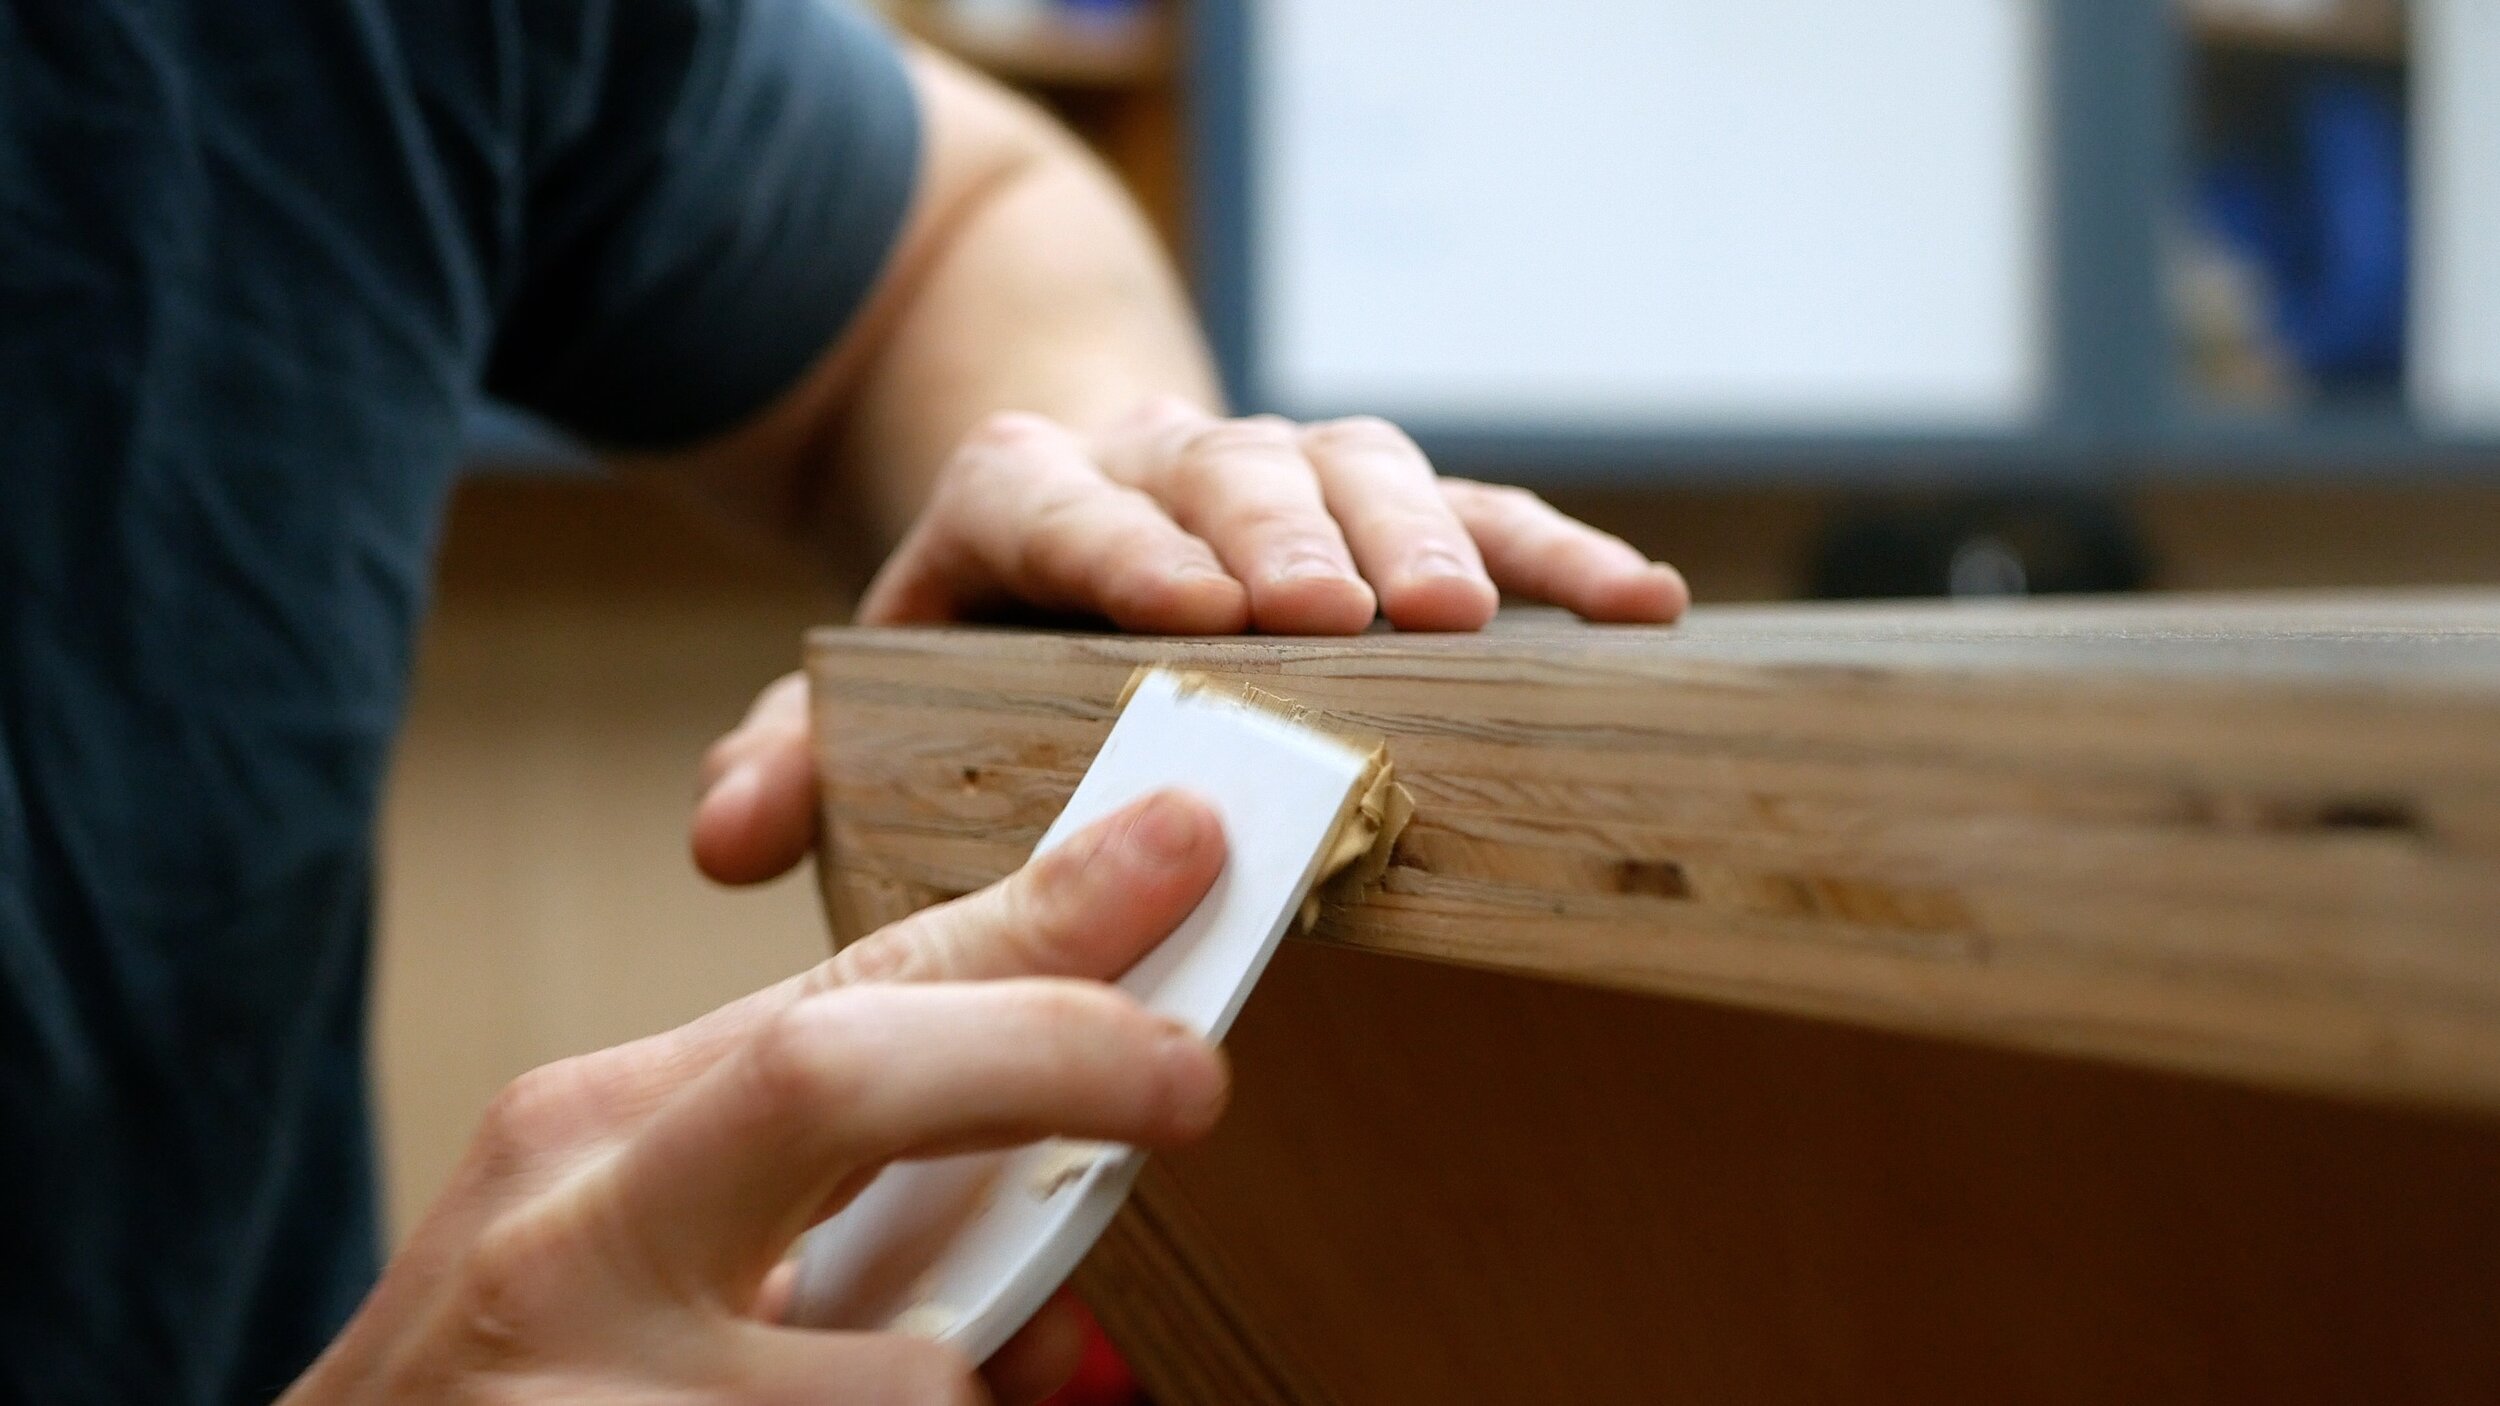
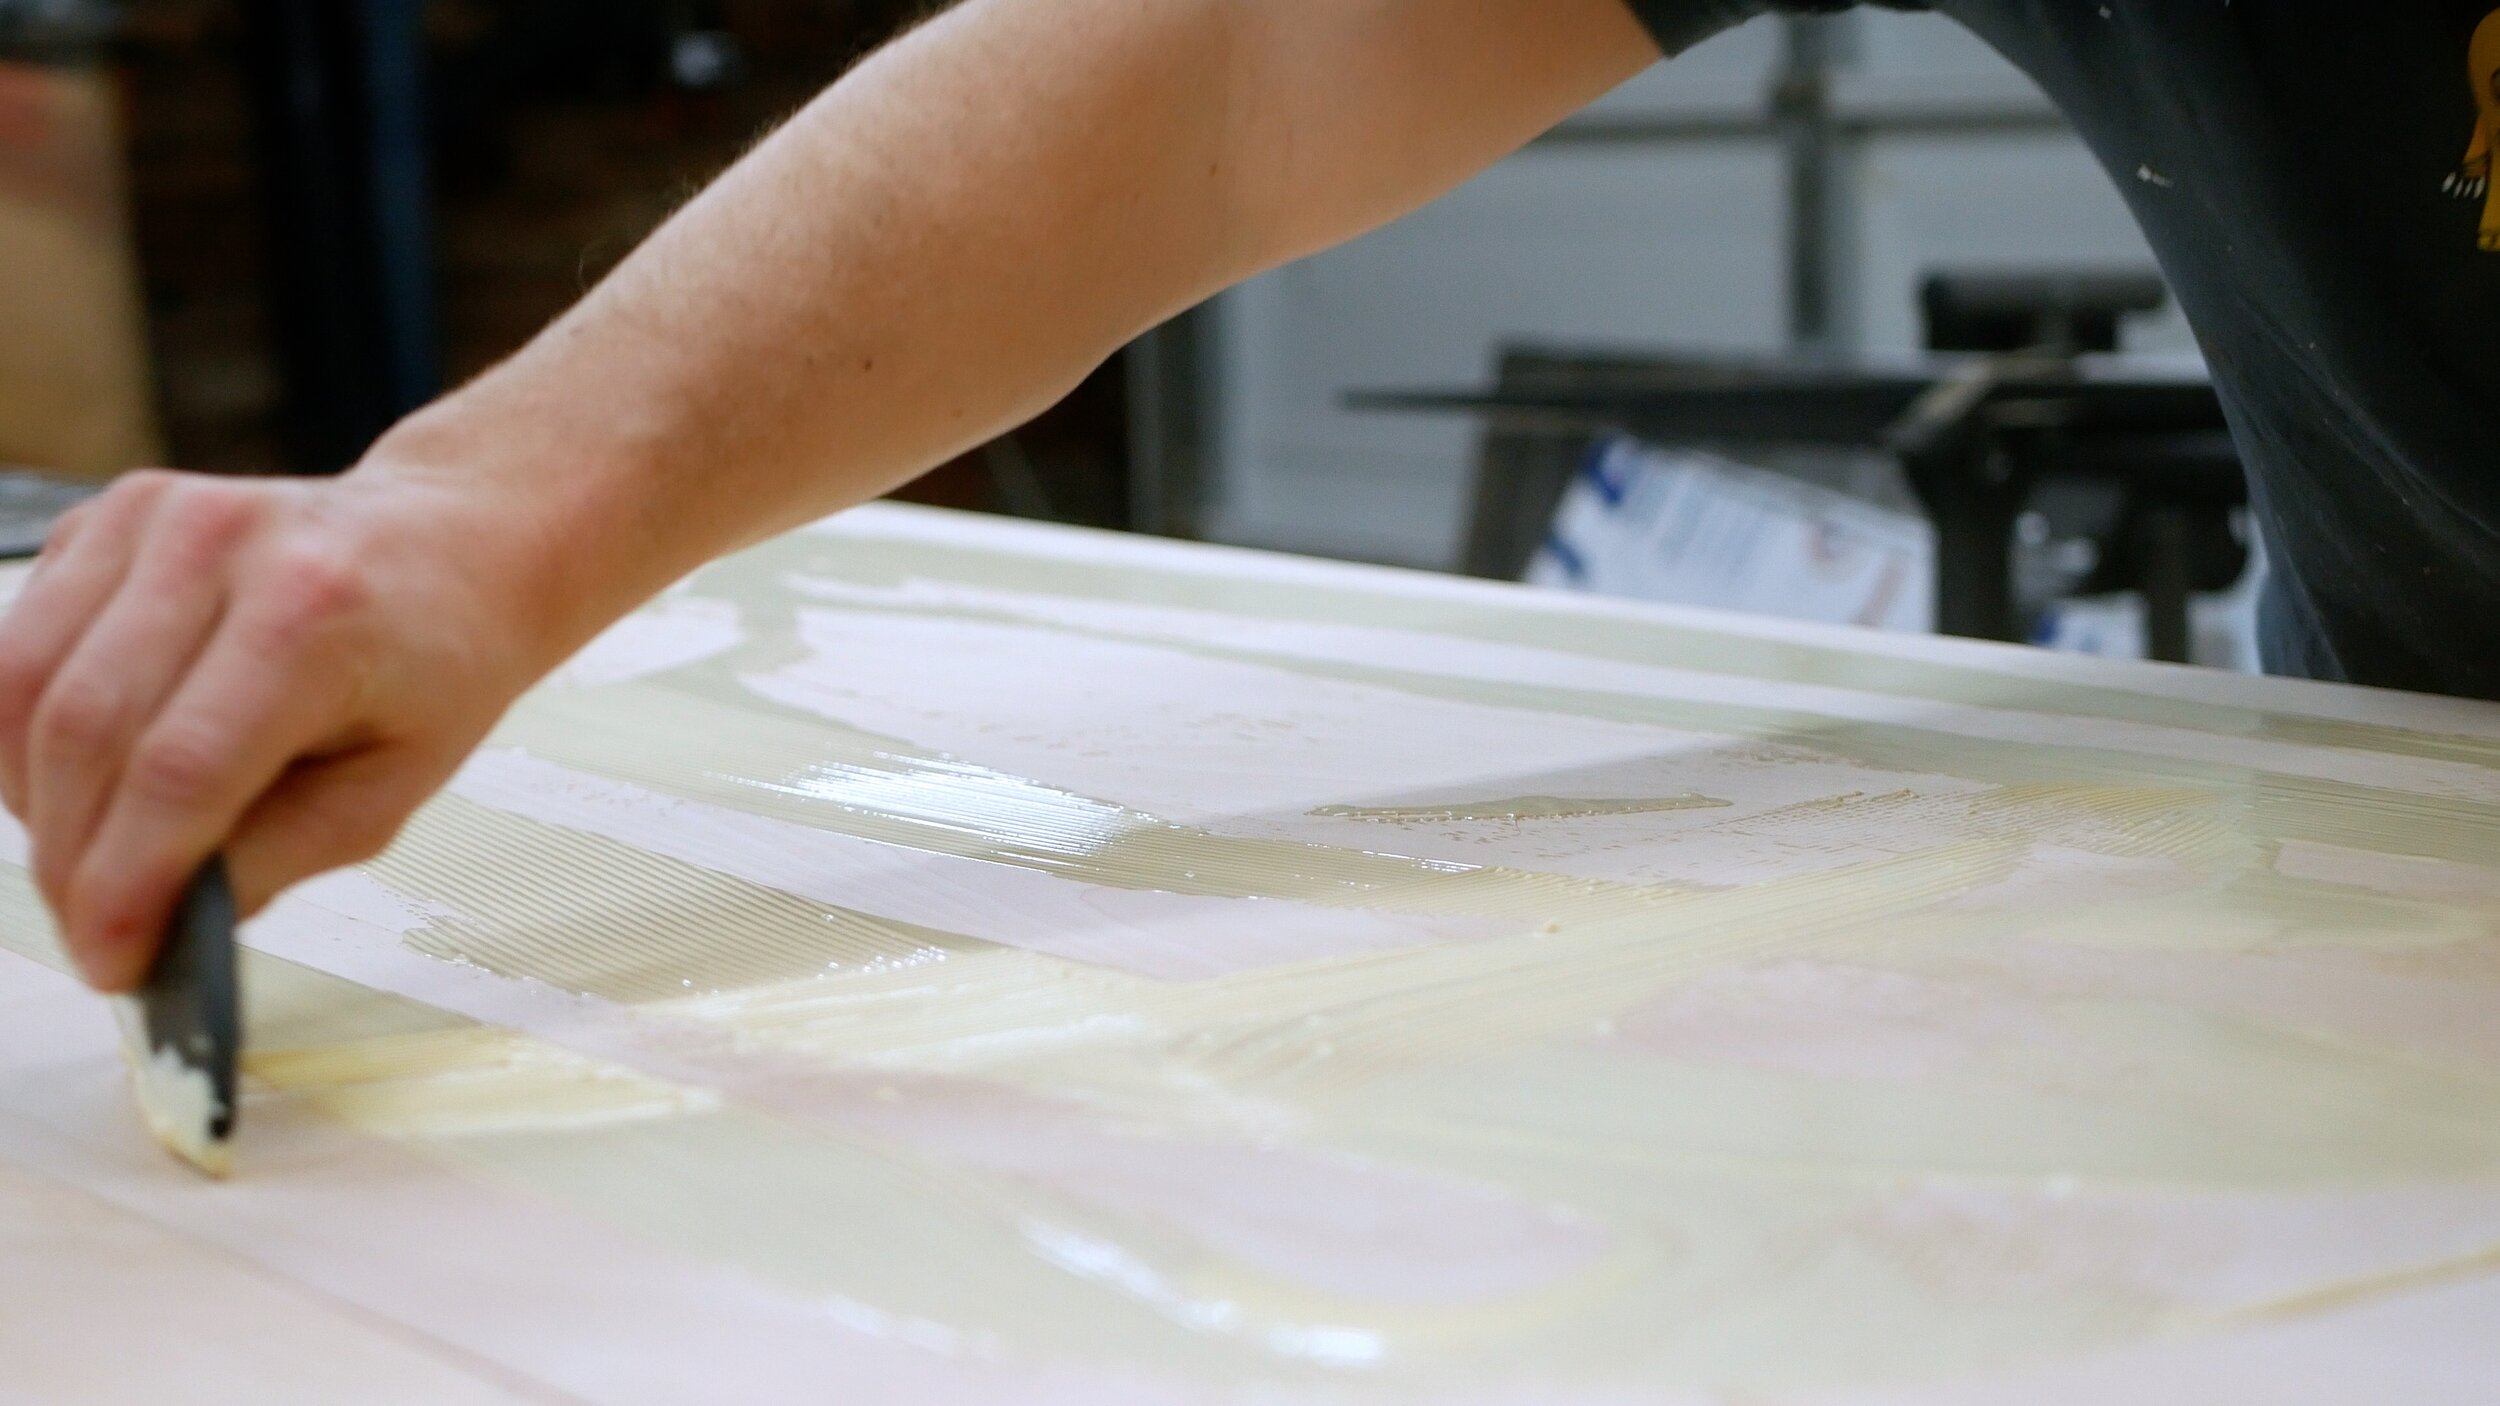
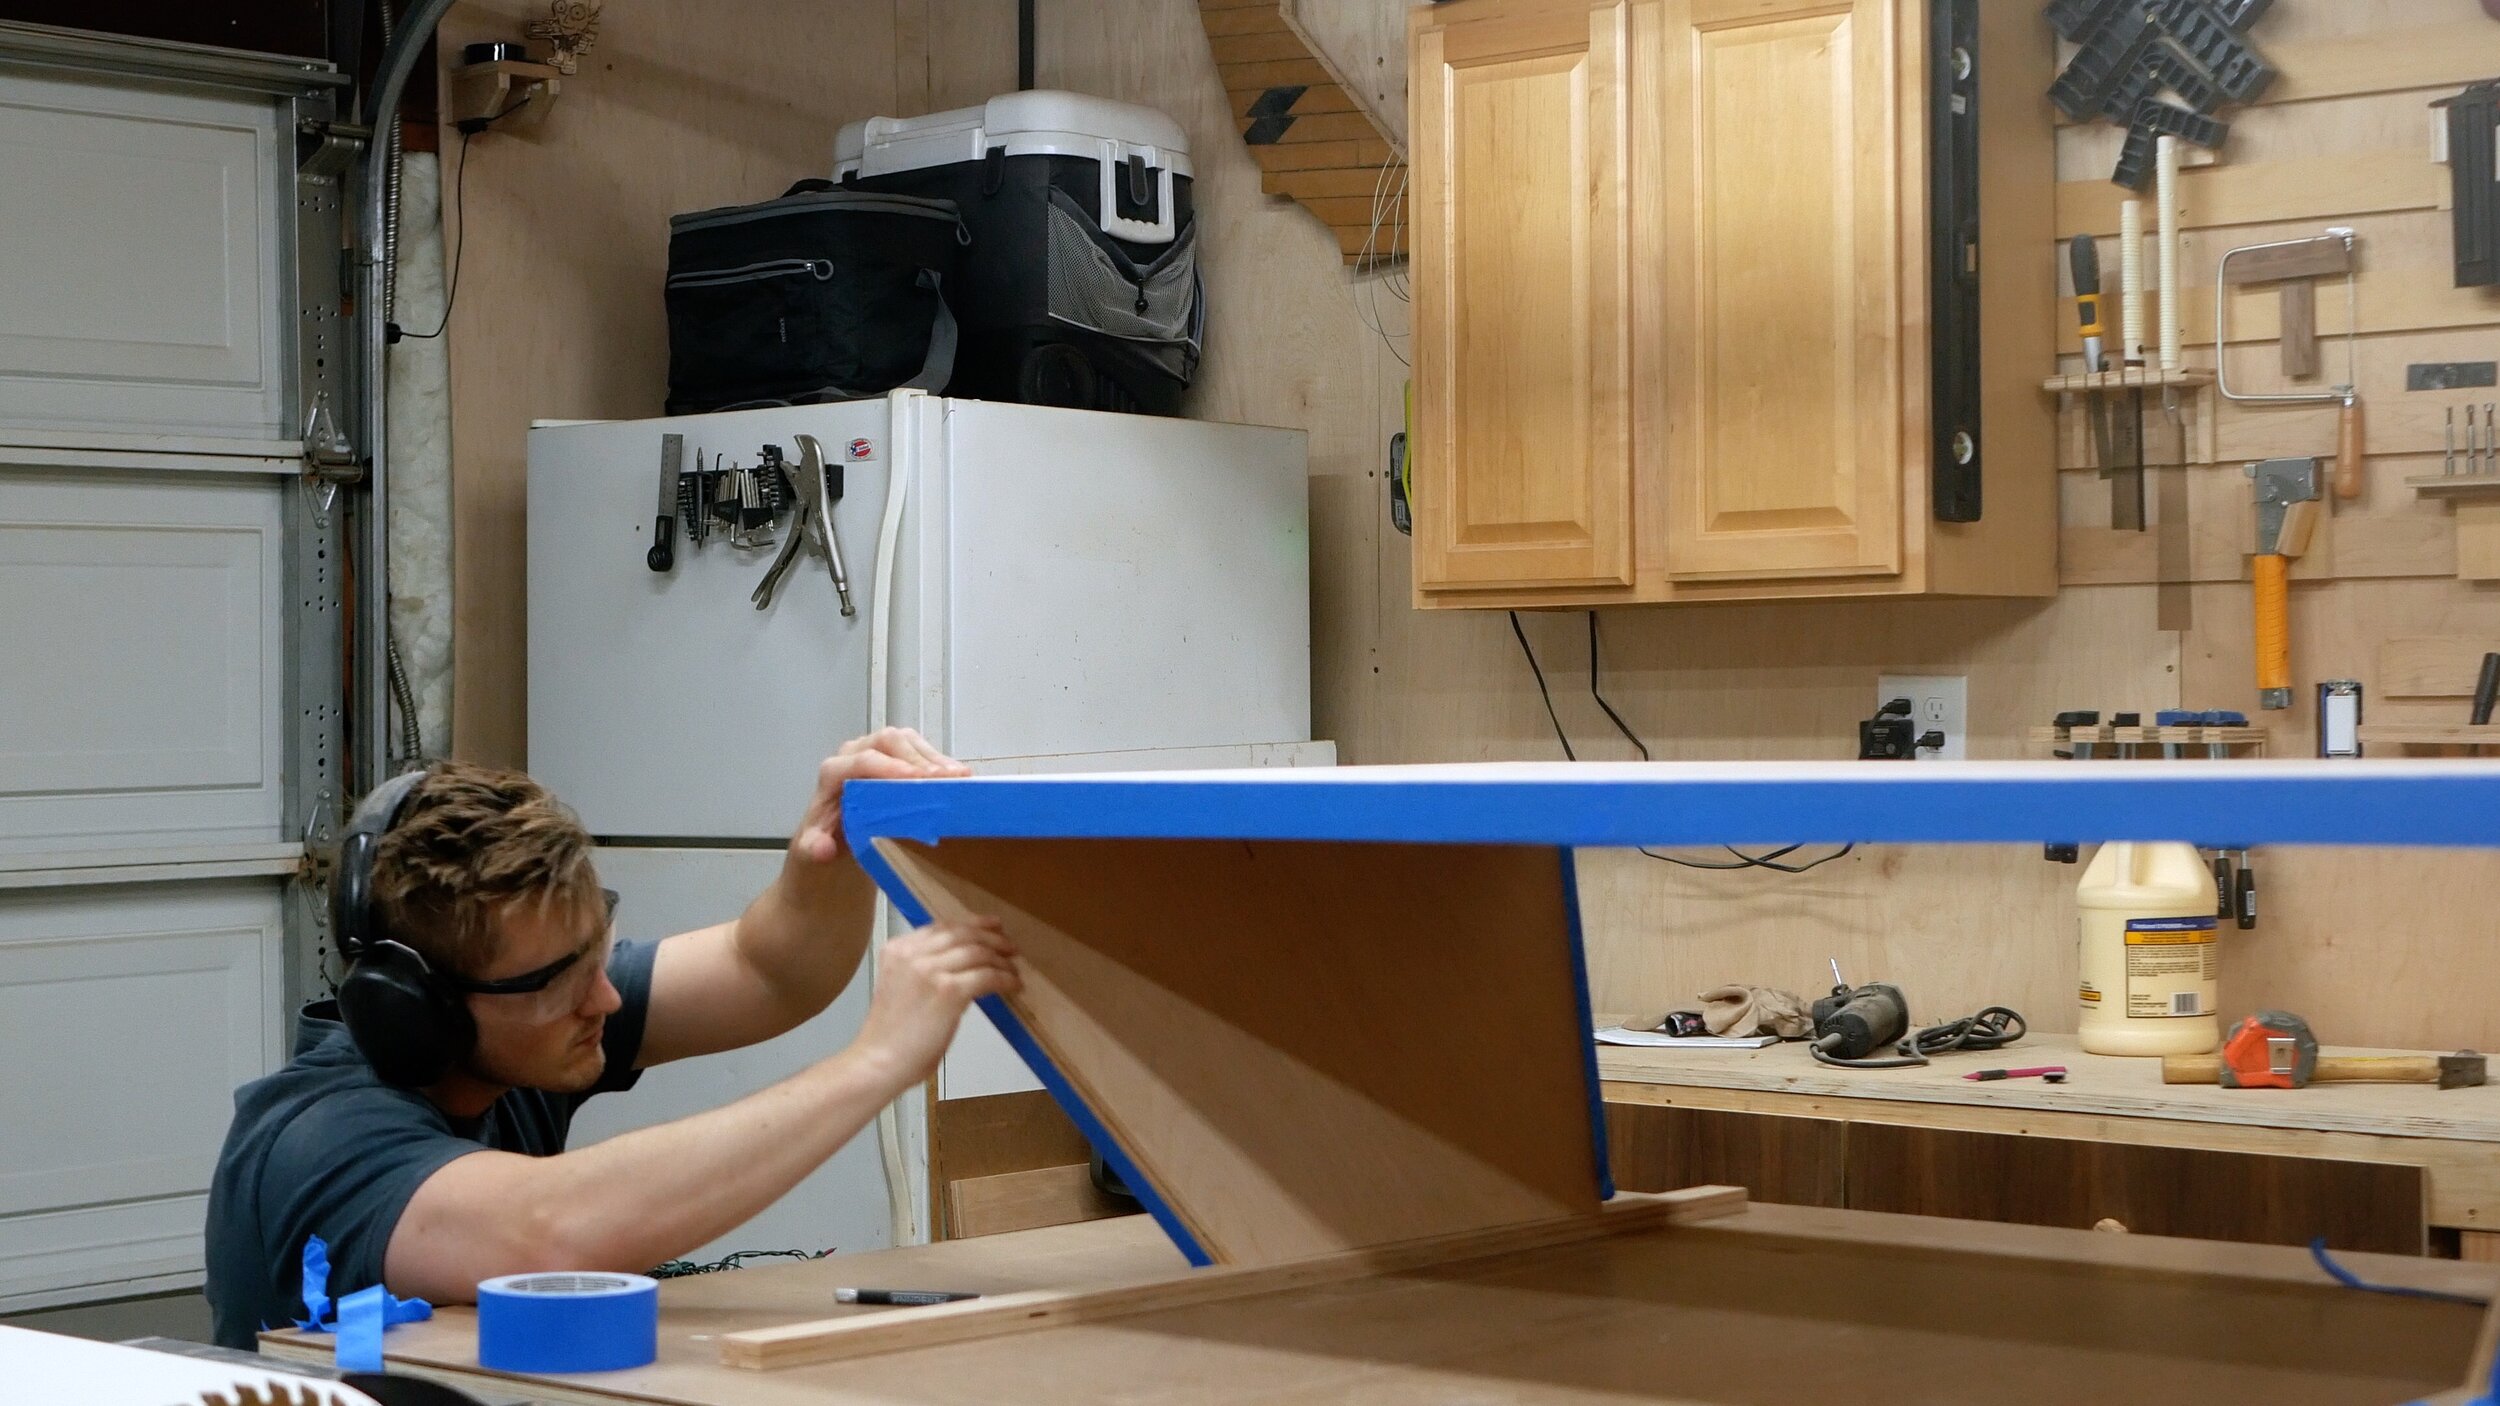
The plywood I purchased wasn’t perfect, and the taping method worked but needed some touch ups. I used some maple wood filler to plug any gaps in the plywoods, let it dry, and then sanded it all down flush to the plywood edges of the table, while also sanding down any of the excess stain that the tape did not block.
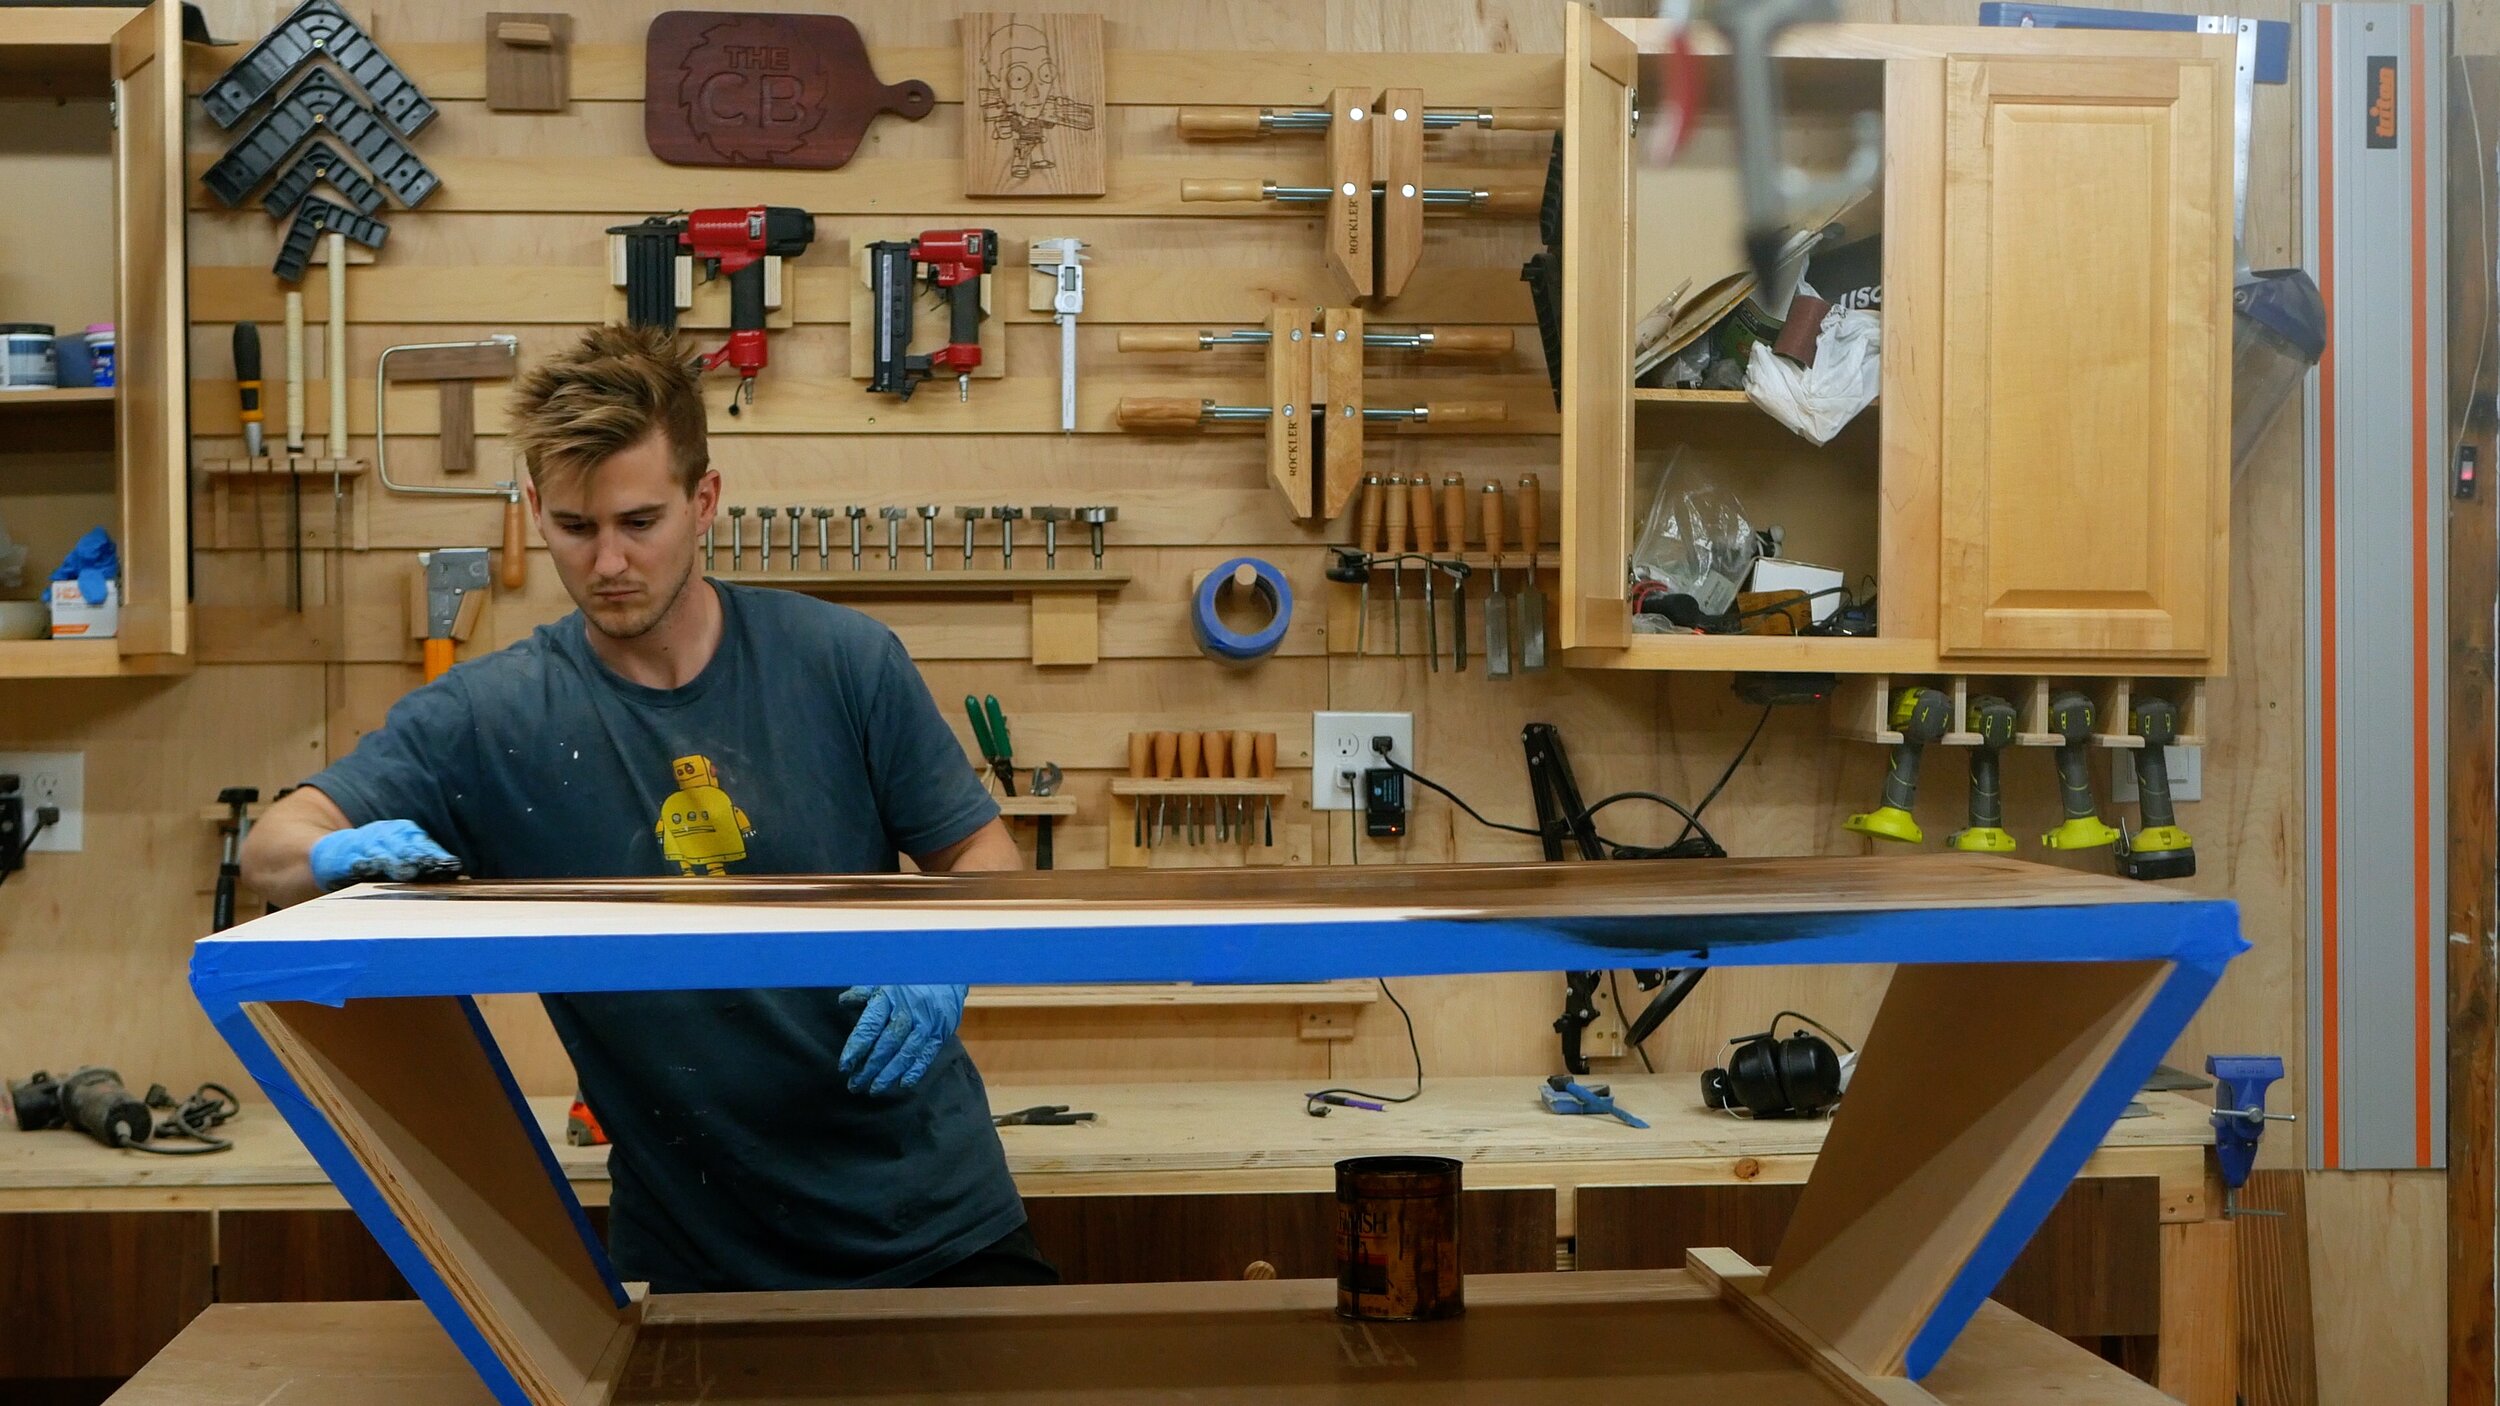
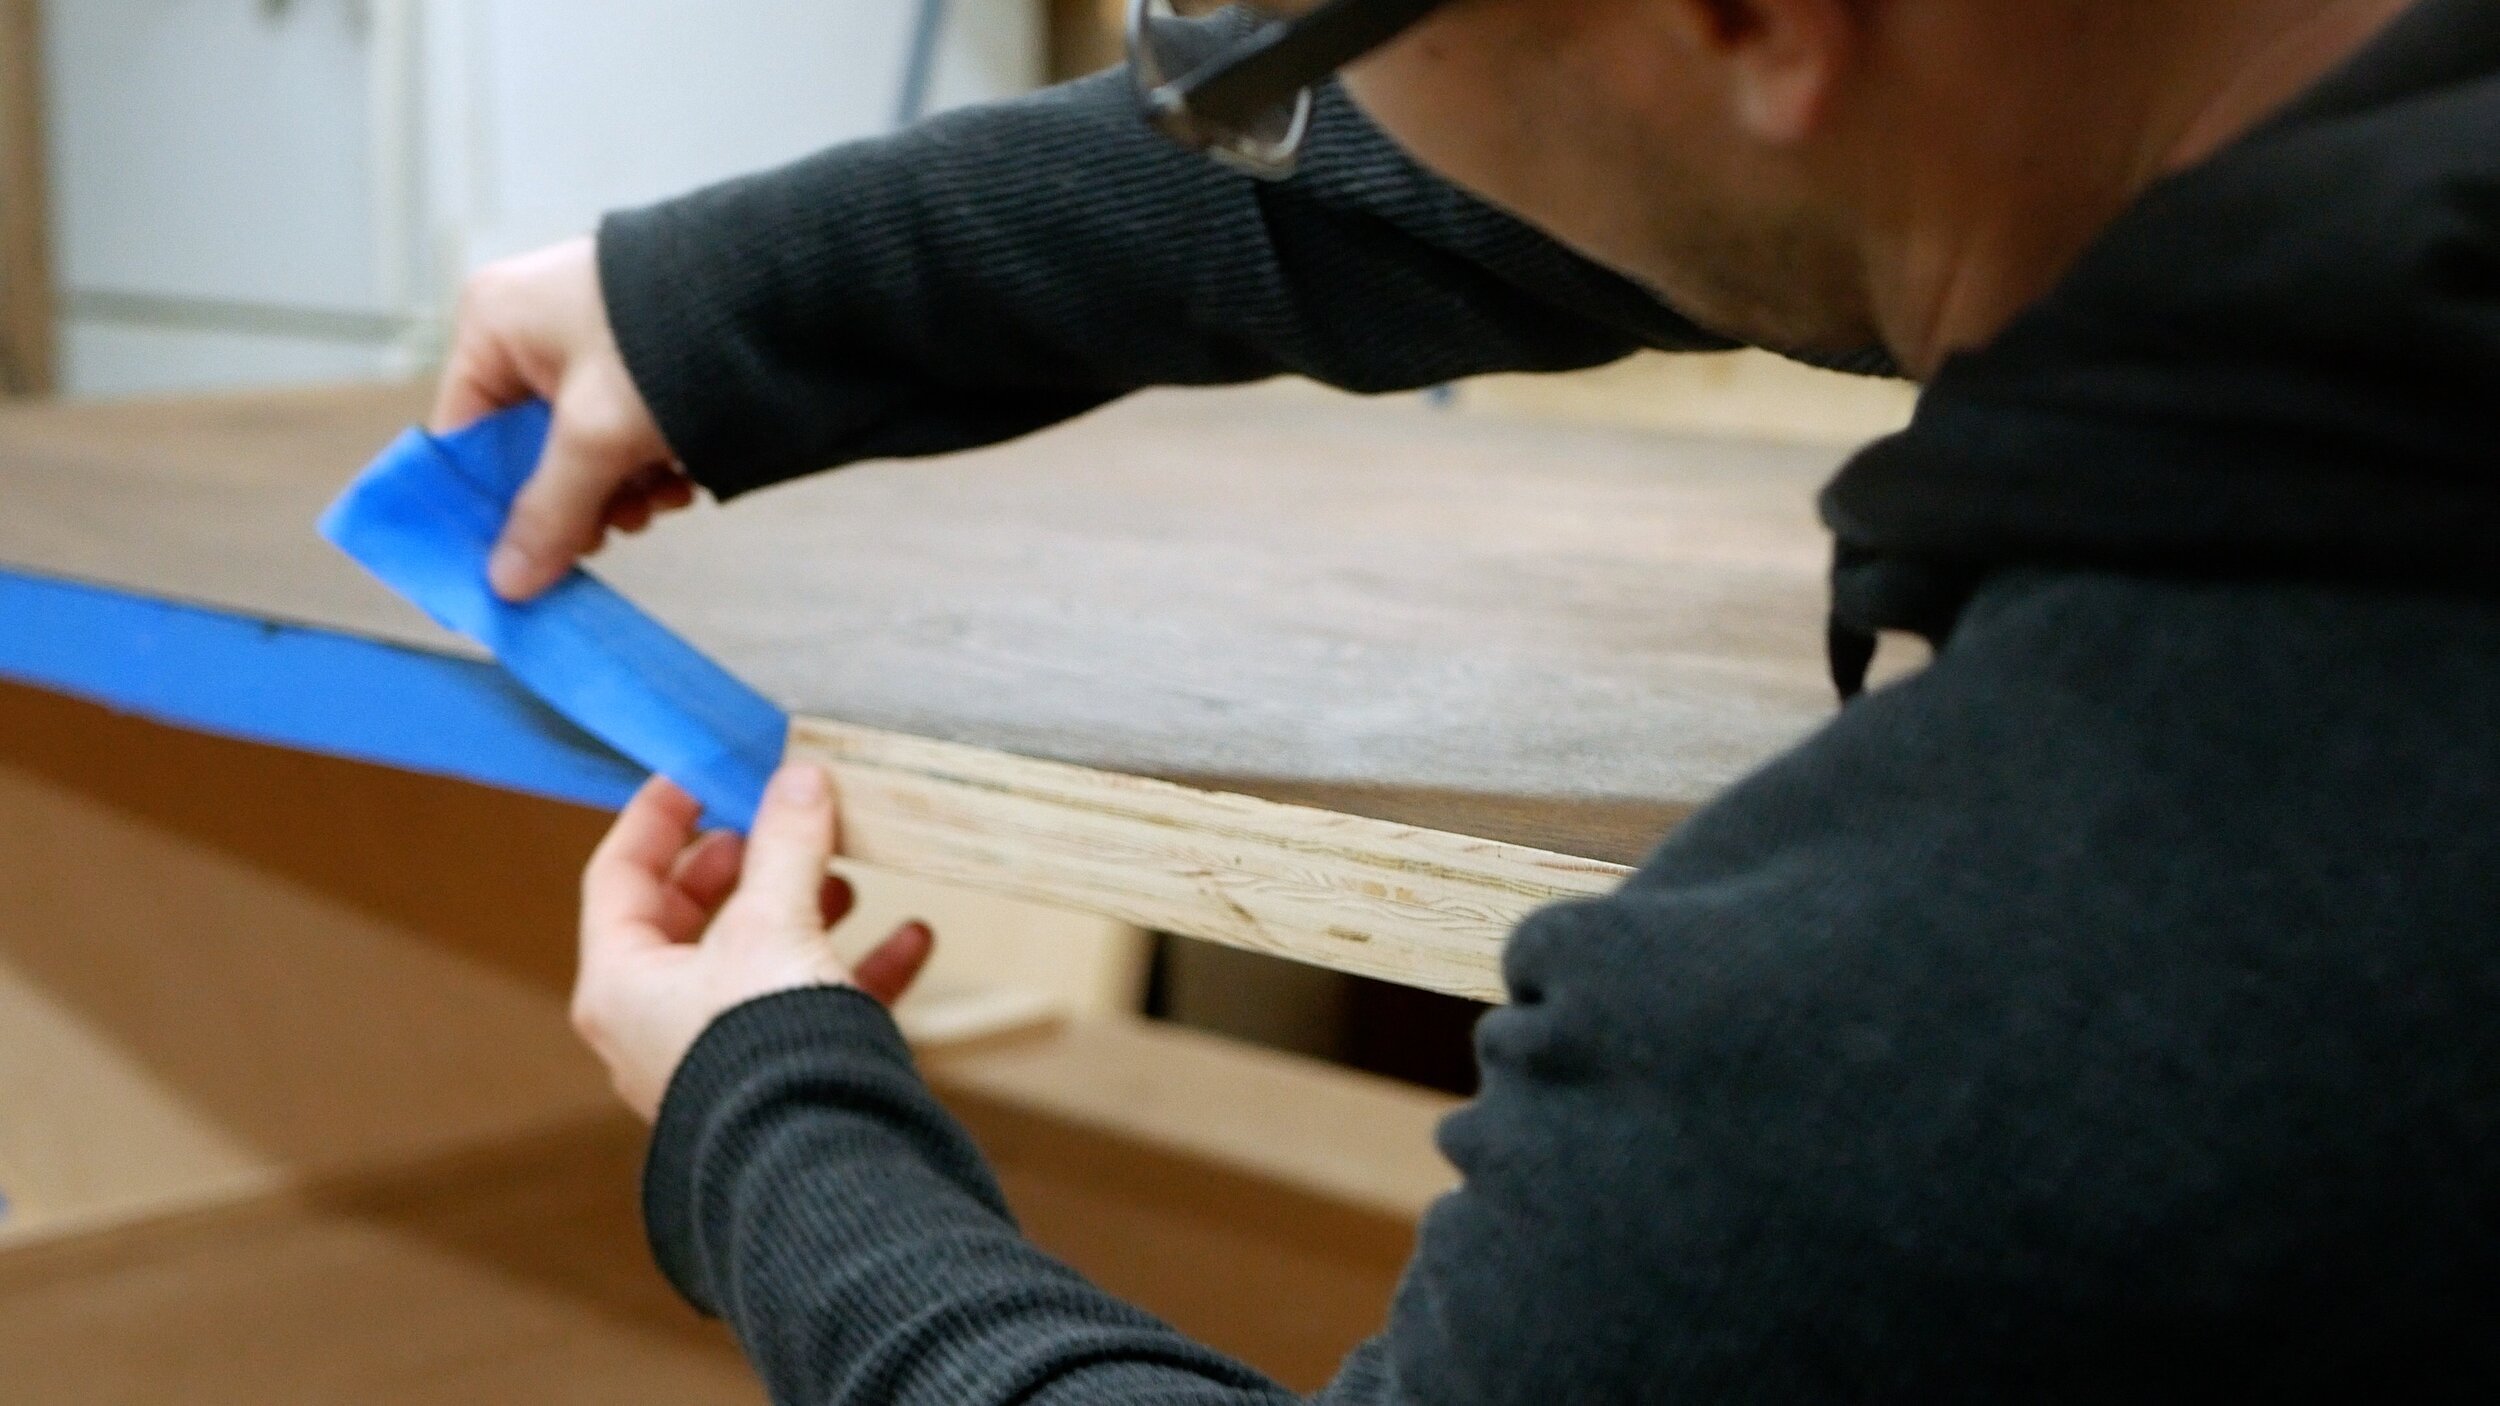
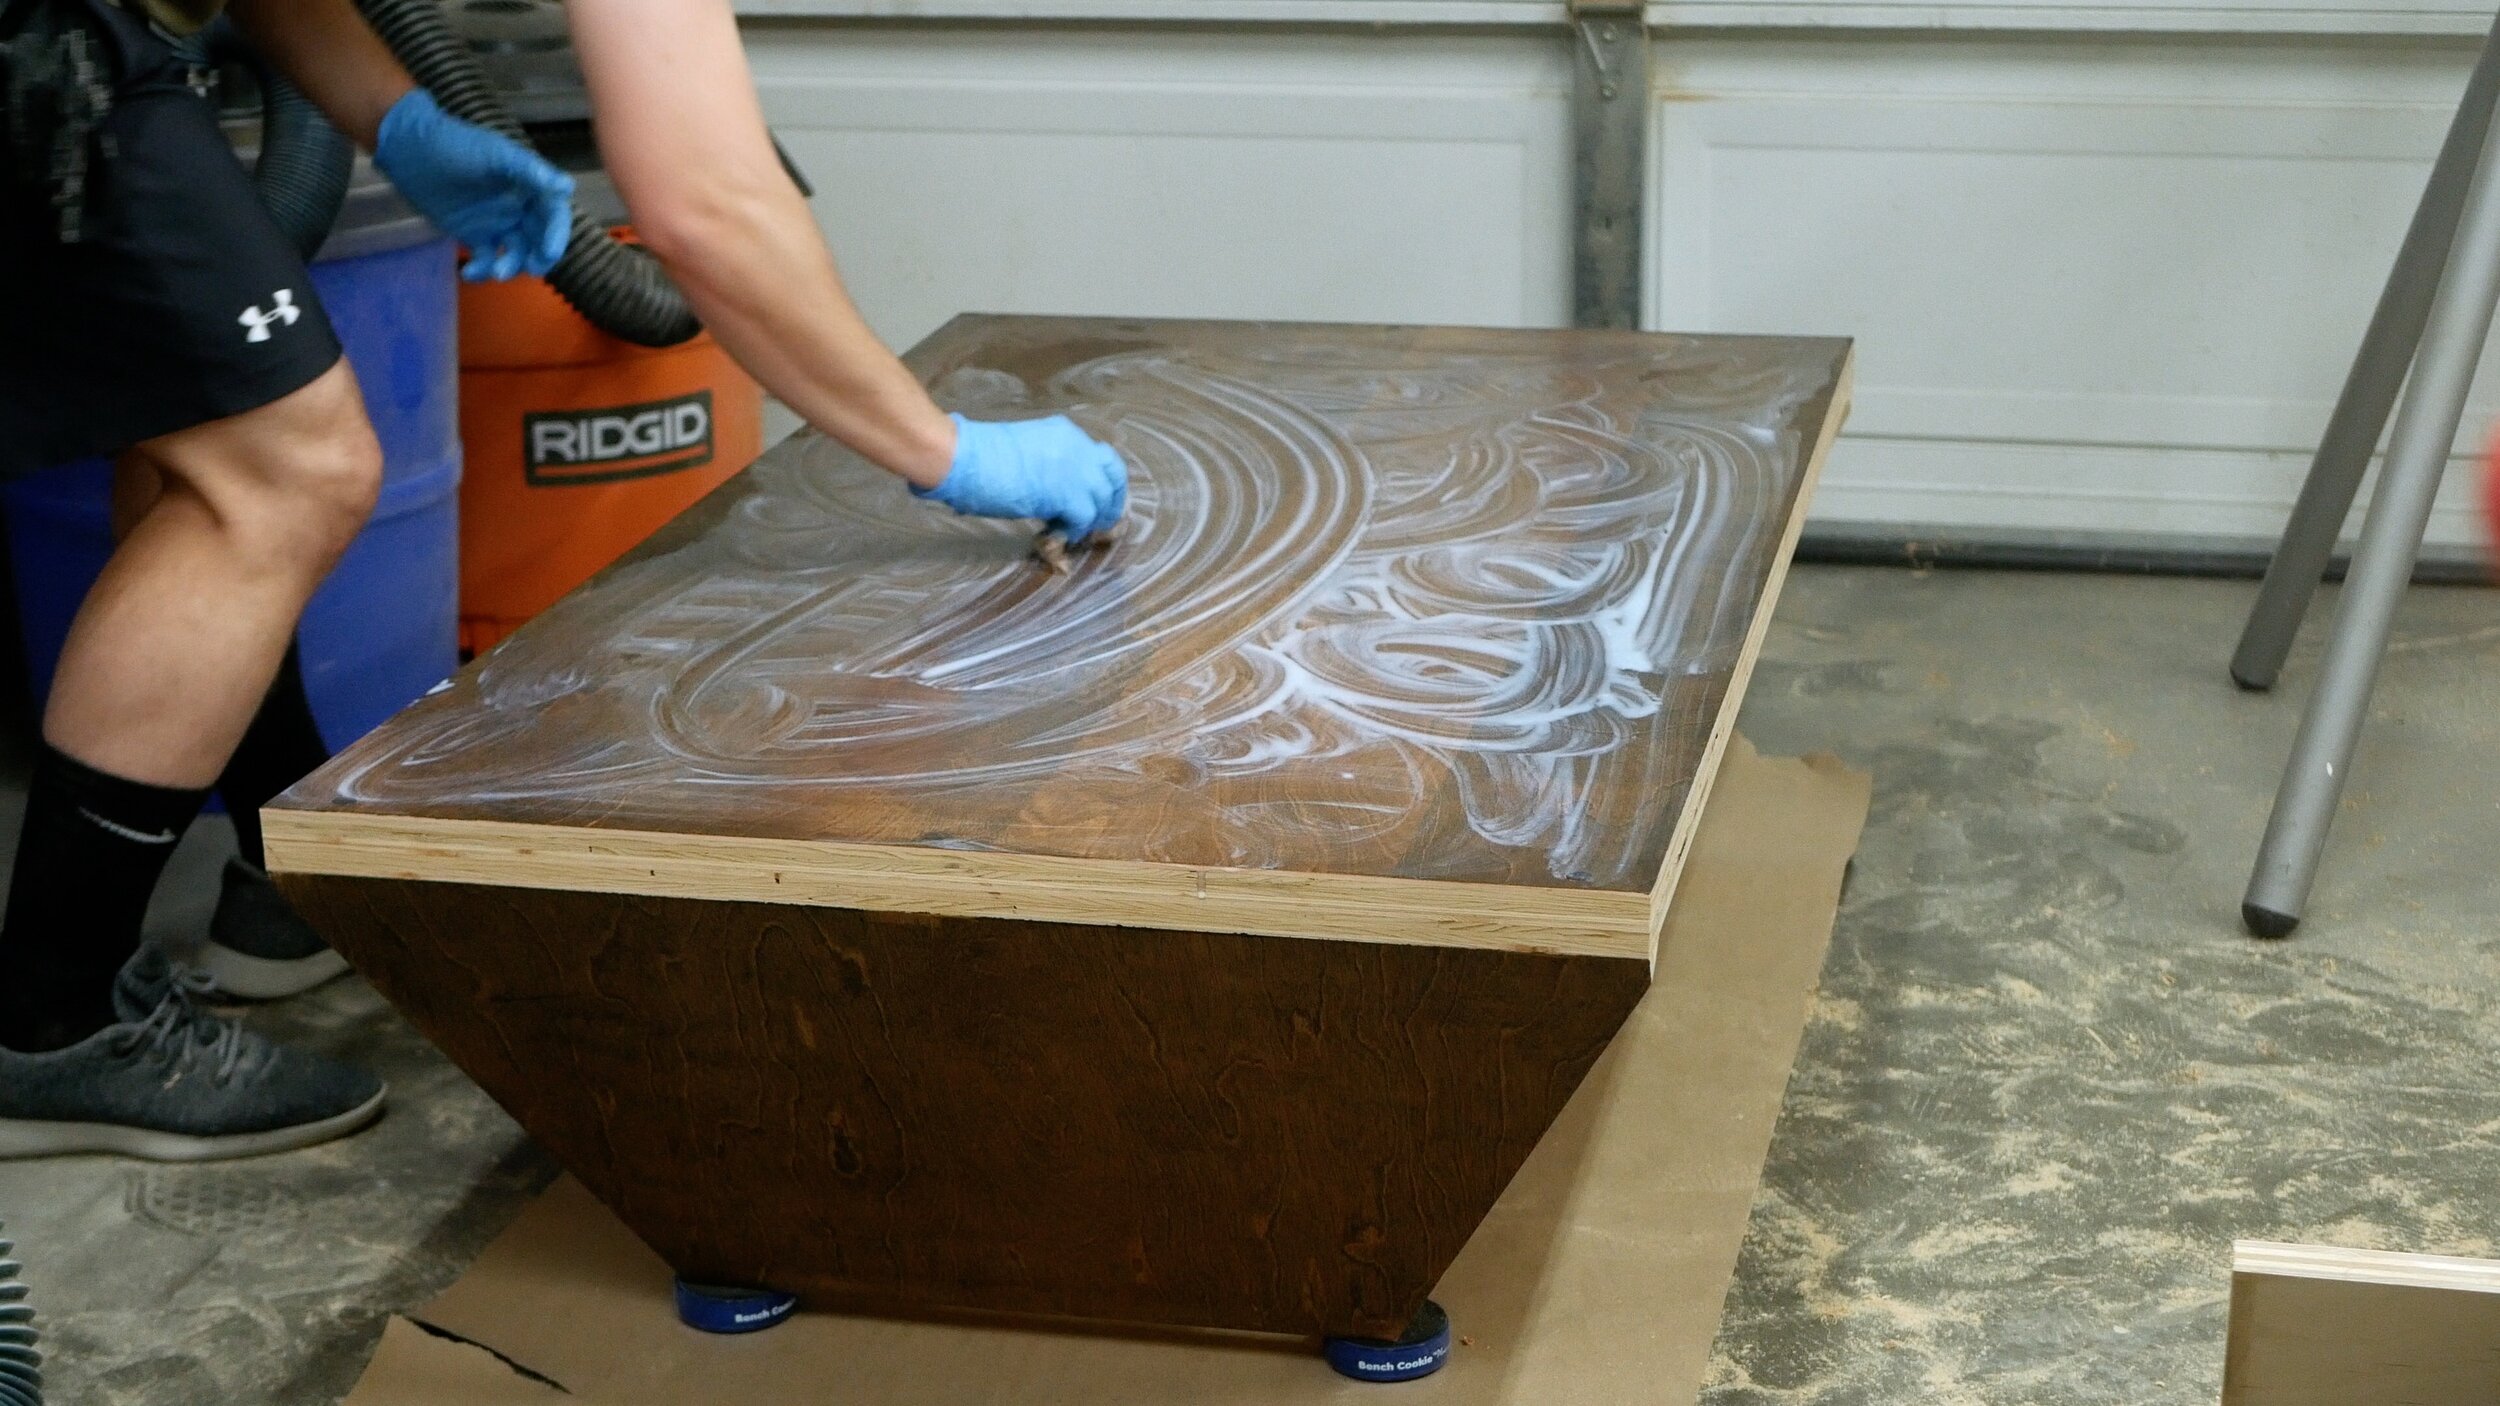
Last up was finishing. I wiped away excess dust using mineral spirits, then applied a coat of pre-conditioner ahead of staining. Personally, I wanted to just apply a clear coat to the wood, but this was for a client, so we compromised and instead, I masked off all of the exposed plywood using painter tape and only applied an espresso color finish to the top and exterior sides of the legs, leaving all interior surfaces and plywood layers free of stain. I then finished off the piece by applying two coats of wipe on polyurethane, sanding in between the two coats using some 320 grit sandpaper. The result was a really cool contrast between the exterior surfaces and the plywood sides and burch underside. I loved it. To give it a more modern vibe, I added ¾” rubber feet to the bottom - just as simple as drilling and installing with screws to each bottom corner!

All done! Enjoy your new modern coffee table! Thanks for checking out the project! Make sure you check out the video in the first step on my YT channel!
See you around!
Zach