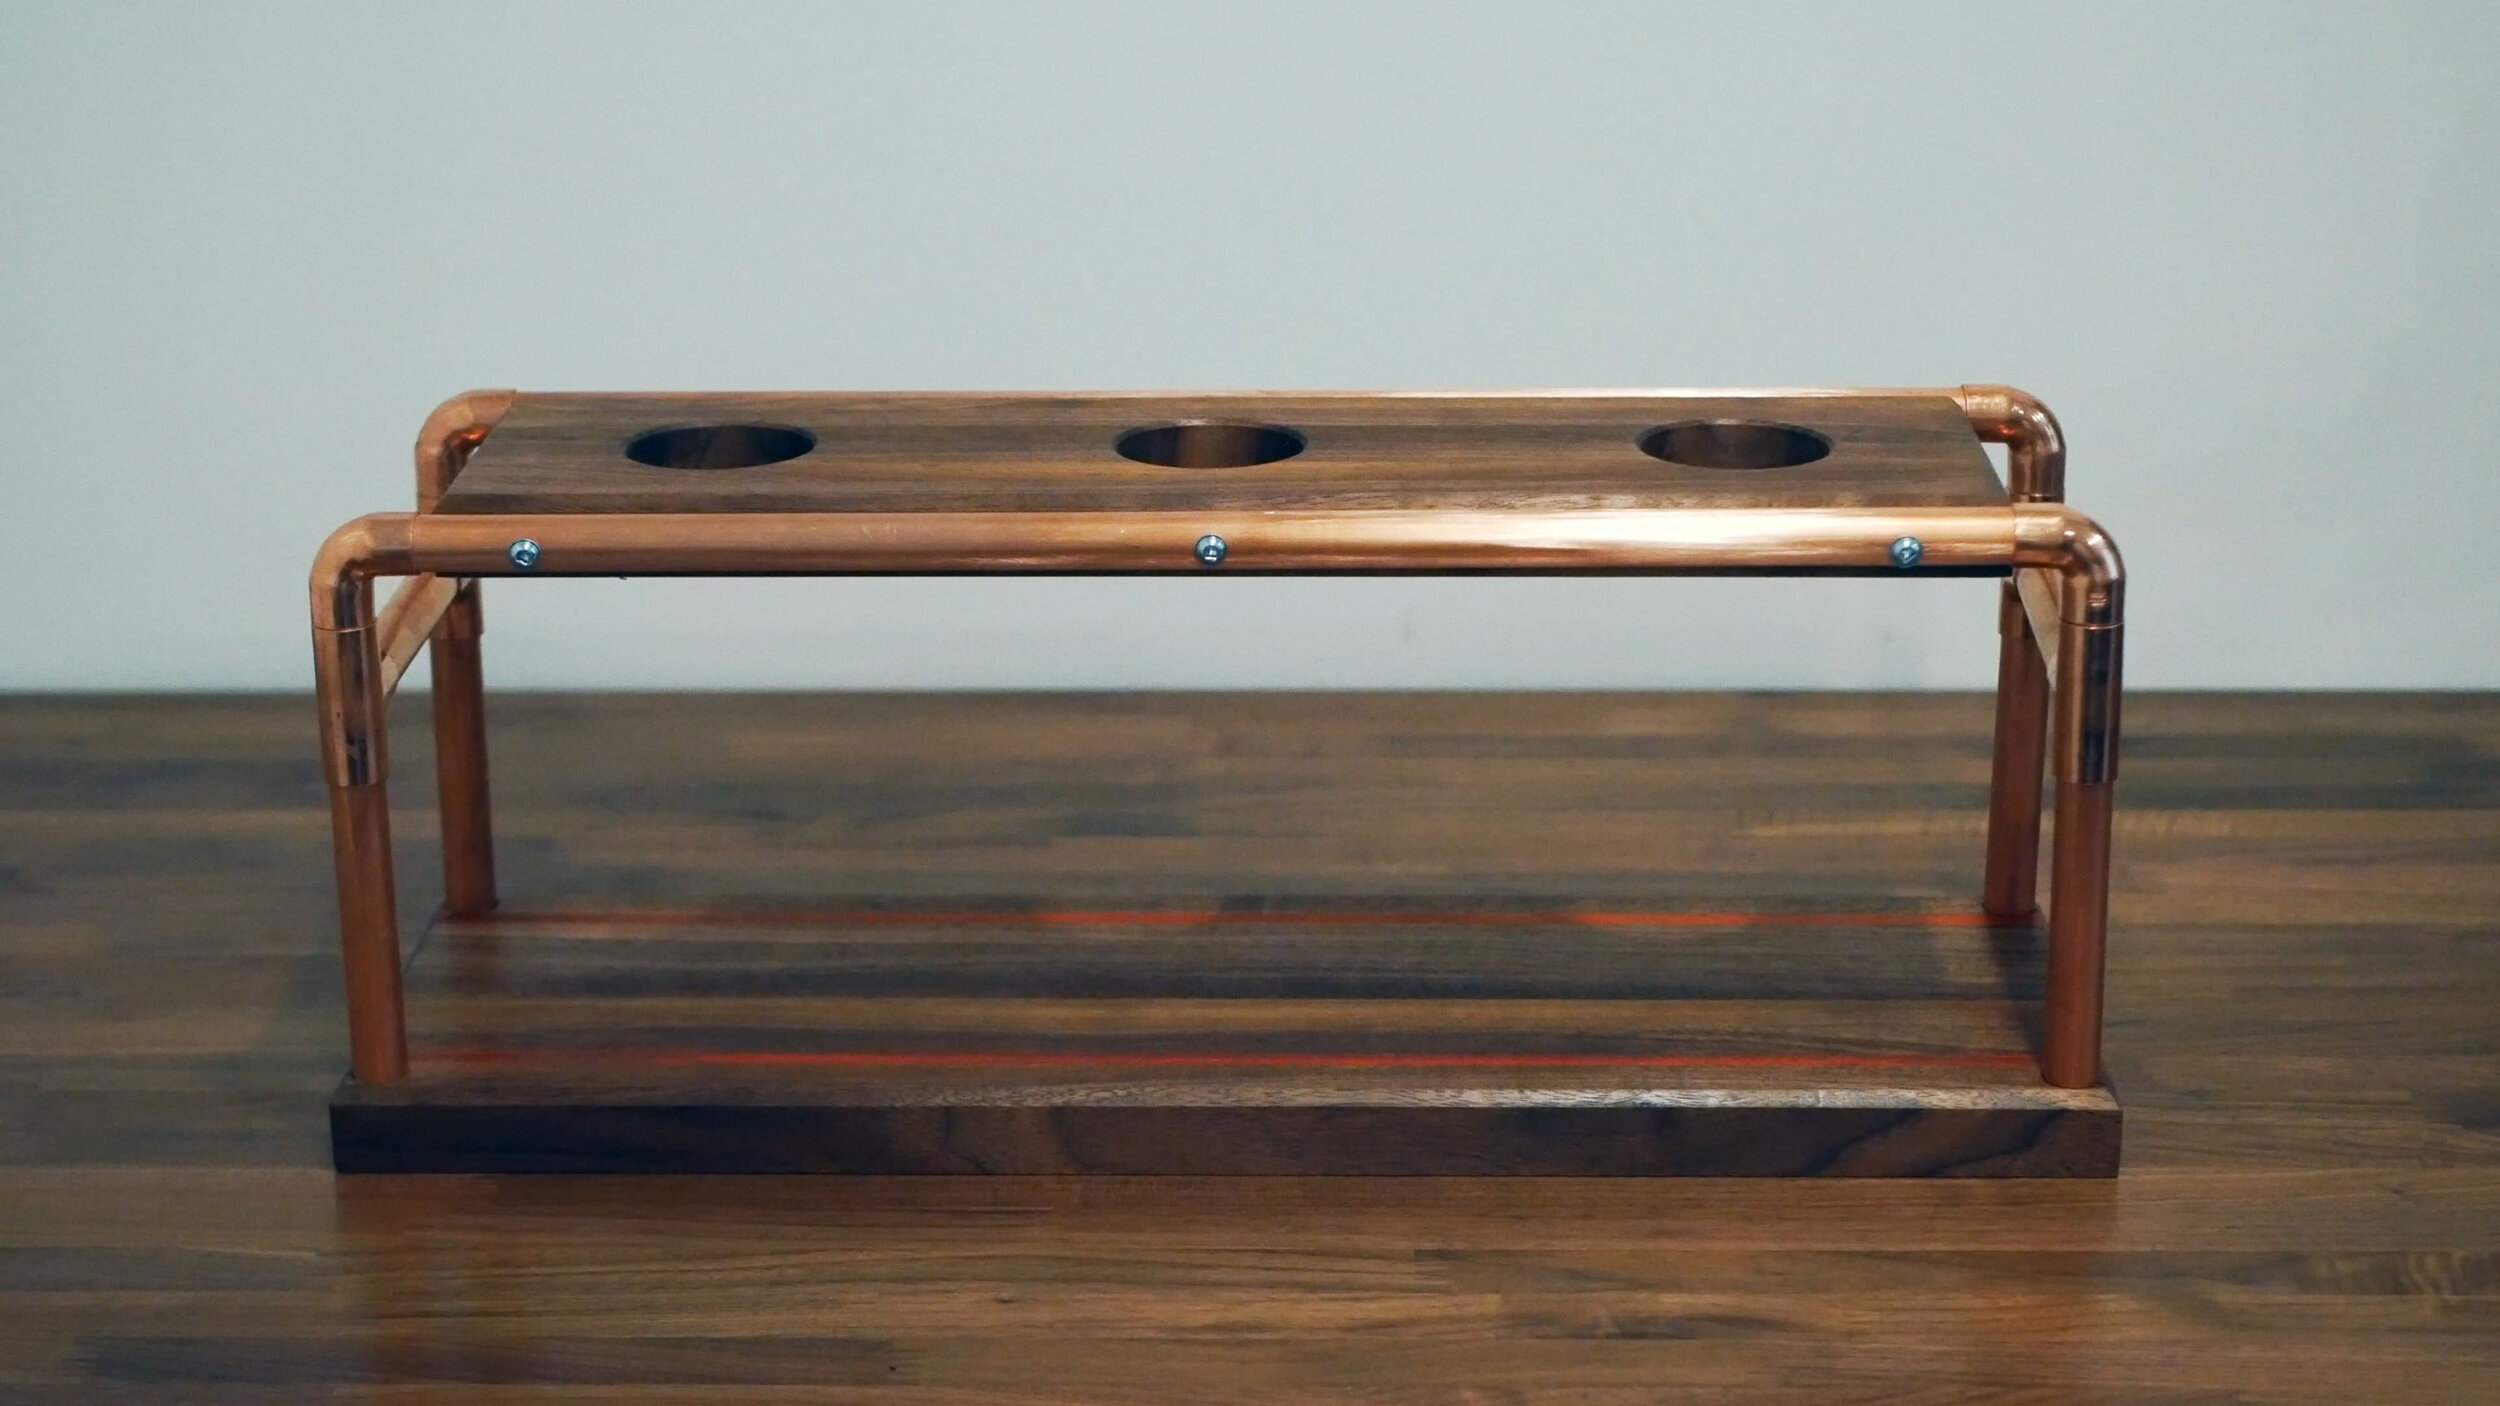
For a long time we wanted to upgrade our coffee pour over system. Something simple but pretty, a bit steampunk in design, and ultimately that could allow us to make 3 cups at once. We landed on a walnut/padauk + copper design with copper pour over devices. Hope you like!
Thanks for checking out the article and video!
MATERIALS
5 BF 4/4 Walnut Scrap Padauk
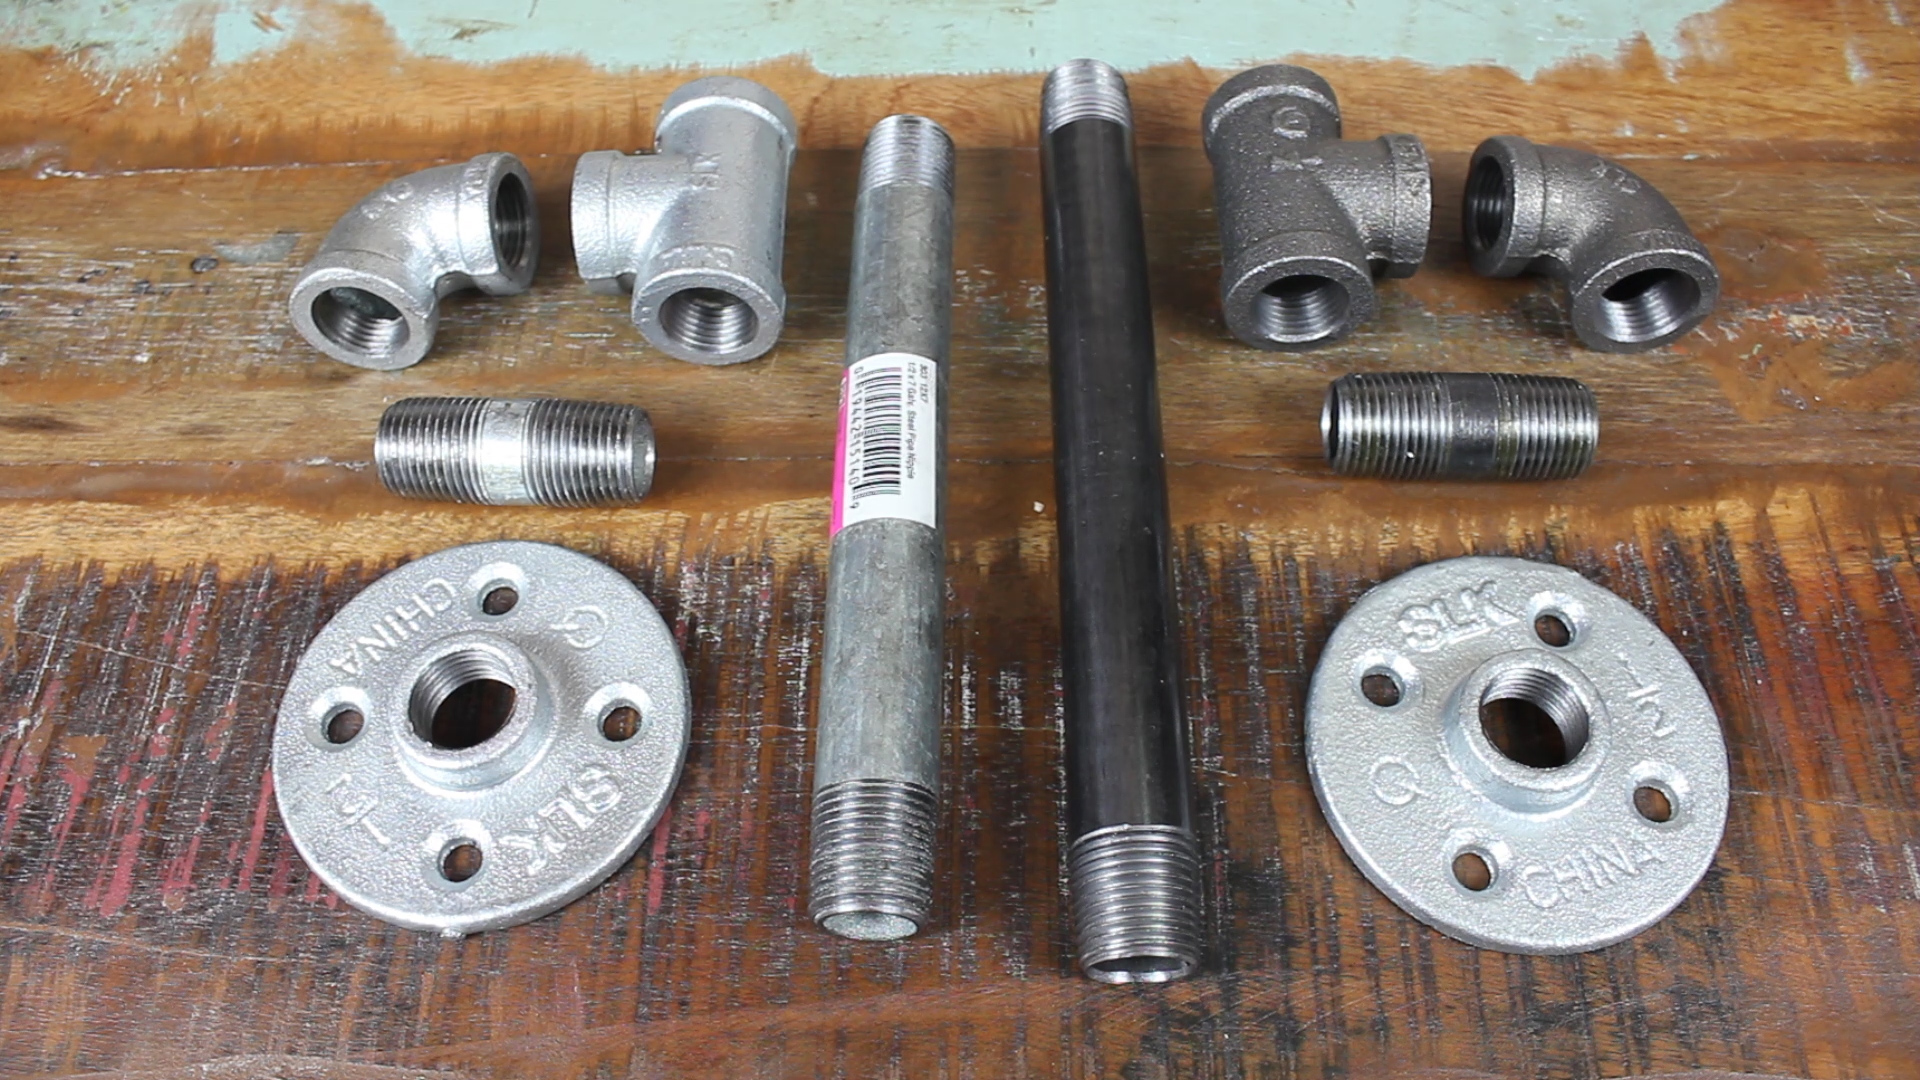
10' 1/2" Copper Pipe
4 x T Fittings
4 x Elbow Fittings Gorilla Super Glue
TiteBond II Wood Glue: http://amzn.to/2peRFus
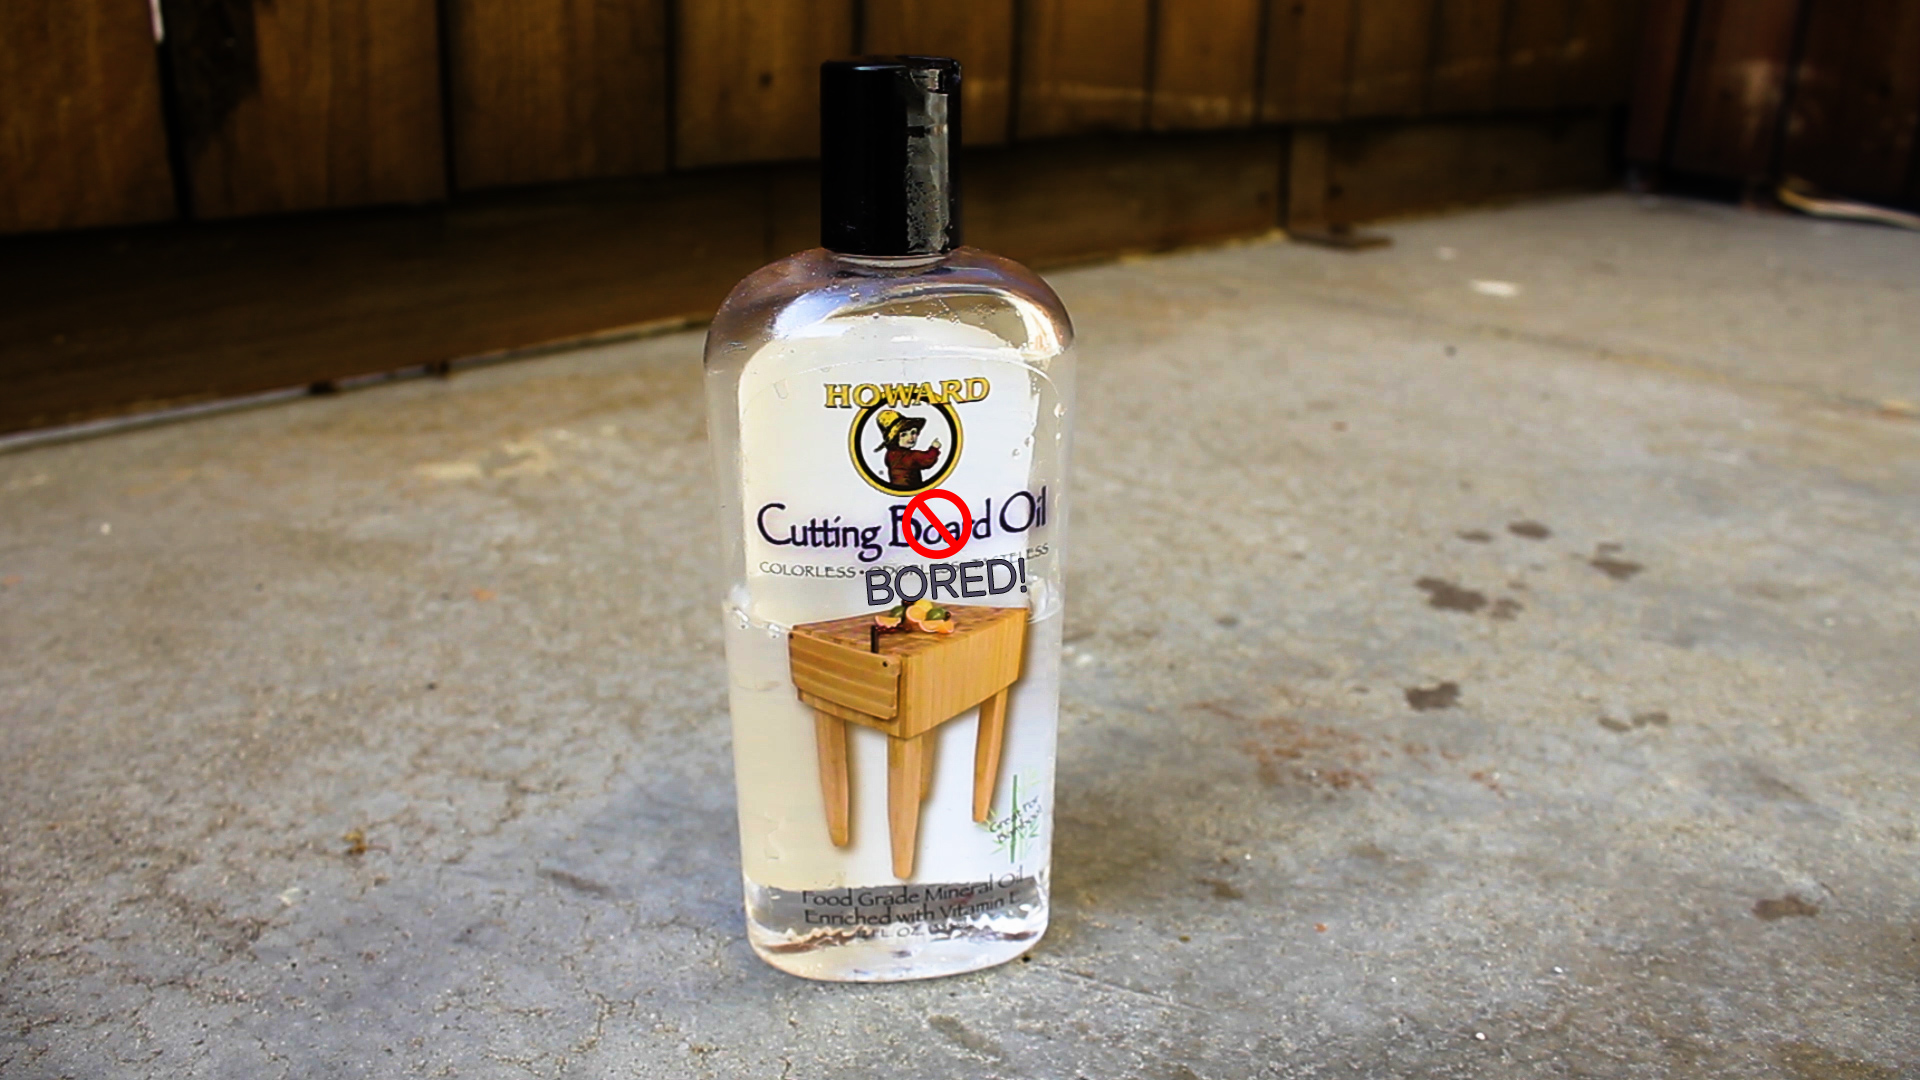
Emmit's Butcher Block Finish
TOOLS
SAWSTOP Contractors 30” Saw: https://amzn.to/2Luh91q
Table Saw Sled: https://amzn.to/2t2qVjD Sliding Compound Miter Saw: http://amzn.to/2q1klHw
Miter Saw Stand: http://amzn.to/2p1072e
Drill Press: https://amzn.to/2GjgOjh
Jointer: https://amzn.to/2I5f9j0
13” Planer: http://amzn.to/2u7YrmK
Impact Driver: http://amzn.to/2q1l5wn
Cordless Orbital Sander: http://amzn.to/2oICOaP
Copper Pipe Cutter: https://amzn.to/2I1TZlx
Bench Cookies: http://amzn.to/2q1qjYZ
Taper Jig from Rockler
Lots of clamps!
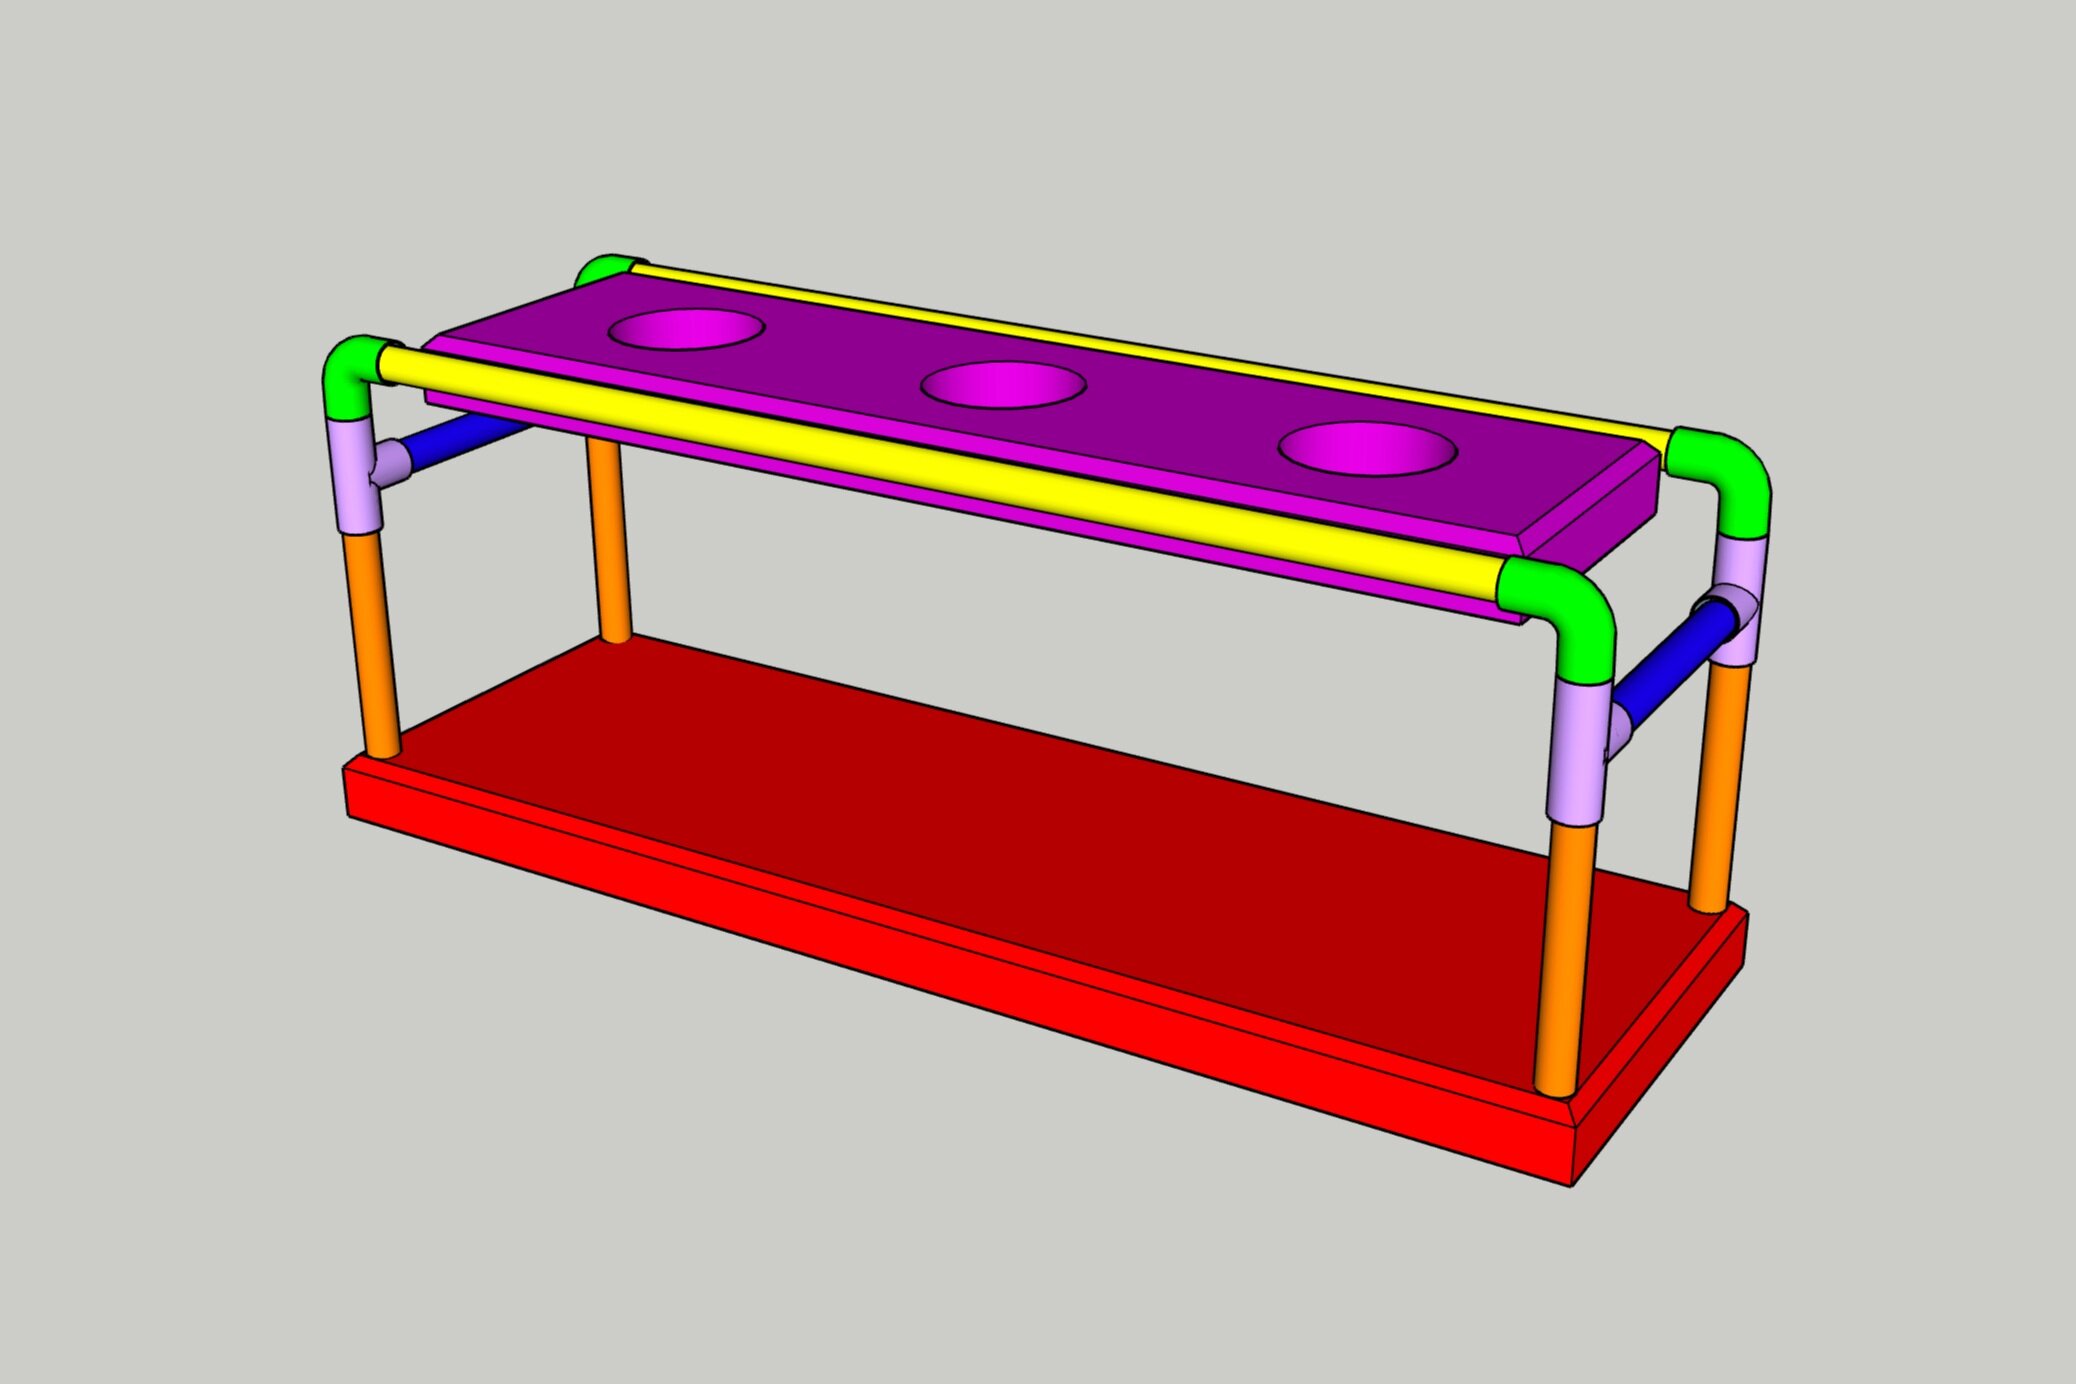
Above is a model of the SketchUp file that you can download for free here to understand the copper and wood measurements!
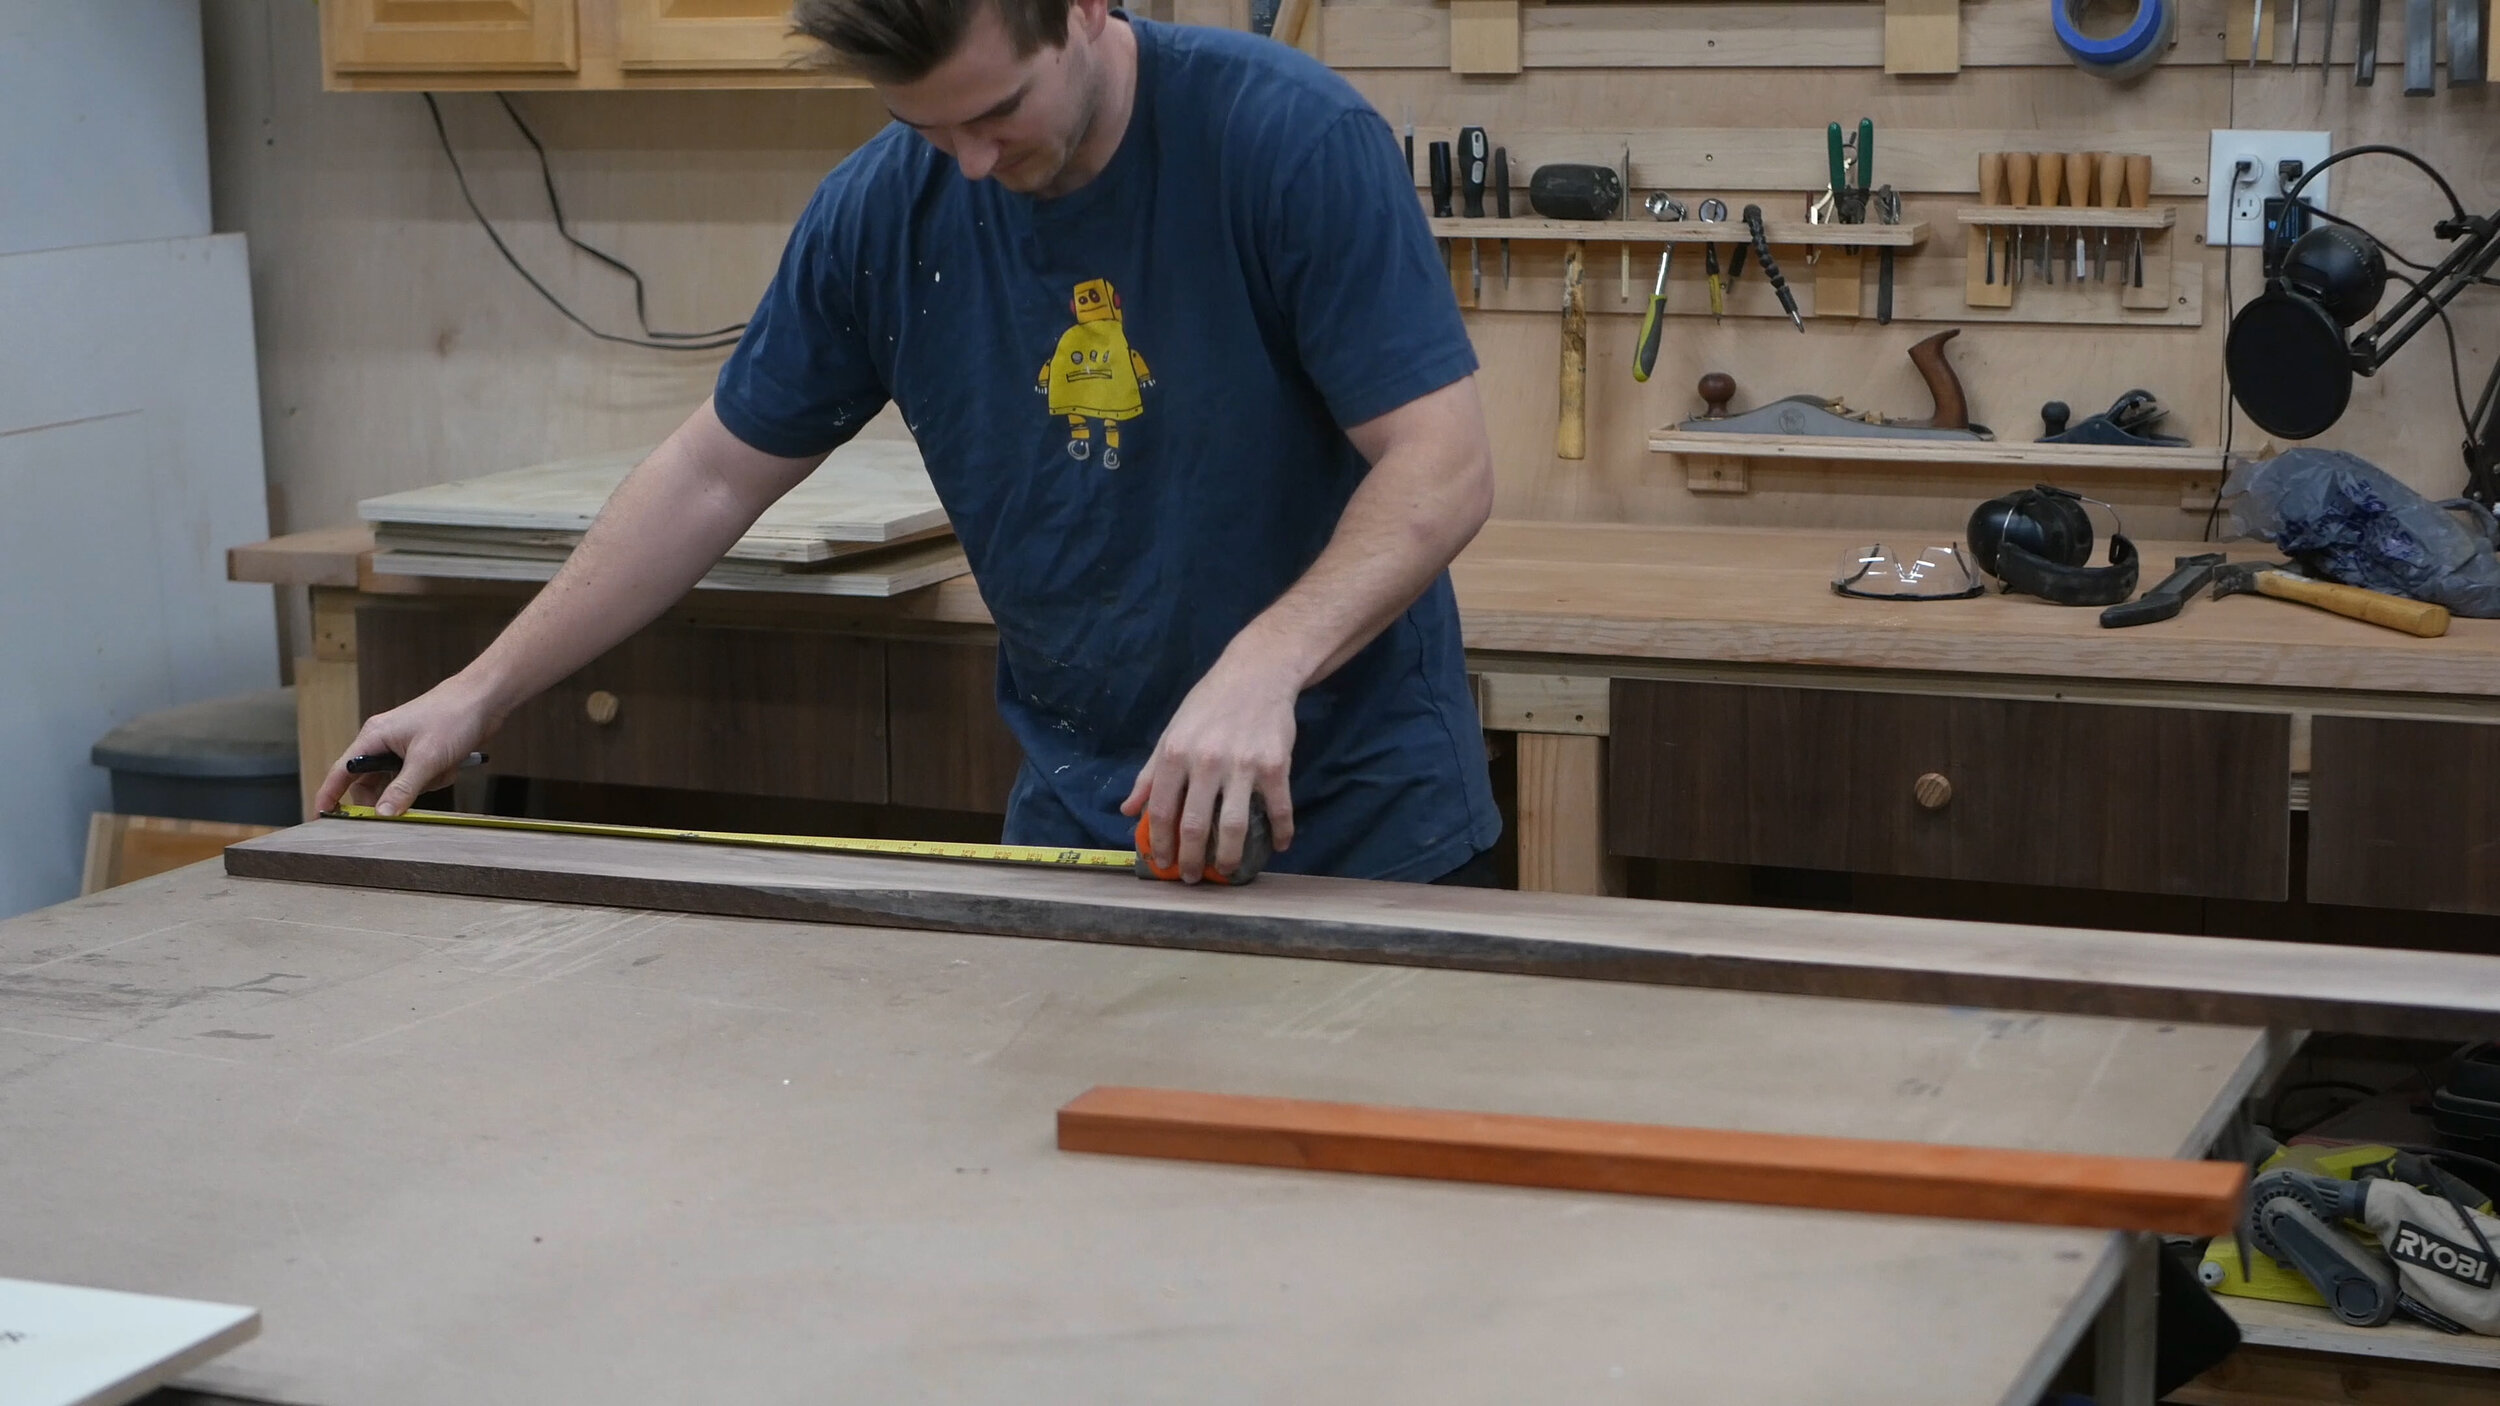
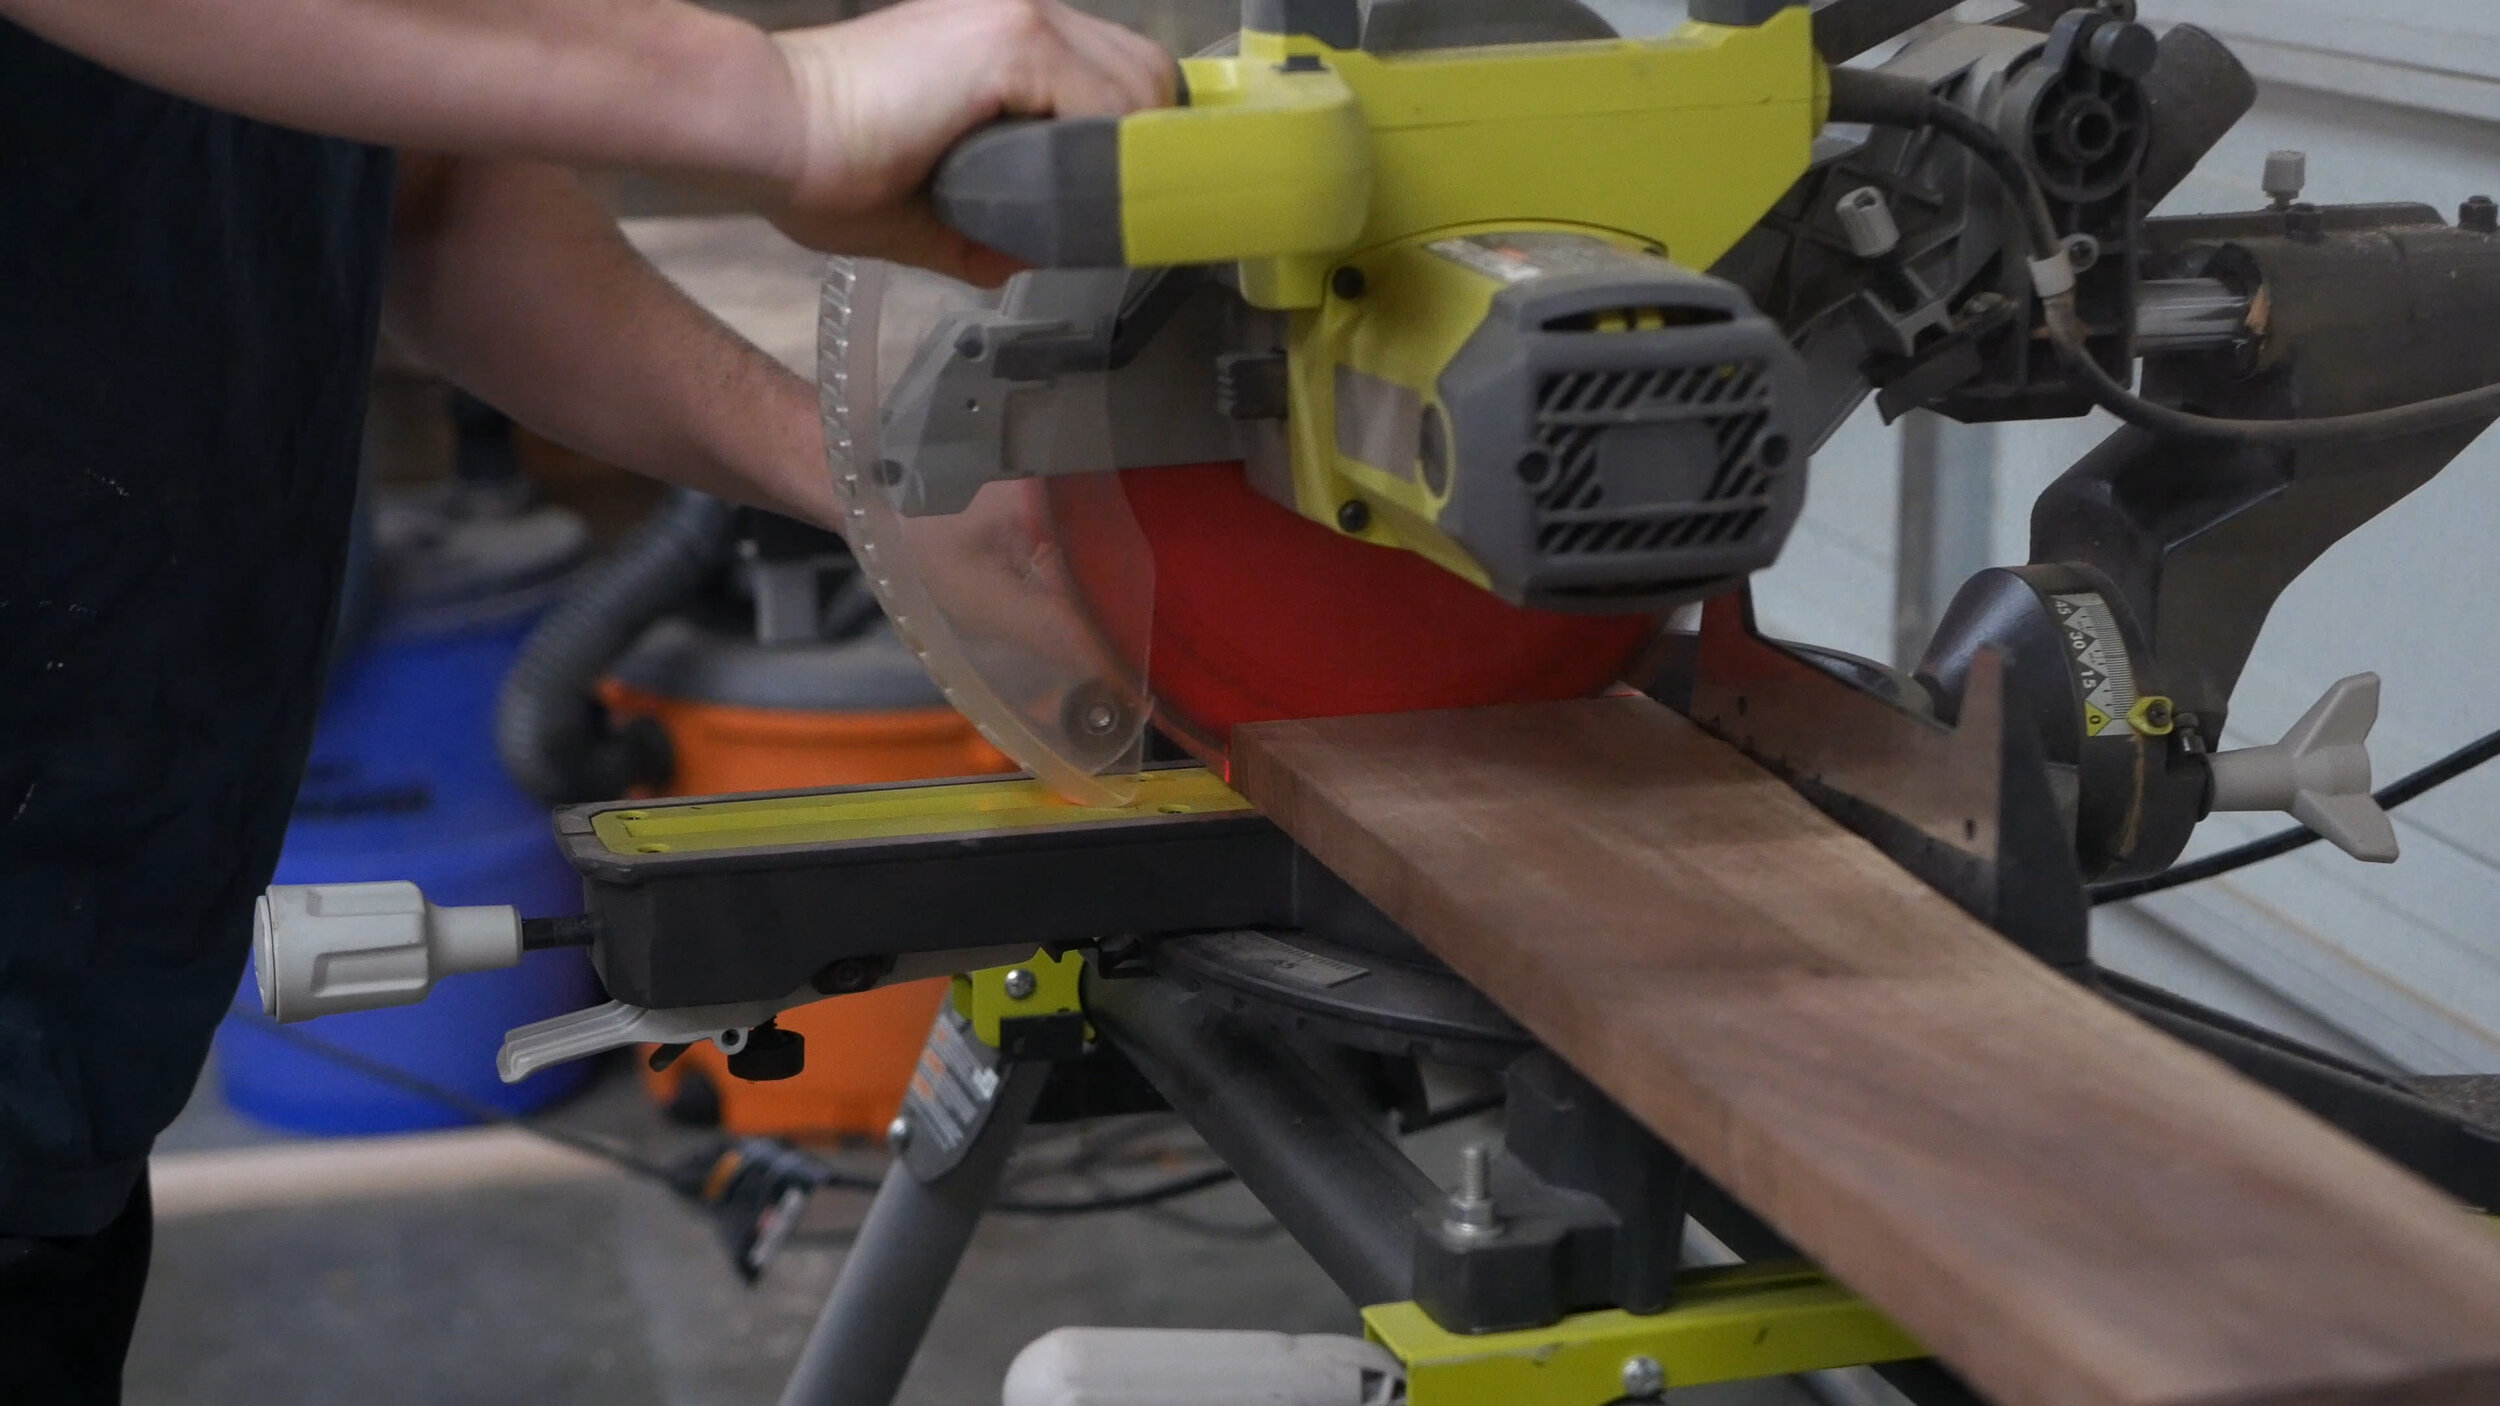
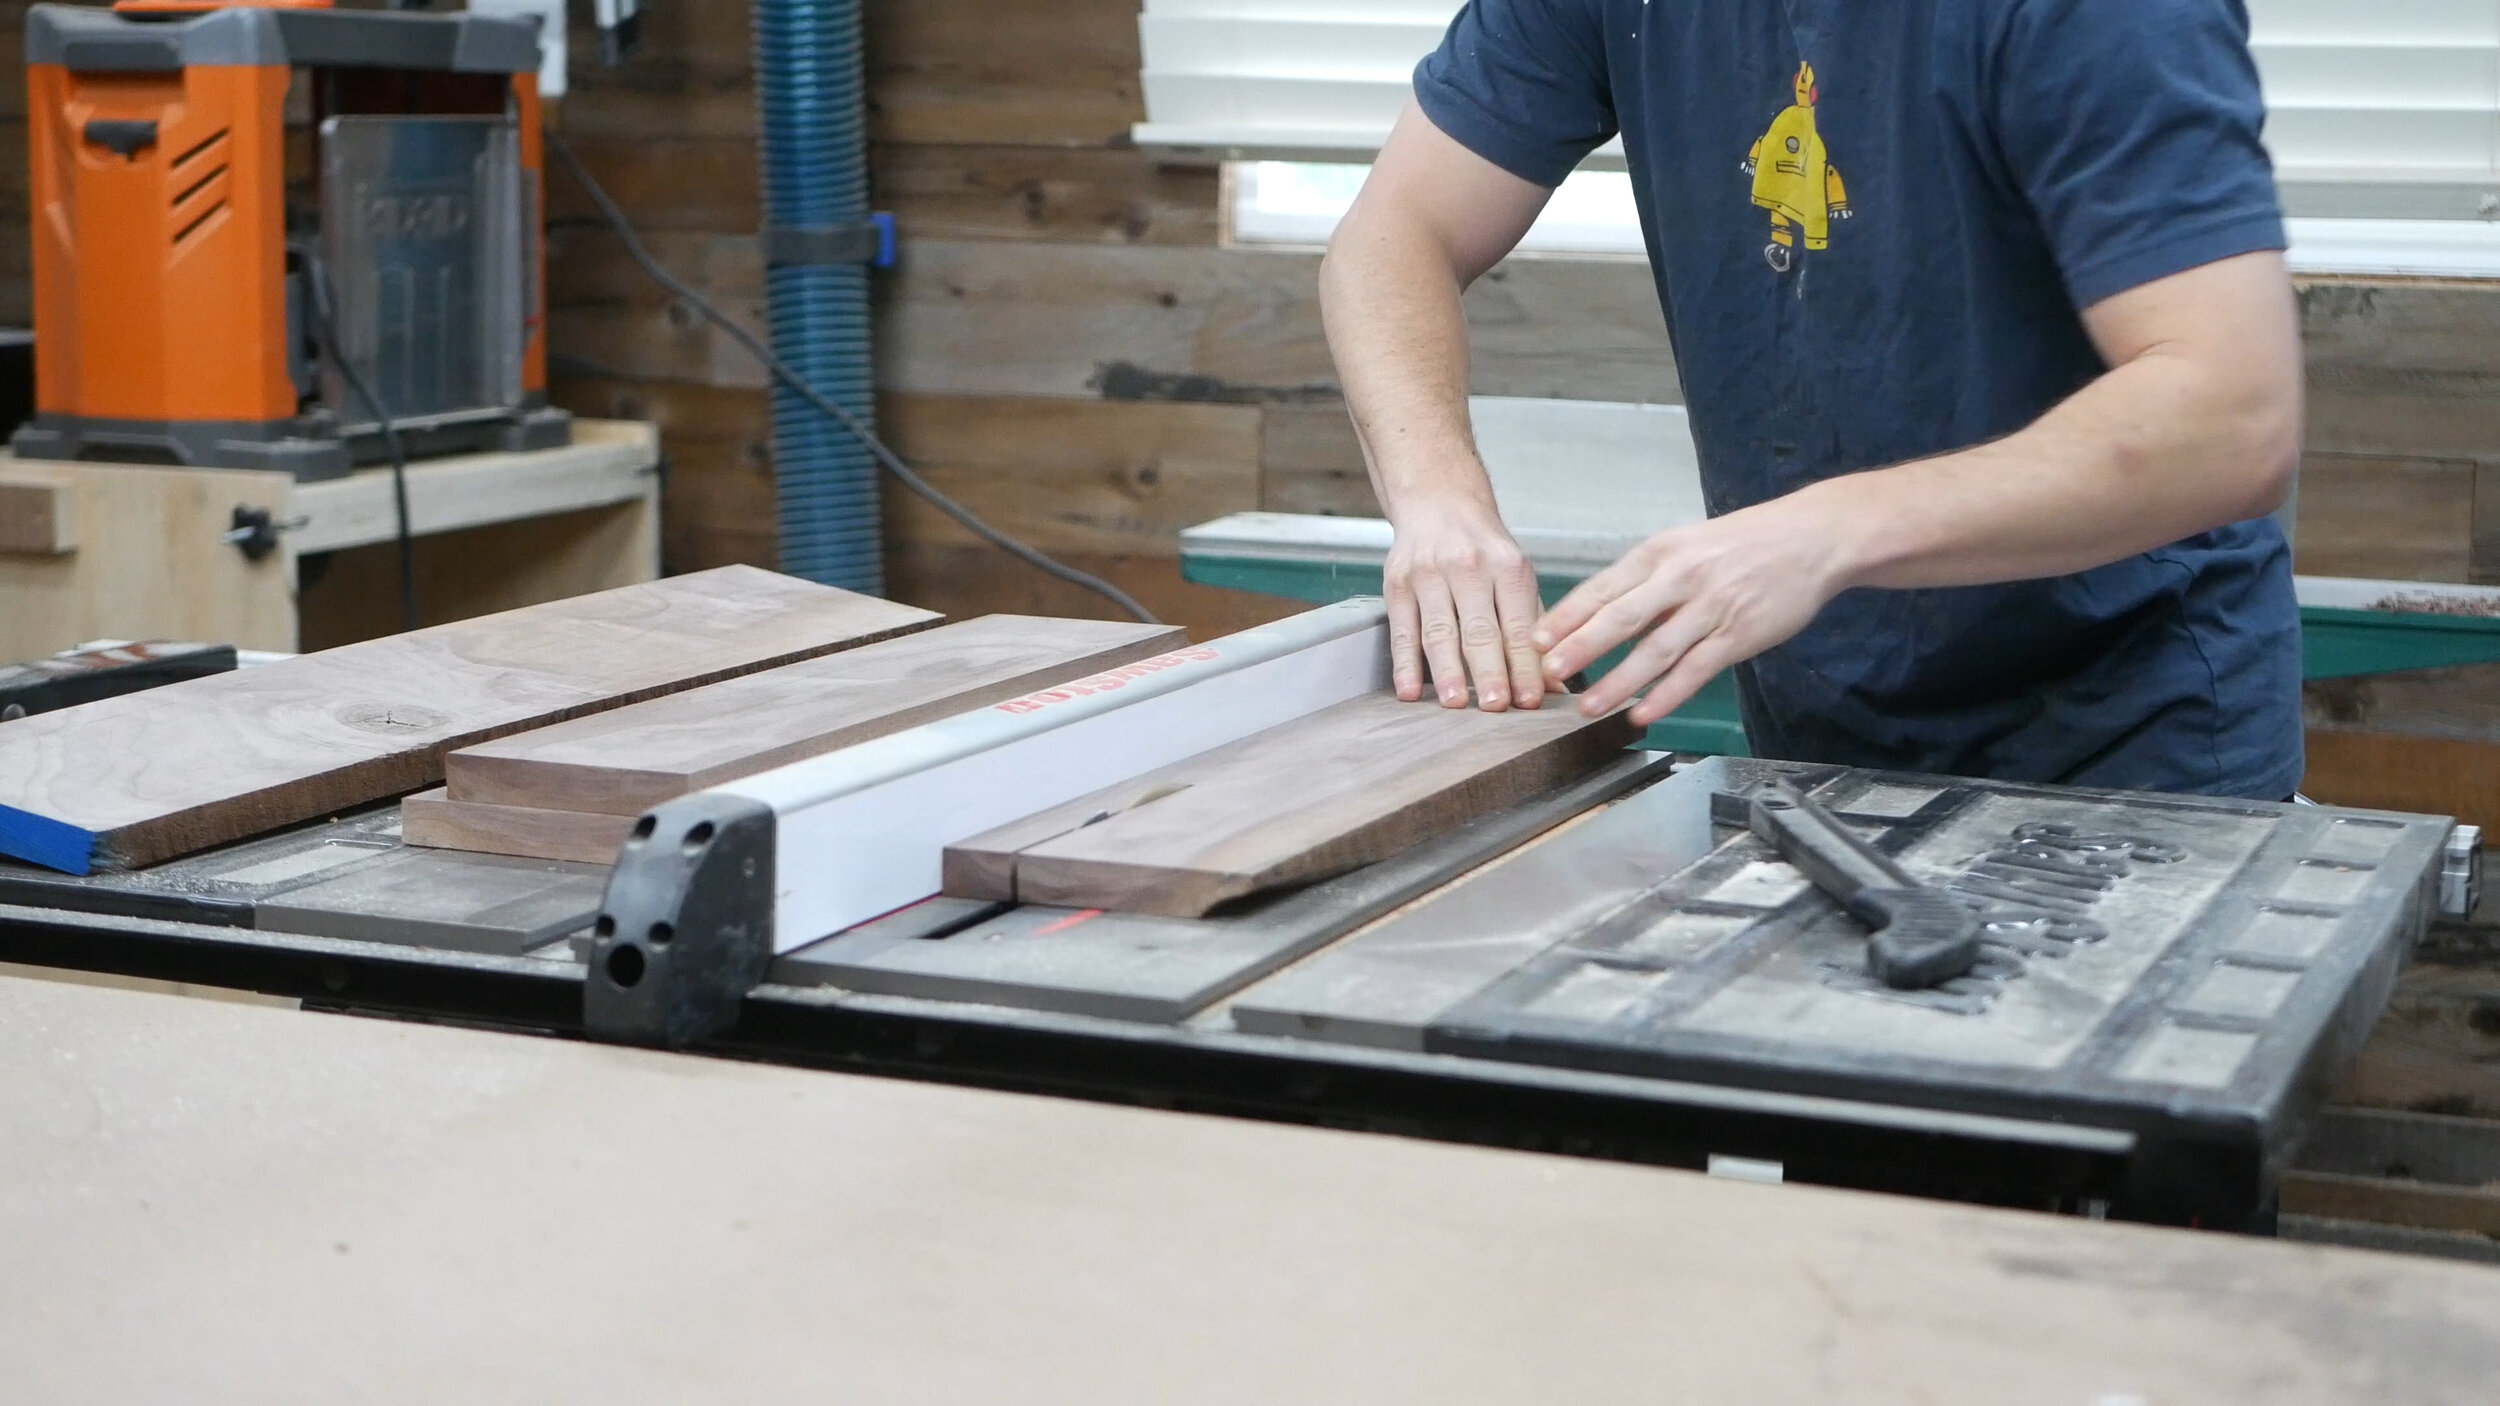

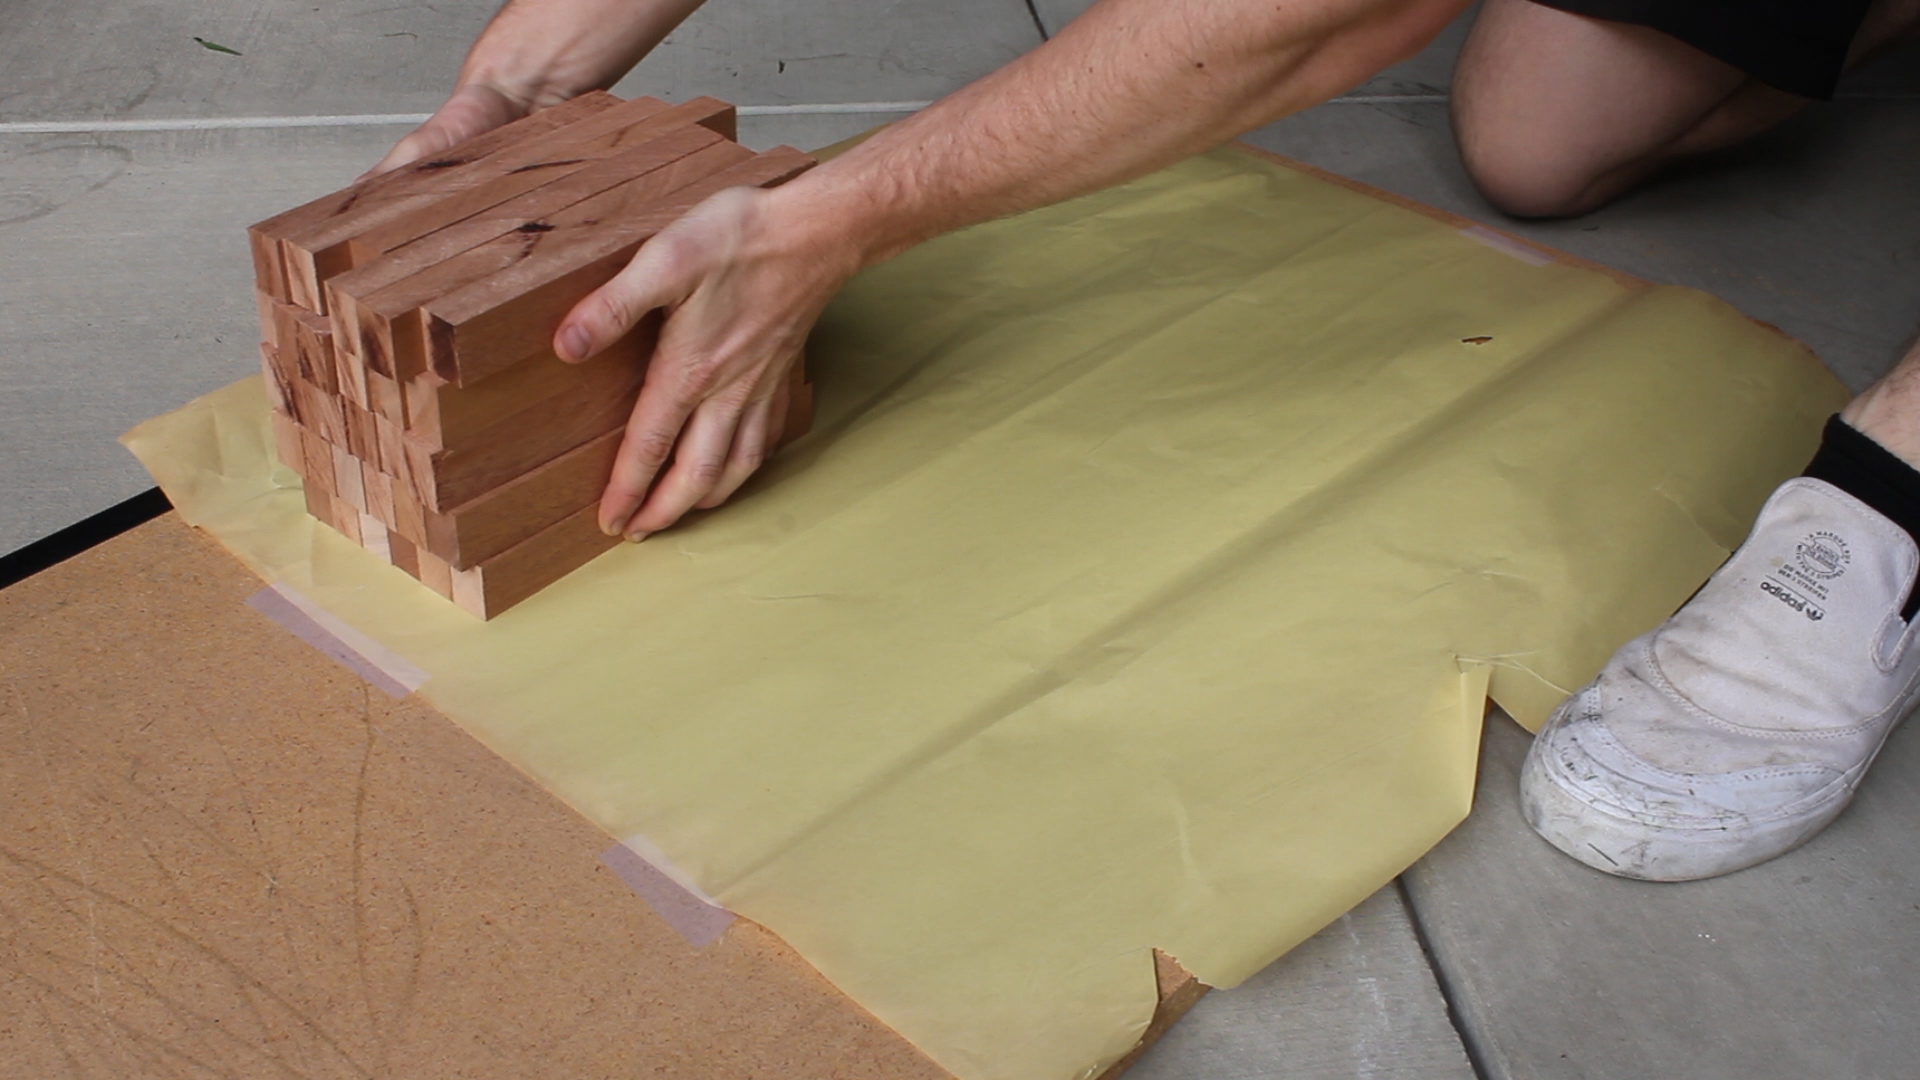
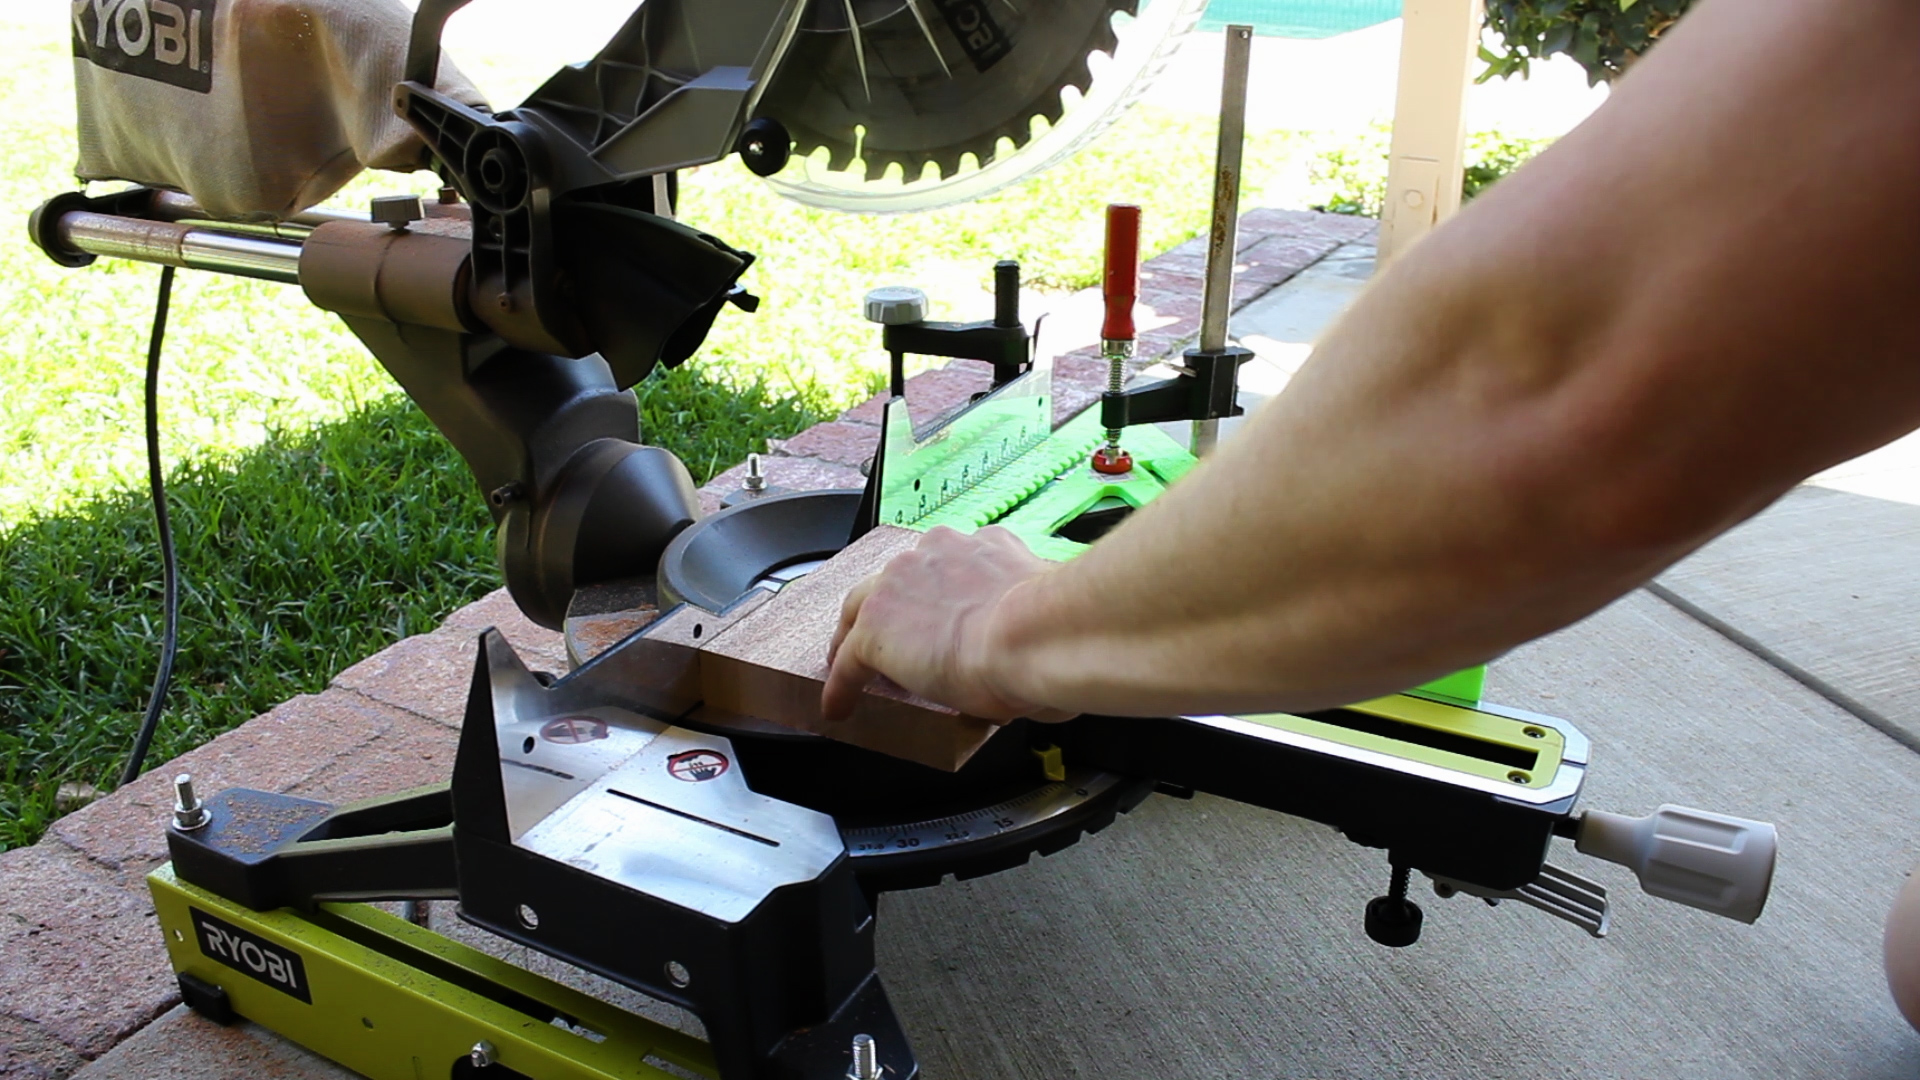
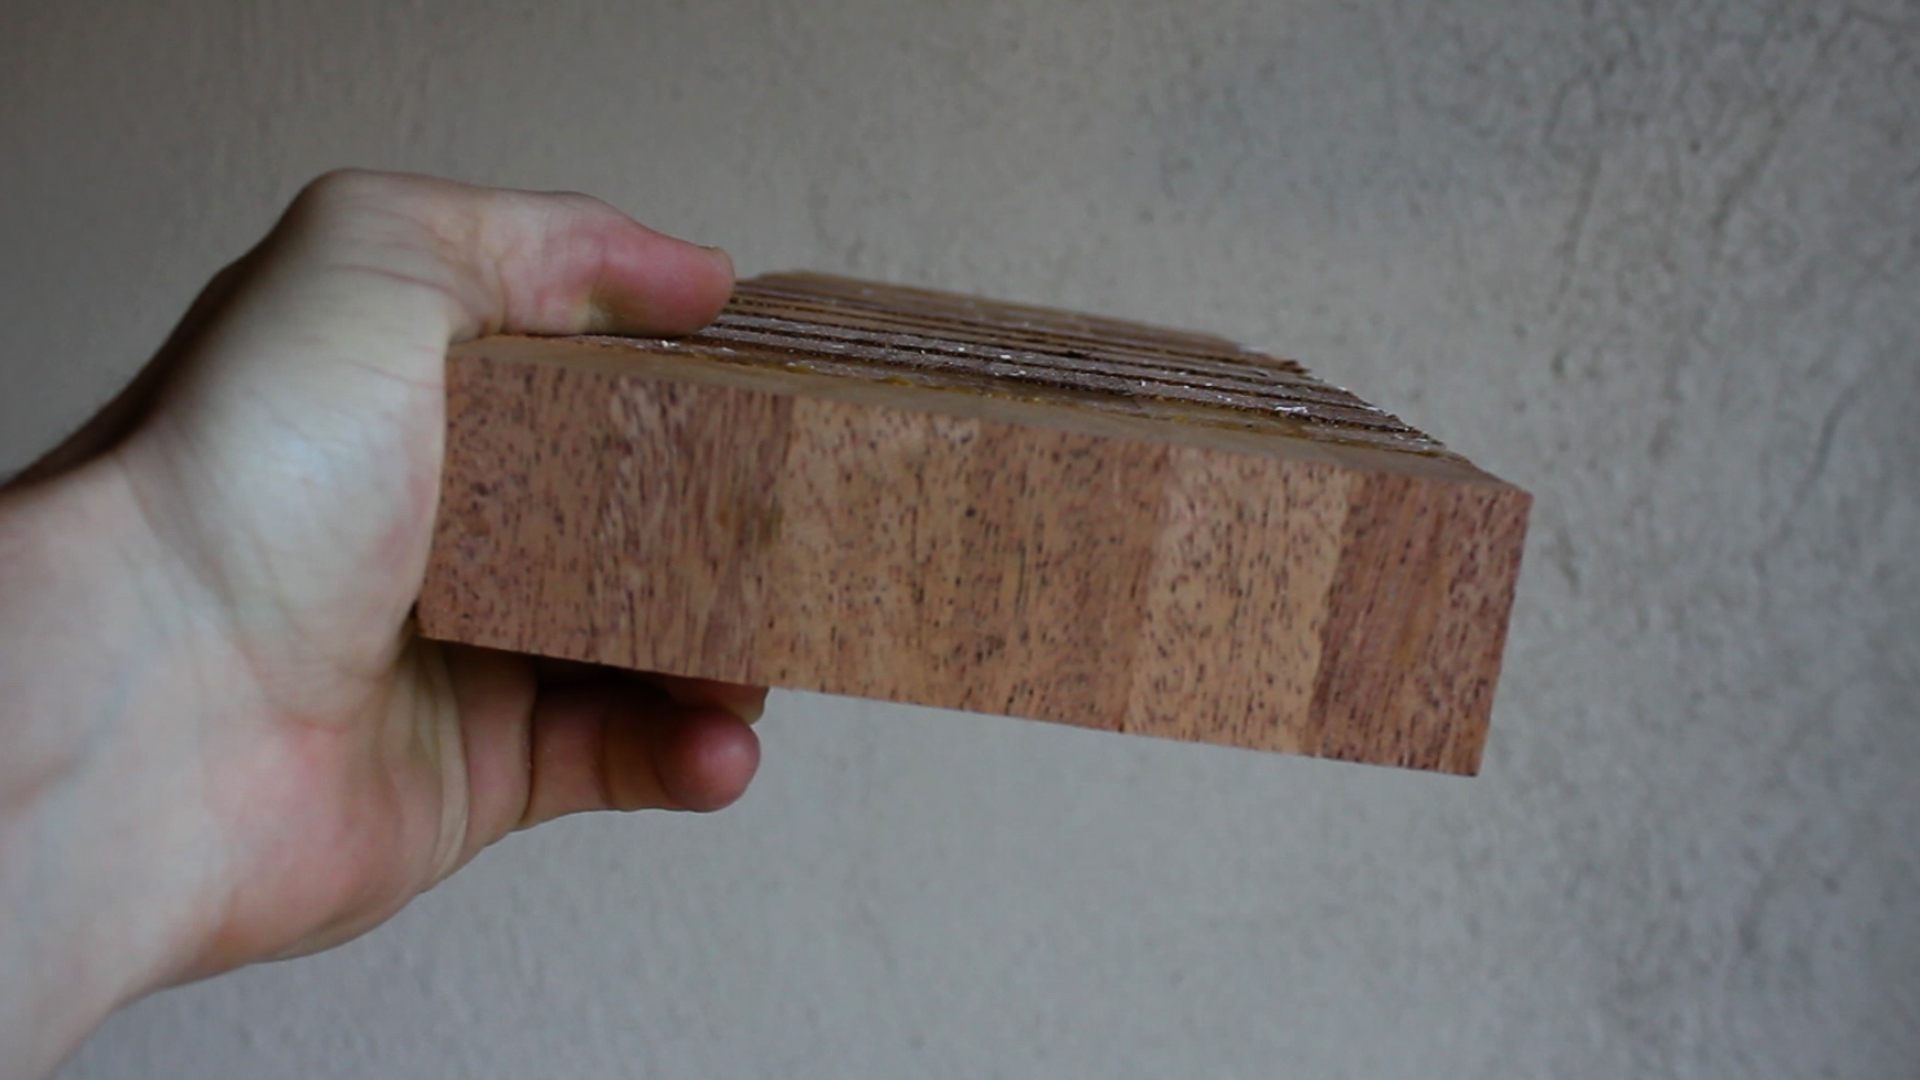
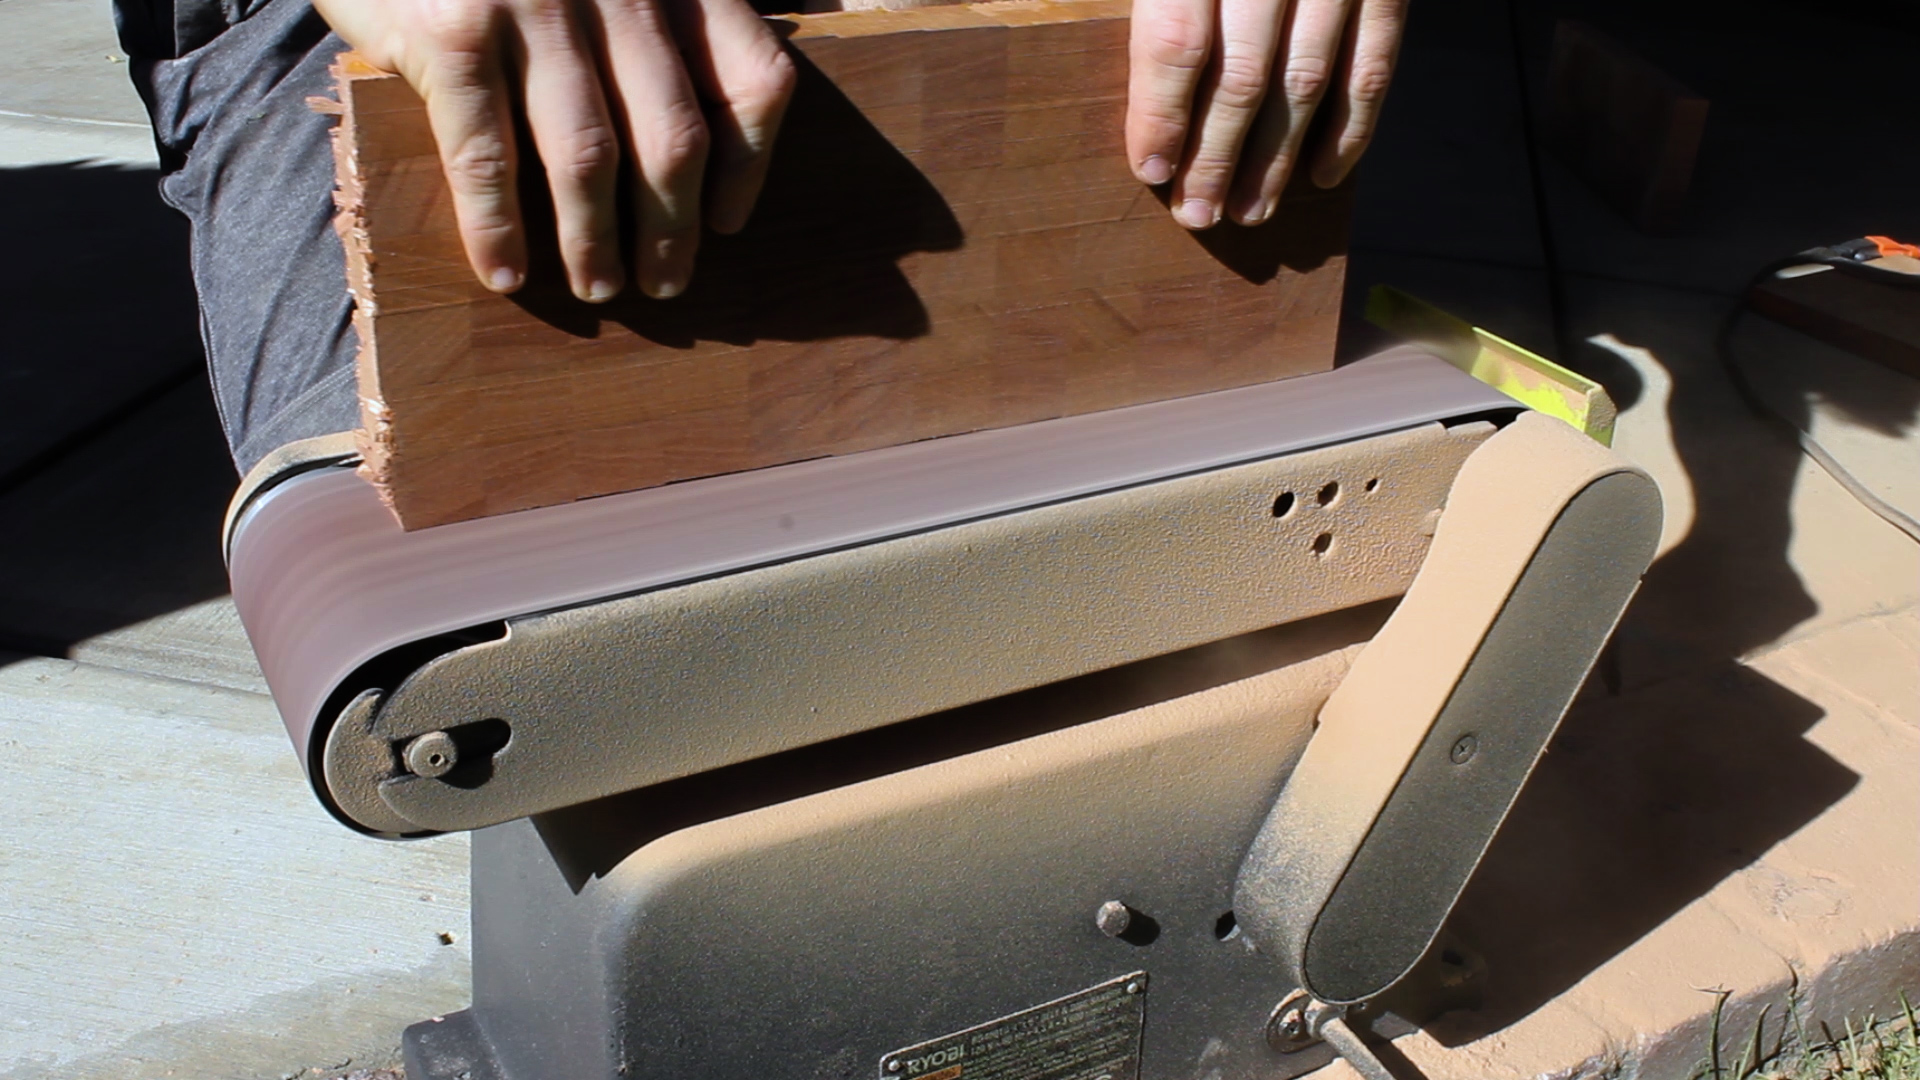
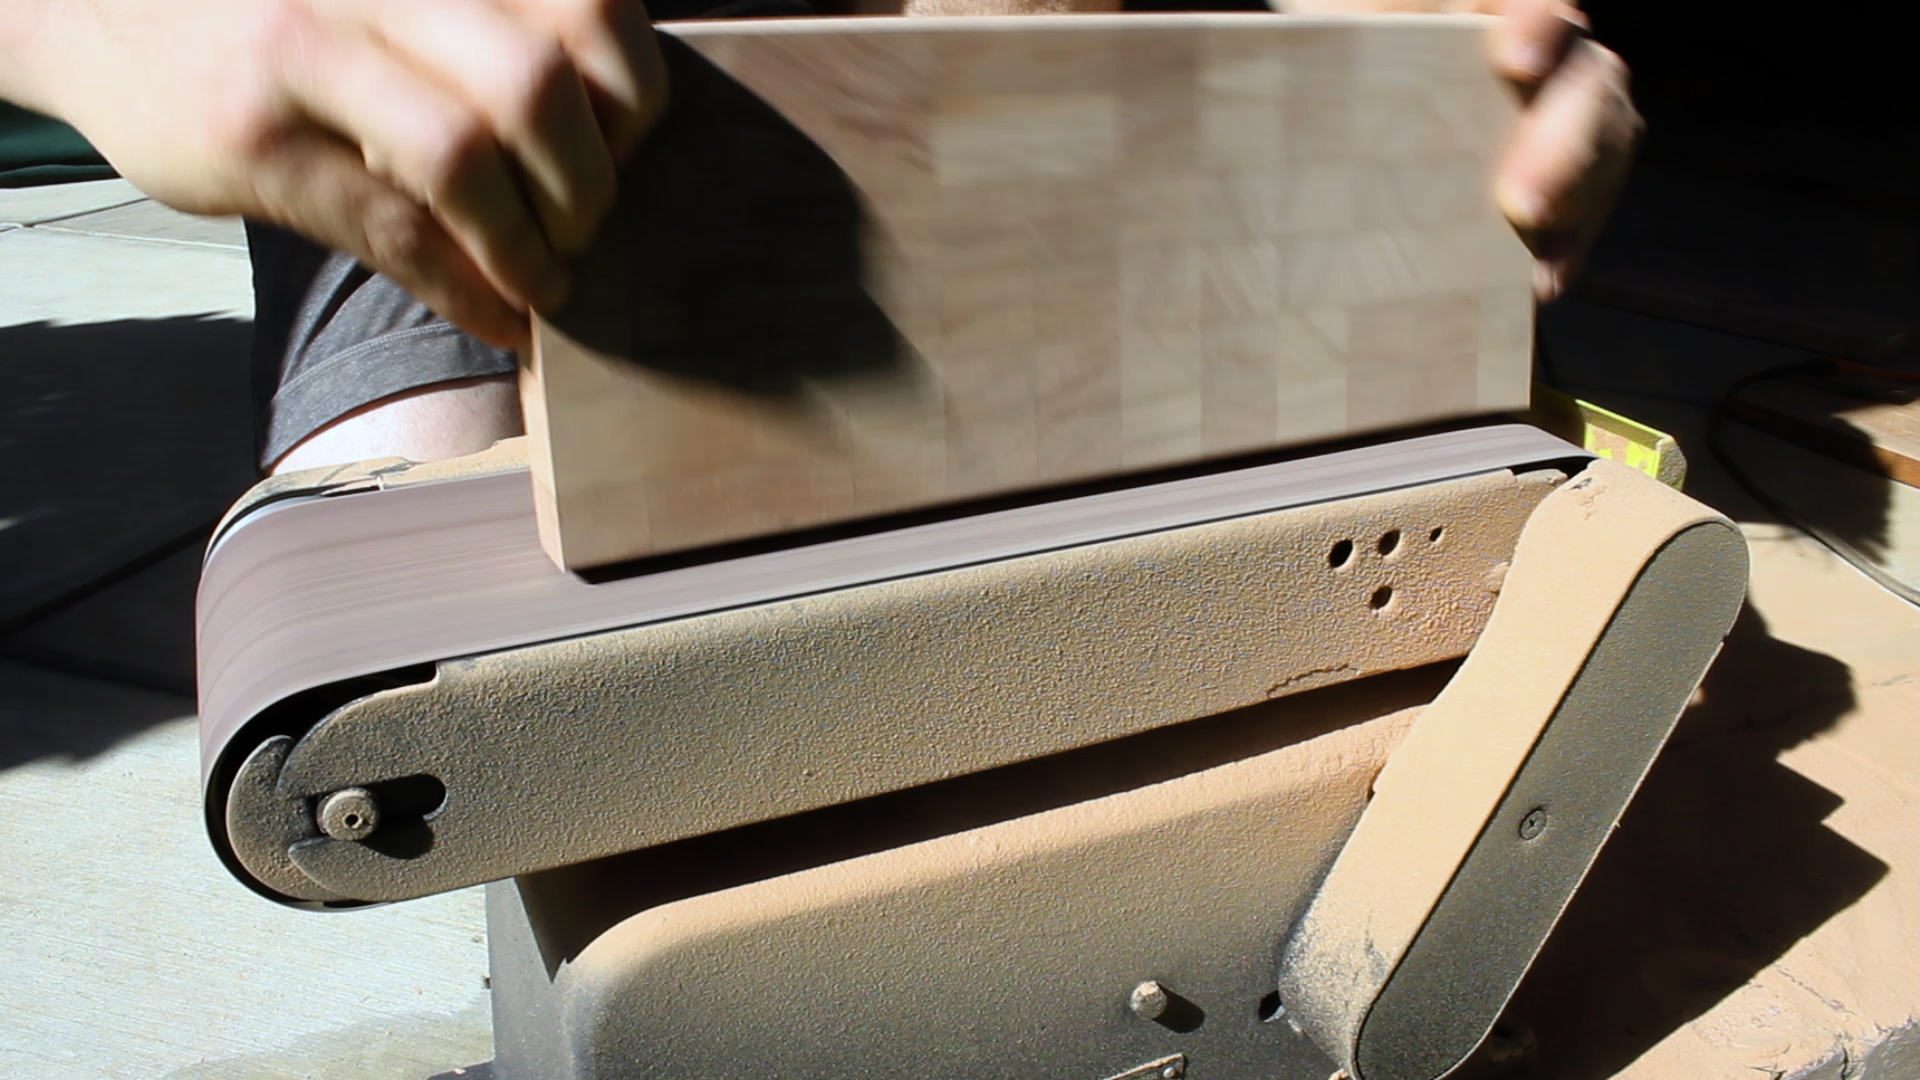
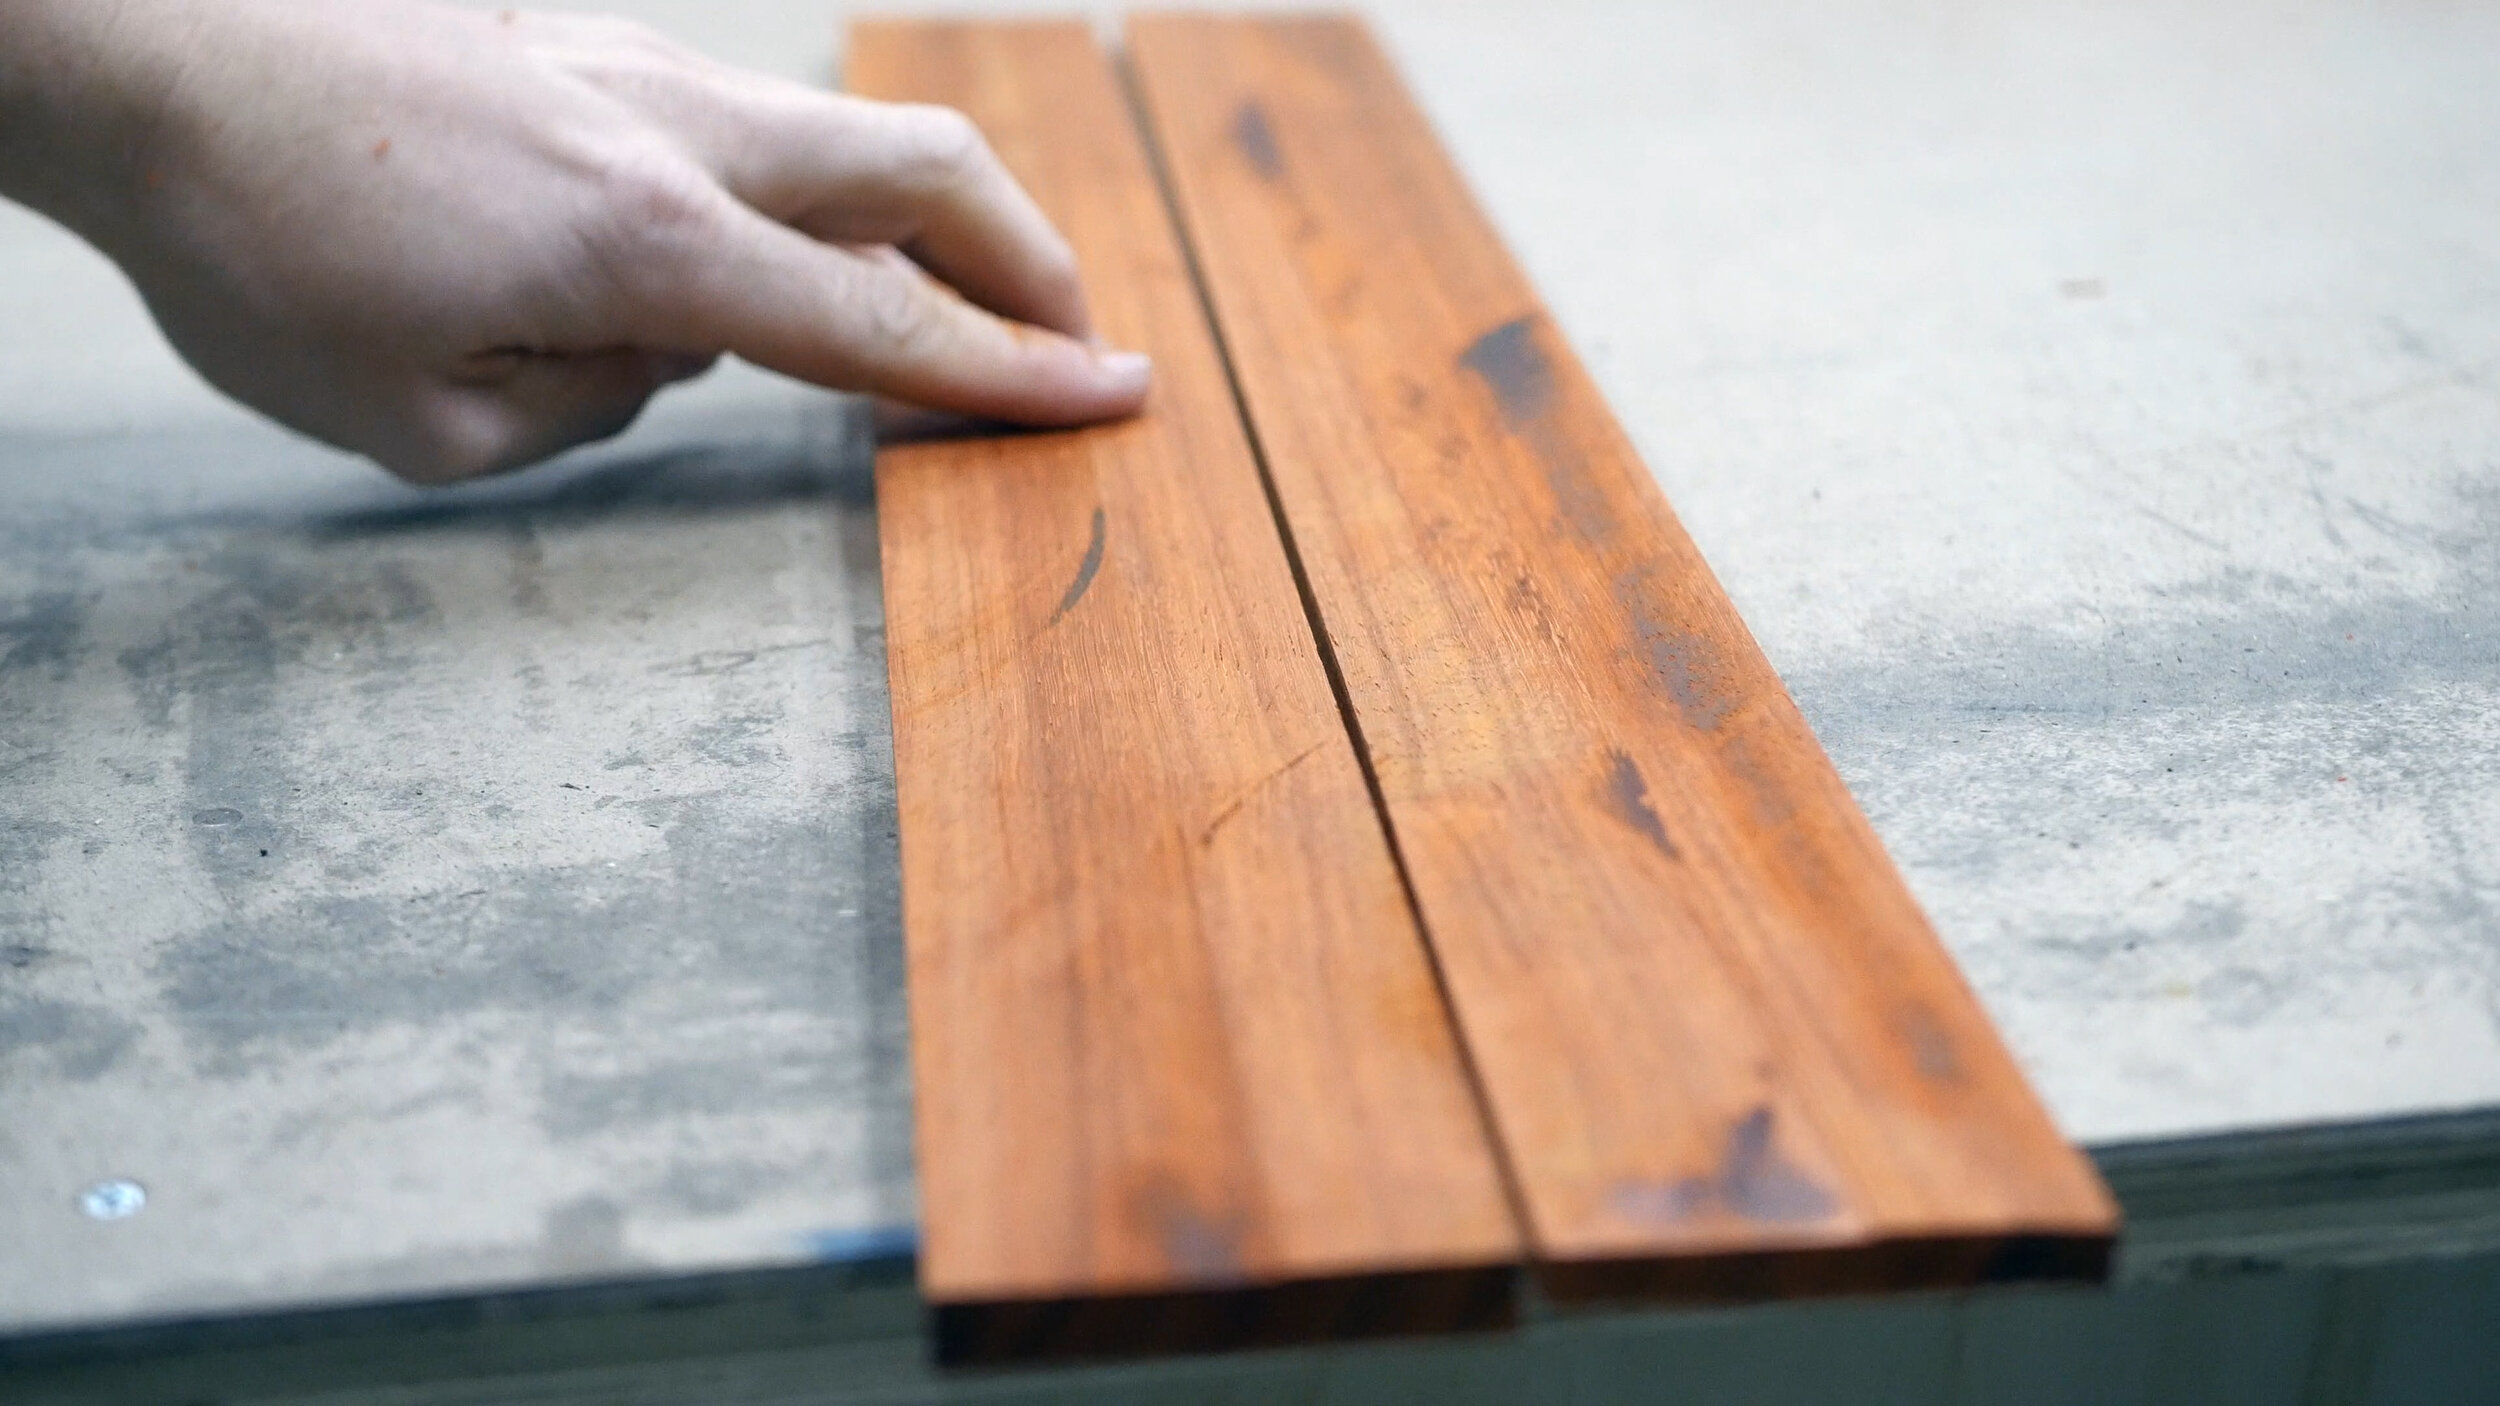
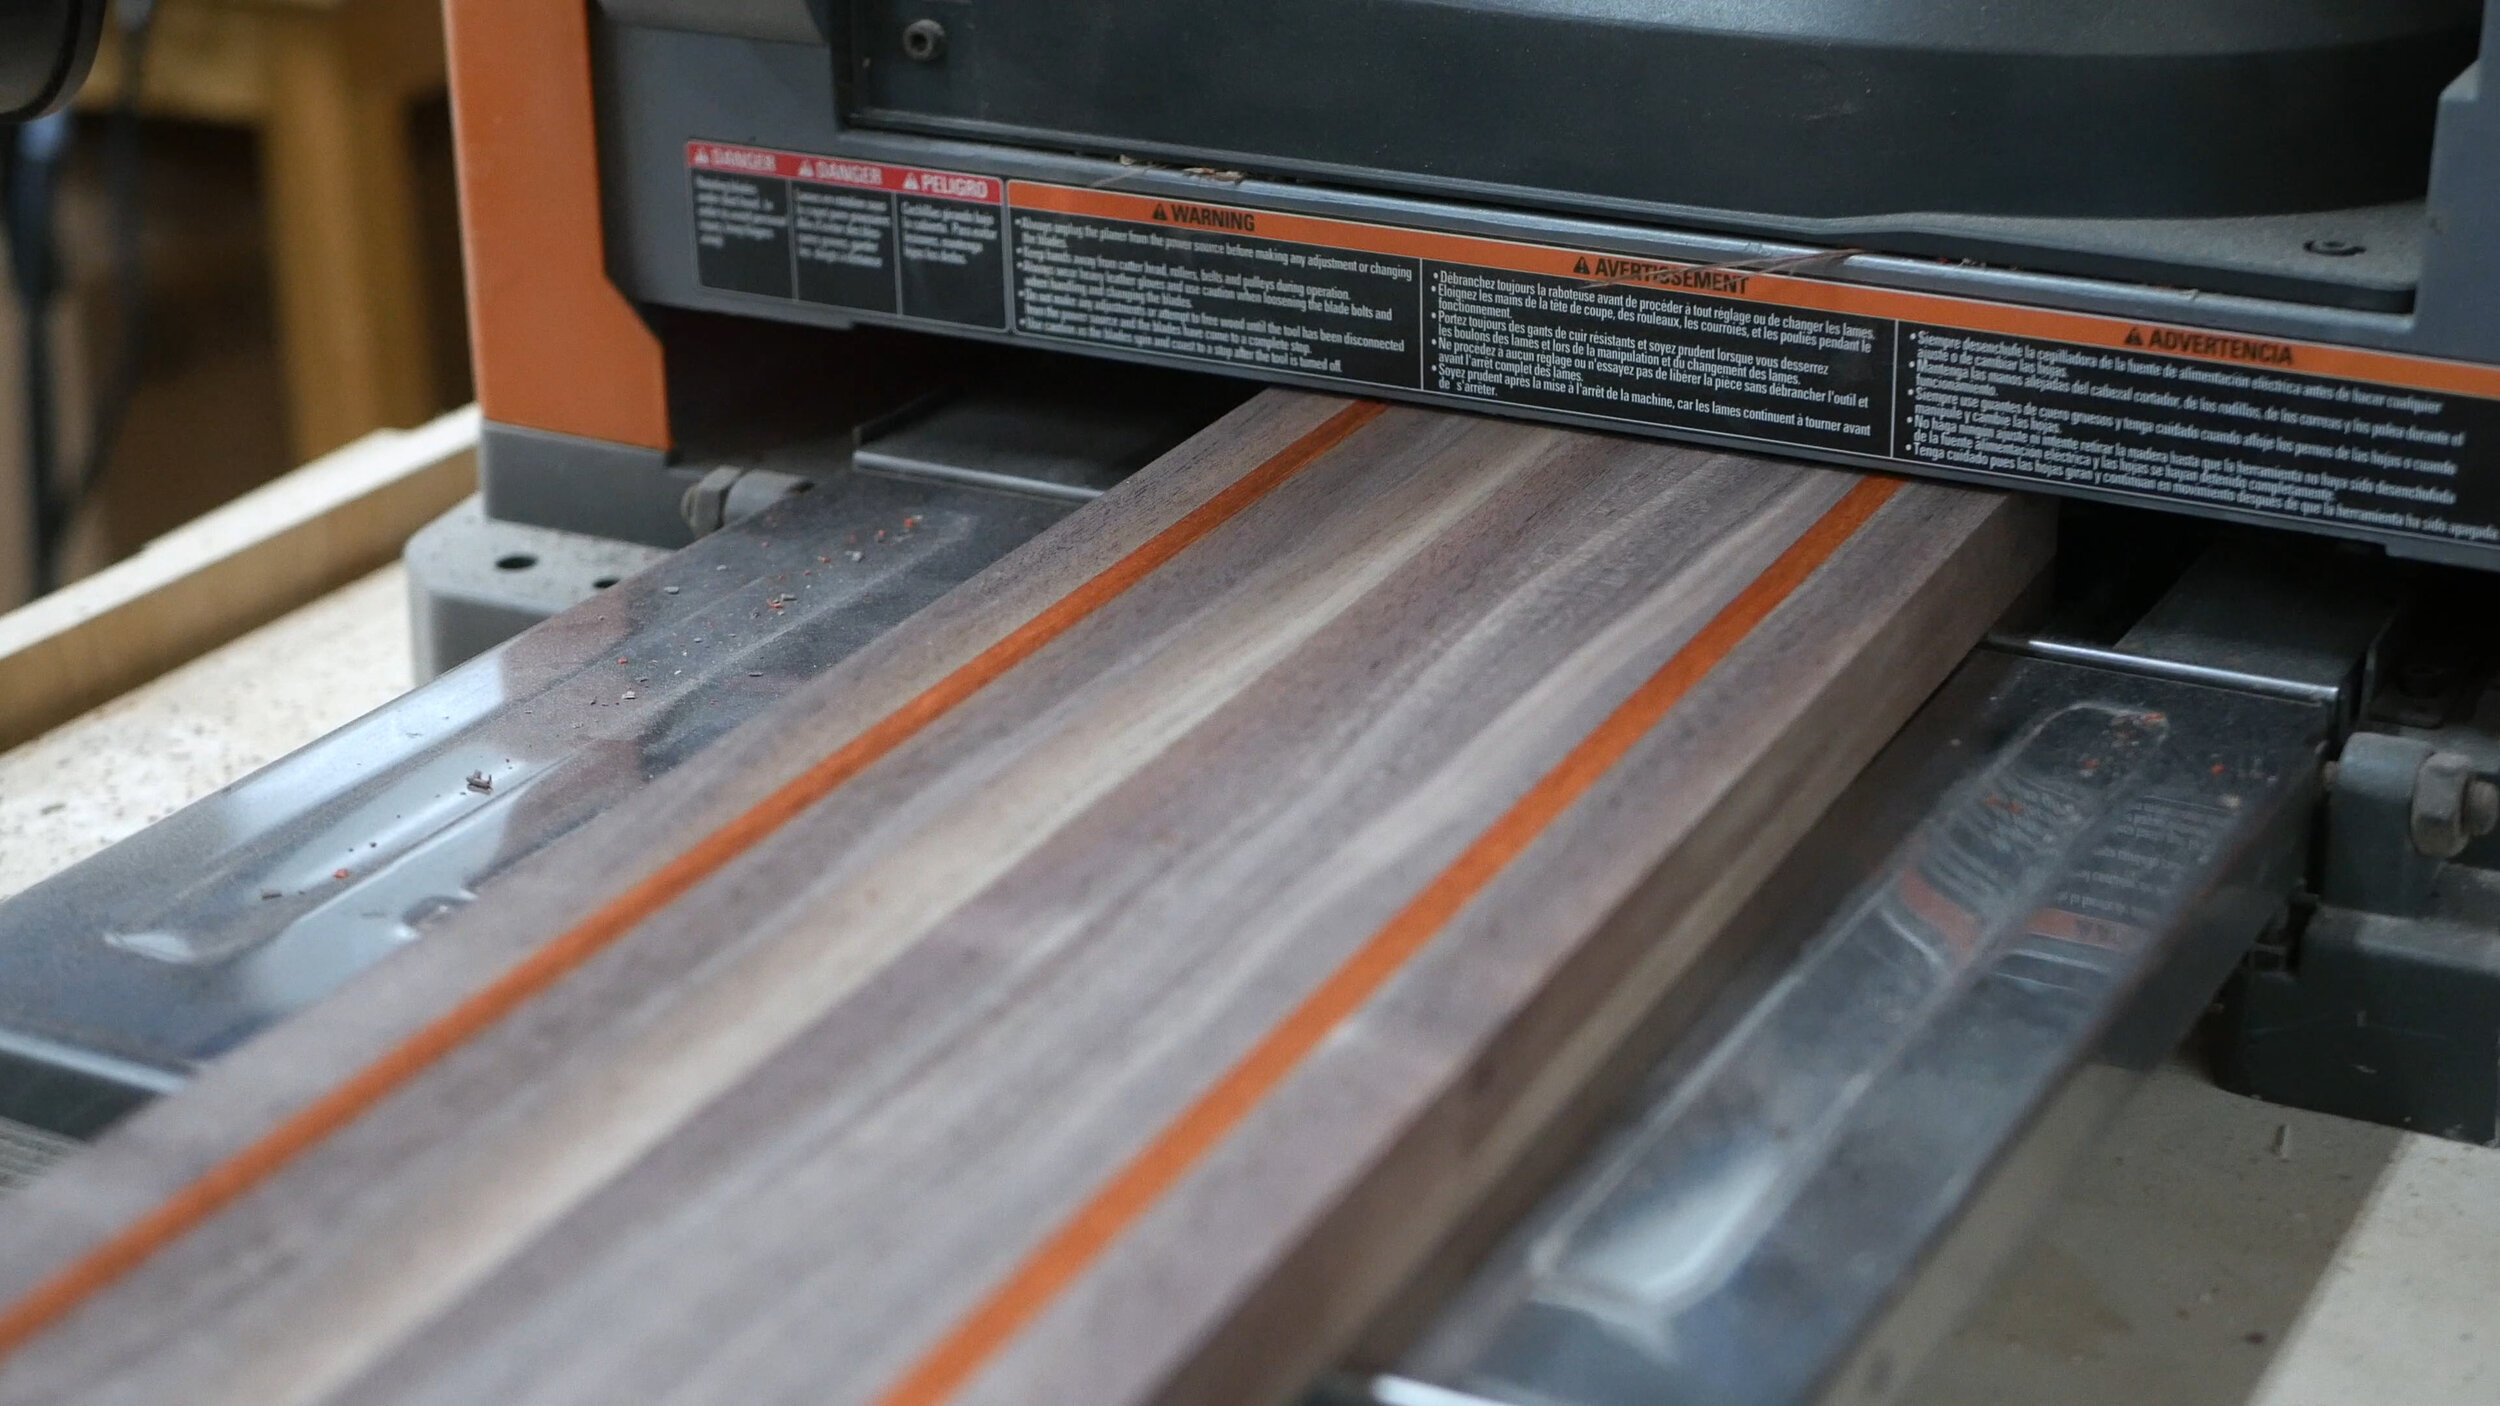
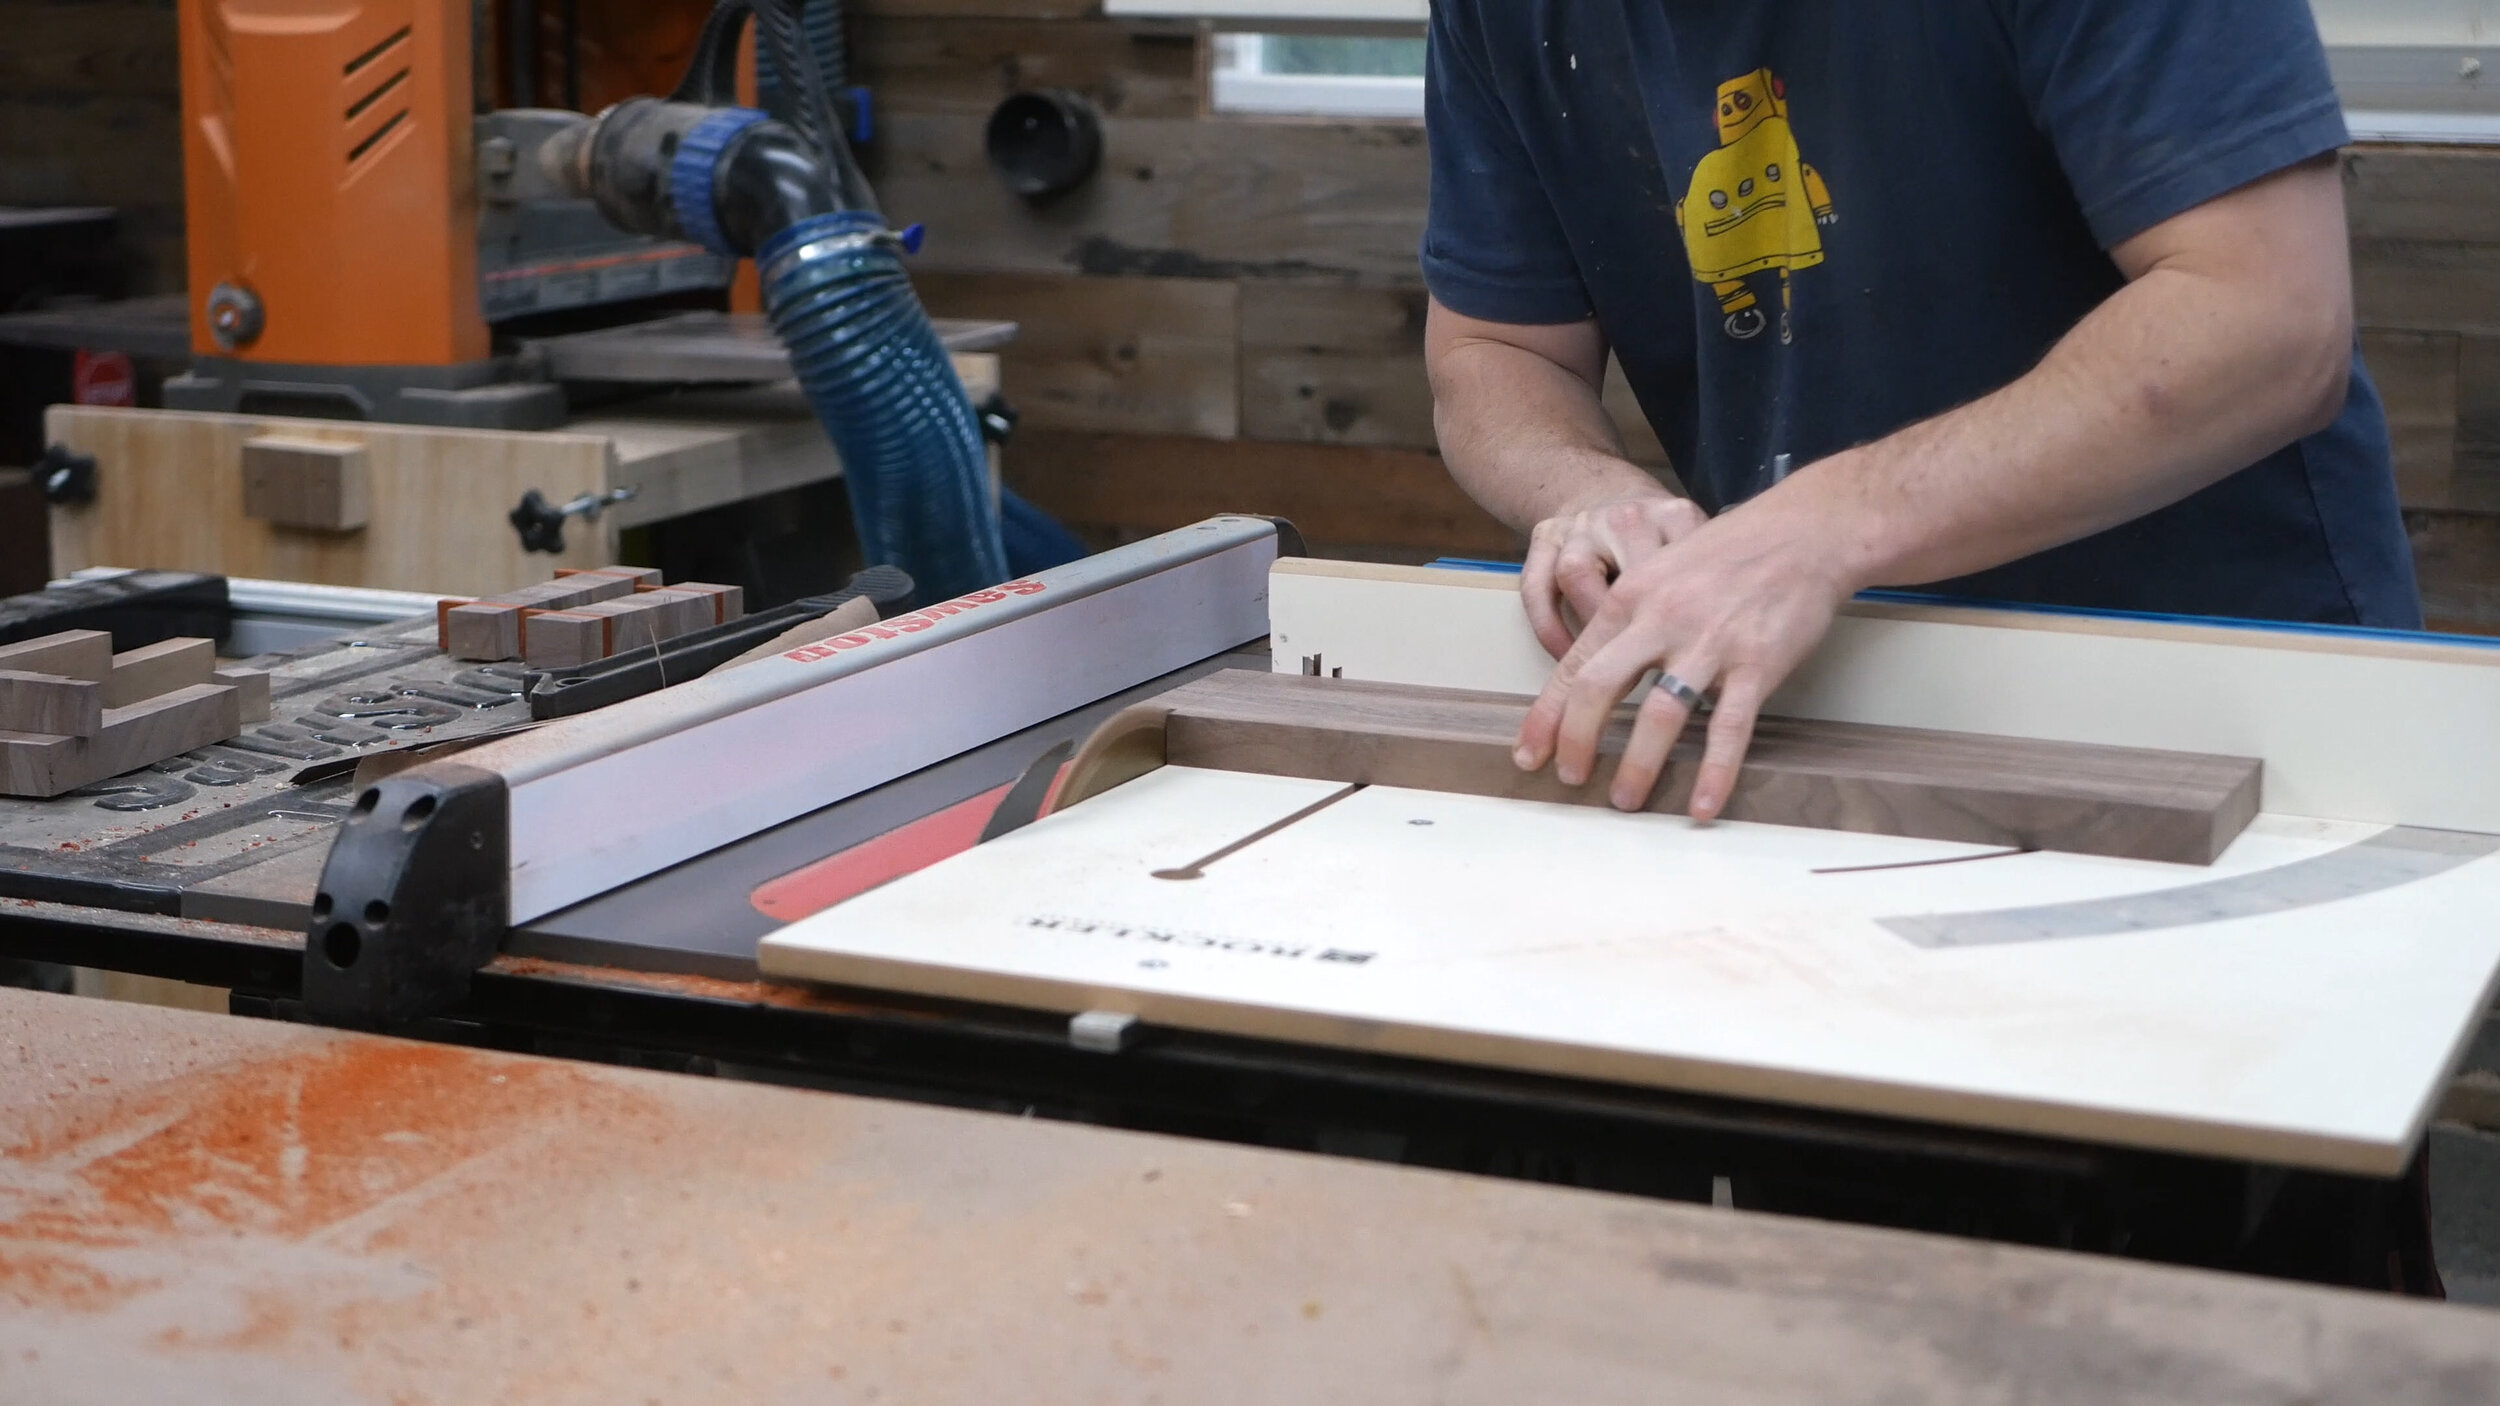
The pour over station is built from 5/4 walnut, padauk accents, and copper tubing. Step one was to take the walnut and padauk I had purchased and mill down to their proper sizes, which was a mix of jointing for straight edges, cutting to rough size on the miter saw, creating flat edges on the table saw, and then squaring up once all of my straight edges were established.
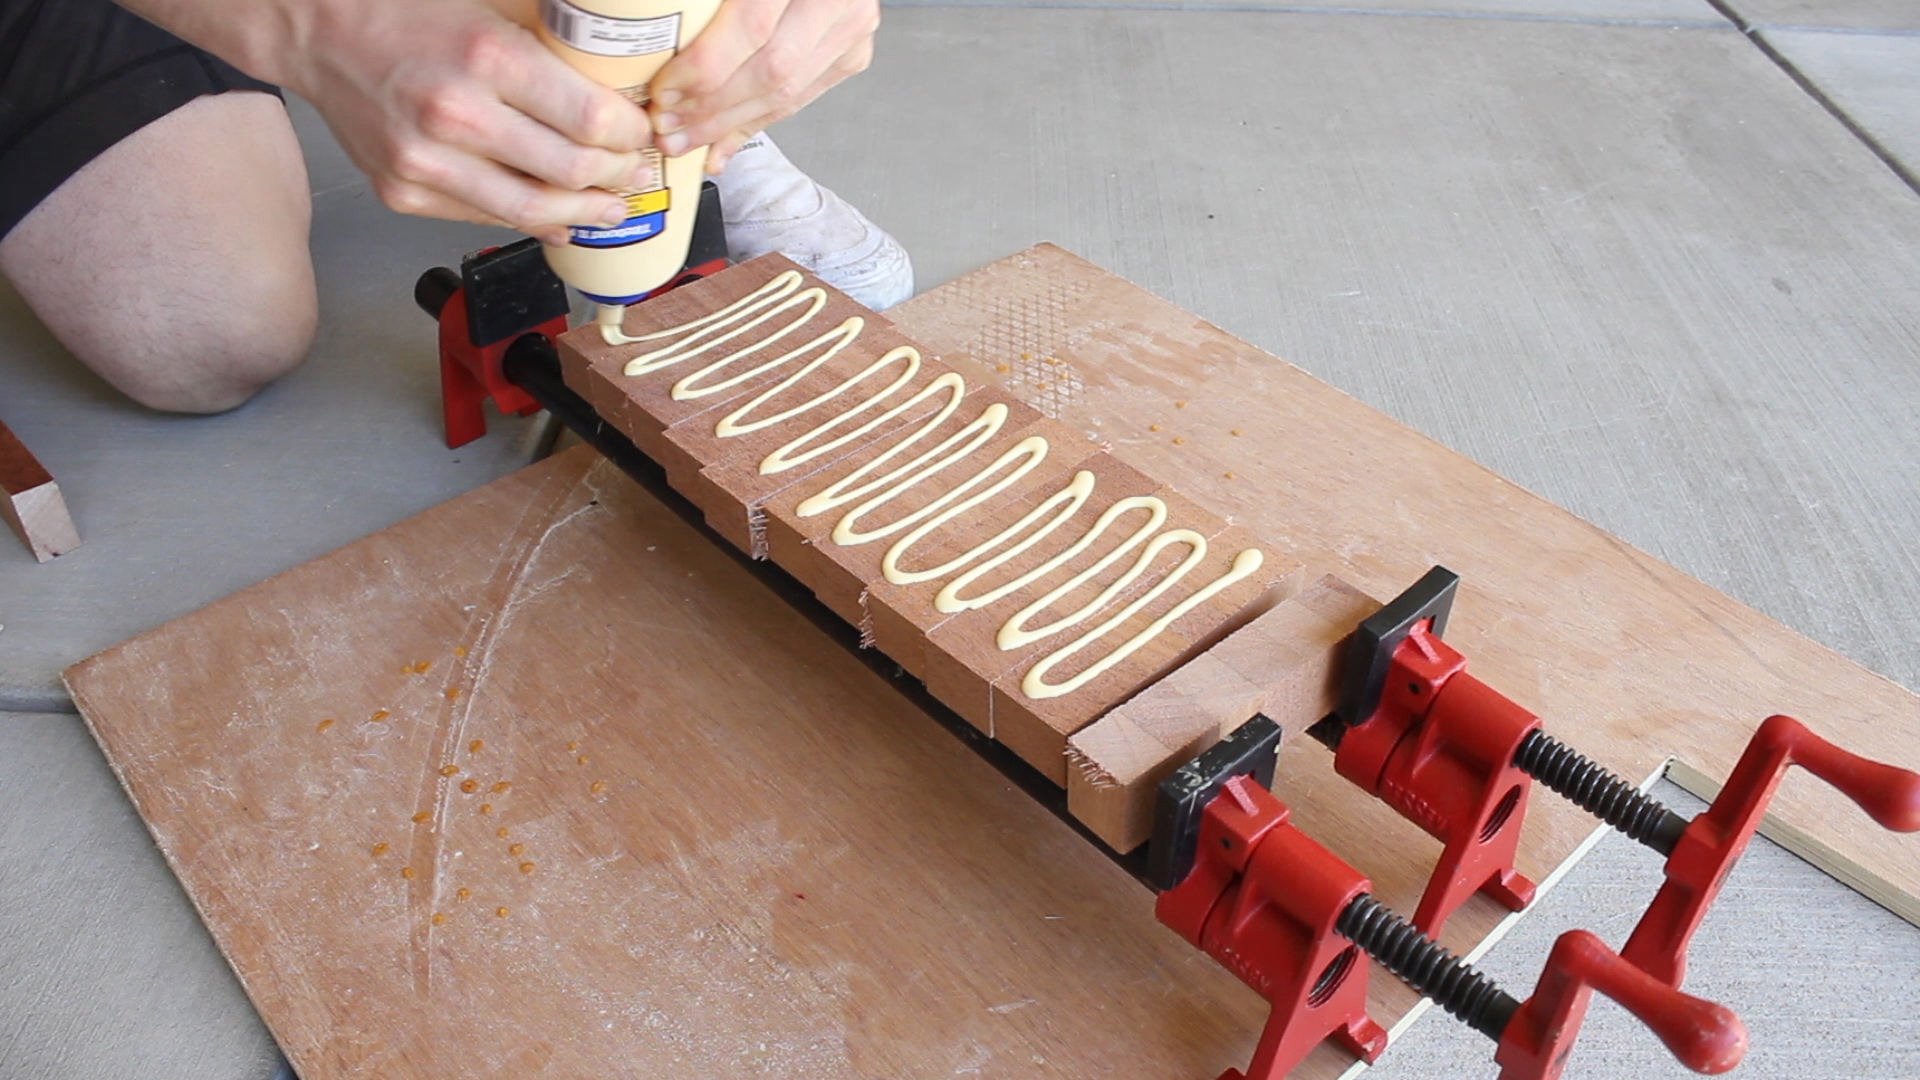
This is a basic milling process you’ll always go through if you purchase rough lumber. I also ripped my walnut pieces into strips that would later be glued up like a butcher block.
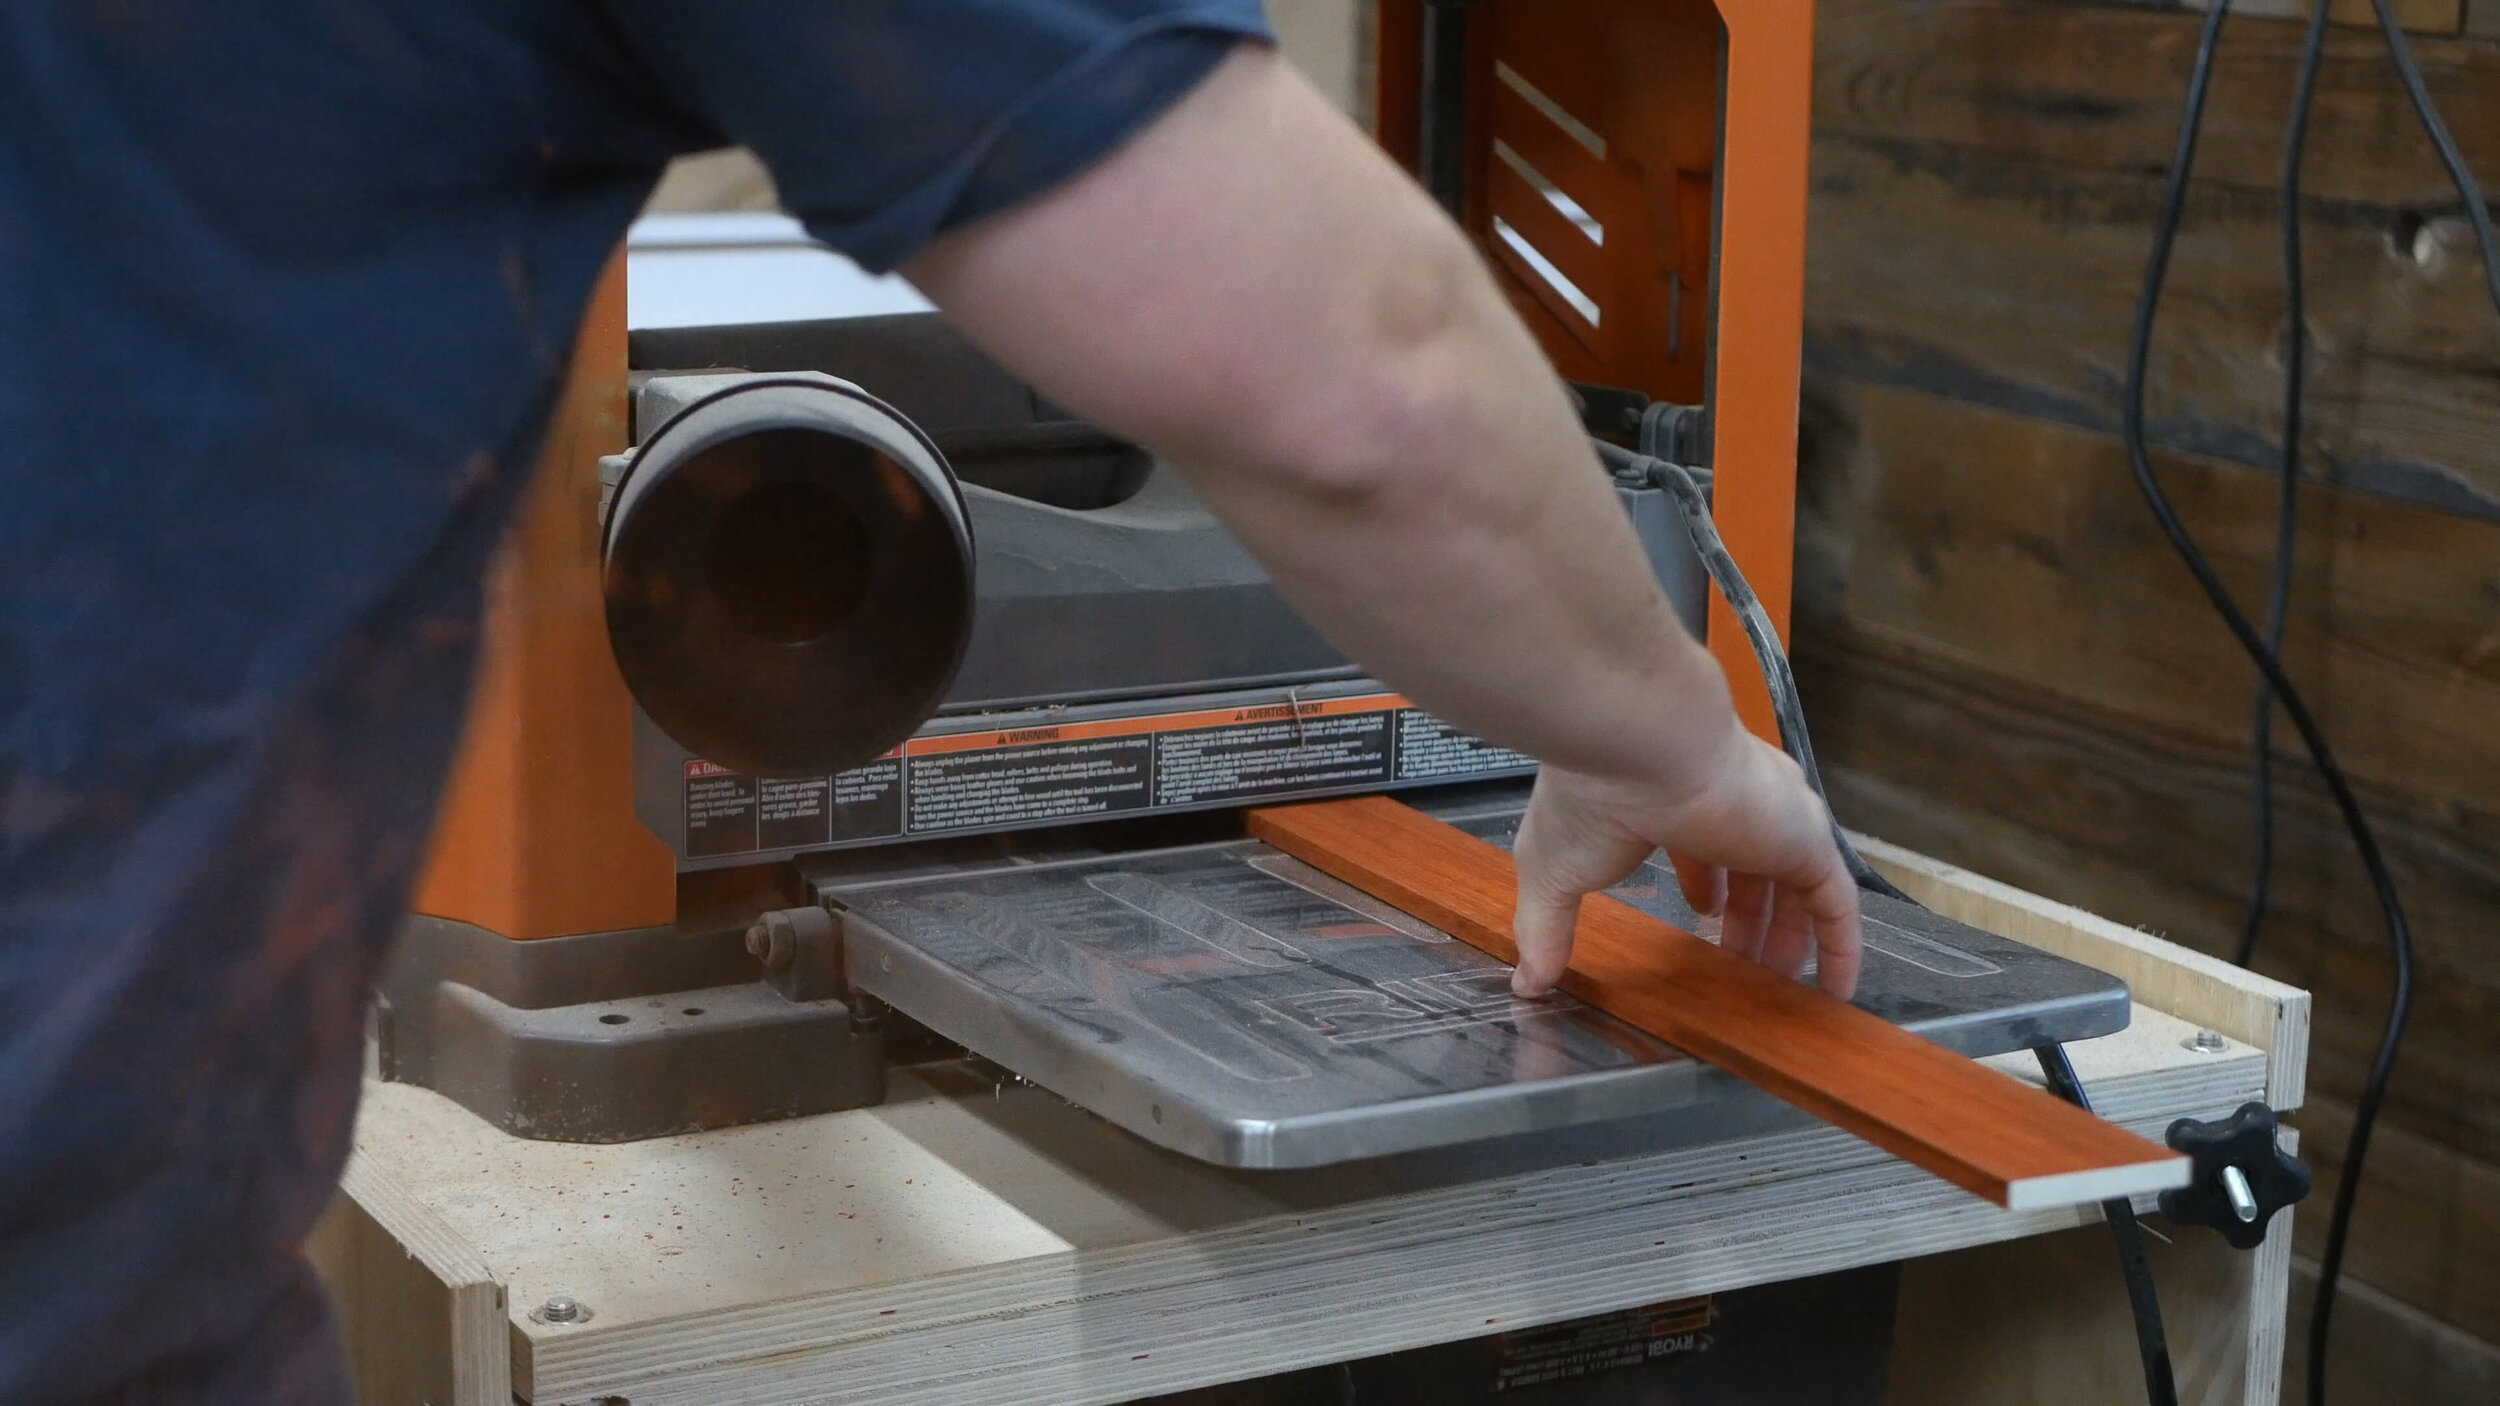
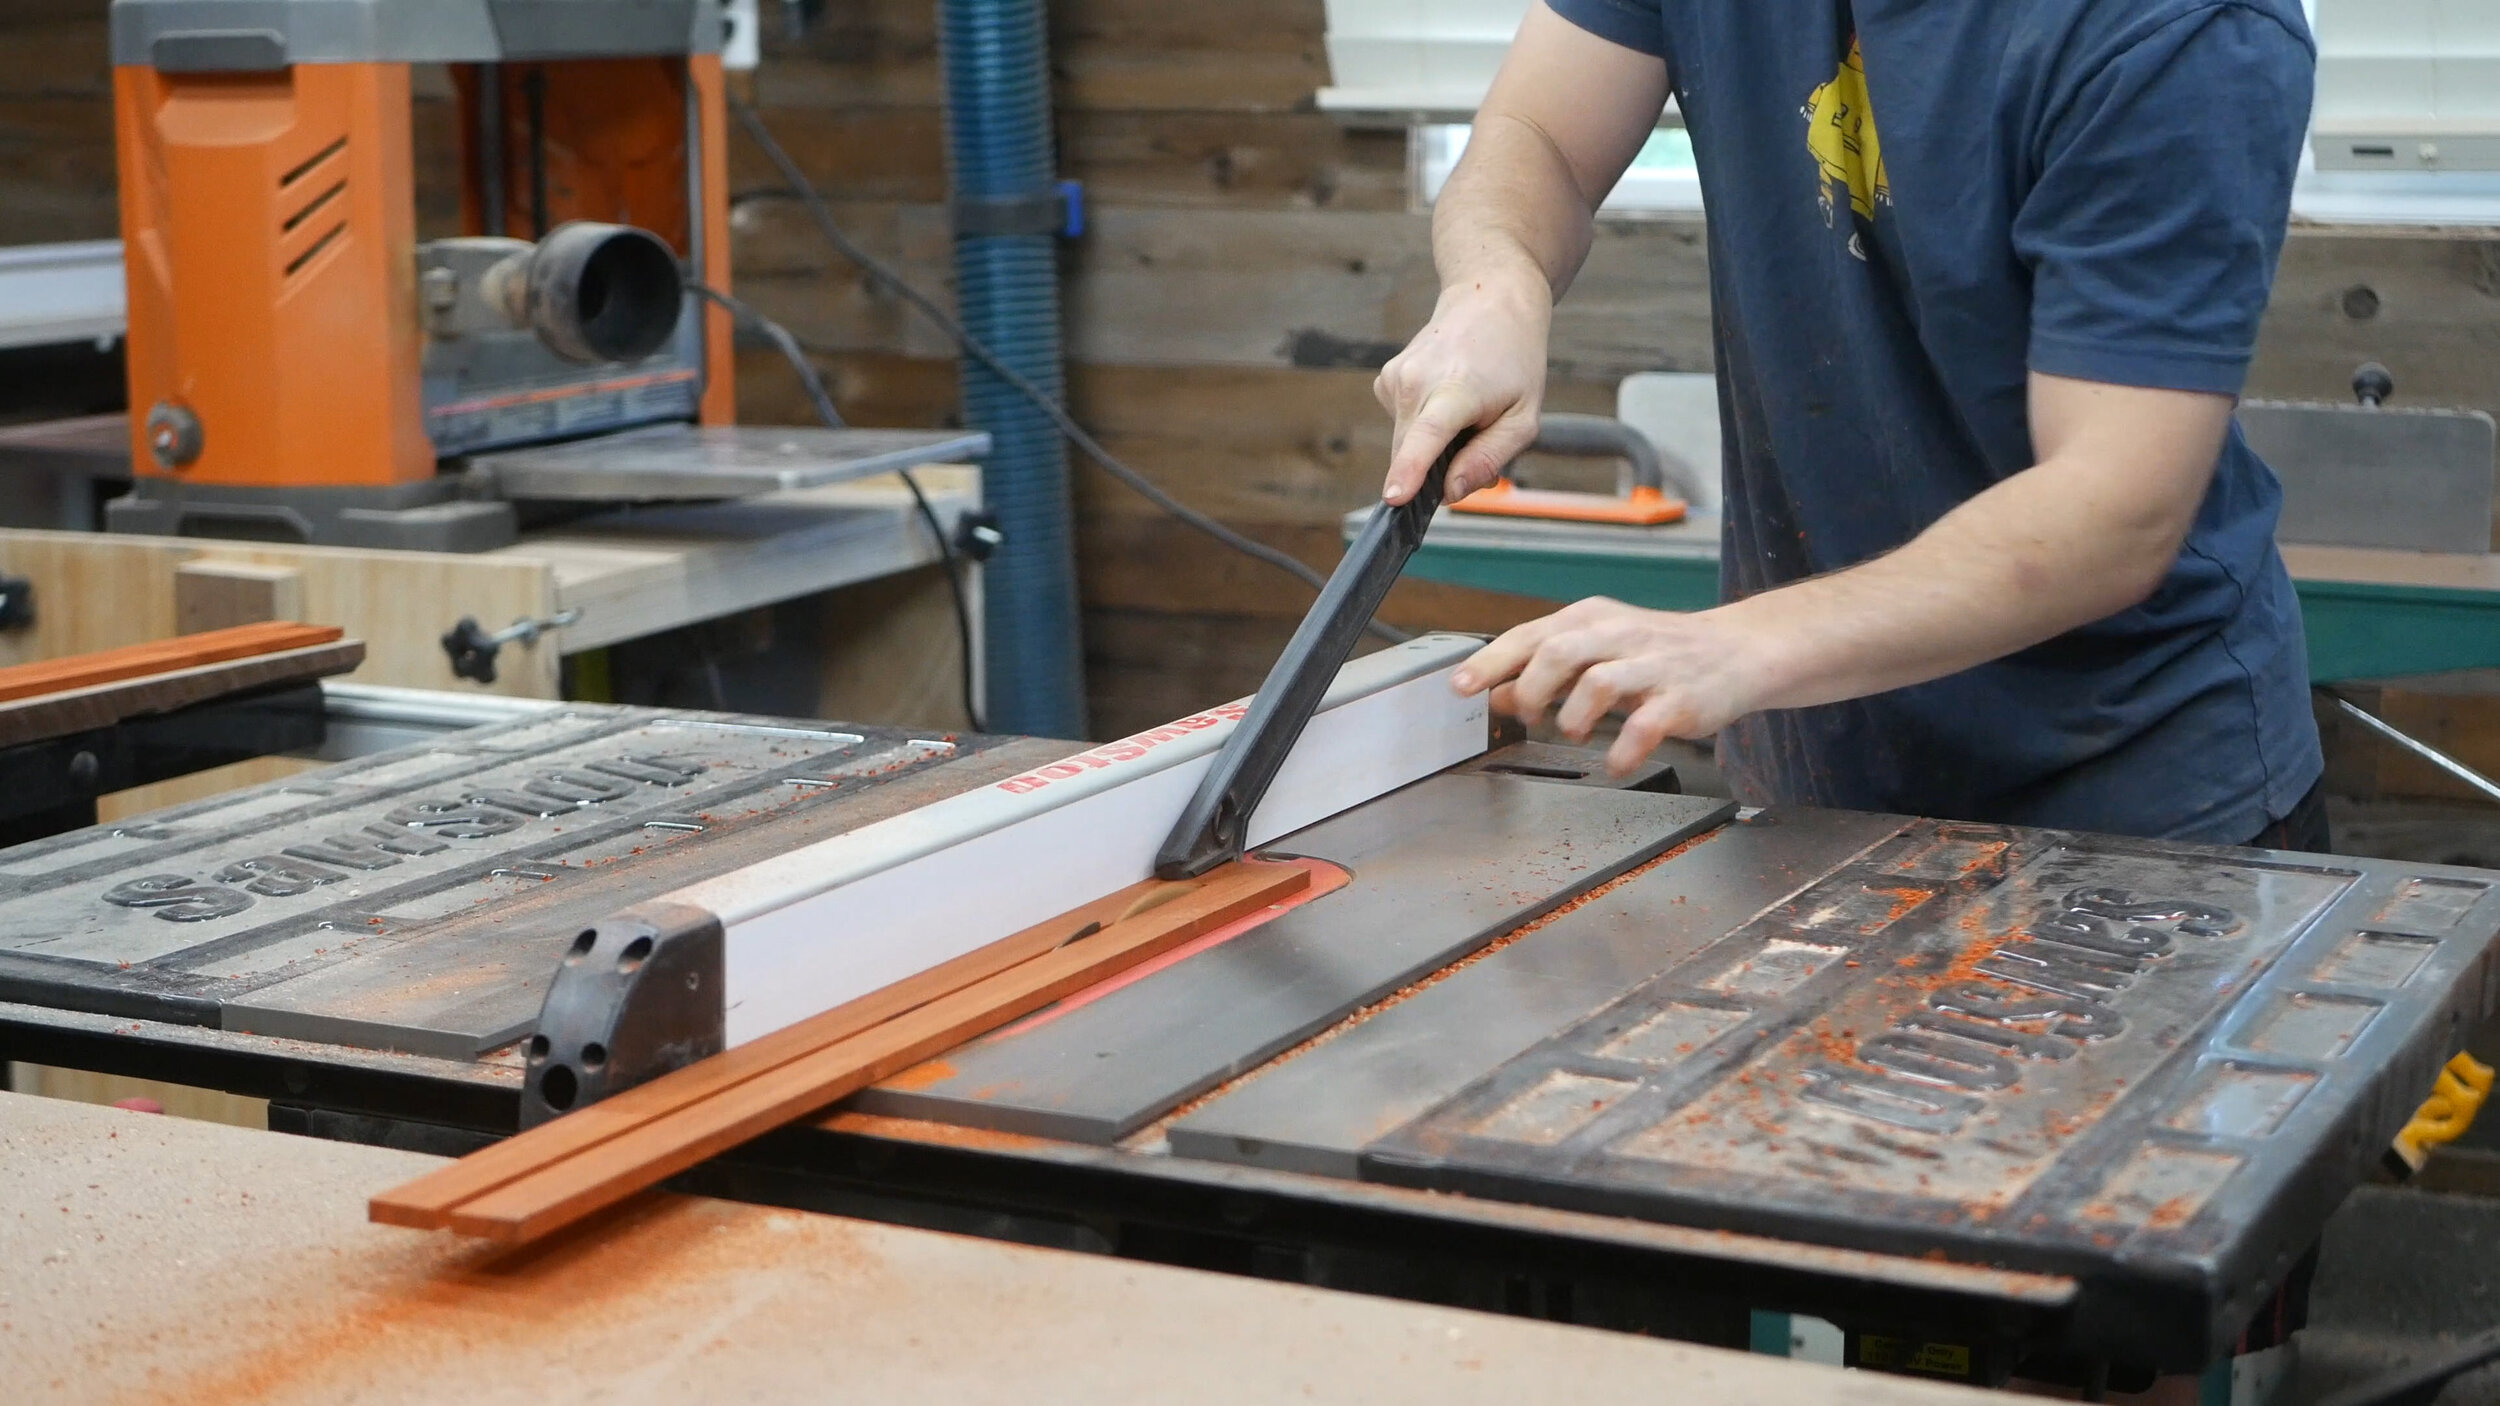
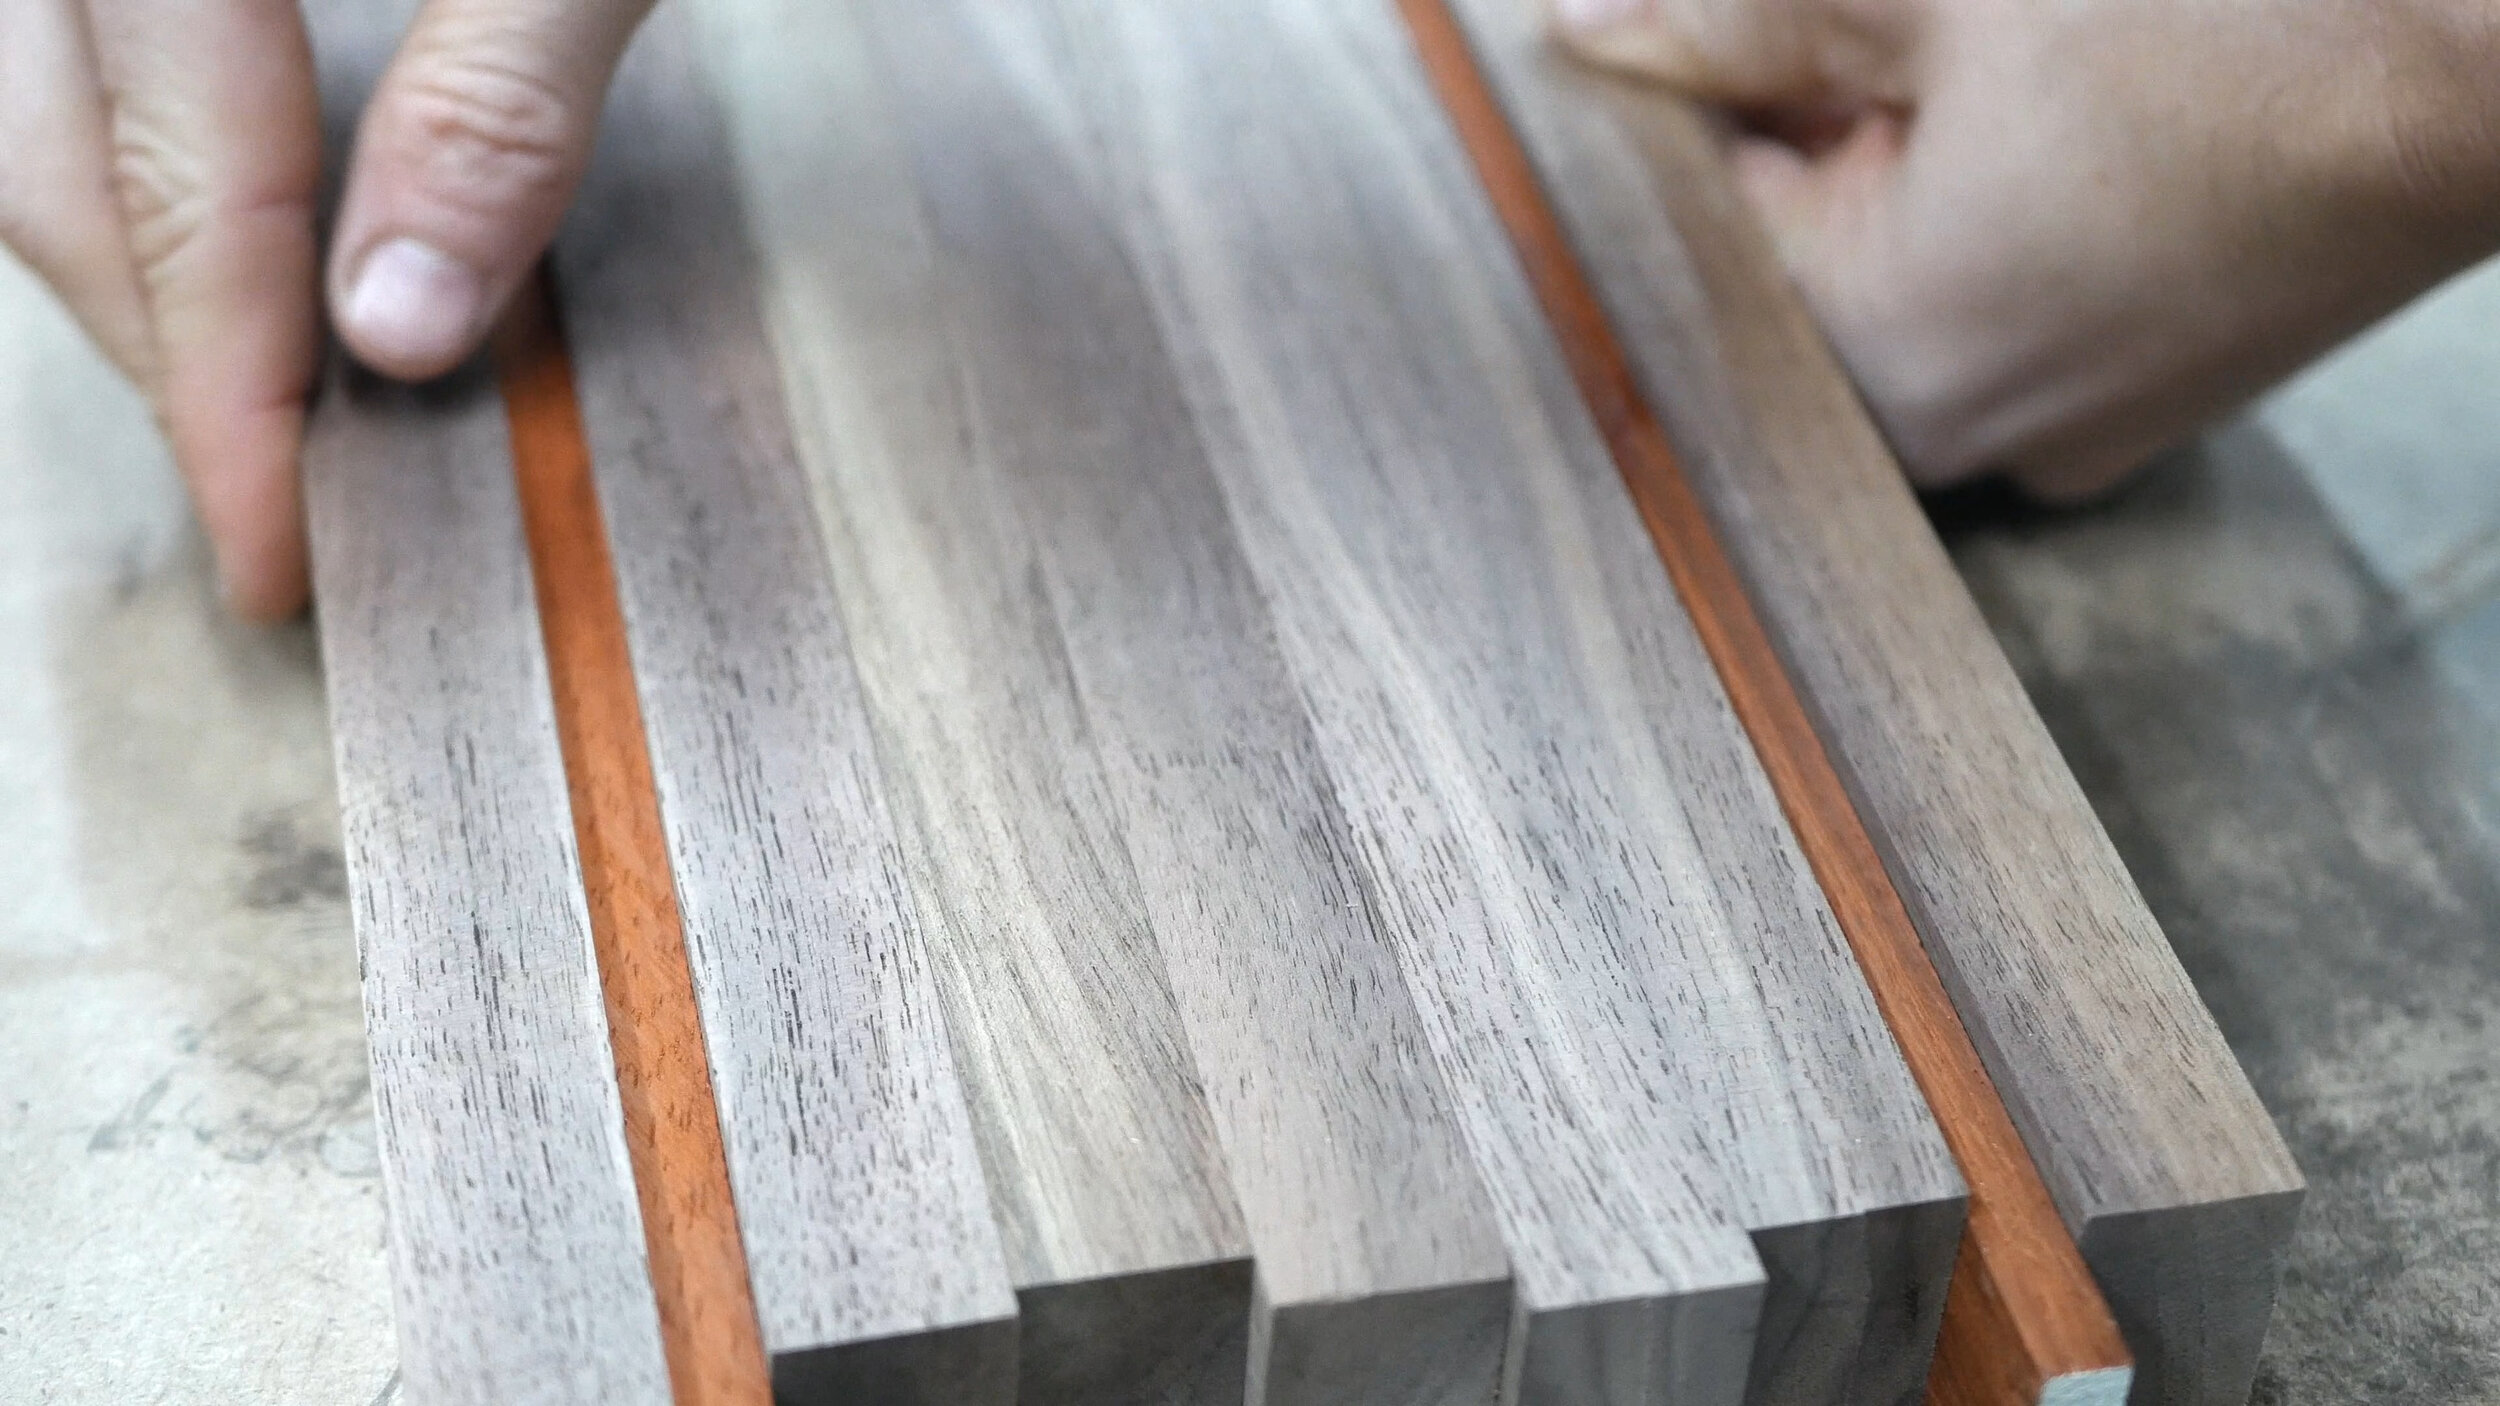
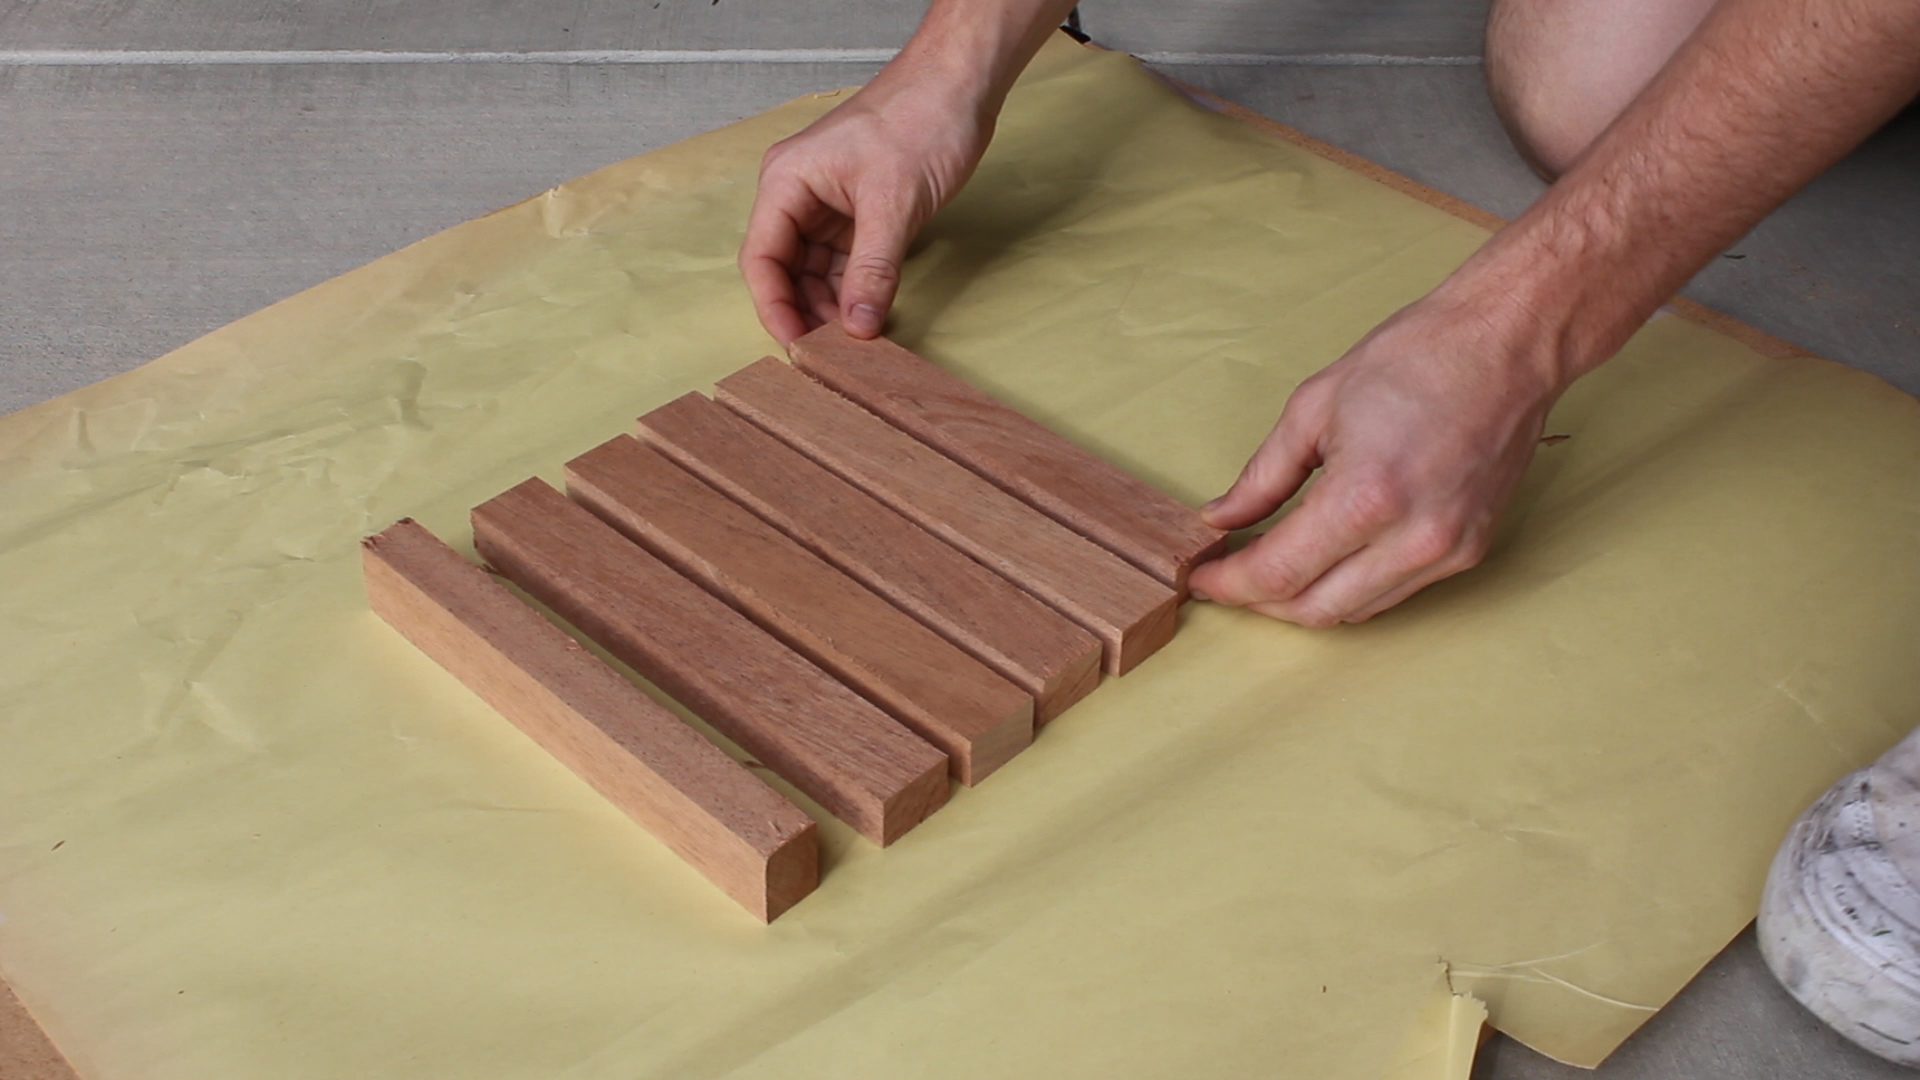
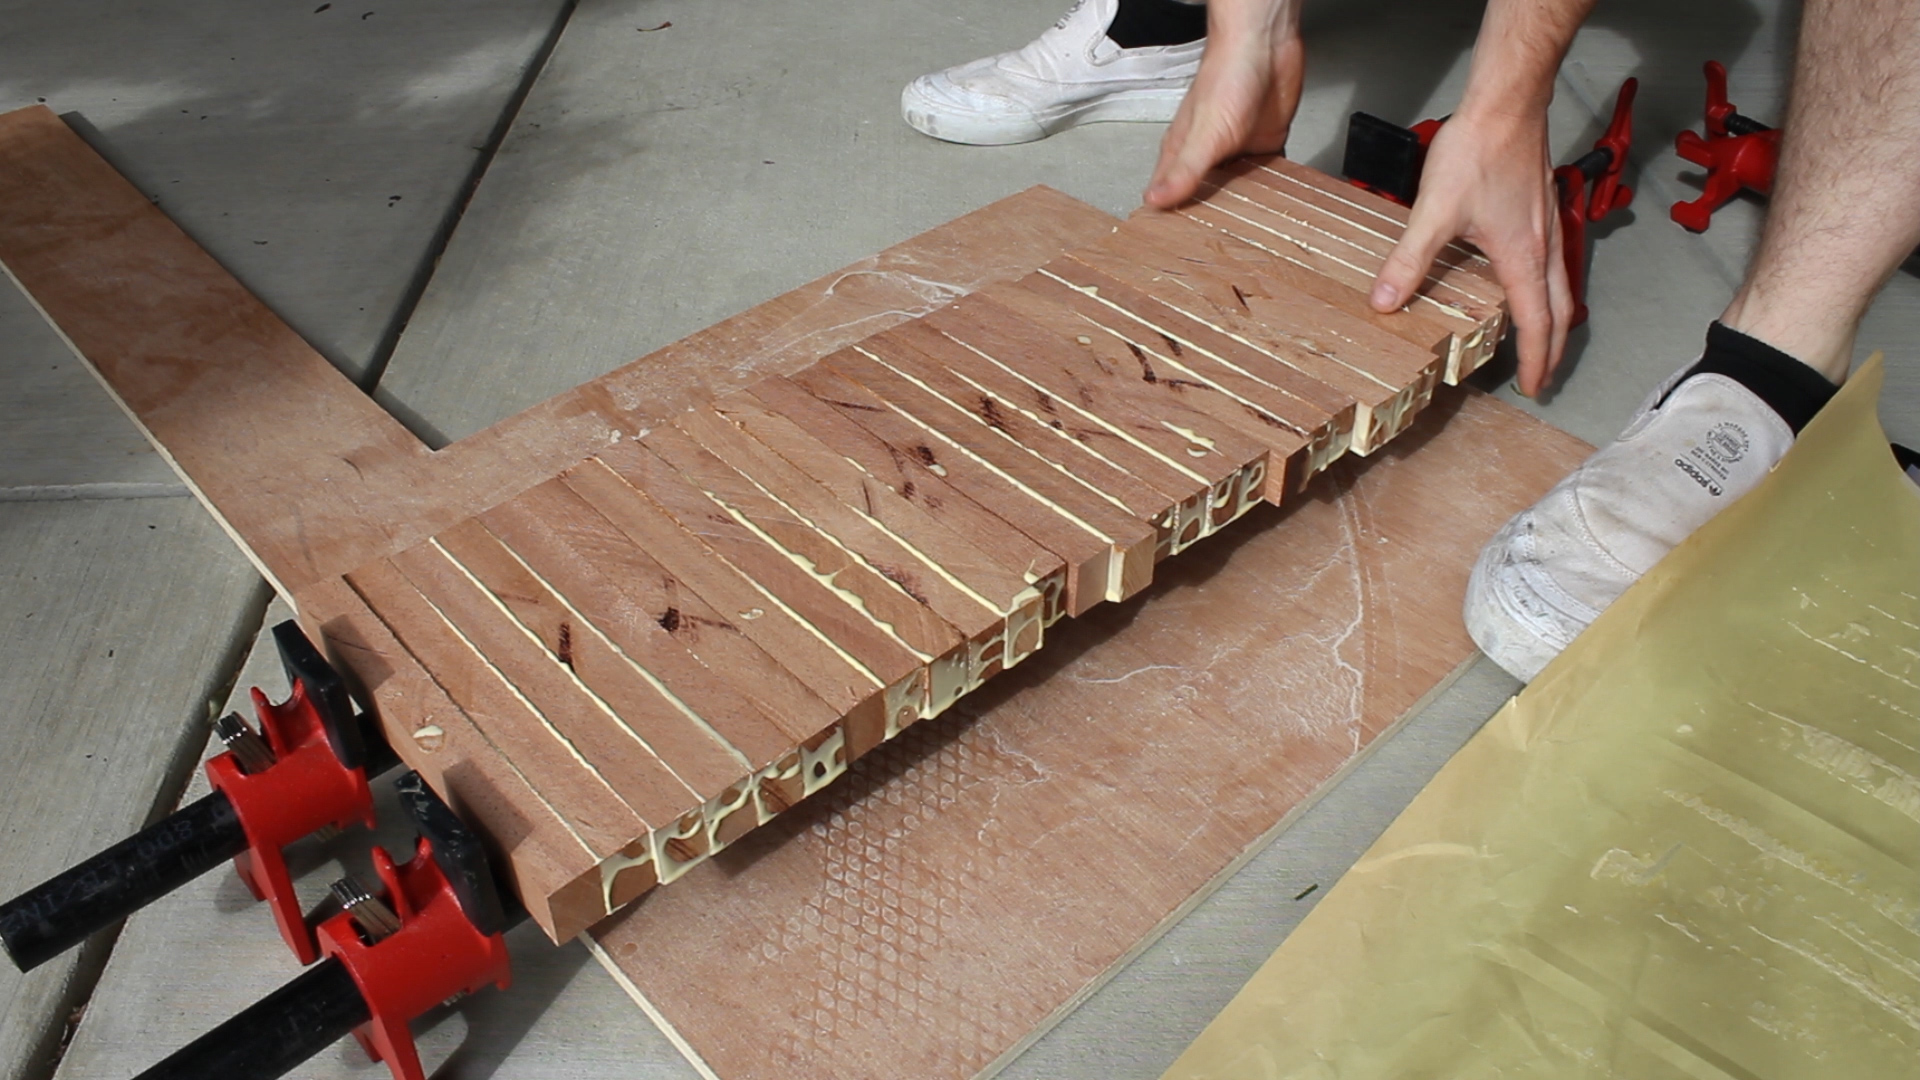
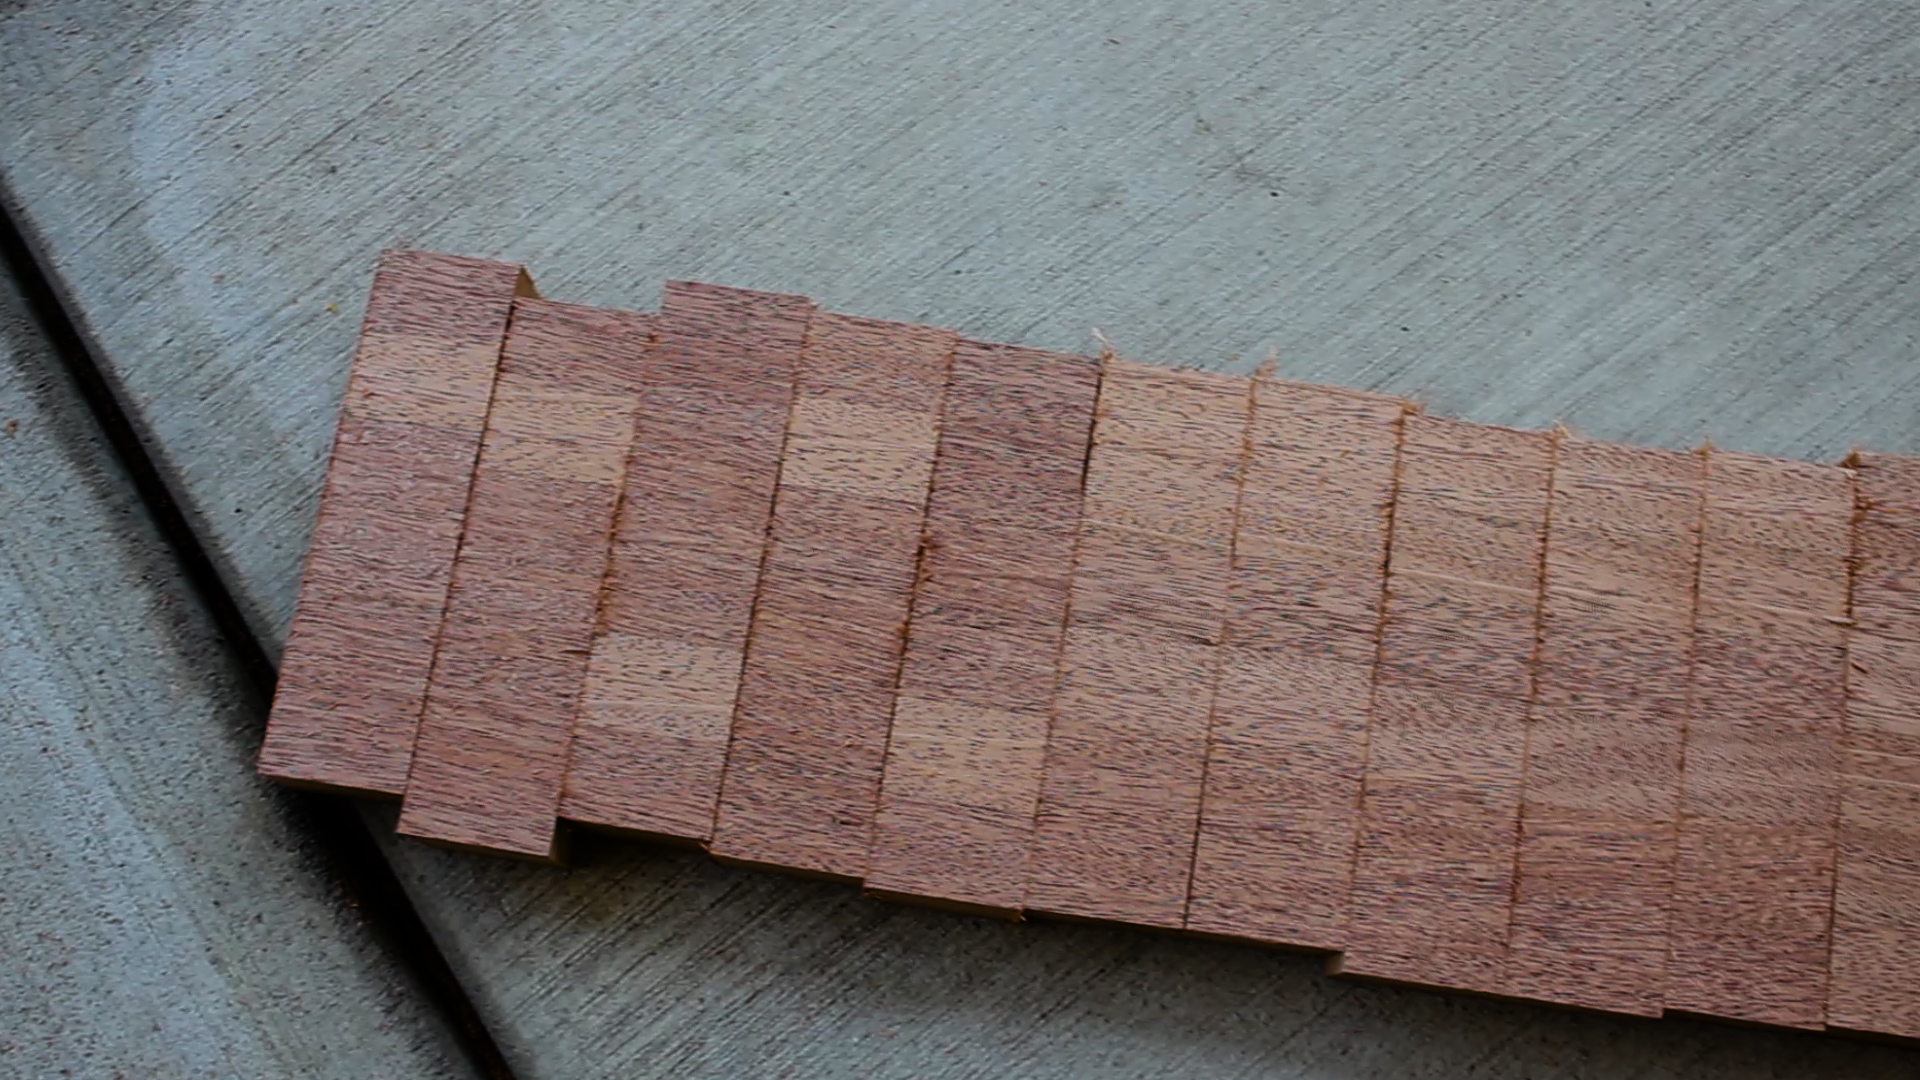
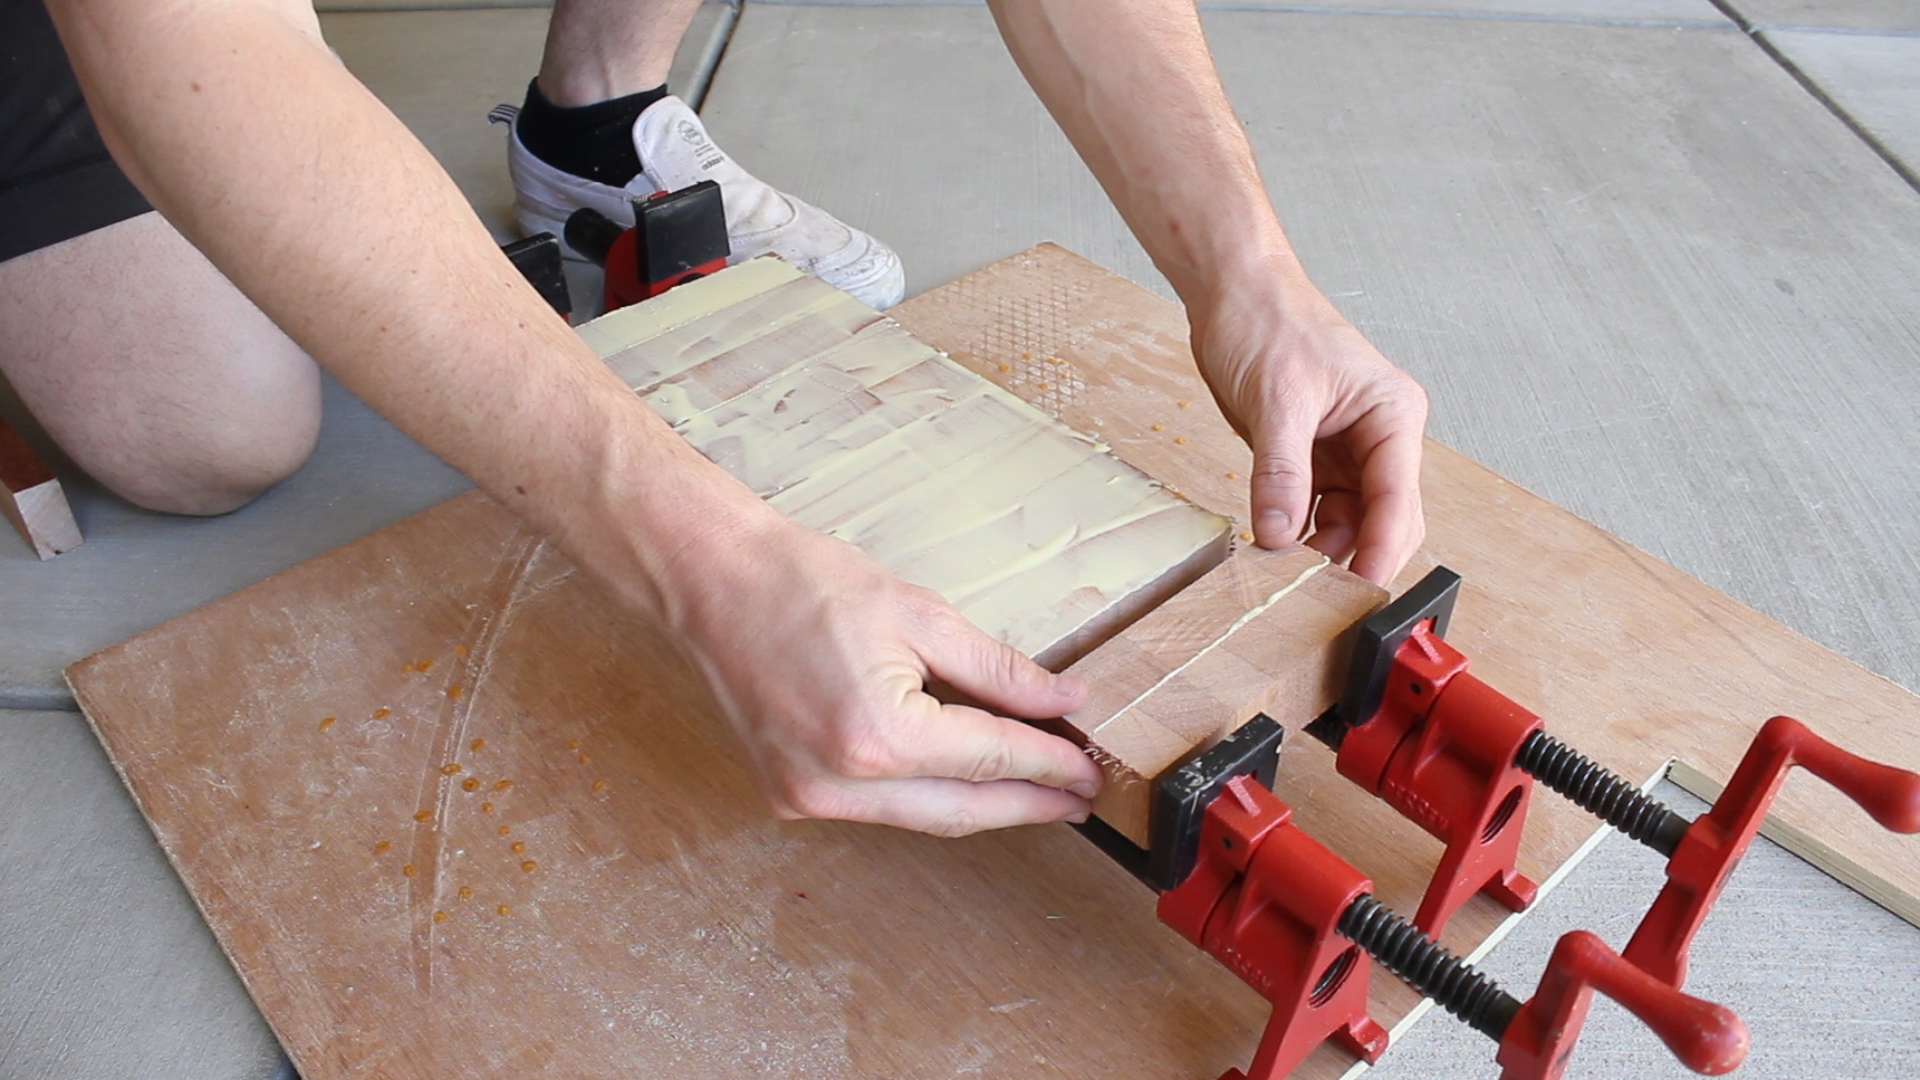
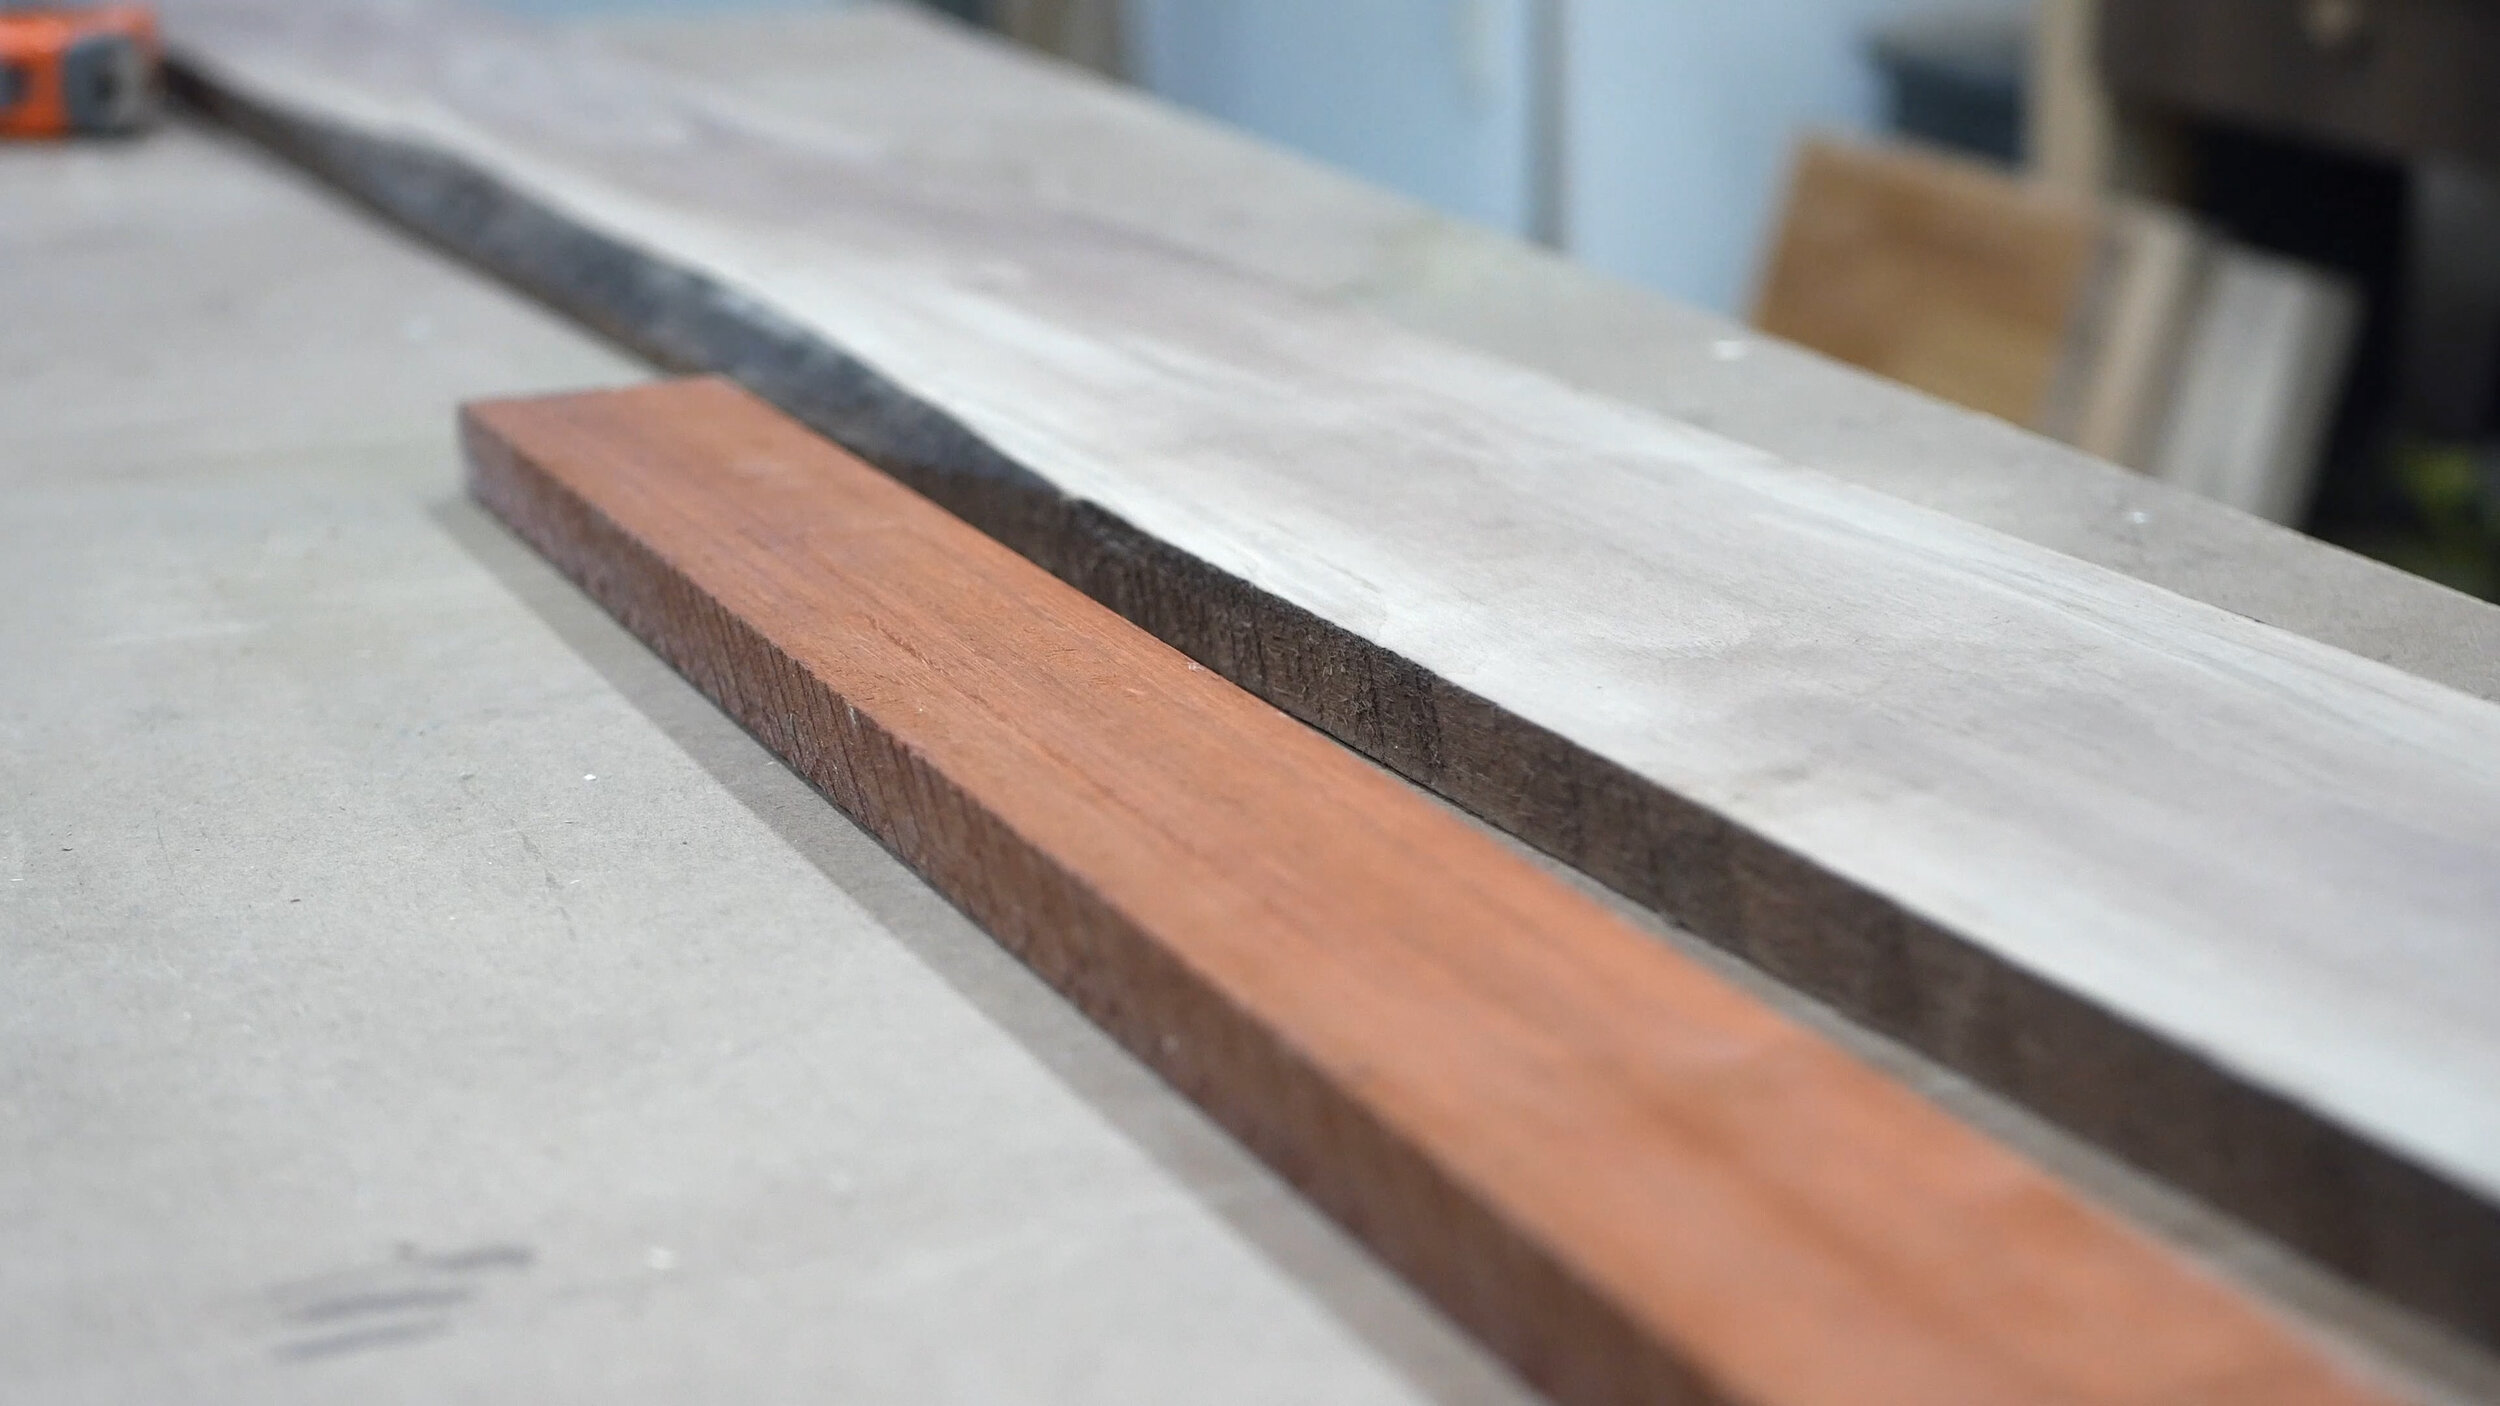
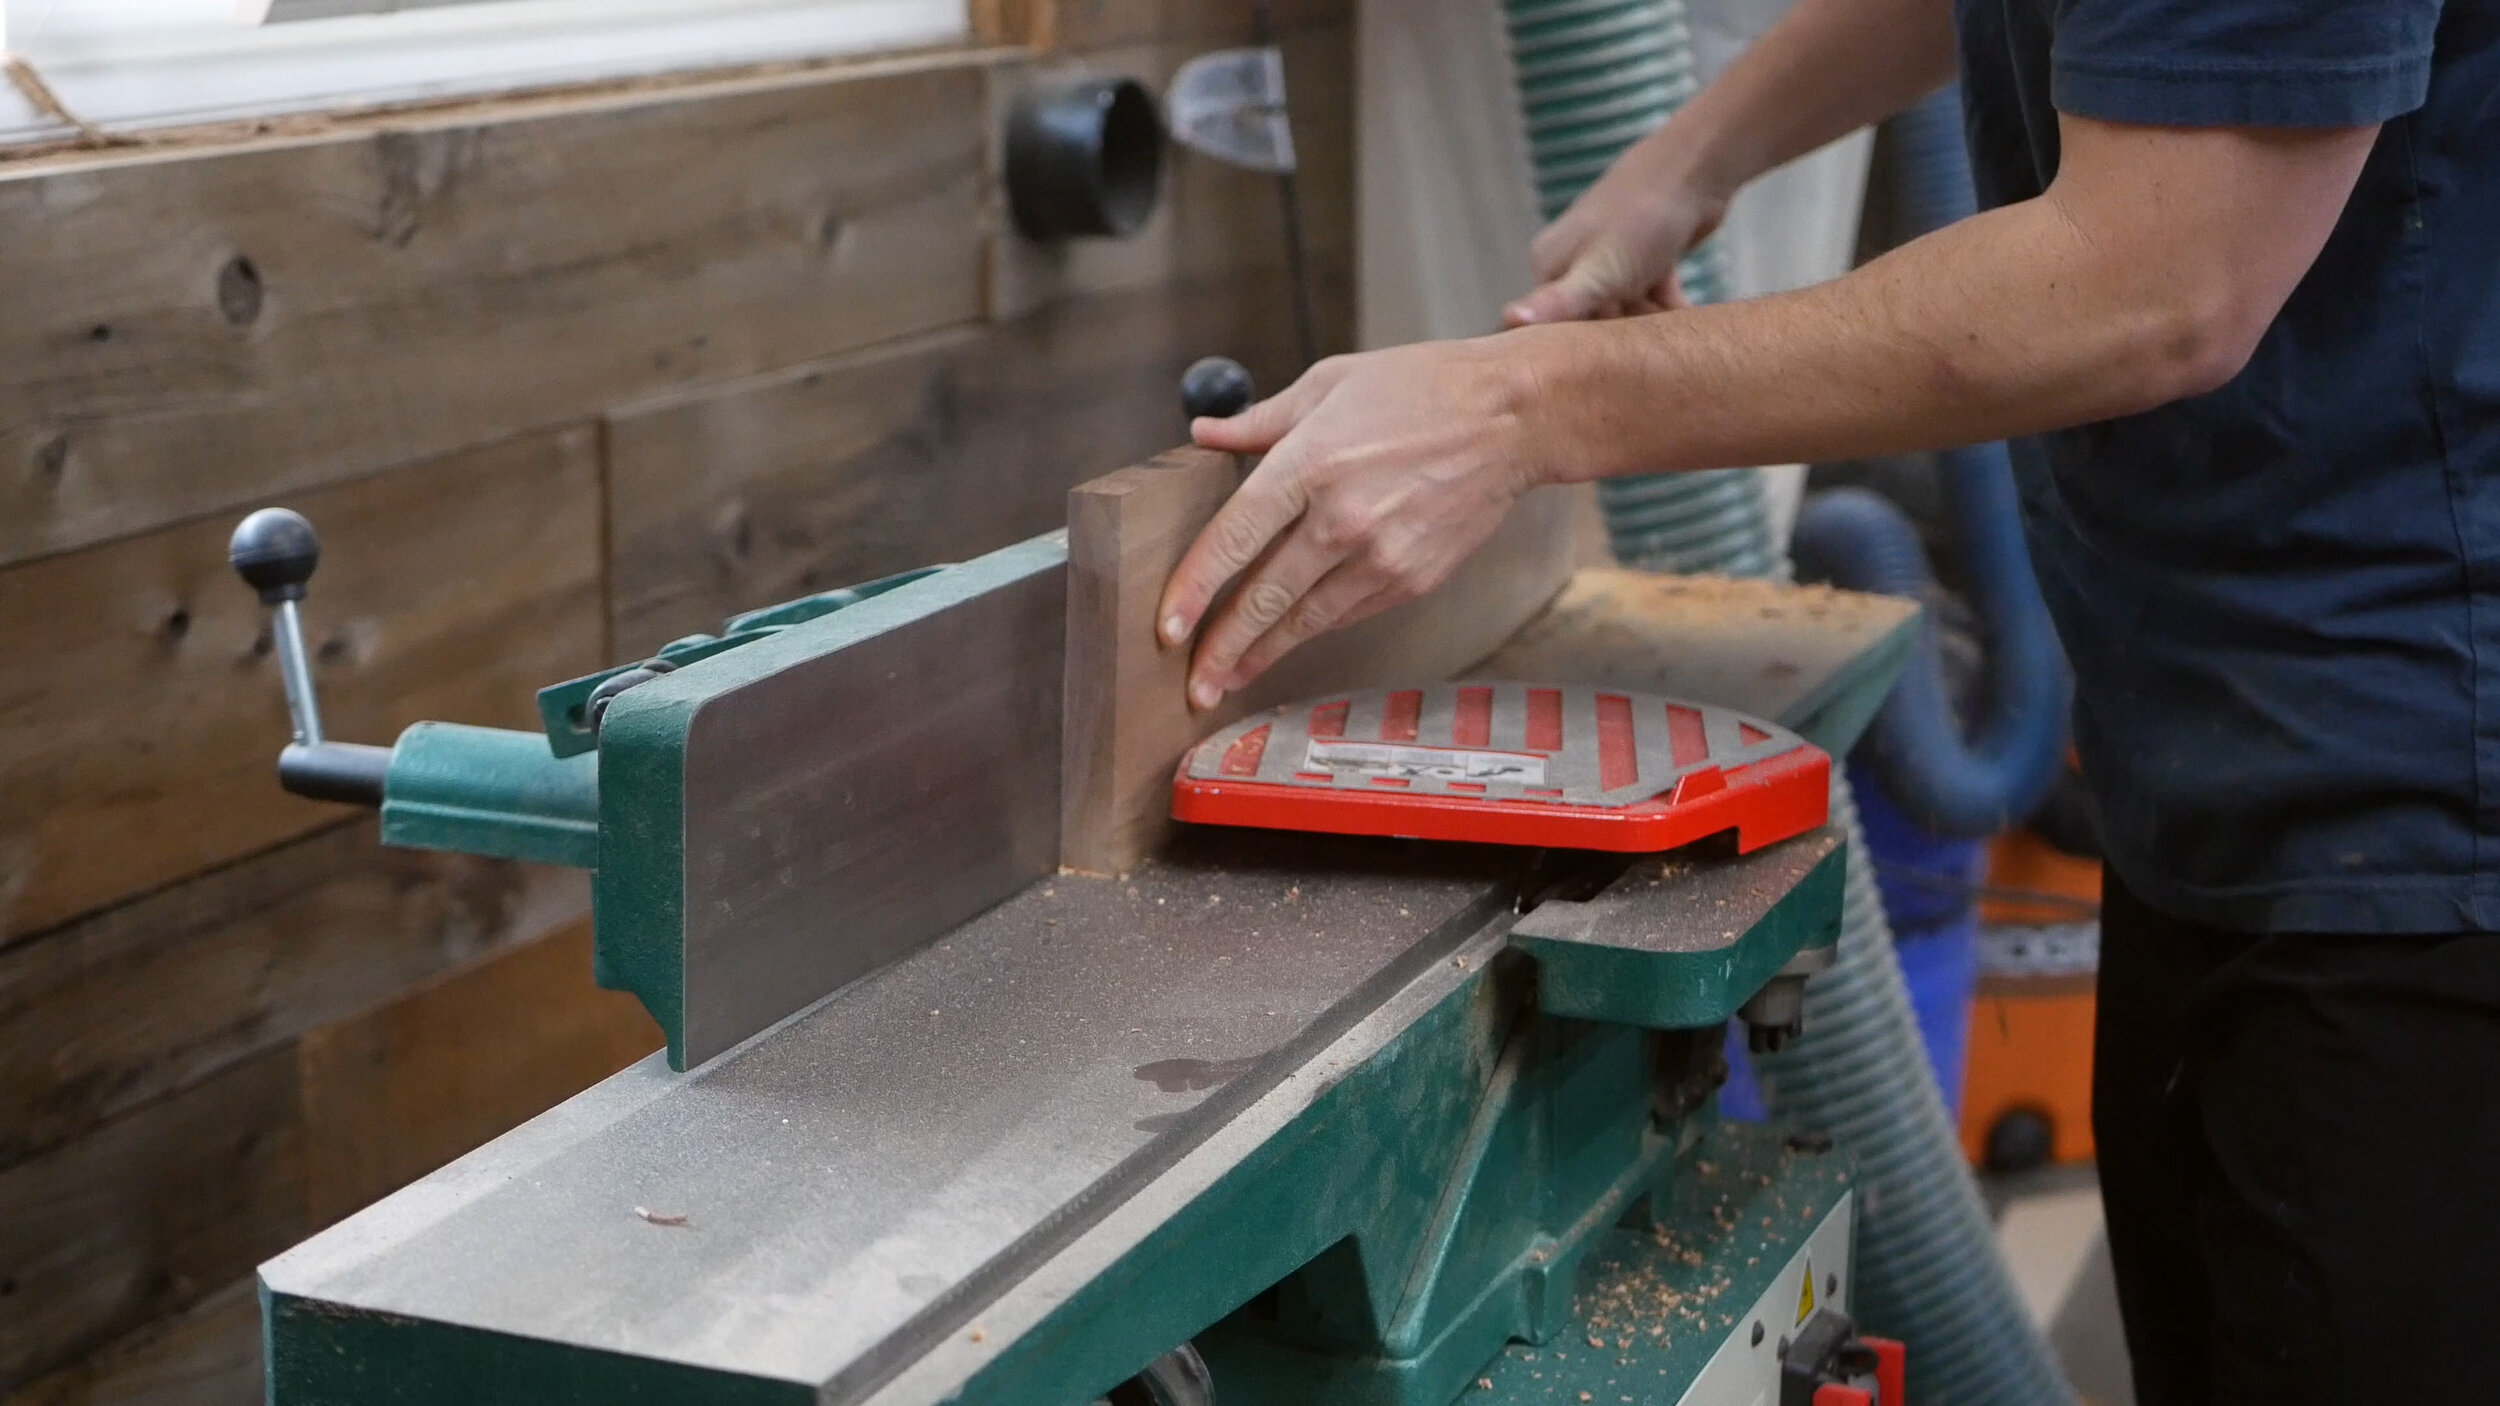
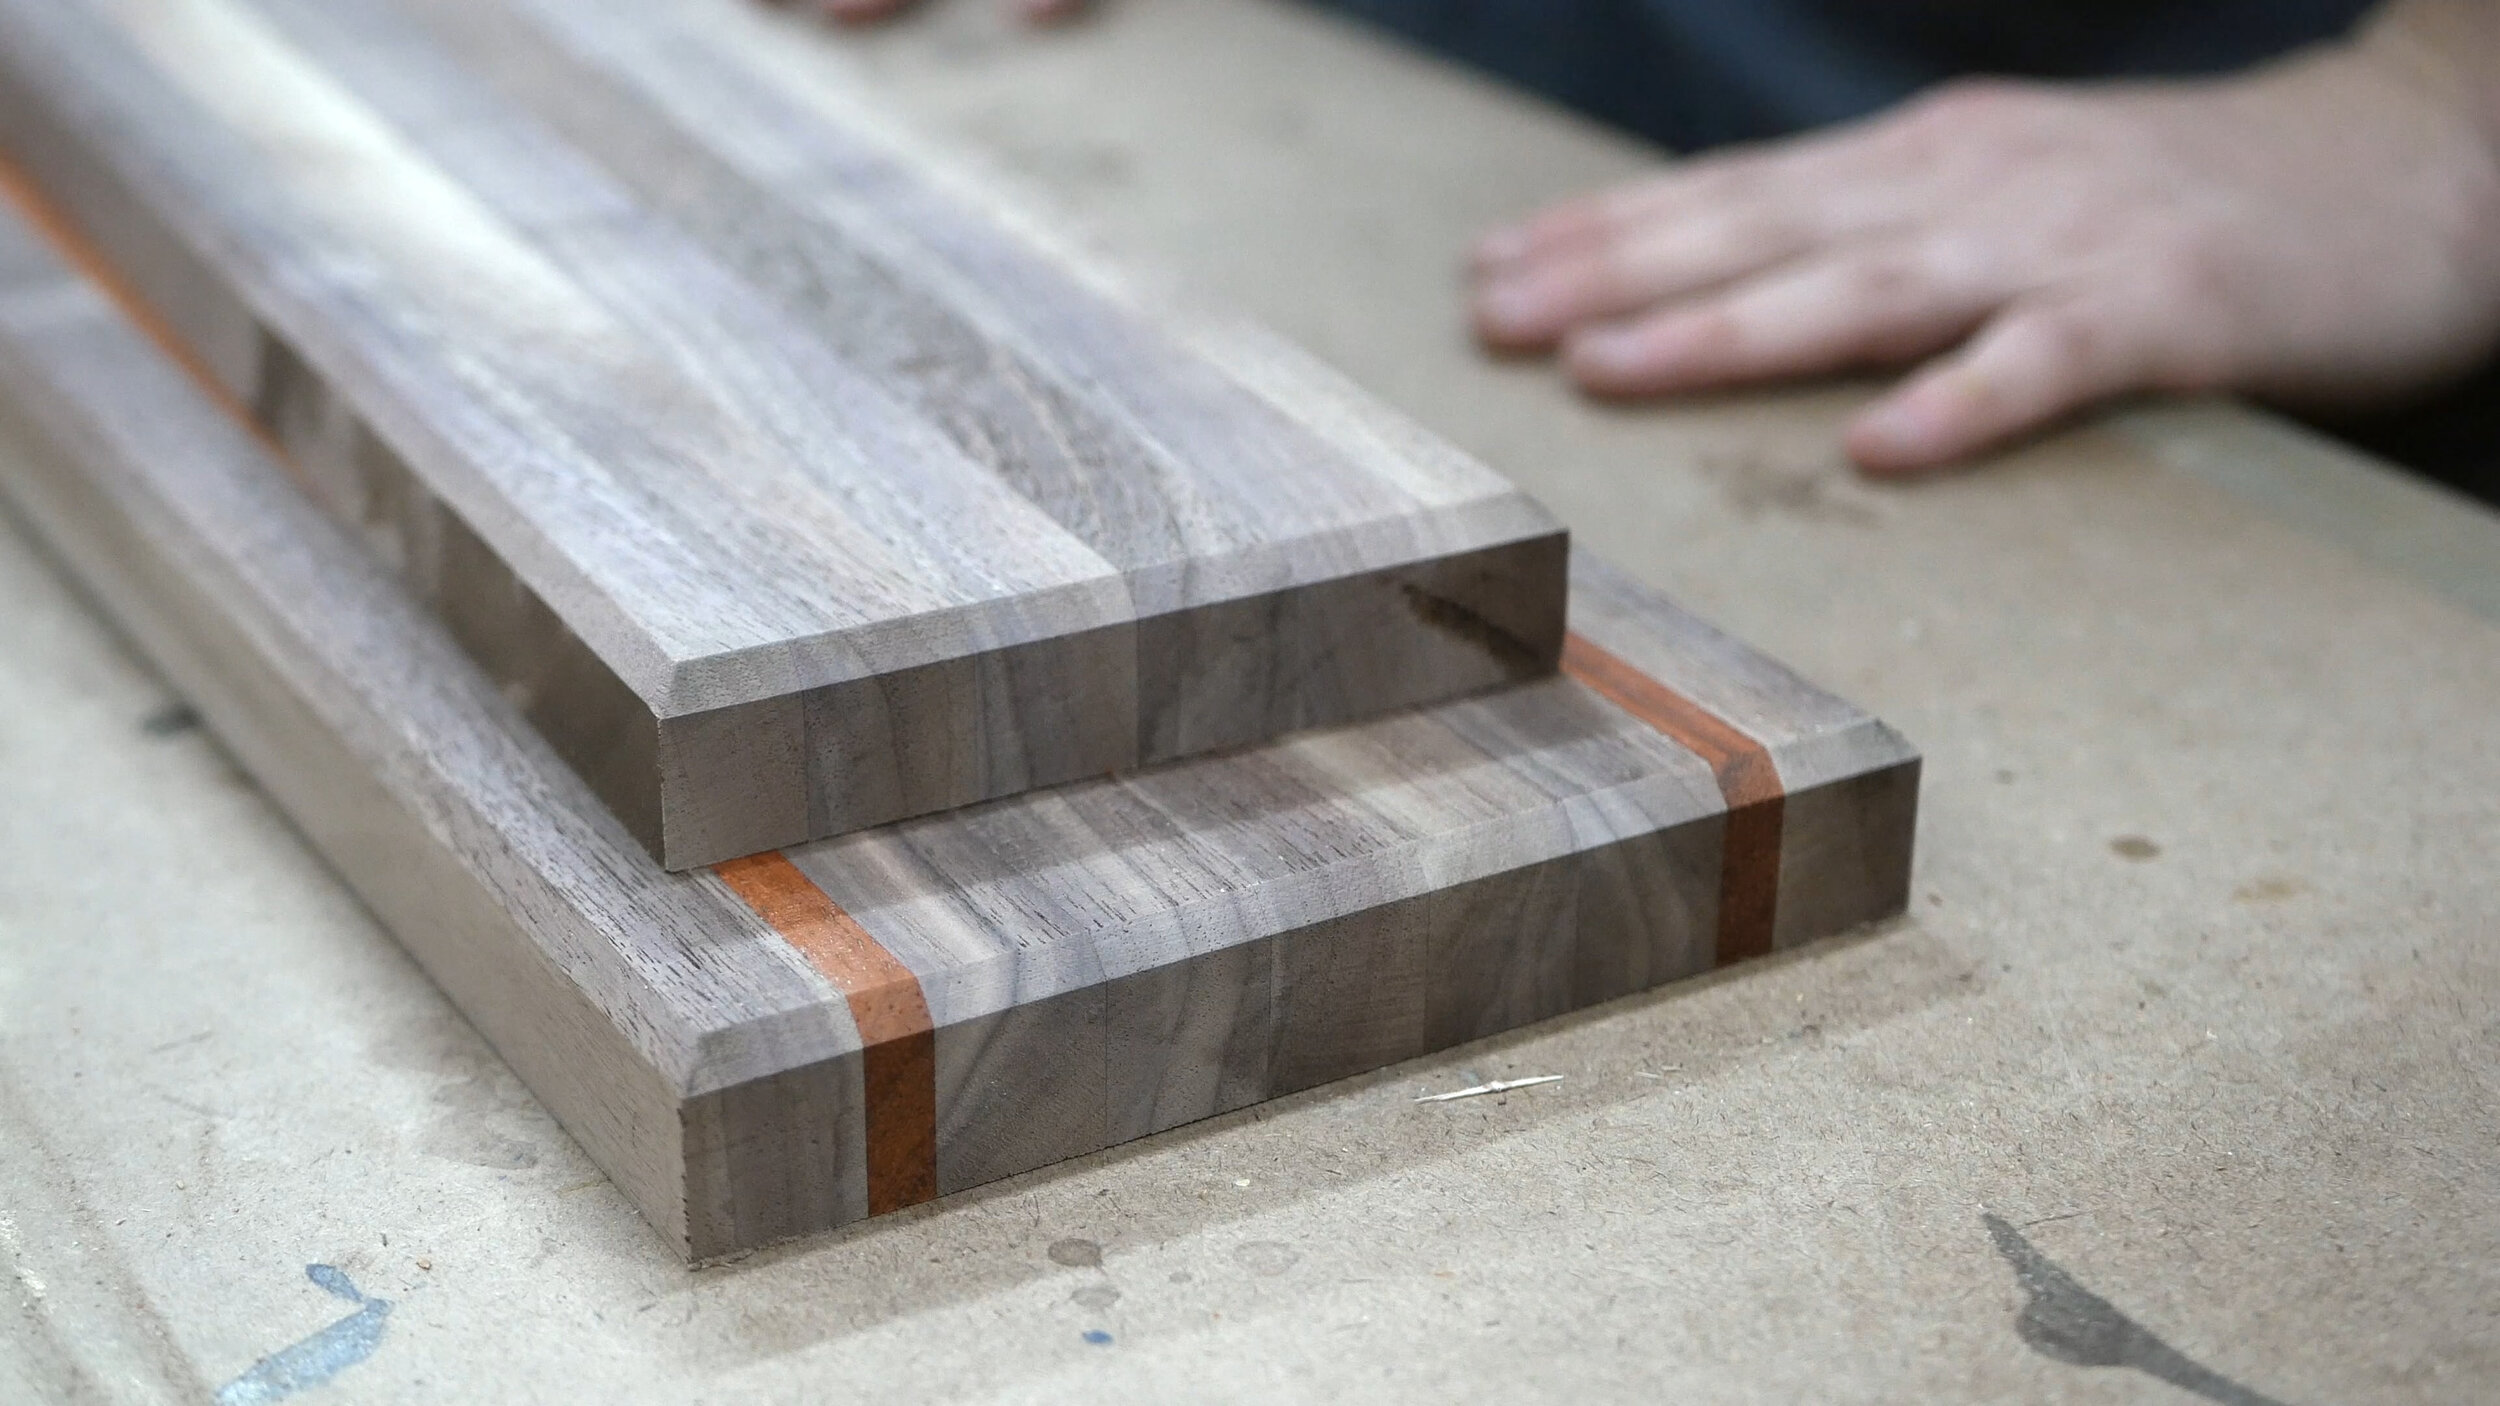
I was pretty limited on padauk, but I also wanted it to be more of an accent than a central component of the wooden look. I don’t have a band saw to resaw, so instead i did the Table saw splitting method. That left me with two thinner pieces that I then ran through the planer and ripped in half on the table saw. You can see how the pieces then fit in with the walnut. This was for the base only.
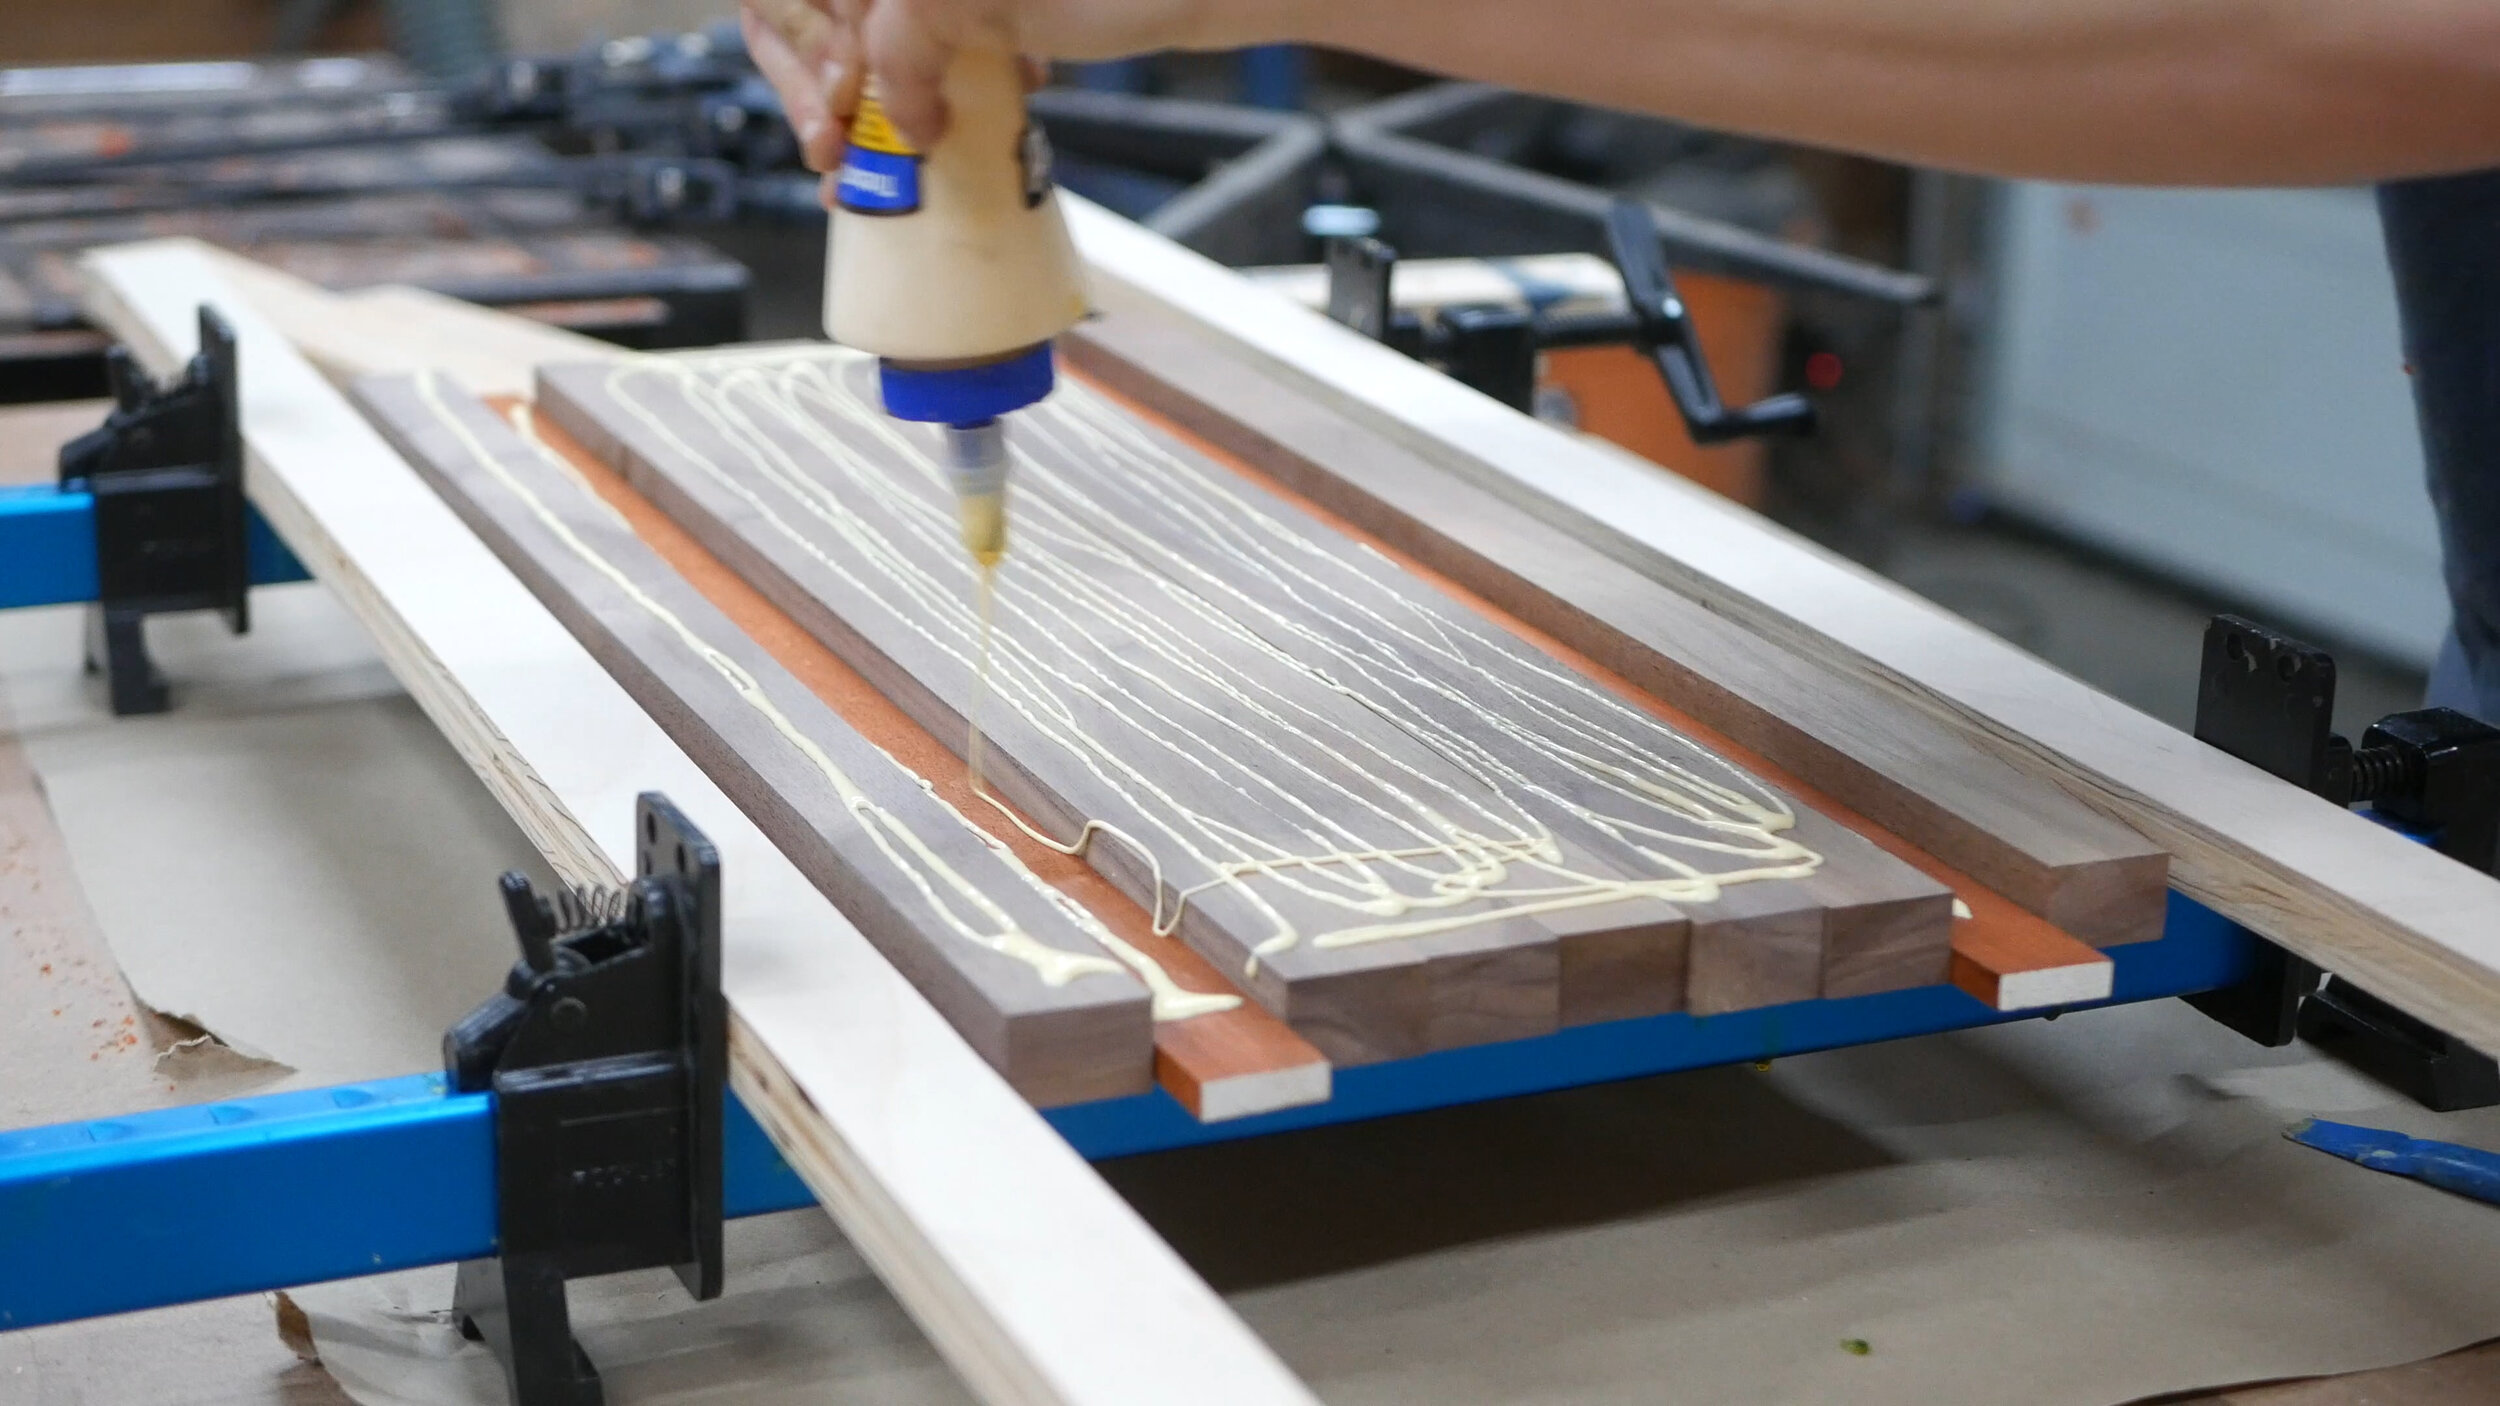

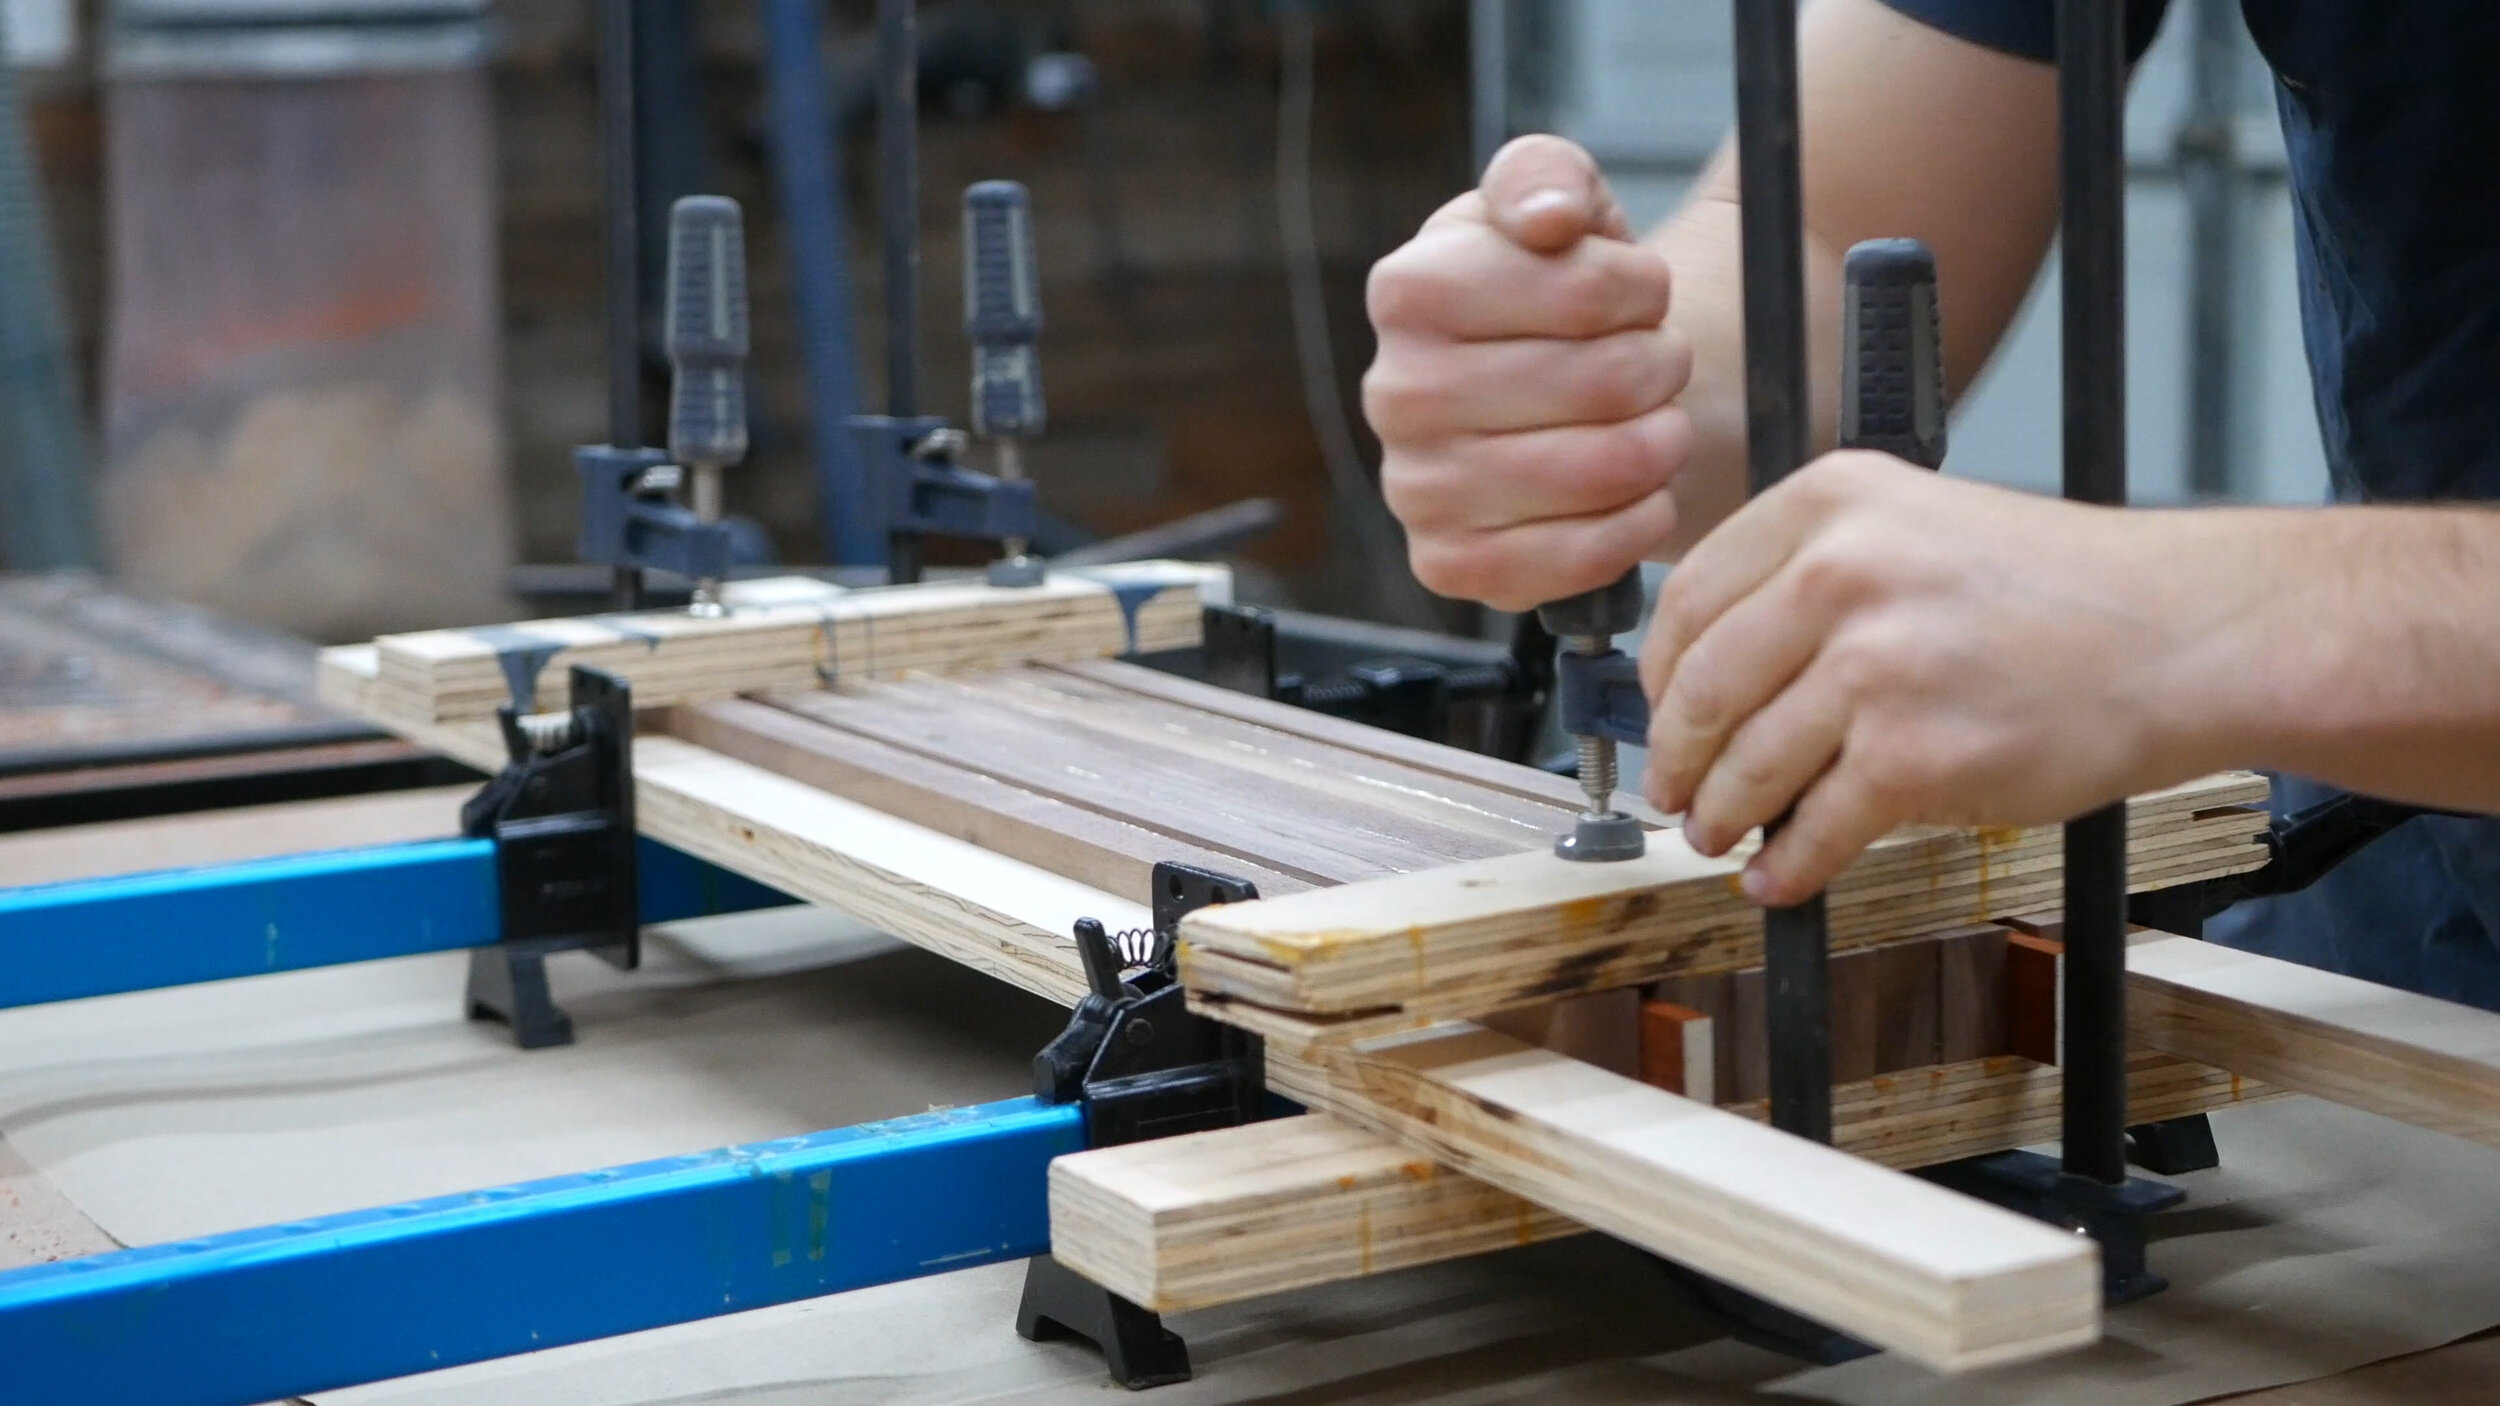
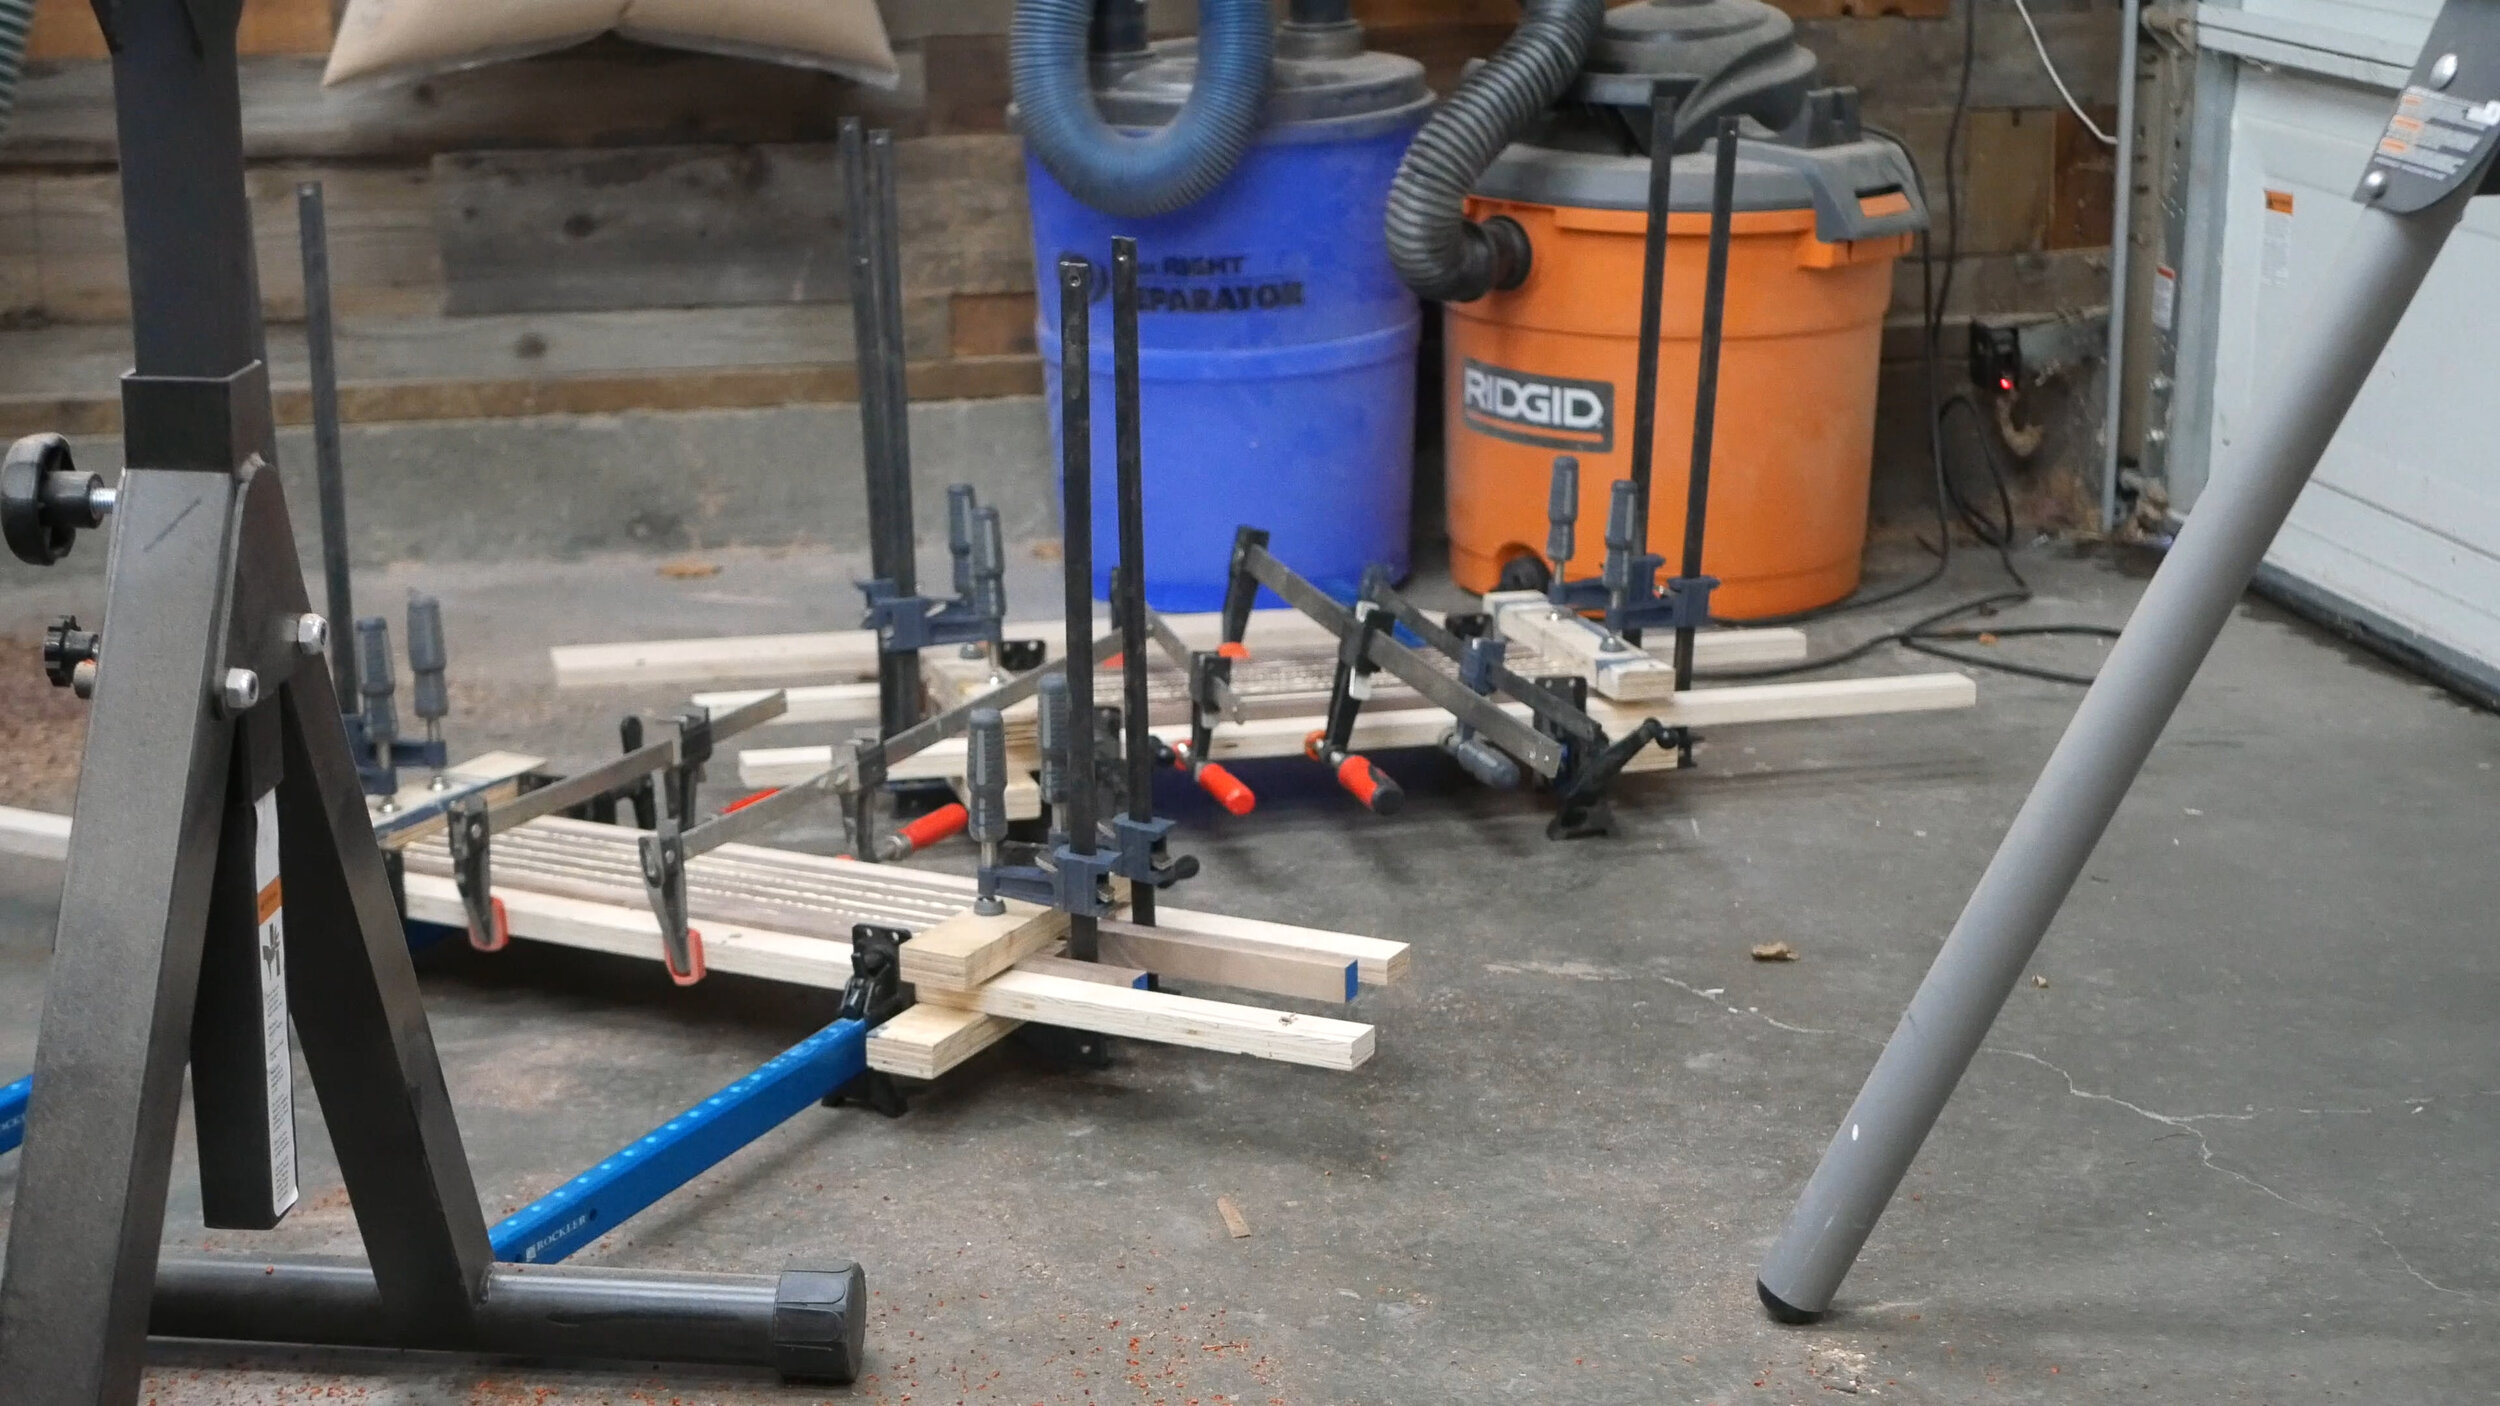
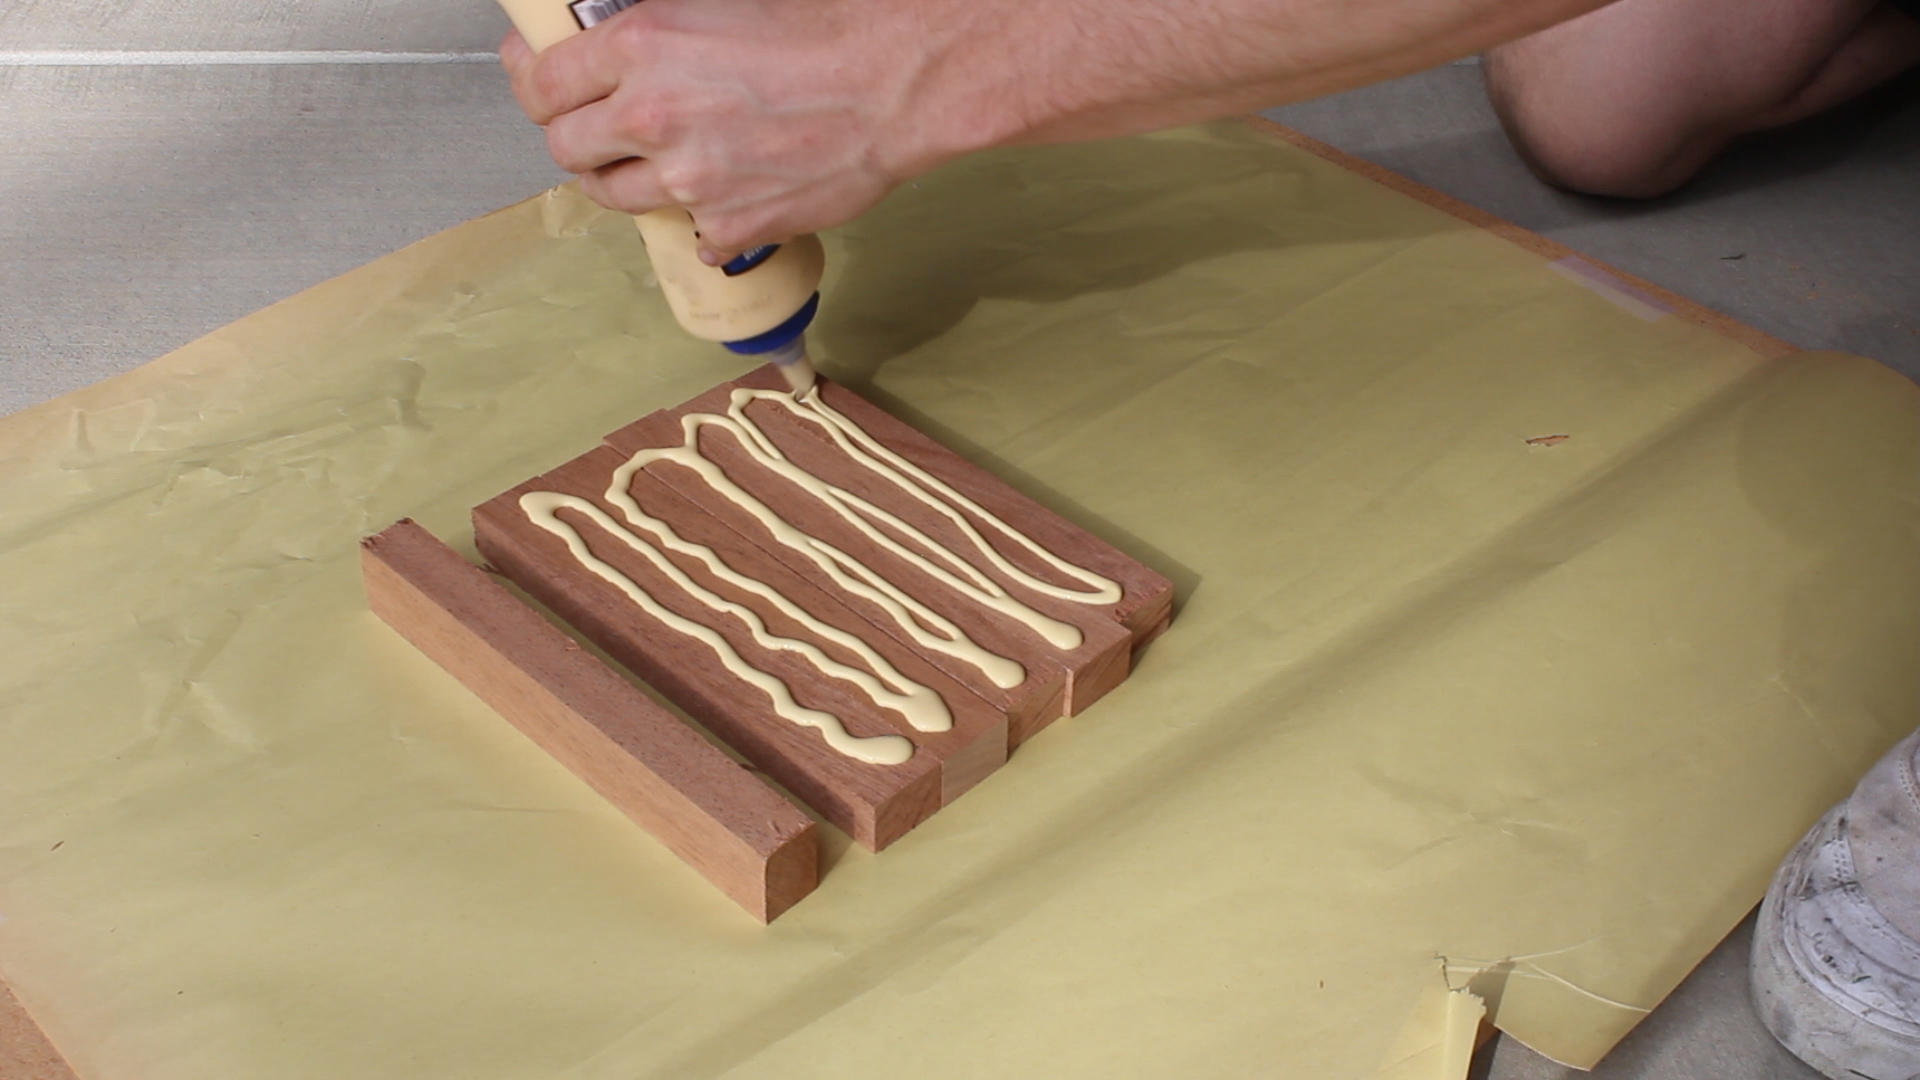
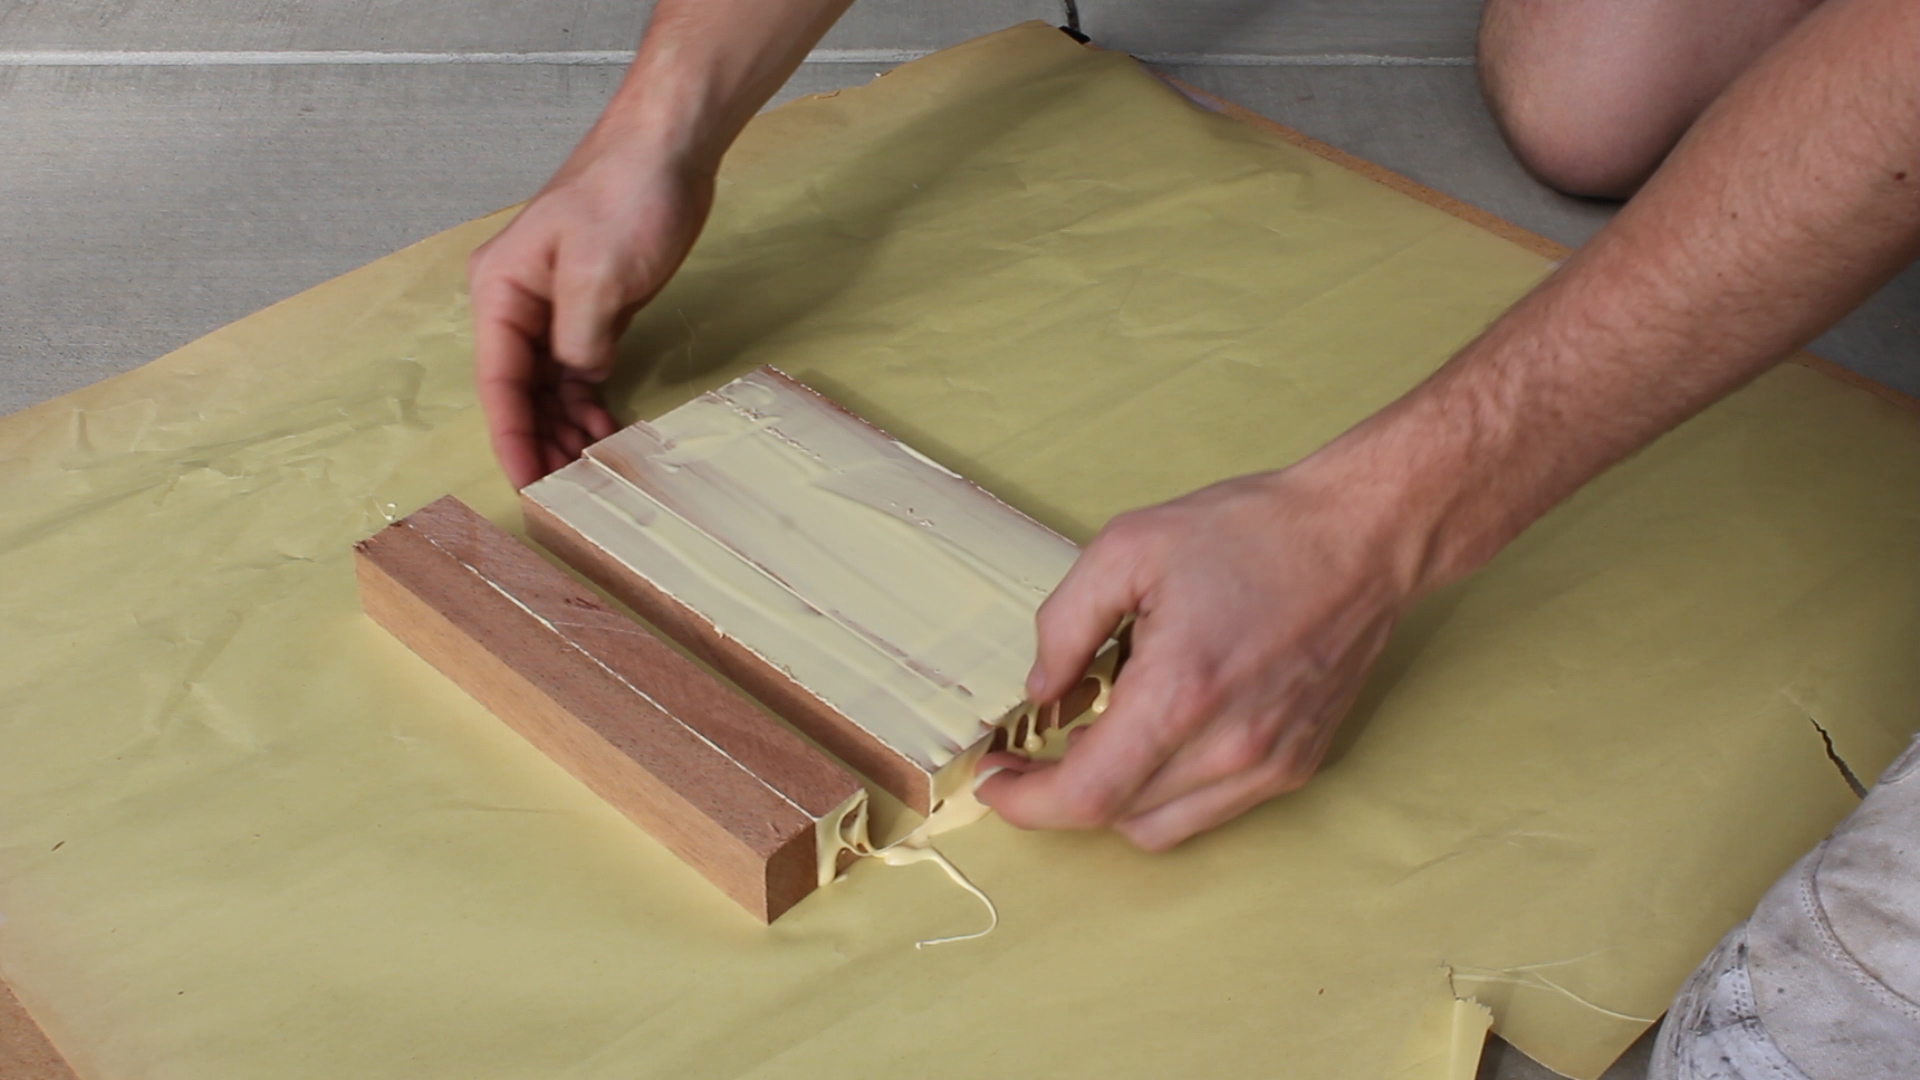
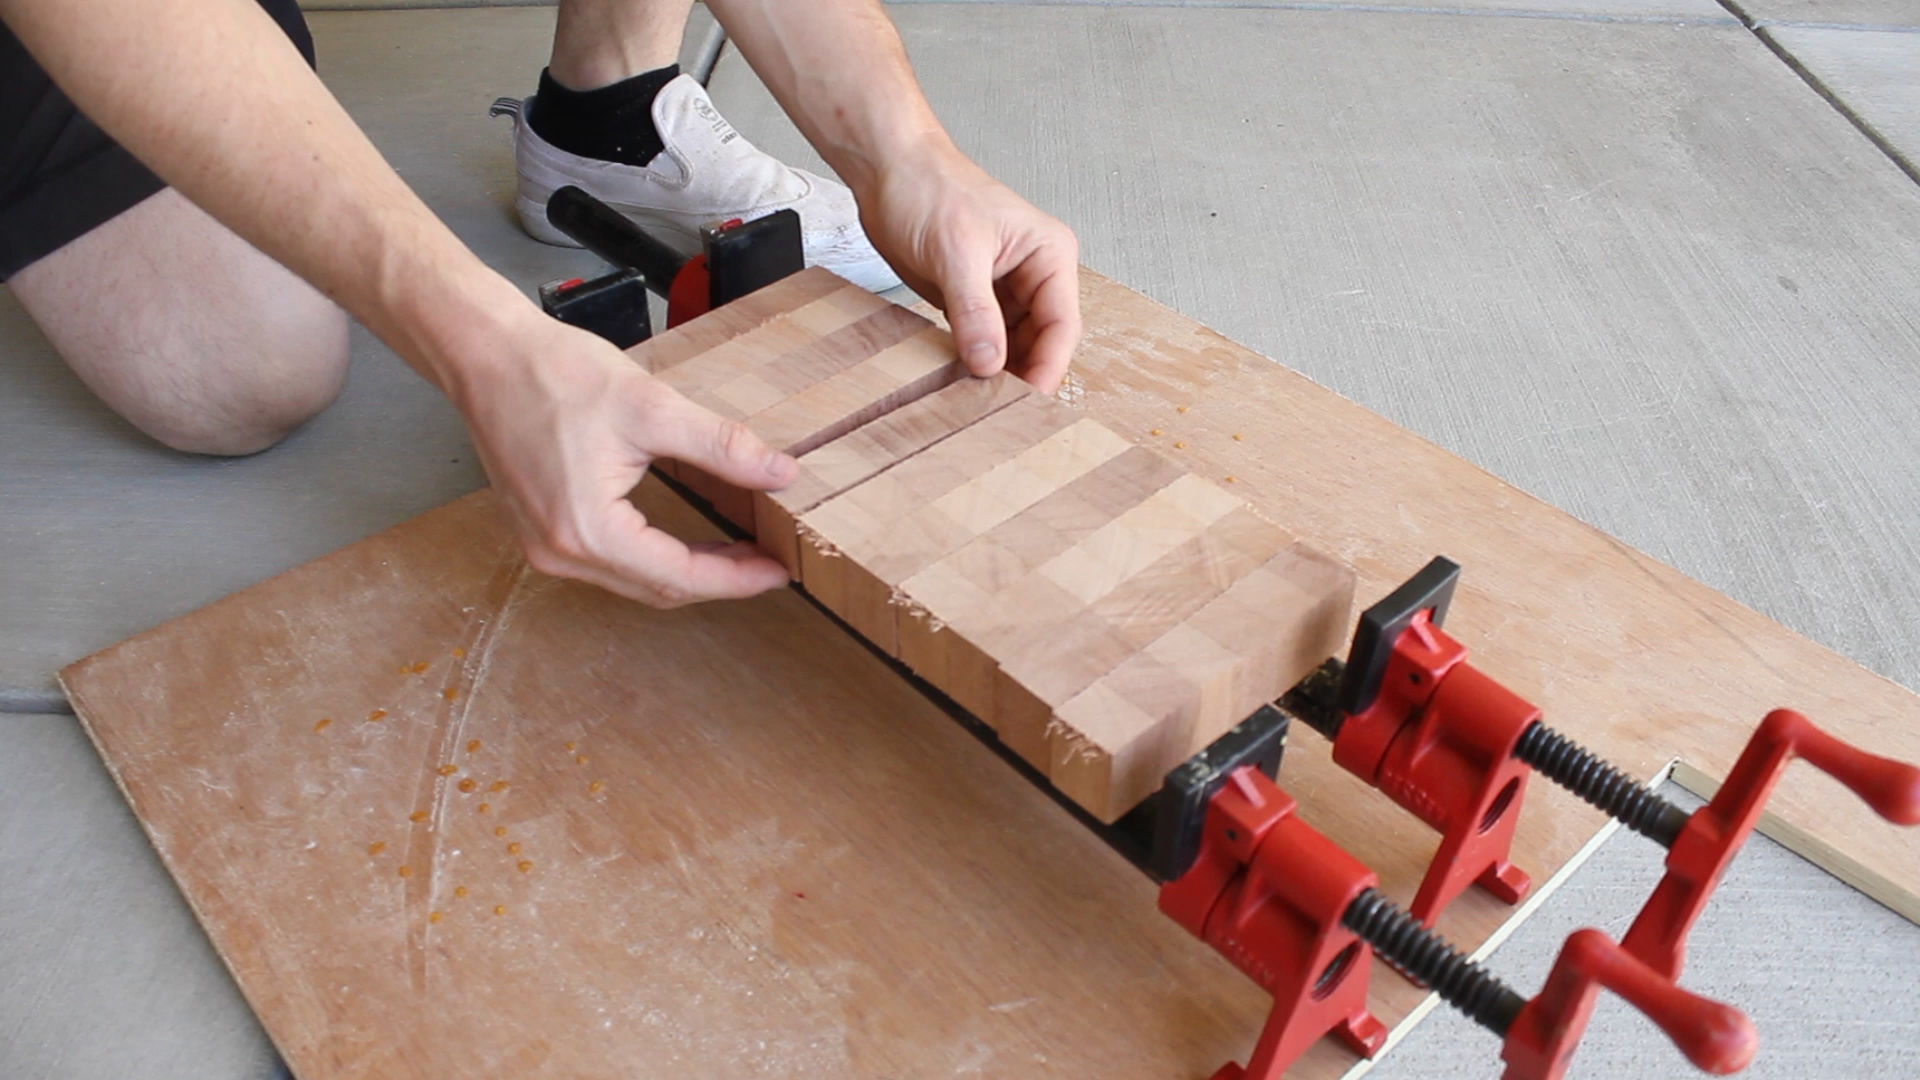
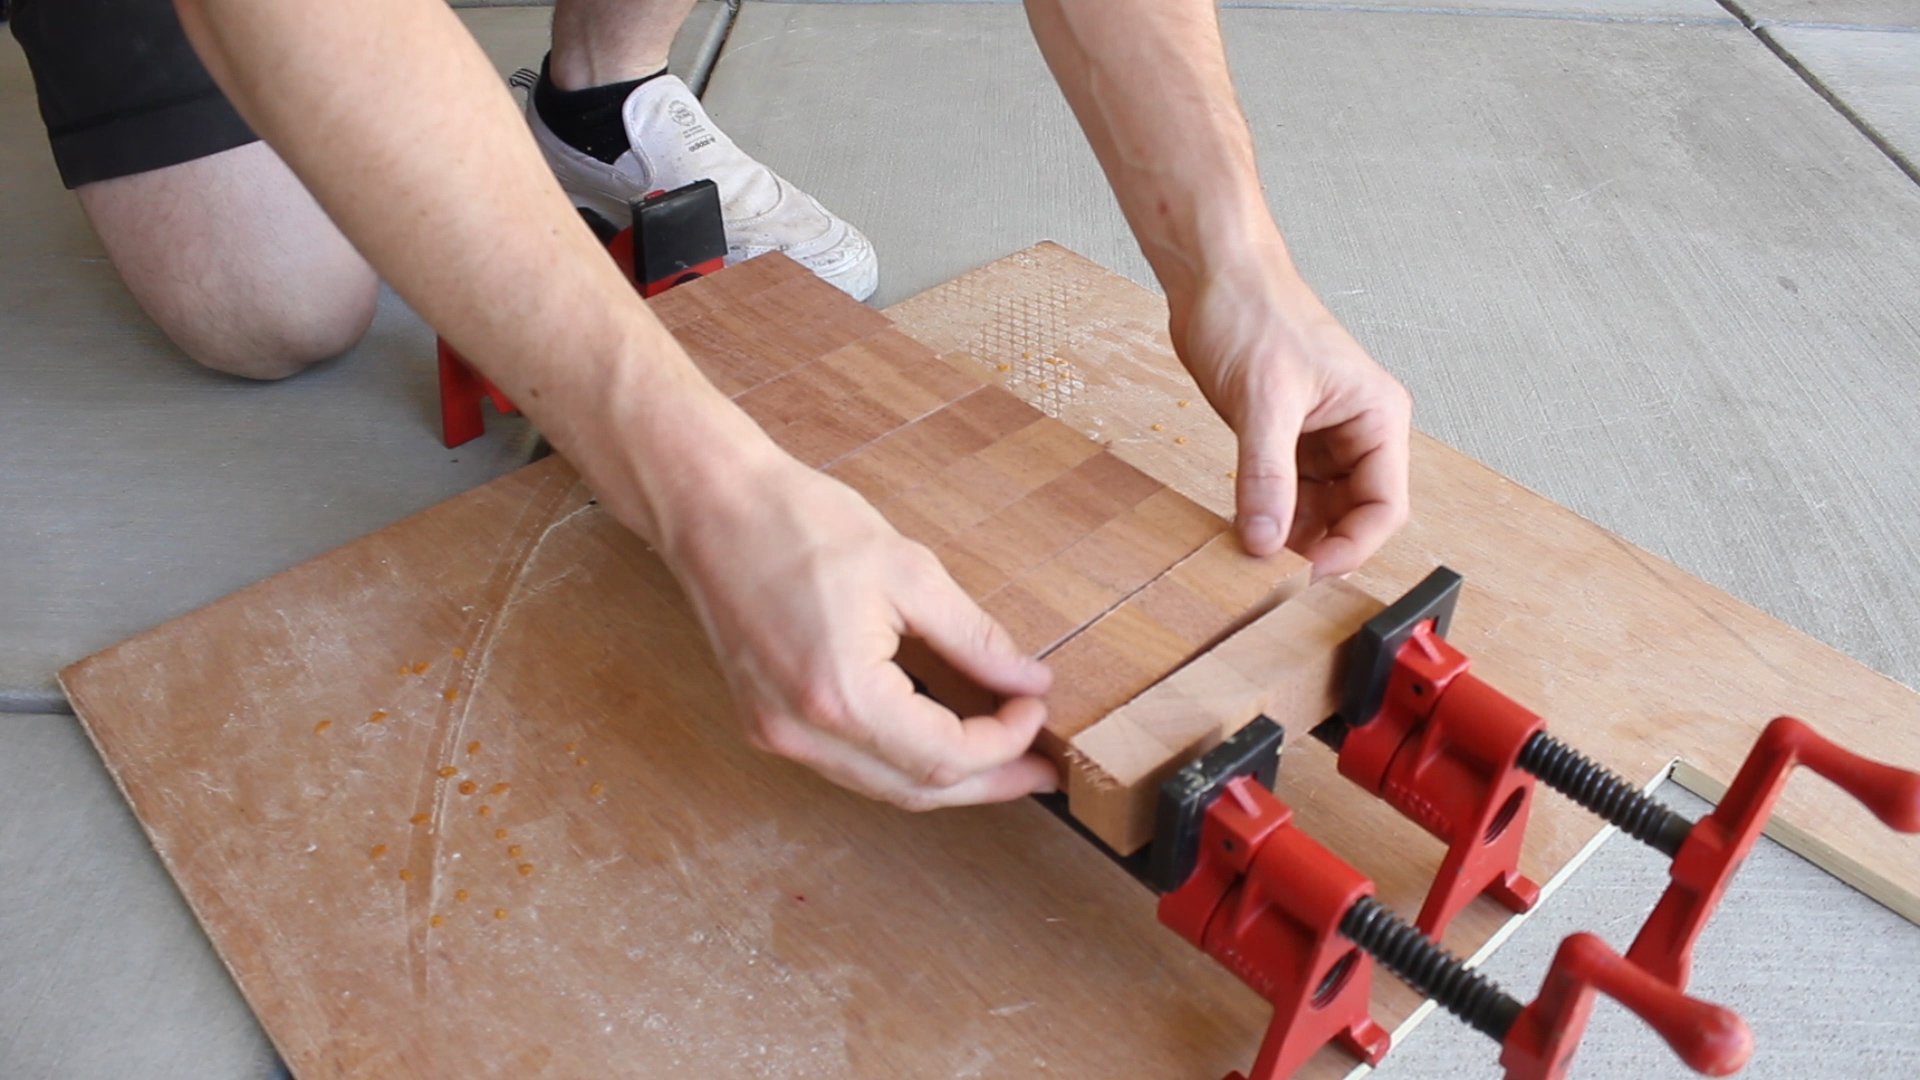
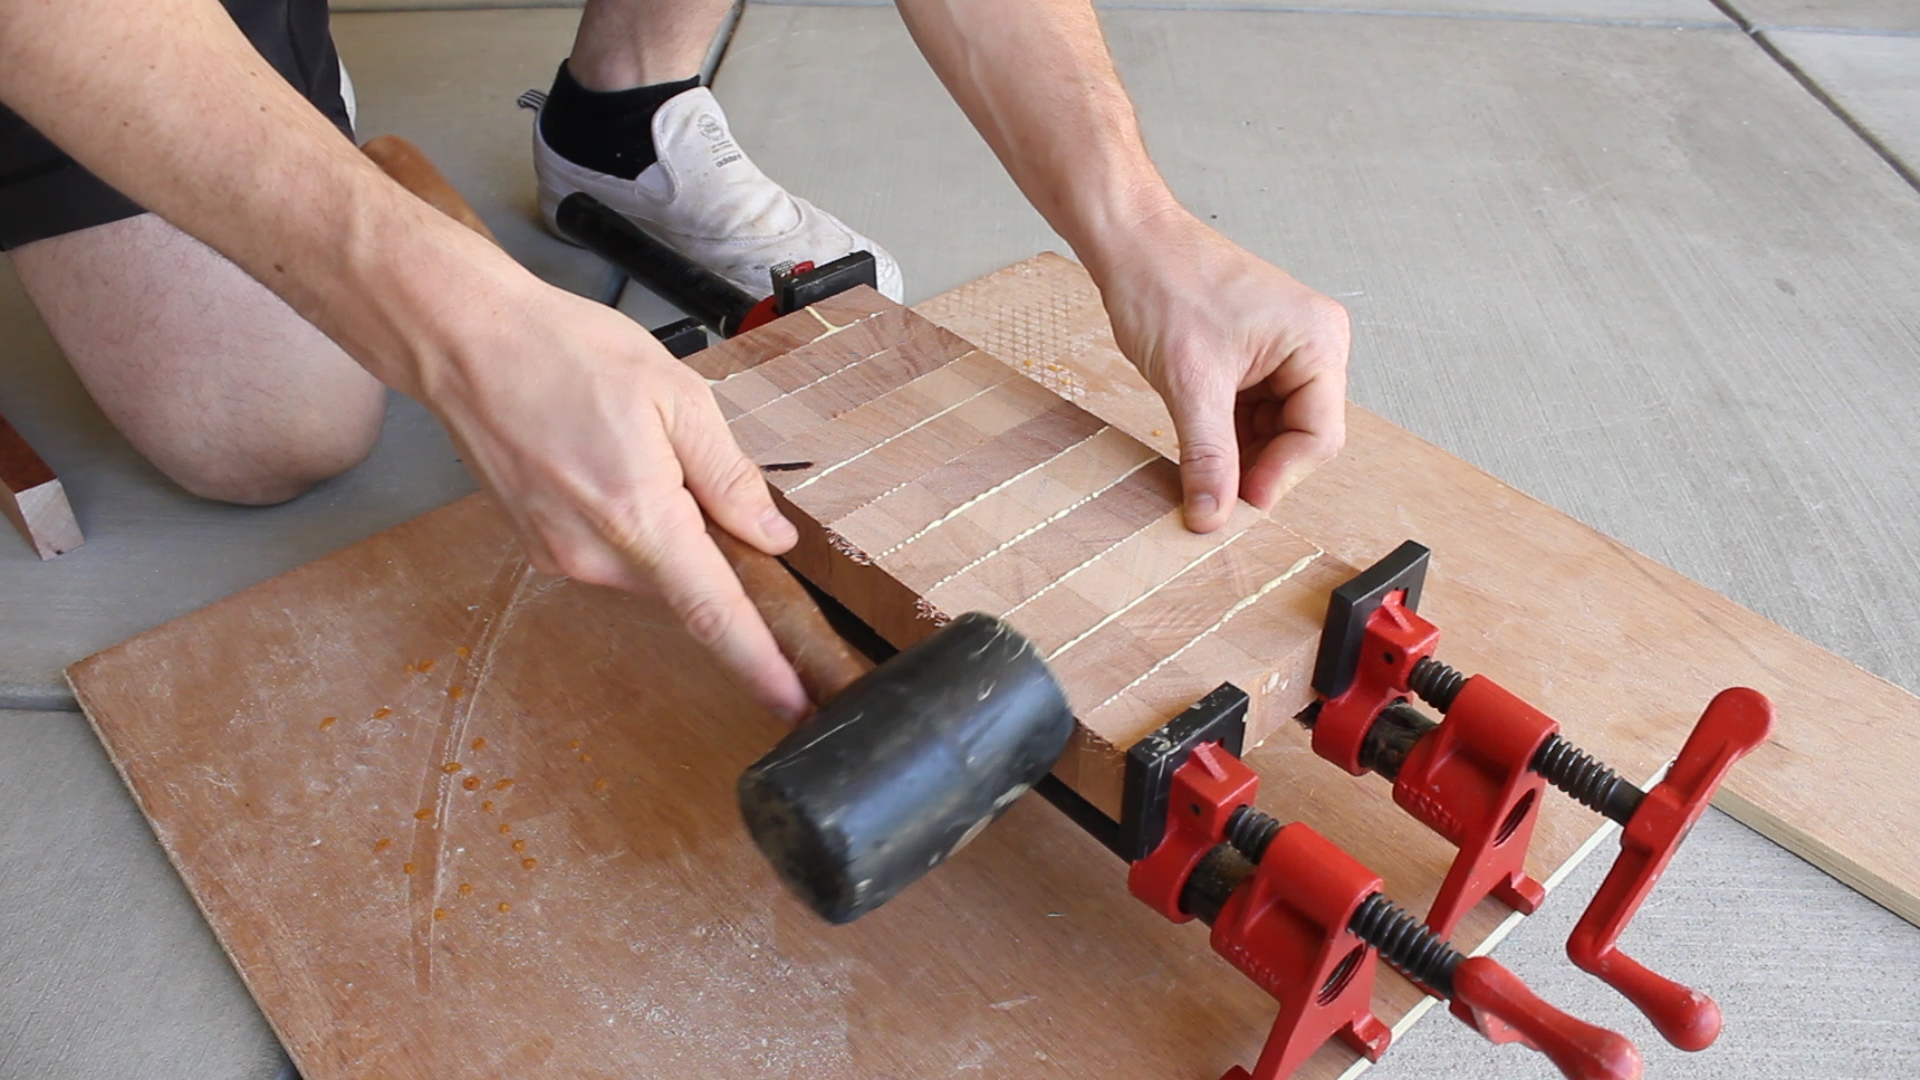
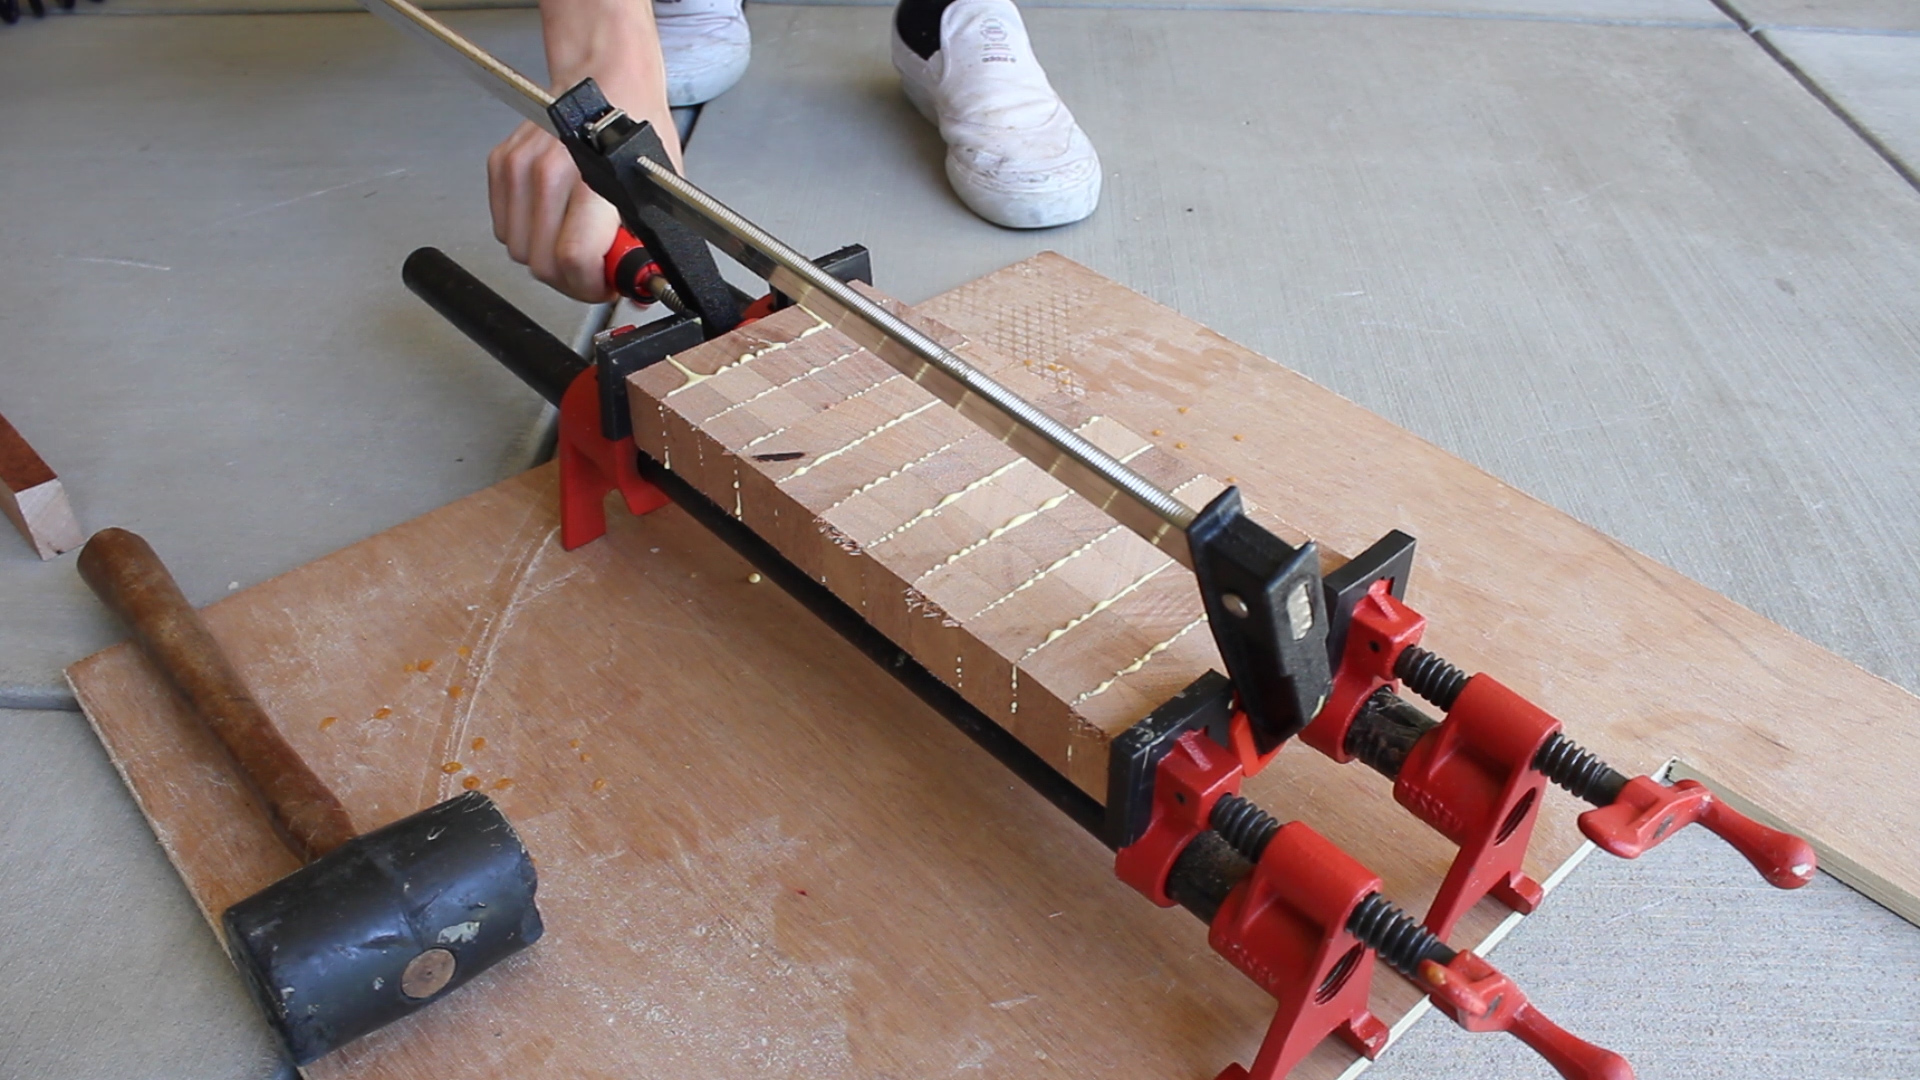
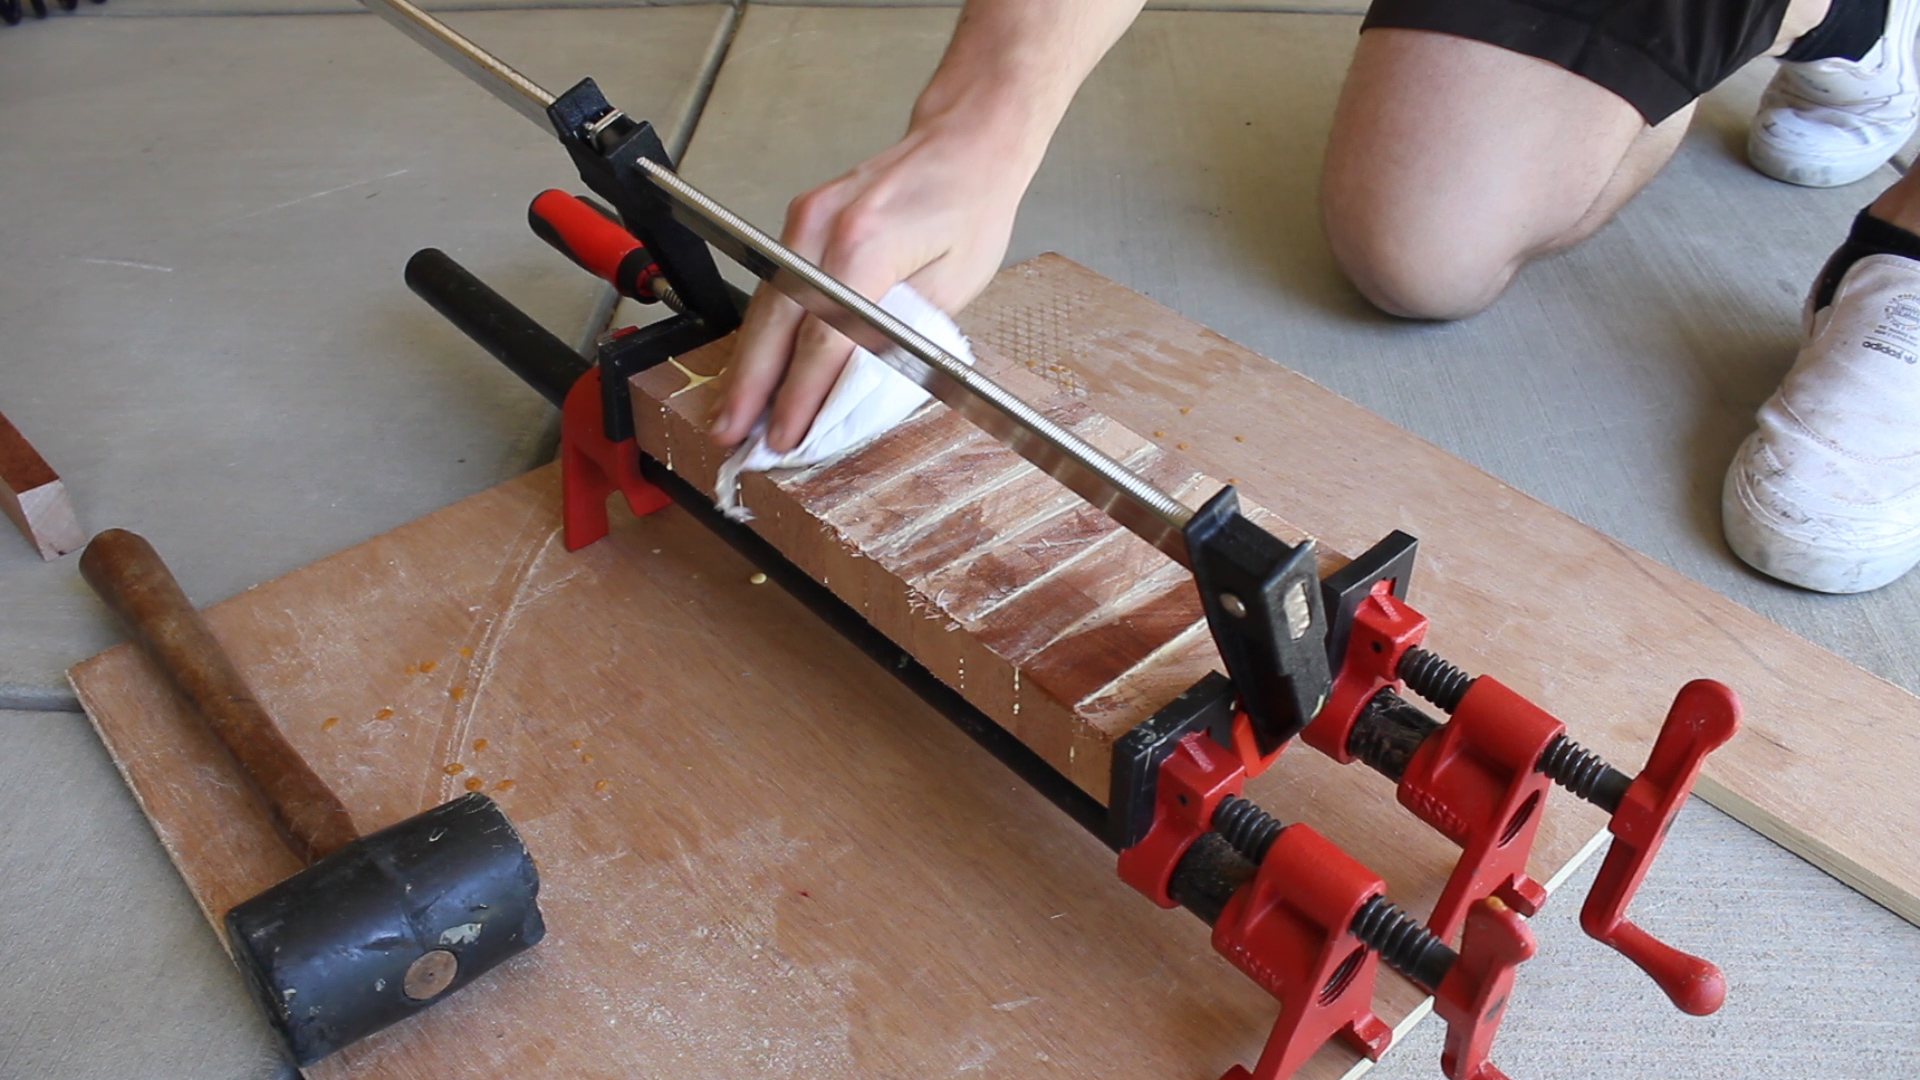
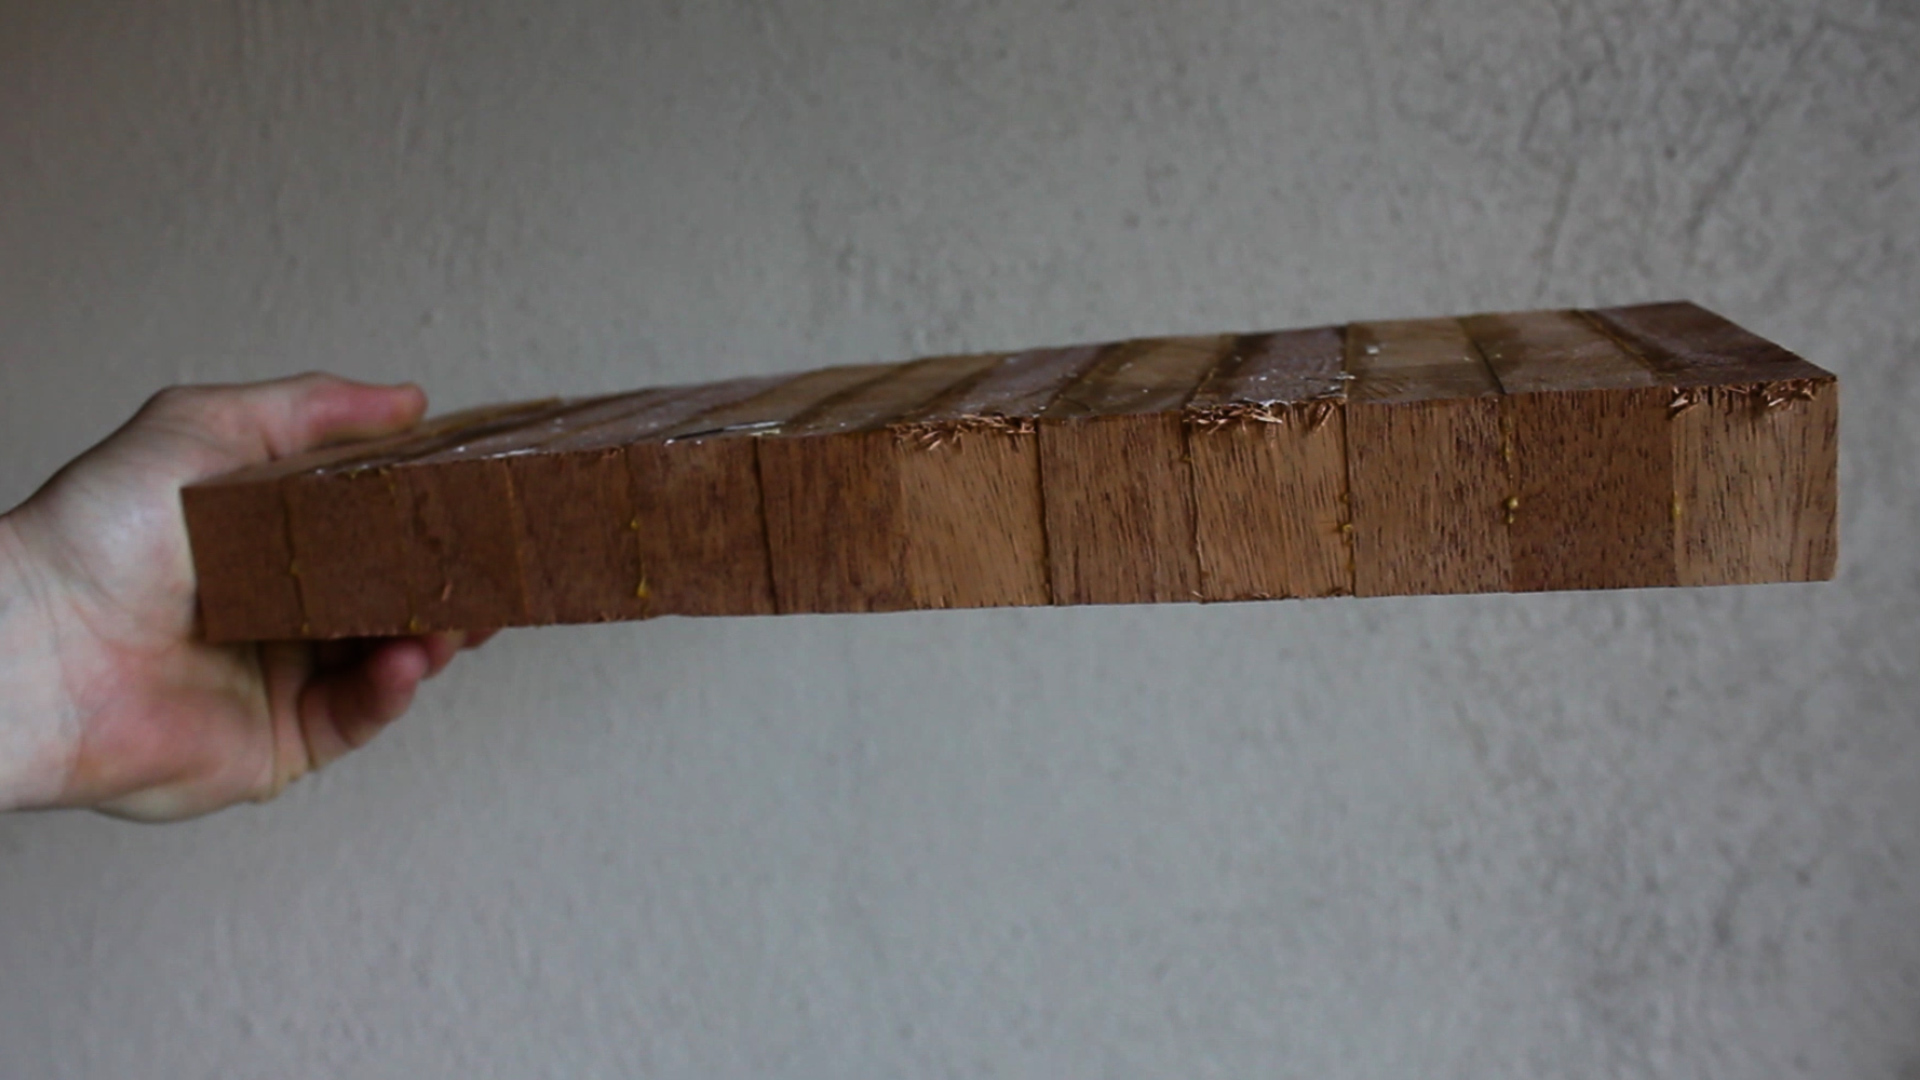
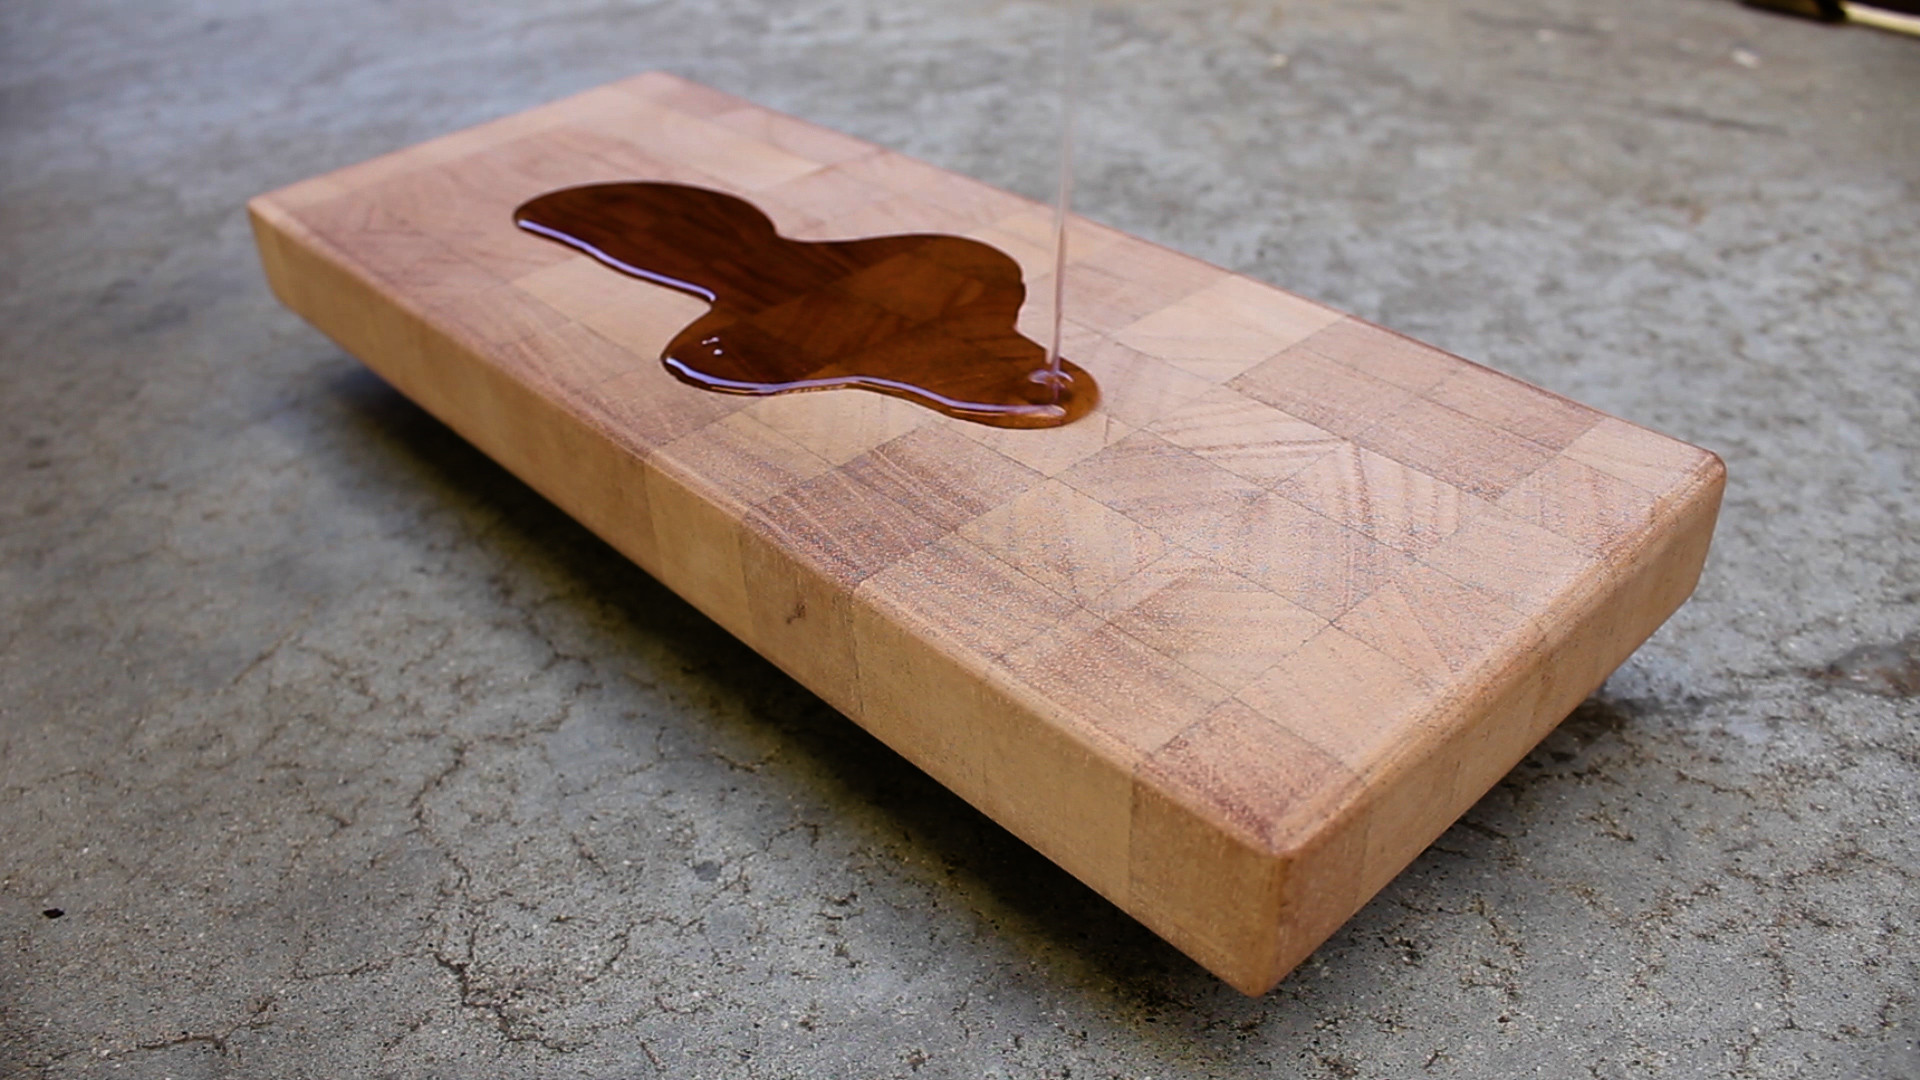
Next was the glue up. Pretty straight forward. For the base, I glued up the walnut mixed with the padauk and used horizontal and vertical clamping to keep things straight. For the top, it was just the walnut, so much the same. I then let it cure overnight in the clamps.
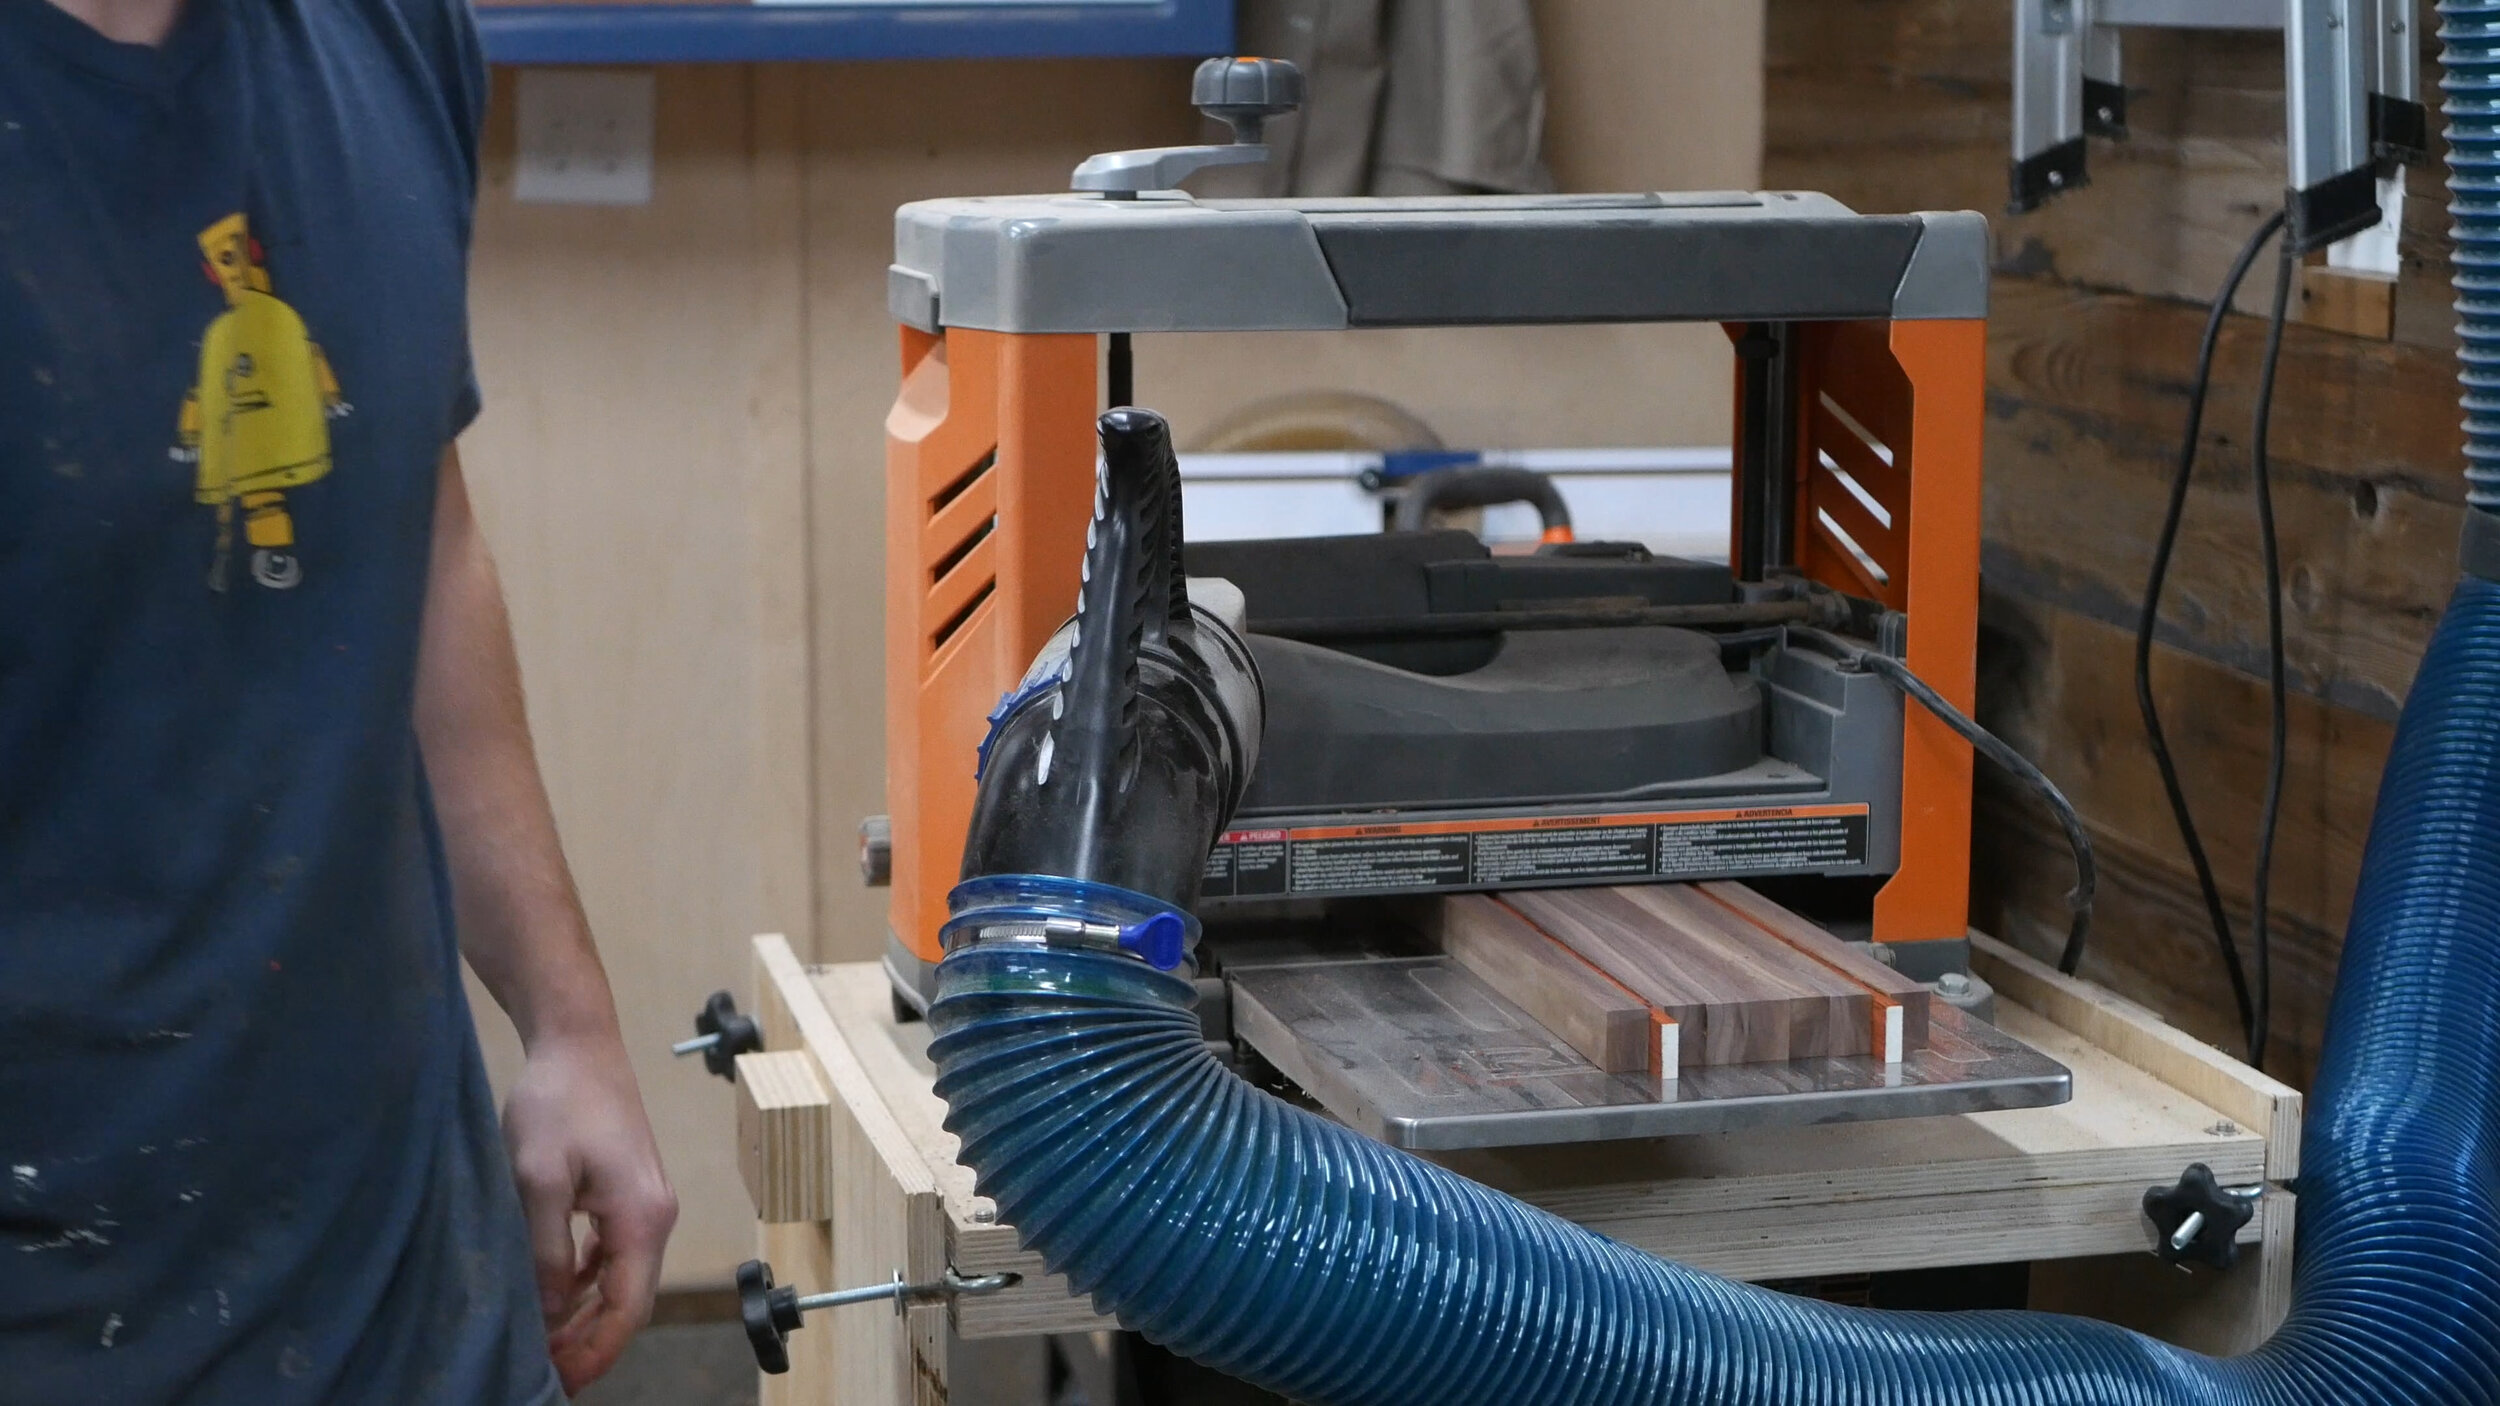
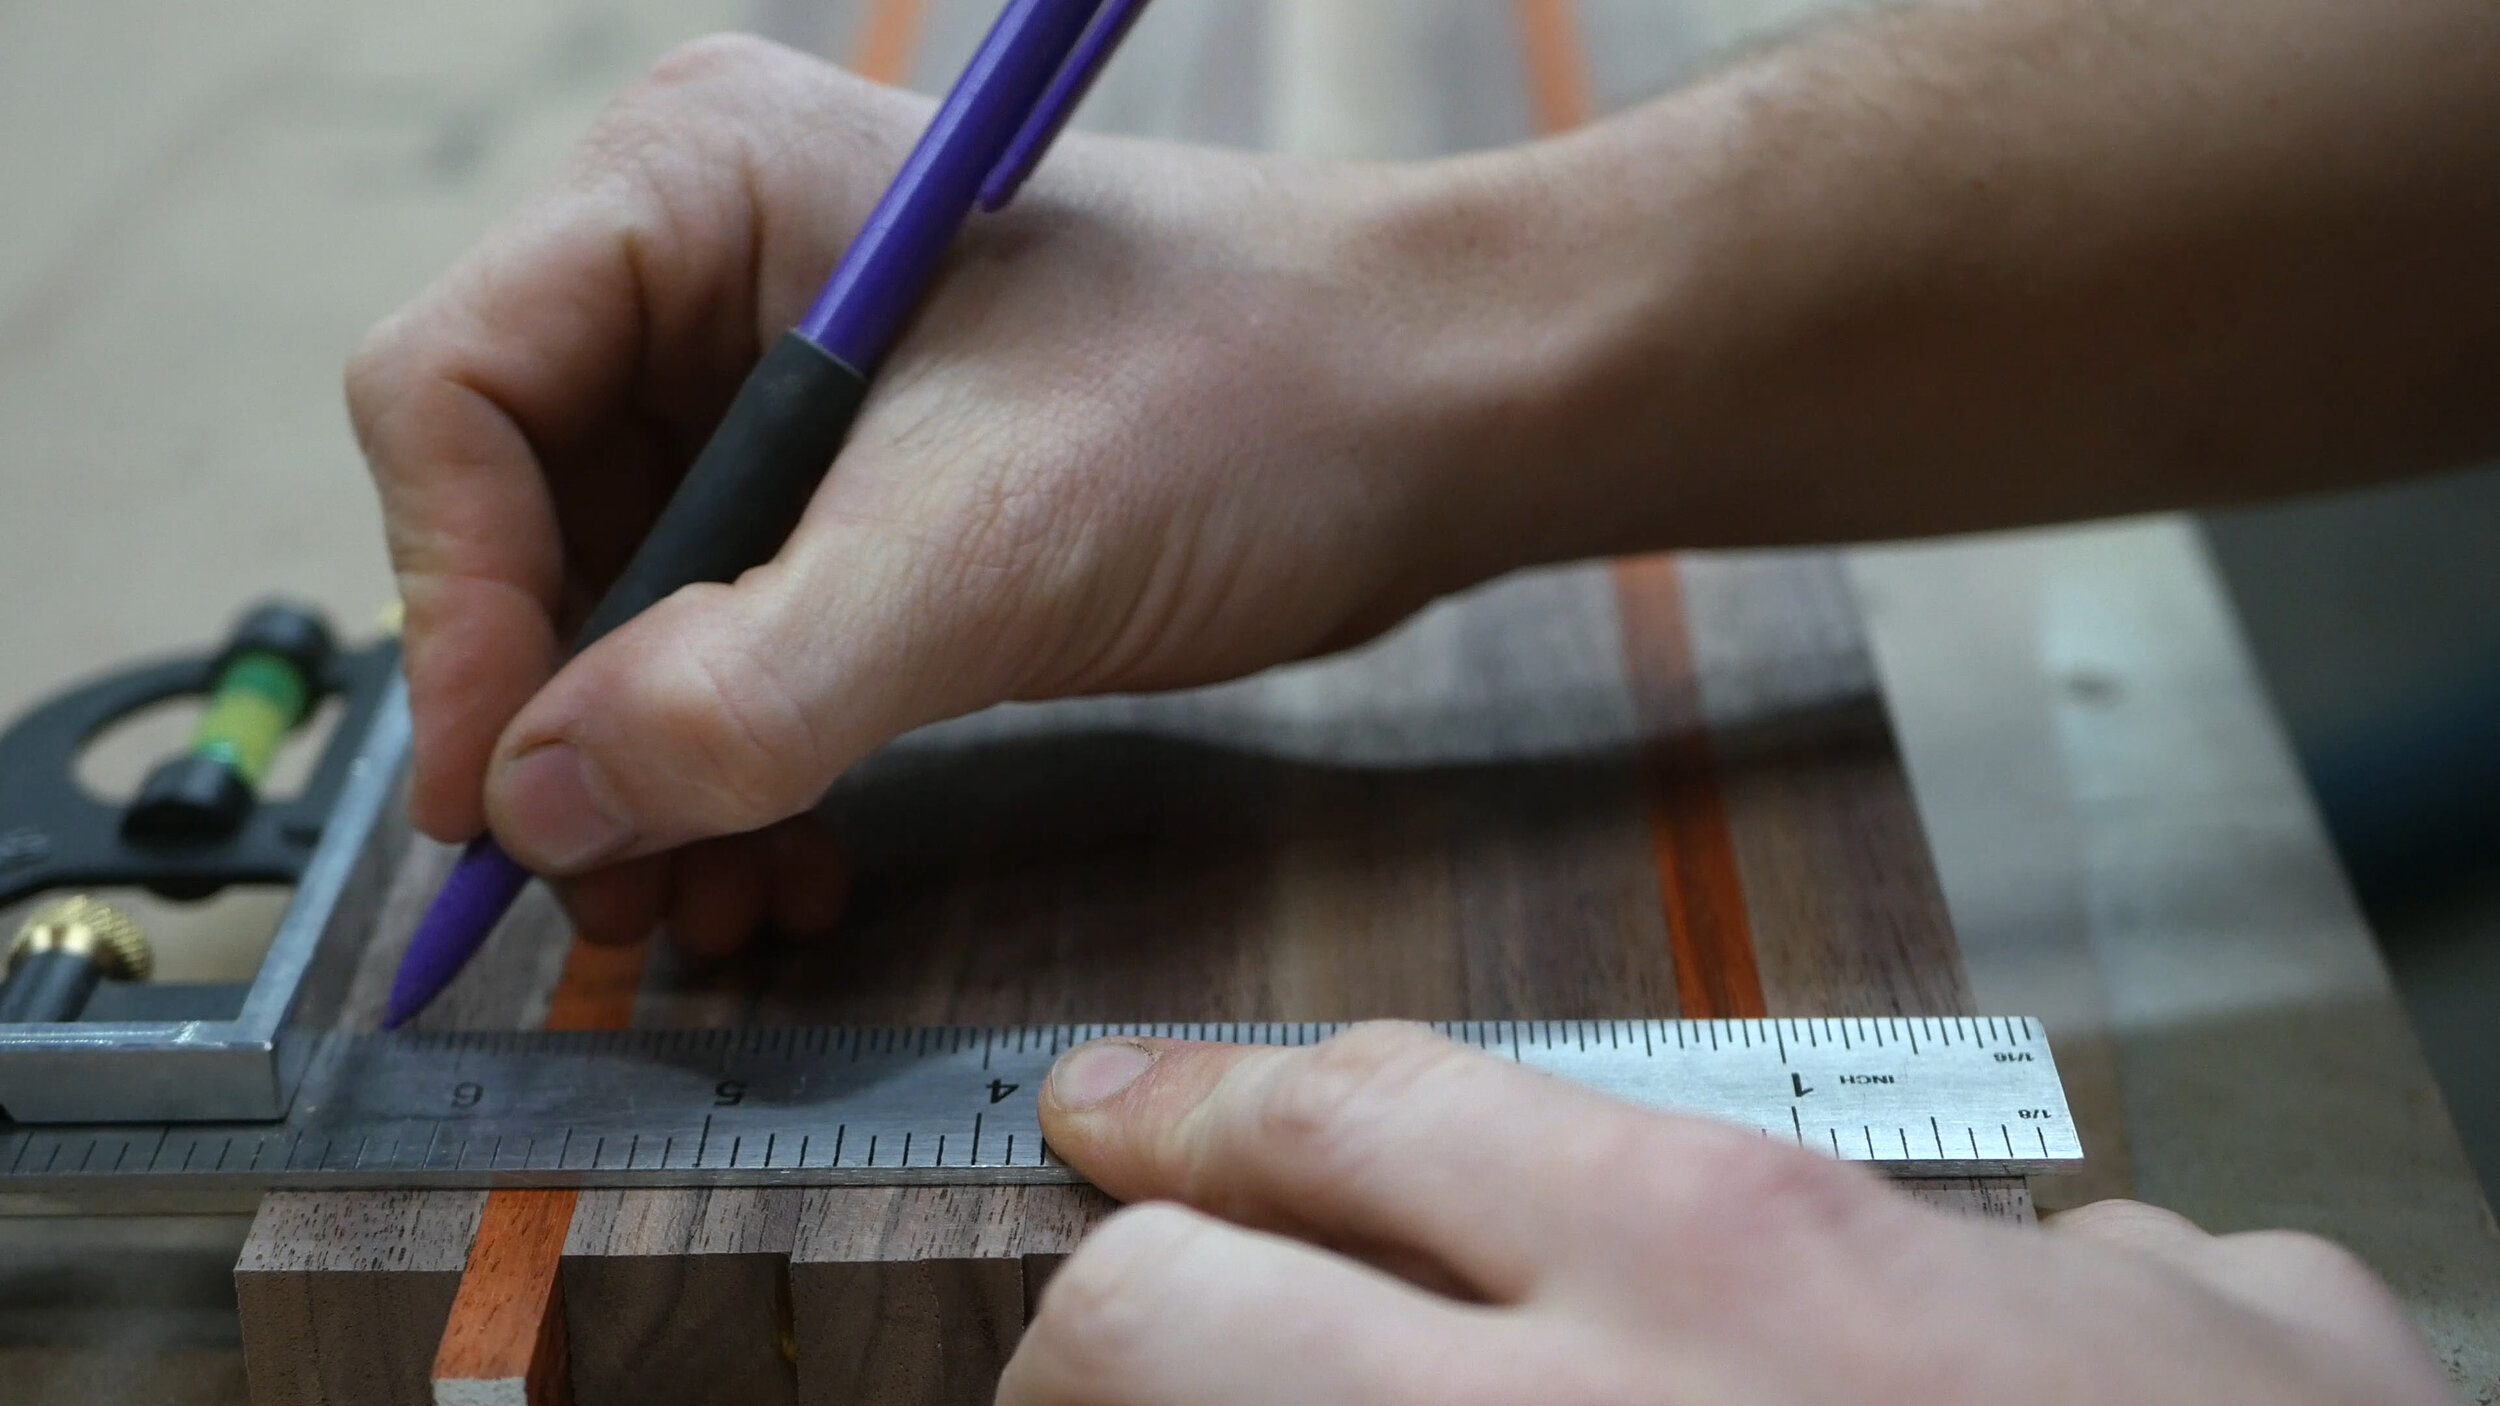
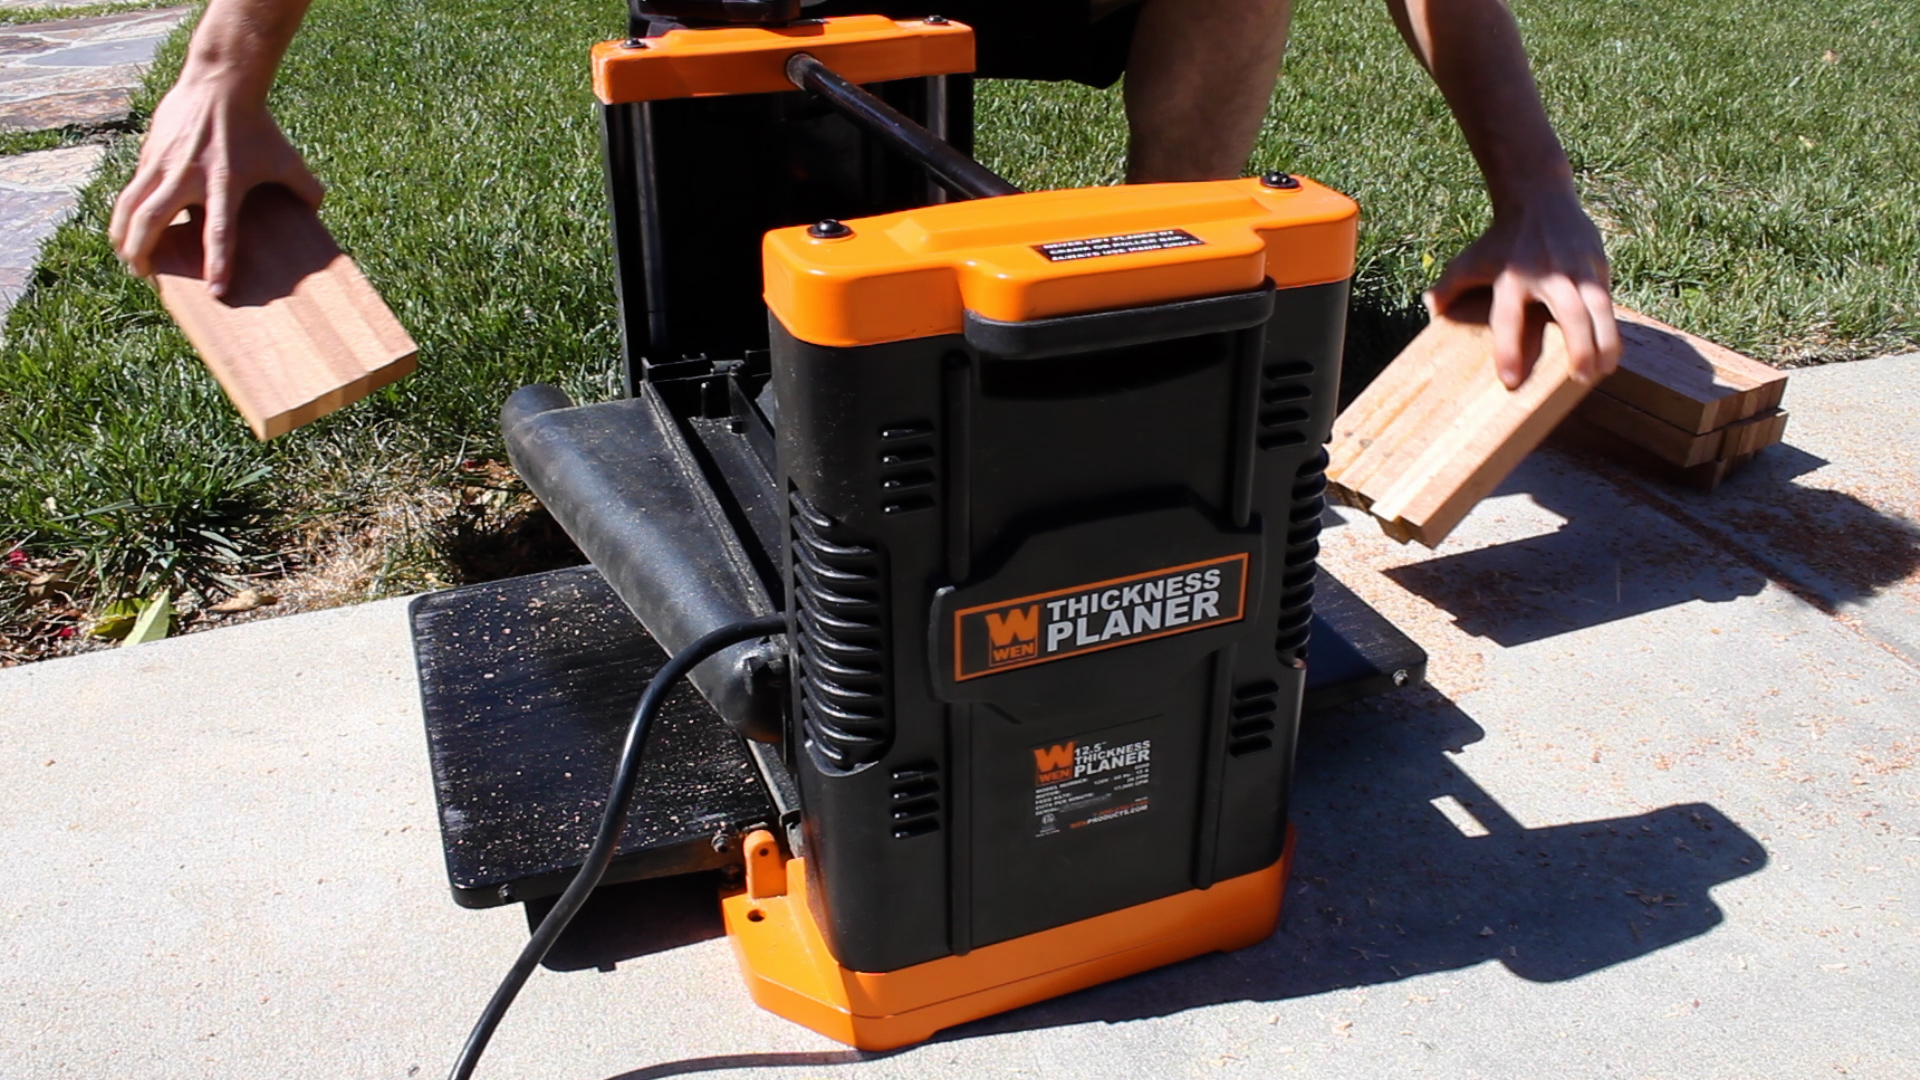
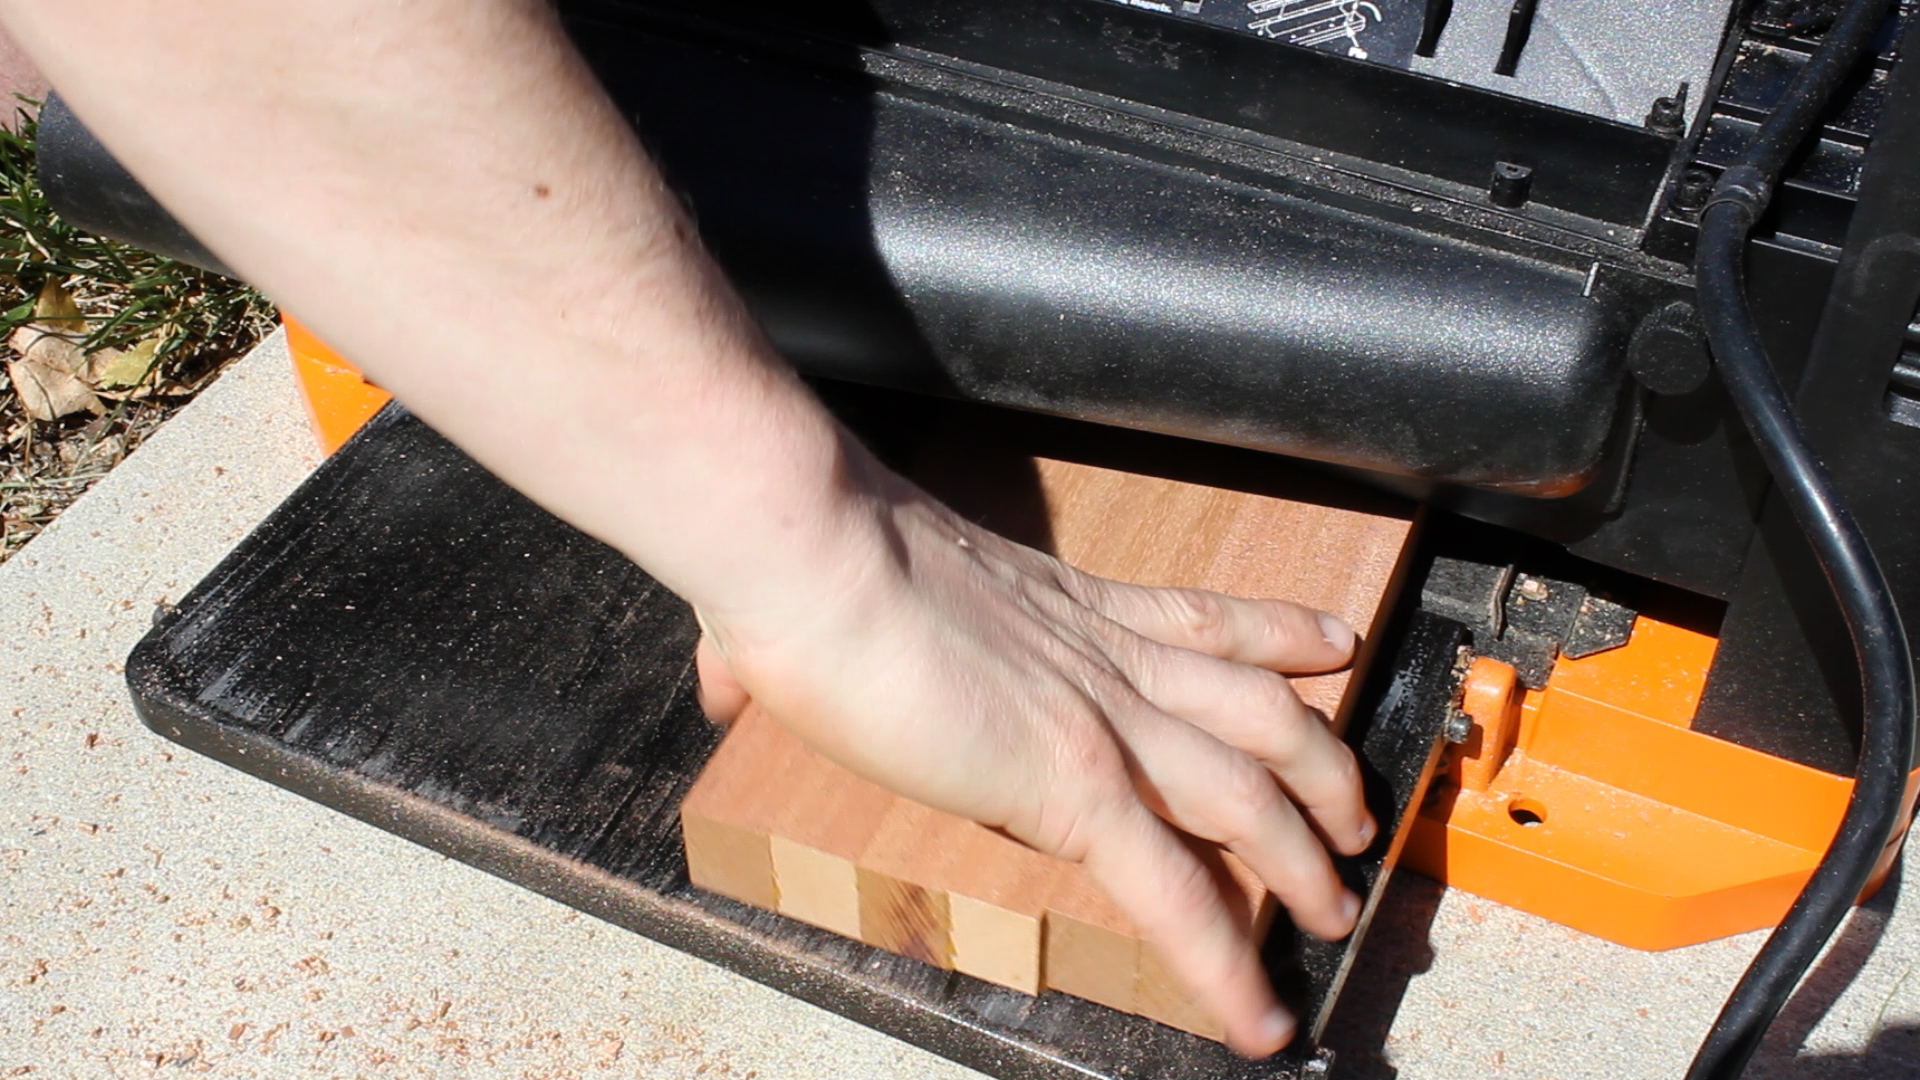
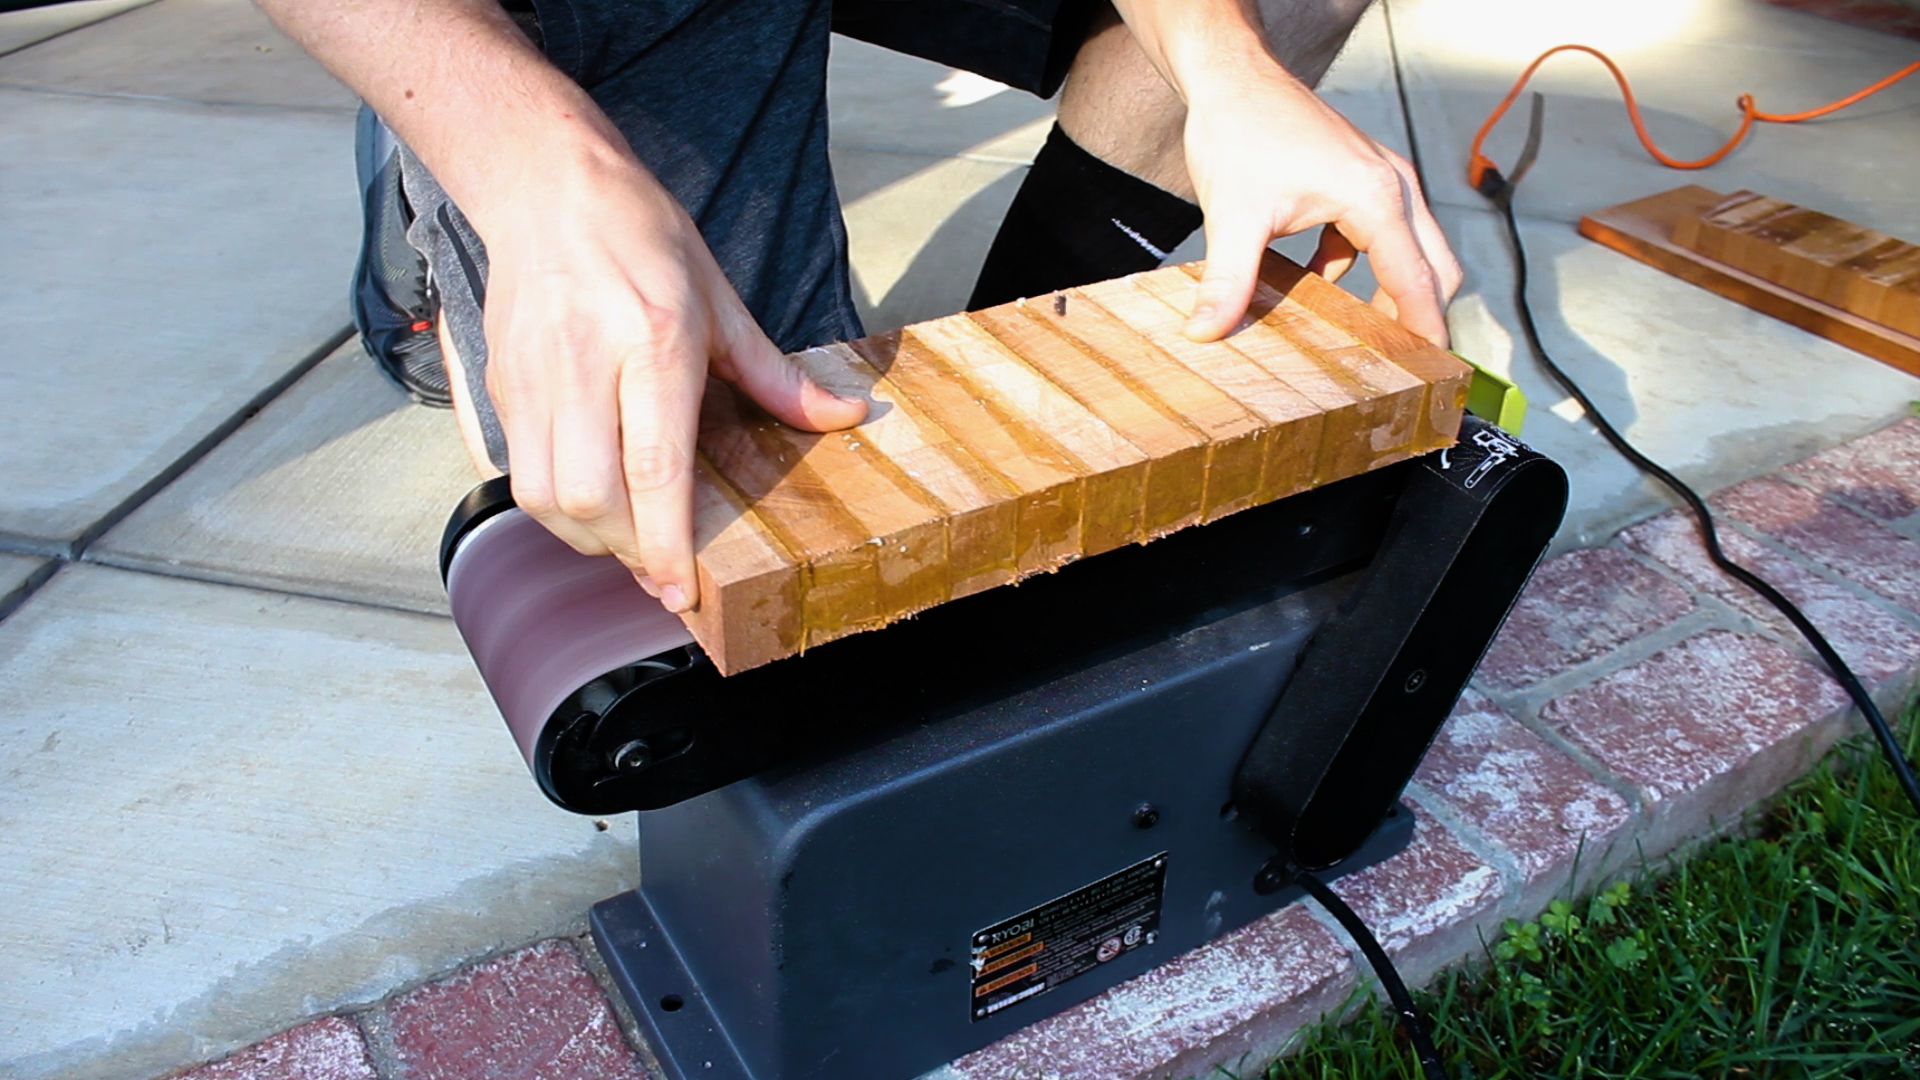
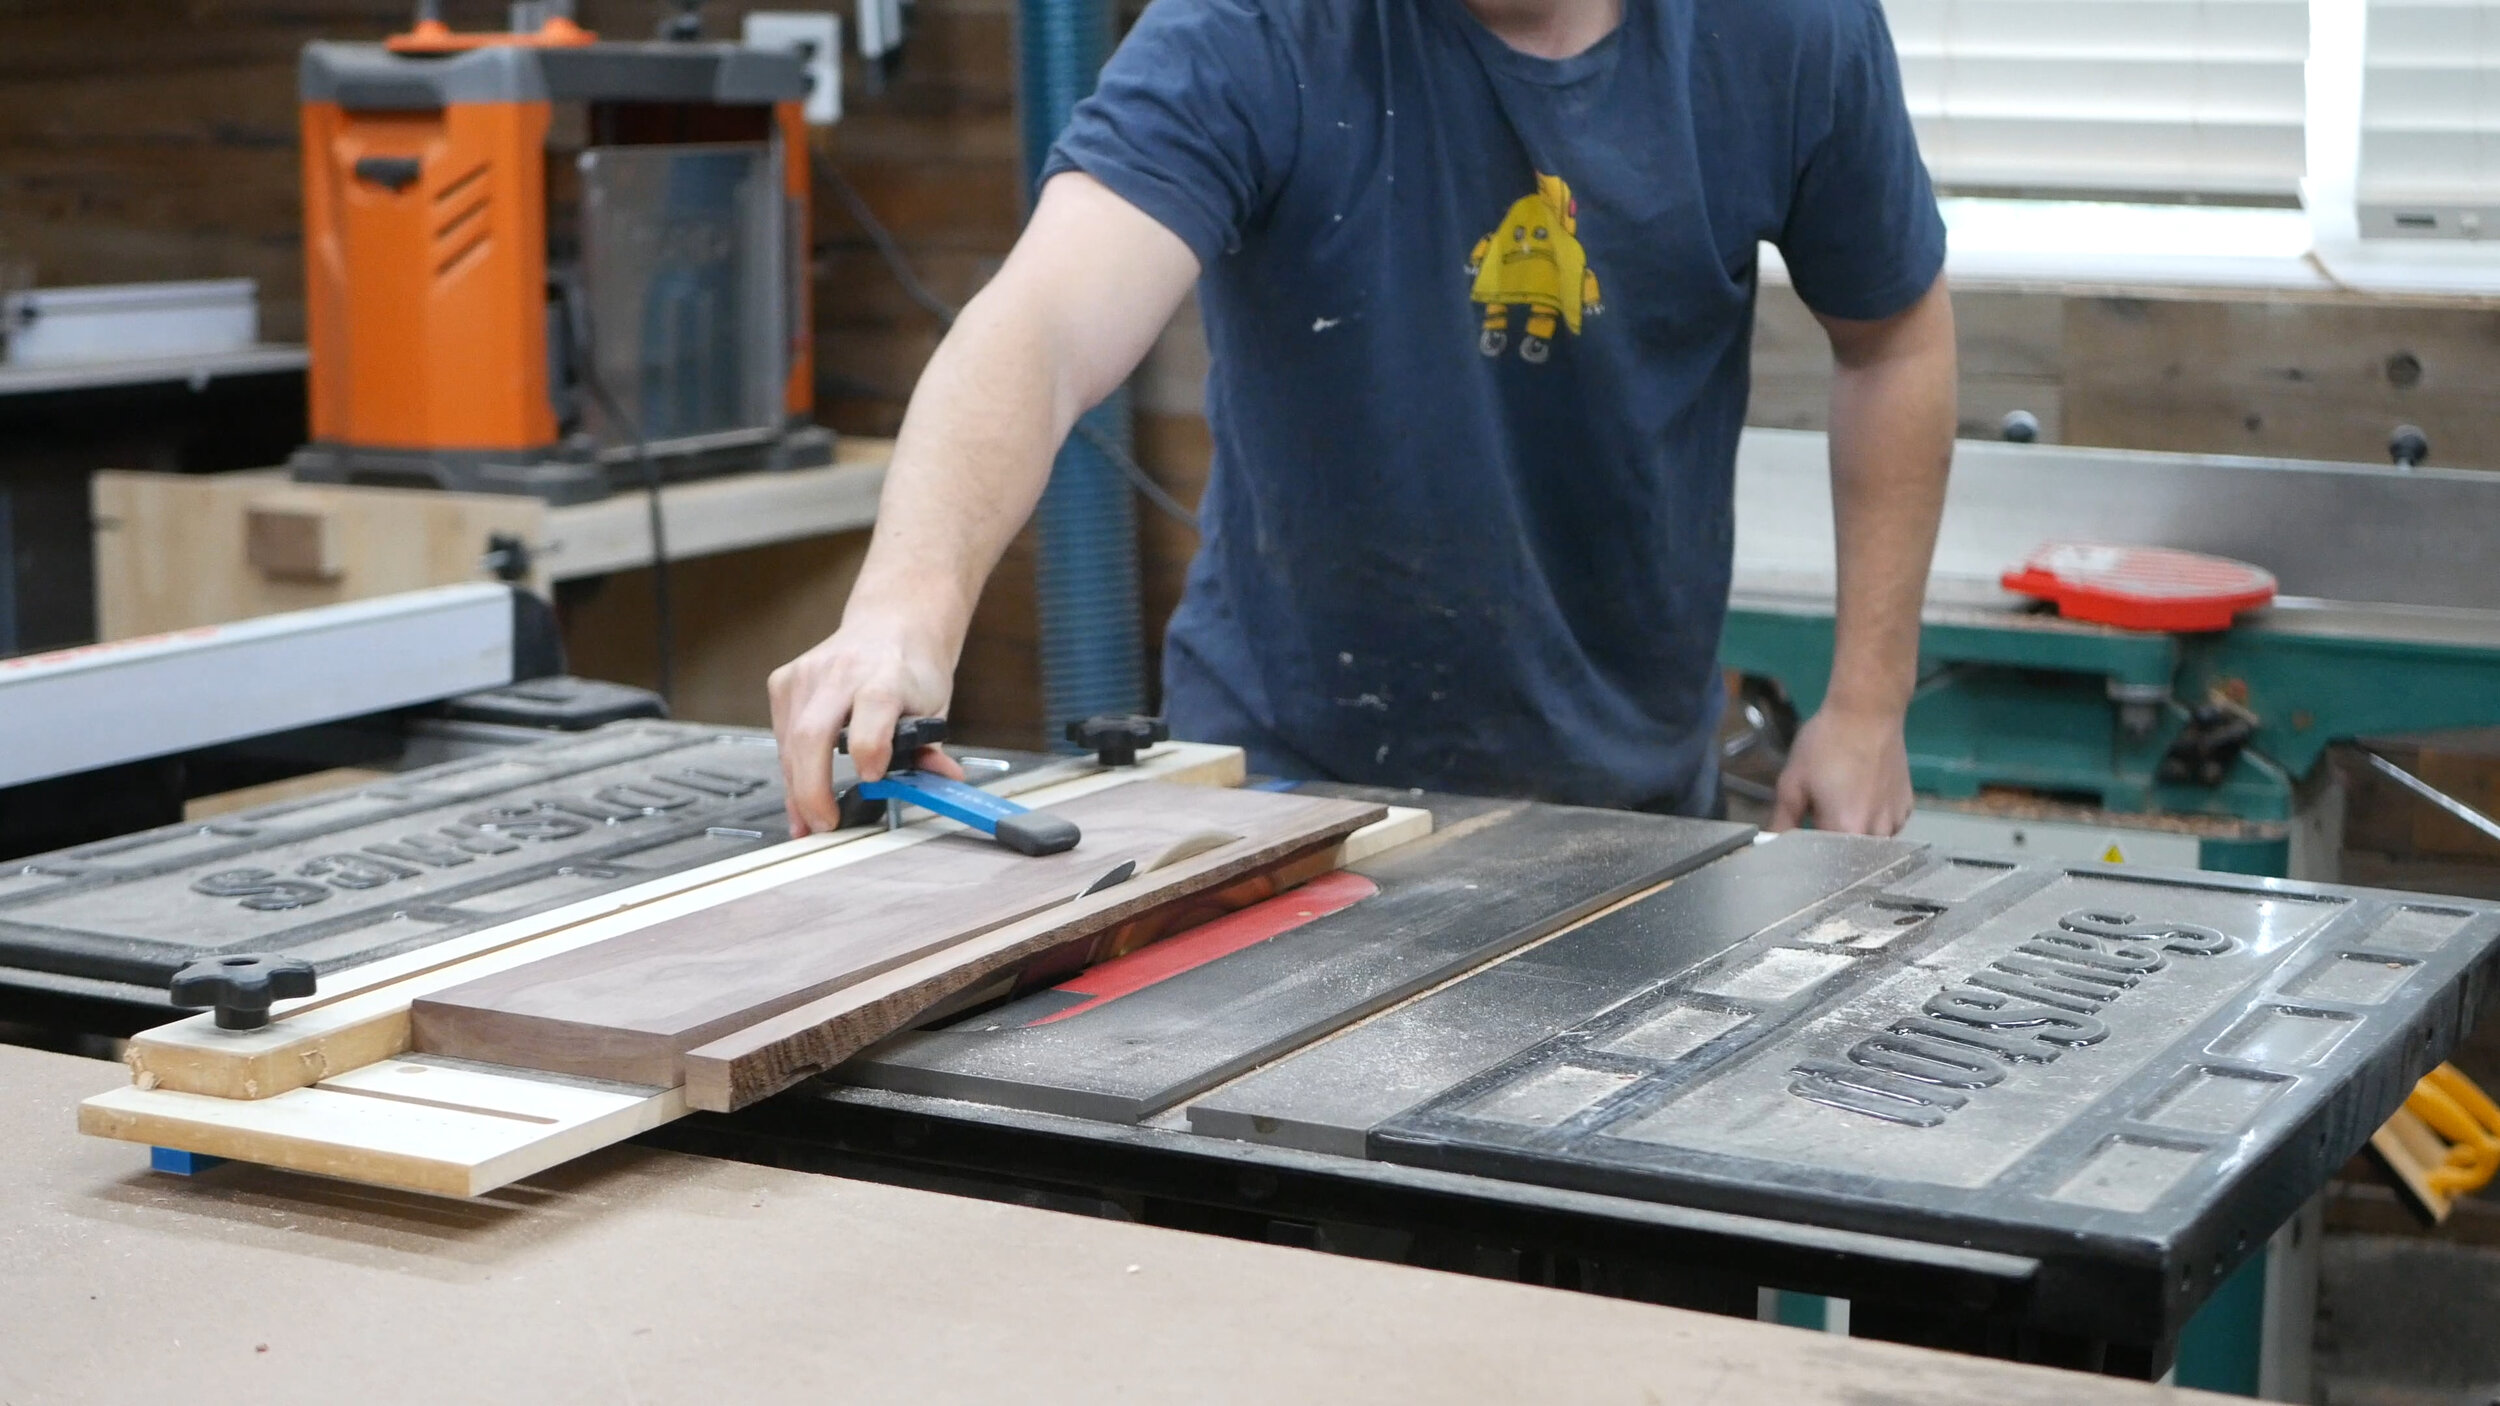
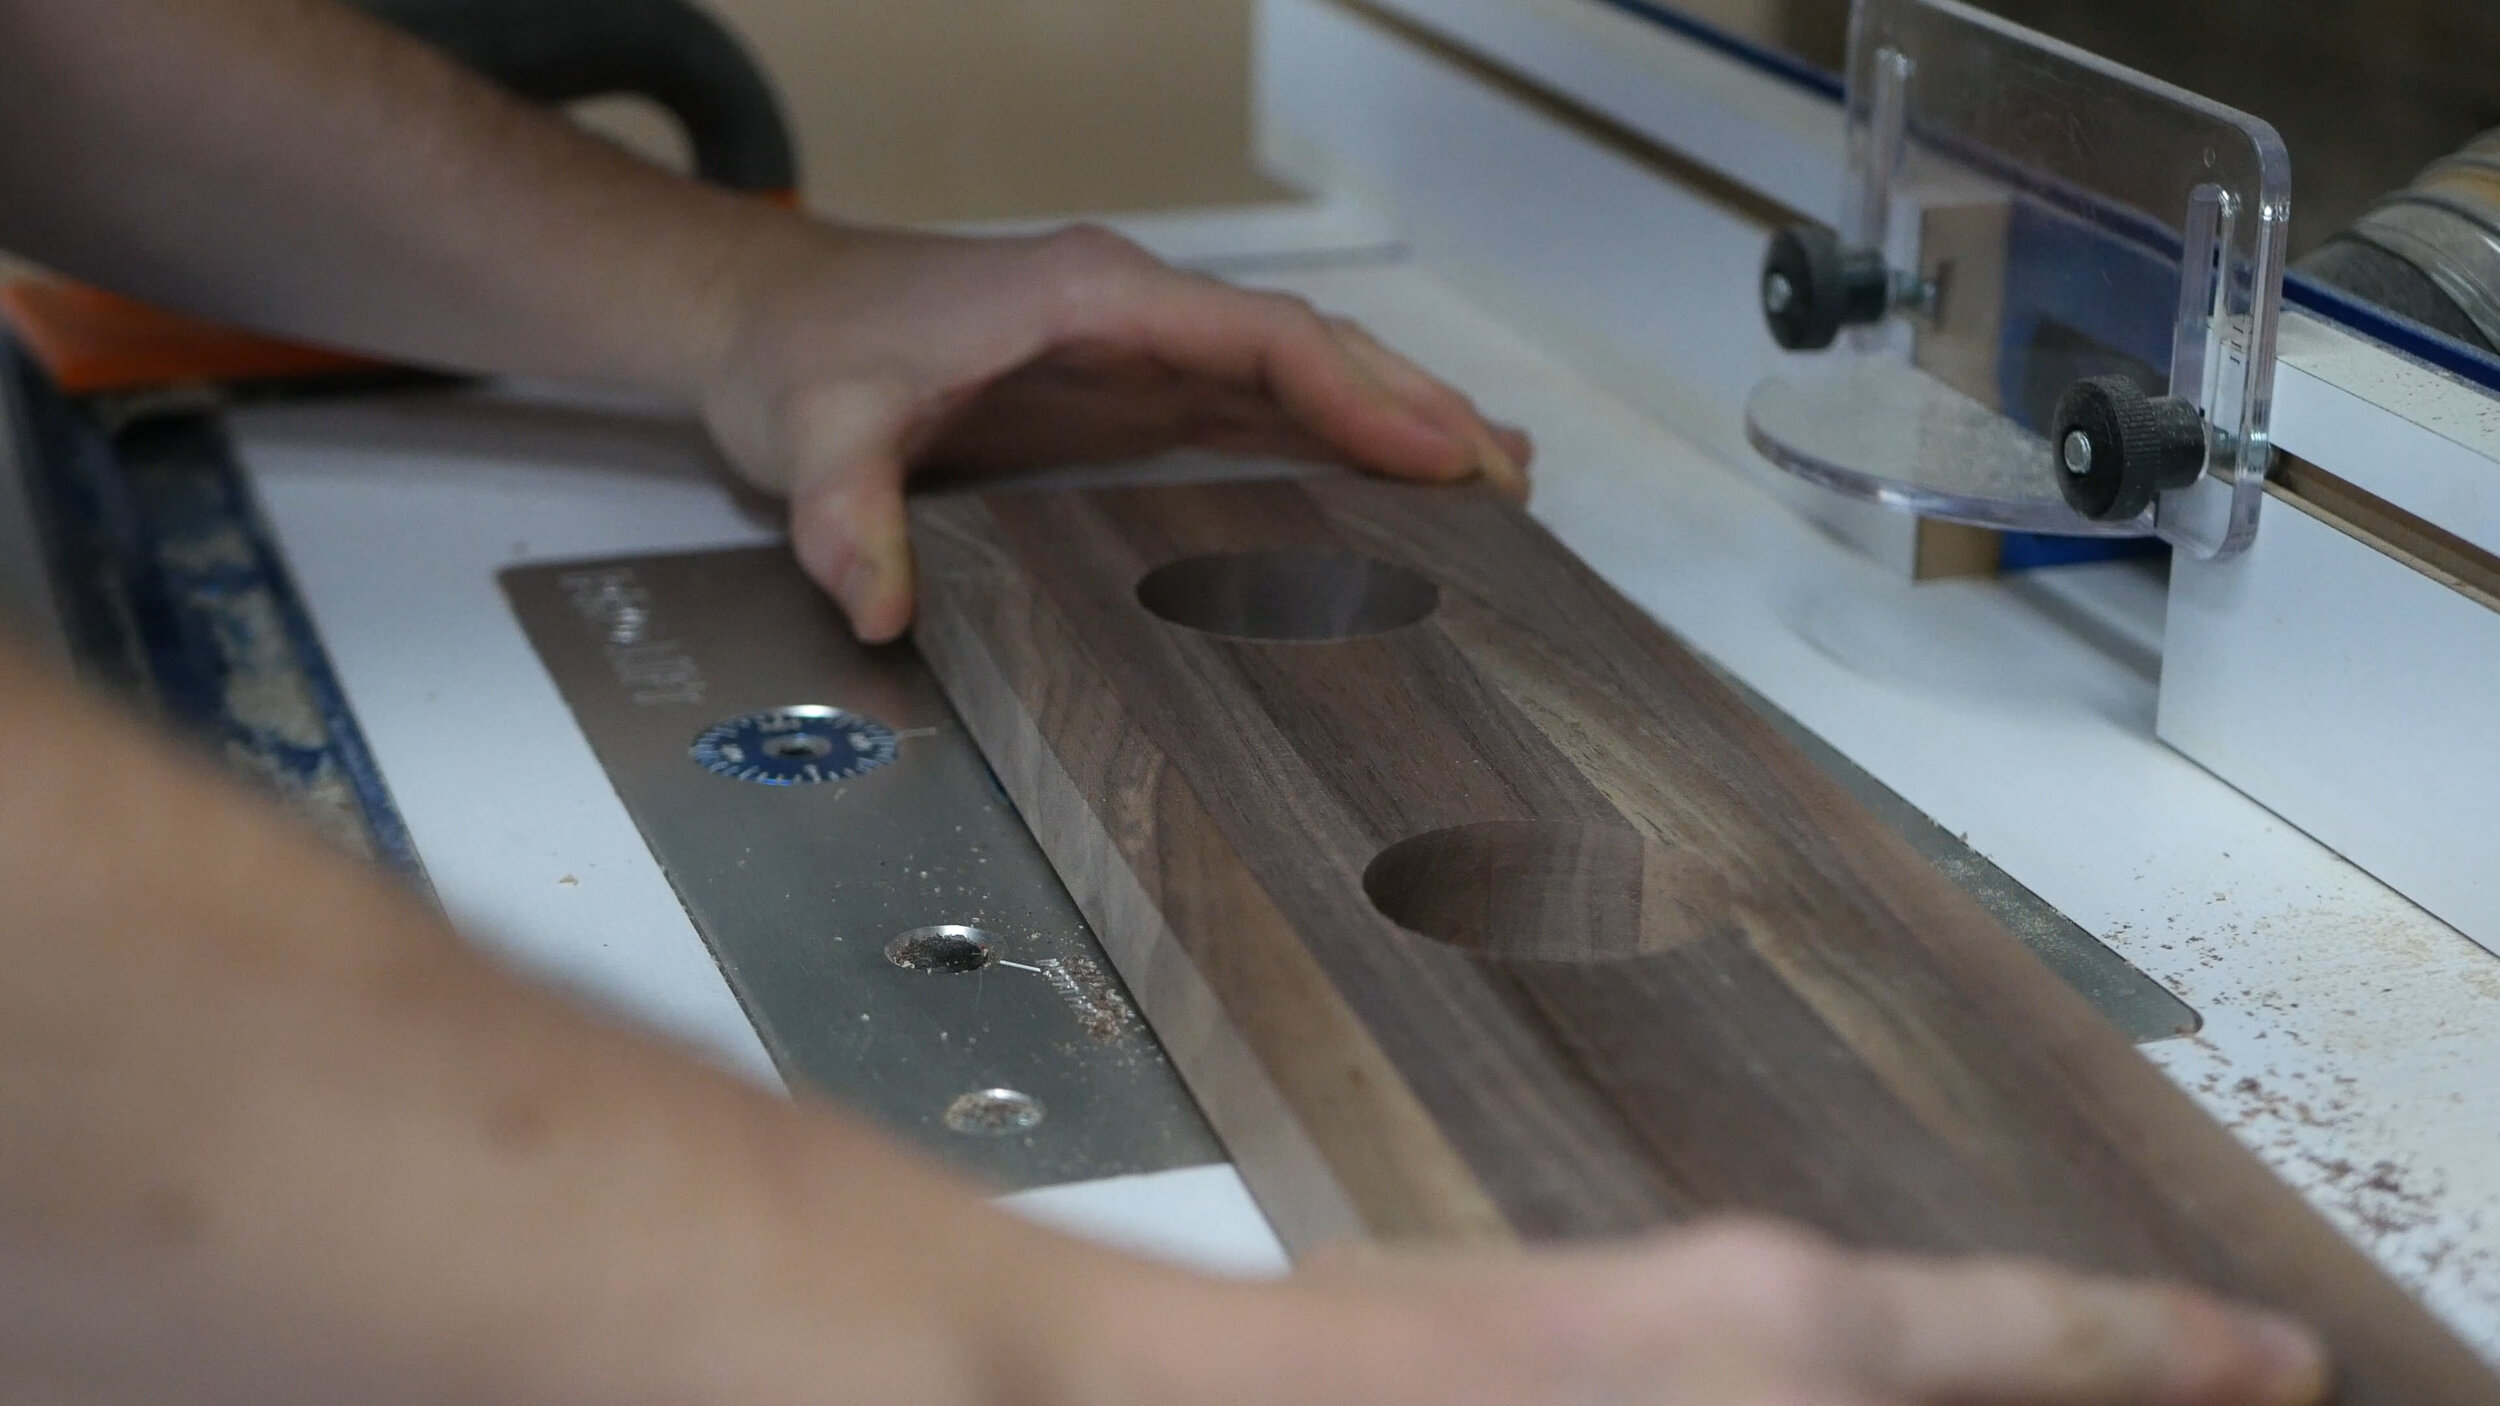
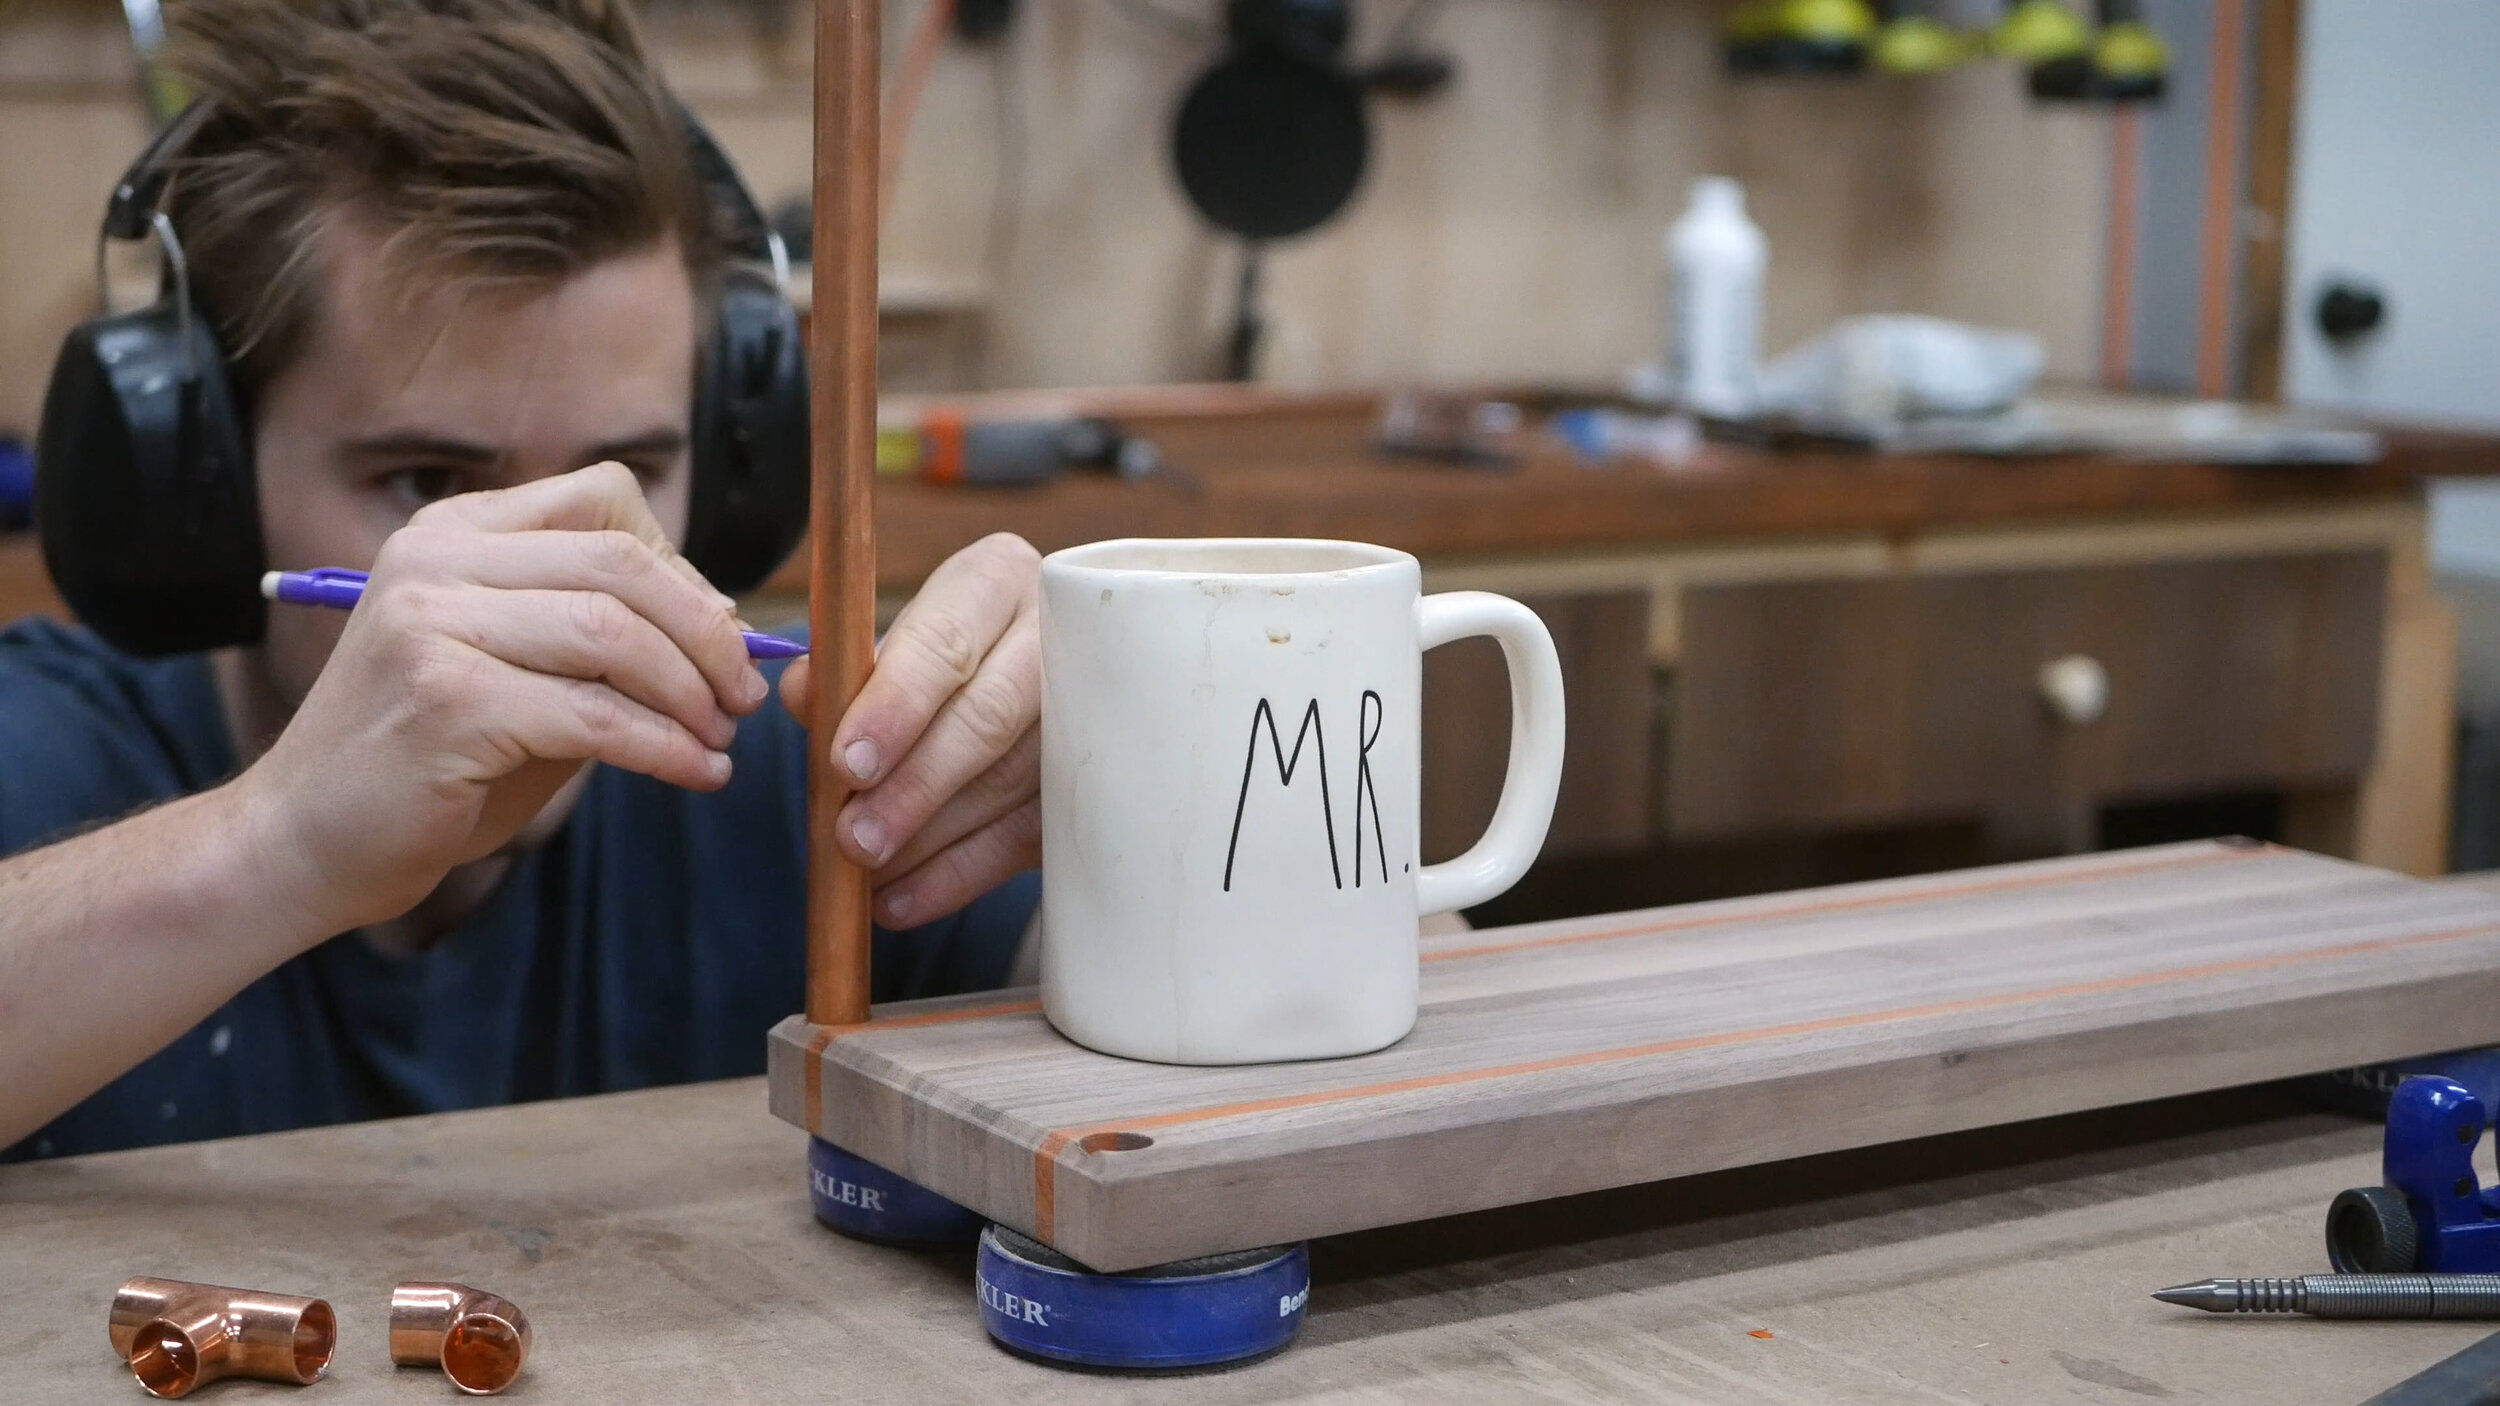
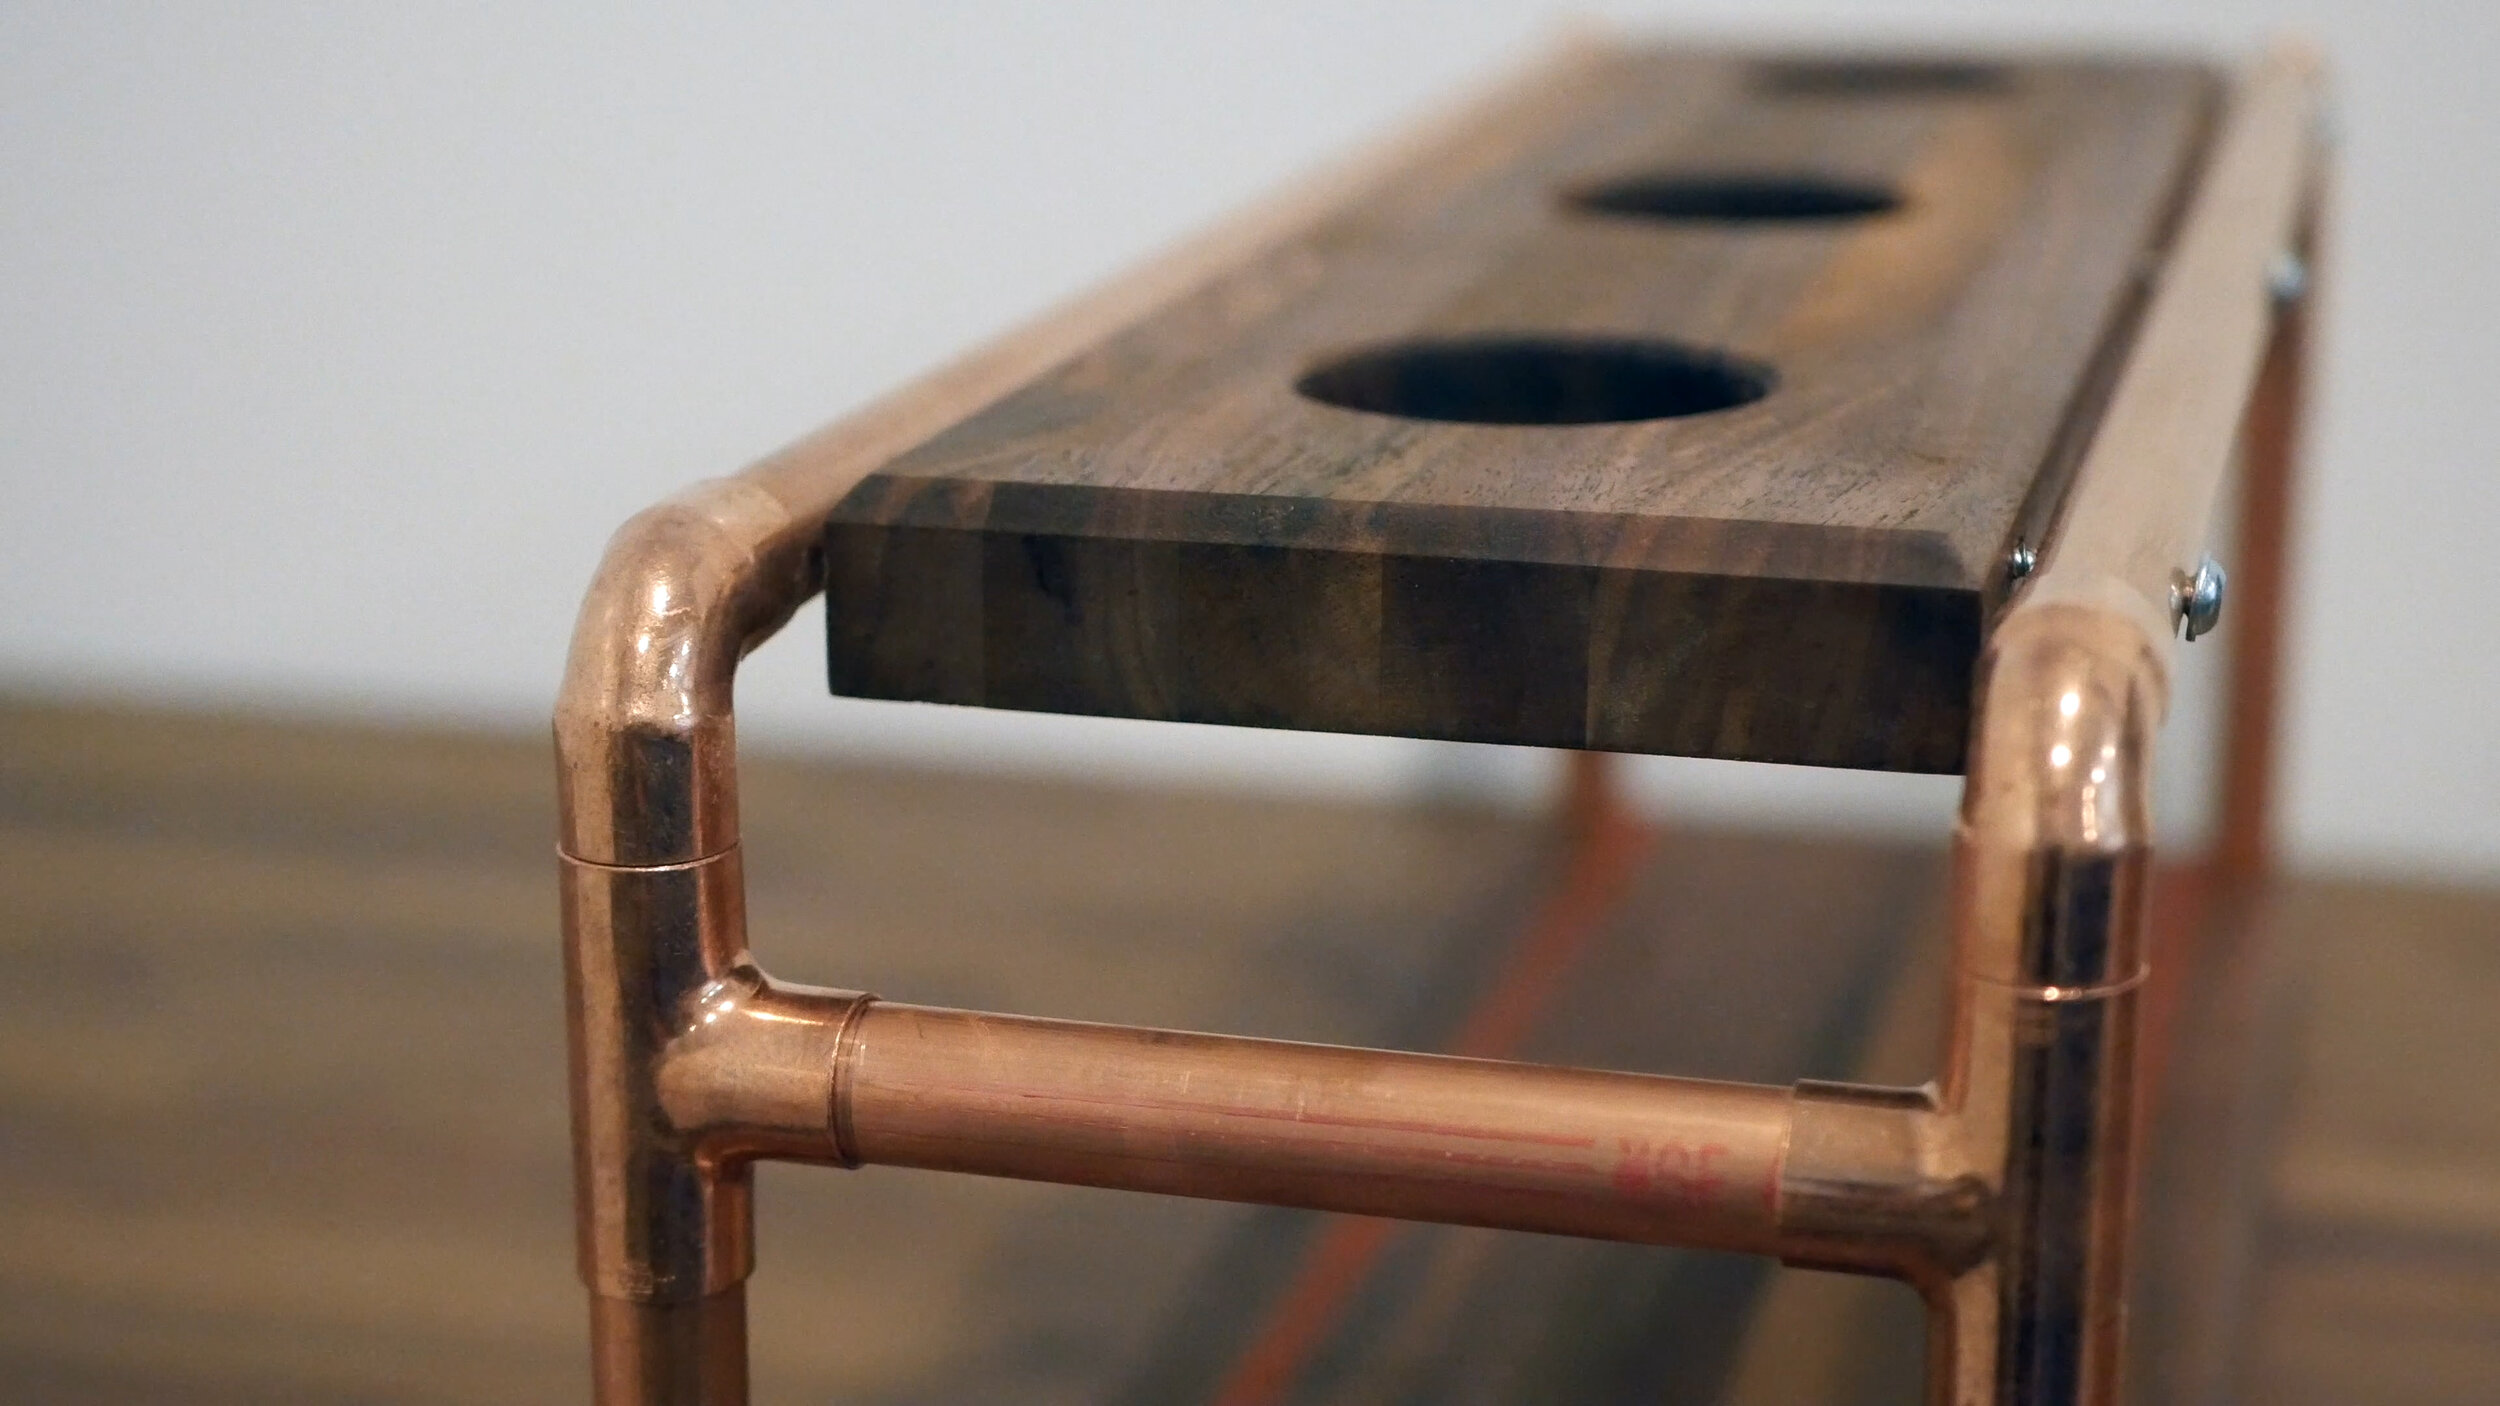
The next day, I could pass both pieces through the planer to clean things up. This is probably my favorite part of the build every time I do it. Really just shows how clean and beautiful a piece will eventually be. I then measured and marked the final length of the base and cut to size on the table saw, followed by measuring and marking the top piece and cutting it as well. It was helpful to use some of the copper pieces to get this last step lined up.
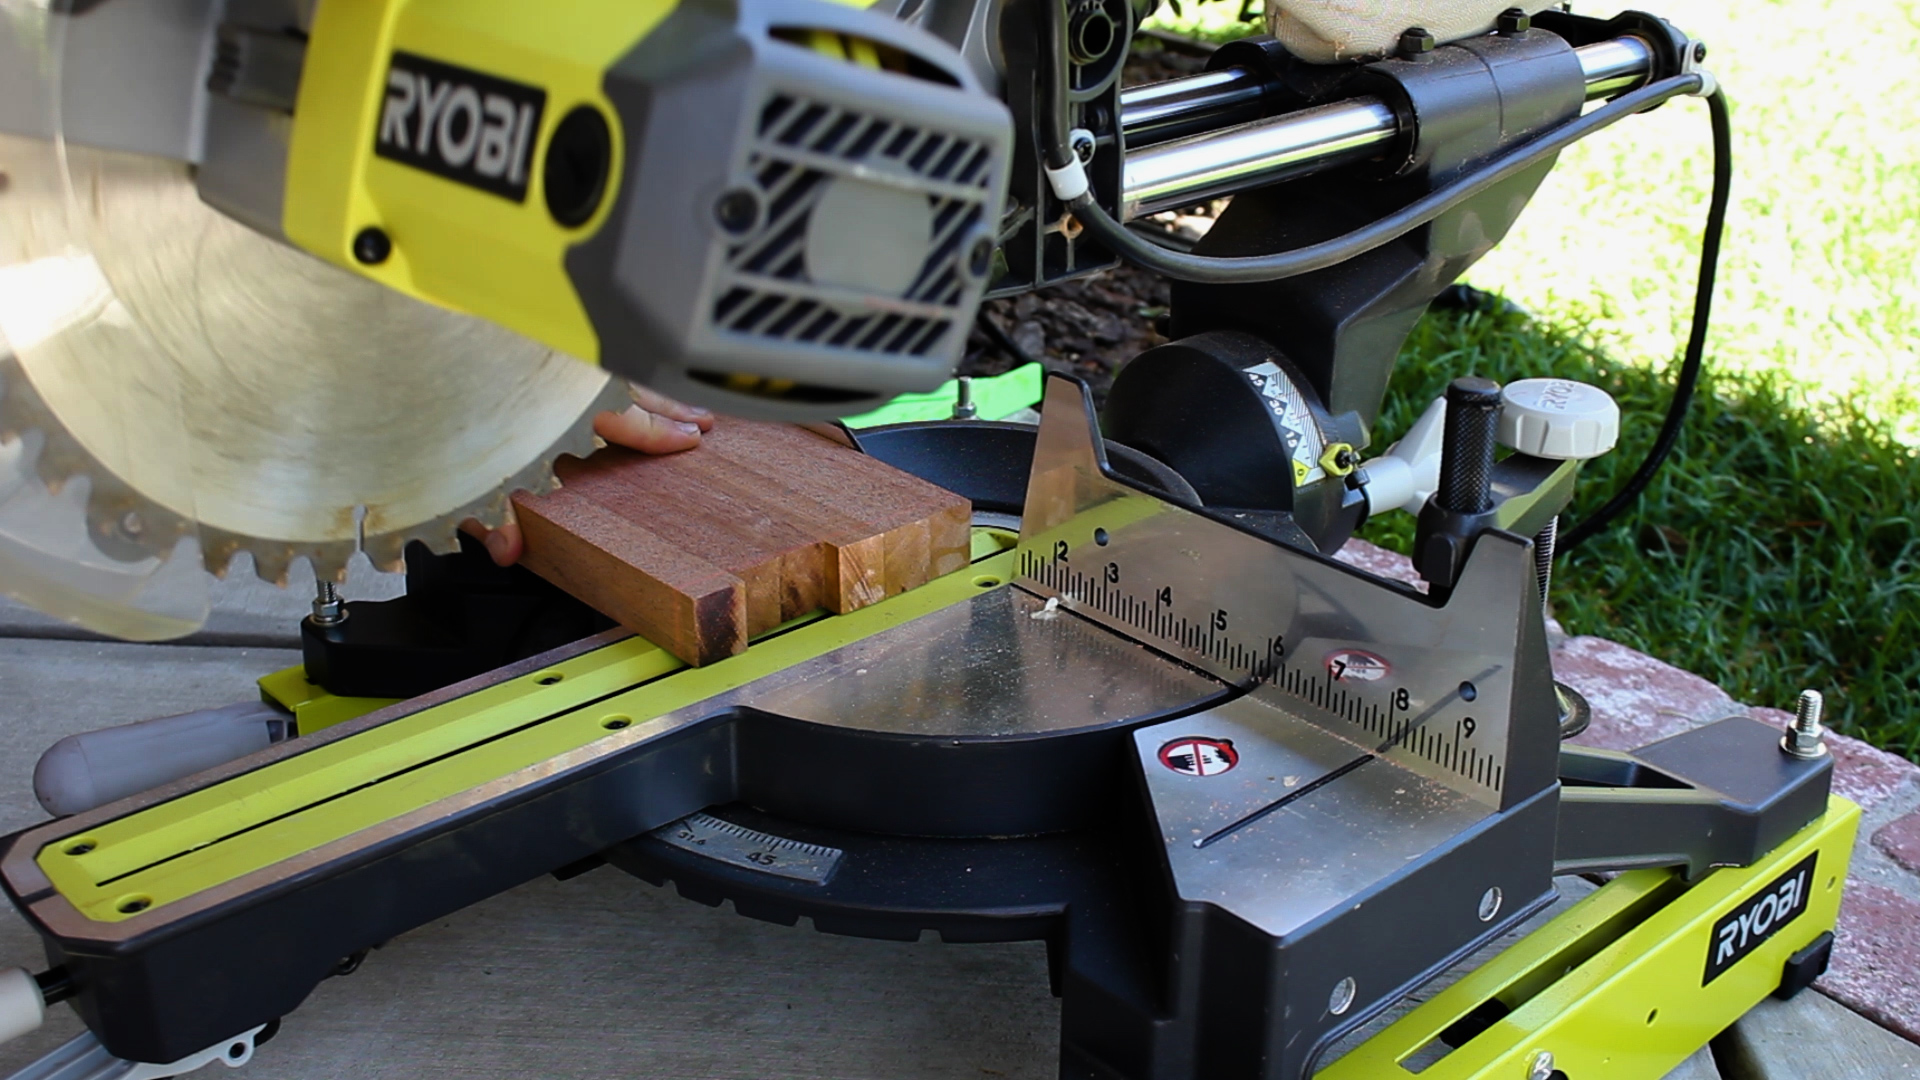
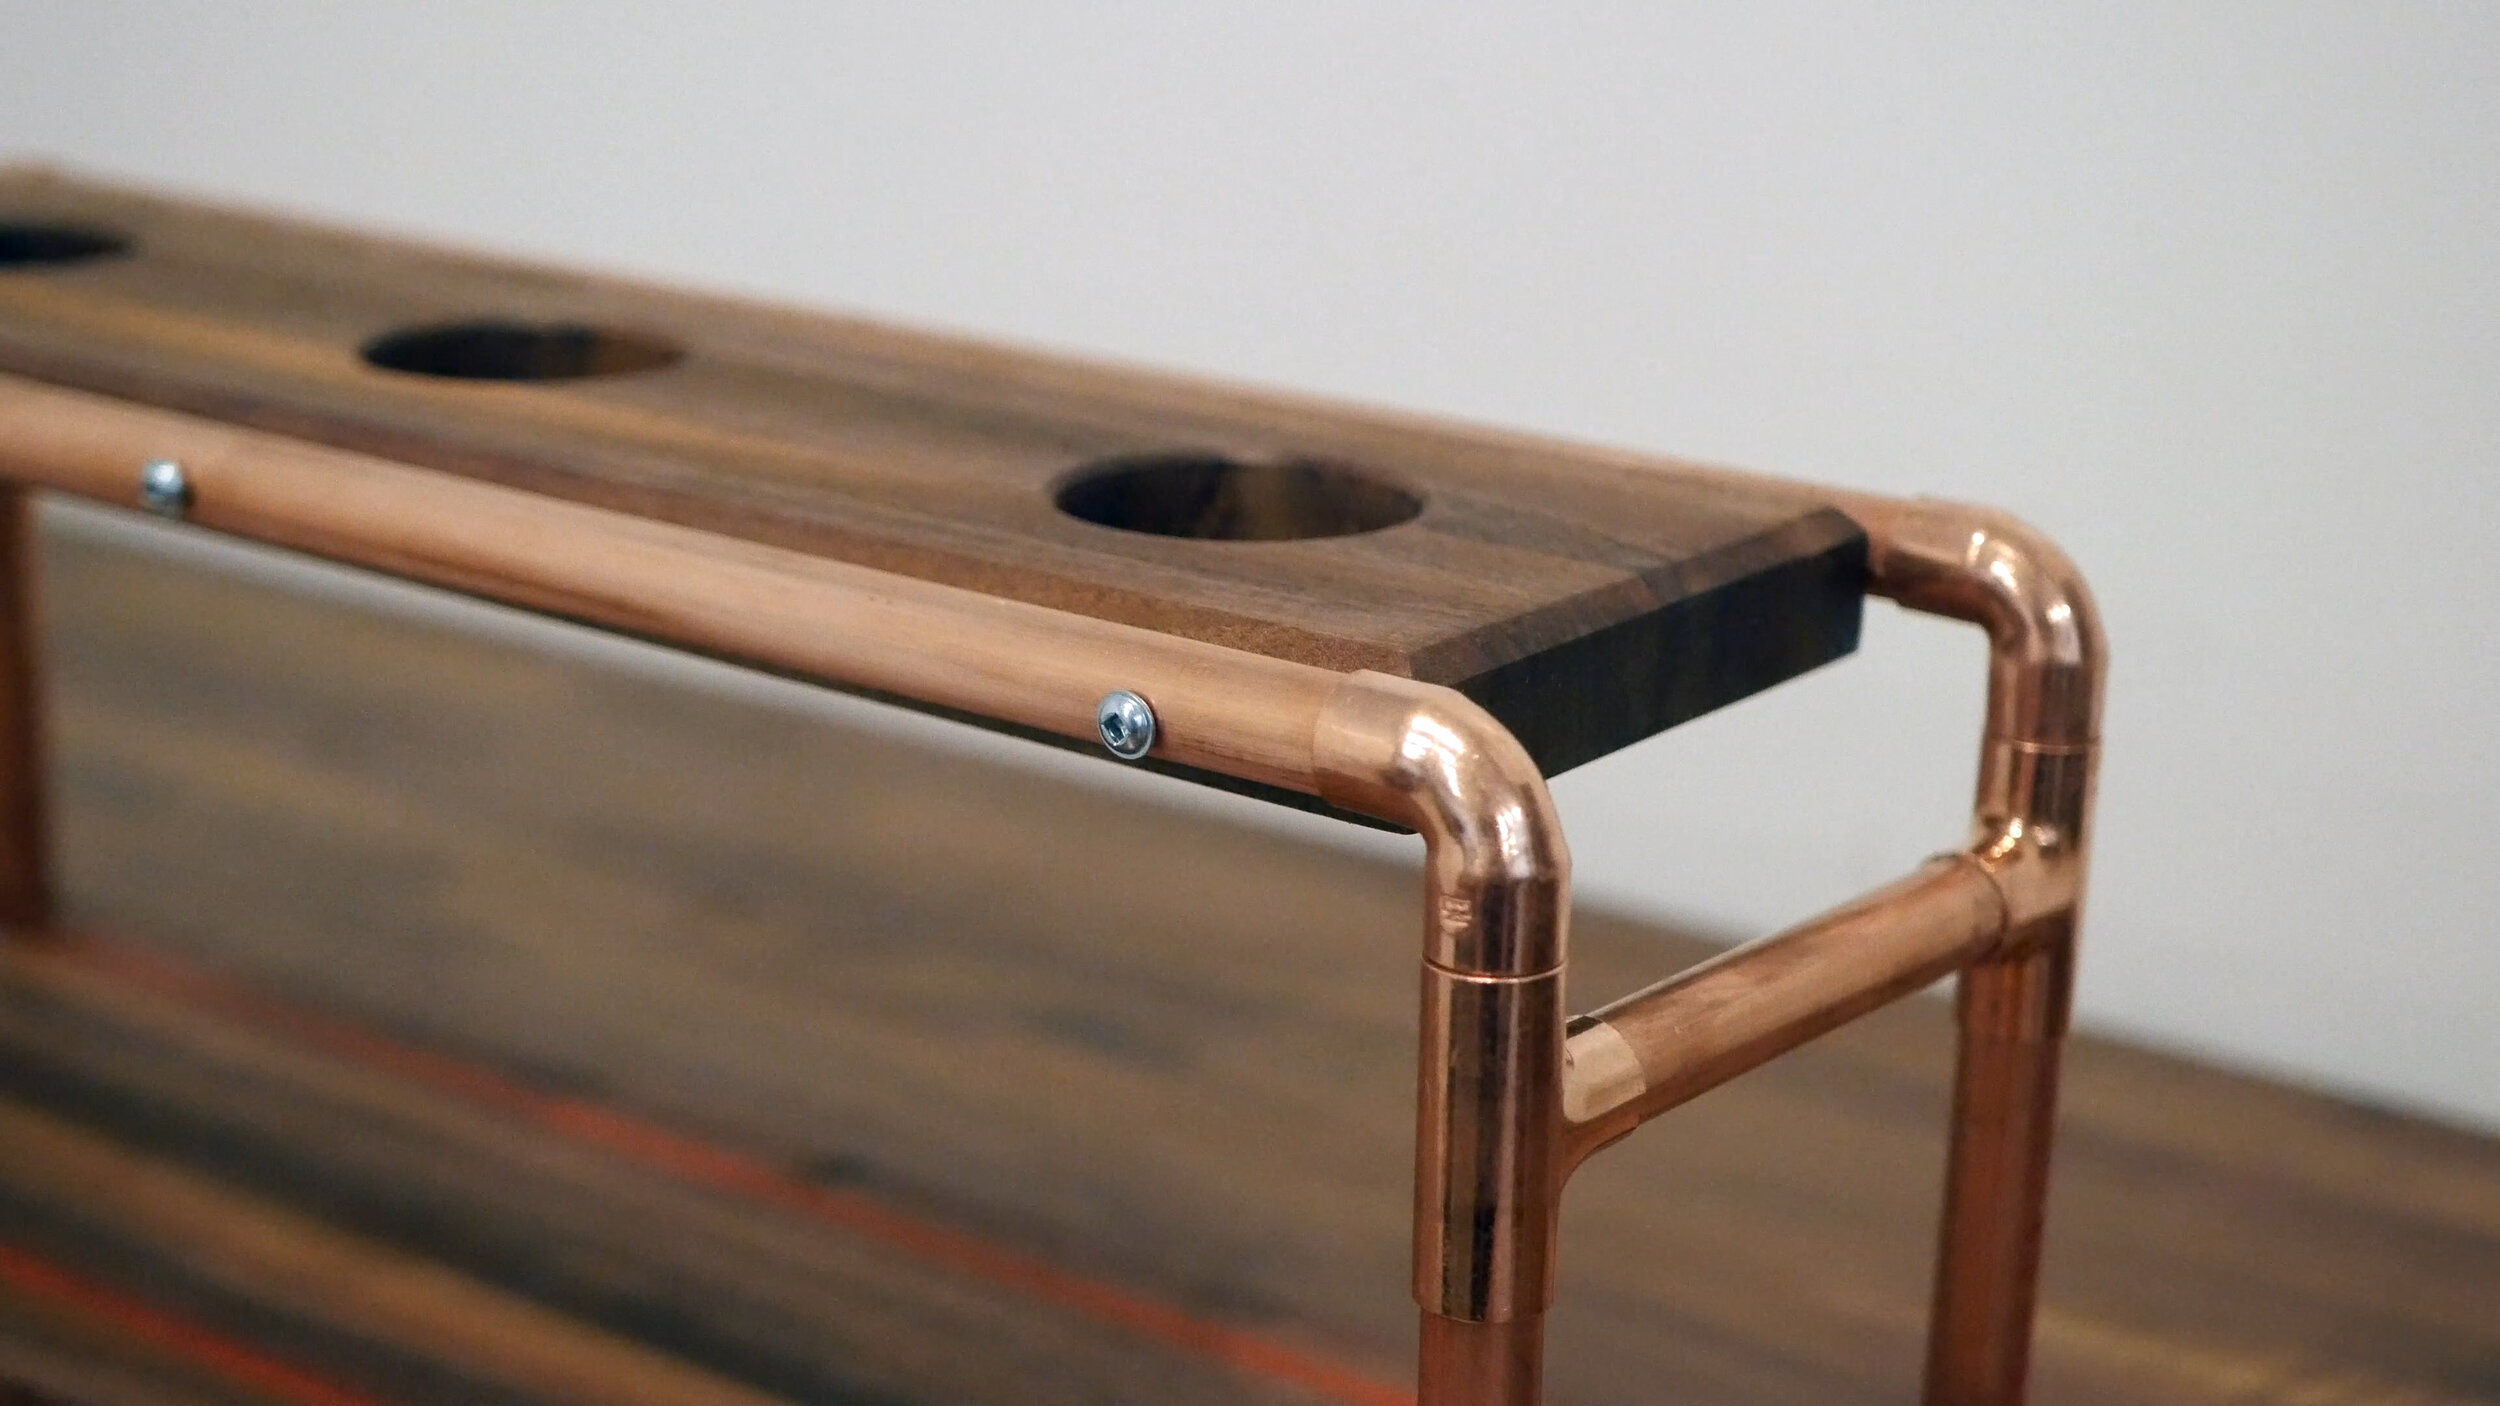
I then added chamfers to the tops of each piece - adding a subtle profile really ups the overall design of the piece. If you have a router, go for it!
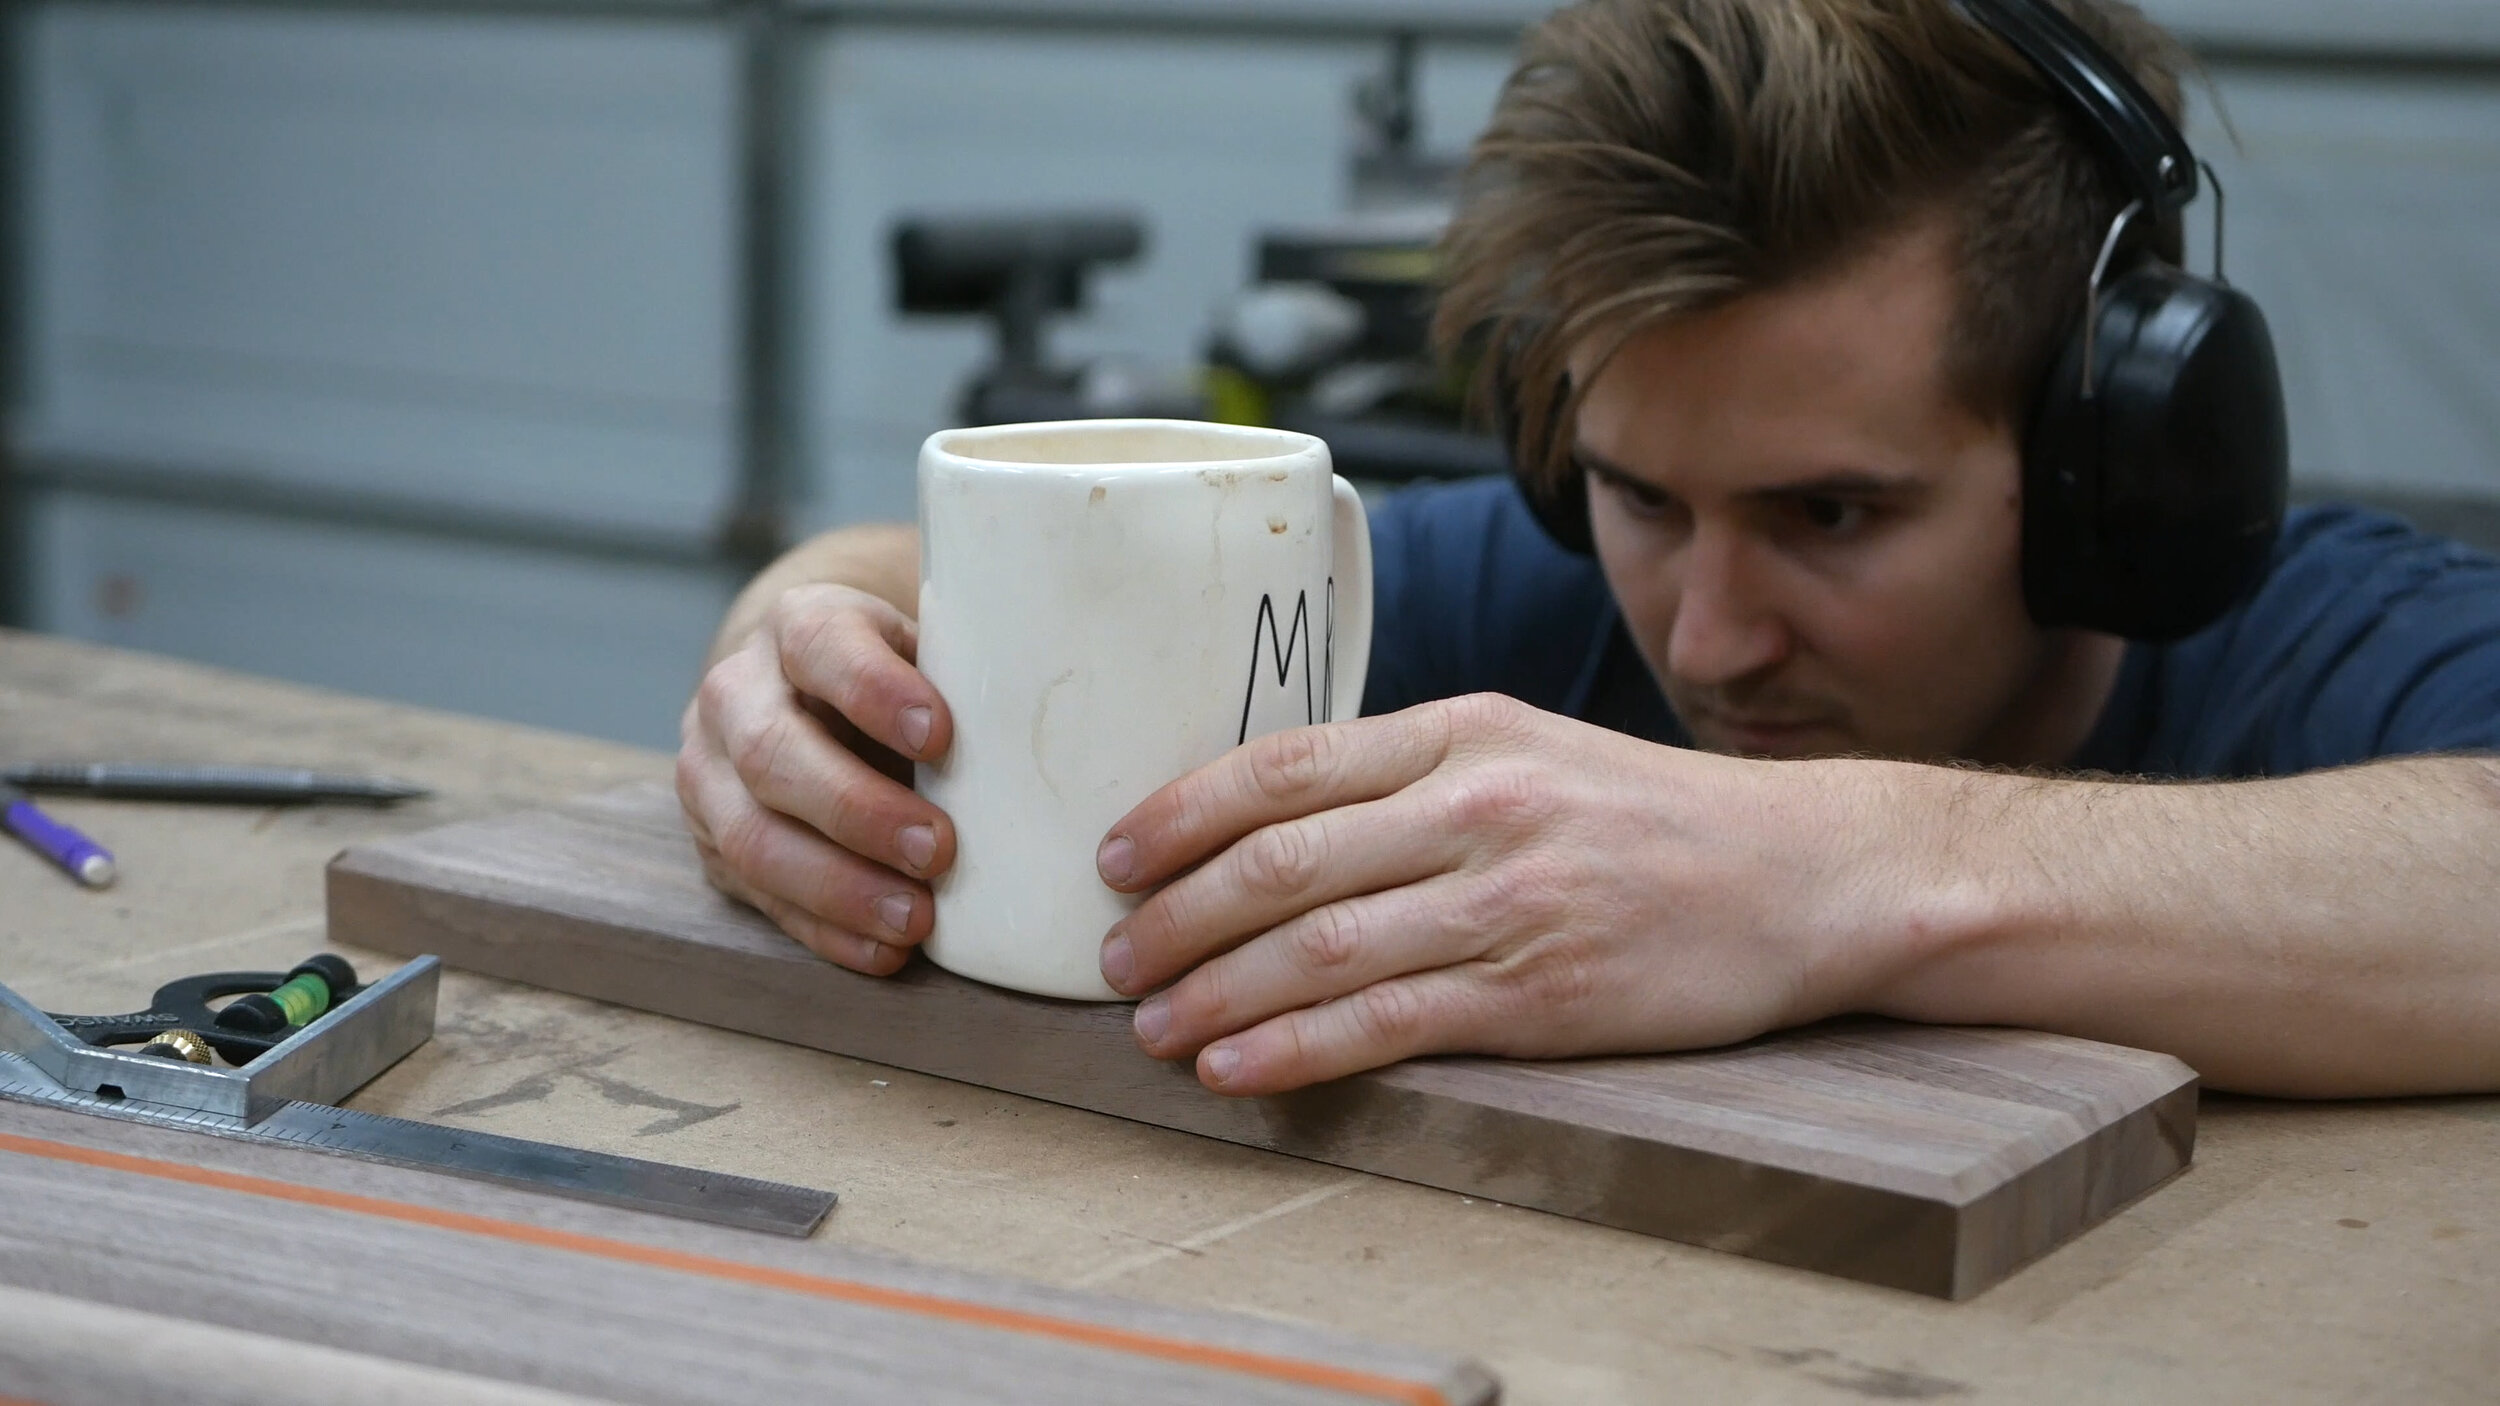
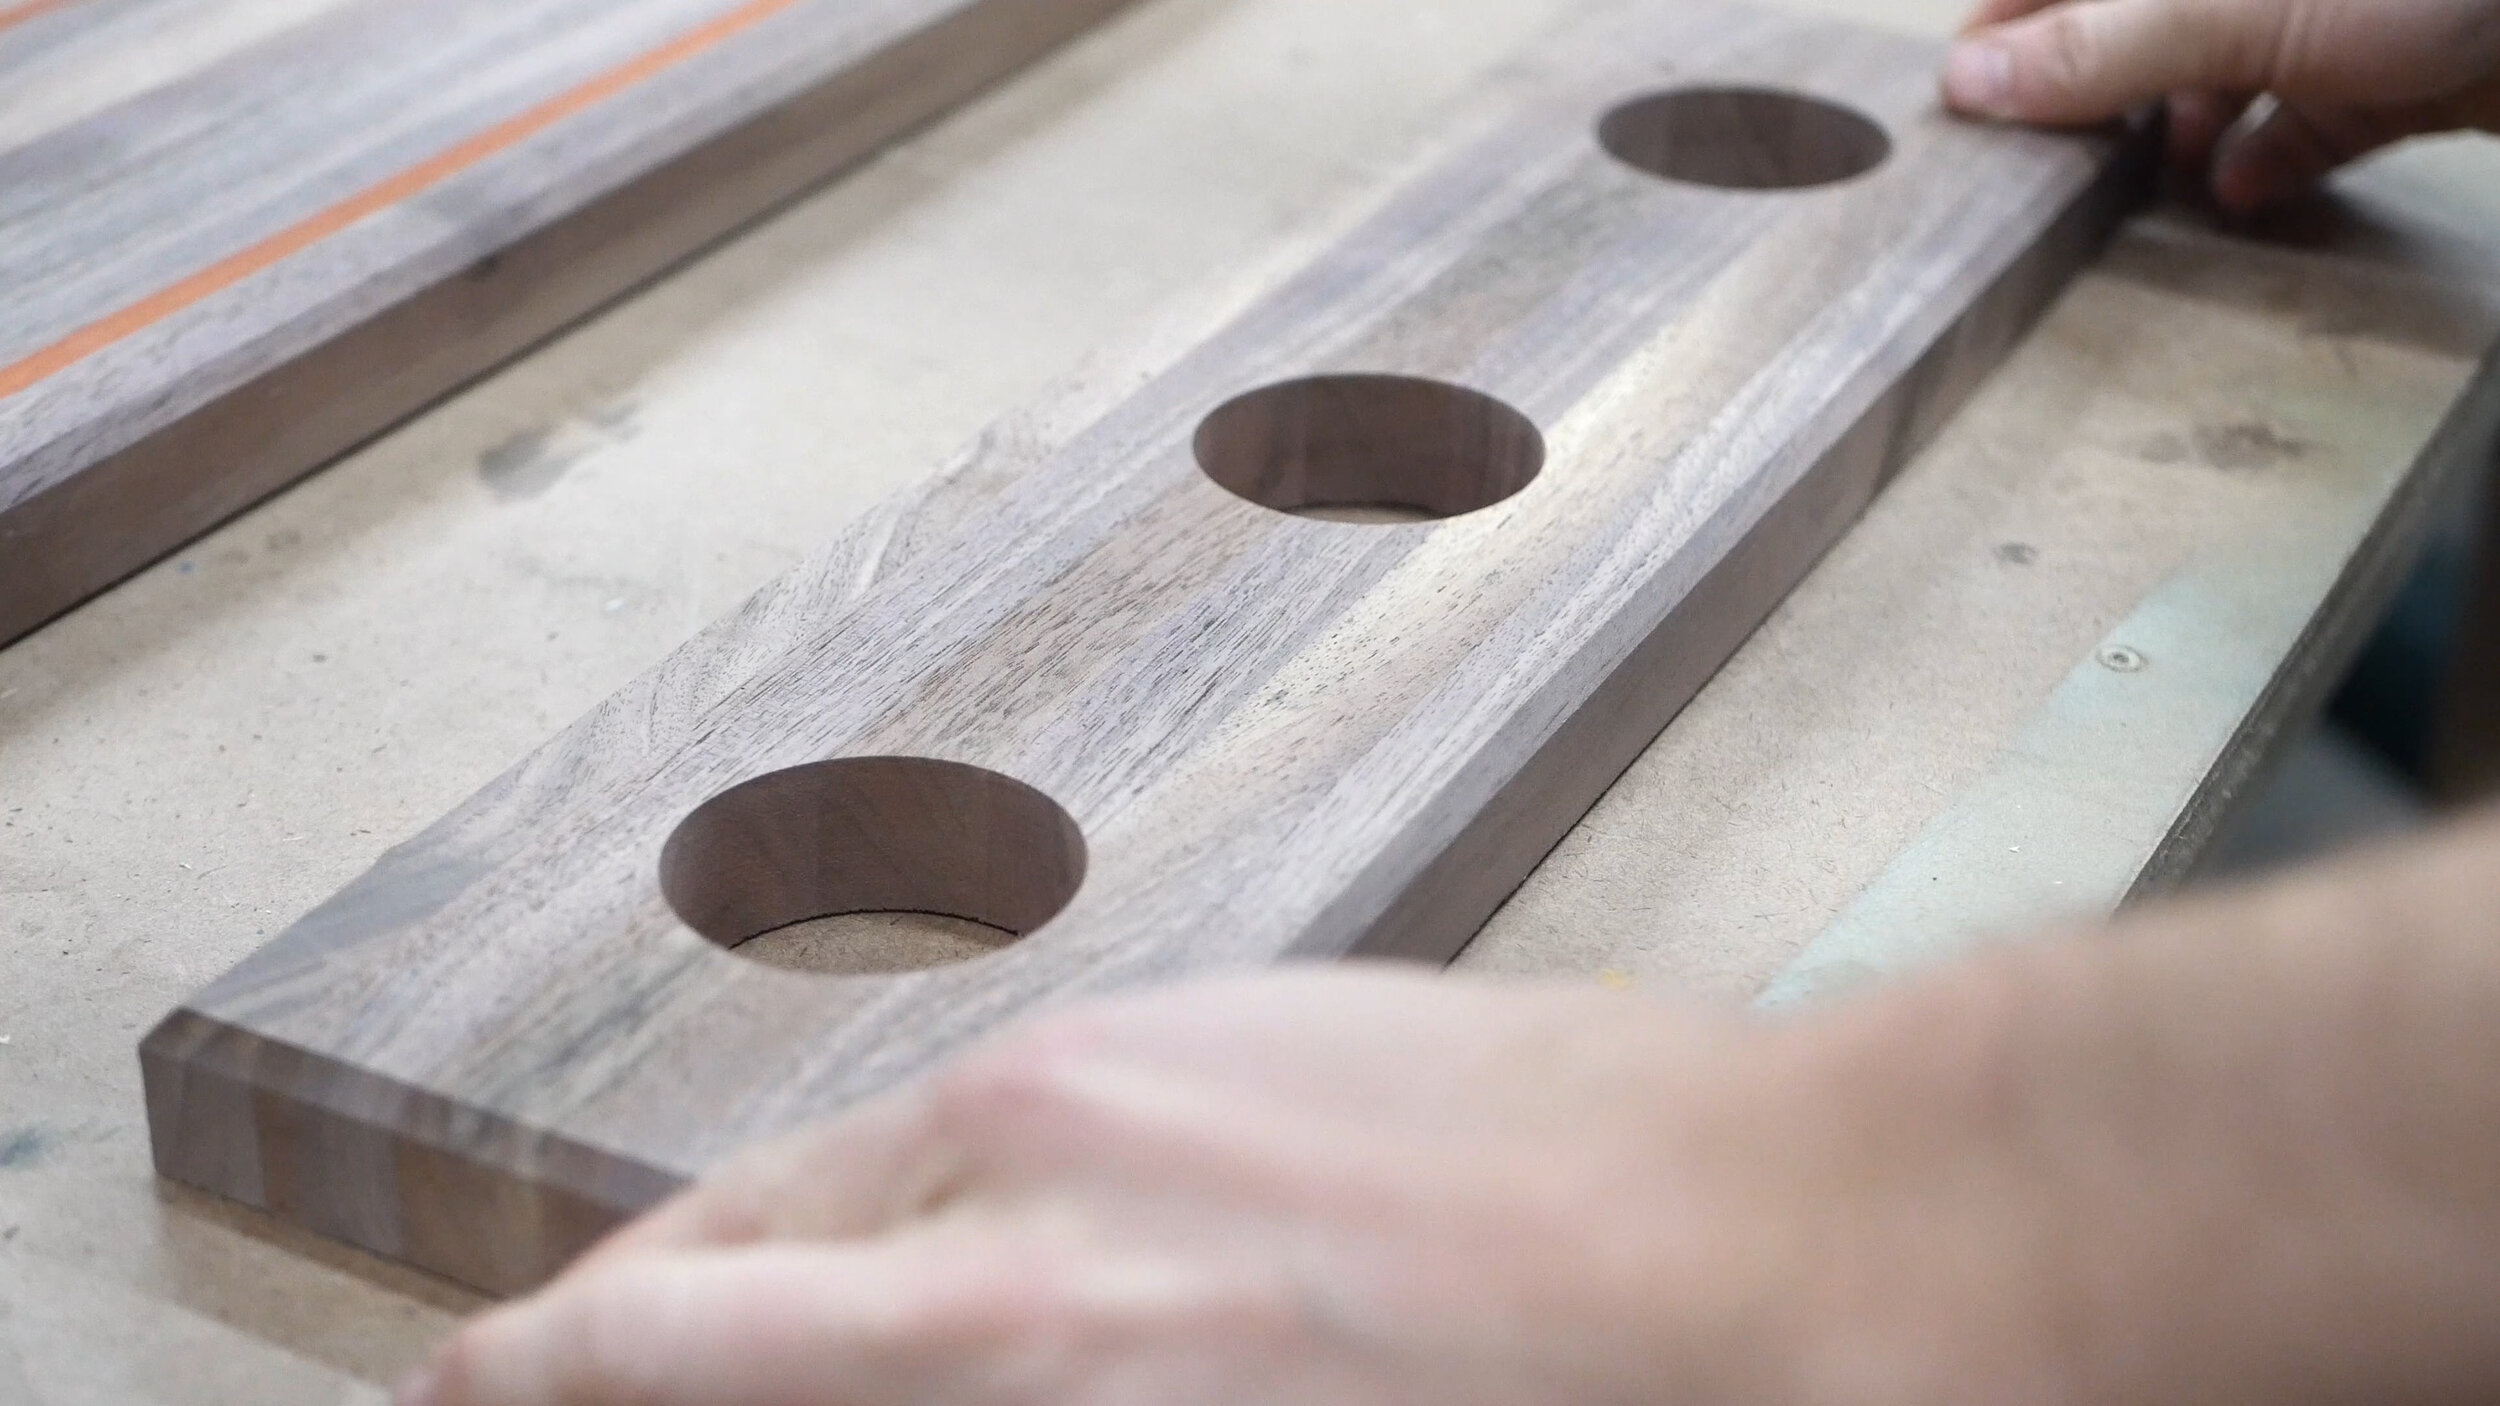
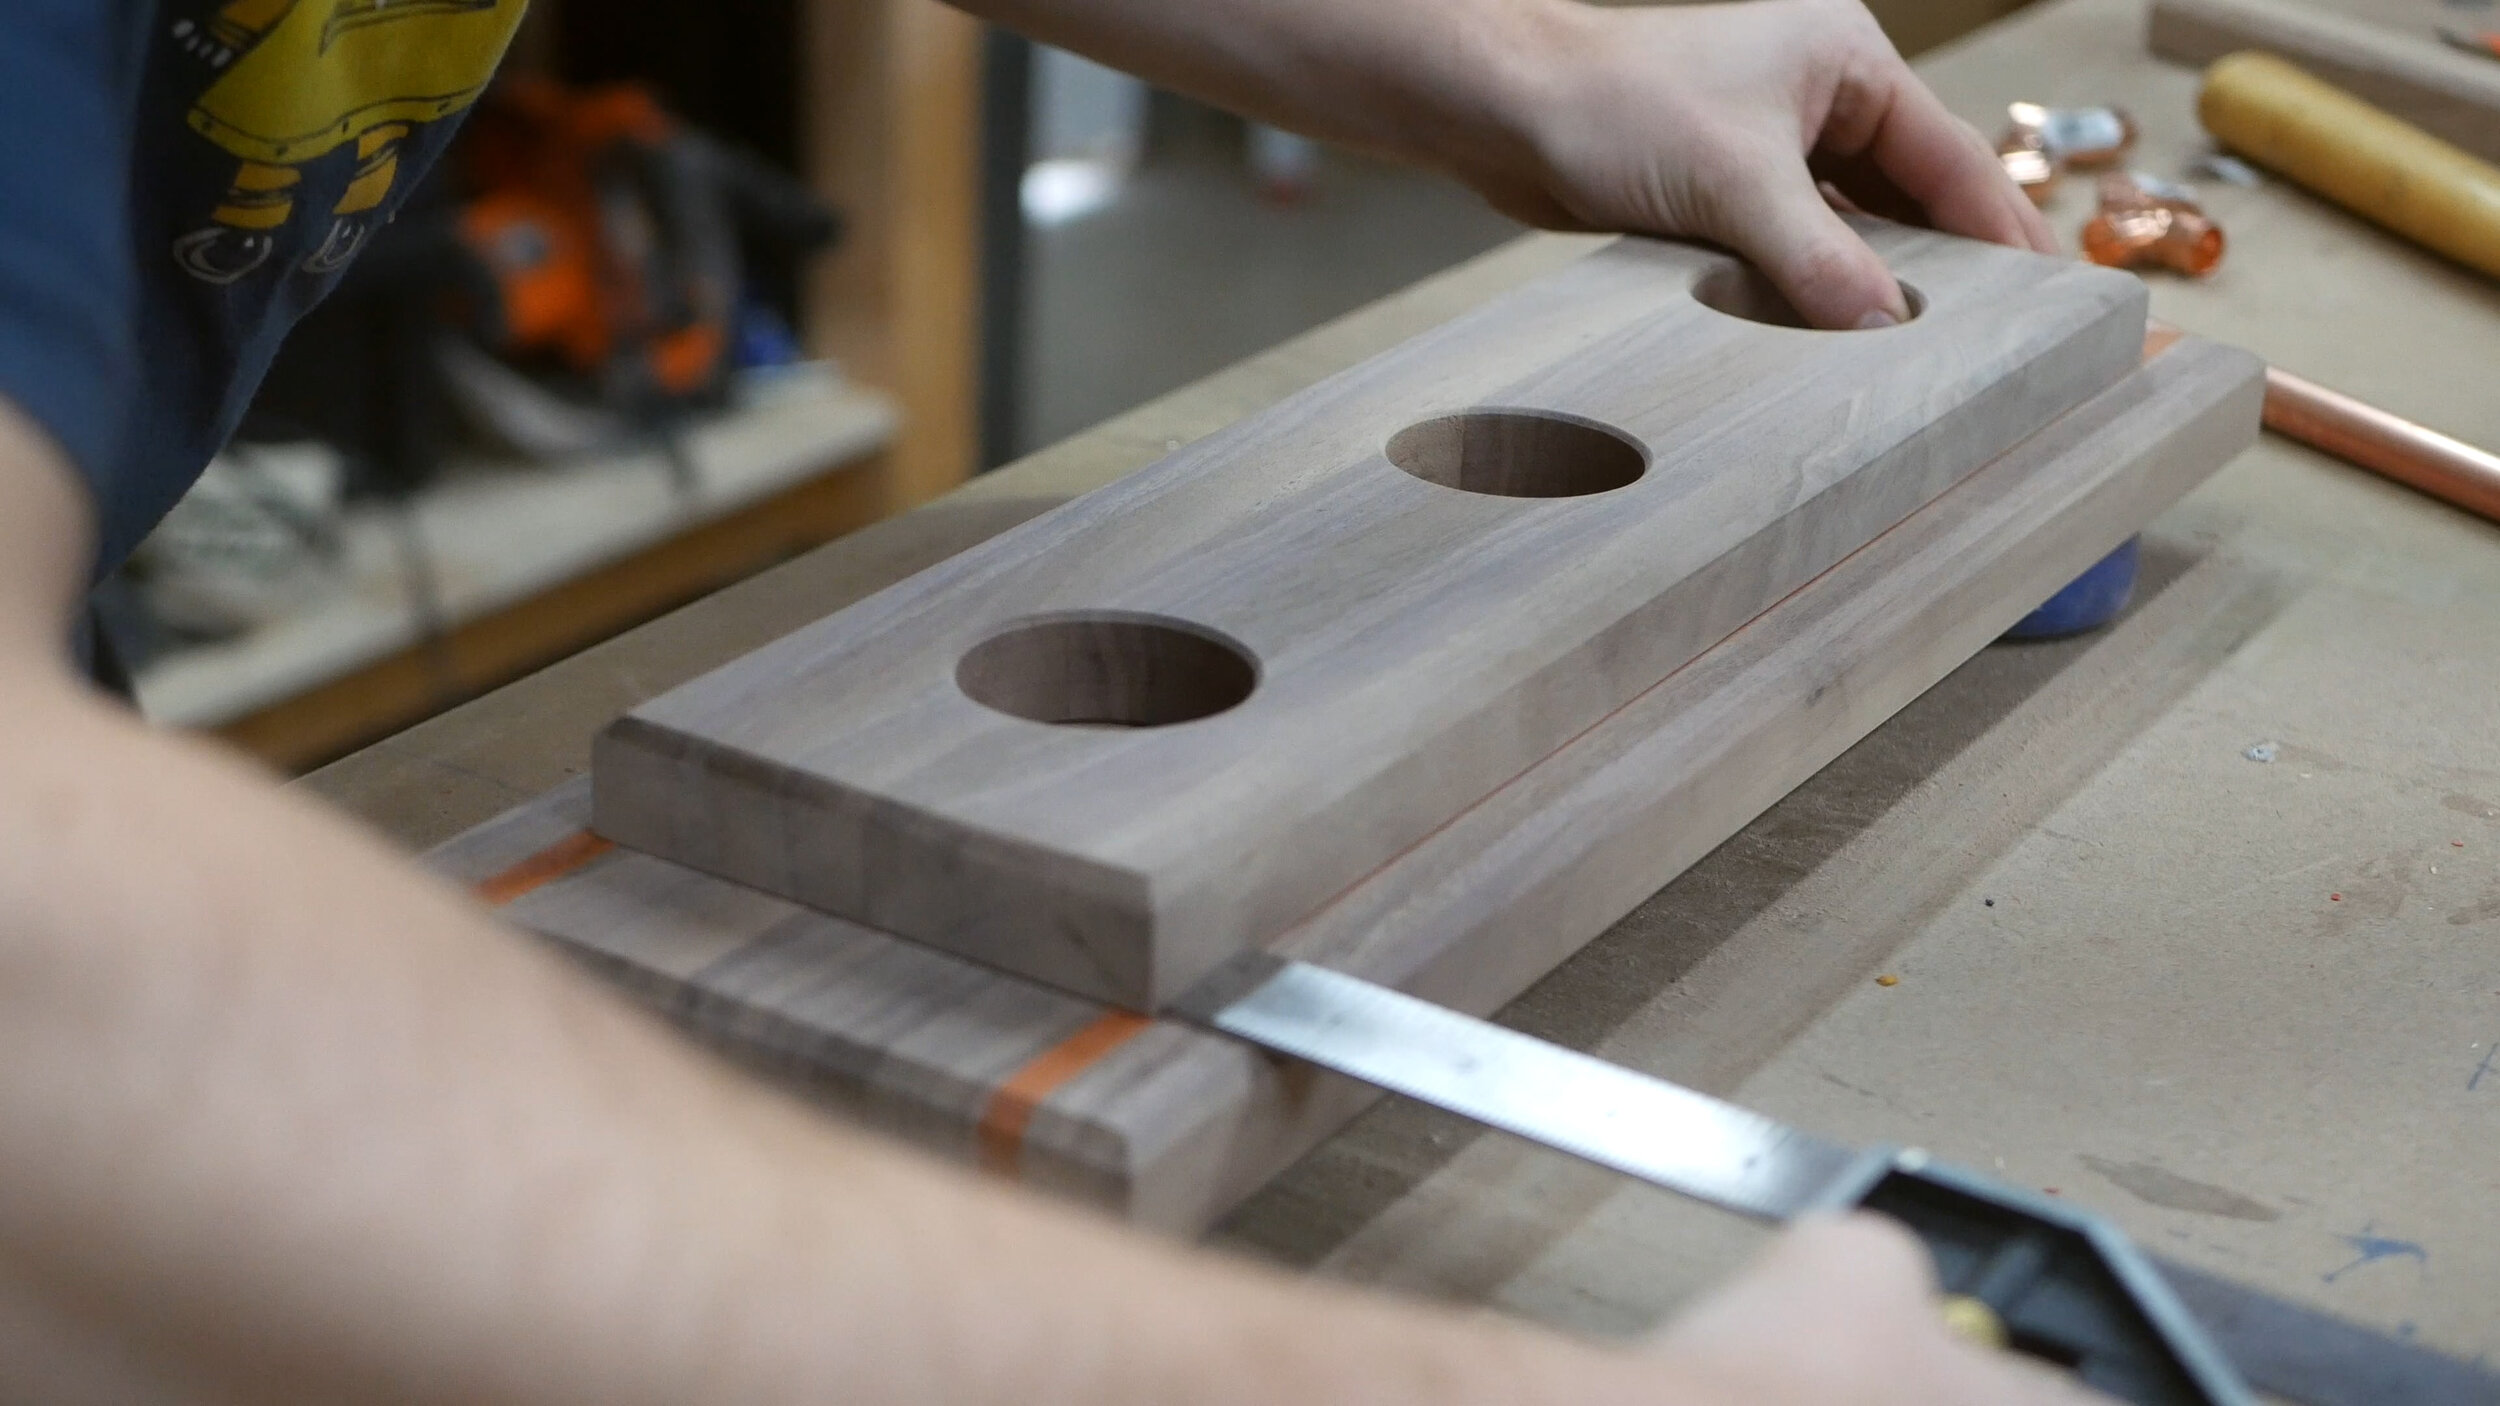
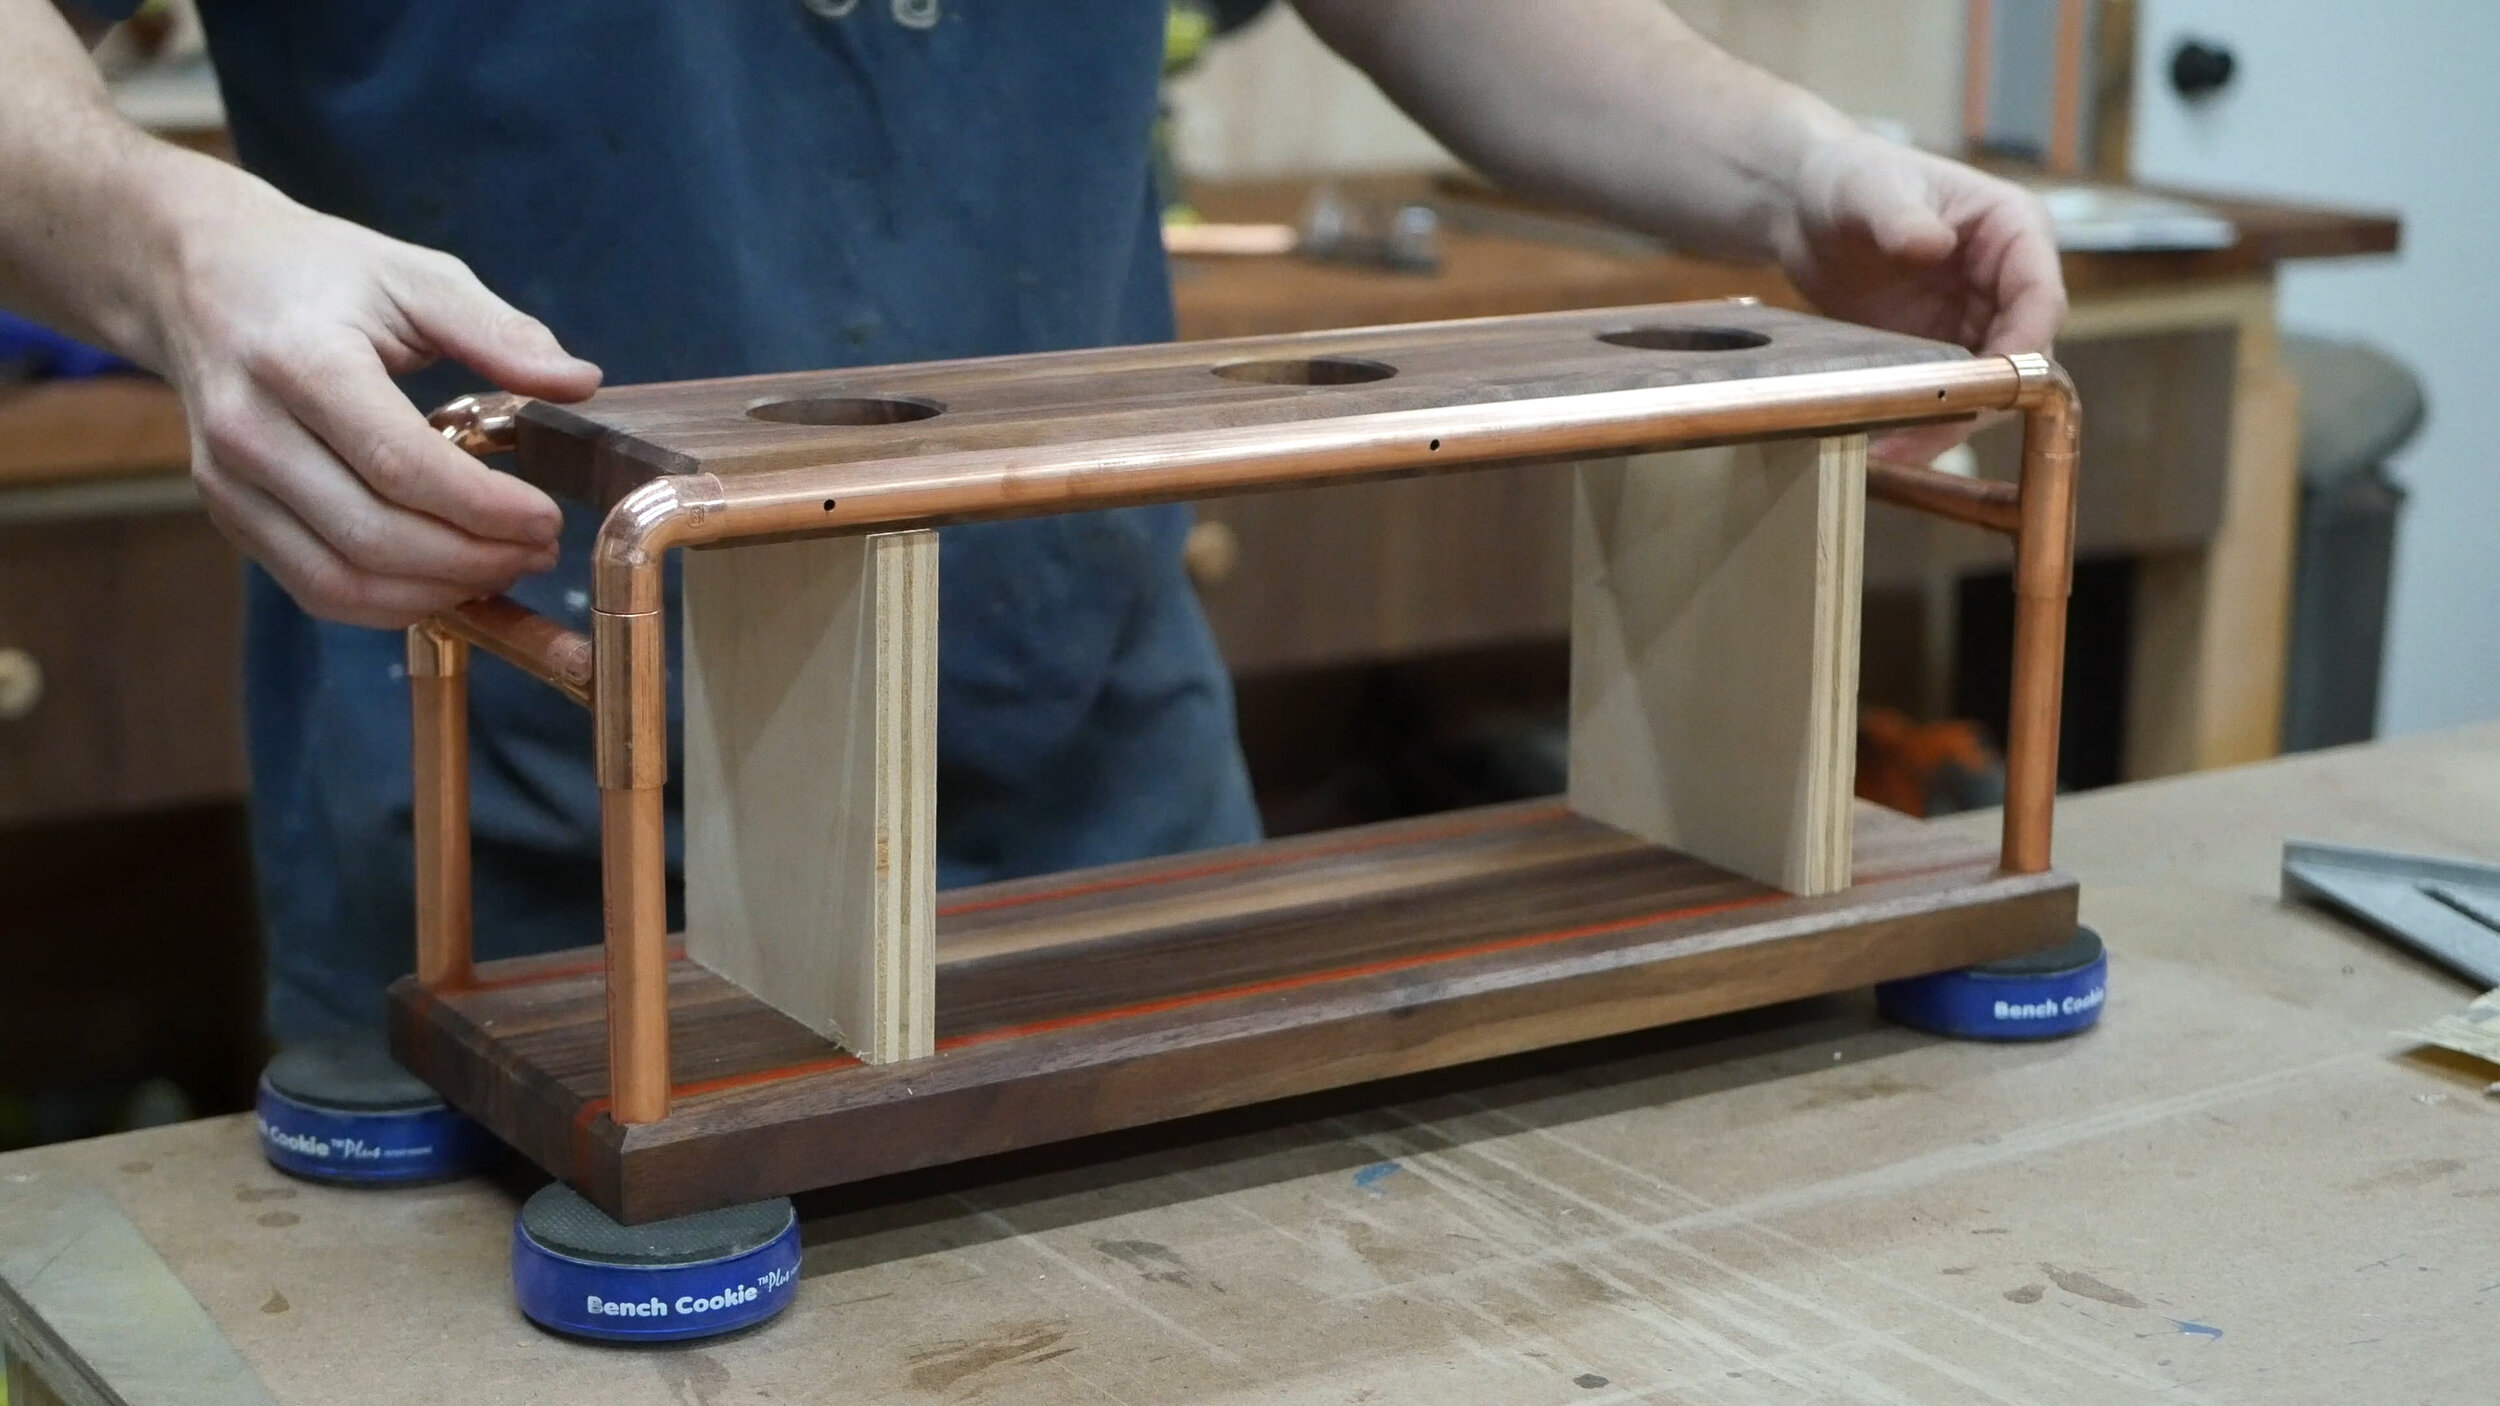
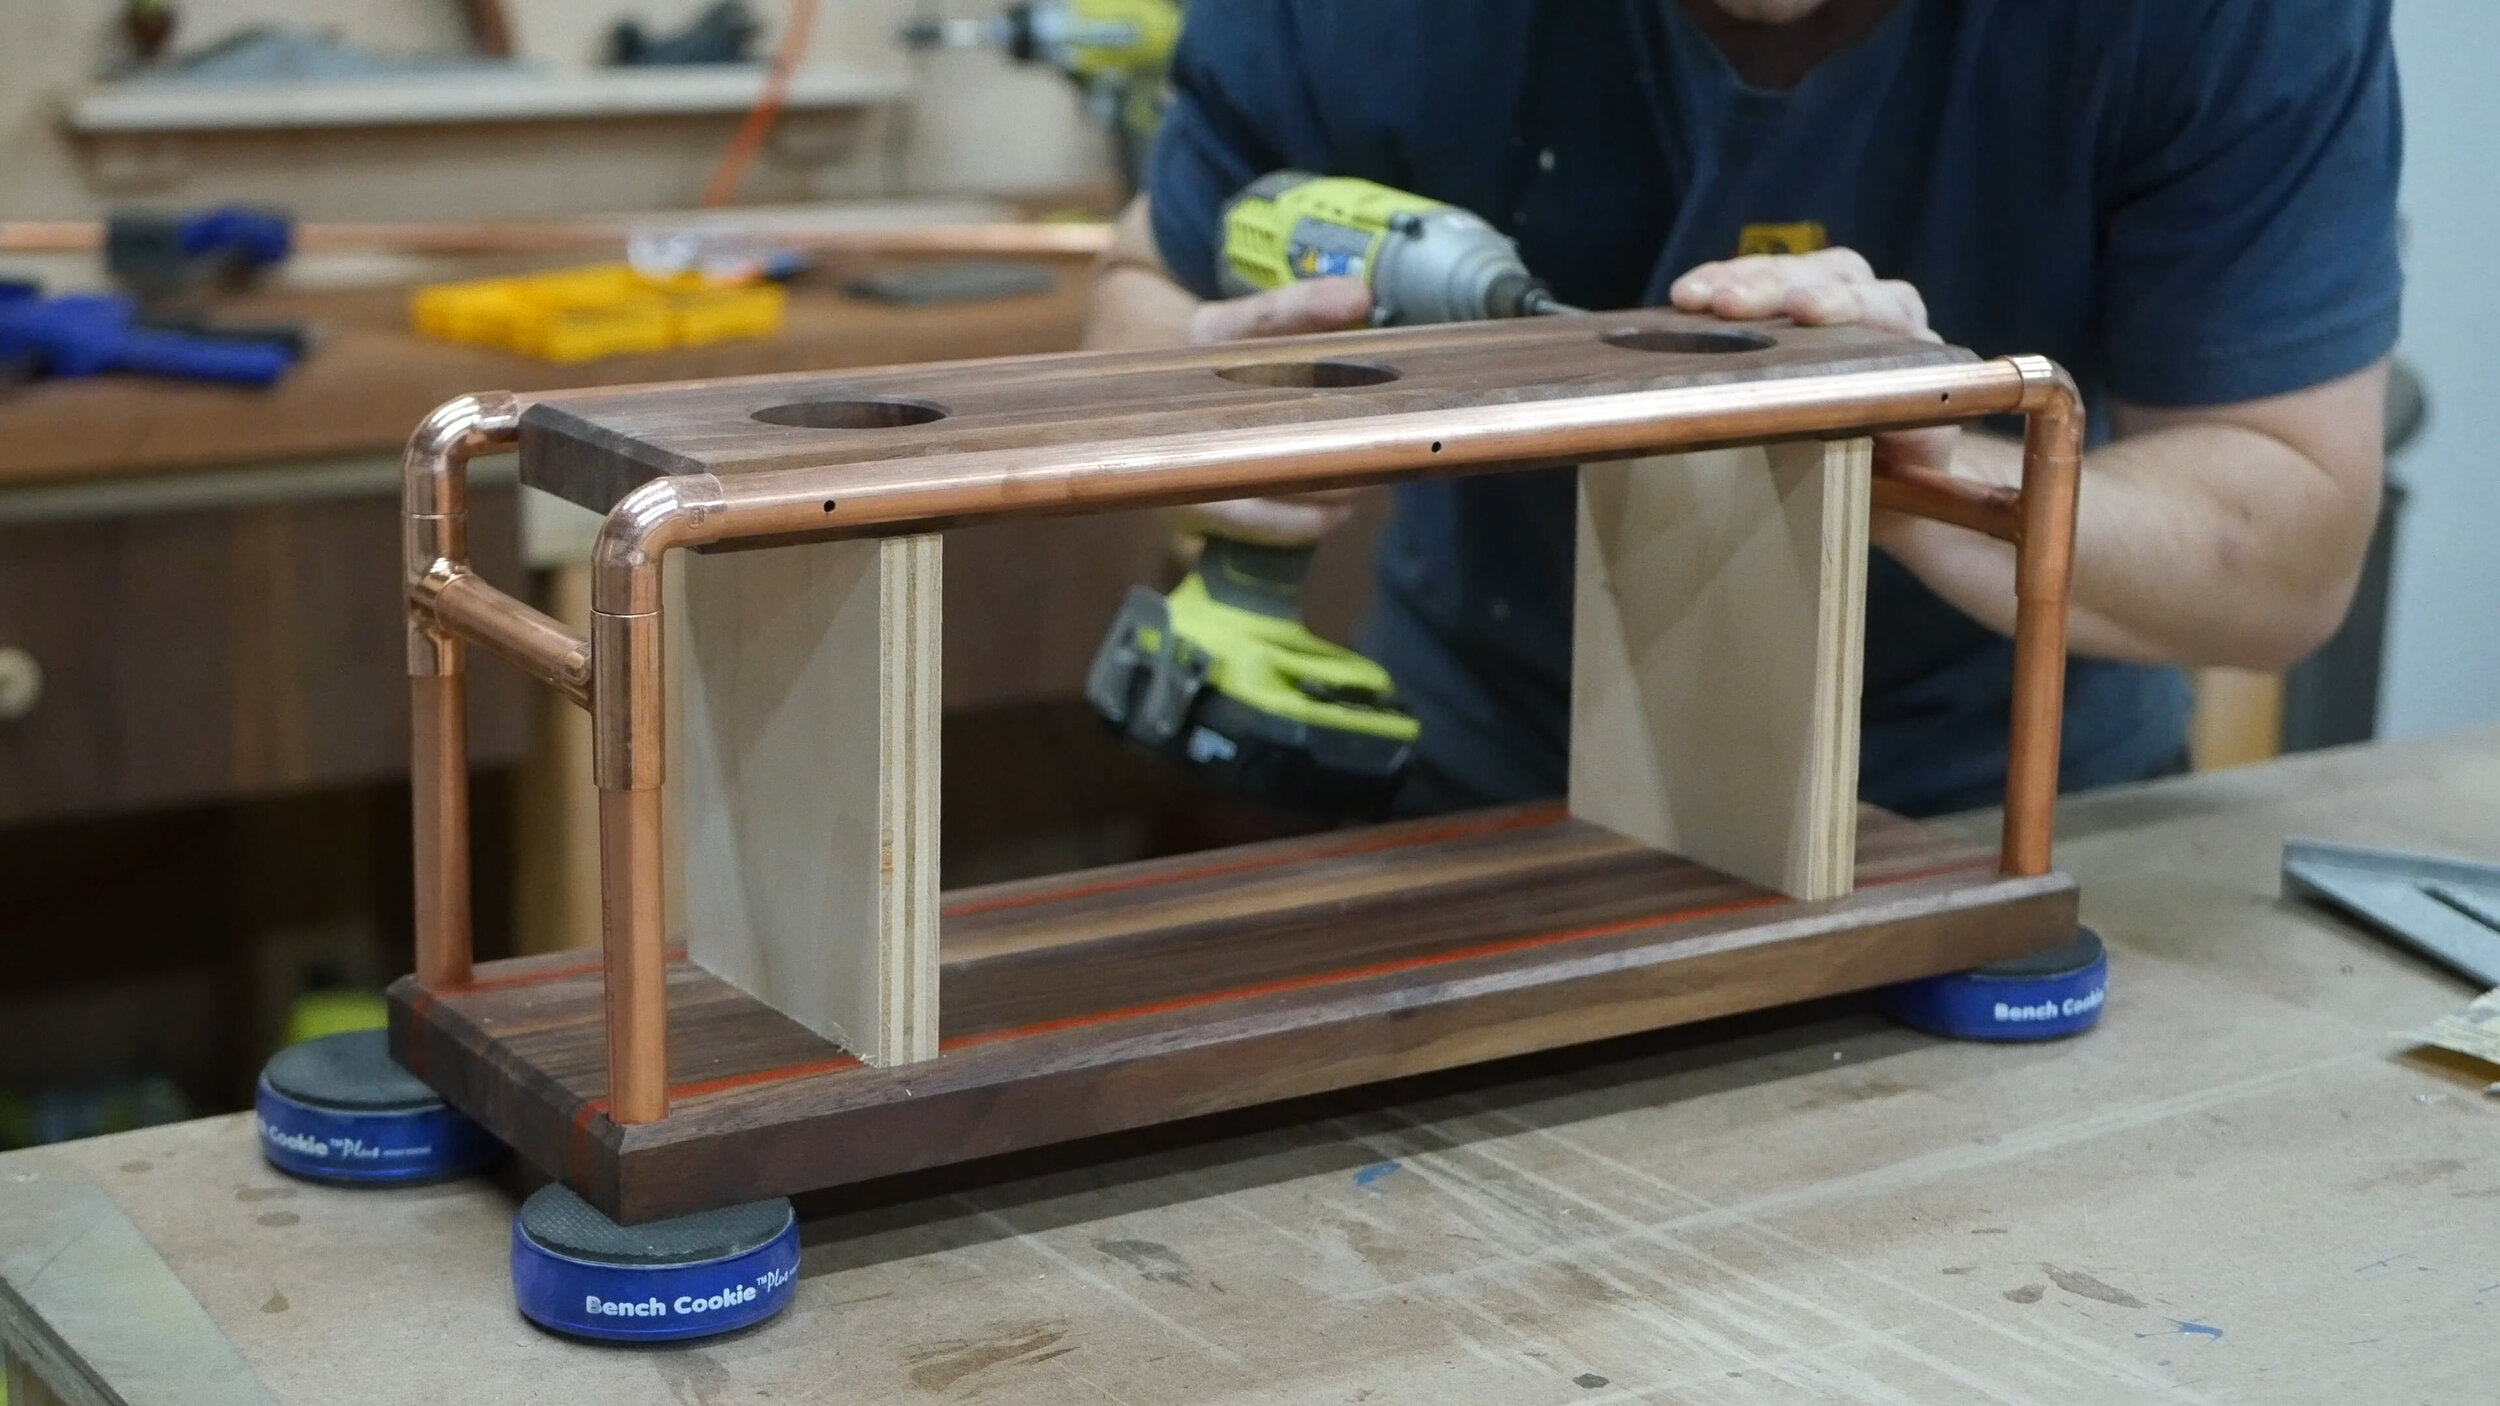
Next up was figuring out where to drill the three holes for the top of the piece. A pour over would sit on top of this section, and the holes would allow the coffee to filter through below to your mug. Using a mug, I measured out roughly where things should go, then spent some time honing in exactt measurements.
I then went over to the drill press and drilled out three 2 1/8” wholes. Using a clamp and a backer piece prevented tear out. I then added the same chamfer to the inside of the holes to create a more dynamic profile.
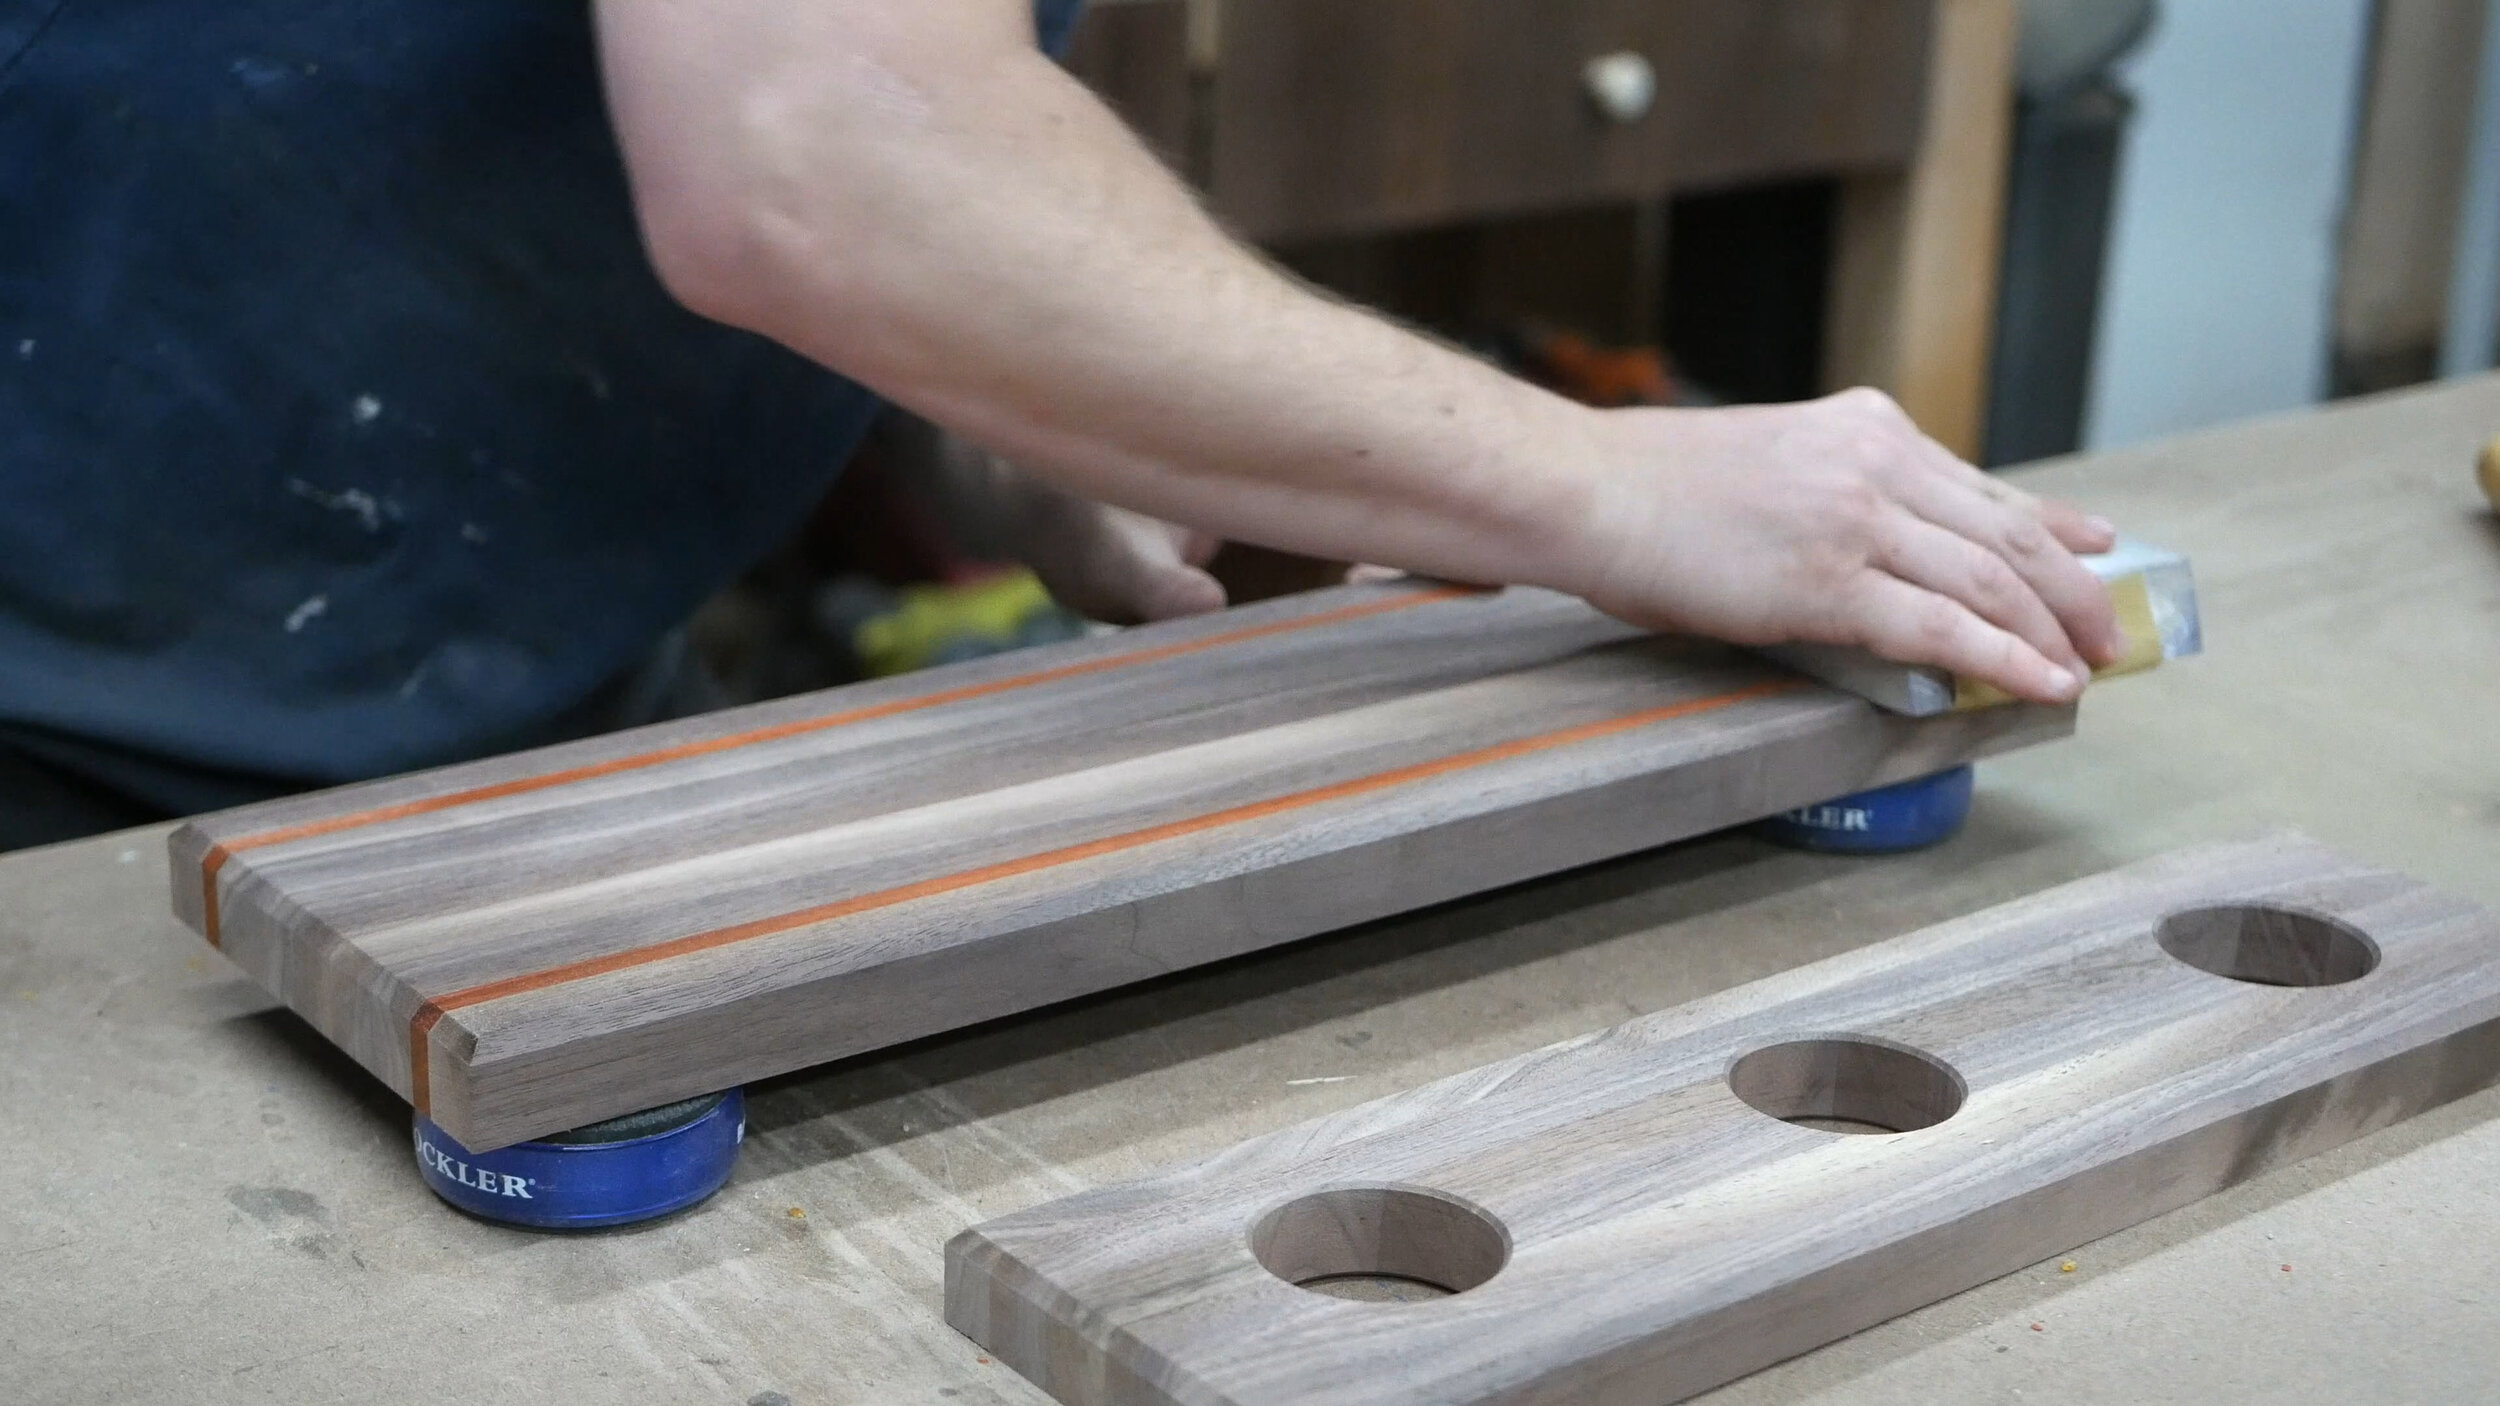
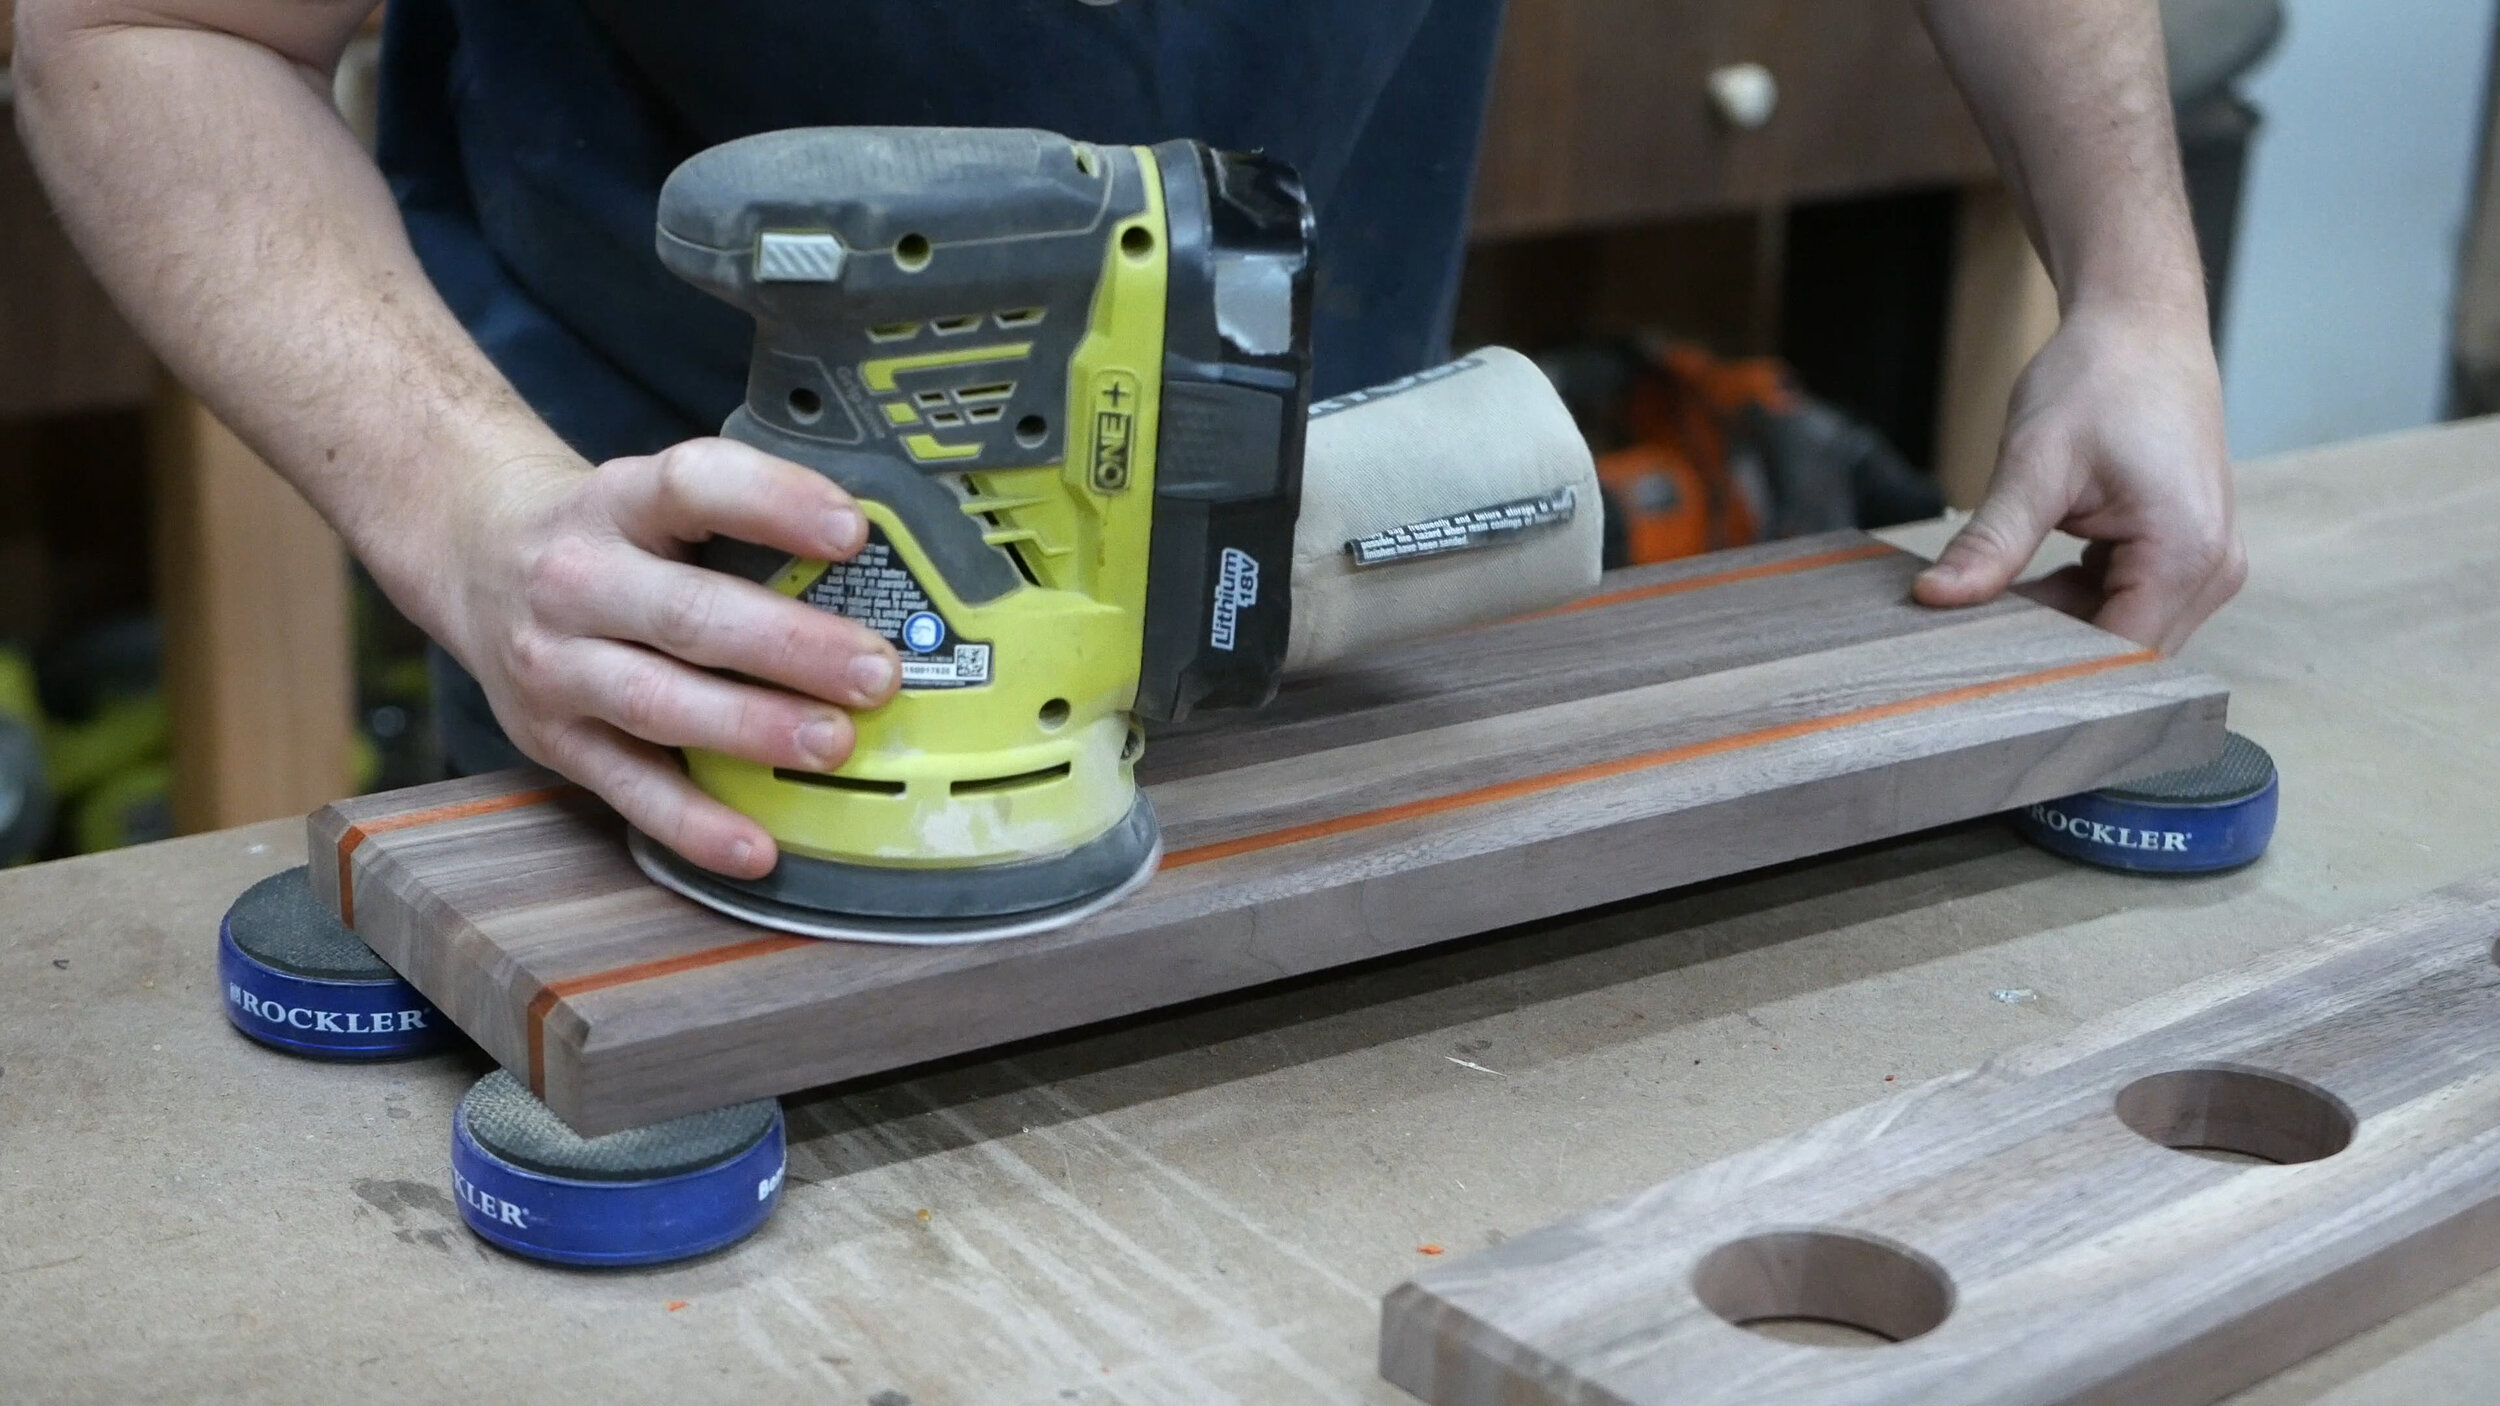
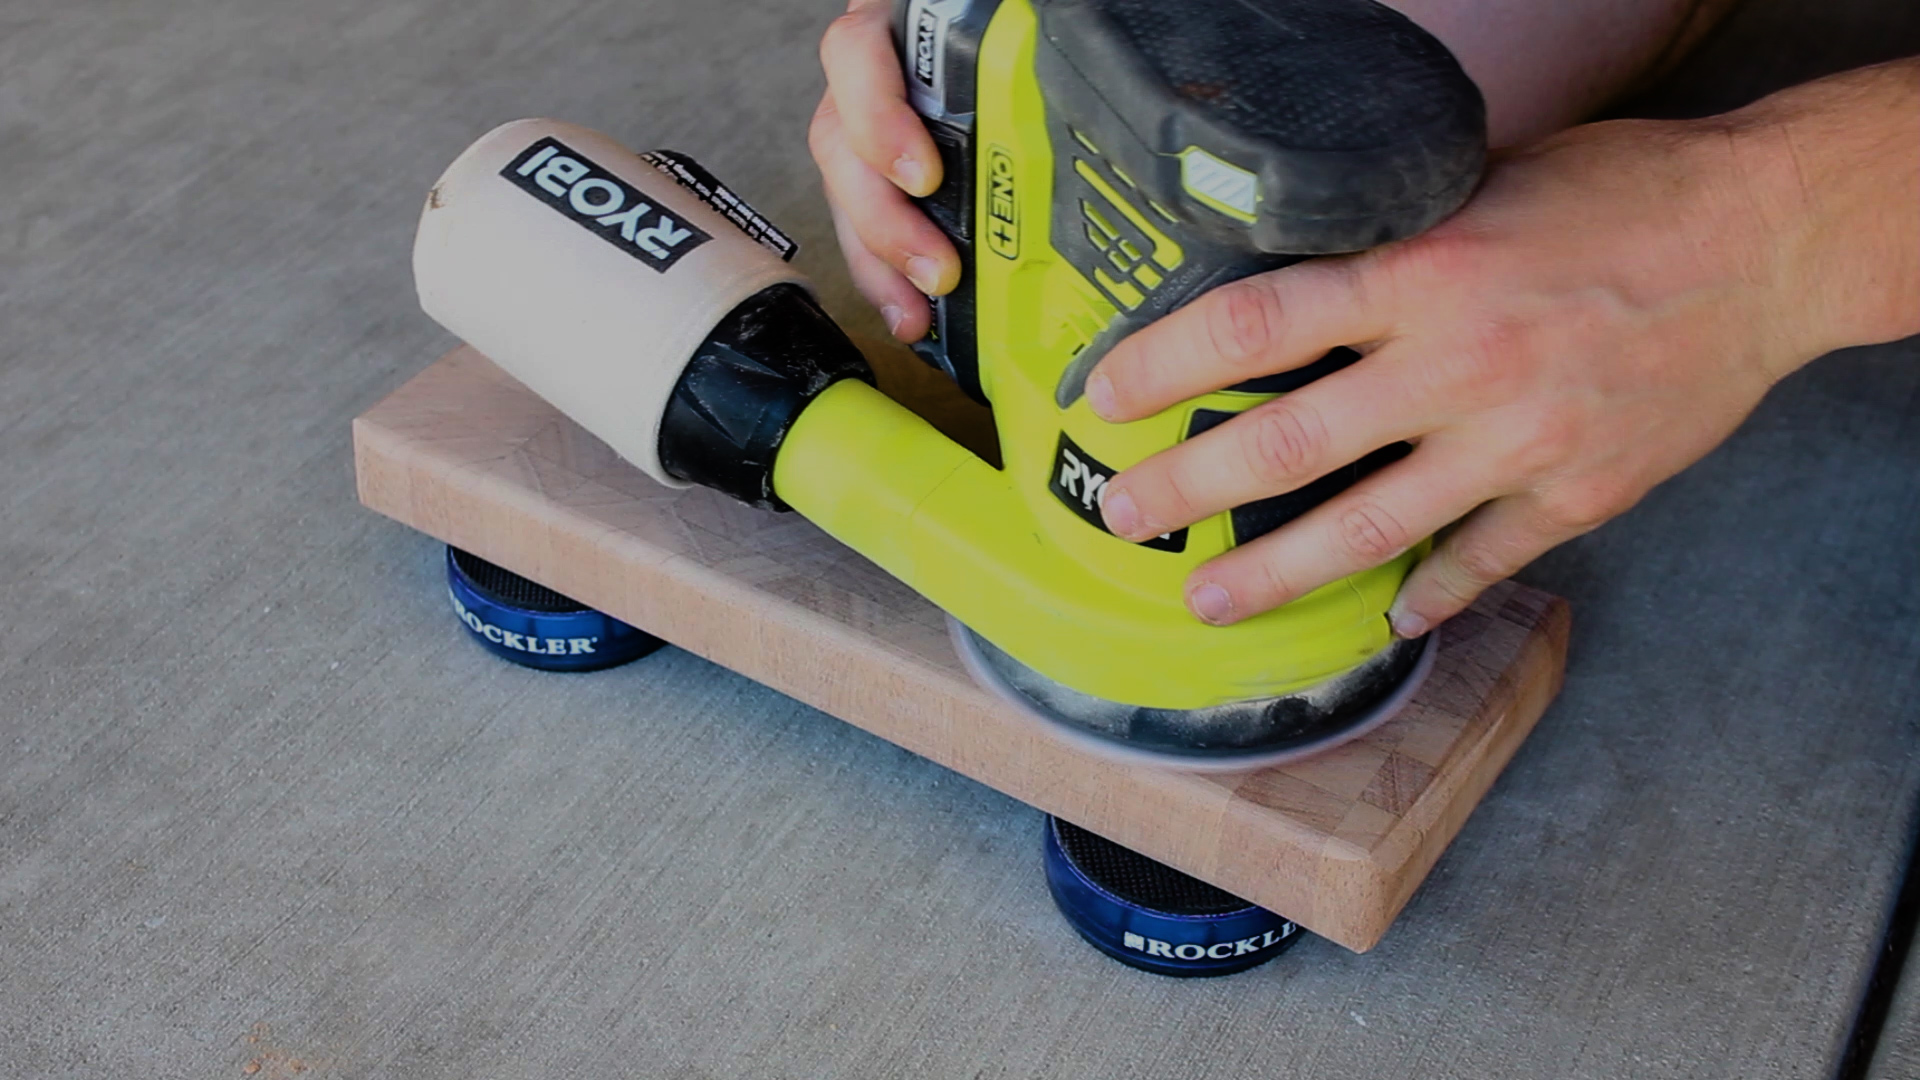
Then I sanded. Yay….
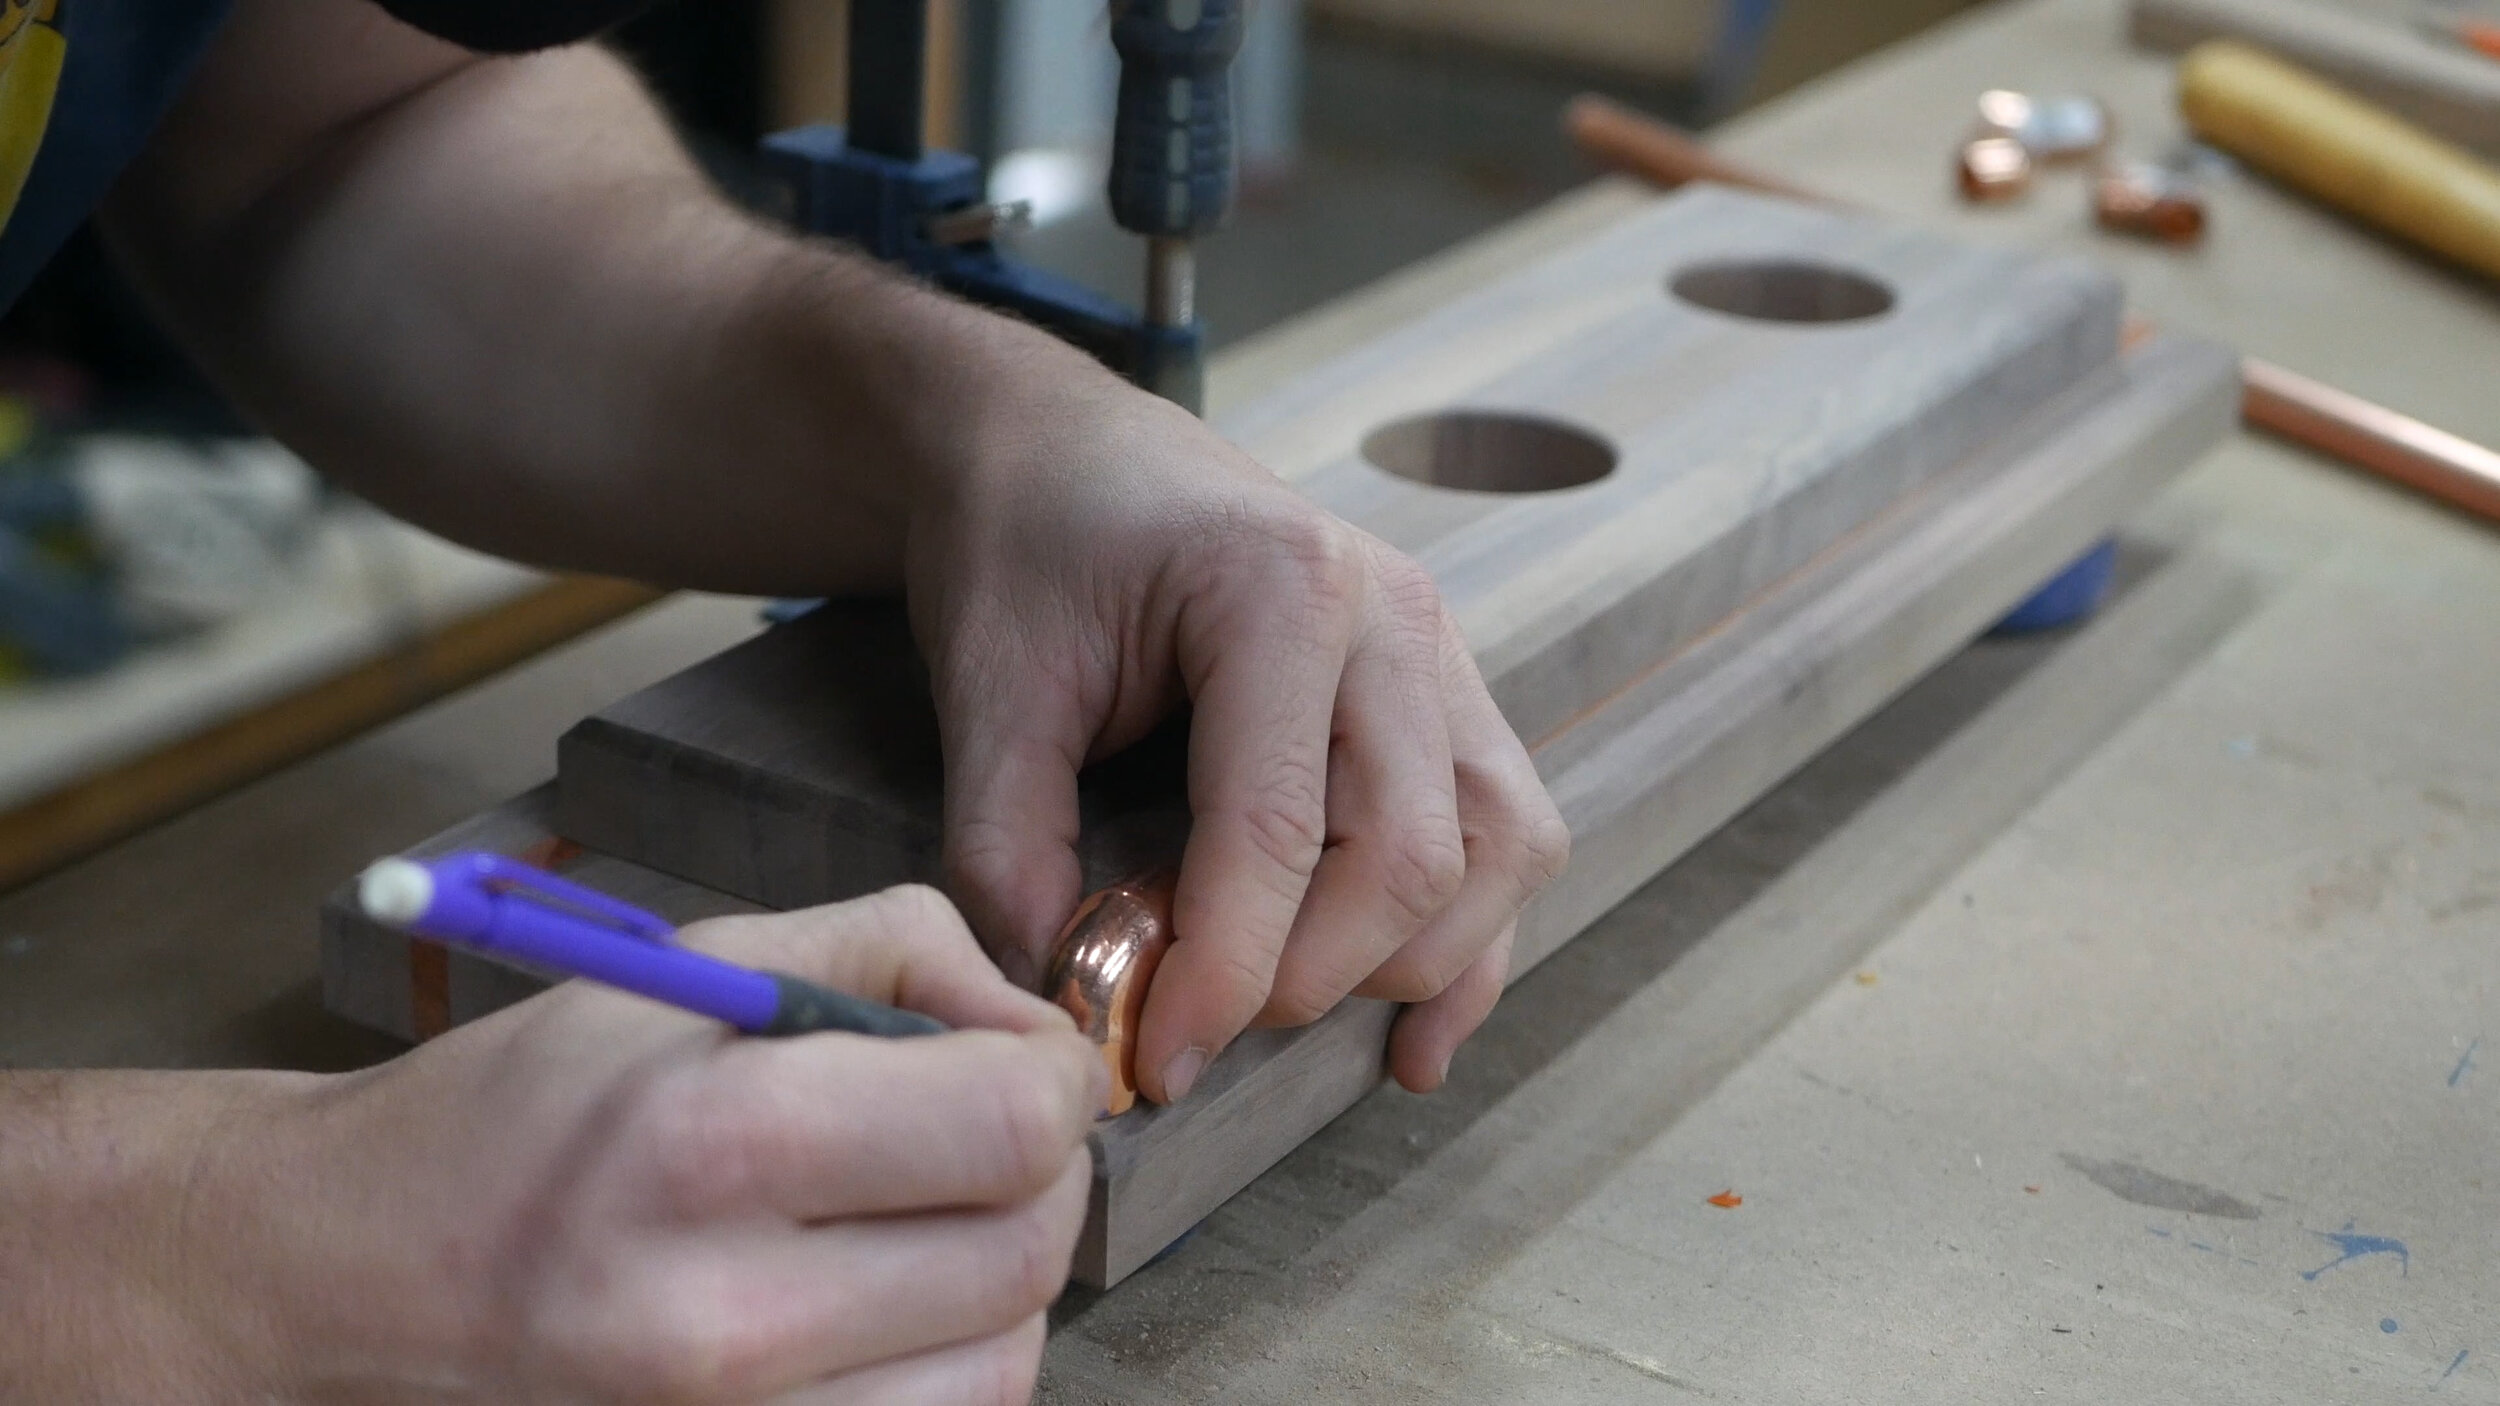
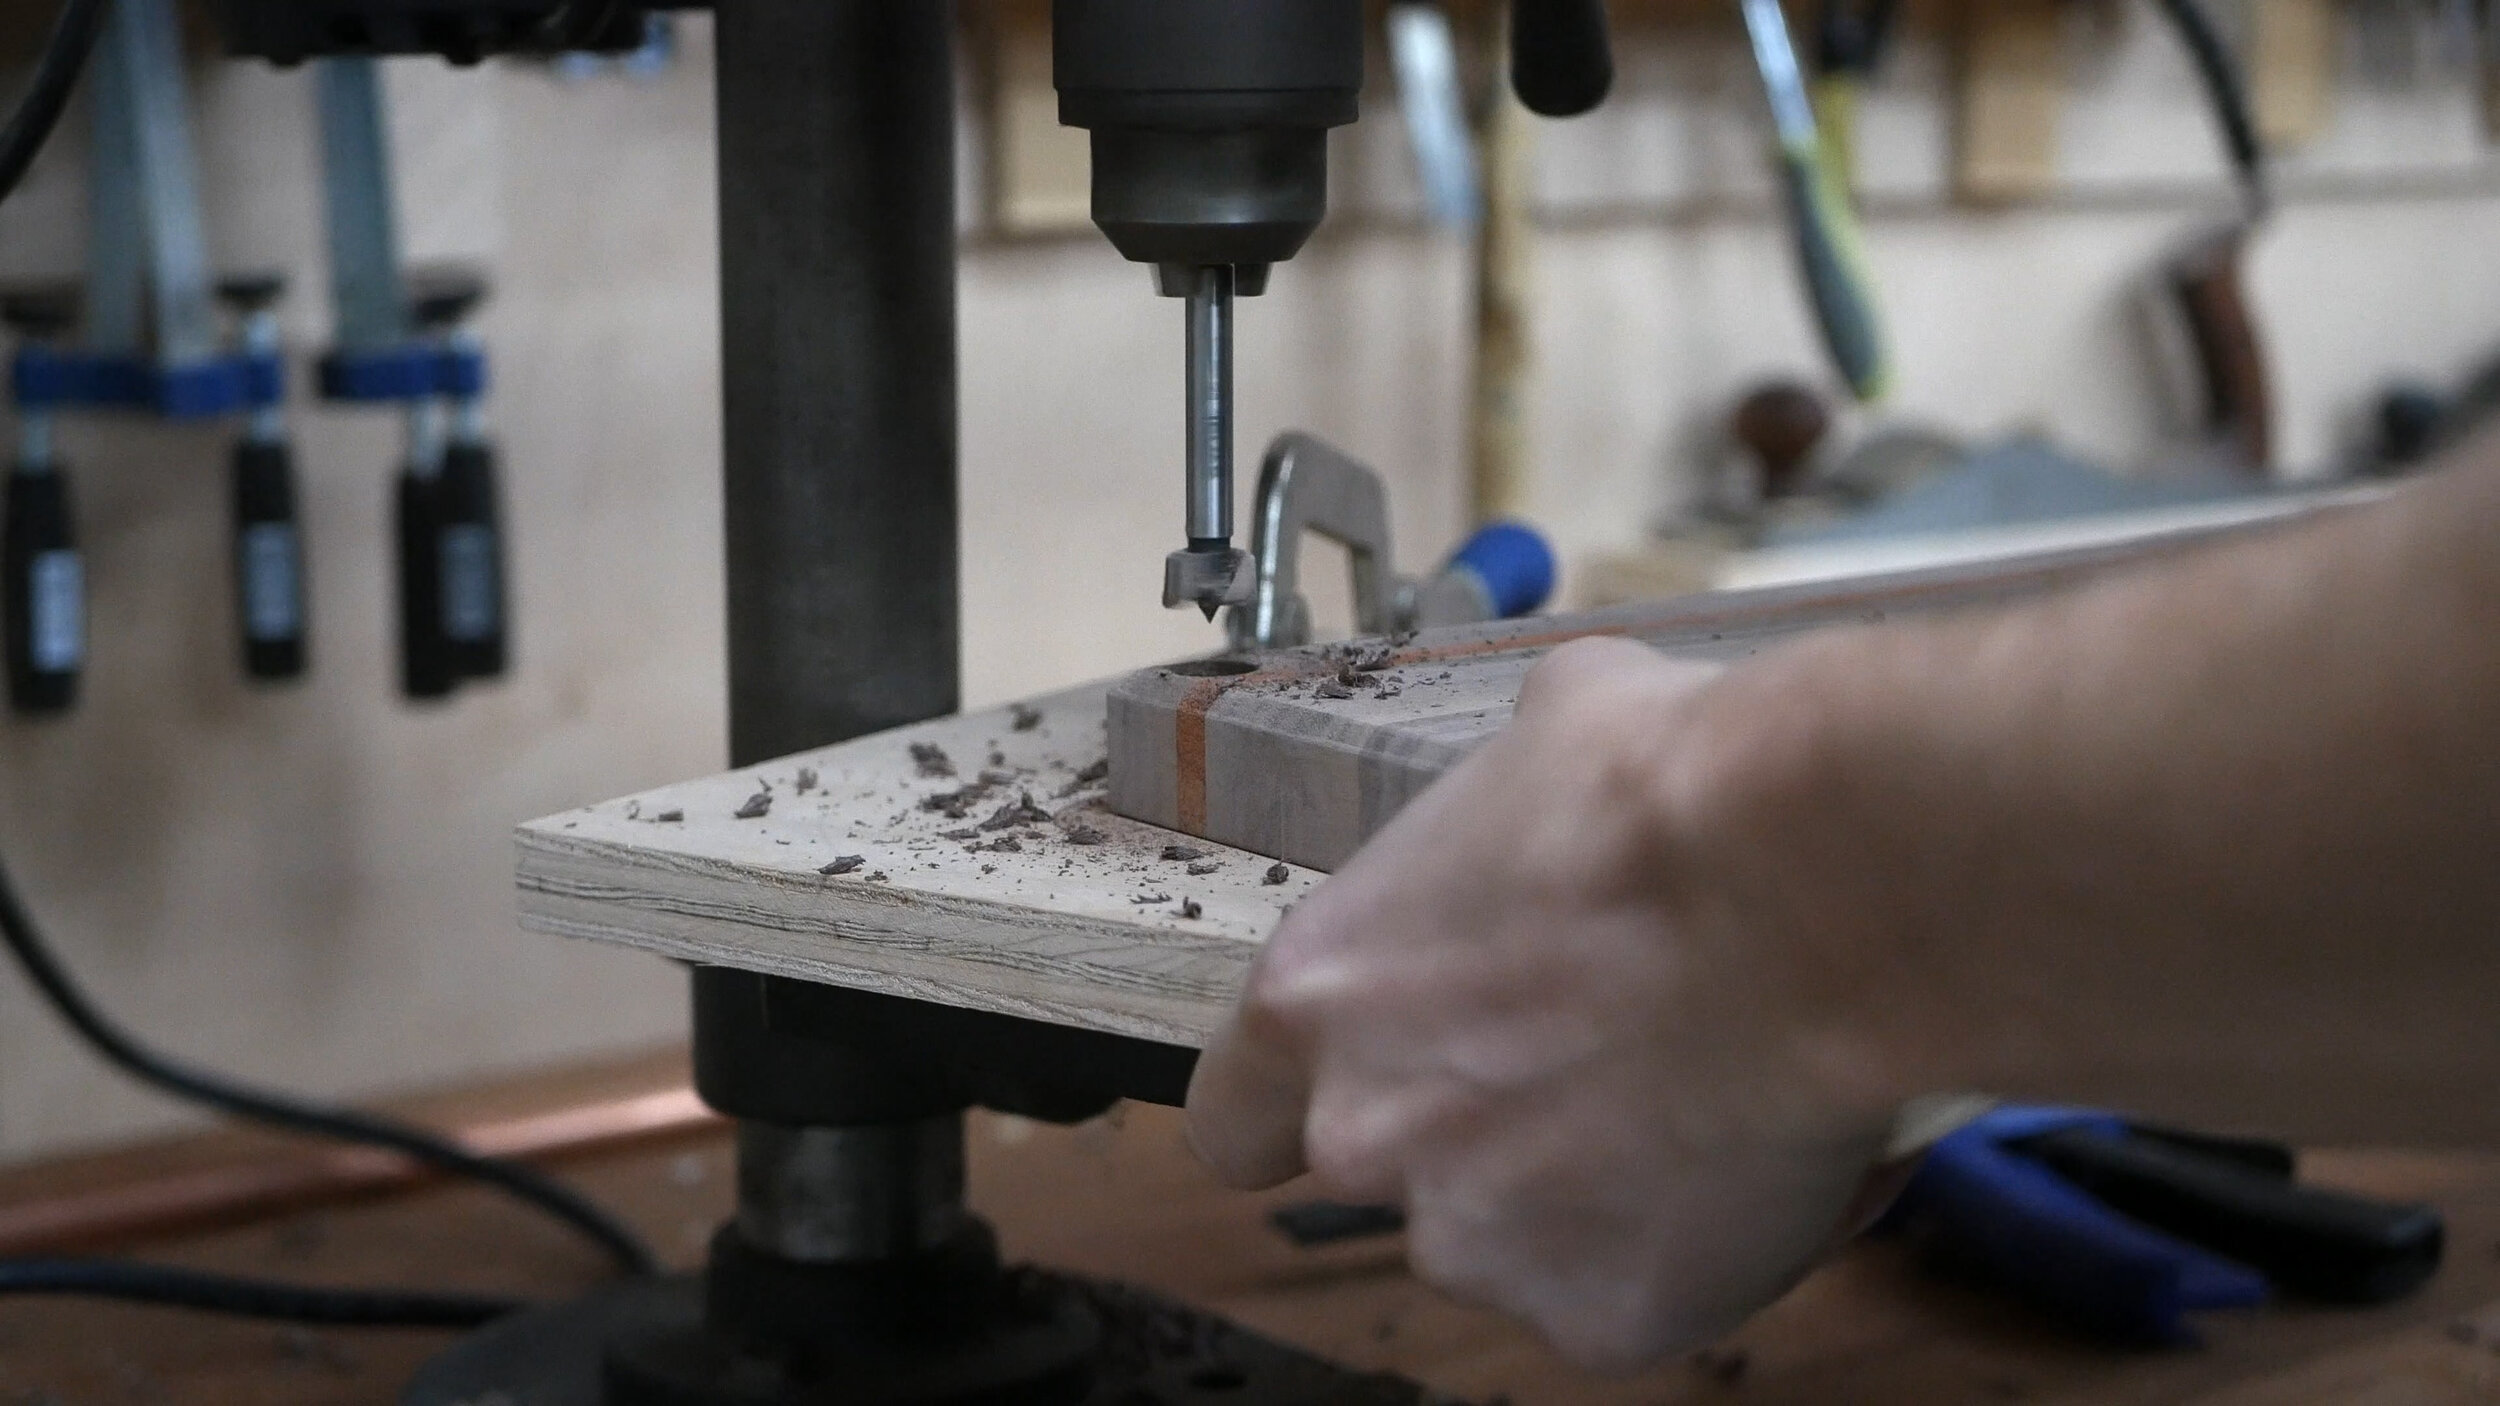
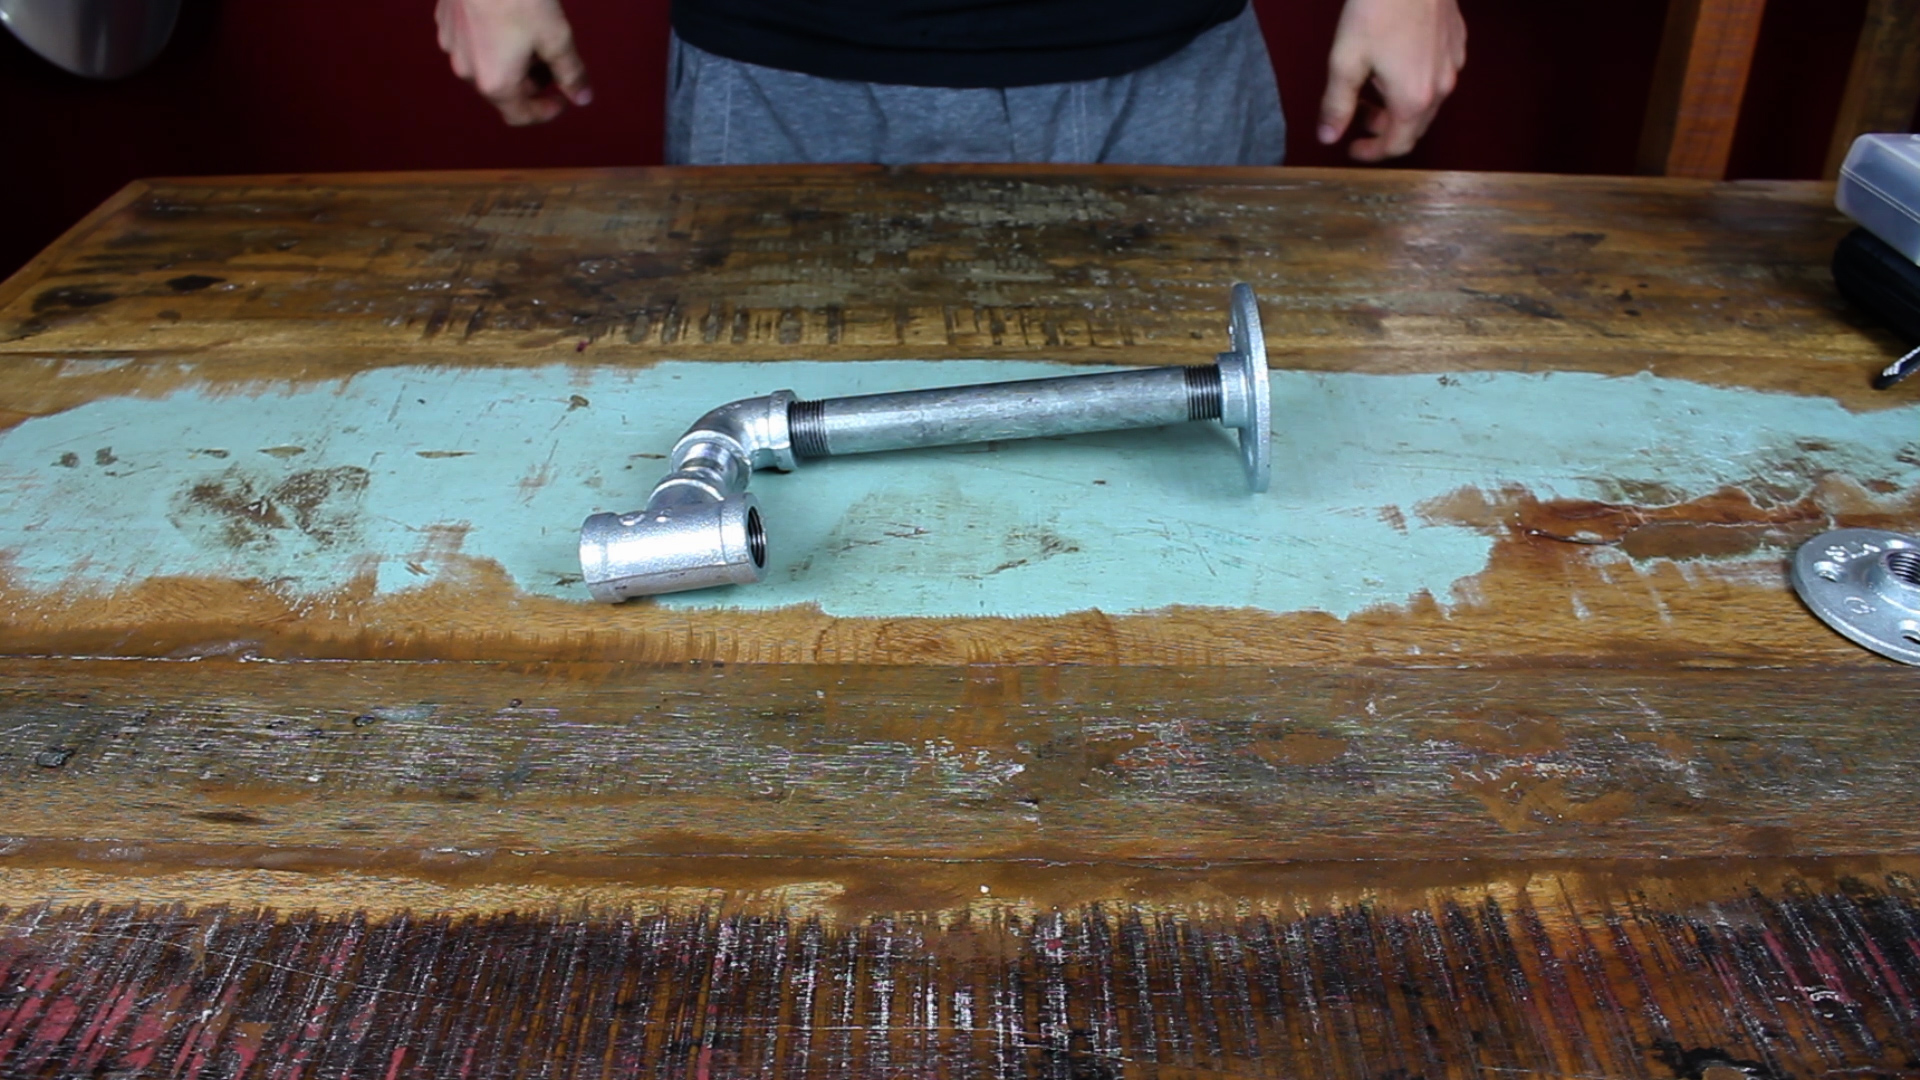
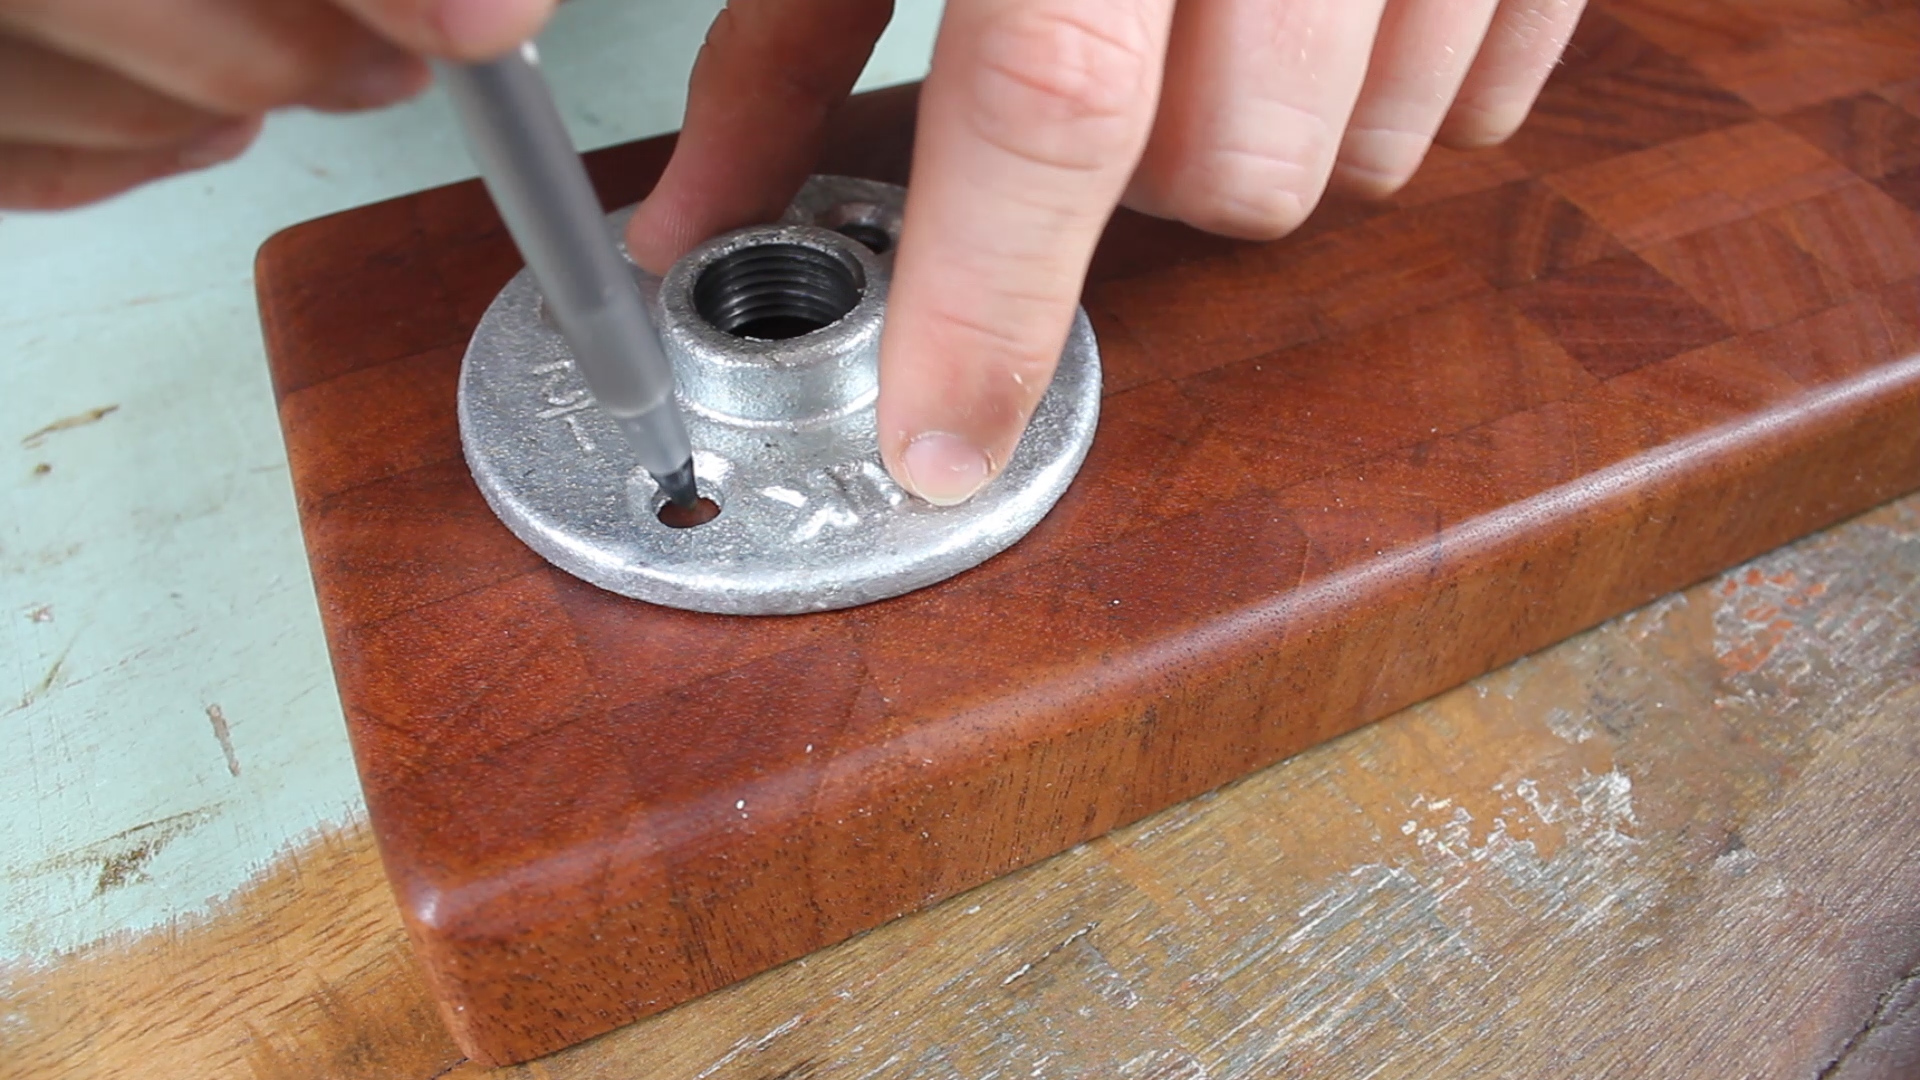
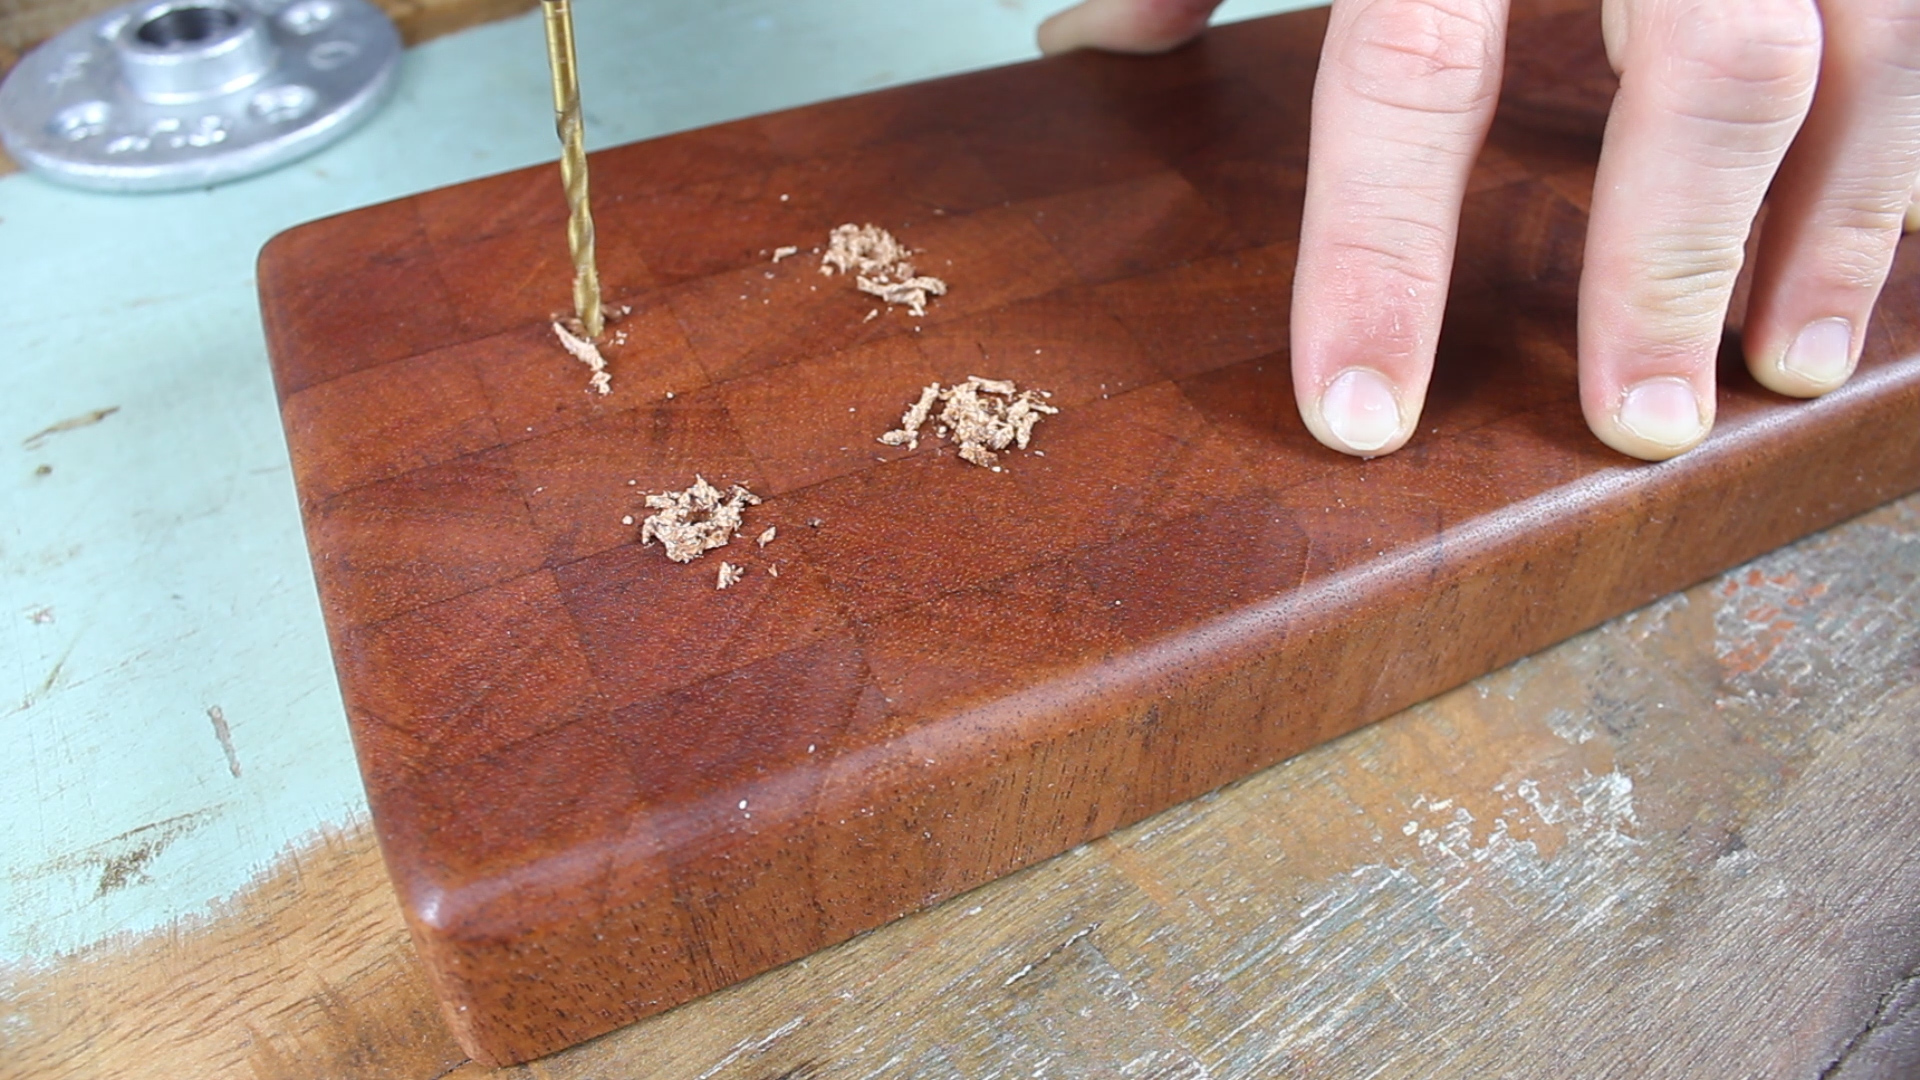
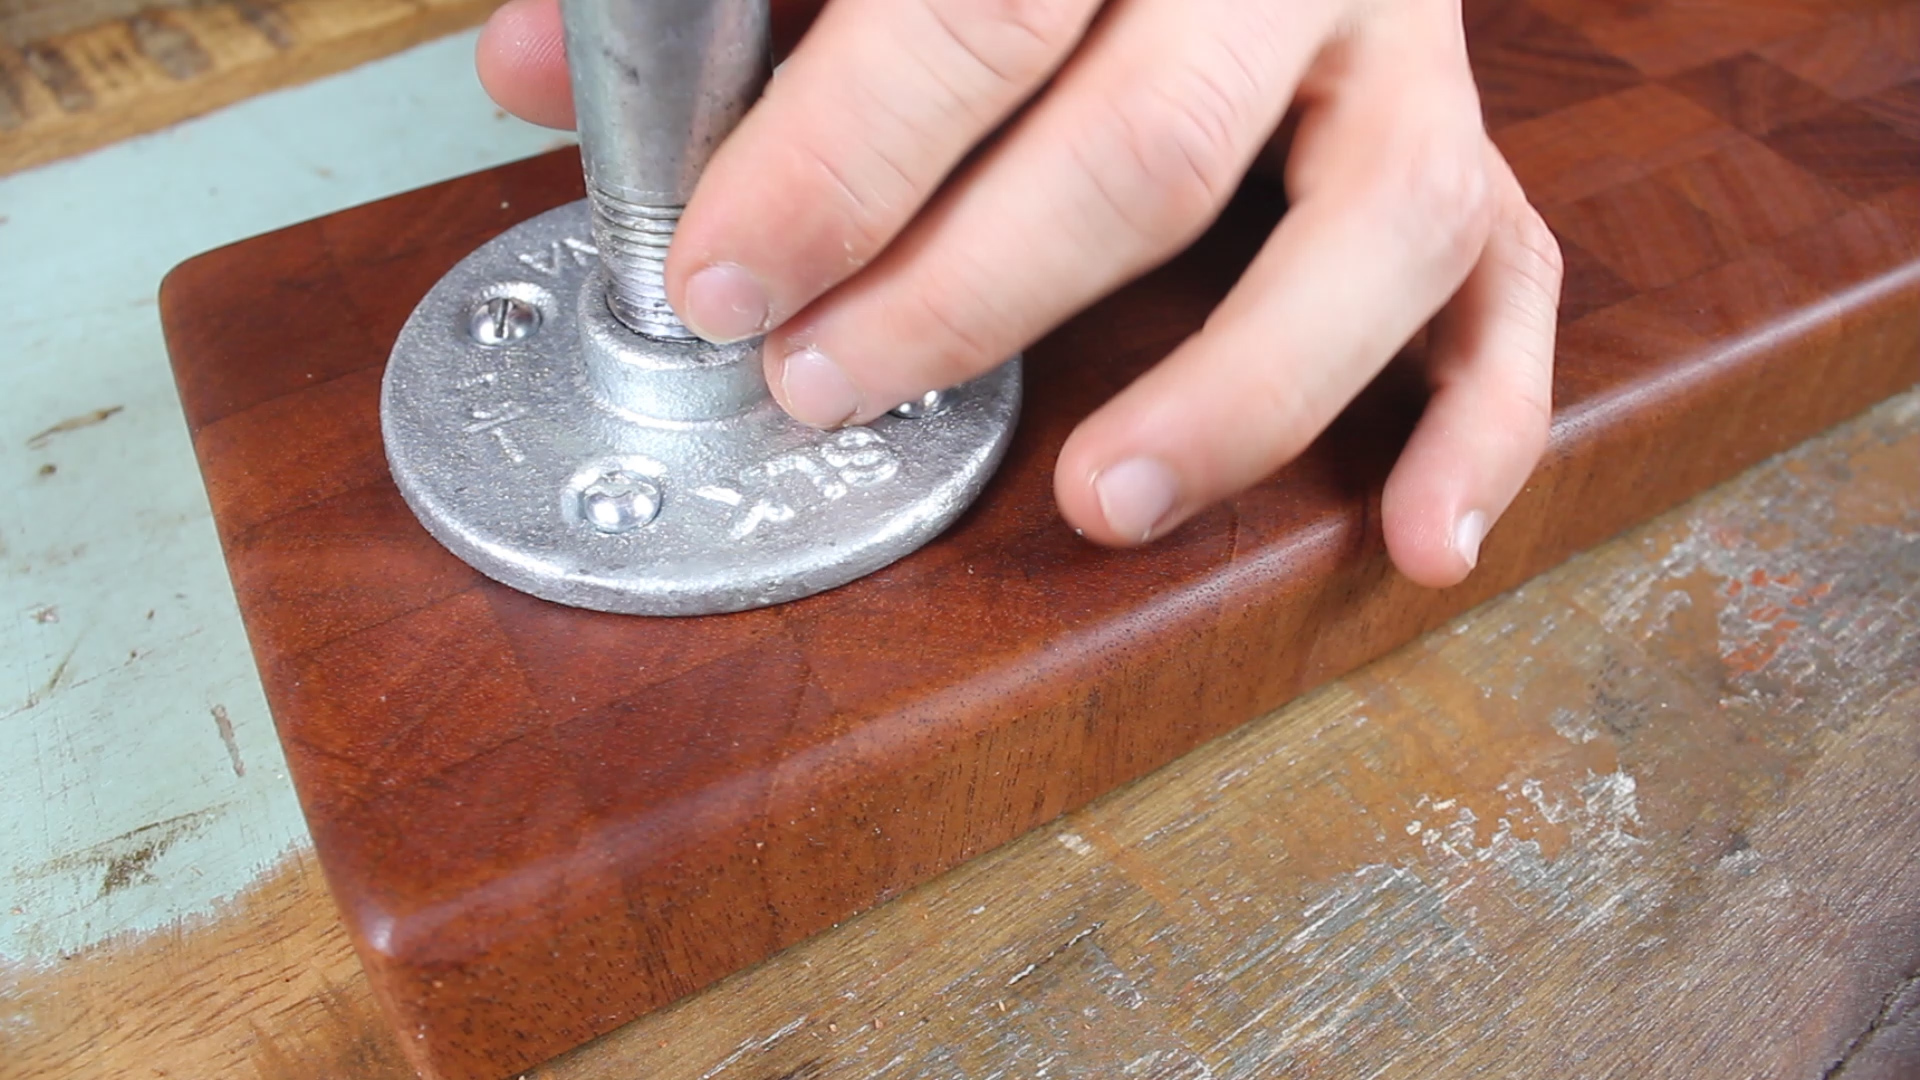
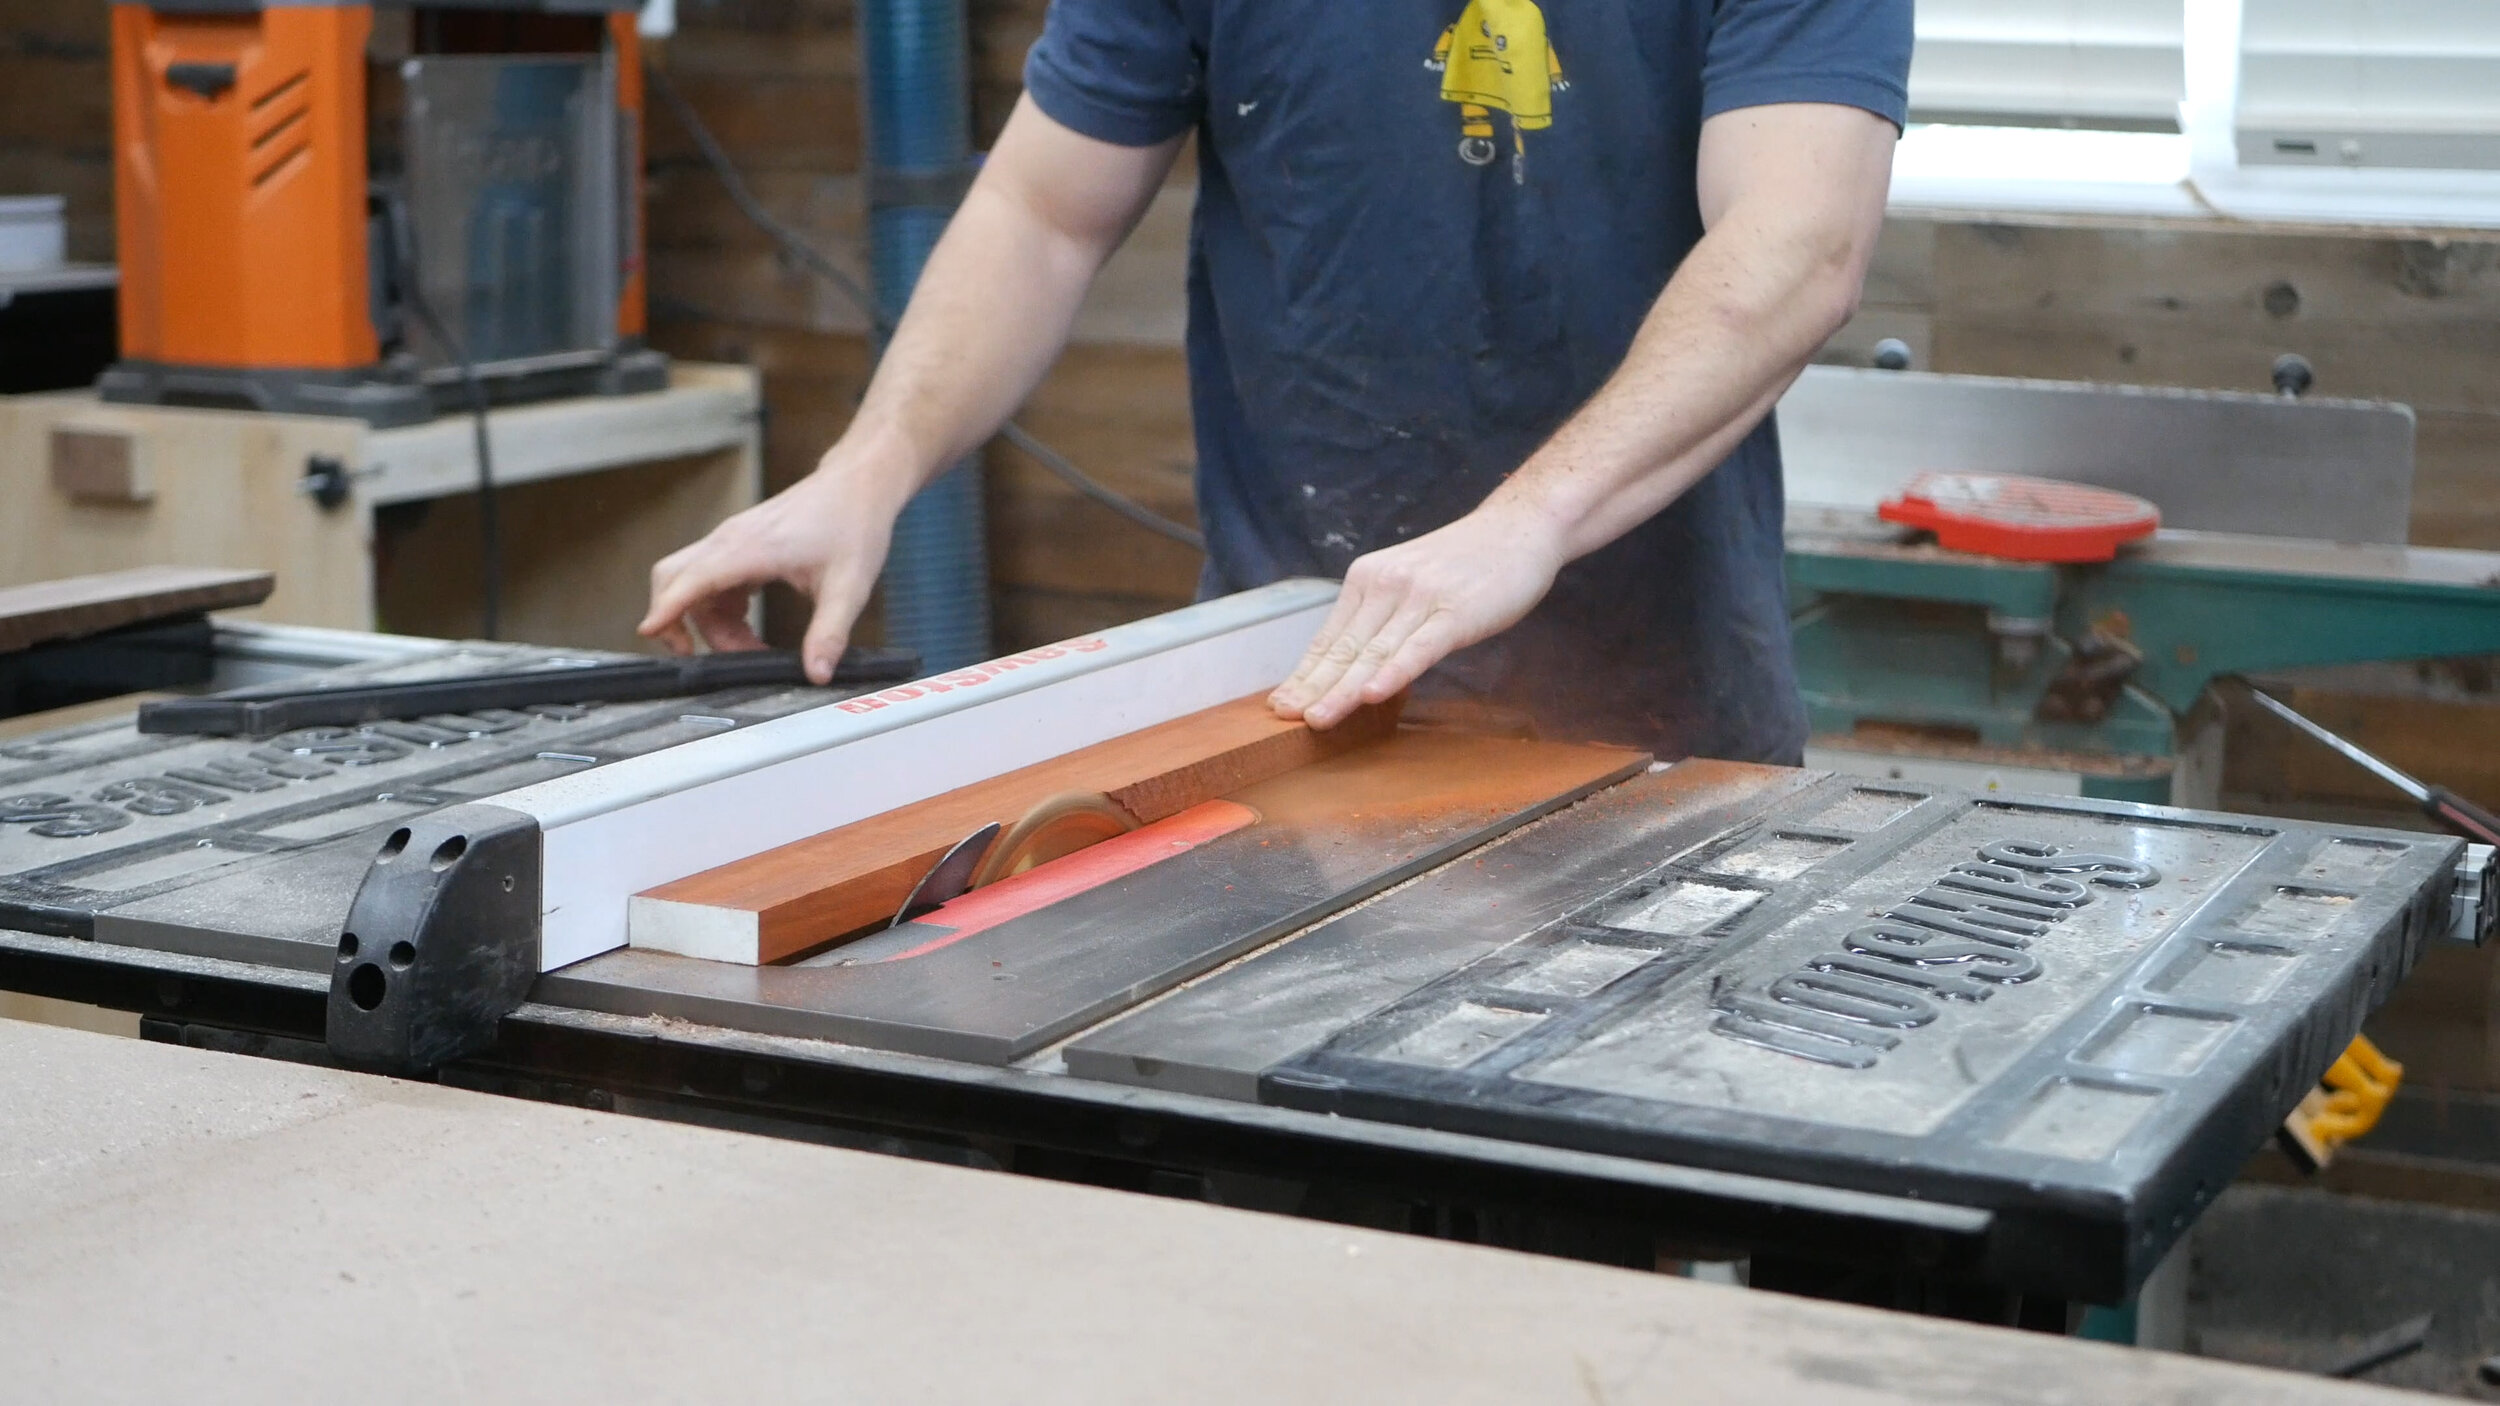
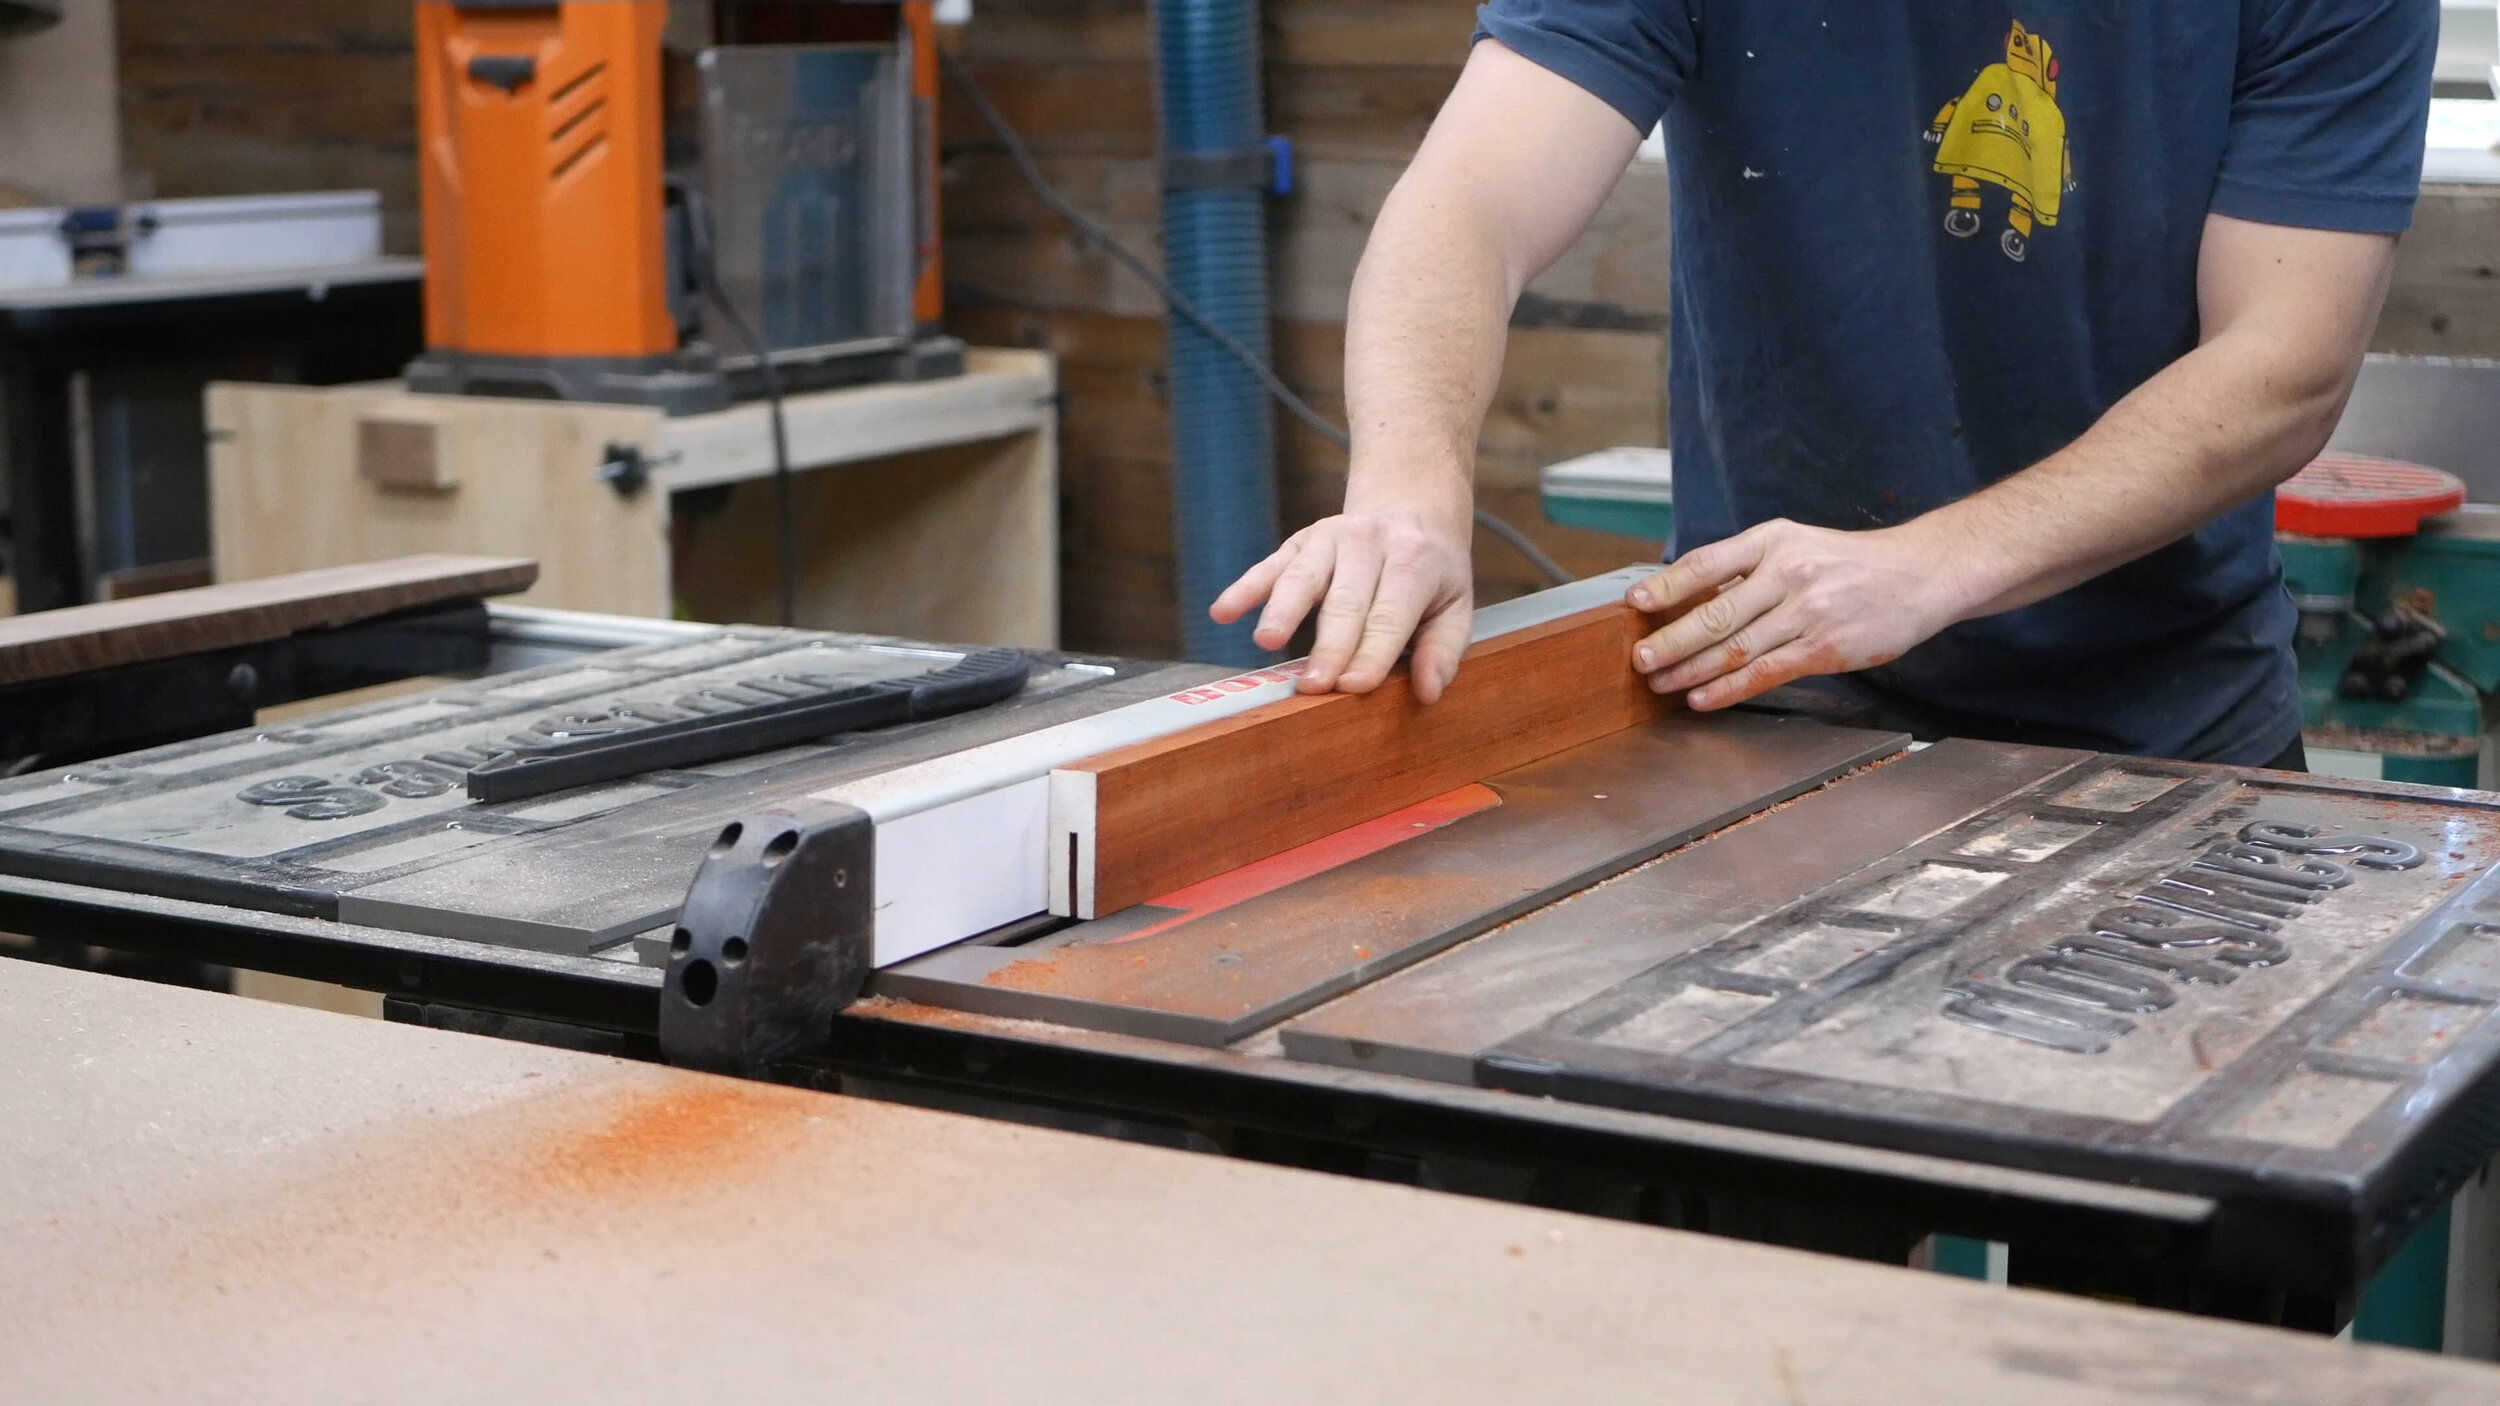
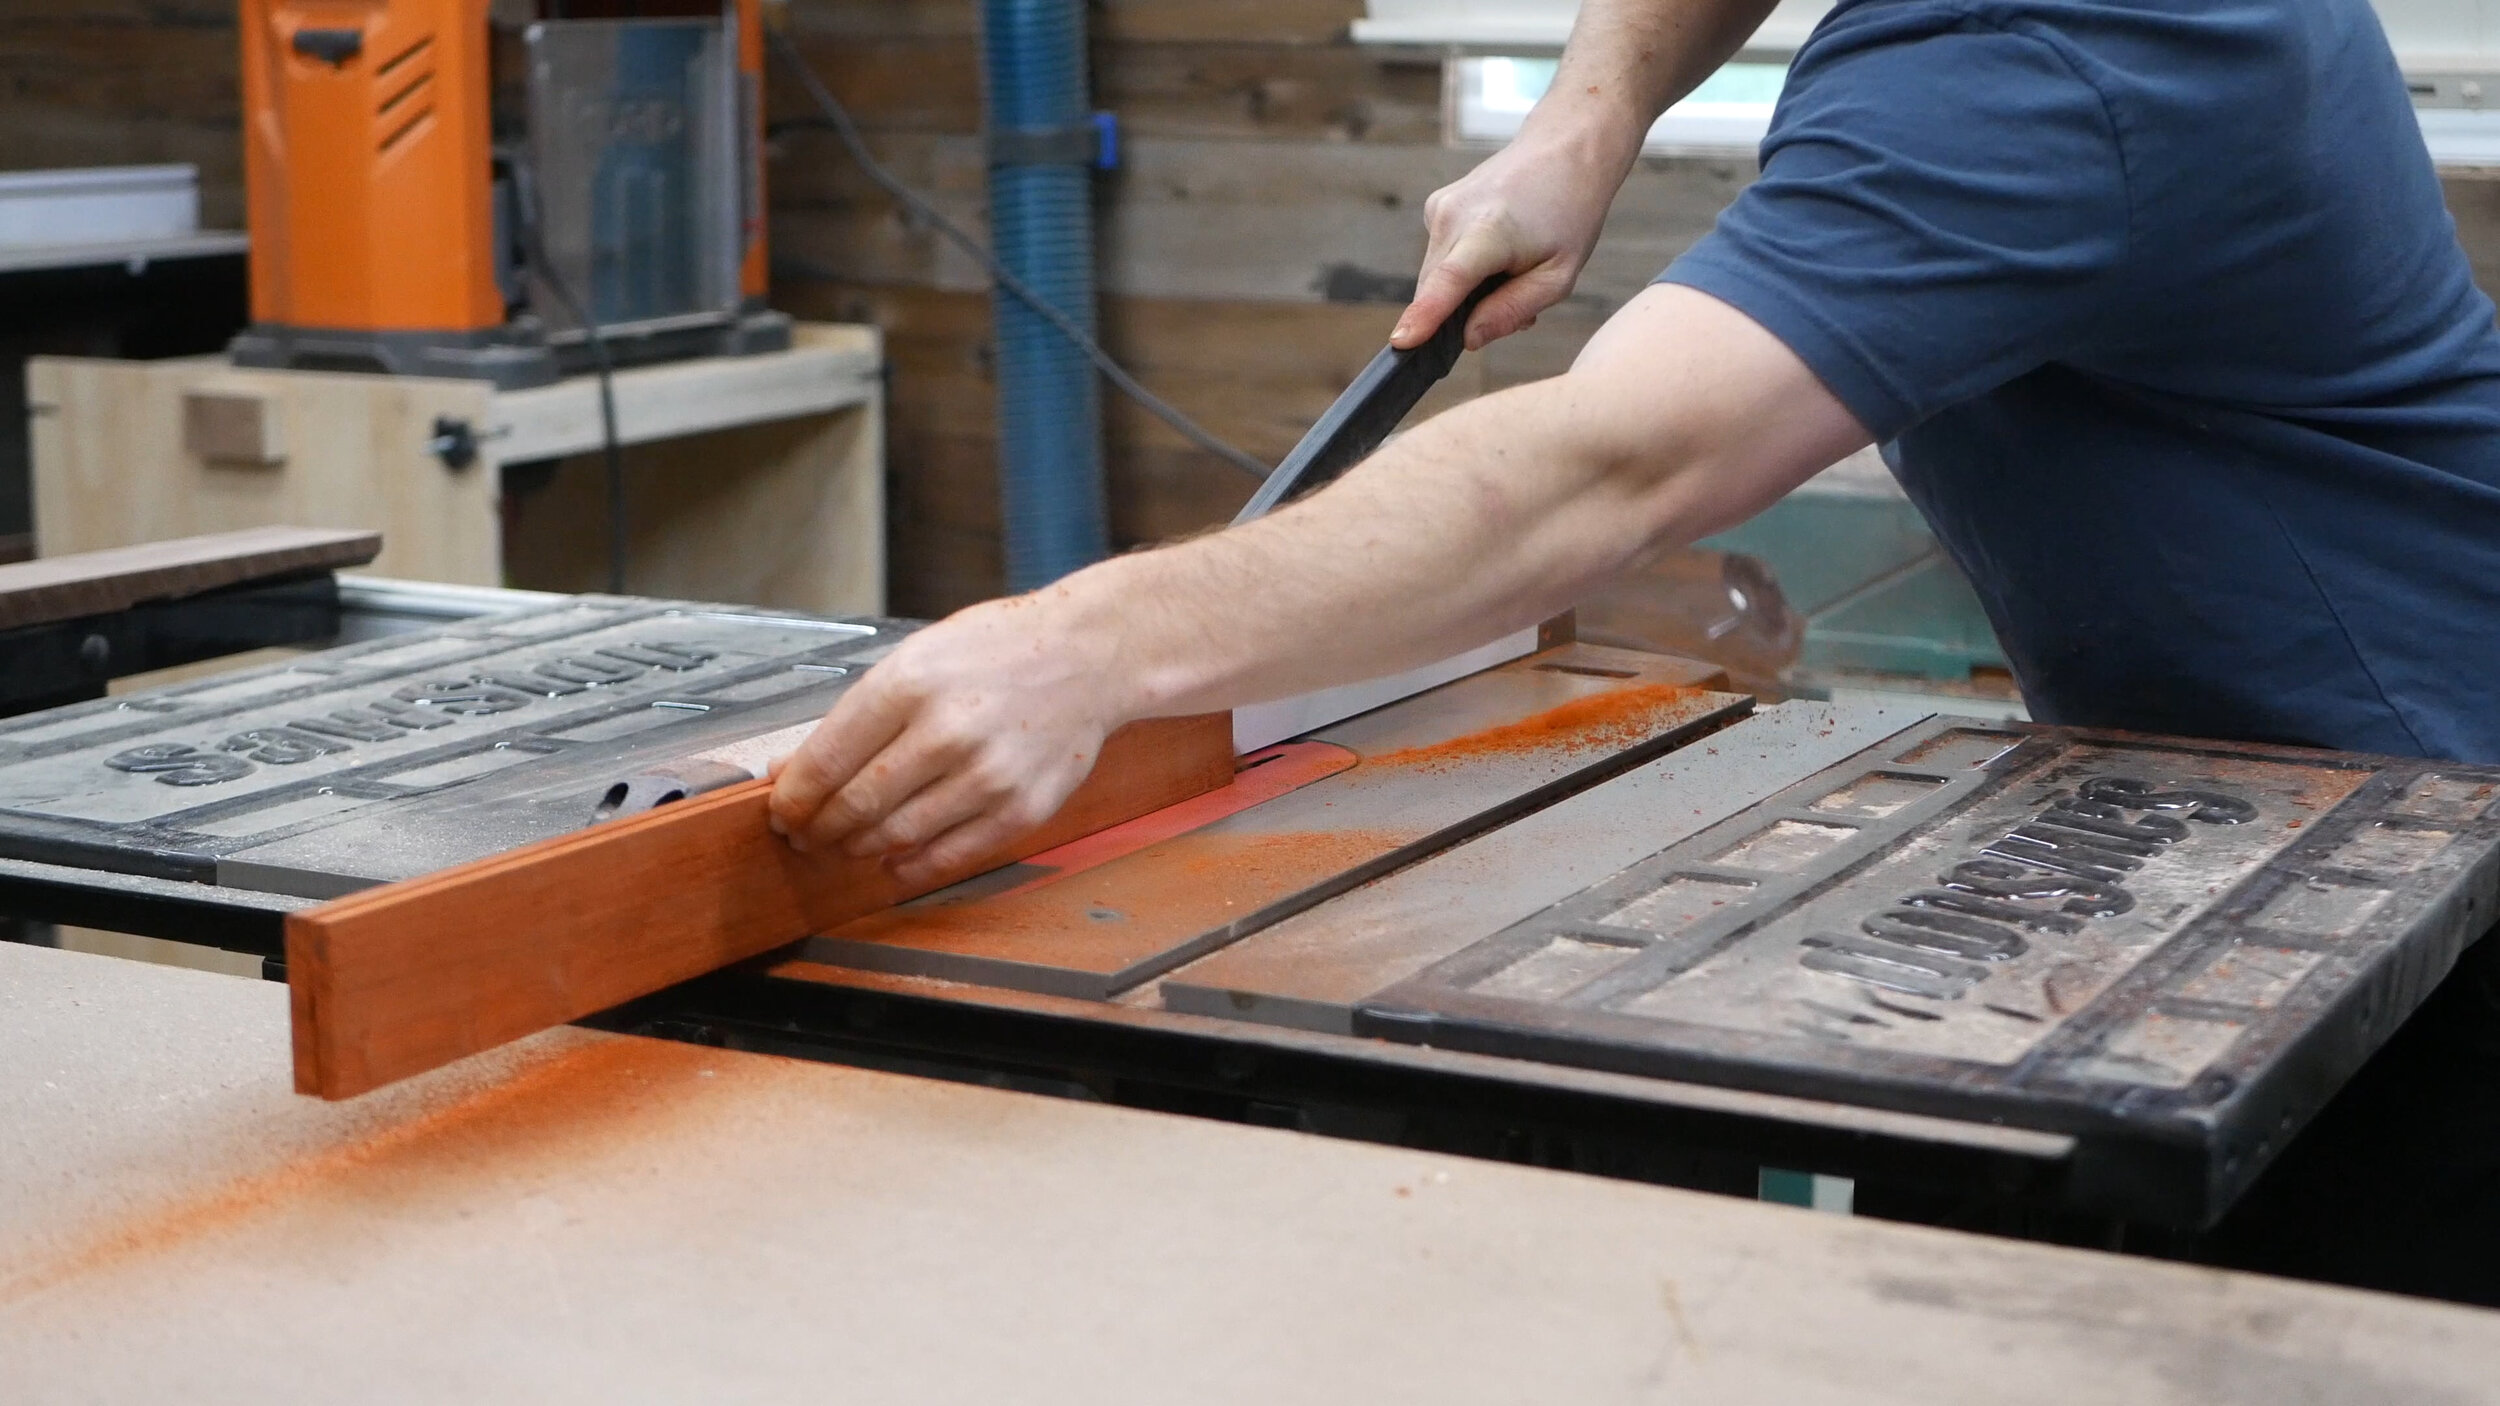
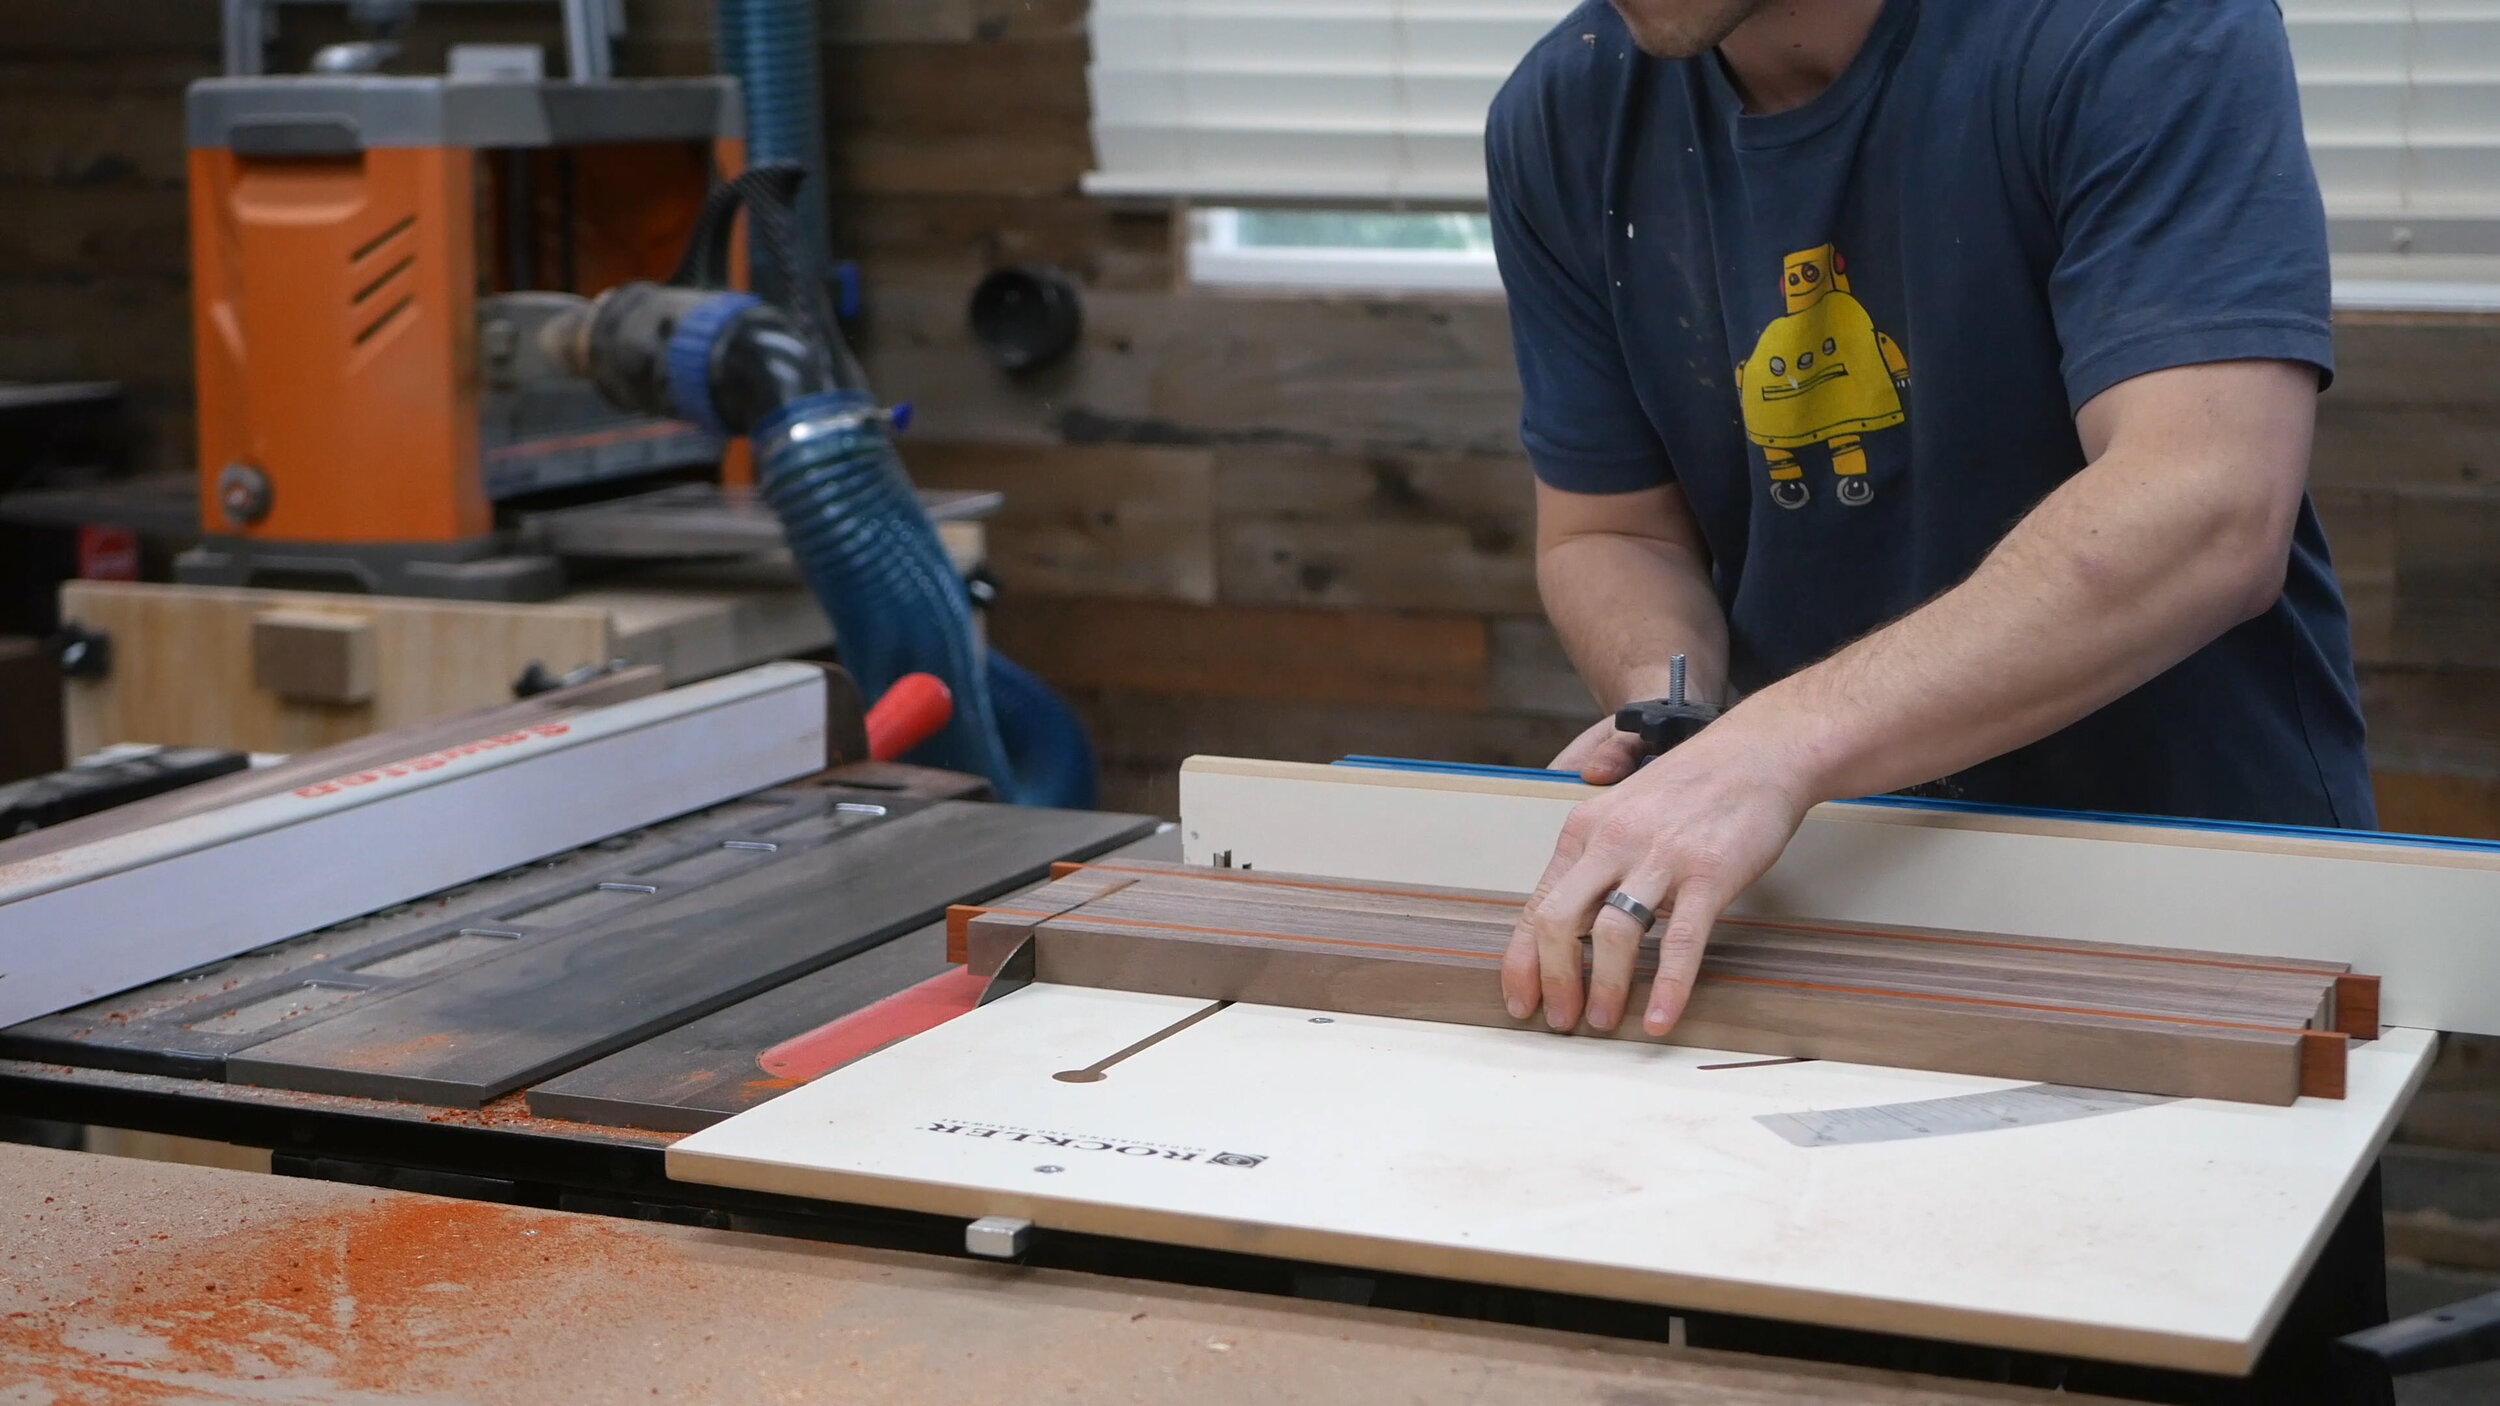
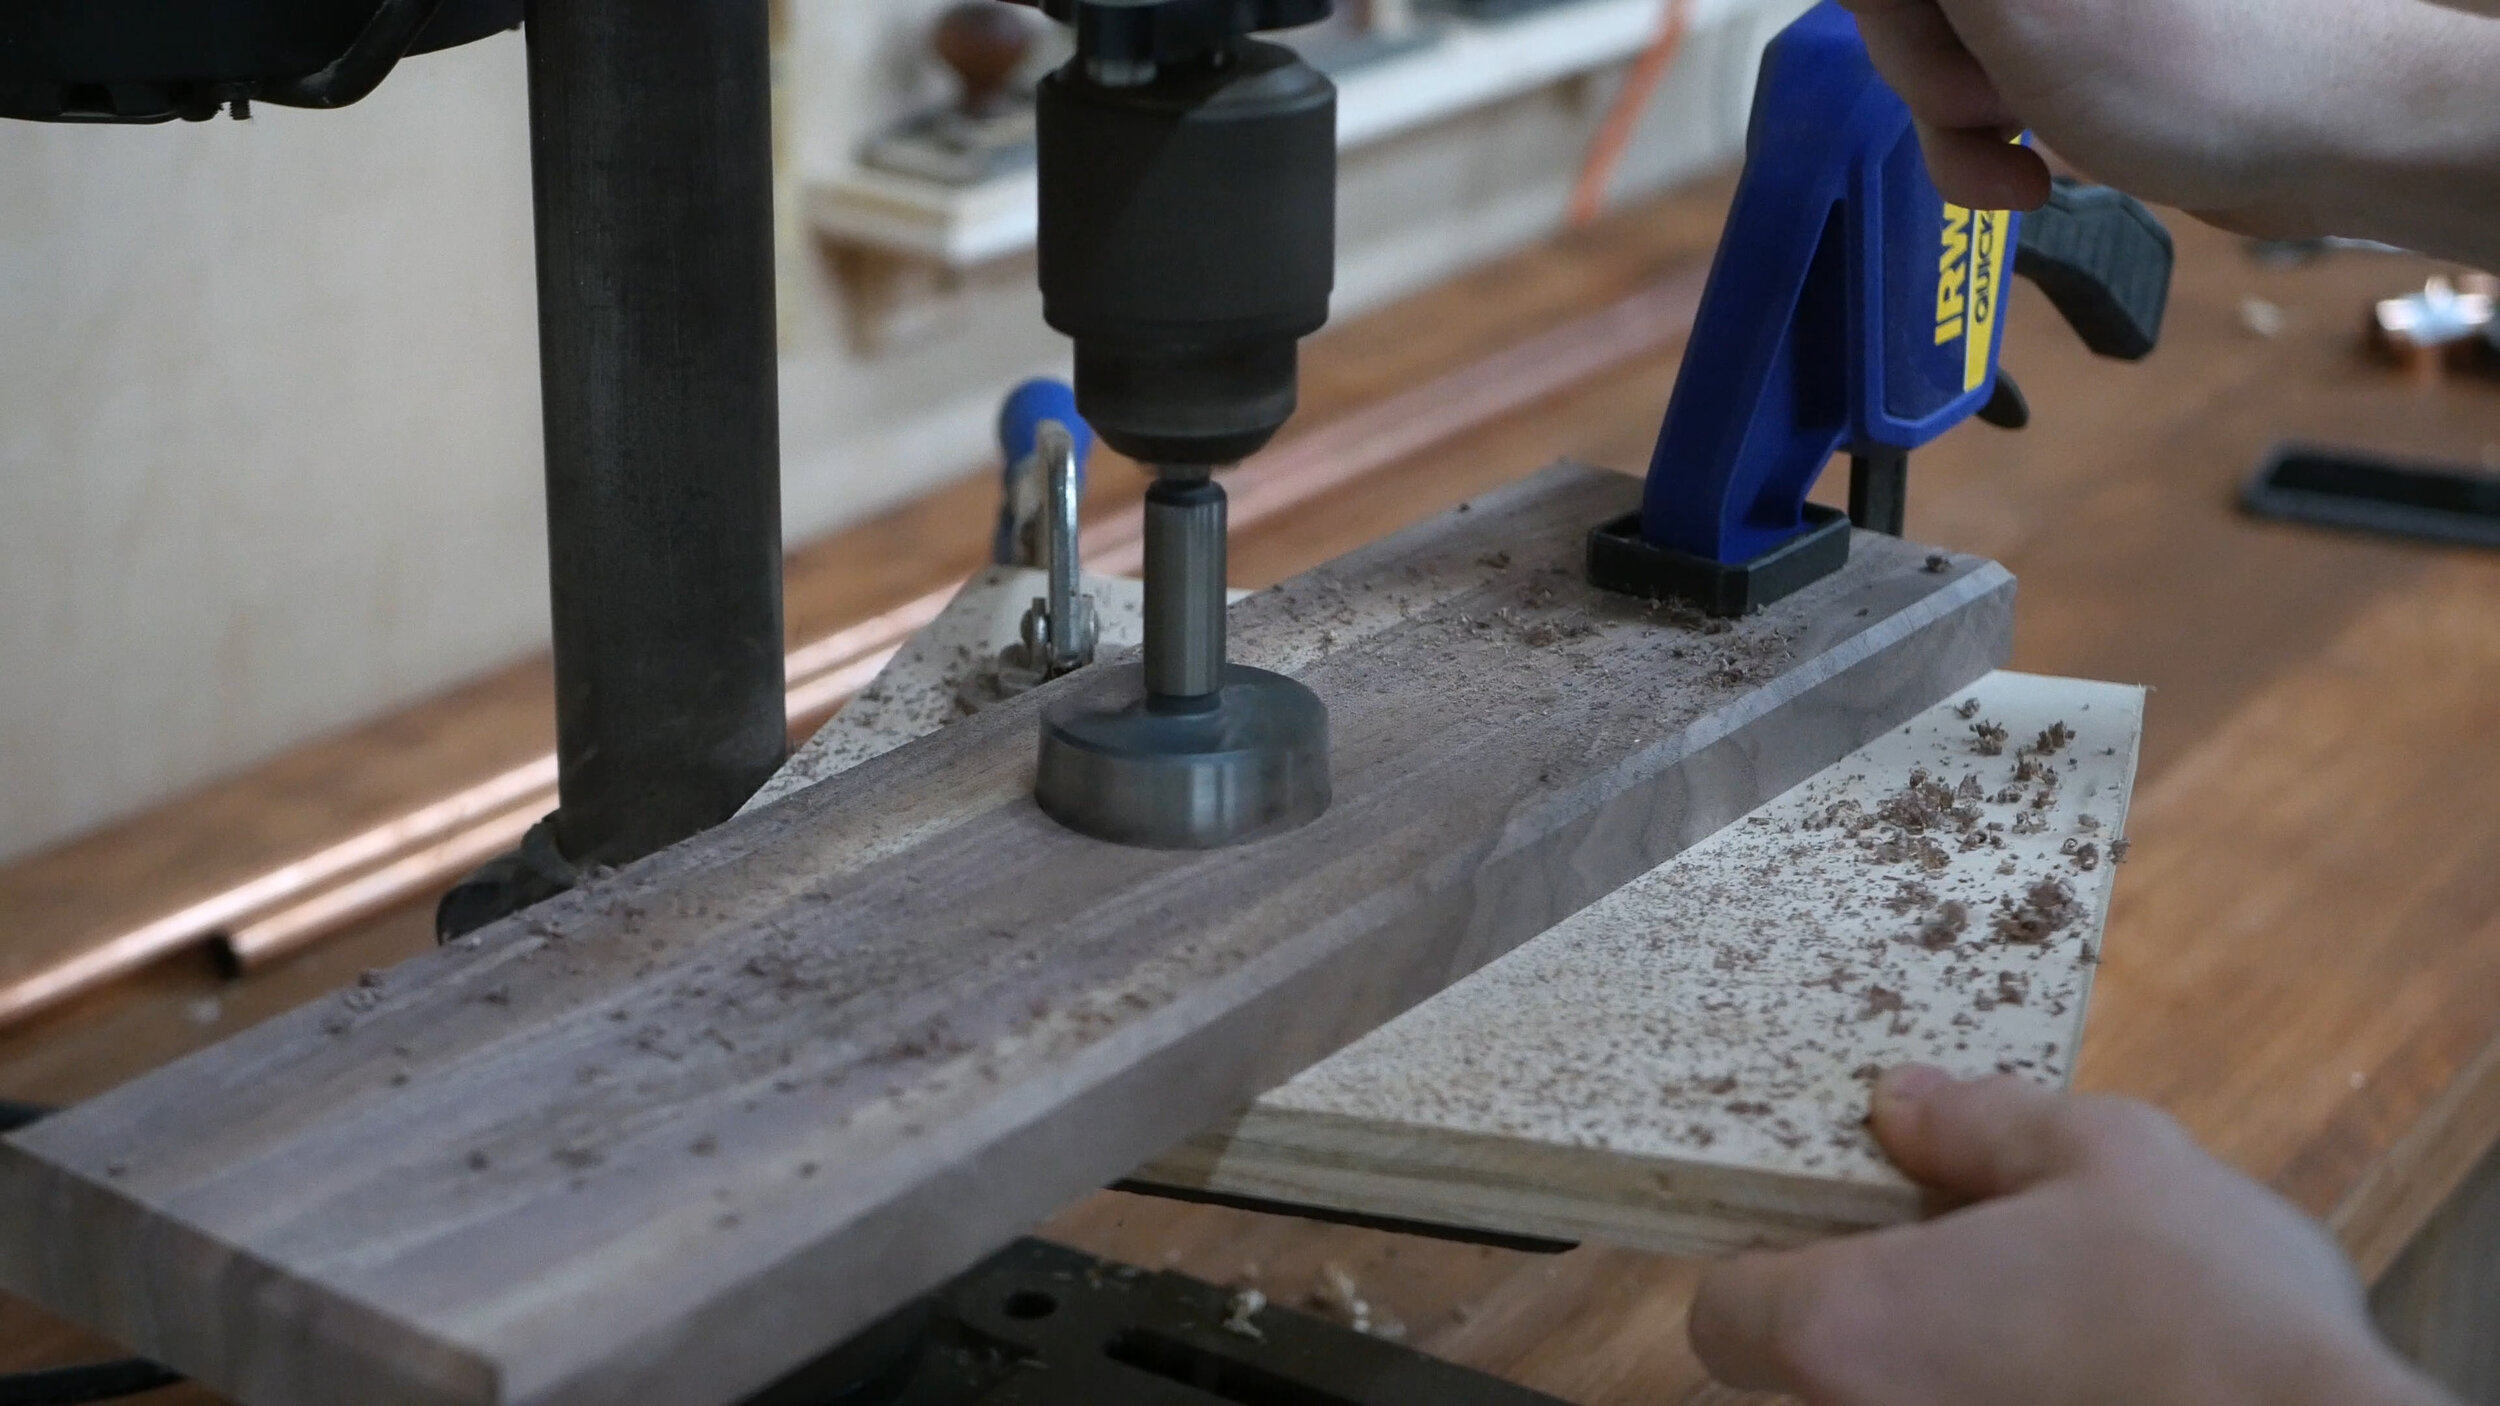
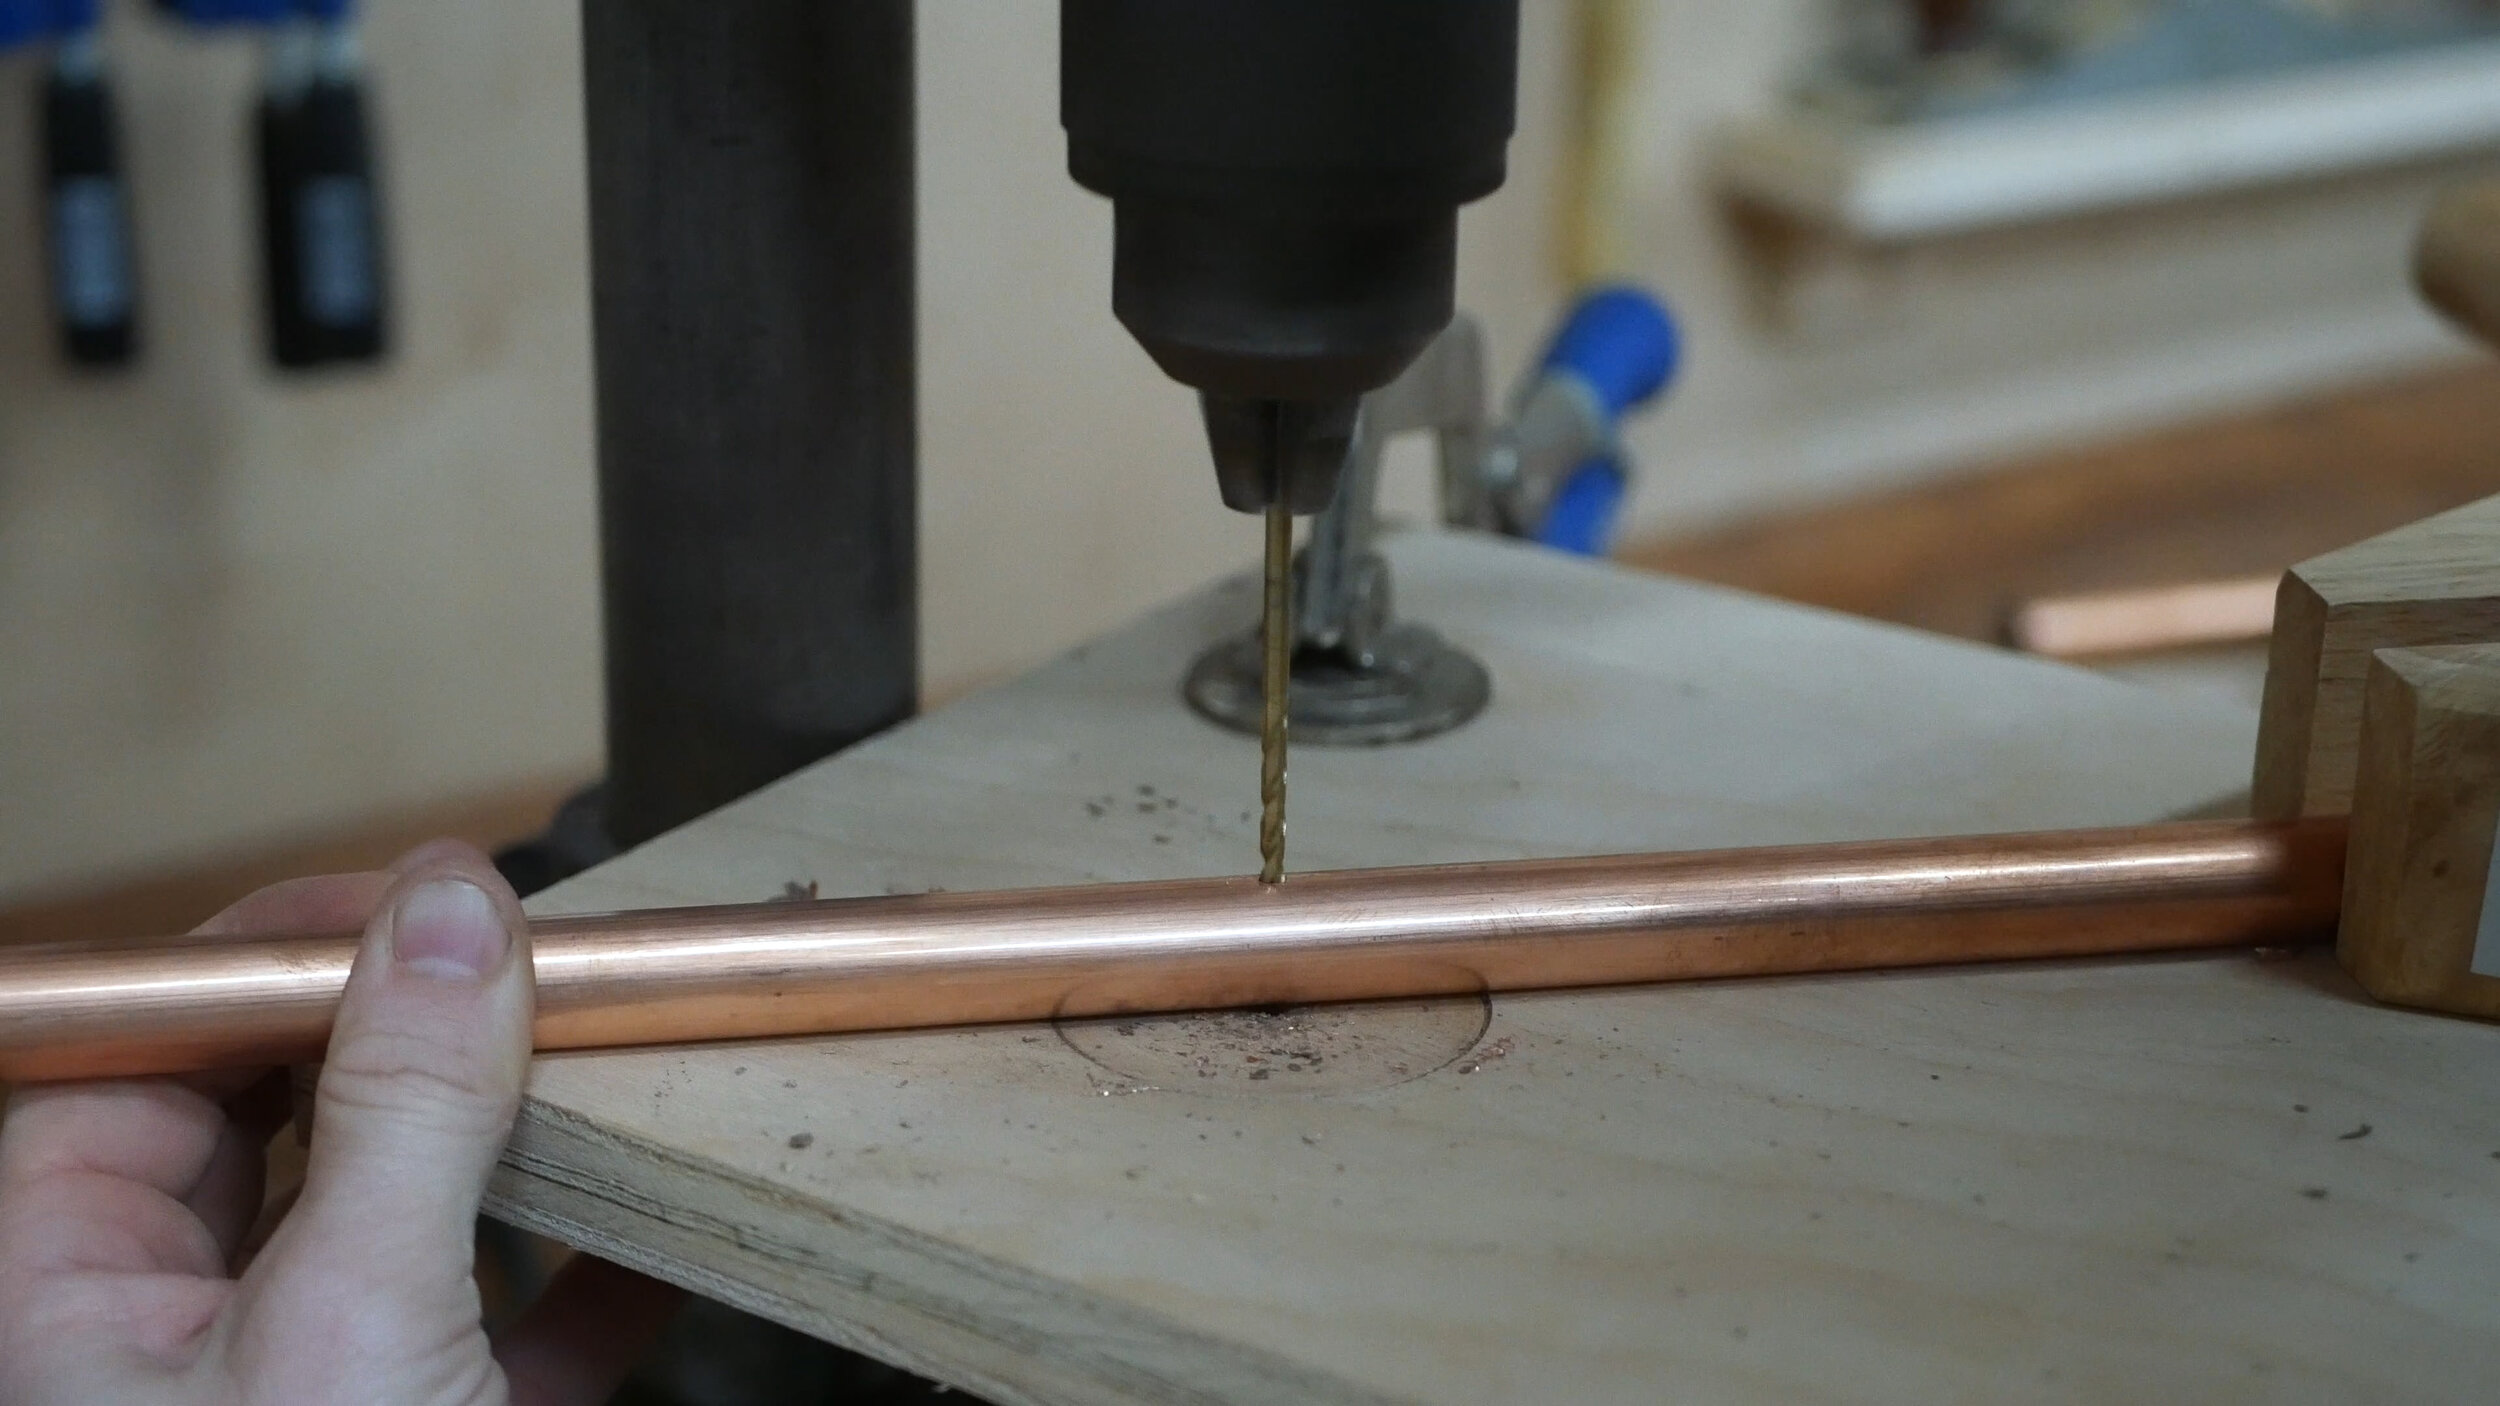
The next step was the first step in adding the copper portion to the build. I needed to measure and mark out the places the holes in the base would be drilled. I did this by centering the top part from all angles, then drilling out half inch holes in the base at each corner. These holes didn’t go all the way through the piece.

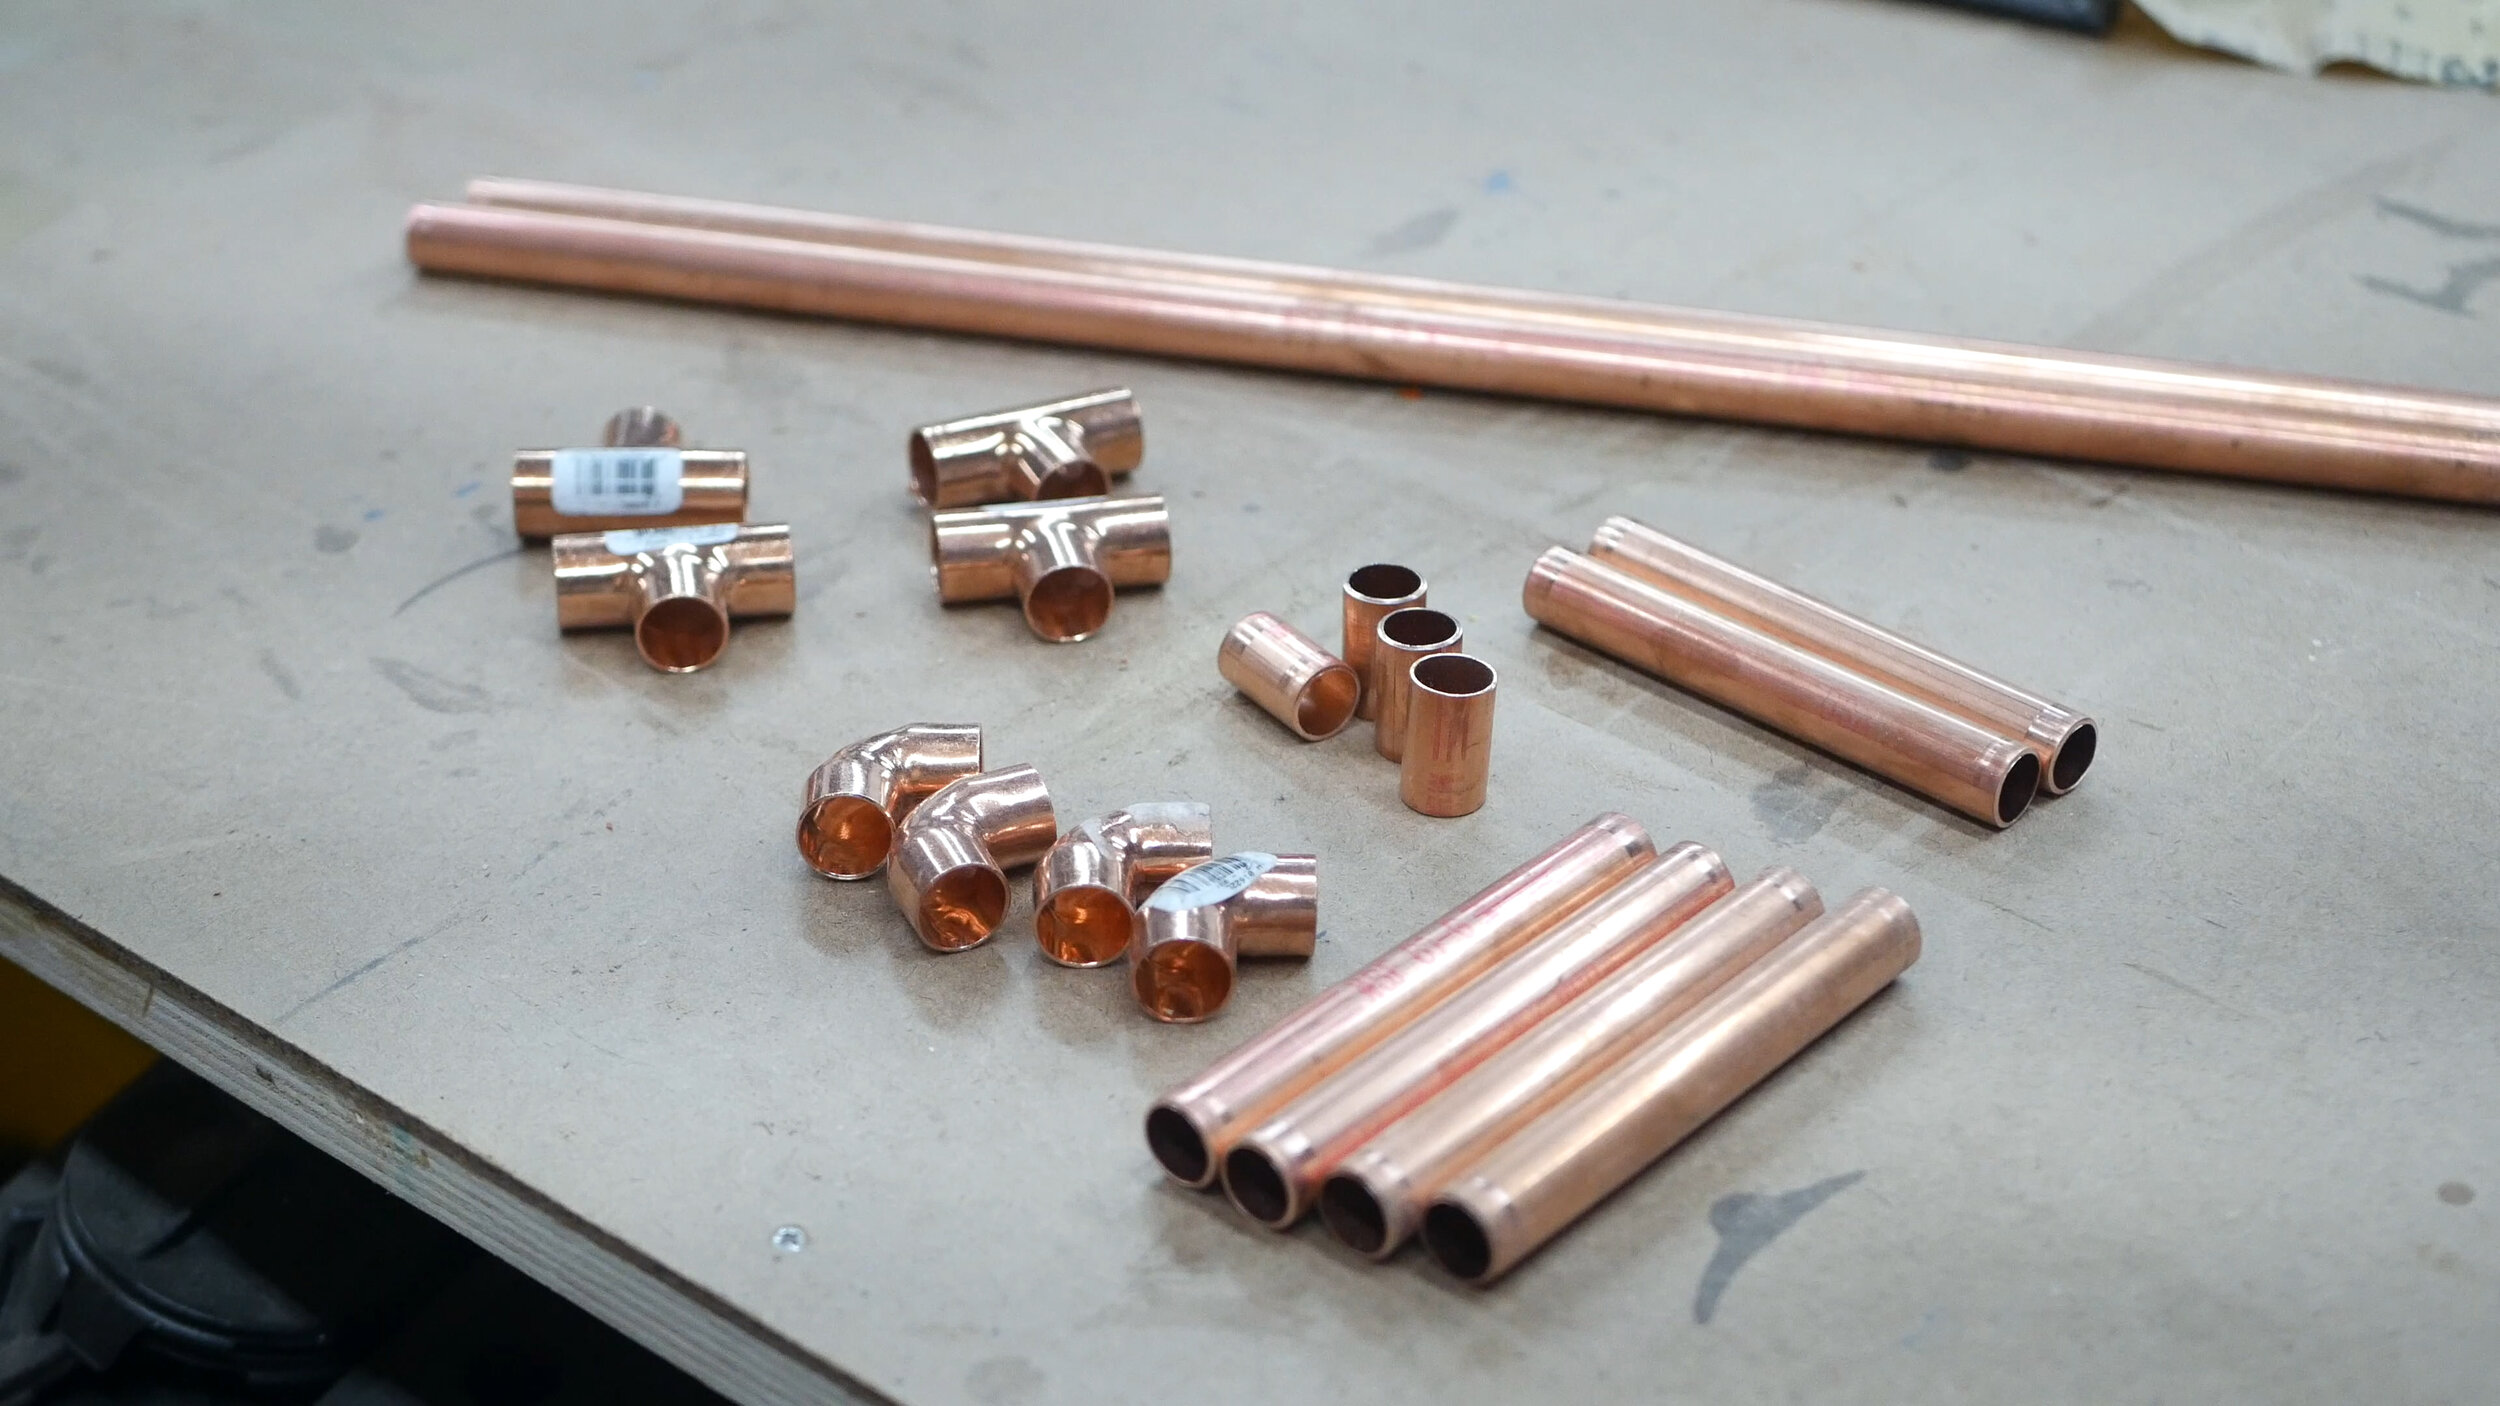
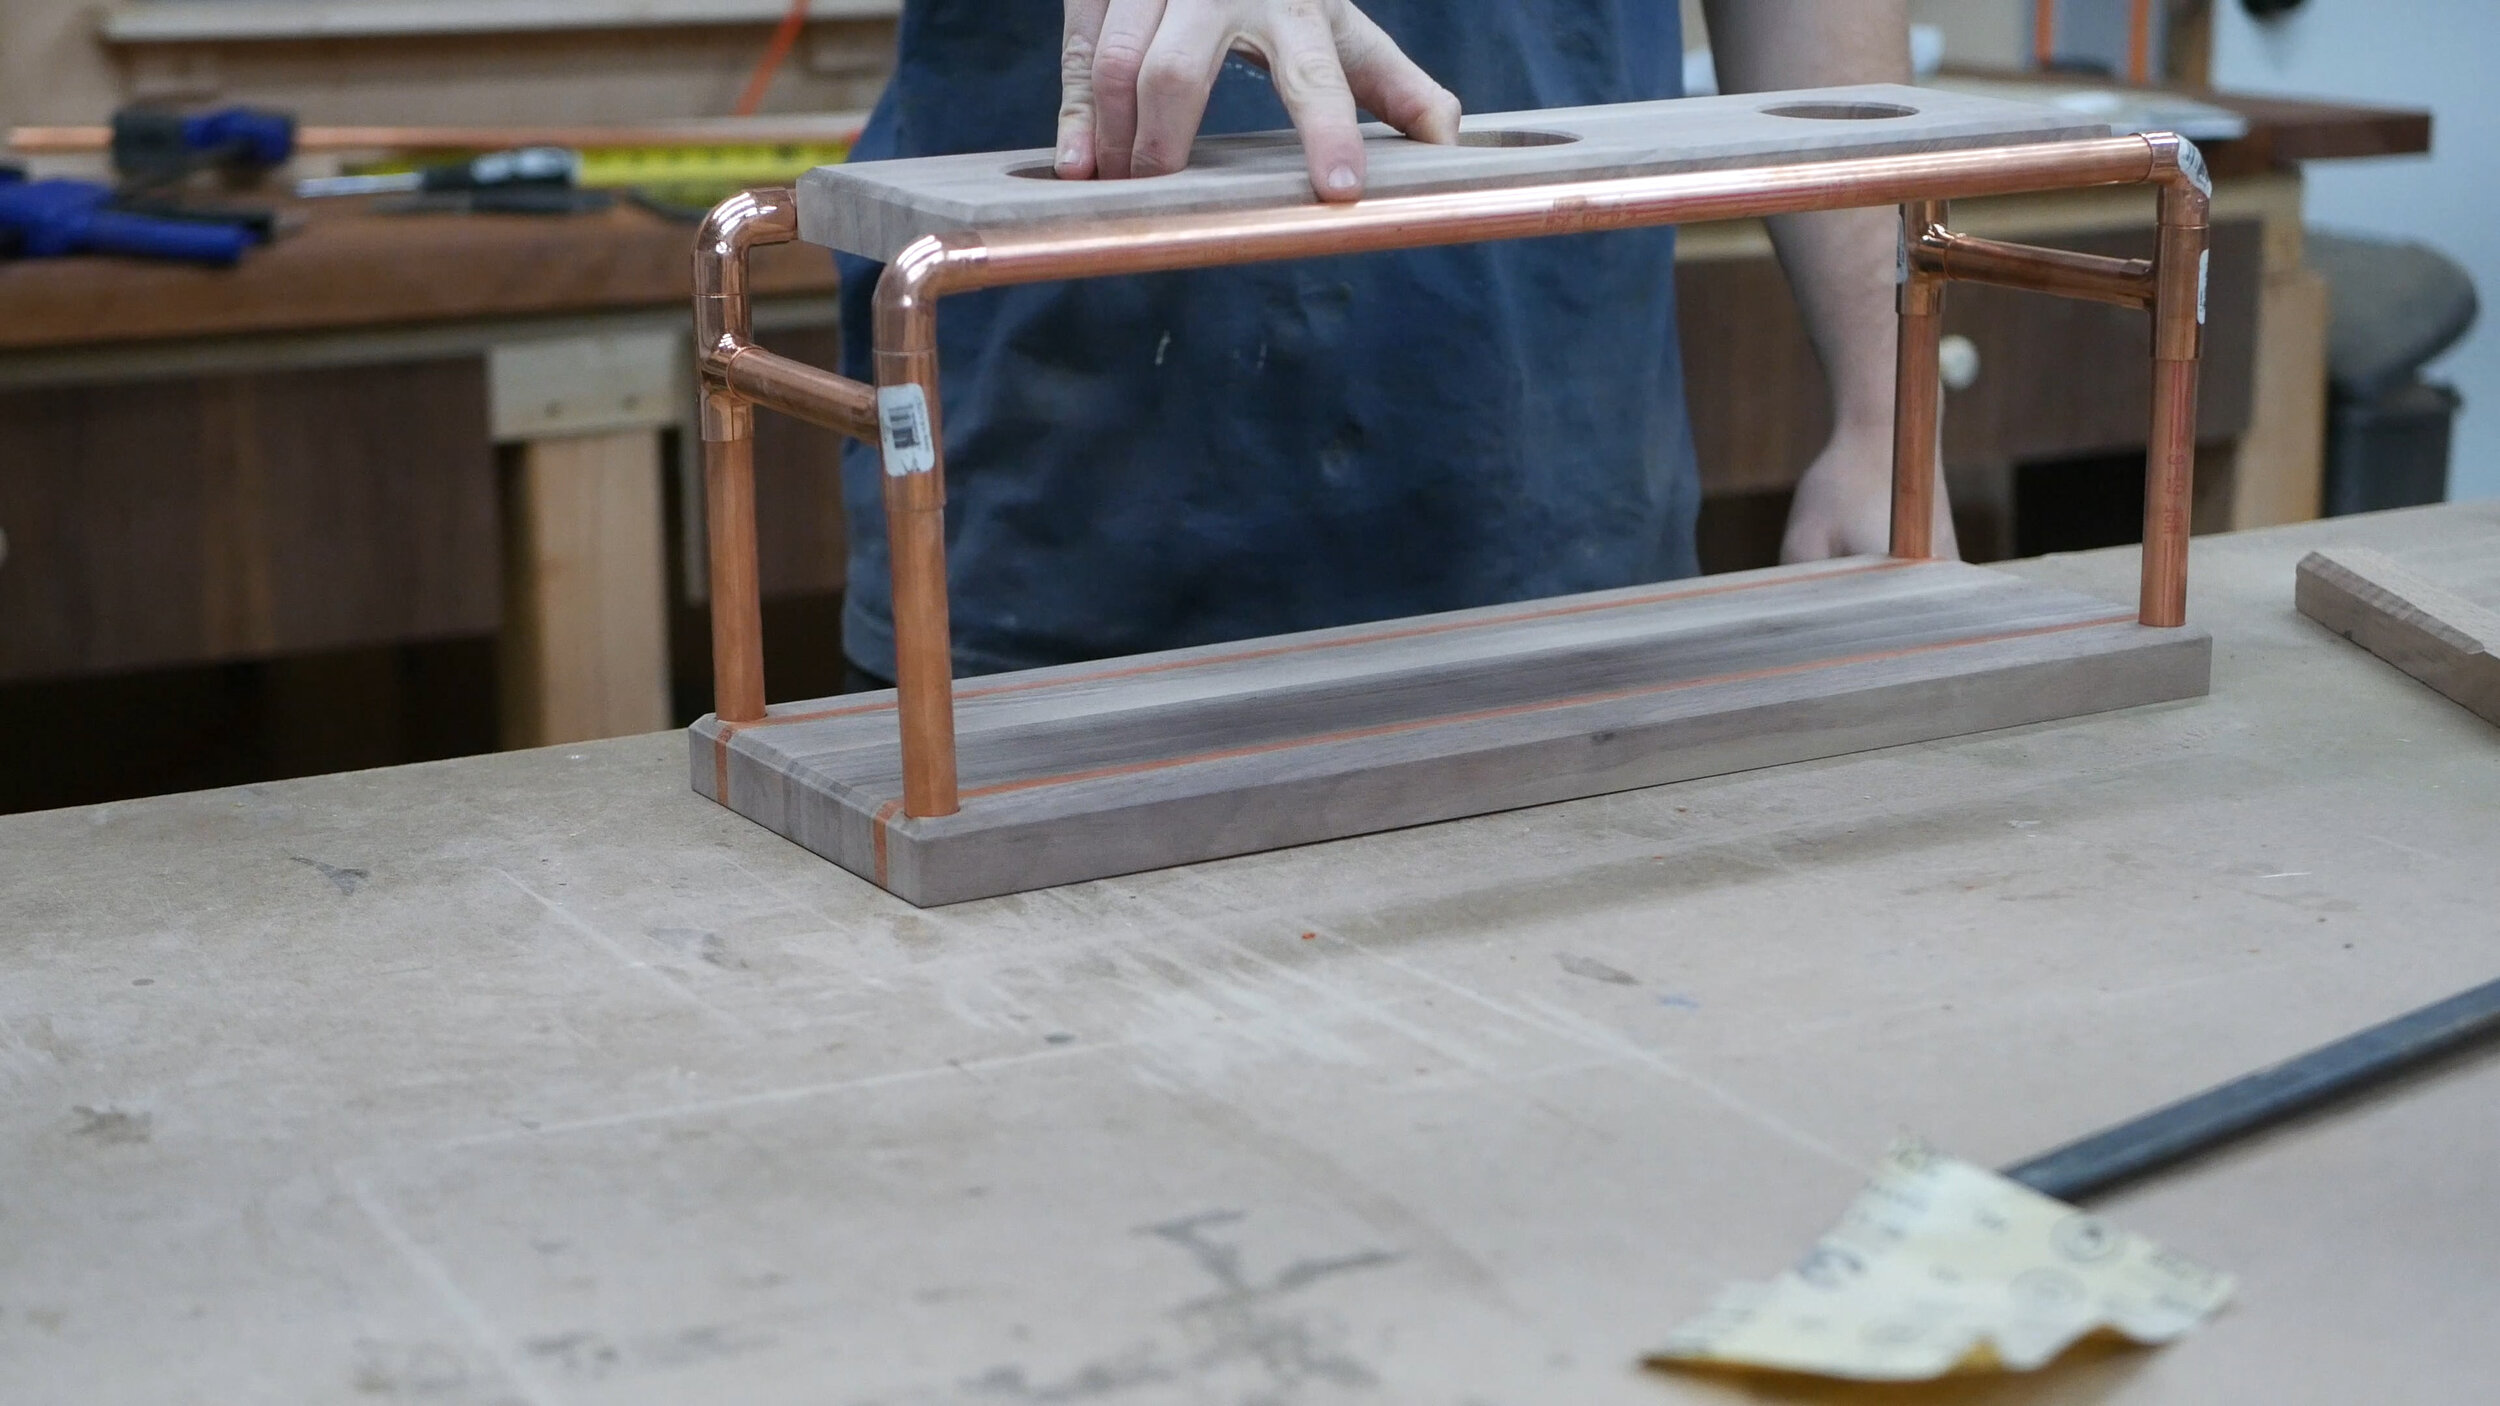
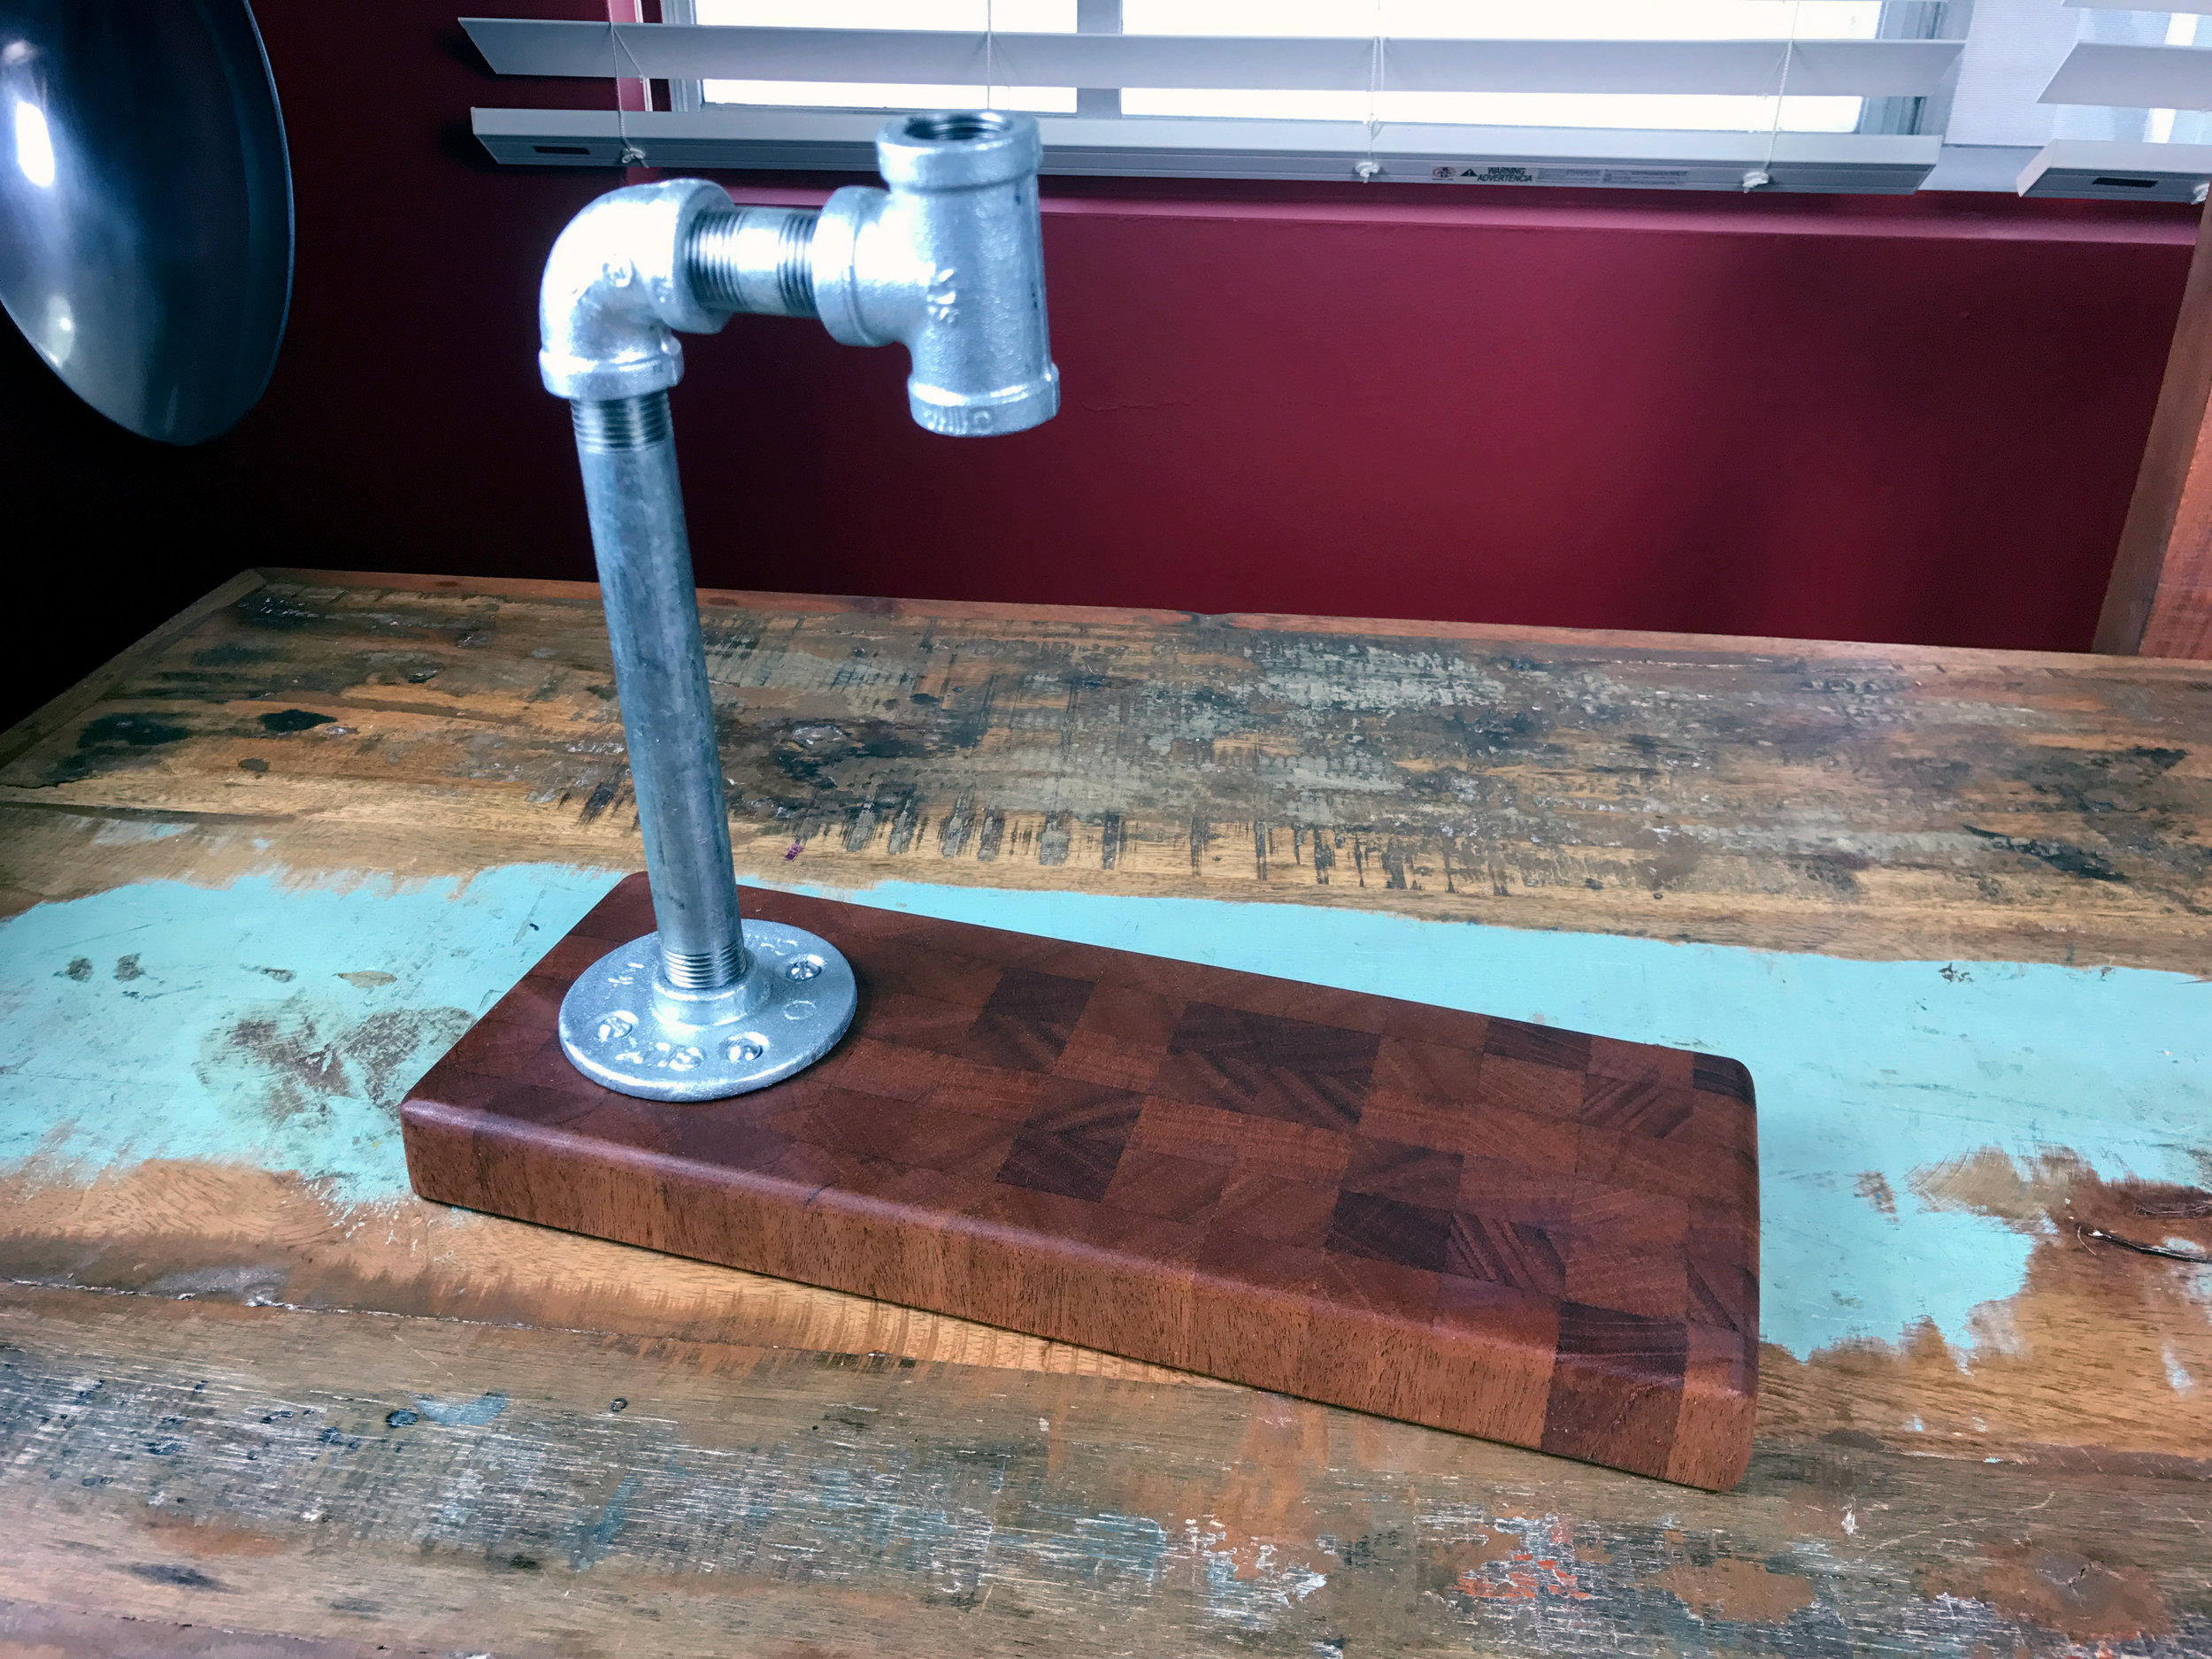
With the holes drilled, I then could measure and cut my copper piping to length for all pieces, including the vertical supports, the horizontal supports, and the connecting horizontal supports on the sides. I purchased this $12 (maybe less?) copper pipe cutter from Lowes and about 8 turns would cut the pipe cleanly. One 10’ copper provided everything I needed. I then did a dry assembly to make sure it was all even and correct. It was (first try!)
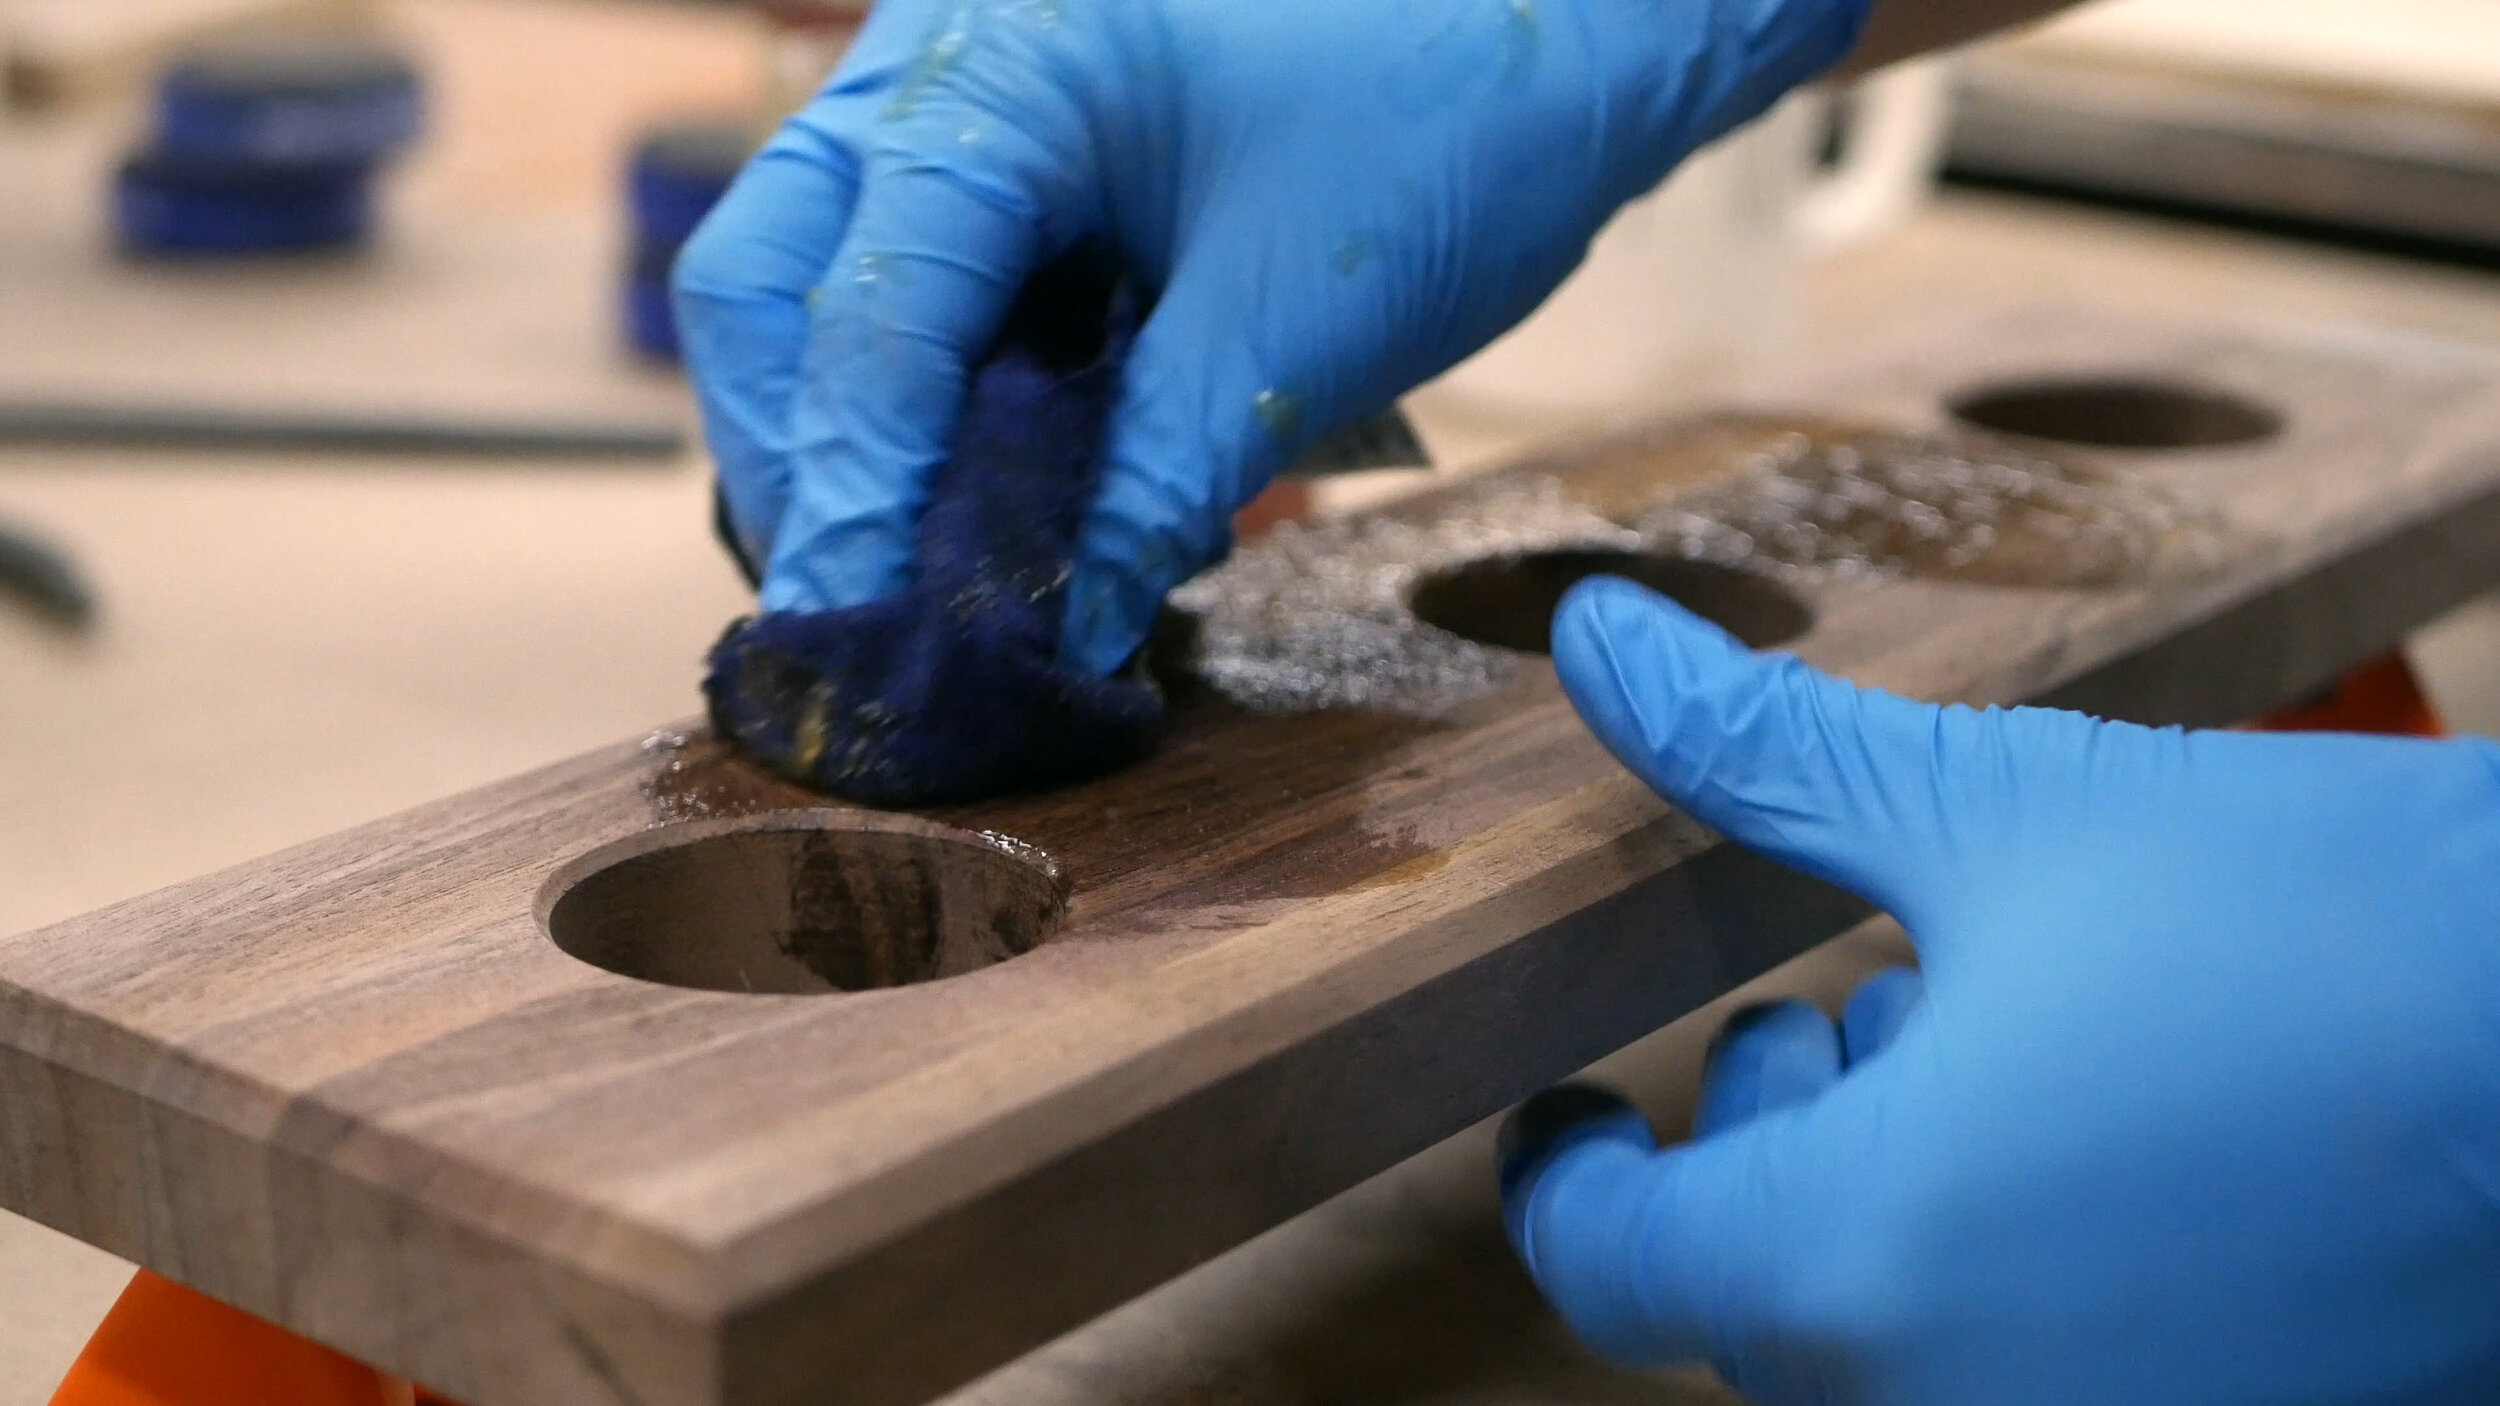
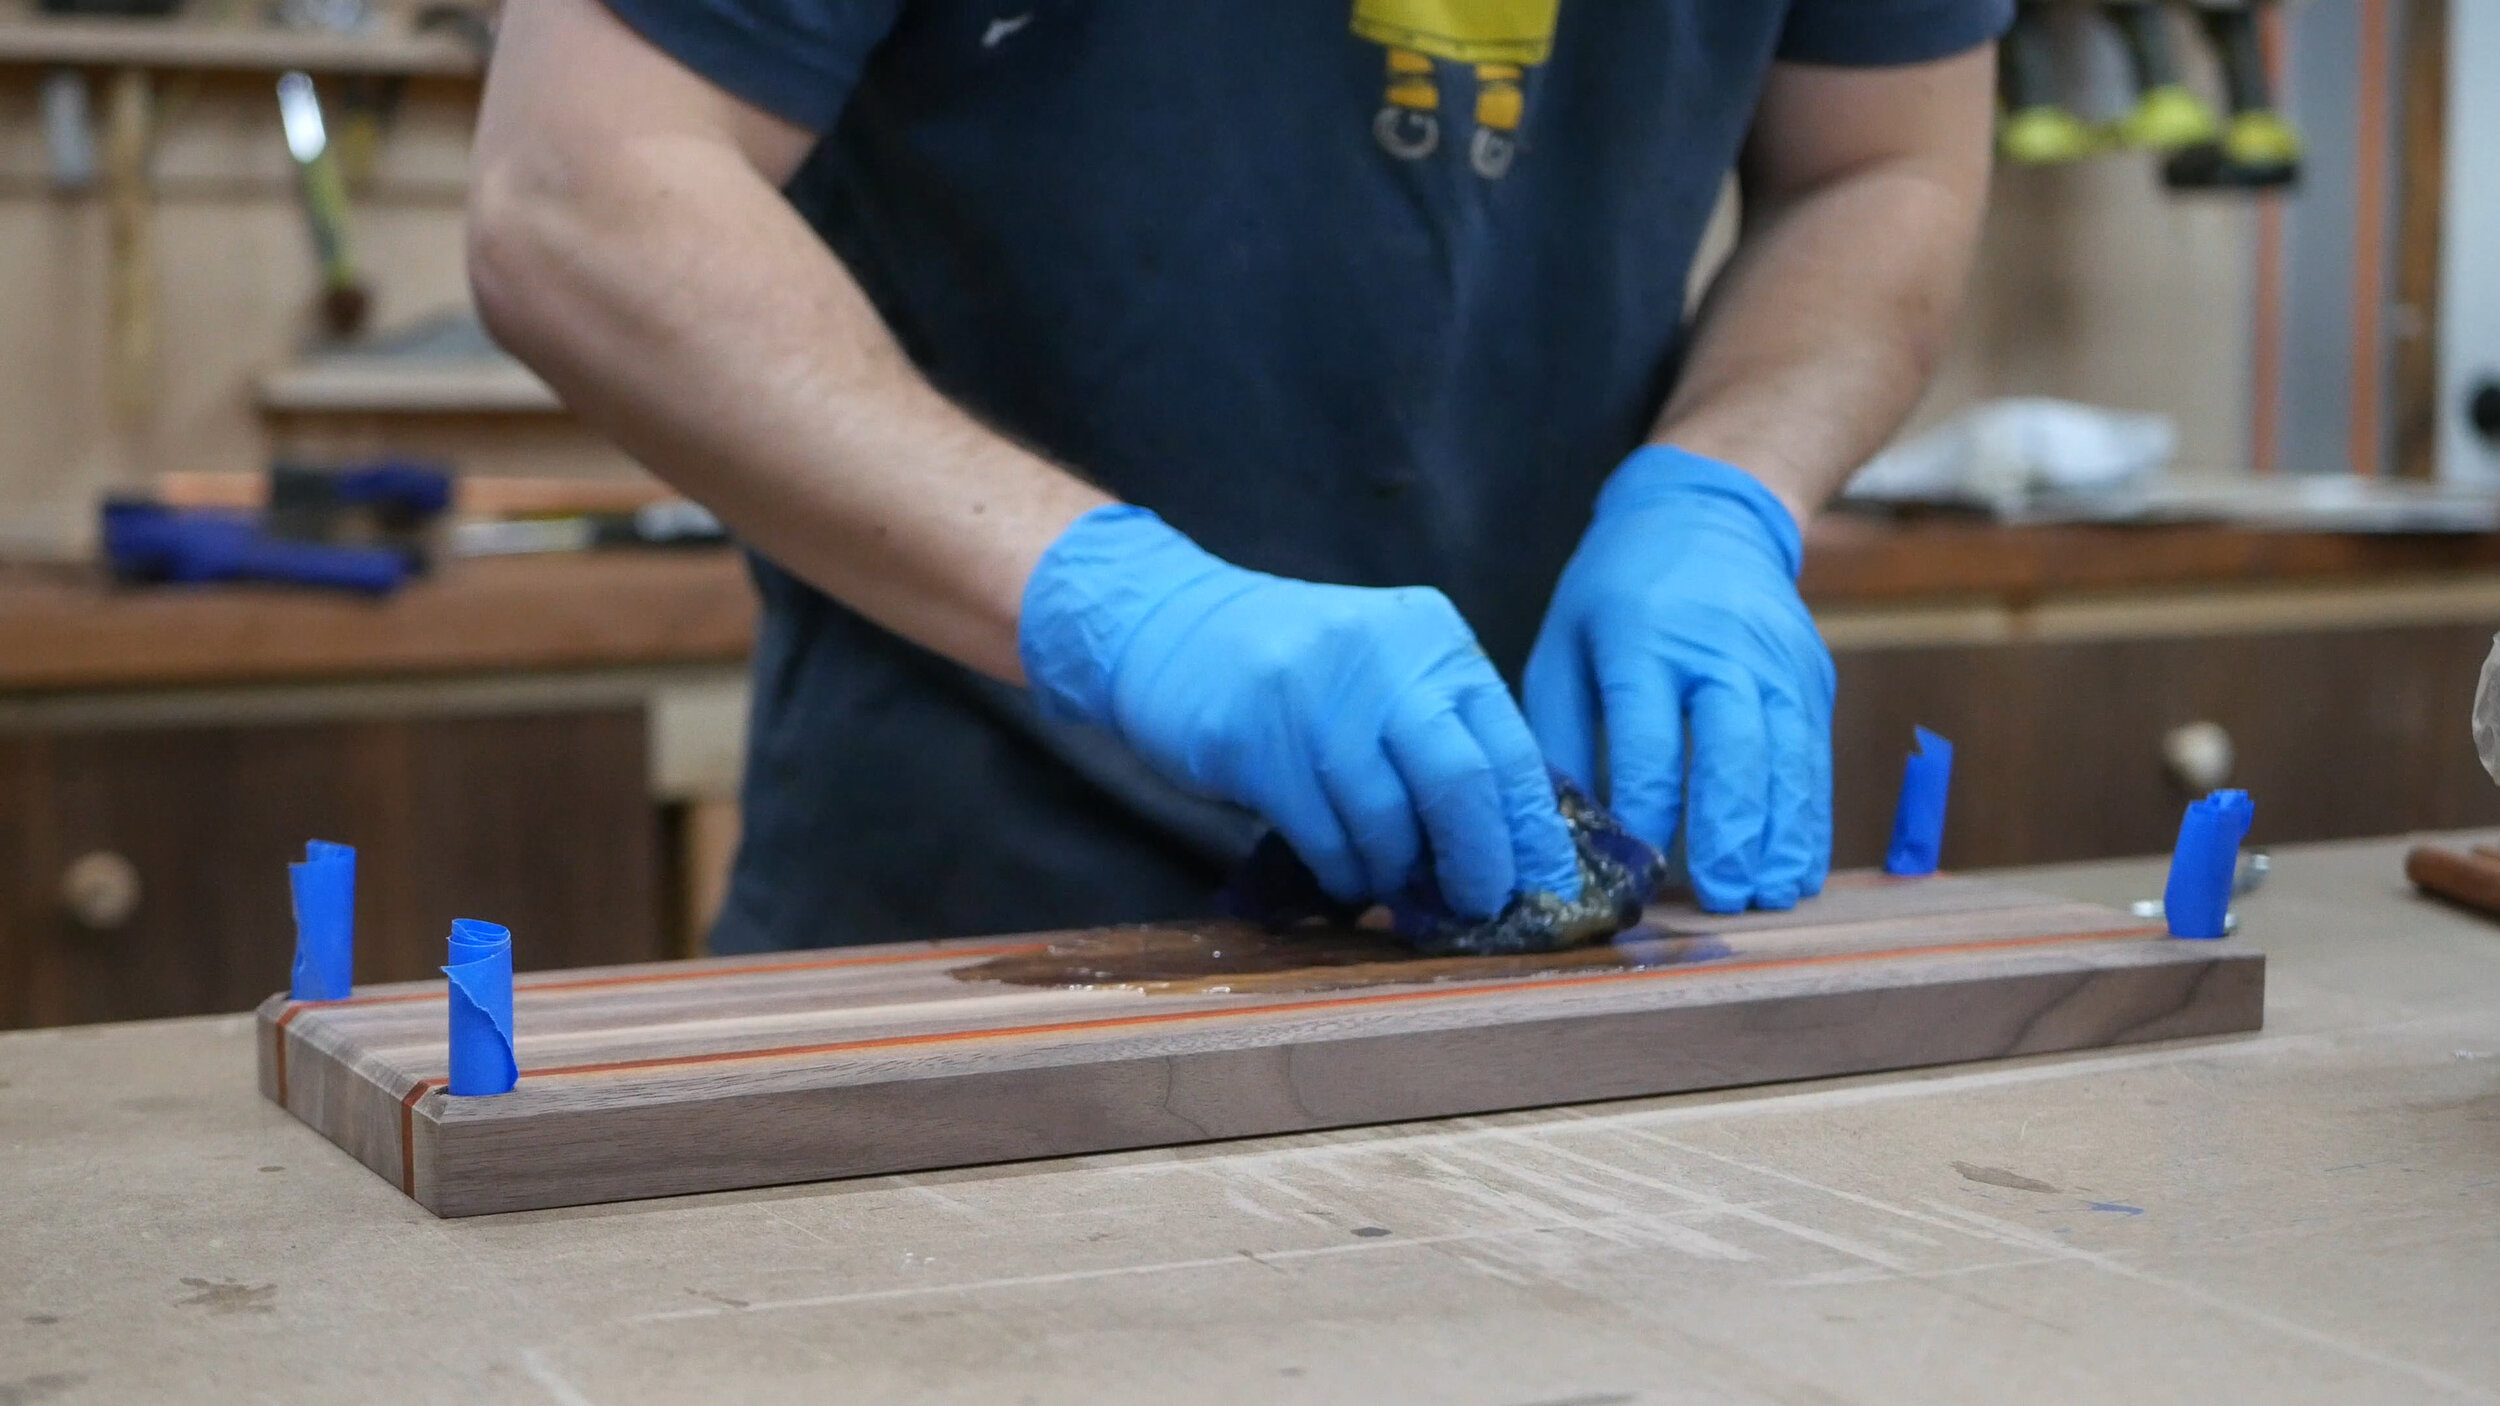
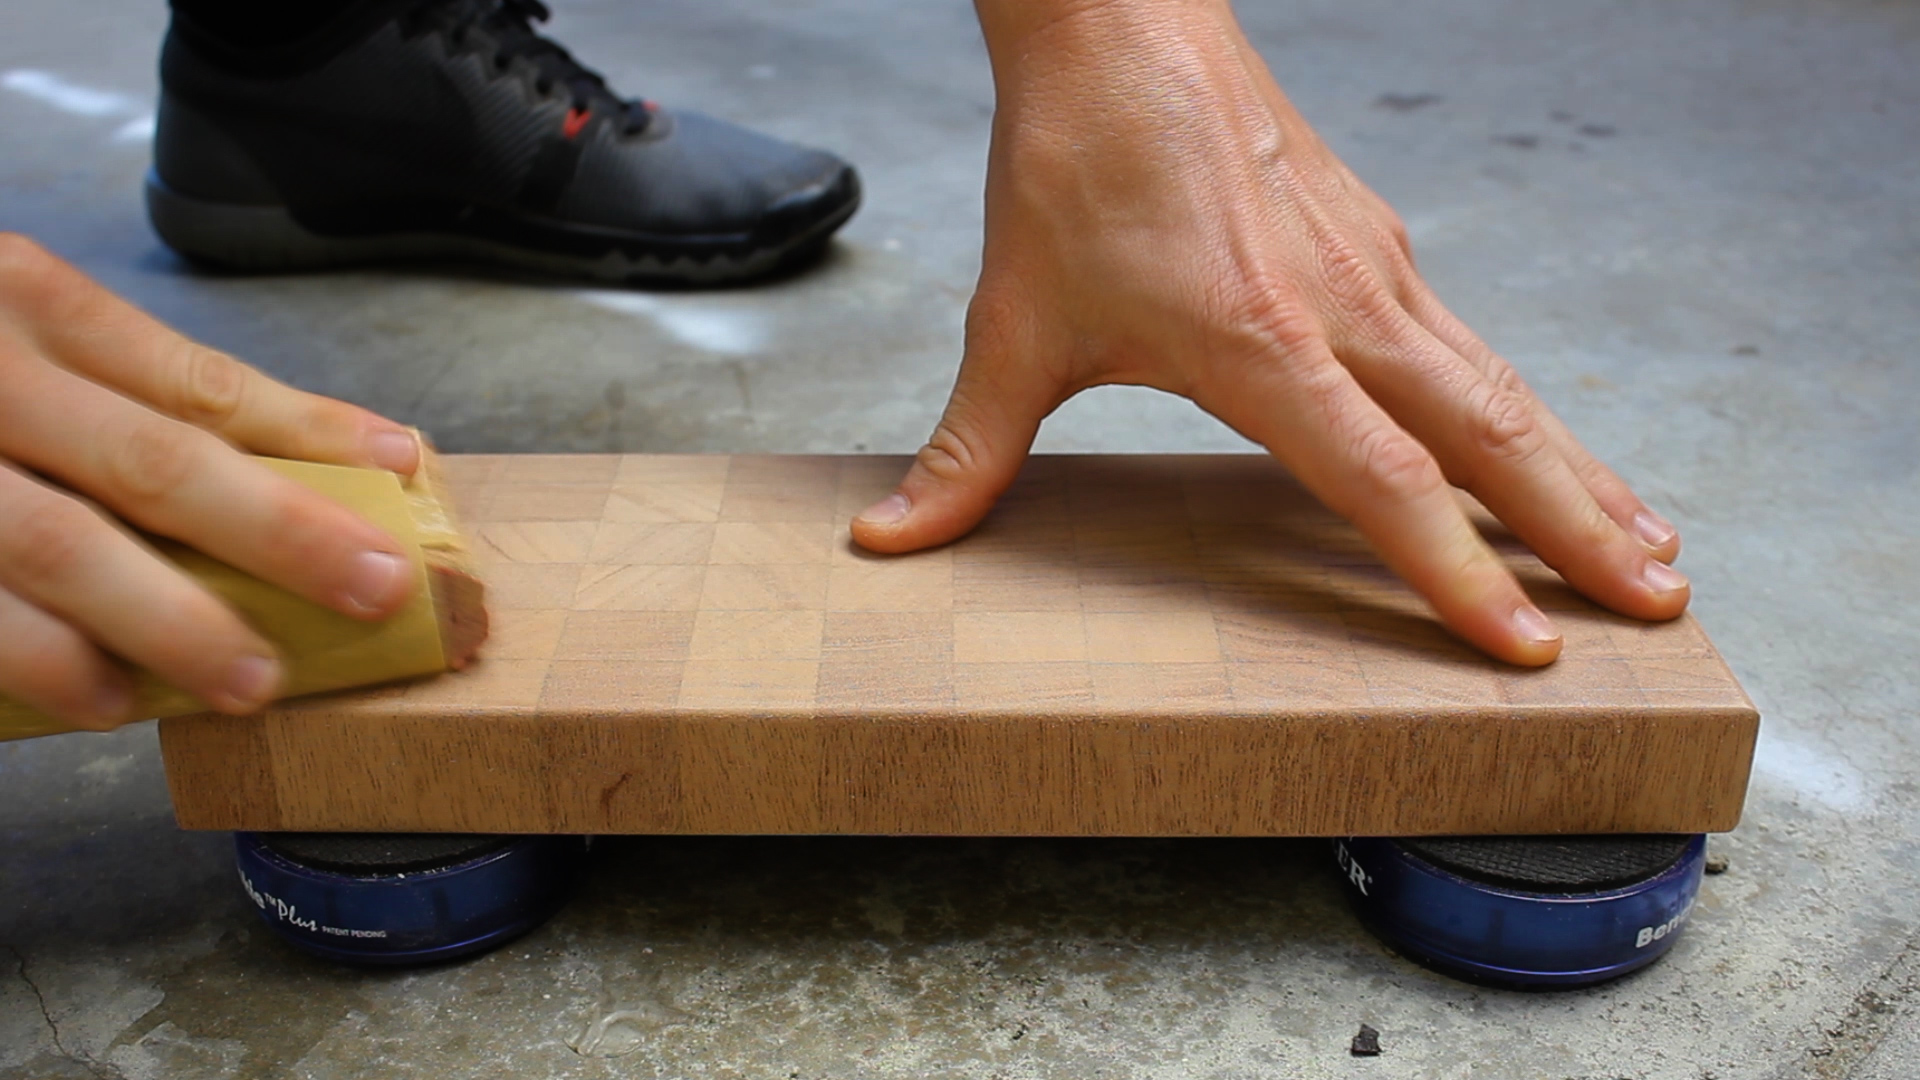
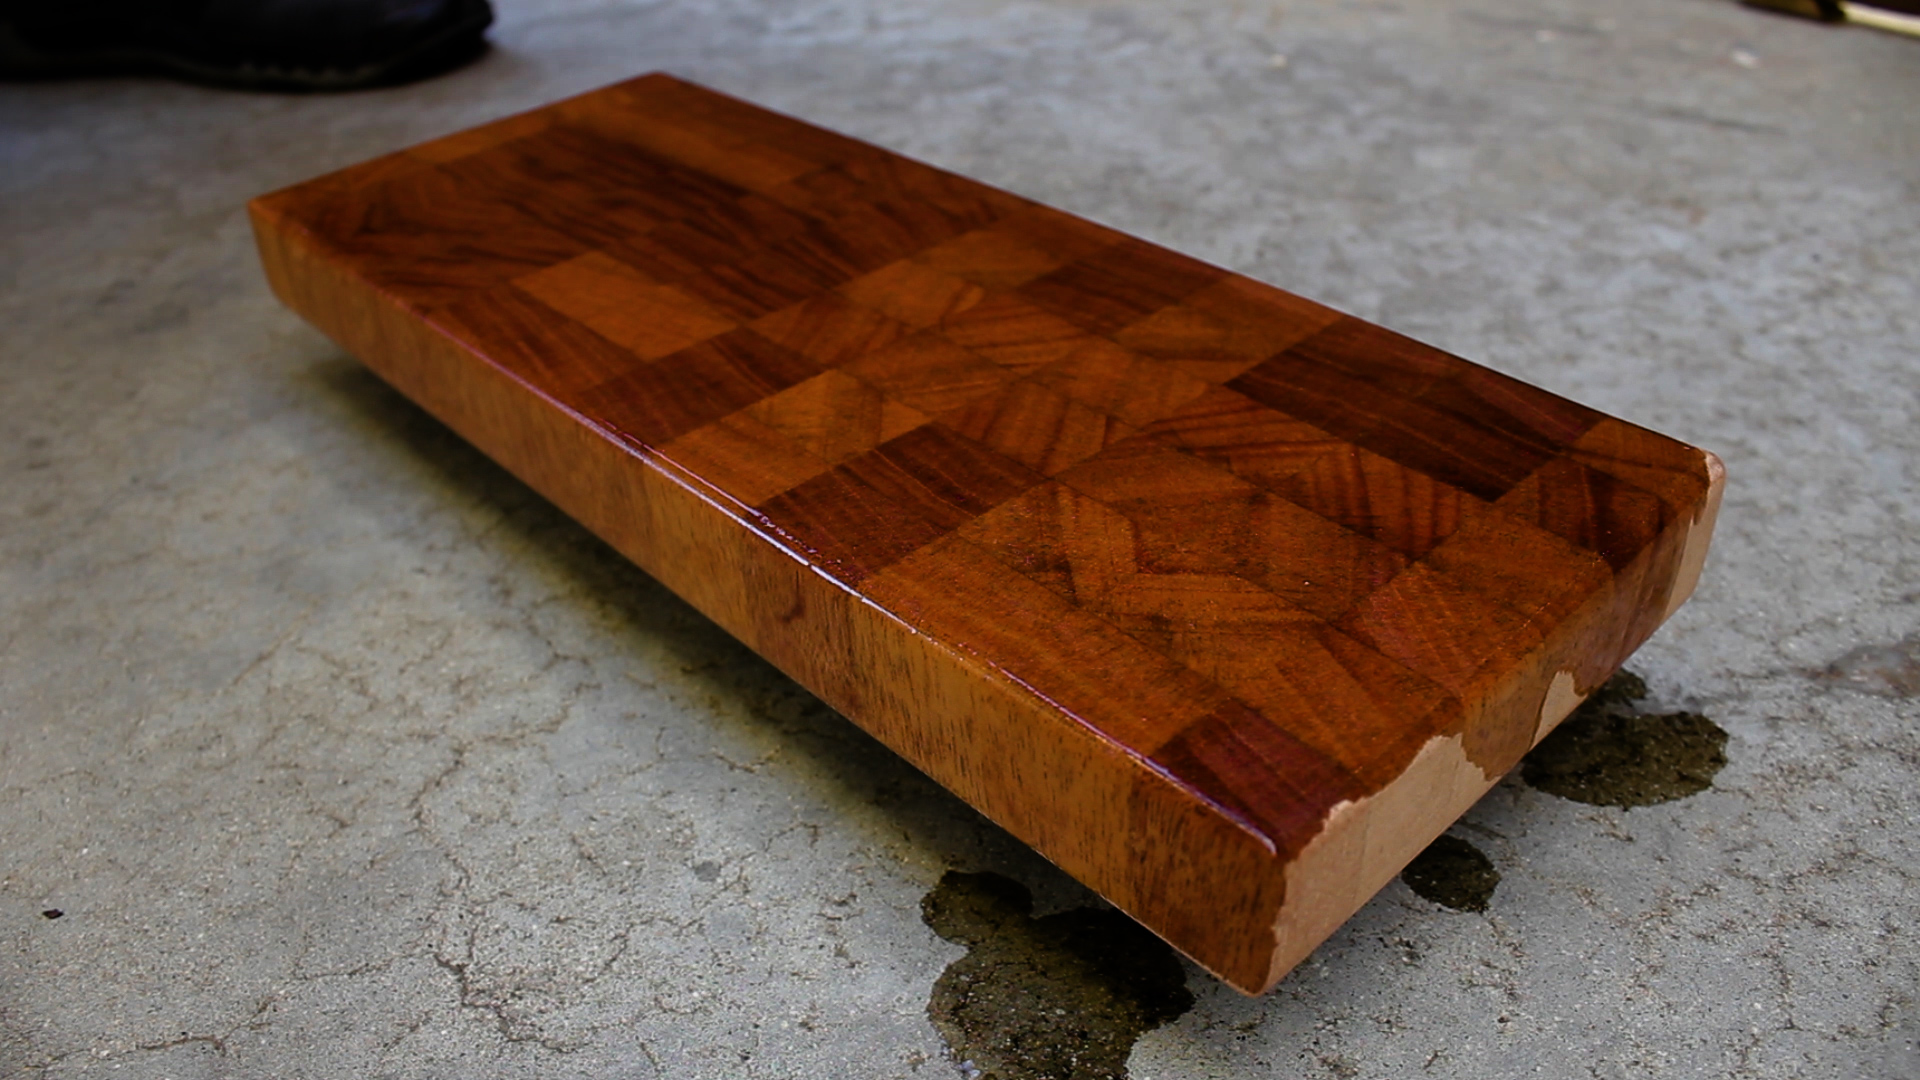
Before final assembly, I then added my butcher block finish (food safe) to the top and bottom wooden pieces. Love this stuff. Really just makes the wood pop like no other product I’ve used. Small thing - I put blue tape in the base holes to prevent any finish from getting into them.
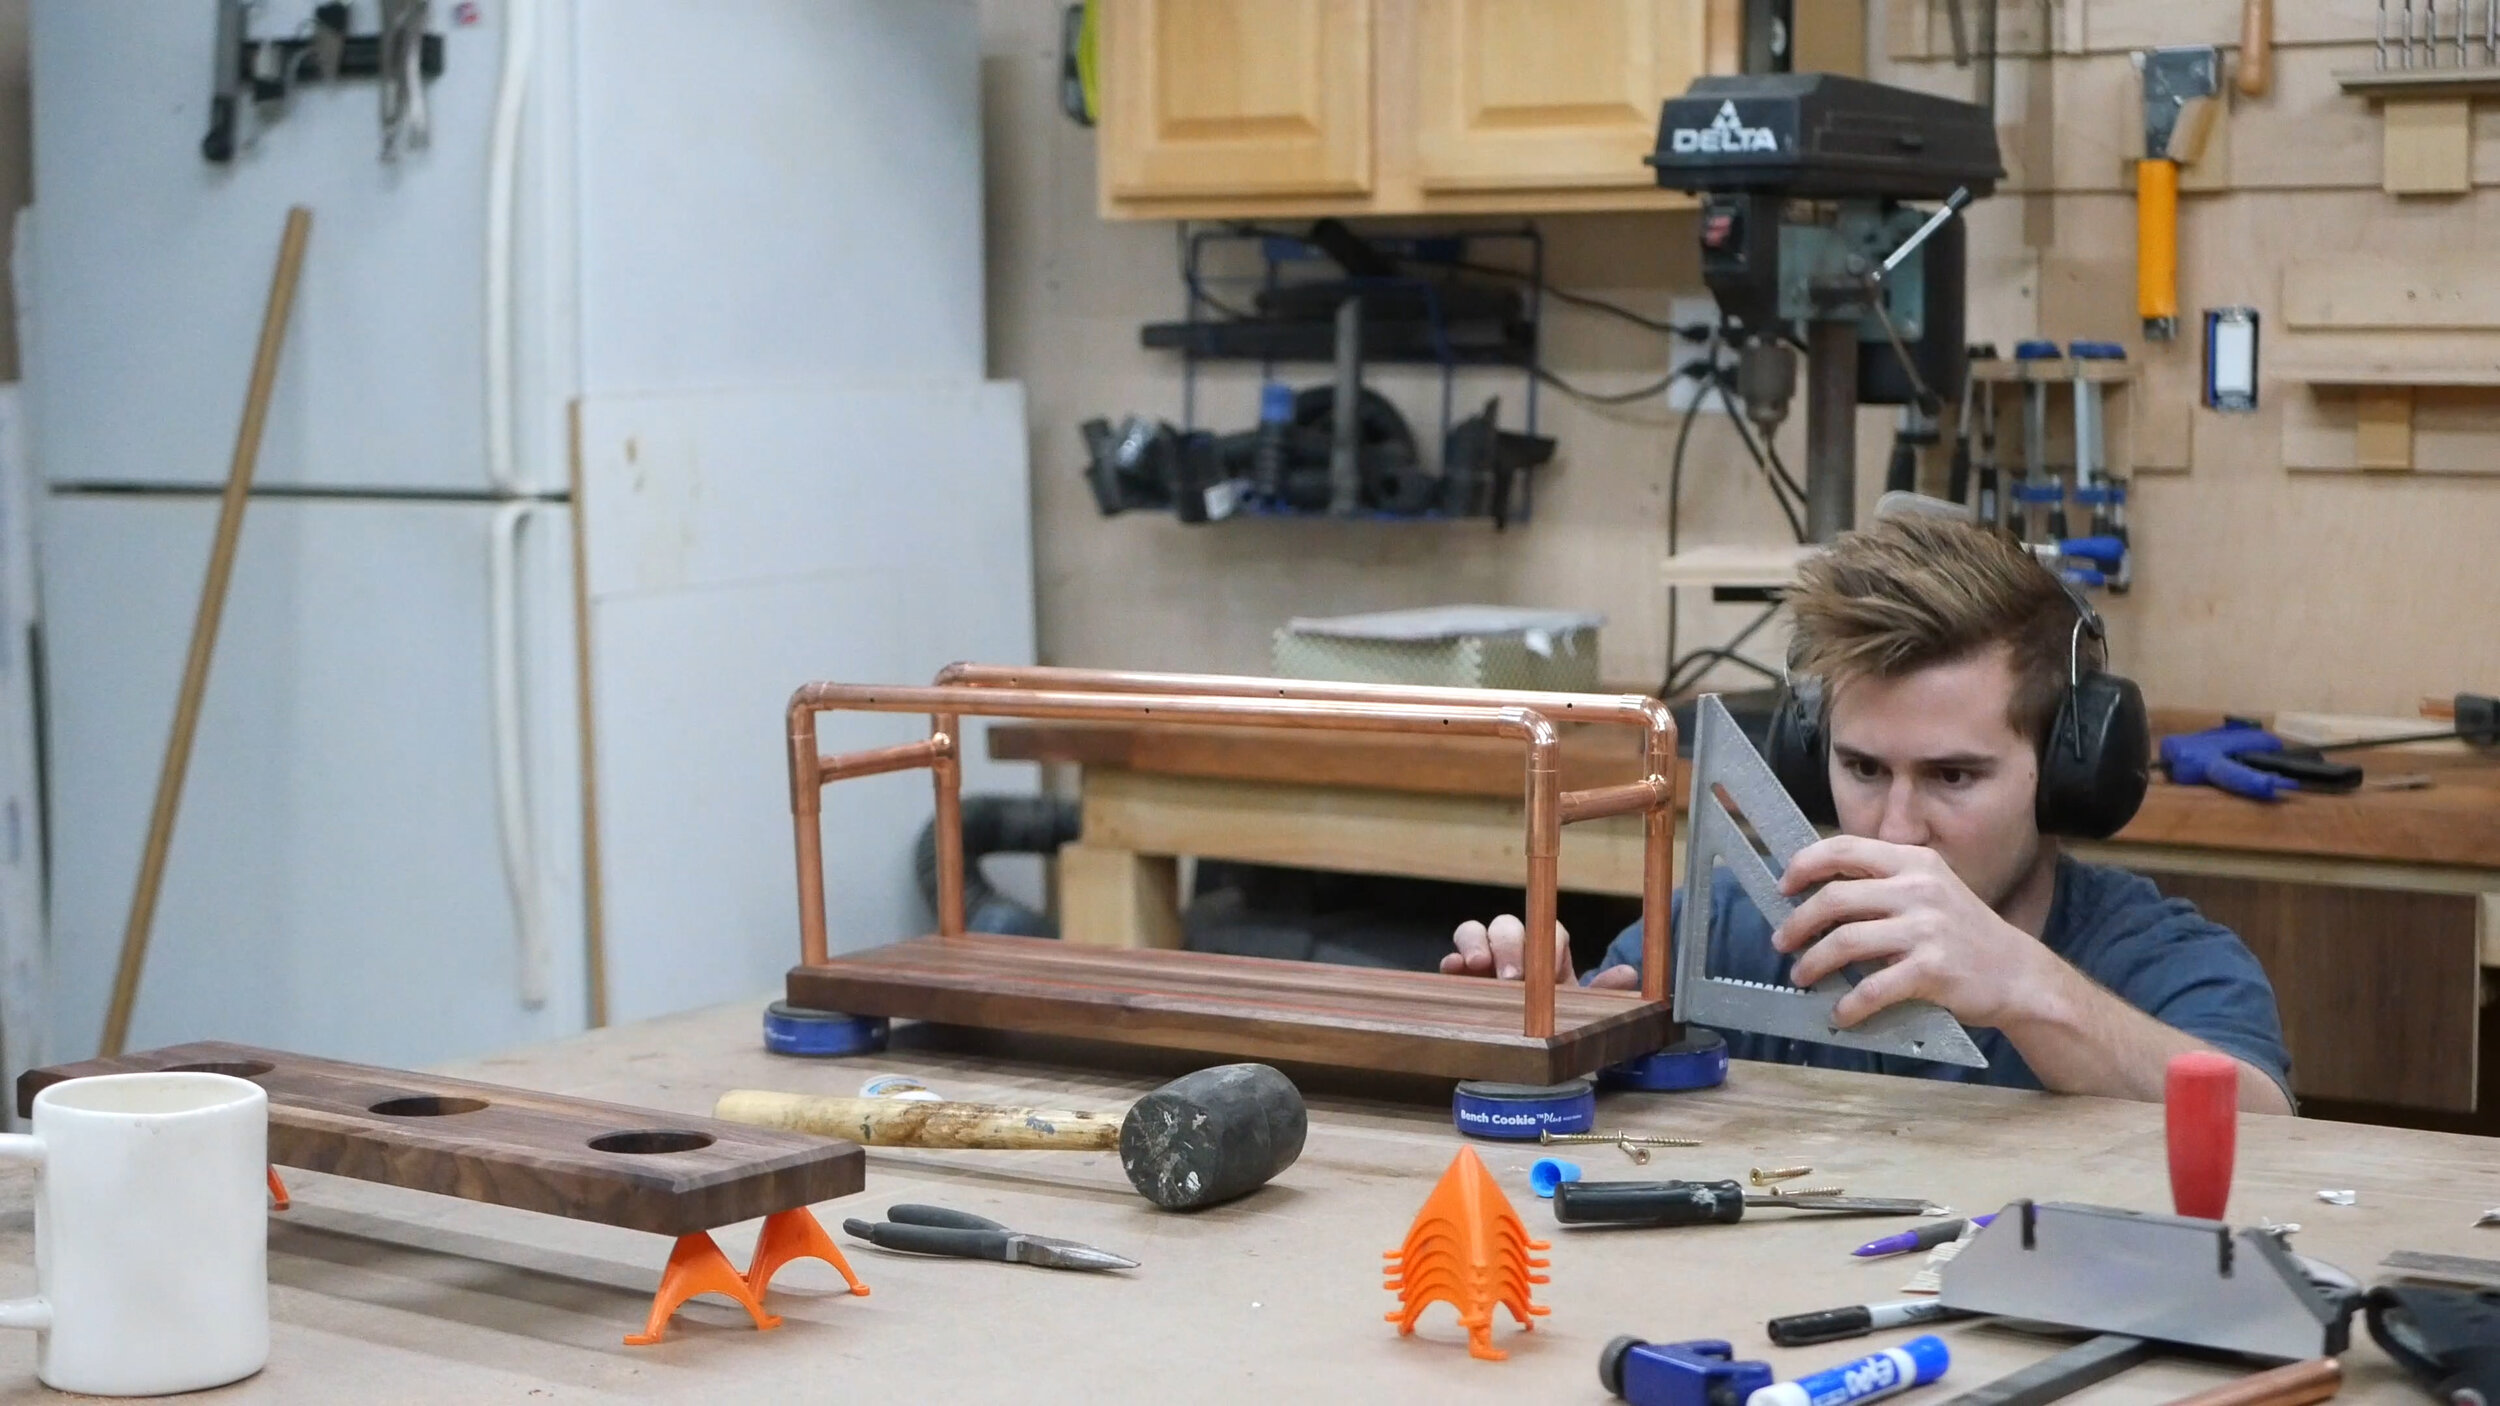
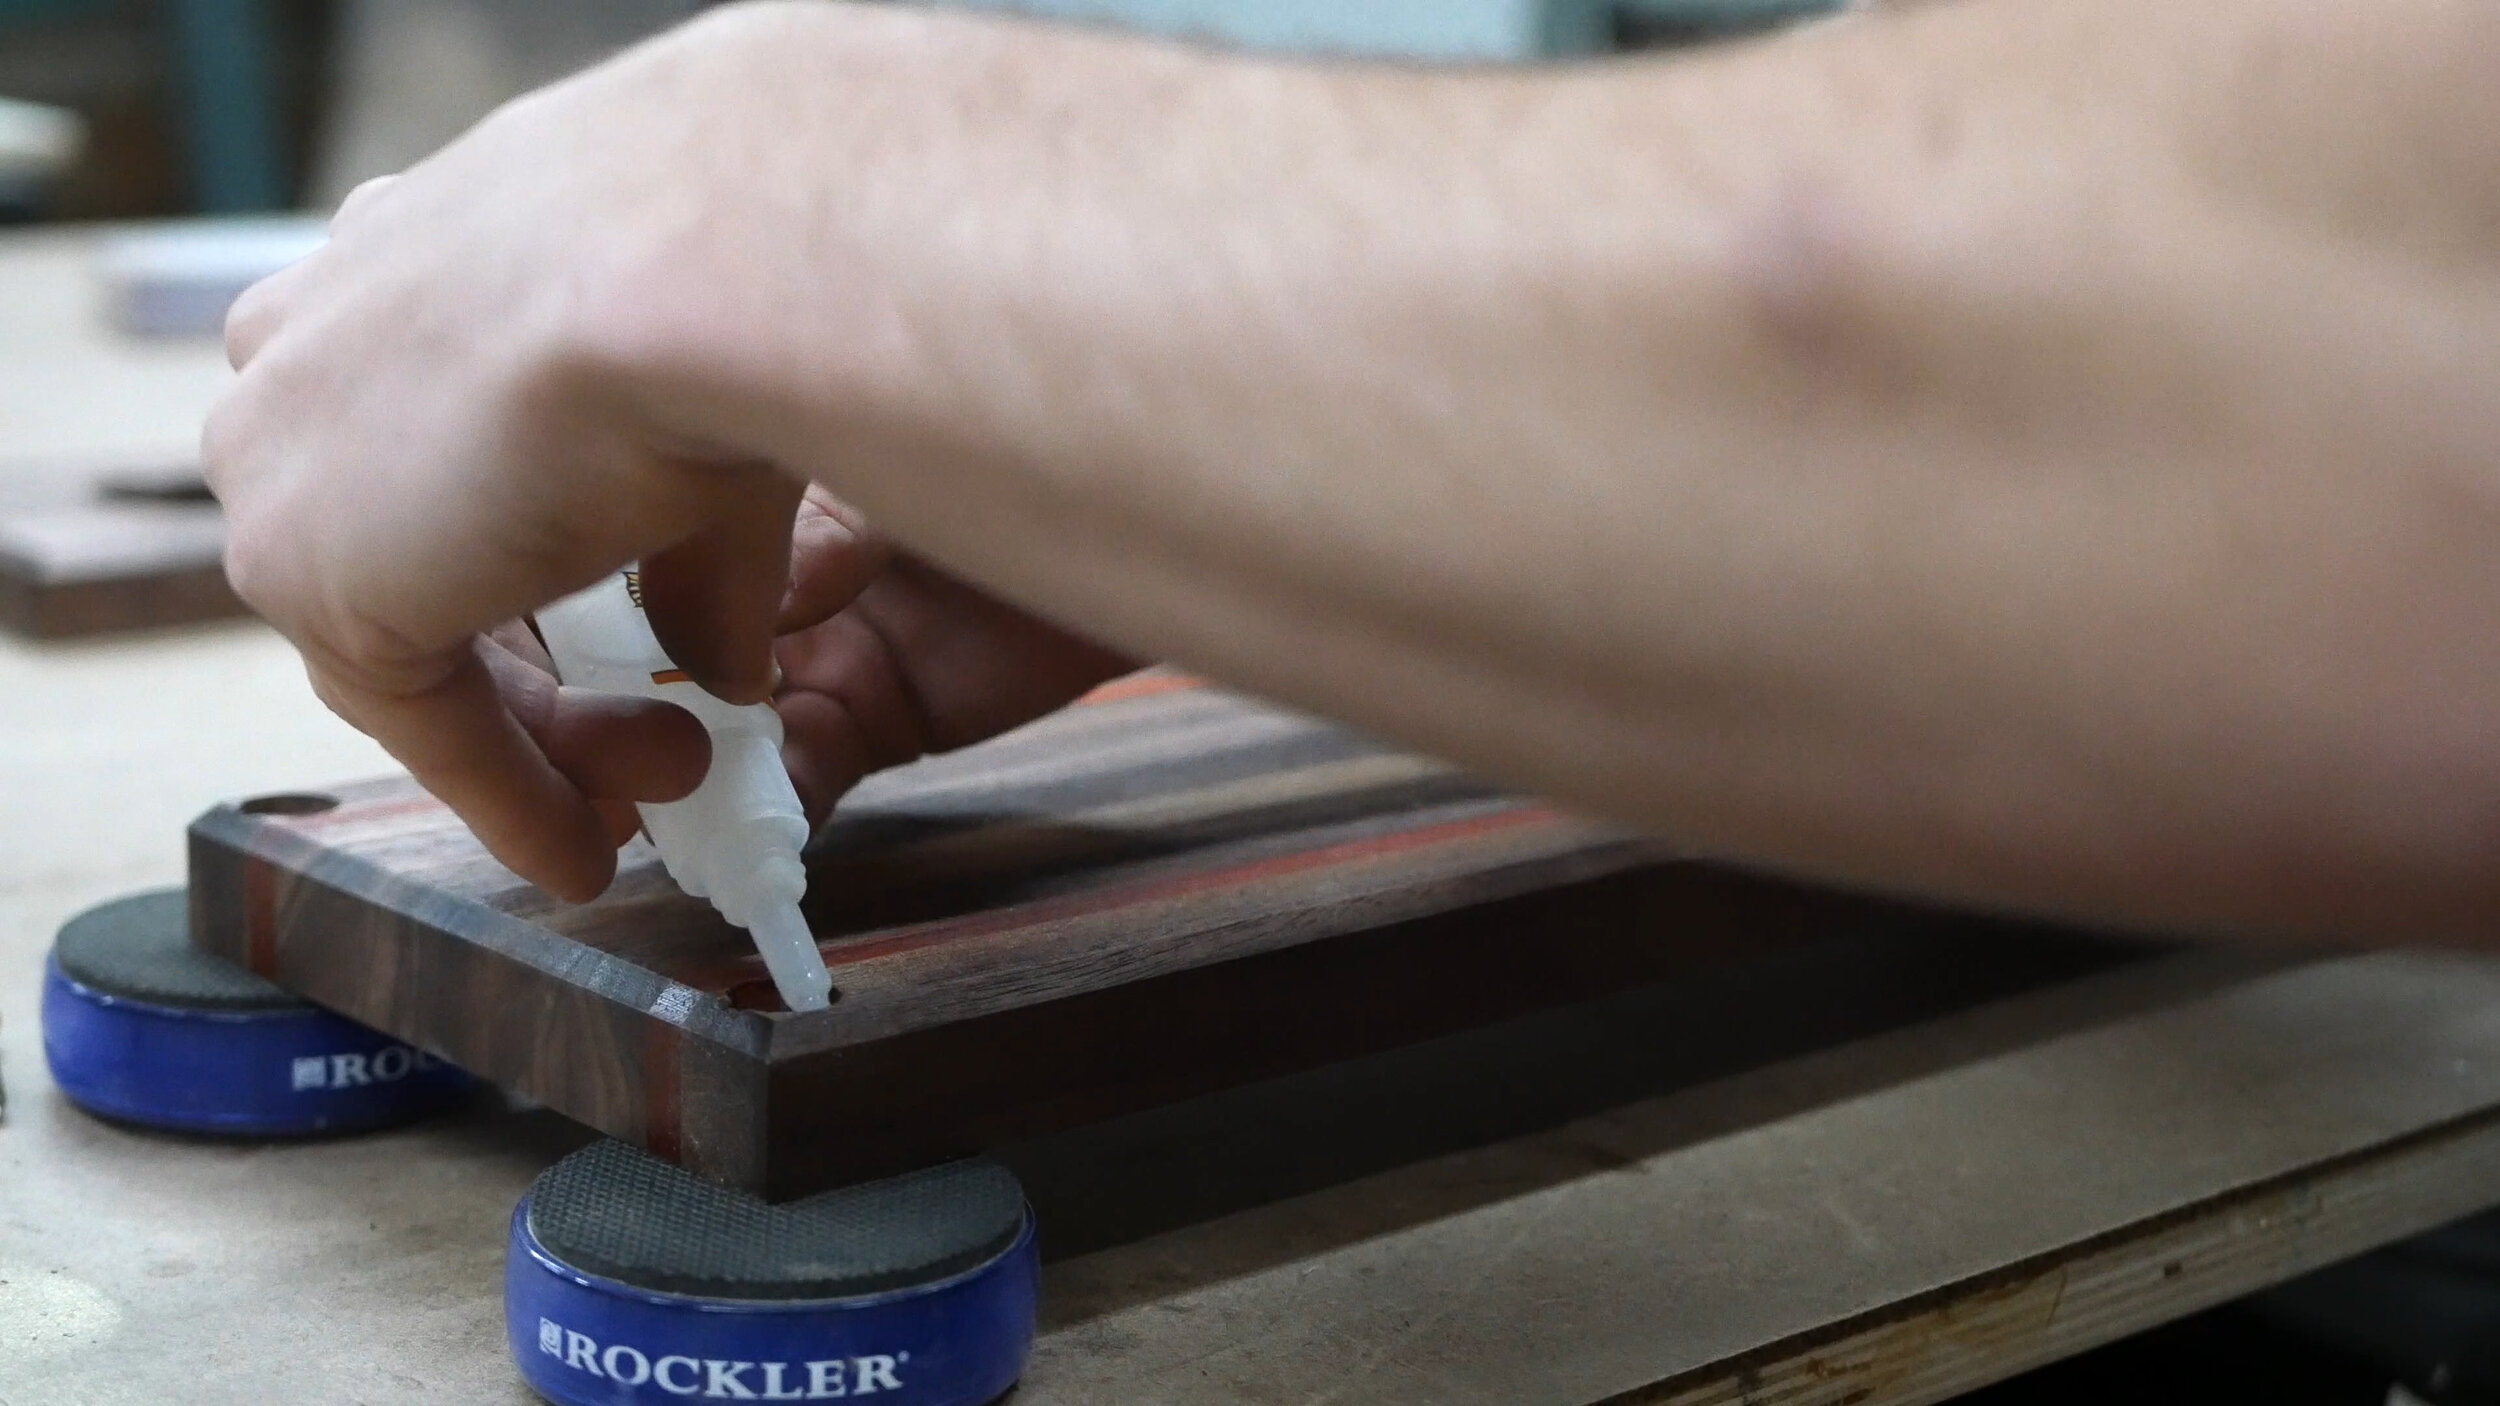
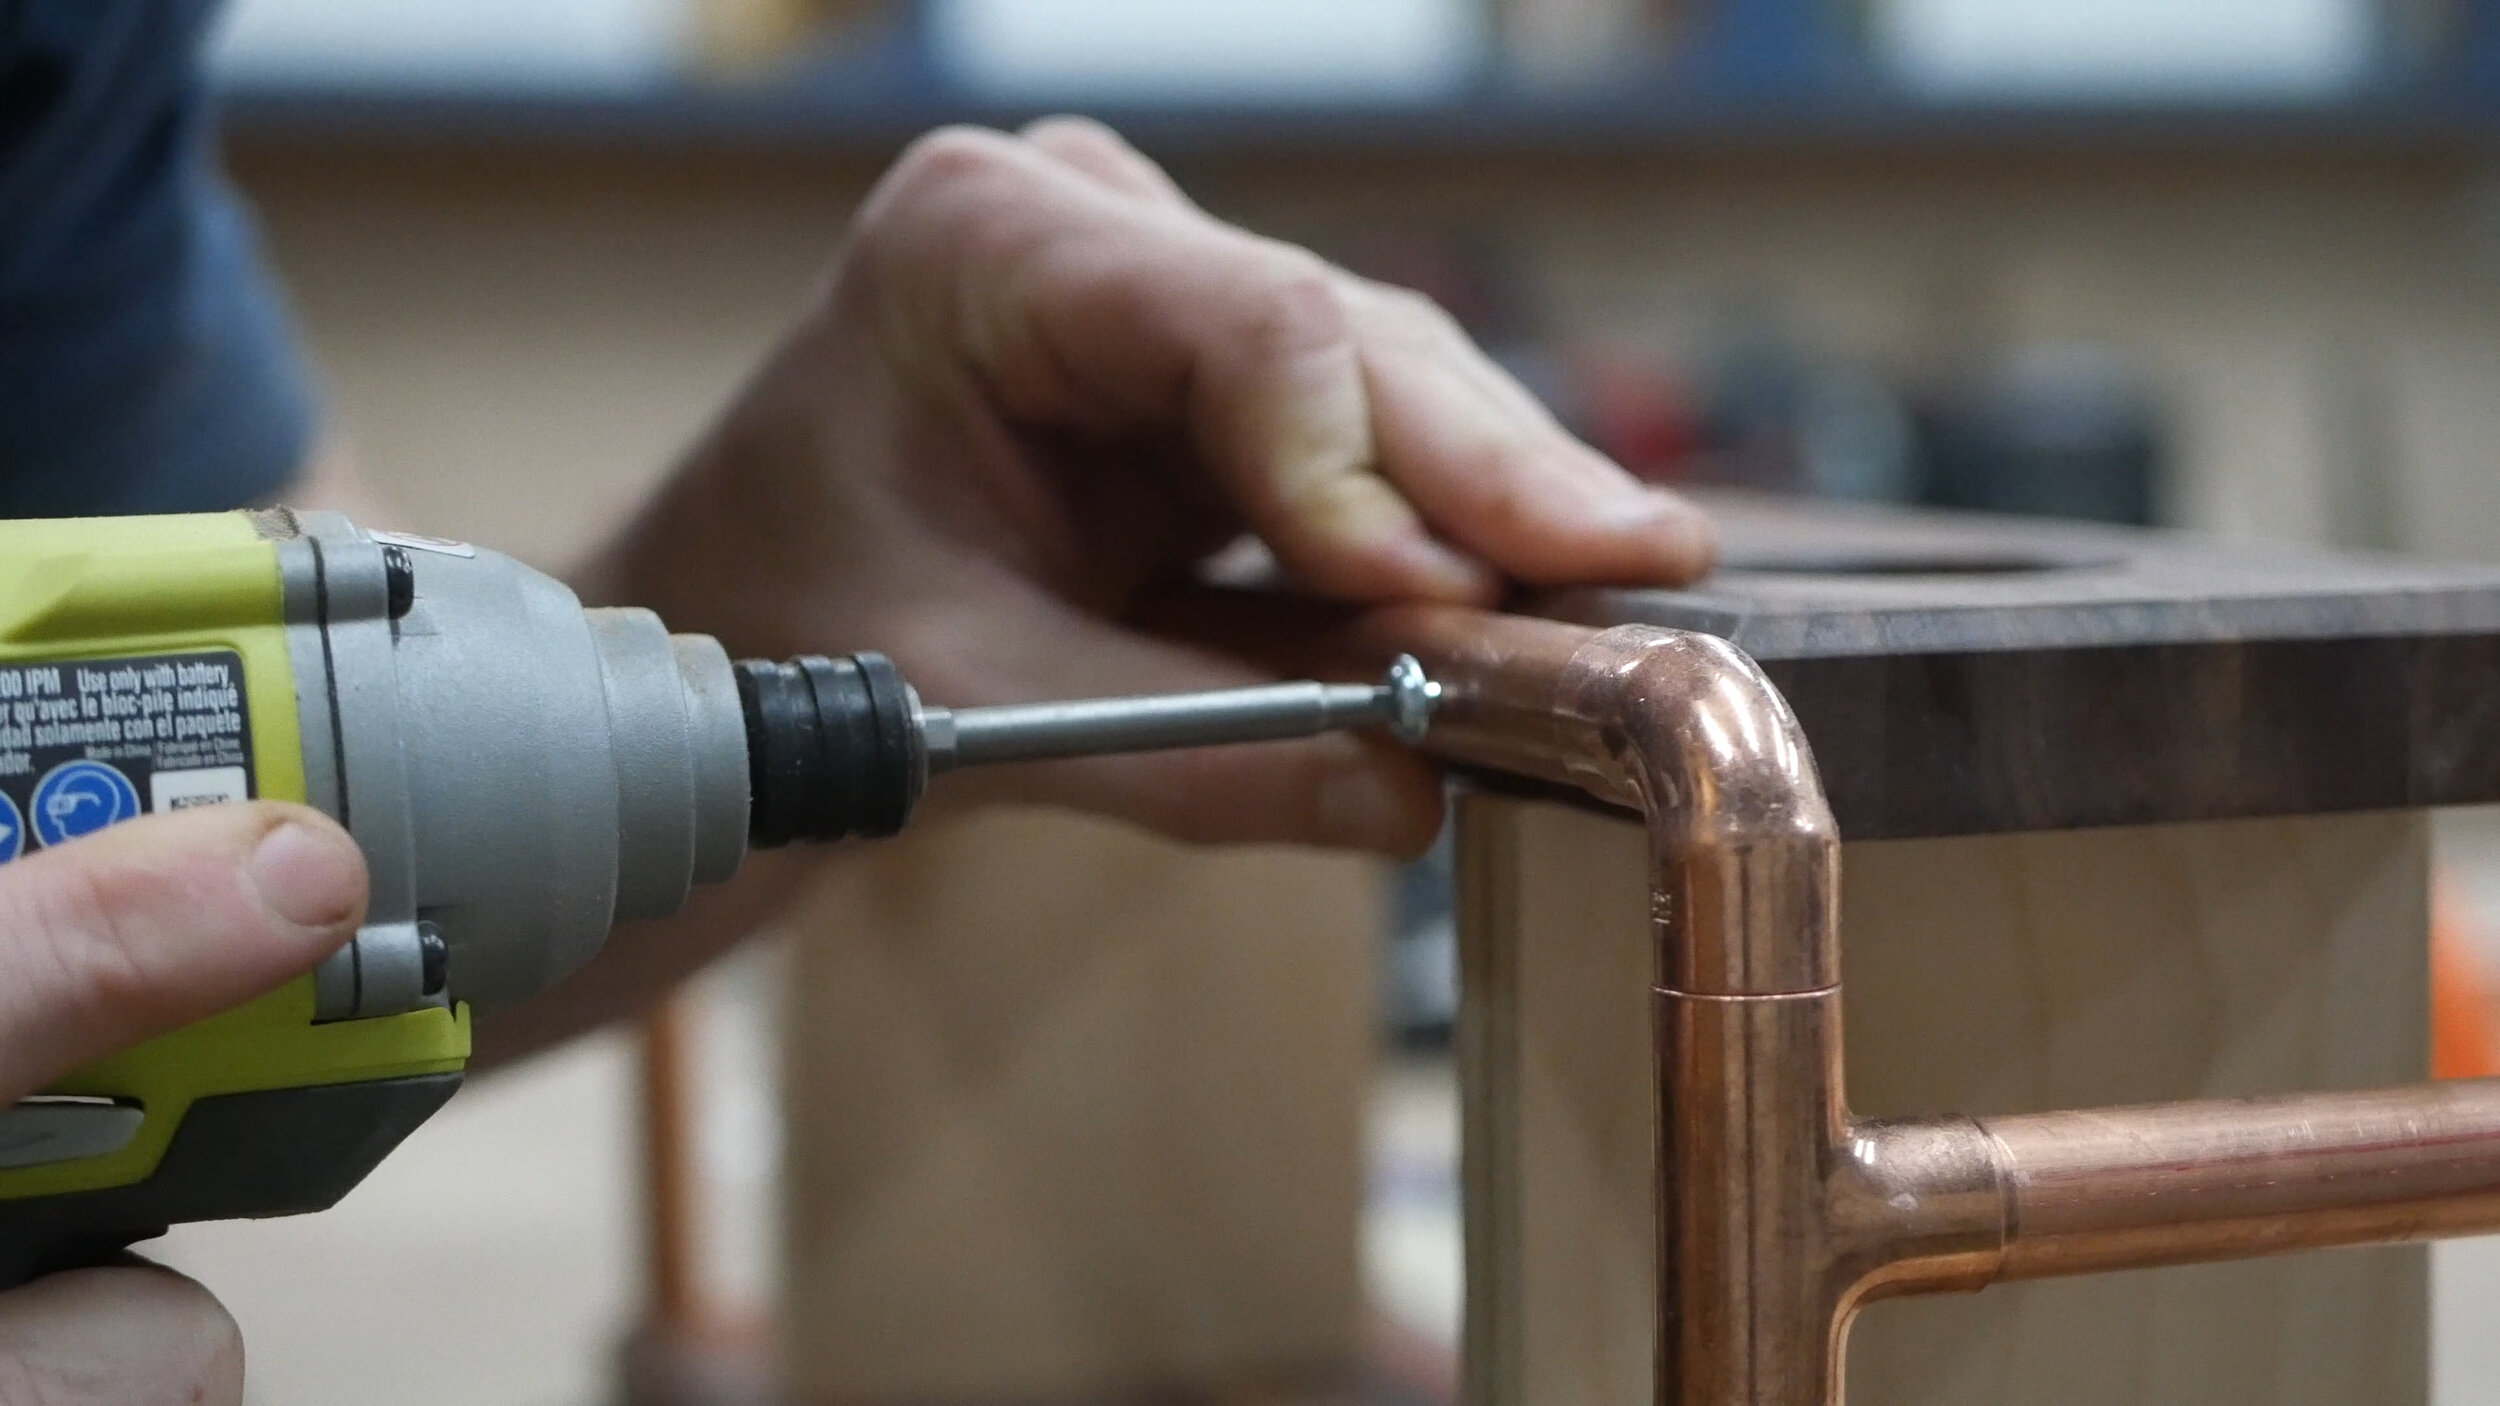
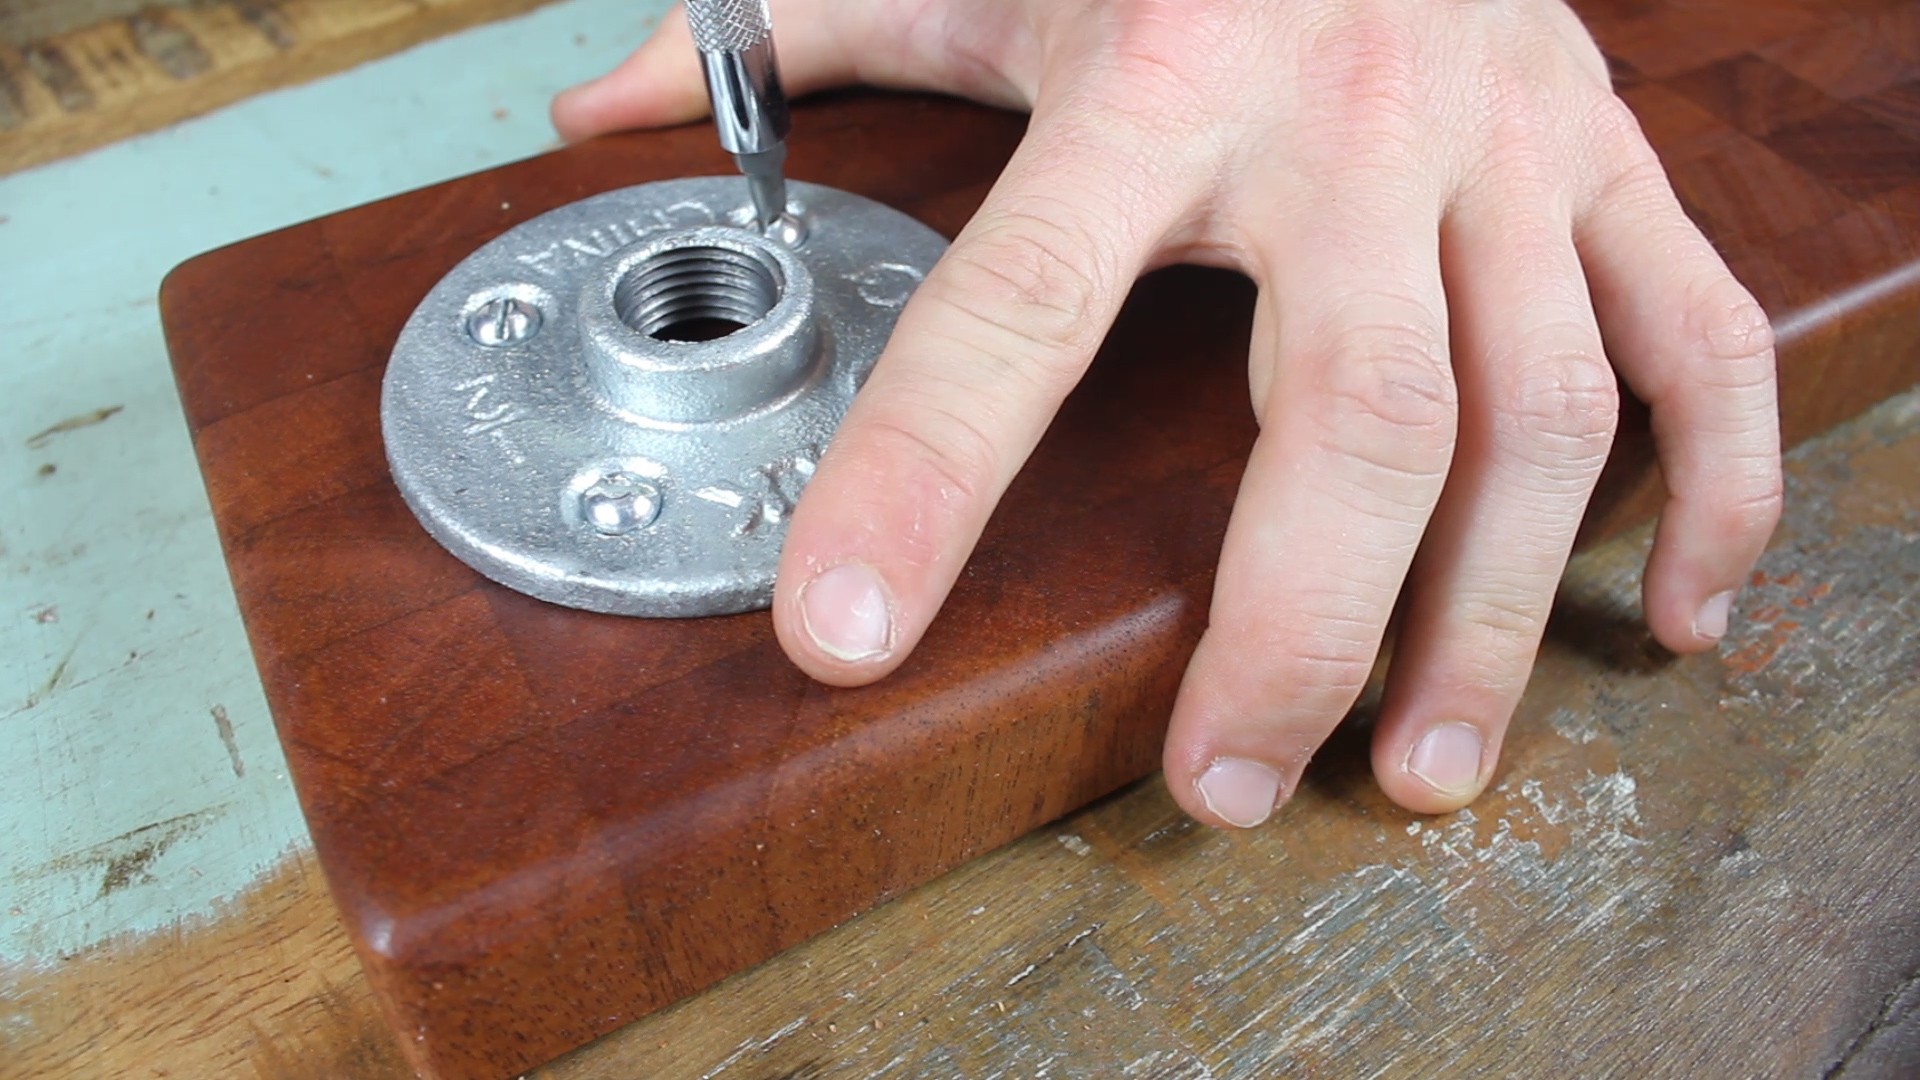
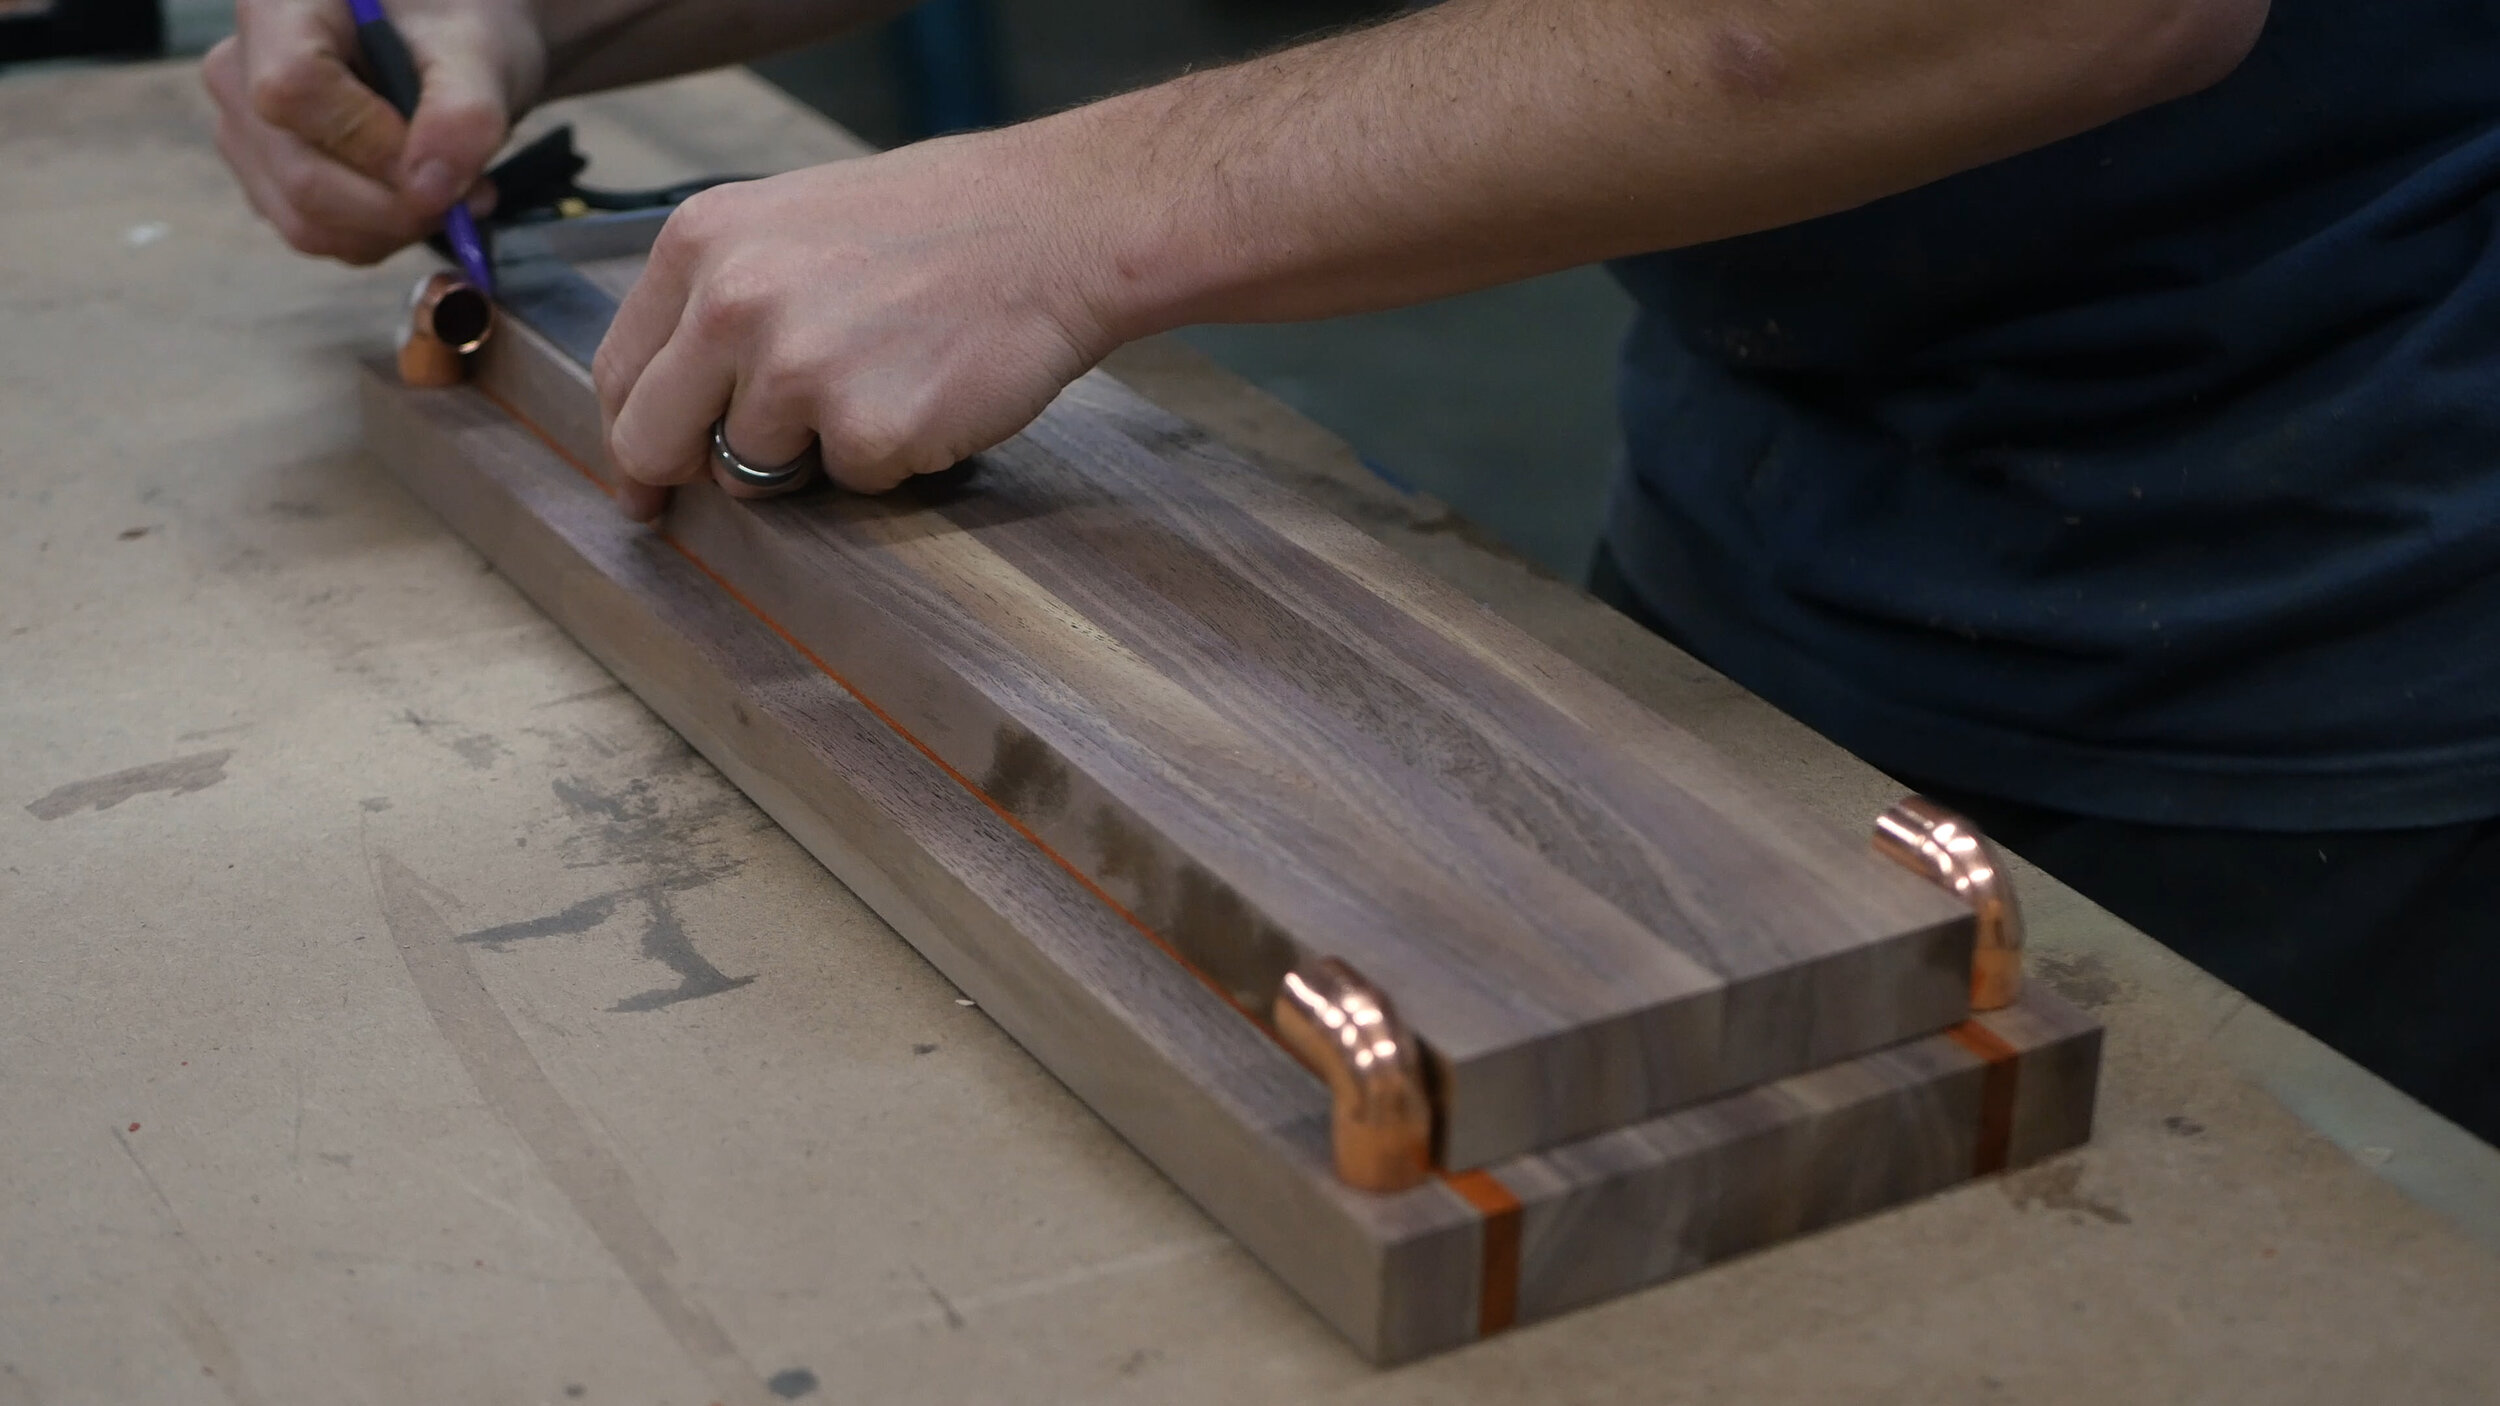
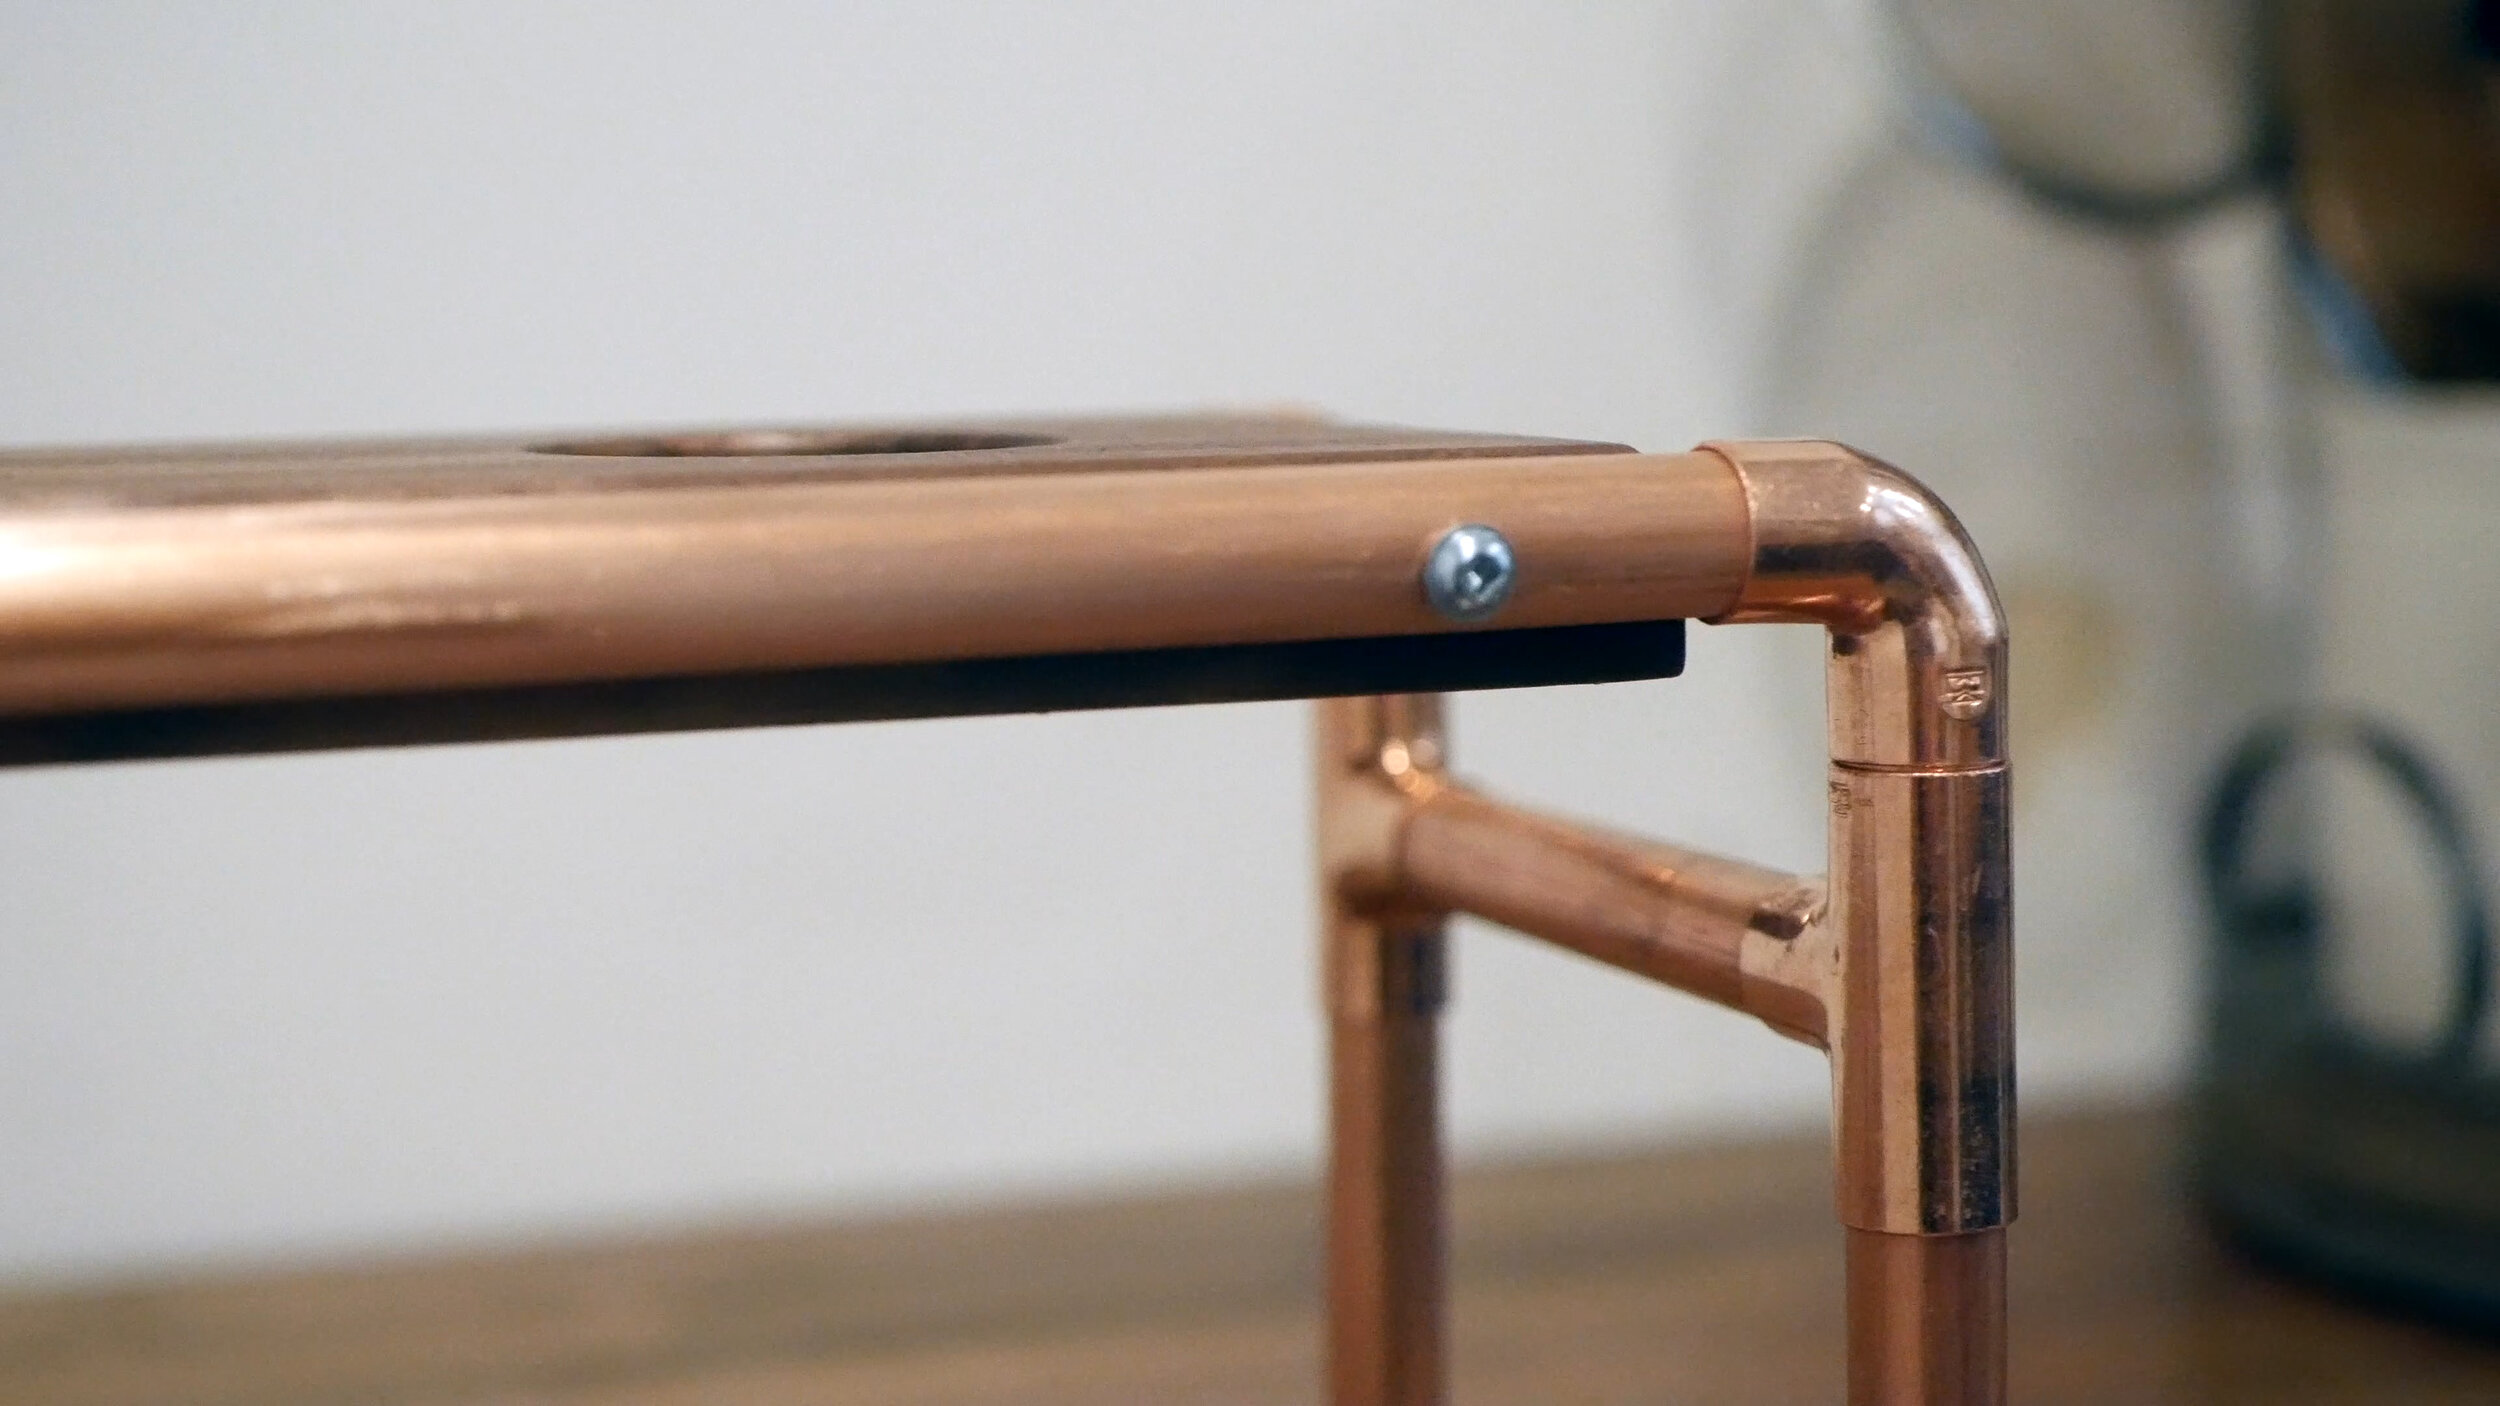
The last portion of the build was final assembly. I drilled out small holes all the way through each of the longer copper pieces to accept screws. Then, using super glue, I assembled all the pieces and used my speed square to make sure things were square and compressed together as best as possible. Super glue worked great for this (I don’t know how to “sweat” copper).
I then used a few spacers and screws to properly seat the top piece and used the impact driver to pull it all together. The silver screws were temporary; I later oxidized them to help better match the copper color.
And then I was done. I made the mistake of not showing it in the video, but the thumbnail for the video shows how it works. Coffee on the top. Water flows through the filter and into the coffee cup below. Honestly, the coffee is amazing.
Thanks for checking out the project! Make sure you check out the video in the first step on my YT channel!
See you around!
Zach