Thanks for checking out the full article!
Please Subscribe to our Youtube Channel by clicking here.
My full video of the build is below, followed by detailed instructions with tools, materials, and measurements!
MATERIALS
1 x 2" x 4" x 8'
3 x 2" x 4" x 10'
1 x 2" x 12" x 10'
1 x 2" x 12" x 12"
TiteBond II Wood Glue
Natural Danish Oil
*Note - All wood is Kiln Dried Douglas Fir
I worked on a really fun table build a few months back in partnership with ArborTech using their ARBORTECH TURBOPlane Blade and it was a blast. They sent me a photo reference of another fun project to tackle with it, so I said why not? The coolest thing about this project is that it is held together purely with glue - no hardware is needed and the results, if done right, are stunning!
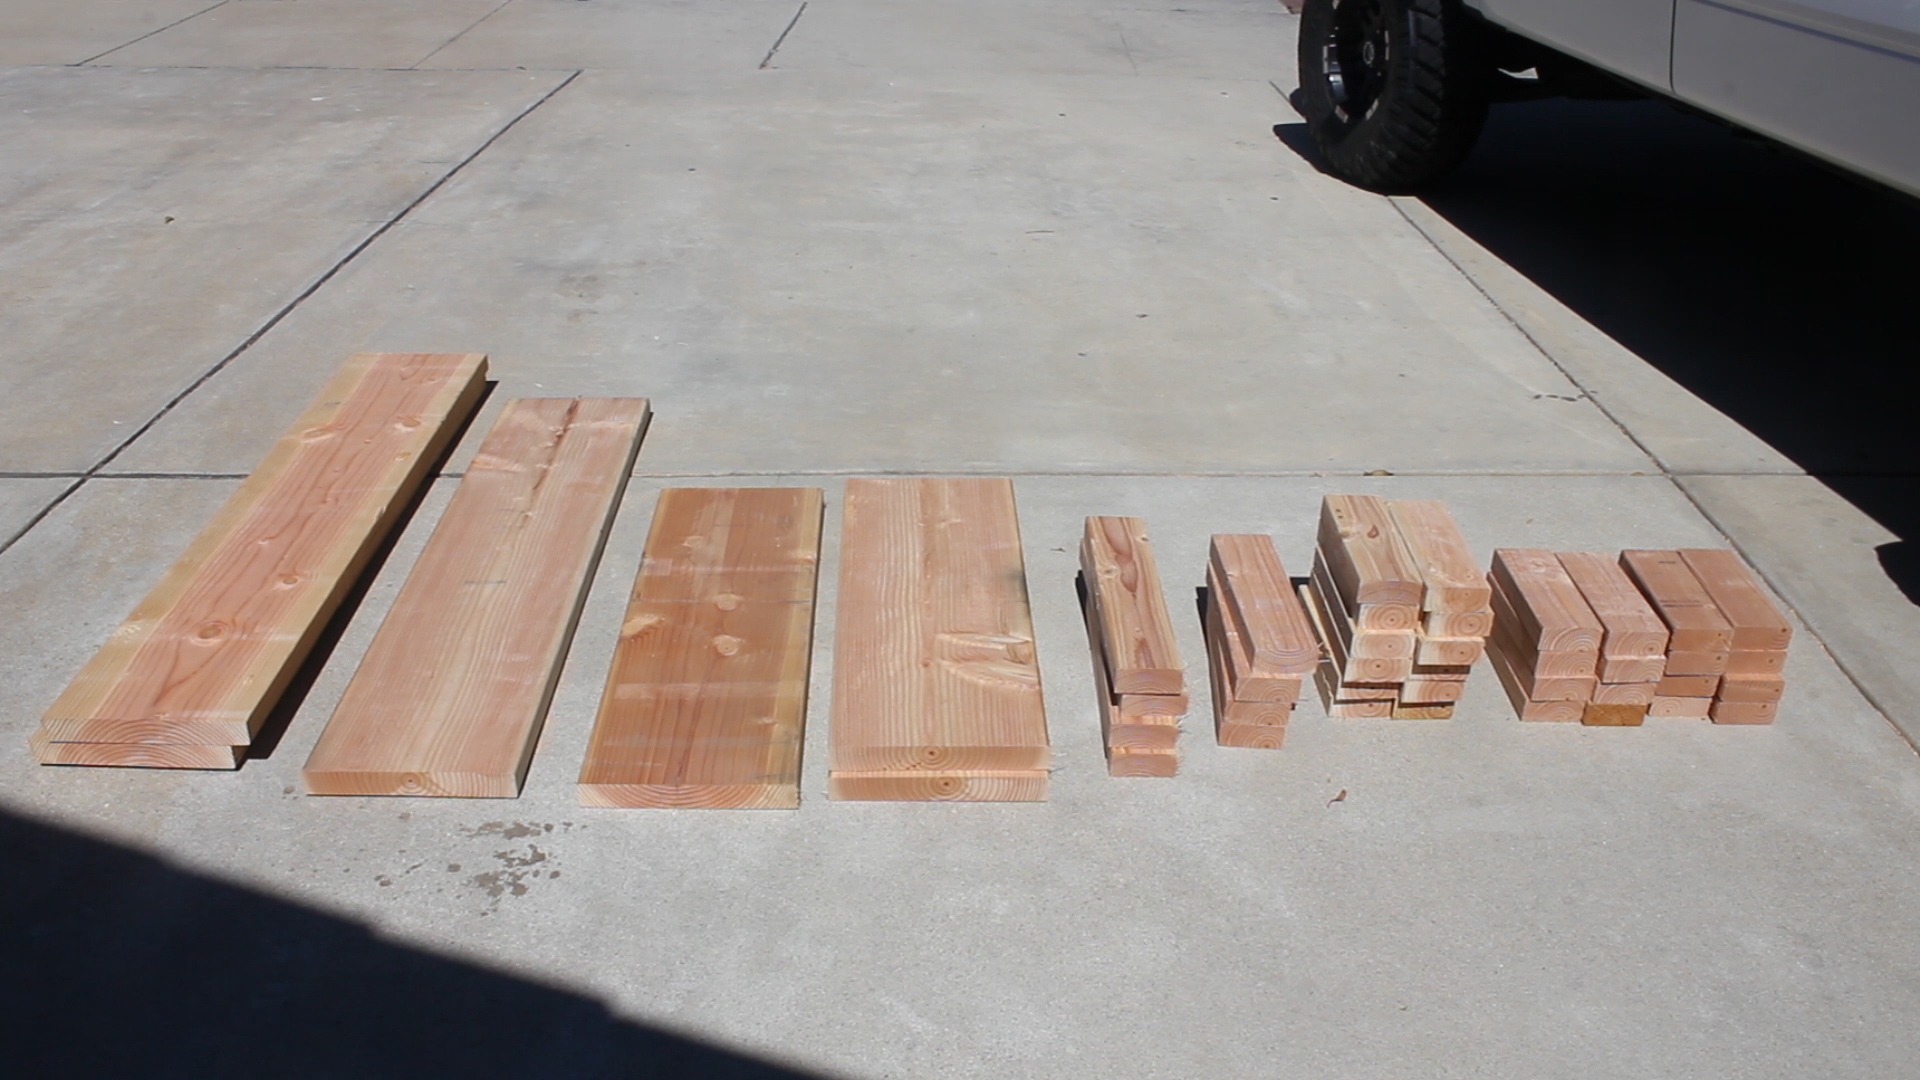
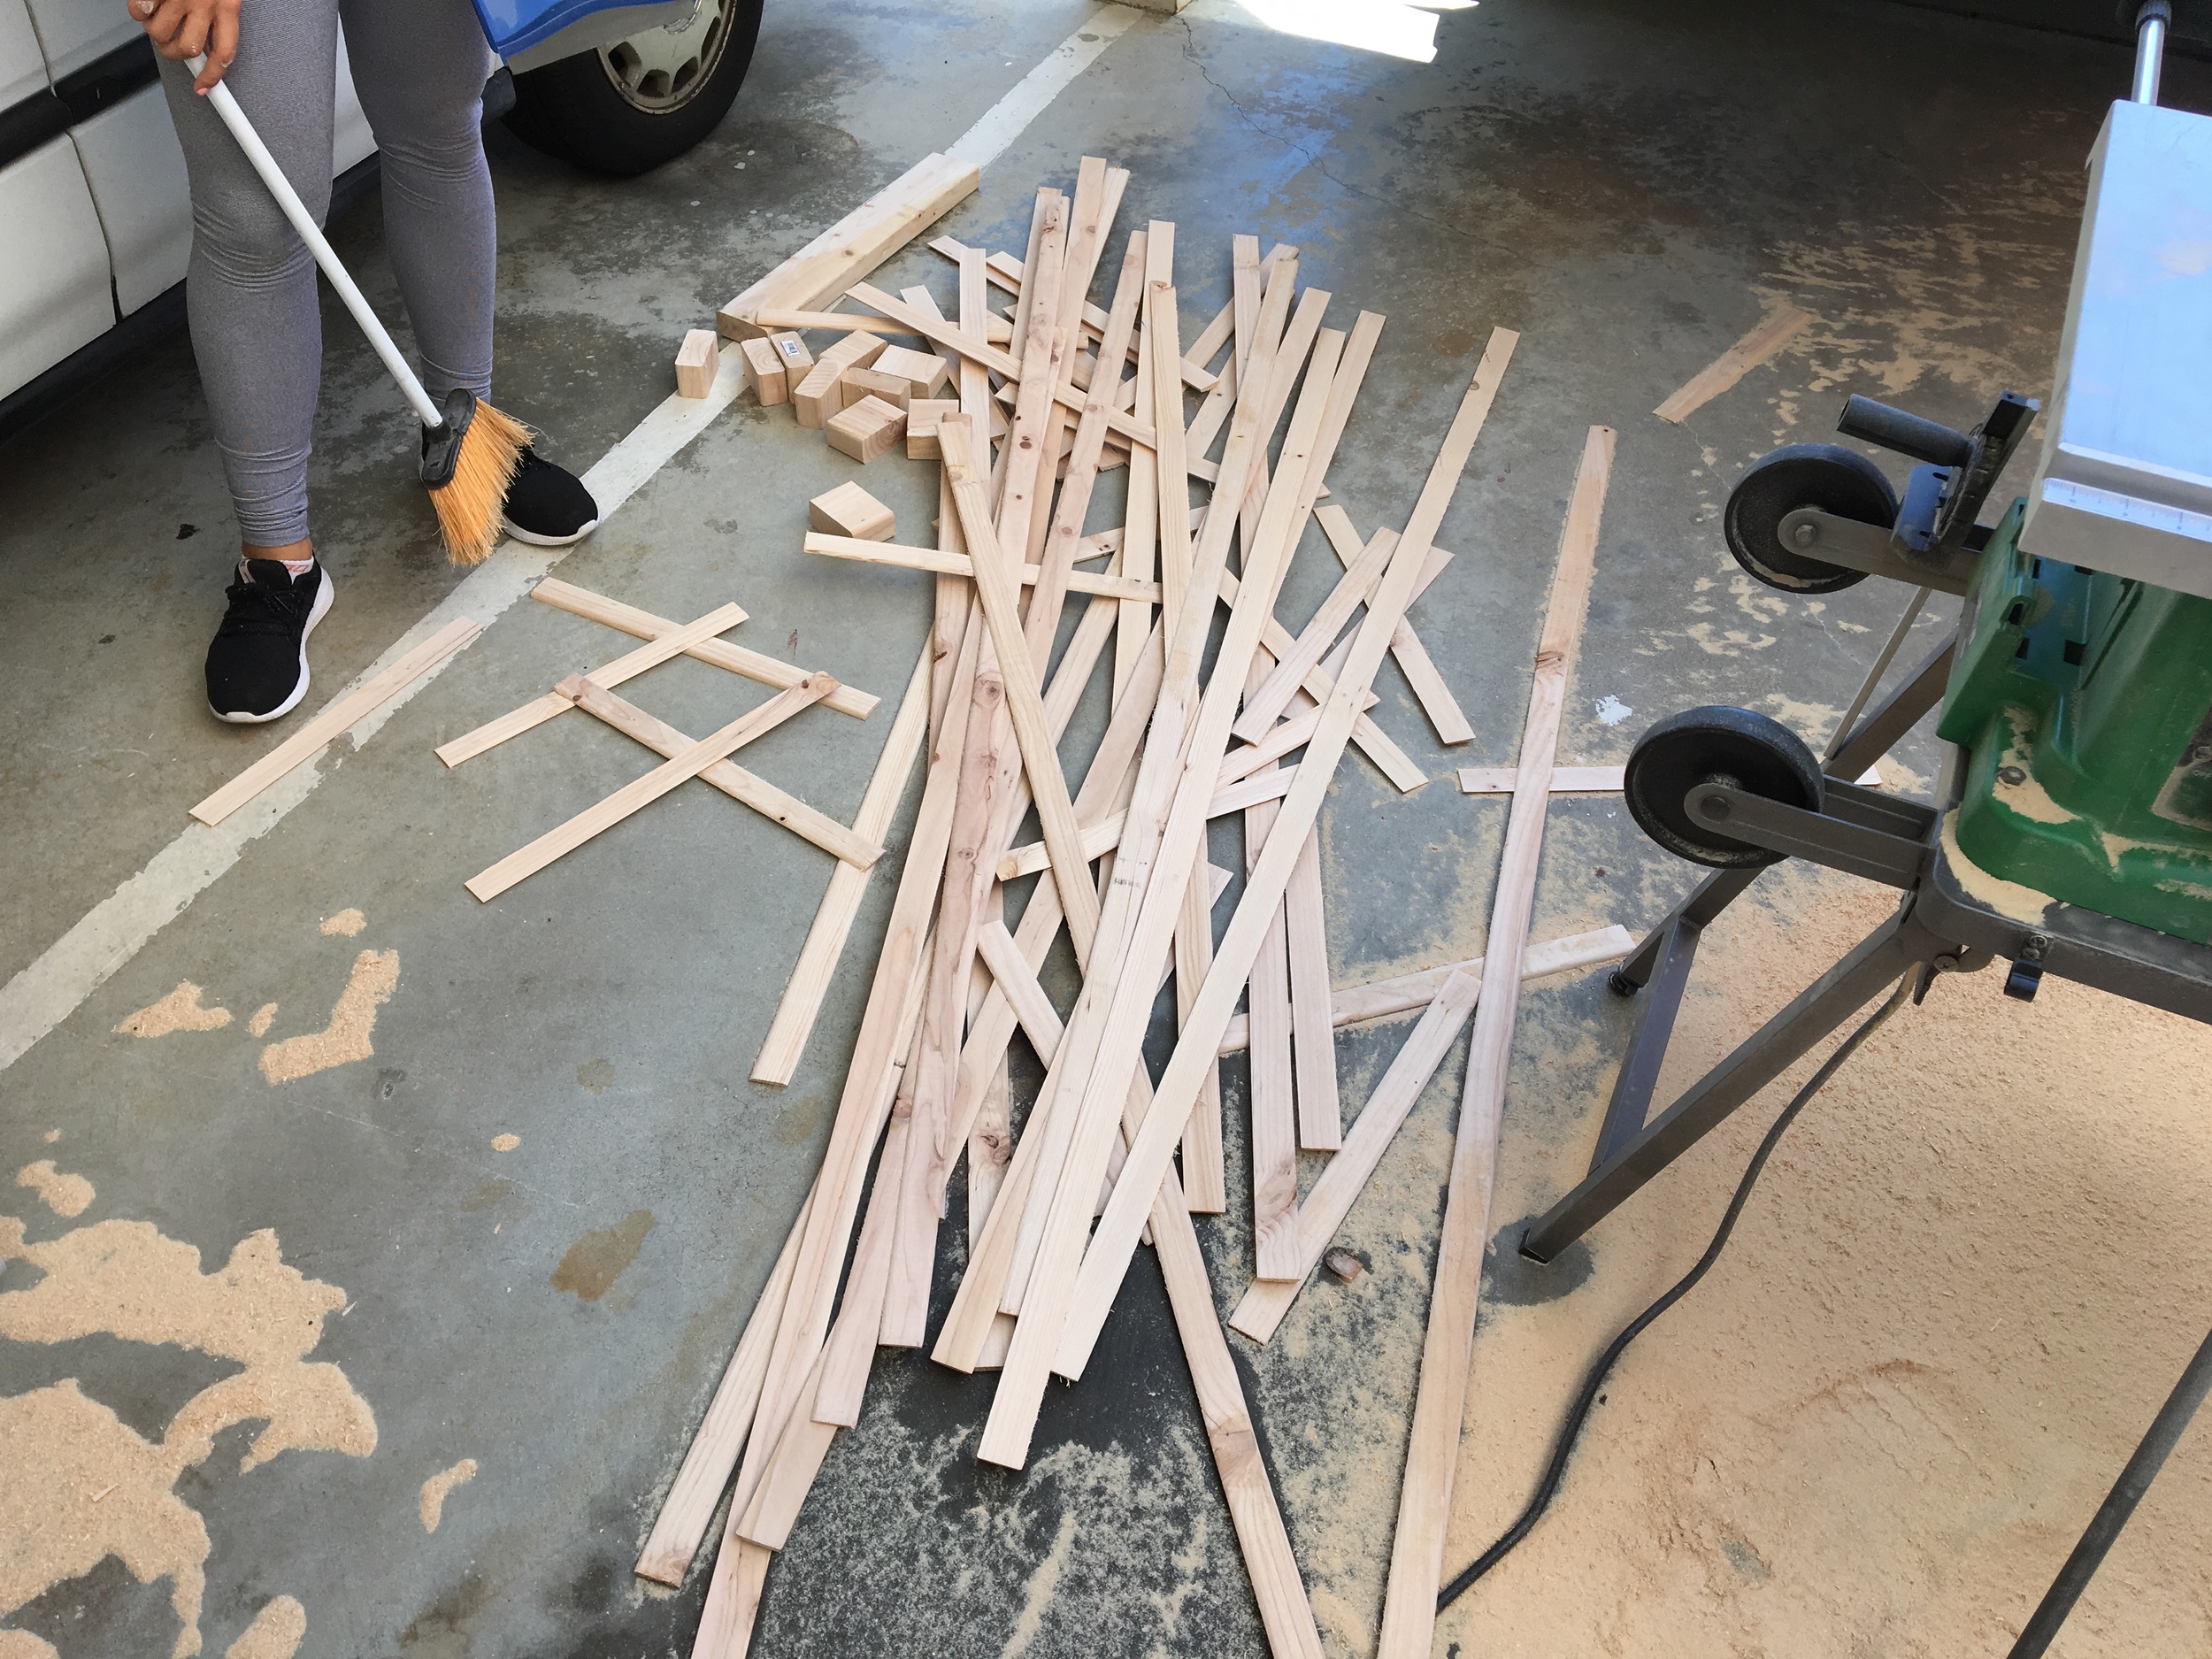
I made the following cuts from my rough lumber:
From 2 x 4's
12 x 9"
12 x 10"
4 x 13"
4 x 17"
From 2 x 12's
1 x 31"
1 x 32"
1 x 34"
1 x 50"
2 x 54"

Here is a diagram of how my cuts are broken out incase you need clarification.

Here is a SketchUp 3D Design file for $2 incase you’re interested in designing a modified version and getting into power-carving.

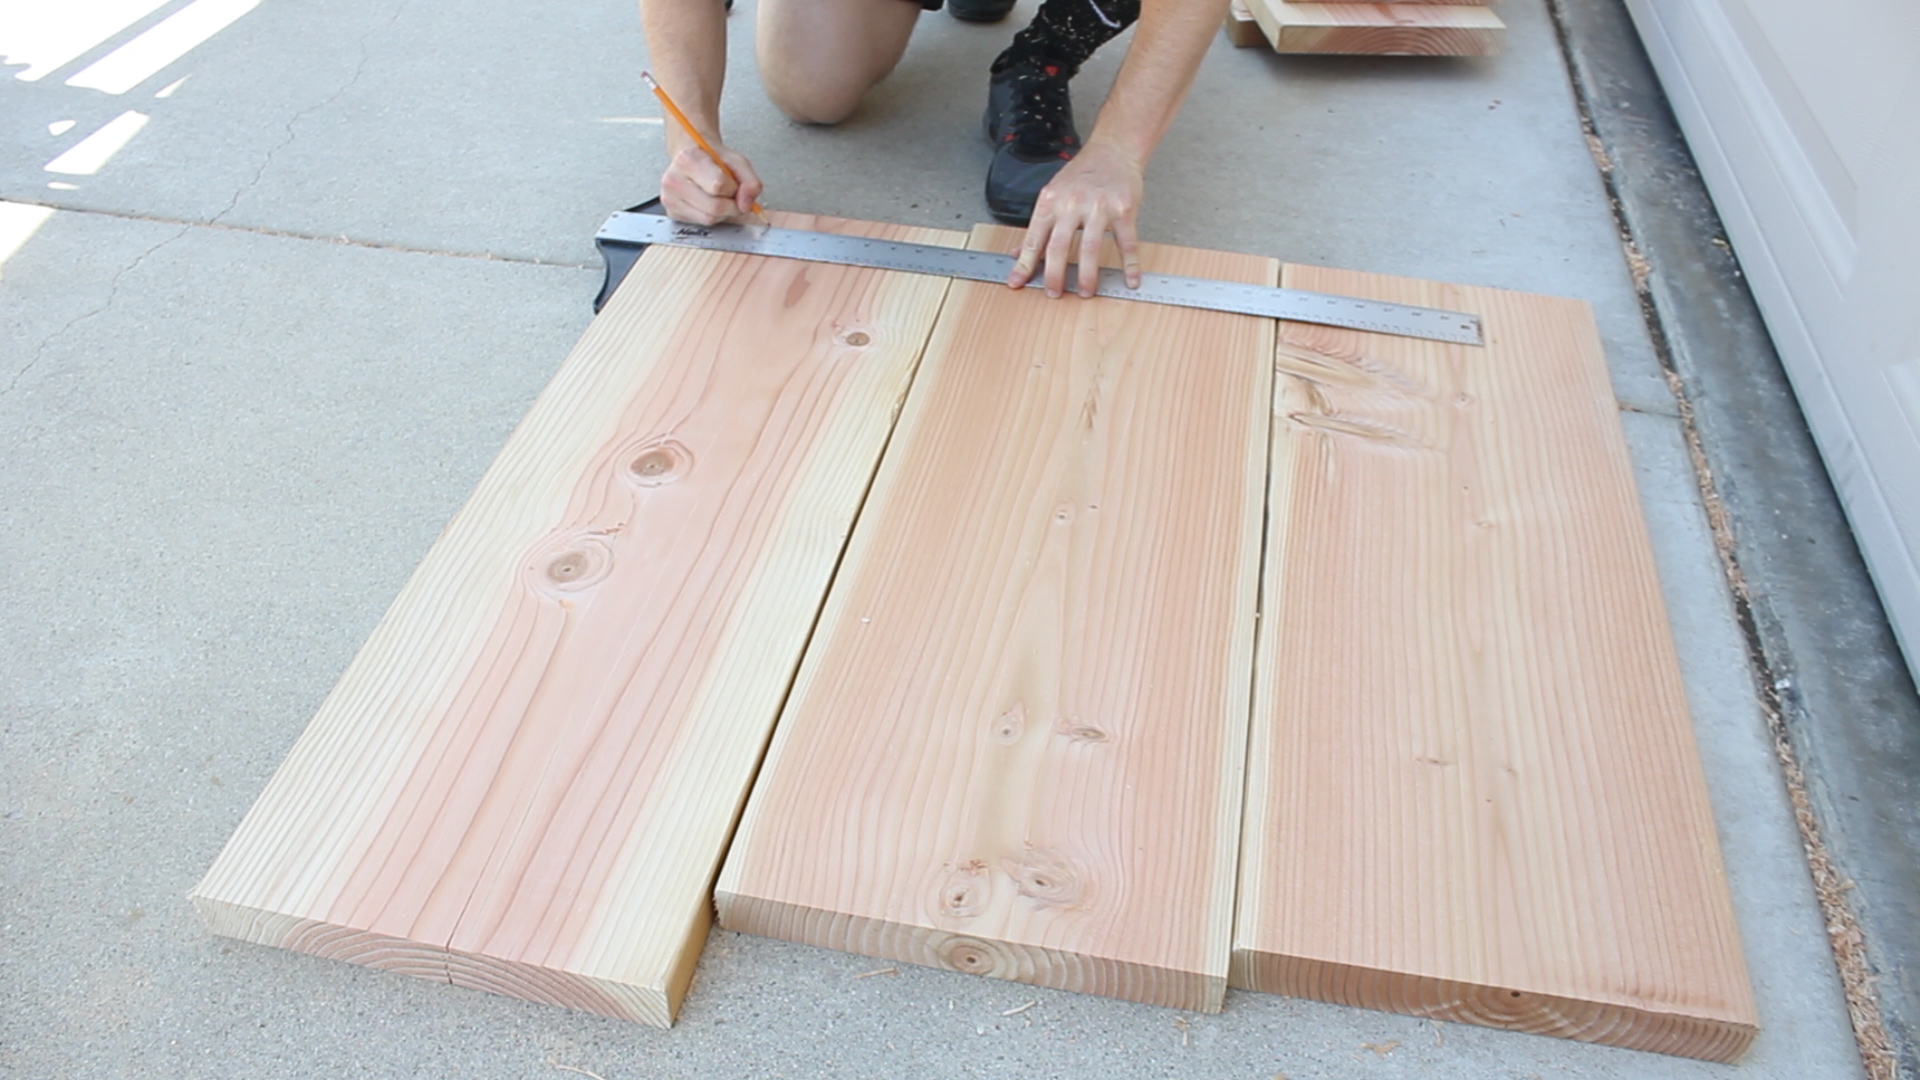
Since I would be laminating all of these pieces together, I needed clean, flat surface.
I planed down all of my pieces as the edges were slightly rough or cupped and in order to make this type of project work, you'll want your surfaces to be as flat as possible to the glue joints are as flush as can be.
Tip - If you cut all of your pieces and don't necessarily plane and glue them up in the same day, make sure you store them flat and stacked to avoid cupping or bowing. Also, it is easier for me to make my cuts then plane the wood down versus planing very large pieces and maneuvering them constantly.
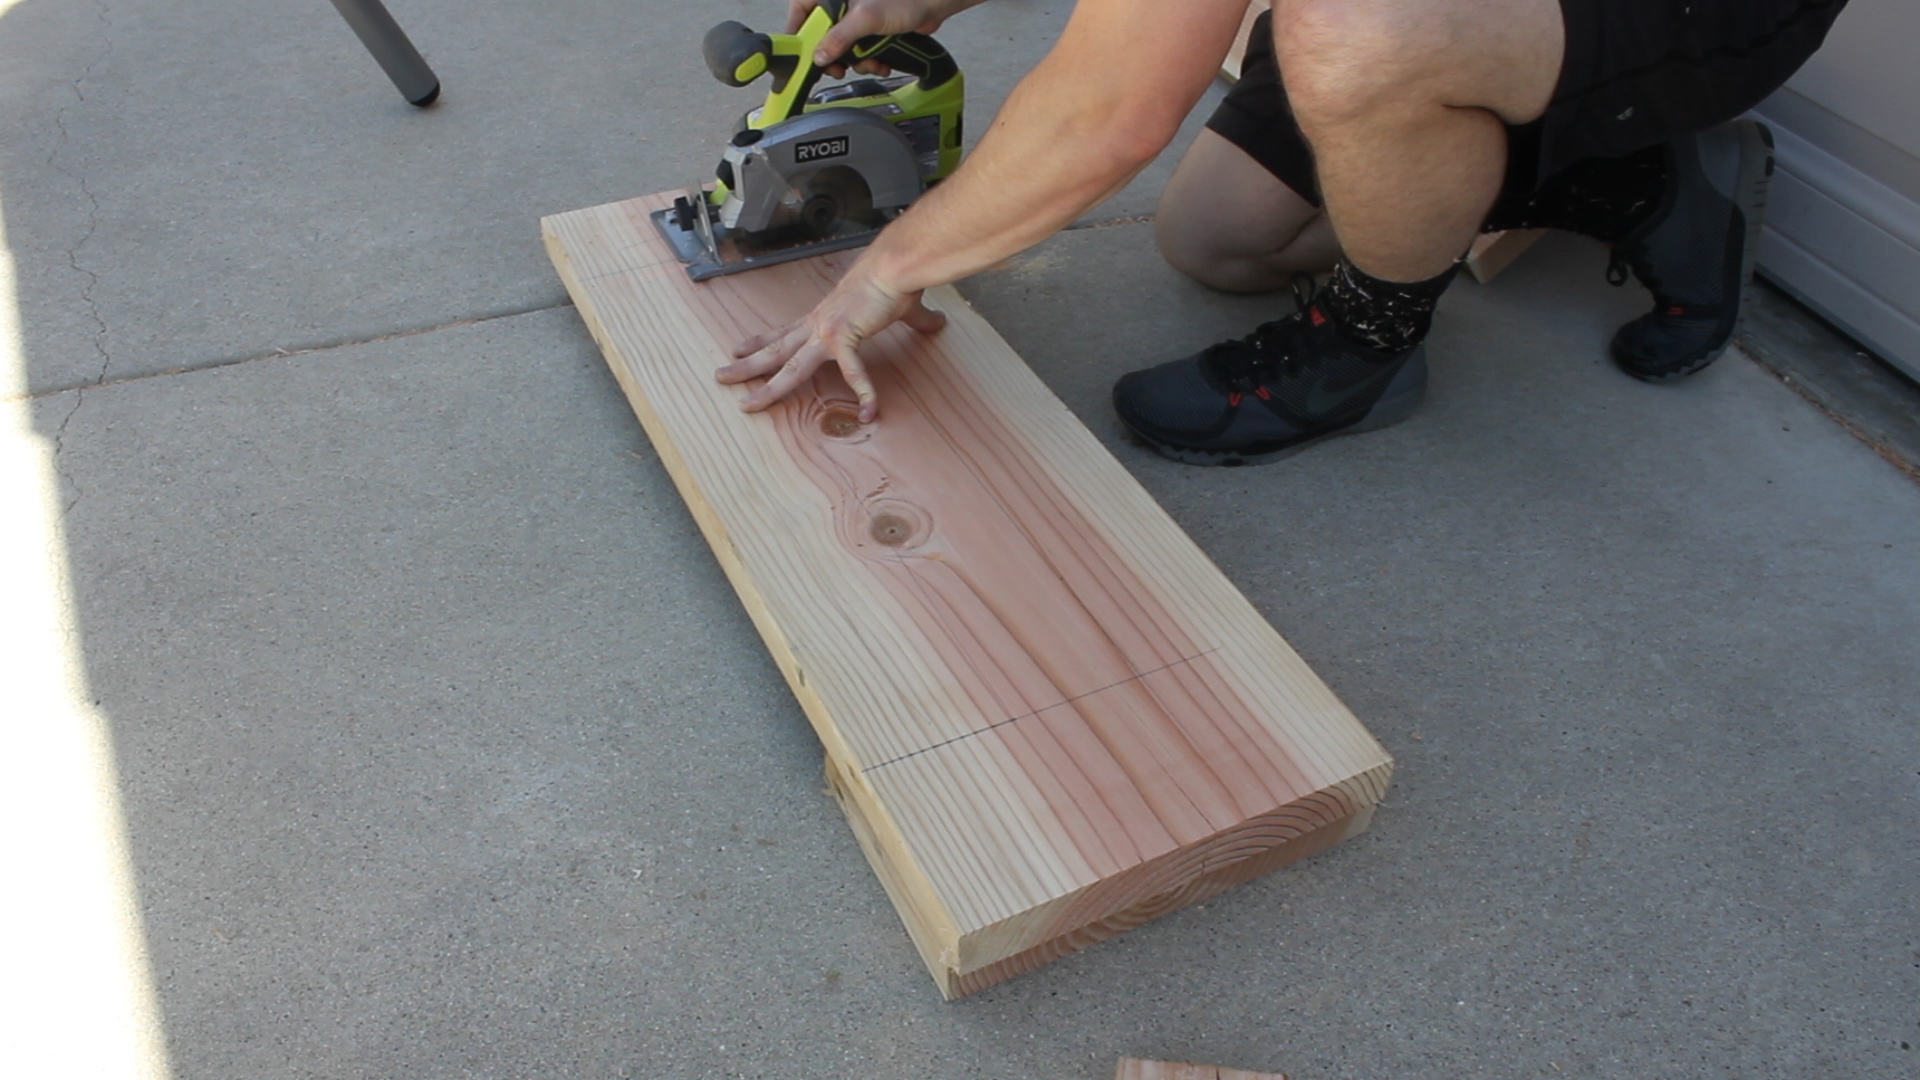
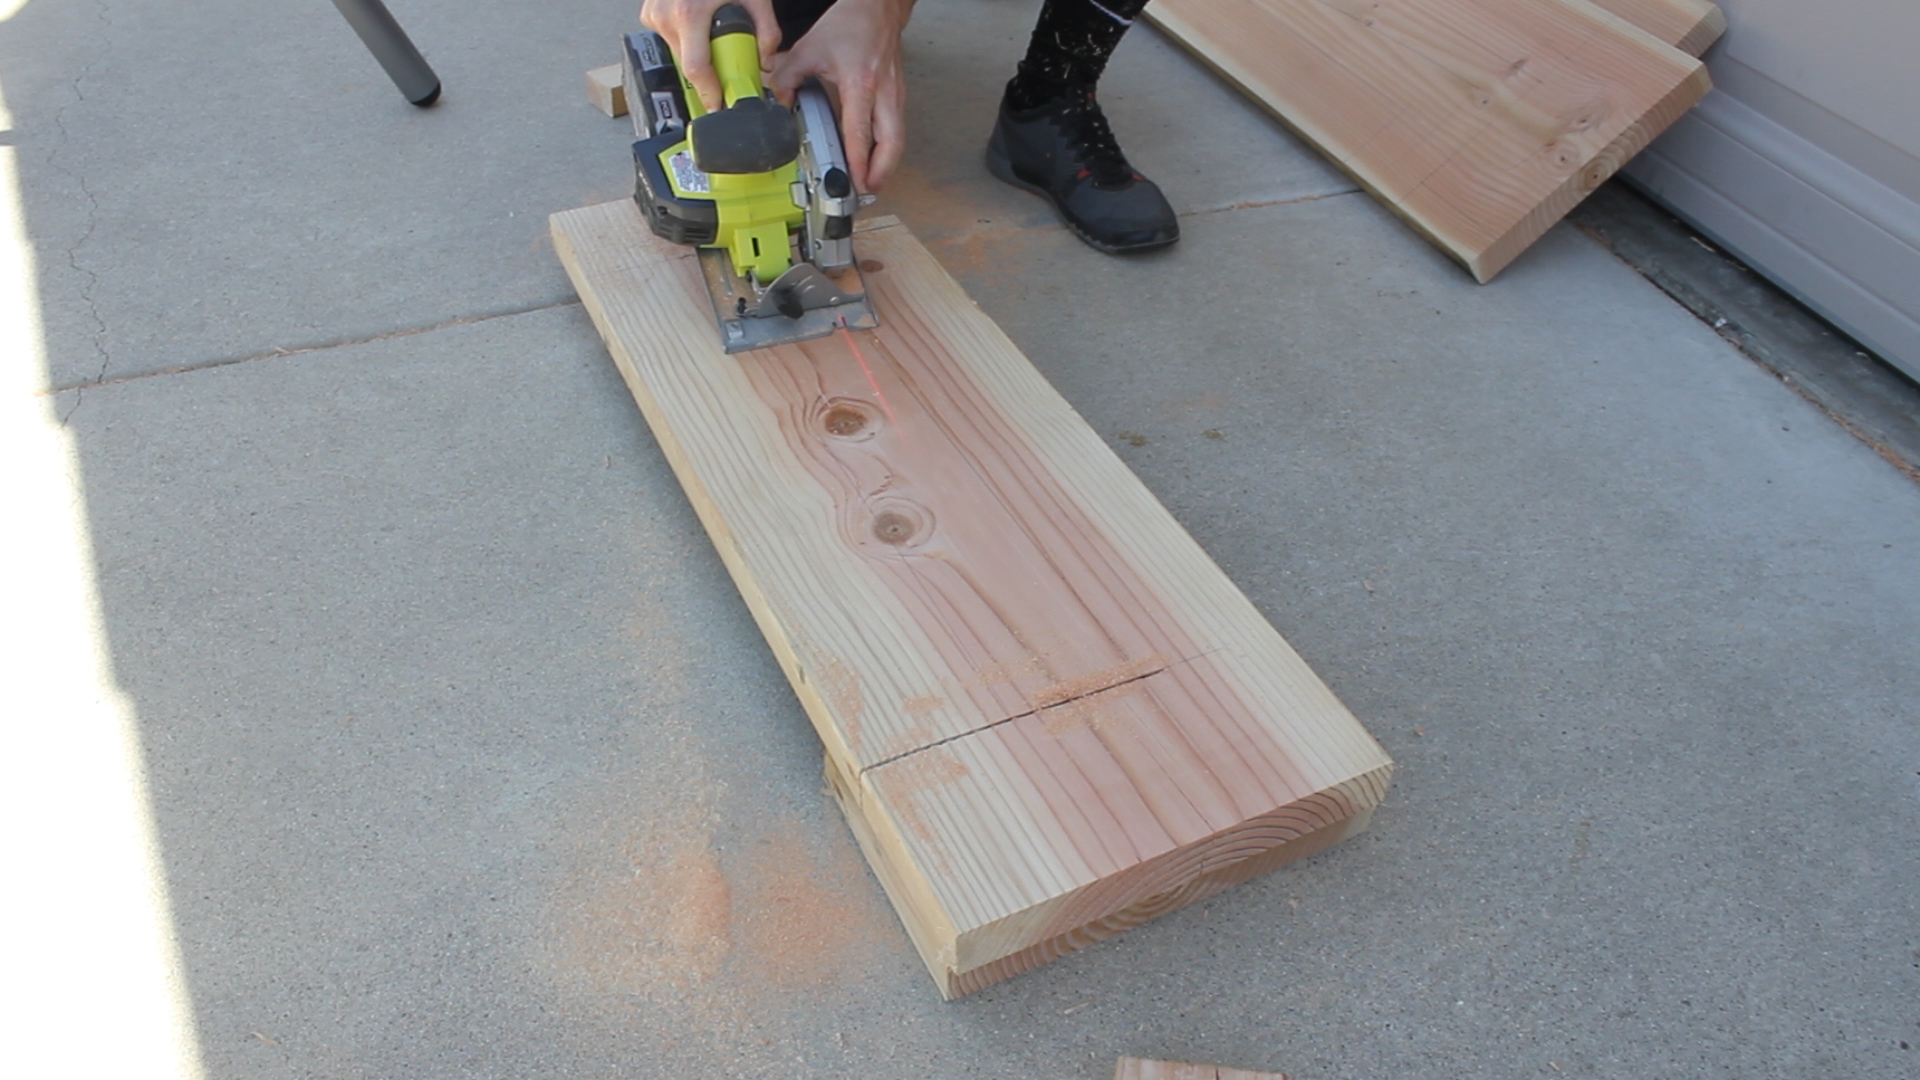

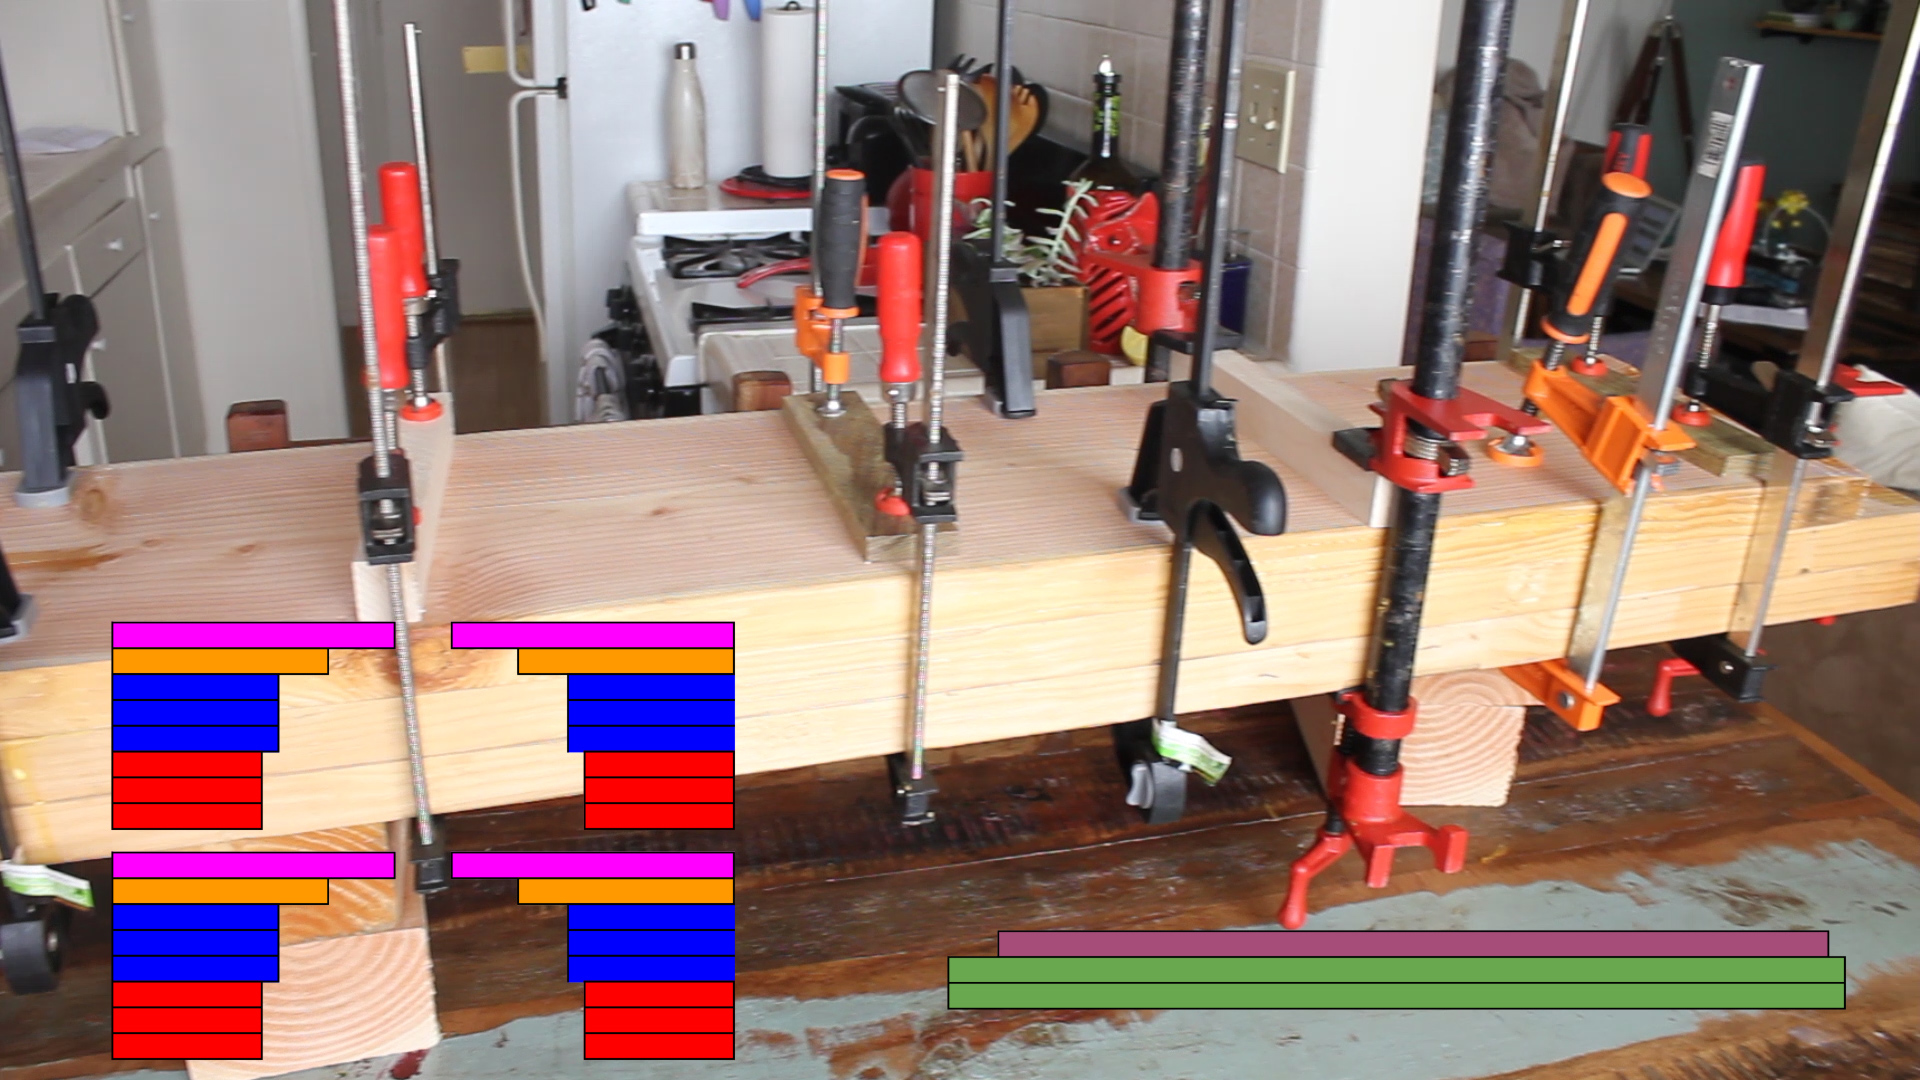
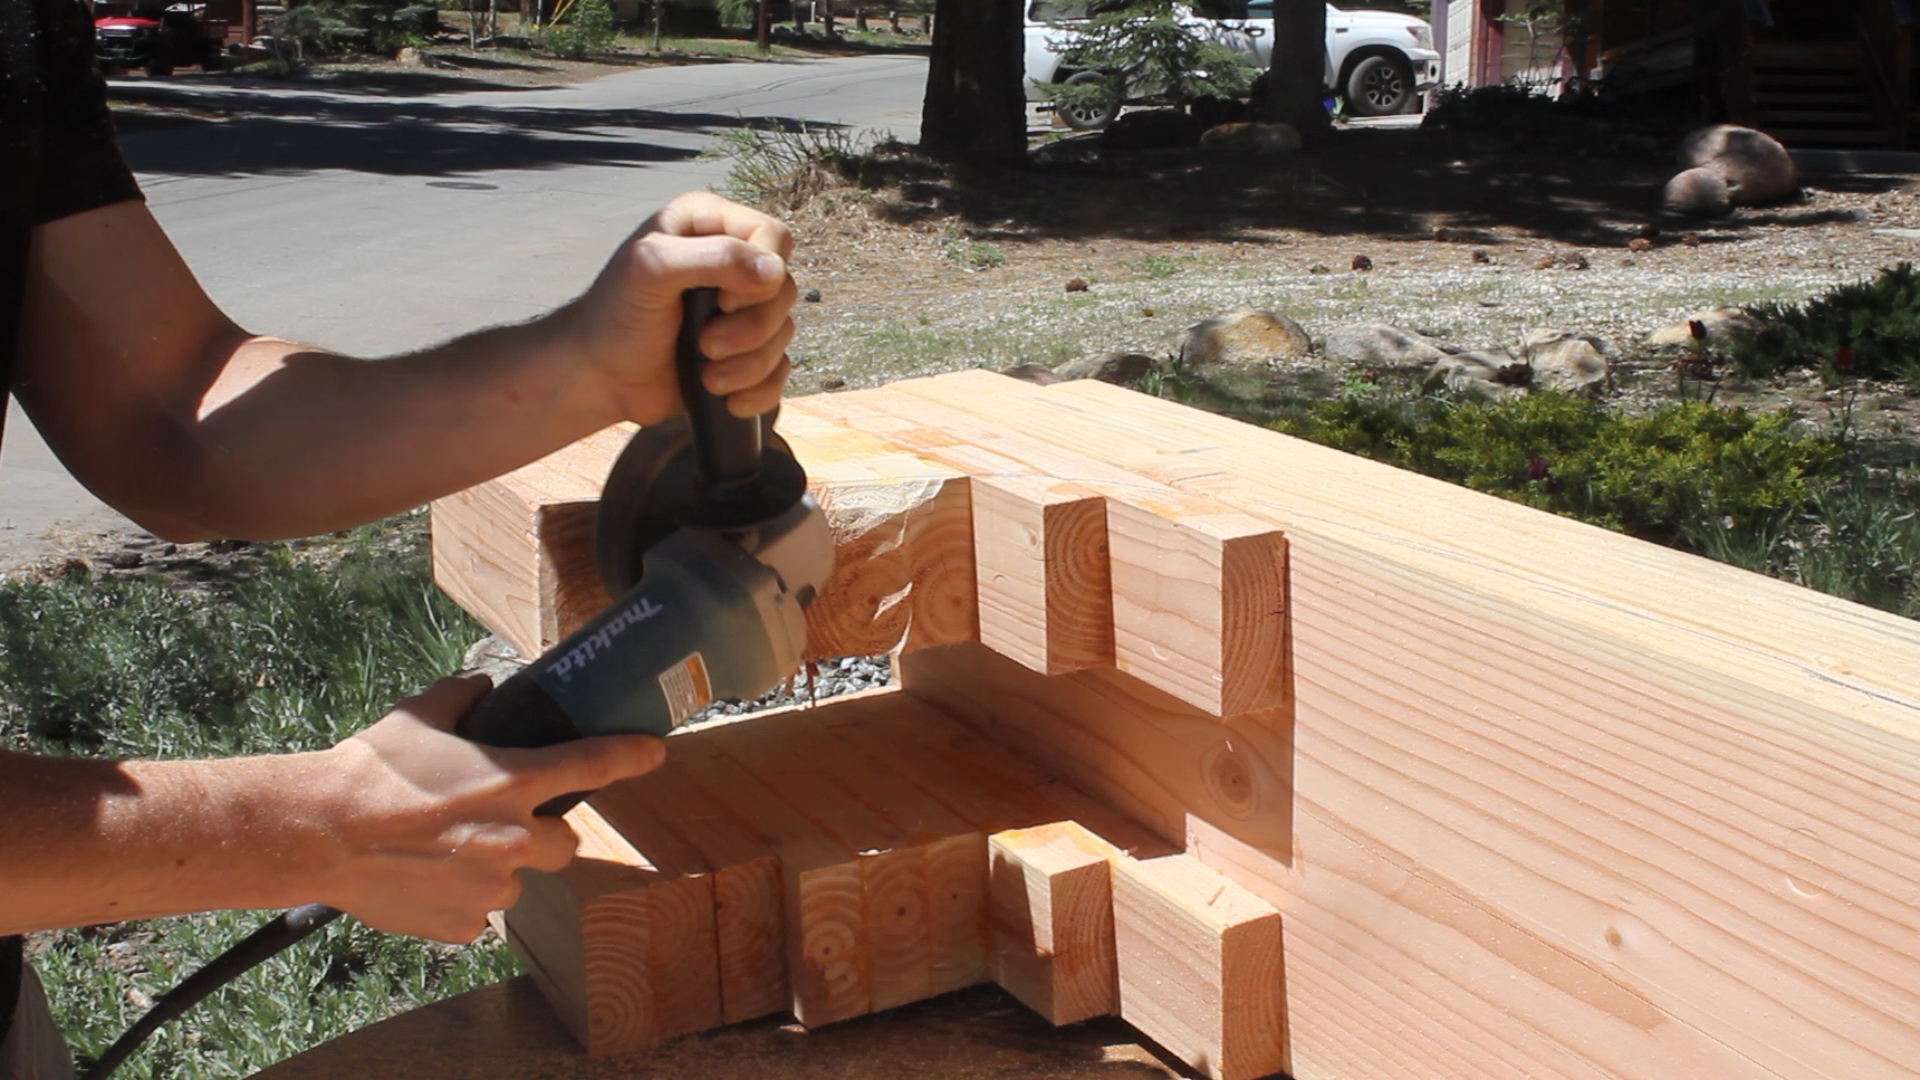
This next step is a little tricky but I'll try my best to explain. In order to make the back of the lounge chair on one side, you'll need to cut a series of "L" shaped pieces from your 2 x 12" pieces so that when you laminate them together and eventually carve them out, everything will flow nicely and the edge grain will transition properly to the end grain.

To do this, I made the above cuts by measuring them out using a T square on my wood carefully and then, using just my circular saw and "plunging" it into the wood, I cut make the cuts. The cuts will extend into the corner of the "L" but that is okay as you'll carve much of this material away anyways. The above diagram shows all of the "L" cuts you'll make.
NOTE - Do NOT cut the small part of the "L" off - your pieces should look like picture number 4 above. The width of the small part of the "L" should be 5 inches wide.

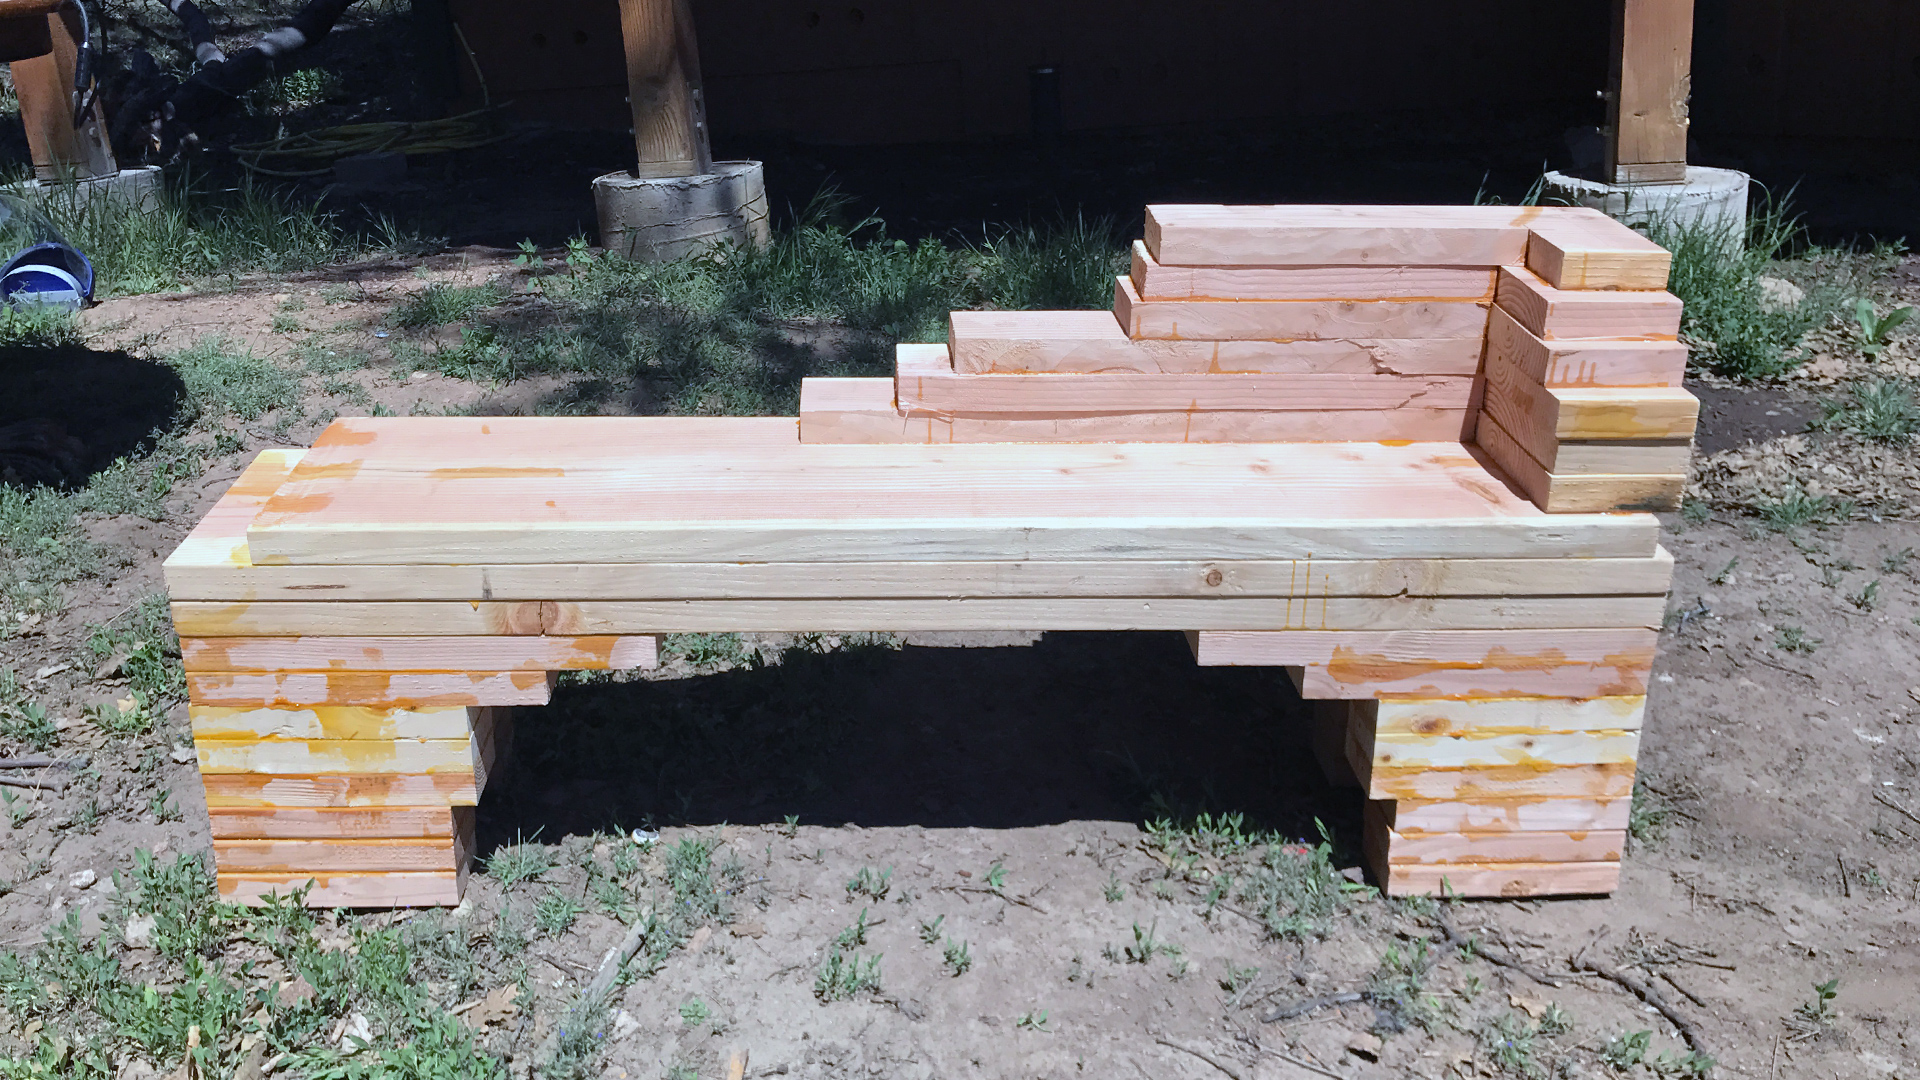
Next were glue ups. If you watched the video, this might be a bit more clear, but I'll write it out here for full detail:
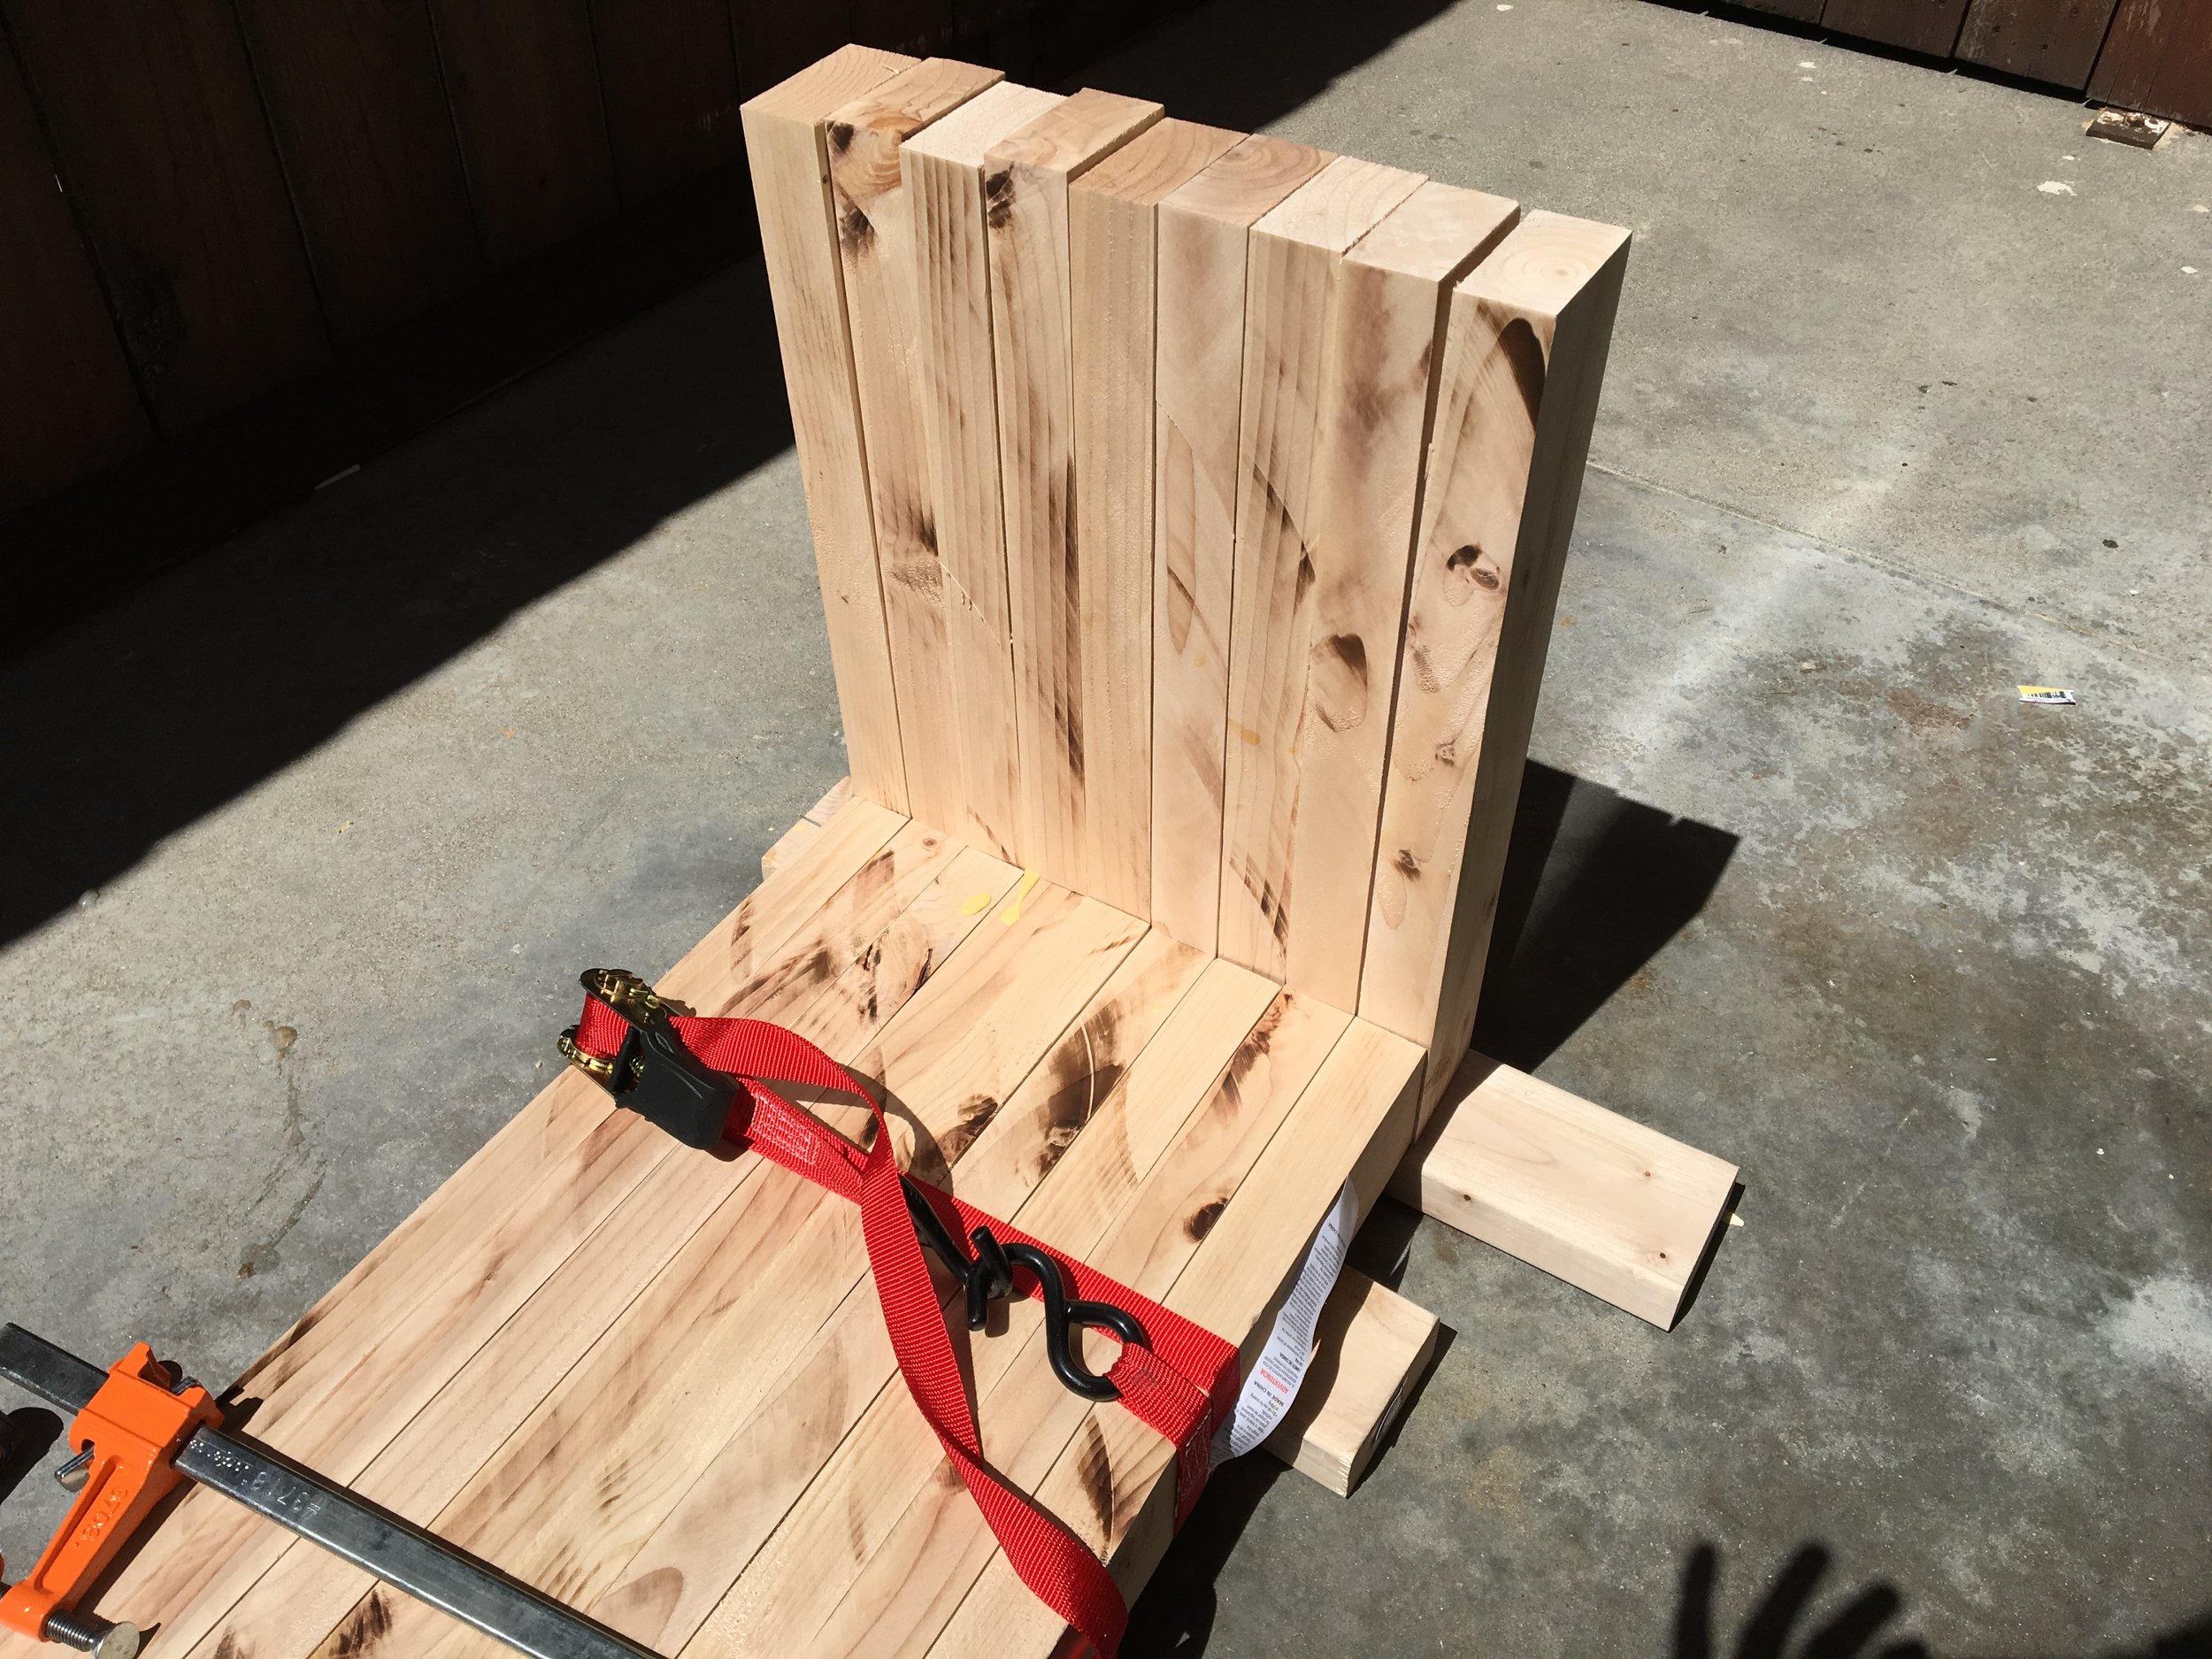
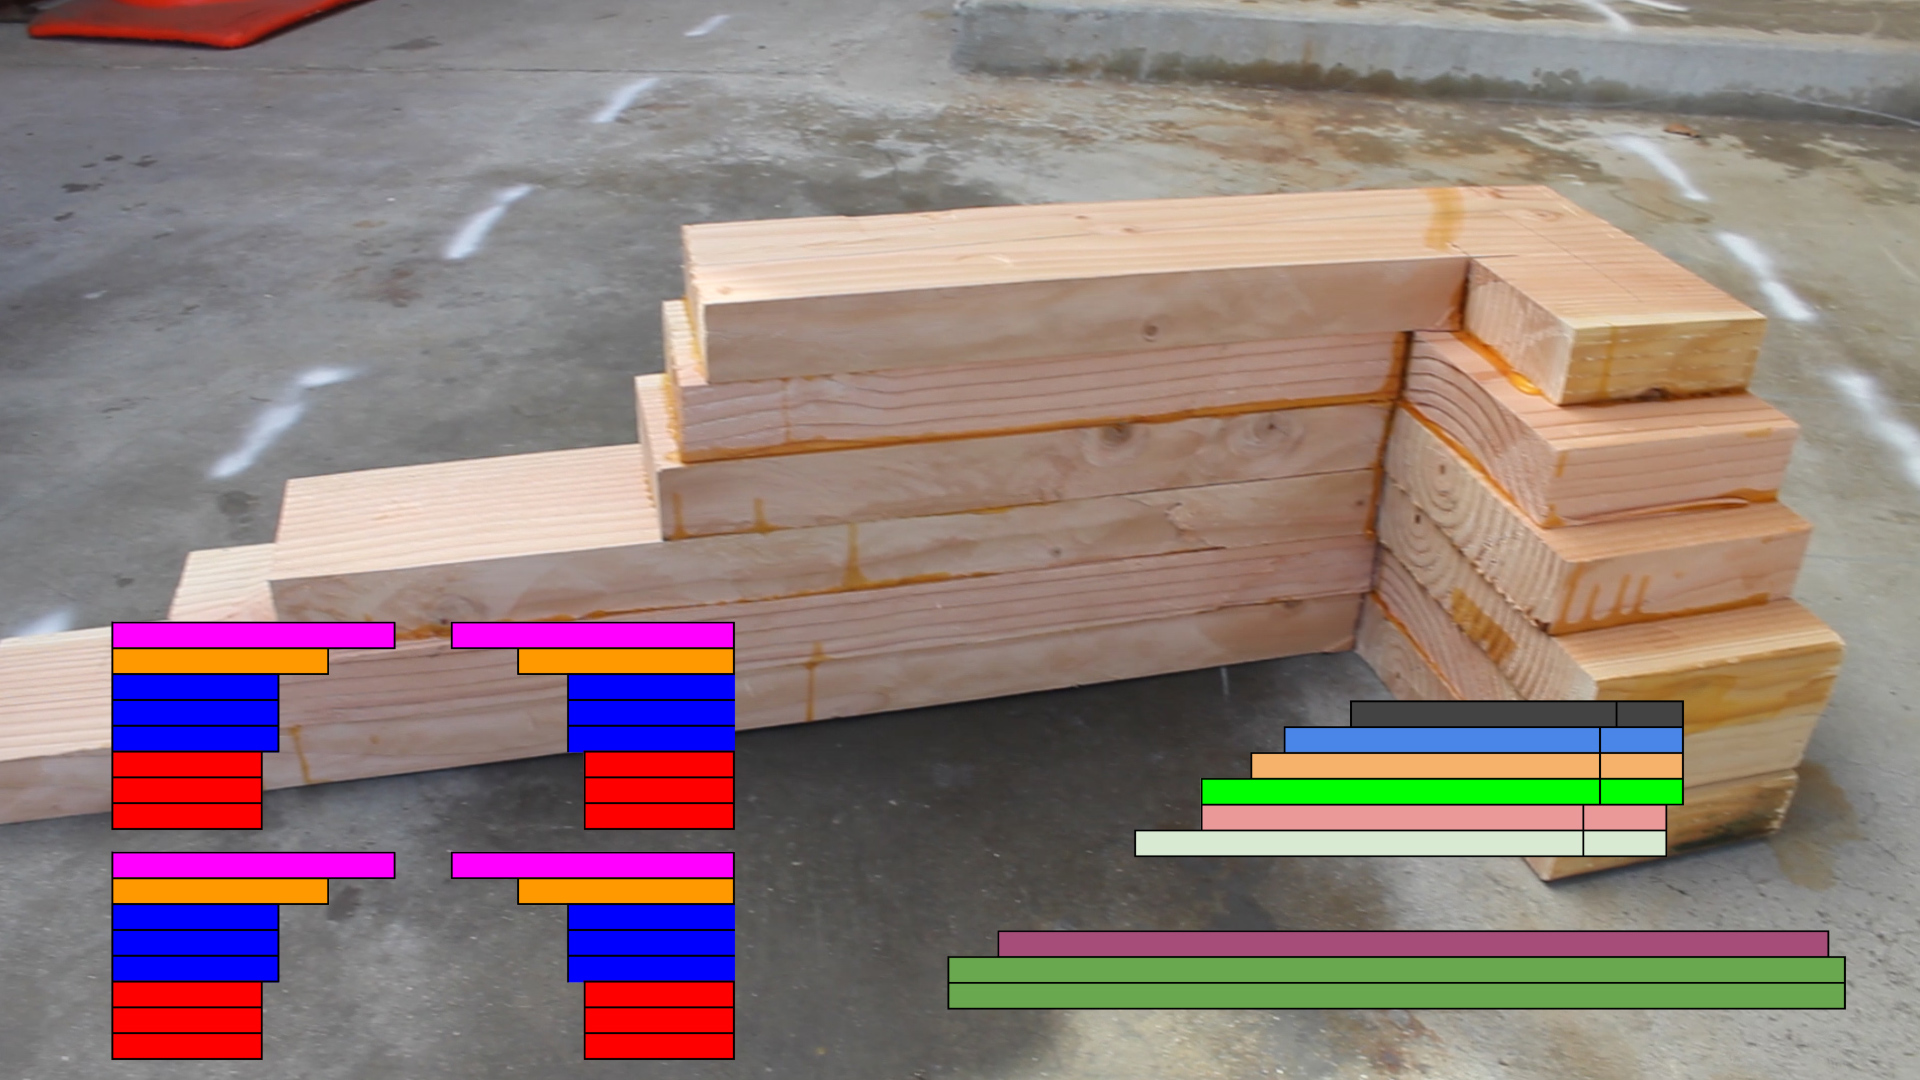
Legs
You'll end up making four total legs, each using 3 x 9", 3 x 10", 1 x 13", and 1 x17" pieces (pics 1-3) laminated together
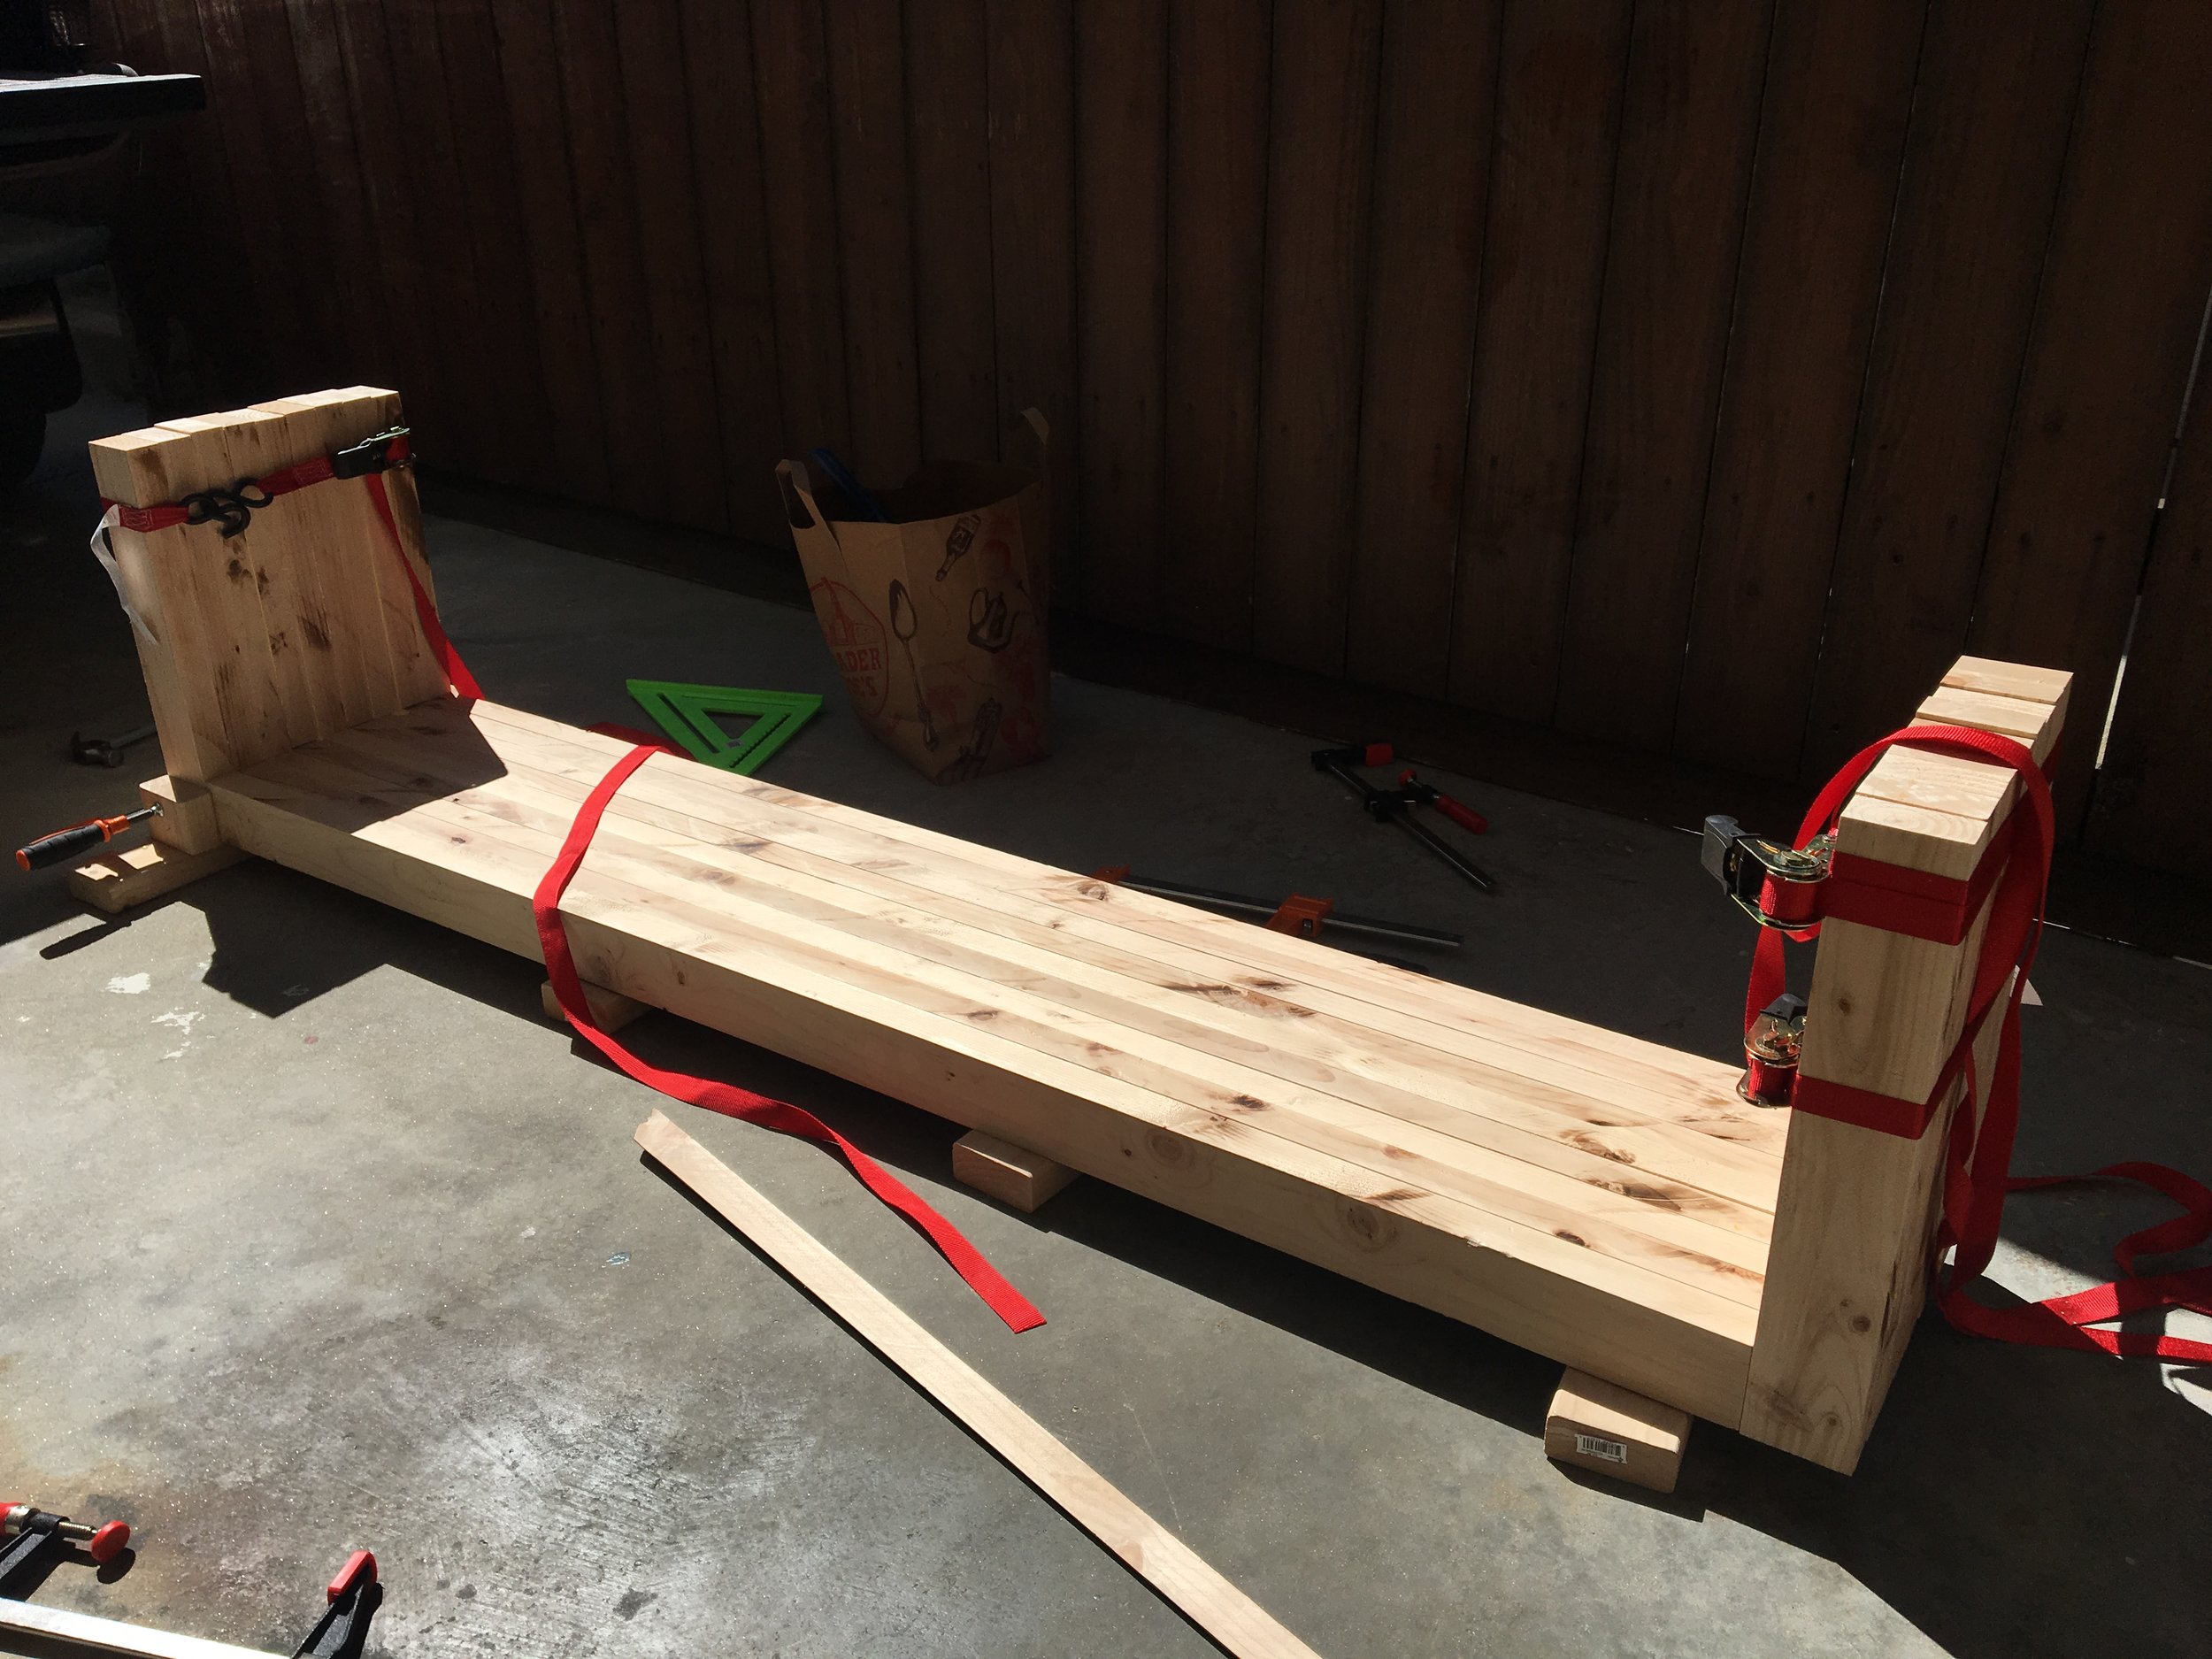
Seat Bench
You'll make one bench seat using 1 x 50" and 2 x 54" pieces laminated together (pic 4). I recommend deep jaw clamps for this so you can make sure your middle is glued together - I used scrap hardwood instead as I don't have deep jaw clamps.
Lounge Back Rest
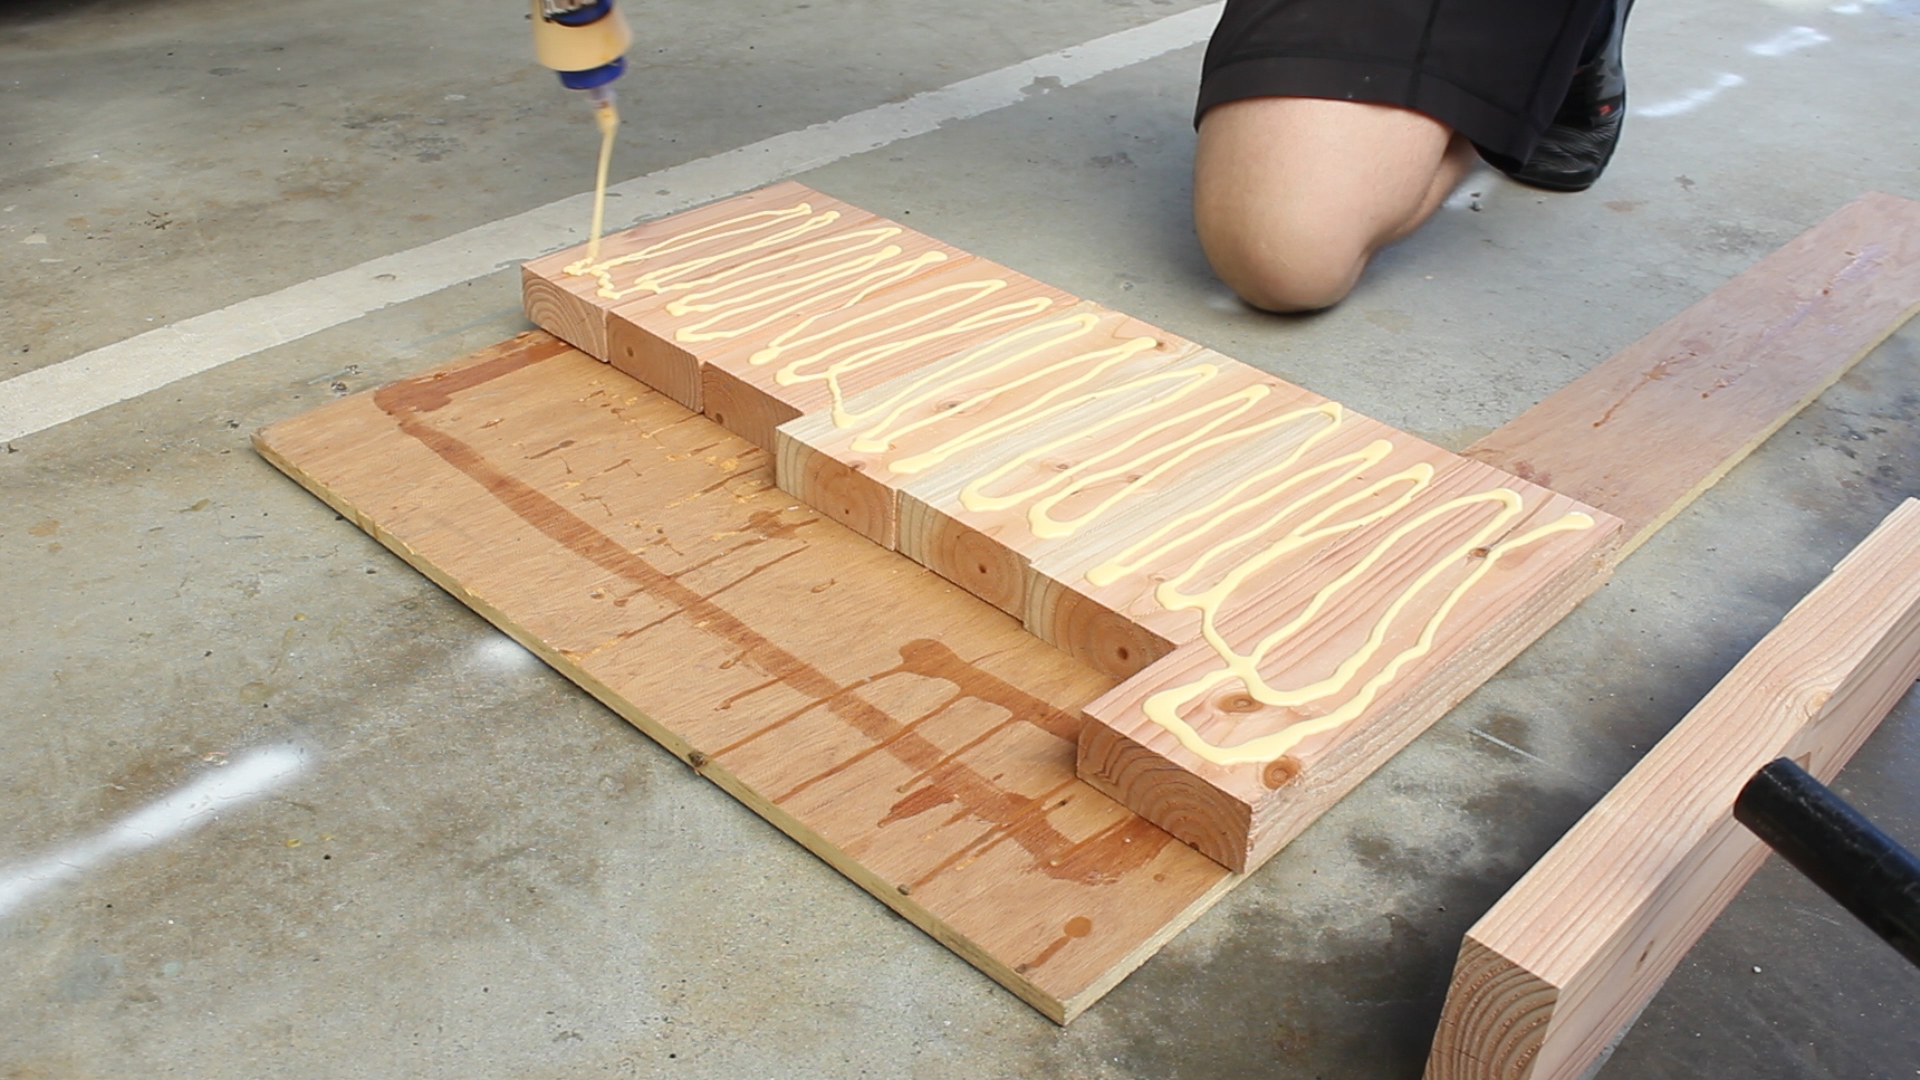
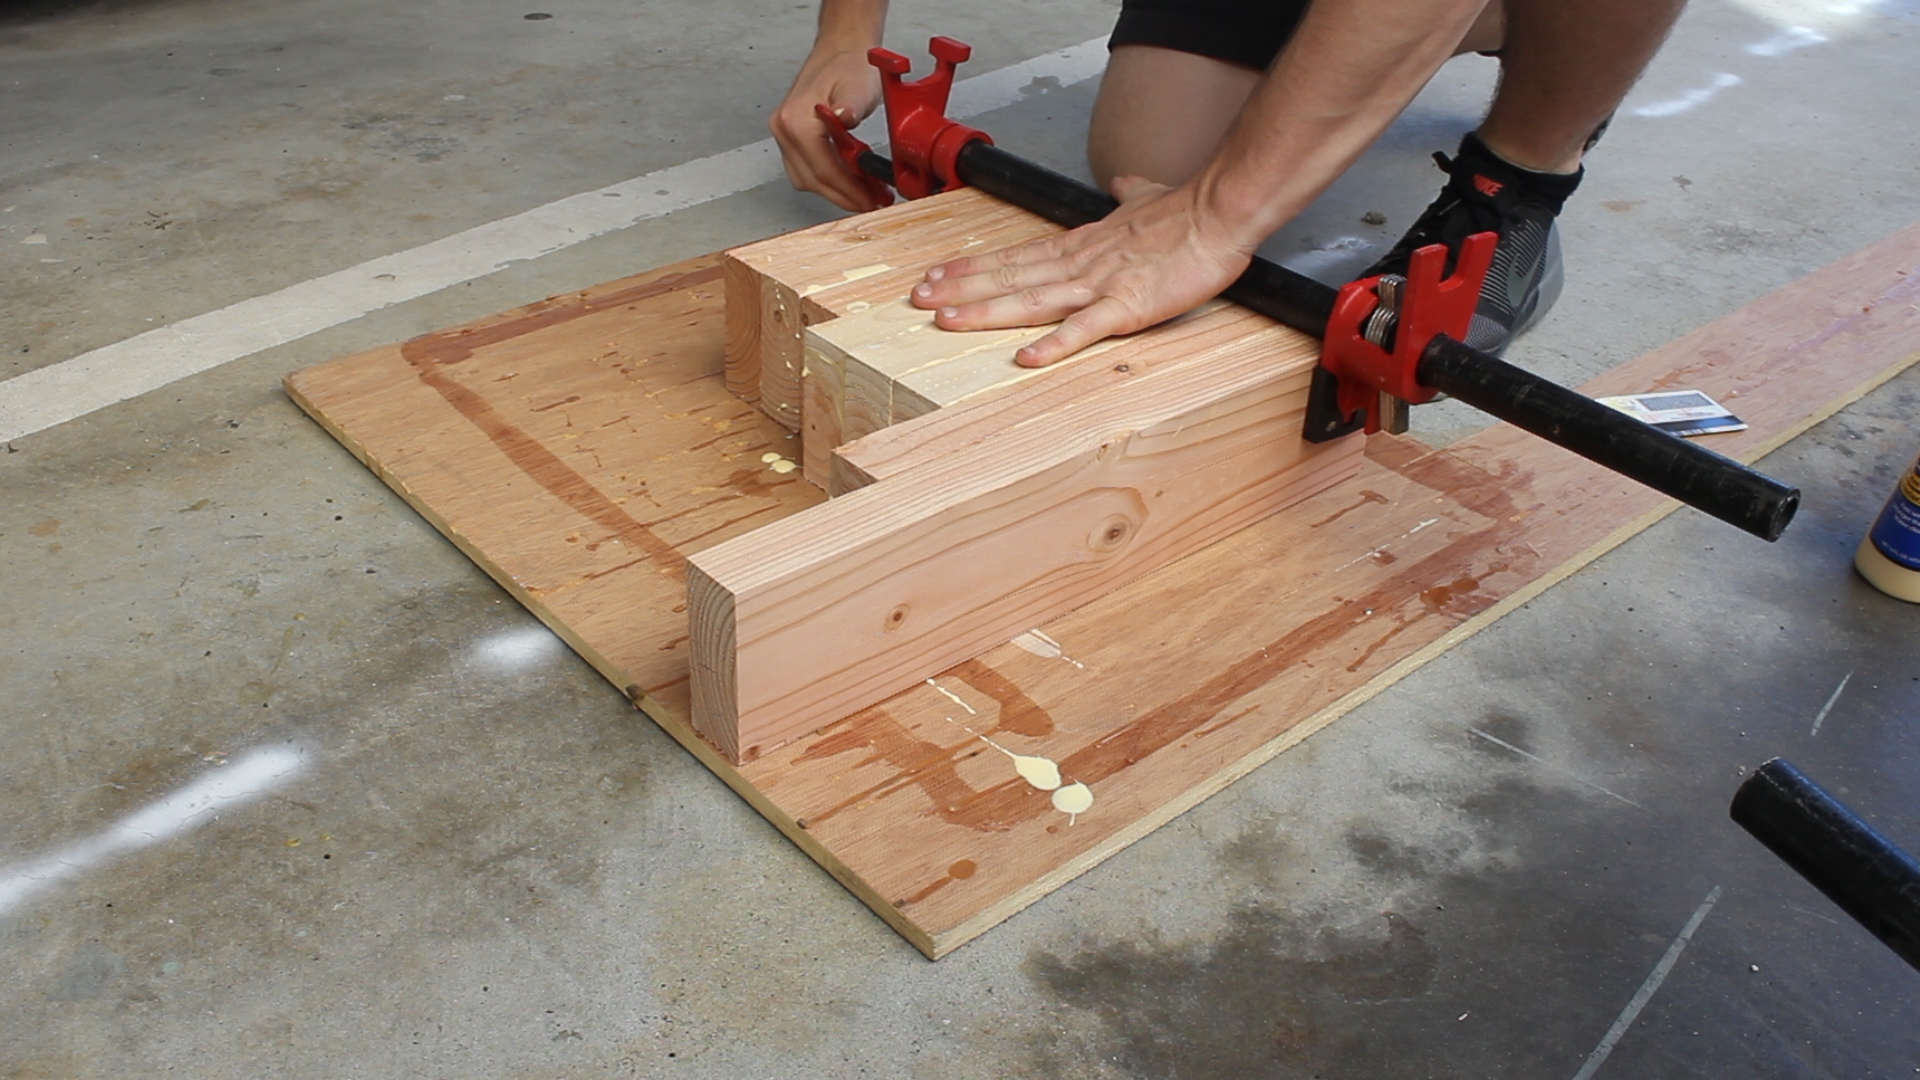
You'll use the six "L" shaped pieces laminated together (pic 5). Pieces will be laminated together in order based on their length so it forms a stepping shape.
Once all four legs, your bench seat, and your lounge back rest are formed, you can laminated all of those pieces together as well to form this really cool looking "Glulam" bench. Note - I am limited on clamps, so this was 9 total glue ups over the course of a week to make sure all of my pieces were properly secured and cured over the right length of time.
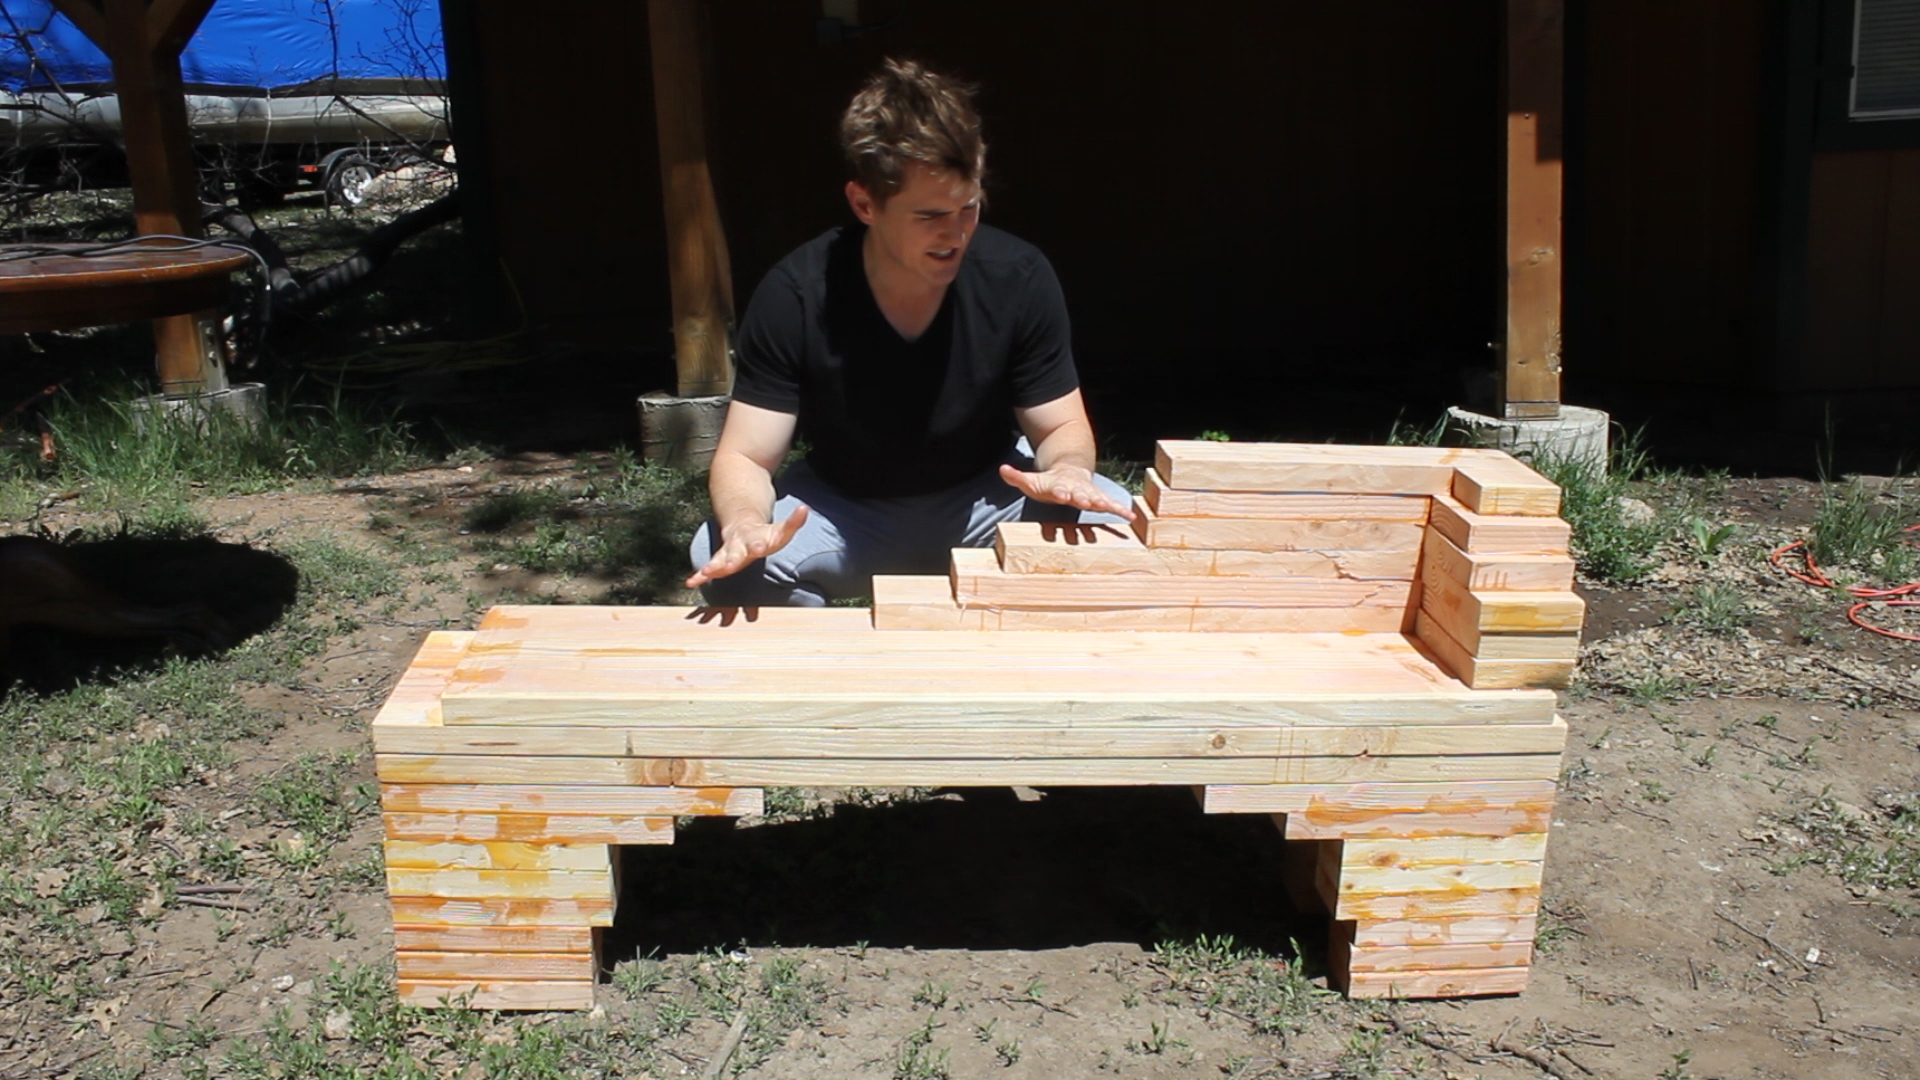
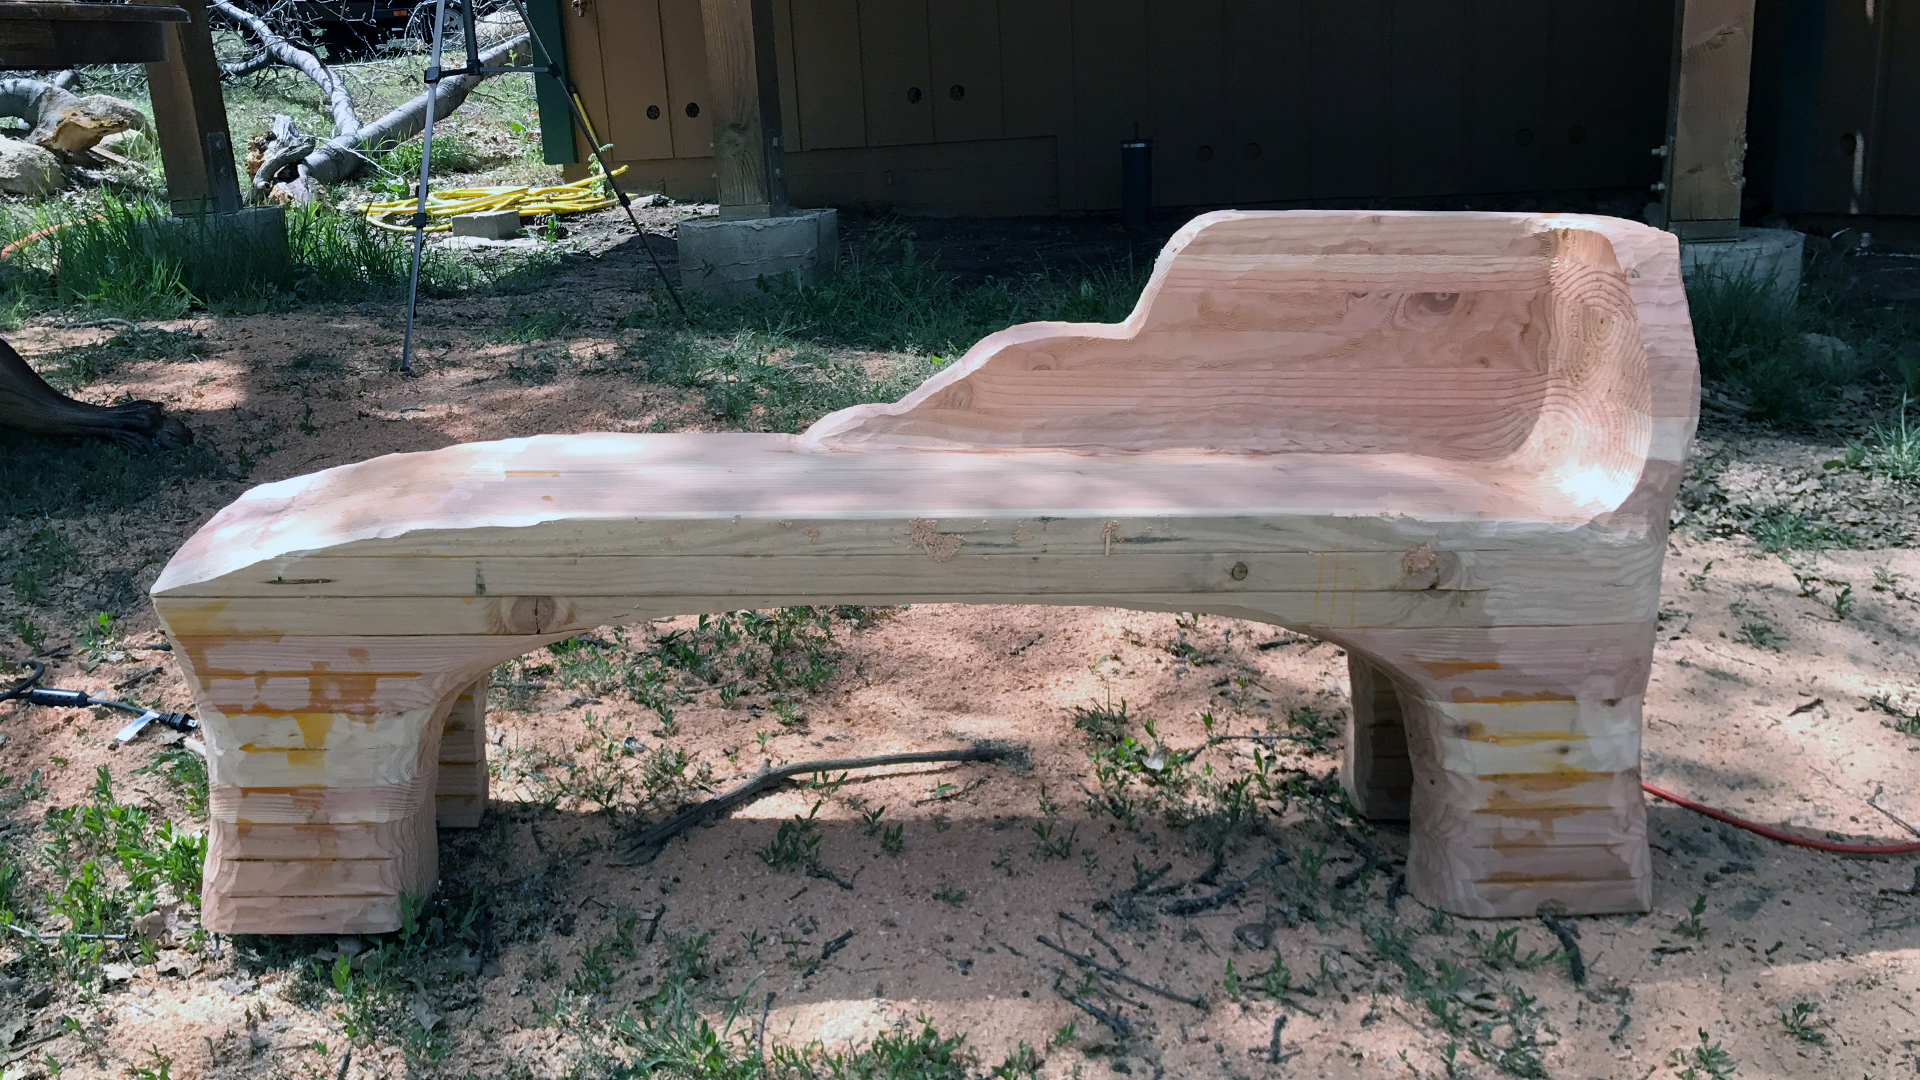
Now it was time to shape my piece down to it's final form!

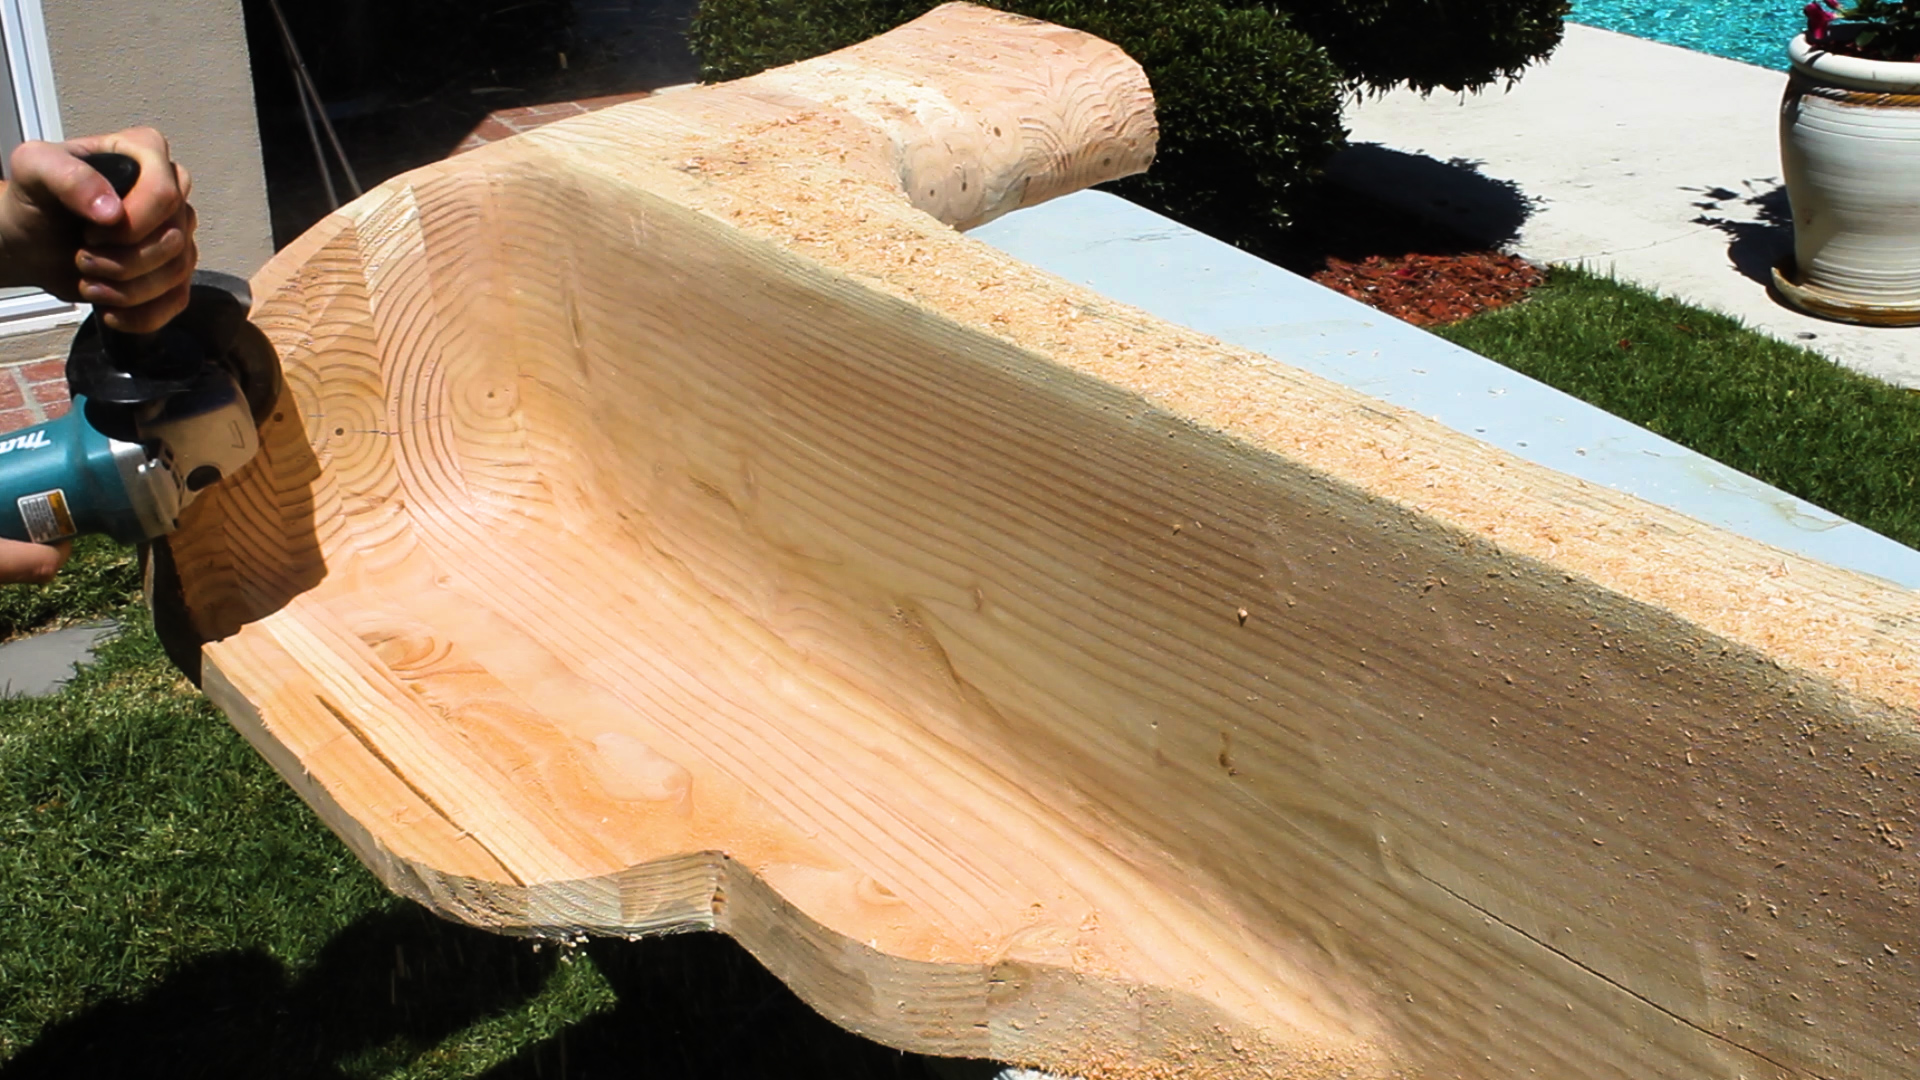
To shape this piece, I am using my ARBORTECH TURBOPlane Blade which is a beast at shaping, contouring, and carving away wood.
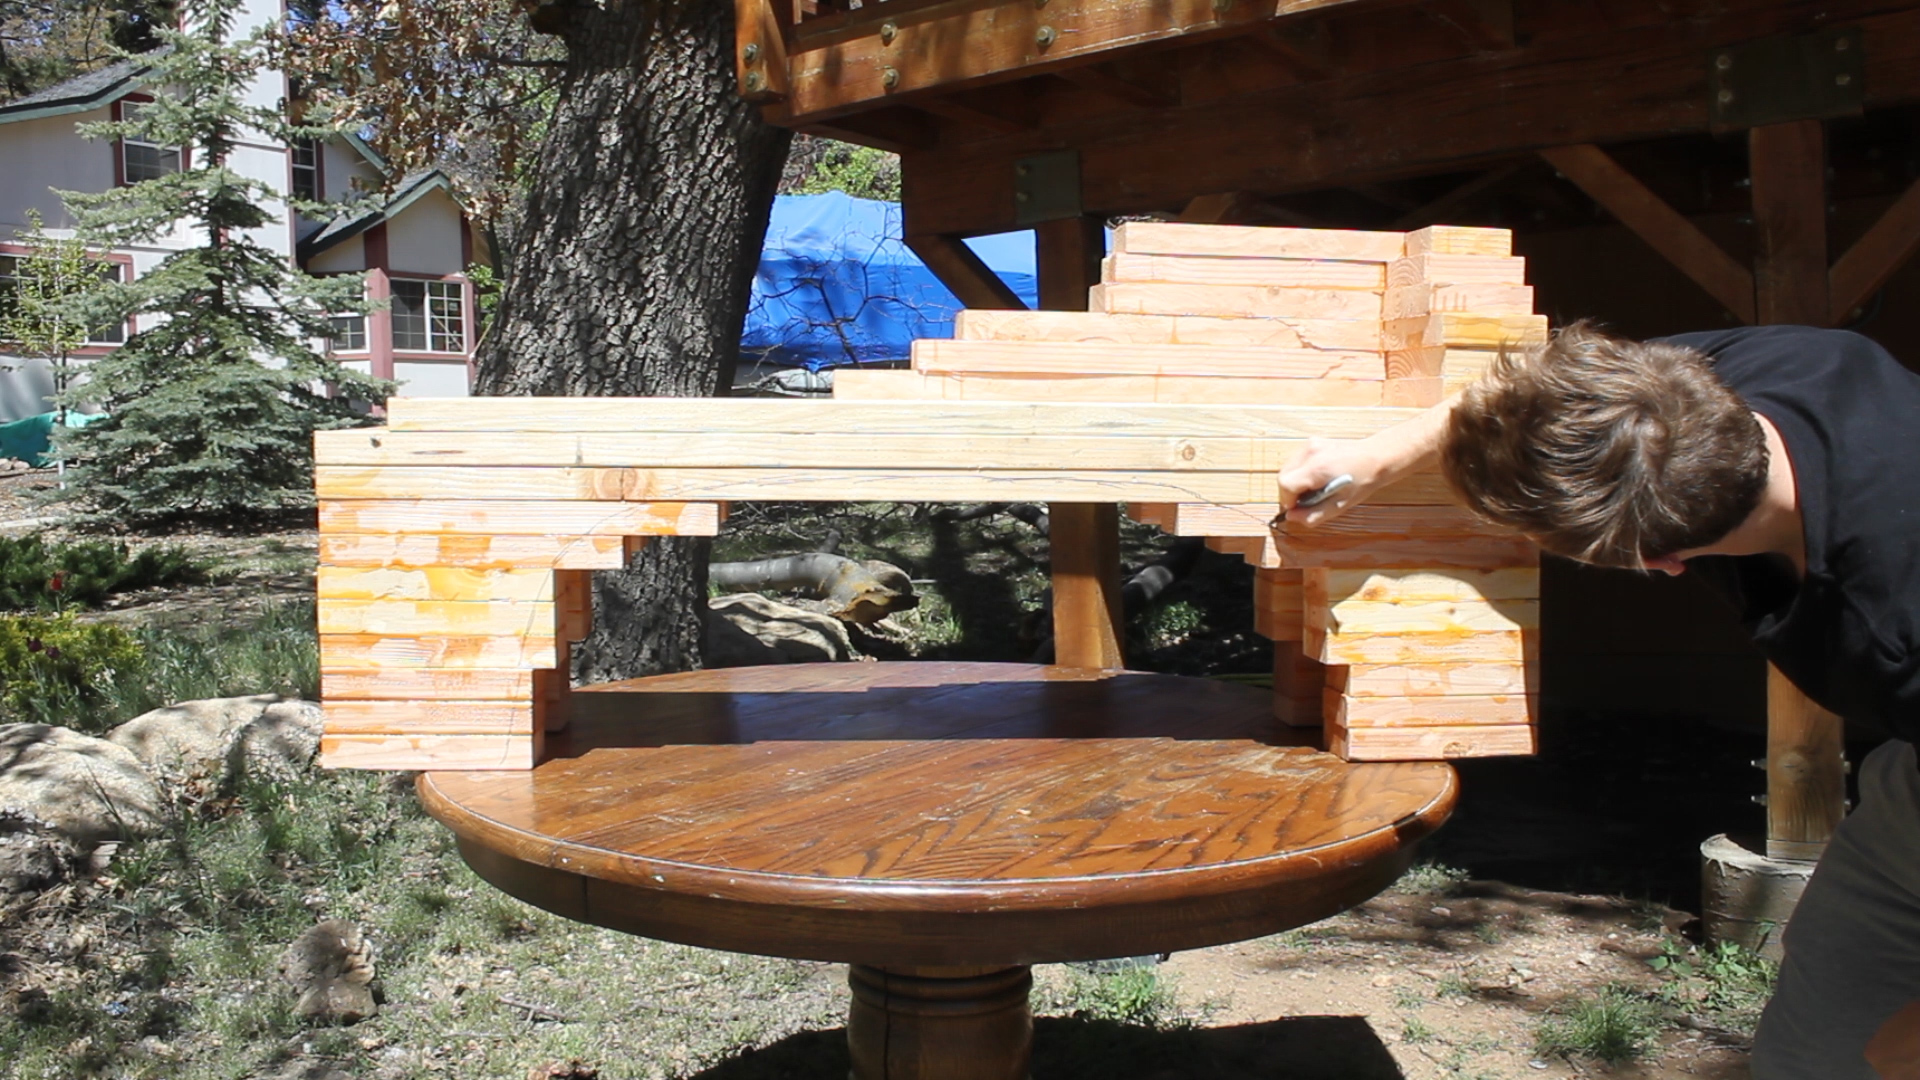
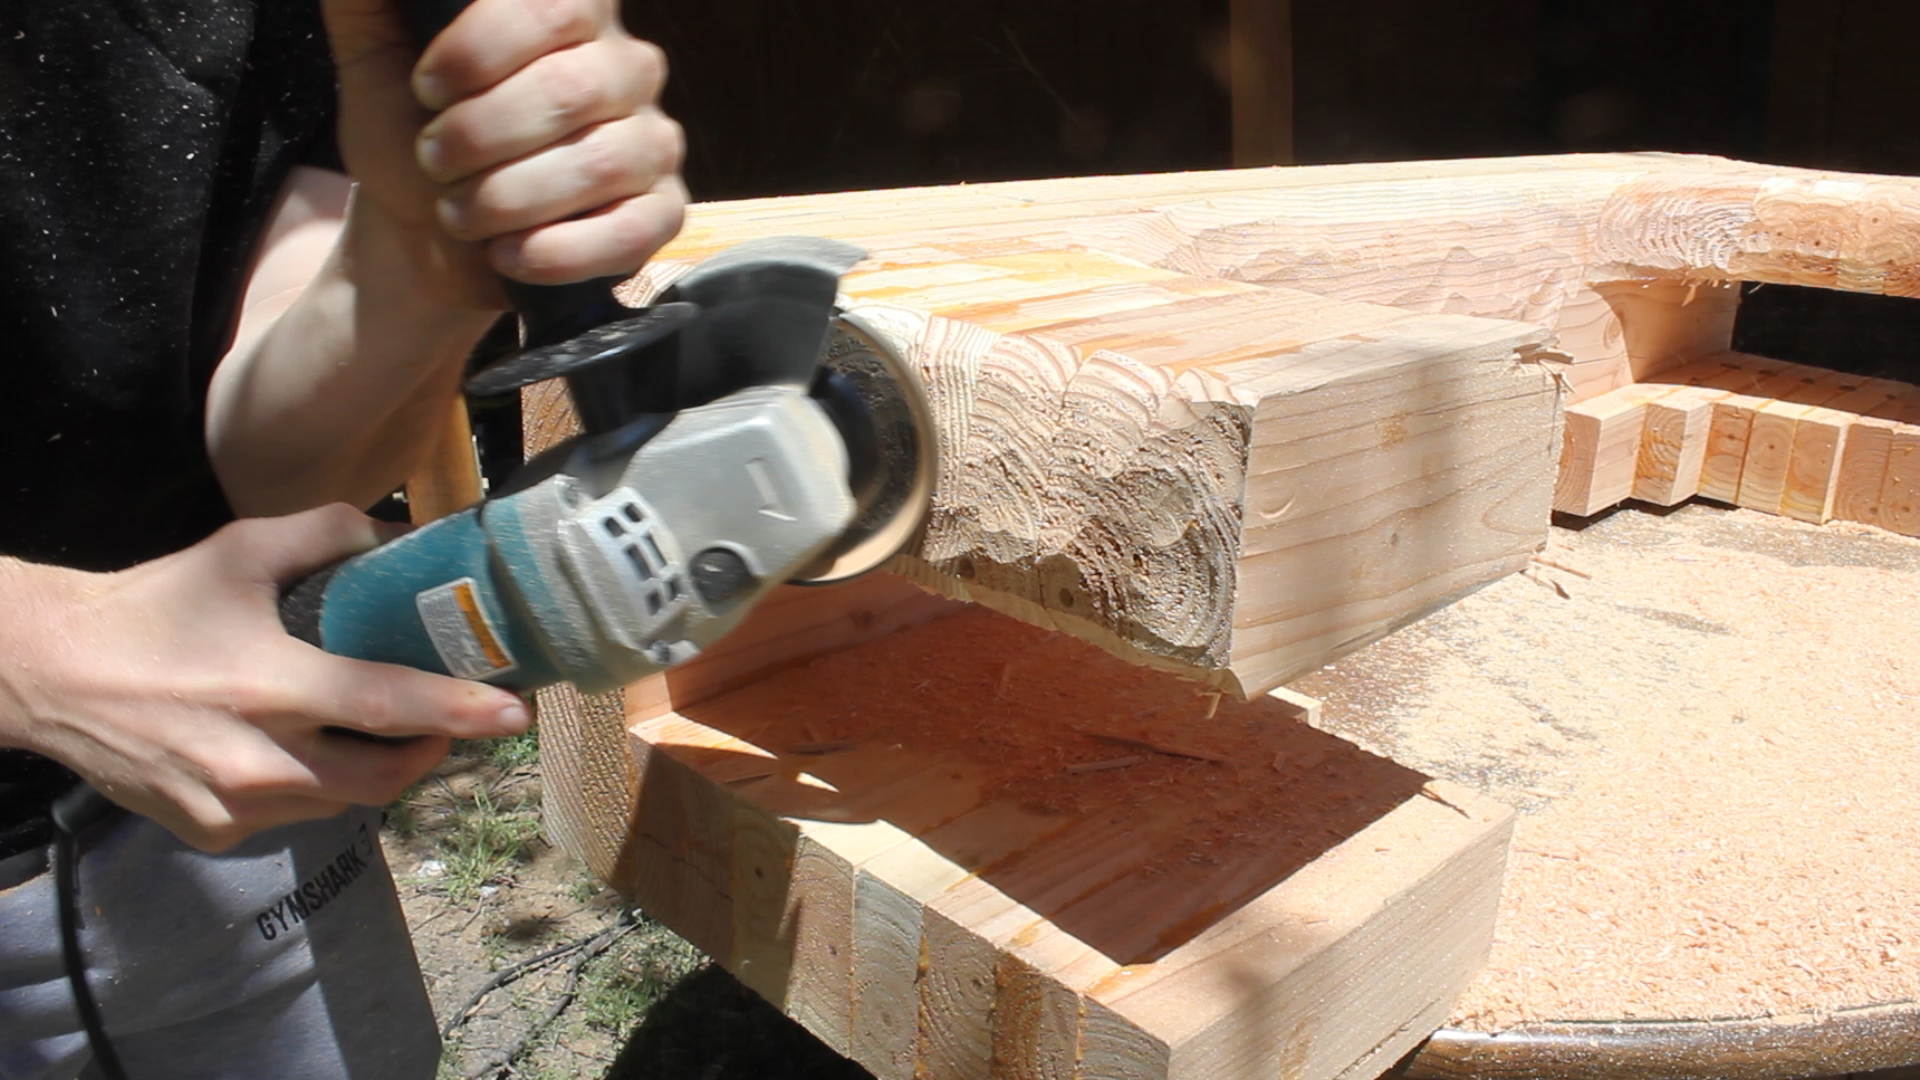
I marked out the rough shape I was aiming for using a sharpie (Pic 1), and then, over the course of four hours, I carved away a large chunk of material from my piece to give it a very sleek look. The TurboPlane is great at carving away wood, and as tricky or intimidating as it might sound, it is very easy to control how much or how little you take away. I carved away material on the legs, back rest, and bench top and bottom to create a flowing curved shape.
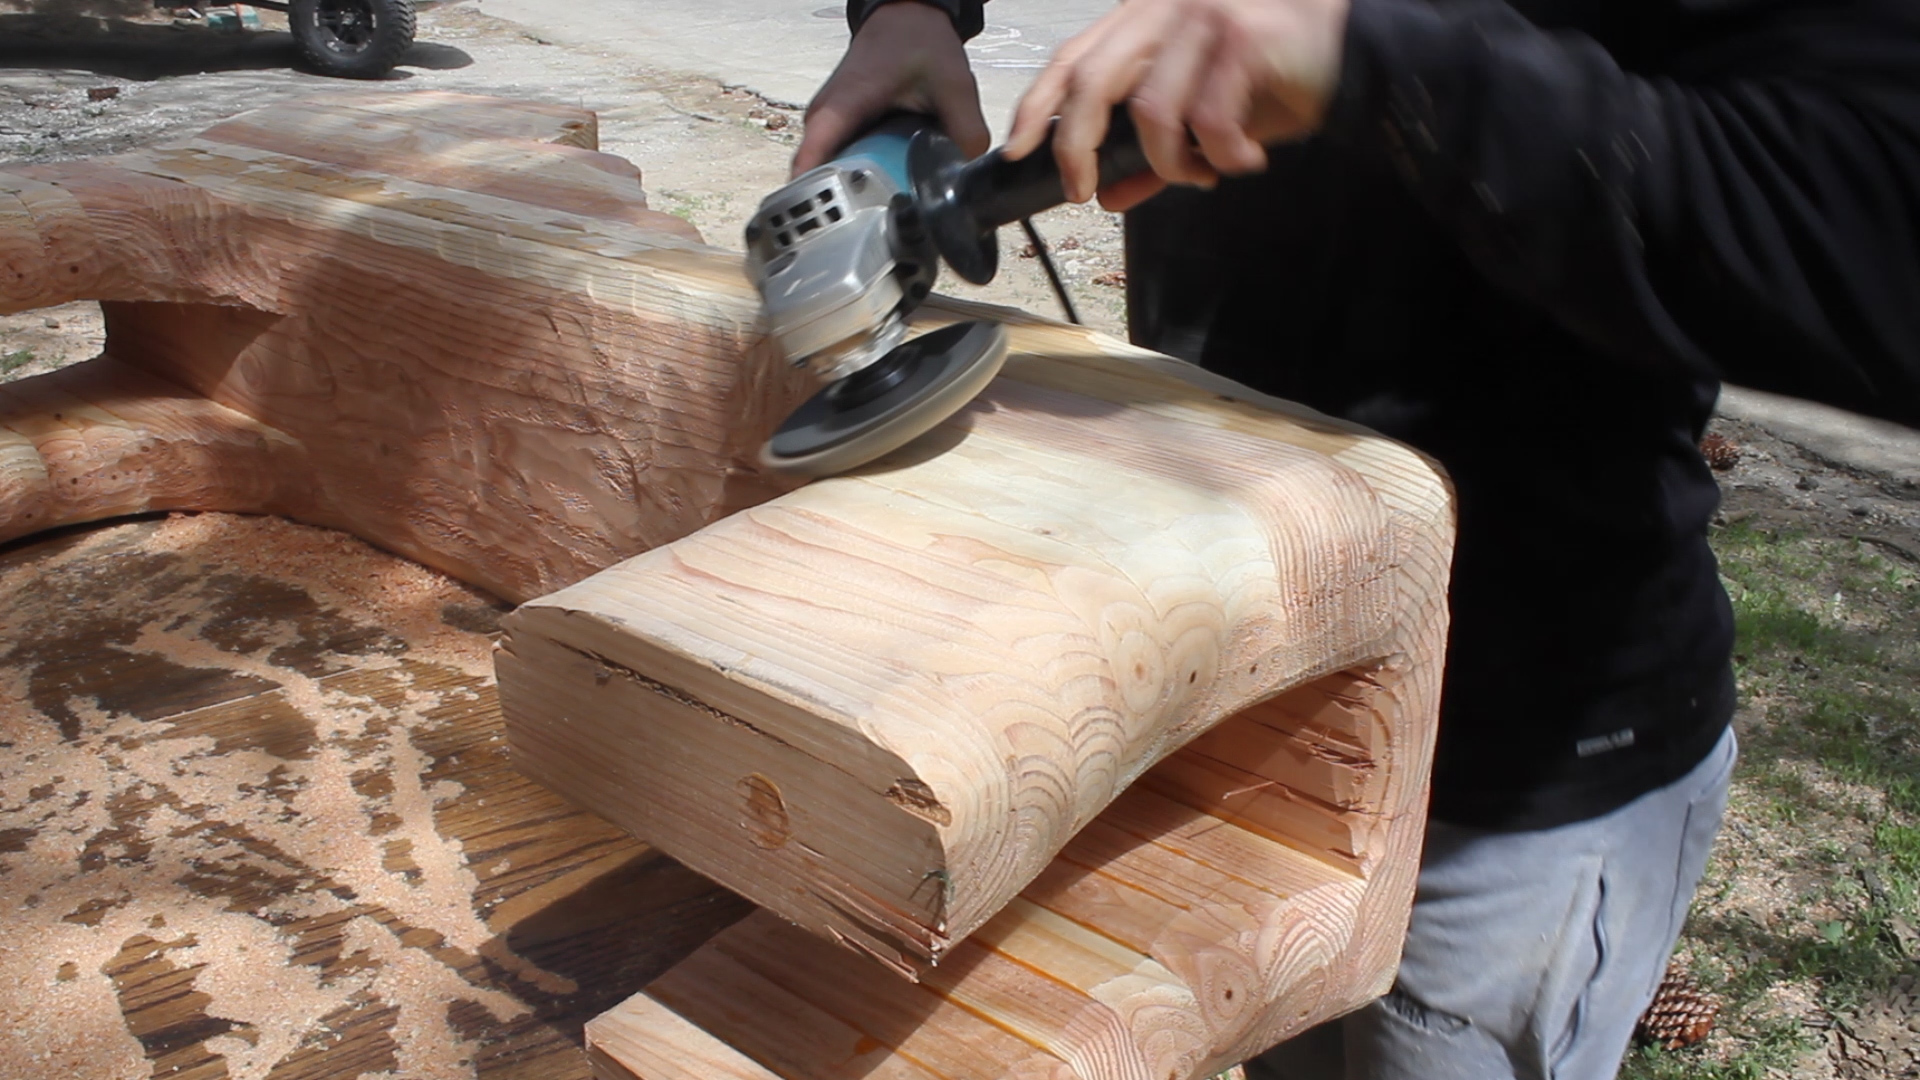
Now, while the TurboPlane carves great, it isn't always easy to carve flat. Often, you're left with gouges, which is where Flap Discs come in handy. I used a 40 grit flap disk, which also removes a lot of material, but is much better at only removing "high points", thus helping you to flatten everything out and begin finessing the curves of your piece. I probably did this for 2 hours after carving.

Then, it literally started snowing where I was, so I called it quits for the day. I was also pretty wiped.
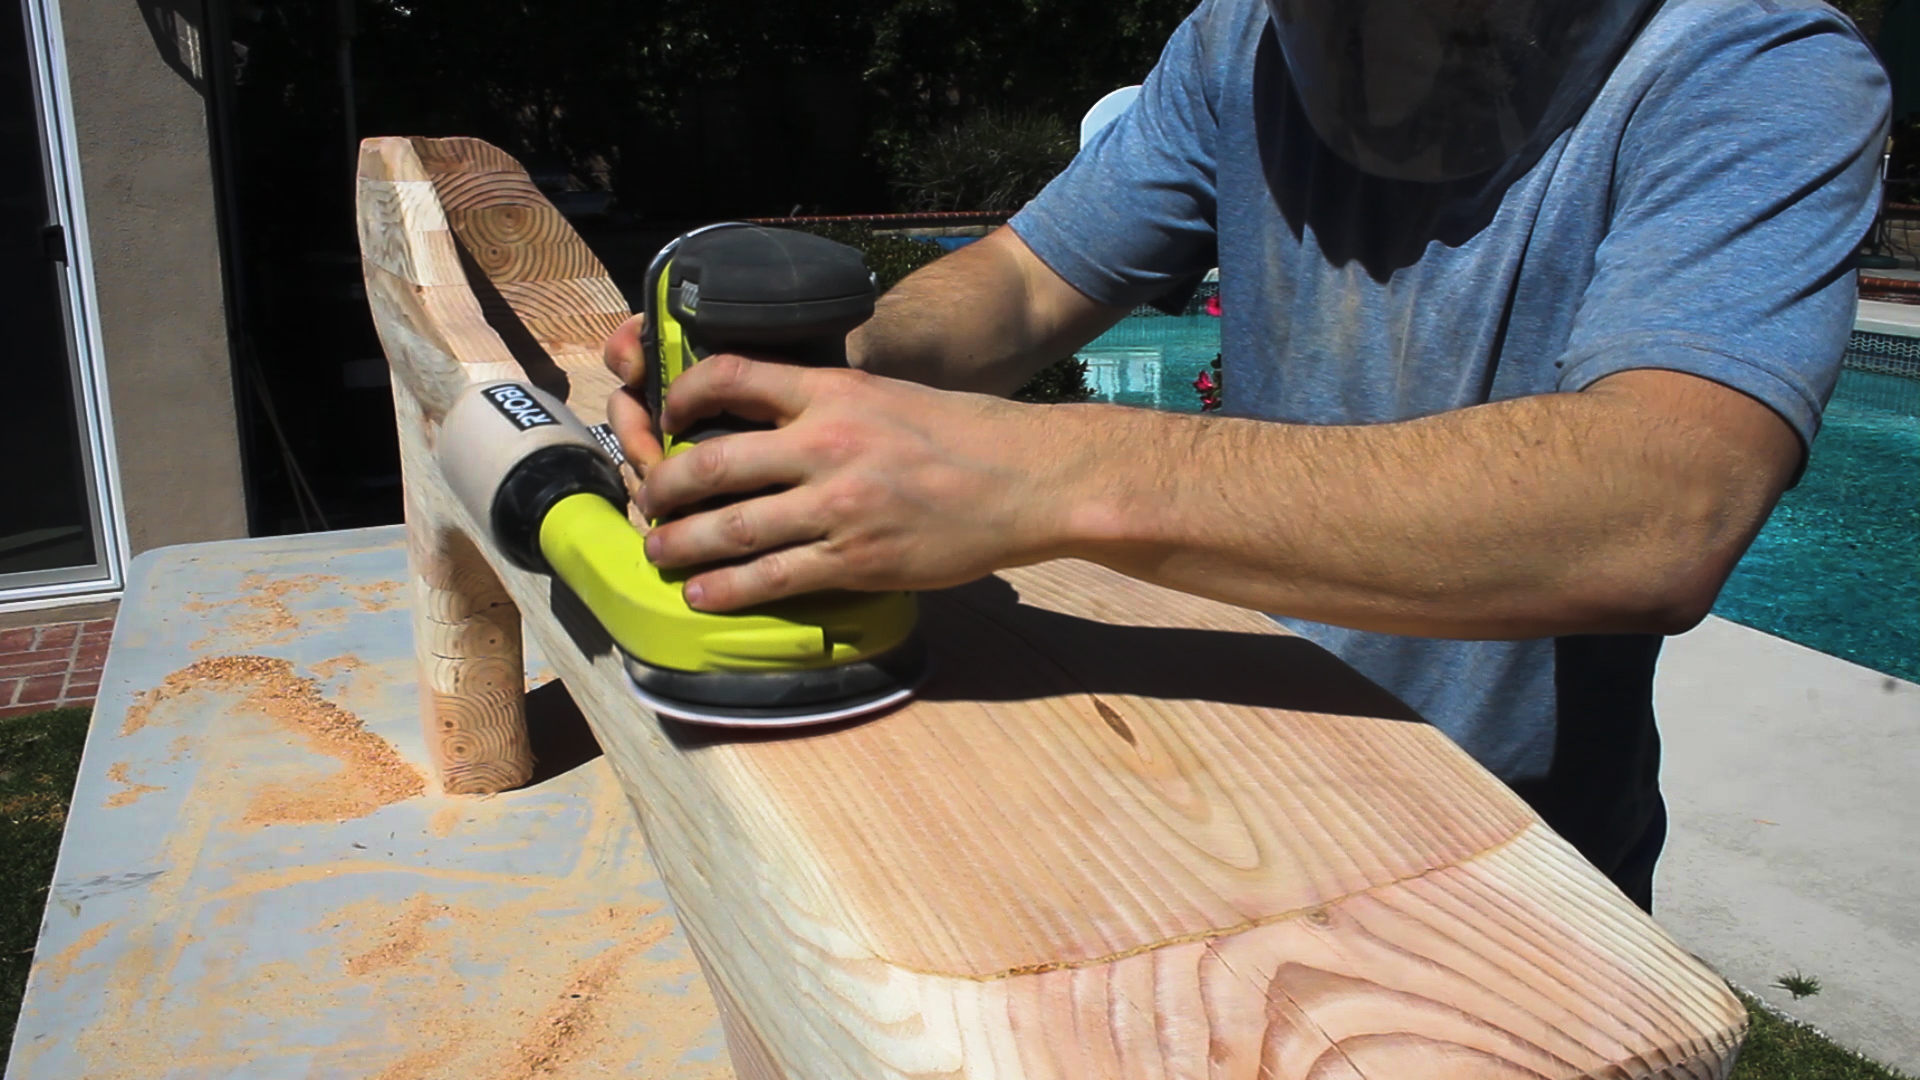
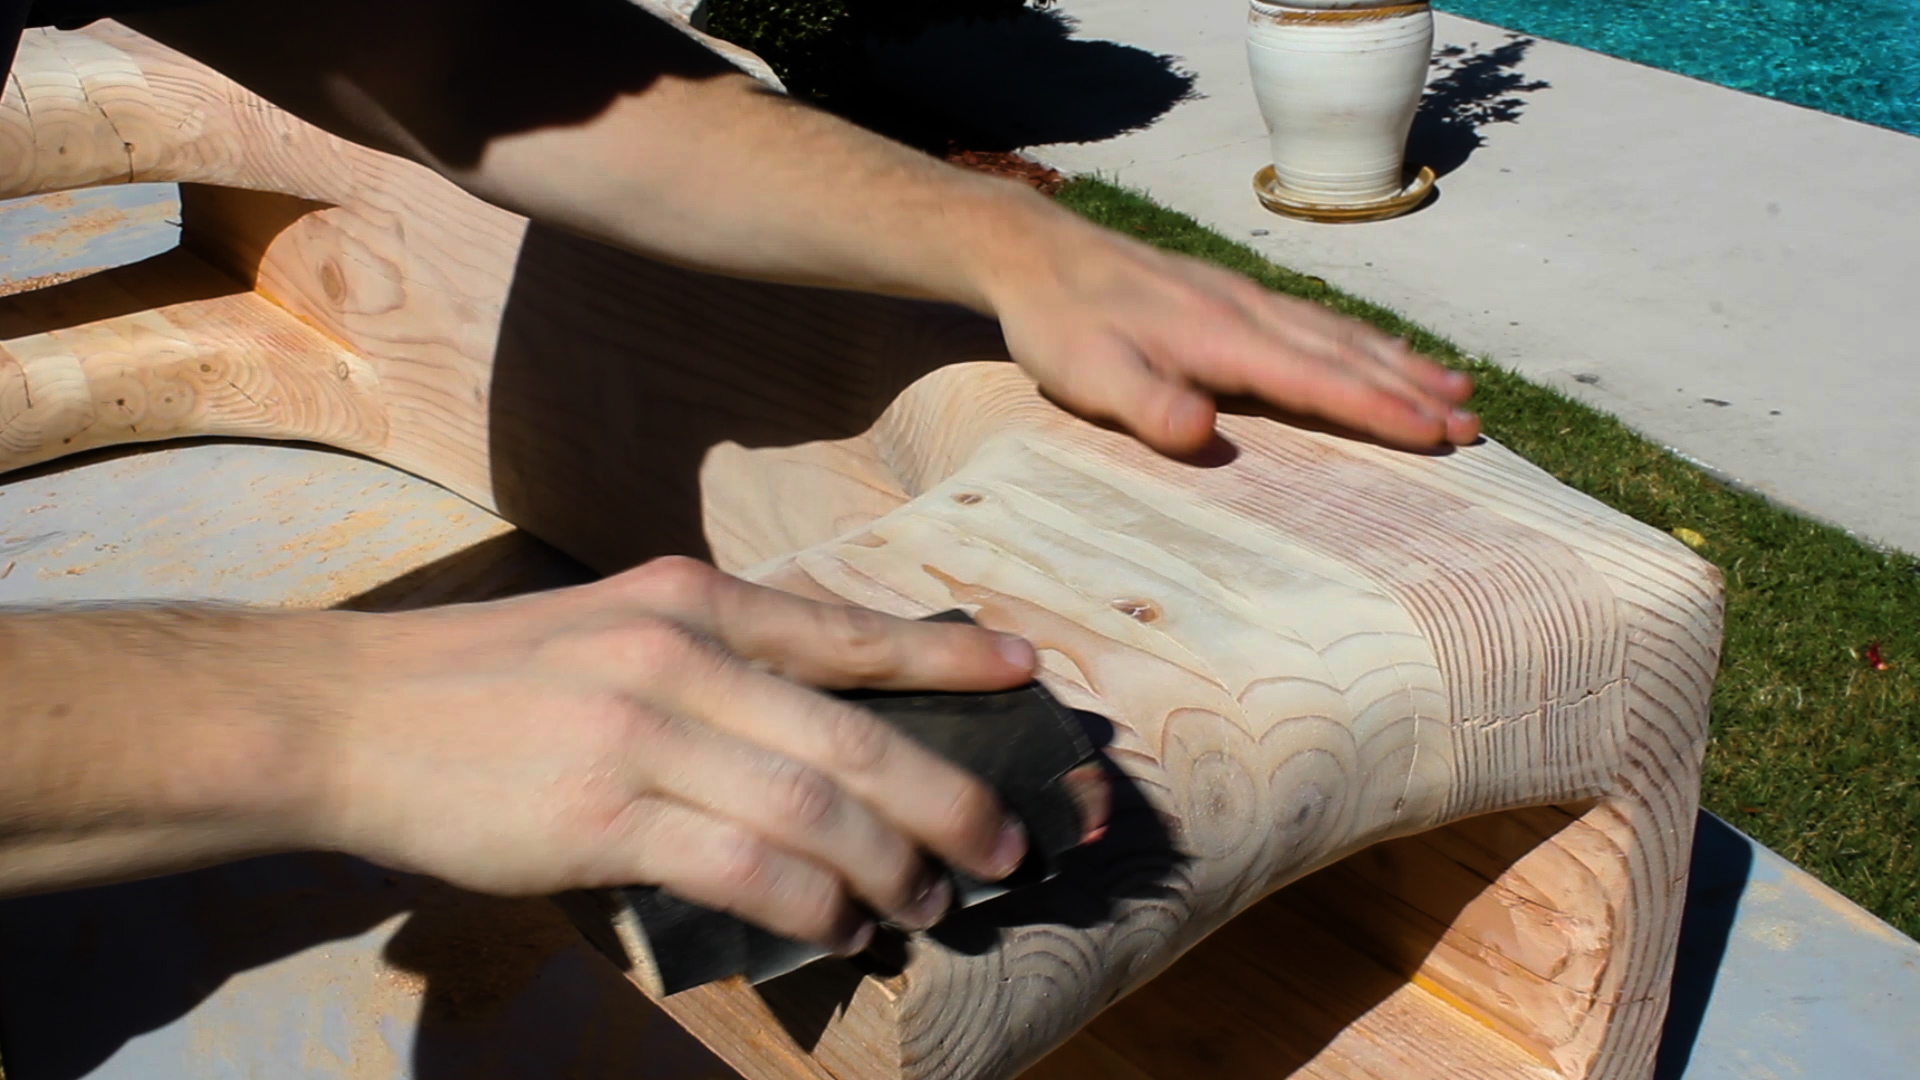
Back at home where it was sunny, I went back and removed another 5 pounds or so of material using the TurboPlane as the profile wasn't sleek enough for what I was going for. After following that up with more flap disk smoothing at 40 grit, I moved onto orbital sanding at 80 and 120 grit, followed by hand sanding at 120 and 220 grit. I also did a wet sanding at 220 as this piece was going to see a lot of weather and I wanted the grain to remain smooth if it got moist.
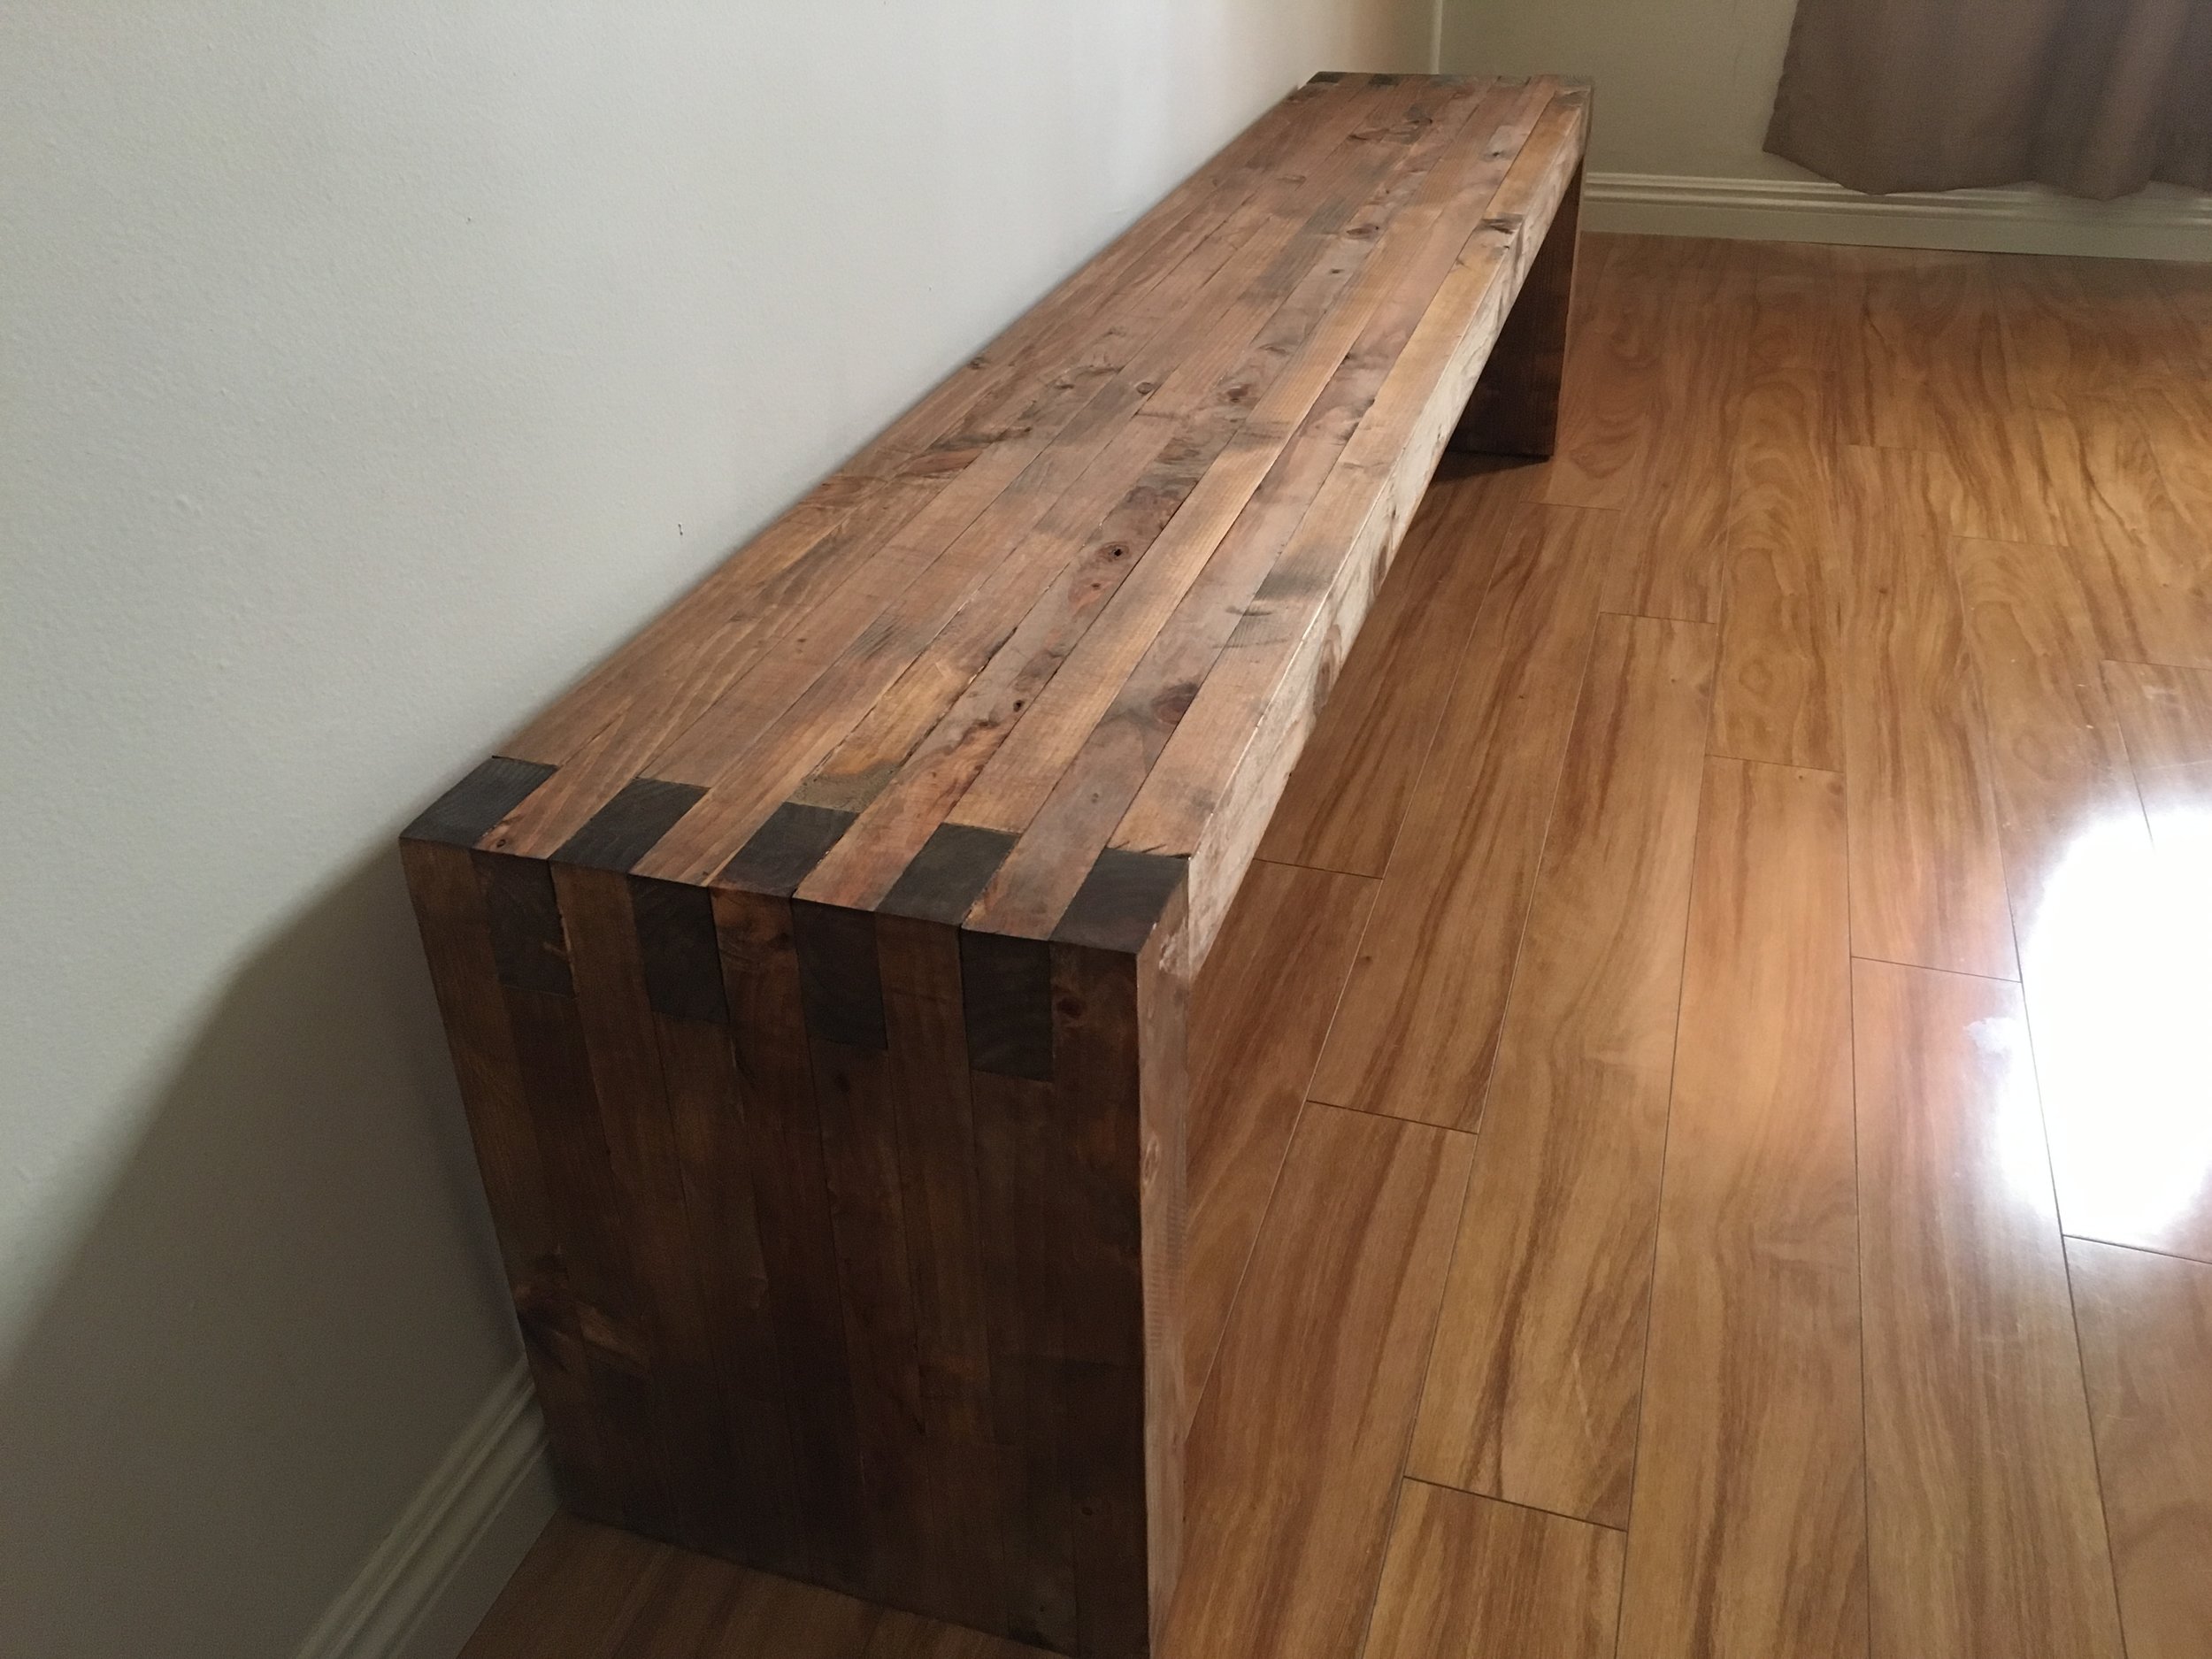
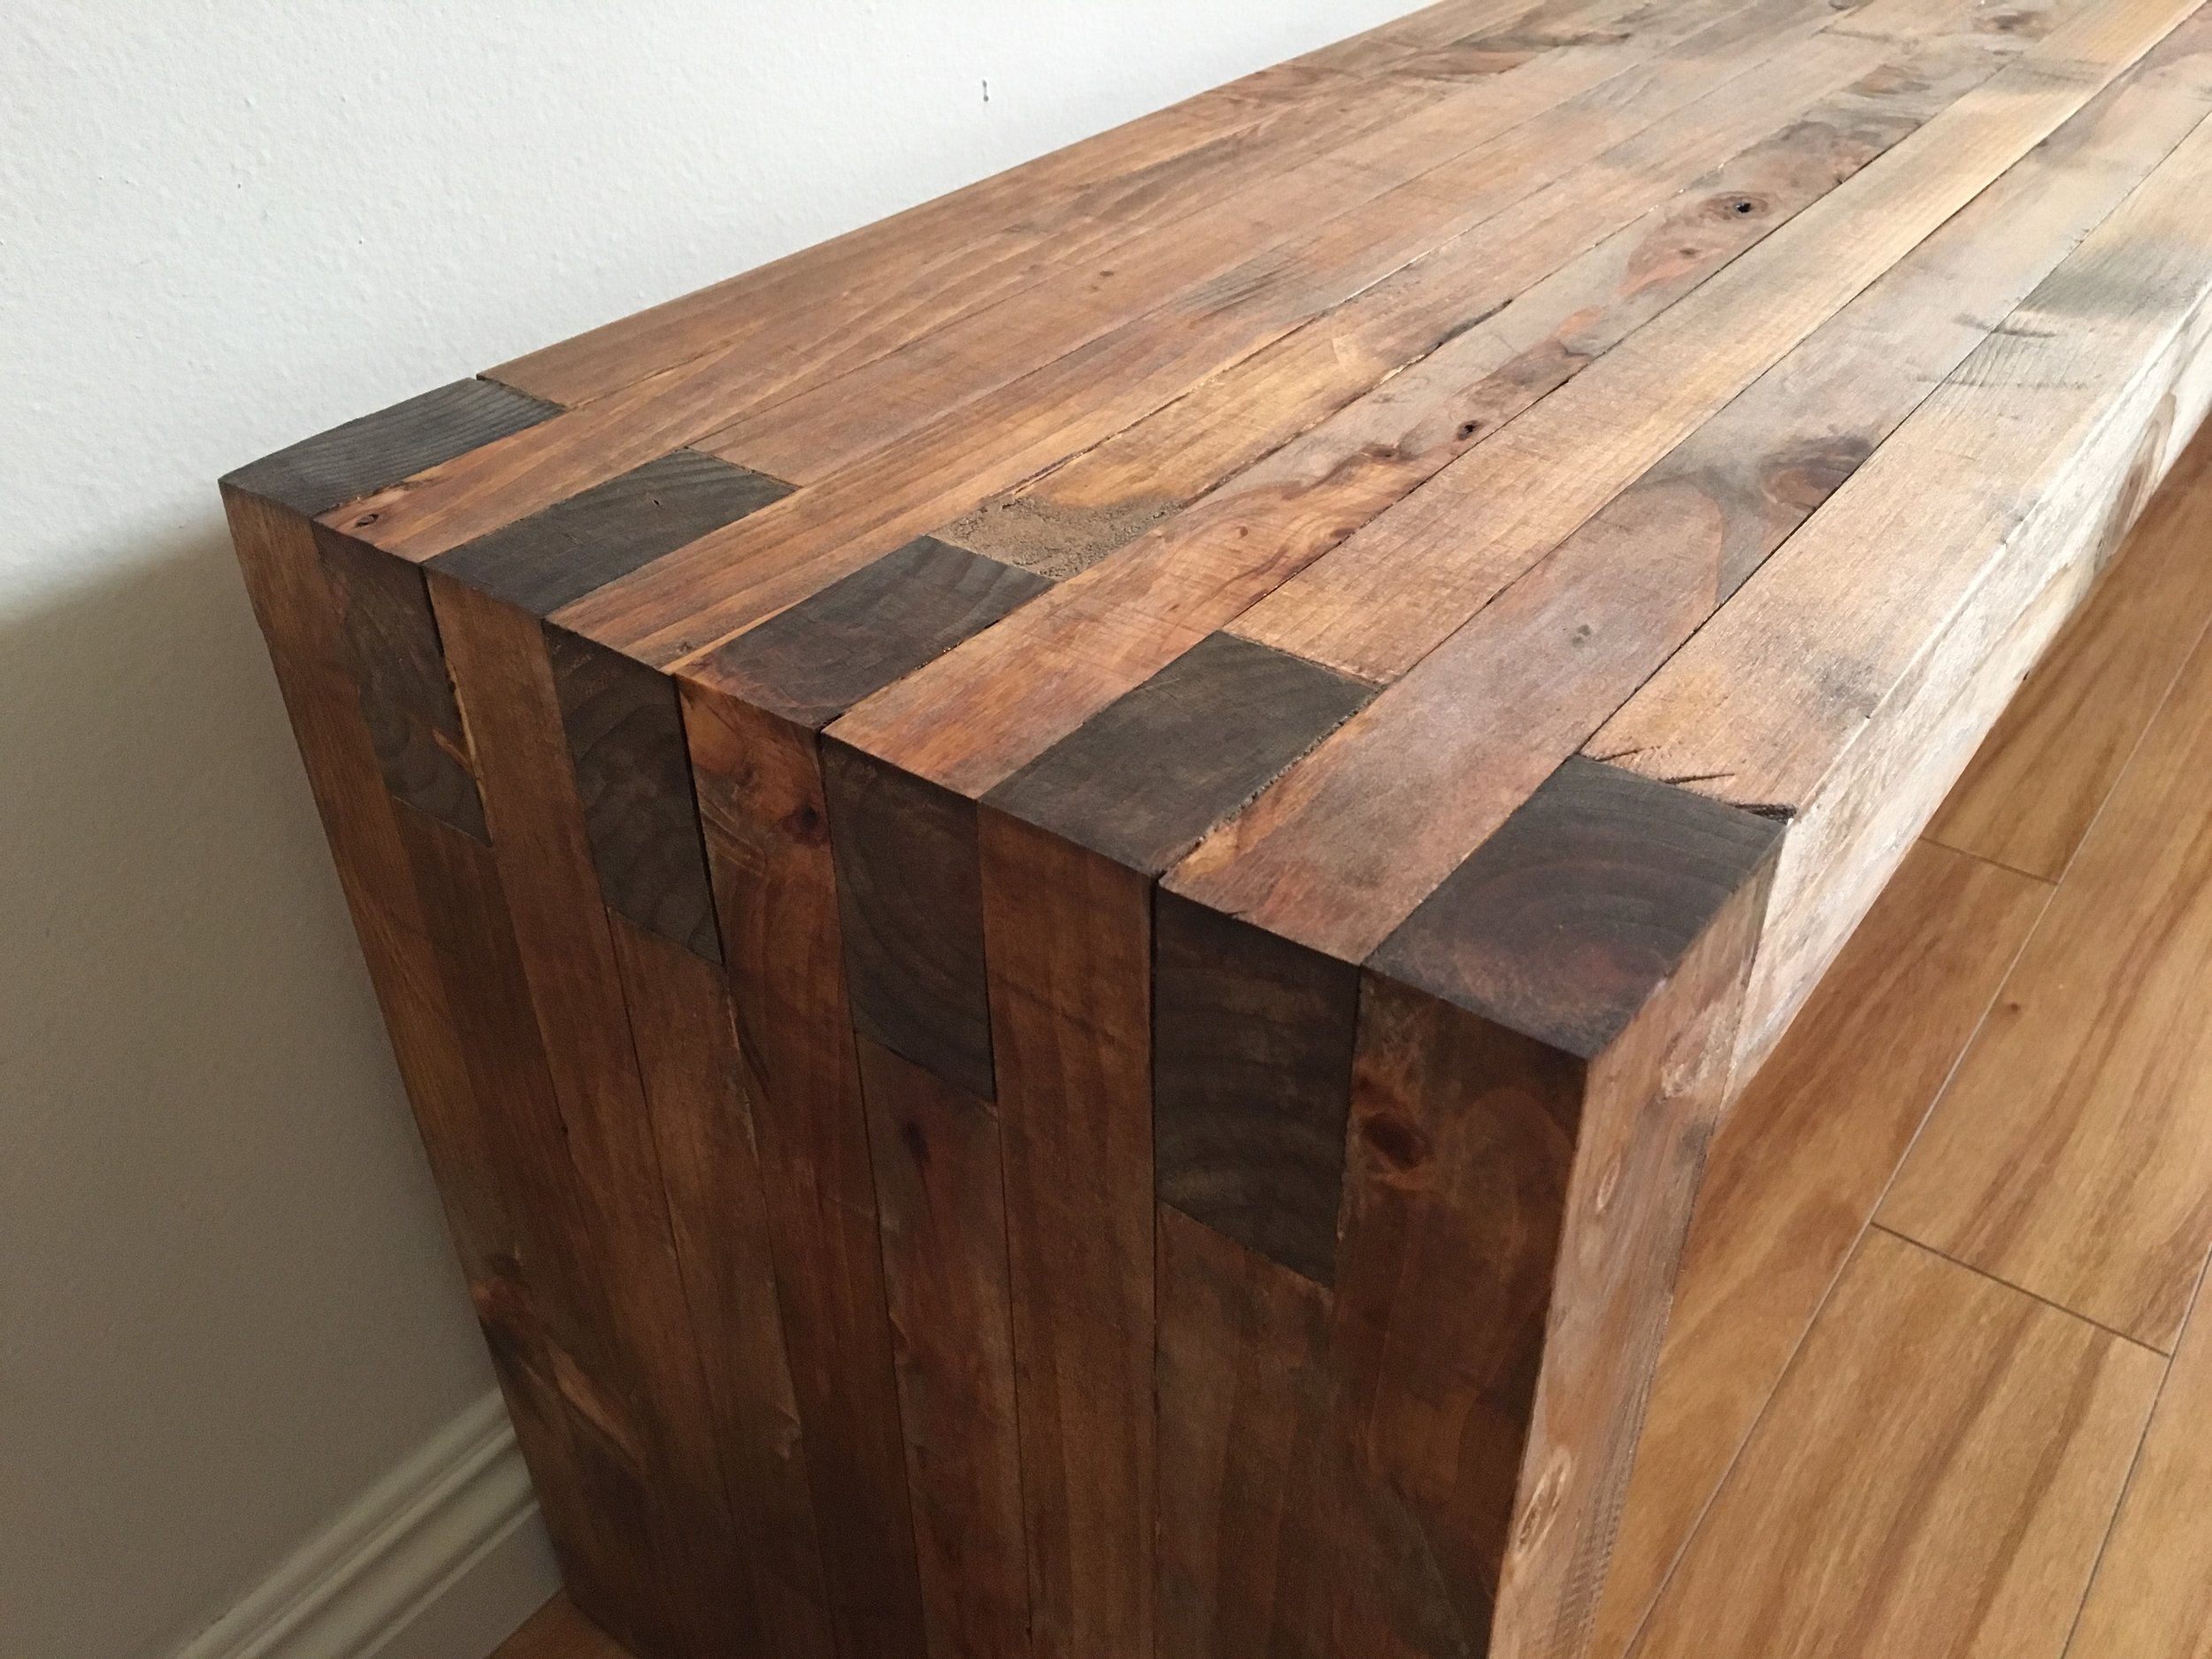
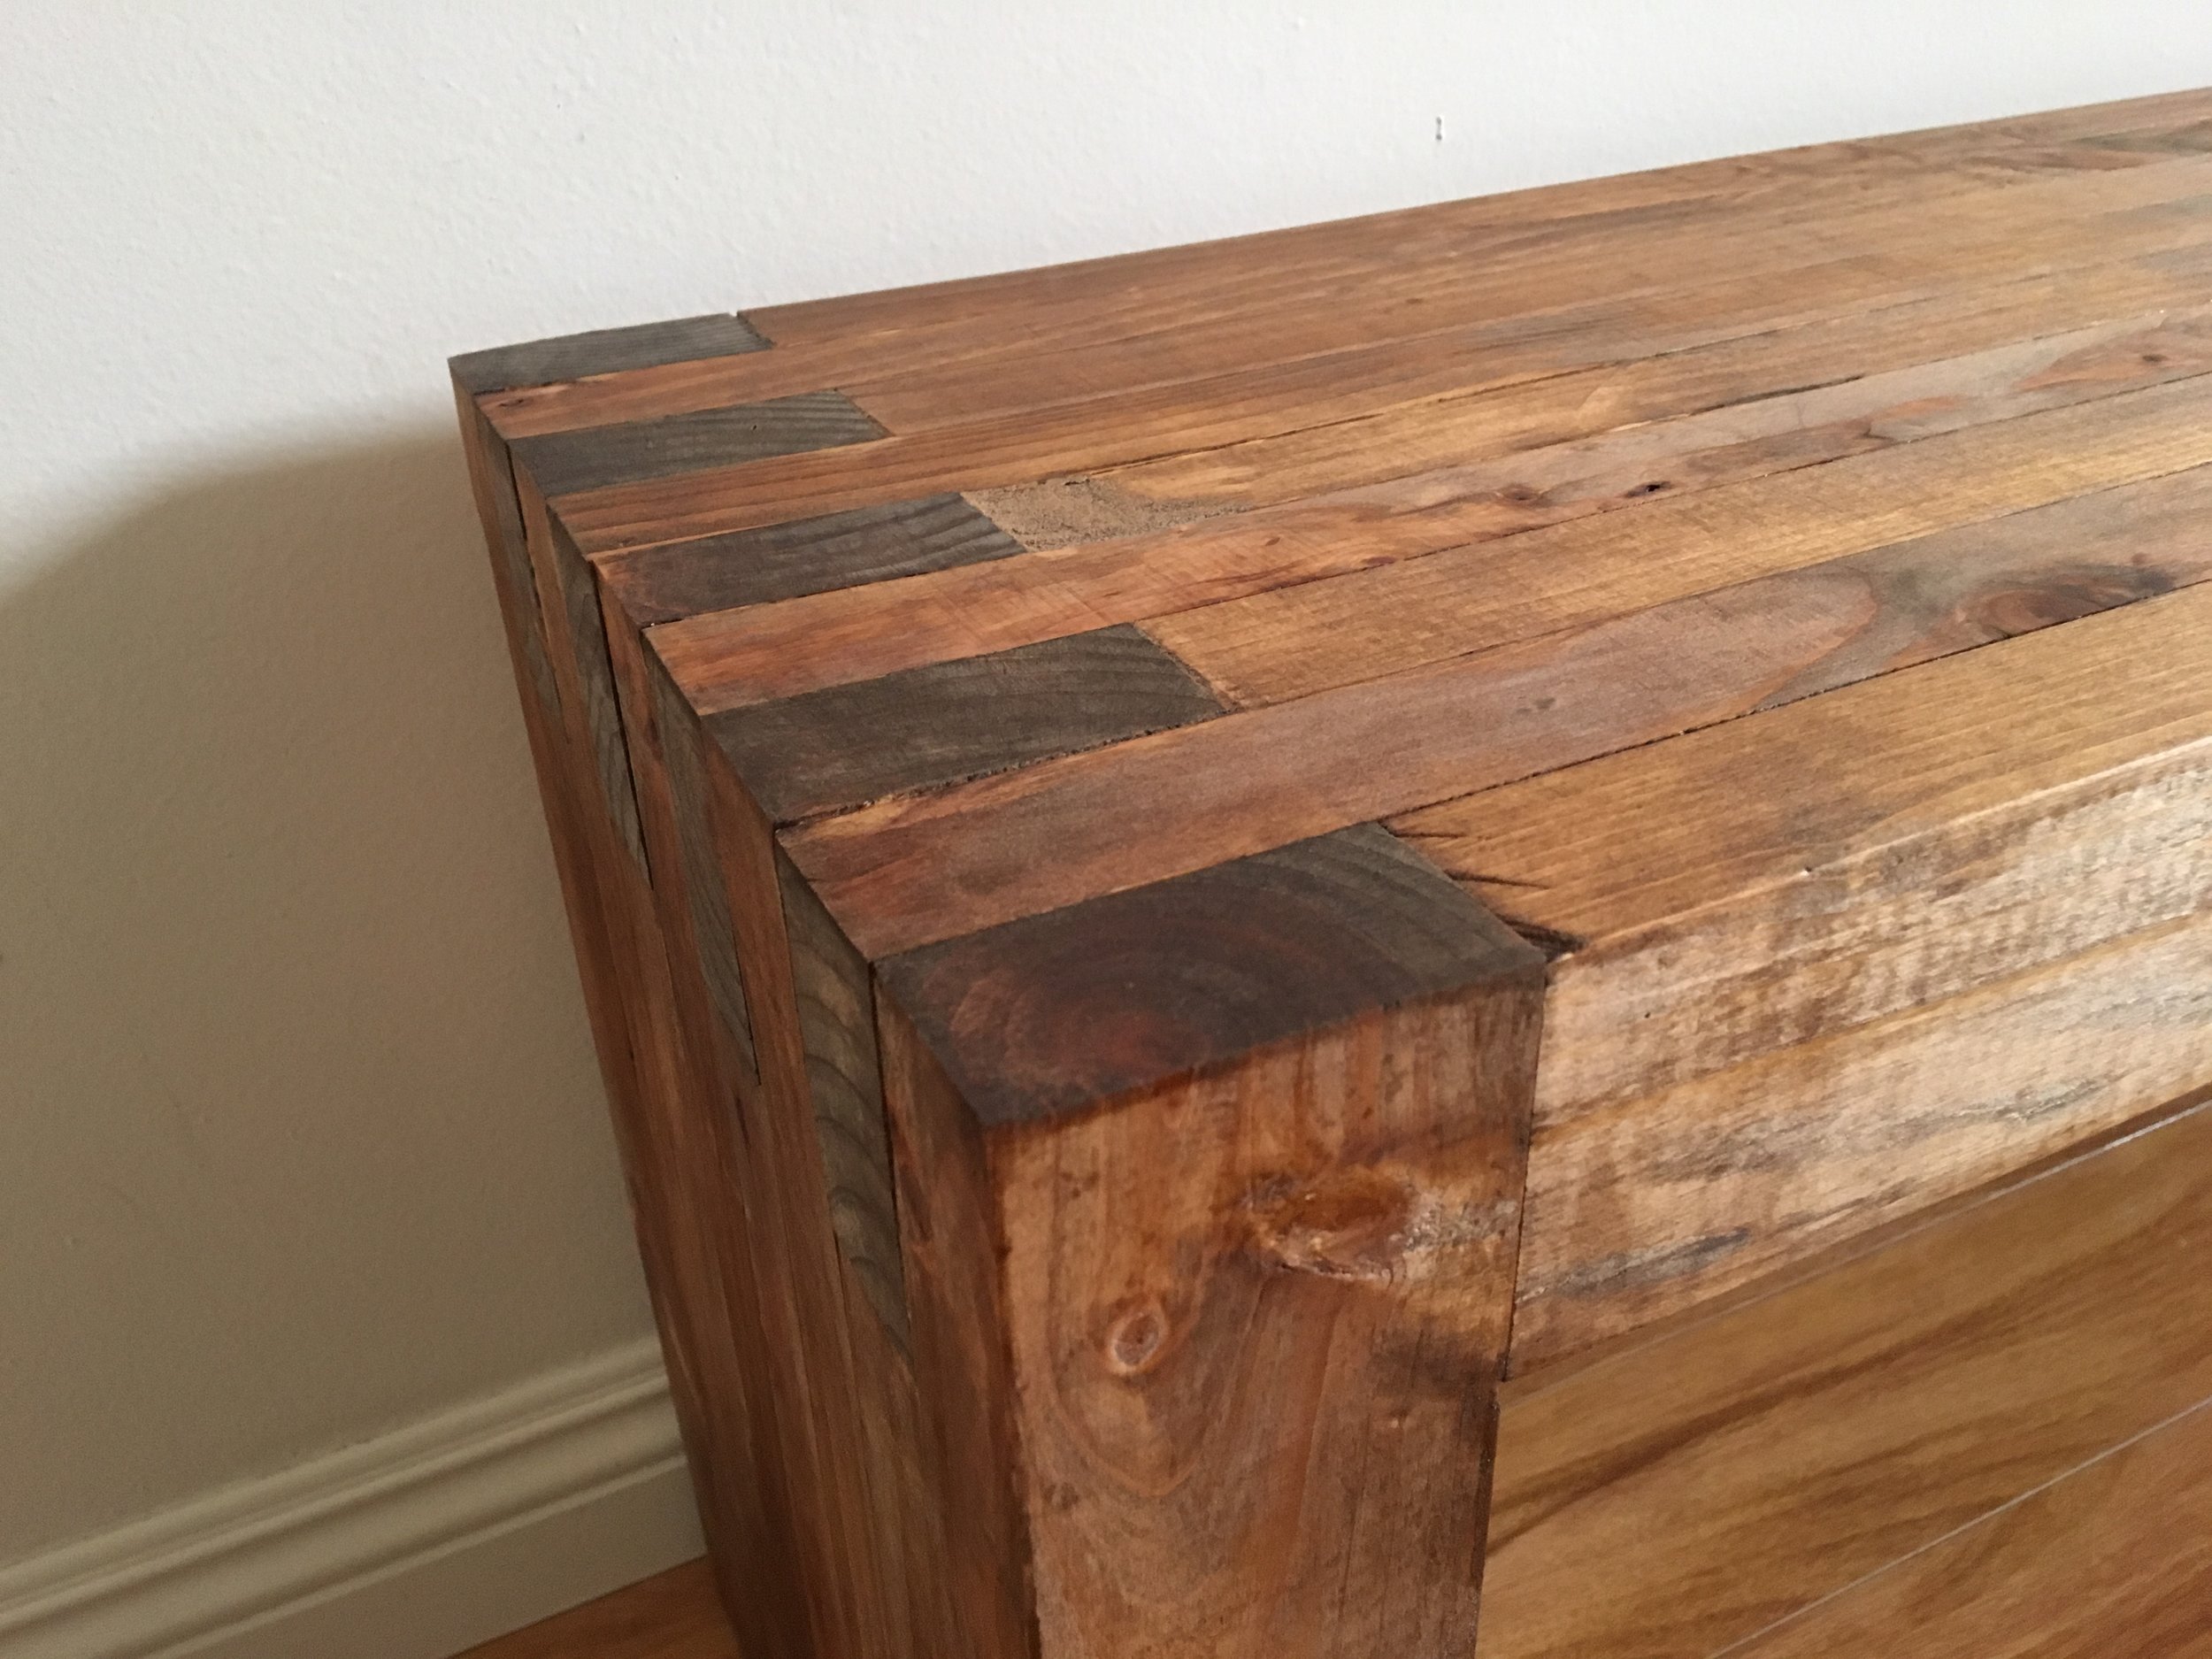
By the way - how cool does picture 3 look with the edge grain transitioning to end grain?

After final sanding, I used a bit of Minwax Wood Filler to take care of a few gaps I couldn't avoid during the lamination stage and then sanded it down. It looks perfect and you'd never notice there were gaps otherwise. This felt unavoidable as Douglas Fir will undoubtedly cup a little bit in between all of these cuts, planes, and glue ups.
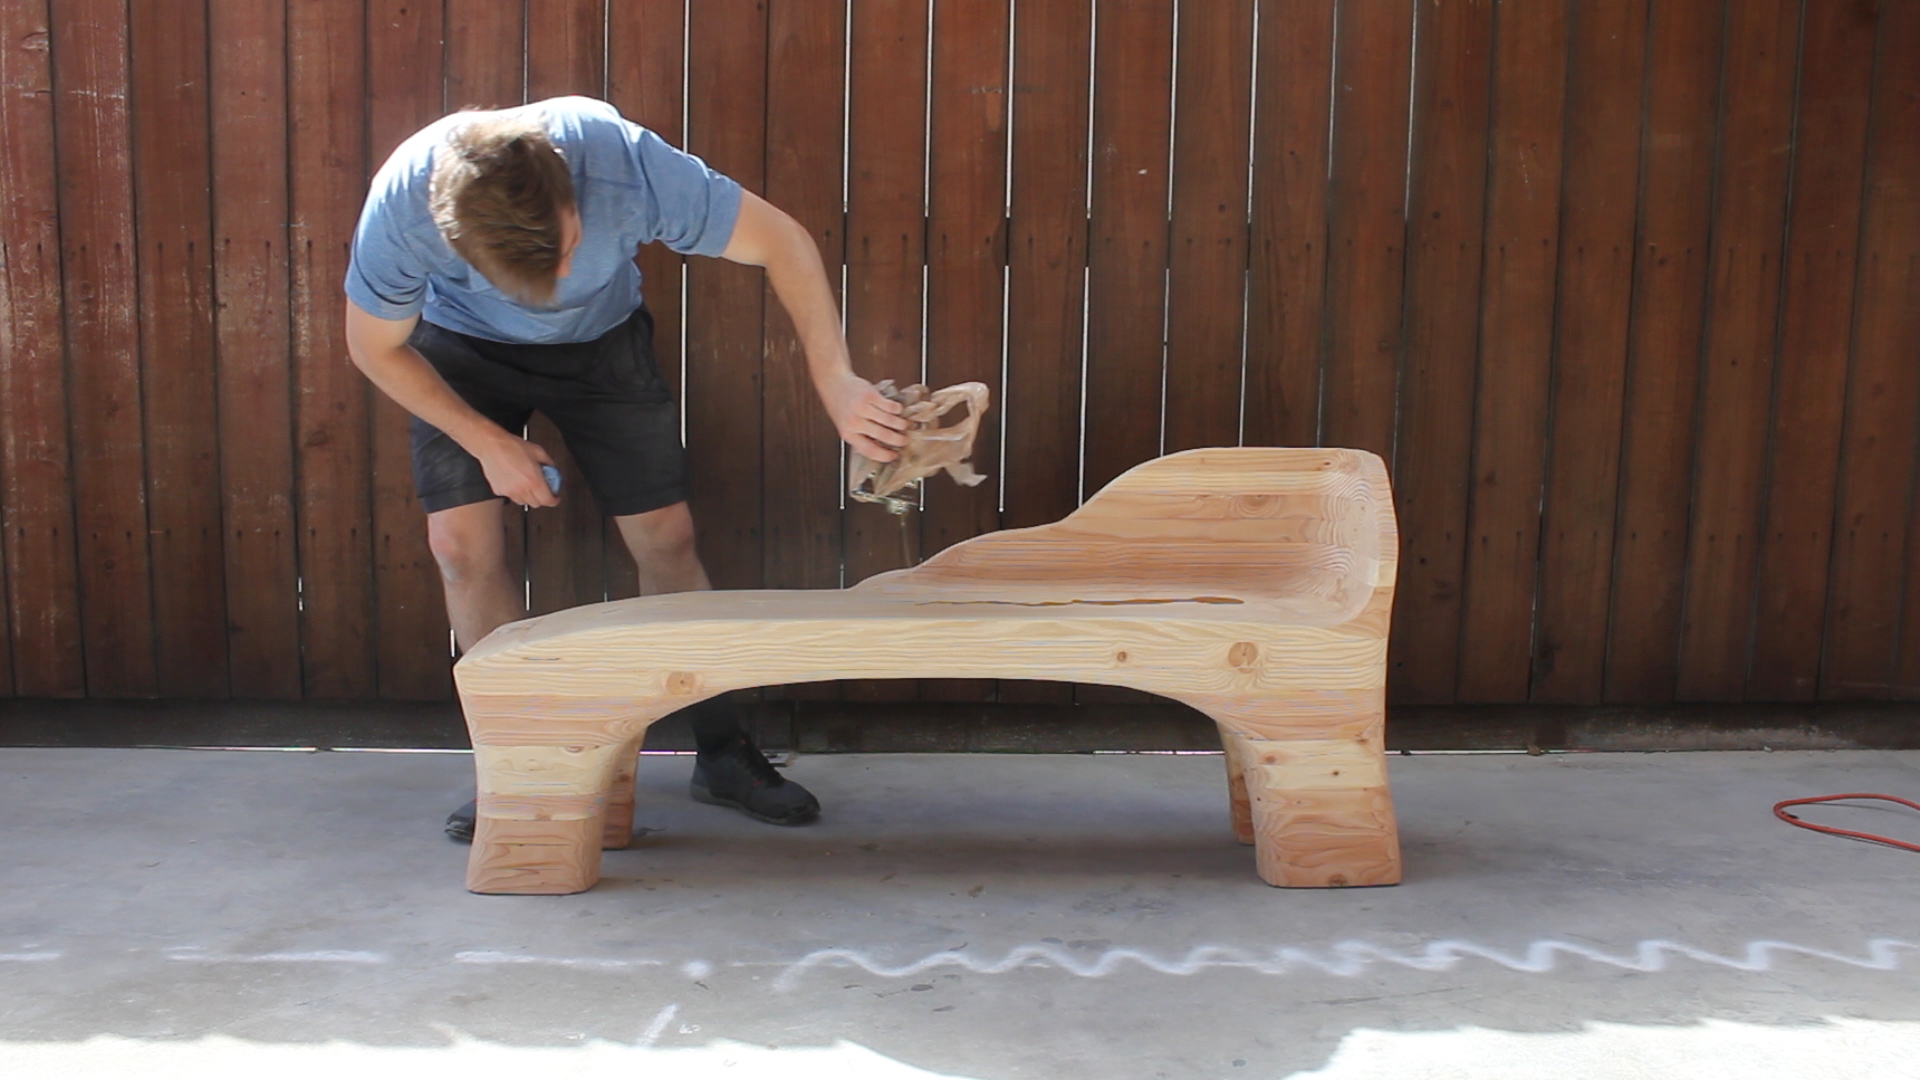
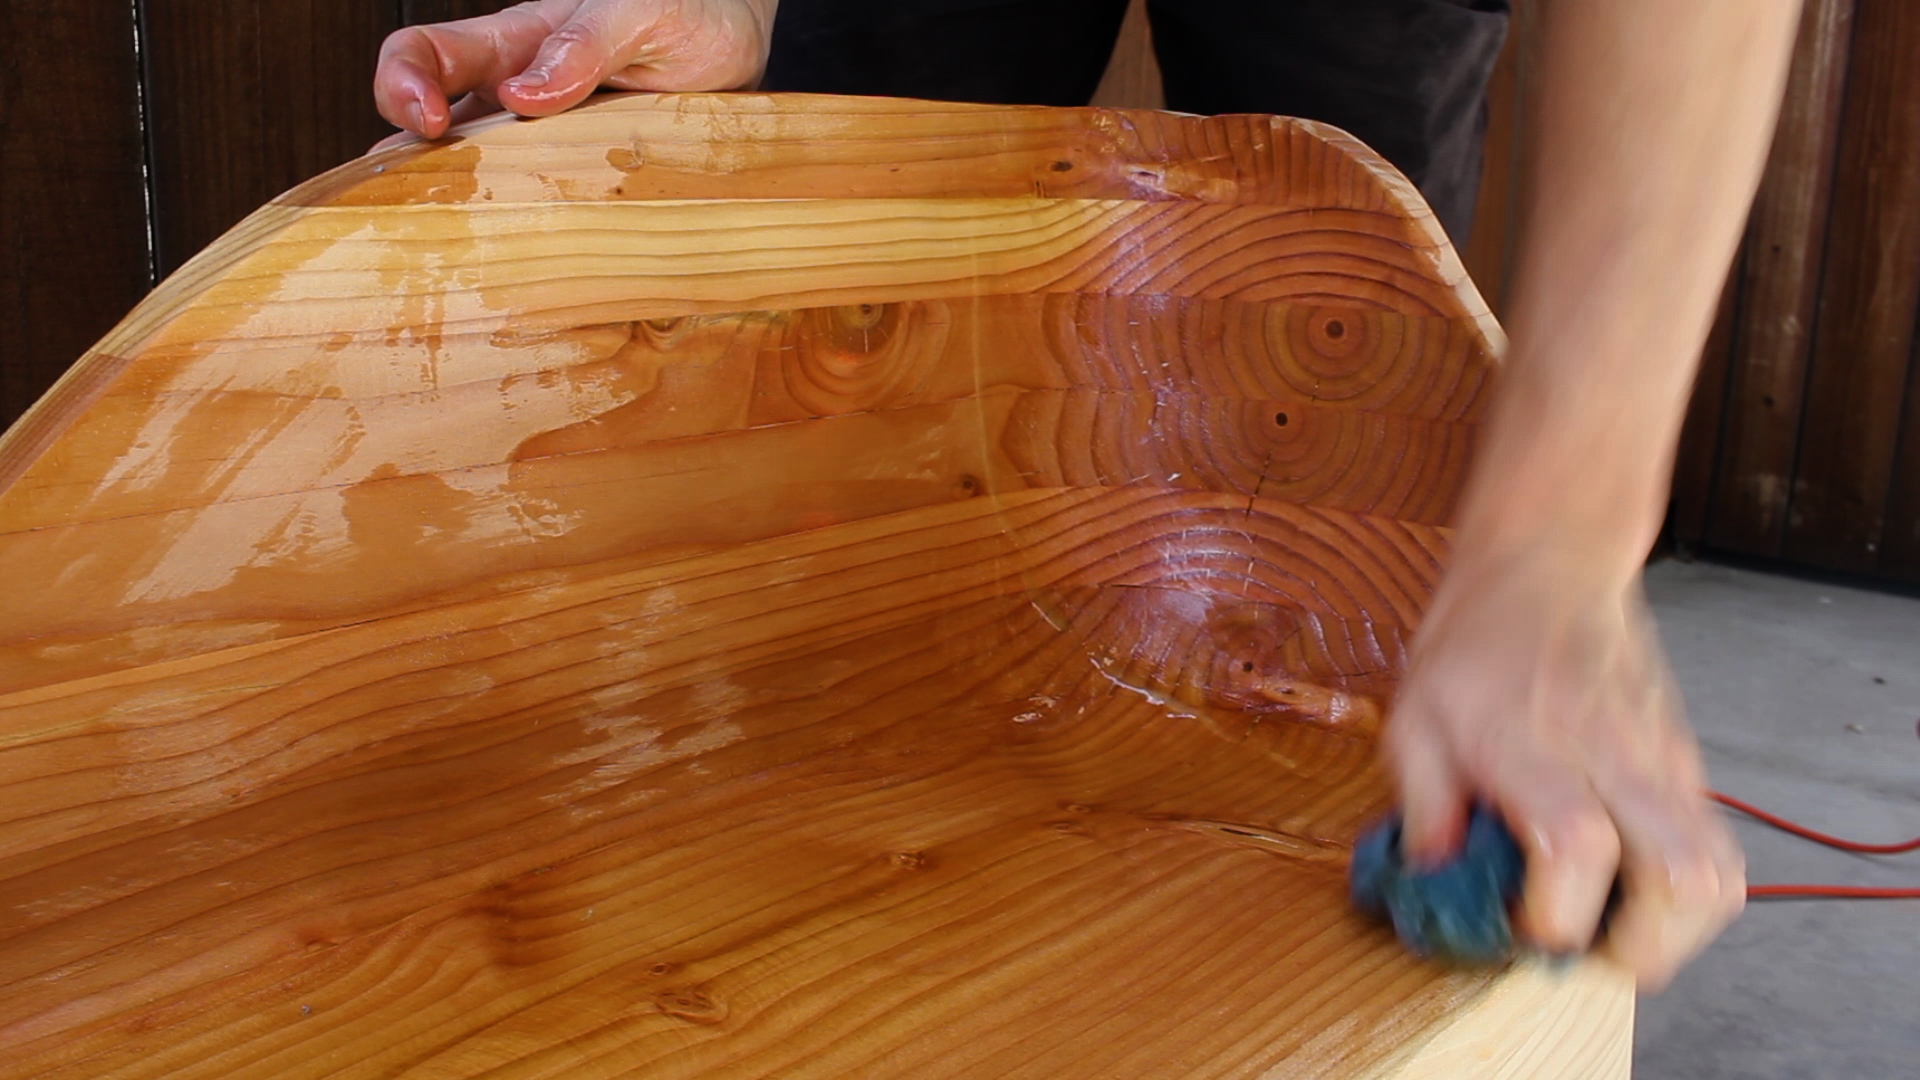
Last up was finishing, and I did one thick coat of Natural Danish Oil on this piece, which helped preserve the look of the wood while also bringing out the grain. I didn't apply any sort of poly or sealant to it as it will be indoors. I will likely revisit a sealant in a few months once I see how the piece holds up as it will be in the mountains and possibly over-exposed to elements and weather shifts.
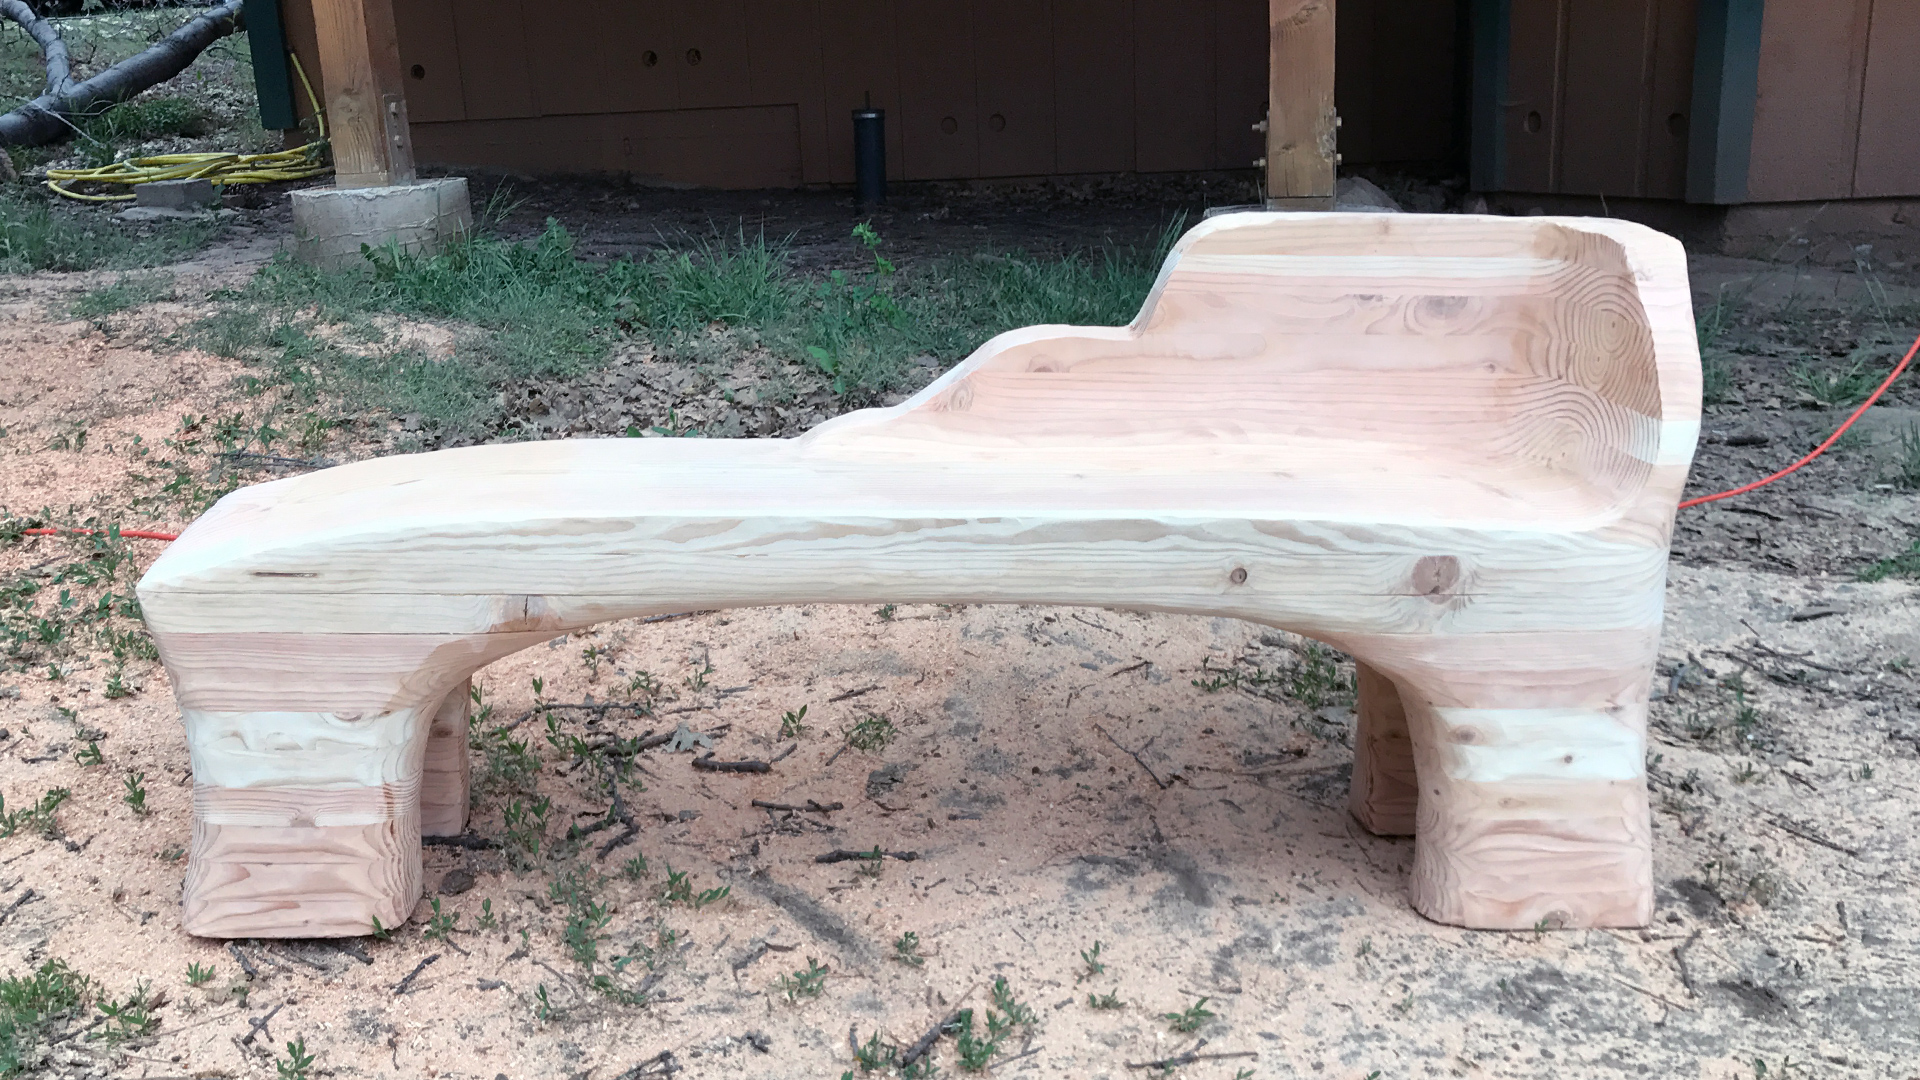
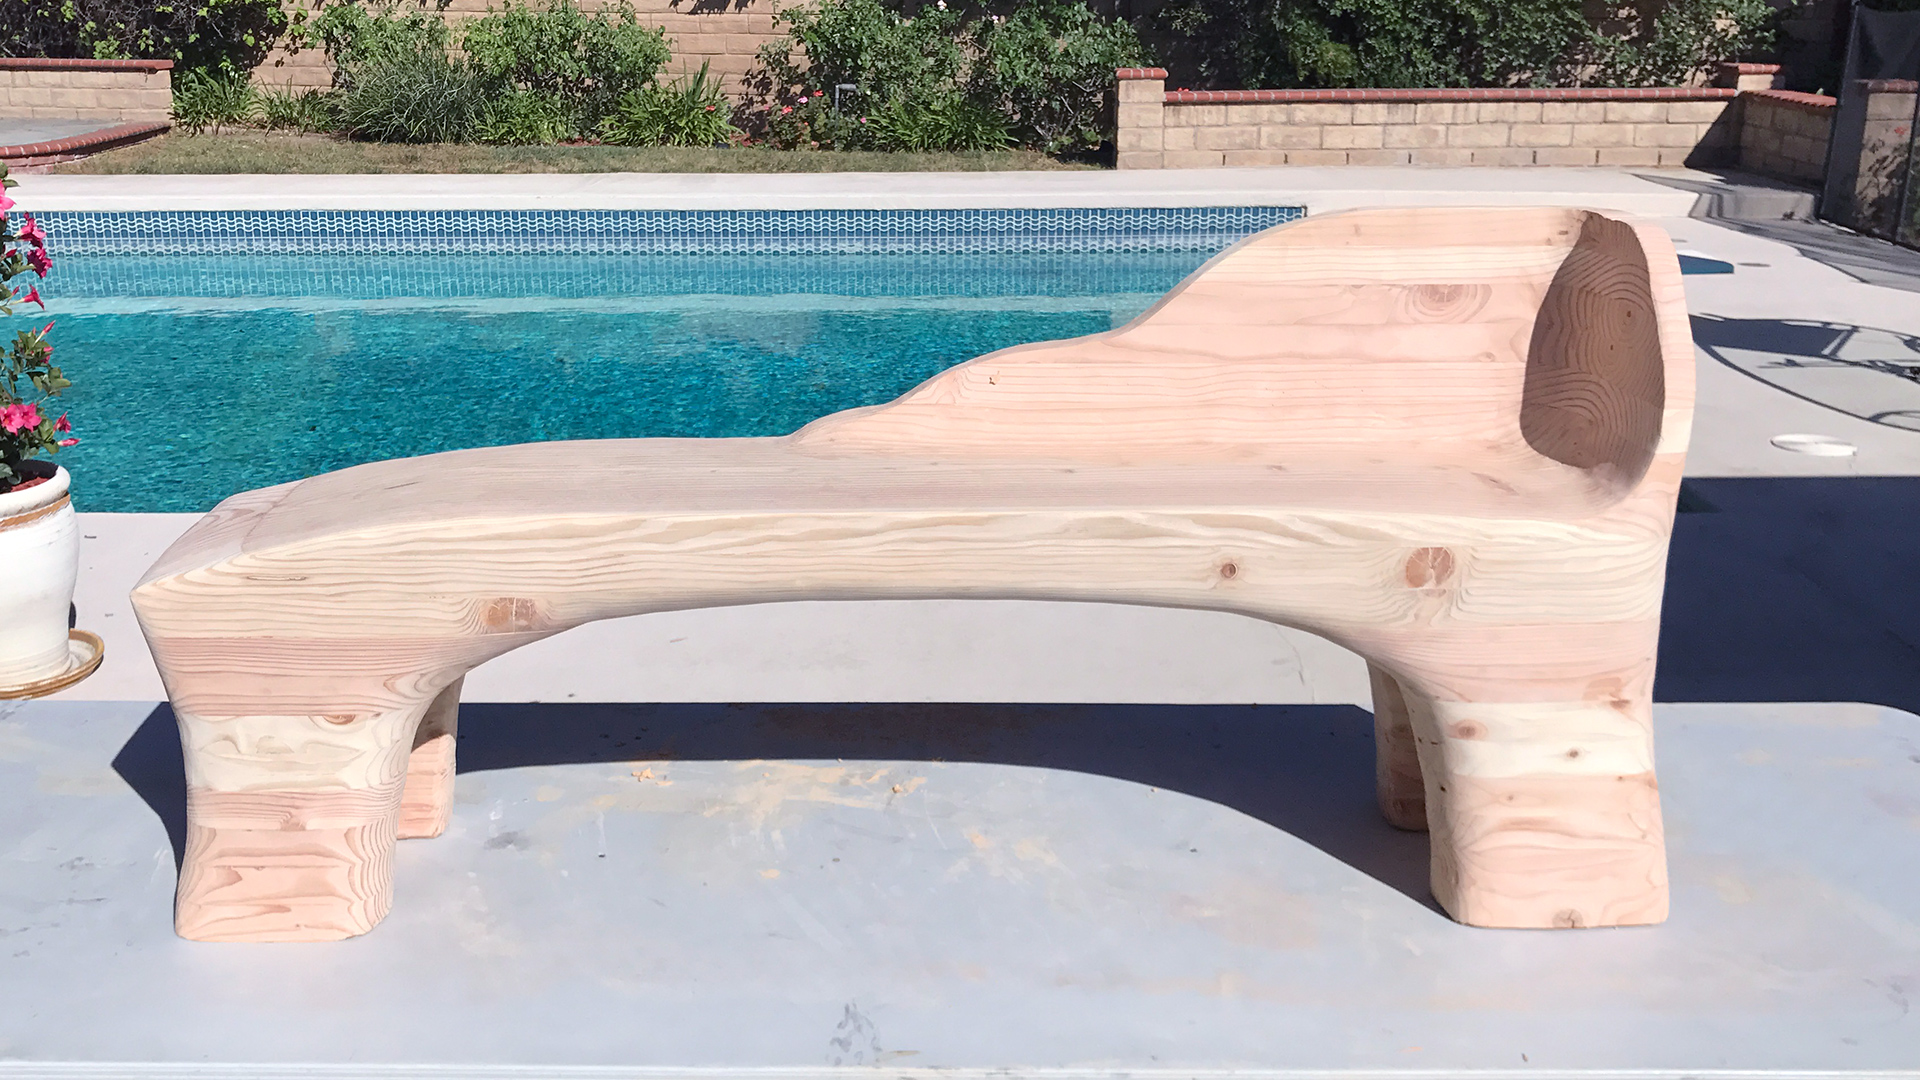
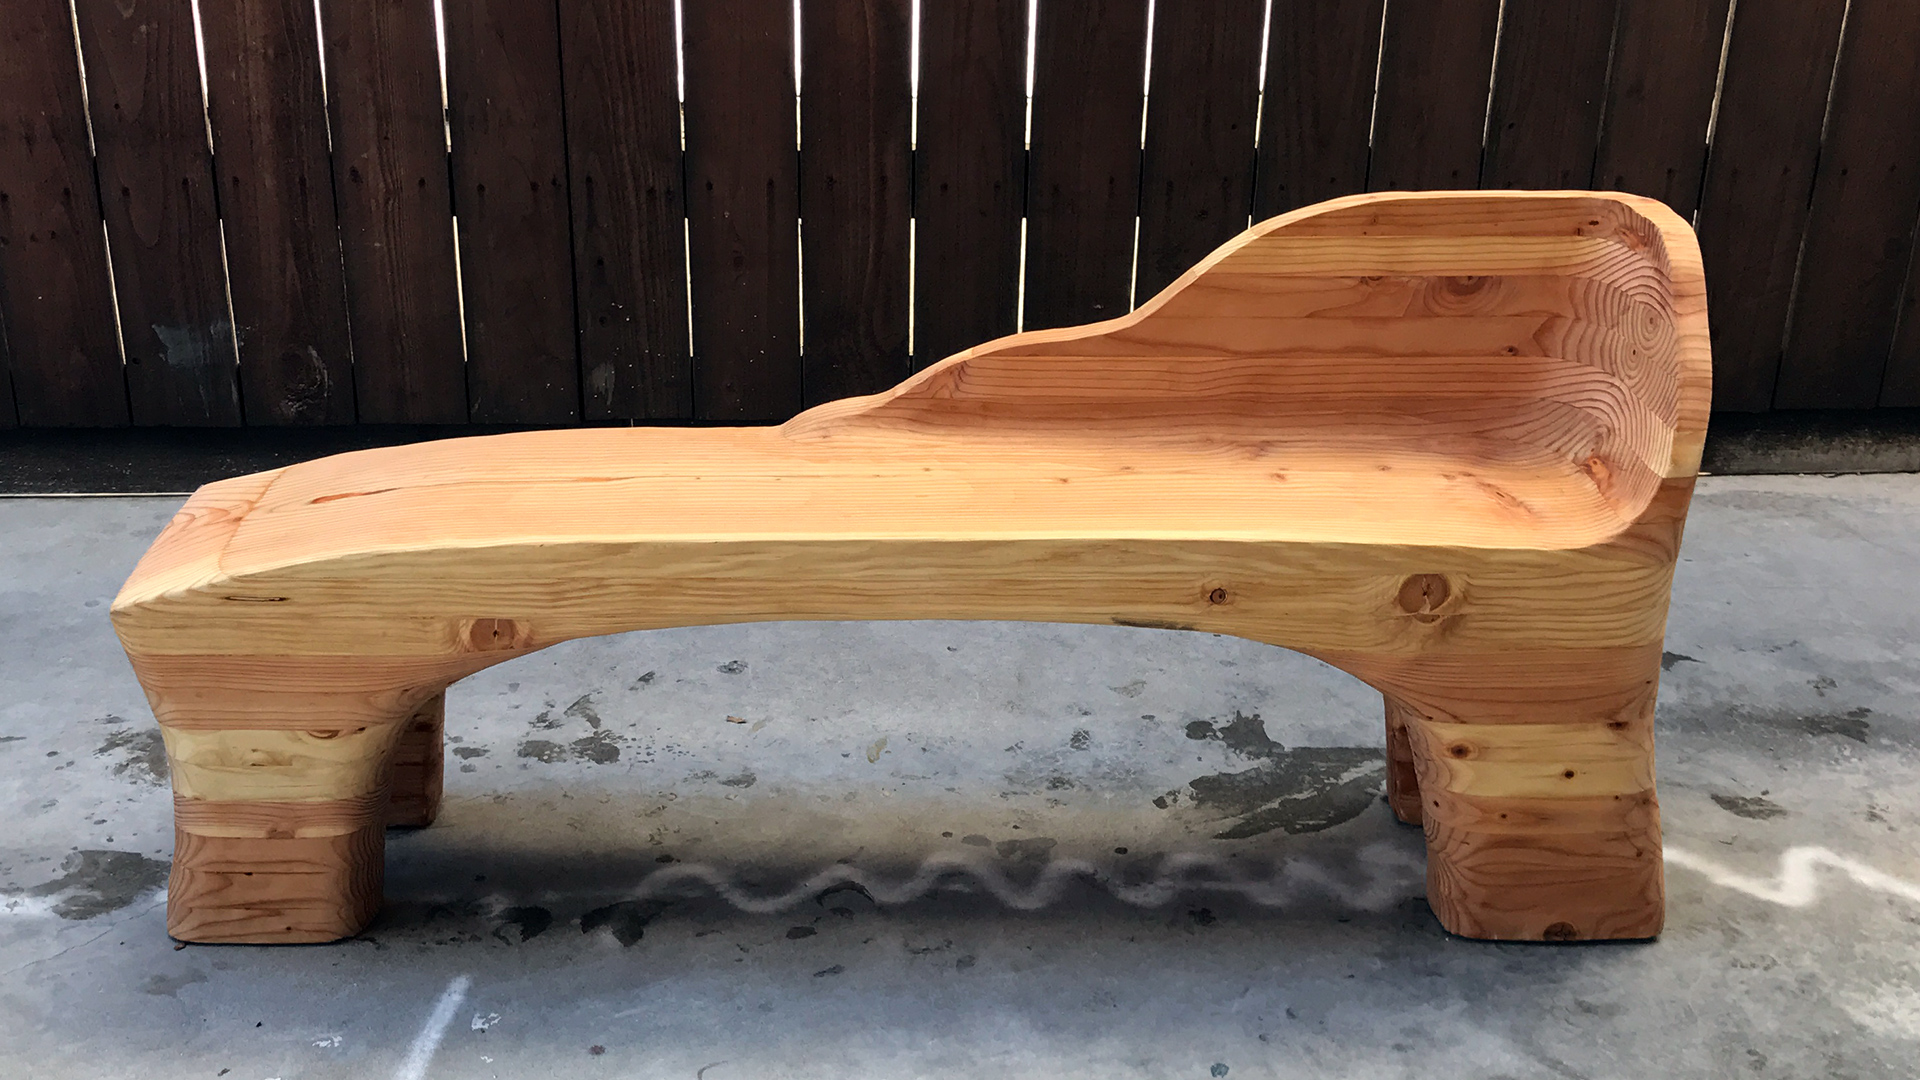
Here is a final carousel for you to check out the transition from various stages until the final form of the bench in picture 5.
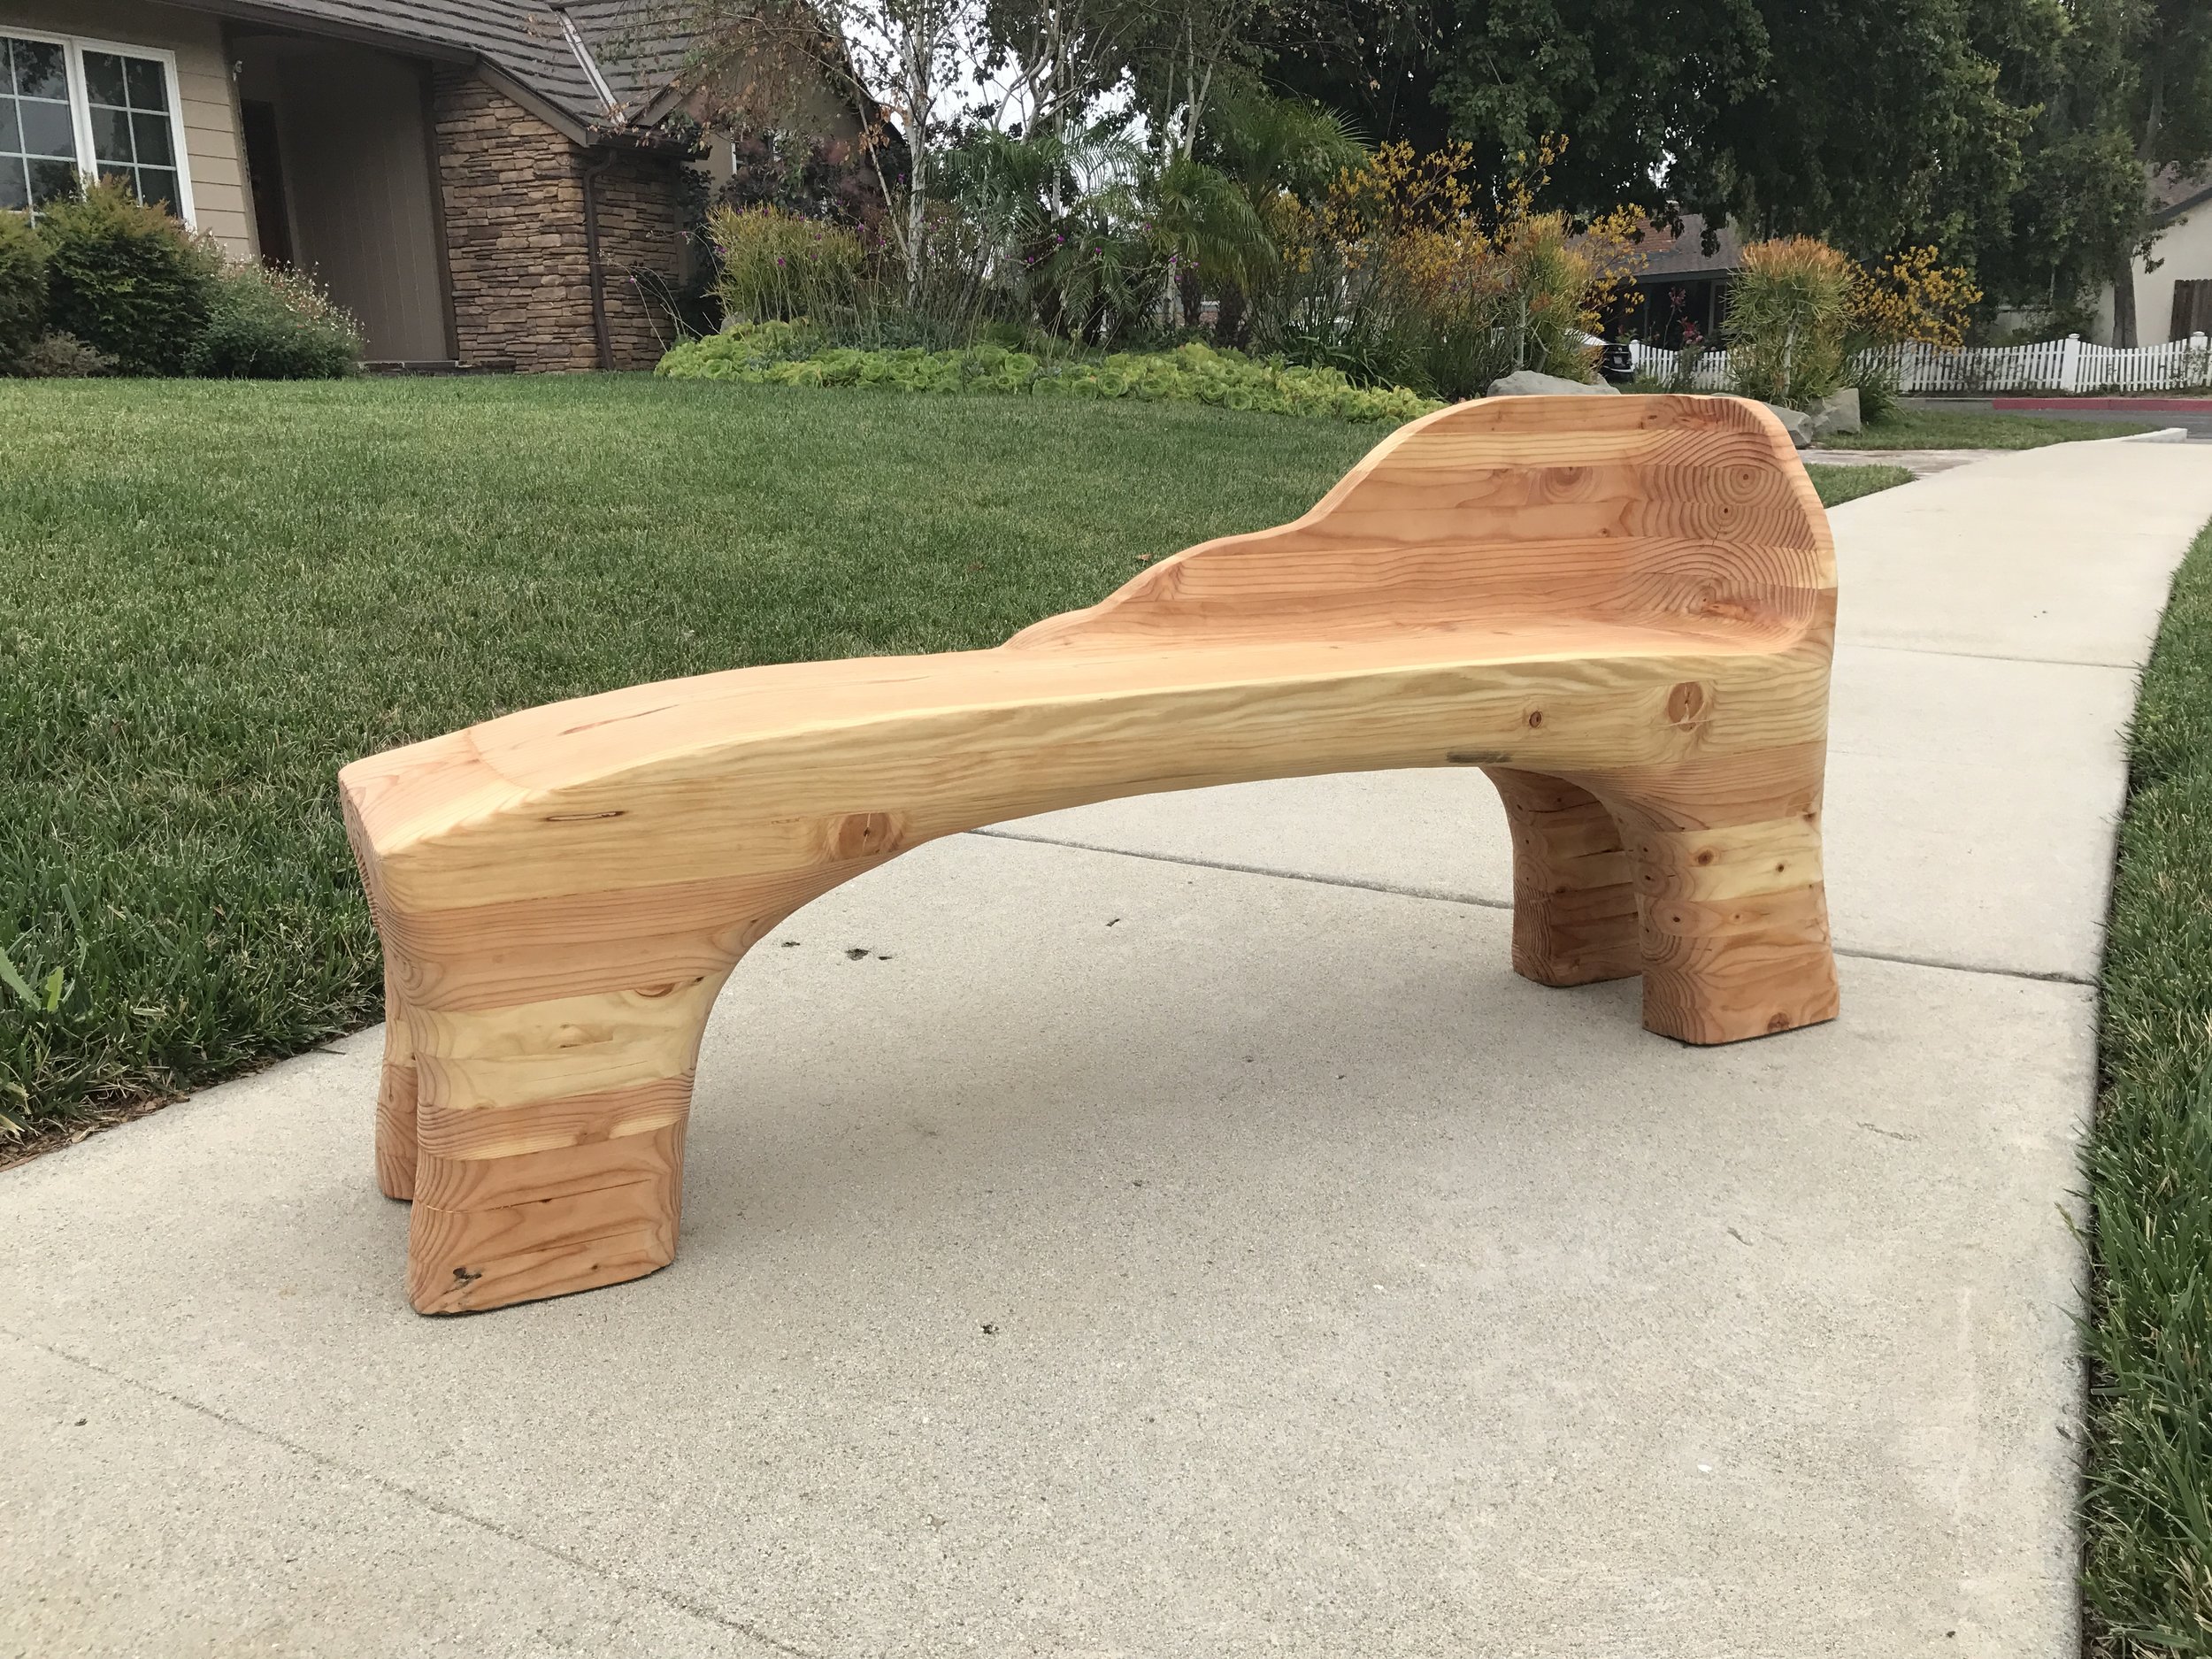
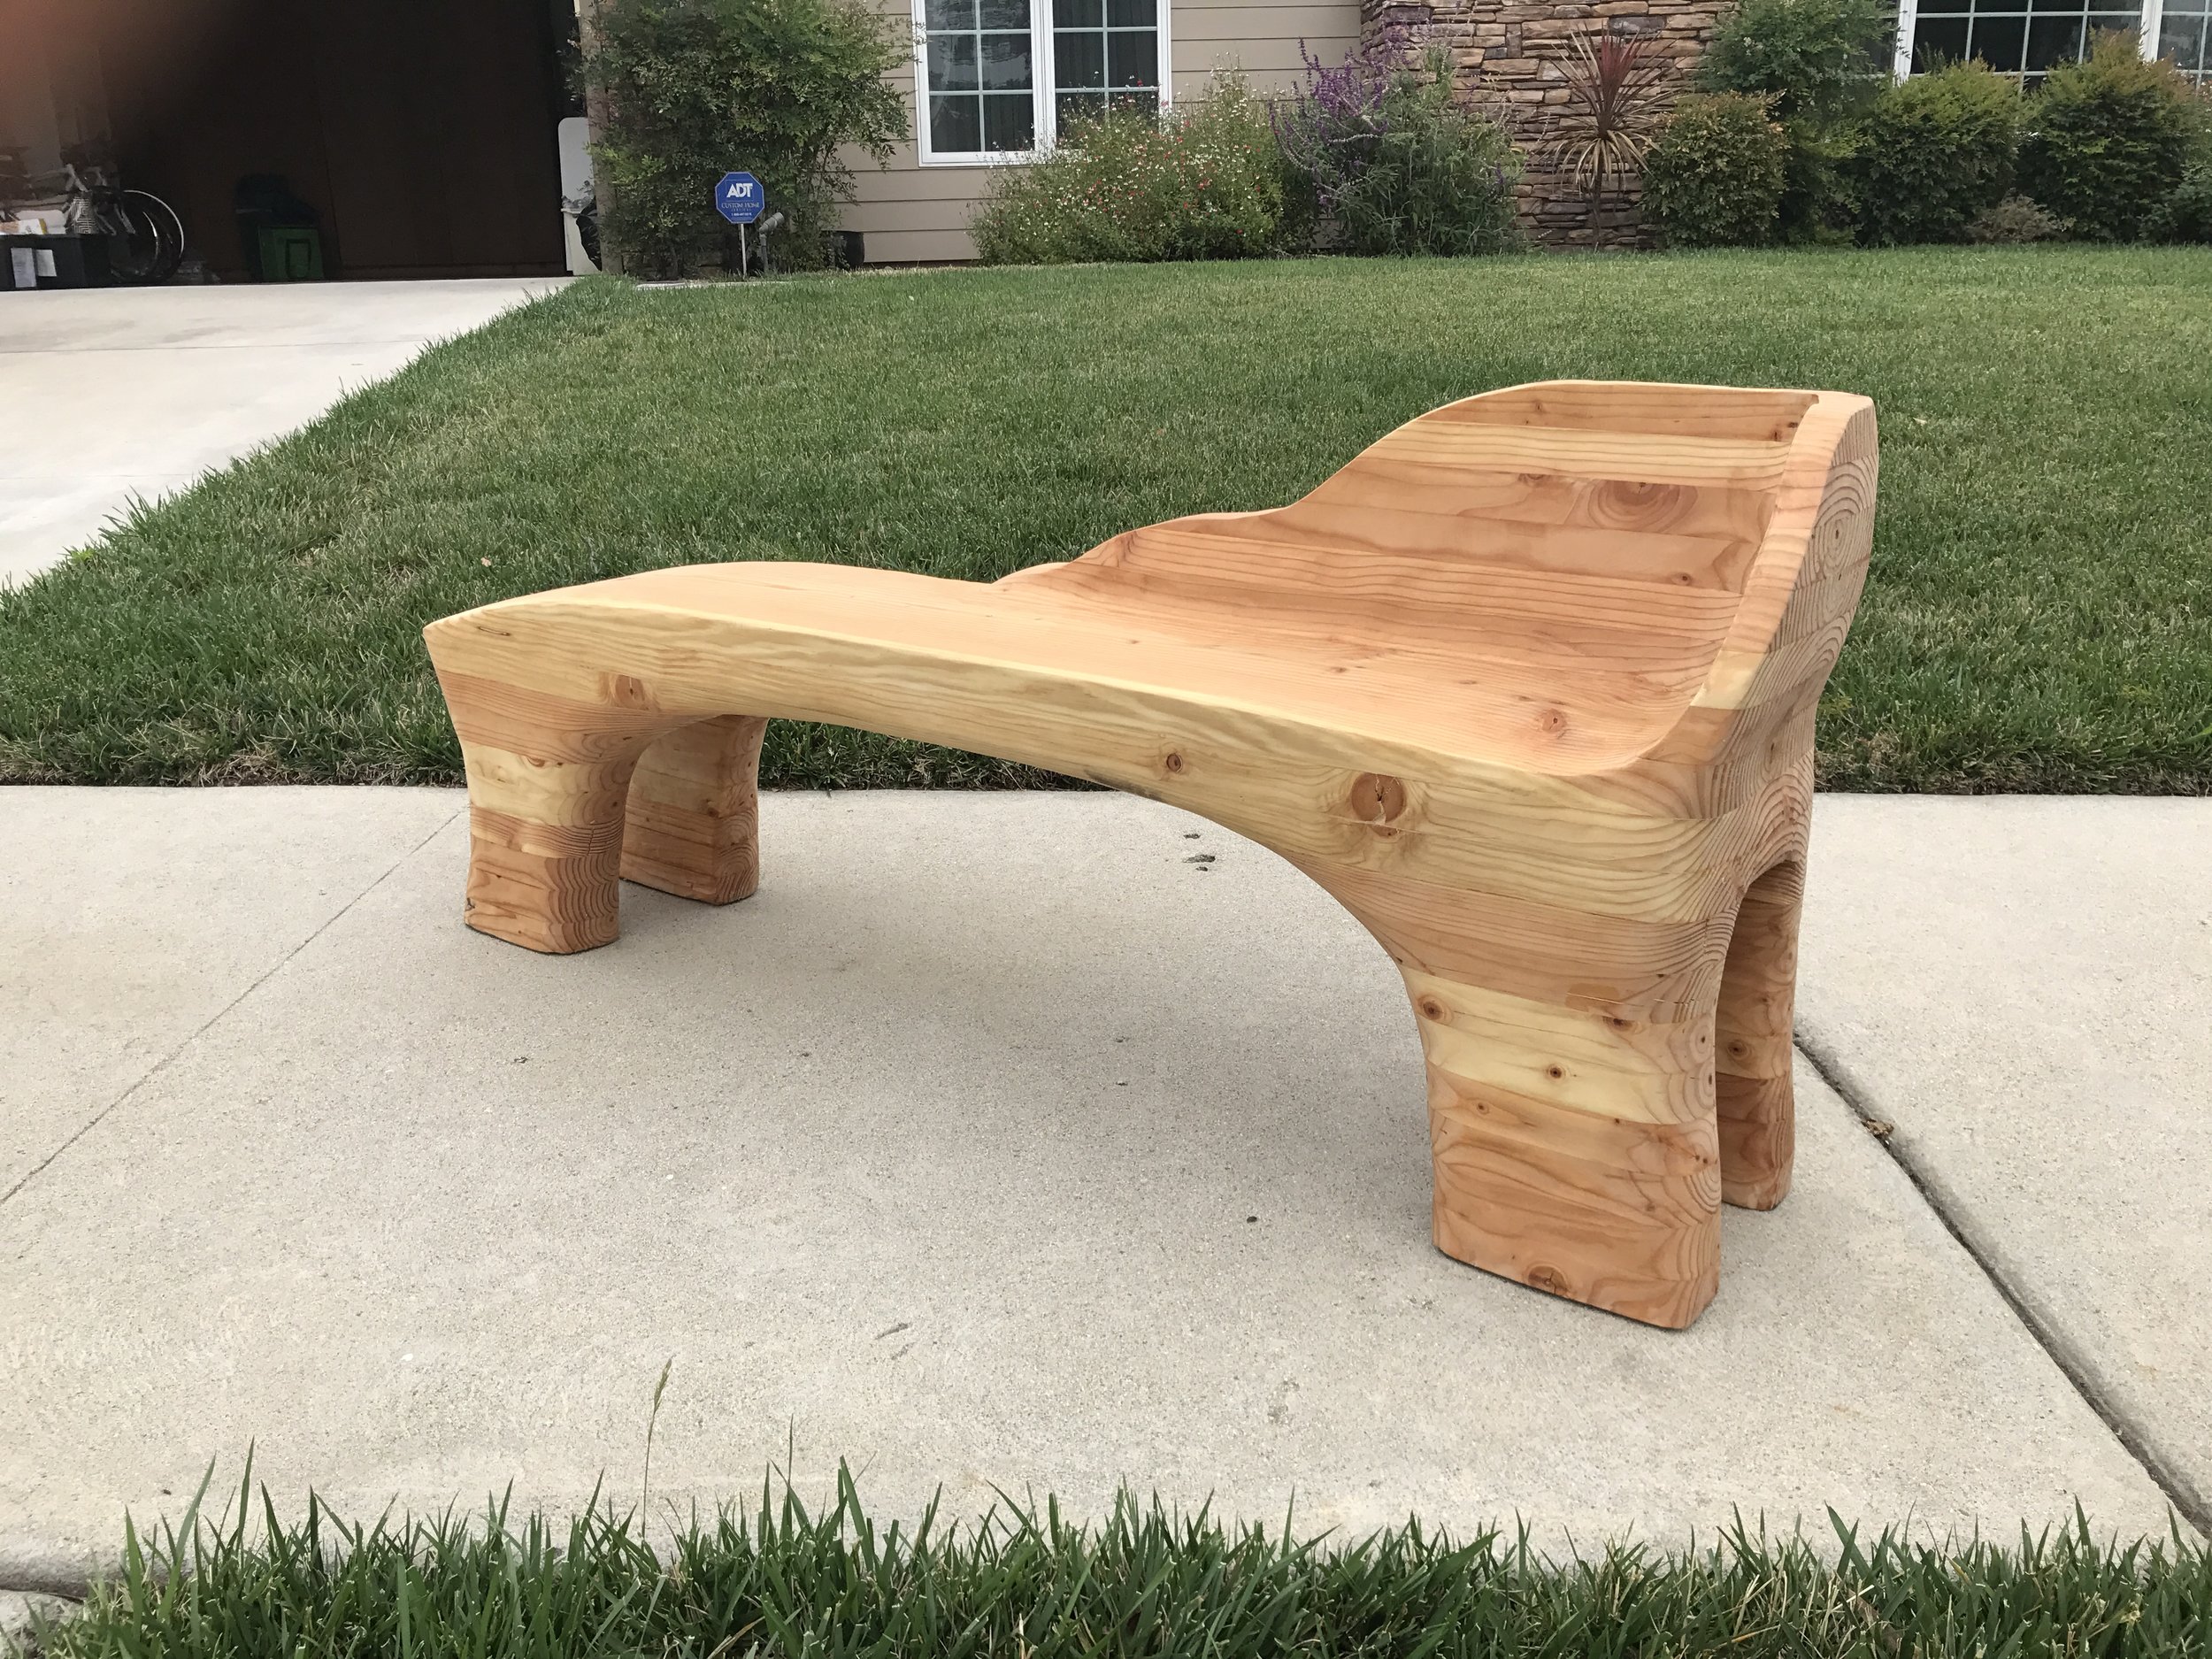
As well as a final photos just to check out! I'll post better photos once it is in its final home.
So stoked with how this thing came out! It is AWESOME.
TOOLS
RYOBI Circular Saw
RYOBI 10 in. Sliding Compound Miter Saw
RYOBI Miter Saw Stand
Wen 12.5” Thickness Planer
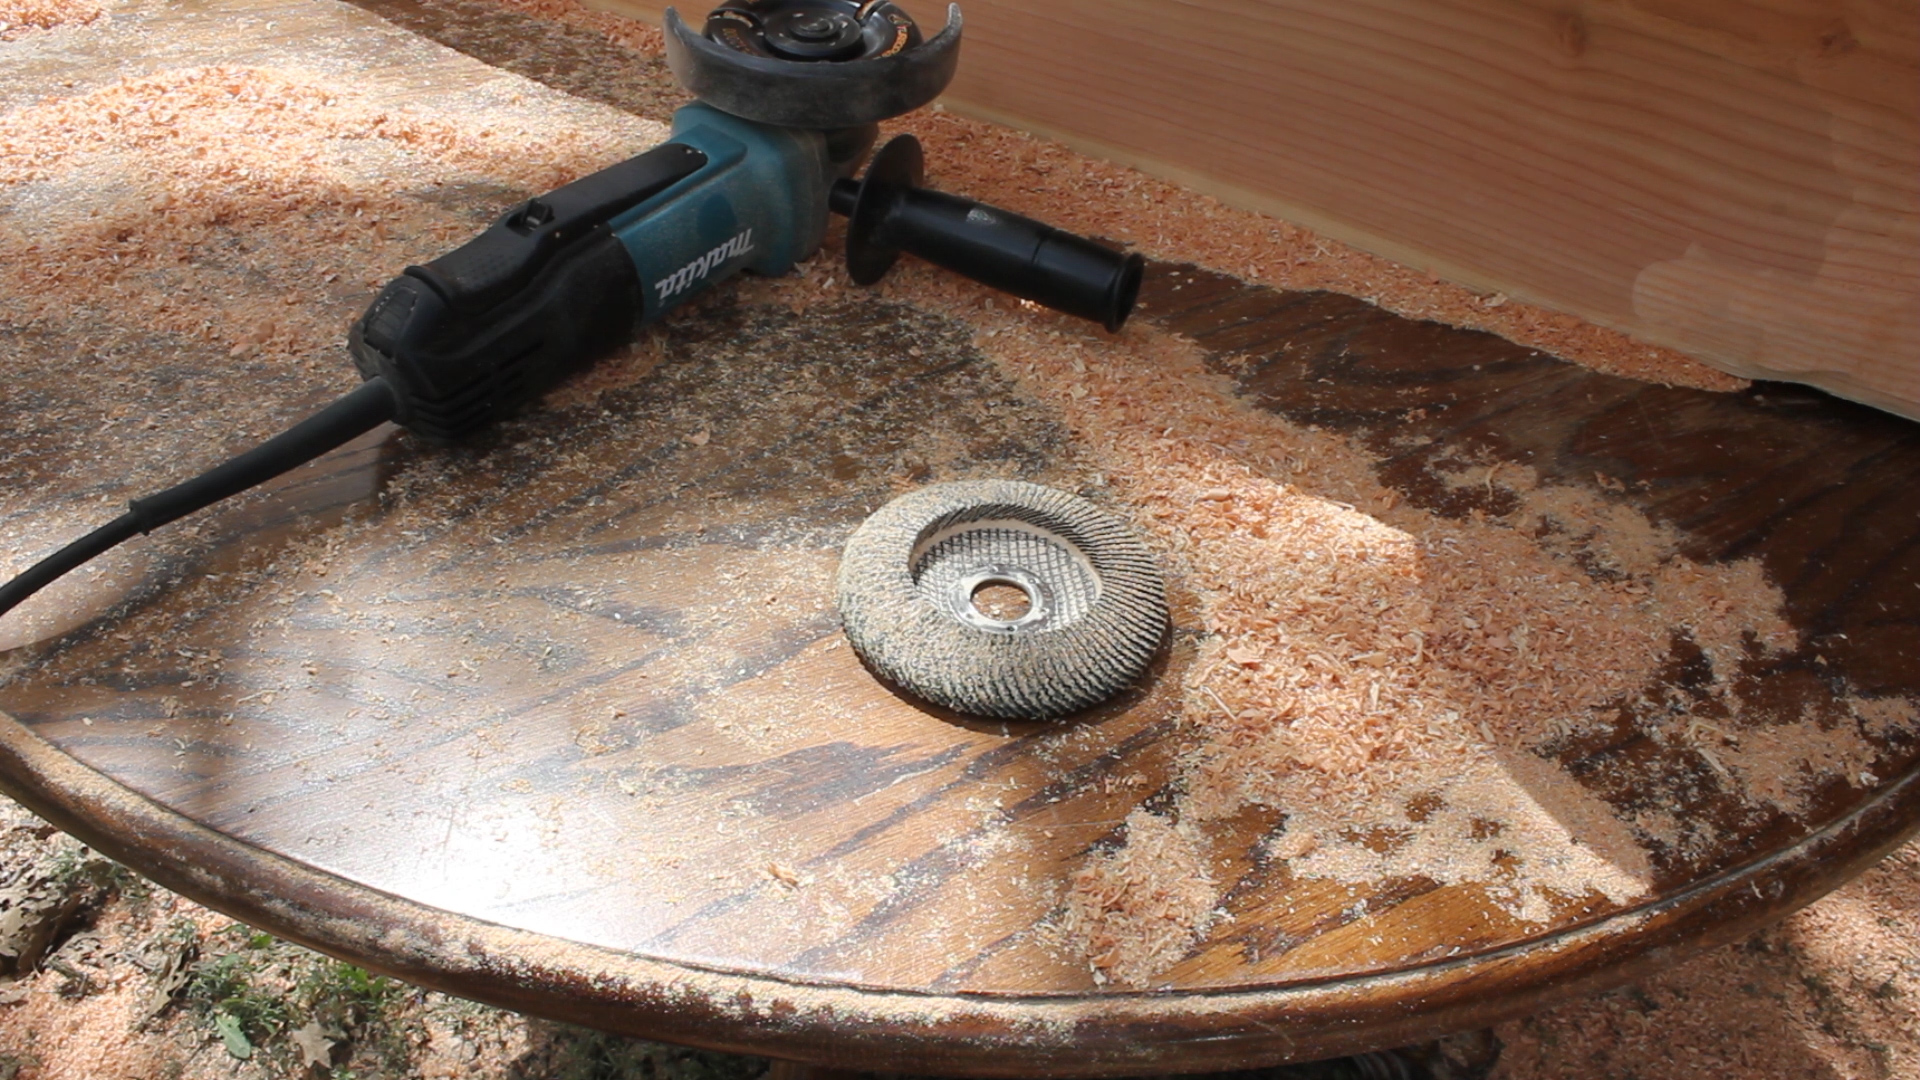
MAKITA Paddle Switch 4.5” Angle Grinder
ARBORTECH TURBOPlane Blade
Flap Discs
BESSEY Economy 2.5” x 12” Clutch Clamps
BESSEY Economy 2.5” x 24” Clutch Clamps
BESSEY H Style Pipe Clamps
Tape Measure
Hand Sanding Sponges (120 and 220 Grit)
3M Face Shield
FILM / EDIT EQUIPMENT:
Canon Rebel EOS T2i
Canon EF-S 18-55mm f/3.5-5.6 IS II Lens
Studio Lighting Equipment
Rode Microphone
Voice Recording
Adobe Premiere (Editorial)
As always, thank you for reading! I would be so grateful if you could please subscribe to my new Youtube Channel for future projects. I put out videos every two weeks.
Cheers!
Zach